Search
Cart
Sign in
  • offerCustomer zone
  • offerYour orders
  • offerEdit account

  • offerAdd project
  • offerLiked projects
  • offerView your artist profile

  • Dark mode

We care about your privacy

We use cookies to provide you with the best possible experience. They also allow us to analyze user behavior in order to constantly improve the website for you. The consent is voluntary. You can withdraw it at any time or renew it in Cookie settings on the home page. Withdrawal of your consent does not affect the lawfulness of processing performed before the withdrawal. Privacy Protection Policy
Accept all
Accept selection
Reject all

Making of Asian Room

Michał Franczak 2014-09-04 13:20 tutorial  > 3ds MAX  > modeling

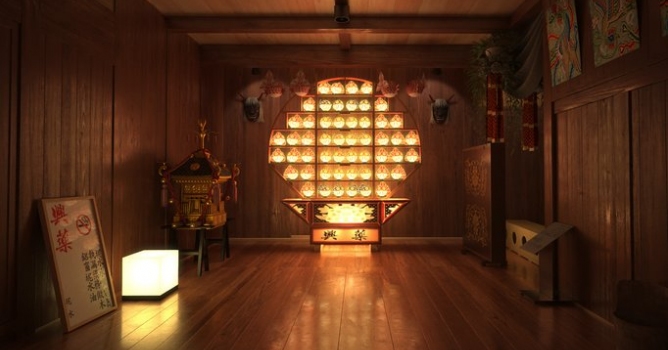
Learn how we setup lights, materials and render settings of this moody Archinteriors vol. 28 scene.

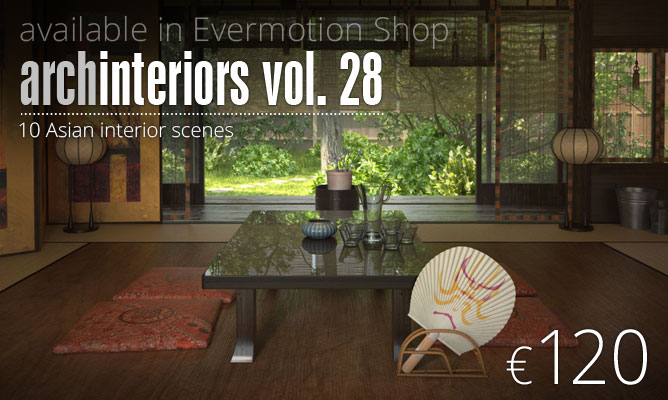
This scene is included in Archinteriors vol. 28 collection, which is available in Evermotion Shop. This scene was modeled and set with 3DS Max and rendered with V-Ray (check V-Ray price!).

668_400_AI28_1.jpg


Click on image to enlarge AI28_01_PS_nr_2421.jpg

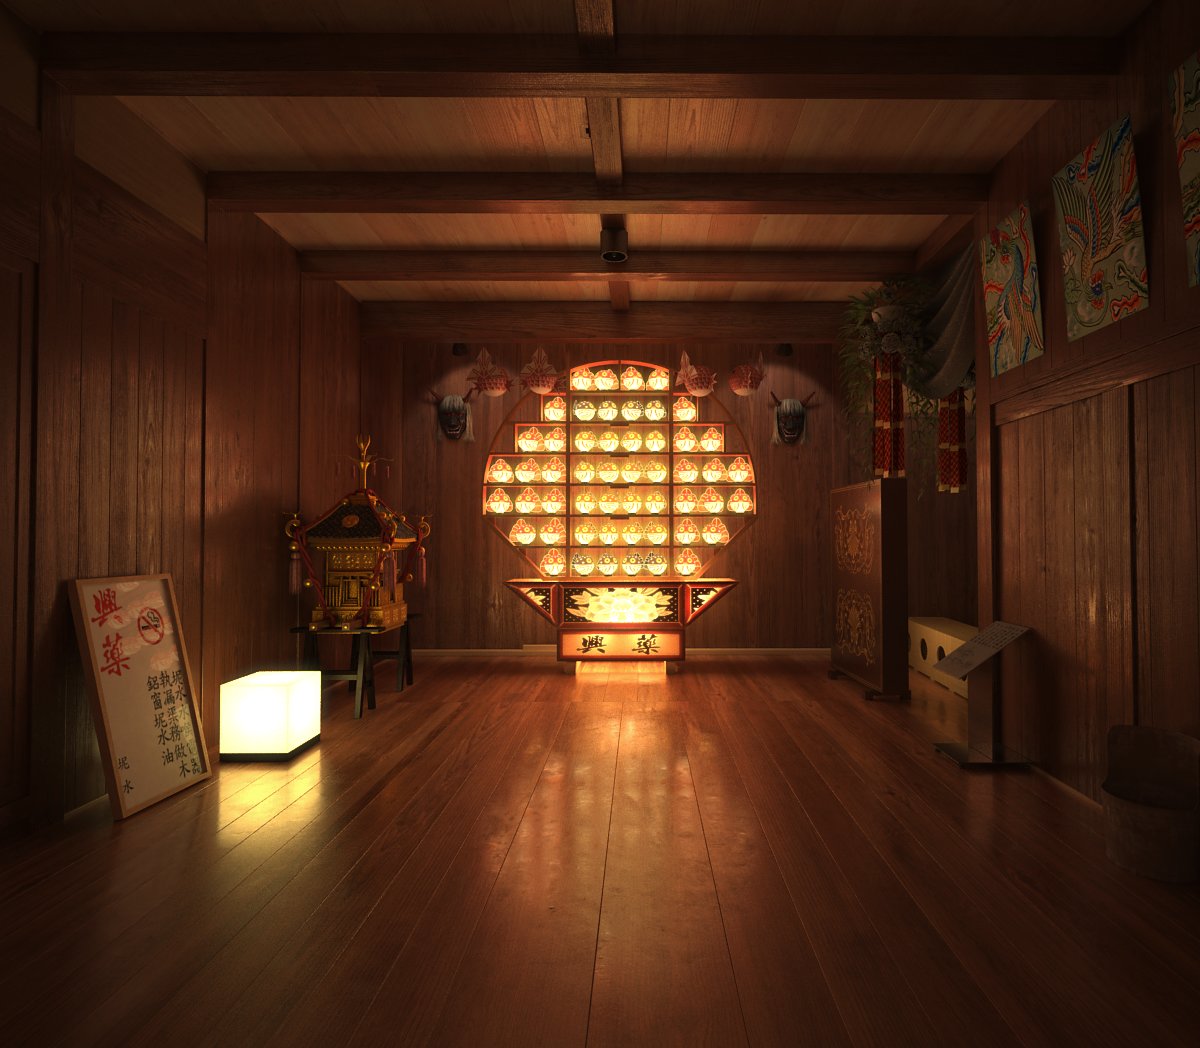
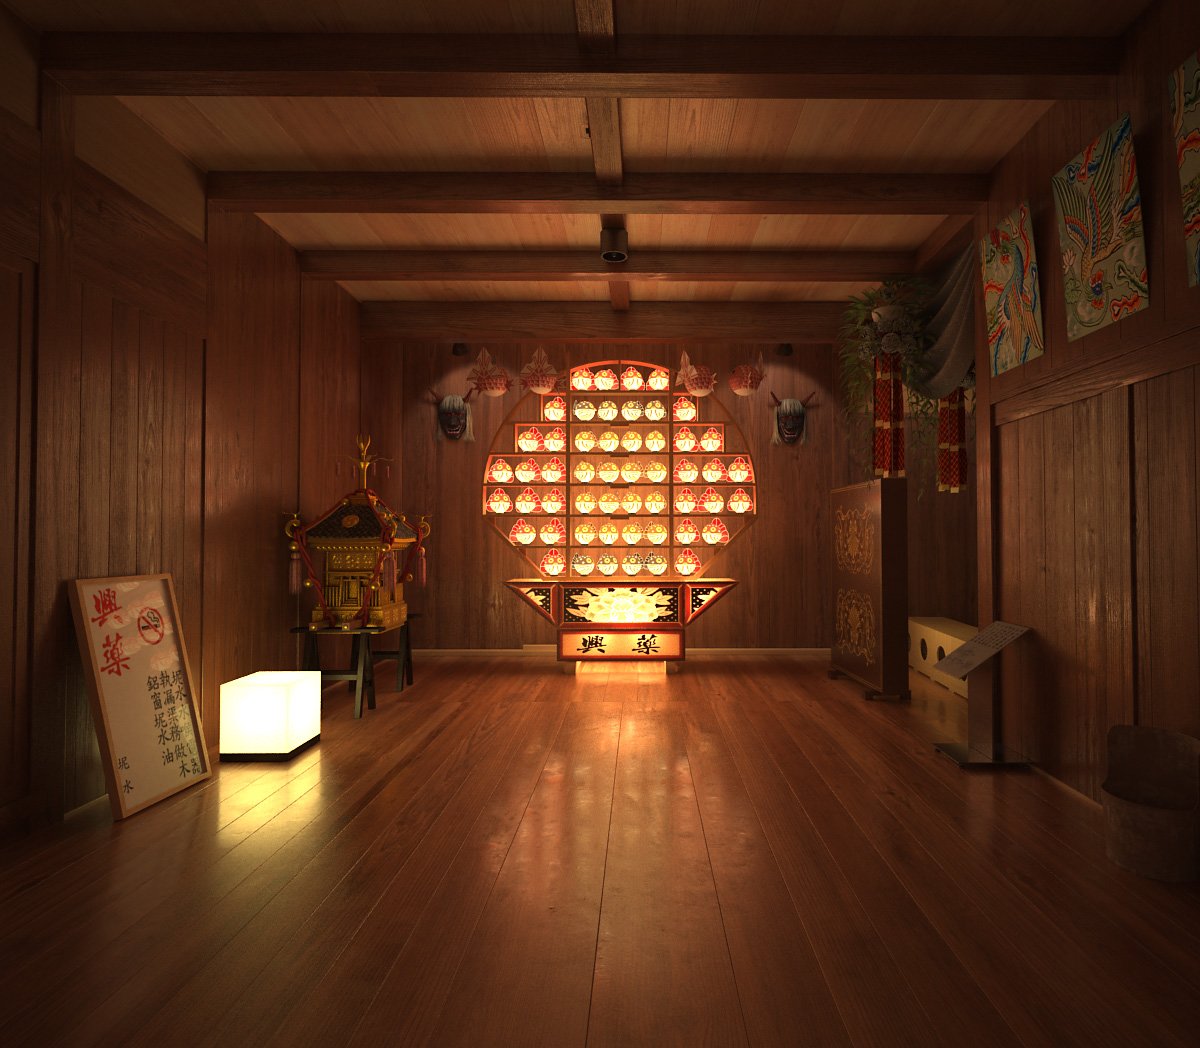
Final image of moody wooden room


Click on image to enlarge AI28_01_wire_nr_2420.jpg

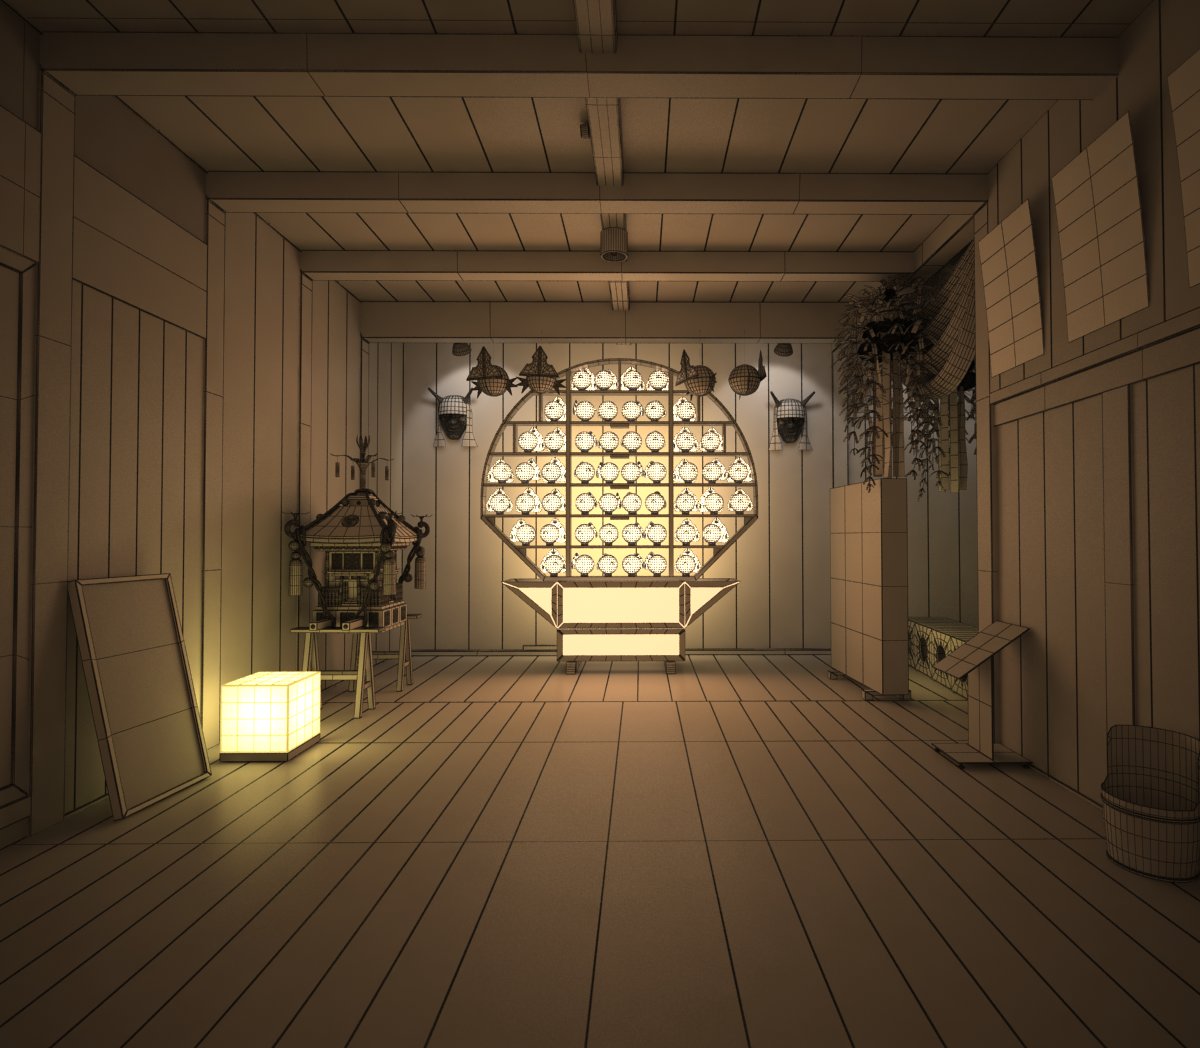
Wires and clay


Click on image to enlarge wire_nr_2412.jpg

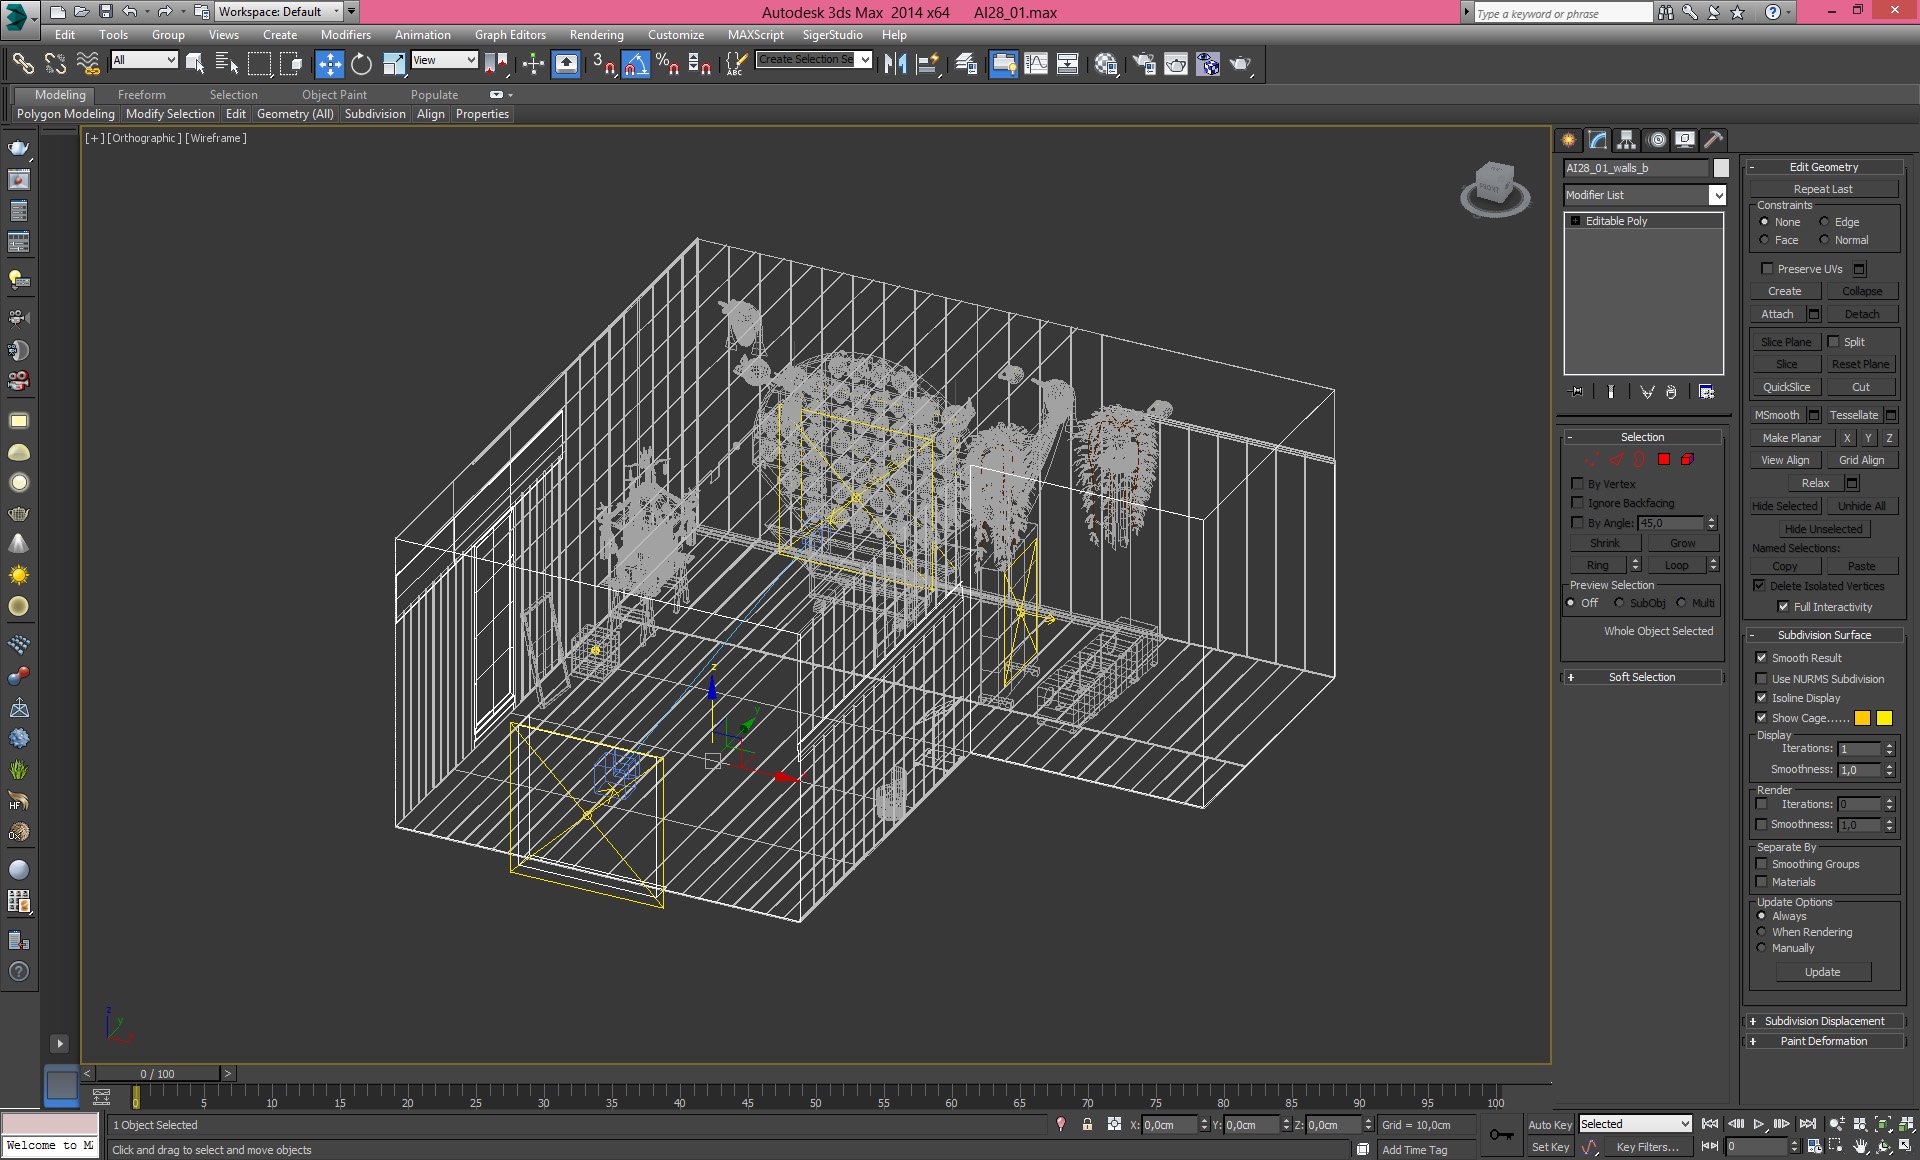
Wireframe, camera and lights


Click on image to enlarge ov_1_nr_2419.jpg

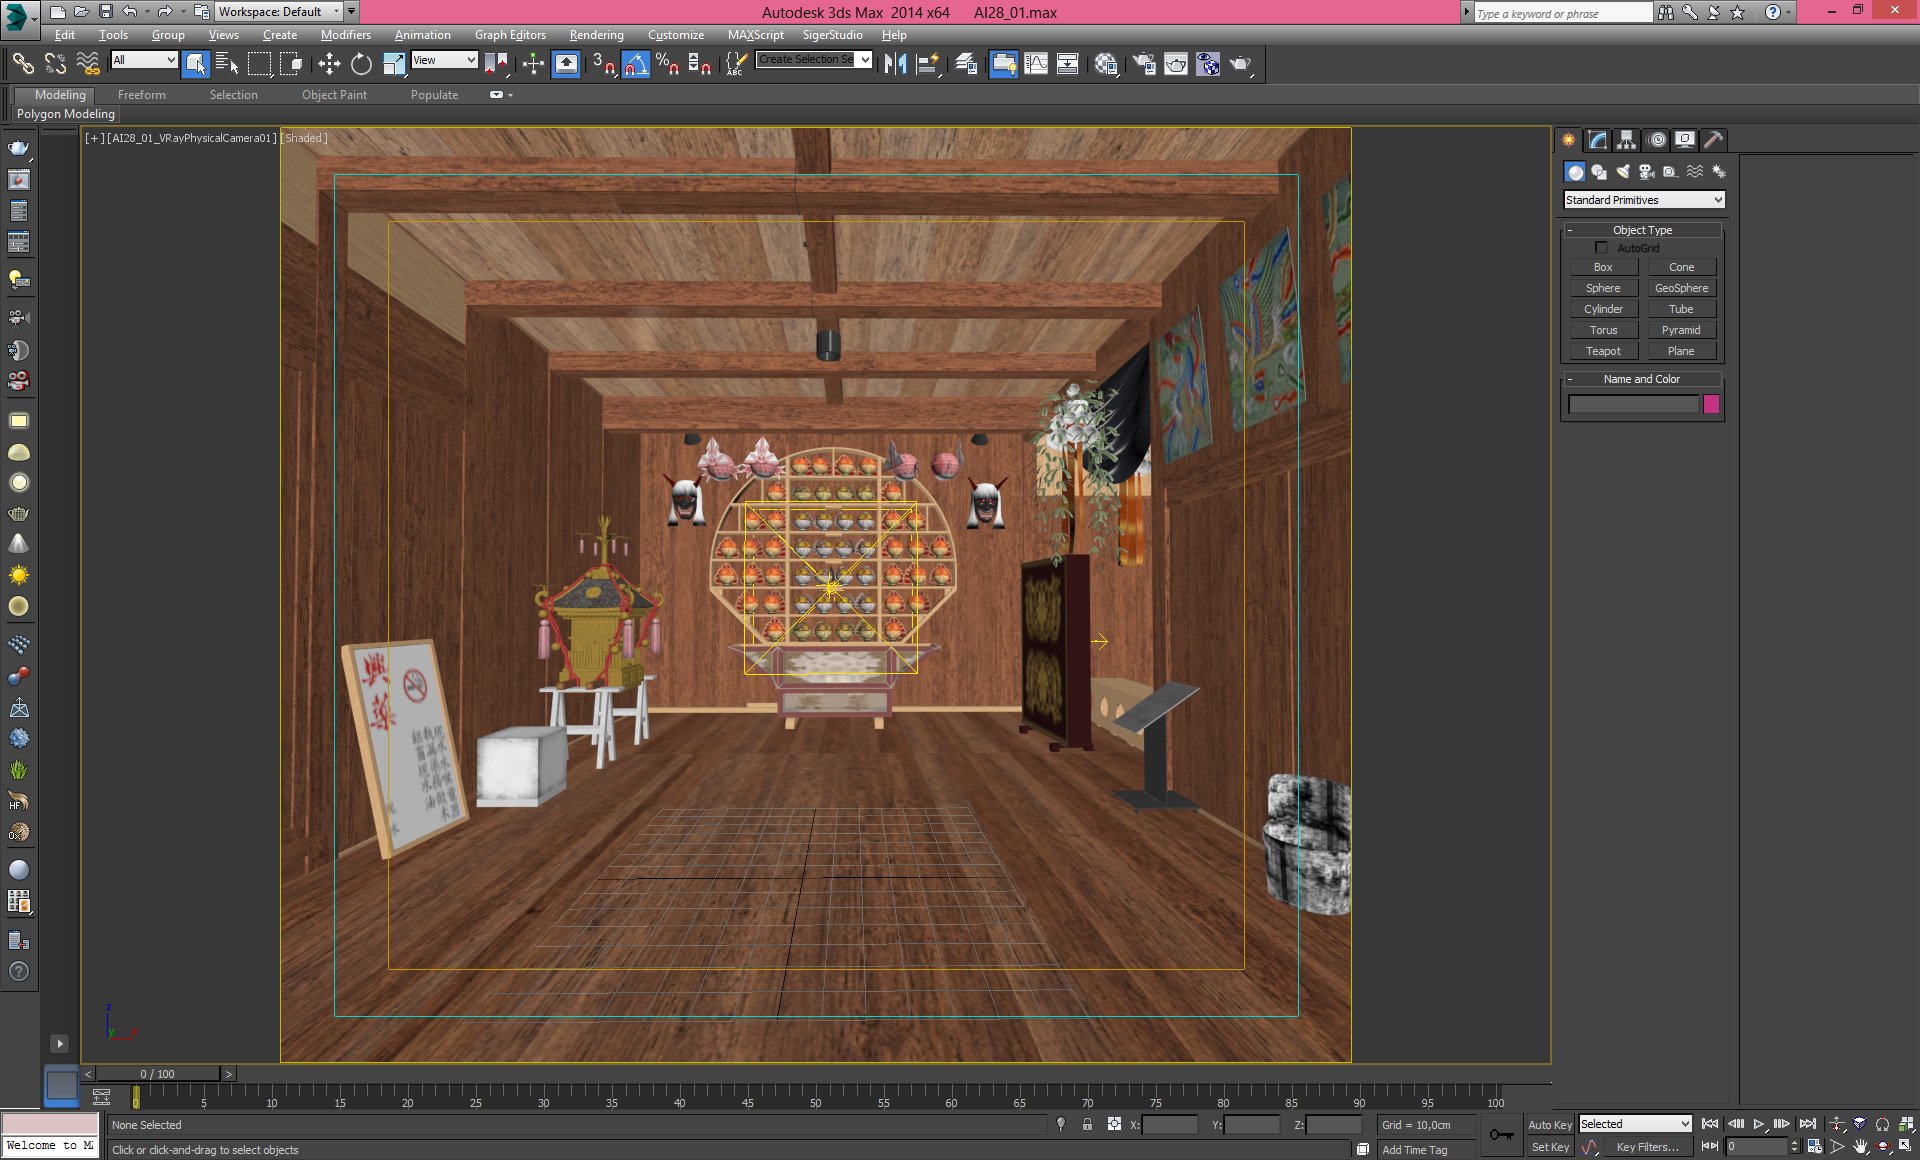
View from camera


Click on image to enlarge ov_2_nr_2418.jpg

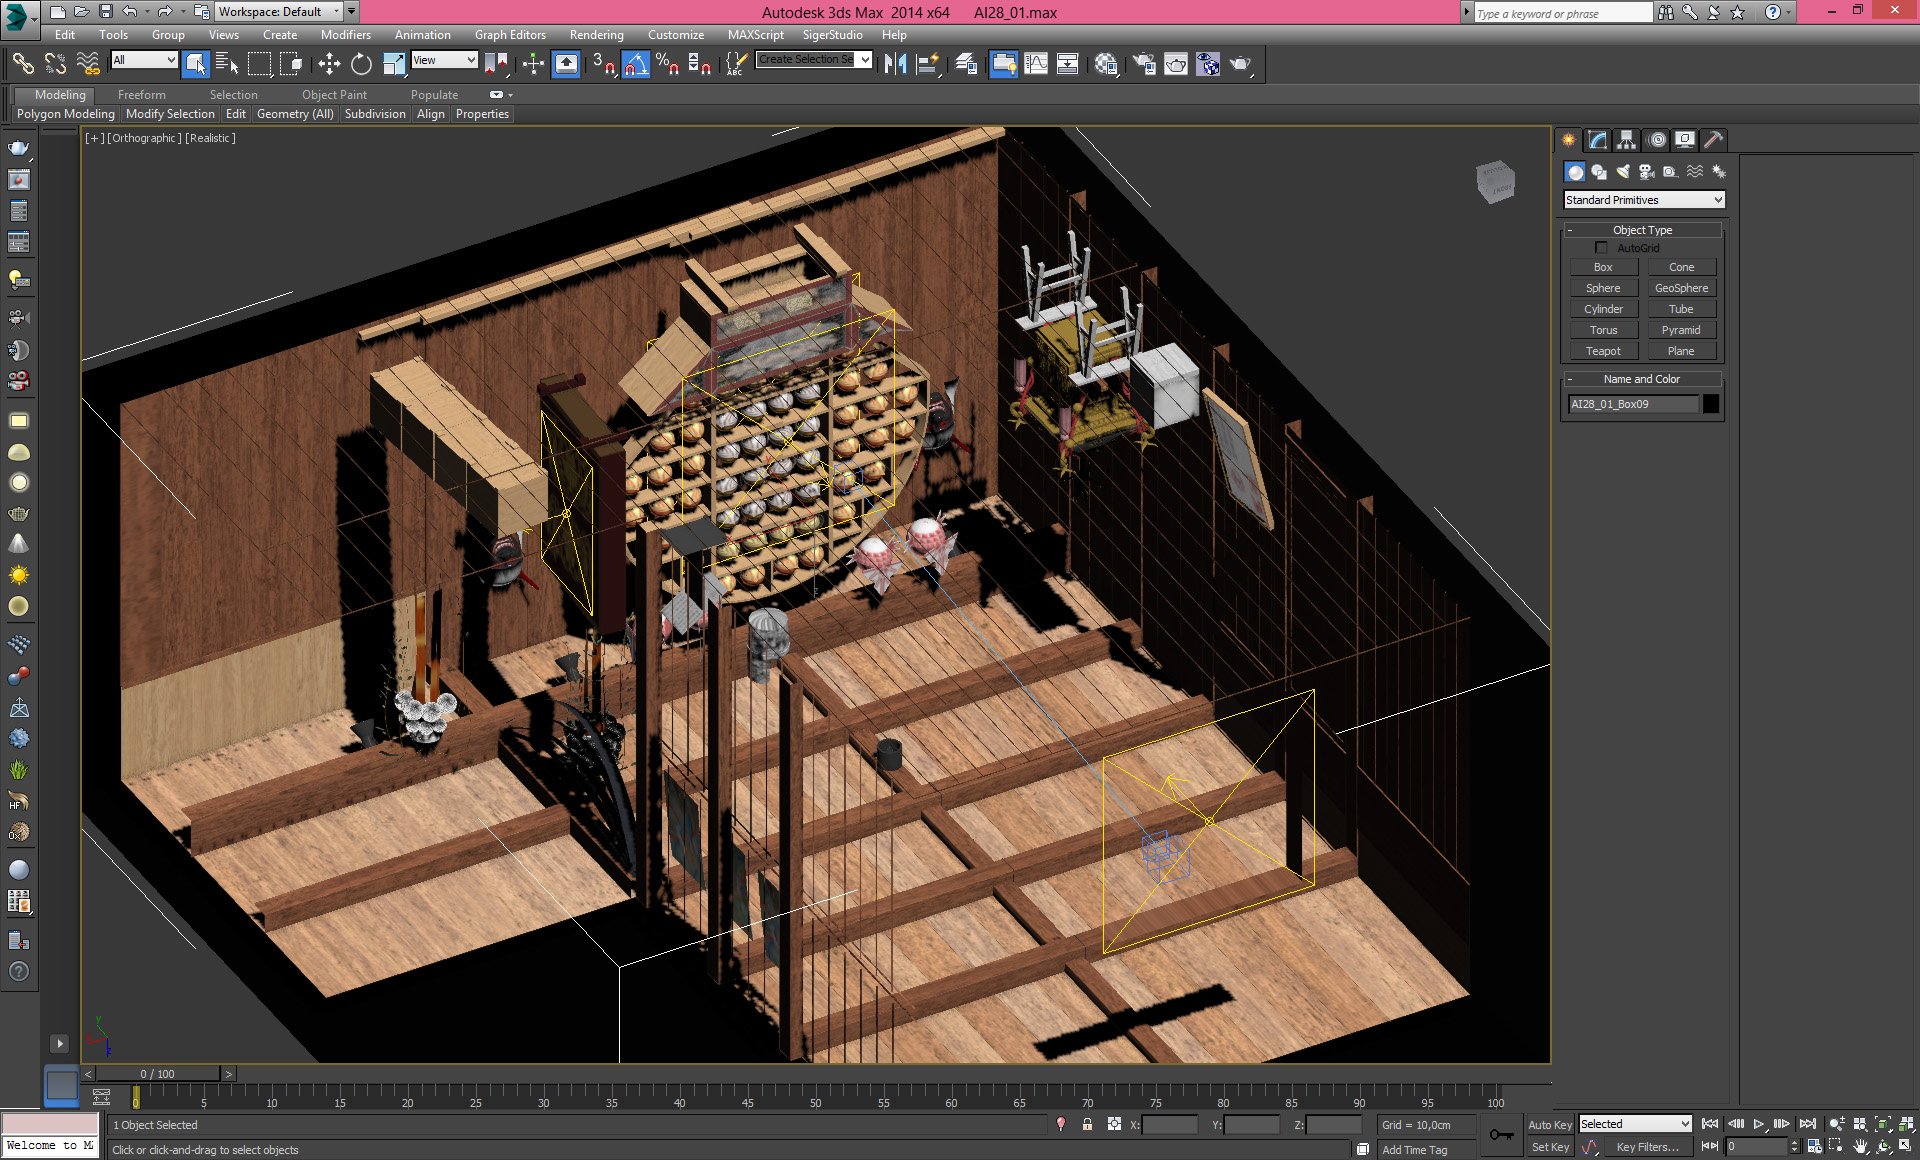
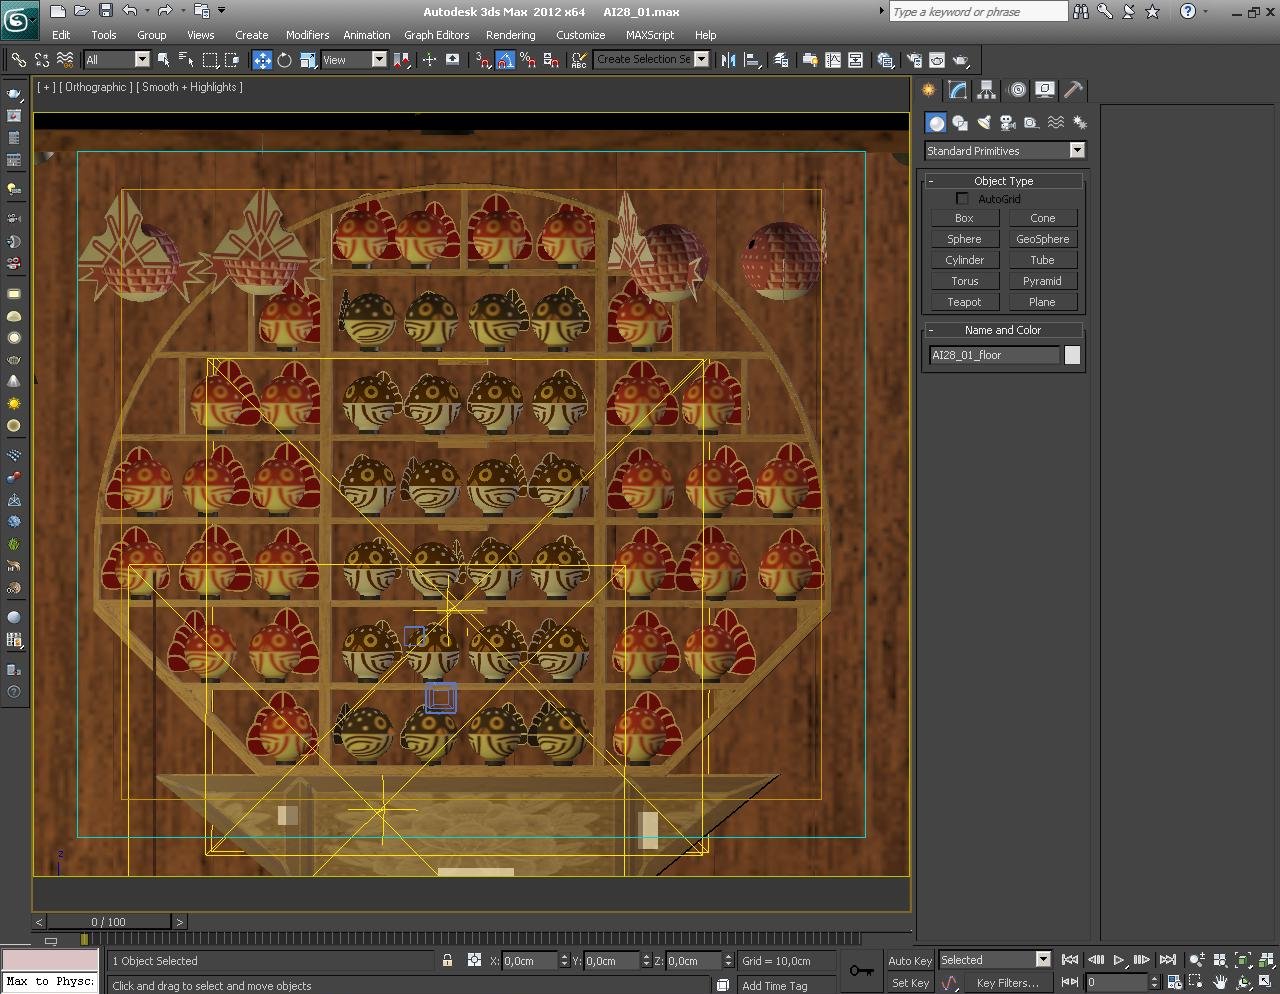
Overview of the scene. Two main distinctive features that make this scene great are: 1) a high quality wood material that is used for floor, walls and ceiling and 2) a couple of carefully placed VrayLight sources that we used to achieve warm and cosy look.
 

 9B_gamma_nr_1951.jpg

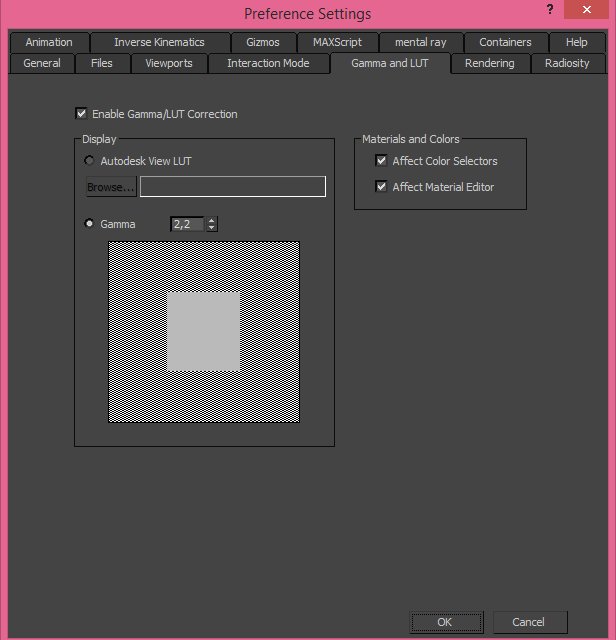
As usual, we use Gamma 2,2.


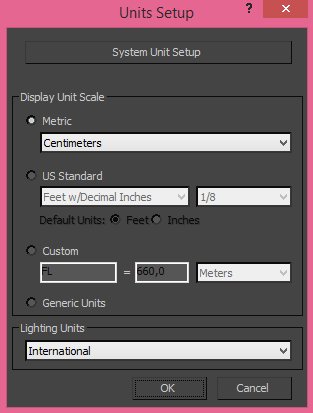
9D_units_nr_1967.jpg

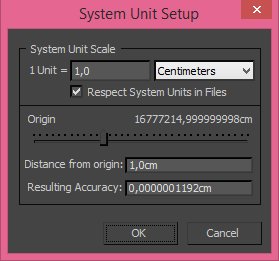
...and metric units system.


9E_system_units_nr_1965.jpg


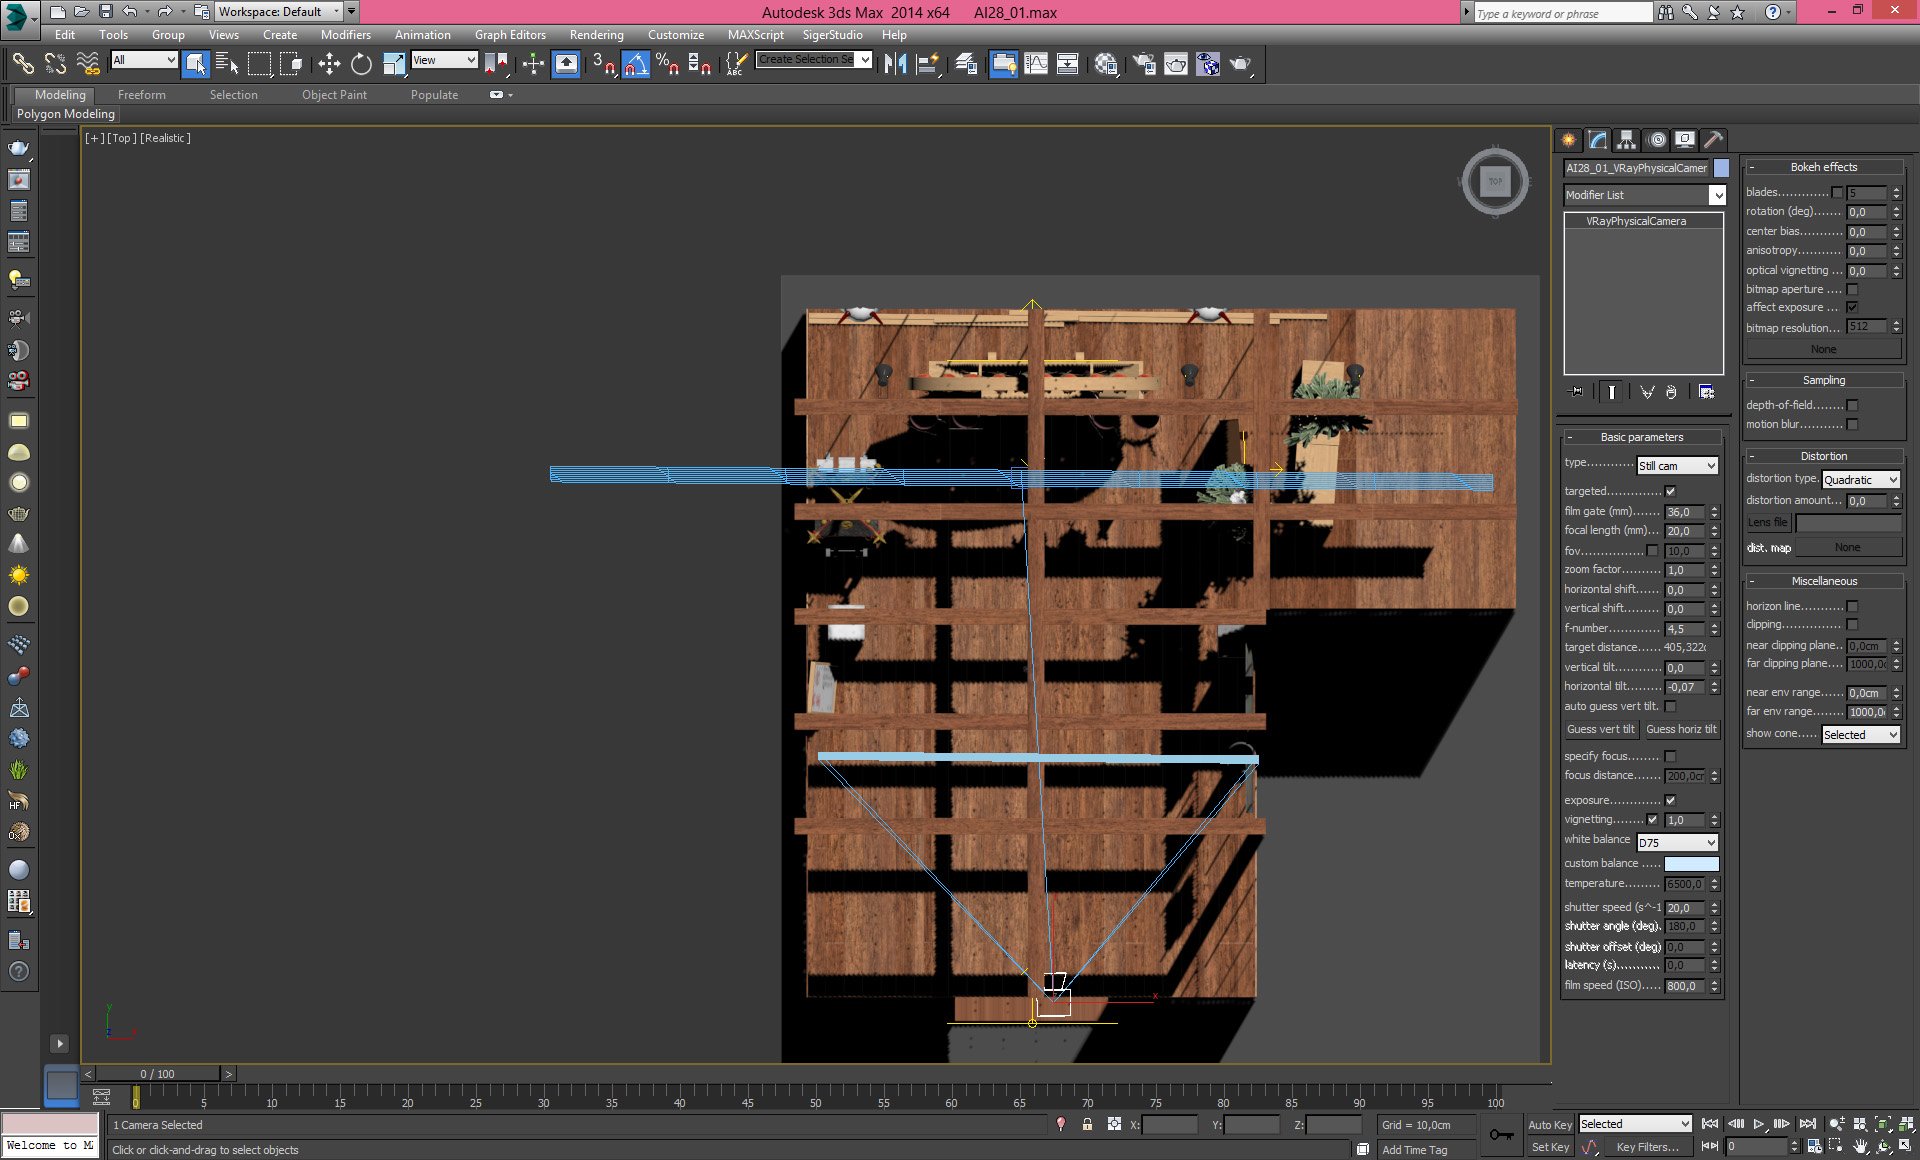
Click on image to enlarge camera_nr_2417.jpg

Camera settings


Click on image to enlarge light_1_nr_2416.jpg

One VrayLight was put behind the camera


Click on image to enlarge only_lights_nr_2411.jpg

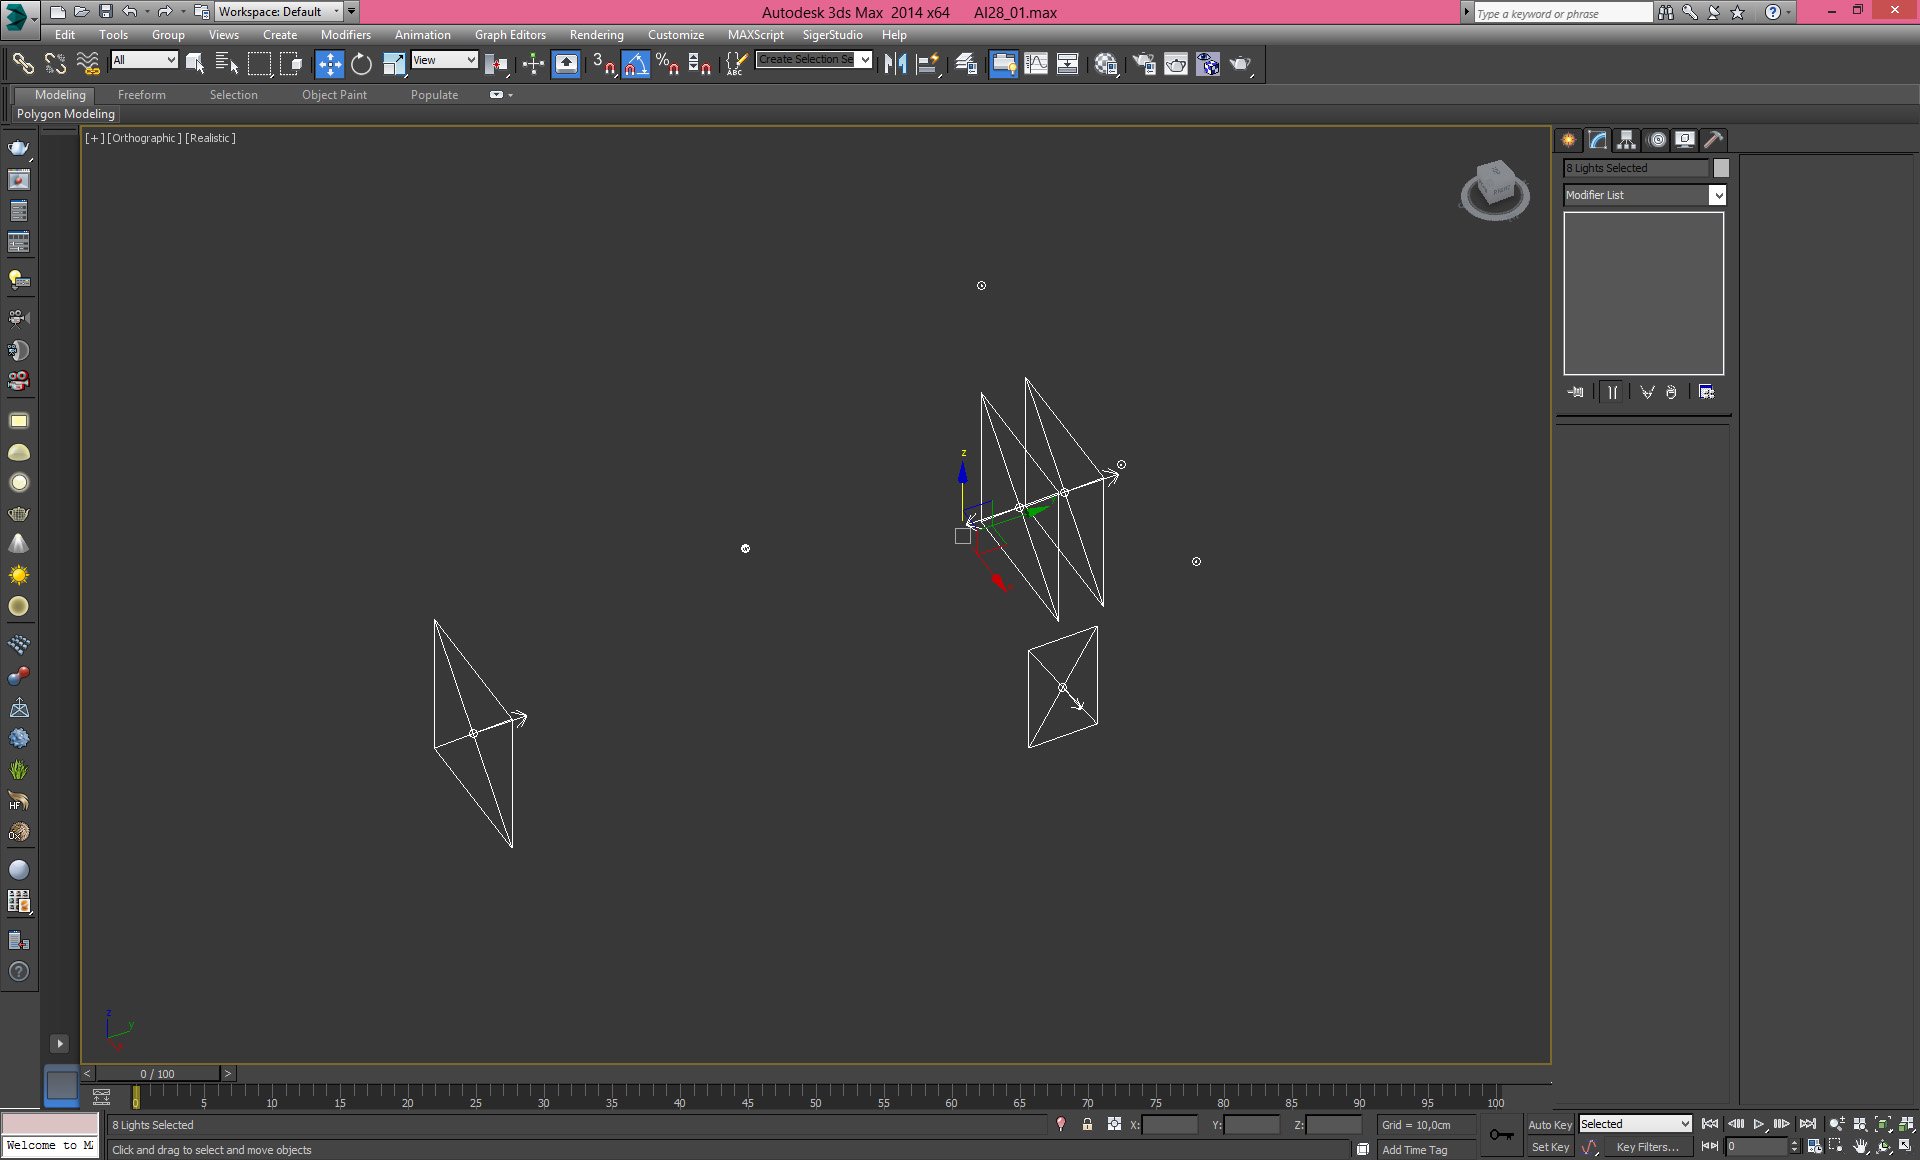
There are 8 lights in this scene, (not counting VrayLight Materials)


Click on image to enlarge light_2_nr_2414.jpg

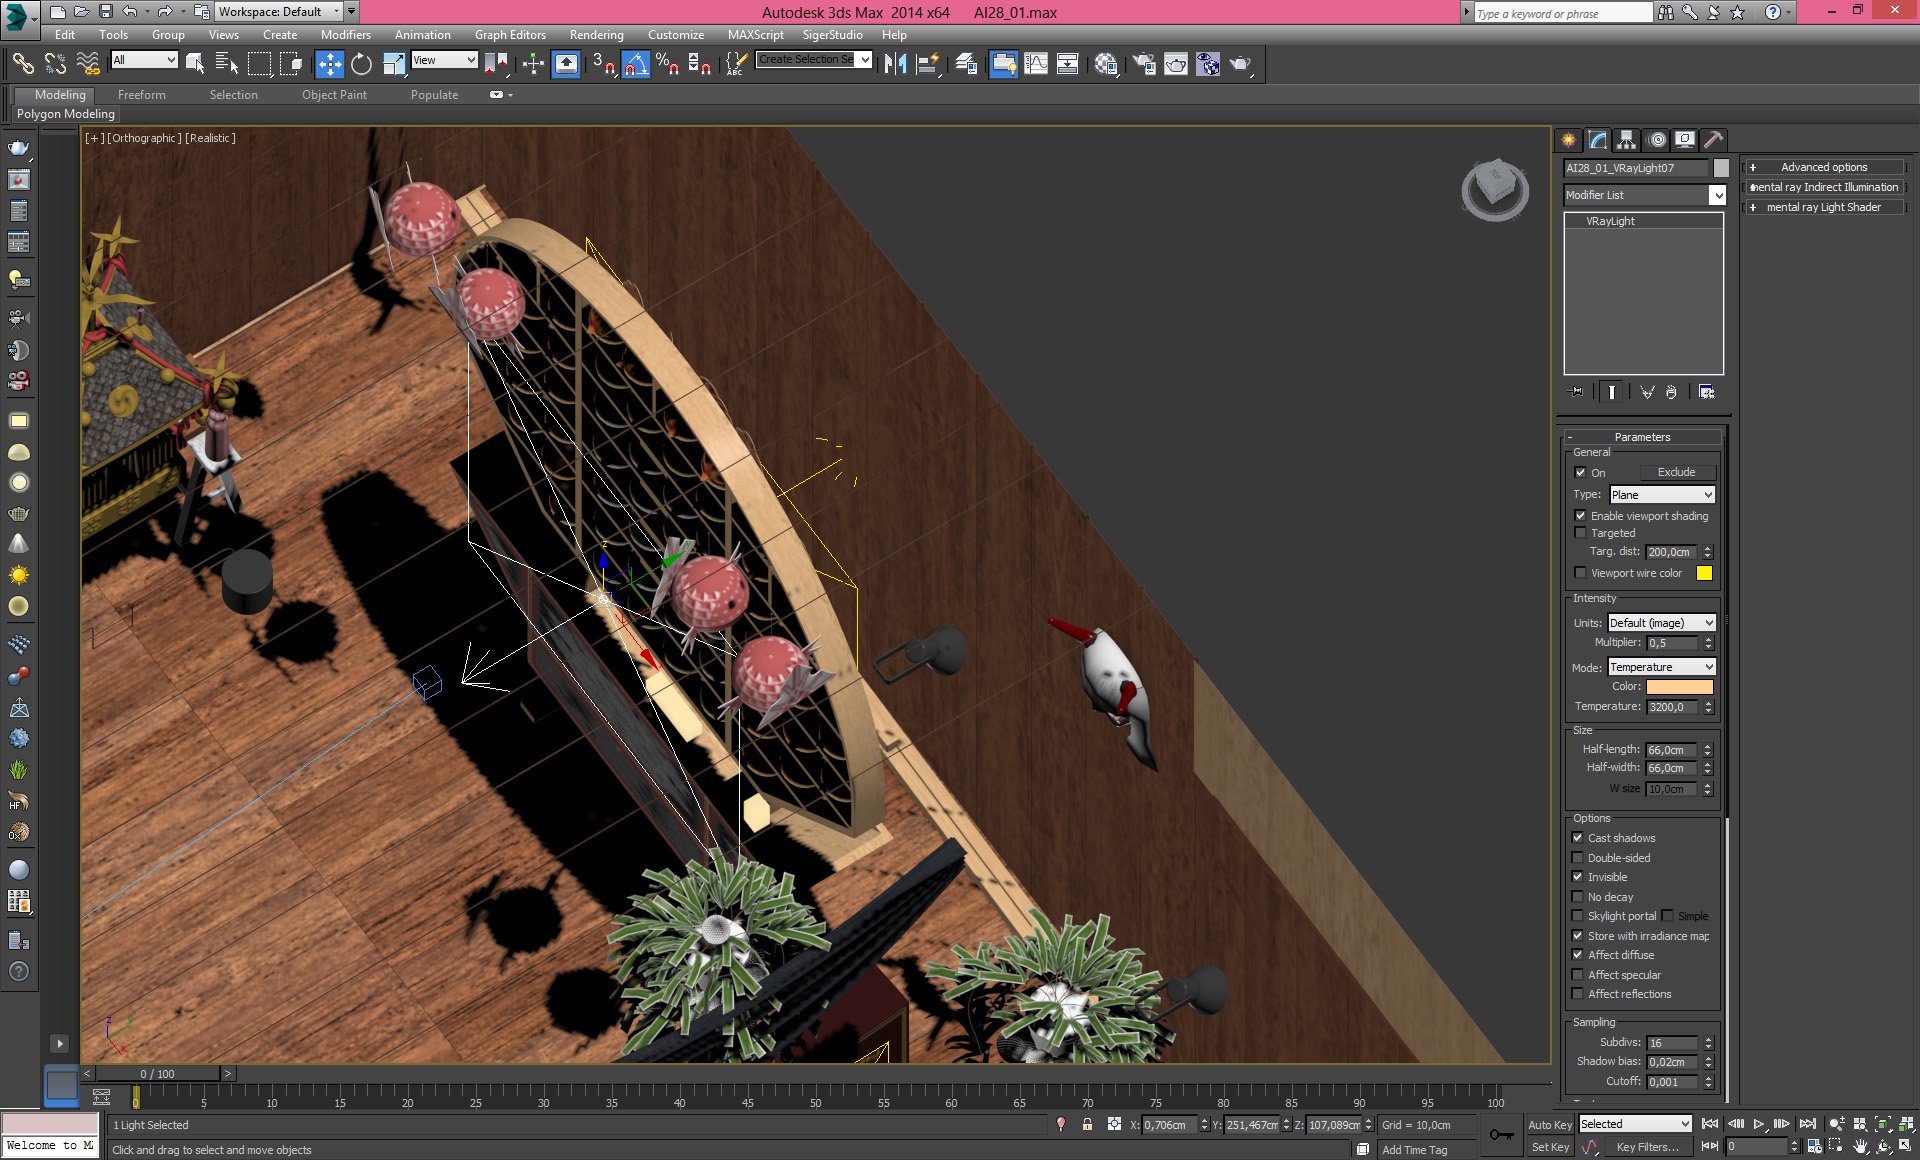
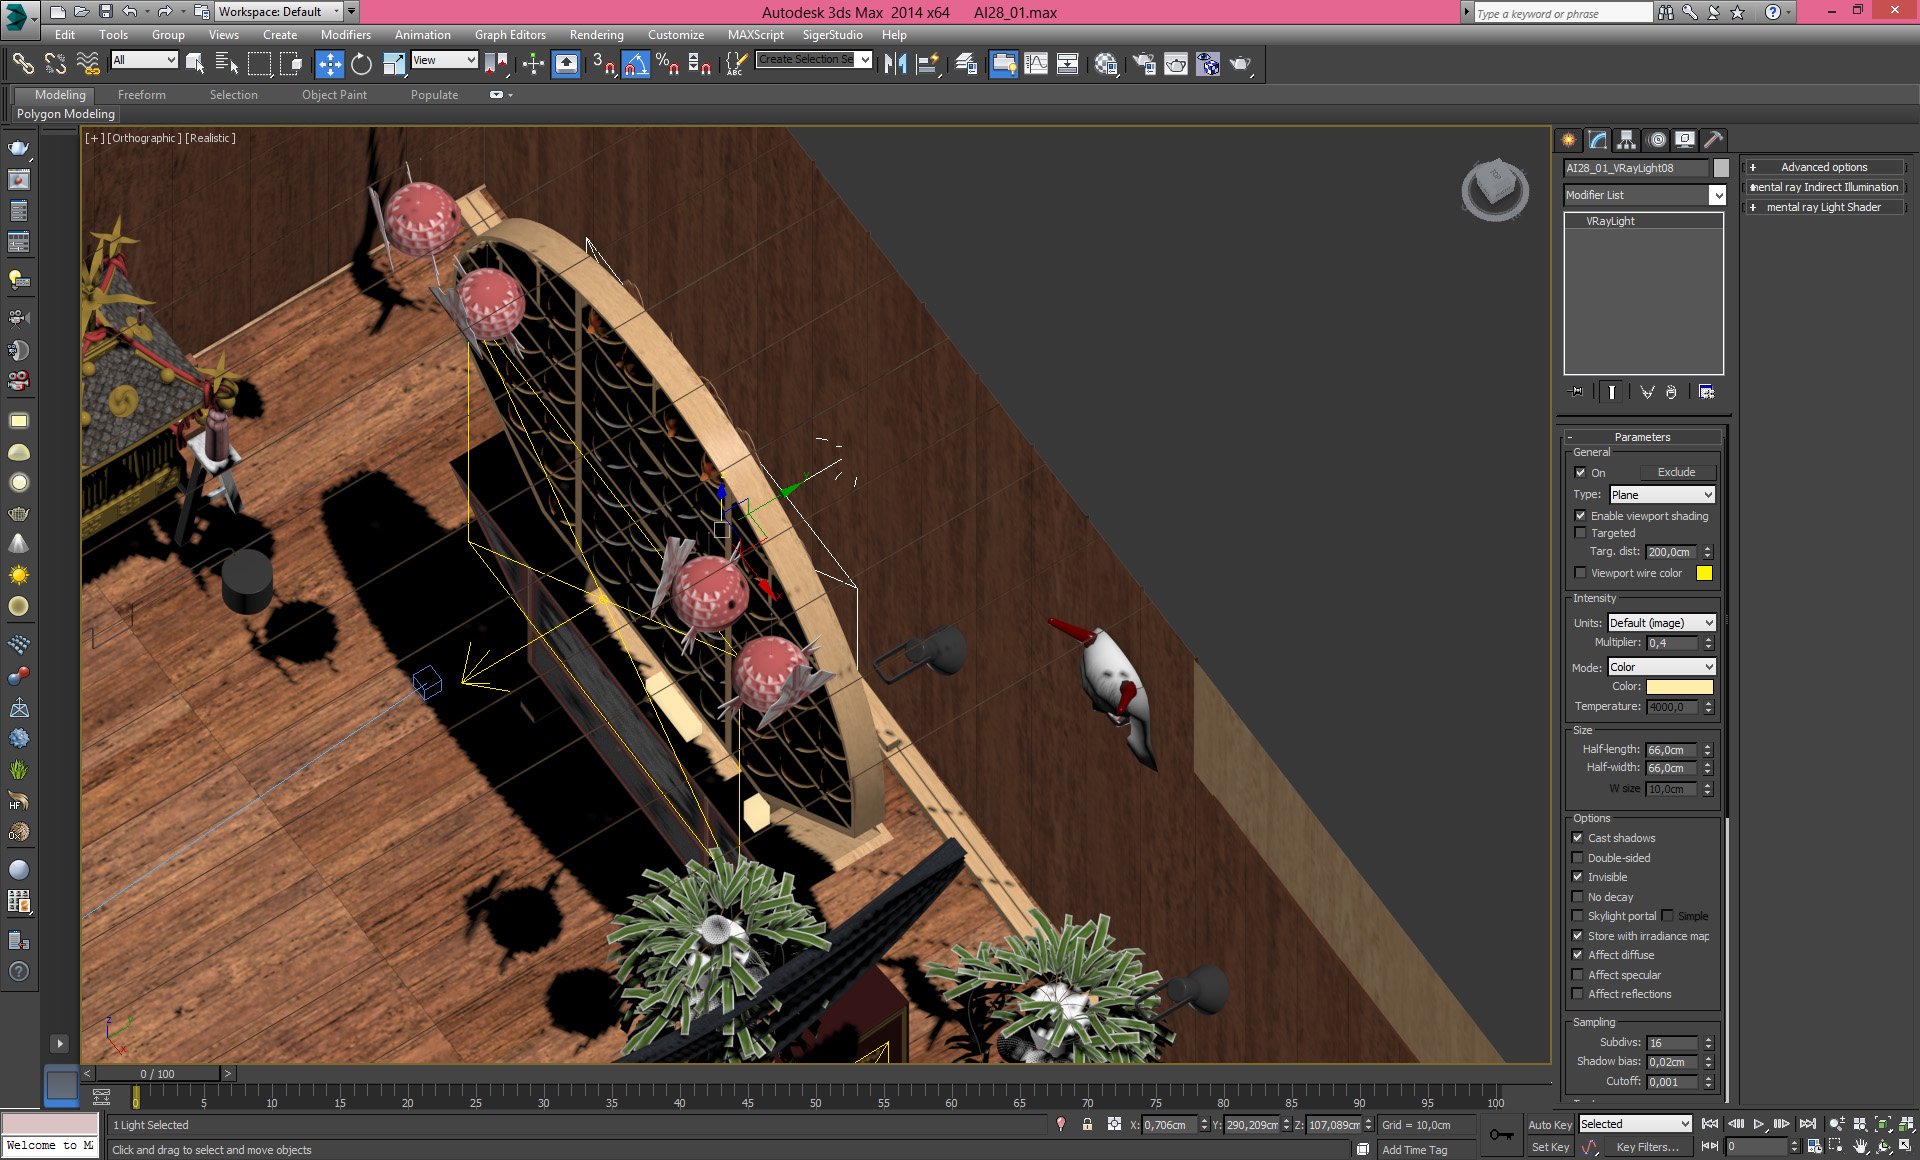
Two lights that are placed in front and behind the shelf are the most important in this scene. Settings of the first light on the right.


Click on image to enlarge light_3_nr_2413.jpg

Notice that both lights don't affect specular or reflections, only diffuse


Click on image to enlarge small_light_nr_2410.jpg

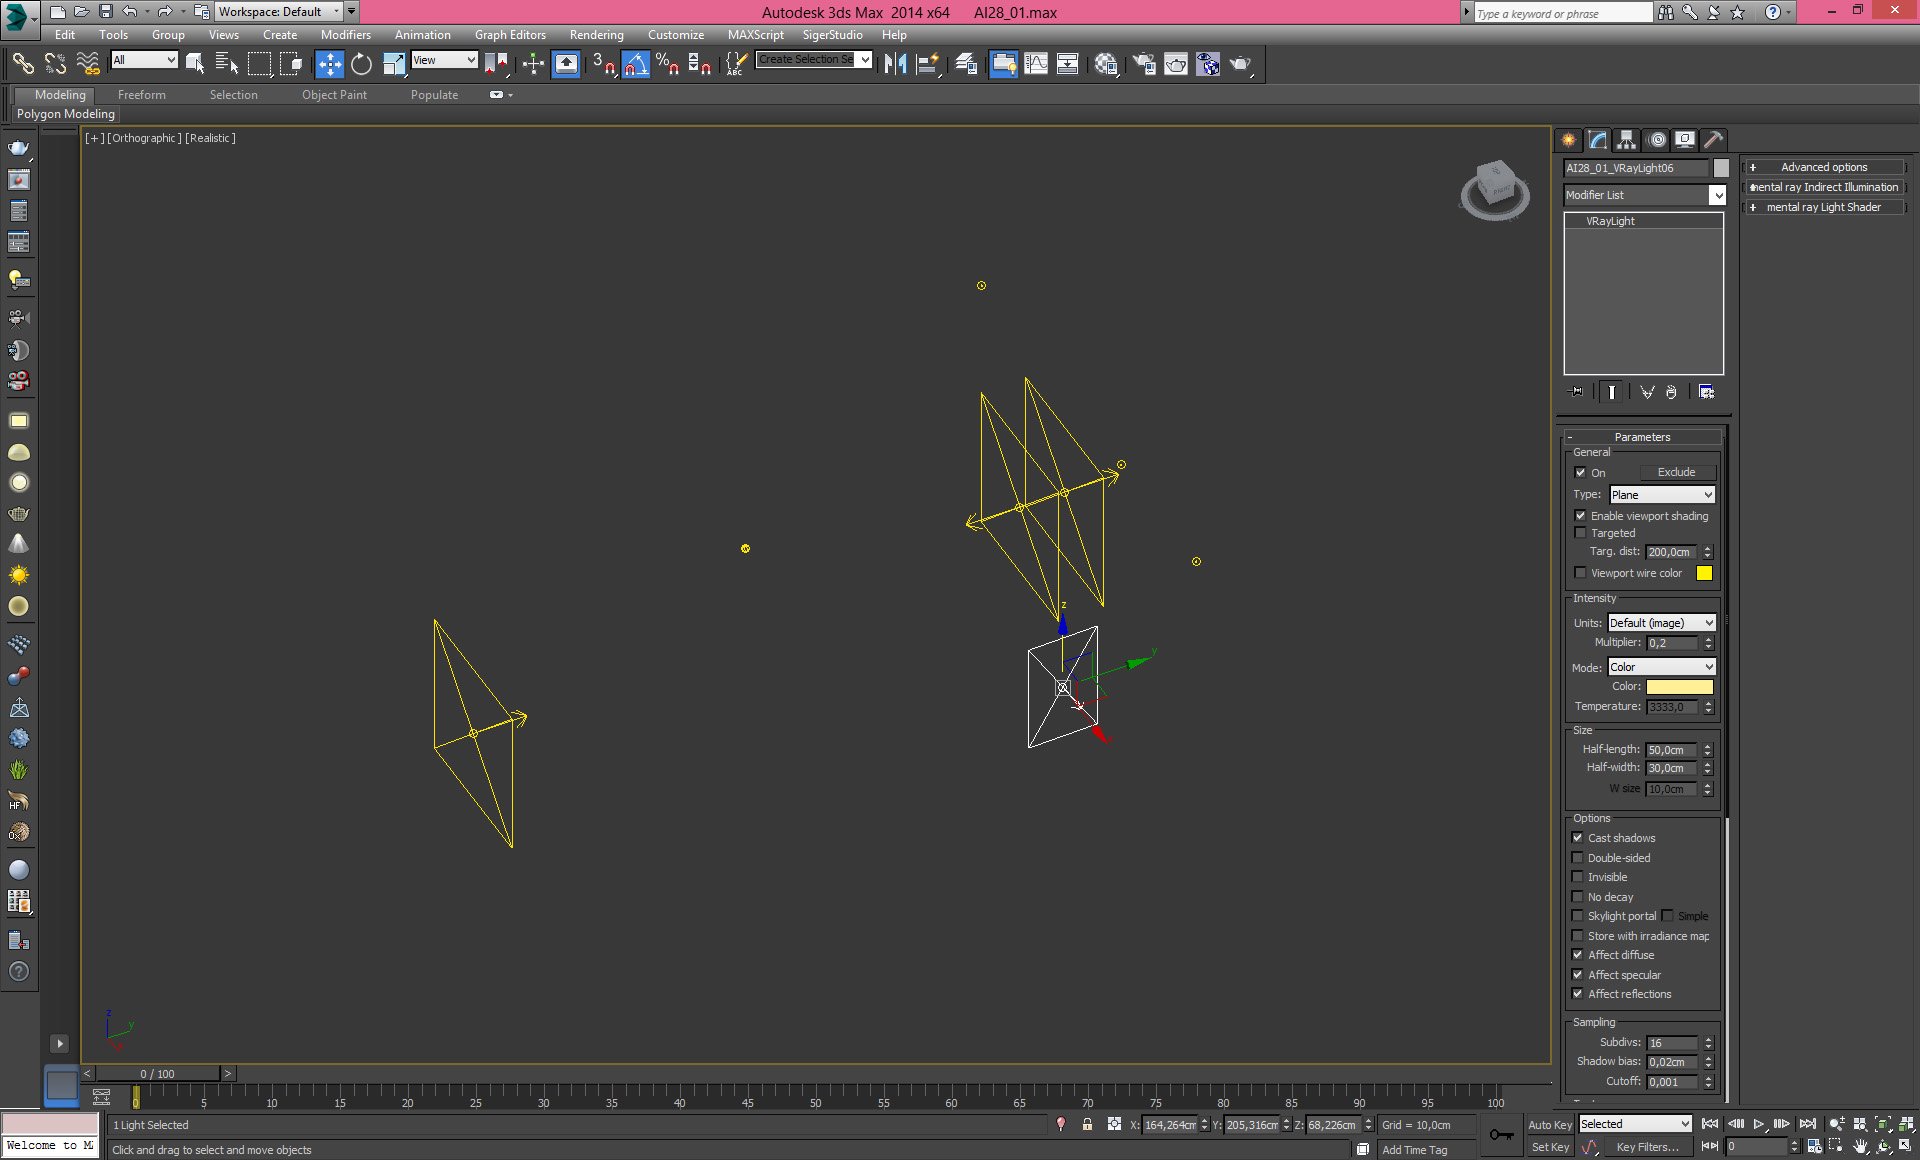
Small lights are put into halogens lamps. Settings on the right.


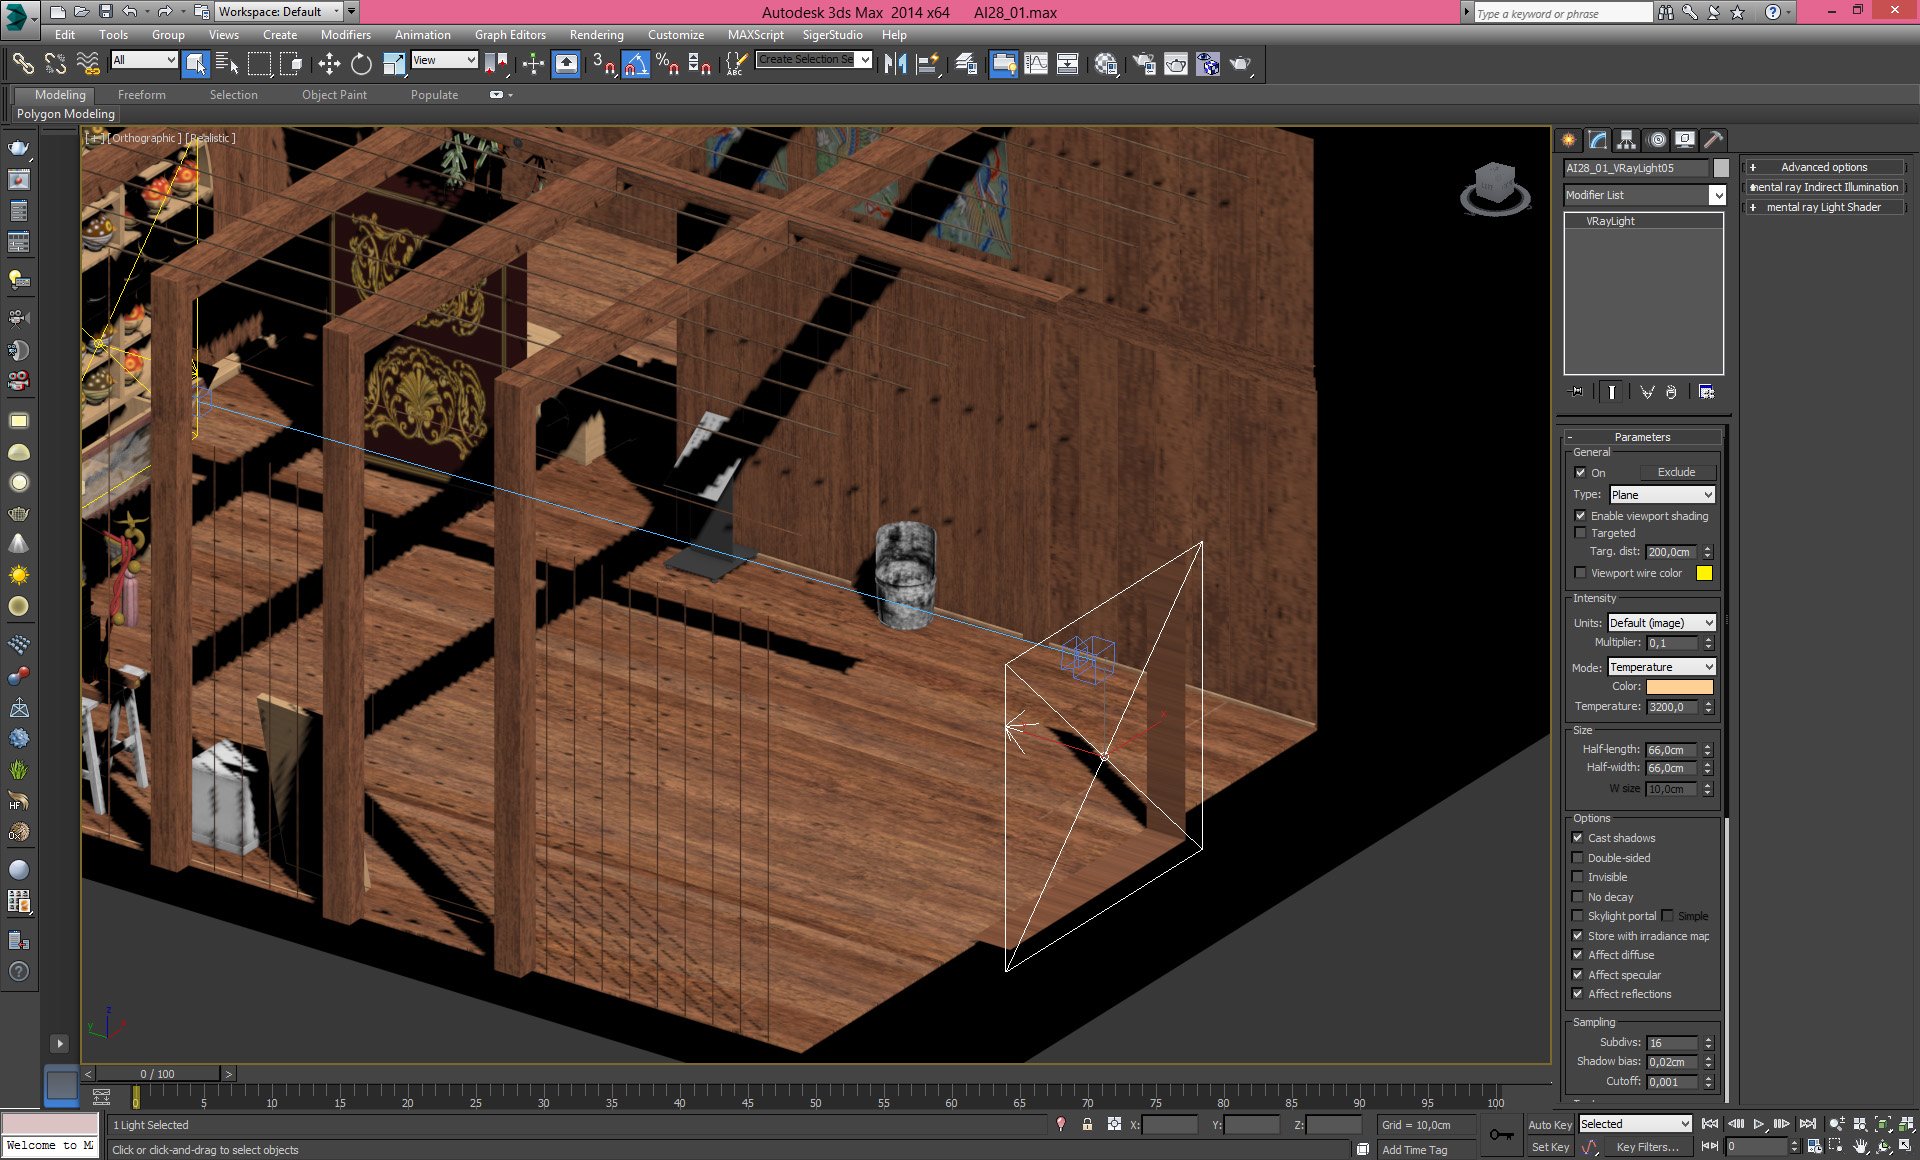
Click on image to enlarge side_light_nr_2409.jpg

Settingss of side light on the right


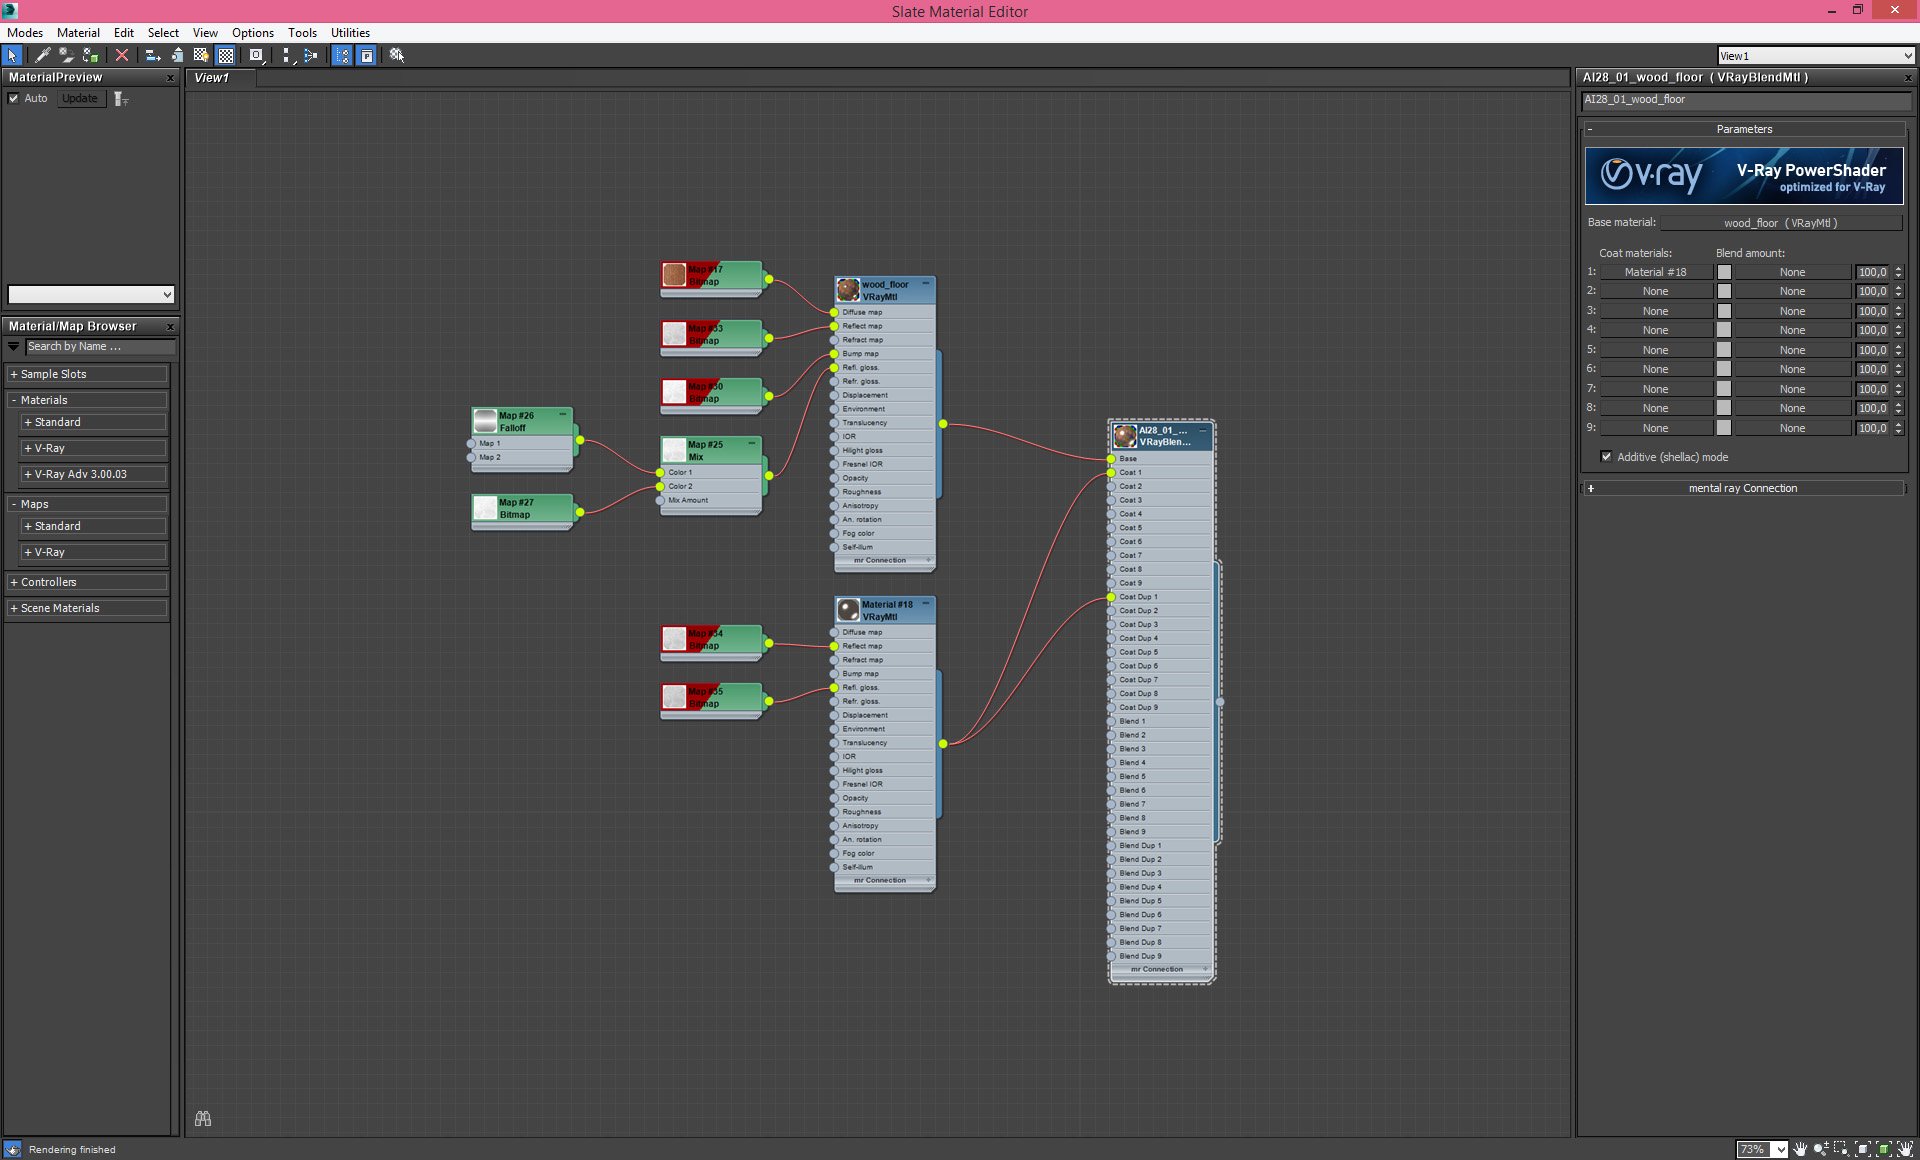
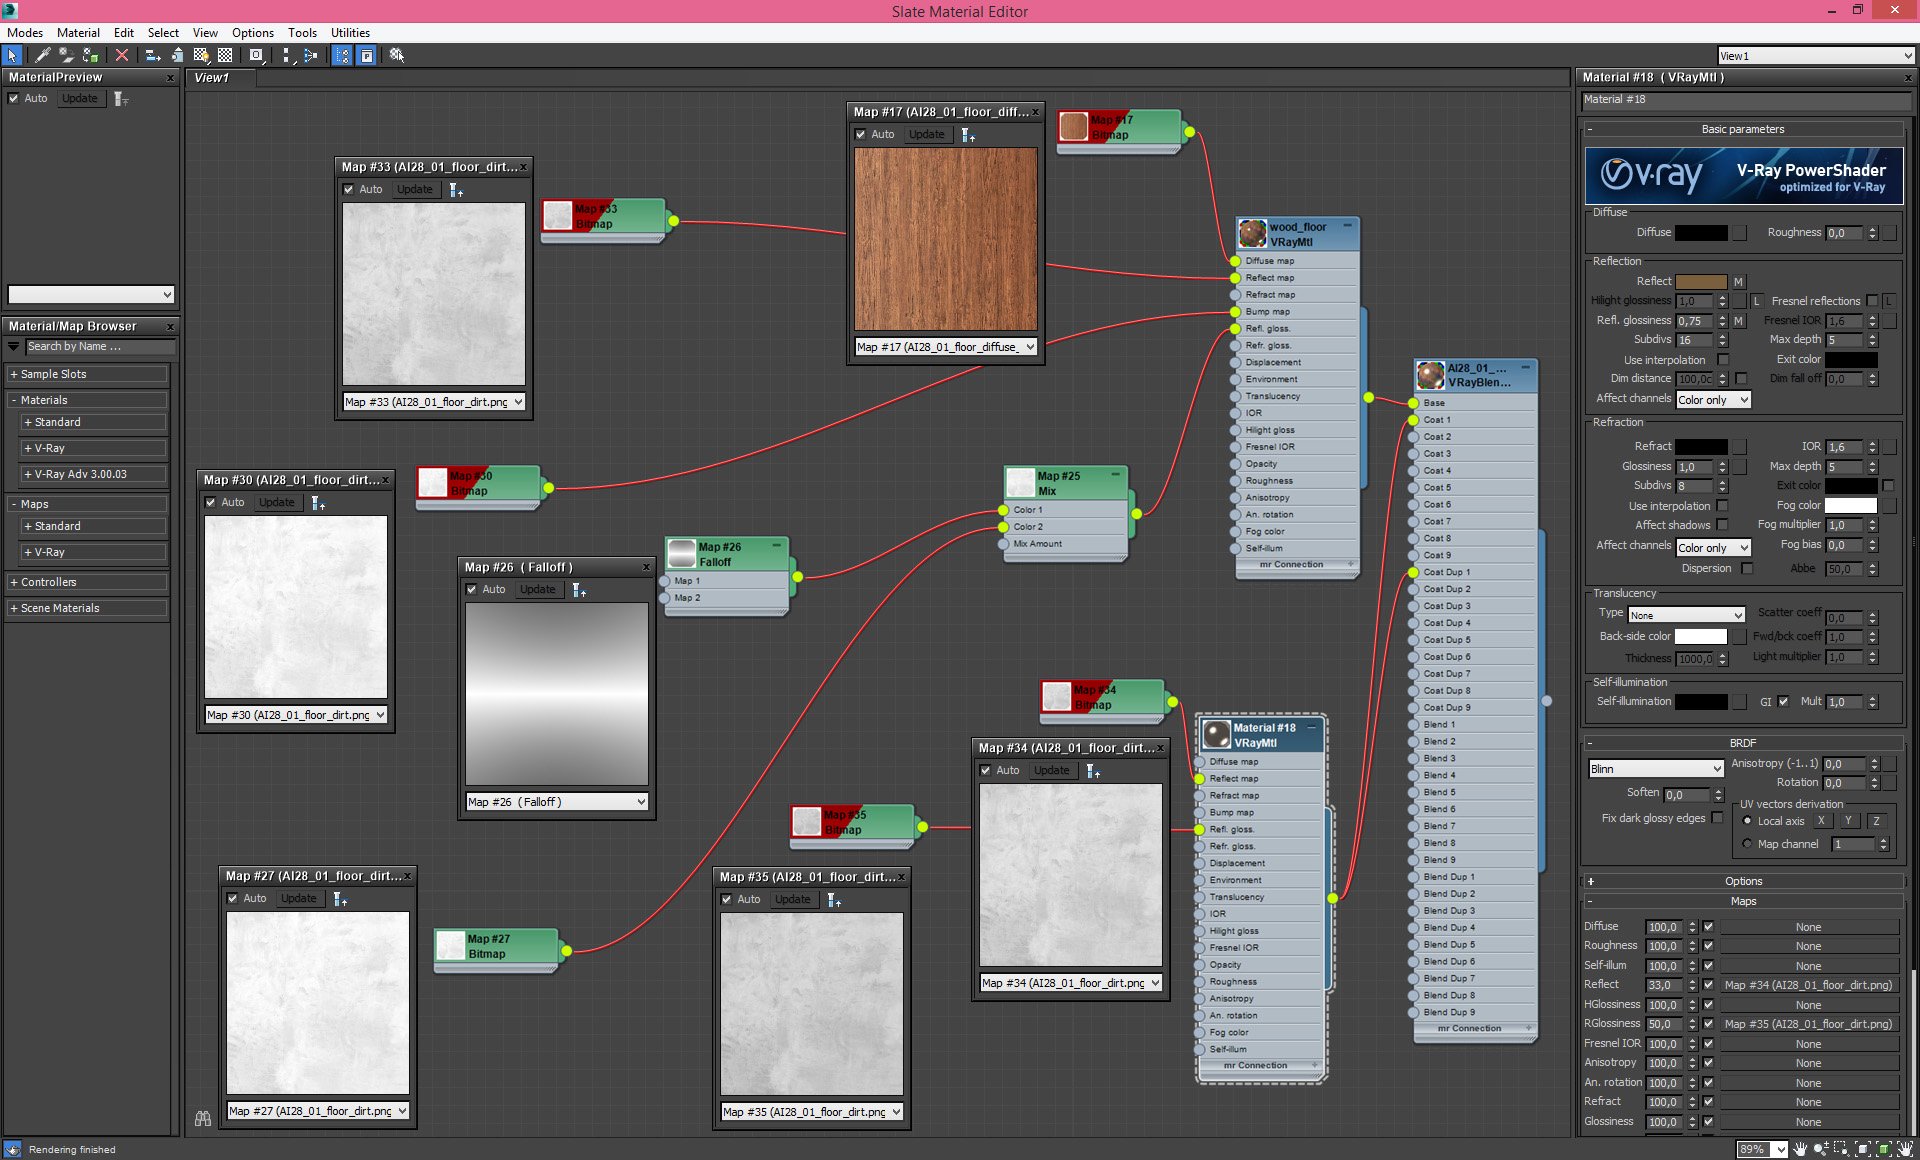
Click on image to enlarge floor_blendmat_nr_2408.jpg

Floor material is the most important material in the scene. It is used not only for floor, but also for walls and ceiling joists. It is a VrayBlend Material that consists of two layers.


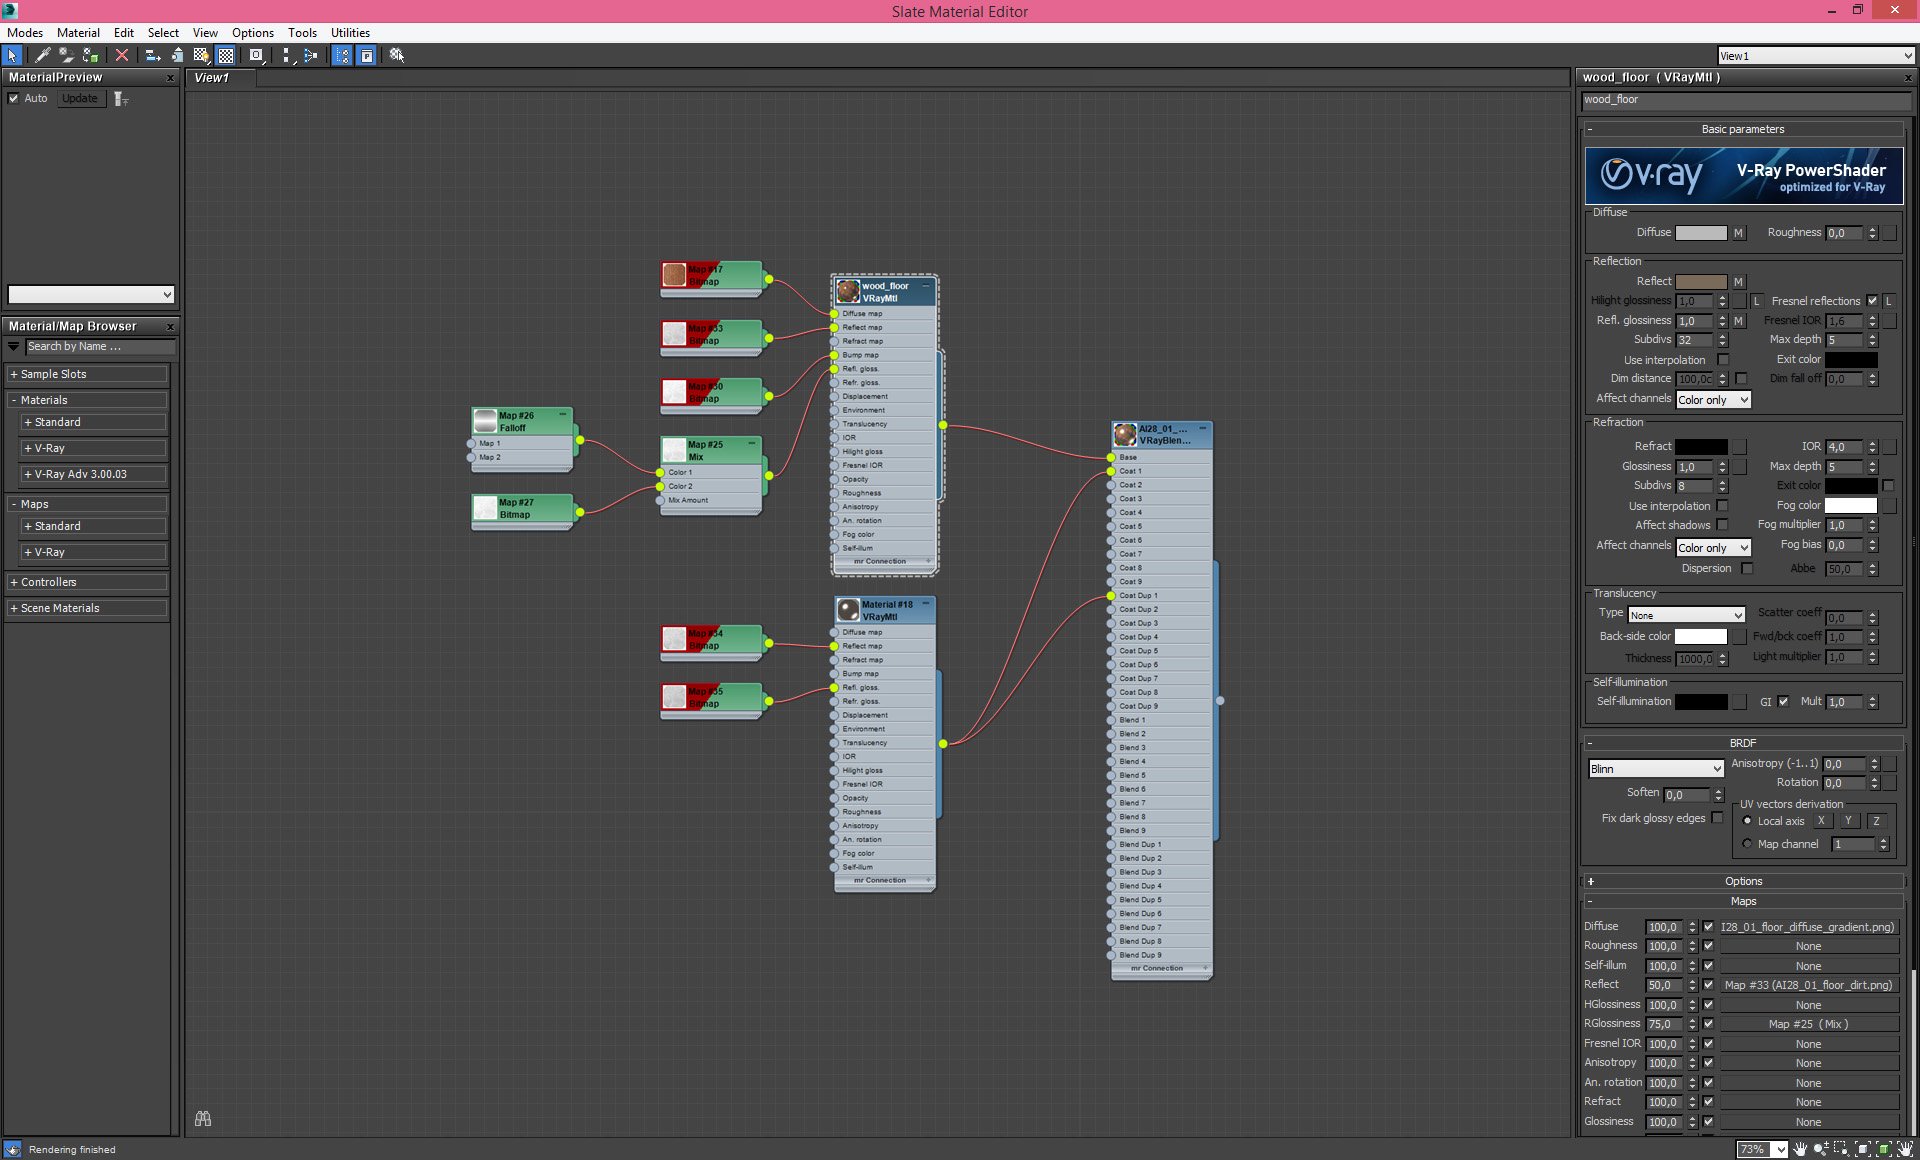
Click on image to enlarge floor_base_nr_2407.jpg

Floor - base material settings


668_400_AI28_2.jpg


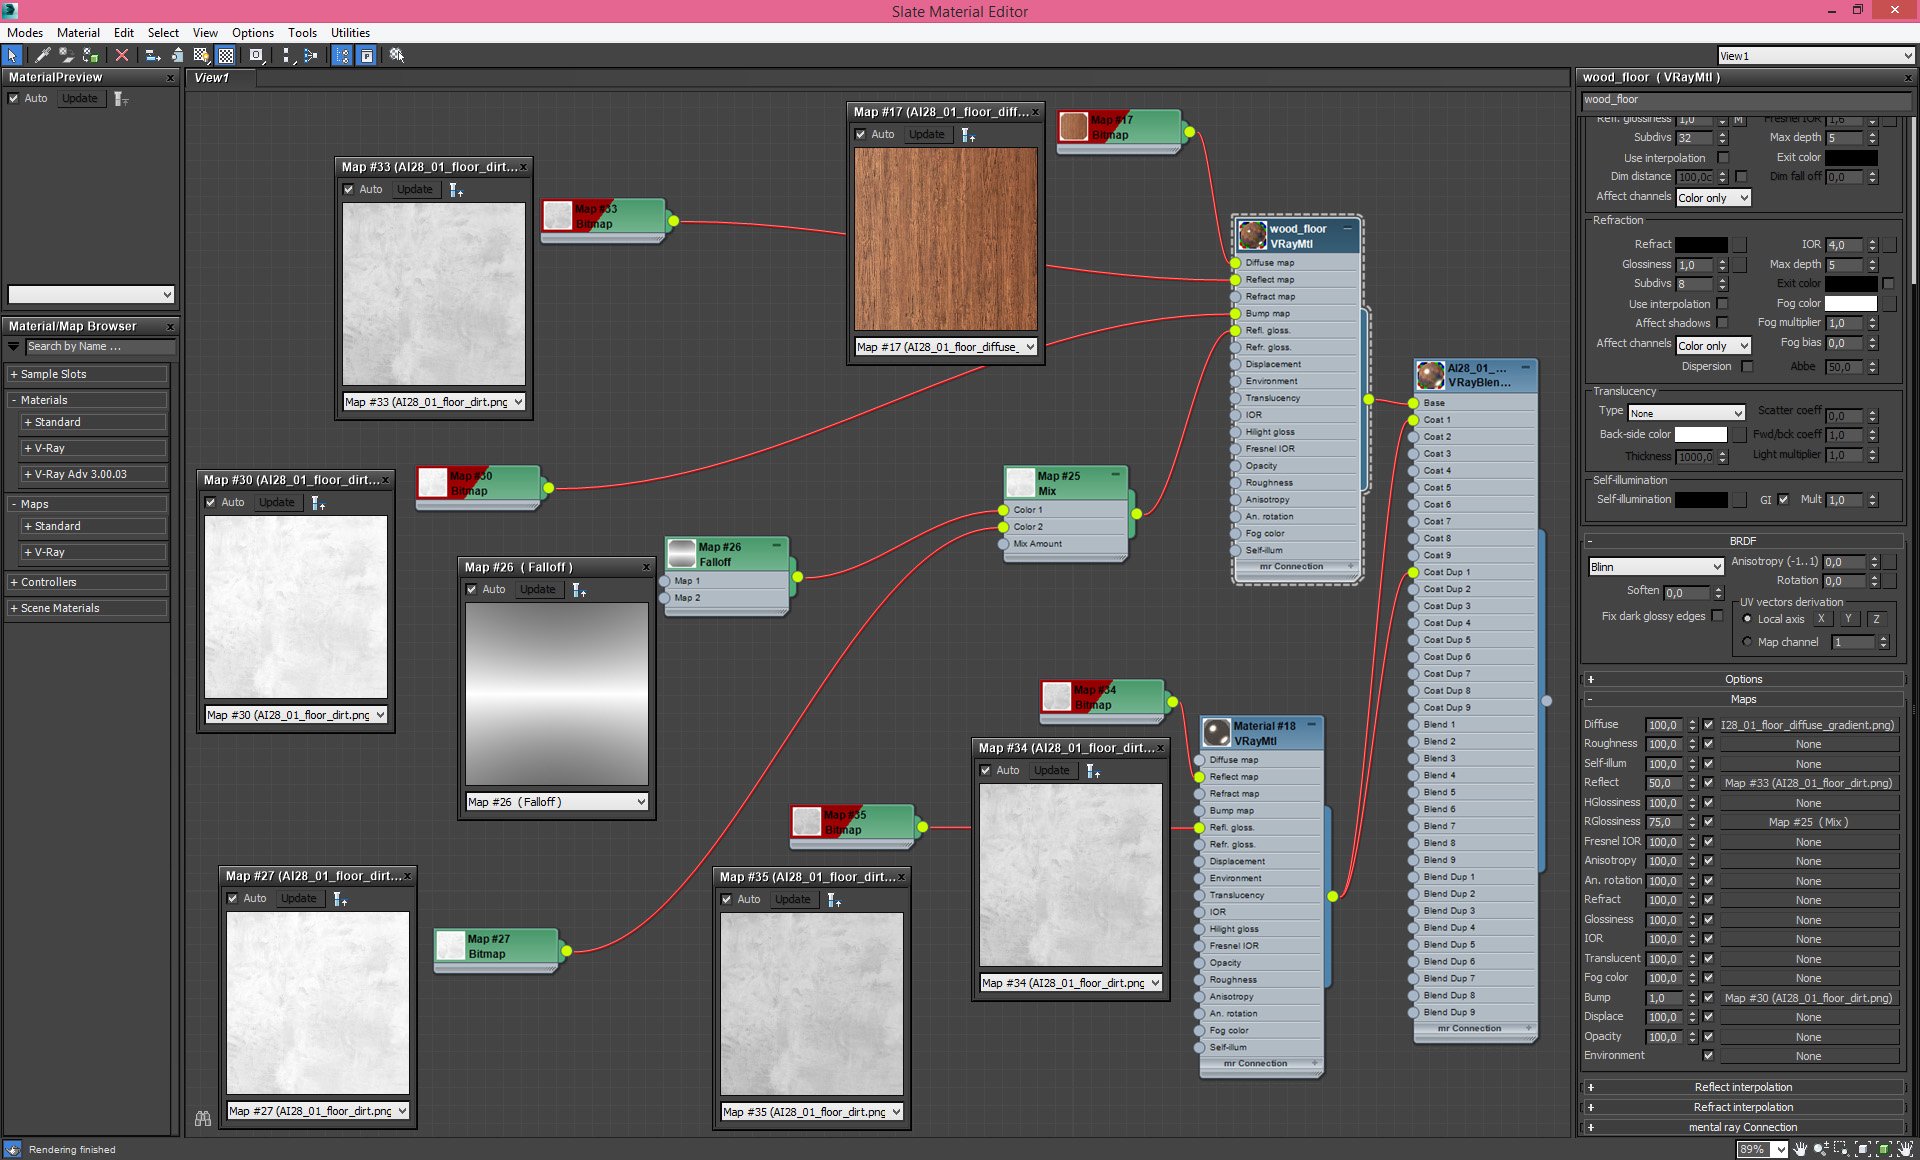
Click on image to enlarge floor_maps_nr_2406.jpg

Floor - base material maps settings


Click on image to enlarge floor_coat_nr_2405.jpg

Floor - coat material settings


Click on image to enlarge chickens_nr_2426.jpg

Paper bird-lamps


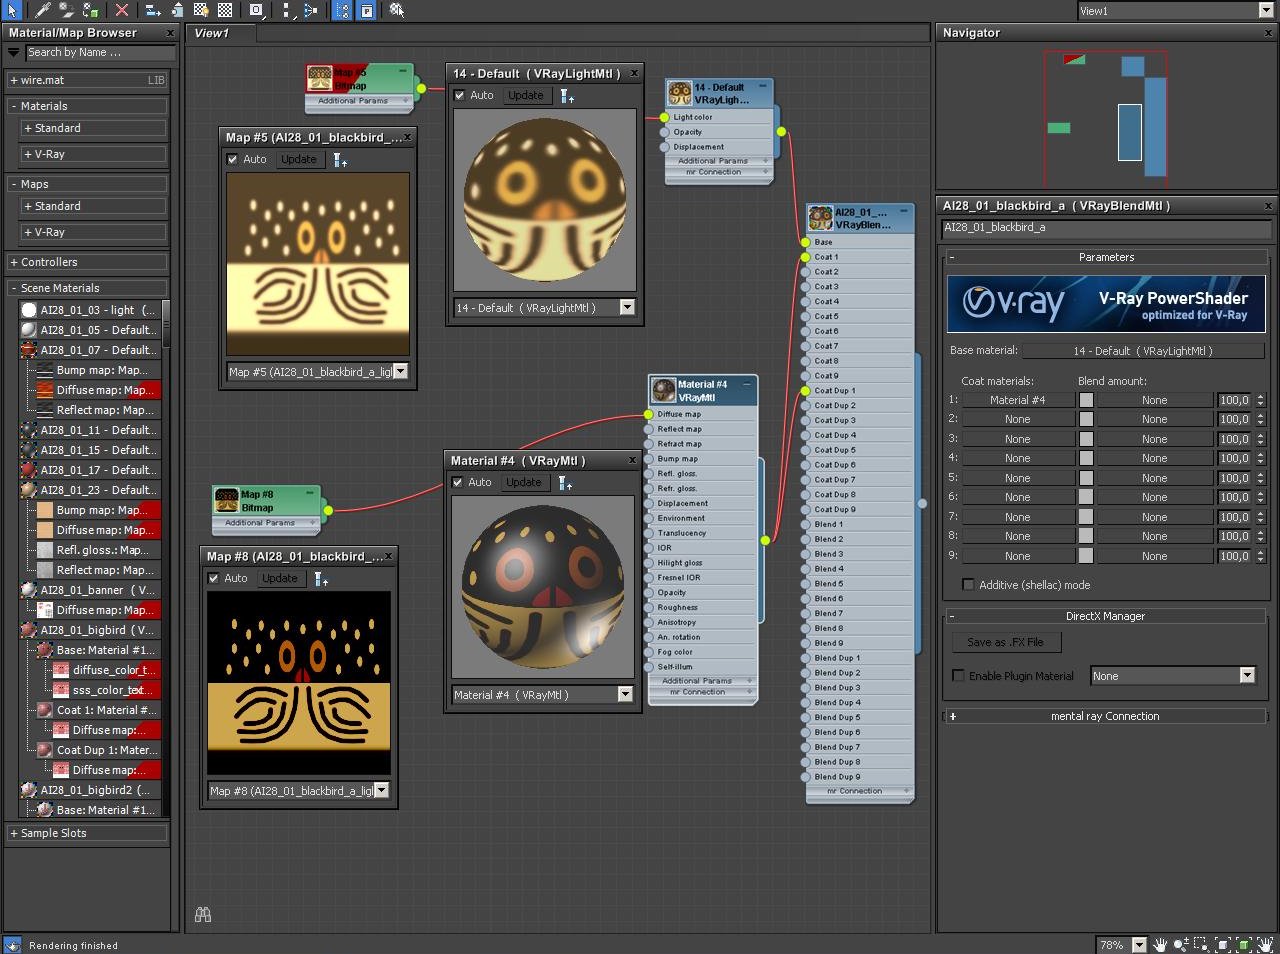
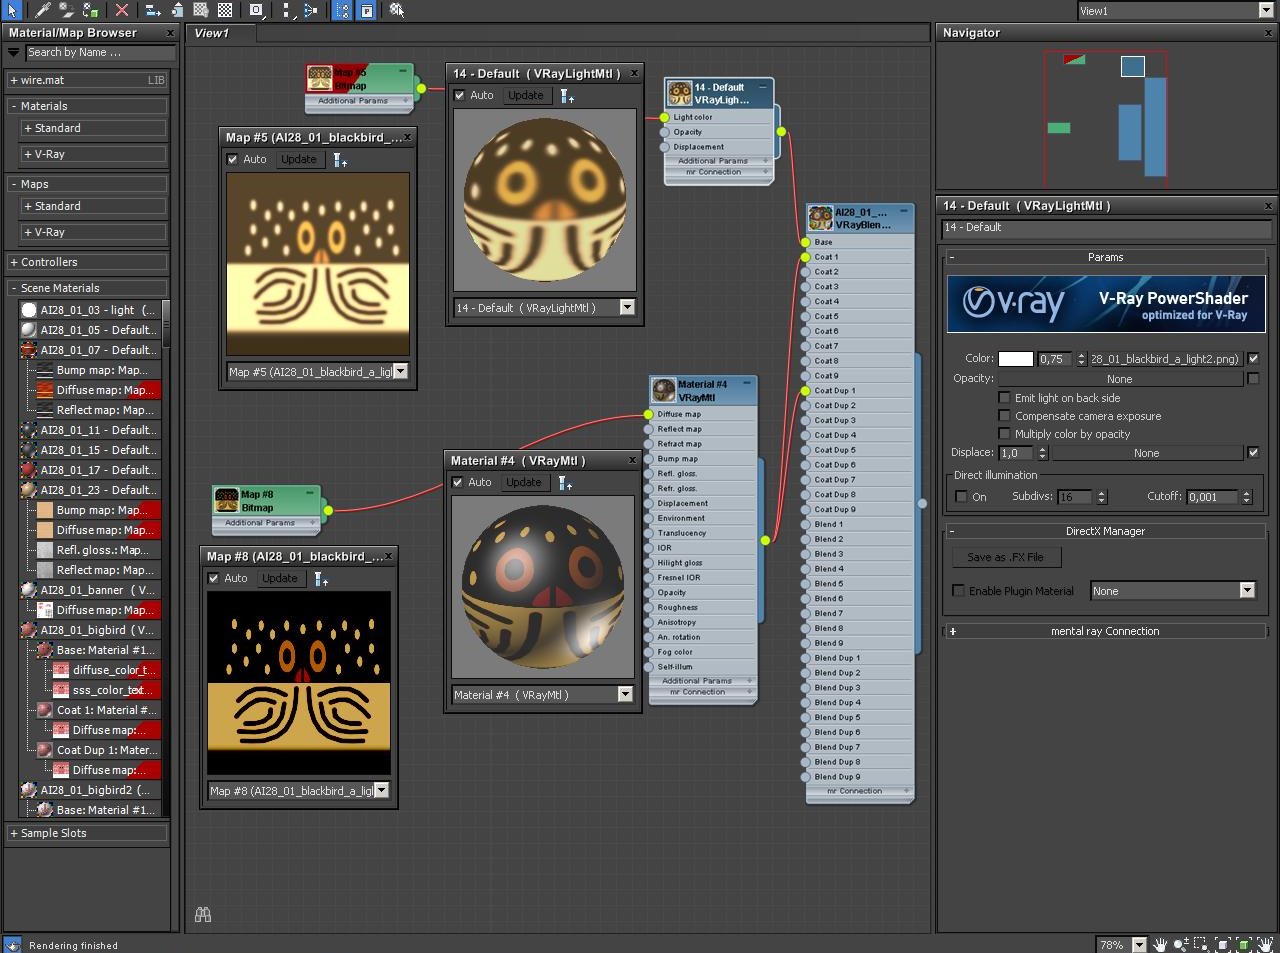
Click on image to enlarge chickens_blend_nr_2425.jpg

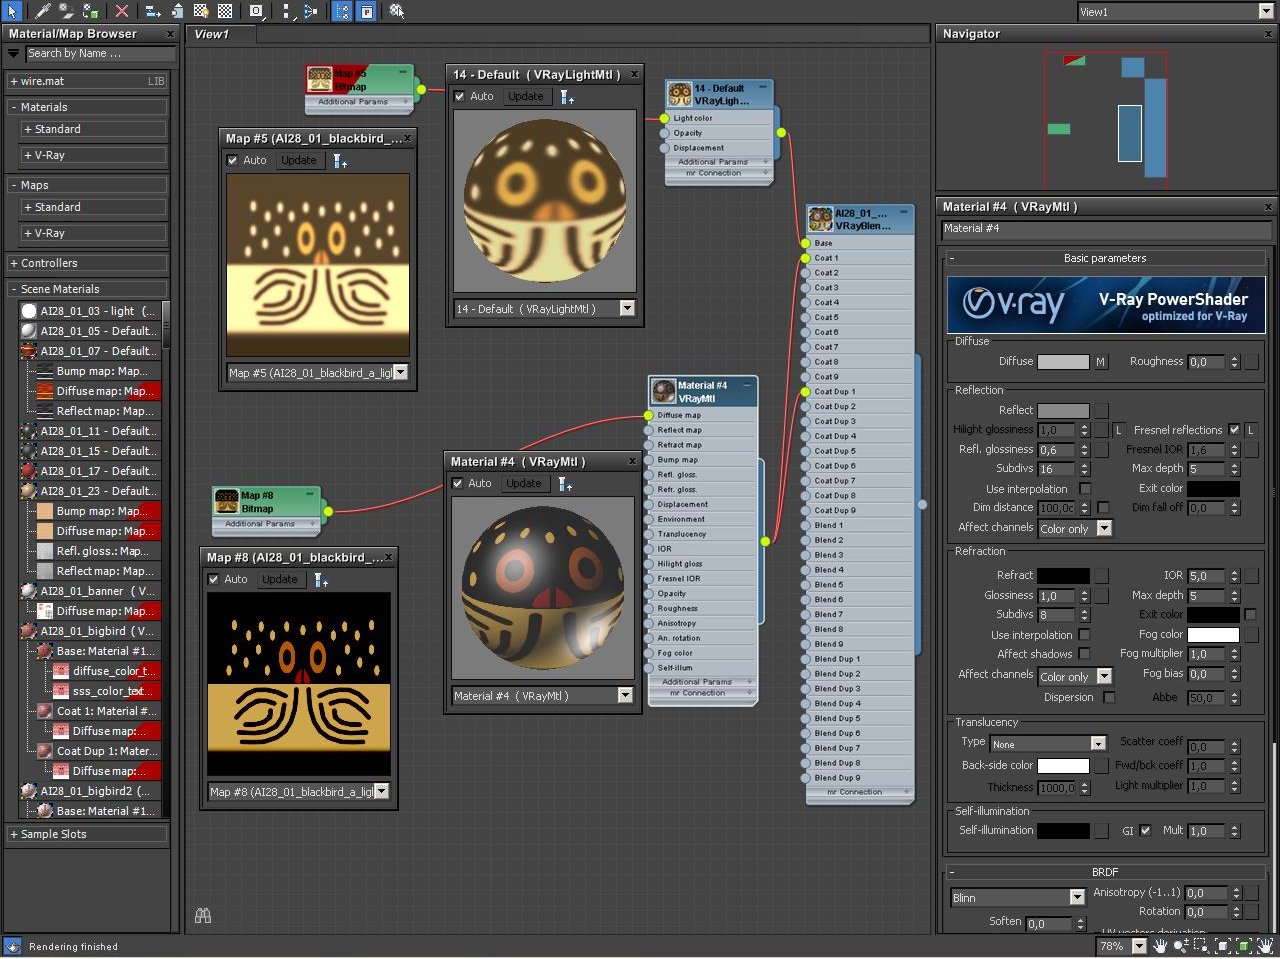
VrayBlend Material of paper birds that are populating the shelf


Click on image to enlarge chickens_base_nr_2424.jpg

Paper bird lamps base material (VrayLight Material)


Click on image to enlarge chickens_coat_nr_2423.jpg

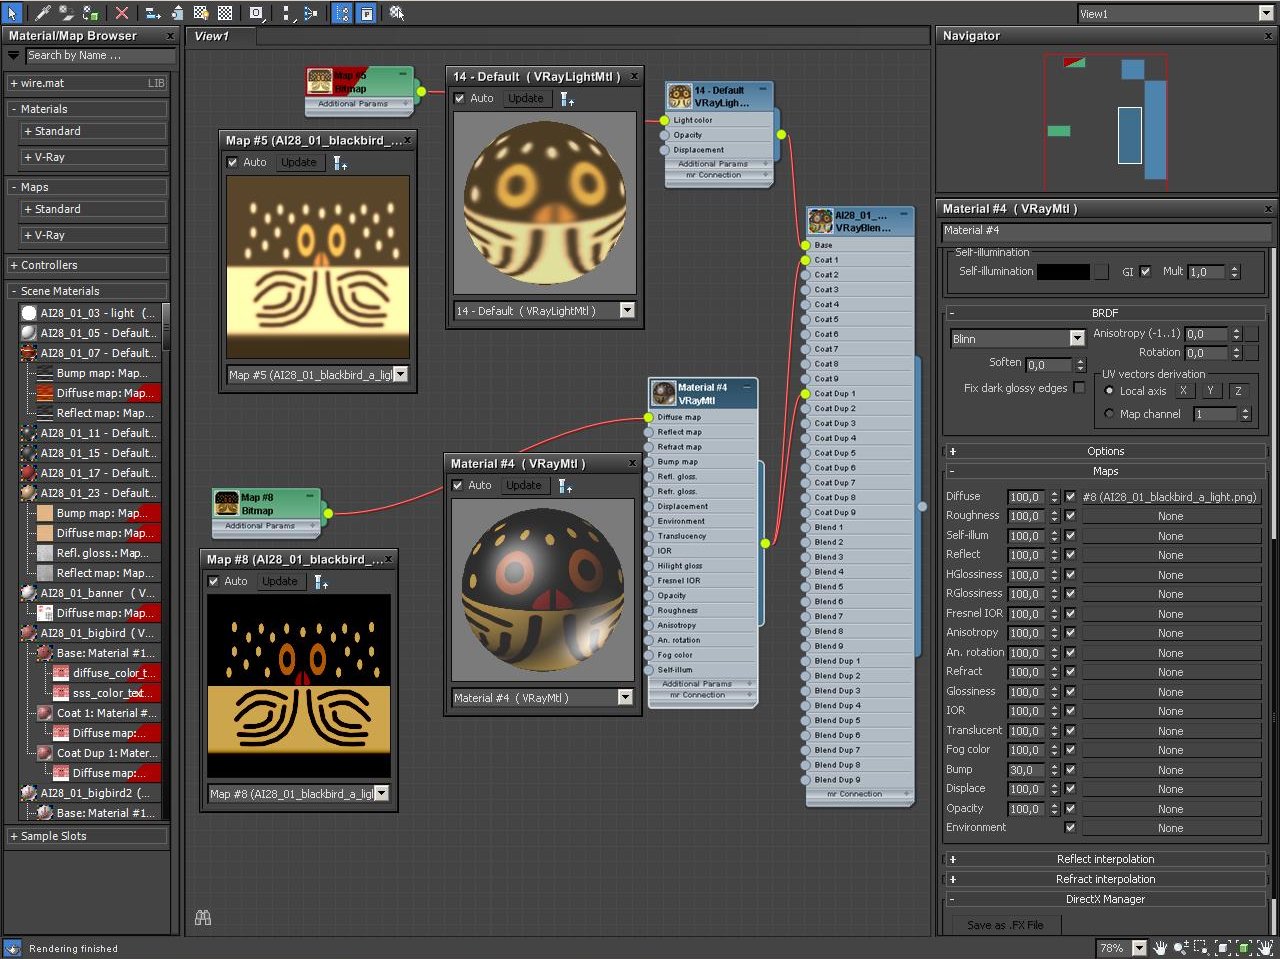
Paper Birds - coat material settings


Click on image to enlarge chickens_coat_maps_nr_2422.jpg

Paper birds coat material - maps settings


Click on image to enlarge light_translucent_nr_2431.jpg

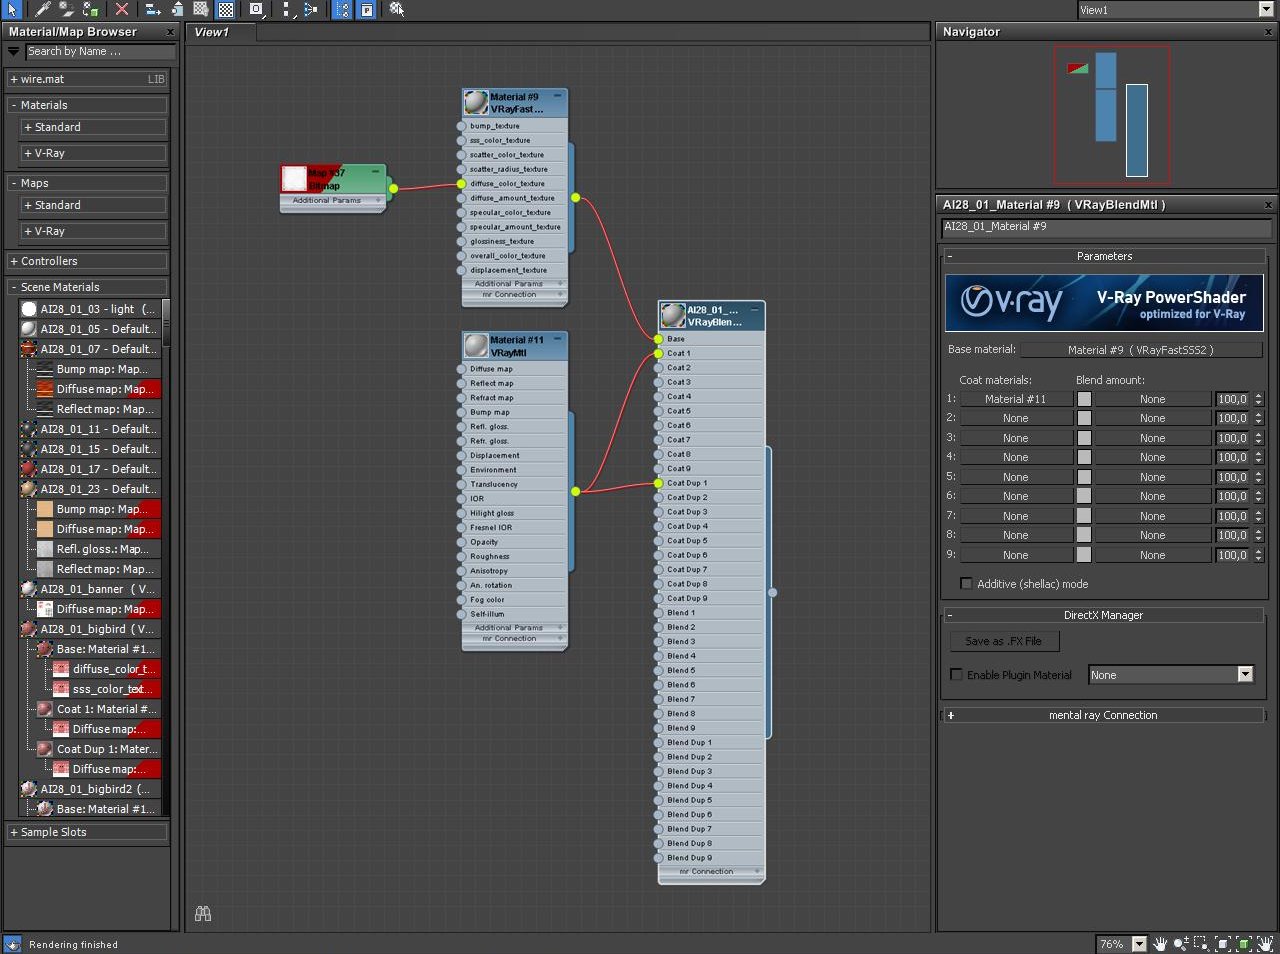
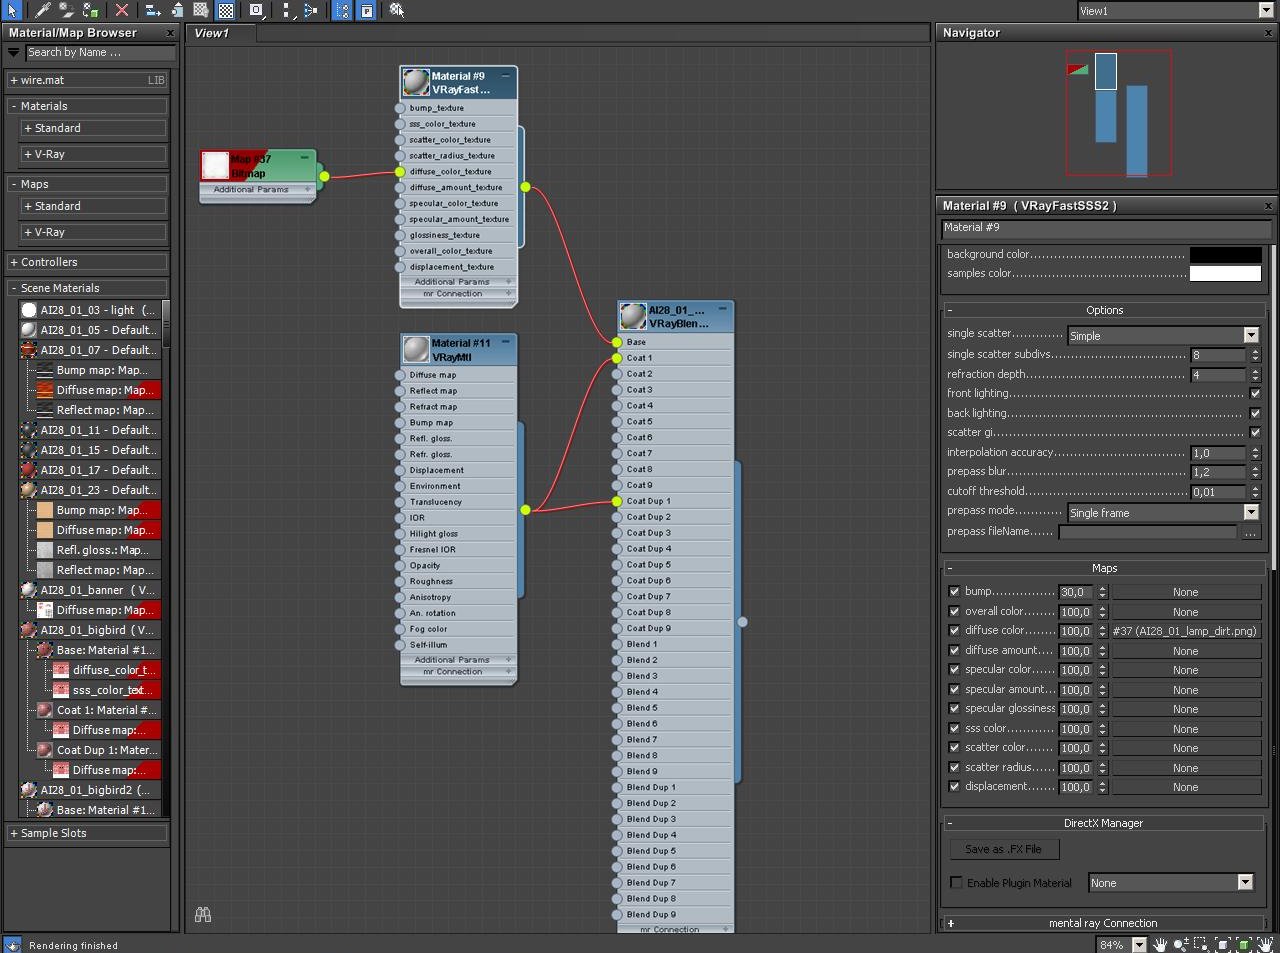
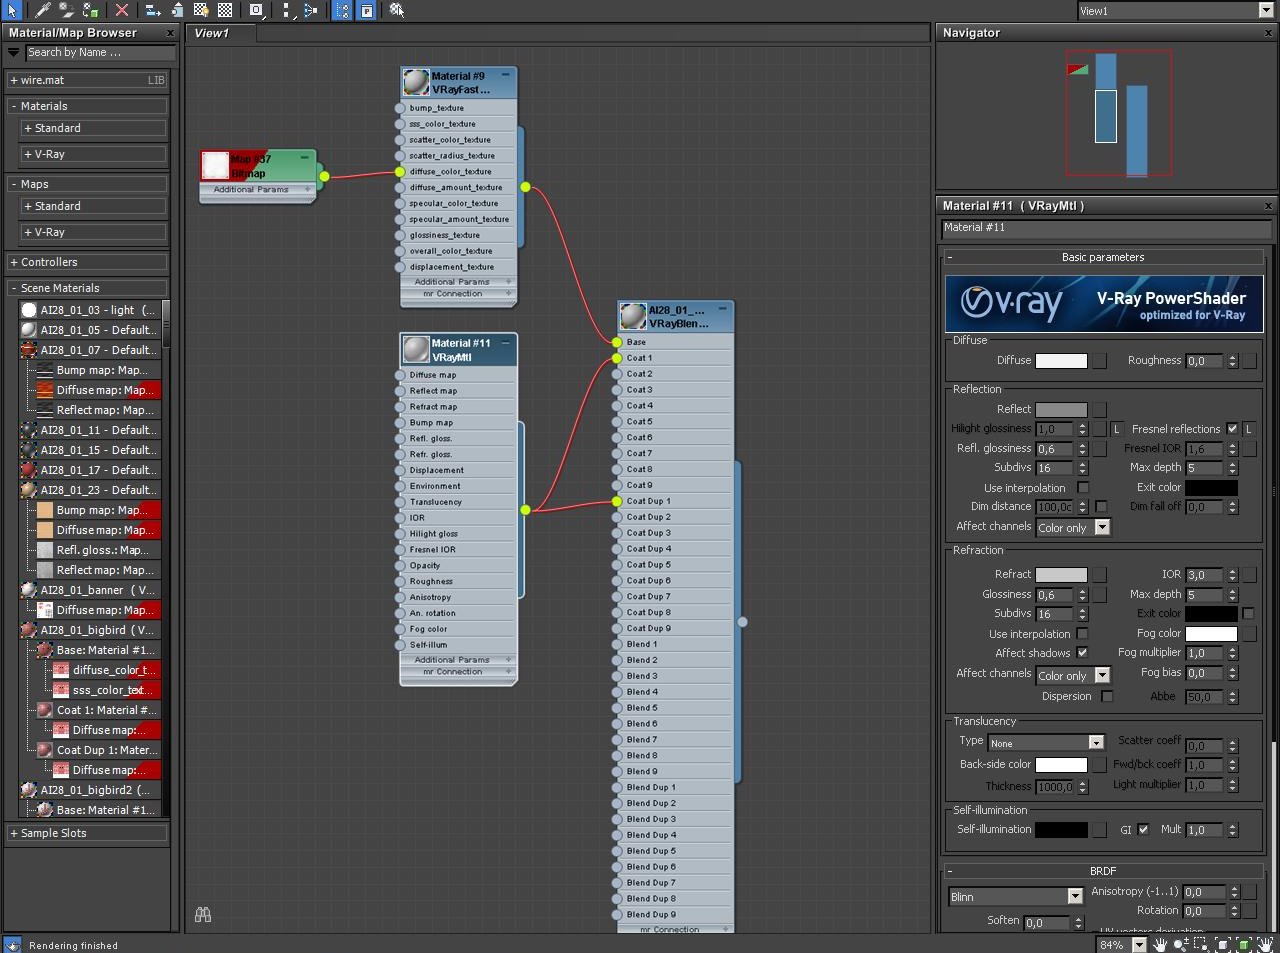
There is another light source on the floor - a lamp standing on the left. Above you can see its material settings. It is VrayBlend material which consists of VrayFastSSS2 and VrayMaterial


Click on image to enlarge light_translucent_sss1_nr_2430.jpg

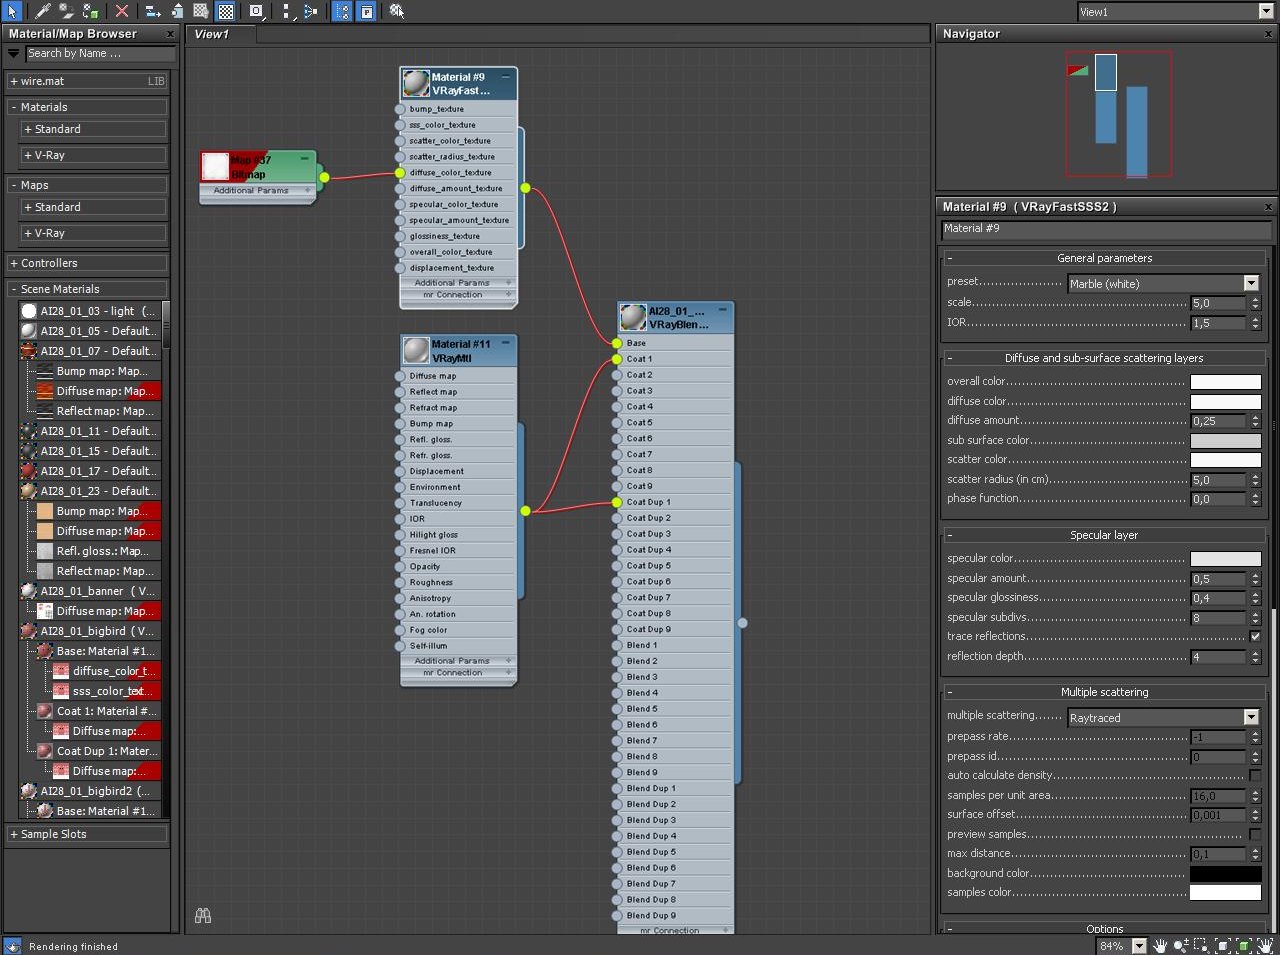
Lamp - VrayFastSSS2 settings


Click on image to enlarge light_translucent_sss2_nr_2429.jpg

Lamp - VrayFastSSS2 settings (continued)


Click on image to enlarge light_translucent_coat1_nr_2428.jpg

Lamp - coat material settings


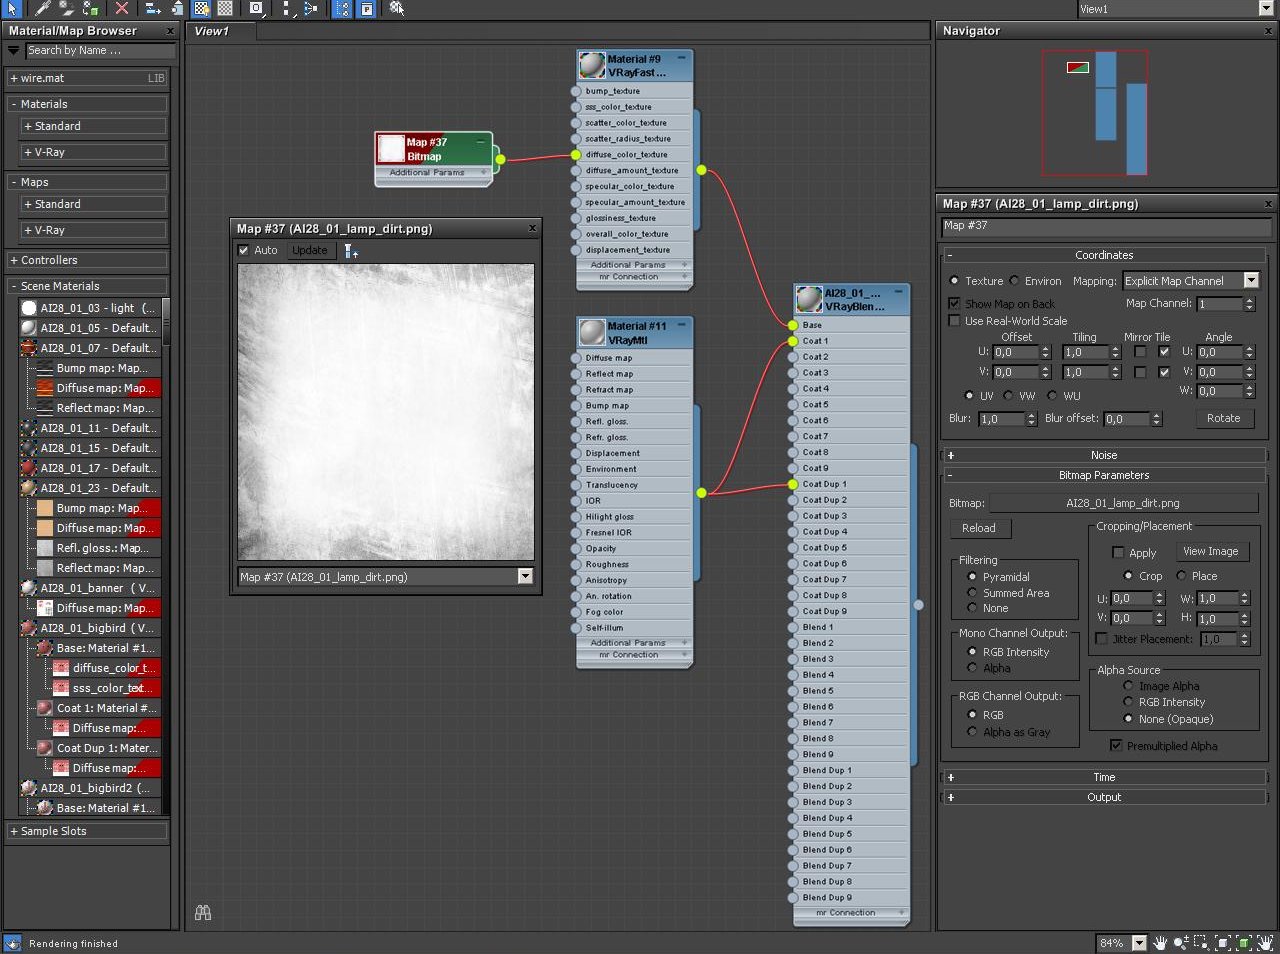
Click on image to enlarge light_translucent_coat_map_nr_2427.jpg

Lamp - coat map settings


Click on image to enlarge rgb_nr_2433.jpg

RAW render - RGB output


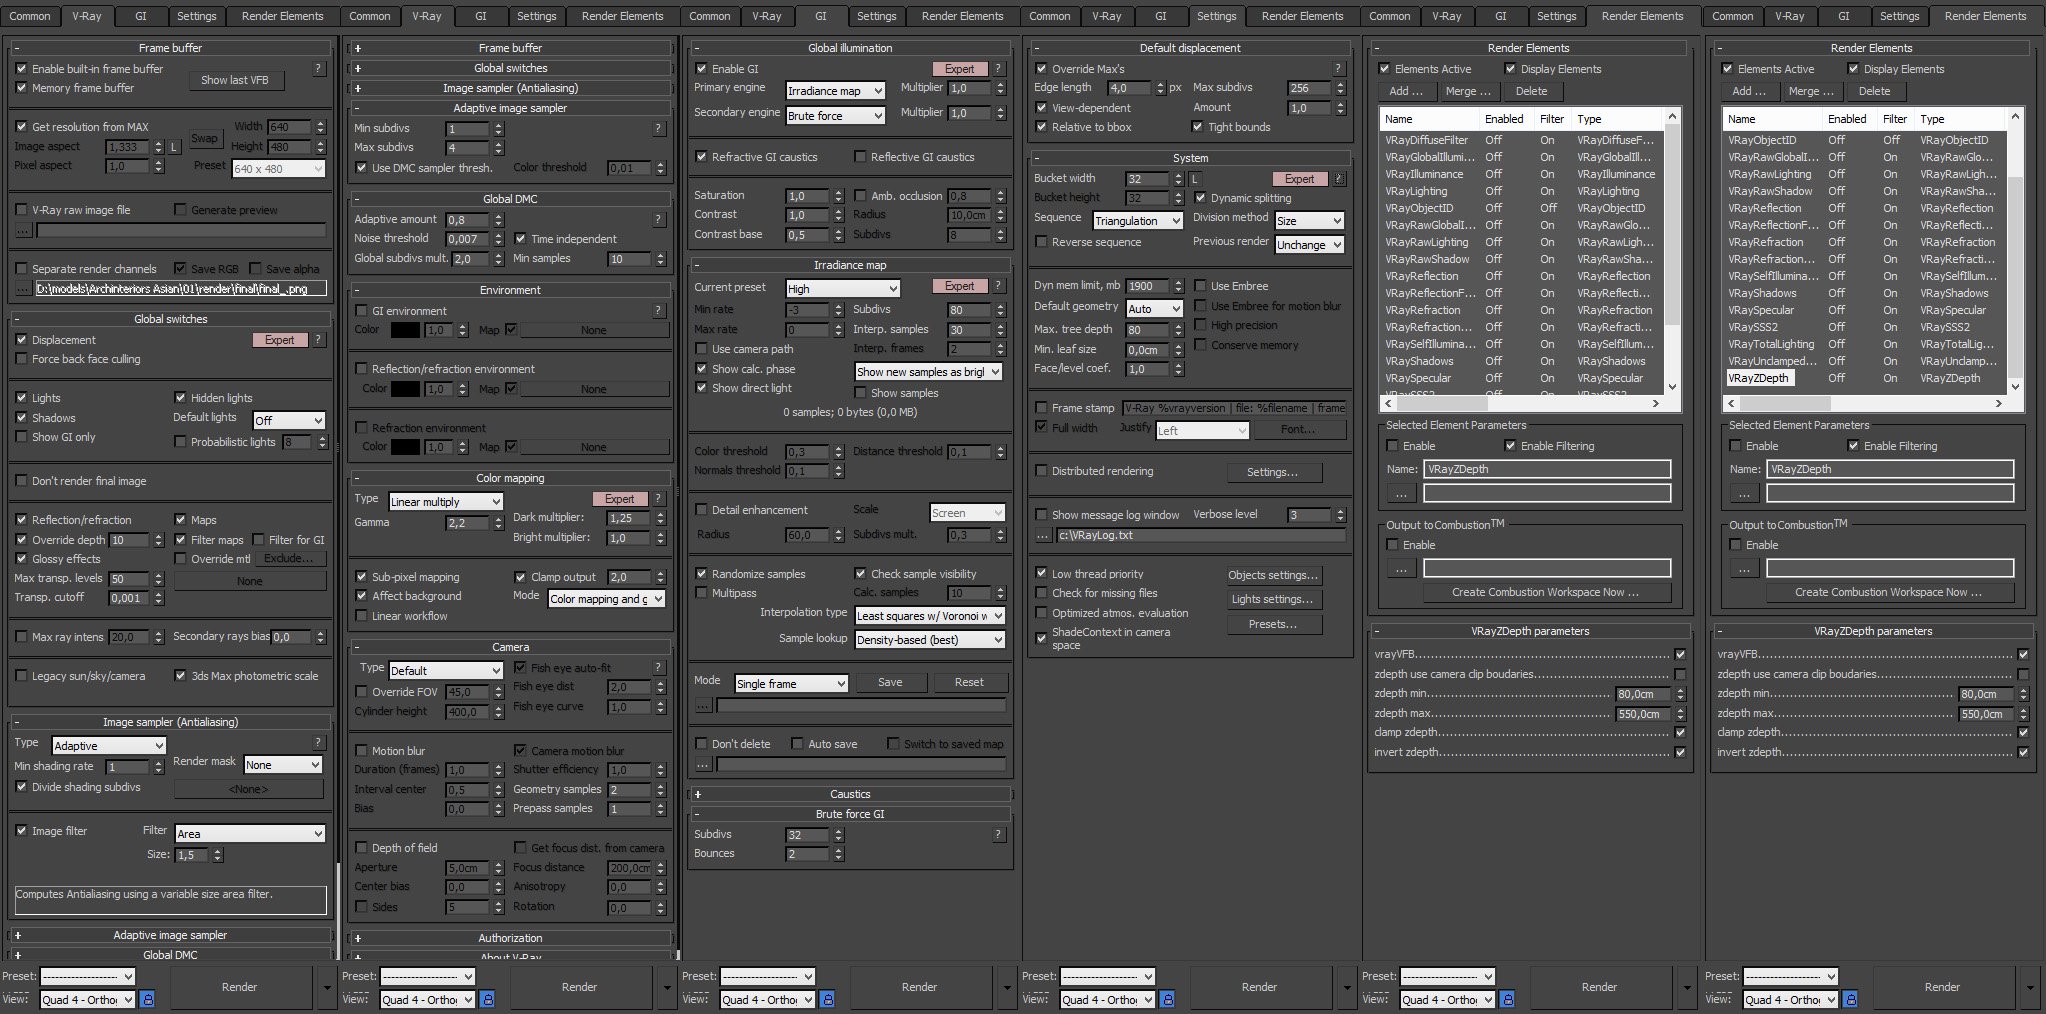
Click on image to enlarge render_settings_nr_2434.jpg

Render settings


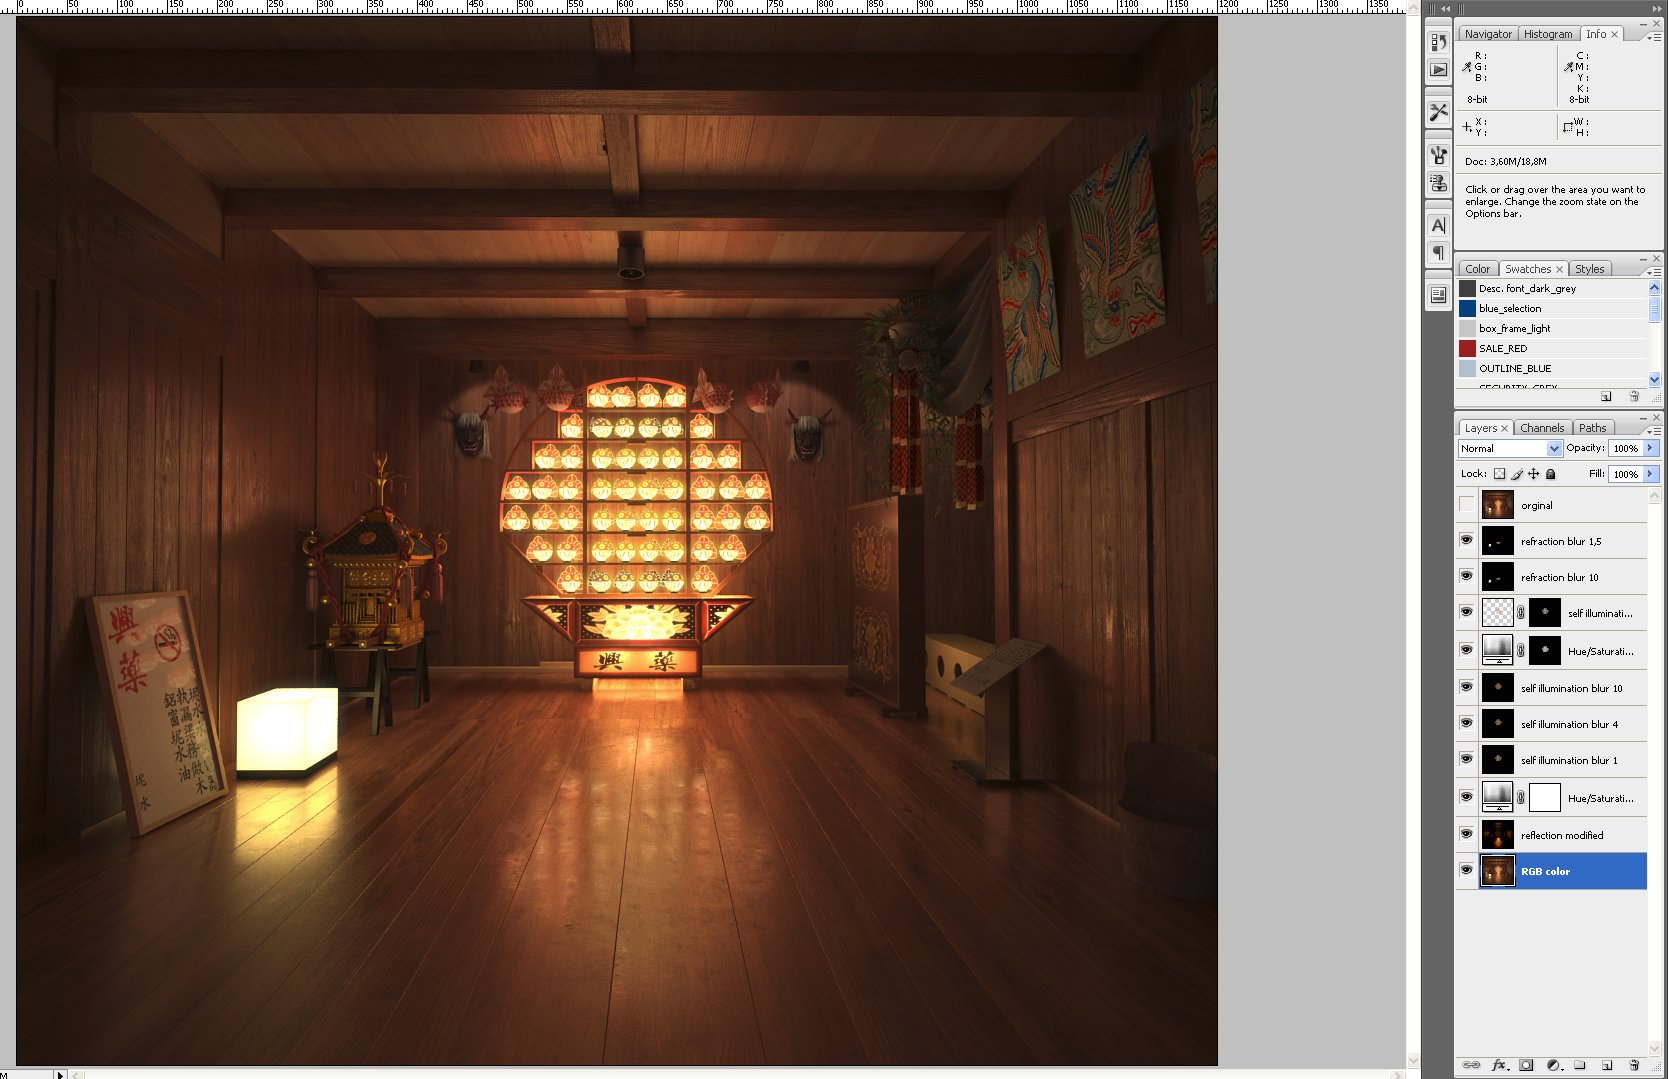
Click on image to enlarge Untitled_nr_2436.jpg

Adobe Photoshop - post production layer stack


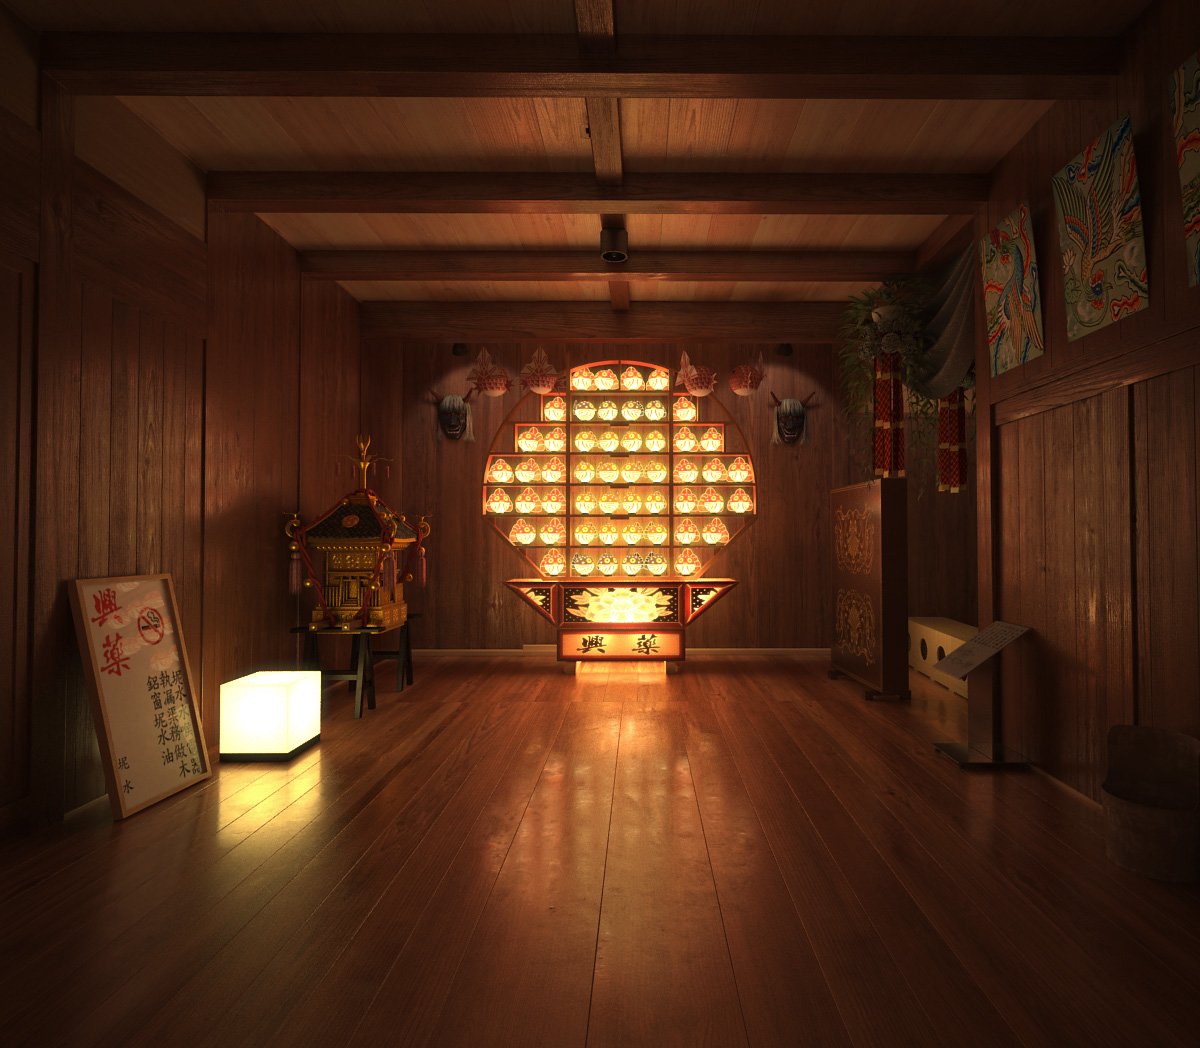
Click on image to enlarge pp_nr_2432.jpg

The final image with post production. PSD file is included with this Archinteriors scene.


668_400_AI28_3.jpg

Thanks for reading! Please, leave your comment if you have any questions.


Author: Michał Franczak Editor: Michal Franczak
Tags: room wood asian makingof archinteriorsvol.28
You may also like...
Swimming Pool in Miami - Tip of the Week

Swimming Pool in Miami - Tip of the Week

Making of Archexteriors vol. 23 scene number 5.
×

LEAVE A COMMENT

You need to be logged in to leave a comment. Don't have account? Register now.

mbialecki 12:12:43  |  05-09-2014
nice lighting
xxEdsonxx 18:59:47  |  05-09-2014
this is one of the most beatiful 3d scenes i've ever seen, nice work
18:14:59  |  26-09-2014
I have one question, is there any script/program for distributing randomisly floor material - each plank is different, i know how to do it by hand with uv map but it would take a while. Is there any faster way?