Search
Cart
Sign in
  • offerCustomer zone
  • offerYour orders
  • offerEdit account

  • offerAdd project
  • offerLiked projects
  • offerView your artist profile

  • Dark mode

We care about your privacy

We use cookies to provide you with the best possible experience. They also allow us to analyze user behavior in order to constantly improve the website for you. The consent is voluntary. You can withdraw it at any time or renew it in Cookie settings on the home page. Withdrawal of your consent does not affect the lawfulness of processing performed before the withdrawal. Privacy Protection Policy
Accept all
Accept selection
Reject all

Making of rustical bedroom

Michał Franczak 2014-11-28 15:34 tutorial  > 3ds MAX  > texturing

Learn how Evermotion artist created rustical bedroom from Archinteriors vol. 35 collection.

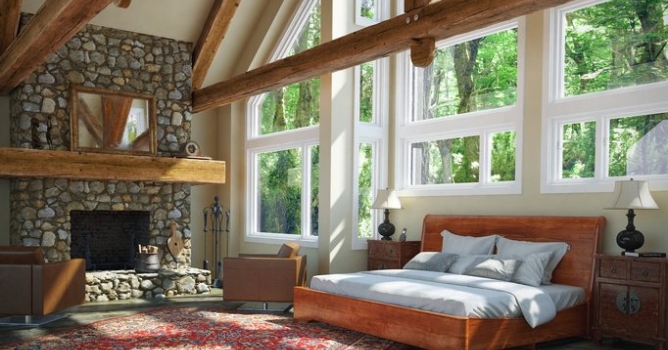
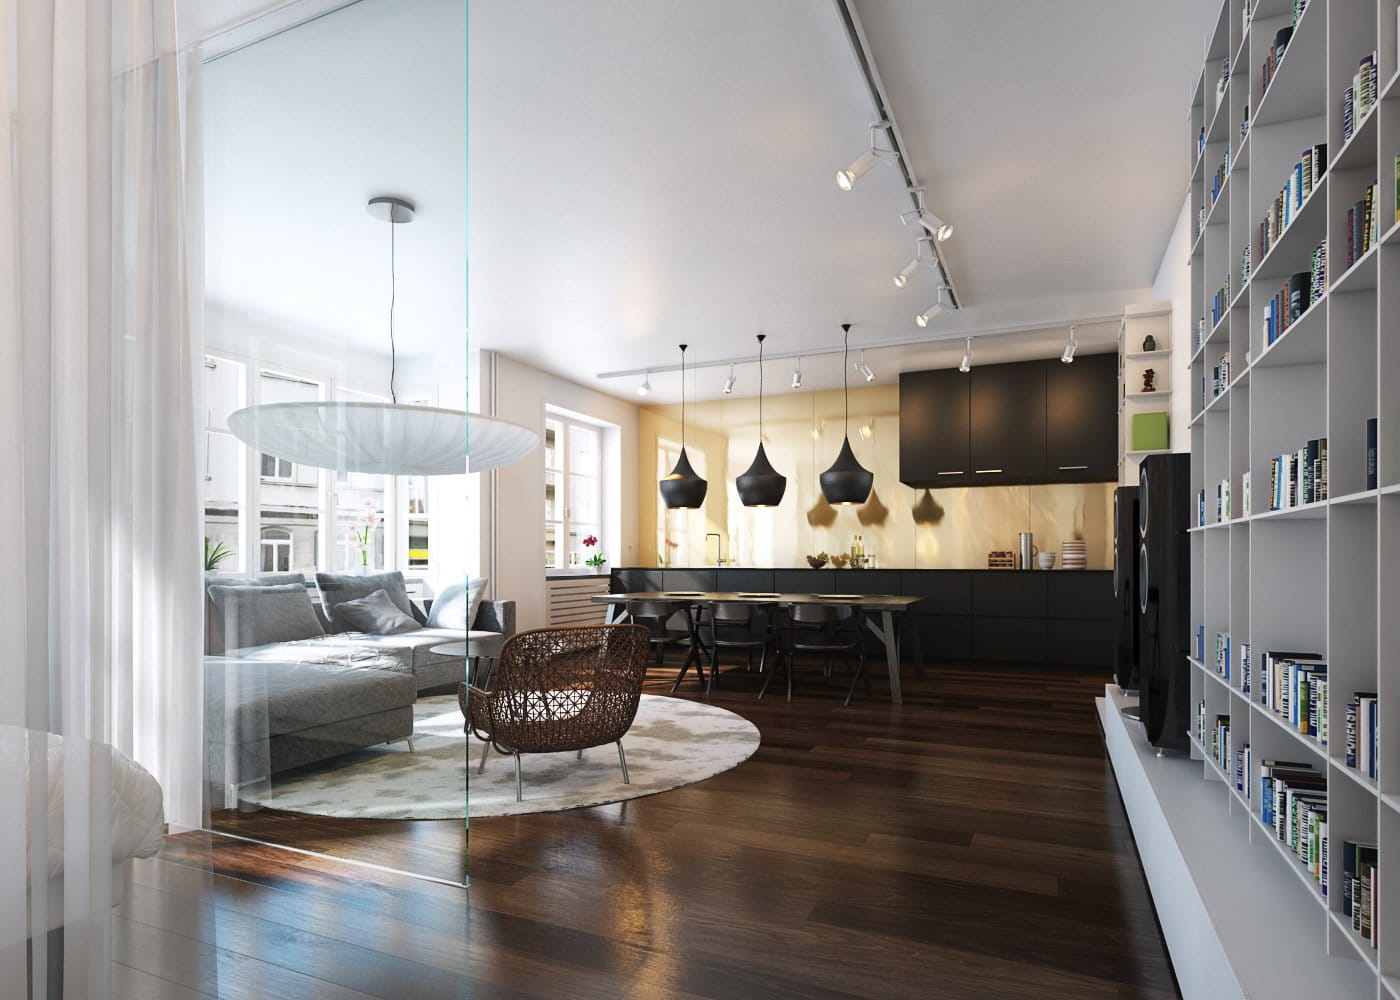
You can buy Archinteriors vol. 35 in Evermotion Shop. This scene was modeled and set with 3DS Max and rendered with V-Ray (check V-Ray price!). This scene was made by Kamil Kuklo from Evermotion.

668_400_AI35_1_3.jpg


Click on image to enlarge nr_AI35_010_PP_352.jpg

This is the final image after post production.


Click on image to enlarge nr_AI35_010_wire_363.jpg

Wireframe view of this scene.


Scene setup

Click on image to enlarge nr__0035_1_Overview_350.jpg

Overview of the scene. As you can see it is not very complicated. We have main building, one light source, two planes simulating outside world and a tree model for shadows casting.


Click on image to enlarge nr__0034_2_Overview_349.jpg

Interior view. Floor modeled by hand, some furniture models, a carpet (plane with displacement), nice bed and wooden elements.


Click on image to enlarge nr__0032_4_Camera_347.jpg

V-Ray Physical Camera settings.


Lighting and environment

Click on image to enlarge nr__0031_5_sun_346.jpg

The scene is lit by single light - Vray Sun. It is placed between branches of tree model, this way we achieves some nice shadows.


Click on image to enlarge nr__0030_6_building_345.jpg

Building model.


Click on image to enlarge nr__0029_7_building_material_344.jpg

Building walls material - a plaster with yellow tint.


Click on image to enlarge nr__0028_8_building_material_maps_343.jpg

Building walls material maps.


Click on image to enlarge nr__0027_9_floor_342.jpg

Floor was modeled only that far to be covered in camera eye. This way we lowered polycount.


Click on image to enlarge nr__0026_10_floor_isolated_341.jpg

Floor was modeled by hand and mapped after that. UV islands were moved one by one, so we could achieve randomness.


Click on image to enlarge nr__0025_11_floor_material_340.jpg

Floor material is VrayMaterial with mixed maps for diffuse, reflection and bump slots.


Click on image to enlarge nr__0024_12_floor_material_maps_339.jpg

Floor material - maps settings


Click on image to enlargenr__0023_13_wooden_elements_338.jpg

Rafters and ceiling joists


Materials

Click on image to enlarge nr__0022_14_wooden_elements_mat_337.jpg

Rafters and ceiling joists material uses a lot of maps.


Click on image to enlarge nr__0021_15_wooden_elements_maps_336.jpg

Rafters and ceiling joists - diffuse maps settings.


Click on image to enlarge nr__0020_16_wooden_elements_maps_mix_335.jpg

Rafters and ceiling joists - maps view.


Click on image to enlarge nr__0019_17_carpet_334.jpg

Carpet - a plane subdivided with displacement


Click on image to enlarge nr__0018_18_carpet_material_333.jpg

Carpet material


Click on image to enlarge nr__0017_19_carpet_material_maps_332.jpg

Carpet material - maps


Click on image to enlarge nr__0016_20_fireplace_displacement_331.jpg

Fireplace is quite simple boxy model with VrayDisplacementMod and b&w stone texture as a displacement map.


Click on image to enlarge nr__0015_21_fireplace_material_330.jpg

Fireplace material


Click on image to enlarge nr__0014_22_fireplace_material_maps_329.jpg

Fireplace material - maps


Click on image to enlarge nr__0013_23_glass_window_328.jpg

Simple window glass material.


Click on image to enlarge nr__0012_24_stojak_361.jpg

A stand near the fireplace.


Click on image to enlarge nr__0011_25_stojak_material_360.jpg

Stand material.


668_400_AI35_2_1.jpg


Click on image to enlarge nr__0009_27_outside_358.jpg

Just outside the windows we placed two planes with VrayLight material to simulate exterior.


Click on image to enlarge nr__0008_28_outside_maps_357.jpg

Outside planes material settings


Click on image to enlarge nr__0007_29_environment_356.jpg

VraySky settings.


Click on image to enlarge nr_render_settings_355.jpg

Render settings.


Click on image to enlarge nr_PASSES_353.jpg

Render passes.


Click on image to enlarge nr_AI35_010.RGB_color_351.jpg

Raw render.


Click on image to enlarge nr_PS_stack_354.jpg

Photoshop stack.


Click on image to enlarge nr__0012_34_EXIT_GLASS_MATERIAL_235.jpg

GIF animation of the scene.


Click on image to enlarge nr_AI35_010_PP_352.jpg

Final image.


668_400_AI35_3_1.jpg

Thanks for reading! :)


Author: Michał Franczak Editor: Michał Franczak
Tags: archinteriors bedroom archinteriorsvol.35
You may also like...
Making of Archinteriors vol. 32 scene

Making of Archinteriors vol. 32 scene

Andrew from Evermotion shows how he made Archinteriors vol. 32 scene using Blender for modeling and 3ds Max and VRay for lighting and rendering.
×

LEAVE A COMMENT

You need to be logged in to leave a comment. Don't have account? Register now.

21:19:00  |  30-11-2014
one question, i have modeled floor by floor generator created similar material for it set appropriate tiling etc, how do i set randomized UV for each plank? any particular script/program/map?
dr_After 08:31:11  |  01-12-2014
Hi @powrot_glodzilli - there was an error in this part of tutorial. This floor was modeled by hand and mapped after that. UV islands were moved one by one, so we could achieve randomness.