Evermotion Pass 10% Off - Get Instant Access to Thousands of 3D Assets

Check Plans

Information Clause

In accordance with the art. 13 section 1 and 2 of the European Parliament and Council Regulation 2016/679 of the 27th April, 2016 on the protection of natural persons, with regard to the processing of personal data and on the free movement of such data, and repealing Directive 95/46/EC (General Data Protection Regulation), hereafter RODO, I hereby inform that:

1. EVERMOTION S.C., 8 Przędzalniana Str., 15-688 Białystok, Poland is the Administrator of your Personal Data (APD)

2. Data Protection Inspector can be reached through e-mail: iod@evermotion.org

3. Your personal data are to be processed on the basis of art. 6 section 1 letter a, b and f of RODO in order to:
a) prepare, conclude and execute the agreement and for other purposes approved by you,
b) to execute the legitimate interest like marketing of products and the agreement, claim assertion or defence against claims resulting from the law regulations.

4. Entities entitled to the reception of your personal data may be the authorised public bodies; mail providers; providers of the services covered by the agreement; responsible for debt recovery, keeping the archives, document utilization, legal consulting, technical services, IT services and accountancy.

5. Your personal data shall not be transferred to the third country, nor to the international bodies.

6. Your personal data shall be processed within the period of the agreement and upon your additional consent until you withdraw it. APD shall keep the data for the period of any civil law claim execution connected with the agreement.

7. You have the right to demand an access to your personal data, to correct or to delete the data if there is no other basis for the processing or any other purpose of such processing or to limit the processing of the data, to transfer the data to another administrator and to raise objections to the further data processing if there is no legal basis for further processing and to withdraw any previous consent.

8. You provide the personal data voluntarily, however they are necessary to conclude the agreement. The refusal of providing such data may result in the refusal of the agreement conclusion.

9. You have the right to lodge a complaint to the Personal Data Protection Office when in your opinion the data processing violates the regulations of General Data Protection Regulation of the 27 April, 2016 (RODO).

10. Your data will be automatically processed, including the form of profiling.
11. You are obligated to forward above mentioned information to your representative, especially if you appointed this person in the agreement as the contact person or as the representative for the agreement execution.

OK

Making of small living room - Tip of the Week

Michał Franczak 2015-12-22 14:30 tutorial  > 3ds MAX  > texturing

Breakdown of a scene 8 from Archinteriors vol. 43.

This exterior scene was made by Ireneusz Jaworski from Evermotion. It was set in 3ds Max and rendered in V-Ray. 

You can:

Click on image to enlargenr_AI43_008_PP_755.jpg

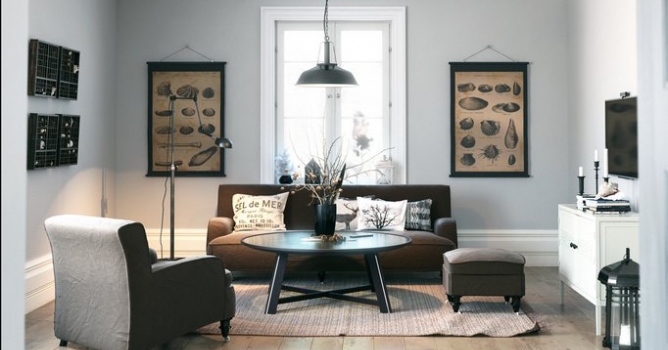
This if the final scene after post-production - small, scandinavian room with elegant props.


Click on image to enlarge nr_ai42_s08__0052_Layer_1_716.jpg
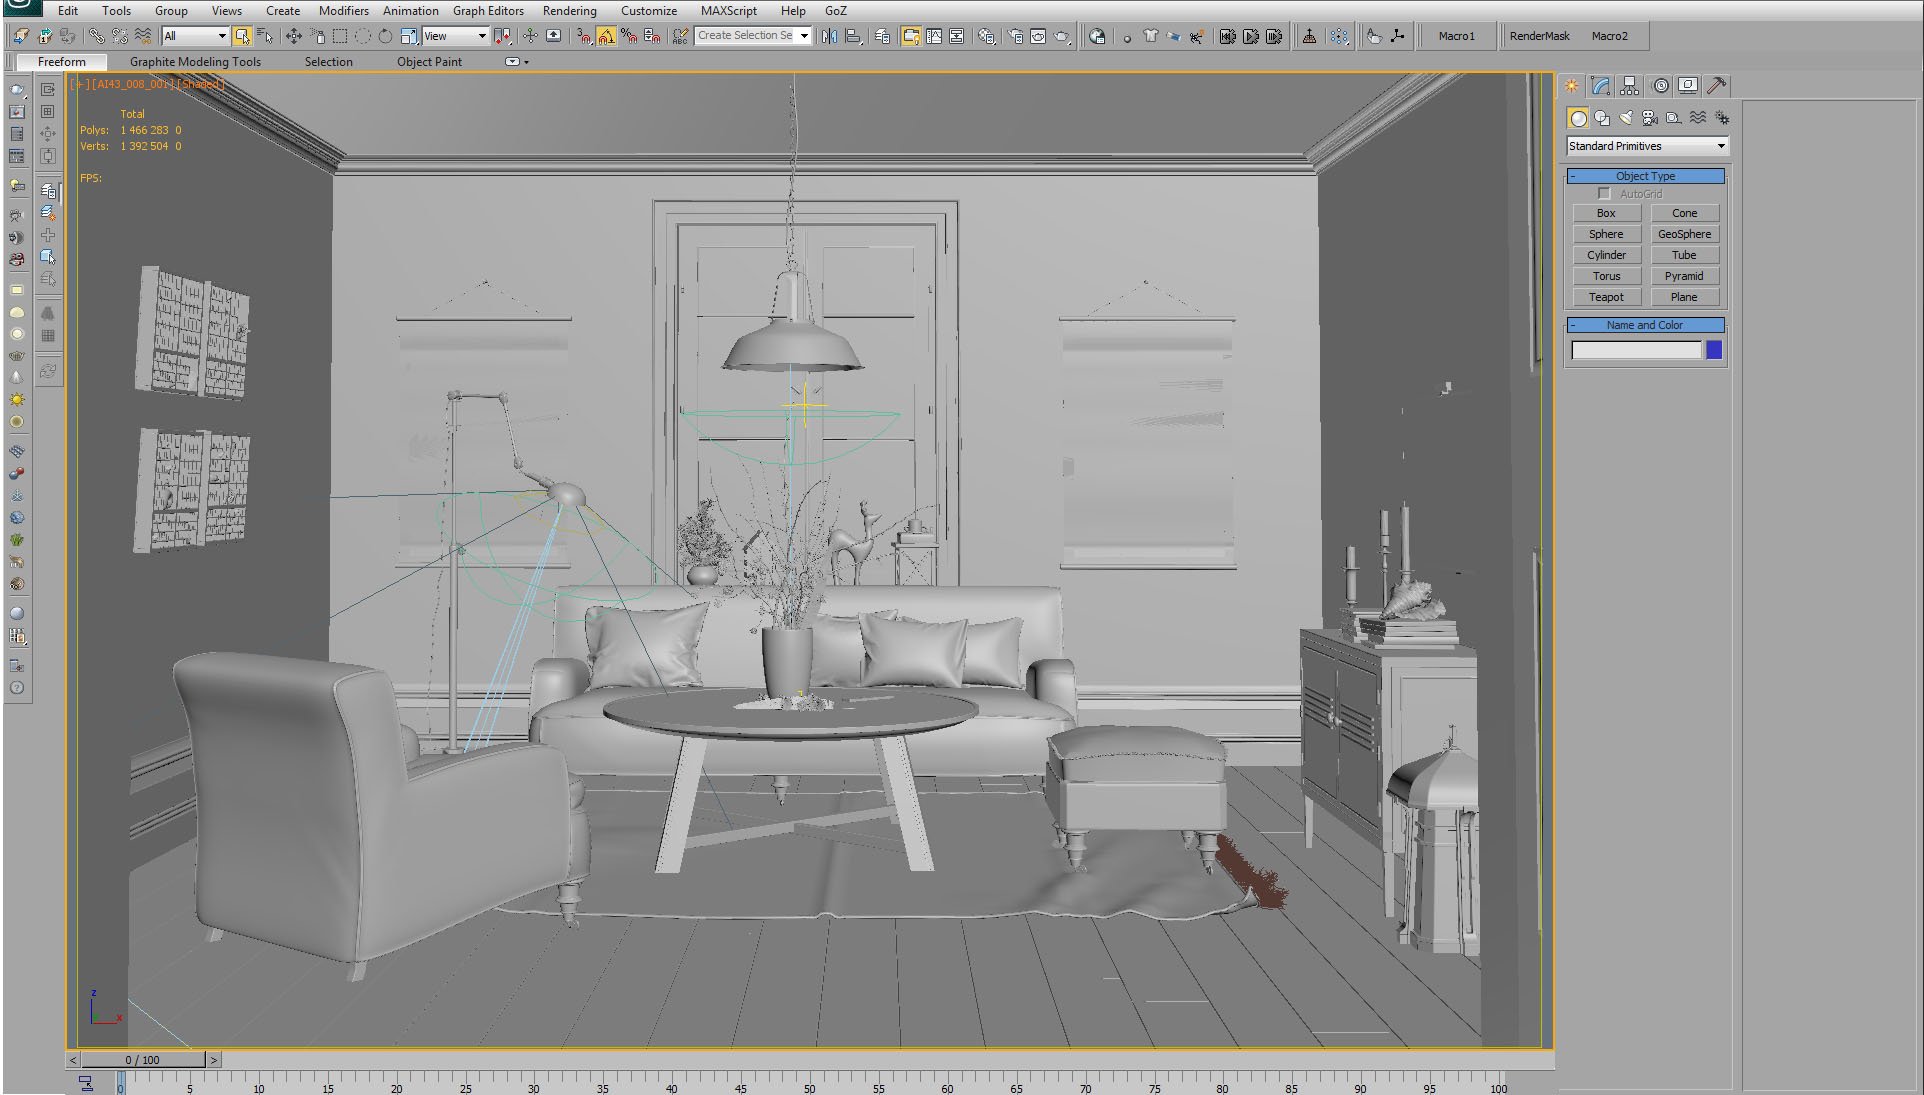
And that's how this scene looks in 3ds Max viewport.


Click on image to enlarge nr_ai42_s08__0051_Layer_2_715.jpg

3ds Max viewport - scene with material and object color enabled.


Click on image to enlarge nr_ai42_s08__0049_Layer_4_713.jpg

There is one main light source in this scene and it is VraySun. Settings on the right.


Click on image to enlarge nr_ai42_s08__0048_Layer_5_712.jpg
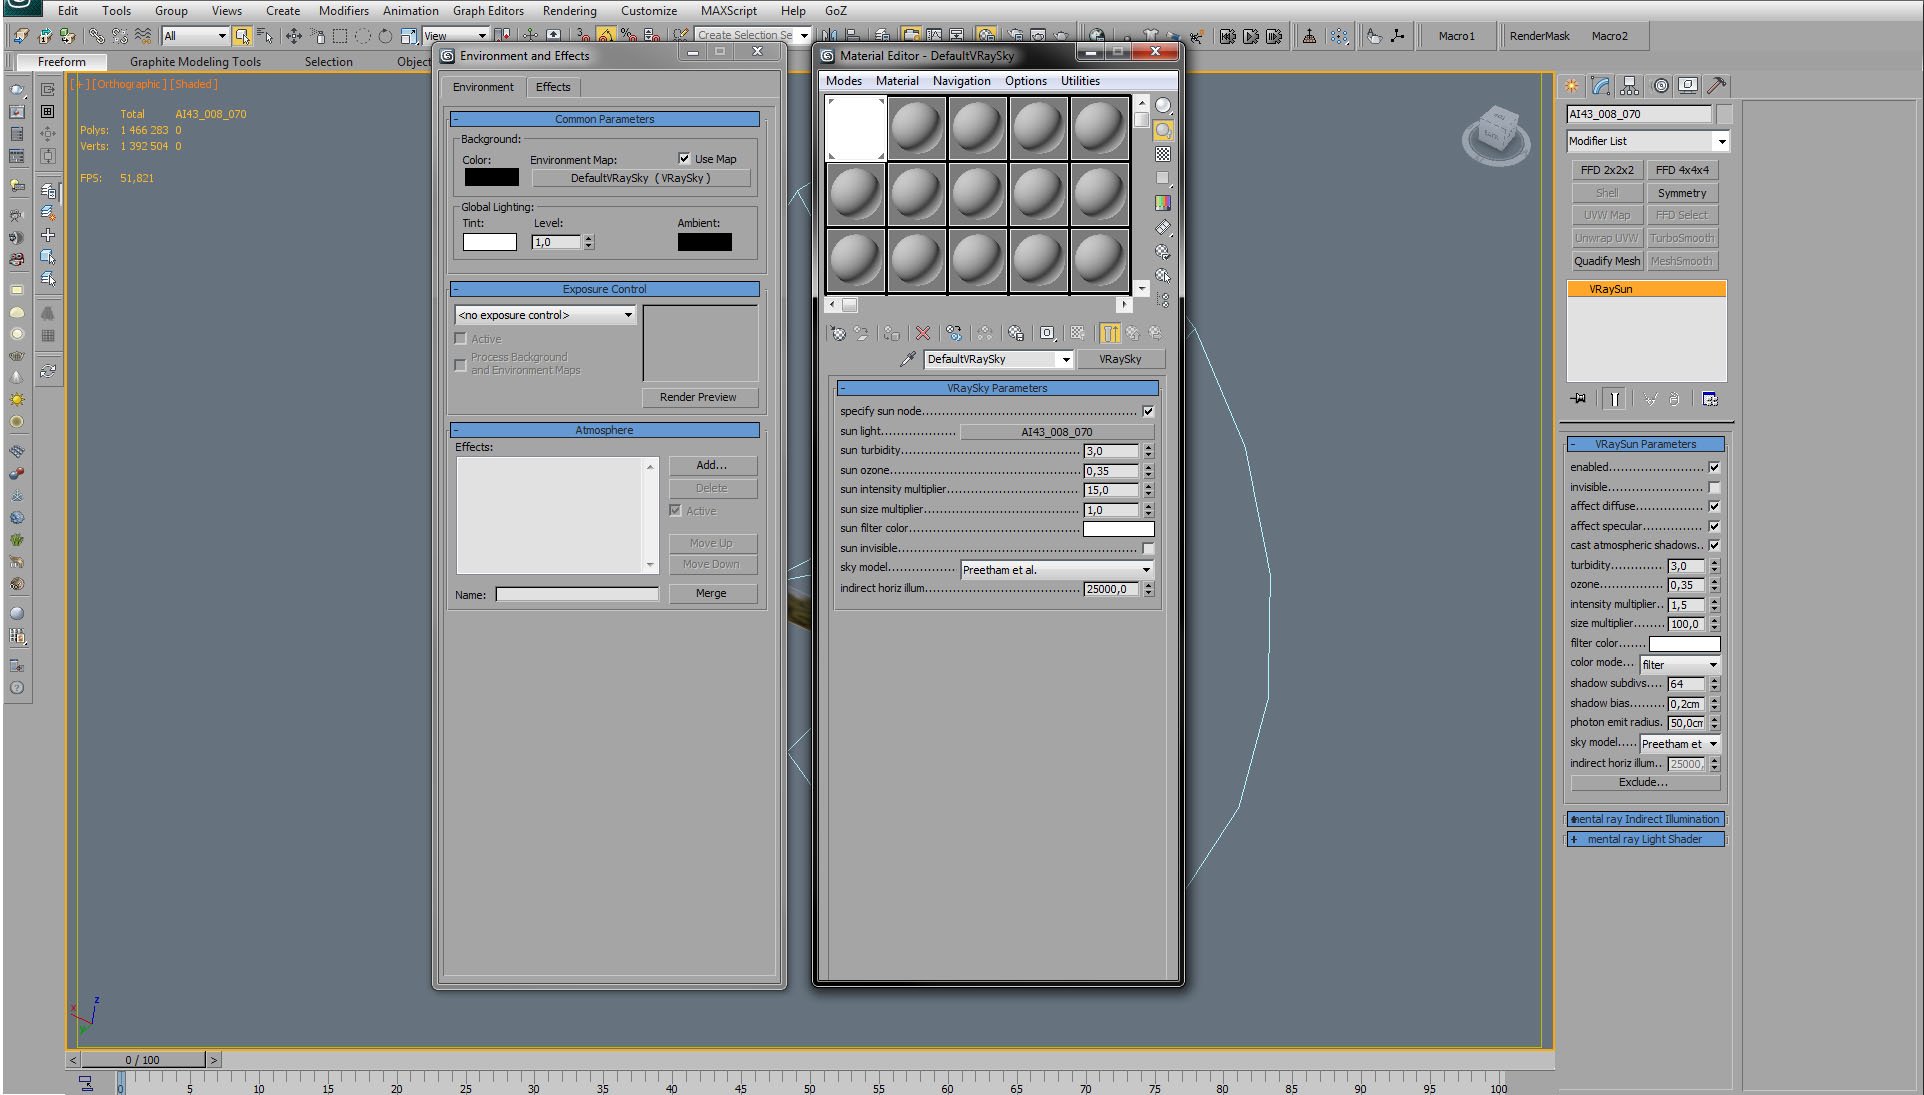
Complimentary to VraySun,we used also VraySky.


Click on image to enlarge nr_ai42_s08__0047_Layer_6_711.jpg
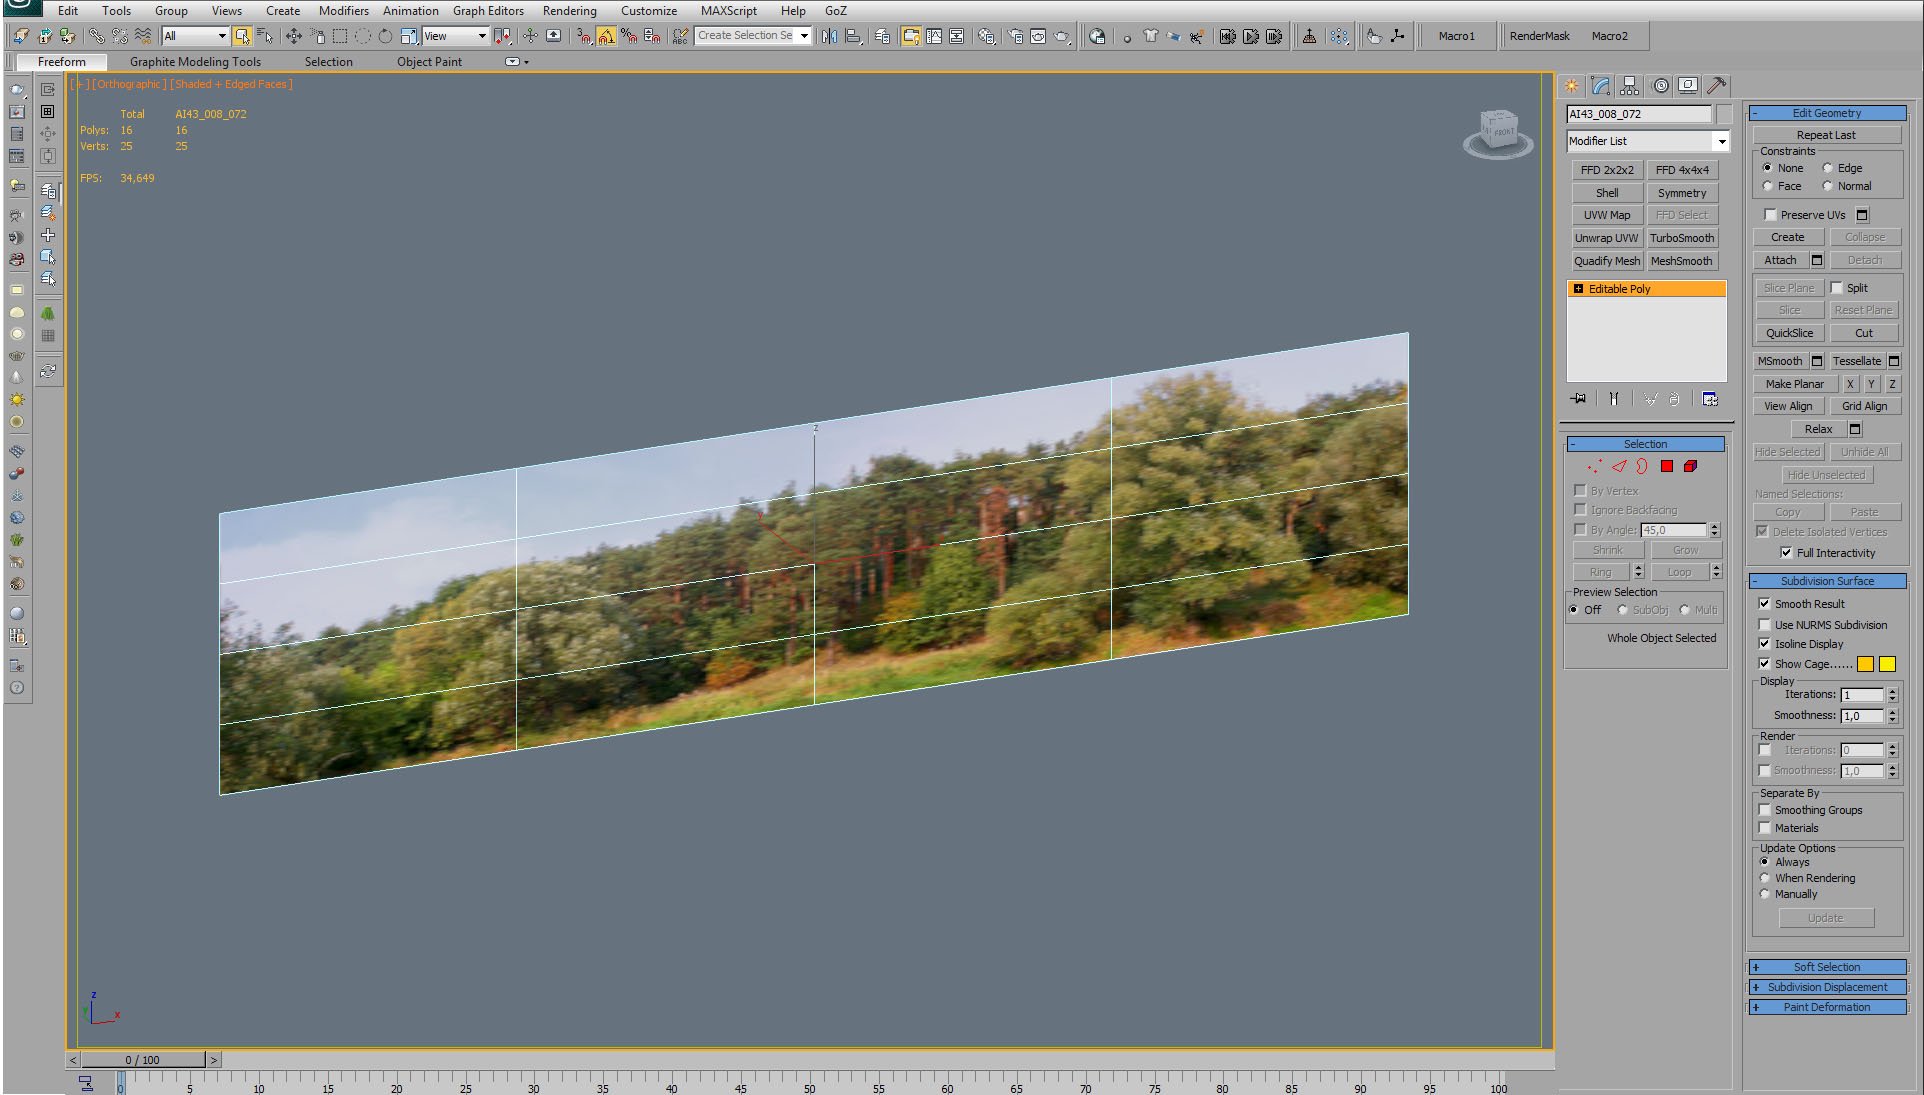
As usual, we used background map for the exterior.


Click on image to enlarge nr_ai42_s08__0046_Layer_7_710.jpg
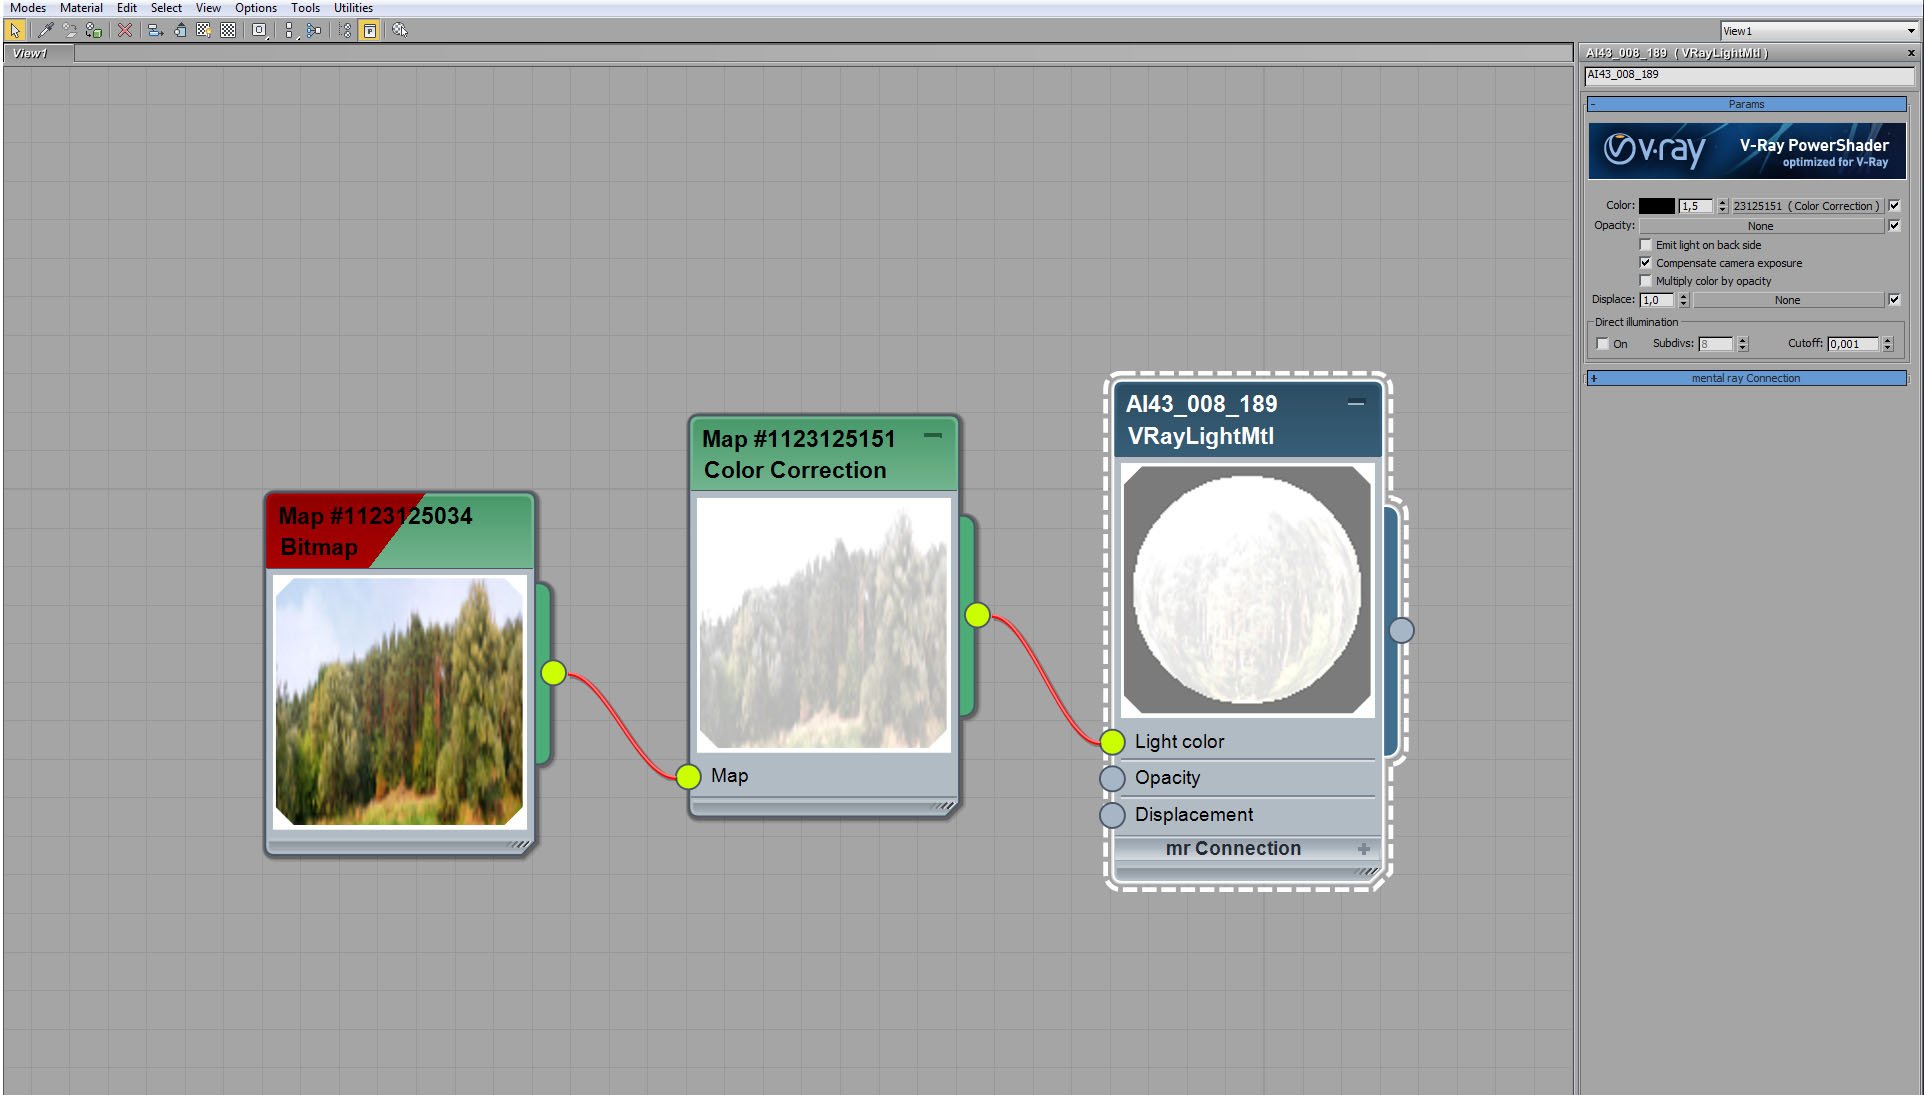
Background map - material settings.


Click on image to enlarge nr_ai42_s08__0045_Layer_8_709.jpg

Background map is washed out (desaturation + brightness increase) by color correction node.


Click on image to enlarge nr_ai42_s08__0043_Layer_10_707.jpg
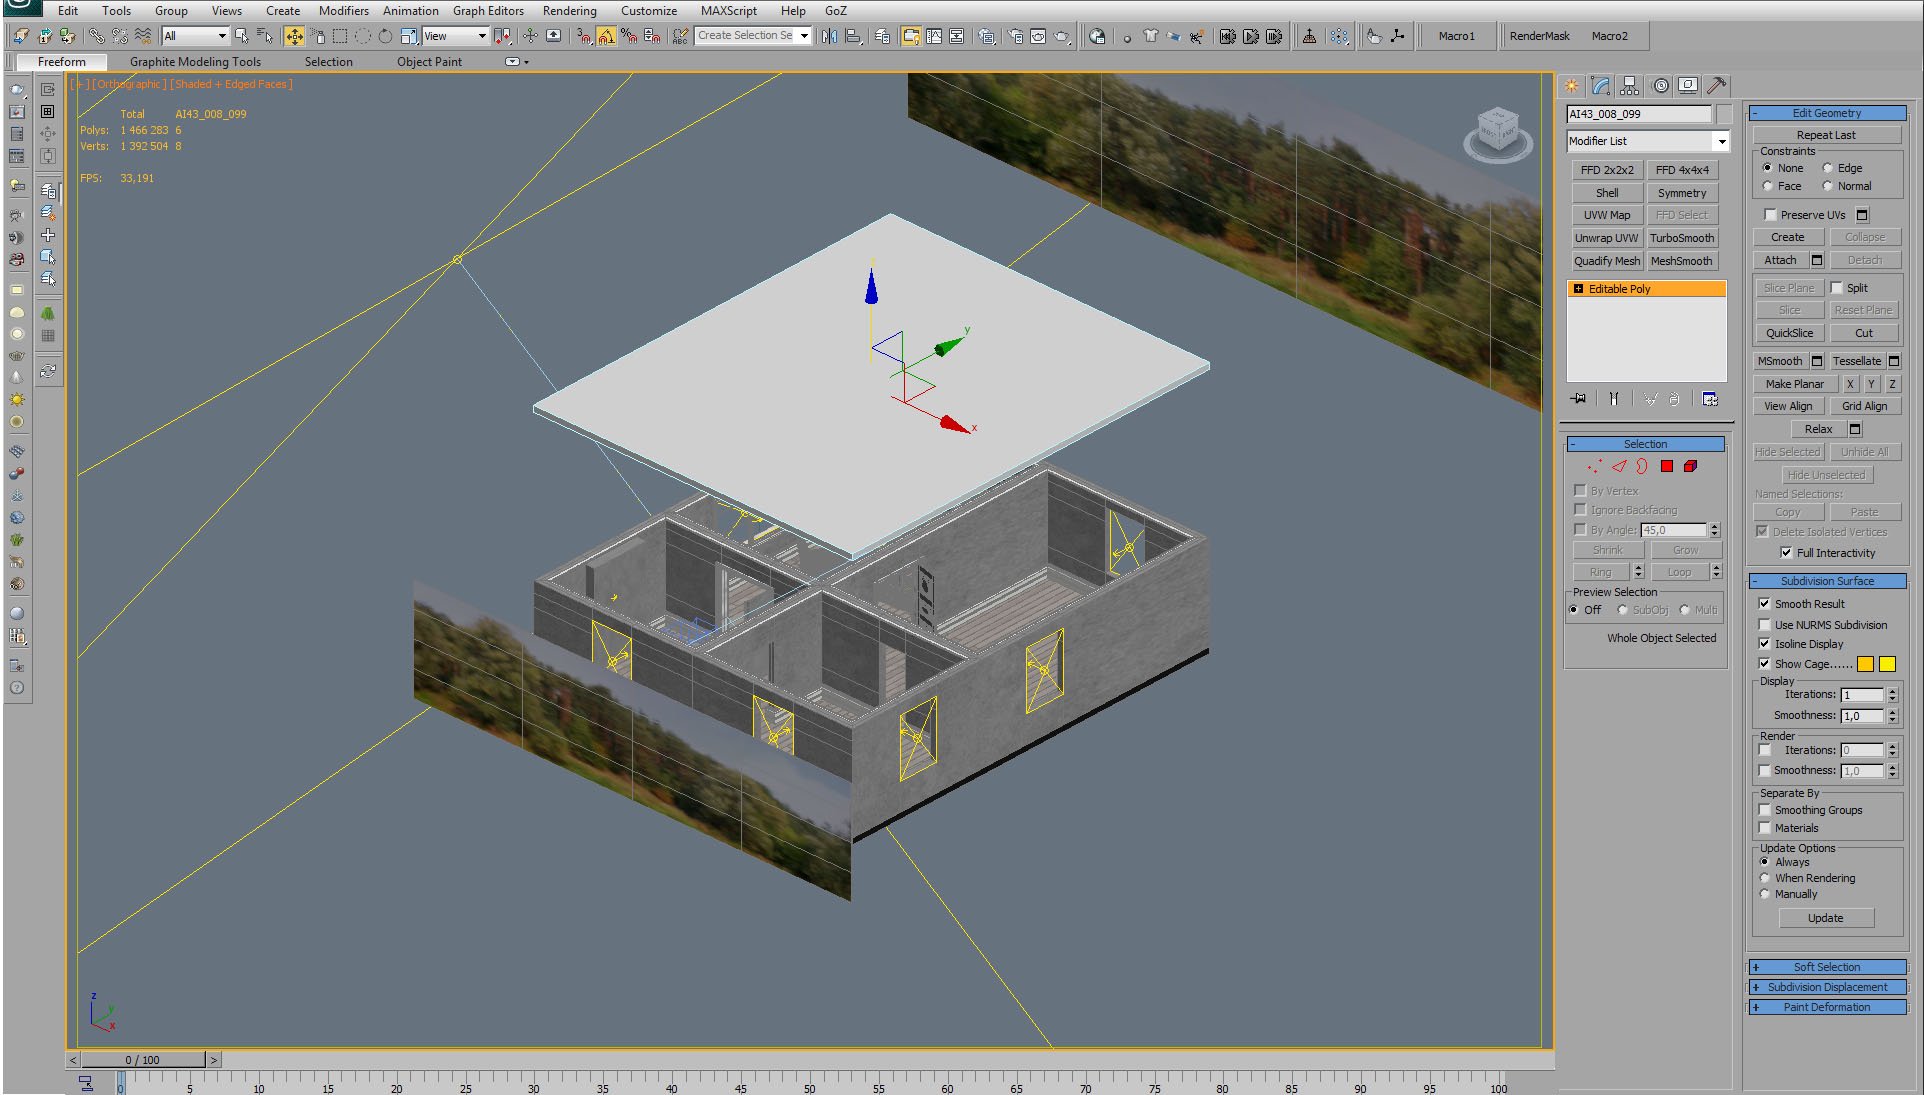
Isometric view of the building. Only the ceiling is a separate mesh.


Click on image to enlarge nr_ai42_s08__0042_Layer_11_754.jpg
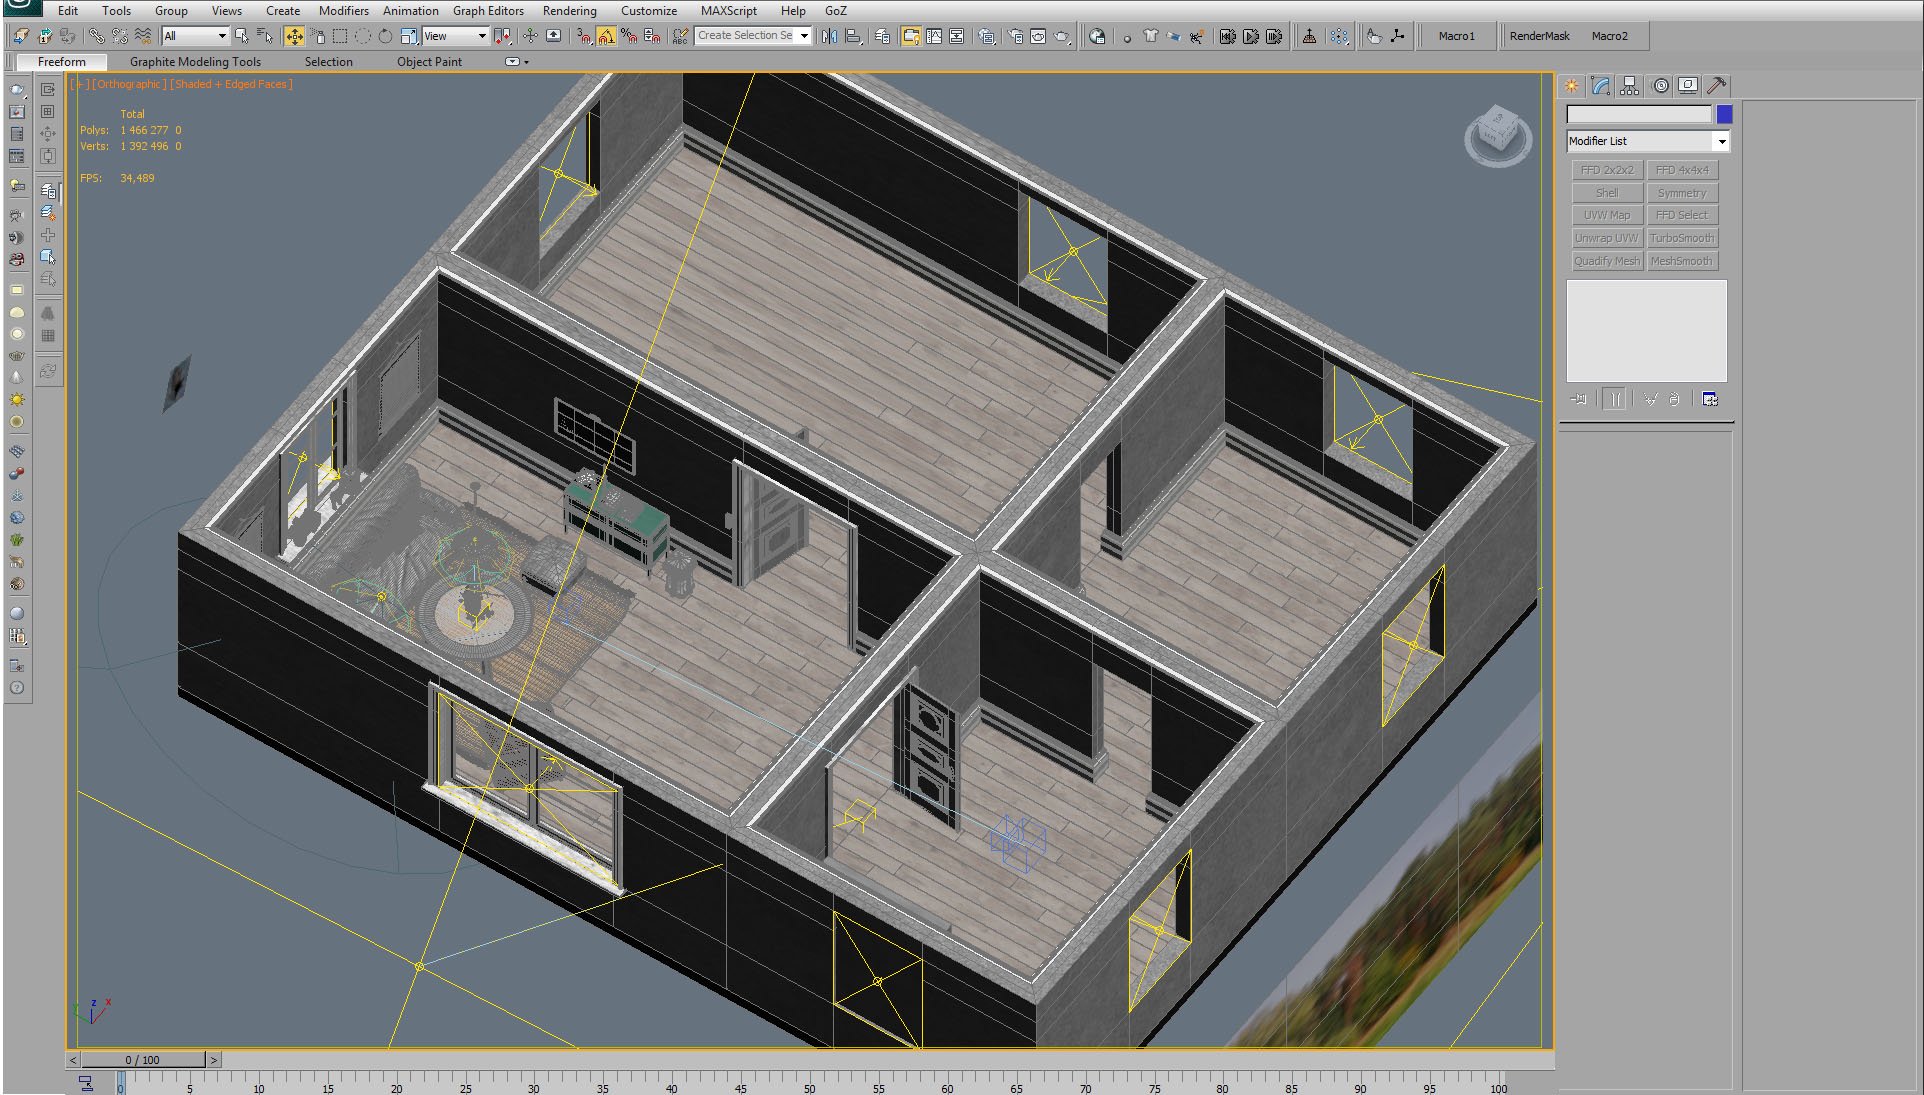
Mesh of the building. There are Vray lights (portals) in every window that let the sunlight to go through. Using portals increases the speed of the rendering.


Click on image to enlarge nr_ai42_s08__0041_Layer_12_753.jpg
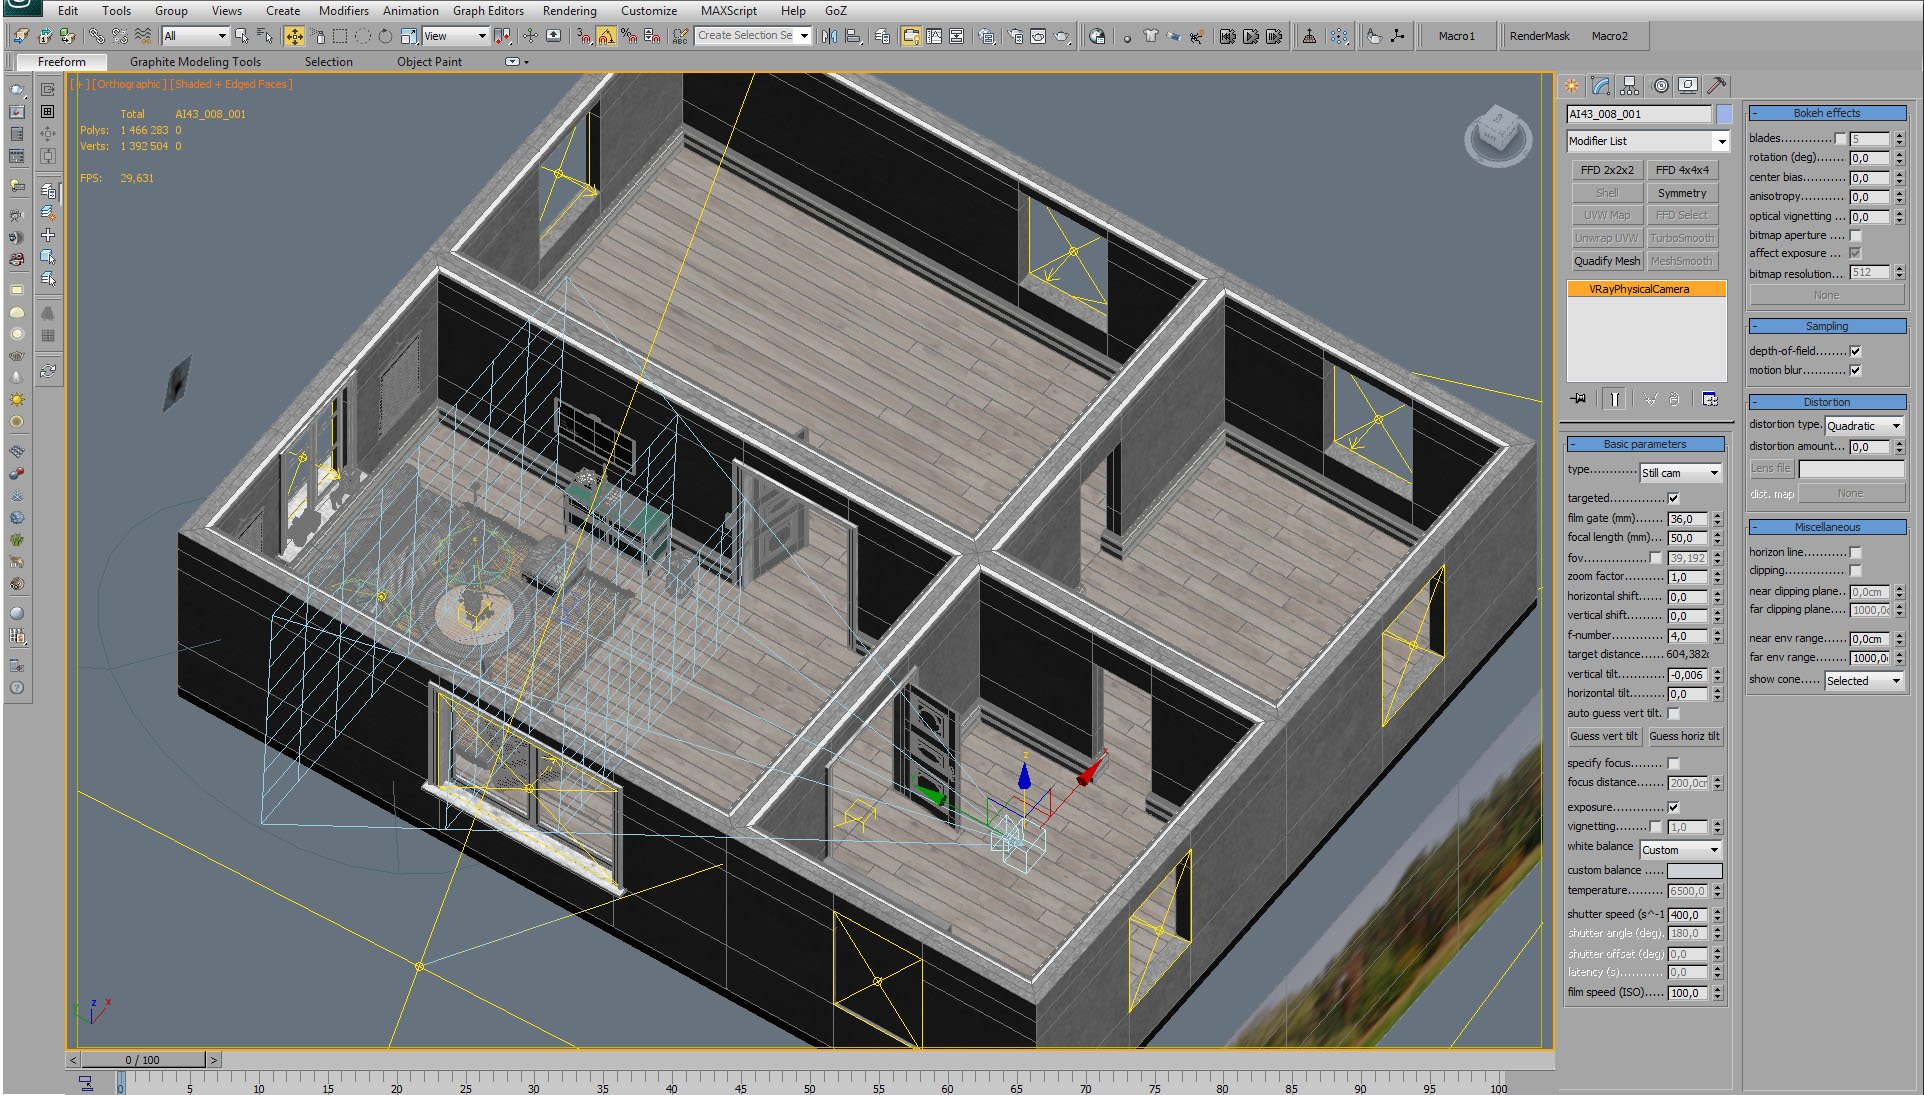
Camera is placed in the next room. Settings on the right.


Click on image to enlarge nr_ai42_s08__0040_Layer_13_752.jpg

Camera placement - top view.


Click on image to enlarge nr_ai42_s08__0039_Layer_14_751.jpg
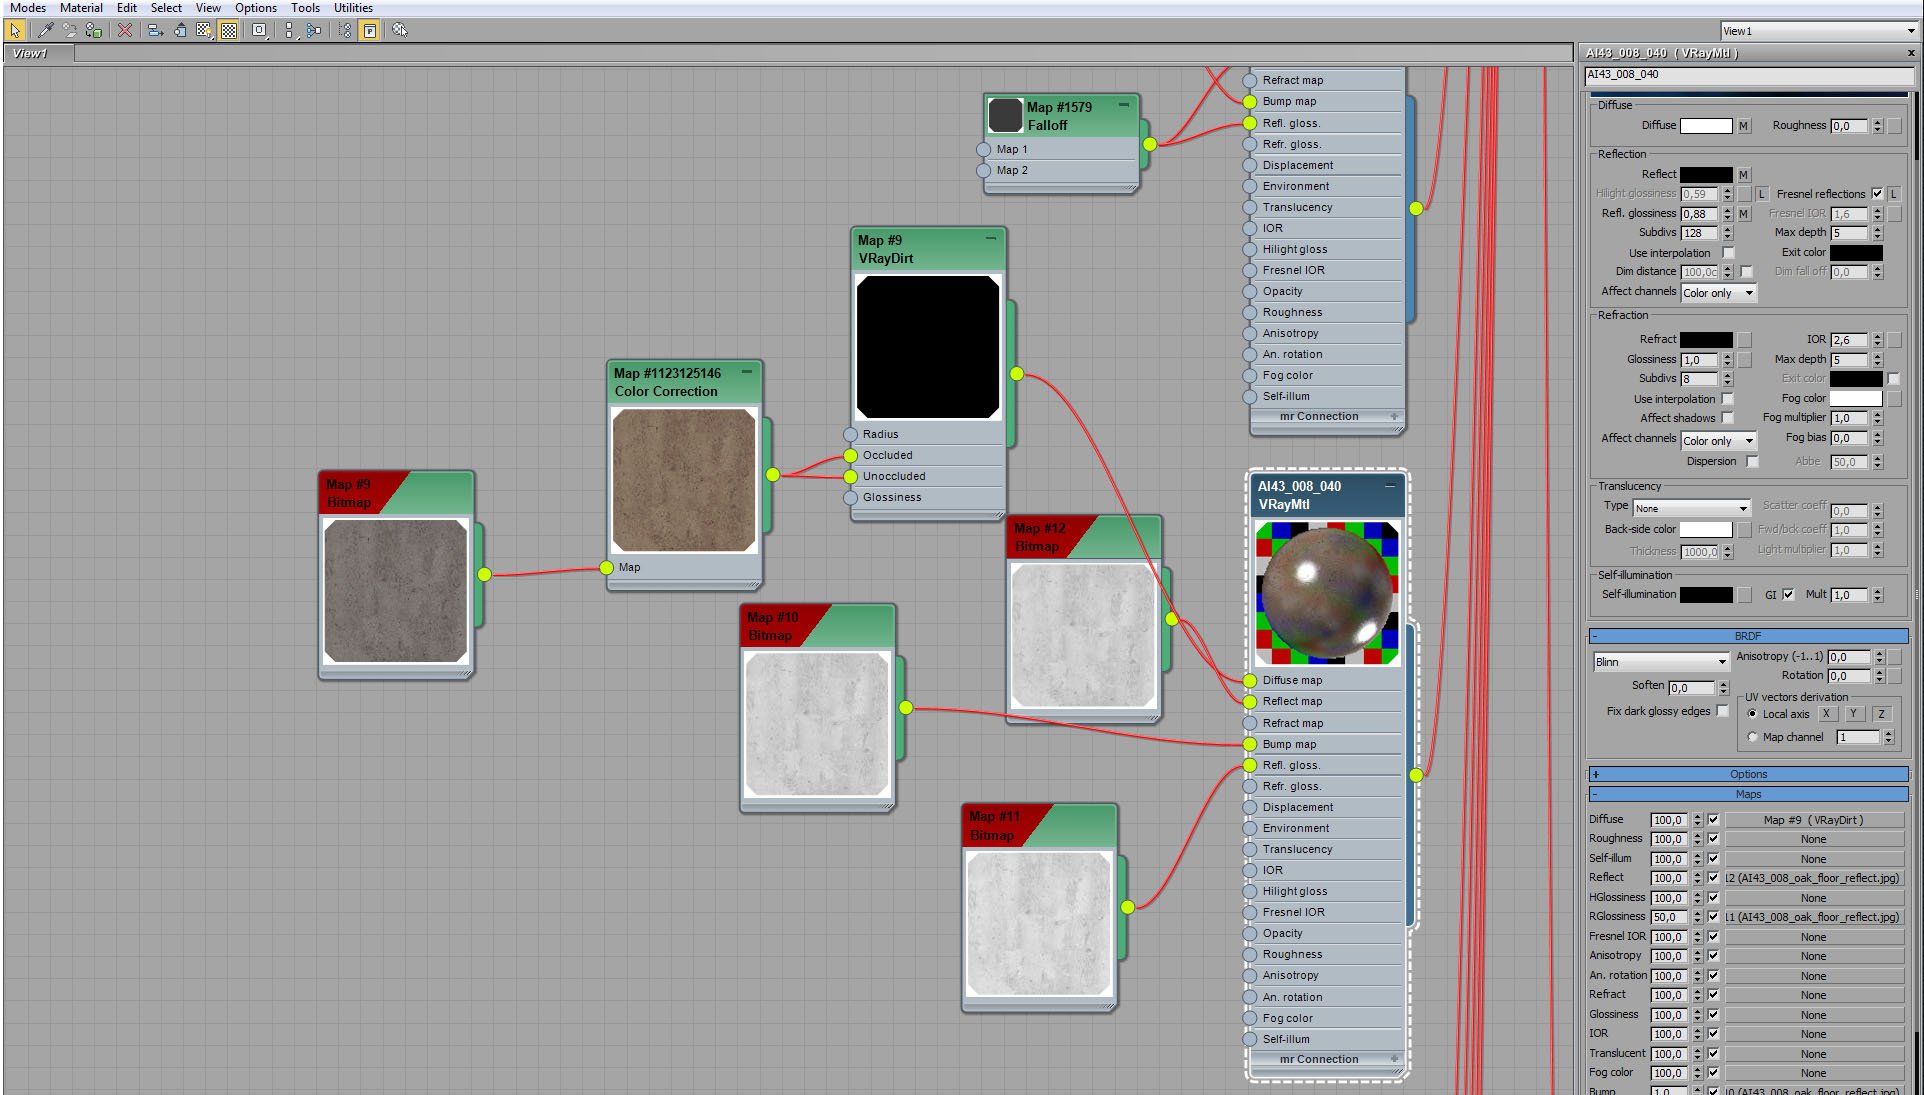
Walls, doors and floor are collapsed to a single editable poly with one big multi-material. Here are Floor material settings. Although bitmaps look more like a concrete in these preview windows, it's actually wood.


Click on image to enlarge nr_ai42_s08__0038_Layer_15_750.jpg
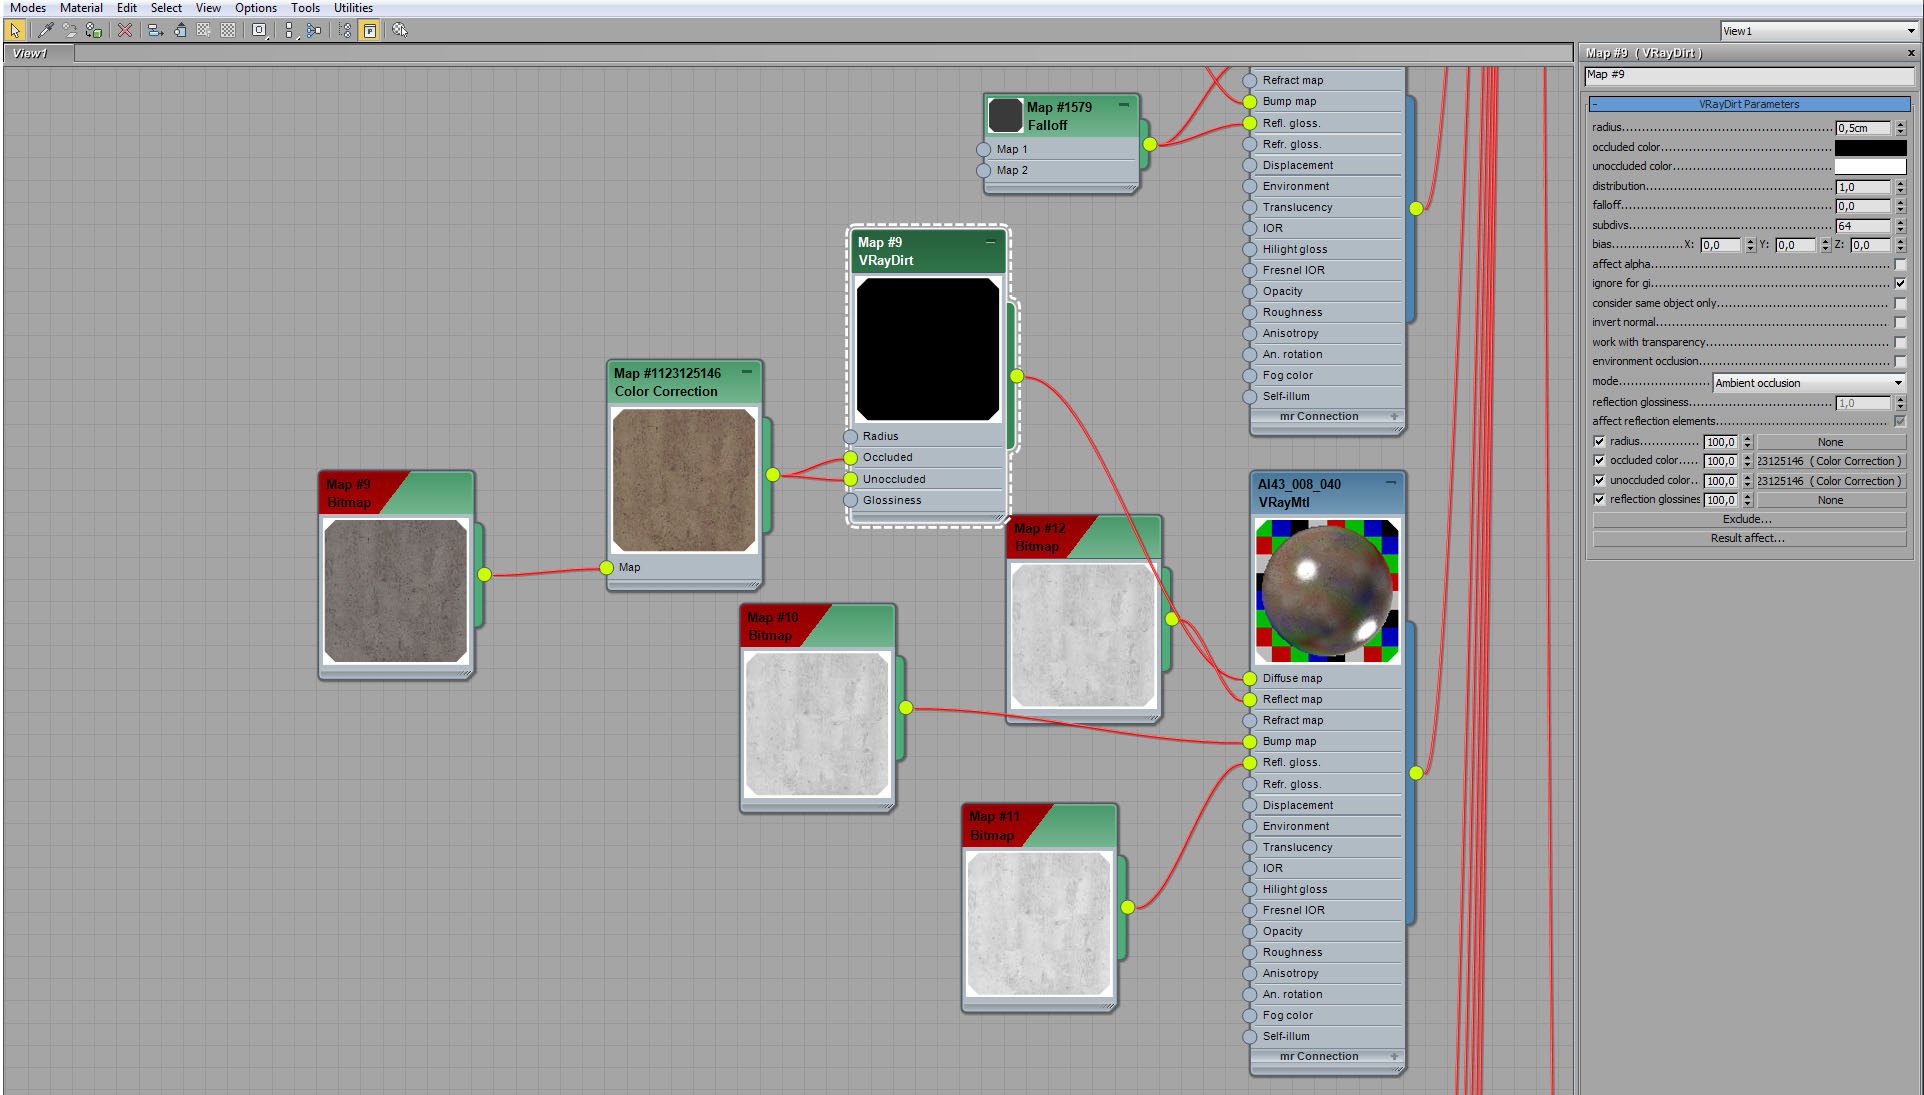
Floor material - VrayDirt settings.


Click on image to enlarge nr_ai42_s08__0037_Layer_16_749.jpg
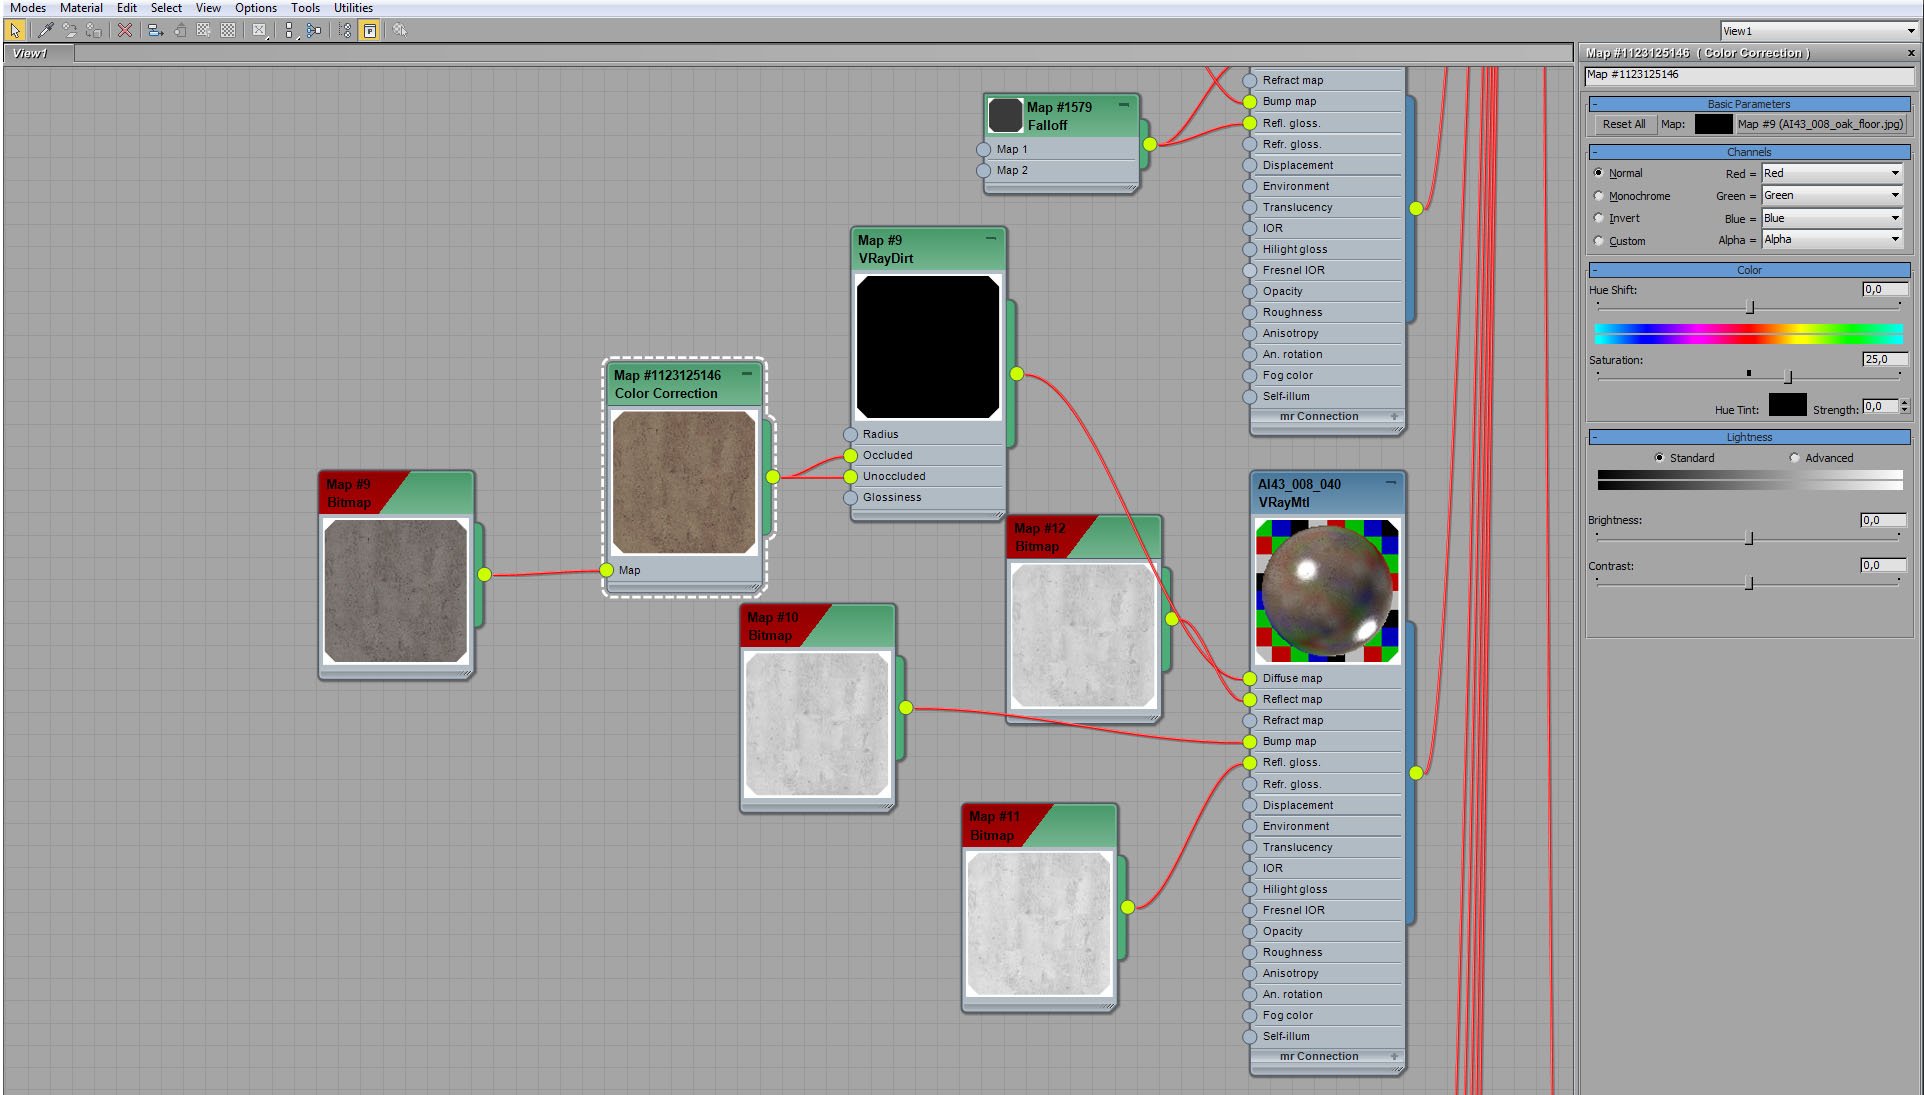
Floor material - diffuse bitmap color correction settings (we increased saturation).


Click on image to enlarge nr_ai42_s08__0036_Layer_17_748.jpg
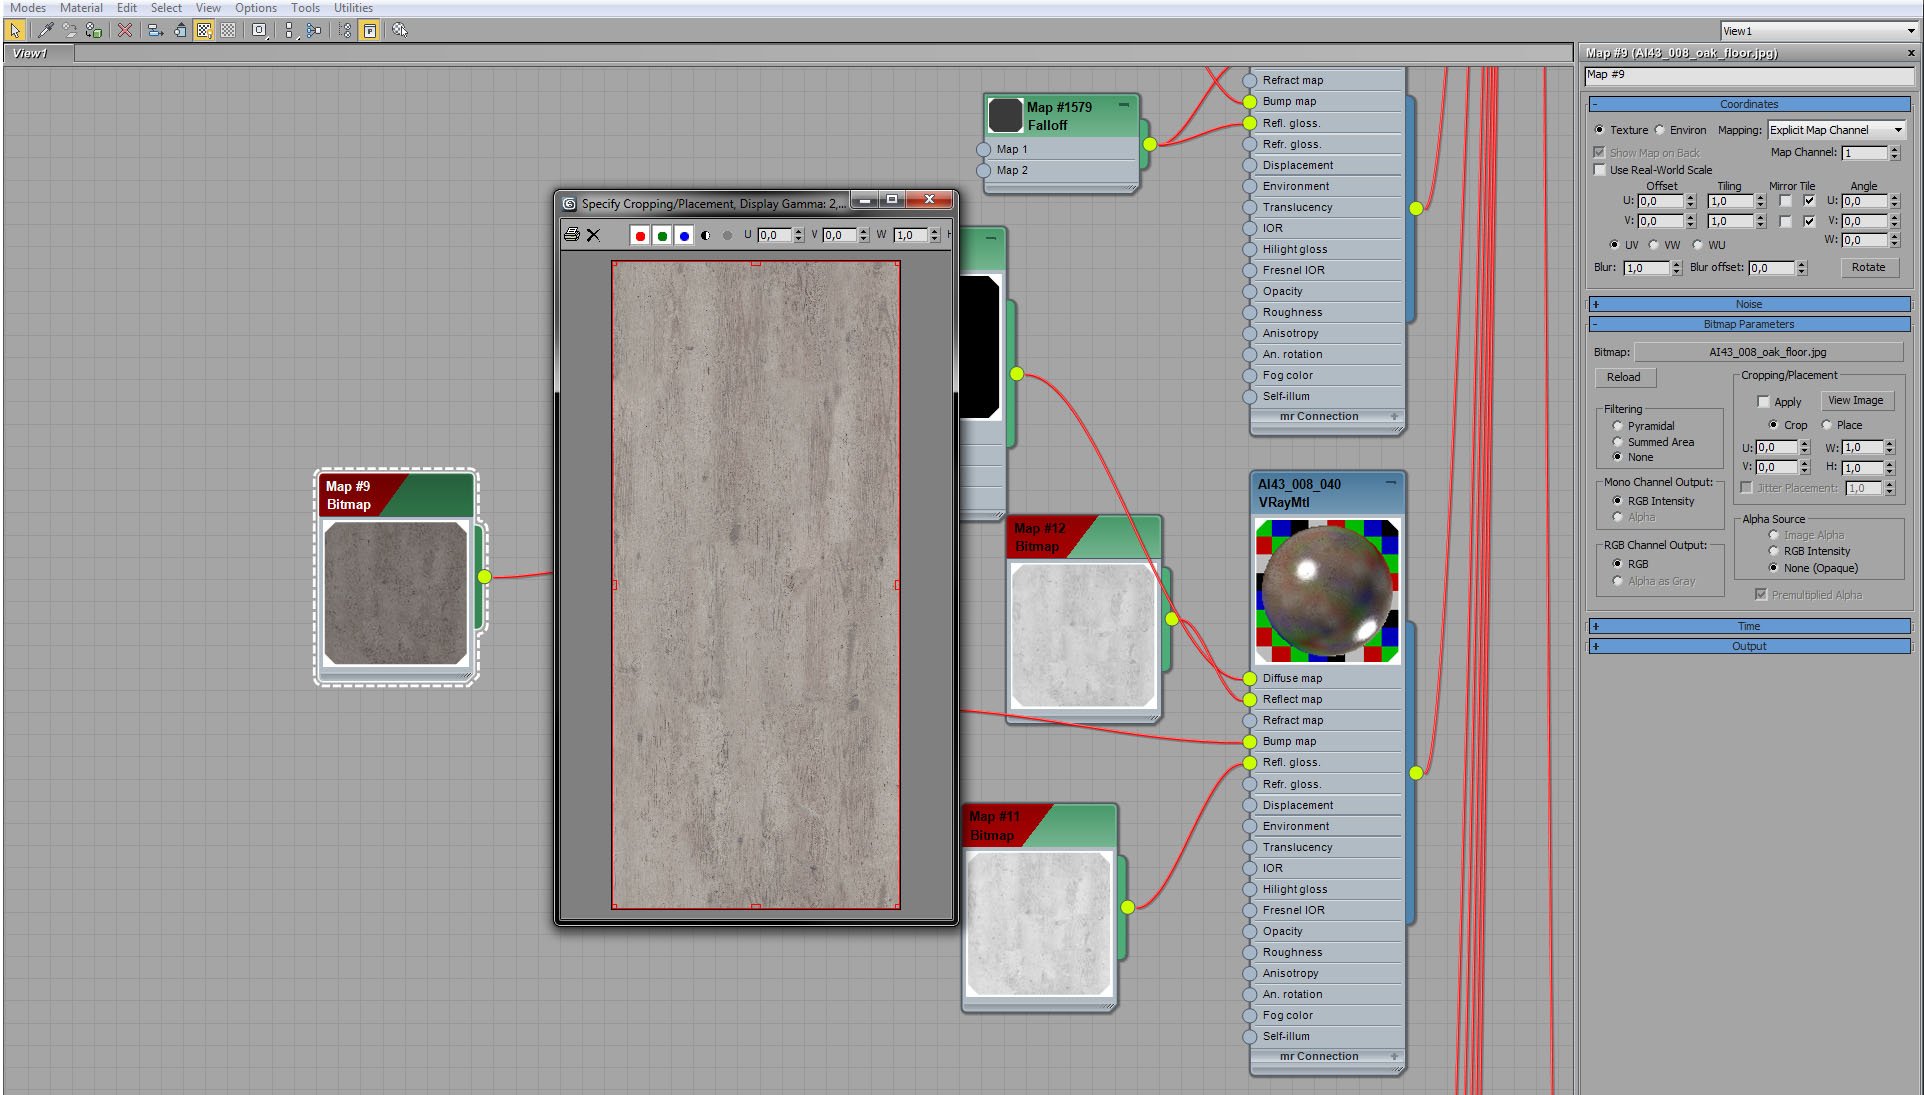
Oak floor - diffuse bitmap.


Click on image to enlarge nr_ai42_s08__0035_Layer_18_747.jpg
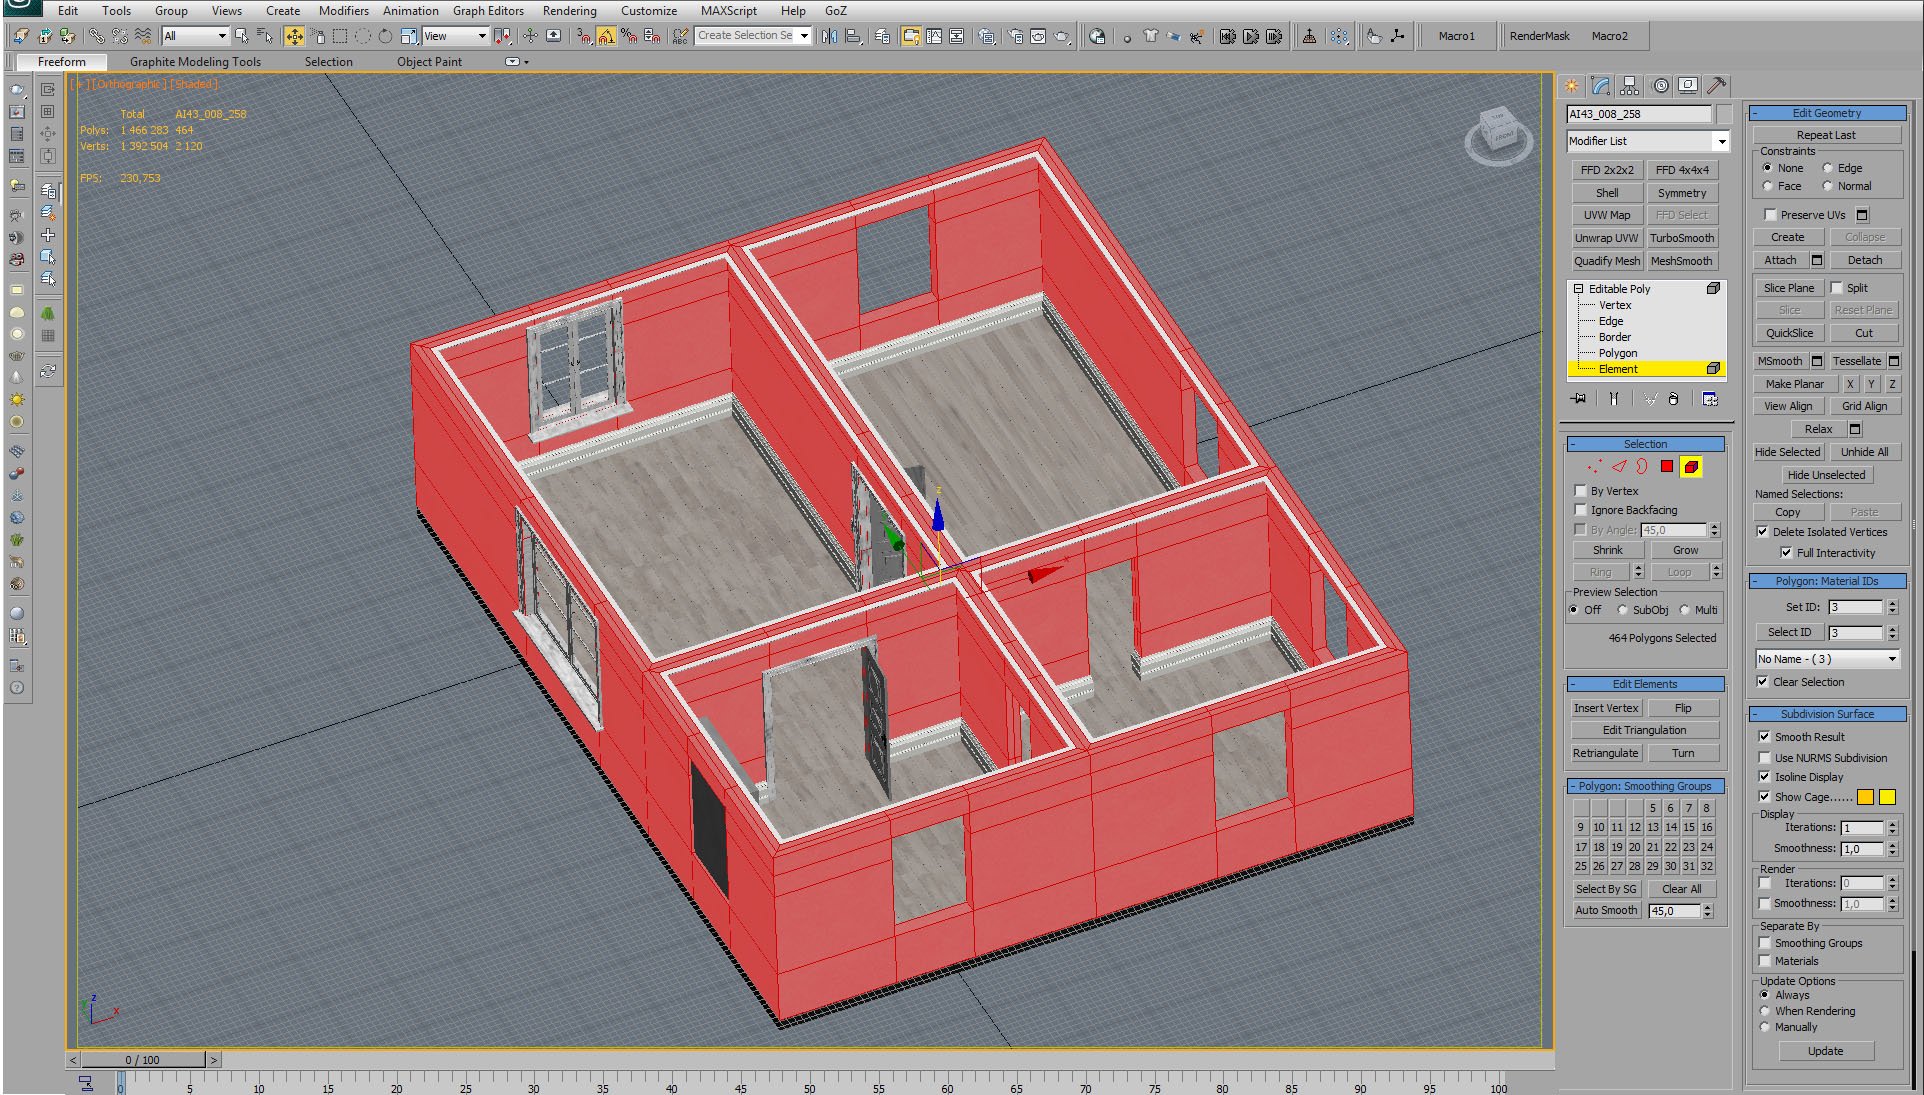
The building is collapsed to single mesh (editable poly).


Click on image to enlarge nr_ai42_s08__0034_Layer_19_746.jpg
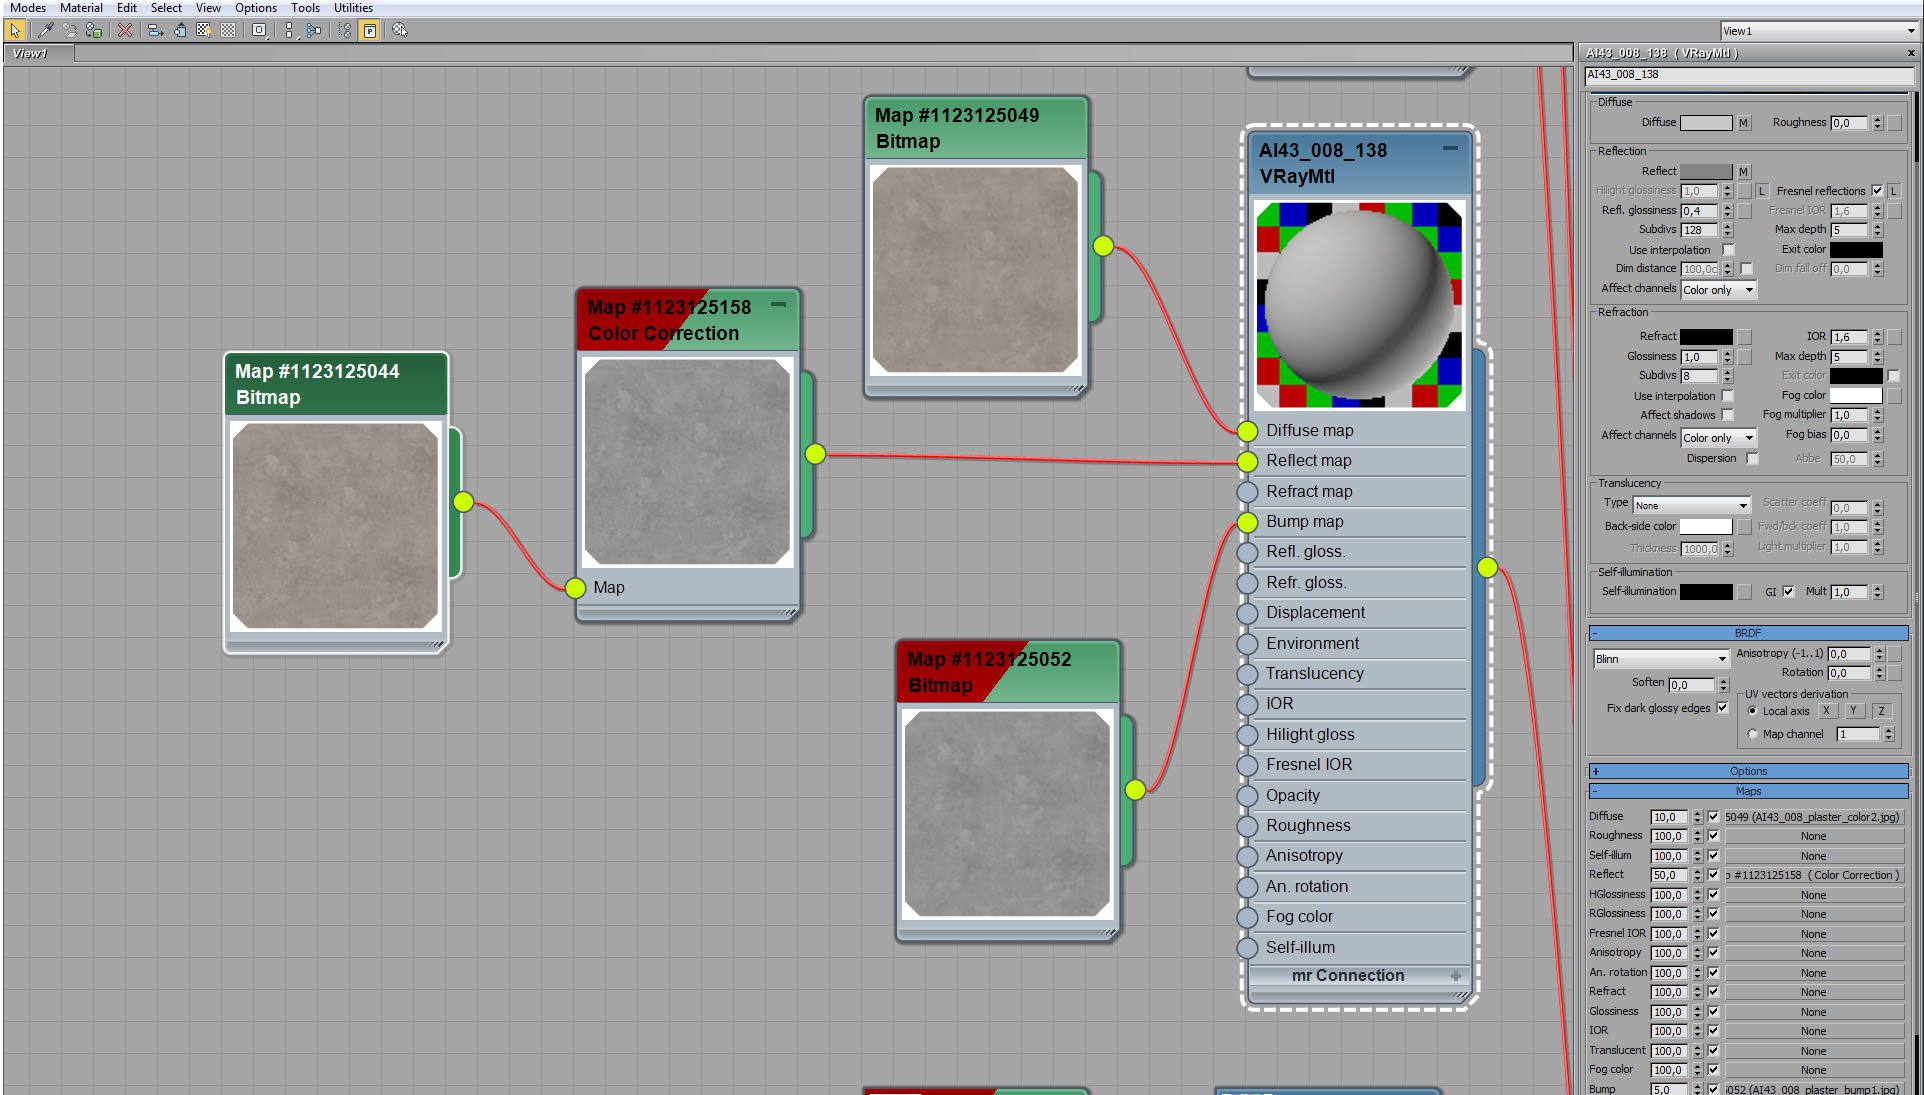
Walls material (plaster)


Click on image to enlarge nr_ai42_s08__0033_Layer_20_745.jpg
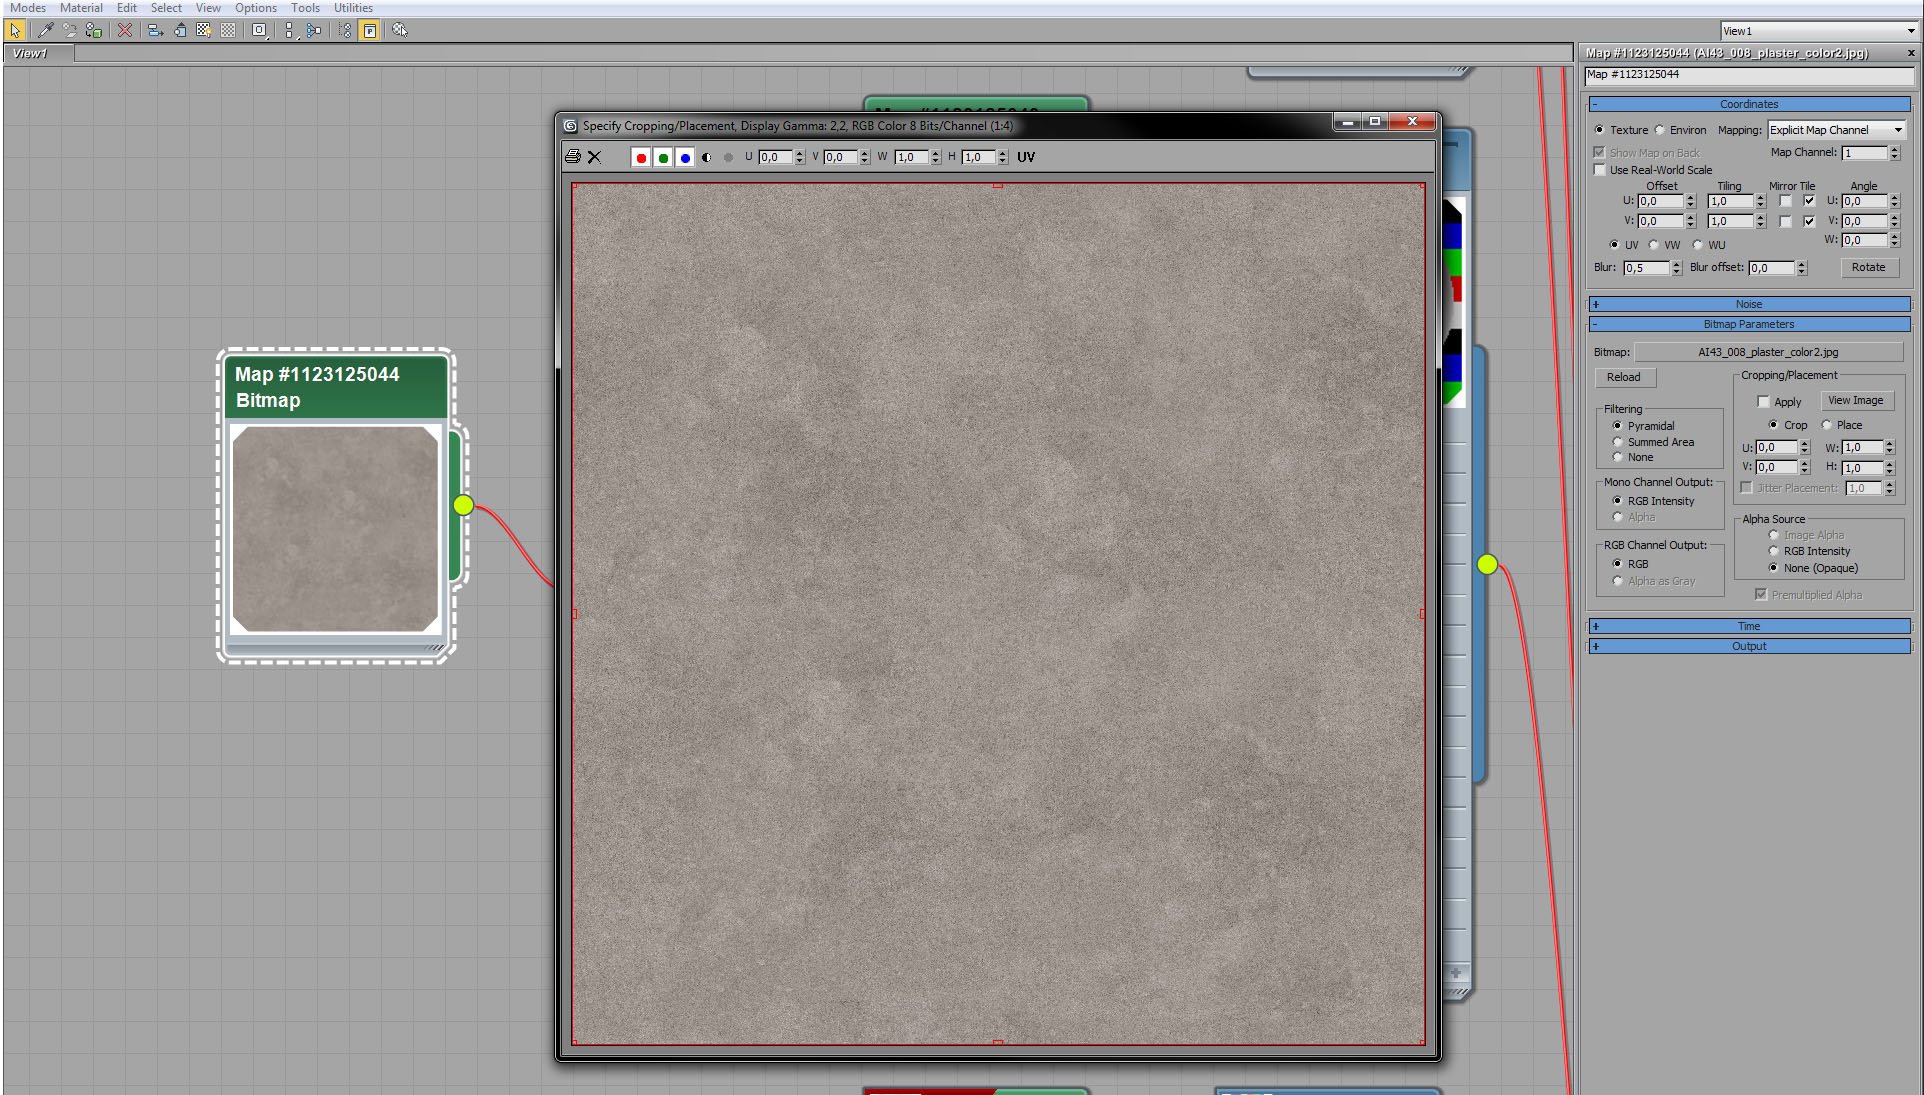
Walls material - diffuse map.


Click on image to enlarge nr_ai42_s08__0031_Layer_22_743.jpg
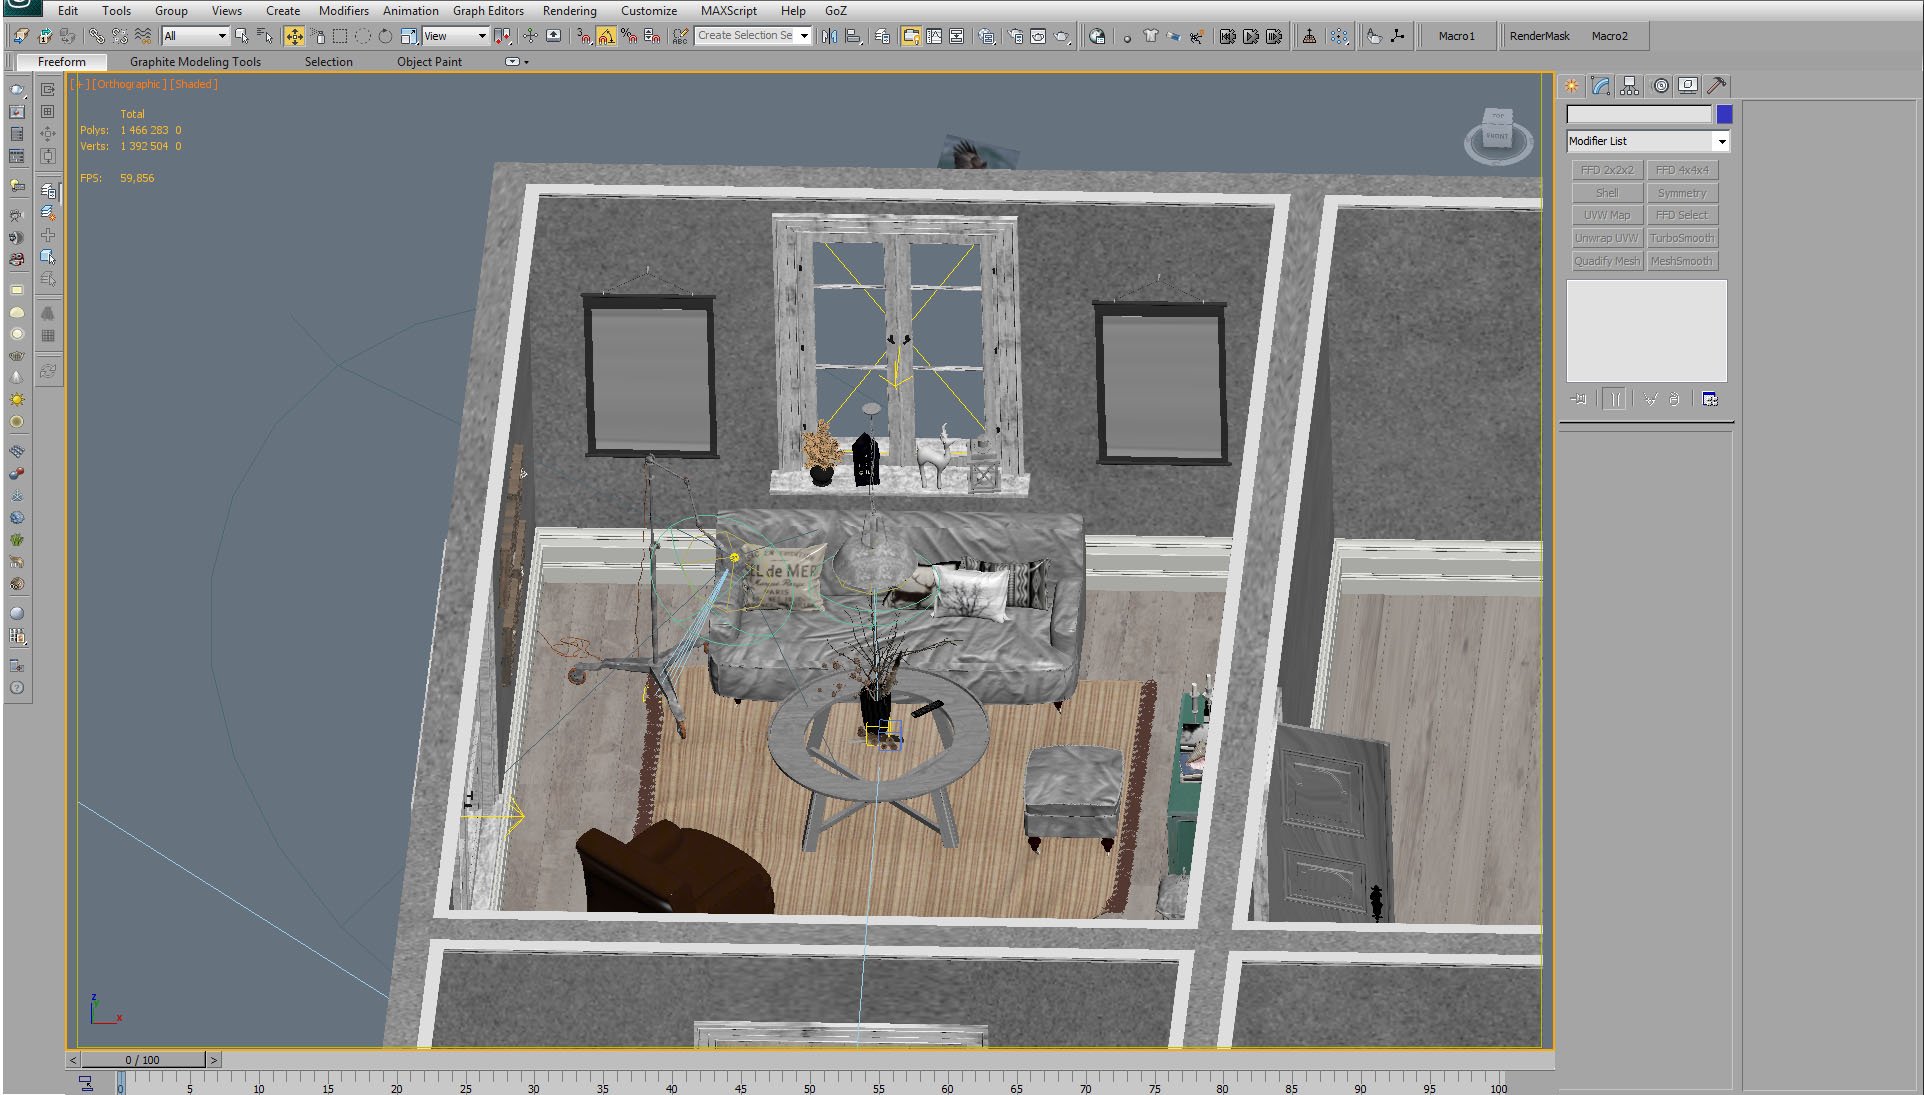
We placed in the room armchair, sofa, pouf, table, lamp and some smaller props.


Click on image to enlargenr_ai42_s08__0030_Layer_23_742.jpg

Armchair (close up).


Click on image to enlarge nr_ai42_s08__0029_Layer_24_741.jpg
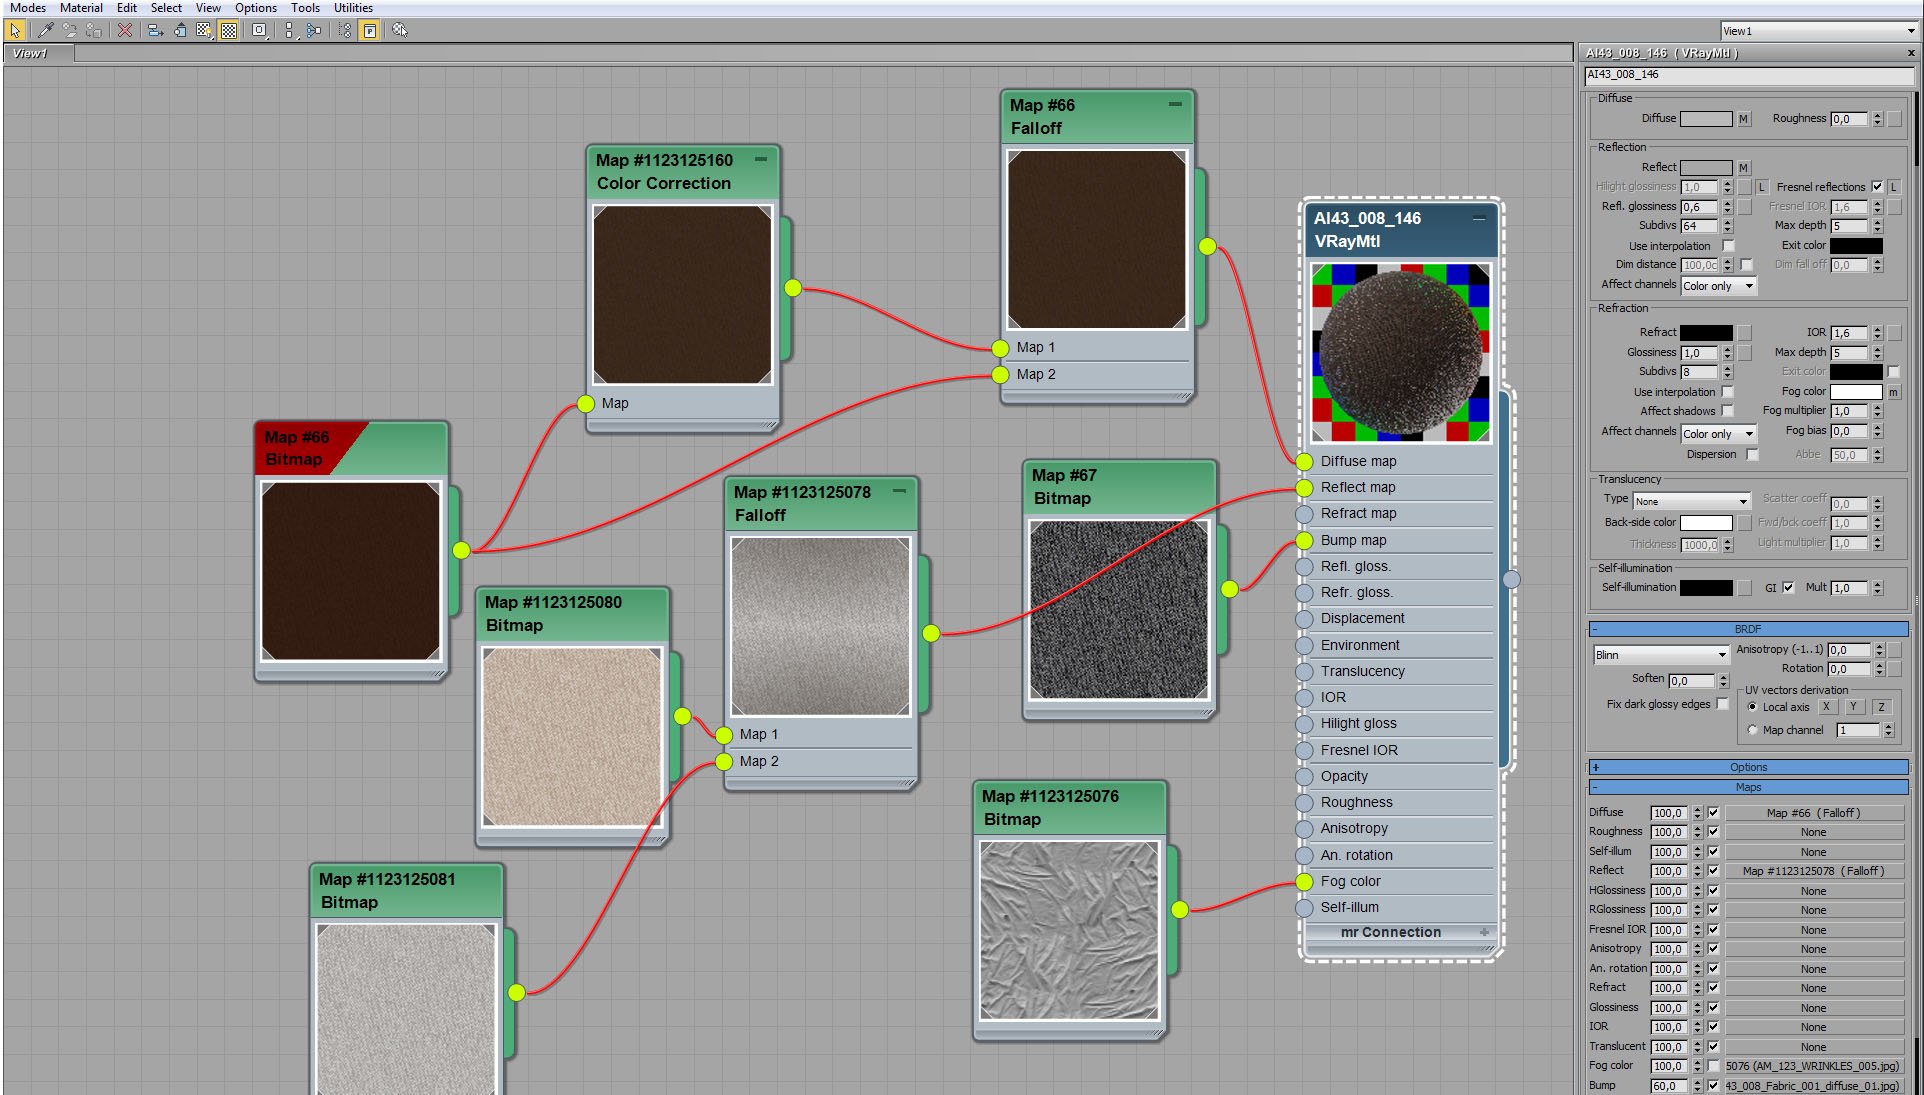
Armchair material.


Click on image to enlarge nr_ai42_s08__0028_Layer_25_740.jpg

Armchair material - fallof map settings. Fallof controls diffuse color (using fresnel type).


Click on image to enlarge nr_ai42_s08__0027_Layer_26_739.jpg
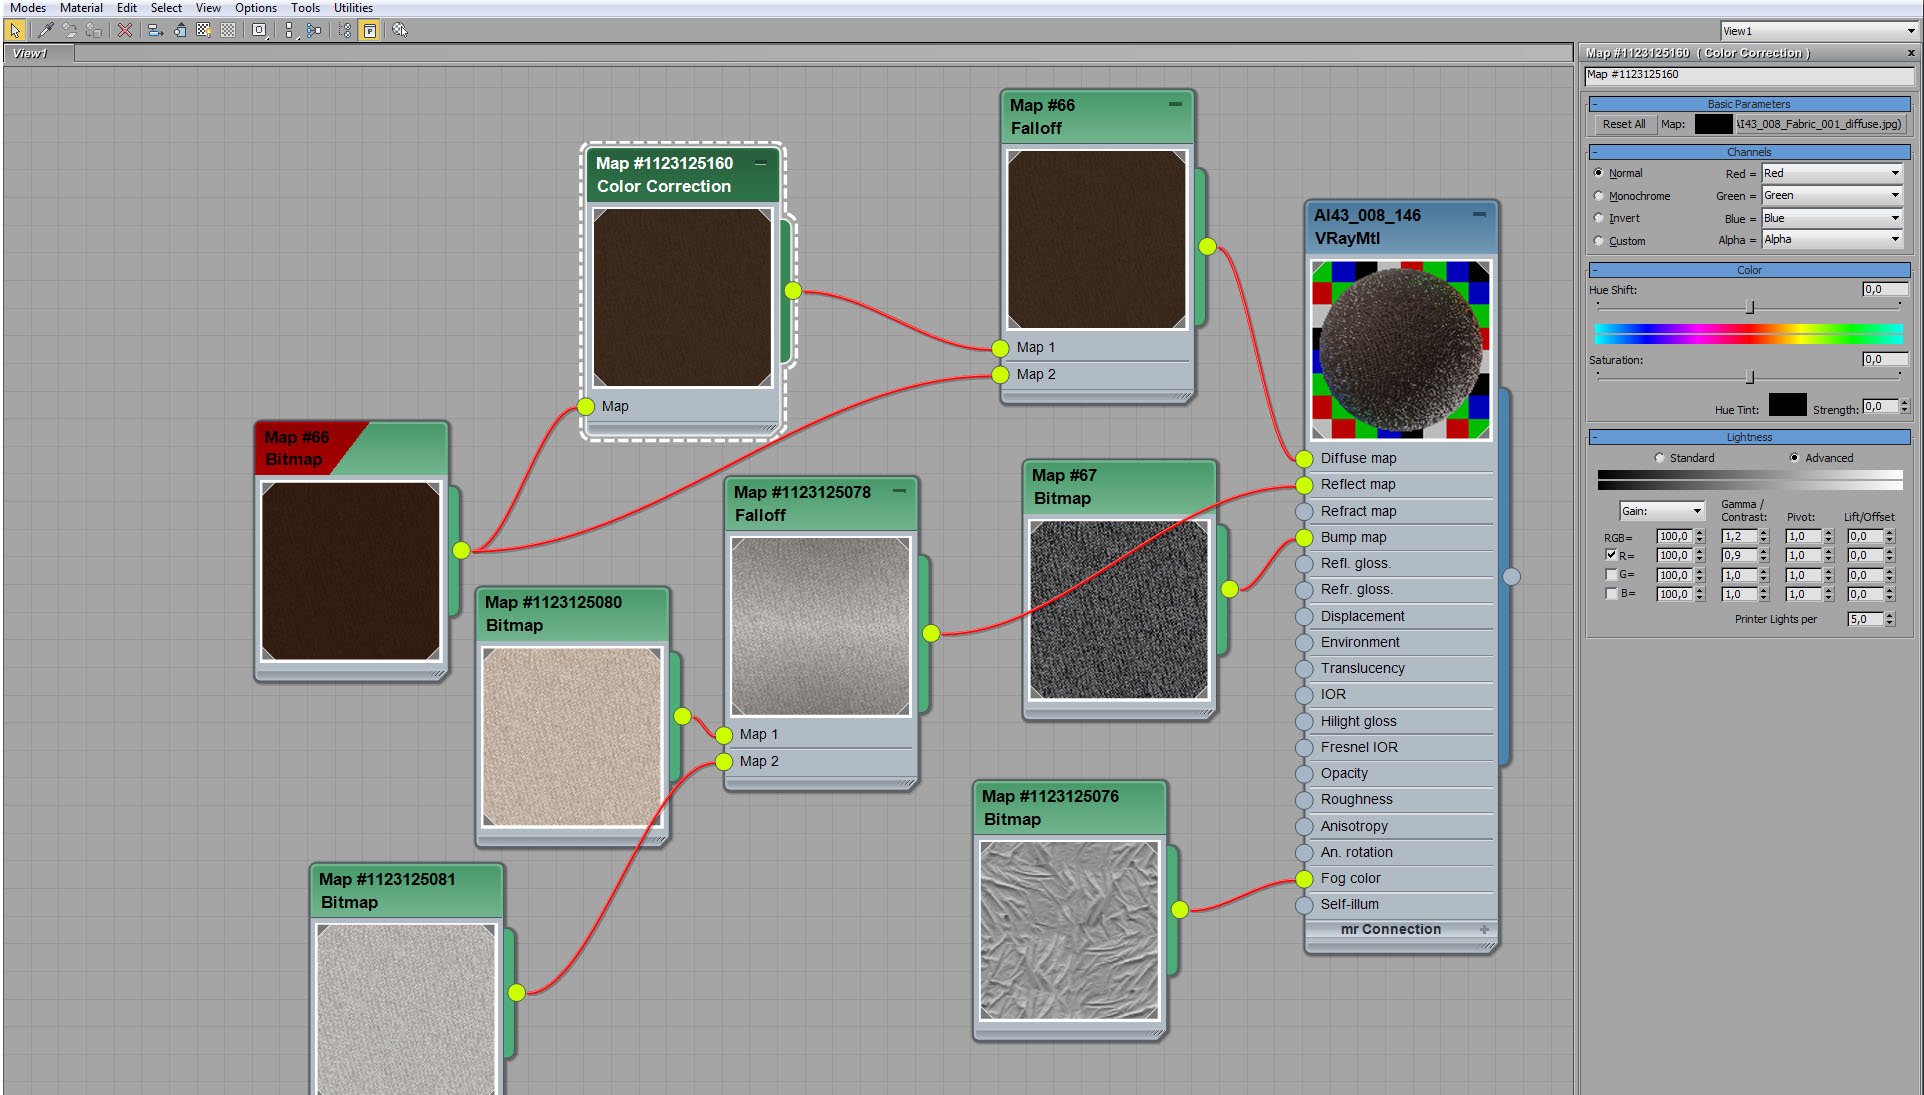
Armchair material - color correction of diffuse map. Increased gamma / contrast on all channels and slightly lower contrast on red channel.


Click on image to enlarge nr_ai42_s08__0026_Layer_27_738.jpg
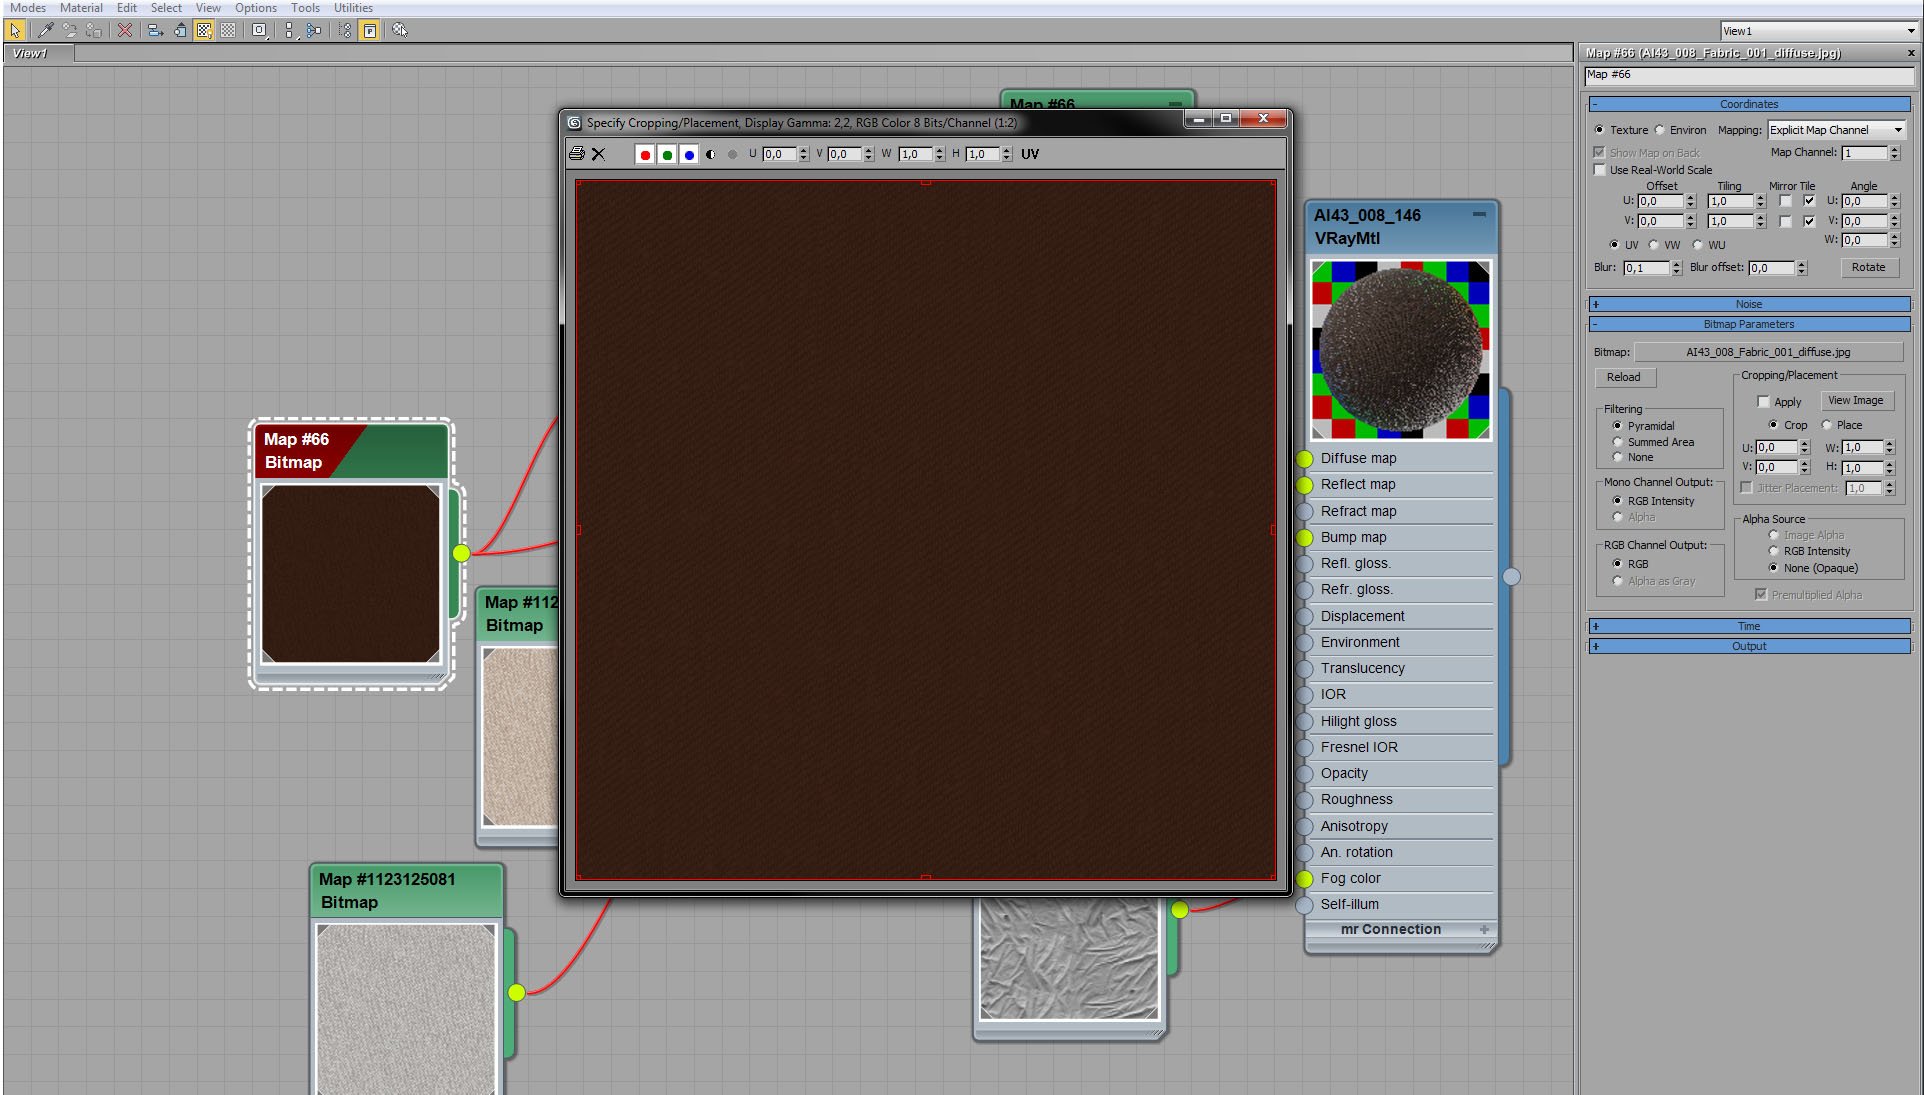
Armchair material - diffuse bitmap.


Click on image to enlarge nr_ai42_s08__0025_Layer_28_737.jpg

Archmchair material - bump map settings.


Click on image to enlarge nr_ai42_s08__0024_Layer_29_736.jpg

Armchair material - two reflect maps are mixed with fallof node.


Click on image to enlargenr_ai42_s08__0020_Layer_33_732.jpg
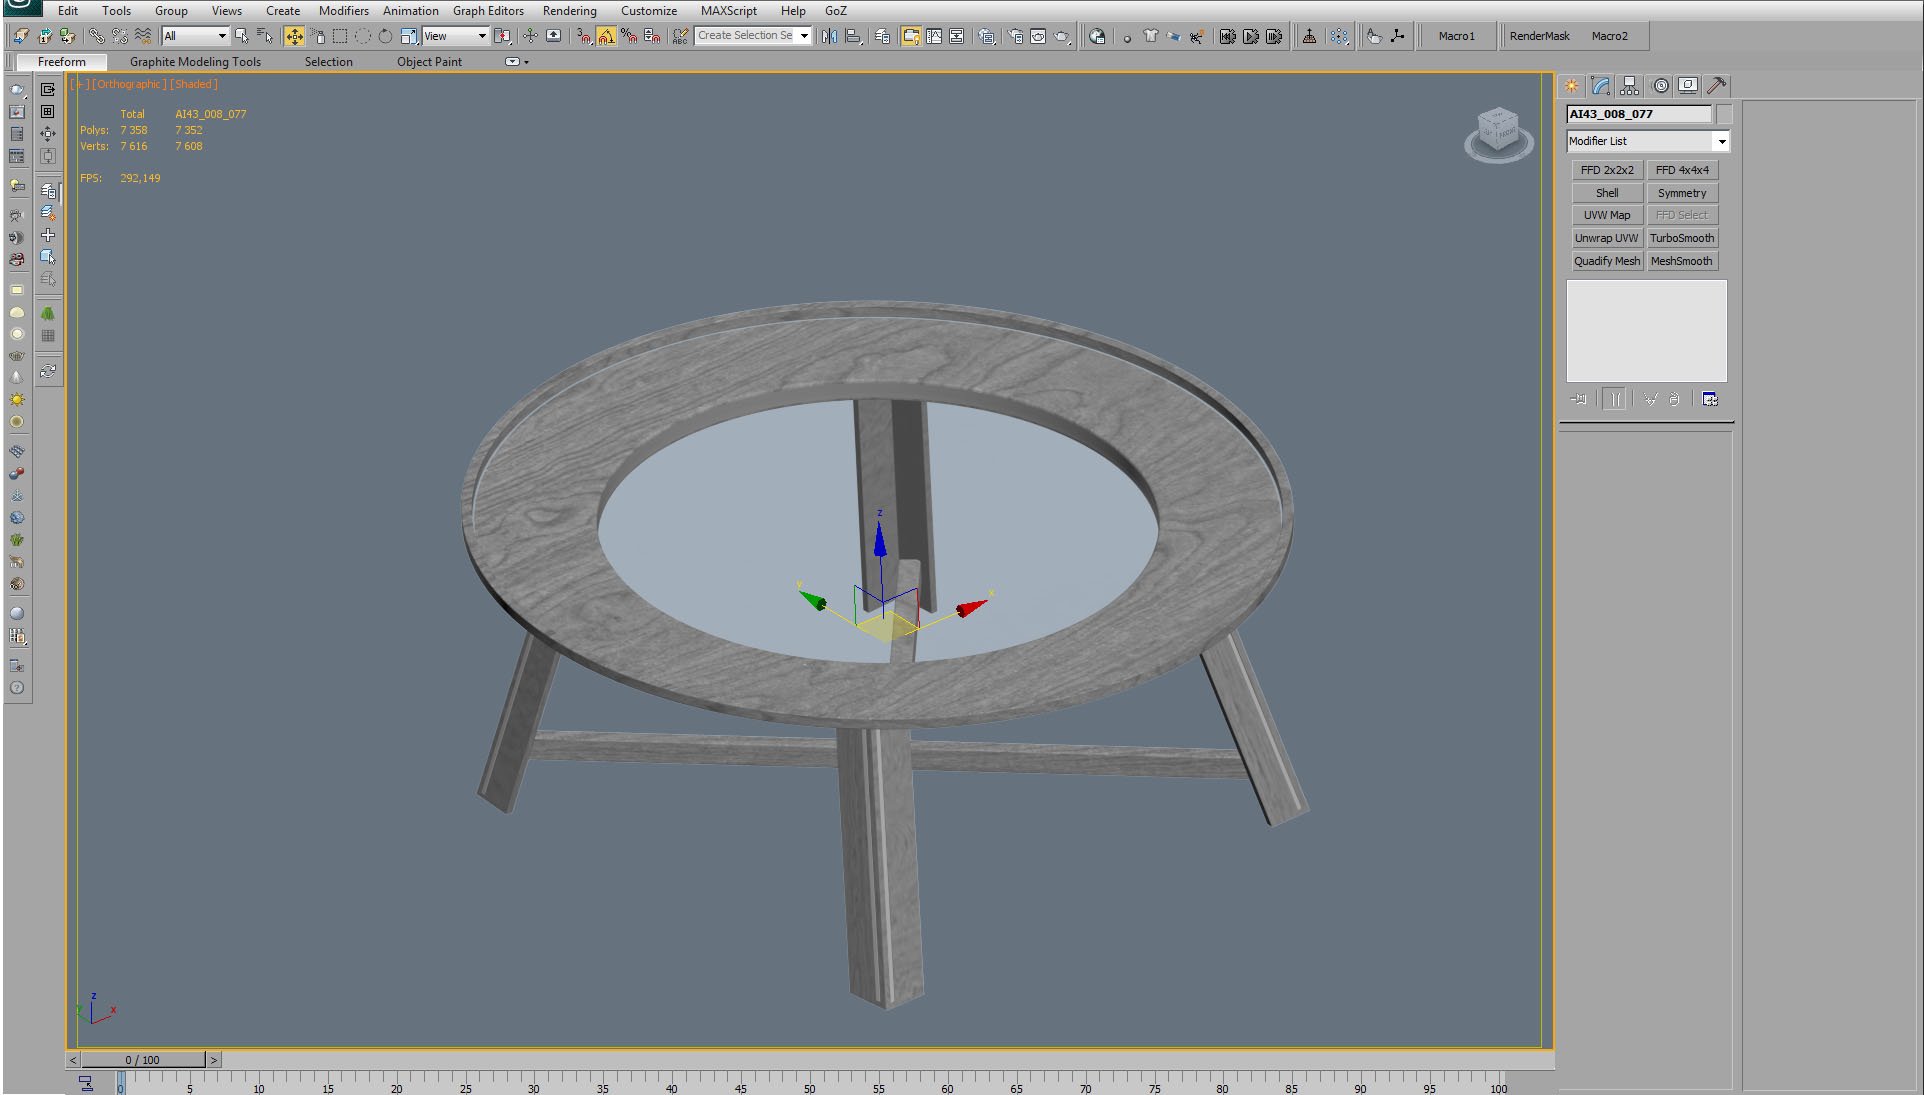
Round table mesh.


Click on image to enlargenr_ai42_s08__0019_Layer_34_731.jpg
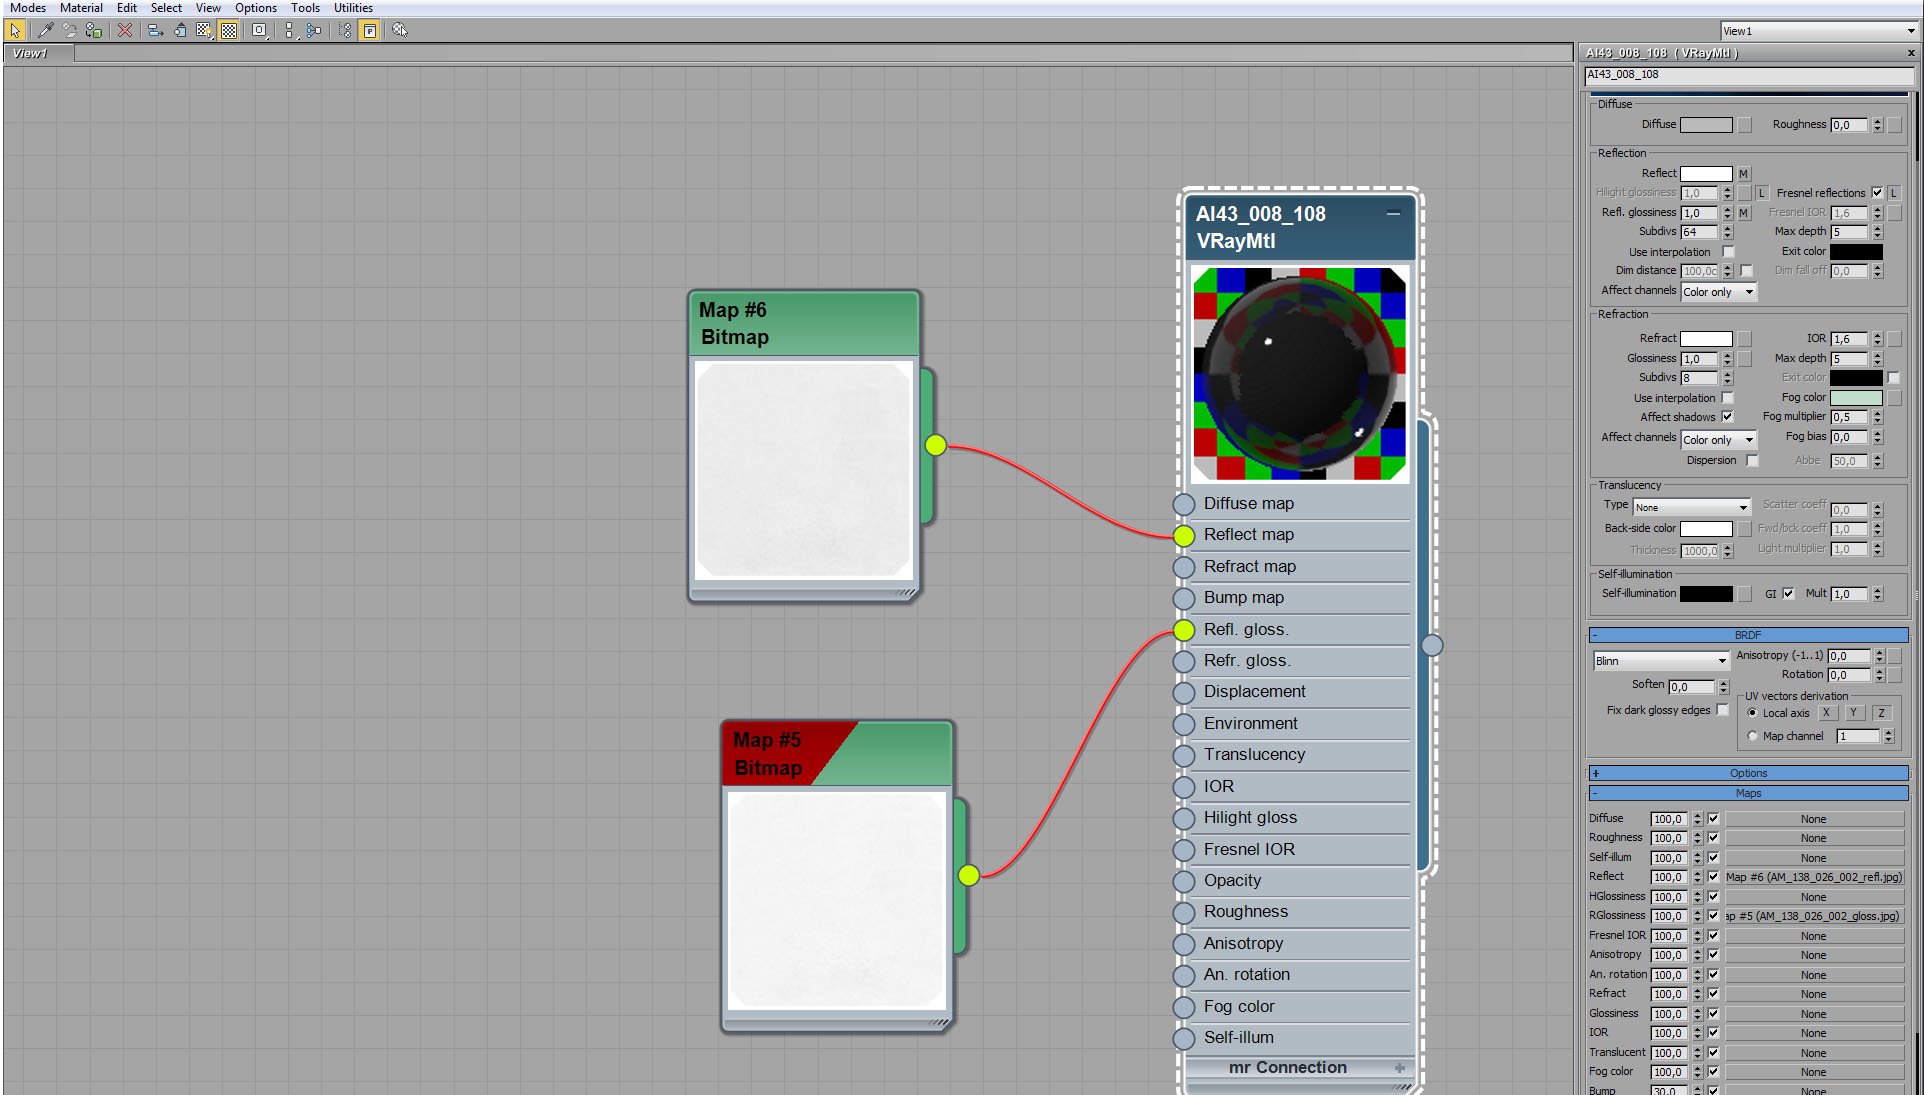
Round table - glass material.


Click on image to enlargenr_ai42_s08__0018_Layer_35_730.jpg

Round table - wood material.


Click on image to enlargenr_ai42_s08__0017_Layer_36_729.jpg
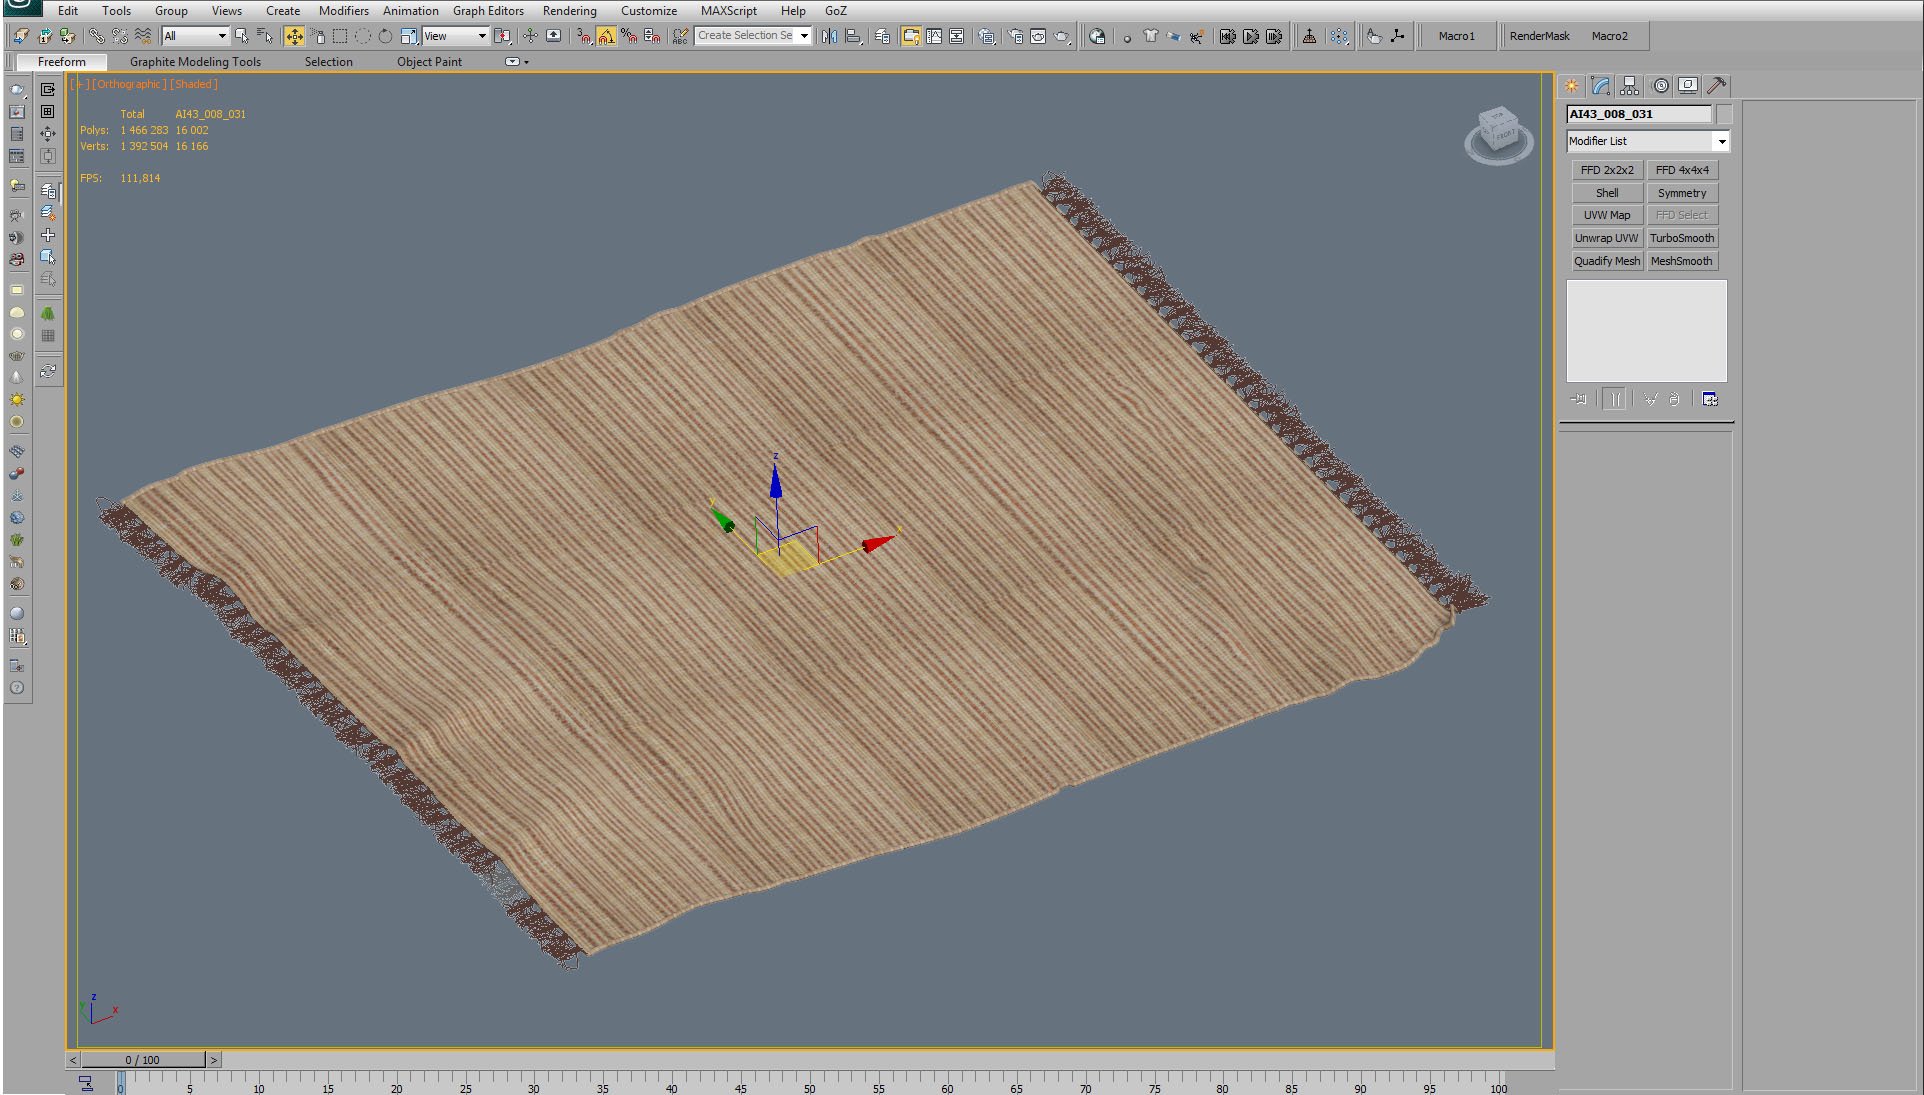
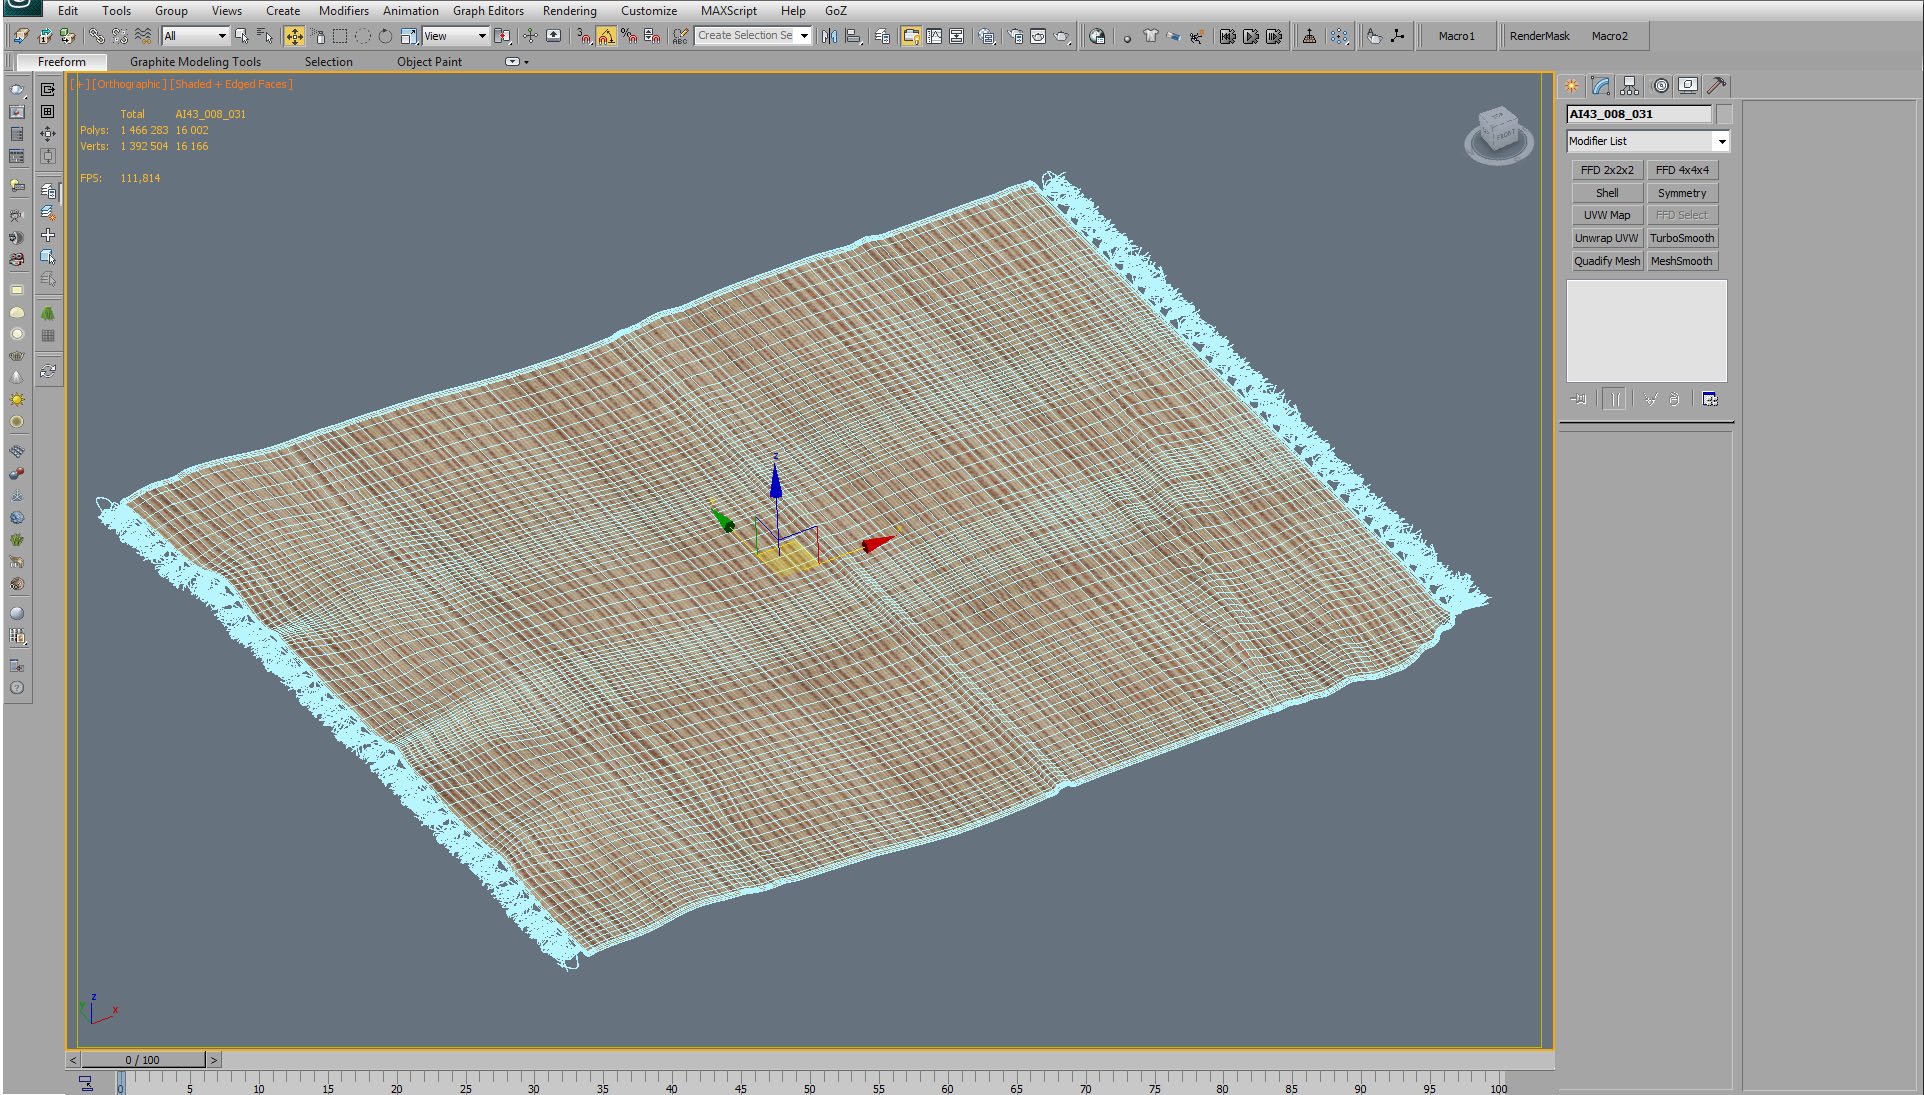
Carpet.


Click on image to enlargenr_ai42_s08__0016_Layer_37_728.jpg

Carpet mesh / wireframe.


Click on image to enlargenr_ai42_s08__0015_Layer_38_727.jpg

Carpet material.


Click on image to enlargenr_ai42_s08__0014_Layer_39_726.jpg
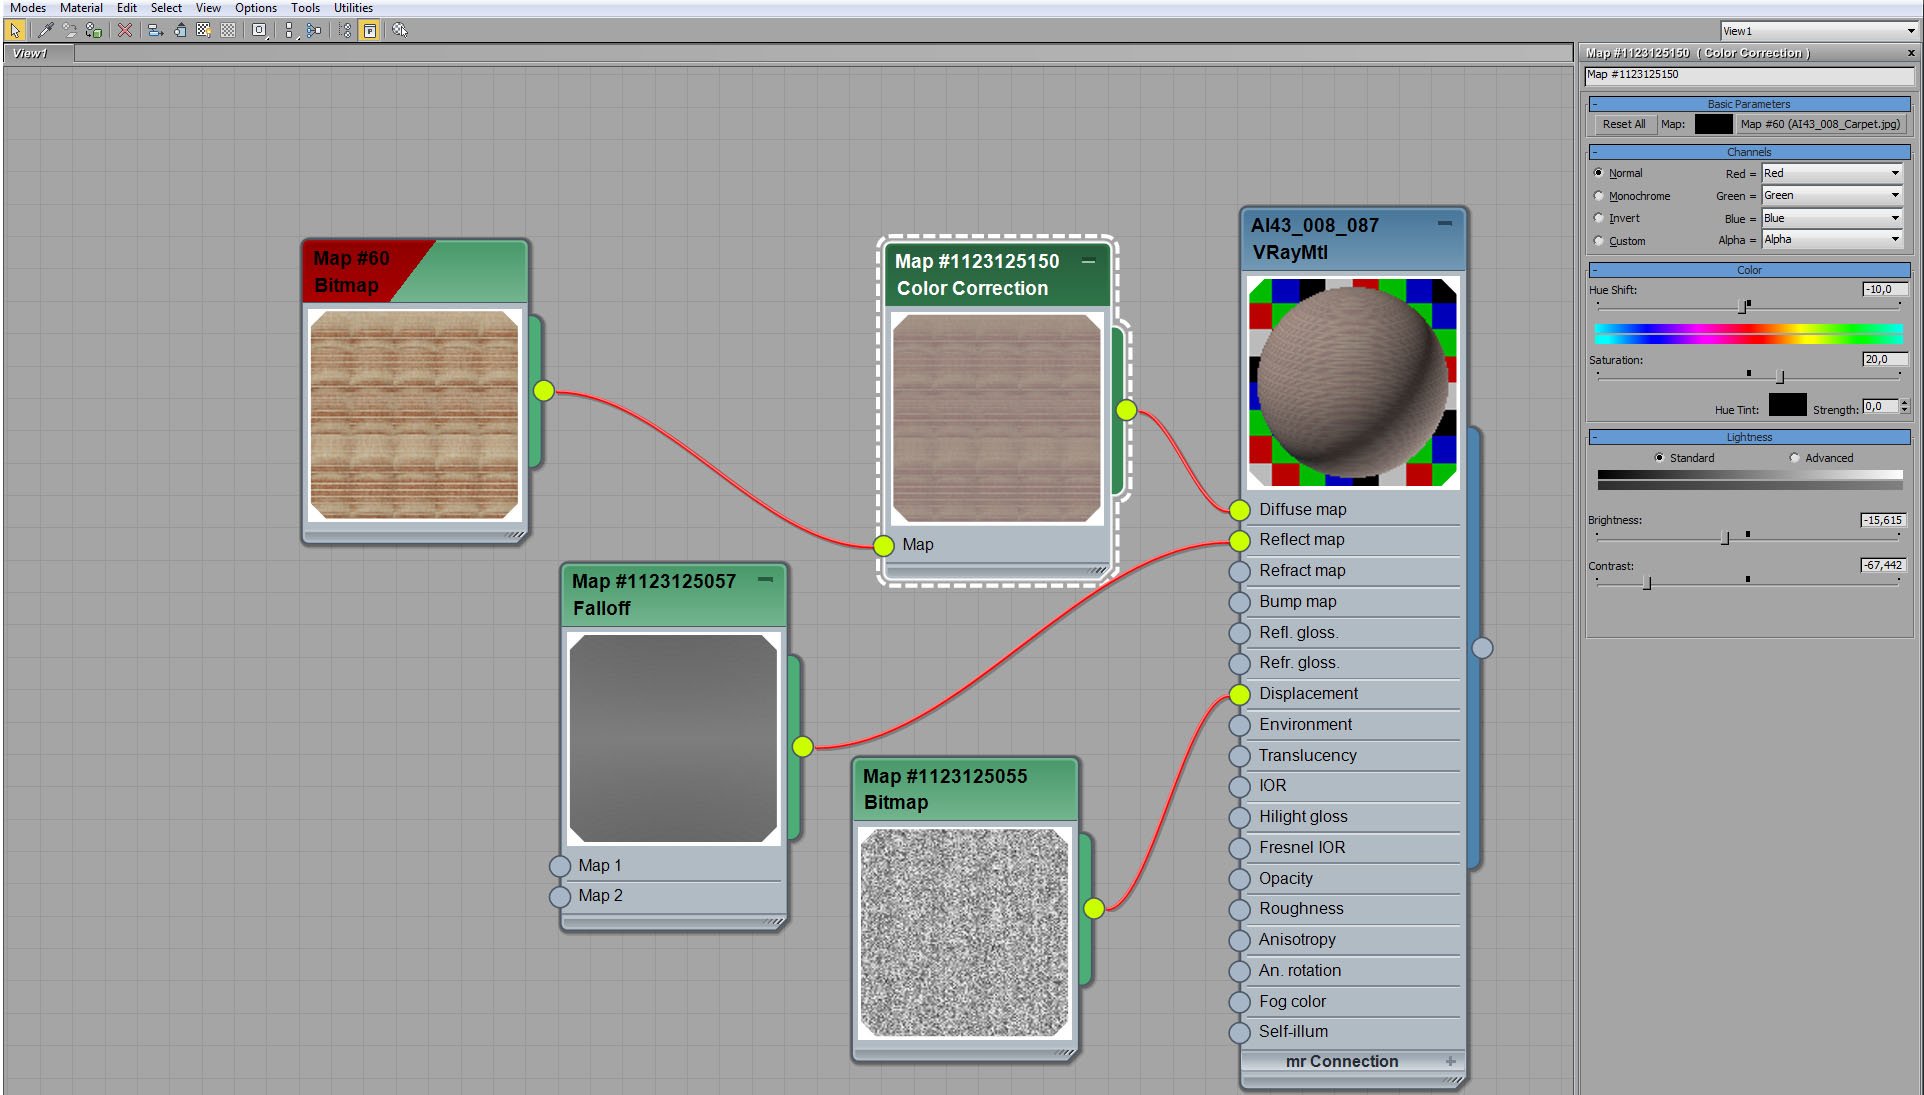
Carpet material - color correction of diffuse map.


Click on image to enlargenr_ai42_s08__0012_Layer_41_724.jpg
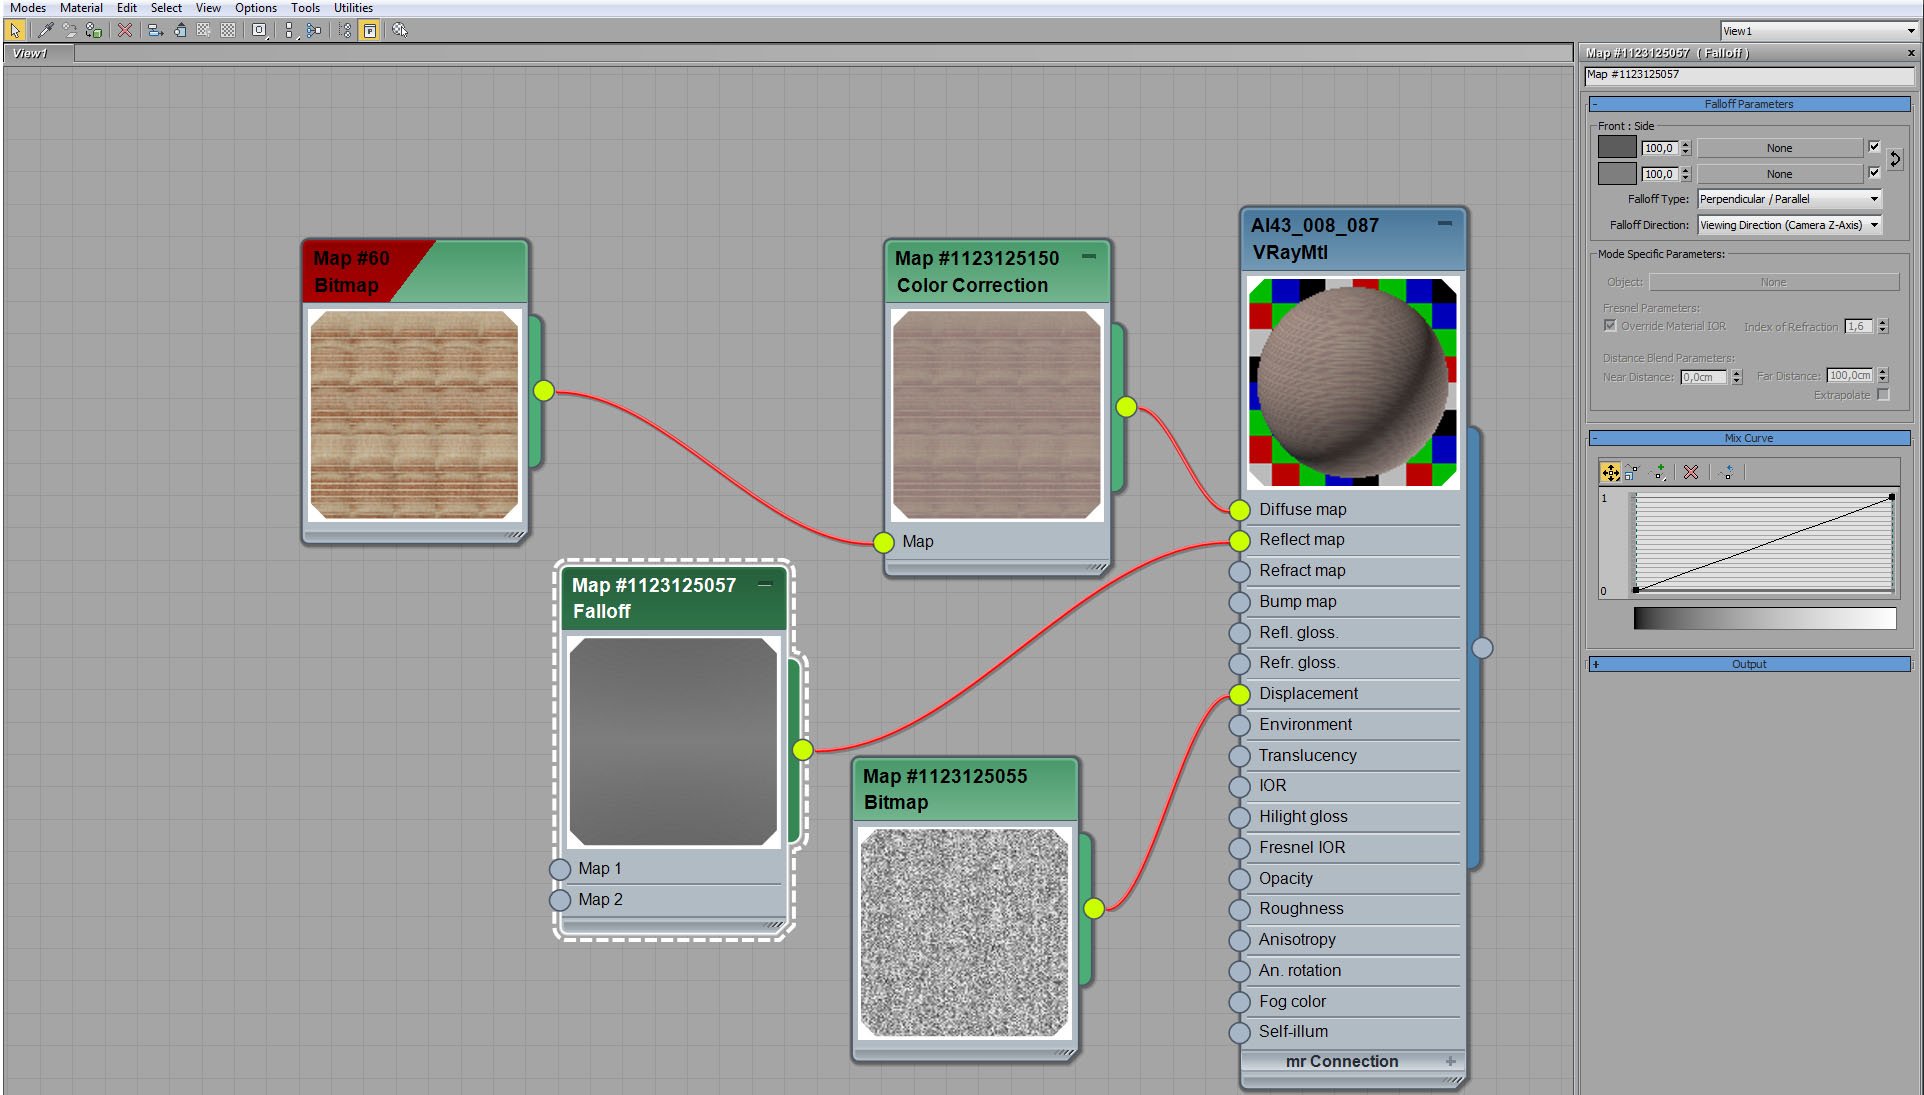
Carpet material - fallof map in reflect slot.


Click on image to enlargenr_ai42_s08__0011_Layer_42_723.jpg
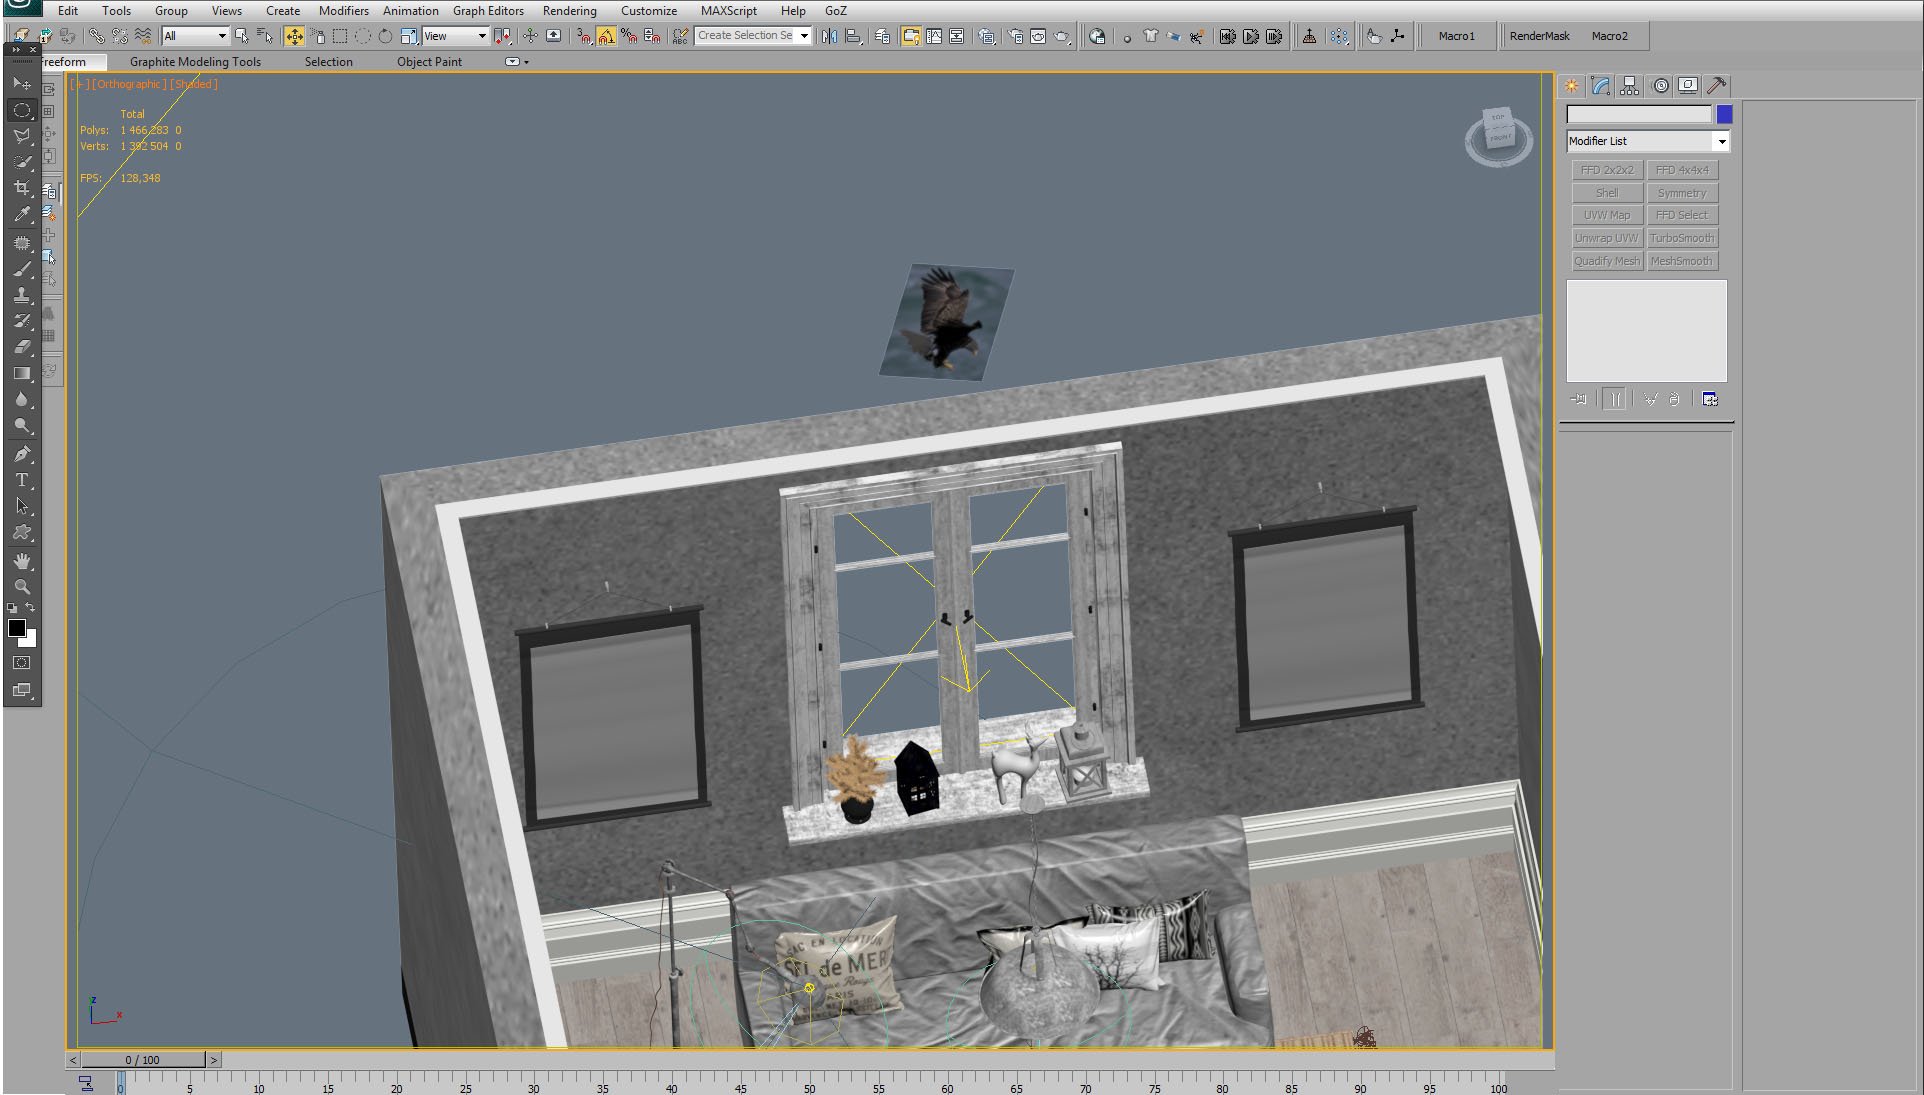
Did you notice a bird behind the window?
 

Click on image to enlargenr_ai42_s08__0010_Layer_43_722.jpg
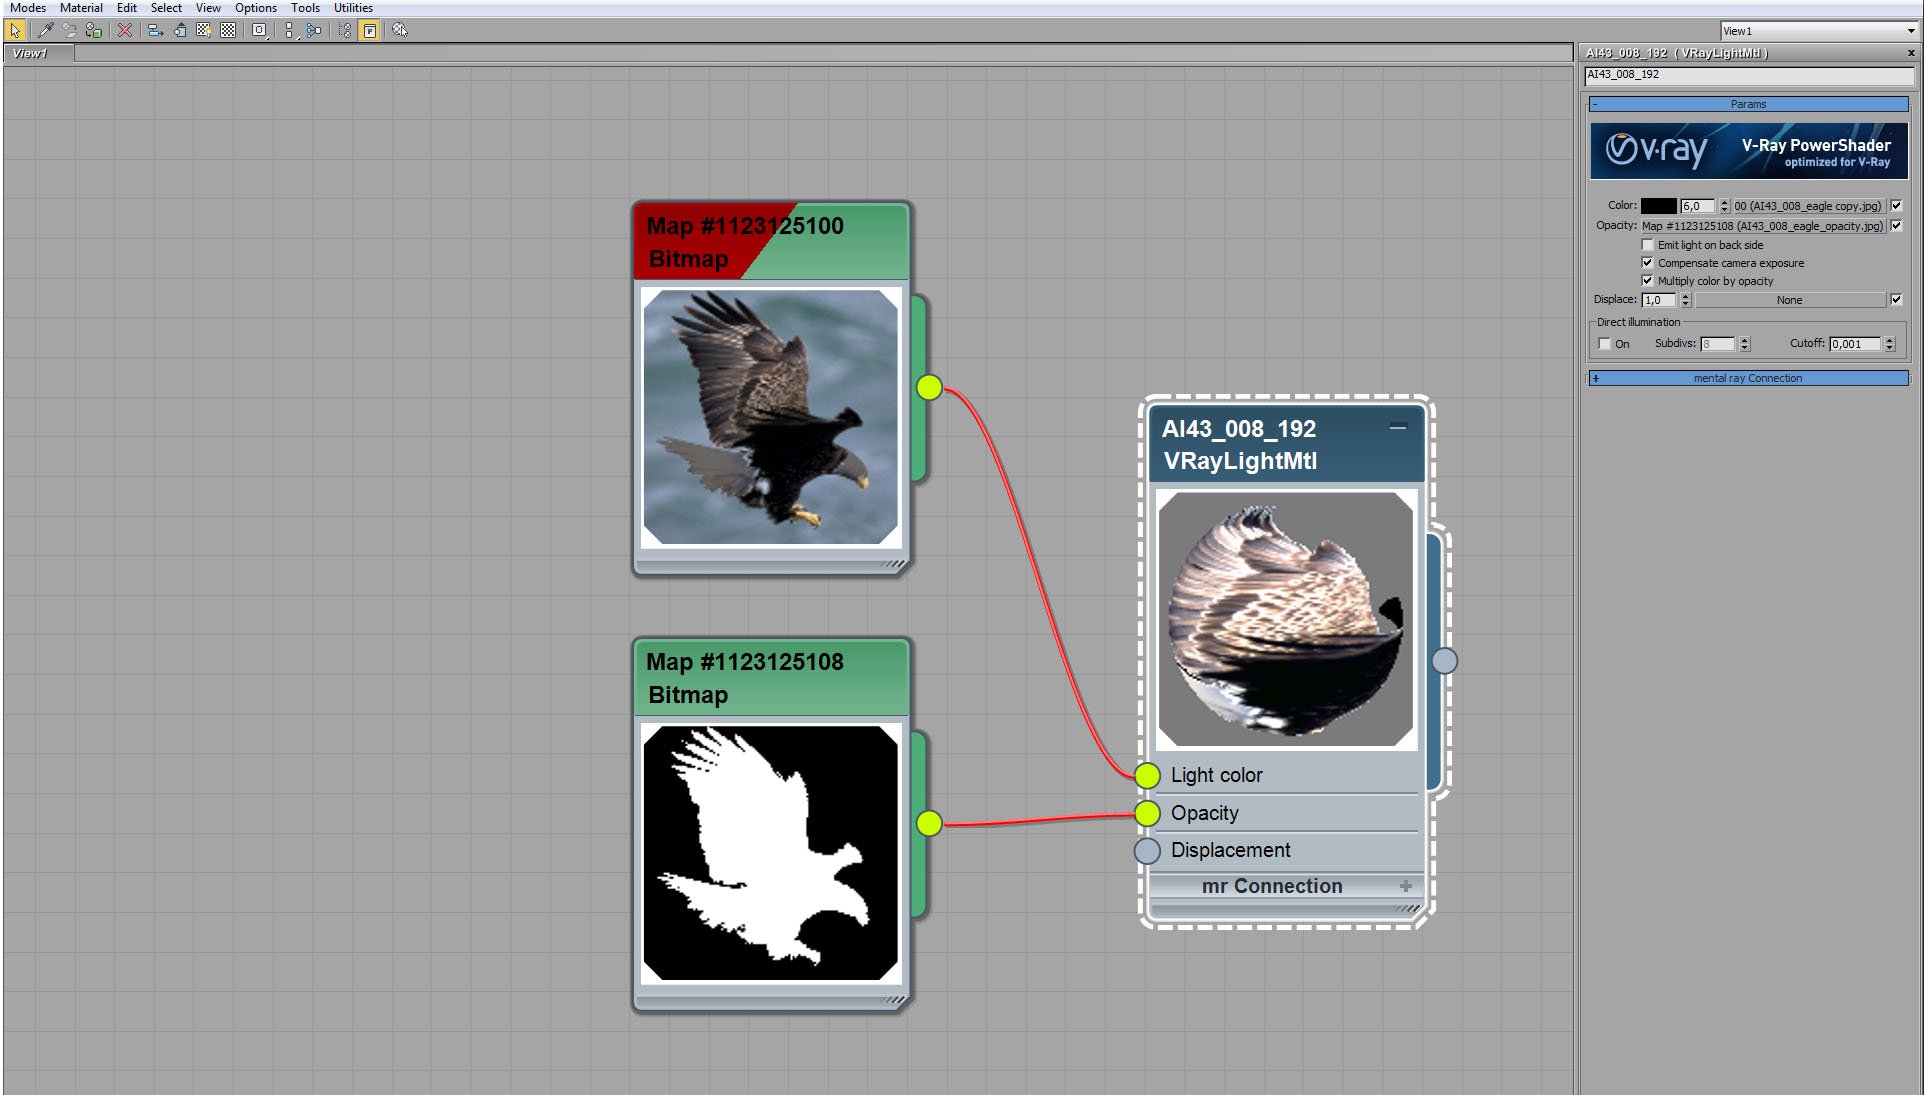
A bird is a bitmap on plane.


Click on image to enlargenr_ai42_s08__0009_Layer_44_721.jpg
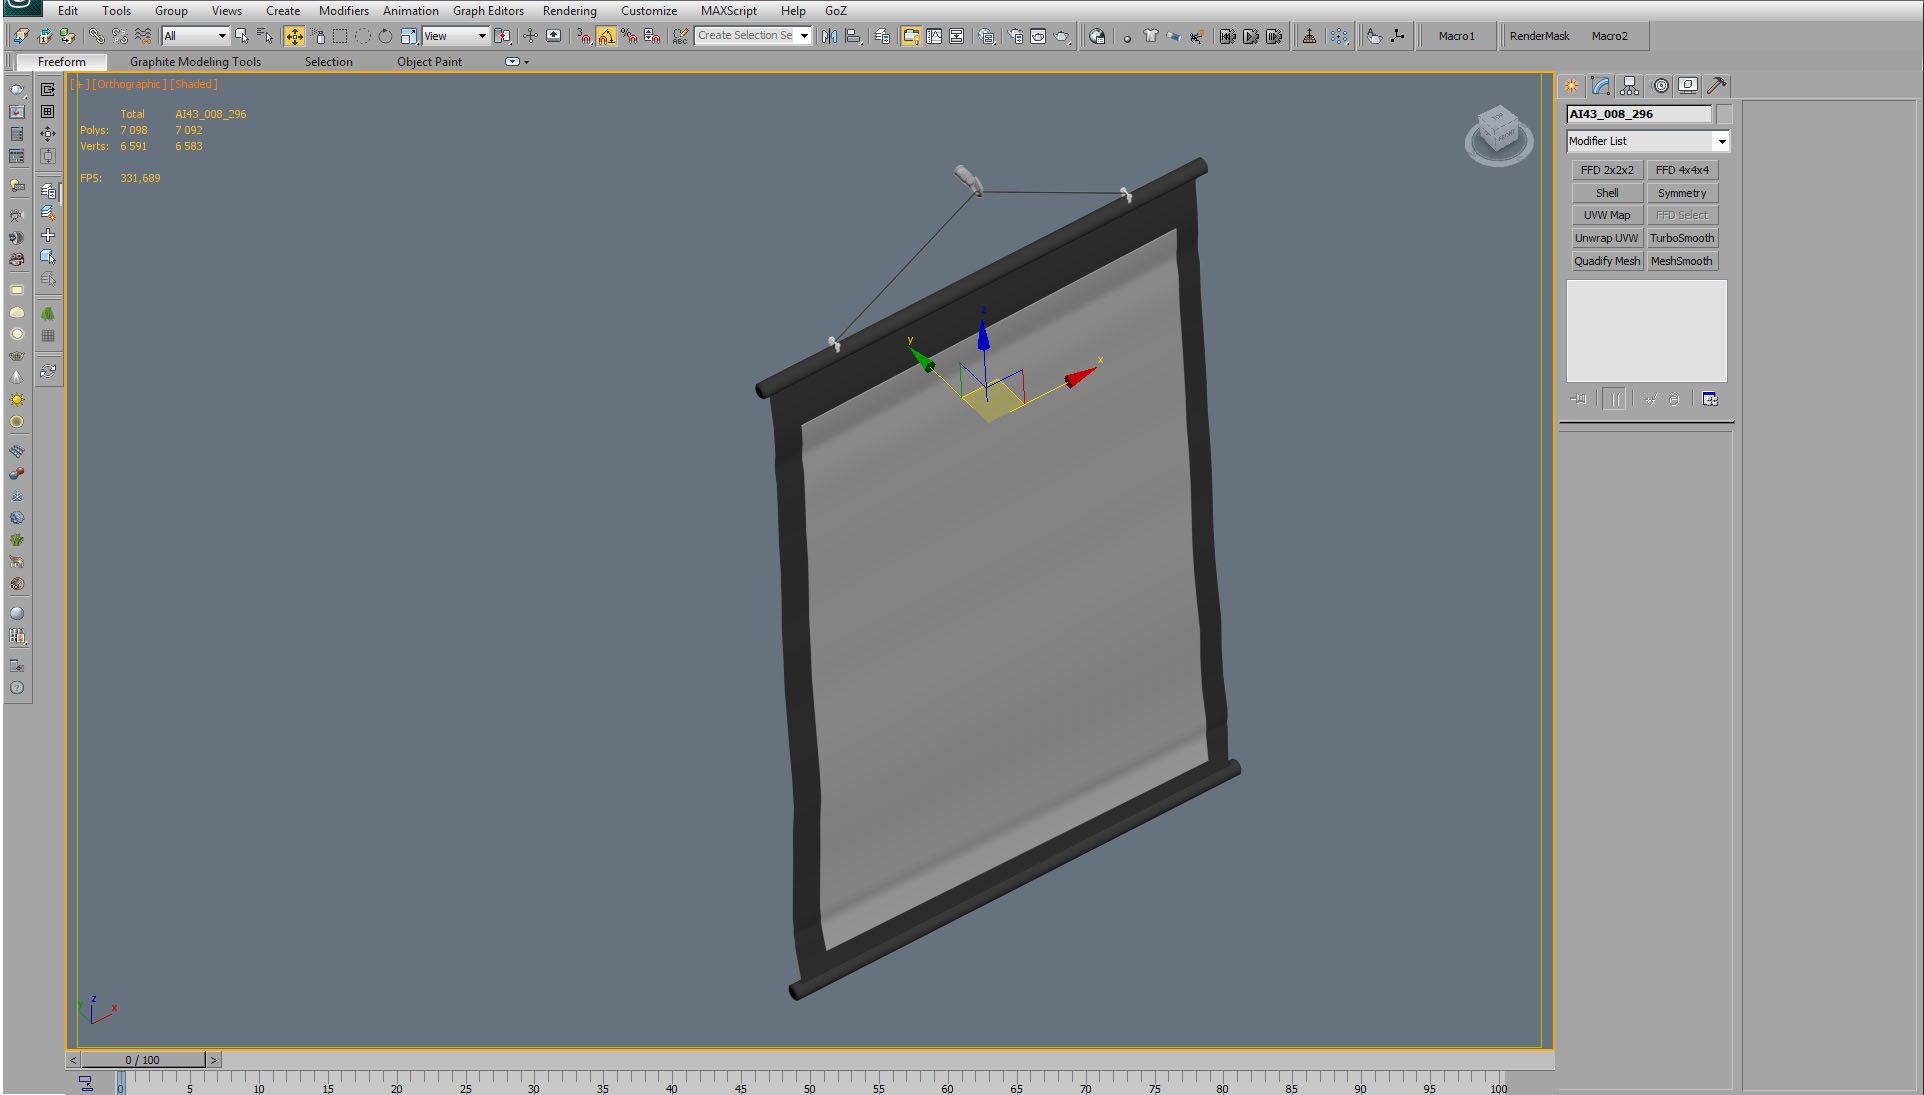
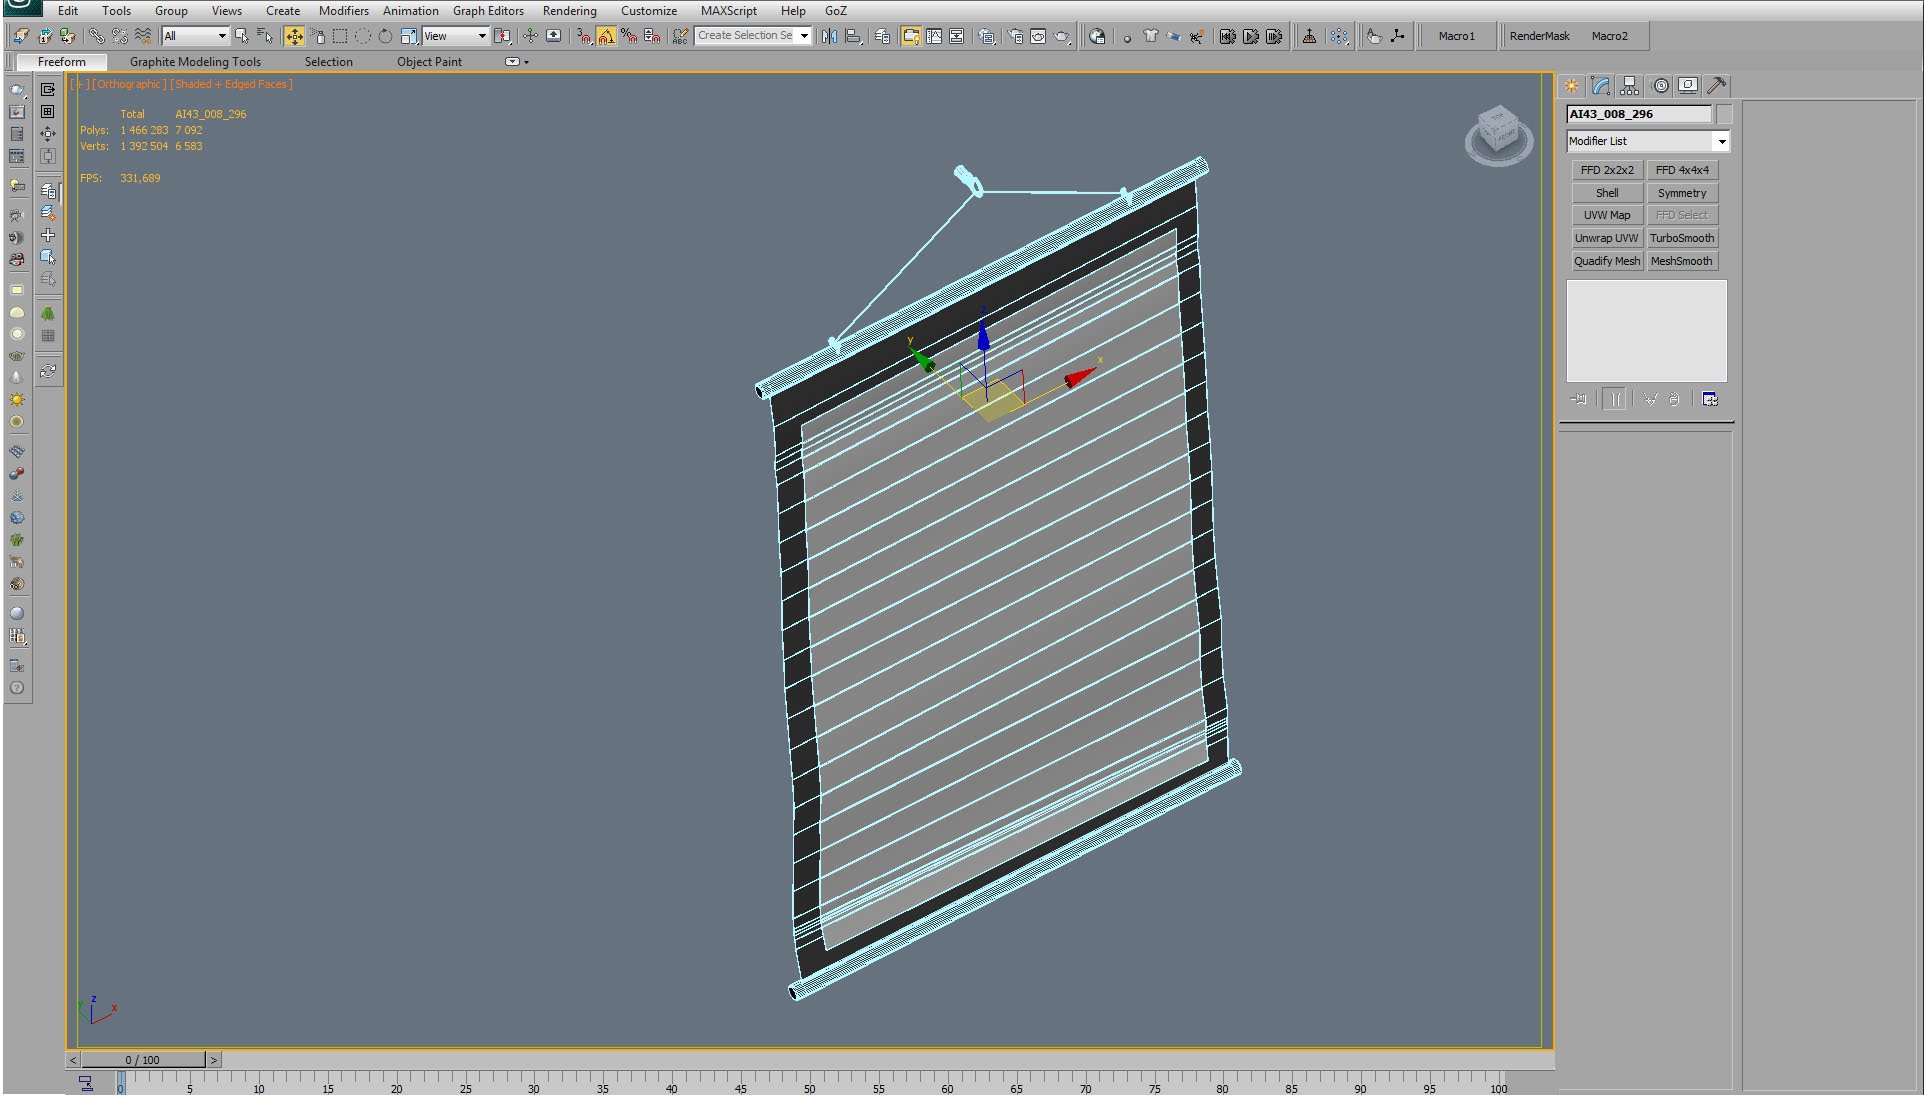
Prop mesh.
 

Click on image to enlargenr_ai42_s08__0008_Layer_45_720.jpg

Prop mesh / wireframe.


Click on image to enlargenr_ai42_s08__0007_Layer_46_719.jpg
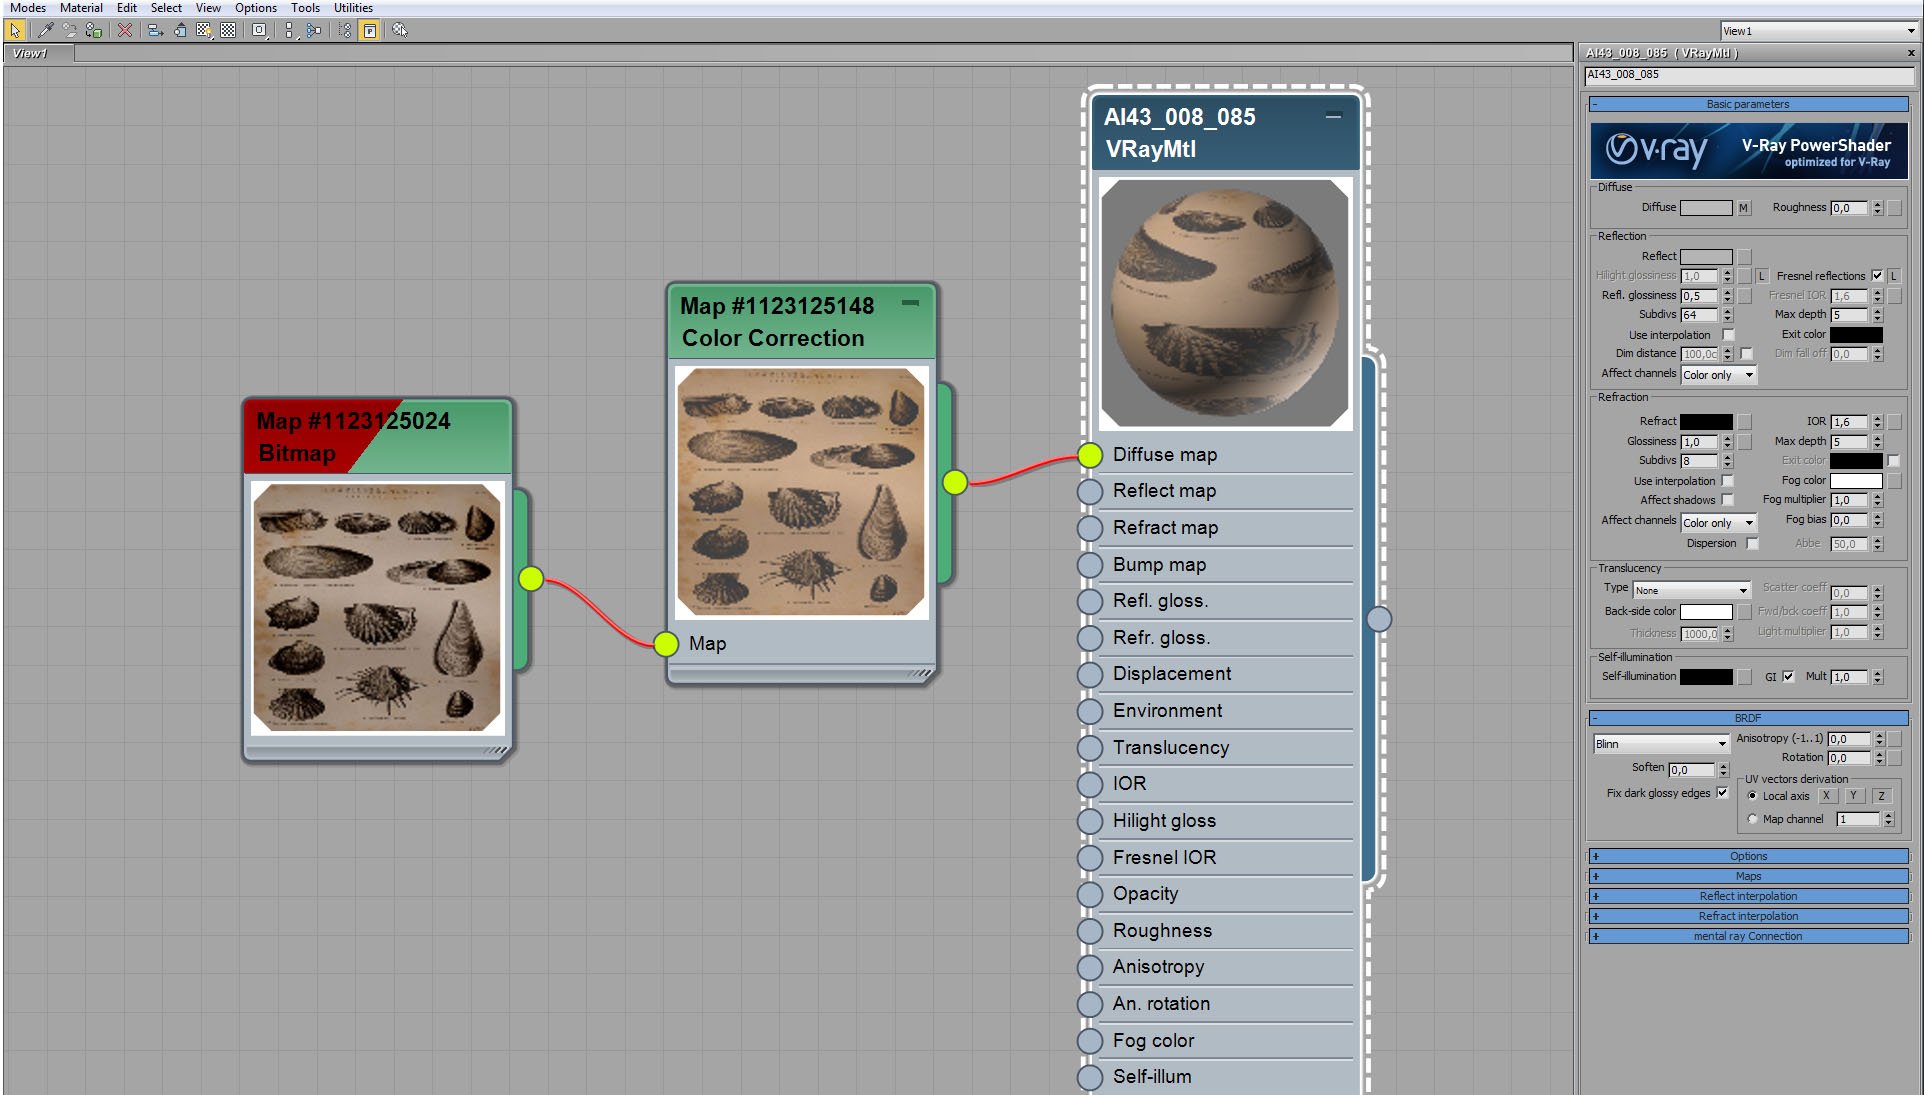
Prop material.


Click on image to enlargenr_render_settings_718.jpg

Render settings.


Click on image to enlarge
nr_AI43_008_raw_756.jpg

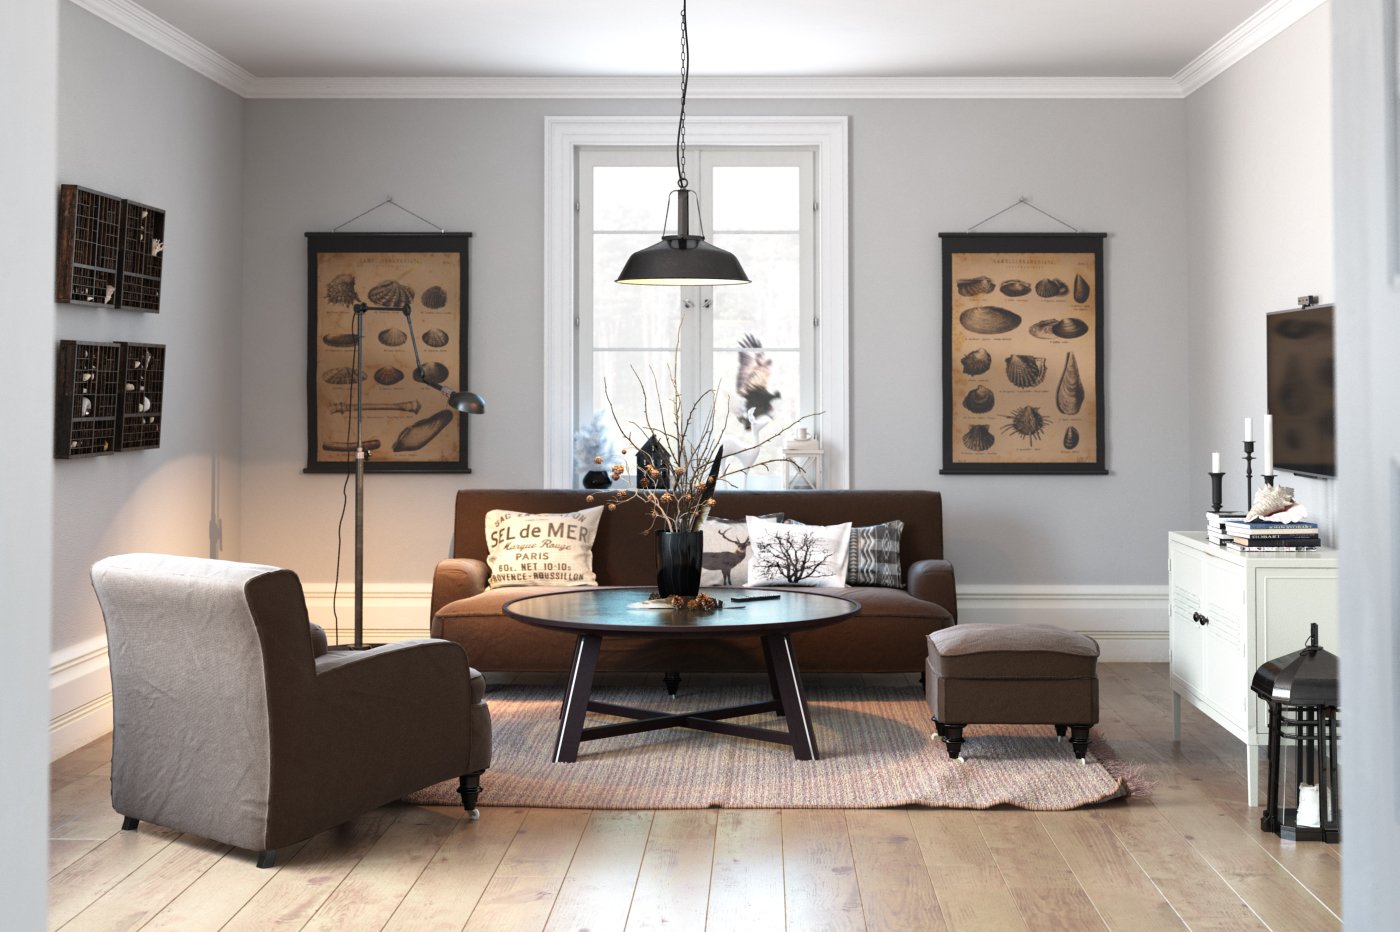
Raw render.


Click on image to enlarge

nr_ps_stack_717.jpg

Photoshop stack. First, we added specular layer (screen, 50%), then we added refraction layers with blur (so we have now nice glow in the window area). Sun and Light select layers make lighting more prominent. Color balance 1 makes the image colder, hue / saturation layer desaturates it a bit and curves ("s" shape) bring more contrast to this image.
 

This exterior scene was made by Ireneusz Jaworski from Evermotion. It was set in 3ds Max and rendered in V-Ray. 

You can:

Click on image to enlargenr_AI43_008_PP_755.jpg

This if the final scene after post-production.Thank you for reading! :)


Author: Michał Franczak Editor: Michał Franczak
Tags: archinteriors 43 ai43 scene8 vol.43
You may also like...
Making of Archinteriors vol. 29 scene

Making of Archinteriors vol. 29 scene

Hi! My name is Piotr Mroz and I work in Evermotion. I would like to show You how I made one of our interior visualizations.
×

LEAVE A COMMENT

You need to be logged in to leave a comment. Don't have account? Register now.

Everton Designer 17:54:17  |  08-07-2016
What are the windows of the light settings?
mbialecki 13:25:25  |  29-07-2016
Please, refine question or ask it in a different way :) I understand all the words but I can not catch sense, sorry :)
Everton Designer 19:29:11  |  02-08-2016
Sorry! My question corret is: What is the configuration / subdivision of lights VRay (Portals)? Congratulations, beautiful scene! :-)
mbialecki 08:01:14  |  11-08-2016
Hi Everton :) Sbdivs 256, OPTIONS>skylight portal>Simple - (faster render). Good day sir :)