Evermotion Pass 10% Off - Get Instant Access to Thousands of 3D Assets

Check Plans

Information Clause

In accordance with the art. 13 section 1 and 2 of the European Parliament and Council Regulation 2016/679 of the 27th April, 2016 on the protection of natural persons, with regard to the processing of personal data and on the free movement of such data, and repealing Directive 95/46/EC (General Data Protection Regulation), hereafter RODO, I hereby inform that:

1. EVERMOTION S.C., 8 Przędzalniana Str., 15-688 Białystok, Poland is the Administrator of your Personal Data (APD)

2. Data Protection Inspector can be reached through e-mail: iod@evermotion.org

3. Your personal data are to be processed on the basis of art. 6 section 1 letter a, b and f of RODO in order to:
a) prepare, conclude and execute the agreement and for other purposes approved by you,
b) to execute the legitimate interest like marketing of products and the agreement, claim assertion or defence against claims resulting from the law regulations.

4. Entities entitled to the reception of your personal data may be the authorised public bodies; mail providers; providers of the services covered by the agreement; responsible for debt recovery, keeping the archives, document utilization, legal consulting, technical services, IT services and accountancy.

5. Your personal data shall not be transferred to the third country, nor to the international bodies.

6. Your personal data shall be processed within the period of the agreement and upon your additional consent until you withdraw it. APD shall keep the data for the period of any civil law claim execution connected with the agreement.

7. You have the right to demand an access to your personal data, to correct or to delete the data if there is no other basis for the processing or any other purpose of such processing or to limit the processing of the data, to transfer the data to another administrator and to raise objections to the further data processing if there is no legal basis for further processing and to withdraw any previous consent.

8. You provide the personal data voluntarily, however they are necessary to conclude the agreement. The refusal of providing such data may result in the refusal of the agreement conclusion.

9. You have the right to lodge a complaint to the Personal Data Protection Office when in your opinion the data processing violates the regulations of General Data Protection Regulation of the 27 April, 2016 (RODO).

10. Your data will be automatically processed, including the form of profiling.
11. You are obligated to forward above mentioned information to your representative, especially if you appointed this person in the agreement as the contact person or as the representative for the agreement execution.

OK

Seven pro tips that will improve your Unreal visualizations

Michał Franczak 2015-09-15 10:50 tutorial  > Unreal Engine  > modeling

Tips for arch-viz artists working with Unreal Engine.

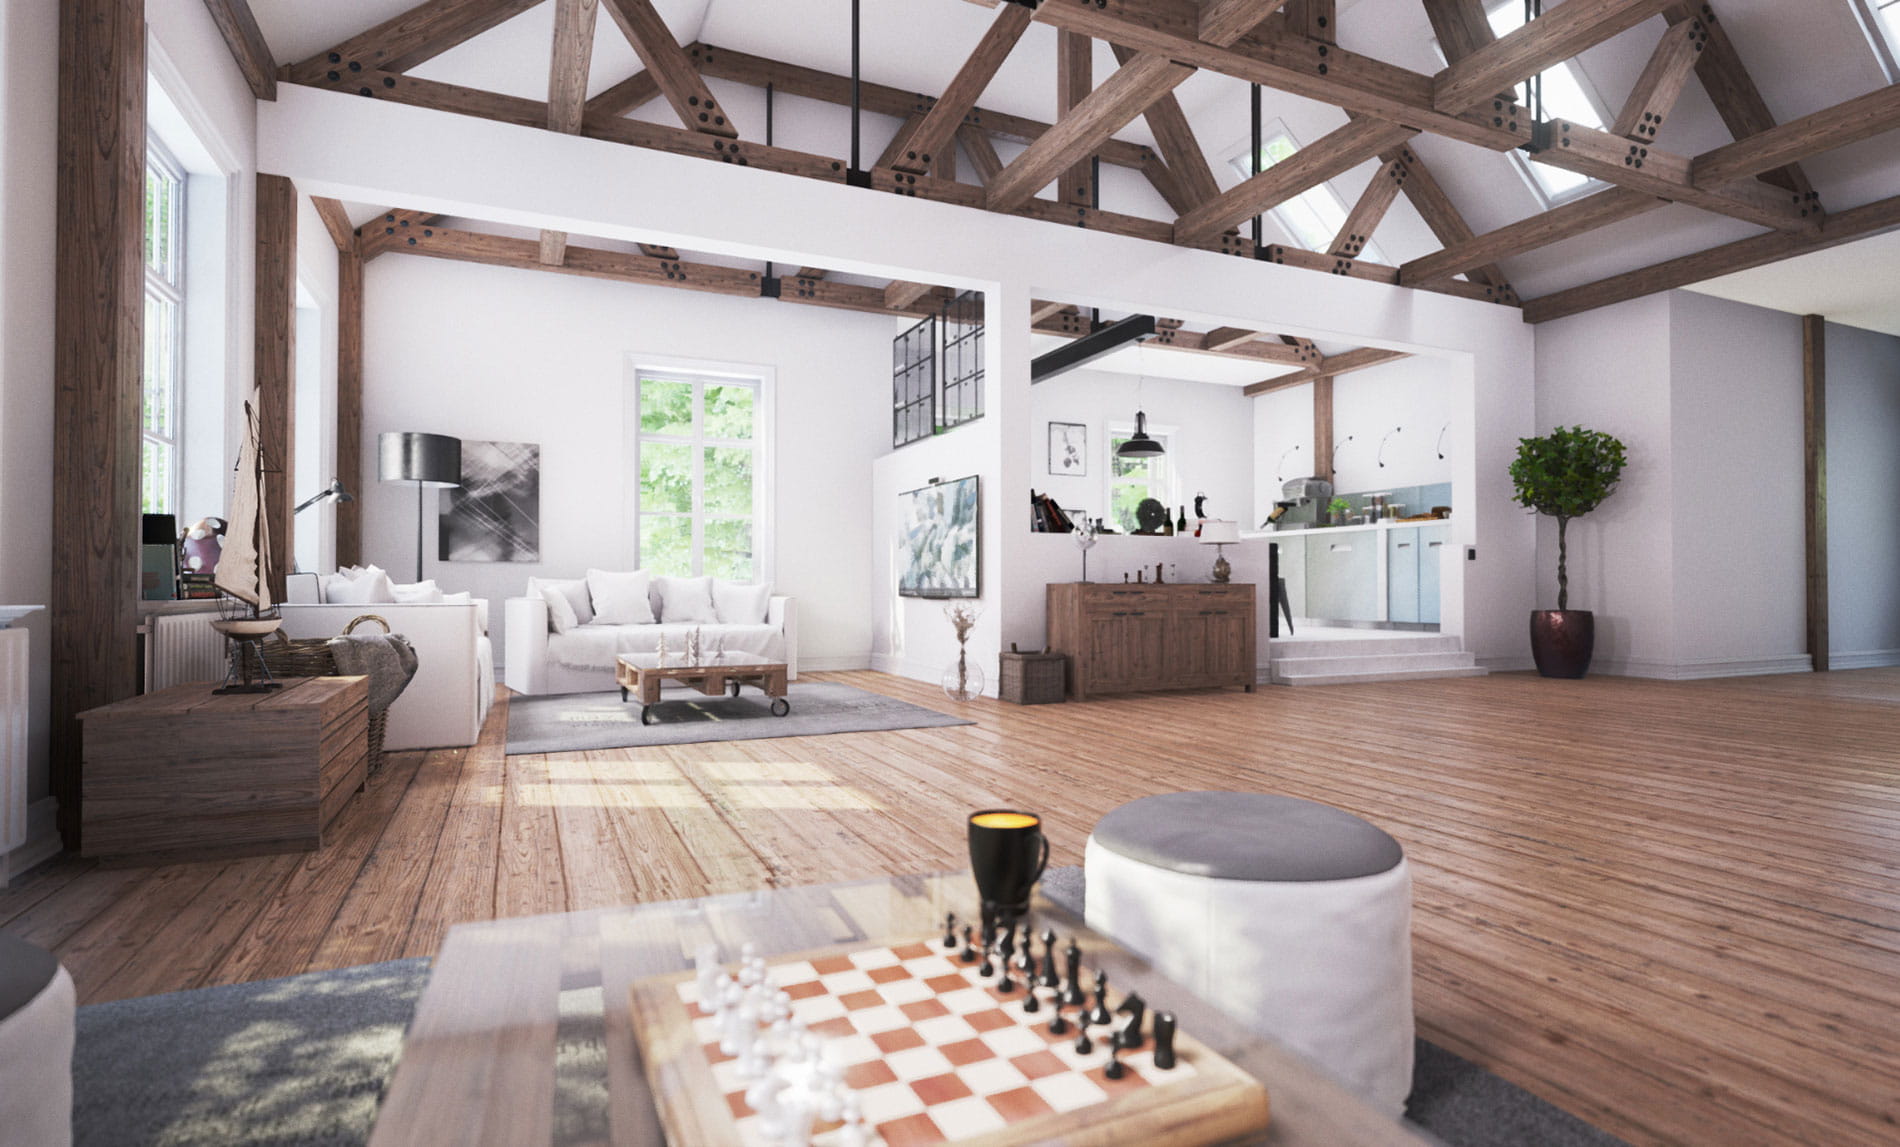
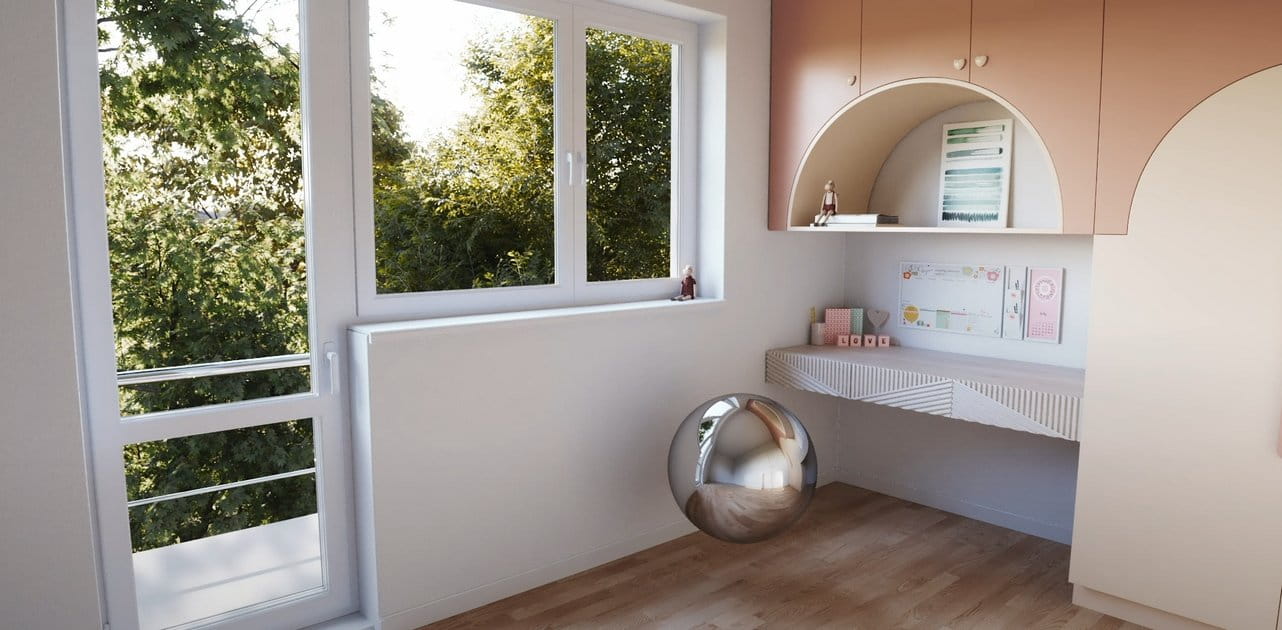
We made seven tips to help you to max out Archinteriors for UE vol. 2 experience. You can watch videos or read the text - both cover the same general aspects, text version goes deeper into details.

Table of contents:

Buy Archinteriors for UE vol. 2 in Evermotion Shop.

Tip 1 - How to import Evermotion models to new scenes (Migrate)

After opening the project file we can see basic Unreal 4.9.0 workspace, divided into 5 different tabs – we will be only interested in 3 of them – 3d viewport, Content Browser and World Outliner.

Click on image to enlargenr_pic_01_714.jpg

3d viewport navigation is fairly simple – we can use standard maya/3ds max navigation or use WSAD keys with Right Mouse Button pressed.


Click on image to enlargenr_pic_02_715.jpg

If we select any model if will be automatically selected in World Outliner and in Detail View – to show it in content browser we need to Right click and select show in Content Browser. This option is available through 3d viewport, World Outliner and as Magnifying Glass icon in Details panel.


Click on image to enlargenr_pic_03_716.jpg

In Content Browser after clicking with right mouse button we'll have few additional options – we are interested in Asset Actions – Migrate.
 

This option not only copies the mesh but also its materials and textures – that's why a good and clean folder hierarchy is recommended. 

Click on image to enlargenr_pic_04_717.jpg

You don't want to put all your assets in one folder, because it can get clumped very fast. First we will be asked if we want to save the scene – if the content which we migrate is saved another save is not necessary.


Click on image to enlargenr_pic_05_718.jpg

Then we get Asset Report with info what content will be migrated to the new project.
 

Next we need to choose where we want to migrate the models – it always needs to be “Content” folder of another project (otherwise the dependences will get lost). 

Click on image to enlargenr_pic_06_719.jpg

Note: It's very important to choose “Content” because every asset in Unreal exe files is using relative paths. If you are working with network paths and don't see you drive you can simply navigate in Windows Explorer and copy&paste the path.


Click on image to enlargenr_pic_07_720.jpg

Now we just need to open our new project and the model can be found in Content Browser and drag&droped into 3d viewport.
 
  • If your materials aren't exported correctly make sure they are added in asset editor (RMB onto asset → Edit) instead of detail view (those are only overrides for objects and don't get exported). 
  • If you need the models in exact same place you can simply copy&paste them between project (of cousre they need to have same hierarchy in "Content" folder).
  • If assets aren't shown properly just close and open again your new project

Tip 2 - How to export model or texture from Unreal Engine


It's important to note that migrate moves only .uasset files (every asset – mesh, material, texture – is converted to this format) but if we want to modify it we need to export if first to a format acceptable for other softwares (fbx for 3d meshes, and tga for textures). 

Click on image to enlargenr_pic_08_721.jpg

The process is same as with migrate – RMB click onto asset → Asset Action → Export
 
  • If you are using other software than 3ds Max (eg. Blender) fbx is still preferable because it allows for multiple uv channels. 
  • Export can also be used to copy models between projects but because it looses materials it's not recommended.

Tip 3 - Creating and modyfing materials


Click on image to enlargenr_img_03_01_745.jpg

In latest Archinteriors for Unreal we used slightly modified approach to materials – we created few base shaders and used material instances. This way we can have realtime interactive preview and unification in shaders (it also saves a lot of time)


If you want to know more about material instances you should see official Unreal tutorials:


Almost all materials are instances of BaseMat – used for surfaces which don't need opacity. The goal was to mimic some of 3dsmax and Vray material functionality (Diffuse, Roughness = inverse of Glossiness; Specular = Reflection) with taking into account that Unreal uses PBR materials (additional Metallic channel).

Click on image to enlargenr_img_03_02_746.jpg

One of differences between V-ray and Unreal shaders is that Unreal metallic shaders use diffuse color for tinting reflections. Each material comes with Color and Texture inputs, UV options (offset texture, 3ds max „real world scale” size, uv rotate) but also basic color correction (contrast, color overlay).


Click on image to enlargenr_img_03_03_747.jpg

 You can achieve bumpiness with normal maps or black and white bump texture. You can also overlay b&w texture onto normal map as a detail map (for eg. if you want to have a couch with wrinkles and fabric detail texture).


Click on image to enlargenr_img_03_04_722.jpg

For glass surfaces we created BaseTranslucent material with Fresnel angle based opacity and refraction.


Click on image to enlargenr_img_03_05_723.jpg

For fur / short grass we used displacement shader. If displacement is too big and intersects other geometry it can lead to flickering during animation or walktrough.


Click on image to enlargenr_img_03_06_724.jpg

All plants in Archinteriors for UE vol. 2 use 2-sided foliage and are animation ready (with basic controls, like for eg. speed and intensity of wind).
 

Note: for proper animation trees require vertex paint (our models are vertex painted of course!).


Tip 4 - UV mapping


Another new thing that we put in Archinteriors for UE vol. 2 are multiple uv channels and 3ds max „real world scale” (this way one 3ds max unit equals 1cm of texture). We can easily exchange materials between scenes and models without worrying about wrong scale. 

Click on image to enlargenr_img_04_01_725.jpg

Example: wooden floor material looks just as good on a wall as on other objects.
 

Note: the only disadvantage of this technique is that Unreal material preview (ball) doesn't show textures in a right scale. There is a workaround – you can use custom object or just check your materials in viewport. 

Click on image to enlargenr_img_04_02_726.jpg

UV channel 1 is reserved for lightmaps in all our models (we unwrapped most of our objects with dedicated plugin – Flatiron. To ensure of good quality we also unwrapped some of objects with Blender carefully by hand.
 

Note: if needed we also added additional uv channel (in range between 0 and 1) for custom details or normal maps that are shared between many objects.


Tip 5 - doors interaction


Note: if you want to know more about blueprints please visit this link:


Click on image to enlargenr_img_05_01_727.jpg

In Archinteriors for UE vol. 2 we added simple interactivity – doors can be opened or closed with RMB click.
 

Of course the blueprint is highly customizable. It's made of three elements:

Click on image to enlargenr_img_05_02_728.jpg

1. Box Trigger object – it's used for interaction, if player steps into box volume, keyboard is unlocked and mouse icon is shown


Click on image to enlargenr_img_05_03_729.jpg

StaticMesh – it's the place where we choose our door mesh (it's important that it has its pivot placed at hinges)


Click on image to enlargenr_img_05_04_730.jpg

MaterialBillboard1 – here we add and configure the icon (sprite) which will indicate player what kind of interaction is allowed.


Click on image to enlargenr_img_05_05_731.jpg

Each of these elements has its associated nodes in Event Graph. This part of graph is responsible for collision with trigger object – if the player walks into „Box” trigger volume (OnComponentBeginOverlap) keyboard and mouse are unlocked (Enable Input) and our icon becomes visible (Set Visiblity). After leaving the „Box” volume keyboard is locked again and icon becomes invisible.


Click on image to enlargenr_img_05_06_732.jpg

The part of graph below is responsible for handling the door. Event Begin Play – this node will be always executed when you will start game/walktrough. Here we set „rest position” for doors (they are closed and player needs to open them to pass to other room). Then, when player walks into Box and after clicking Right Mouse Button we can execute an event. It is based on FlipFlop node. First Right Click executes „Play” (opens the door), right clicking again reverses animation and closes the door.


Click on image to enlargenr_img_05_07_733.jpg

This animation graph (a simple Float track) is used to set interpolation between keyframes. It's linear in this case – which means that the speed of animation is constant. Our animation is one second long. You can set duration of the animation in the „Length” box above the graph.


Click on image to enlargenr_img_05_08_734.jpg

Timeline uses "Update" output to execute each frame "Set Relative Rotation" node by amount specified in Lerp (Rotator) – this simply says the door to open/close.


Click on image to enlargenr_img_05_09_735.jpg

The last part is used to move our icon to the other side of door - so when we walk into room, we can still see it.
 
  • Values for Lerps are relative to actual blueprint position/rotation
  • We could use Matinee animation instead of these nodes but this way it's a bit easier to exchange nodes and build upon more complicated blueprints.

Click on image to enlargenr_img_05_10_736.jpg

Last thing worth mentioning is Construction Script which is executed always when we create or move our Door Blueprint – it's just sets the door in „open” position (other way we would get black borders after light bake).


Tip 6 – IES lights interaction


Click on image to enlargenr_img_06_01_737.jpg

Another example of interactive blueprint is the use of IES lights – they are a bit more complicated than interactive doors because we want one trigger to turn on/off many specific lights and have ability to move each light separately.


Note: it is recommended to first see this videos about blueprint communication:


These interactive lights are split as two blueprints – first one is the trigger and the second are the lights. Light Trigger is made almost the same way the doors were – instead of having geometry inside, it communicates with other blueprints.

Click on image to enlargenr_img_06_02_738.jpg

Example: After pressing Left Mouse Button we tell the blueprint to find all Lights associated with this trigger („Get All Actors Of Class” - every blueprint is a custom class). Then for every one of them („ForEachLoop”) we execute „IES Visibility” event.  „IES Visibilty” is a custom event made in another blueprint (in this case in „Livingroom_IES_00”).


Click on image to enlargenr_img_06_03_739.jpg

Lights associated with the trigger are very simple – when the Event BeginPlay is executed (for eg. by pressing play) the light is hidden and we need to execute IES_Visibility event to turn it on/off.  Advantage -  if we add another lights (duplicates of specific IES Light blueprint), they are automatically taken into account.
 

Note: if duplicated blueprints (Trigger and IES_Light) are not working correctly (you get error while compiling) make sure IES_Light is saved and compiled . Then manually add again 3 last nodes: Get All Actors Of Class; ForEachLoop and IES Visibility to the trigger.


Tip 7 - Rendering – achieving better quality


Most of default unreal settings are well suited for games, but if we want to make high quality archviz renders, we need to change a few things:

Click on image to enlargenr_img_07_01_740.jpg

Lighmass quality – lighmass is Unreal way of dealing with global illumination (it's similar to Vray lightcache/irradiance map). It first computes bounces of light and then bakes them to lightmaps (that's why there can't be any uv overlaps or mirroring). Most of Lightmass quality settings can be found in World tab.
 

Four options are most important:

  • Static Lighting Level Scale – the smaller scale the more samples are emitted. Too small values can produce lighting artifacts, or give visible patterns
  • Num Indirect Lighting Bounces – this setting controls how many times light will bounce
  • Indirect Lighting Quality – it is the most important slider. It's locked at 4. If you want to achieve higher quality, you need to click on the number and manually enter „10” value. Increasing Indirect Lighting Quality value has the big impact on Lightmass bake time.
  • Indirect Lighting Smoothness – here you can control how much smoothing is added to all shadows (smaller values give crisp looking shadows but also can introduce artifacts).

If you still don't get satysfying results, you need to increase lightmap size of the models, the best way is to override default values.

Click on image to enlargenr_img_07_02_741.jpg

Lightmap resolution value has a big impact on baking time, so it's better to have lower resolution in Static Mesh settings (most of our models in Archinteriors for UE vol. 2 have Lightmap resolution between 128 and 256 to get the quickest preview lighting baking times). If you want to achieve even better quality, just override it in Details panel. If there are too many big light maps in the scene there can be errors during packaging a project to „exe” file. Remember that lightmaps are only textures that are streamed by engine to fixed buffer size. If buffer is full, engine loads mipmapped (scaled) much lower resolution textures. So if you have too many big maps, buffer will fill much quicker and you will get lower quality maps during streaming. You can also turn off streaming completely, but you will need a powerful machine to play the animation.
 

Note: if you need even higher quality you can edit BaseLightmass.ini (in C:\Program Files\Epic Games\4.9\Engine\Config), but it's beyond the scope of this tutorial.

Click on image to enlargenr_img_07_03_742.jpg

 Screen Space Reflections Quality. Unreal has two ways of dealing with reflections – using Refection Capture spheres and postproces Screen Space Reflection. The latter has much higher quality (Reflection Capture spheres are constrained by dx11, they can be max 128px in size).
 

Note: if you need higher quality you need to edit ScreenSpaceReflections.usf (in \Unreal Engine\4.x\Engine\Shaders\ See example)

Click on image to enlargenr_img_07_04_743.jpg

To get higher quality antialiasing we can add „Execute Console Command” node in level blueprint with „r.PostProcessAAQuality 6”
 

If you want more particles and from some reason you can't switch to gpu particles, execute another console command: "FX.MaxCPUParticlesPerEmitter" (default value is 1000, you may need to increase it).

Click on image to enlargenr_img_07_05_744.jpg

It's a good practice to render final output in at least 2 times bigger resolution than intended. Although you will get much slower playback, the quality boost is worth it. You can find this option in Global PostProcess (Misc → Screen Percentage)
 
Author: Michał Franczak Editor: Michał Franczak
Tags: archinteriors engine unreal ue
You may also like...
Making of Archinteriors vol. 32 scene

Making of Archinteriors vol. 32 scene

Andrew from Evermotion shows how he made Archinteriors vol. 32 scene using Blender for modeling and 3ds Max and VRay for lighting and rendering.
×

LEAVE A COMMENT

You need to be logged in to leave a comment. Don't have account? Register now.

+421media 01:32:23  |  16-09-2015
i think there is an error, the tip 1 and tip 2 videos seem to be the same...
dr_After 10:41:31  |  16-09-2015
421media - yes, thanks, fixed :)
poisxpto 19:09:01  |  20-09-2015
very good tutorial
Aaron Smithey 21:29:40  |  28-01-2016
I do not understand what the BP_IES and IES2 blueprints a for. What is the difference between them? Thanks, Aaron
martta 09:44:47  |  08-02-2016
Aaron Smithey: BP_IES and IES2 blueprints were base for all the other bluepints - the diffreneces is ies profile used. They are not required for other blueprints to work, but we left them if anybody would like to see where other blueprints came from (if you want to use them remember to connetct nodes in construcion script).
Tedesco 01:50:07  |  12-02-2017
Is there a way to override all materials to a single material so we can test lights? This is a common feature on renderers like Vray to speed up the lighting process.
saeeddaliri 13:51:26  |  03-03-2017
The Material Editor in the Tutorial is not the same as in my Unreal Engine. Is it a Plugin ???
giorgiodeleo 21:23:04  |  10-11-2019
Hi! Whre can I found the node 'Play' to improve the AA settings? Thanks, Giorgio