This interior scene was made in 3ds Max and V-Ray by Adam Zimirski / Evermotion. It is scene 4 from Archinteriors vol. 40. You can purchase this single scene or entire Archinteriors vol. 40 collection in Evermotion Shop. This scene is inspired by Adidas office in Shanghai.
Click on image to enlarge 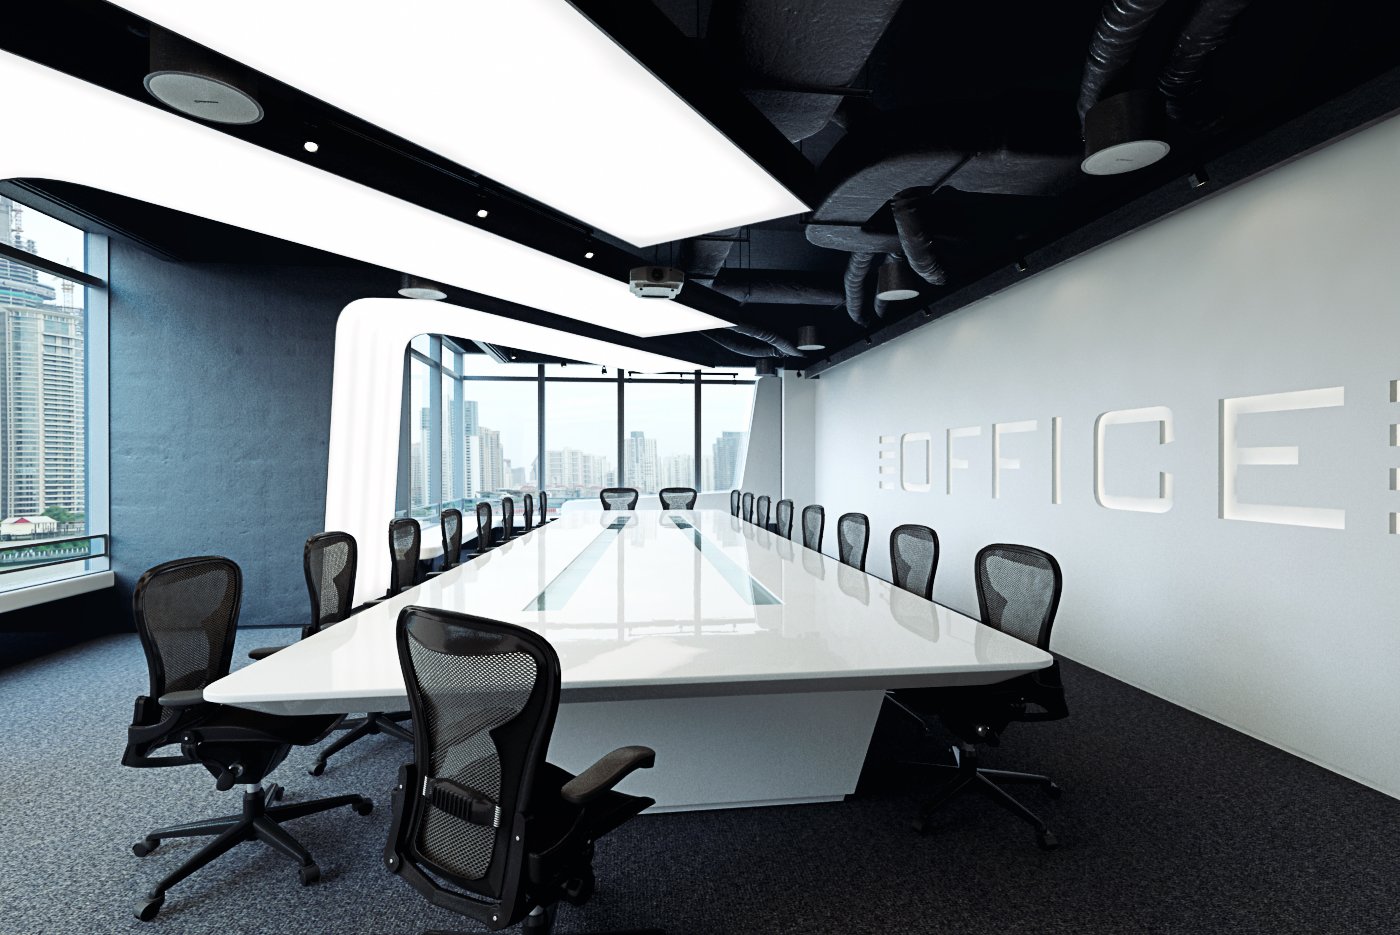
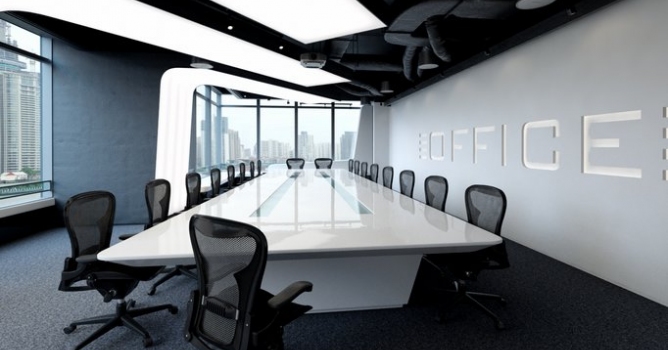
Final image after post-production. This is simple and quite small interior. Interesting things are: lighting panels on the left that are bending over the table and industrial ventilation pipes beneath the ceiling. Although the space is small, it is lit by many light sources.
Click on image to enlarge 
Click on image to enlarge 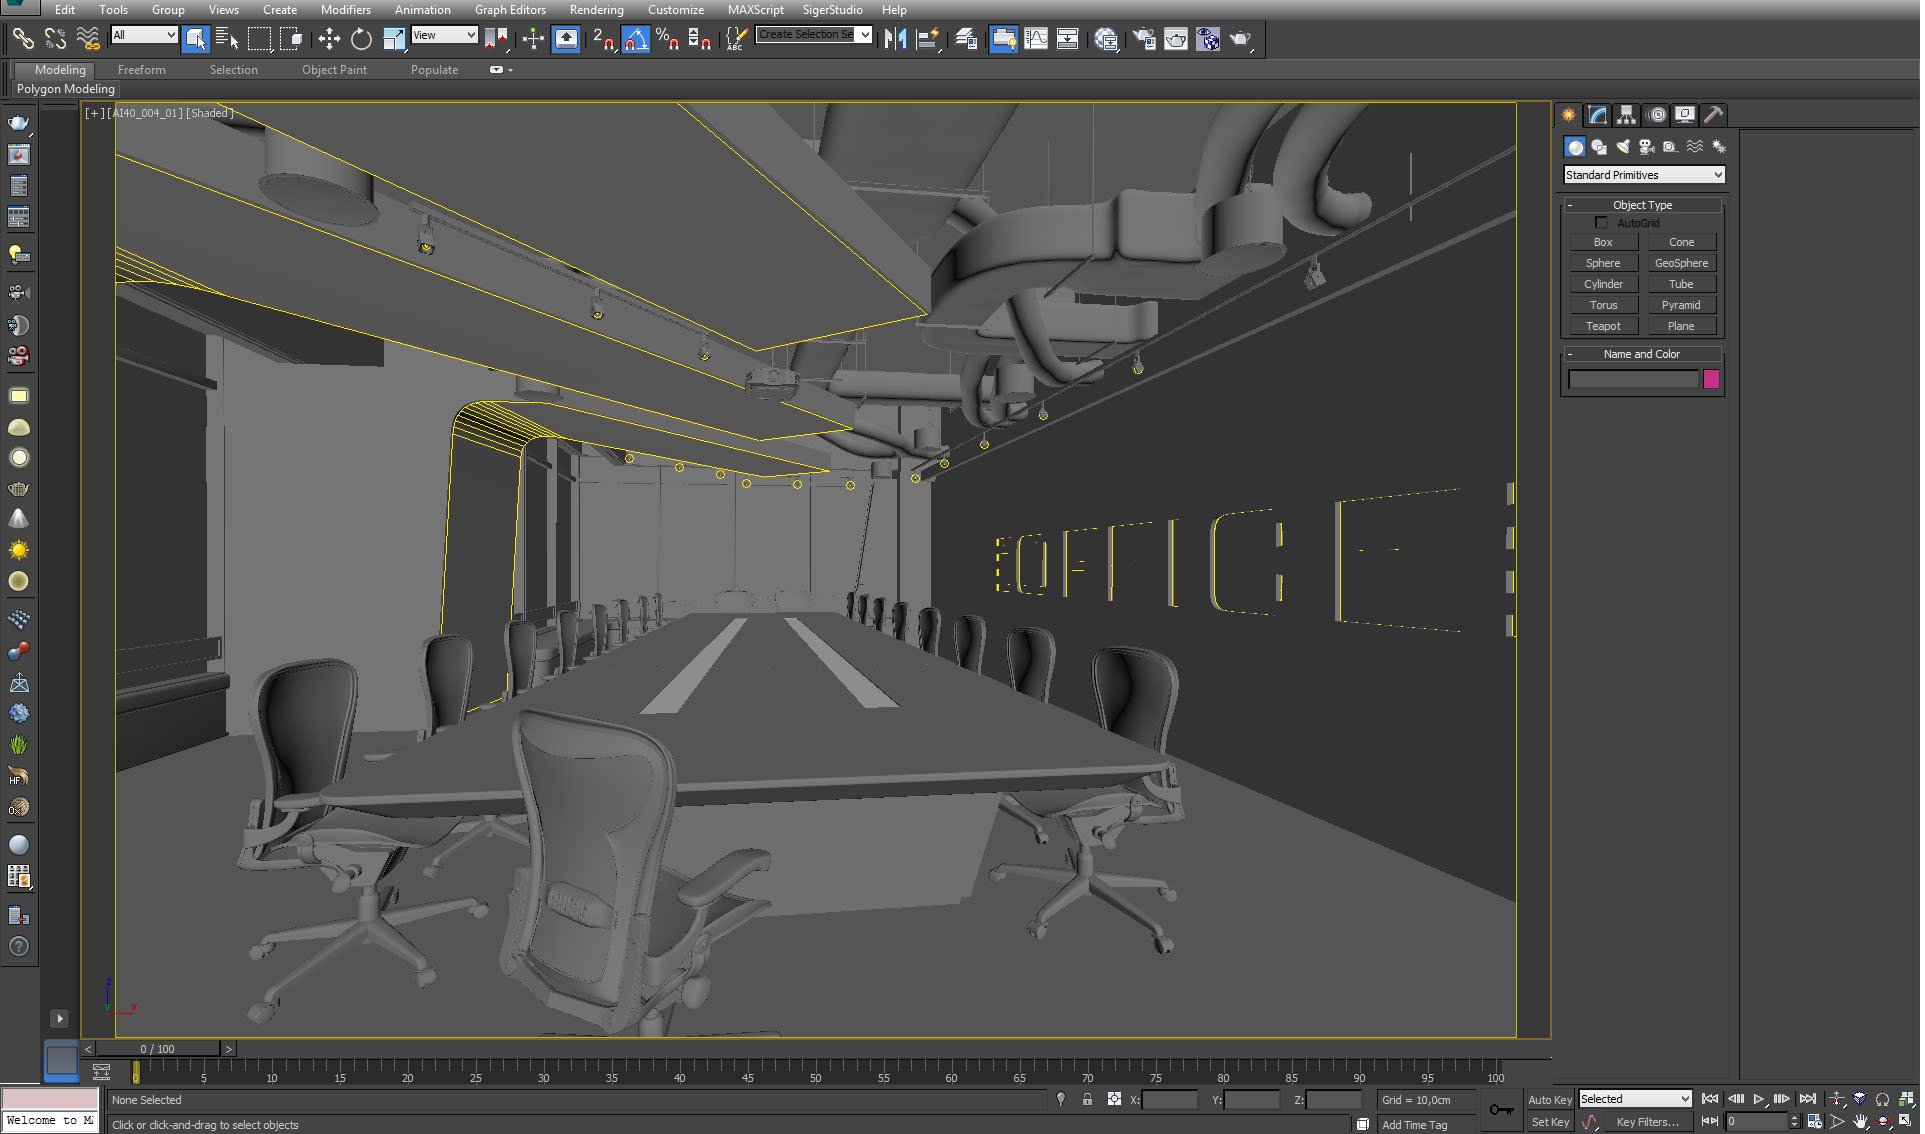
3ds Max viewport. View from camera.
Click on image to enlarge 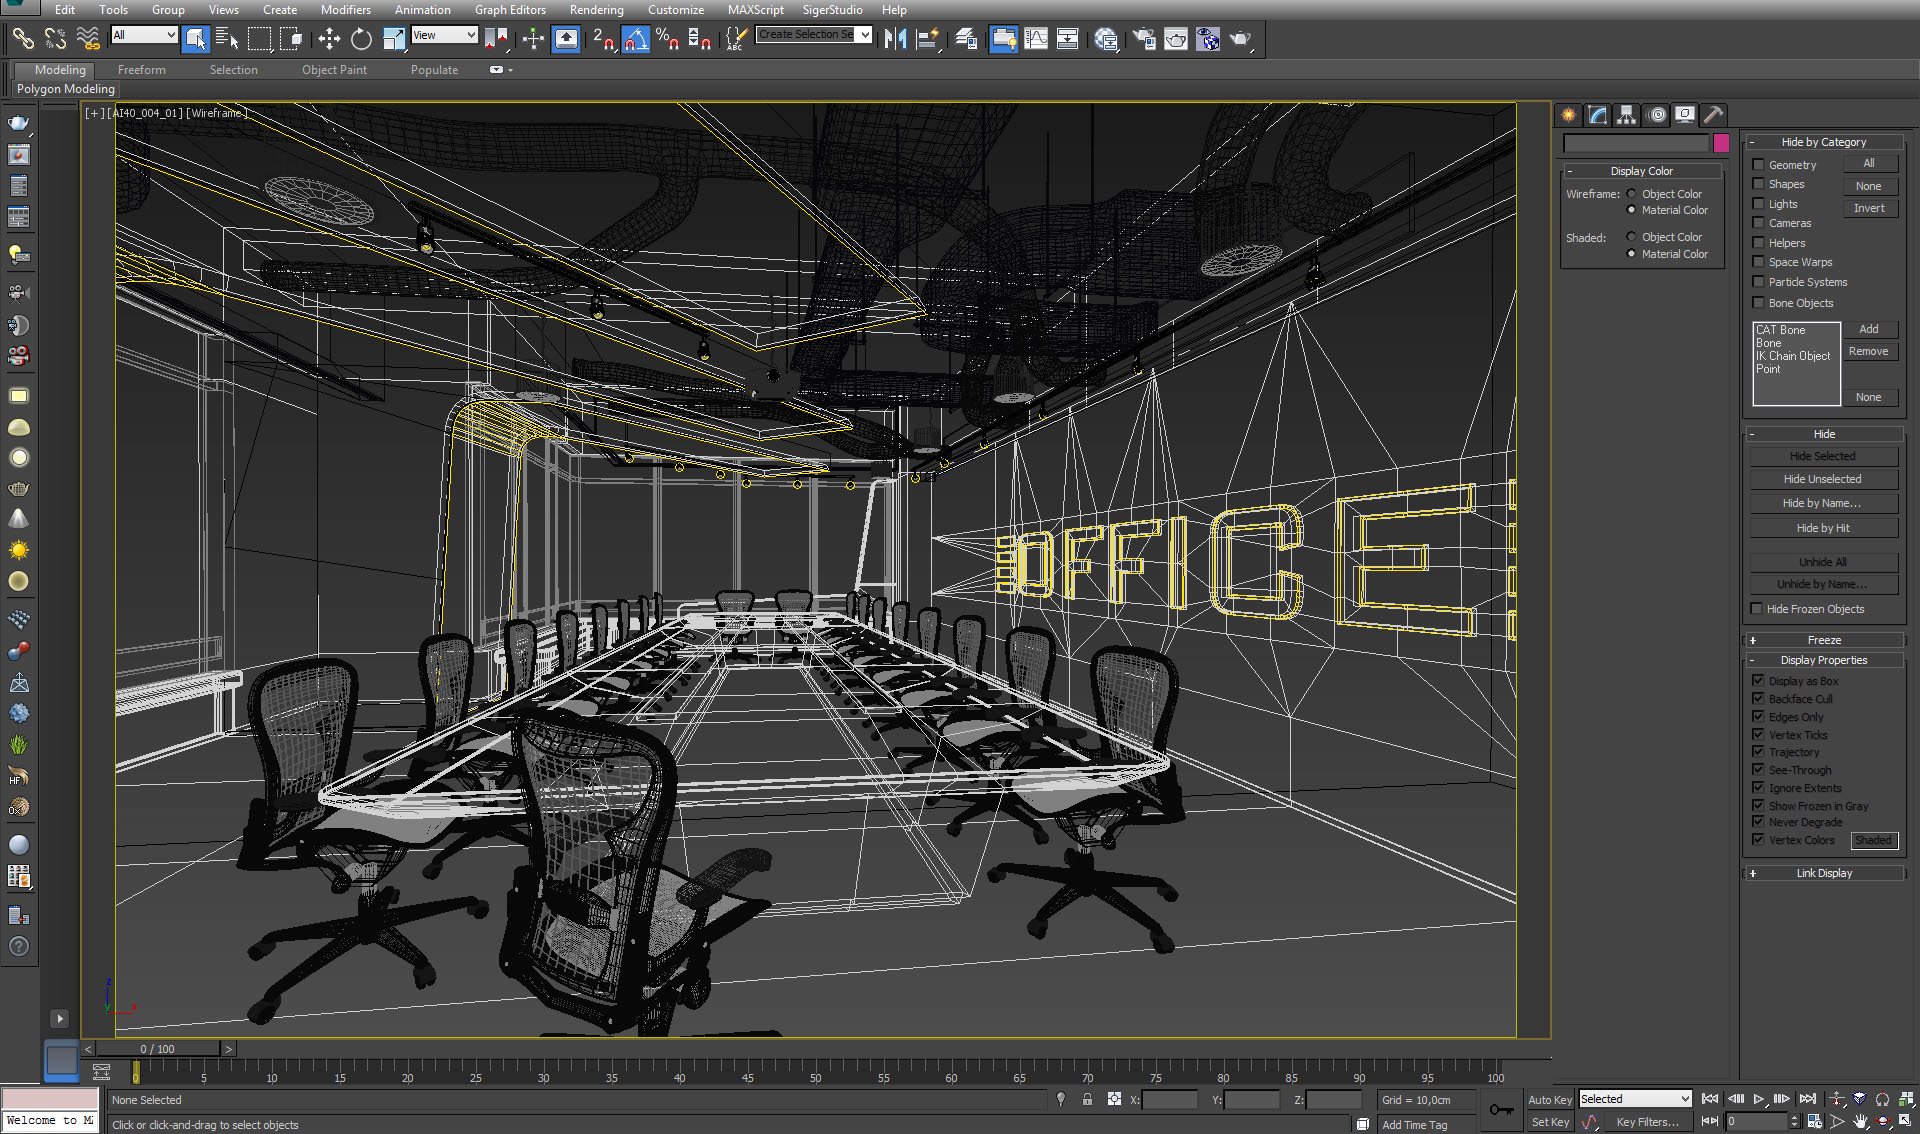
View from the camera + wireframe. As you can see, we put Vray lights in the panels on the left, there is also light in the shape of "Office" logotype and many small lights in the ceiling.
Click on image to enlarge 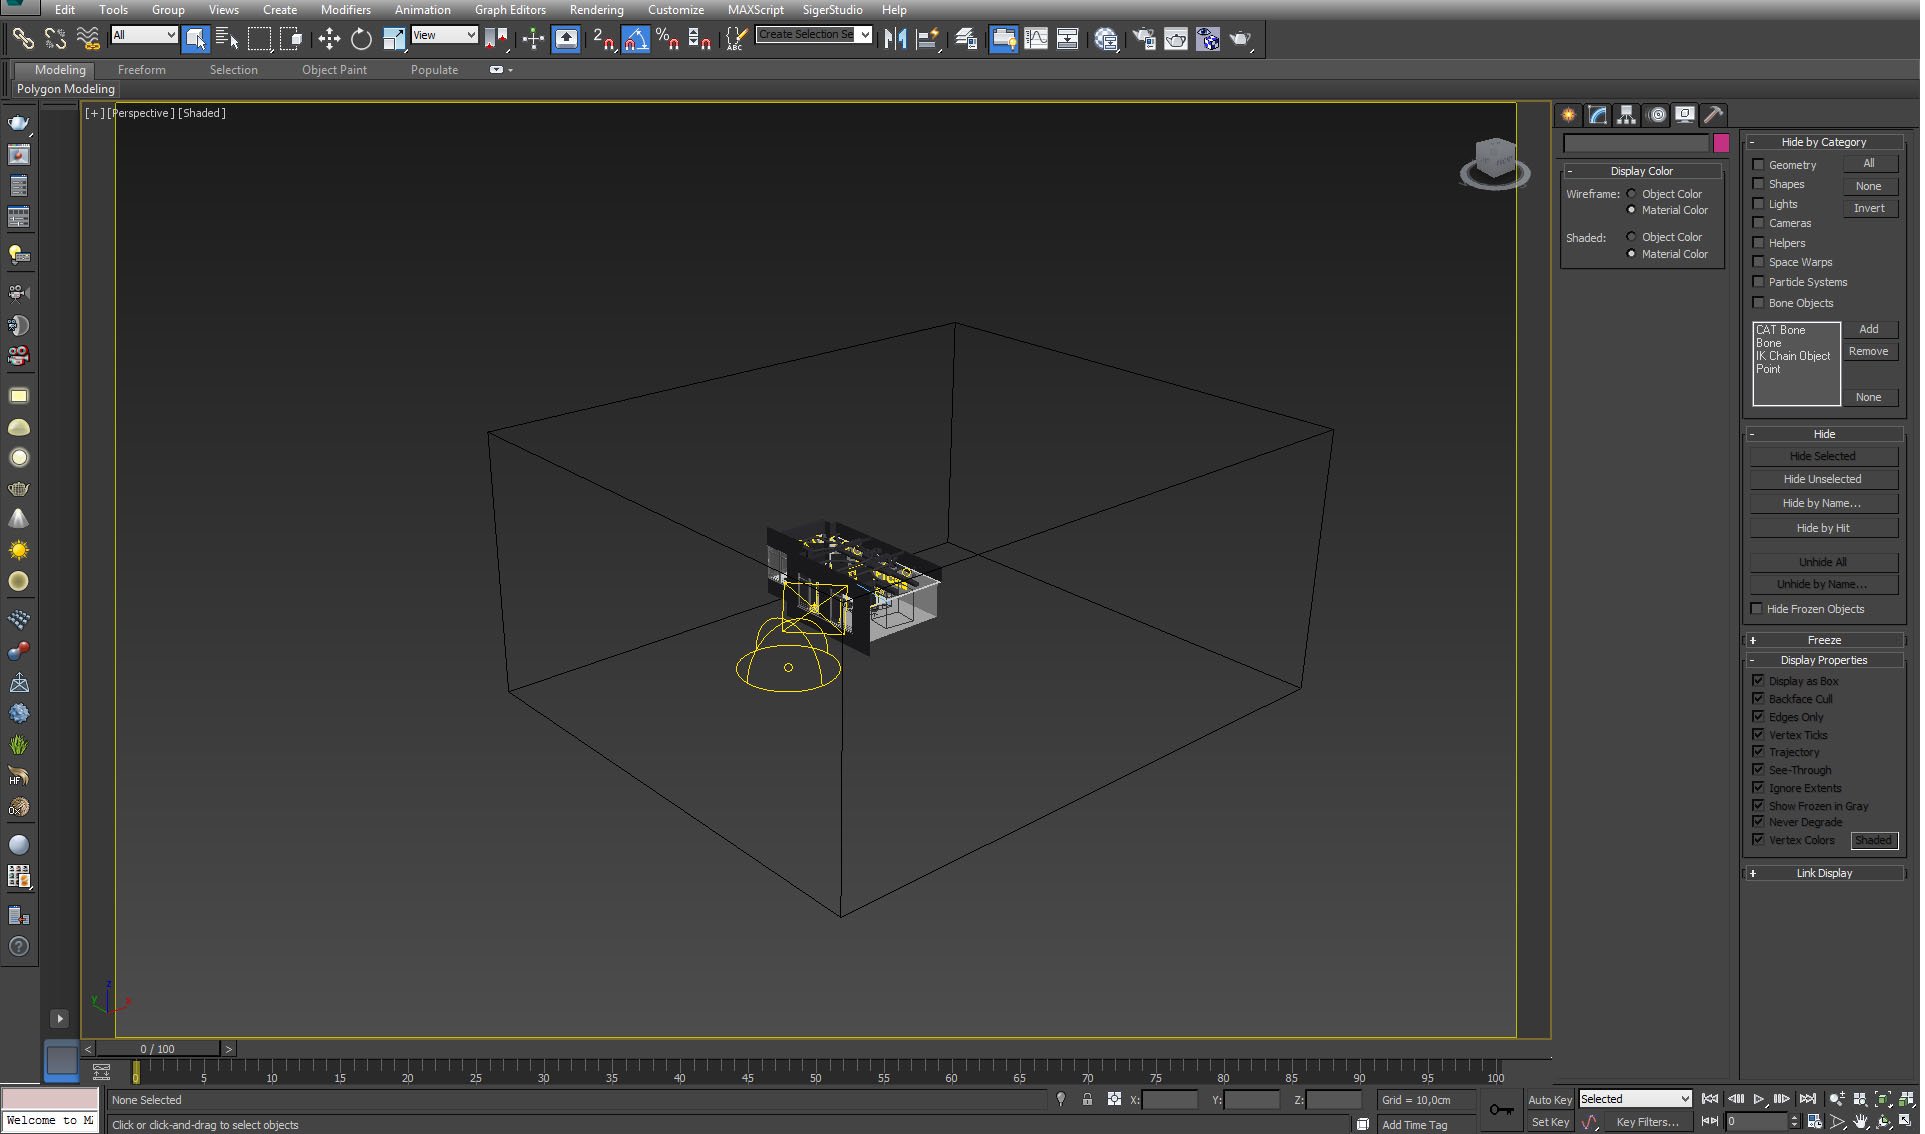
We placed our scene in a box with enviroment map.
Click on image to enlarge 
Small version of city map that is used by the box material. Original is 10000 pixels wide.
Click on image to enlarge 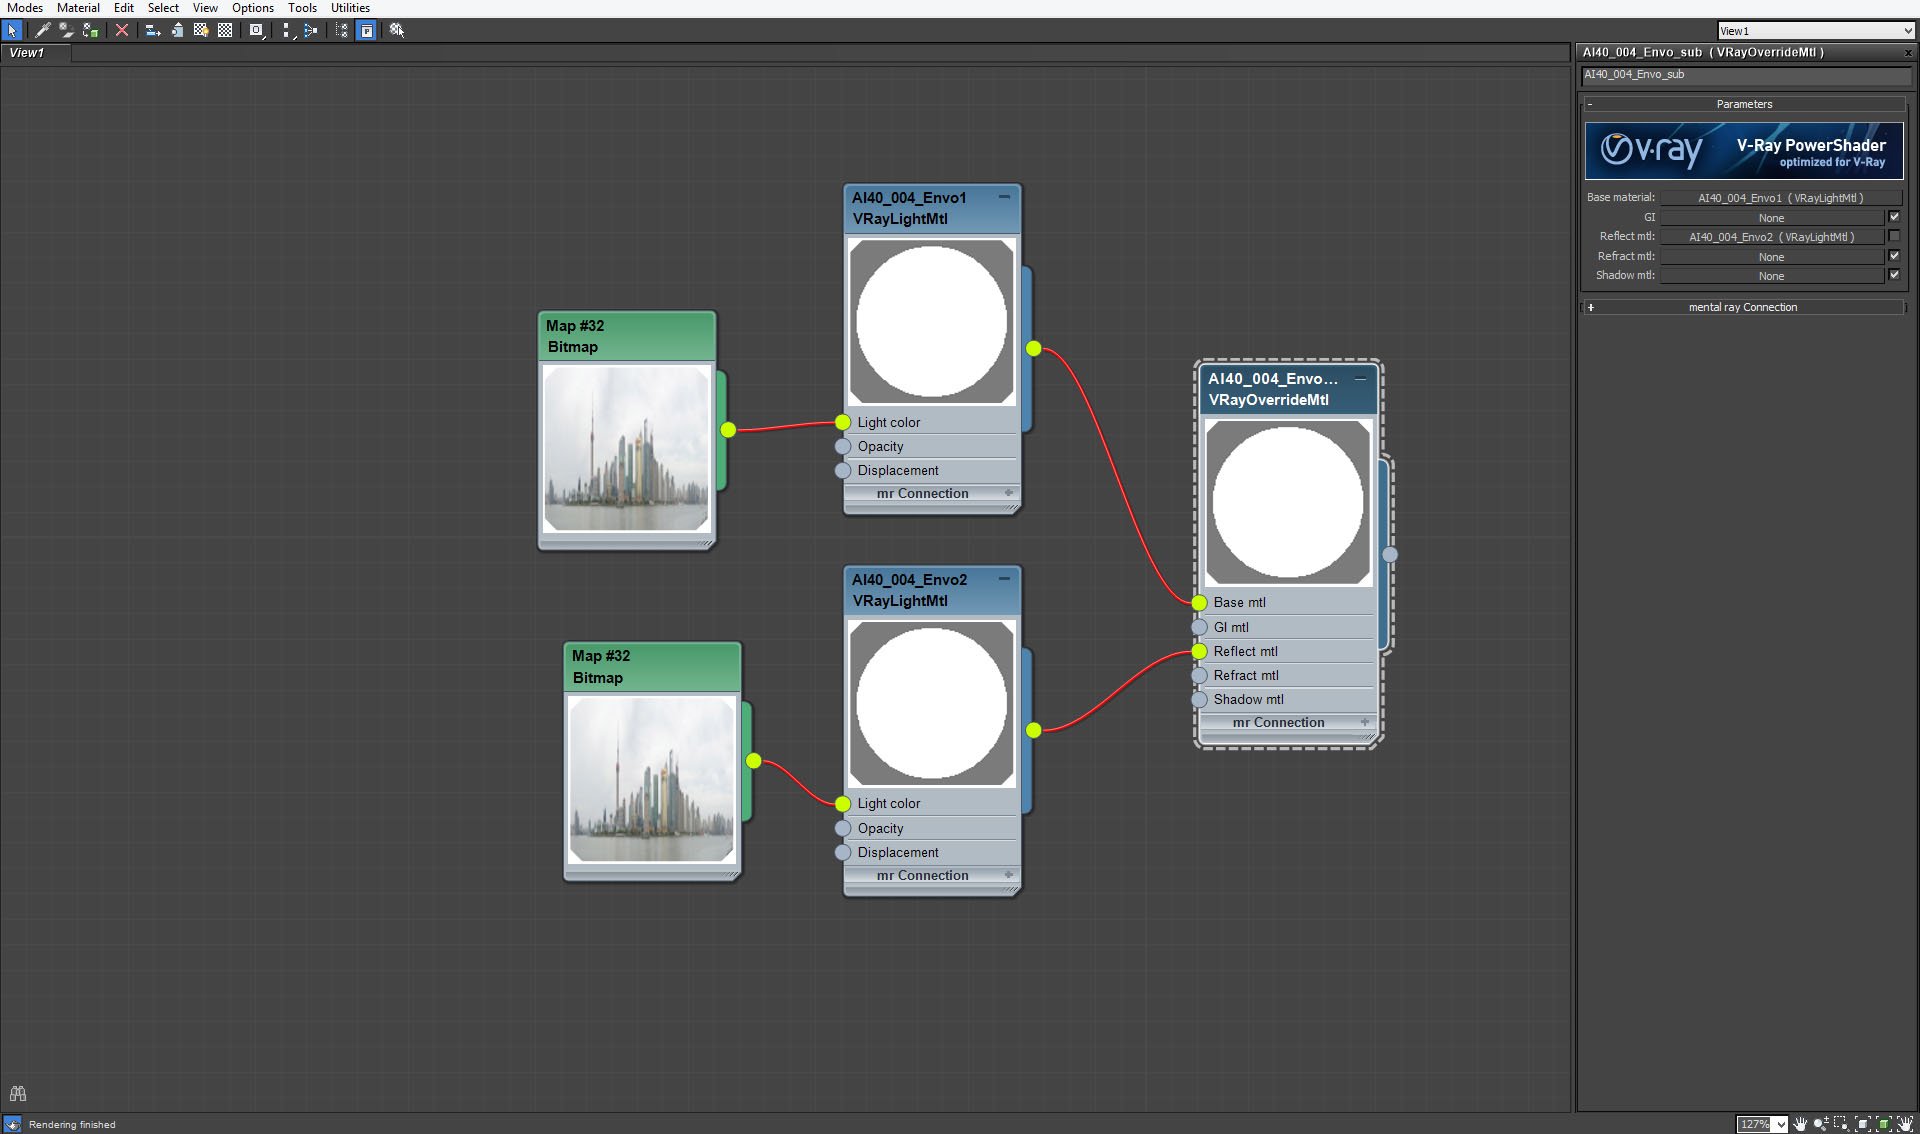
Box has two light materials with maps of a city in base and reflect mtl slots of VrayOverrideMtl.
Click on image to enlarge 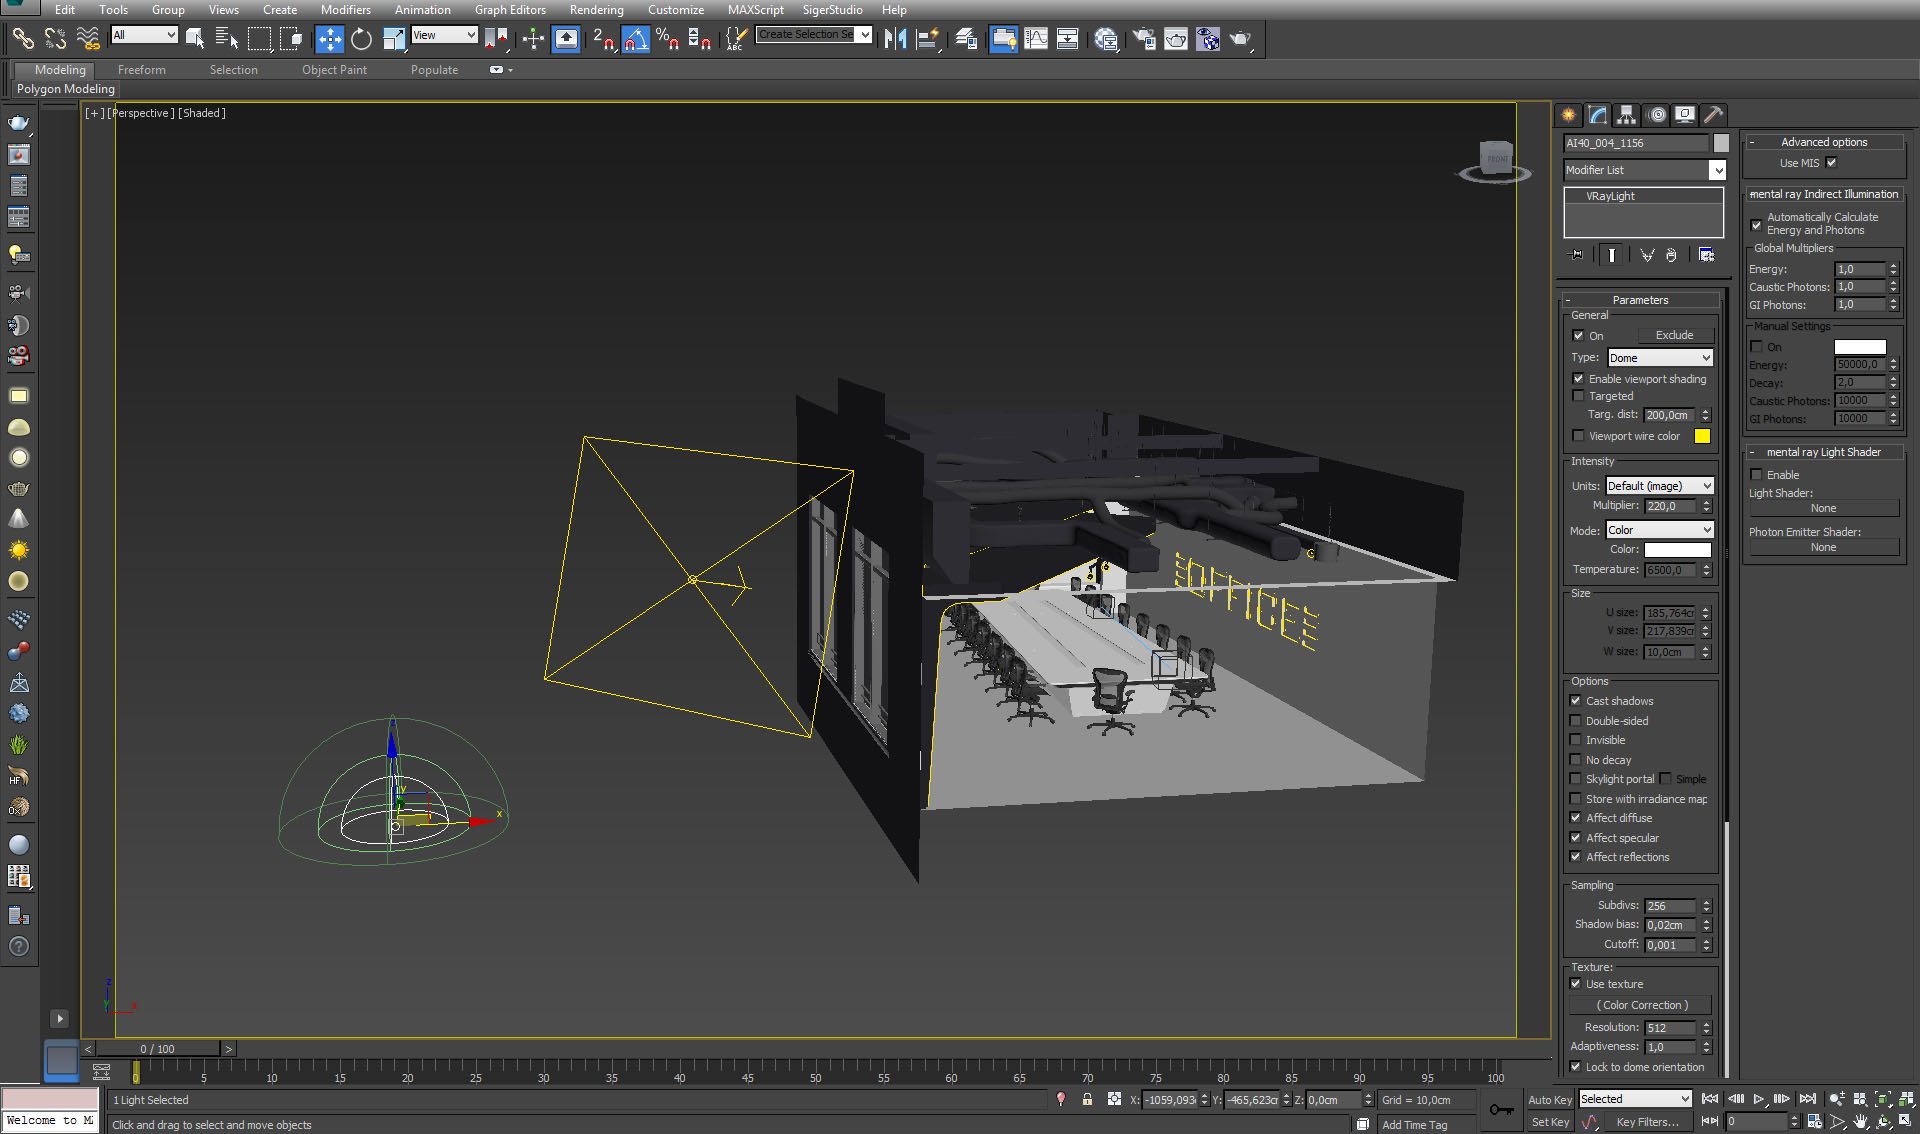
Outside light is made with Vray dome. It uses HDRI texture.
Click on image to enlarge 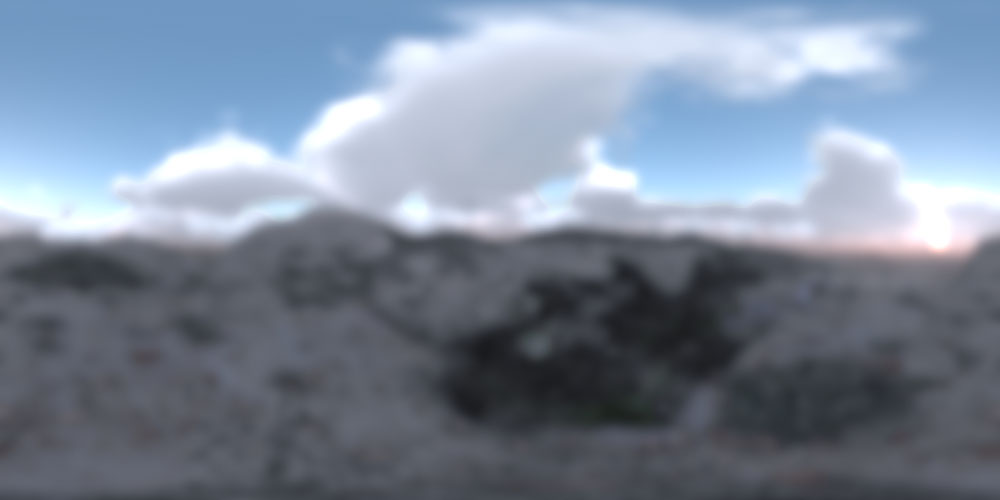
Blurred HDRI map in texture slot of Vray Dome light..
Click on image to enlarge 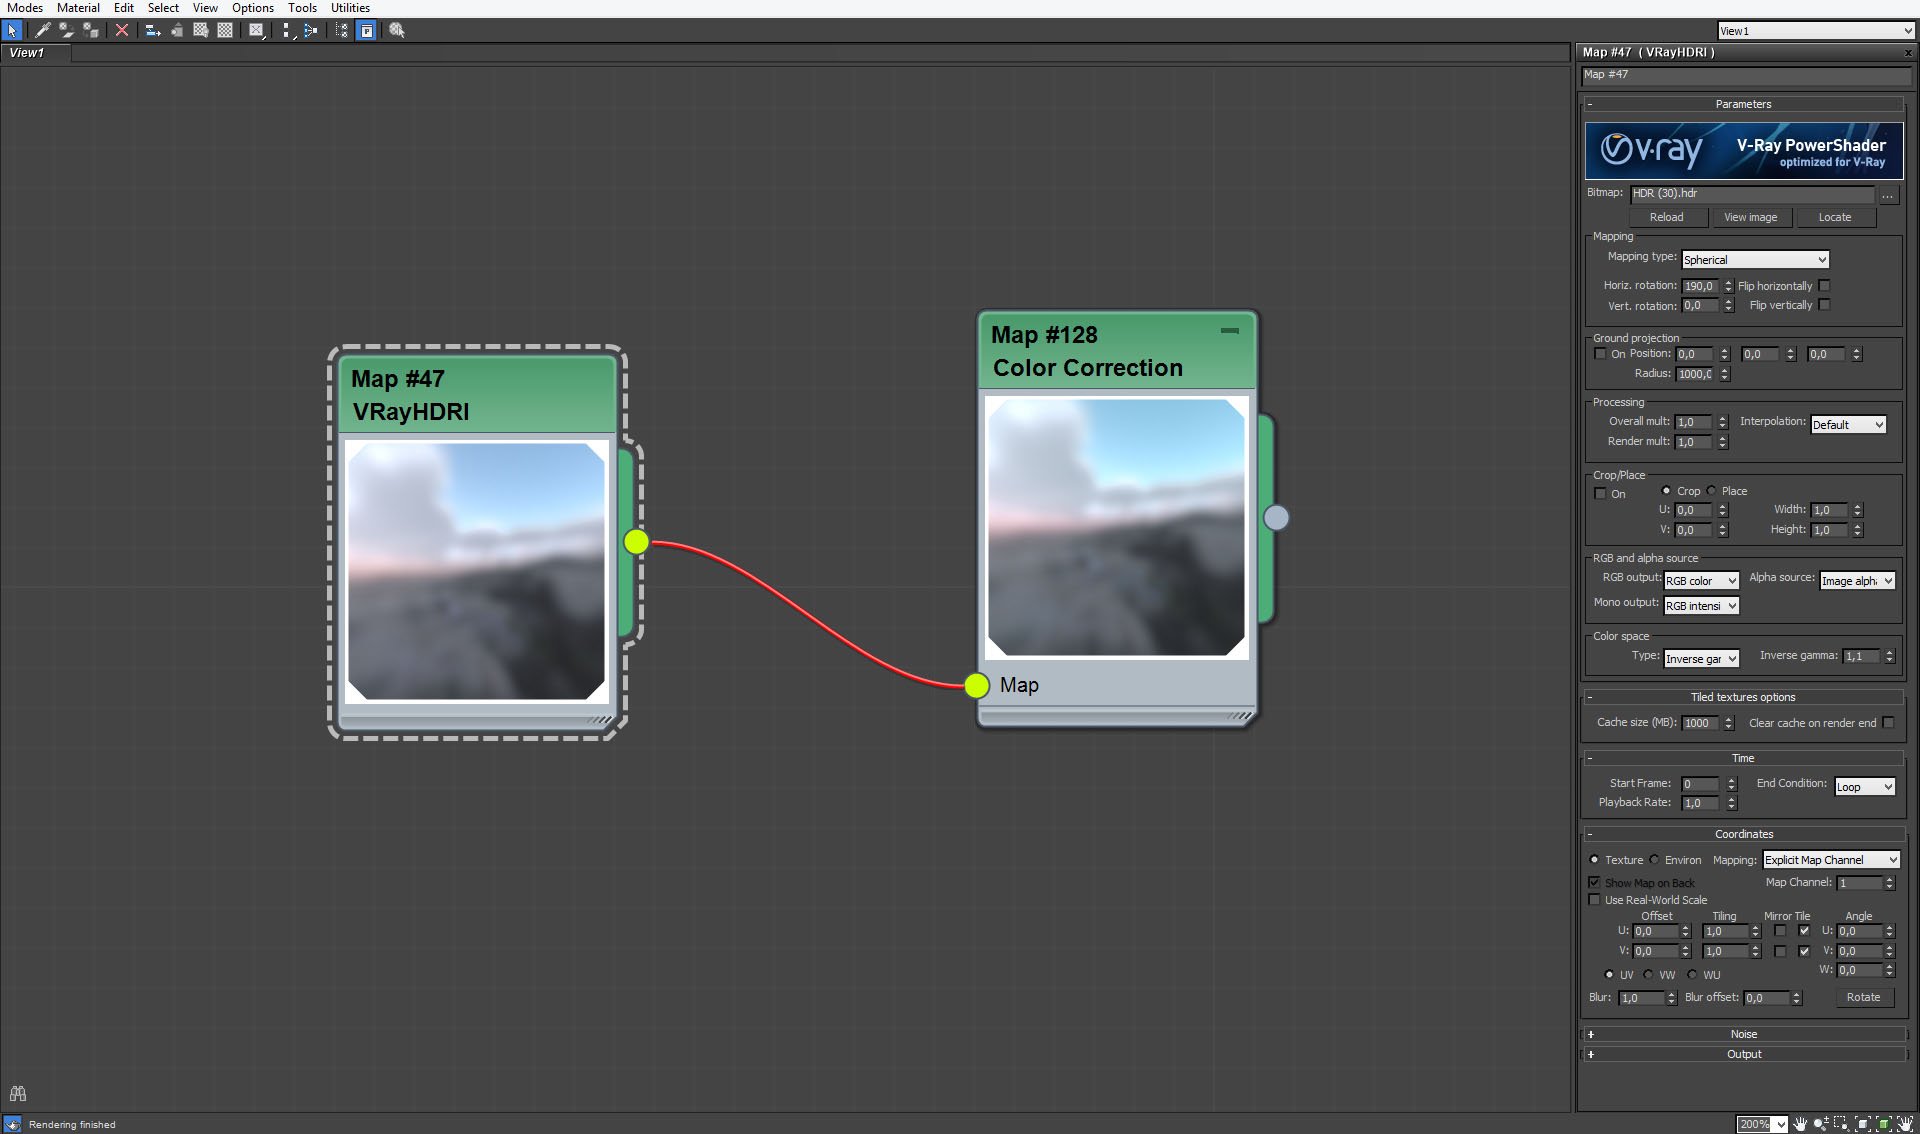
Dome light Vray HDRI settings.
Click on image to enlarge 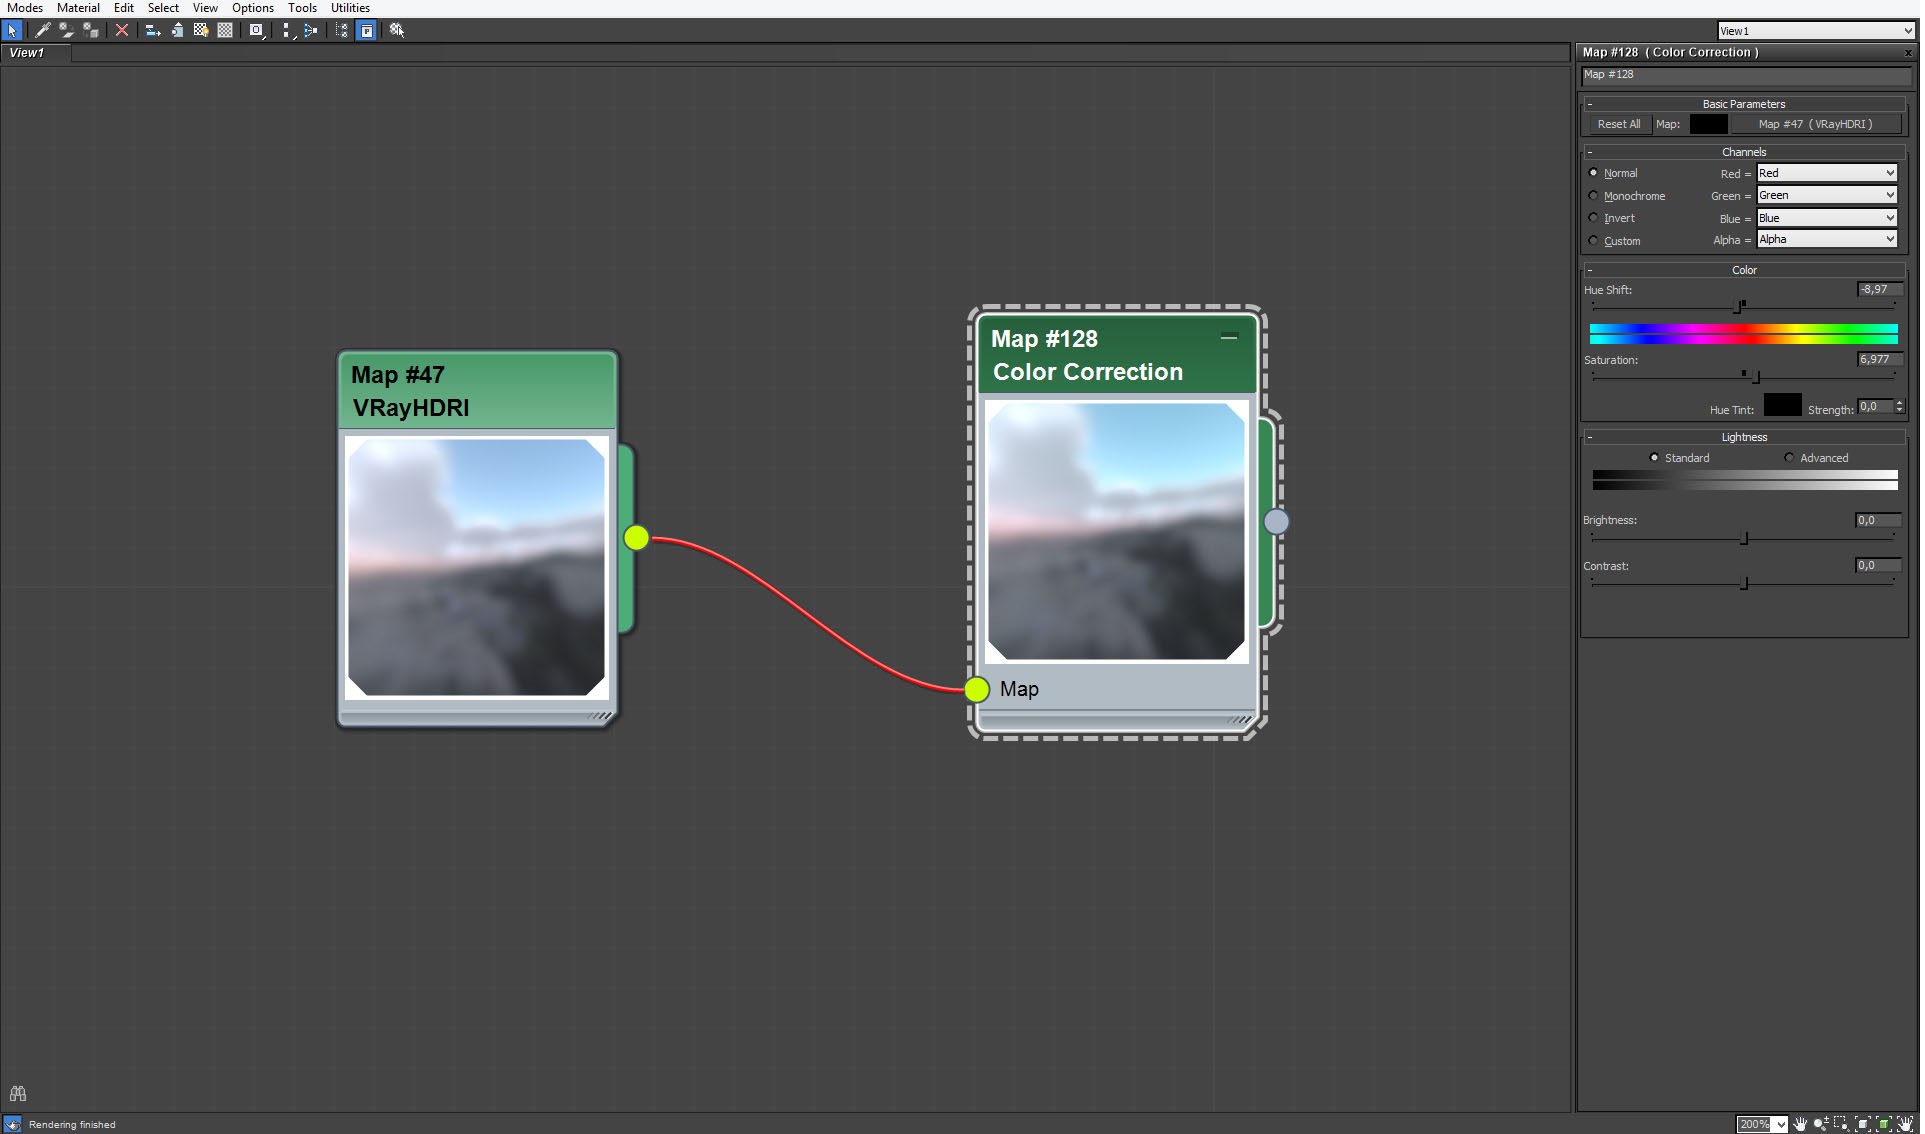
Background plane material settings.
Click on image to enlarge 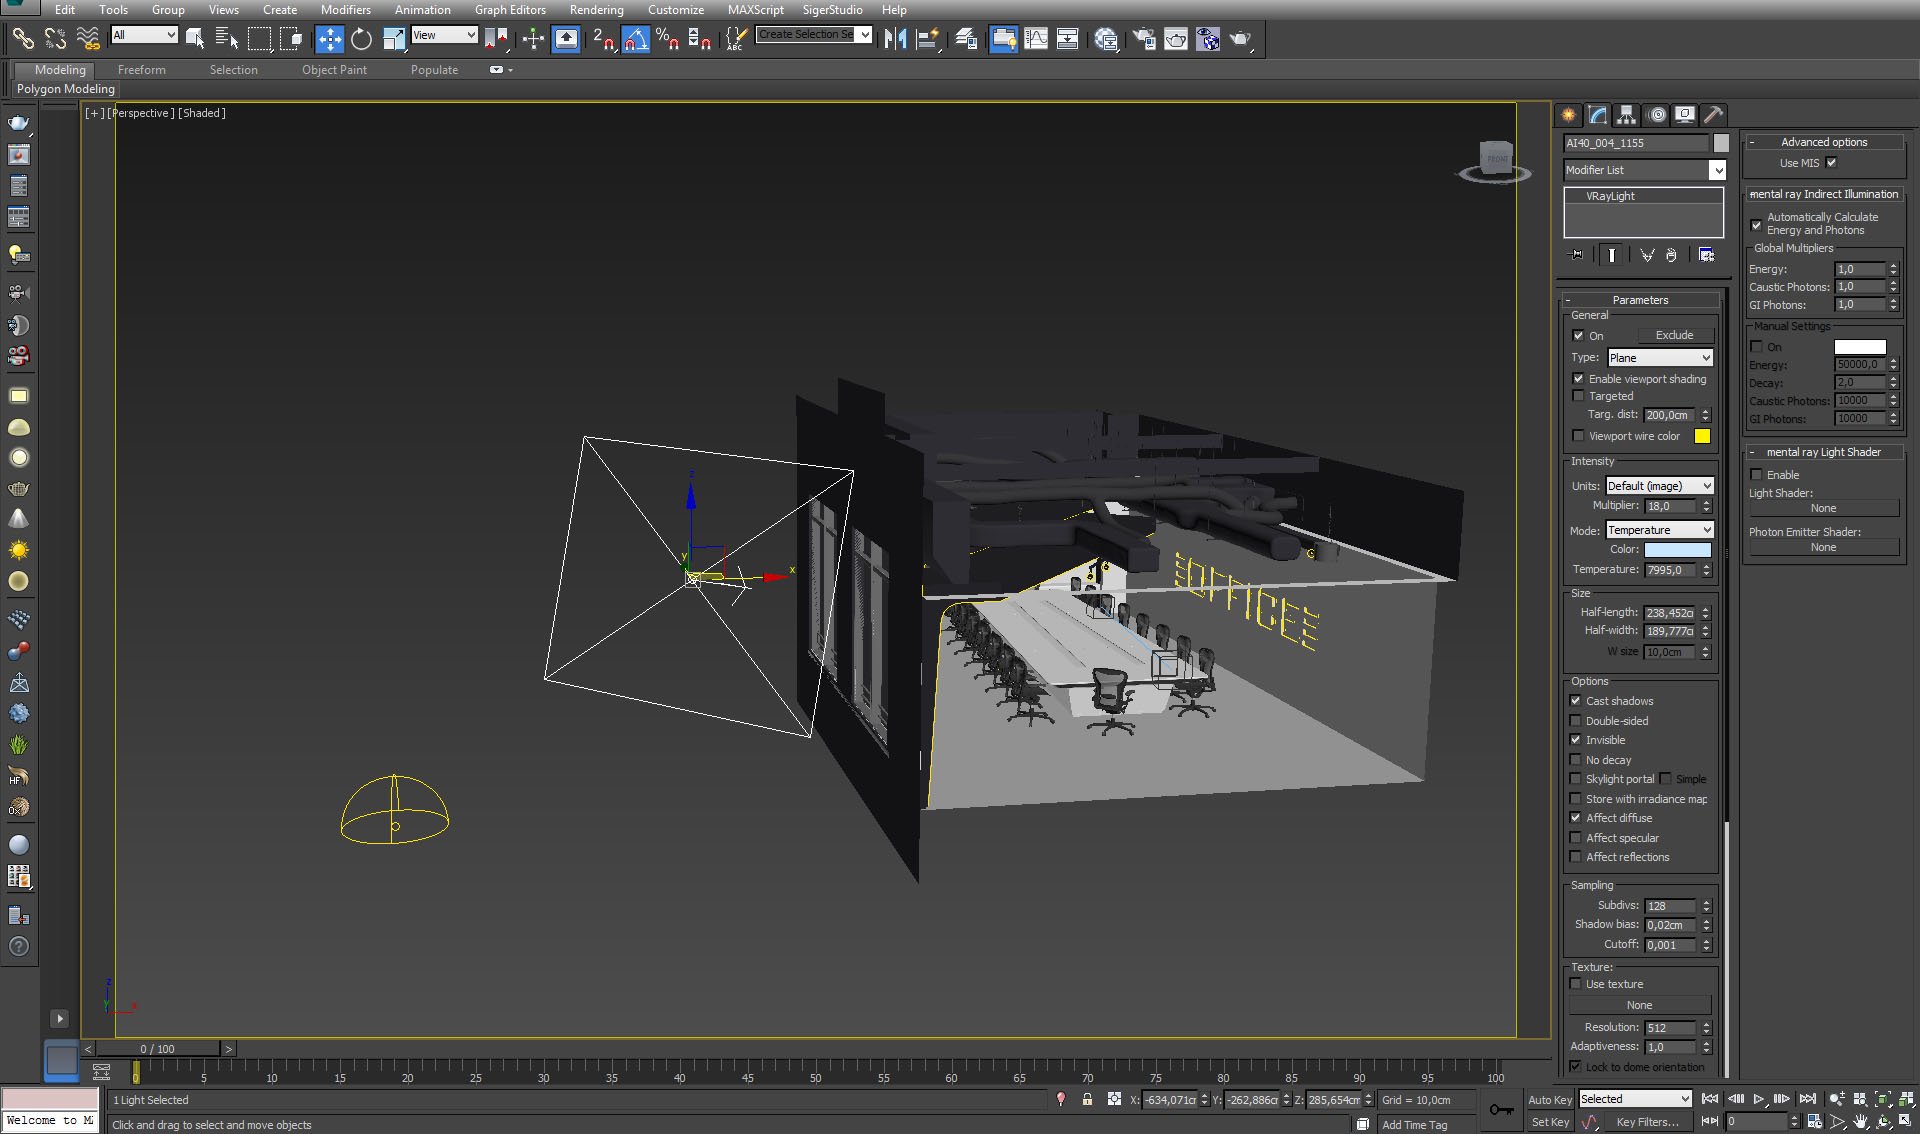
Big VRay plane light - our additional blueish light source.
Click on image to enlarge 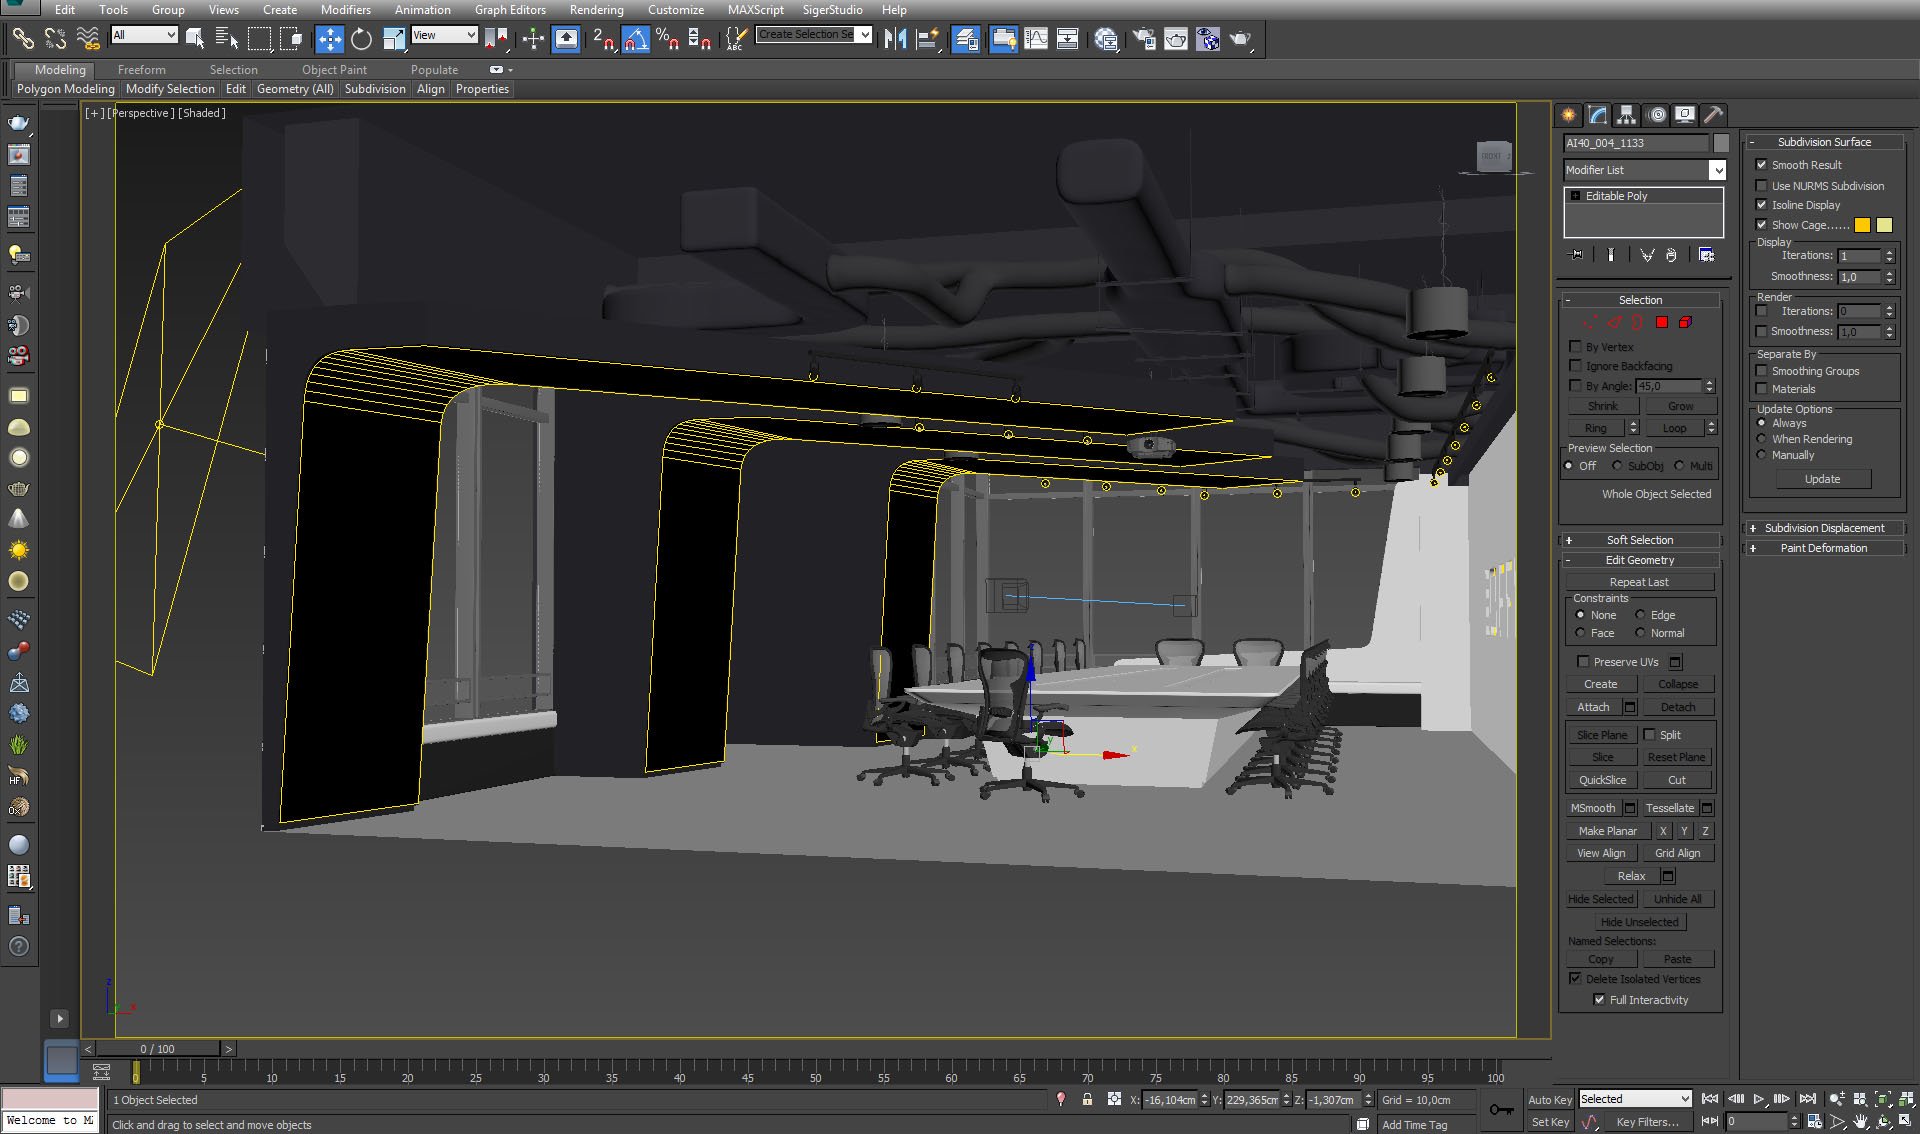
Light panels in the interior.
Click on image to enlarge 
Light panels material settings.
Click on image to enlarge 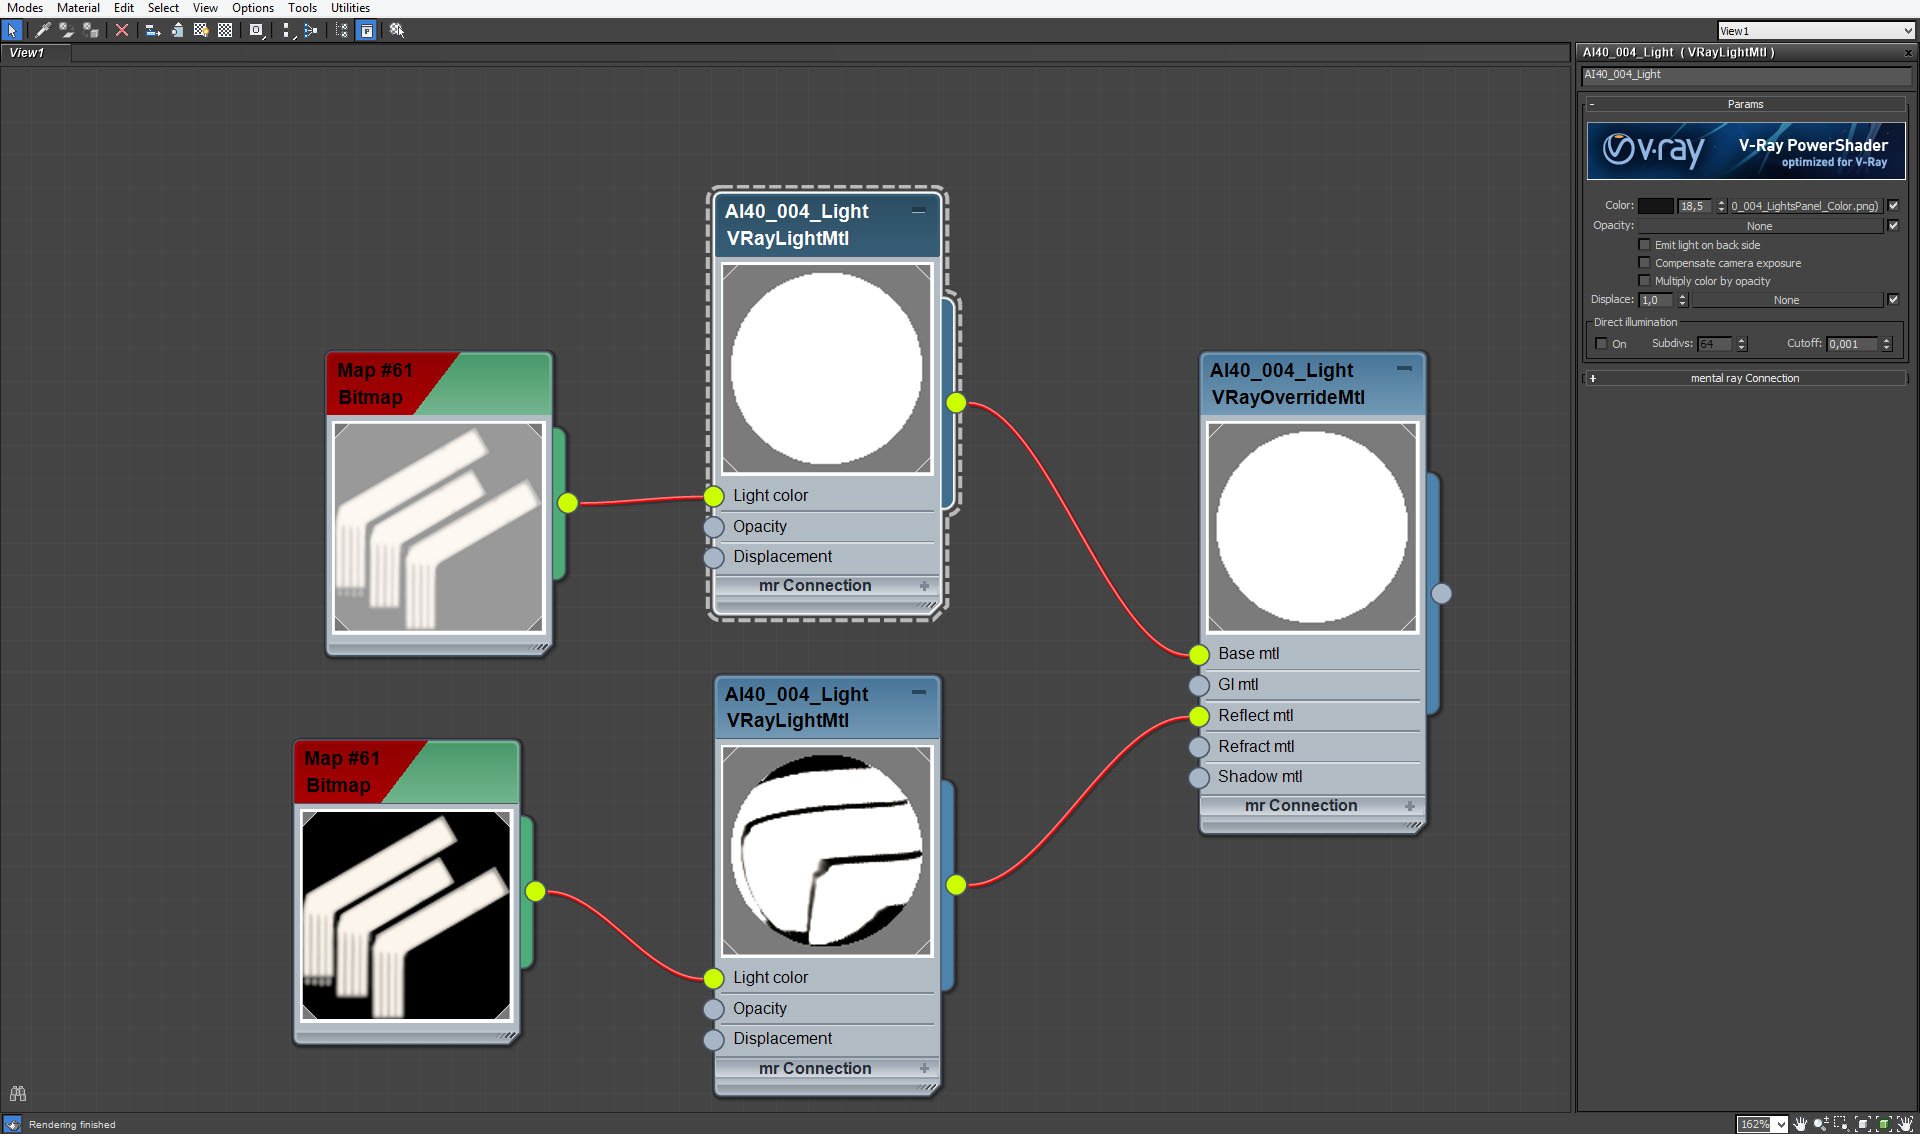
Light panels material settings, continued.
Click on image to enlarge 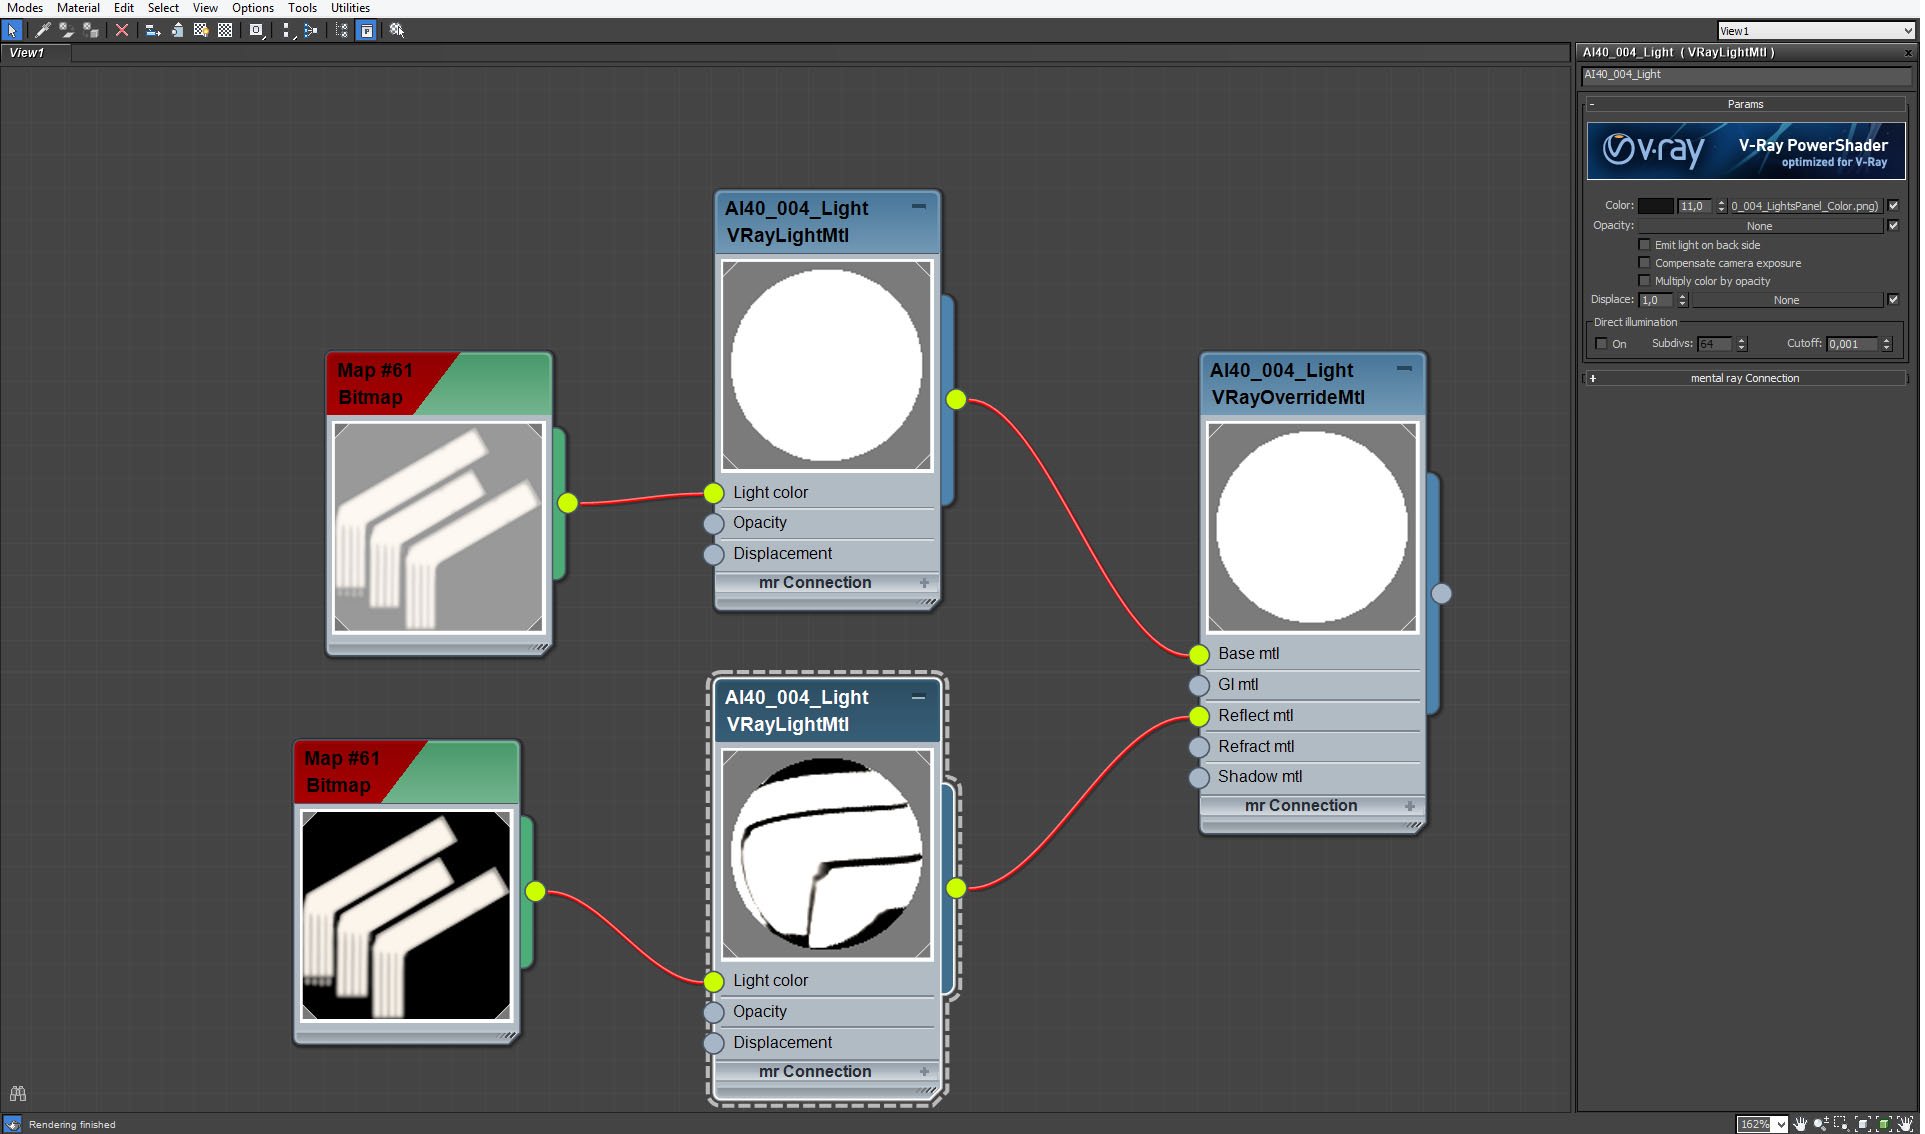
Light panels material settings, continued.
Click on image to enlarge 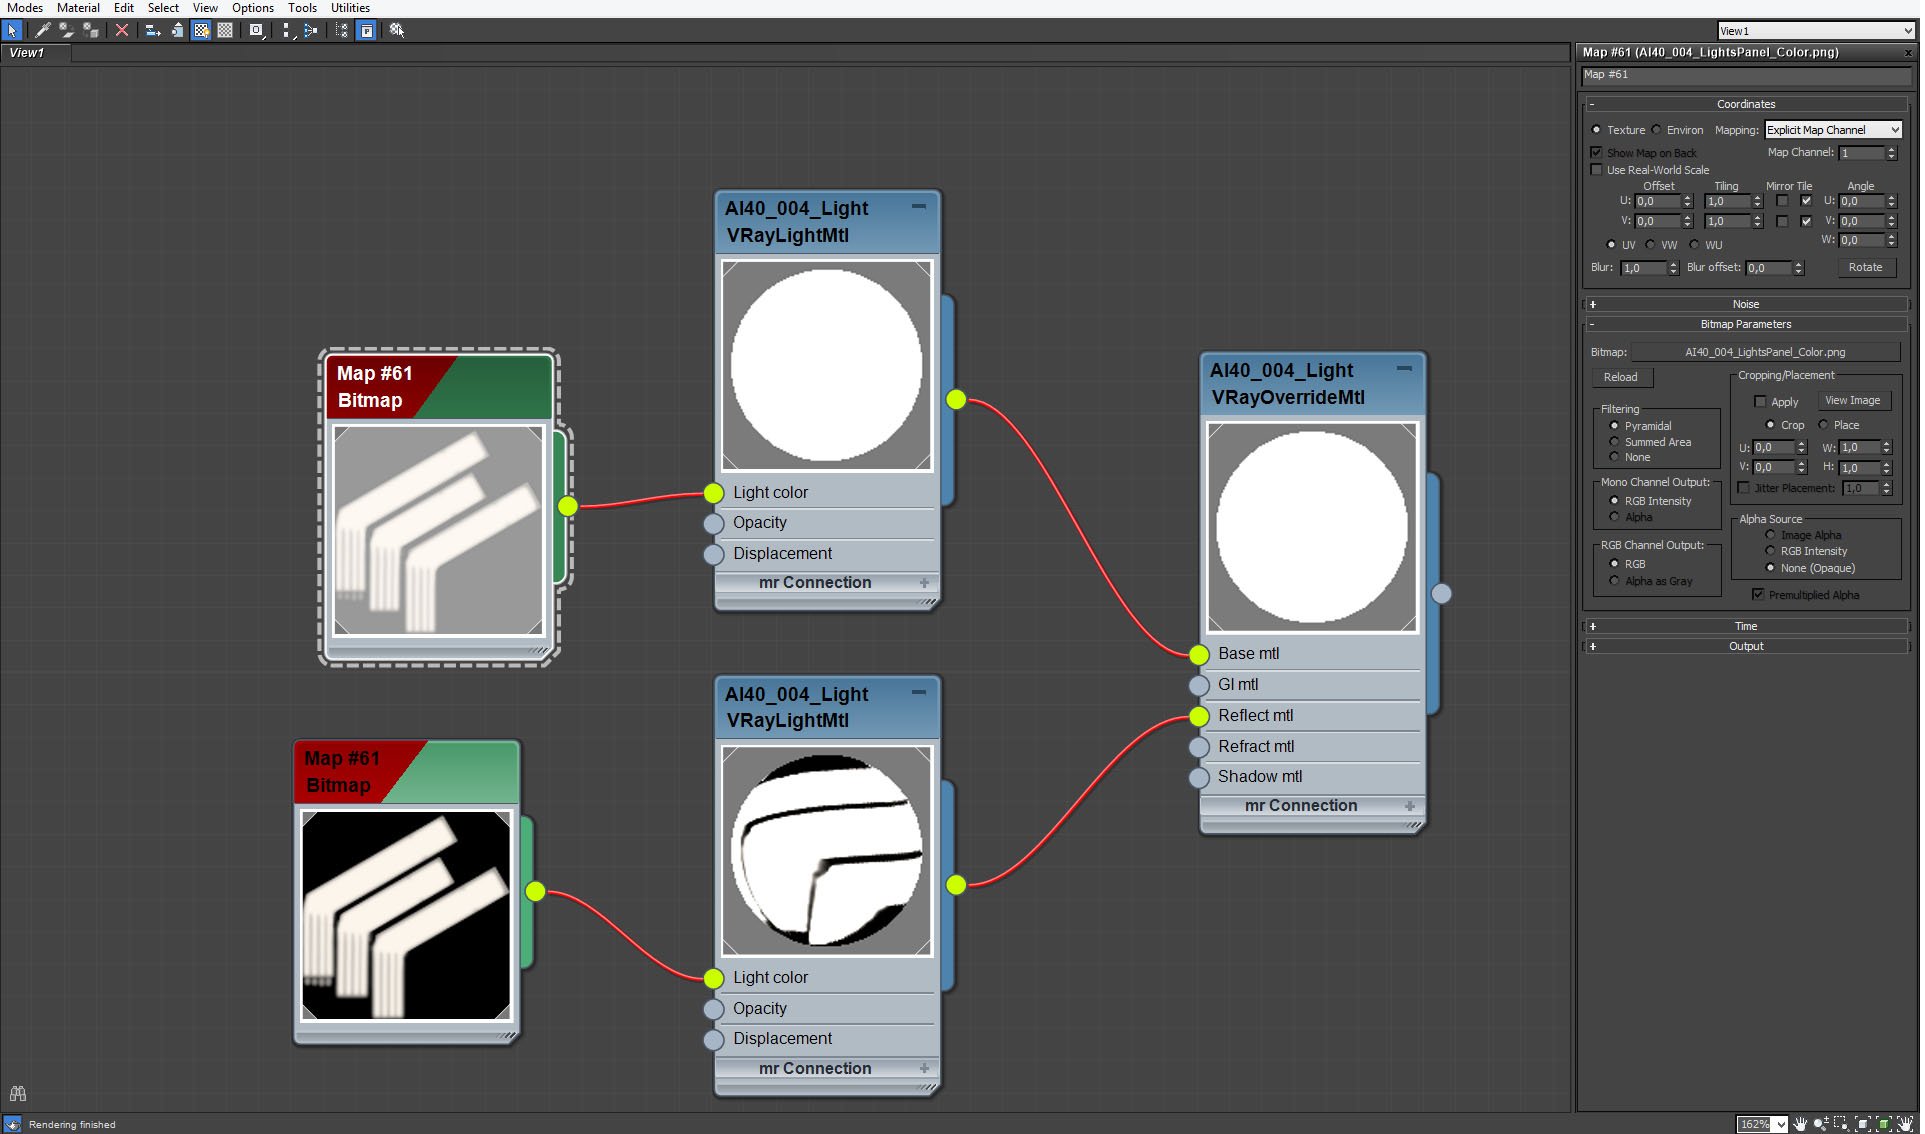
Light panels material settings, continued.
Click on image to enlarge 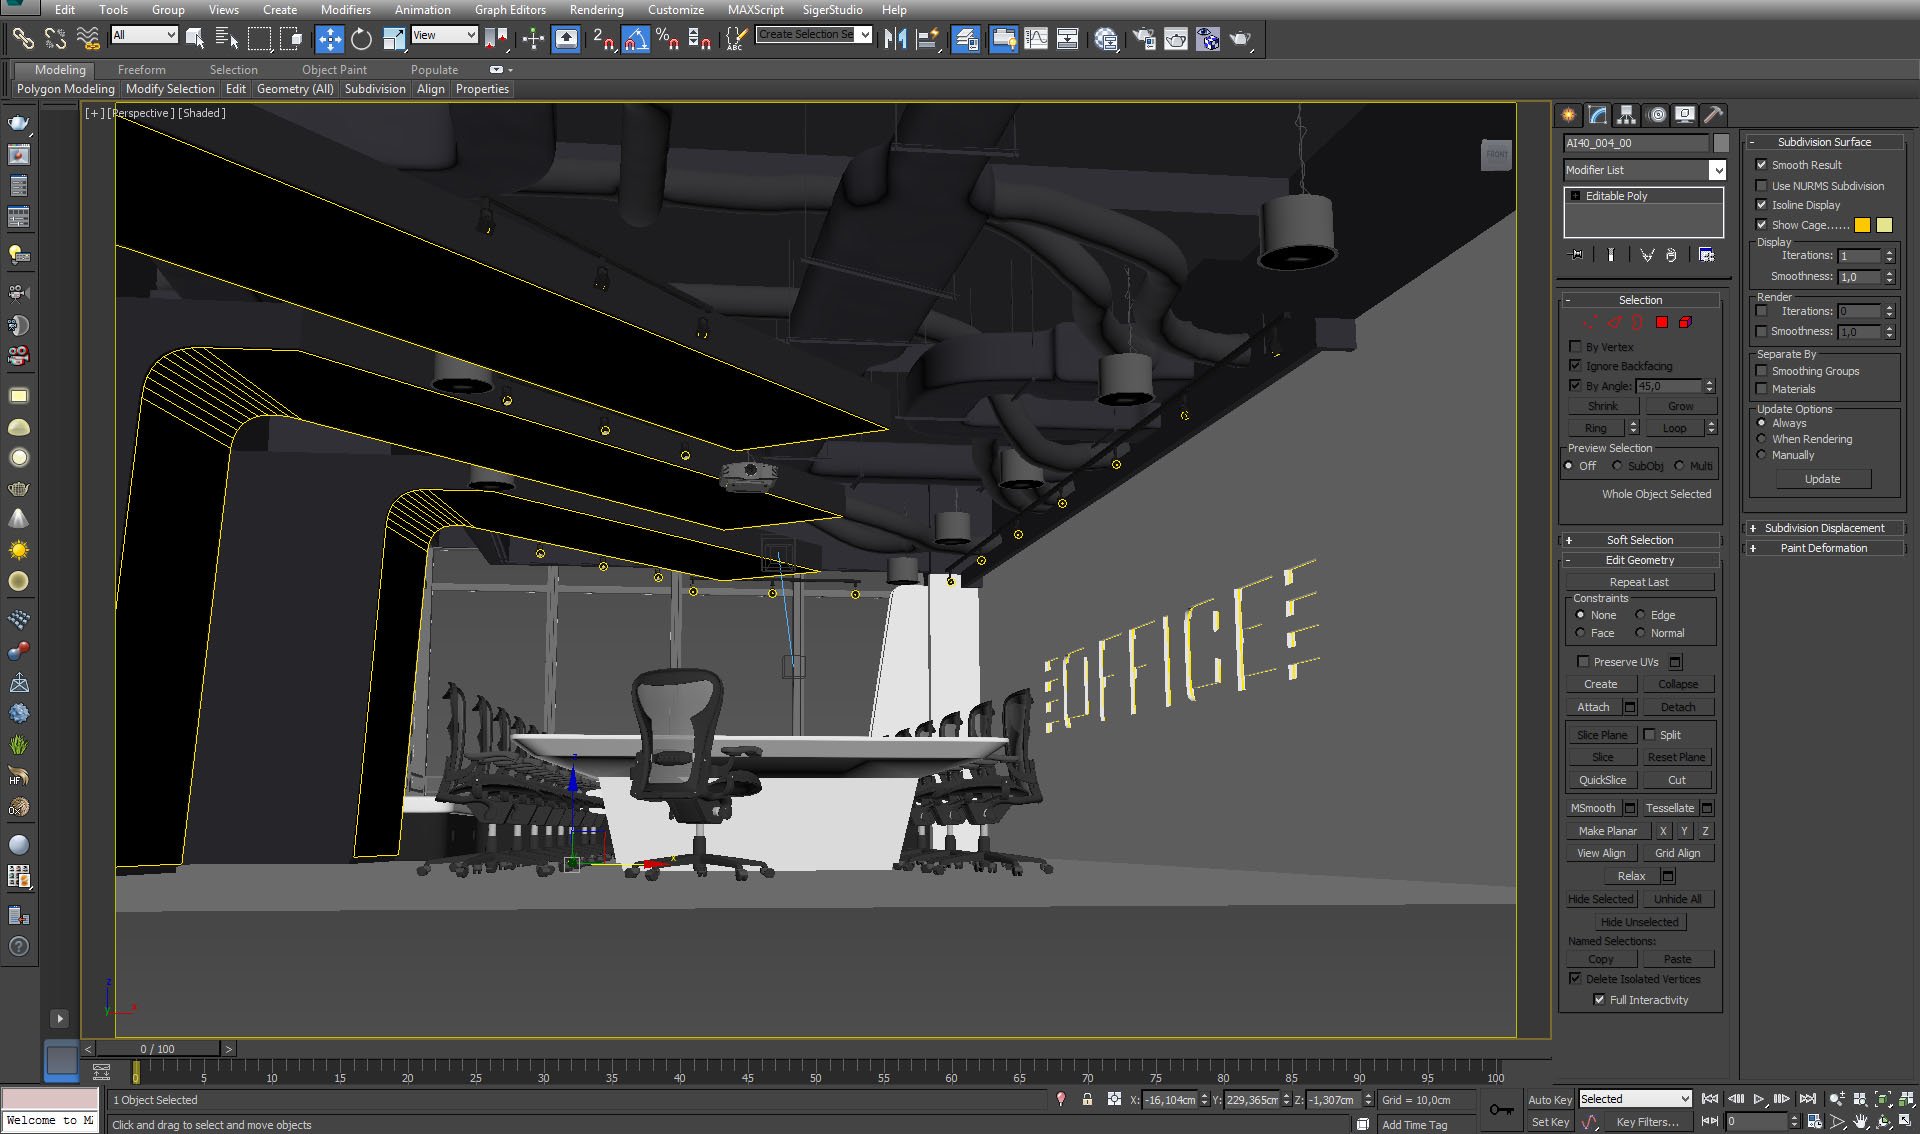
We also made a light in the shape of the "OFFICE" logotype.
Click on image to enlarge 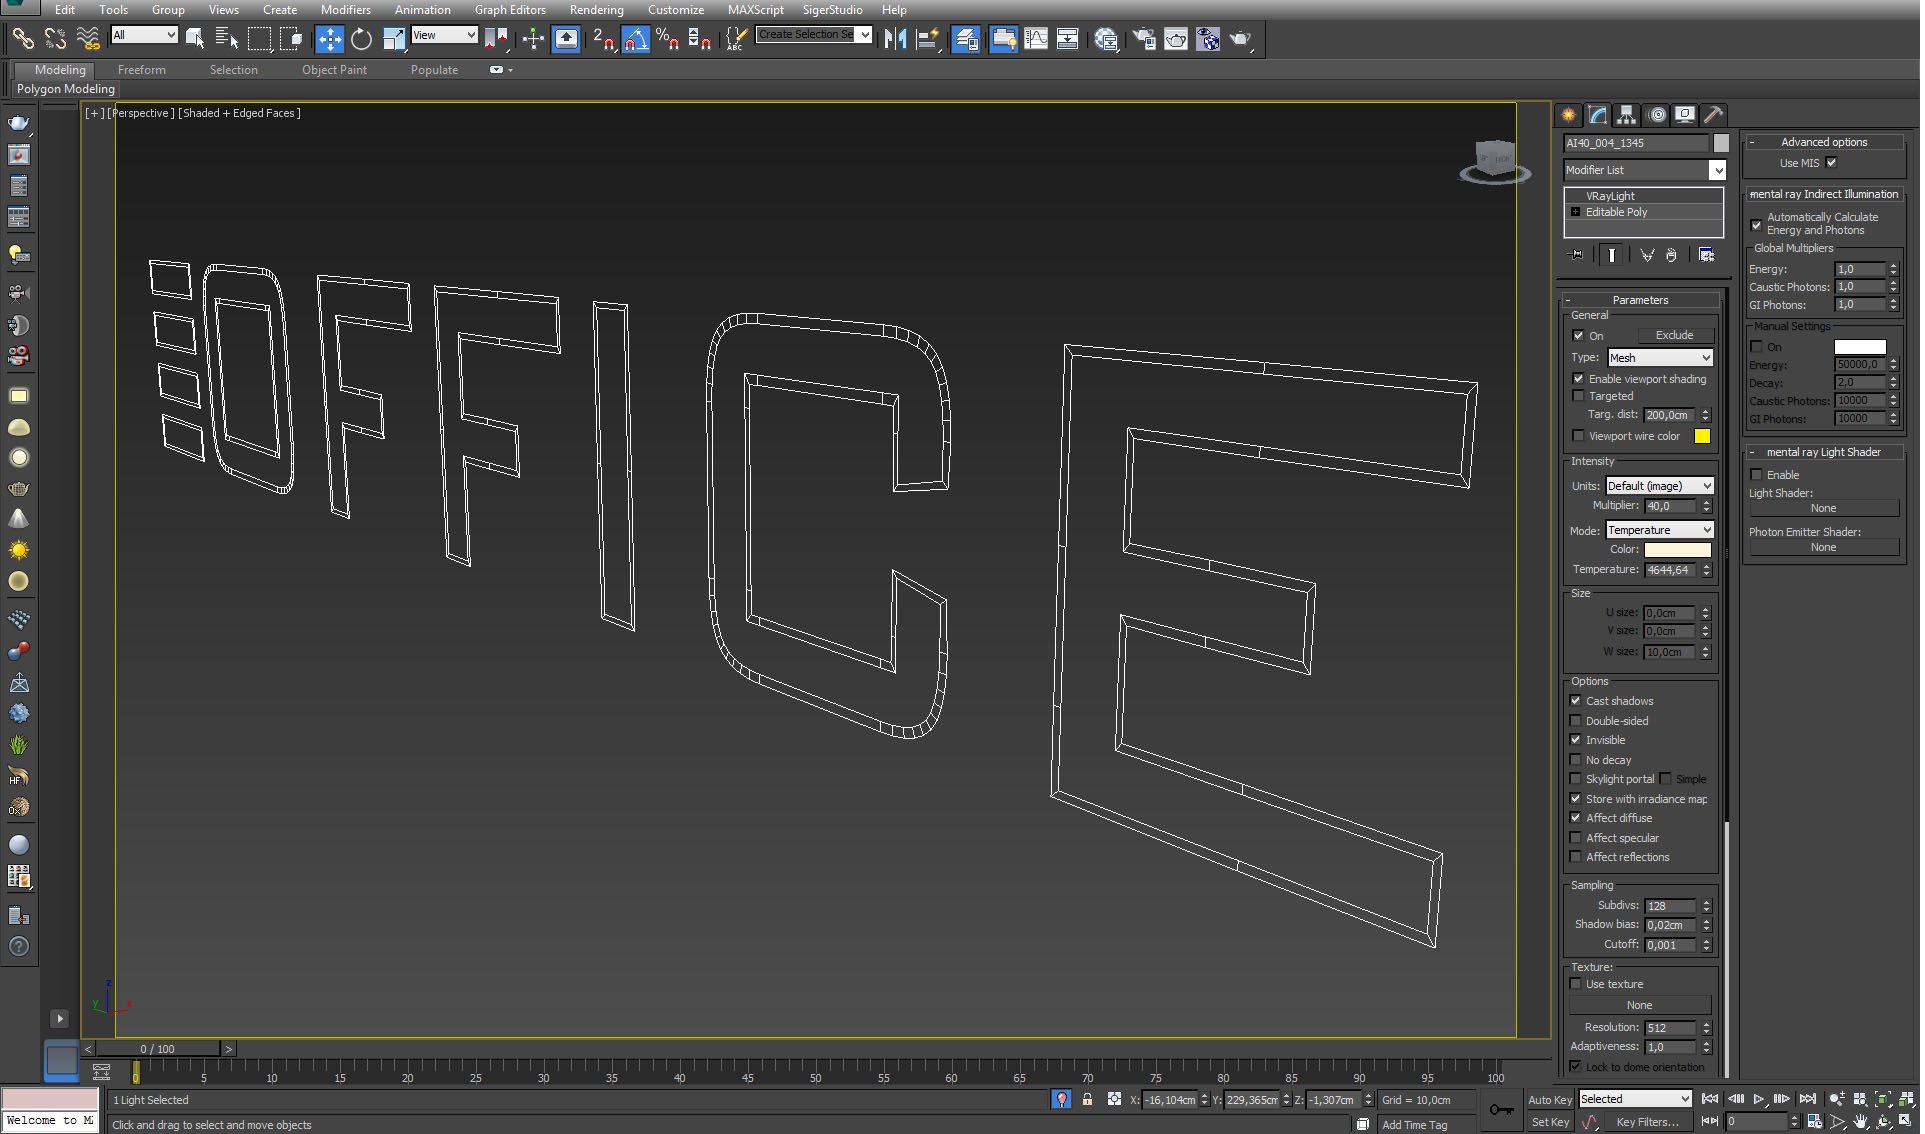
Click on image to enlarge 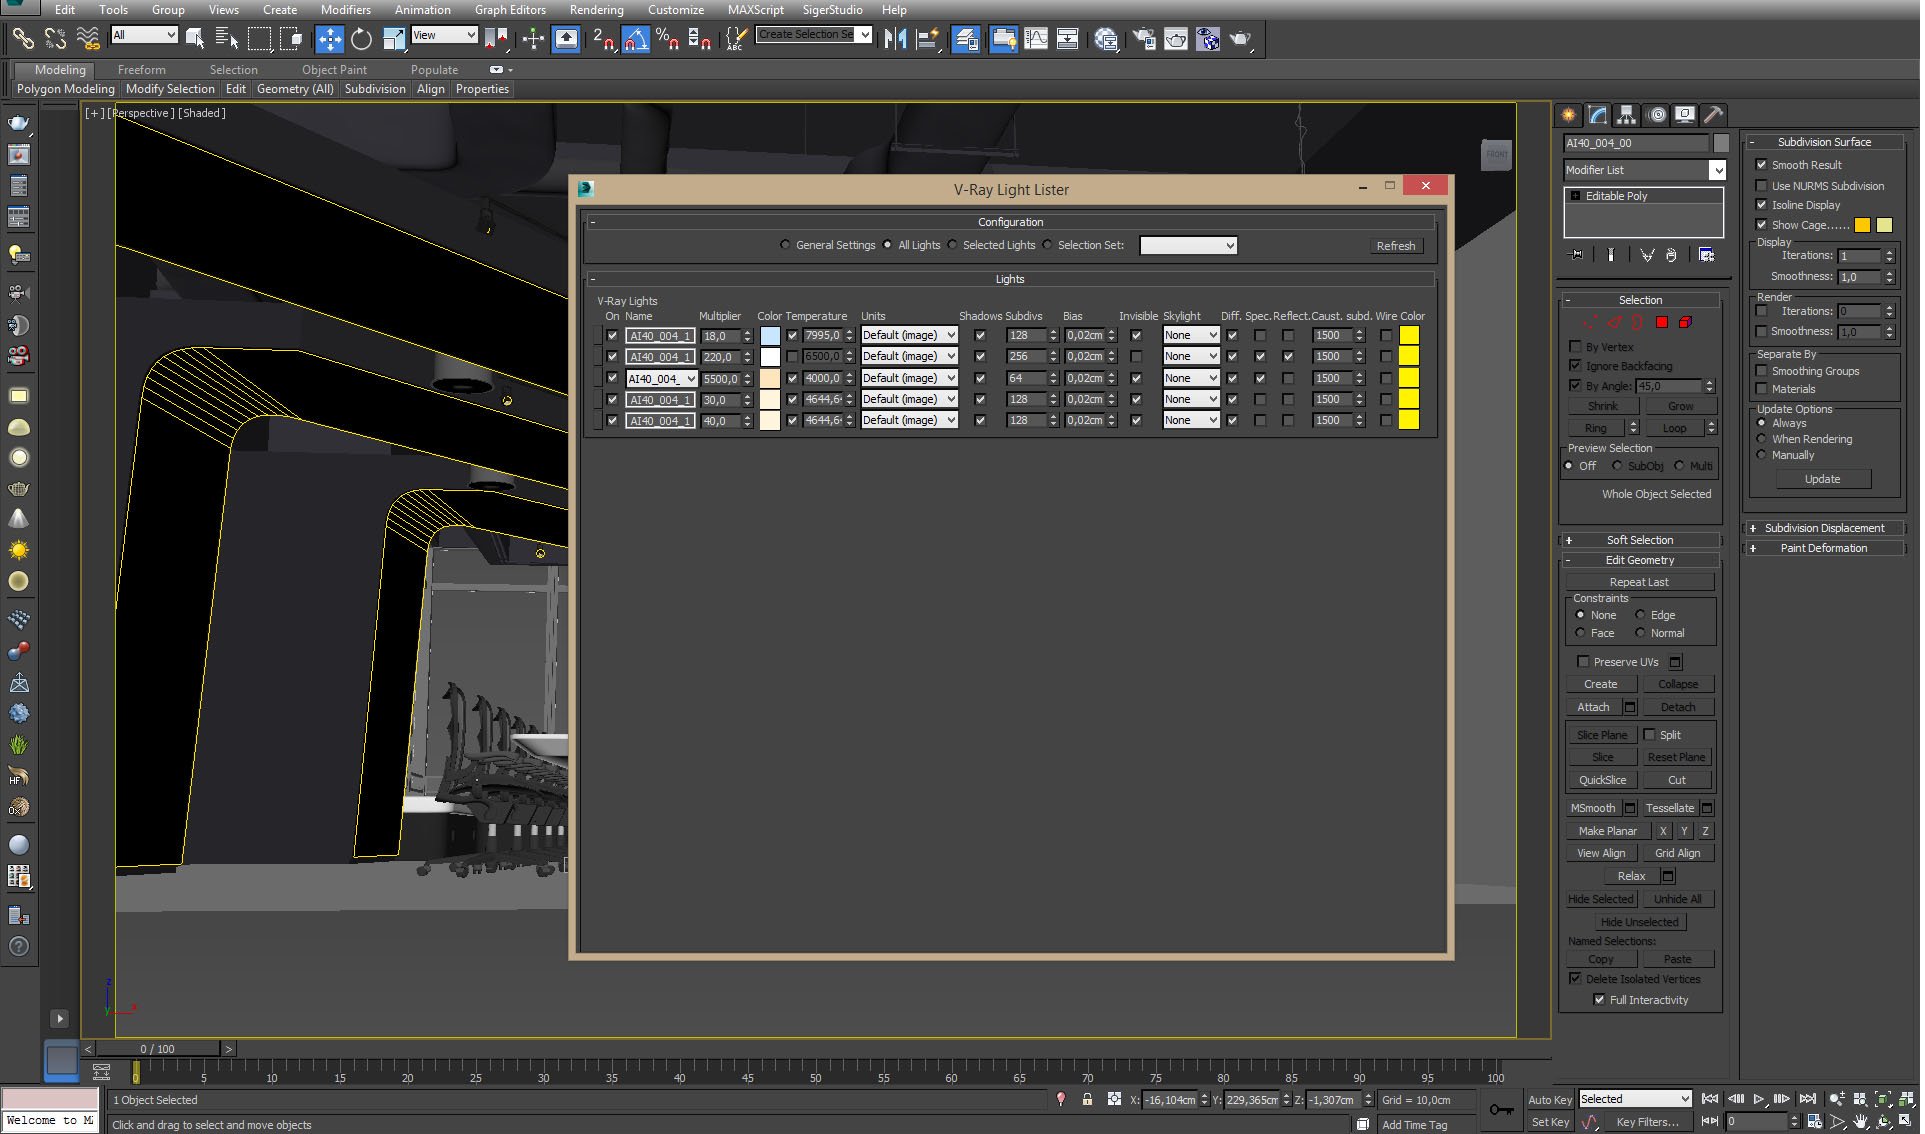
Click on image to enlarge 
Camera settings. Small FOV, quite slow shutter (1/60s).
Click on image to enlarge 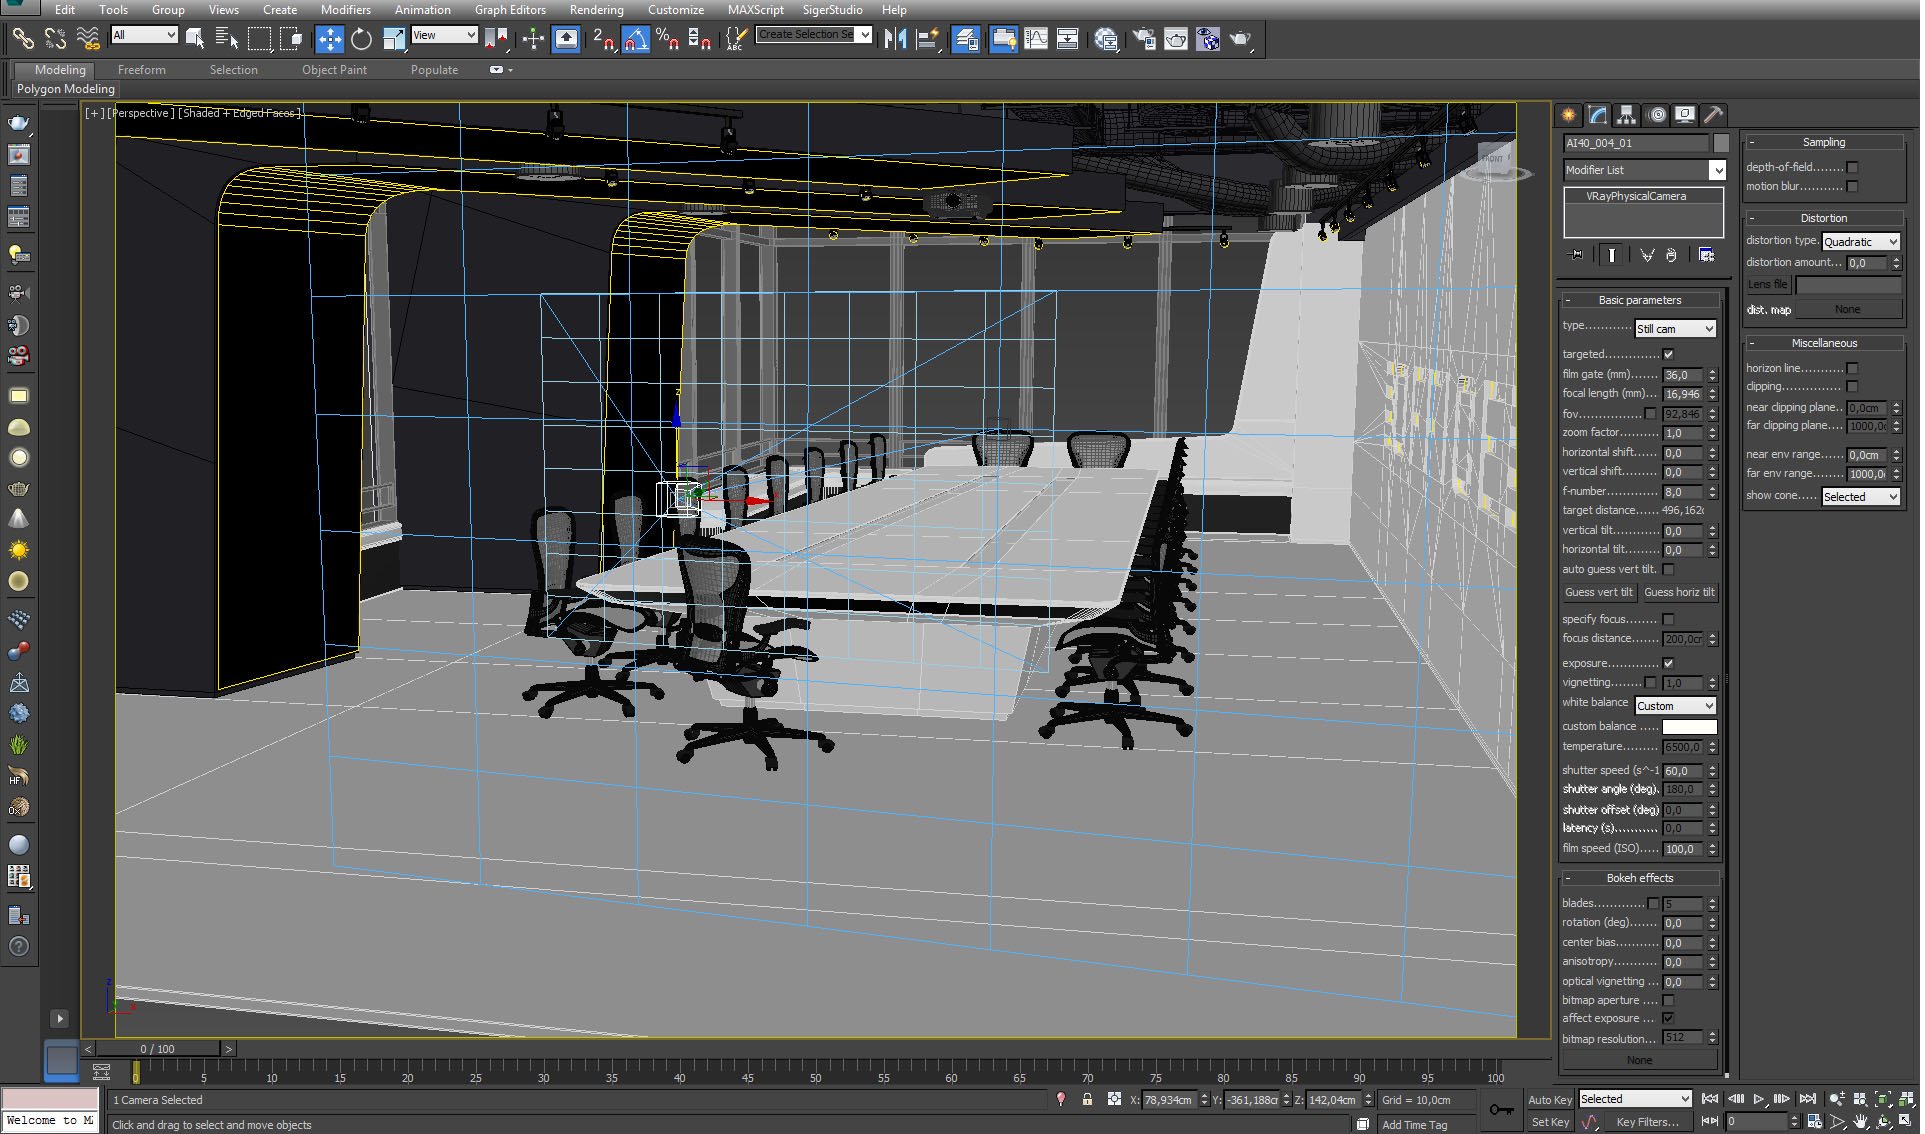
Camera settings, view from behind of the camera.
Click on image to enlarge 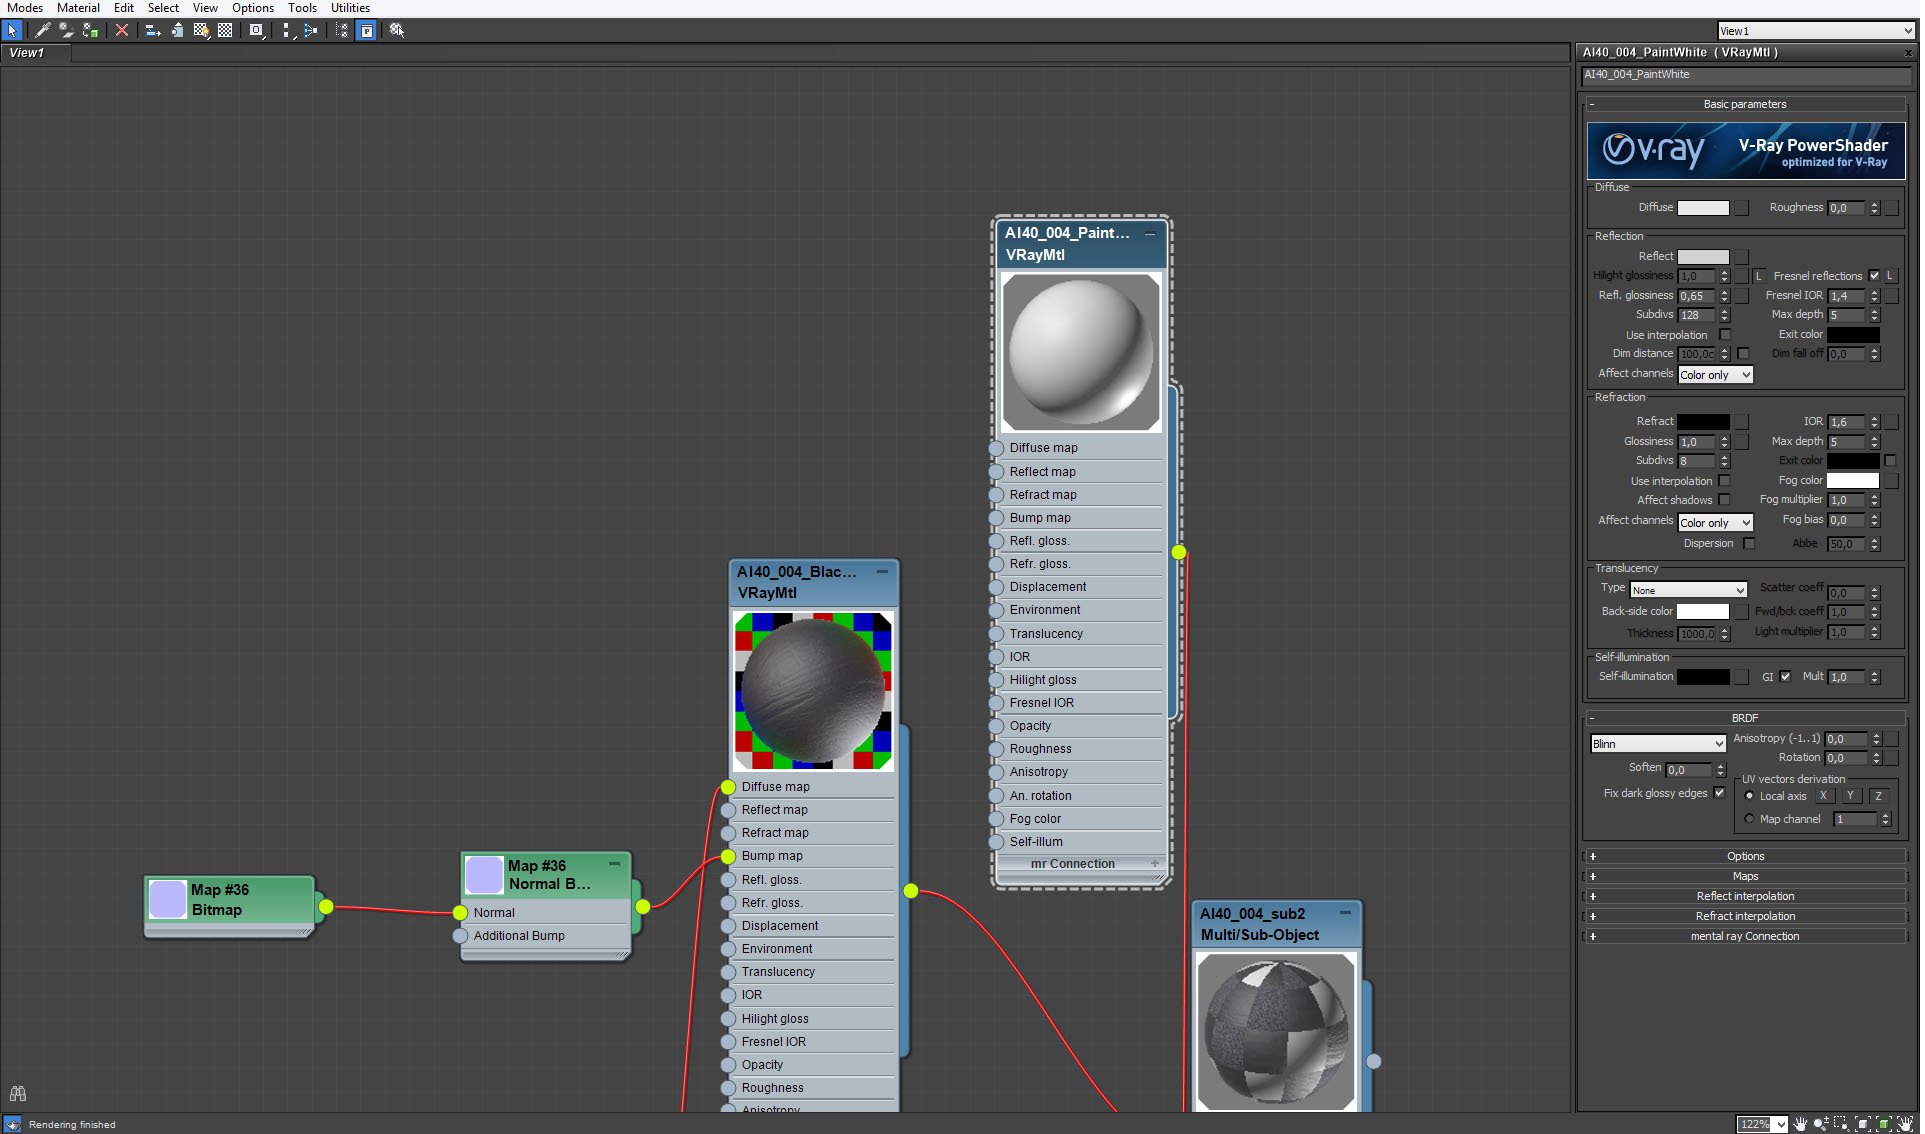
This Multi/Sub-Object material covers right wall, carpet and left wall. Currently selected material is right wall (with Office logotype).
Click on image to enlarge 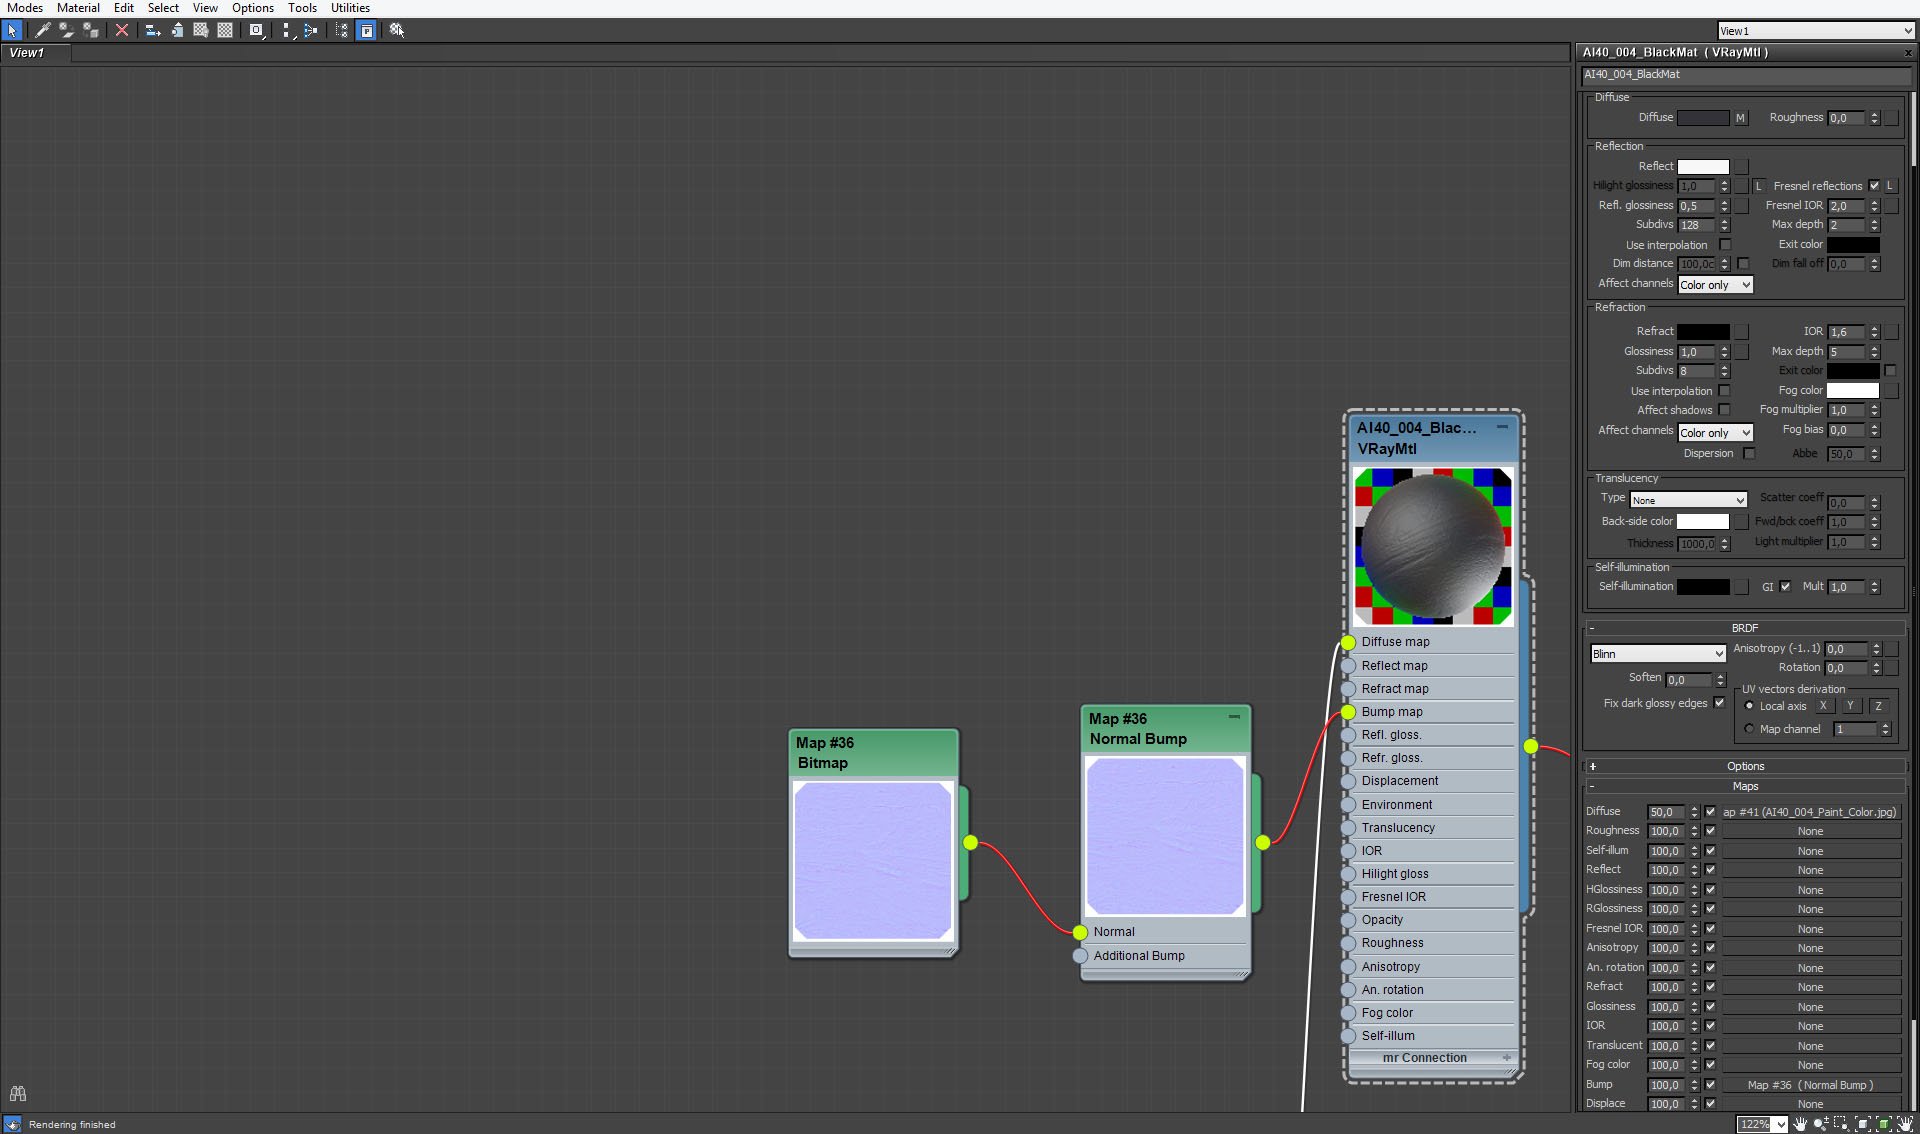
Left wall material settings with prominent normal bump map.
Click on image to enlarge 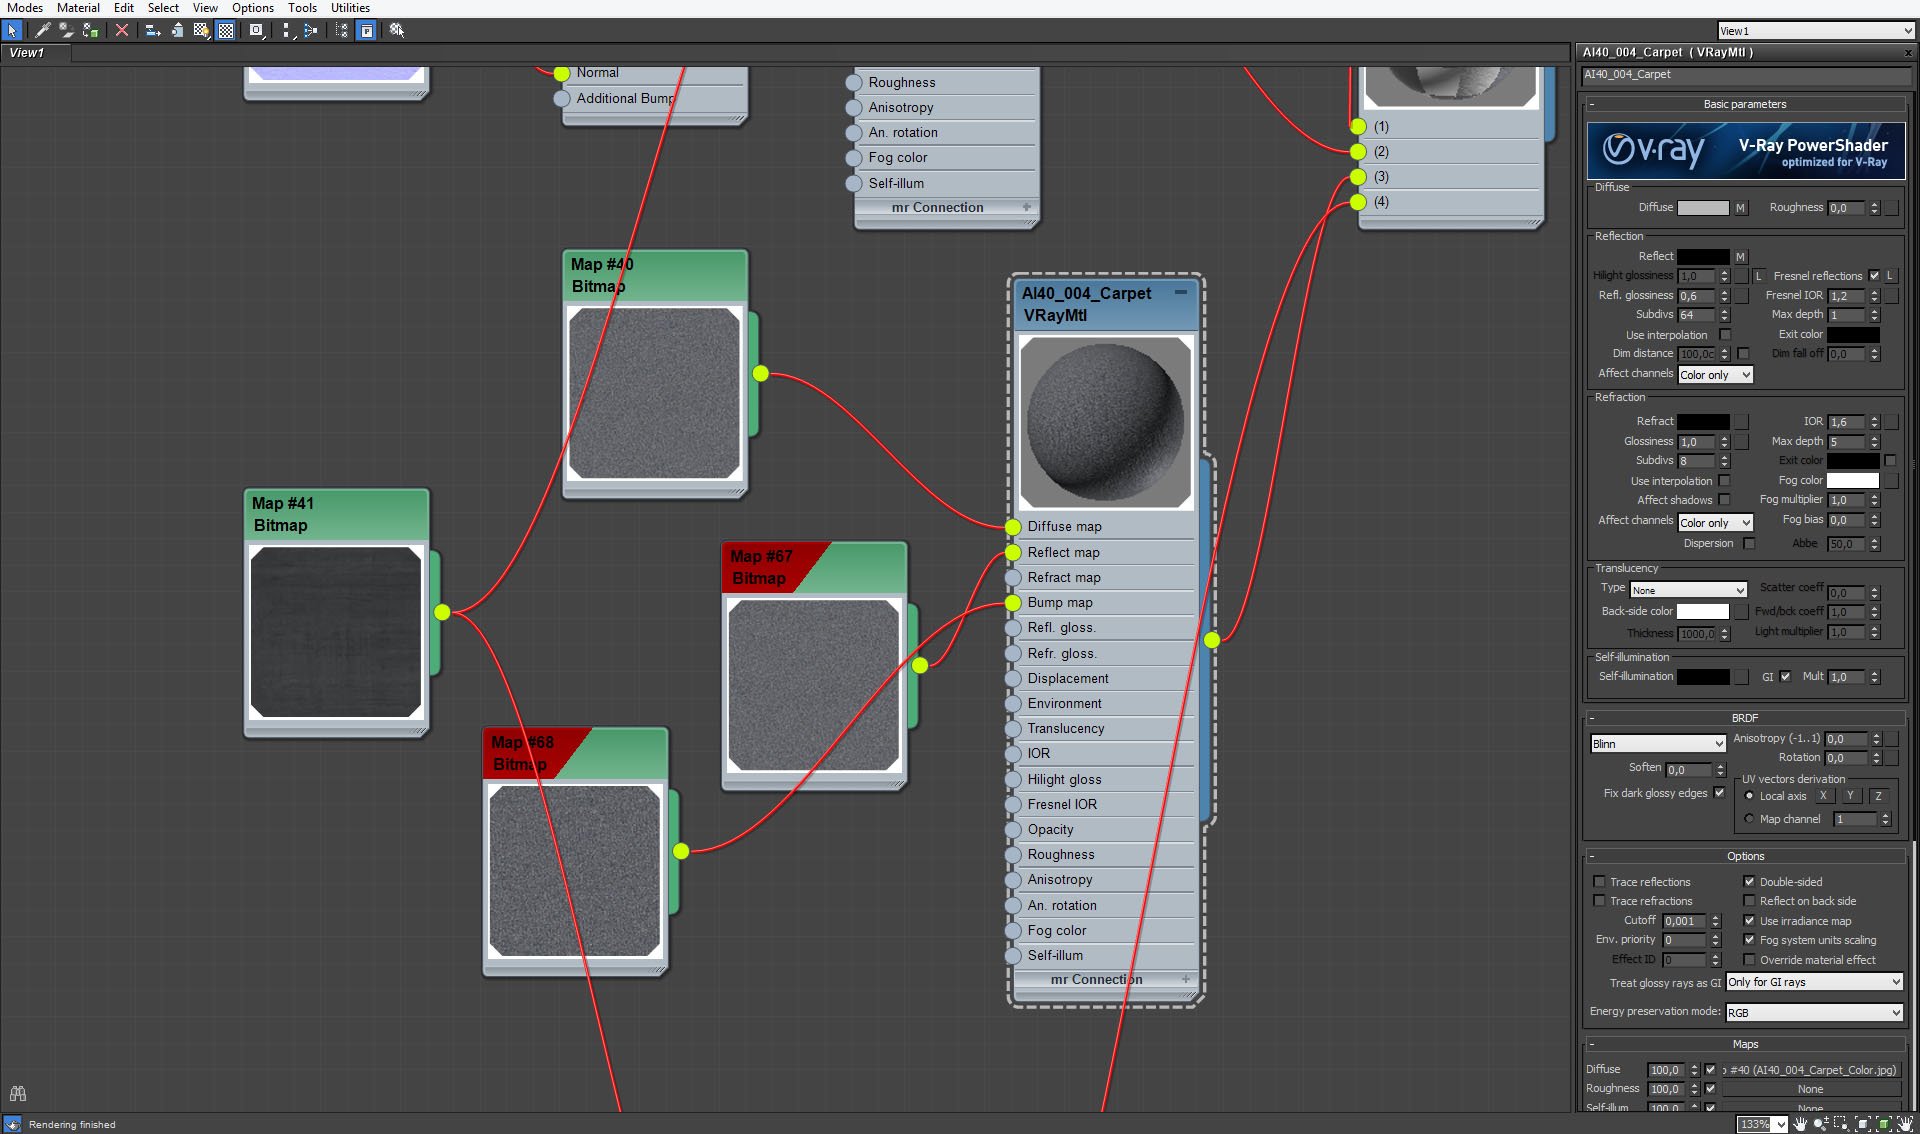
Carpet material settings.
Click on image to enlarge 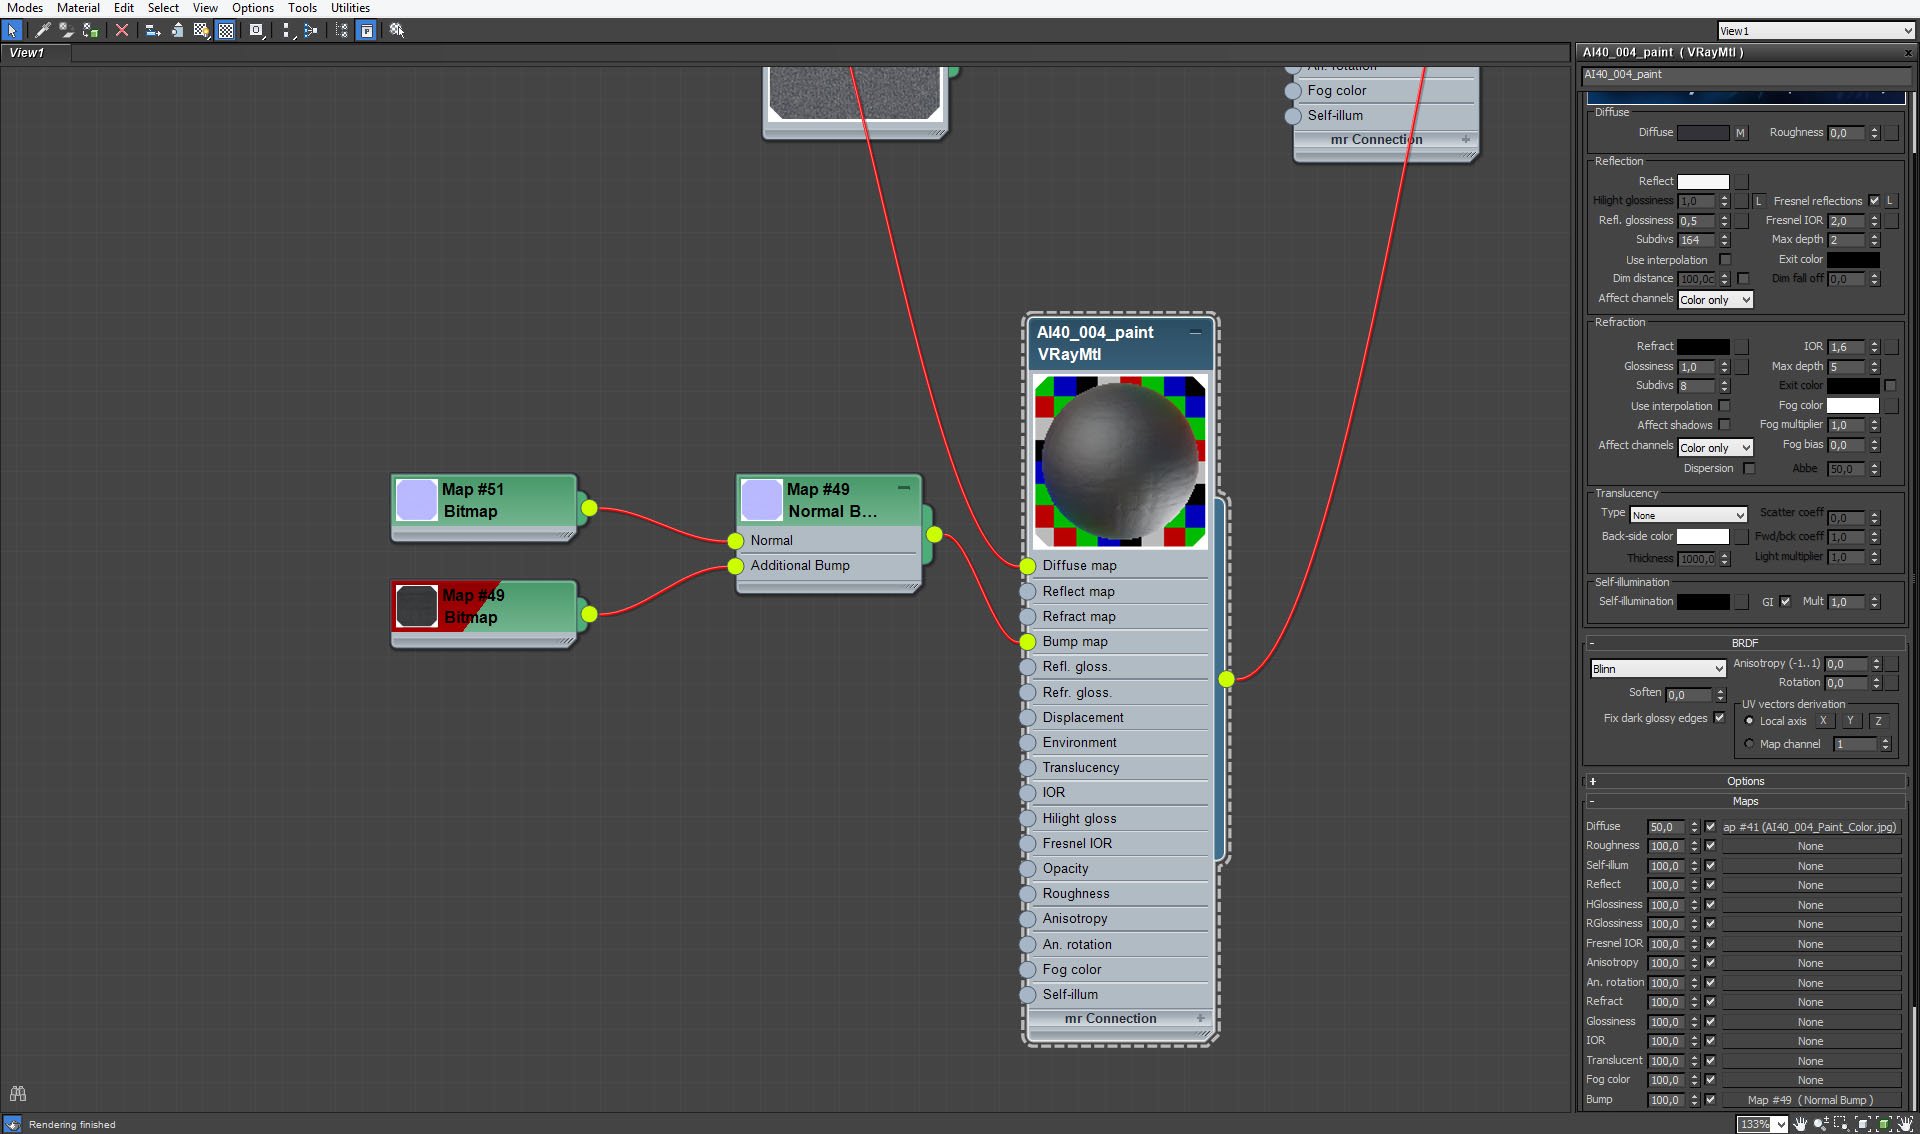
Another version of wall material.
Click on image to enlarge 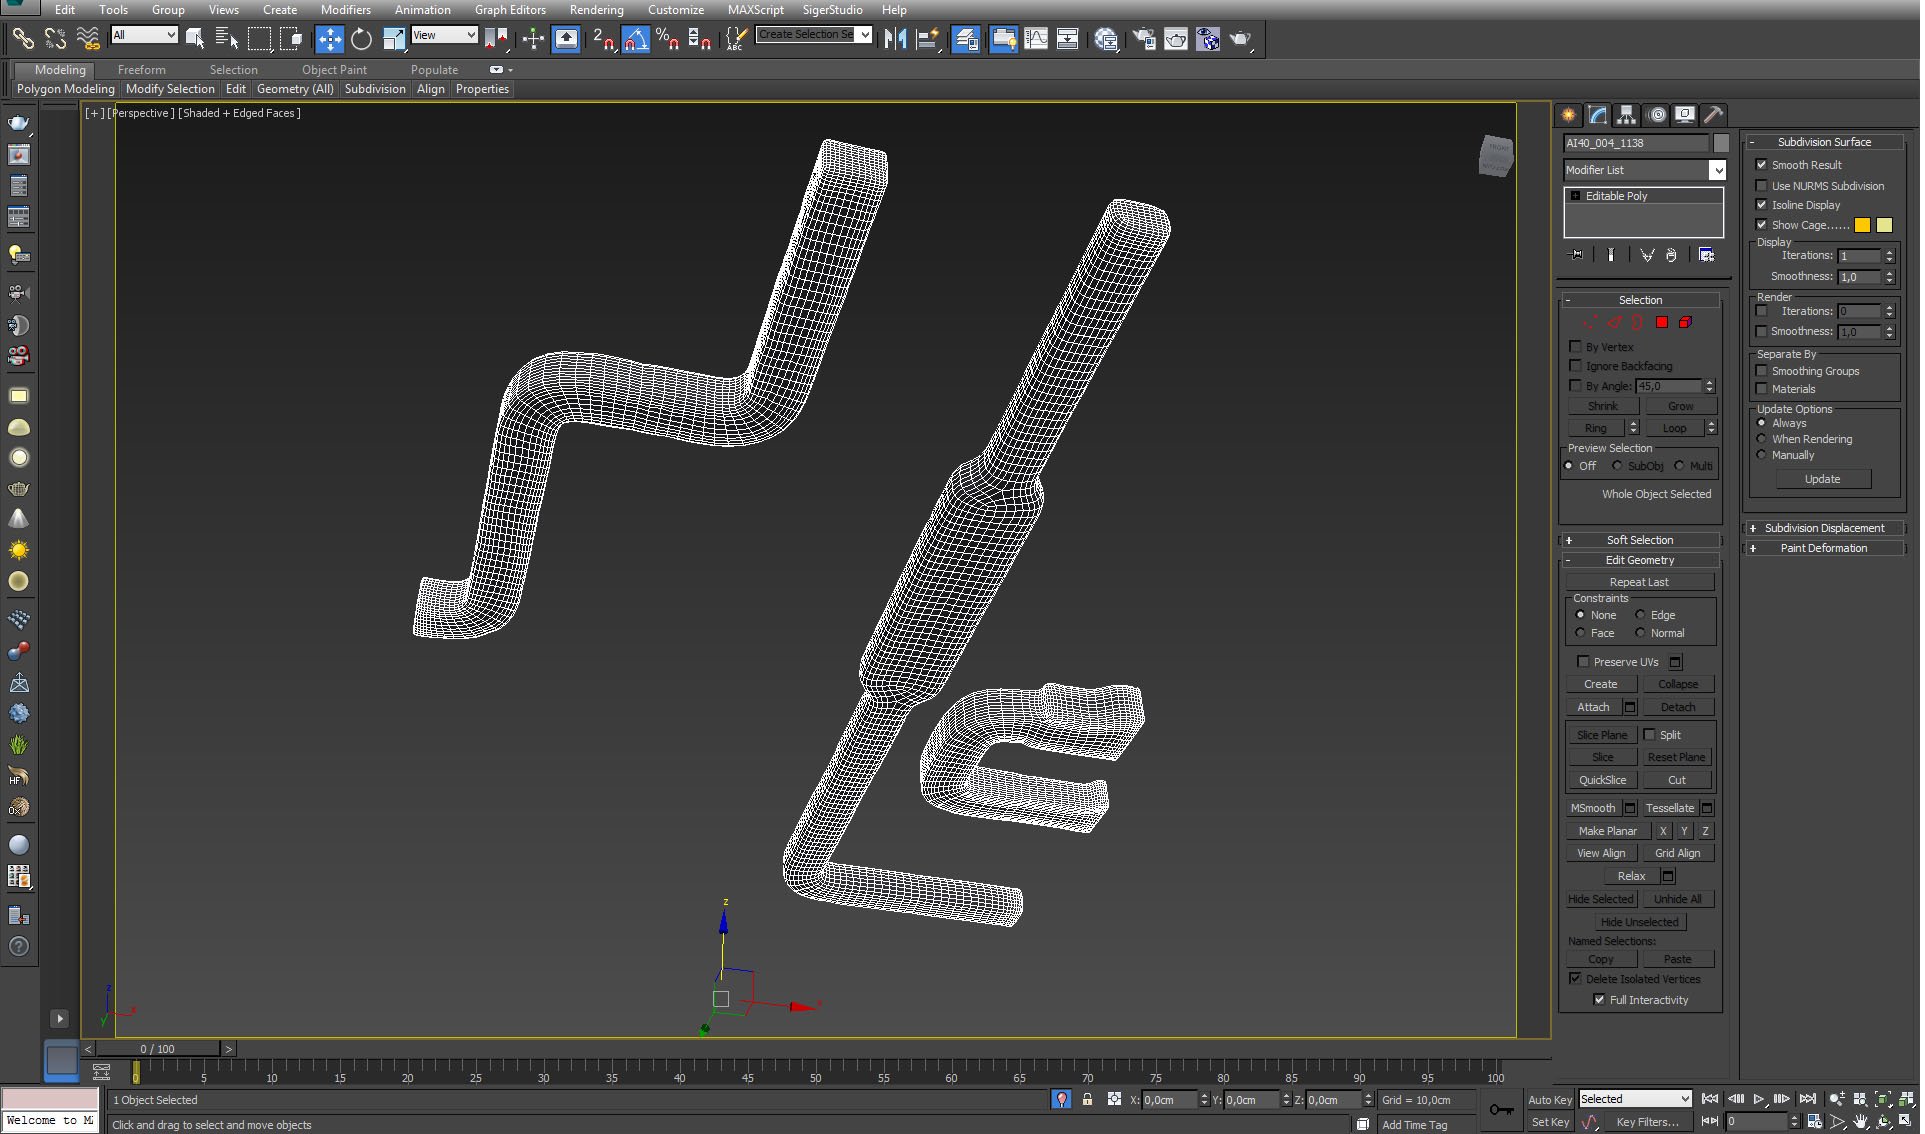
Pipes beneath the ceiling - wireframe view.
Click on image to enlarge 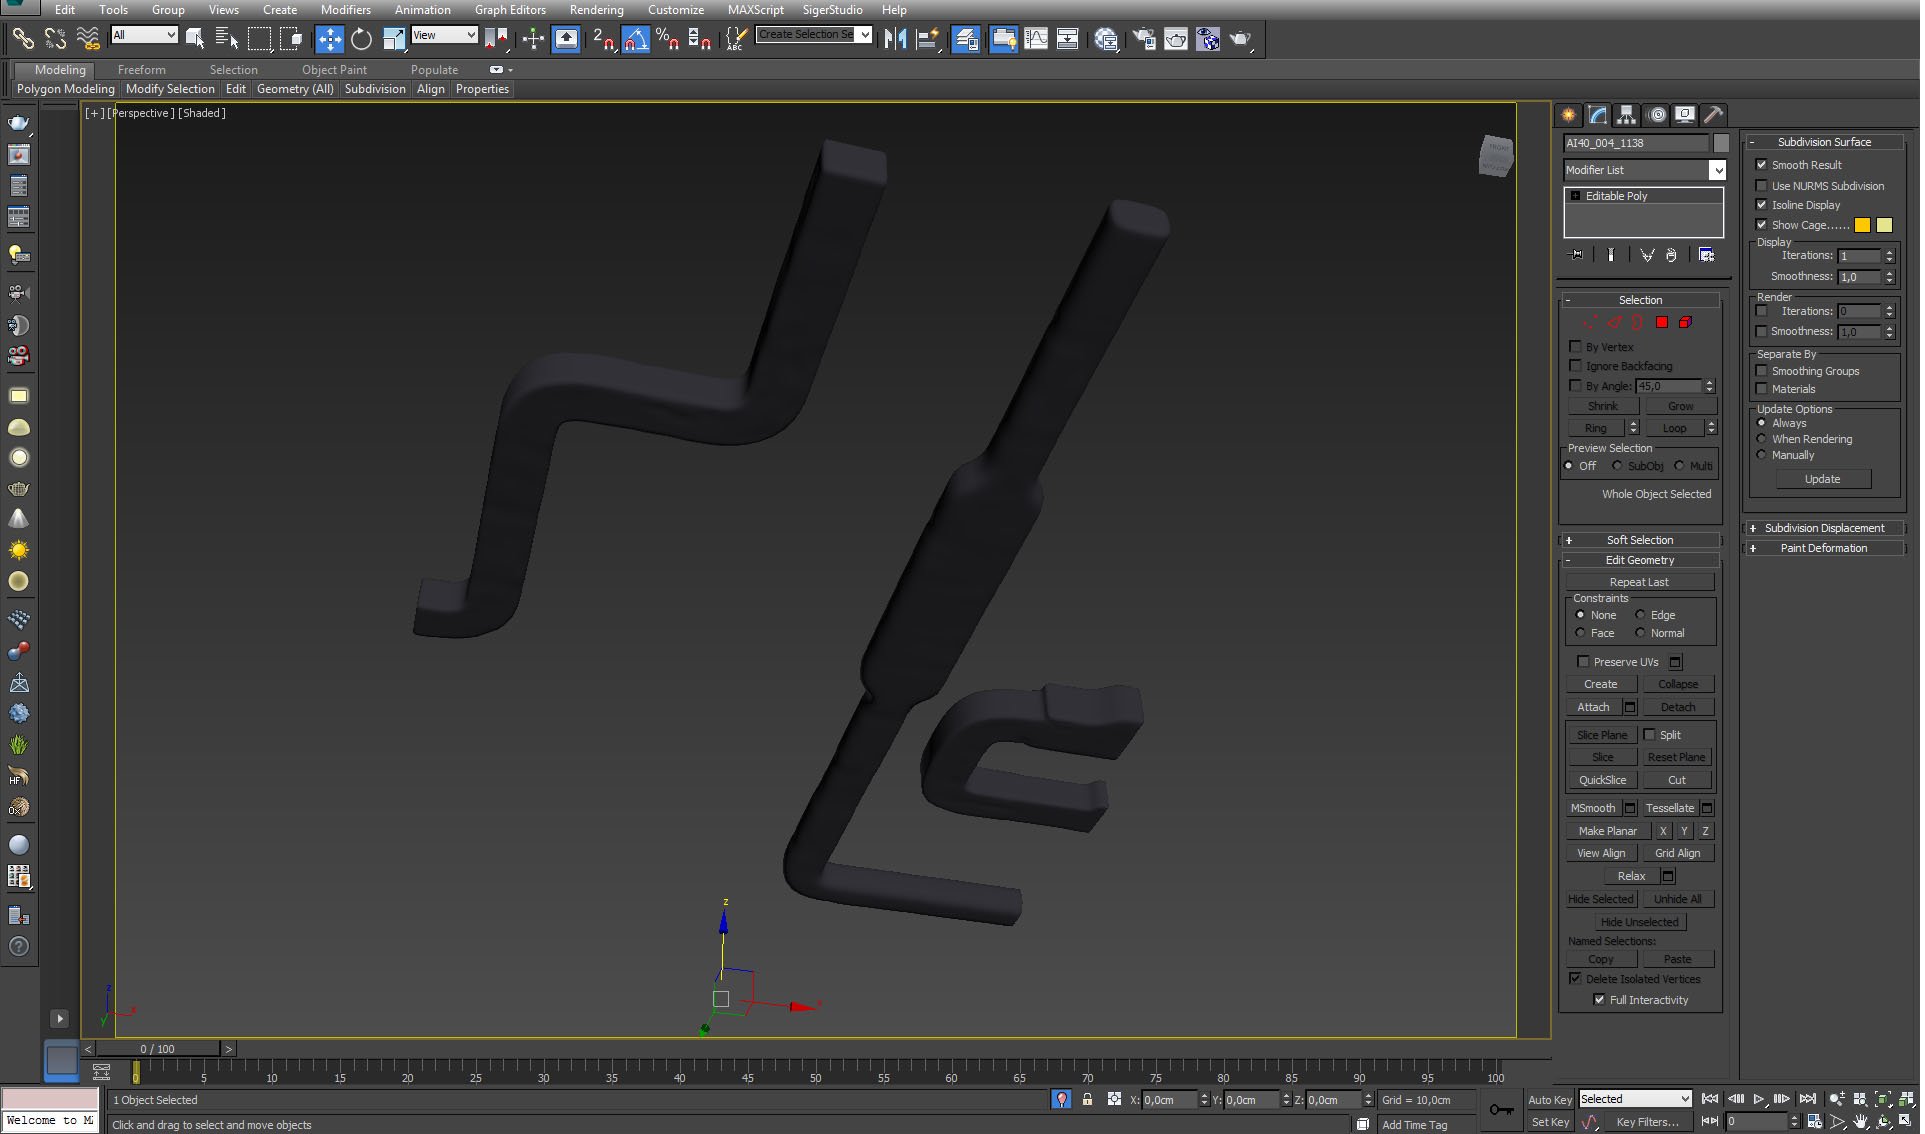
Pipes without wireframe. Pipes were modeled in 3ds Max, then exported to ZBrush and sculpted there. After that, we exported displacement map from ZBrush and used it in bump slot of VRay material.
Click on image to enlarge 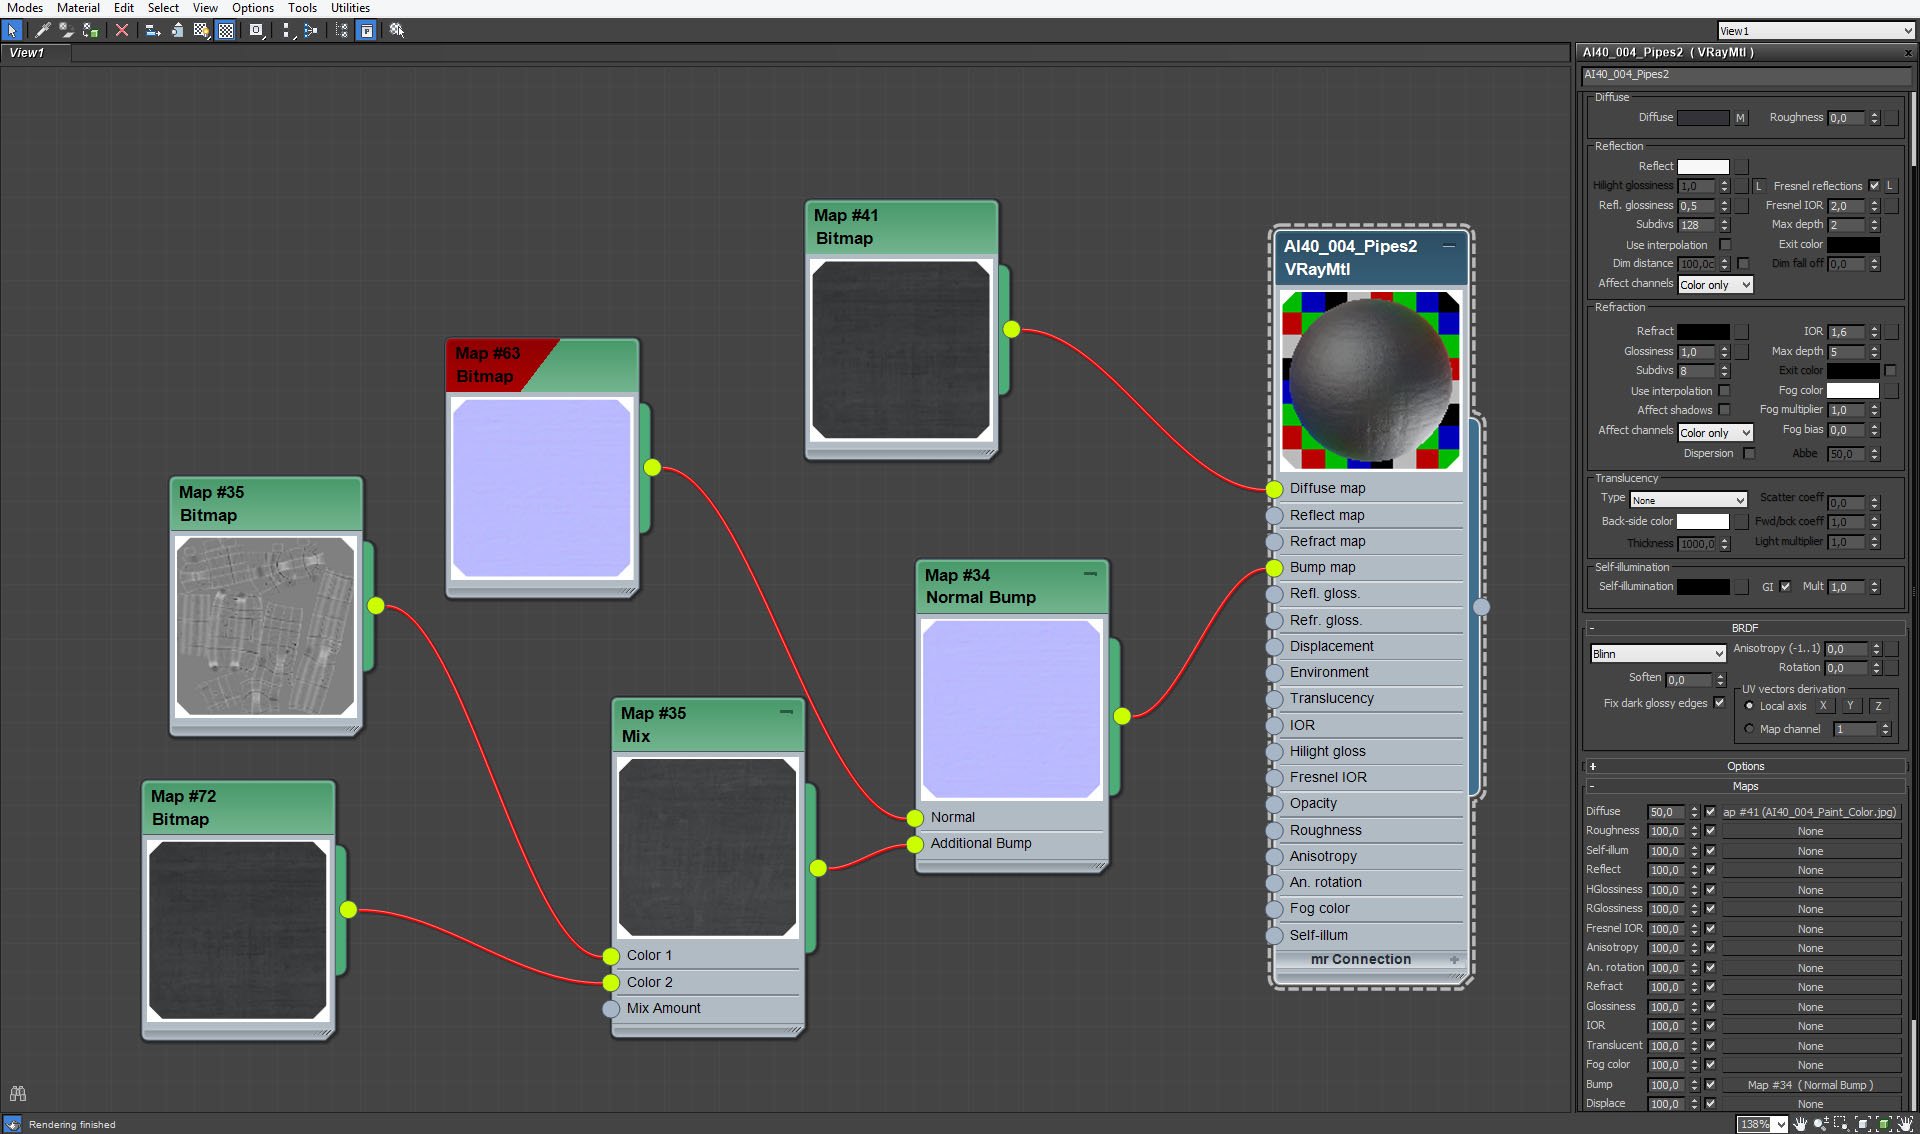
Pipes material. As you can see it uses quite complex bump settings - it mixes three different maps in bump map slot. It gives a look of thick, uneven paint surface on the pipes.
Click on image to enlarge 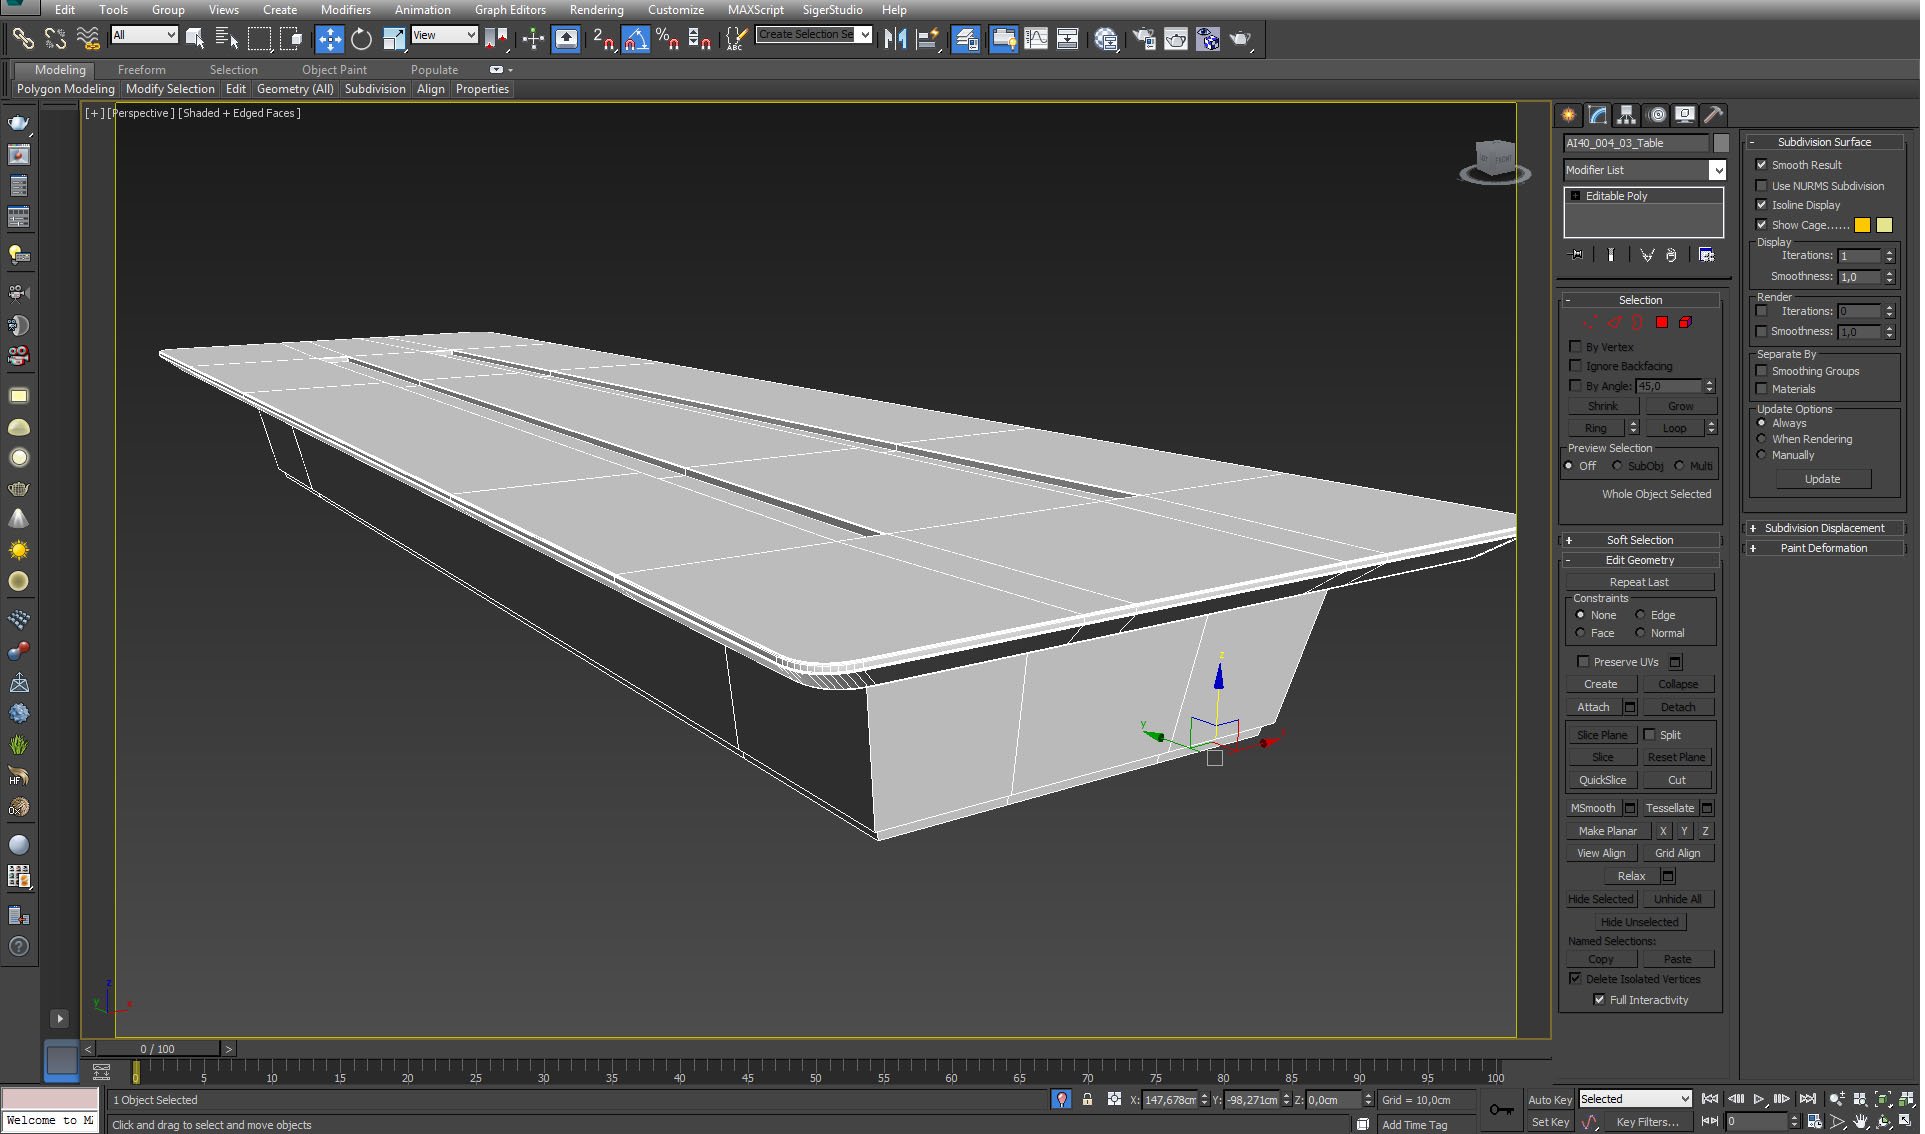
Click on image to enlarge 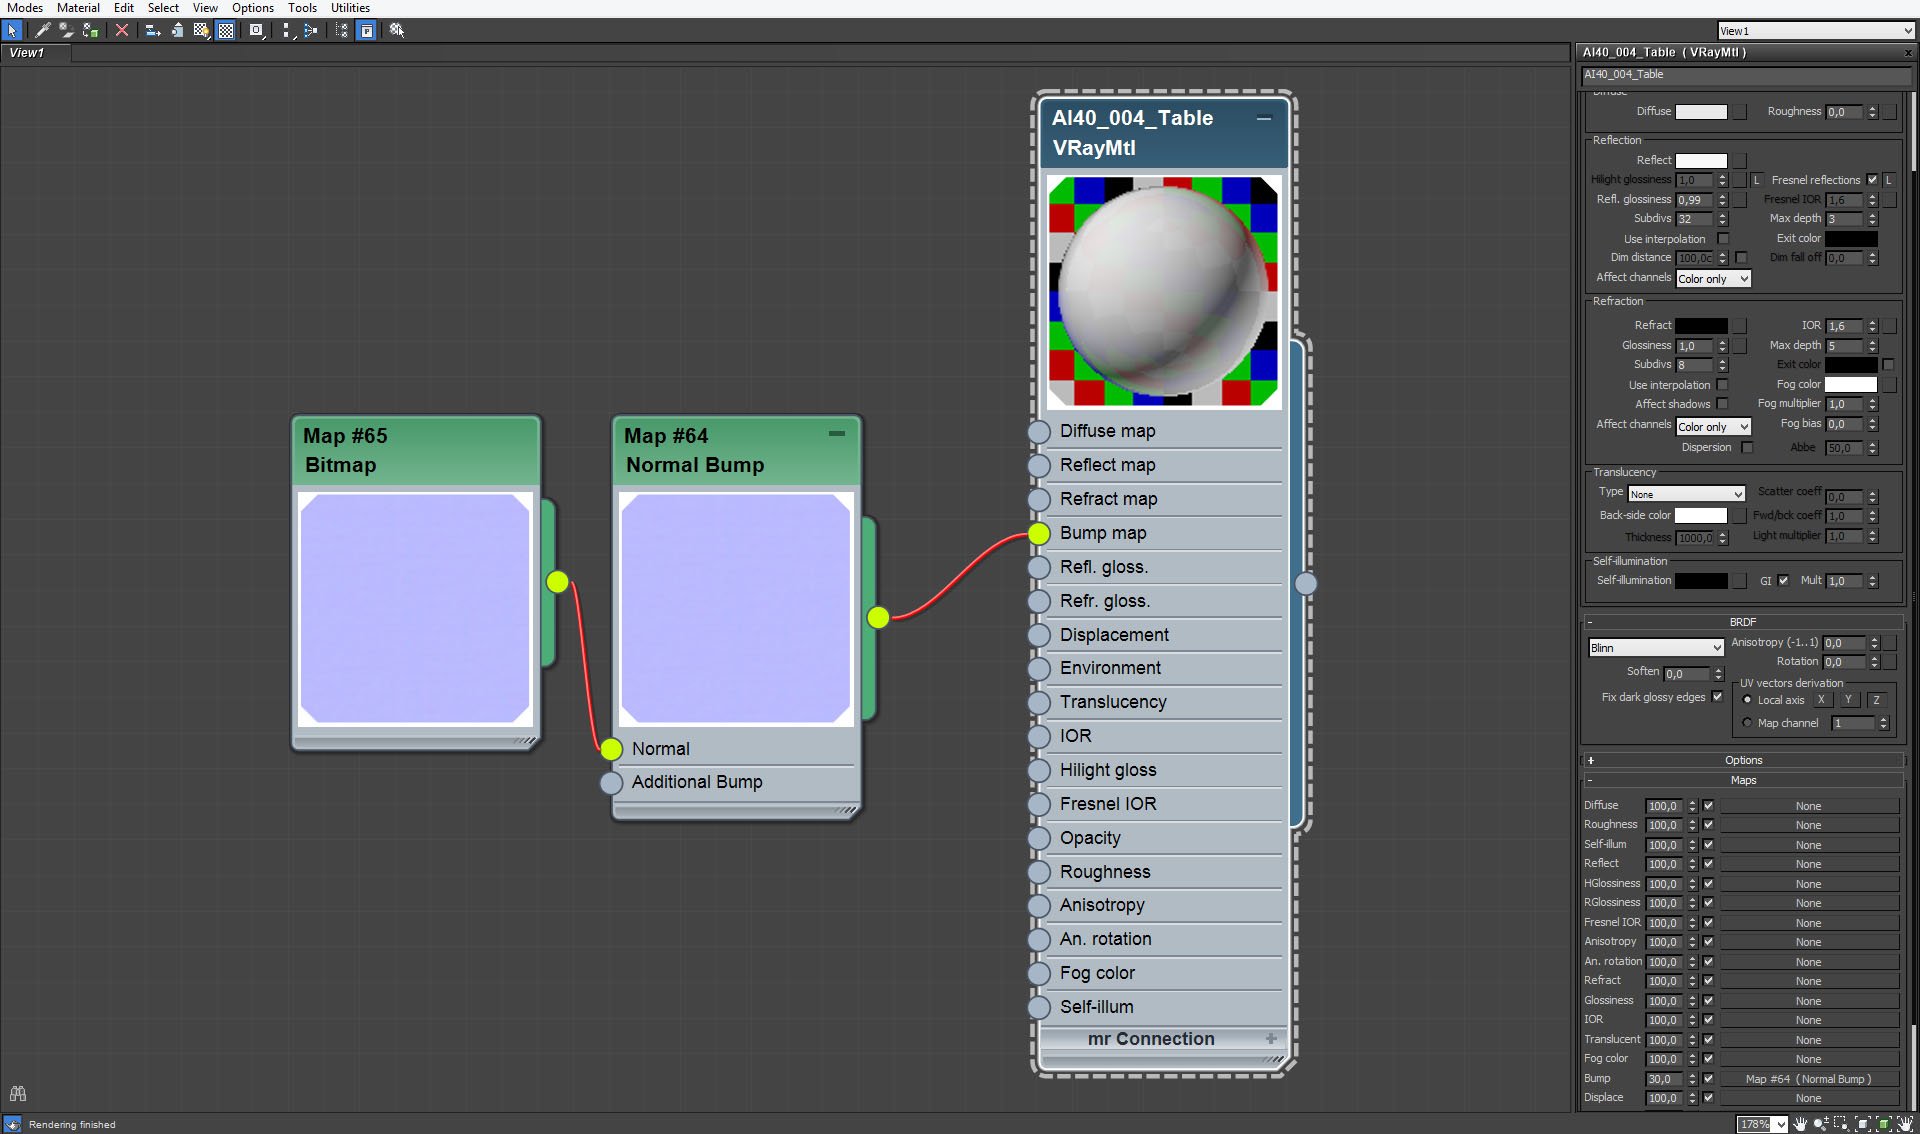
Click on image to enlarge 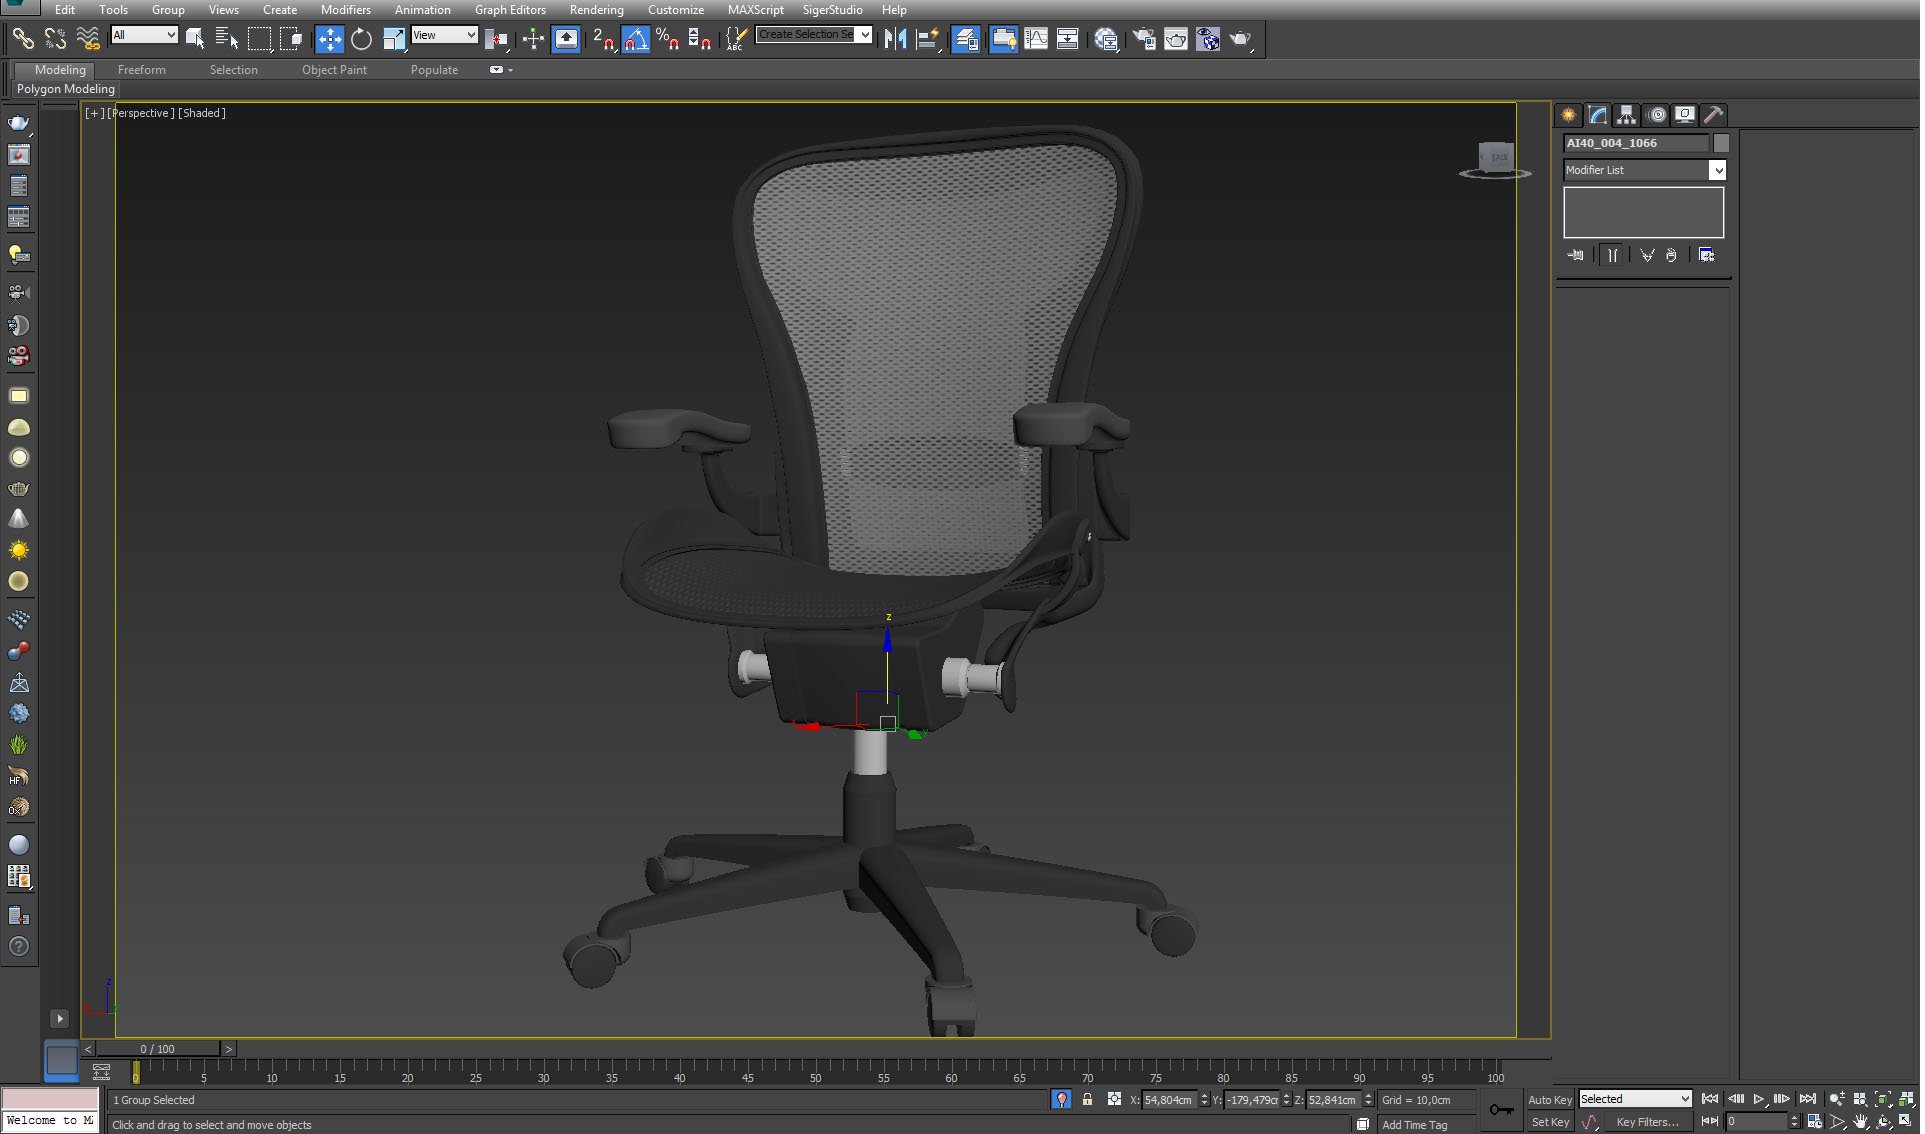
Chair model is a complex one.
Click on image to enlarge 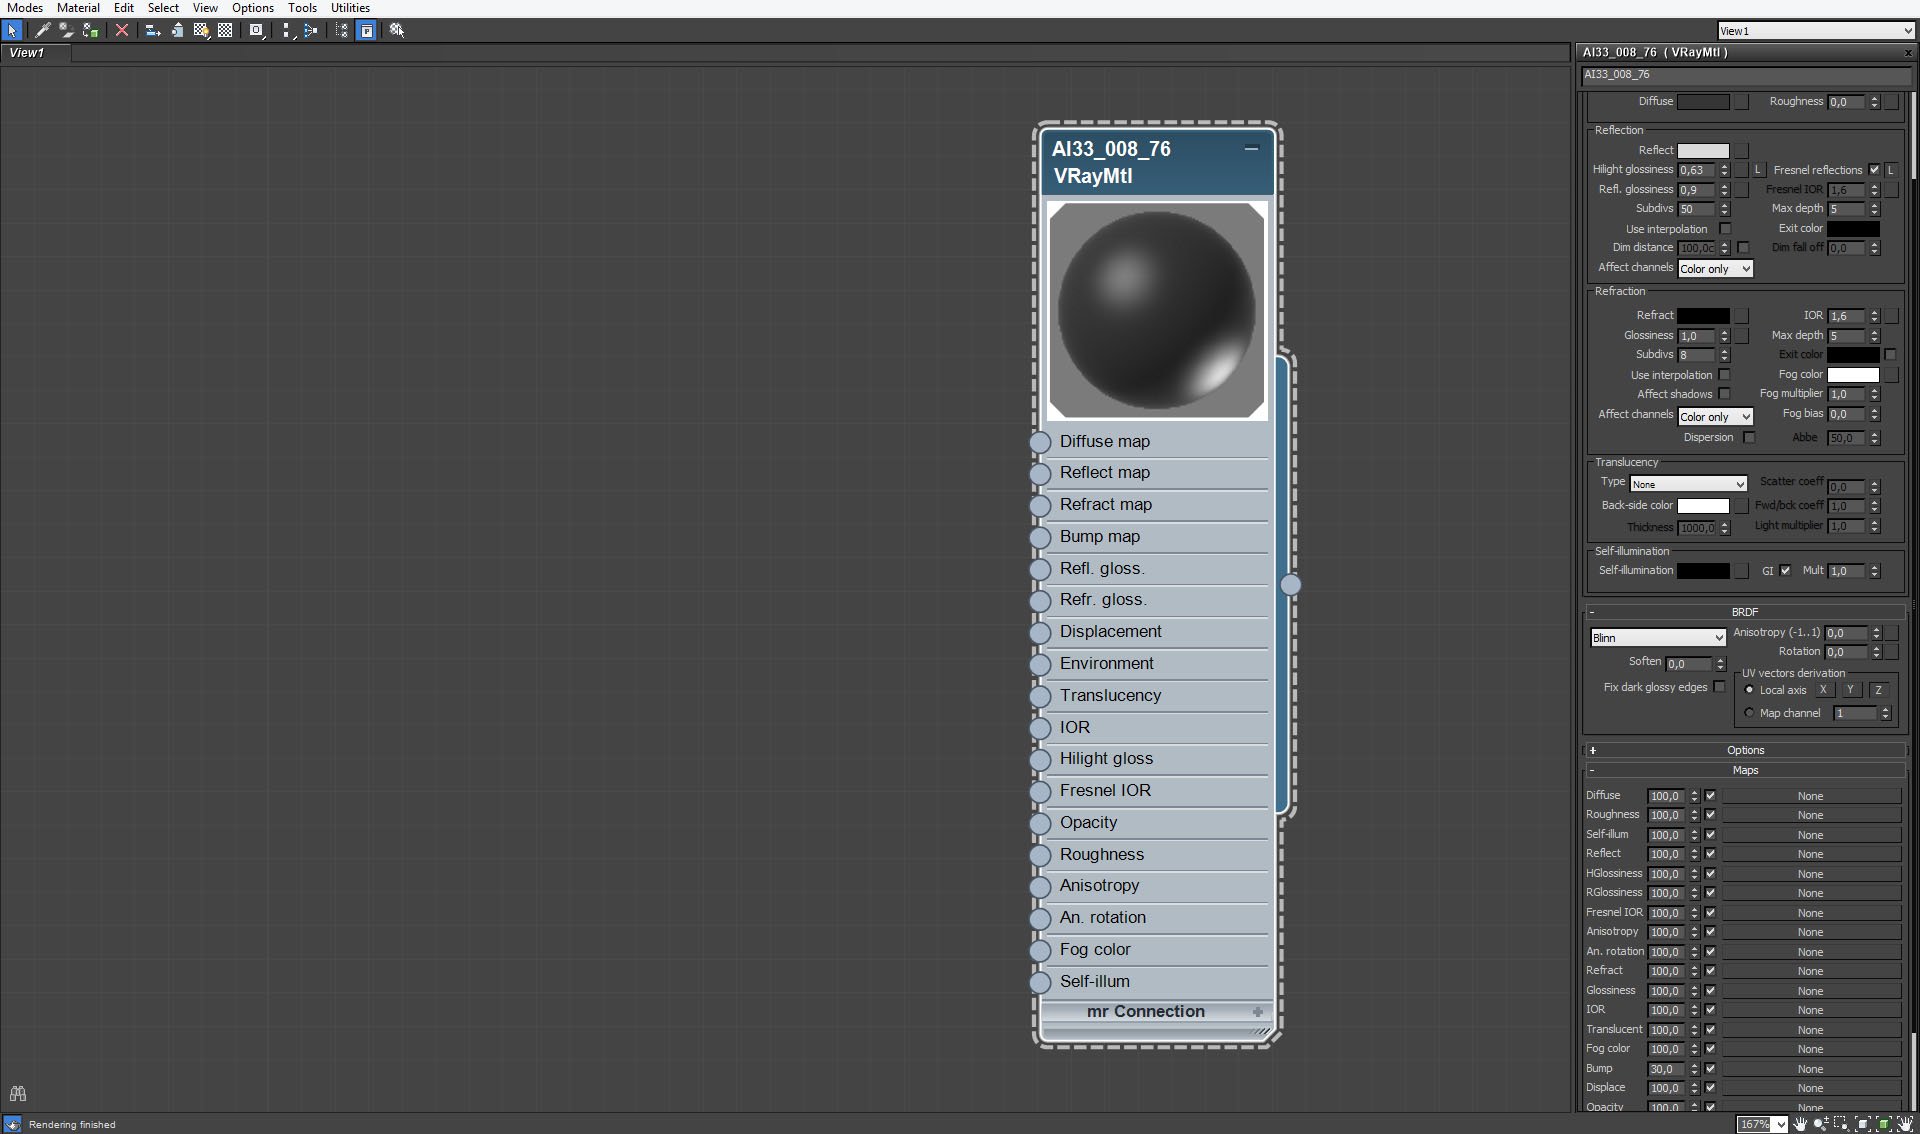
Chair material (seat and arms).
Click on image to enlarge 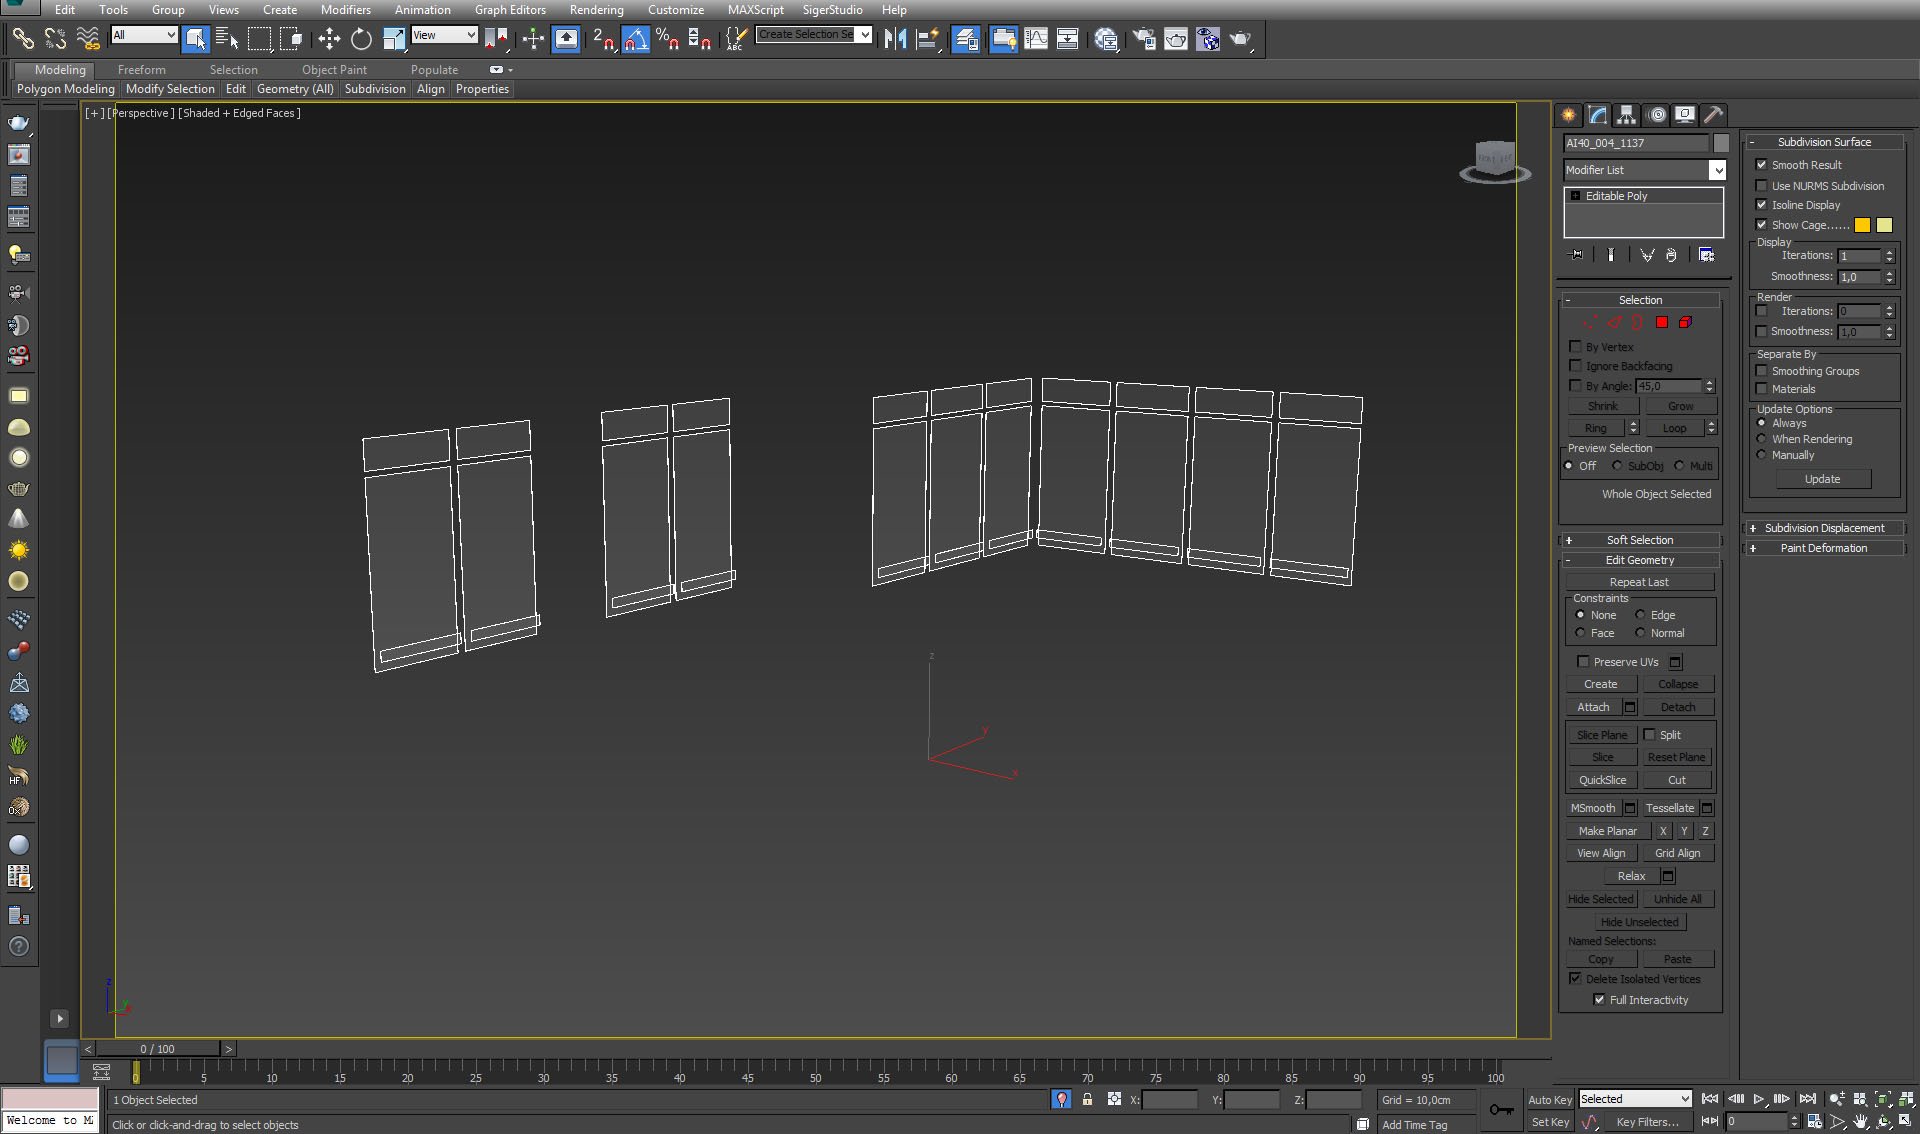
Click on image to enlarge 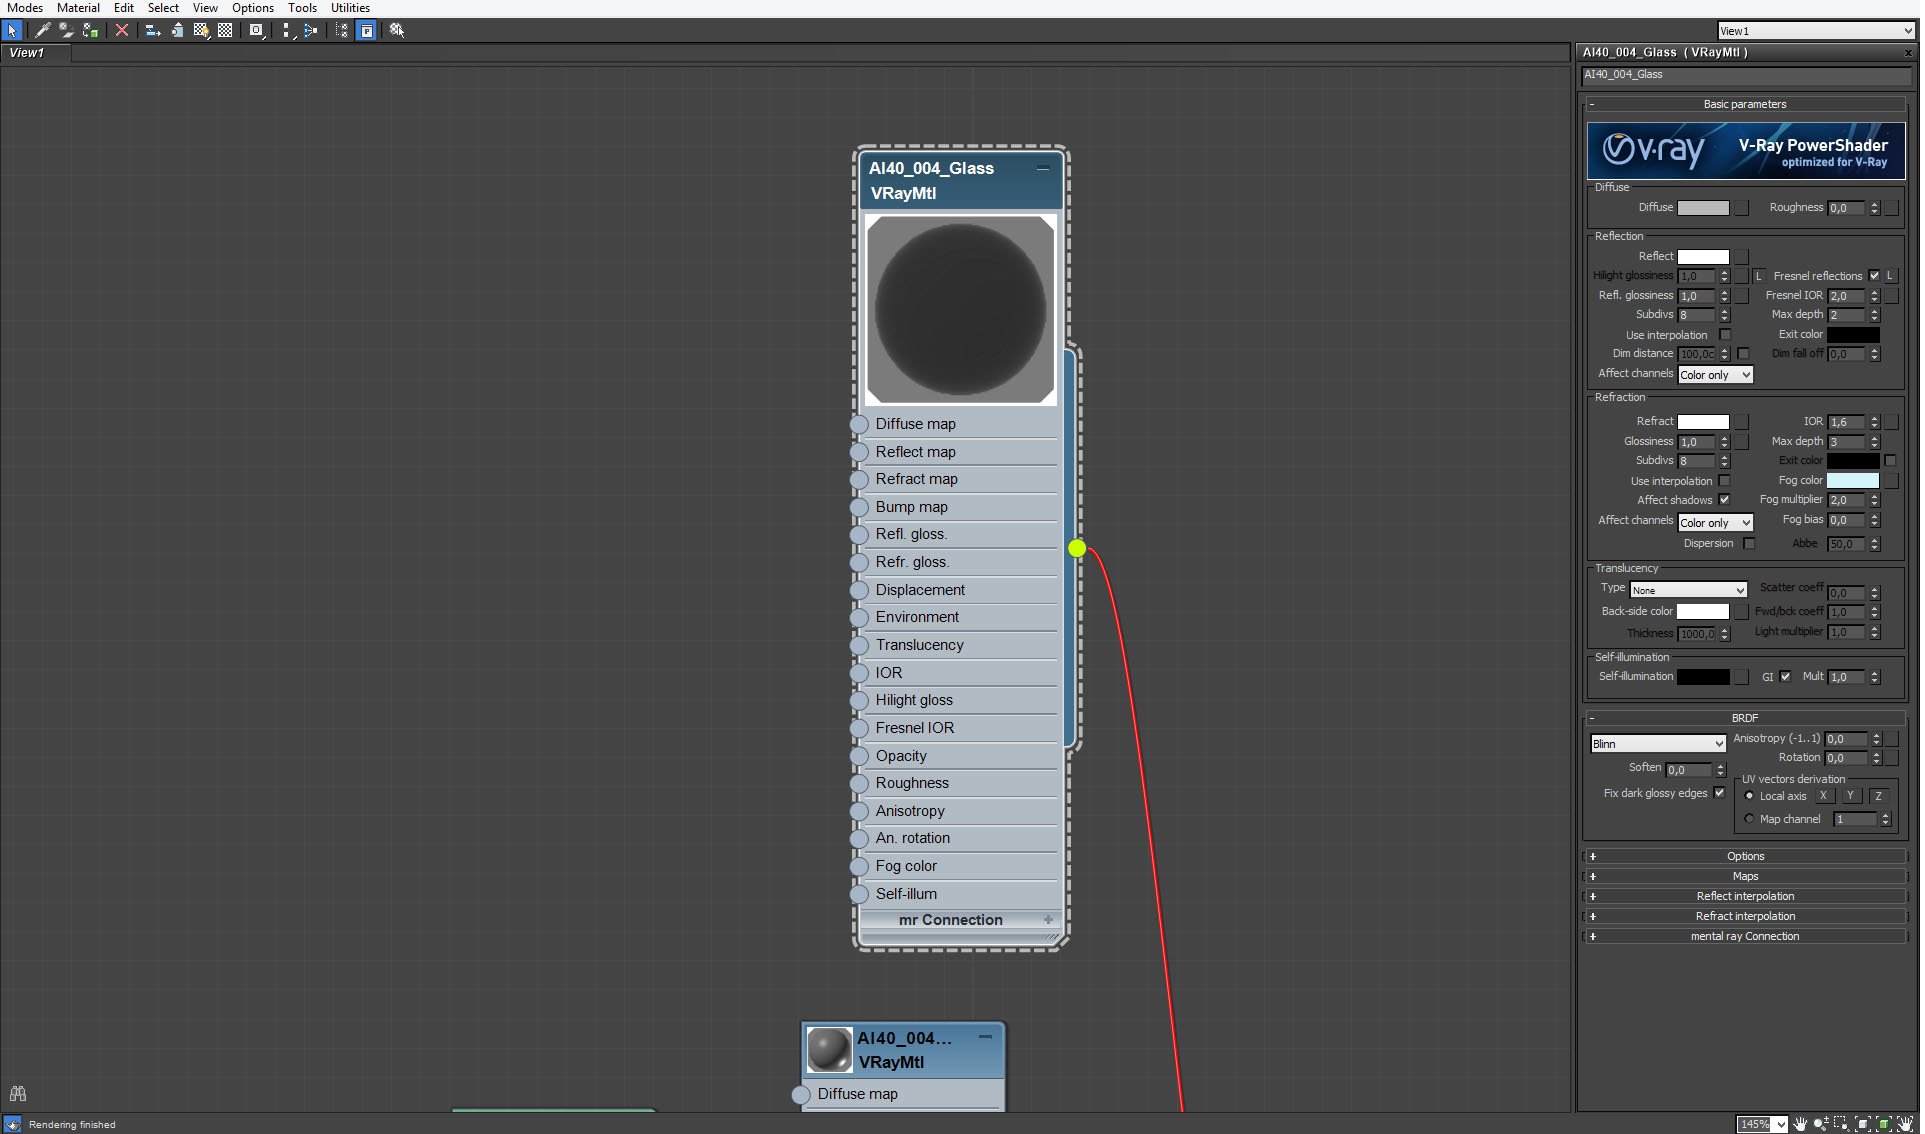
Windows - glass material.
Click on image to enlarge 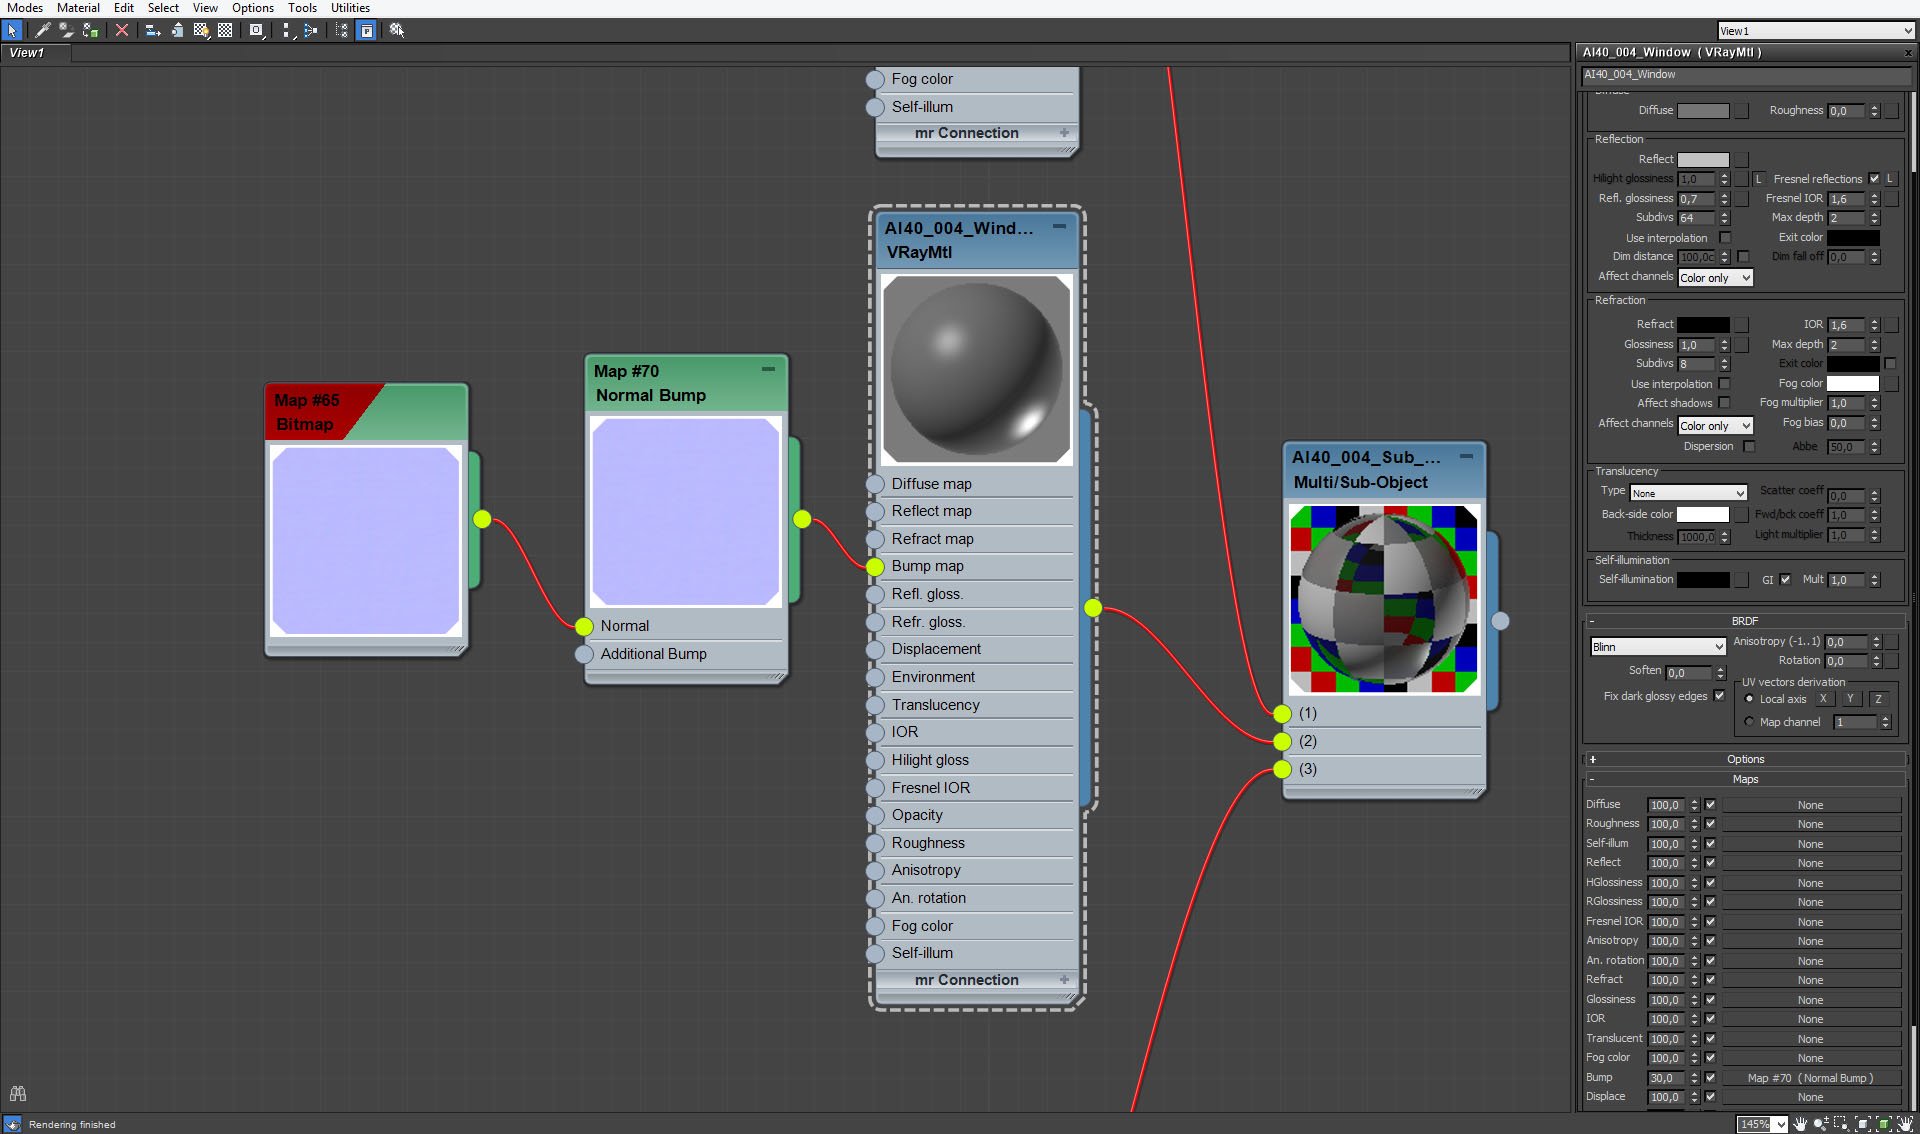
Windows - frame material.
Click on image to enlarge 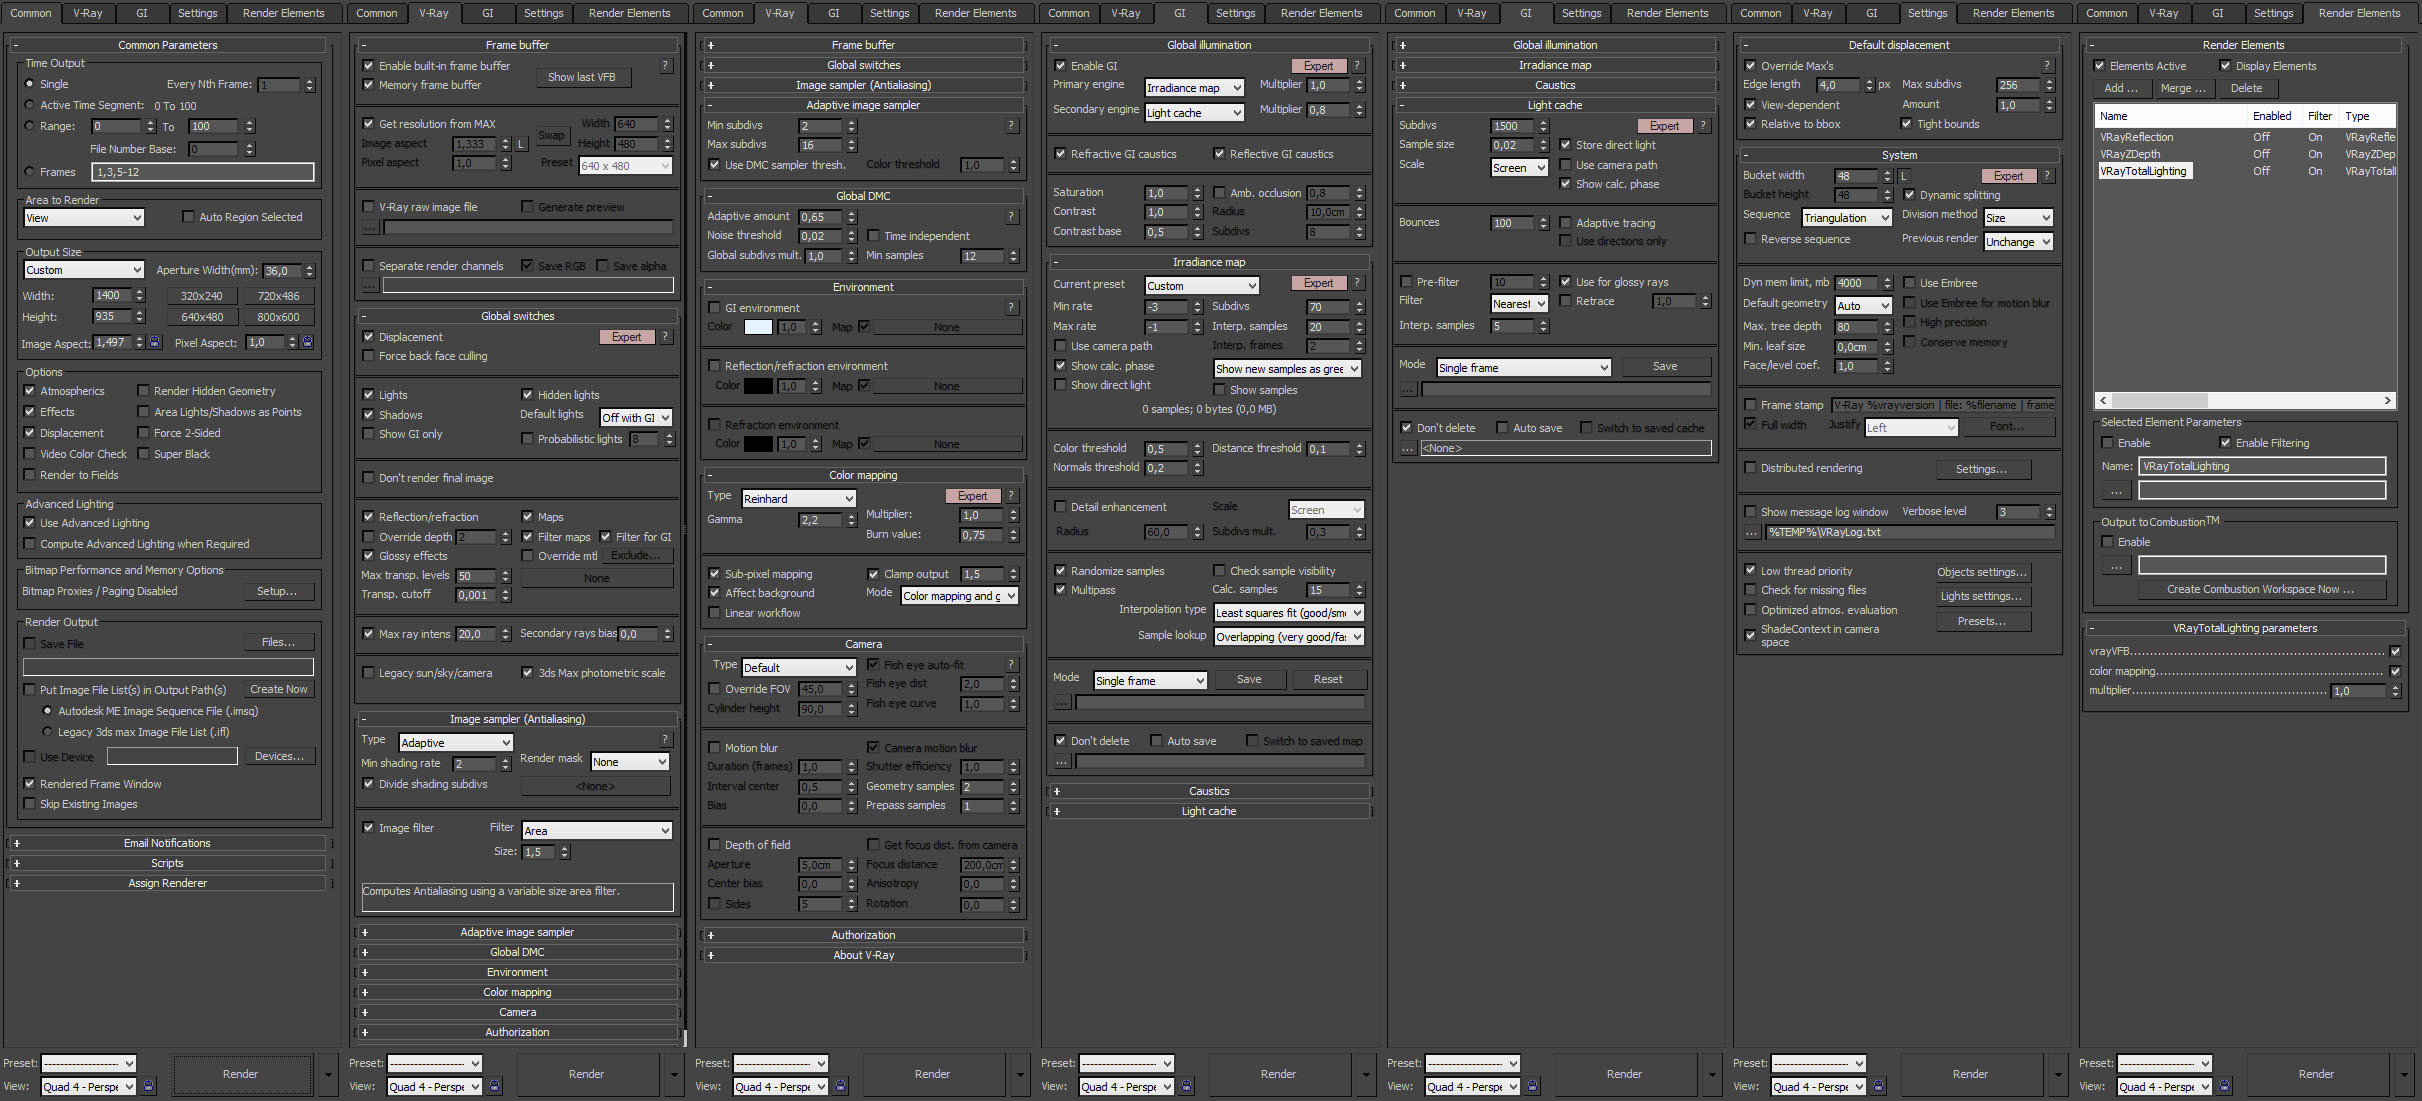
Click on image to enlarge 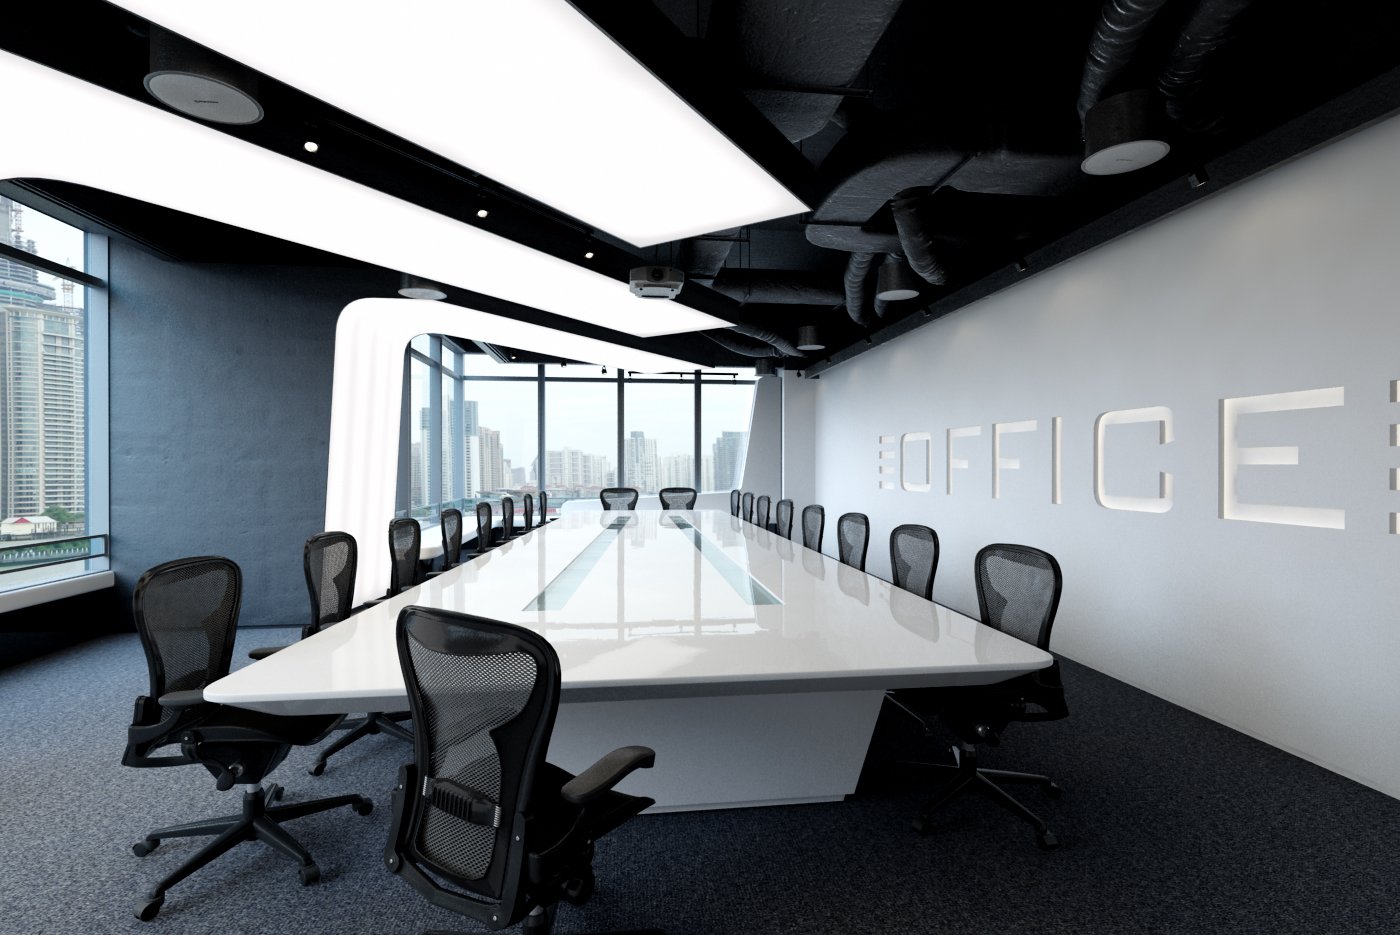
RAW render. It actually looks quite good already, there is not much to do, we need only adjust it tonally.
Click on image to enlarge 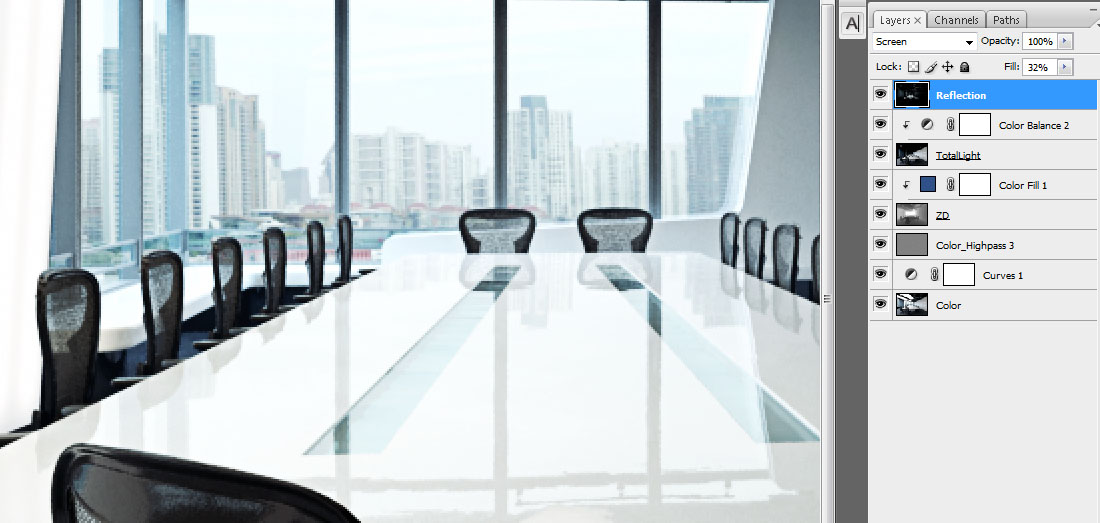
Photoshop layers. We used Curves layer to get rid of grey and change it to blue / green tint. then we put highpass layer to sharpen the image. ZDepth layer fill 11%, screen) enhances pipes details. It is limited by Color Fill 1 clipping mask (that is giving blue tint). TotalLight layer enhances overall brightness. On top of that we have Reflection layer.
Click on image to enlarge 
Final image after post-production. Thanks for reading! :)
You can purchase this single scene or entire Archinteriors vol. 40 collection in Evermotion Shop.
 How To Make Your CGI Walls More RealisticRealistic walls with noise modifier.
 Removing LUTs from Textures for better resultsRemove the LUT from a specific texture in order to get perfect looking textures in your render.
 Chaos Corona 12 ReleasedWhat new features landed in Corona 12?
 OCIO Color Management in 3ds Max 2024Color management is crucial for full control over your renders.
 A look at 3dsMax Video SequencerDo you know that you can edit your videos directly in 3ds Max? Renderram is showing some functionalities of 3ds Max's built in sequencer.
 FStorm Denoiser is here - First ImpressionsFirst look at new denoising tool in FStorm that will clean-up your renders.
Customer zone
Your orders
Edit account
Add project
Liked projects
View your artist profile




COMMENTS