Located in the heart of Uptown Charlotte, The Ritz-Carlton, Charlotte, is a luxury hotel that brings an urbane sophistication through its innovative restaurants, dramatic skyline views, spacious guest rooms and suites, and its environmental commitment. Evermotion created 3D scene inspired by its great lobby. This scene comes from Archinteriors vol. 44. It is scene 10 of this collection. It was rendered in V-Ray.
Click on image to enlarge
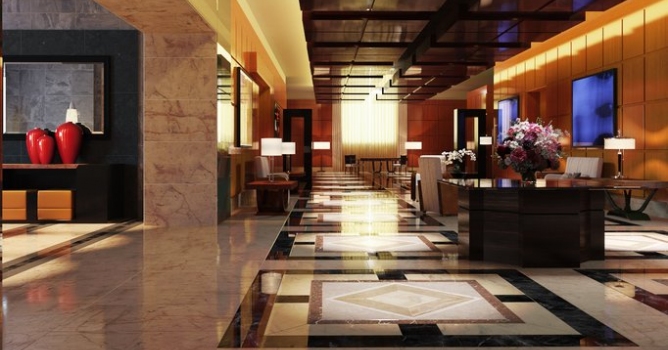
Final render (camera 1). We can see lobby with marble floor, wooden hanging ceiling, classy lamps on tables and some light from LED strip hidden under hanging ceiling.
Click on image to enlarge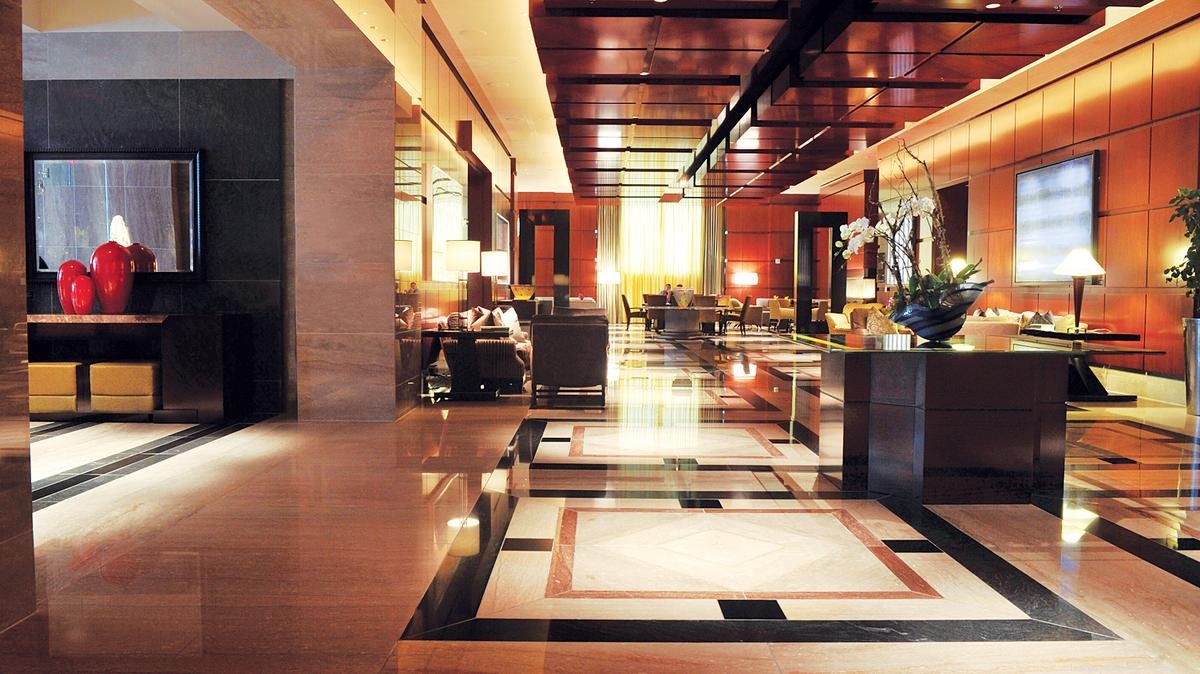
Reference (real photo). That's how this lobby looks in "real life".
Click on image to enlarge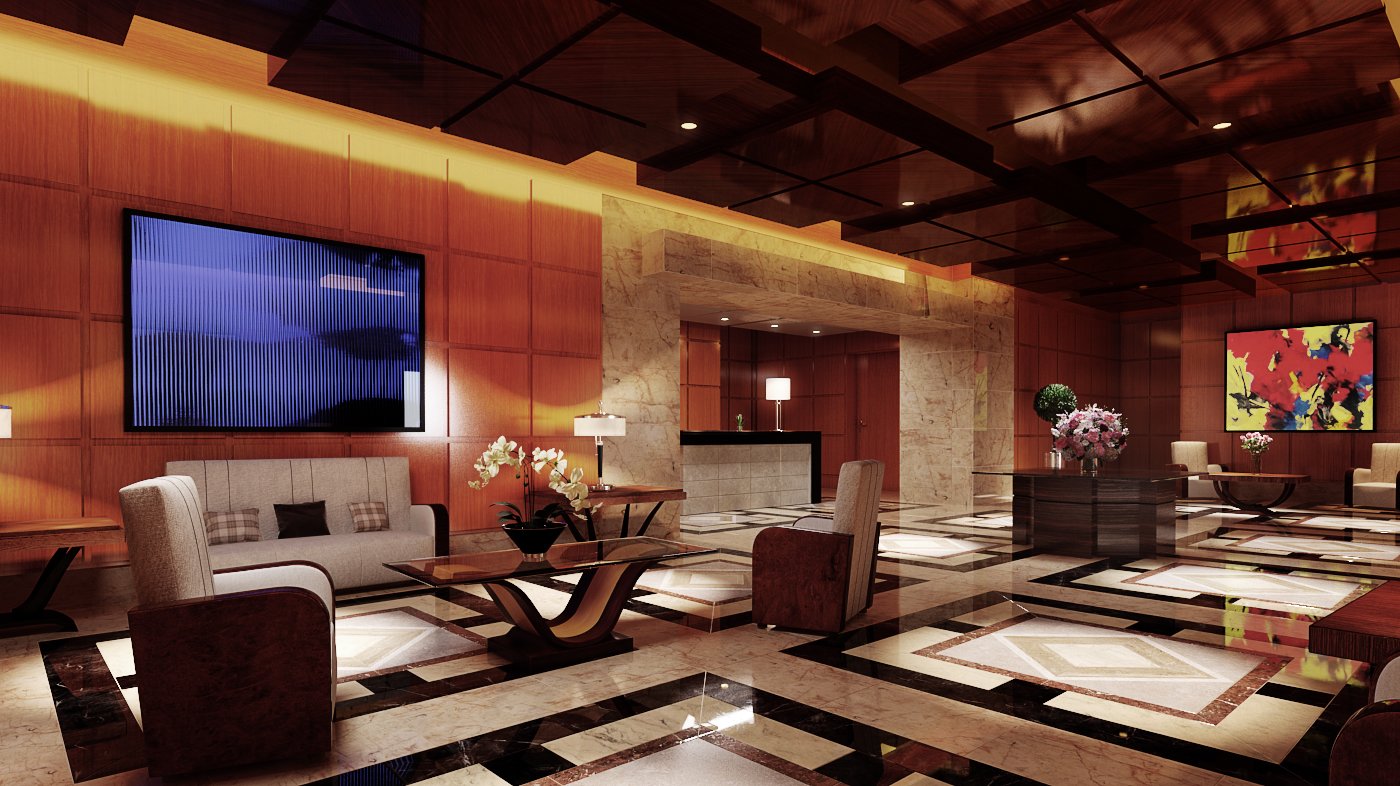
Final redner, camera 2.
Click on image to enlarge
That's how this scene looks through Vray Camera in 3ds Max viewport with Materials color enabled (top right corner).
Click on image to enlarge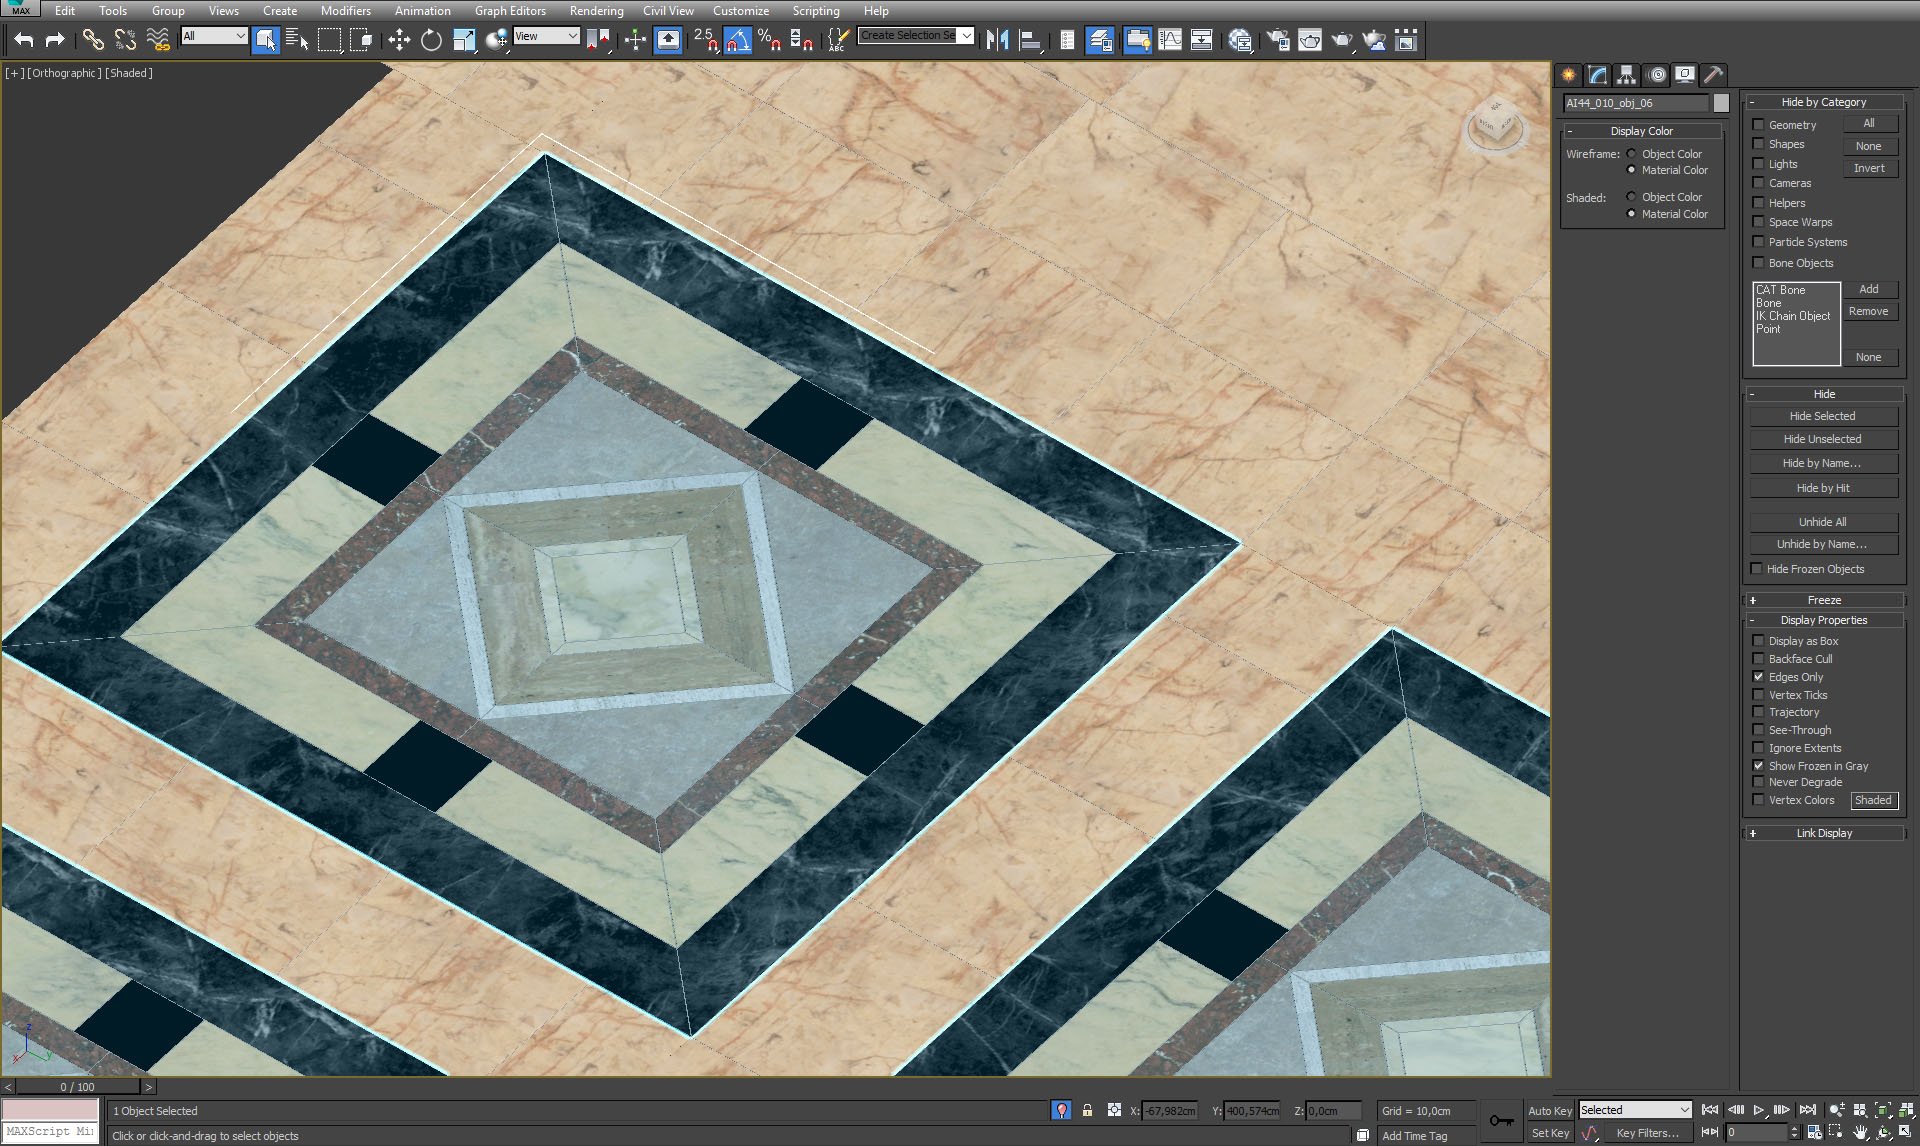
Floor has a pattern made of different kind of marble. We haven't use just some mapping on a floor, we used geometry nad different VrayMaterials for greater realism of marble floor.
Click on image to enlarge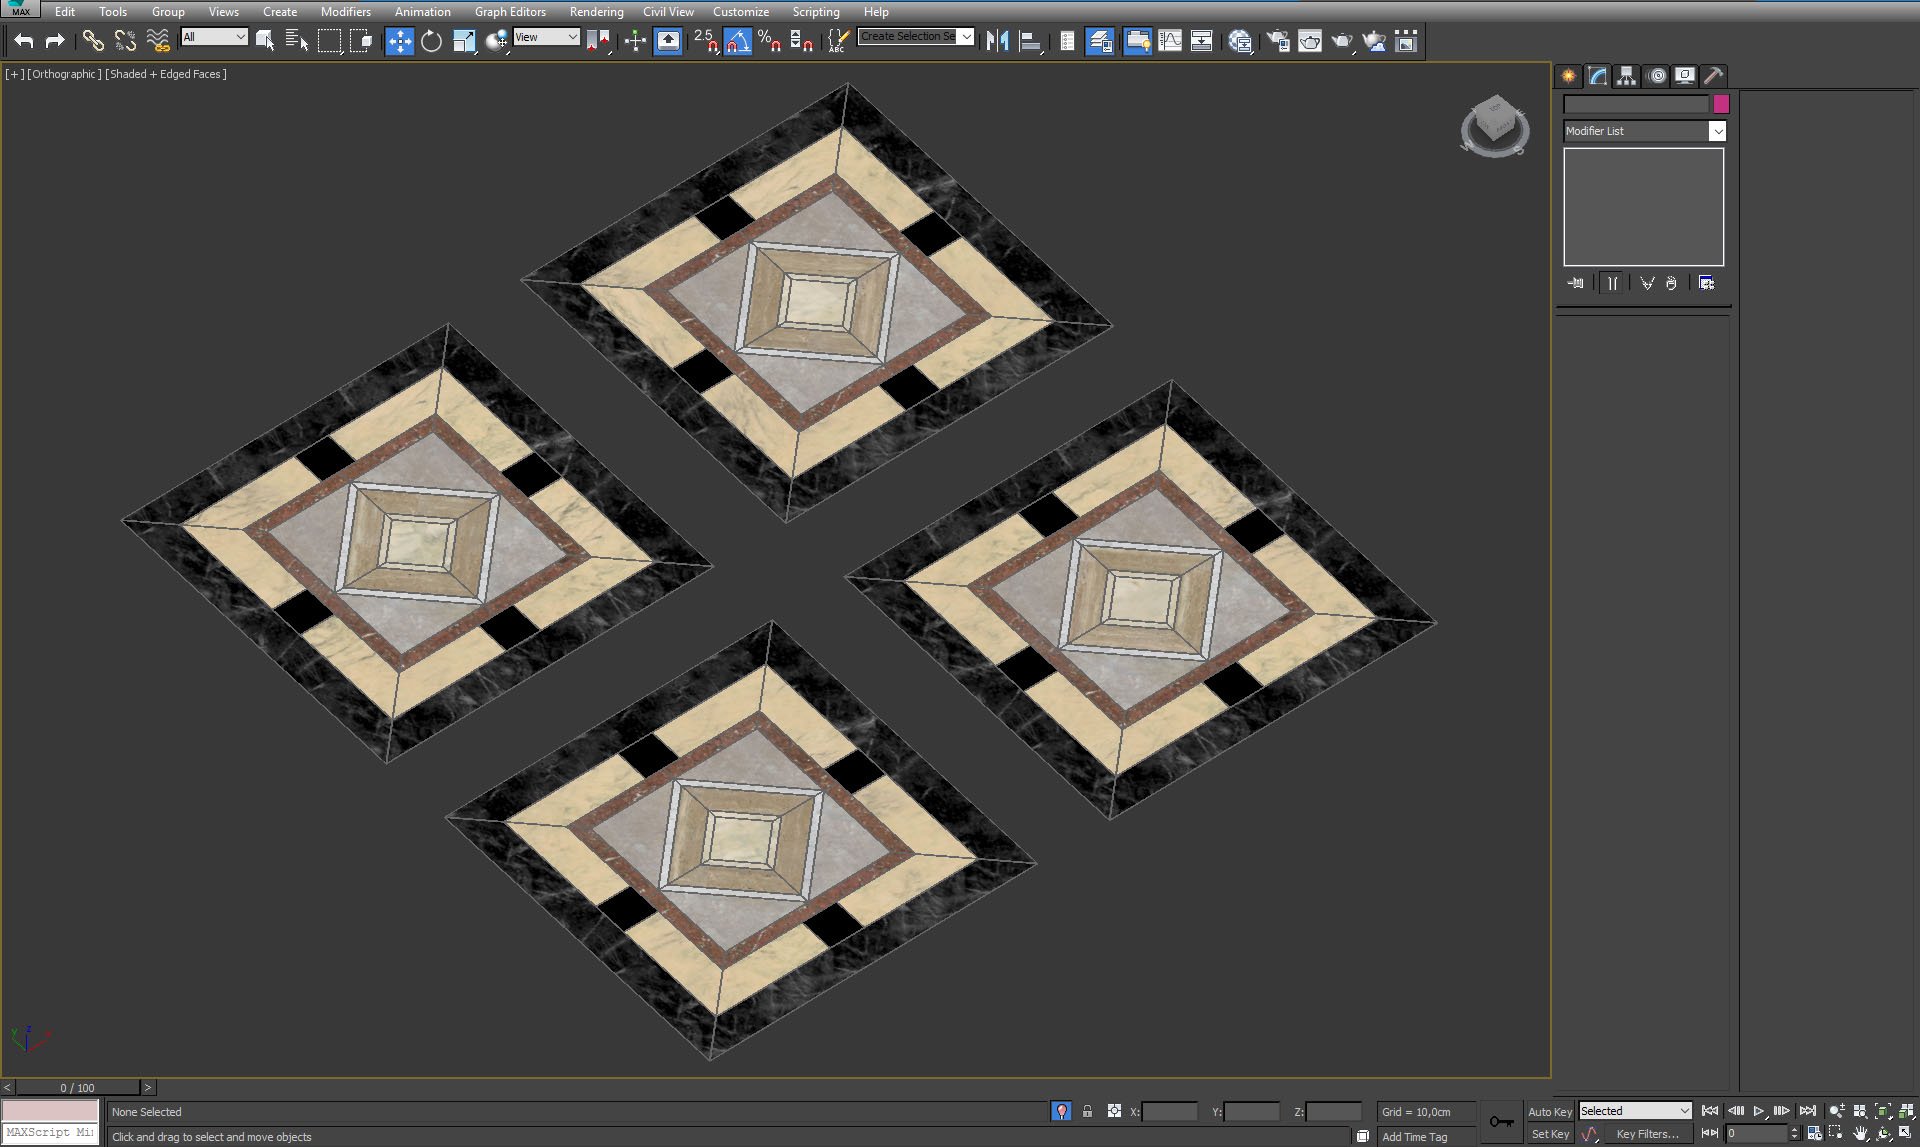
Floor marble - close up.
Click on image to enlarge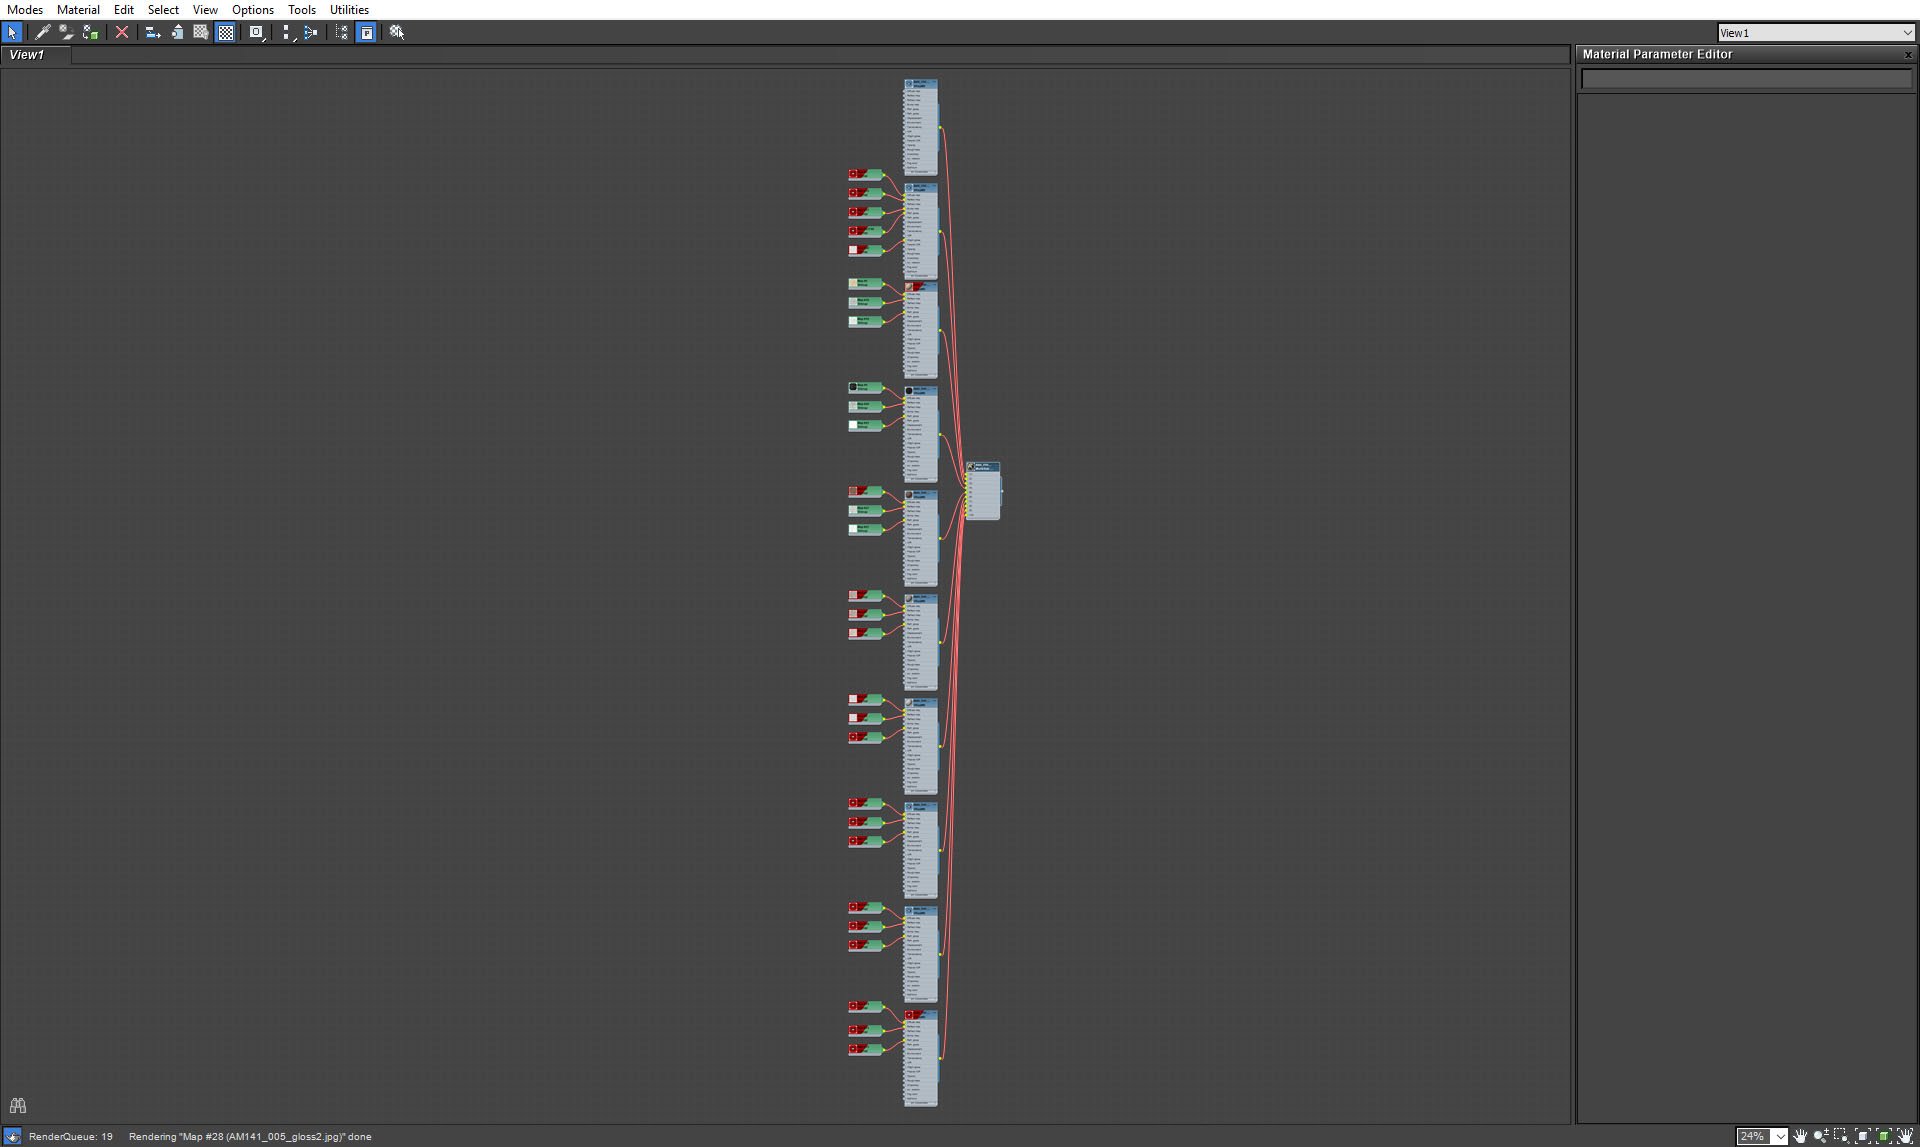
This is floor material. It consists of many bub-materials for different kinds of marble. We will make a close-up on some of them on later screens.
Click on image to enlarge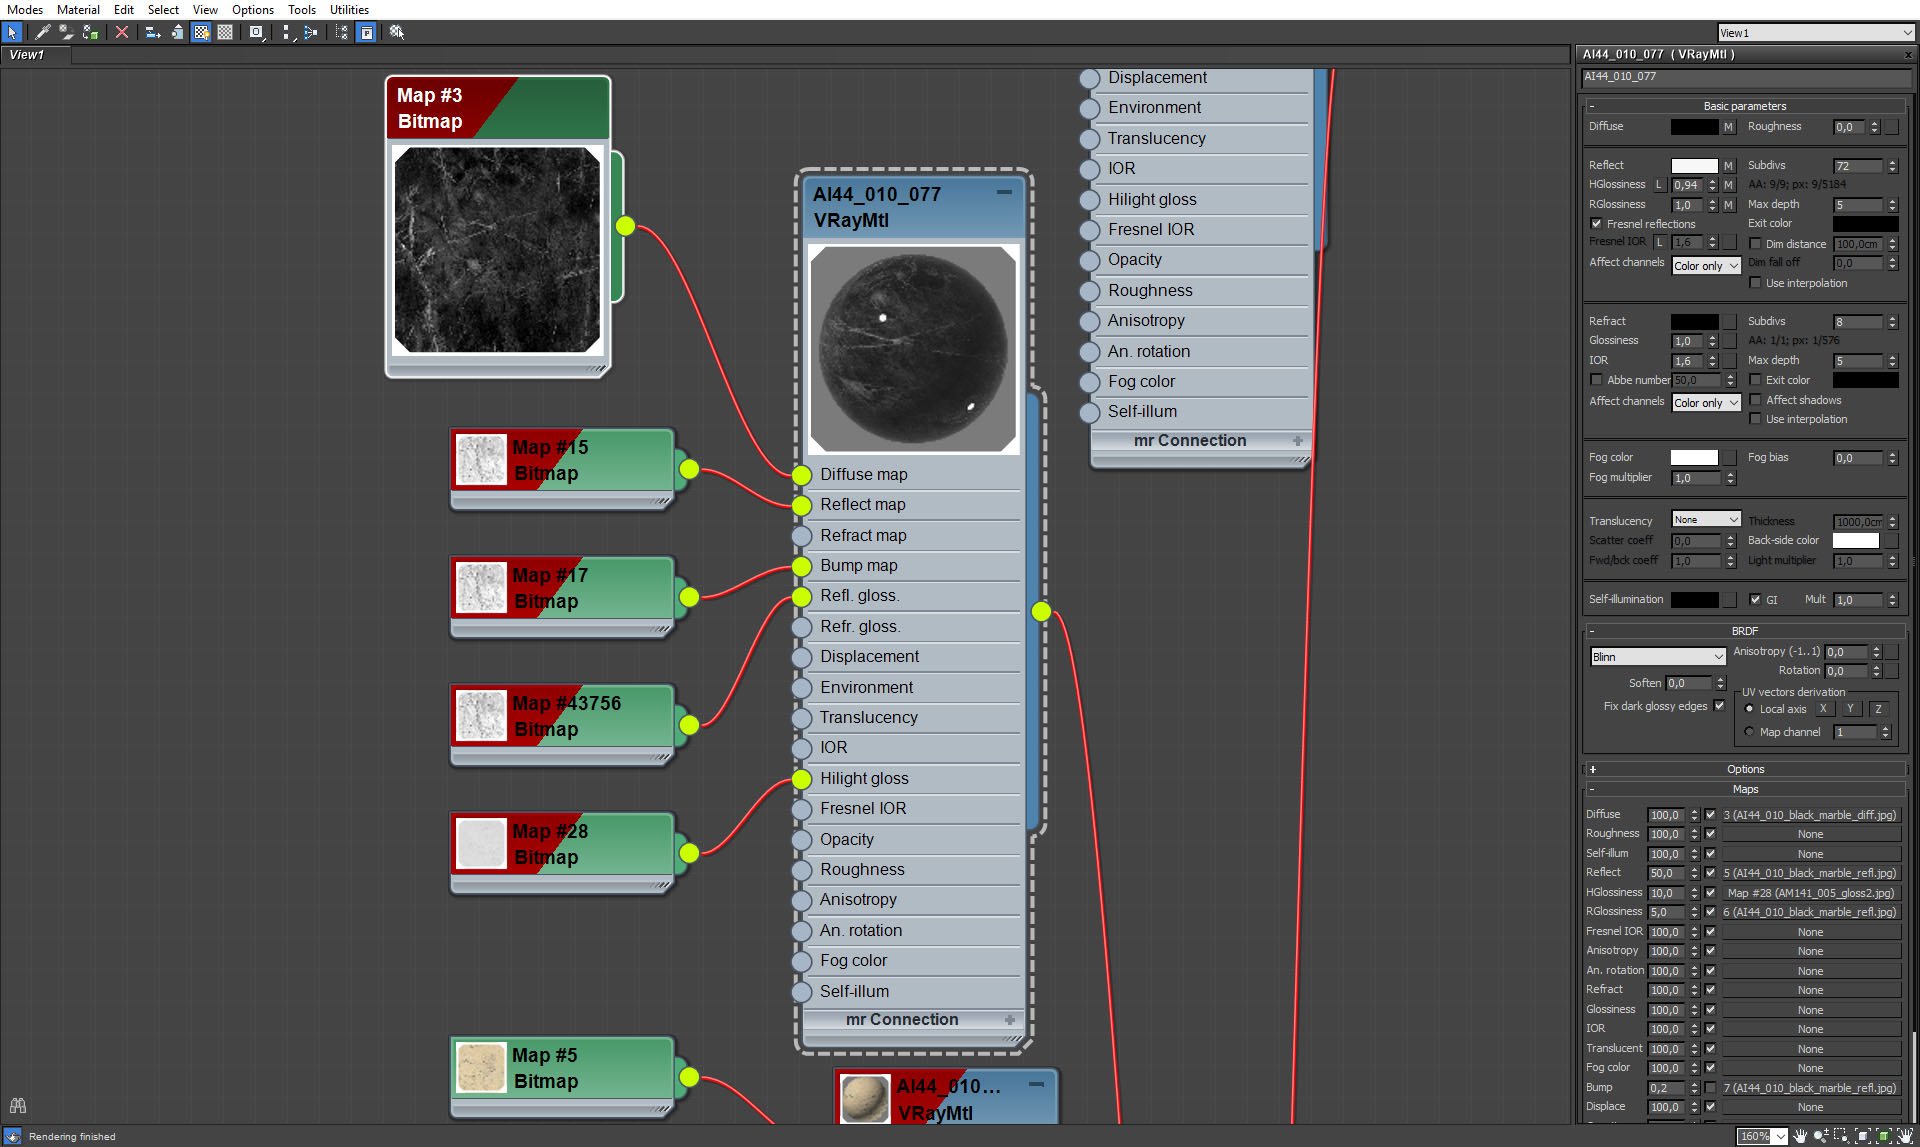
Floor: black marble 1.
Click on image to enlarge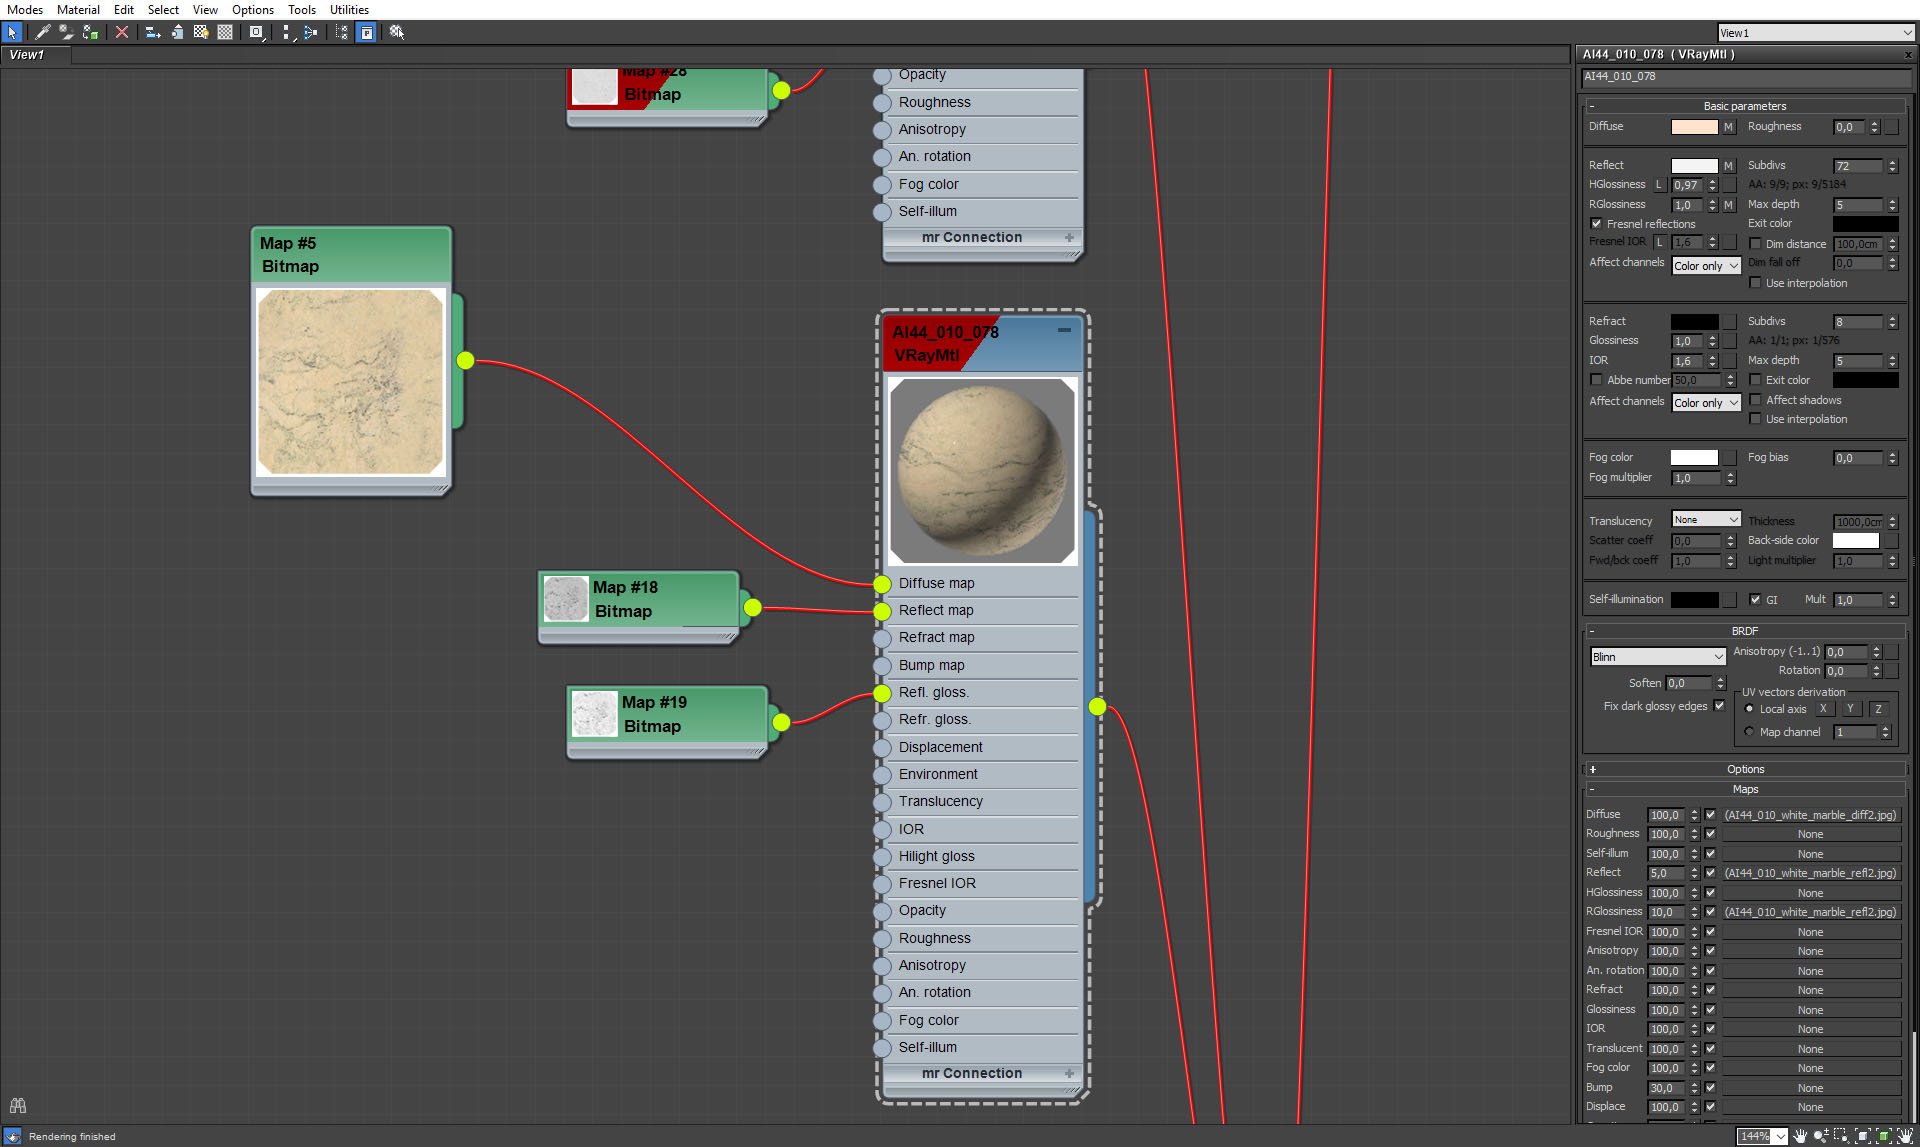
Floor: yellow marble.
Click on image to enlarge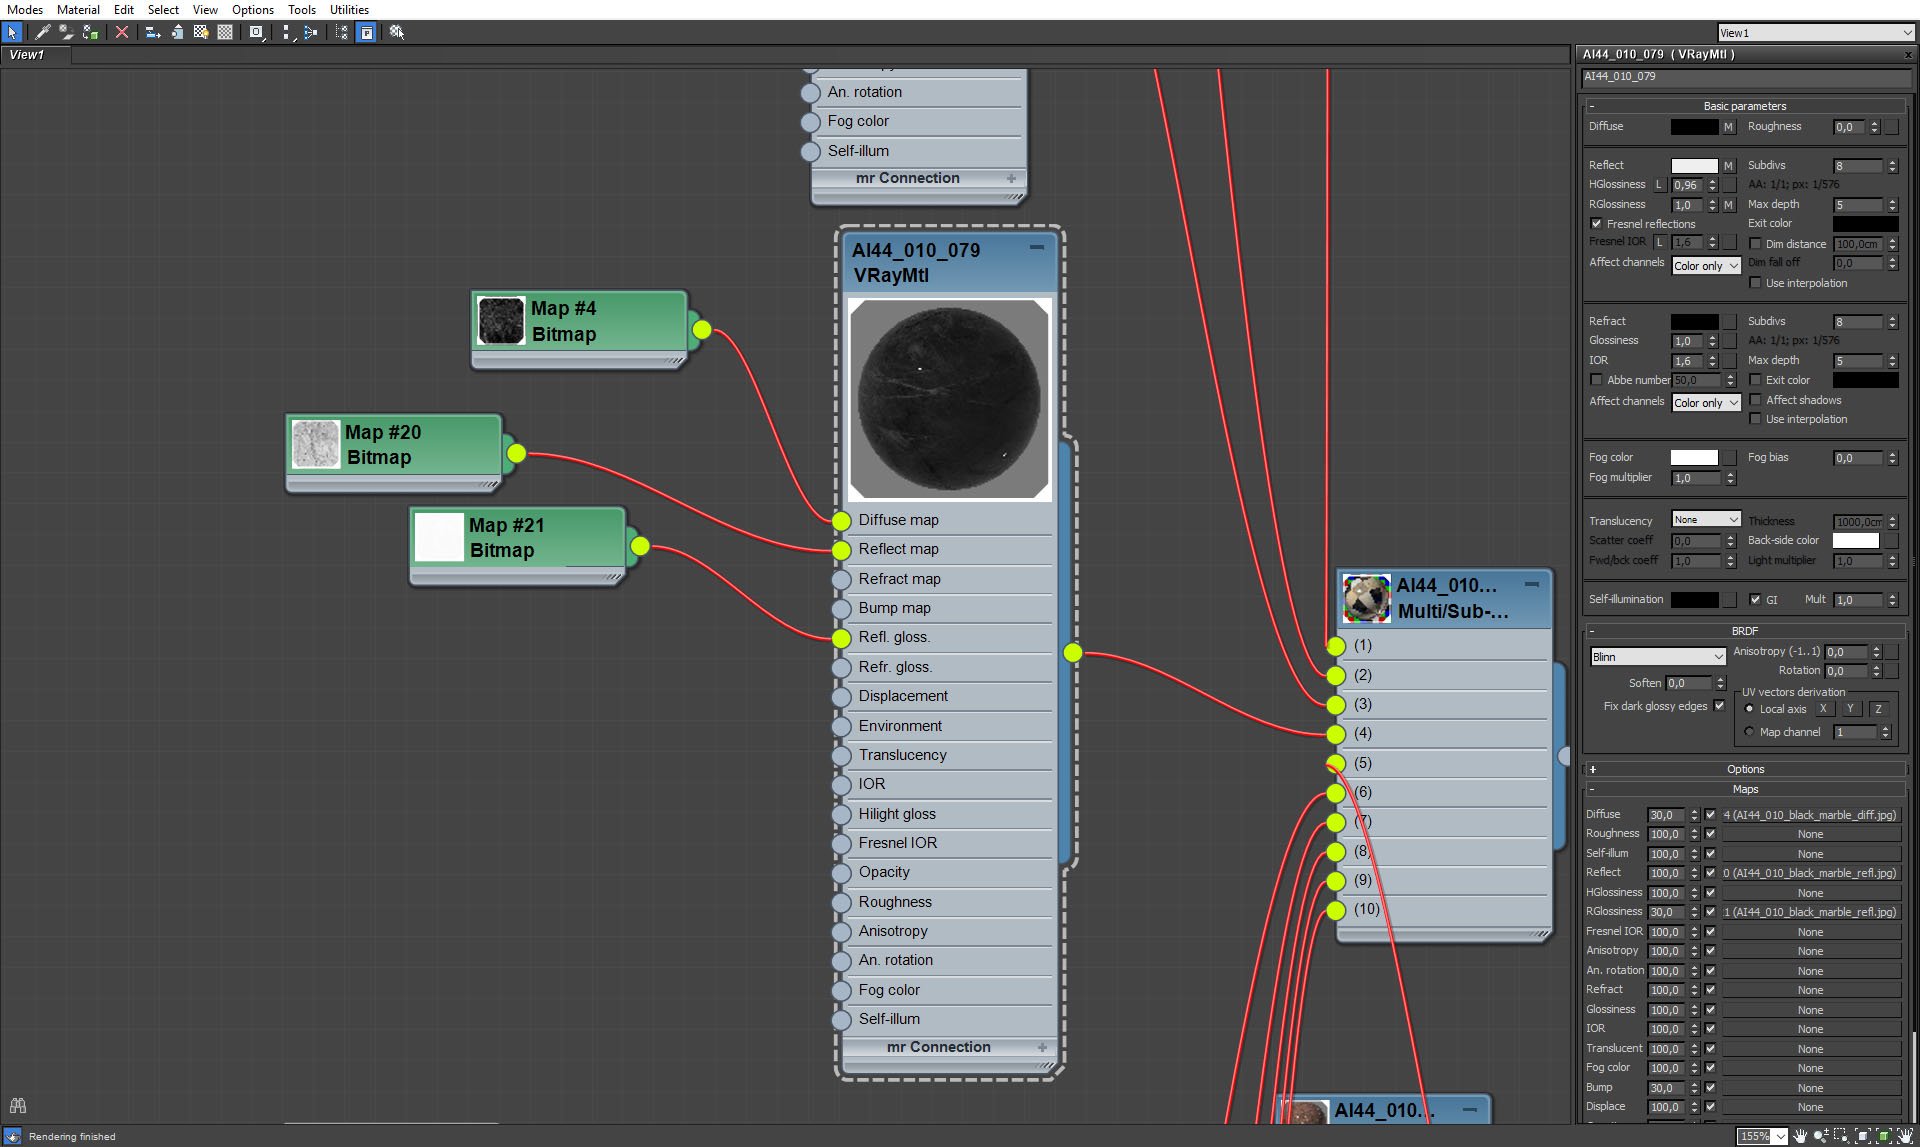
Floor: black marble 2.
Click on image to enlarge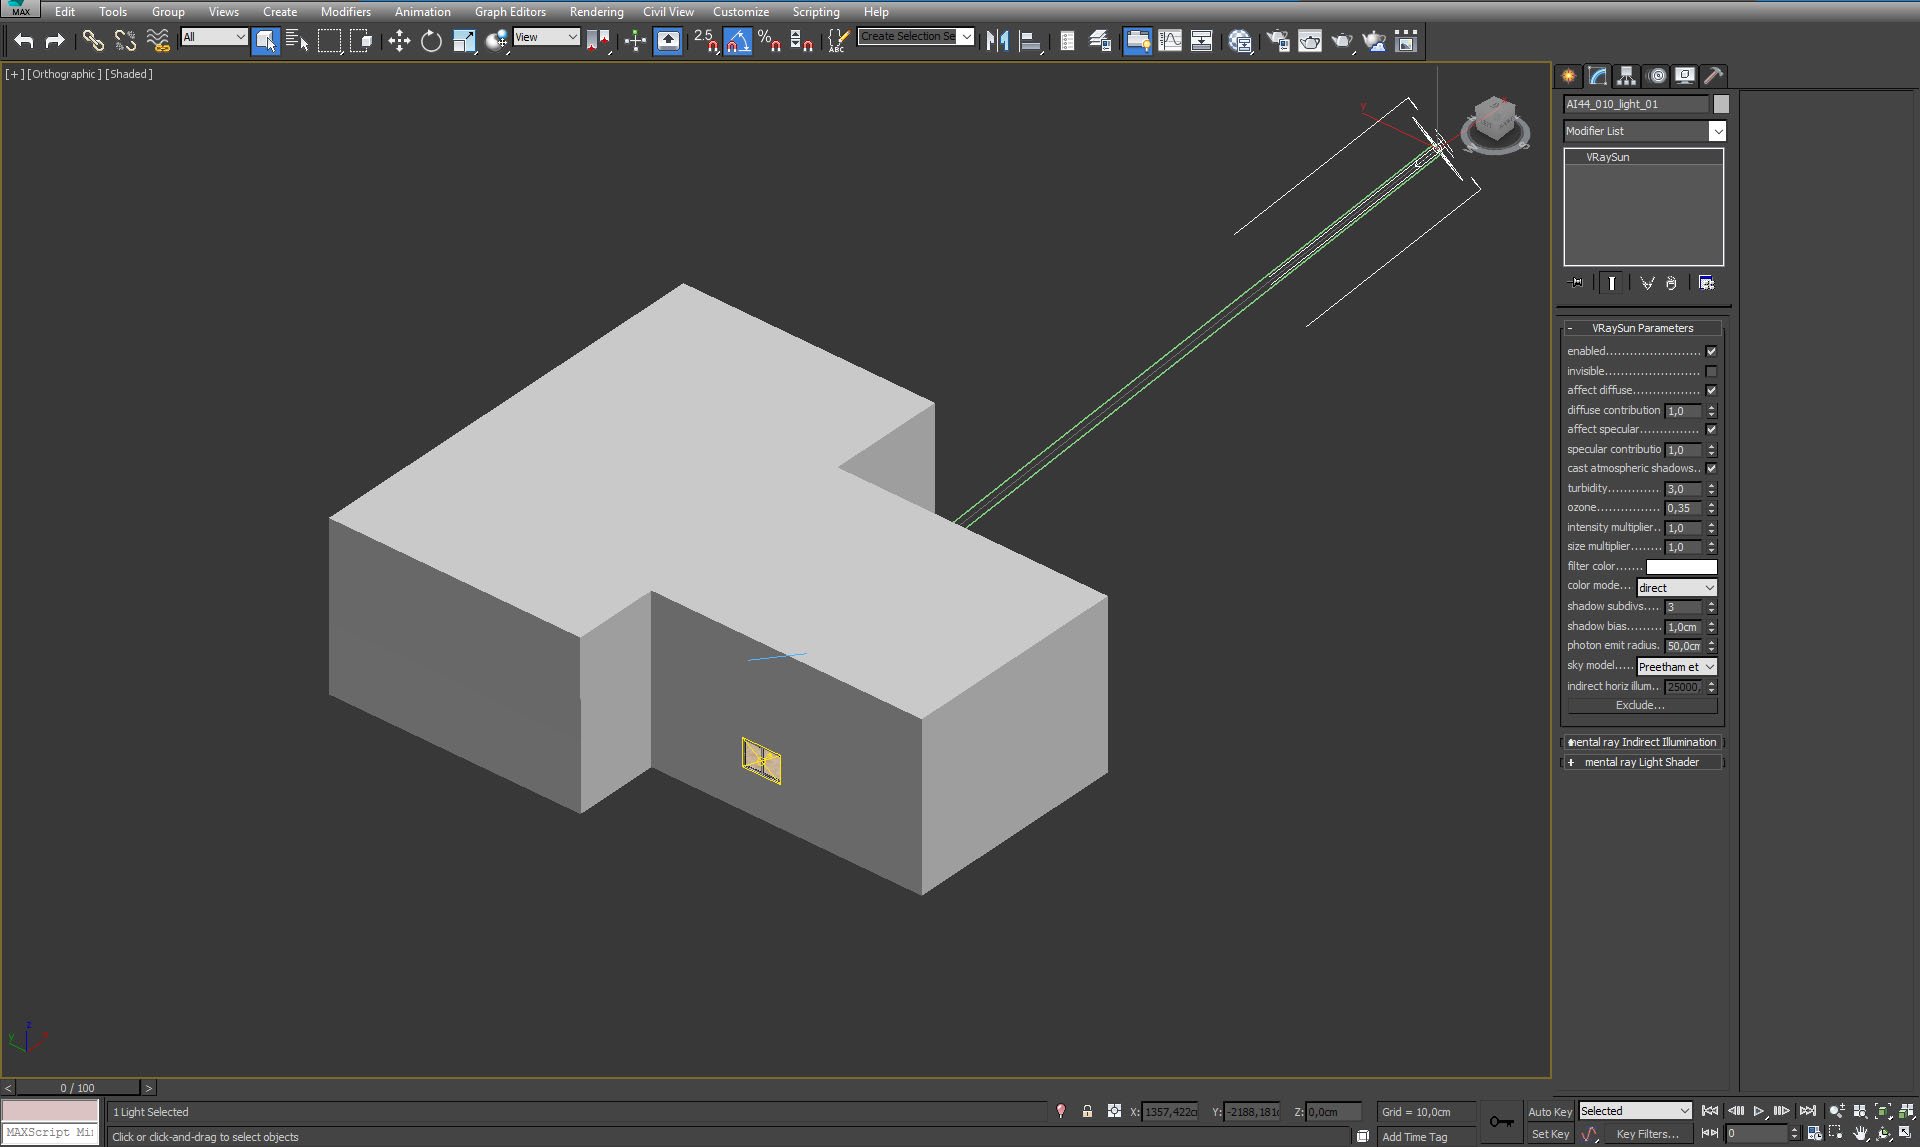
The full scene as seen from outside. You can see that we used VraySun to give additional light. In the final render it influences side room and lits translucent curtain that hangs against camera 1, in the end of the lobby.
Click on image to enlarge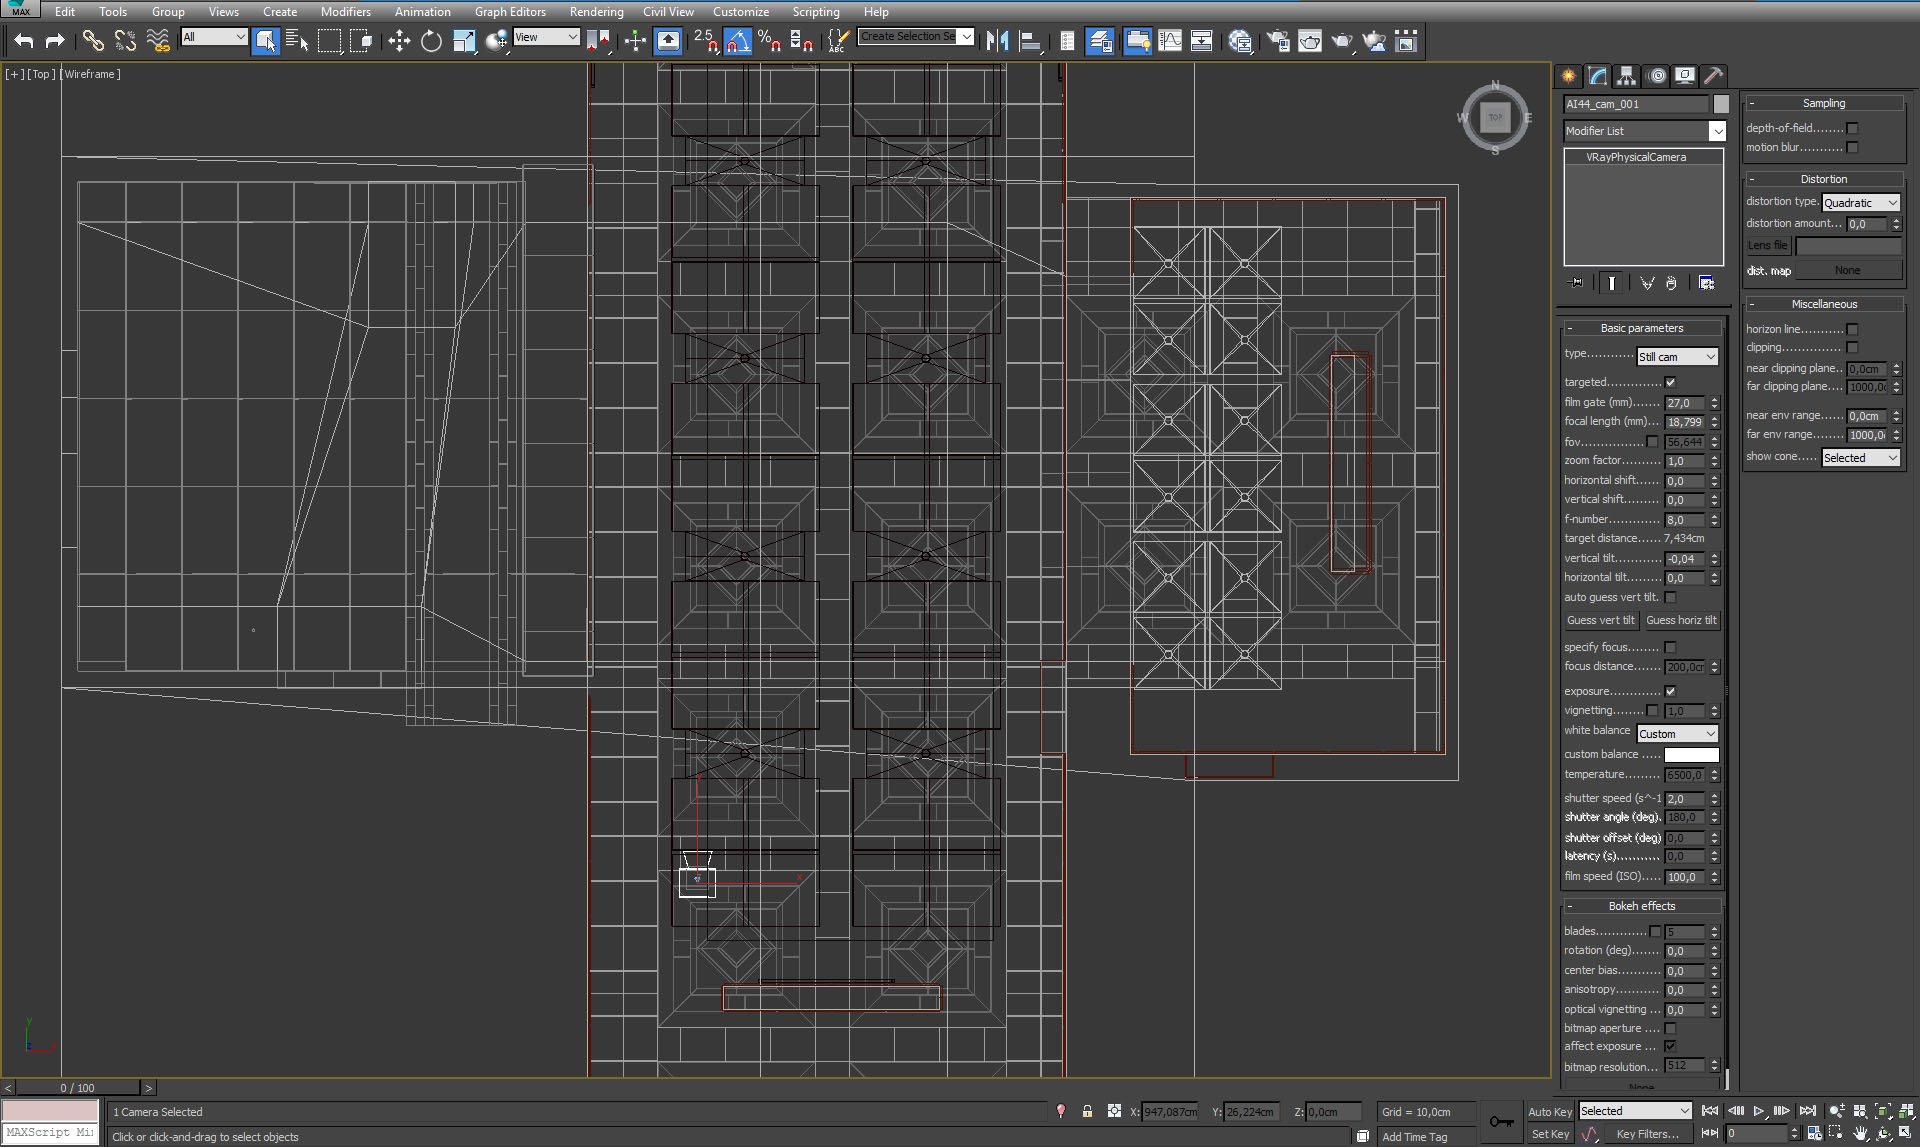
Camera 1 settings.
Click on image to enlarge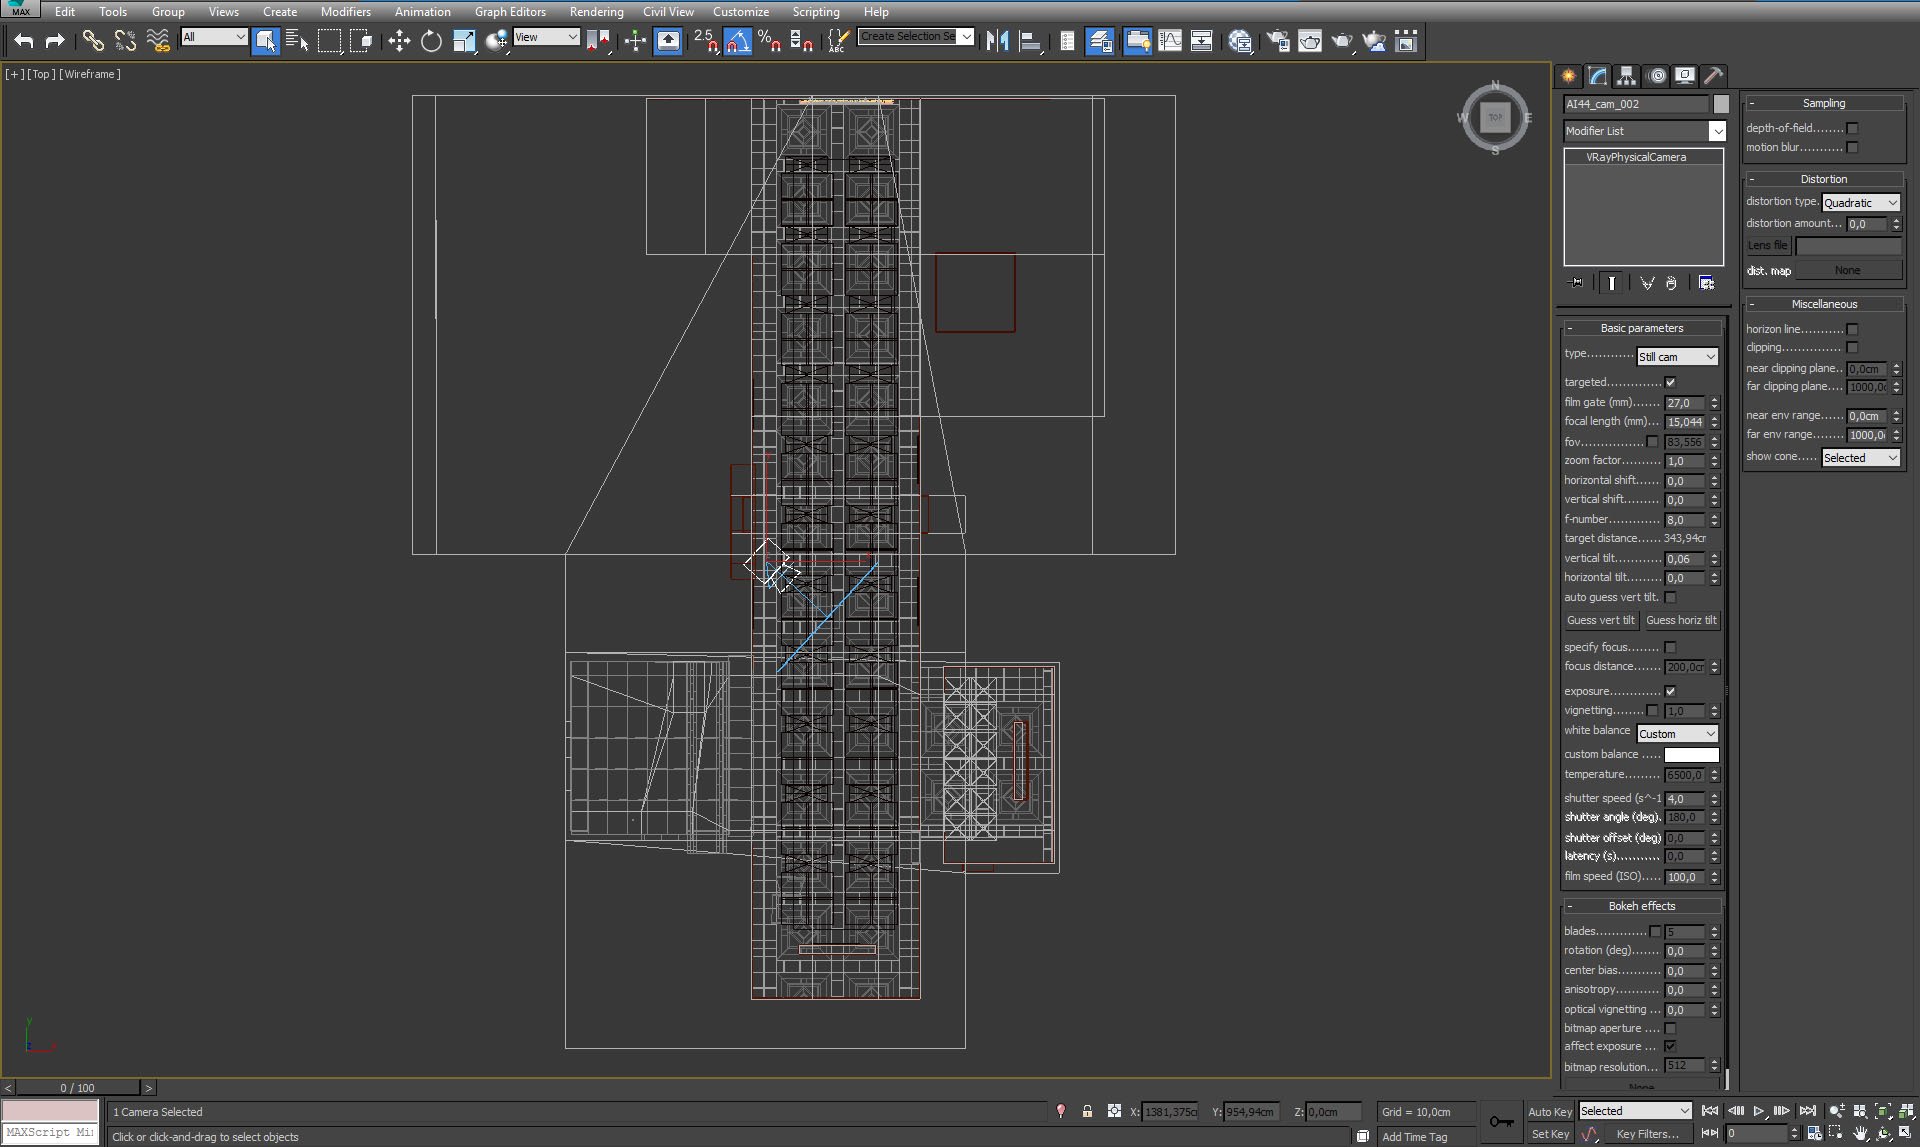
Camera 2 settings.
Click on image to enlarge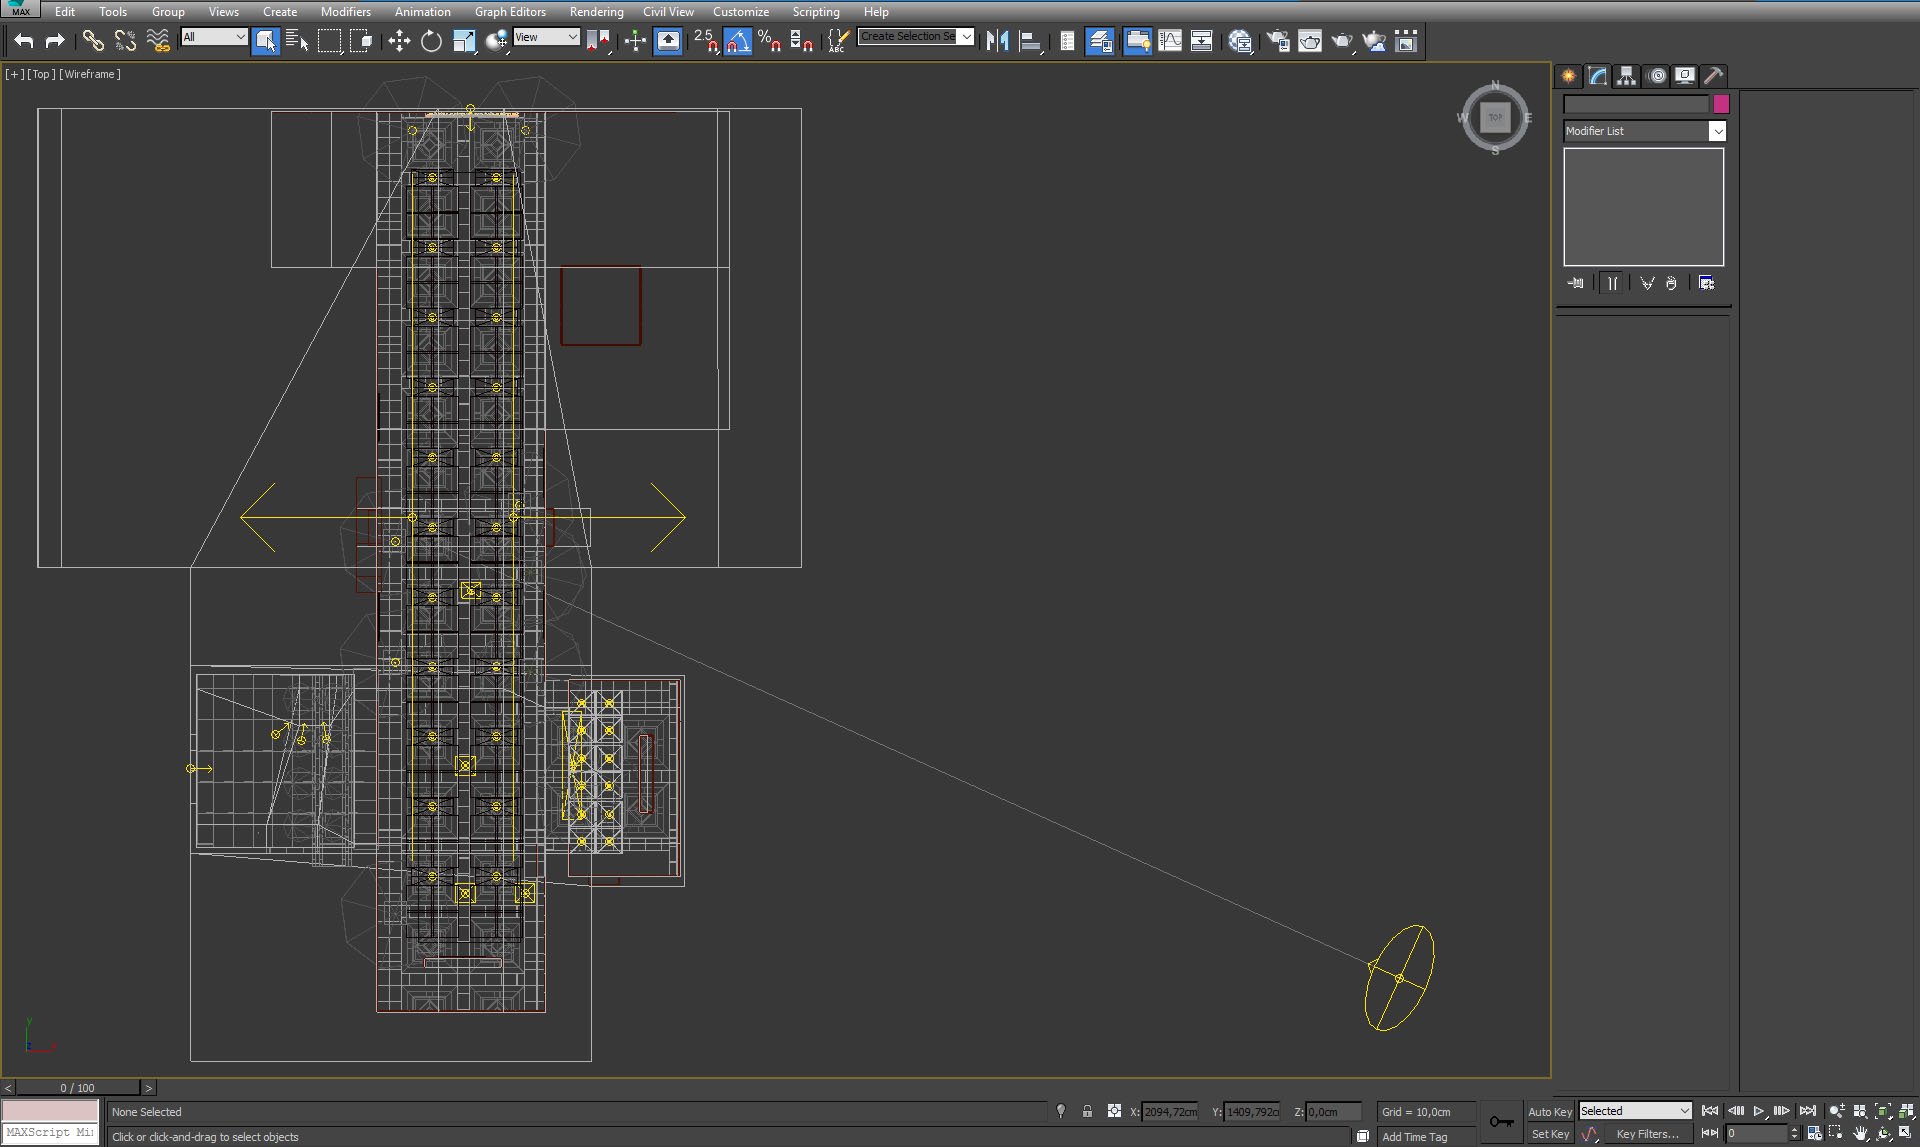
Lights seen from the top view.
Click on image to enlarge
Our LED strip is just long recangular VrayLight with warm color. Settings to the right.
Click on image to enlarge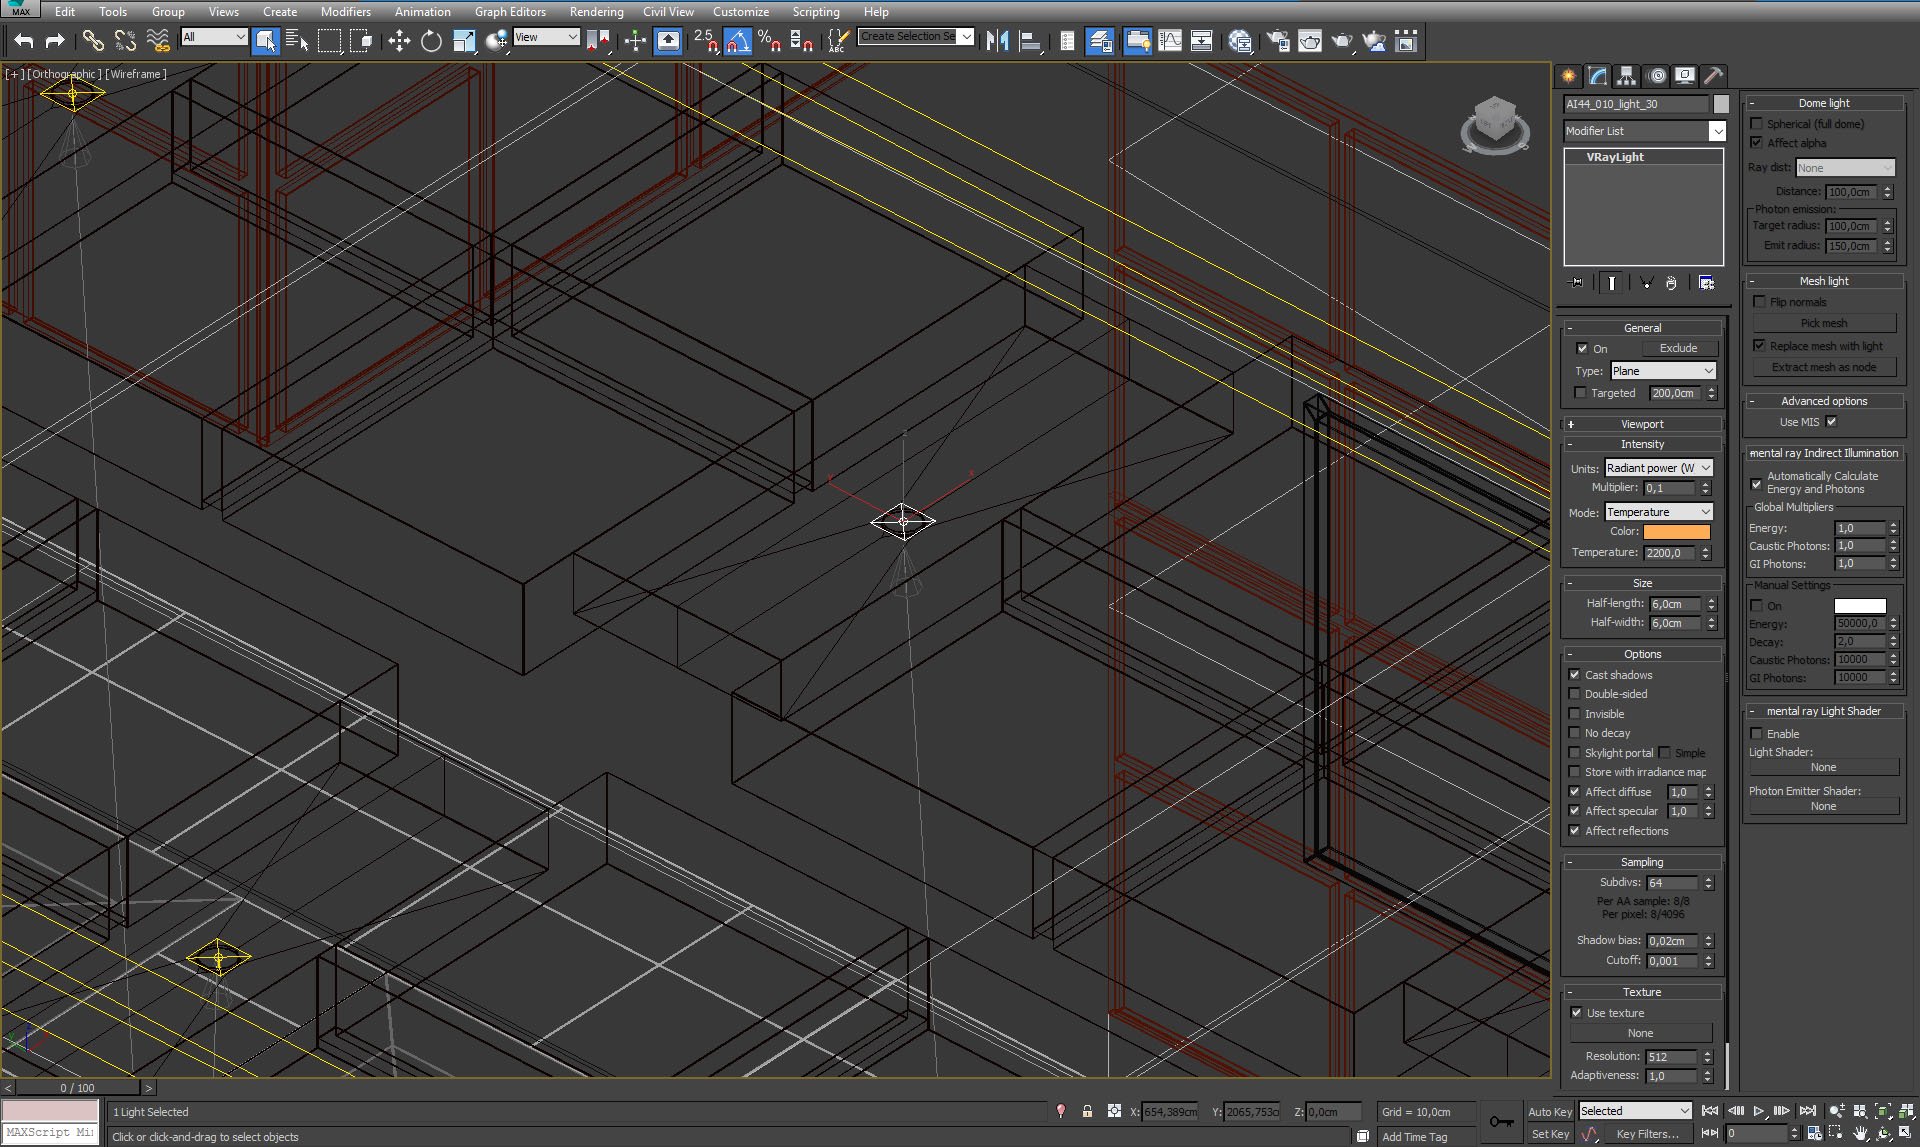
We also used many small light sources in the ceiling. Settings to the right.
Click on image to enlarge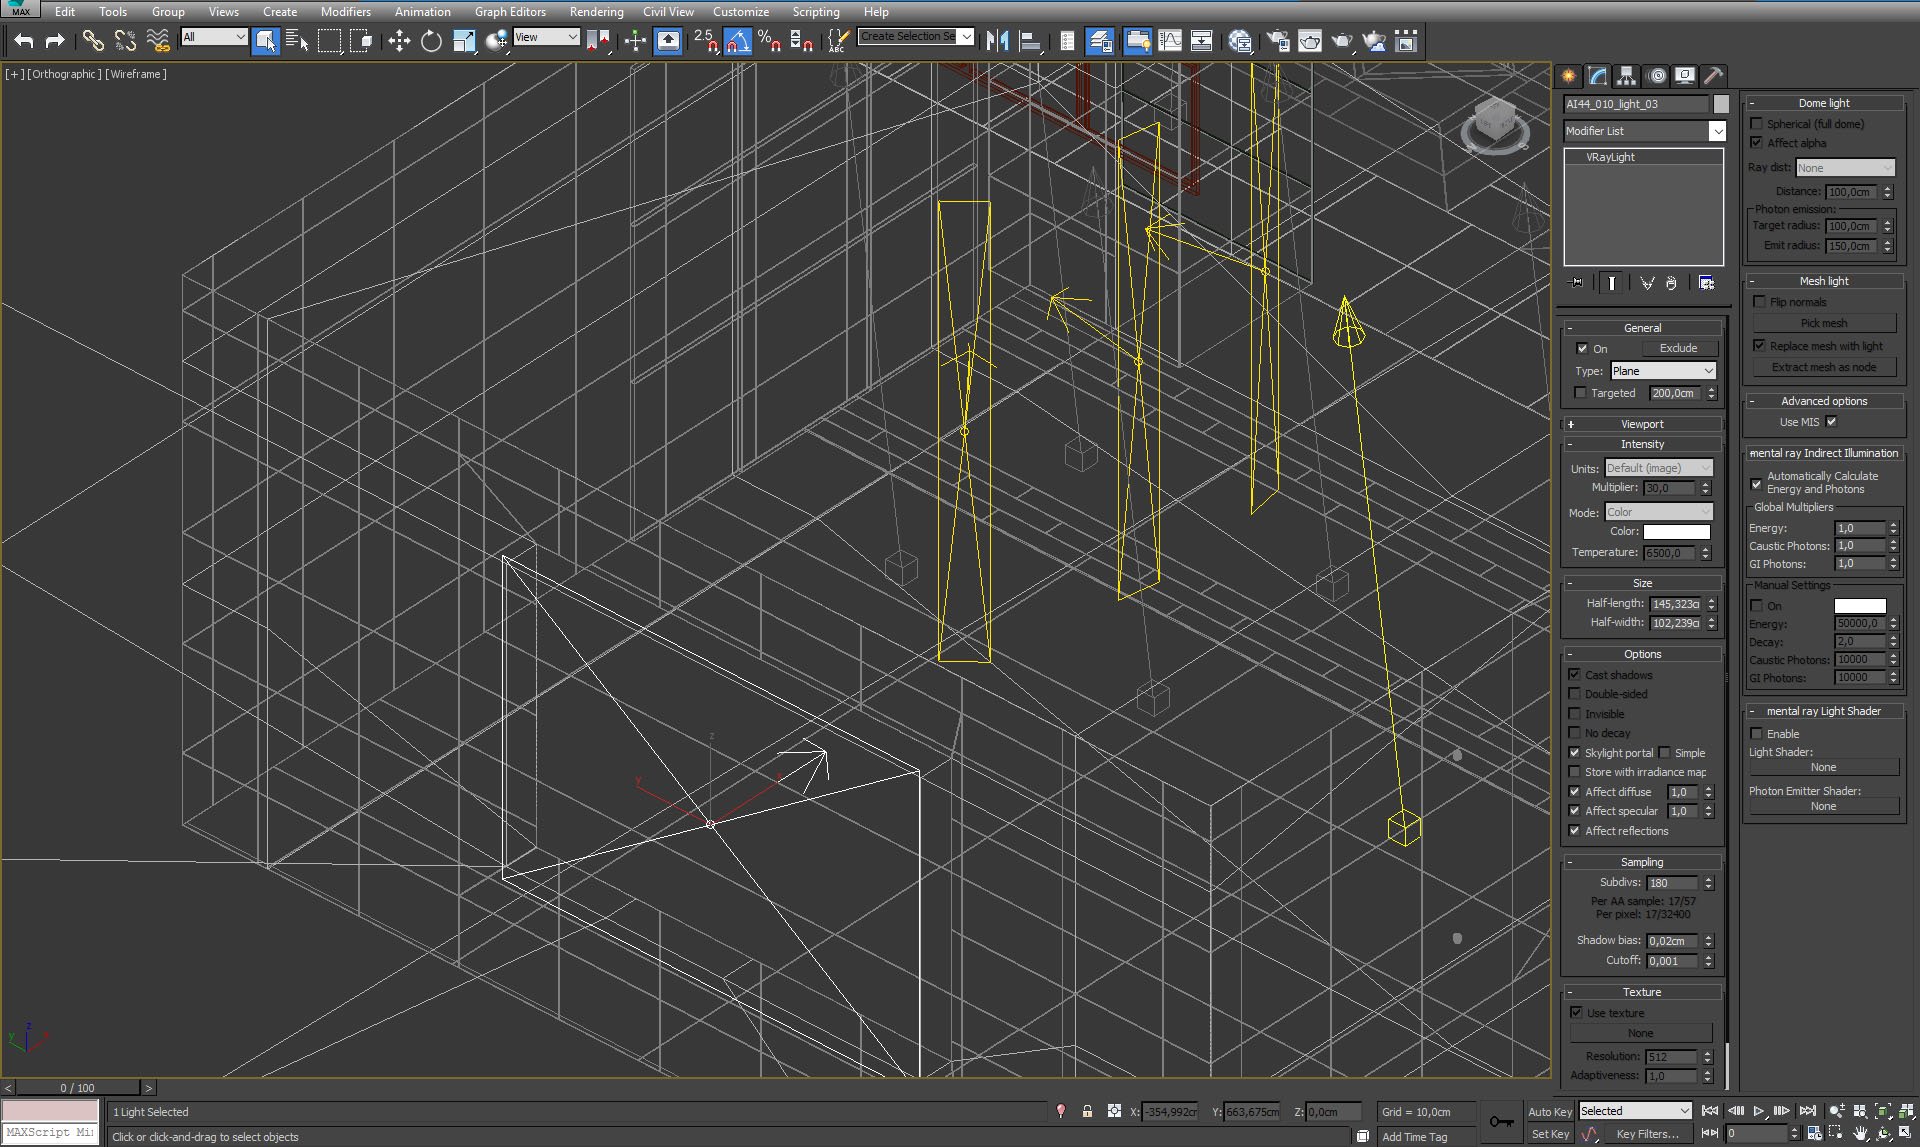
Side room has a Skylight portal in the window that lets sunlight in.
Click on image to enlarge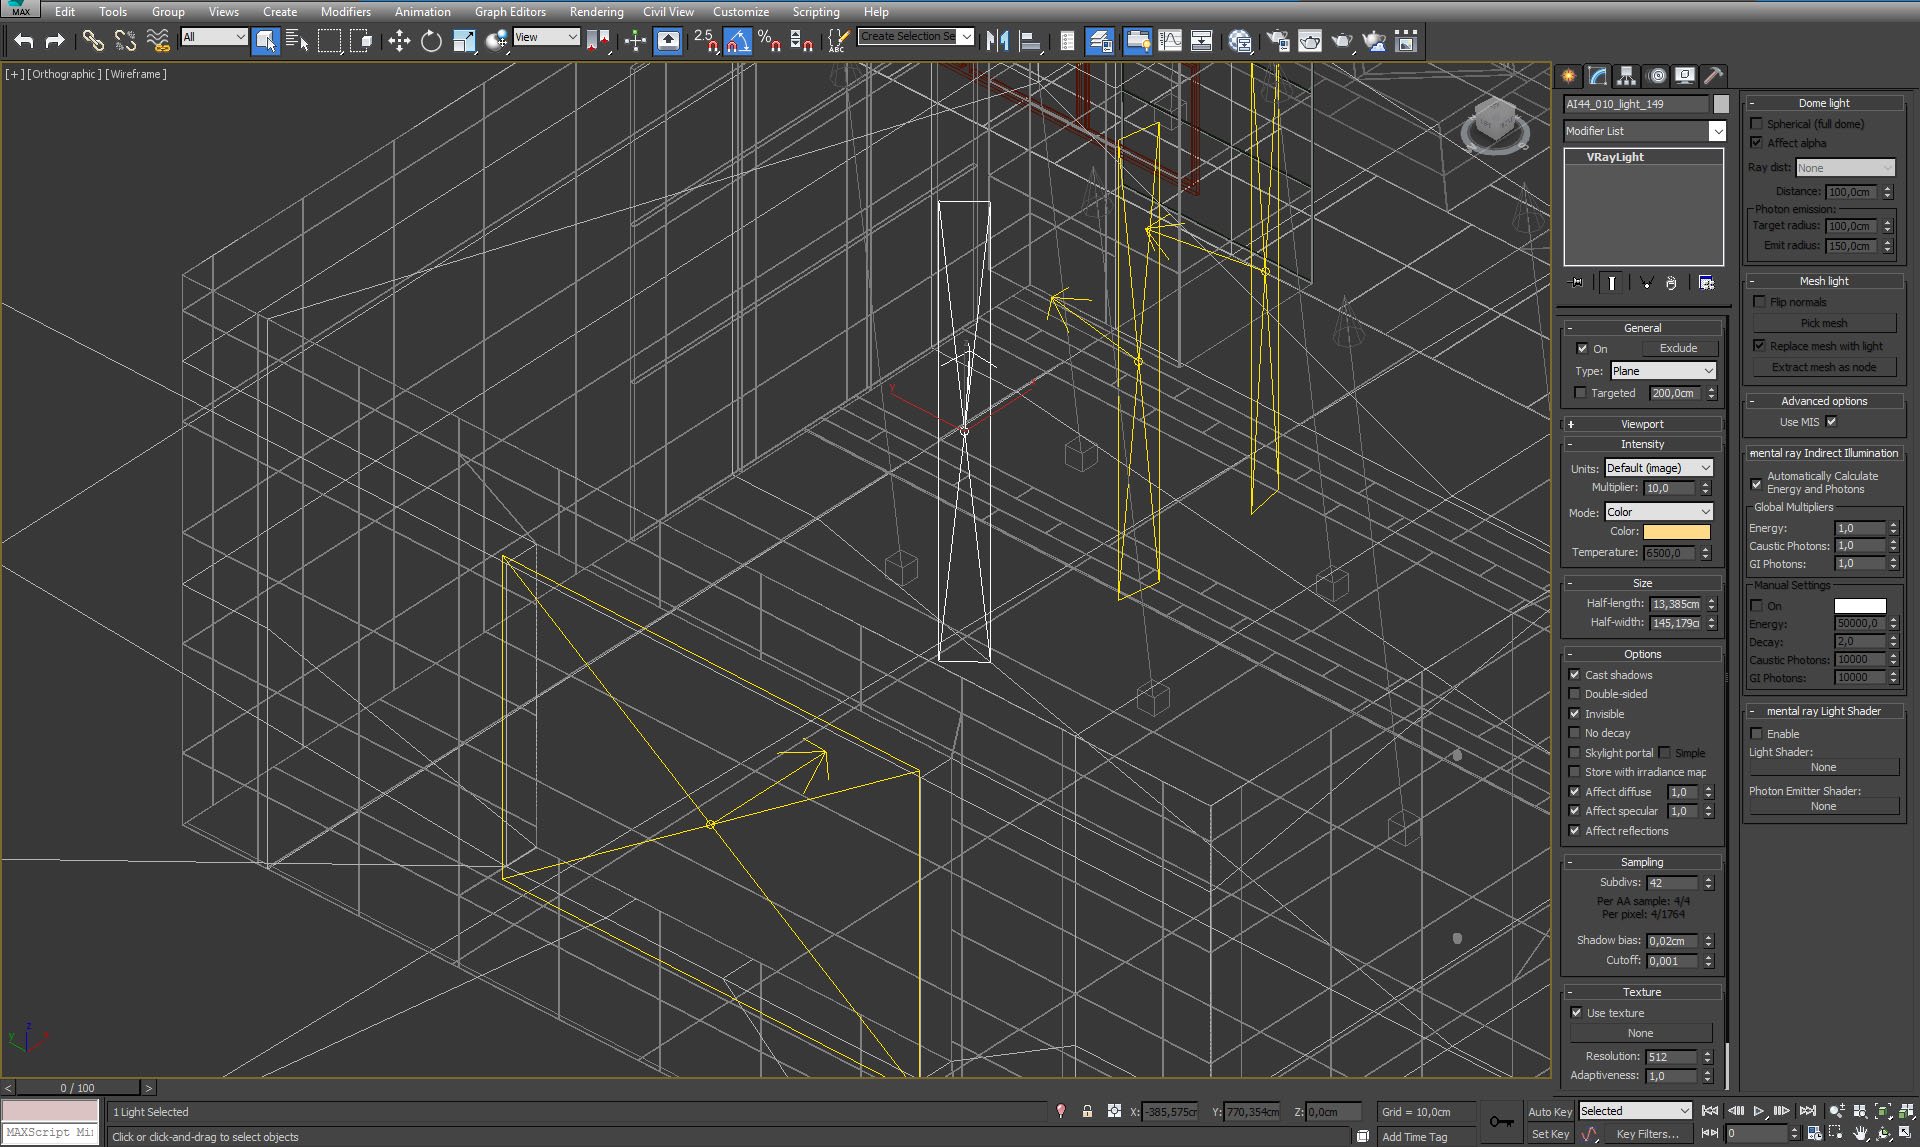
Additional vertical lights in side room.
Click on image to enlarge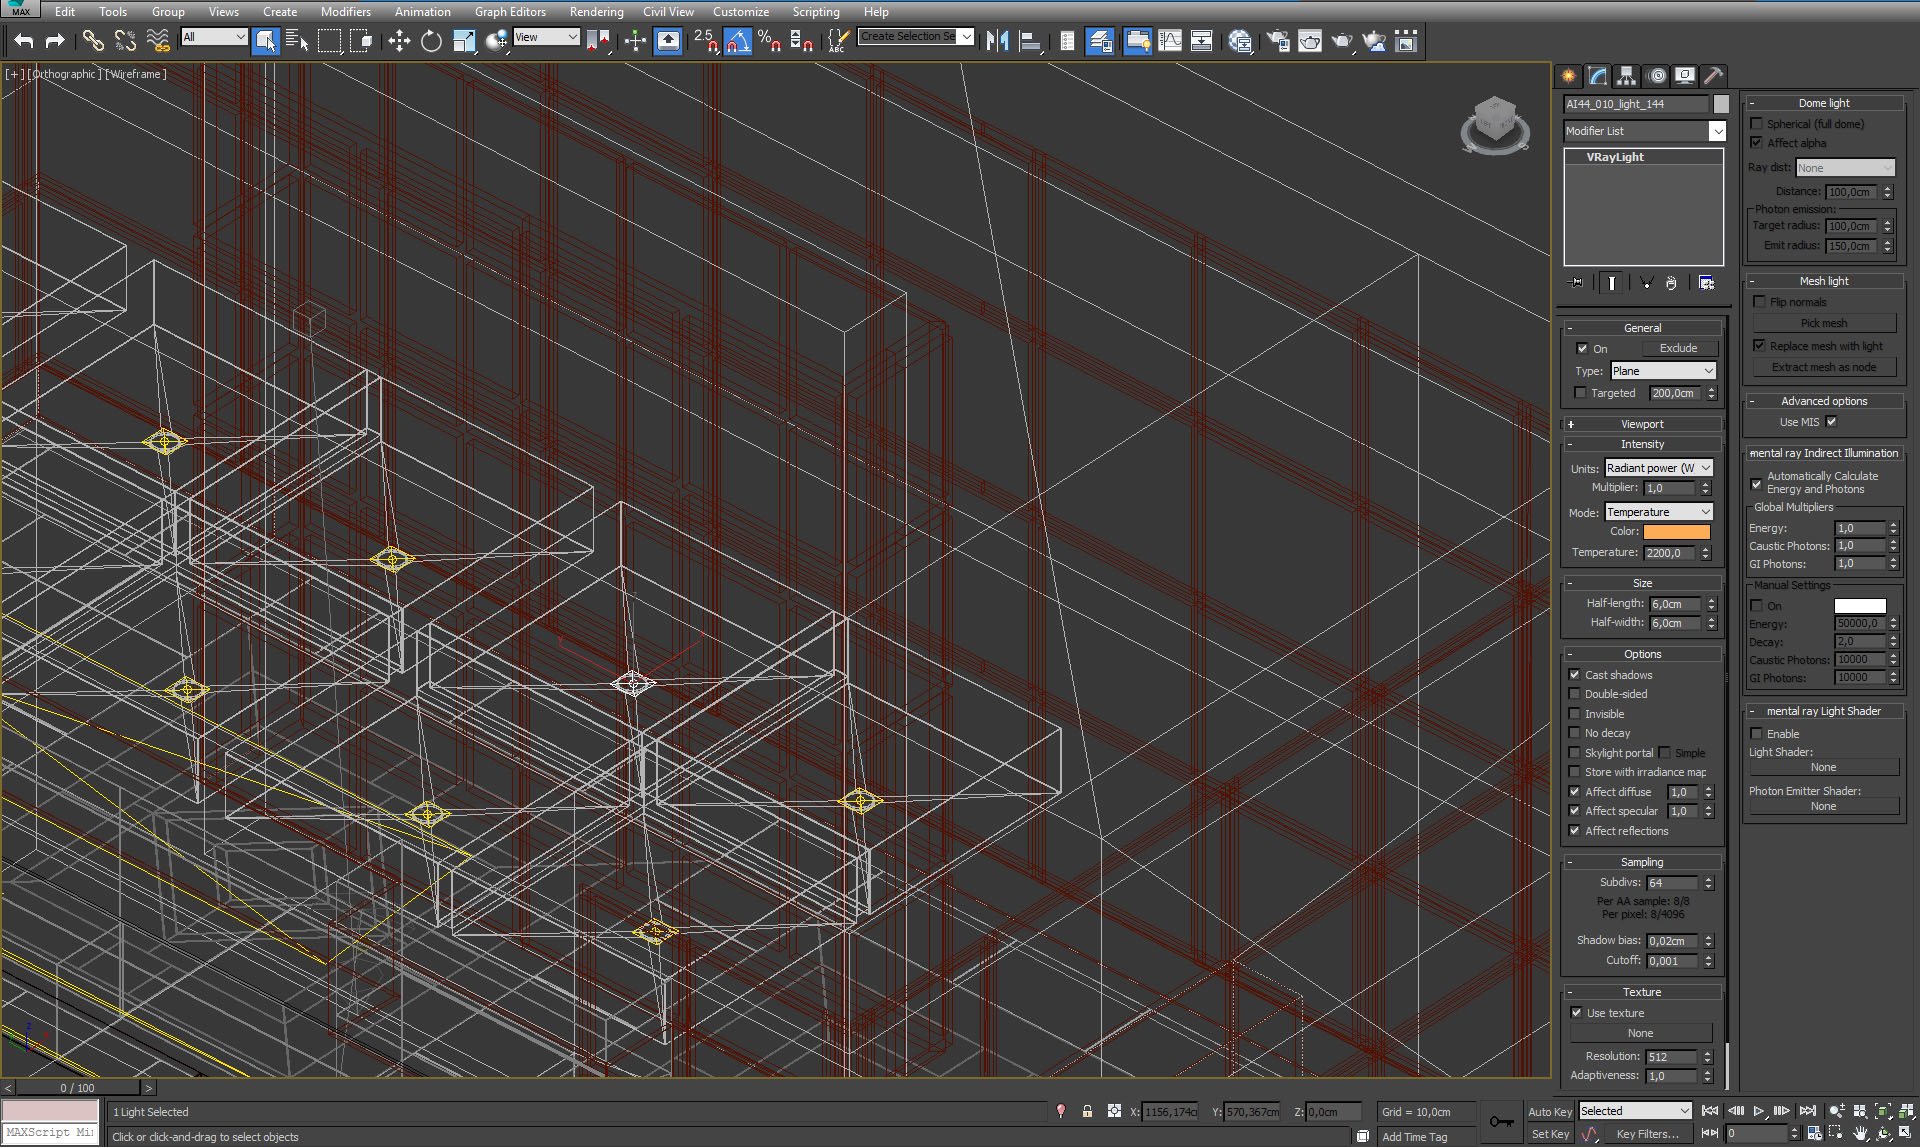
Small lights in hanging ceiling.
Click on image to enlarge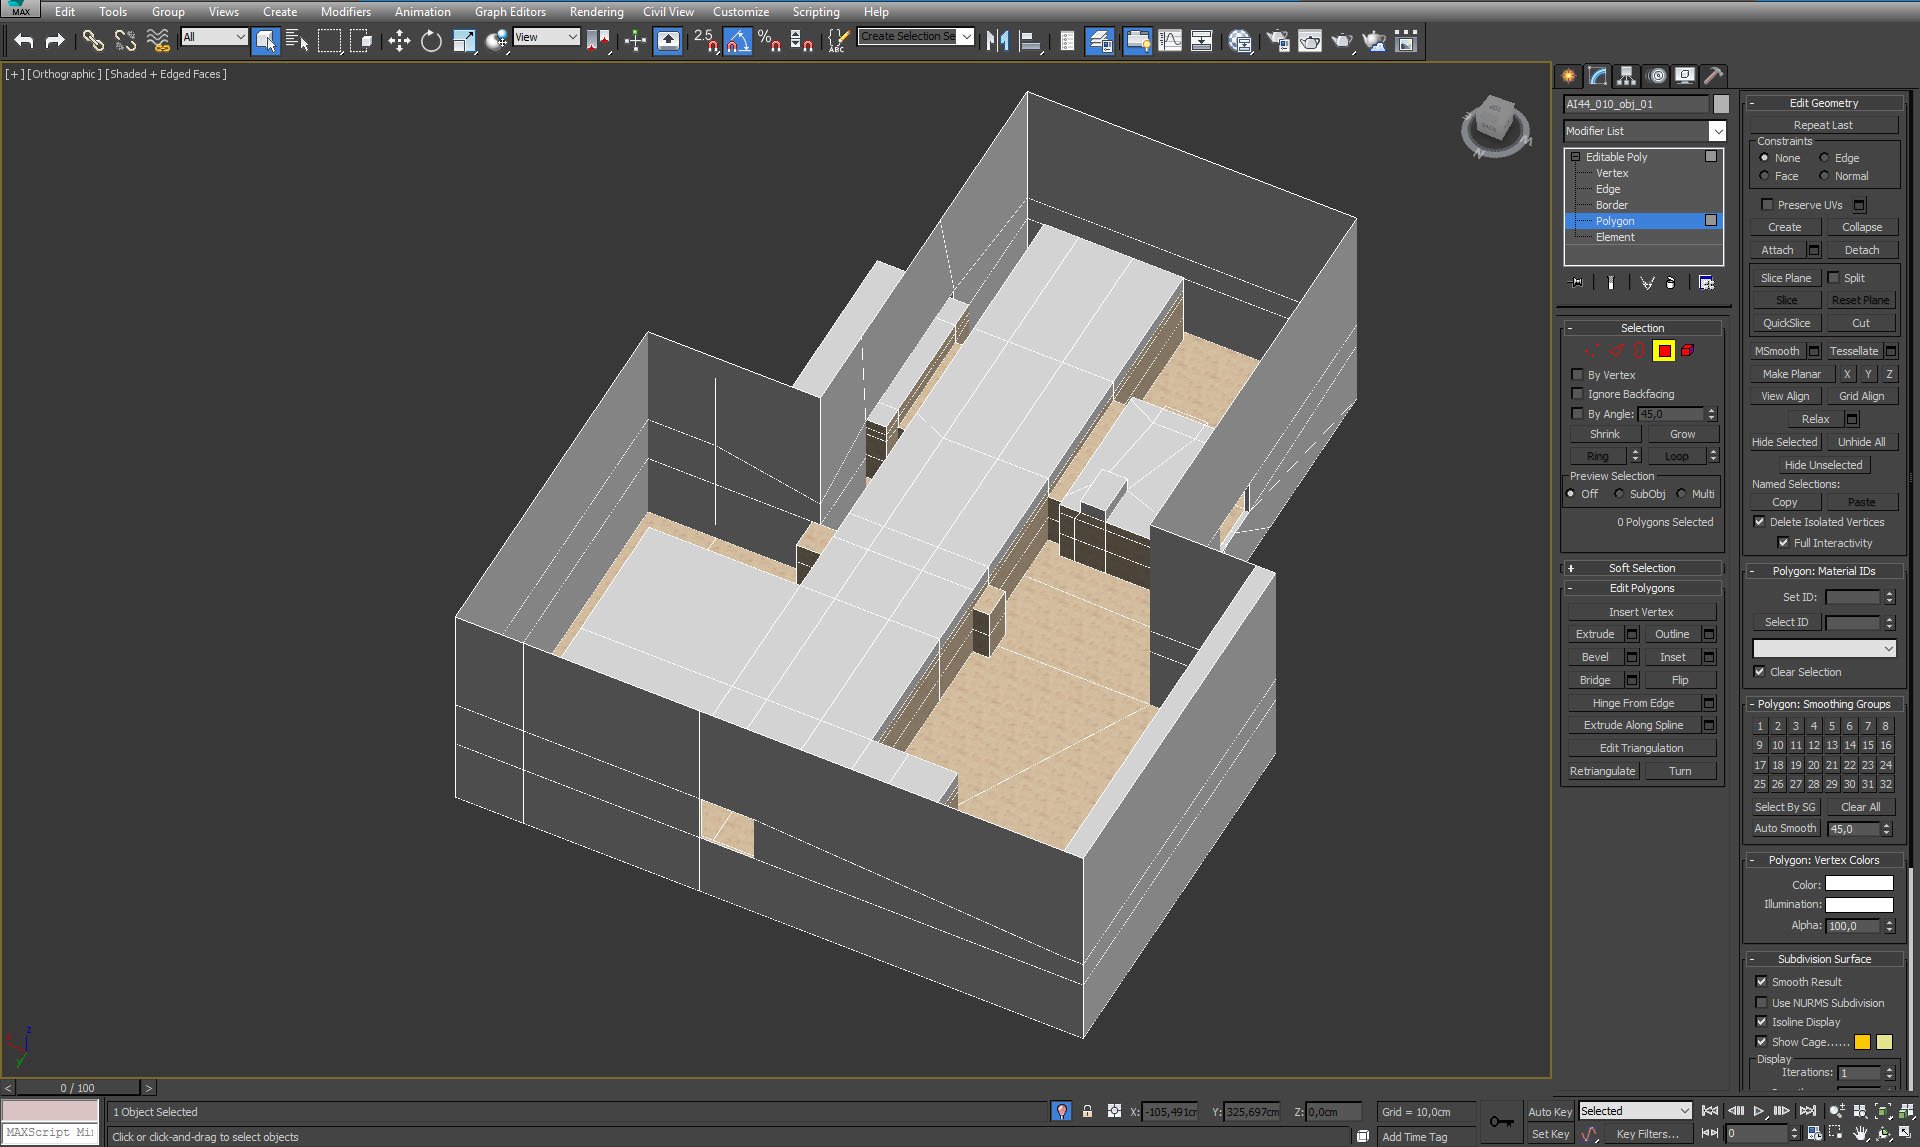
Main building mesh with removed ceiling polygons. The lobby is a long hall with two smaller rooms on its sides.
Click on image to enlarge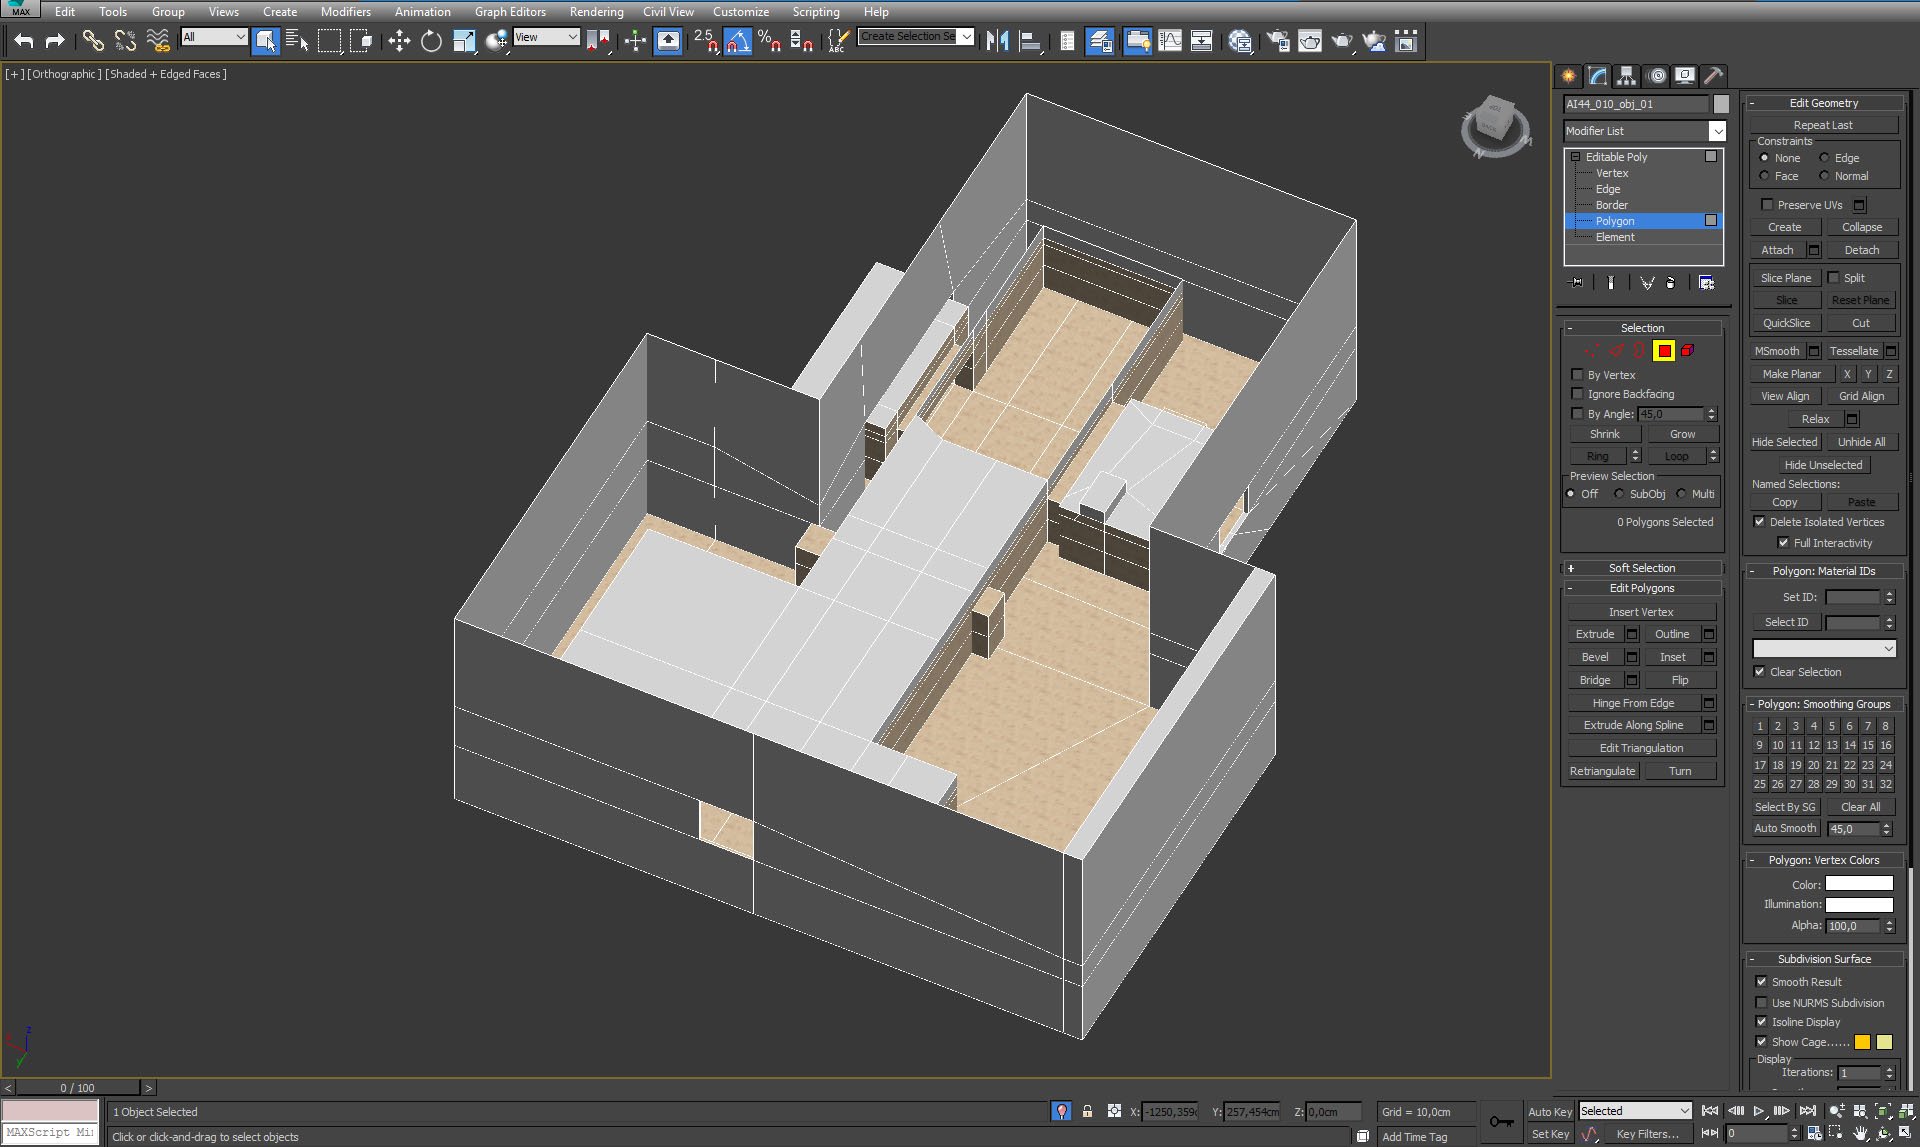
The lobby with ceiling polygons removed. We also hid props, hanging ceiling, lights and cameras on this screen.
Click on image to enlarge
Marble floor material of the building (but not the marble pattern).
Click on image to enlarge
Building with some polygons cut. You can see that we have separate plane for ceiling (selected on the image).
Click on image to enlarge
Ceiling material.
Click on image to enlarge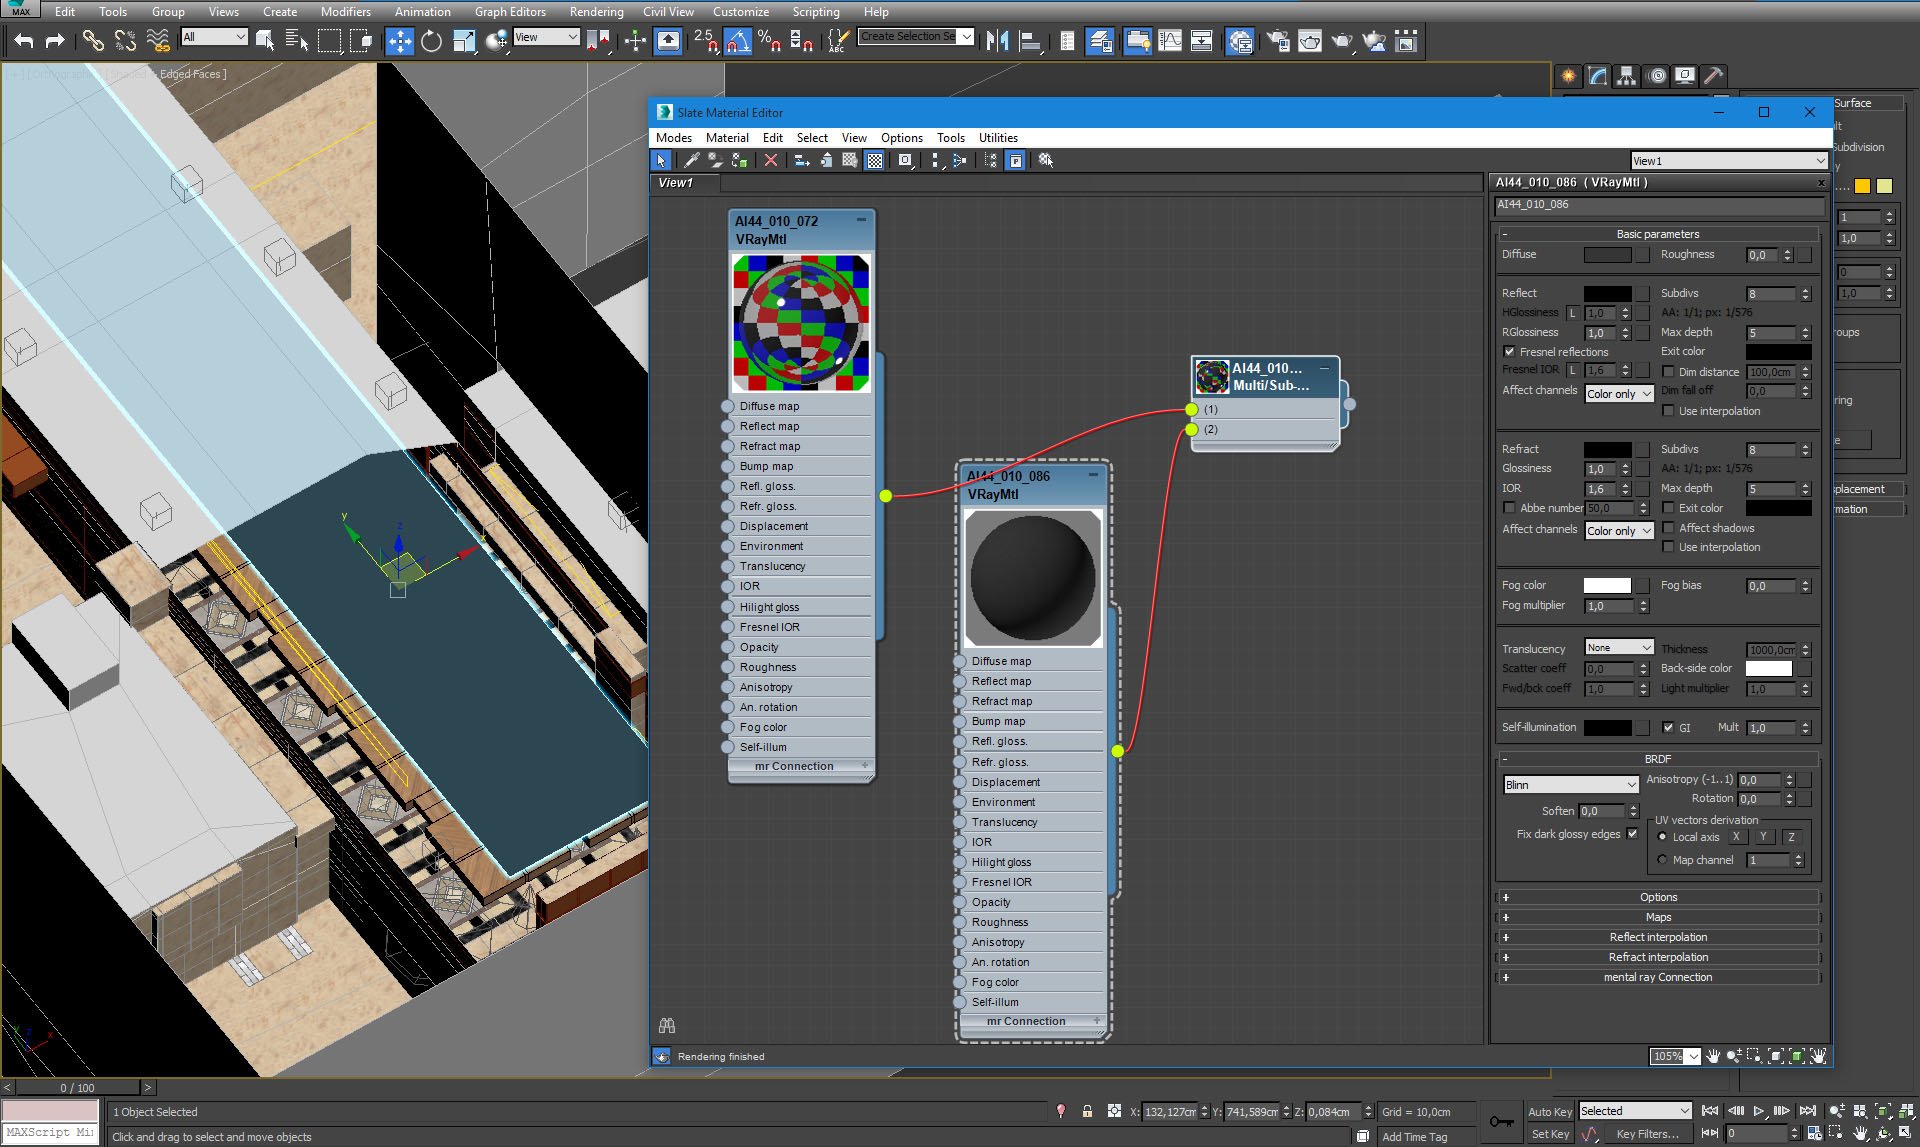
Ceiling material.
Click on image to enlarge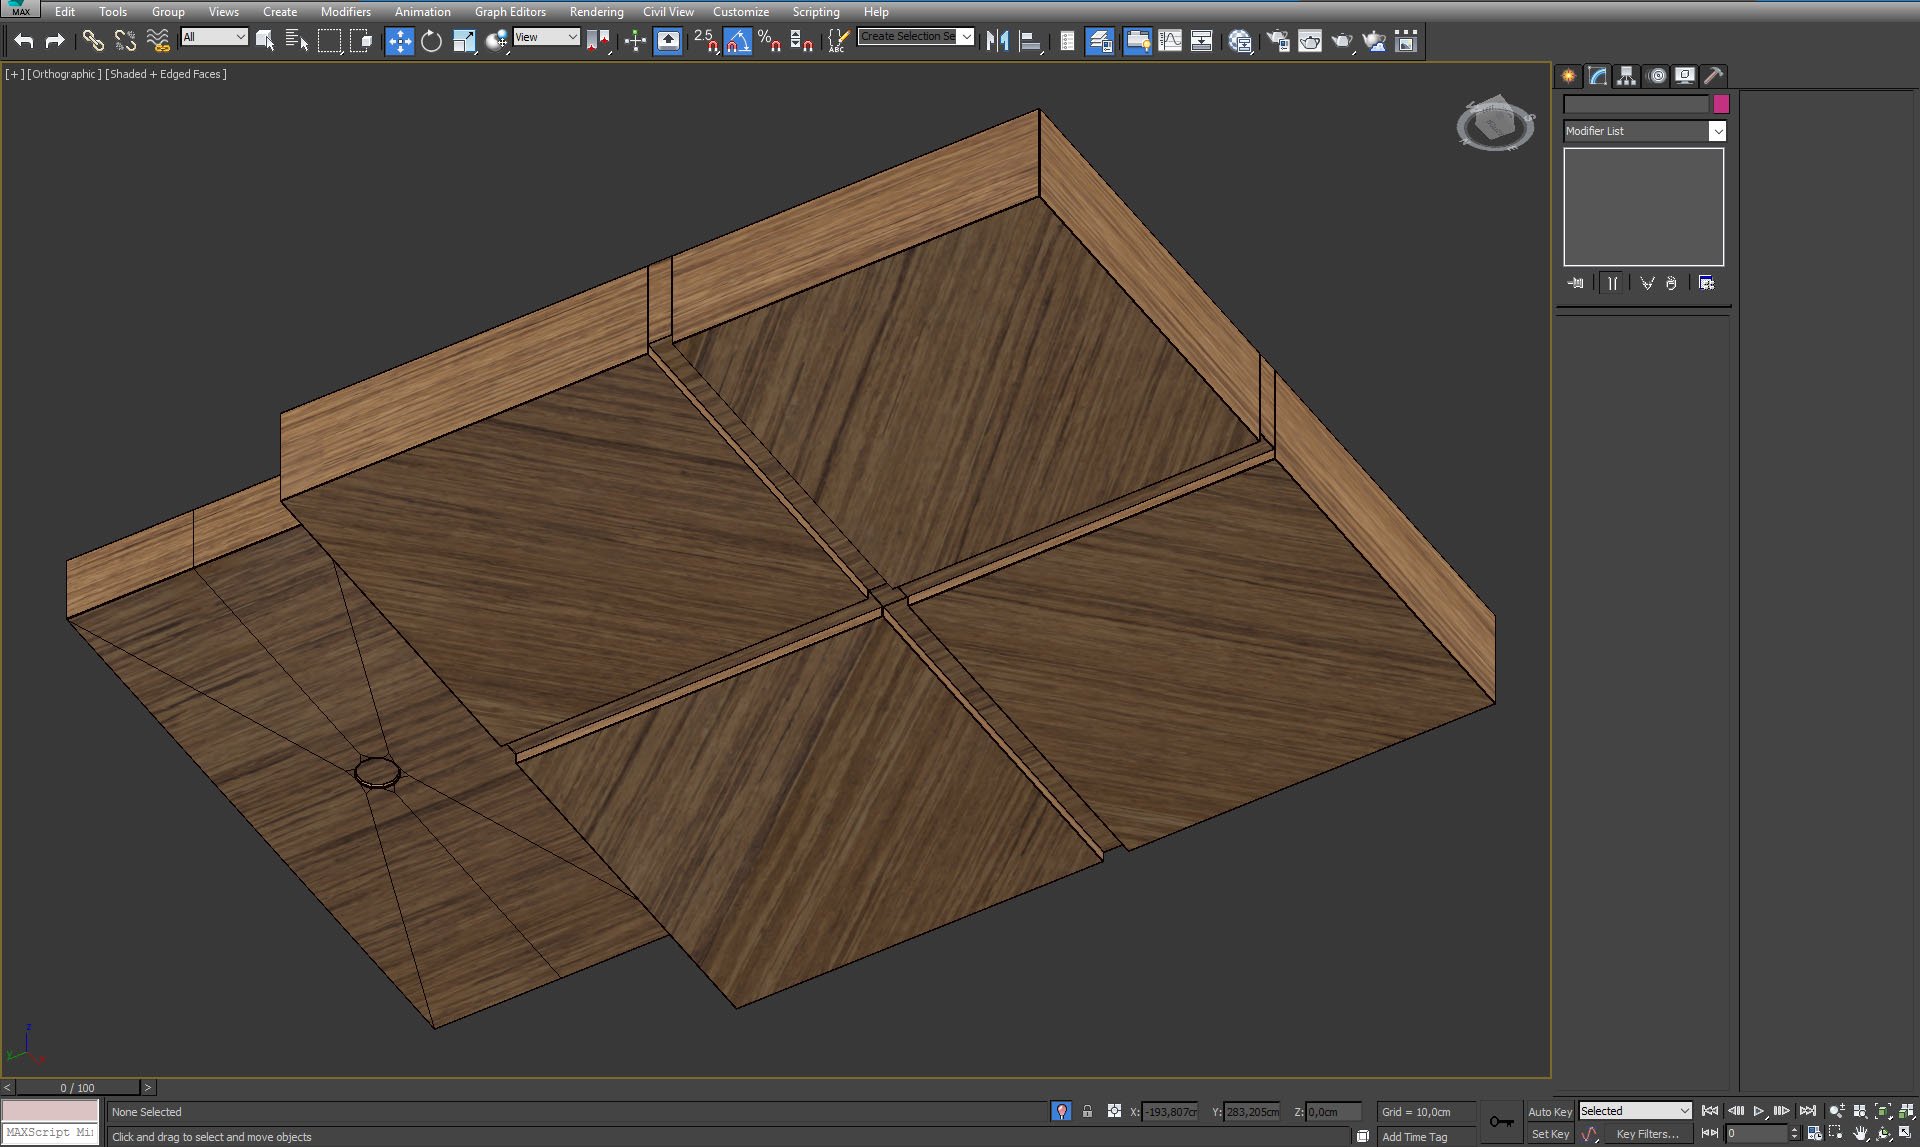
Hanging ceiling module.
Click on image to enlarge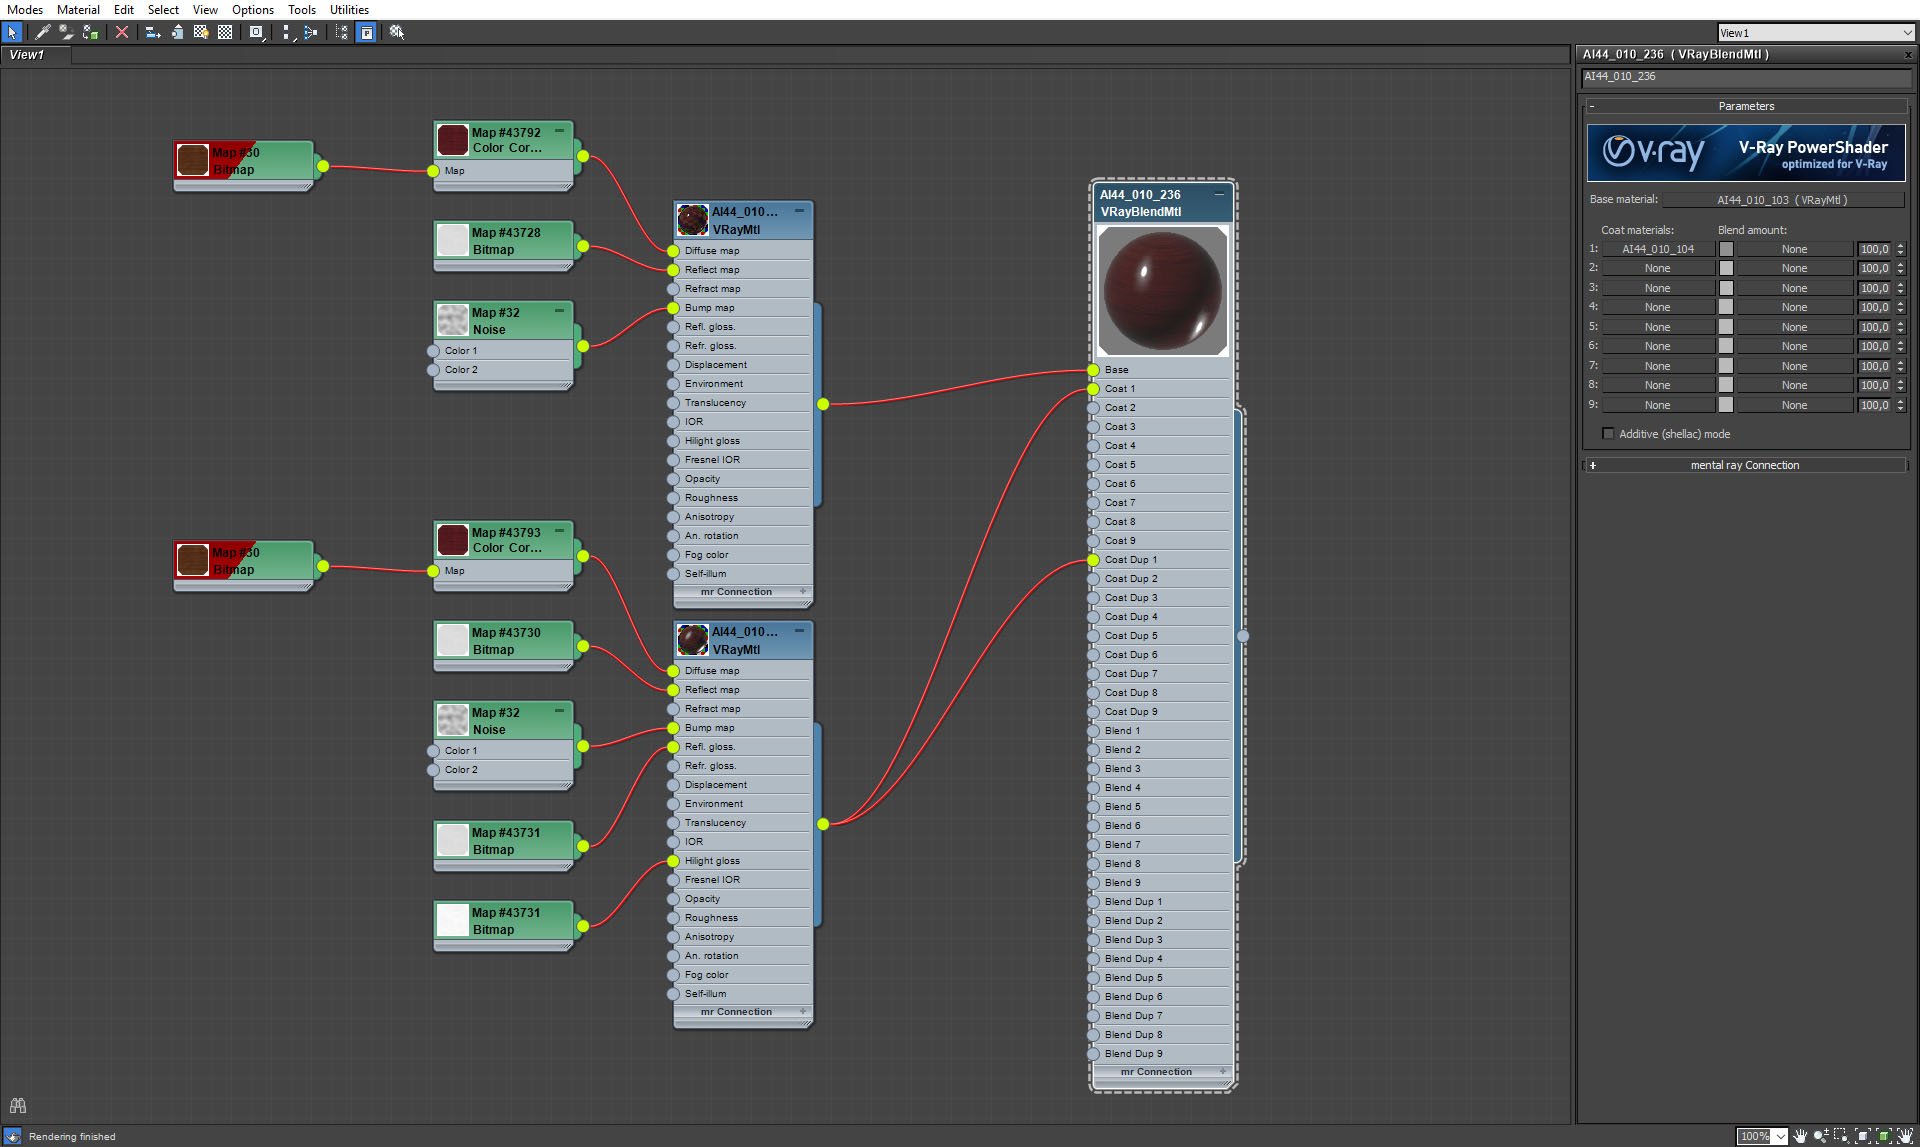
Hanging ceiling material.
Click on image to enlarge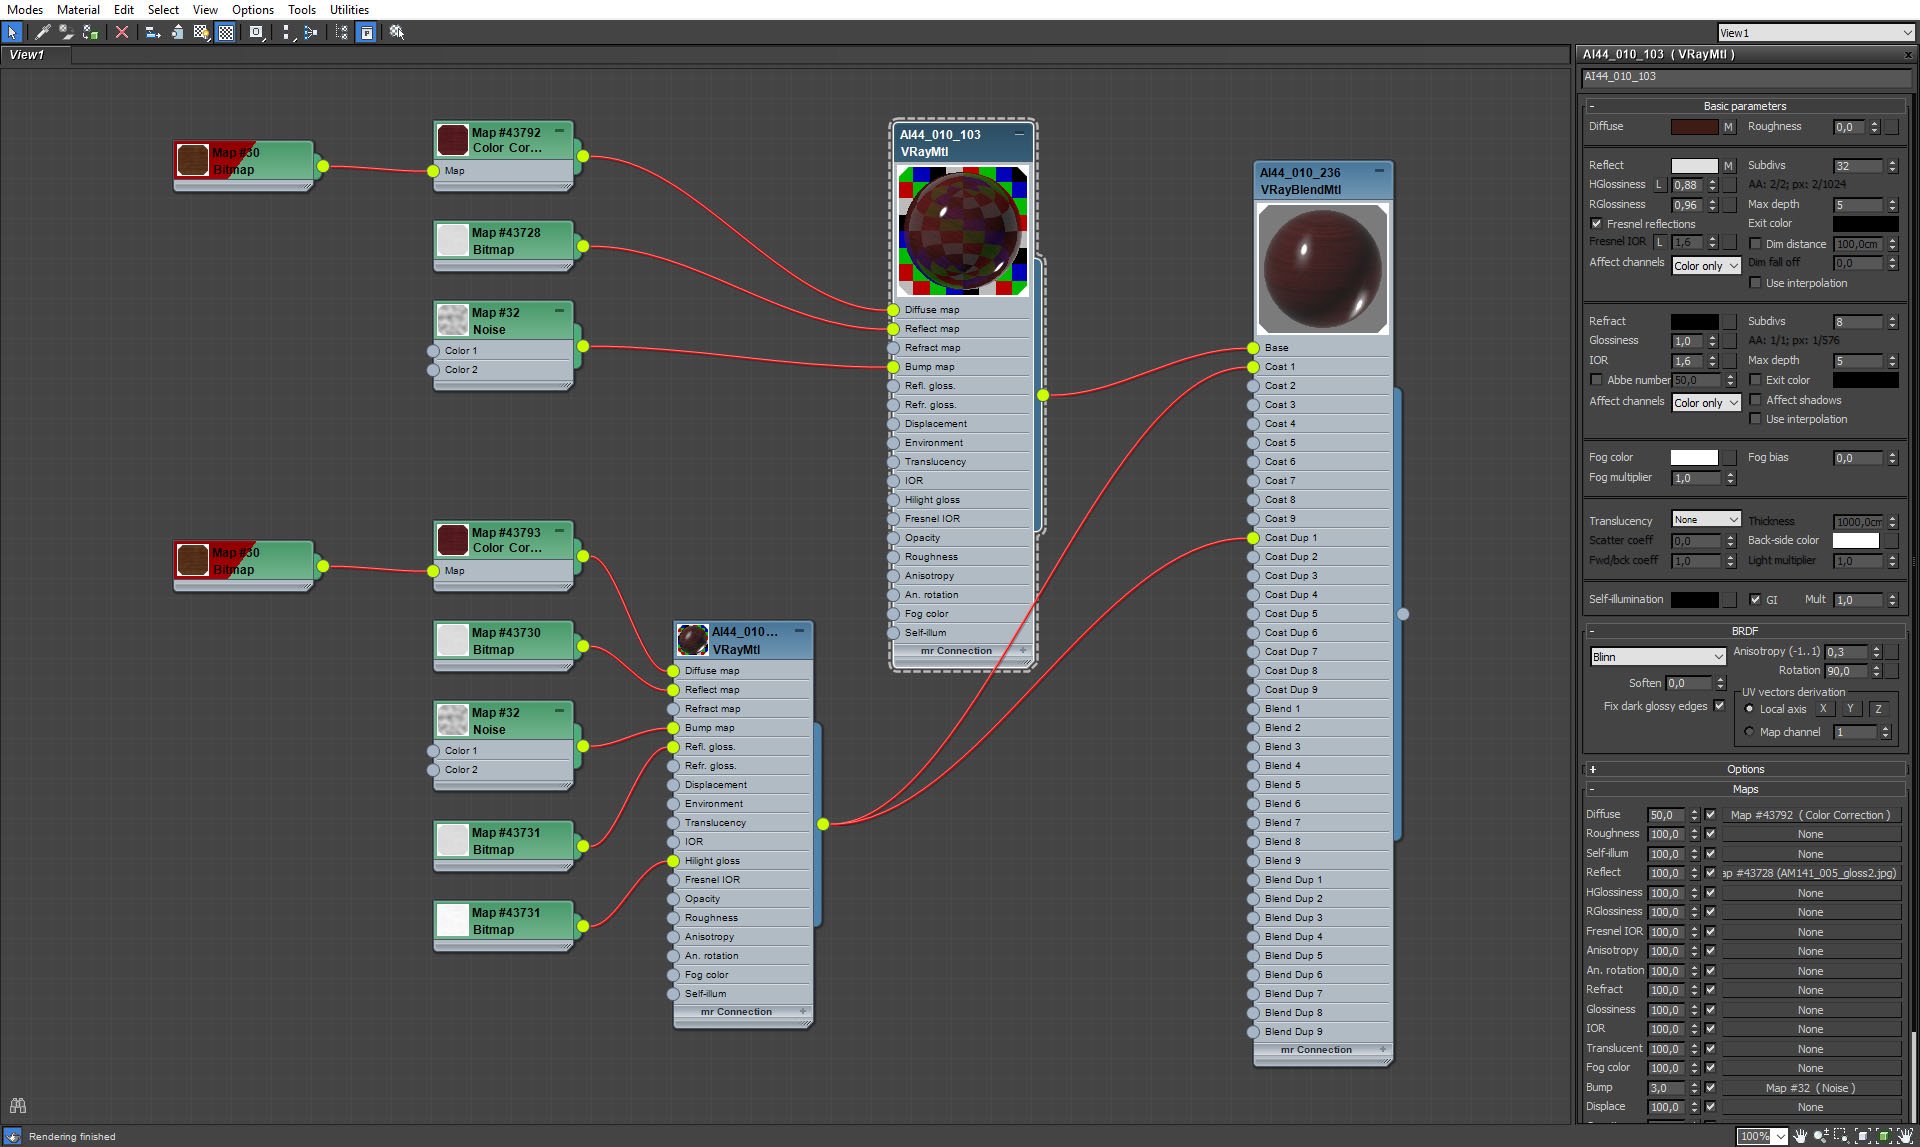
Hanging ceiling material, continued.
Click on image to enlarge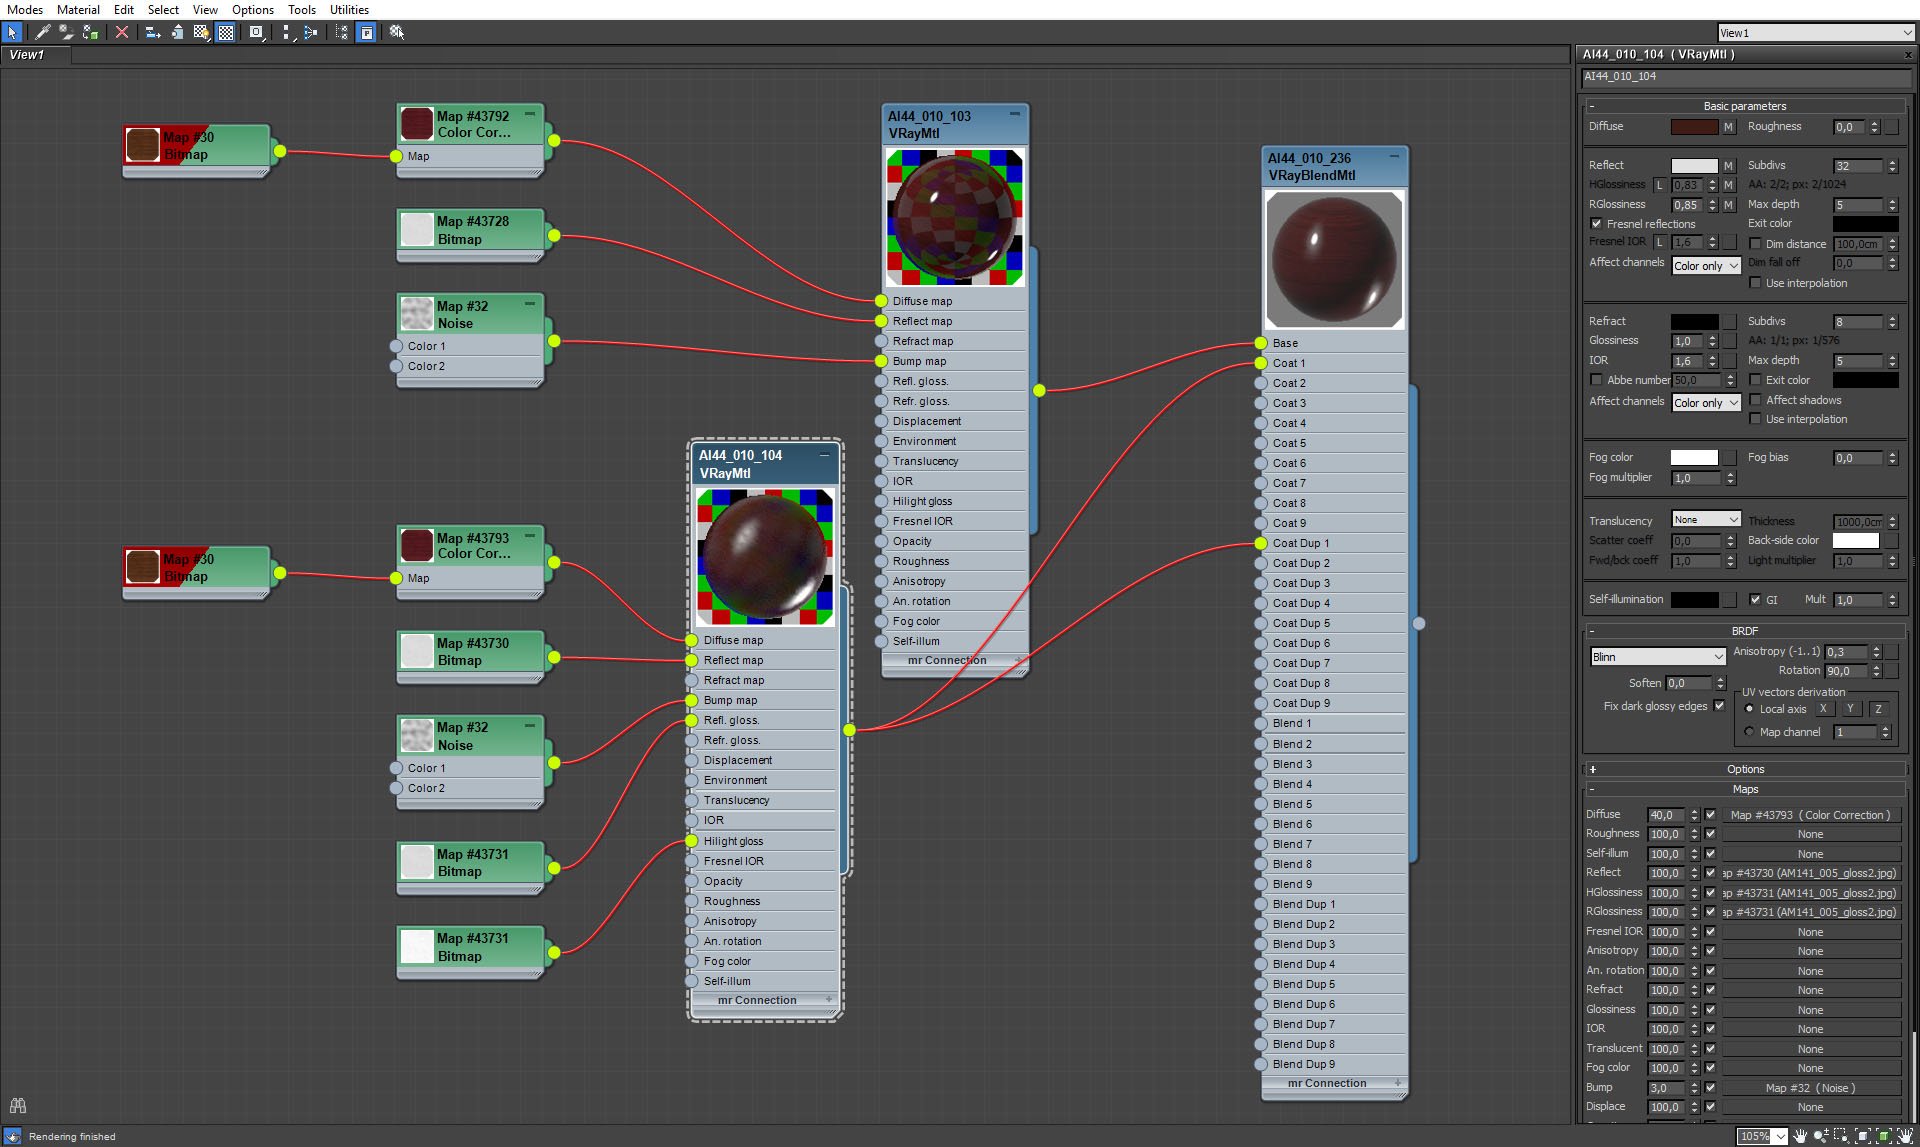
Hanging ceiling material, continued.
Click on image to enlarge
Hanging ceiling material, maps.
Click on image to enlarge
The curtain that hangs at the end of a lobby.
Click on image to enlarge
Curtain mesh.
Click on image to enlarge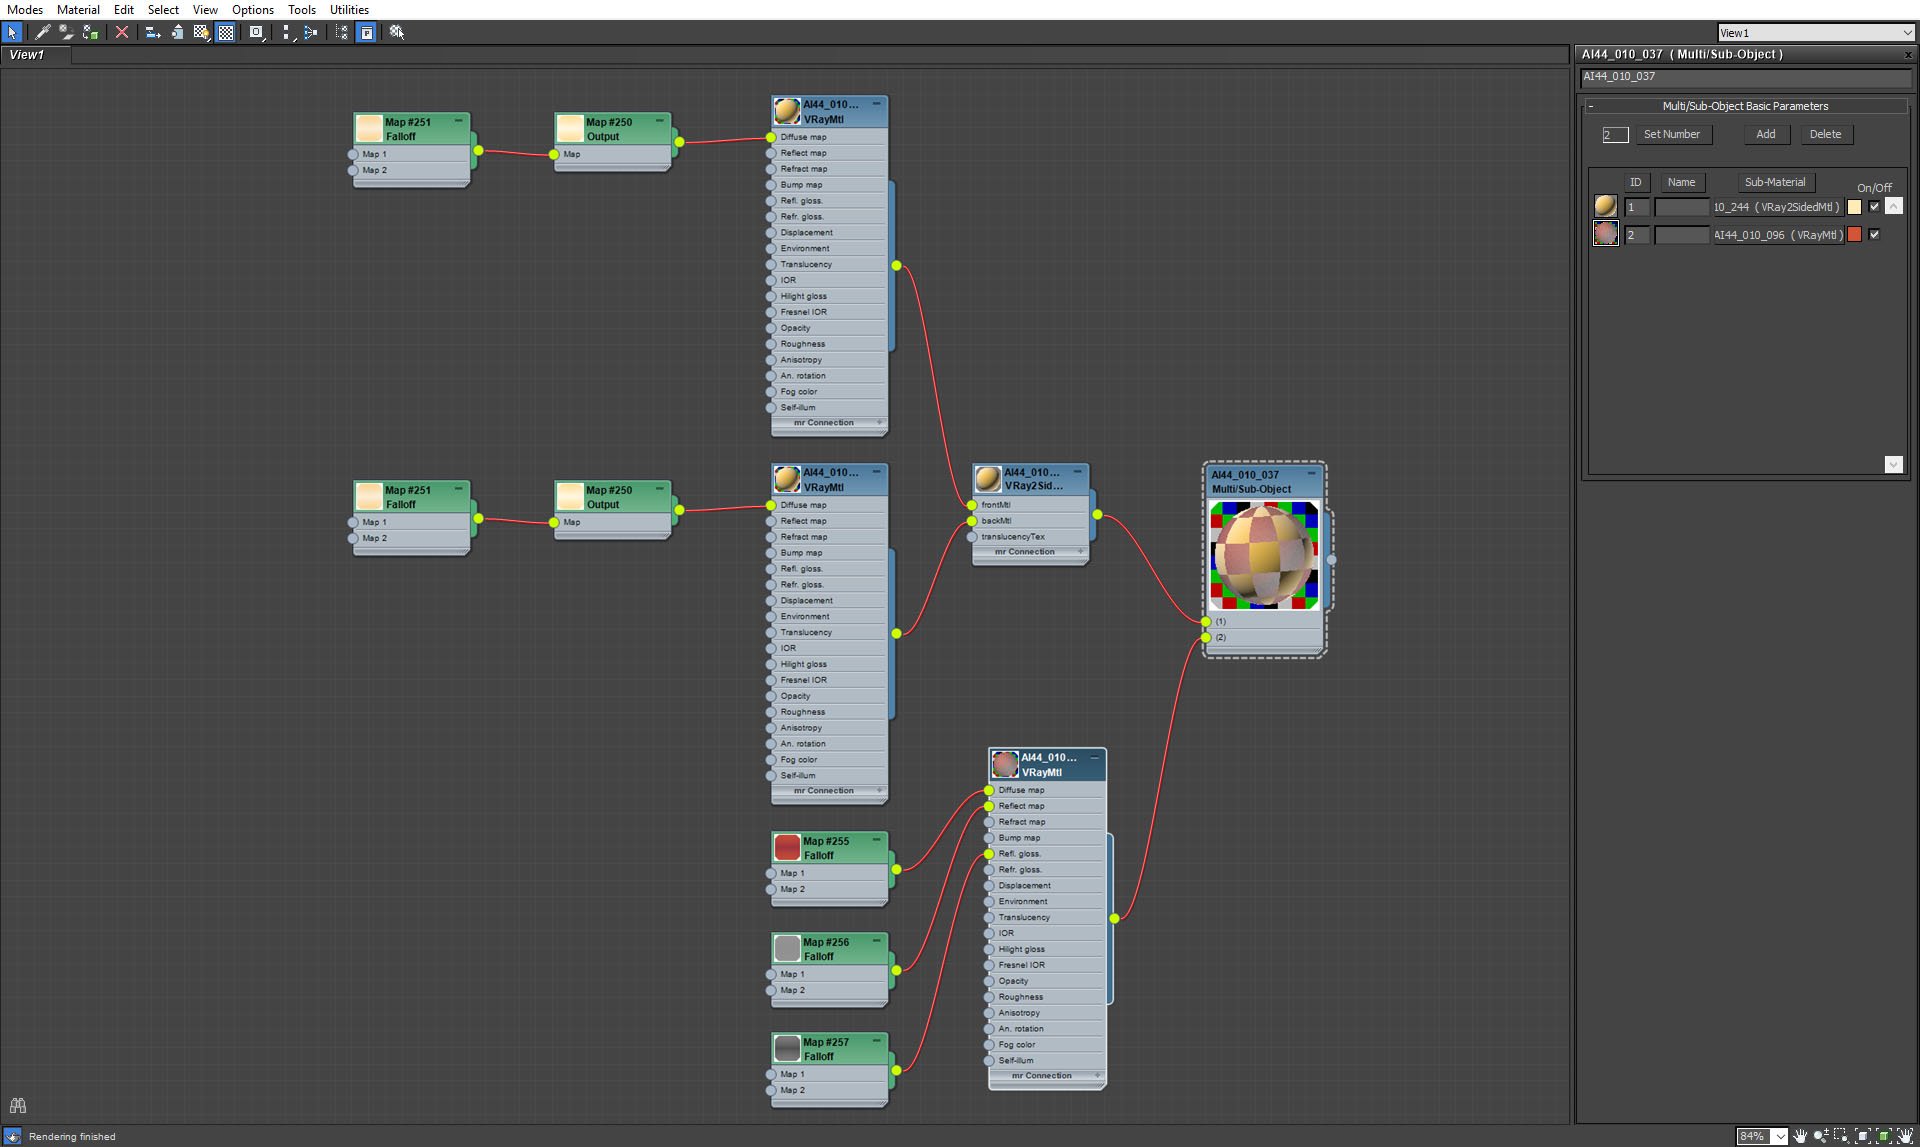
Curtain material. Curtain has two colors, so we used Multi/Sub object material.
Click on image to enlarge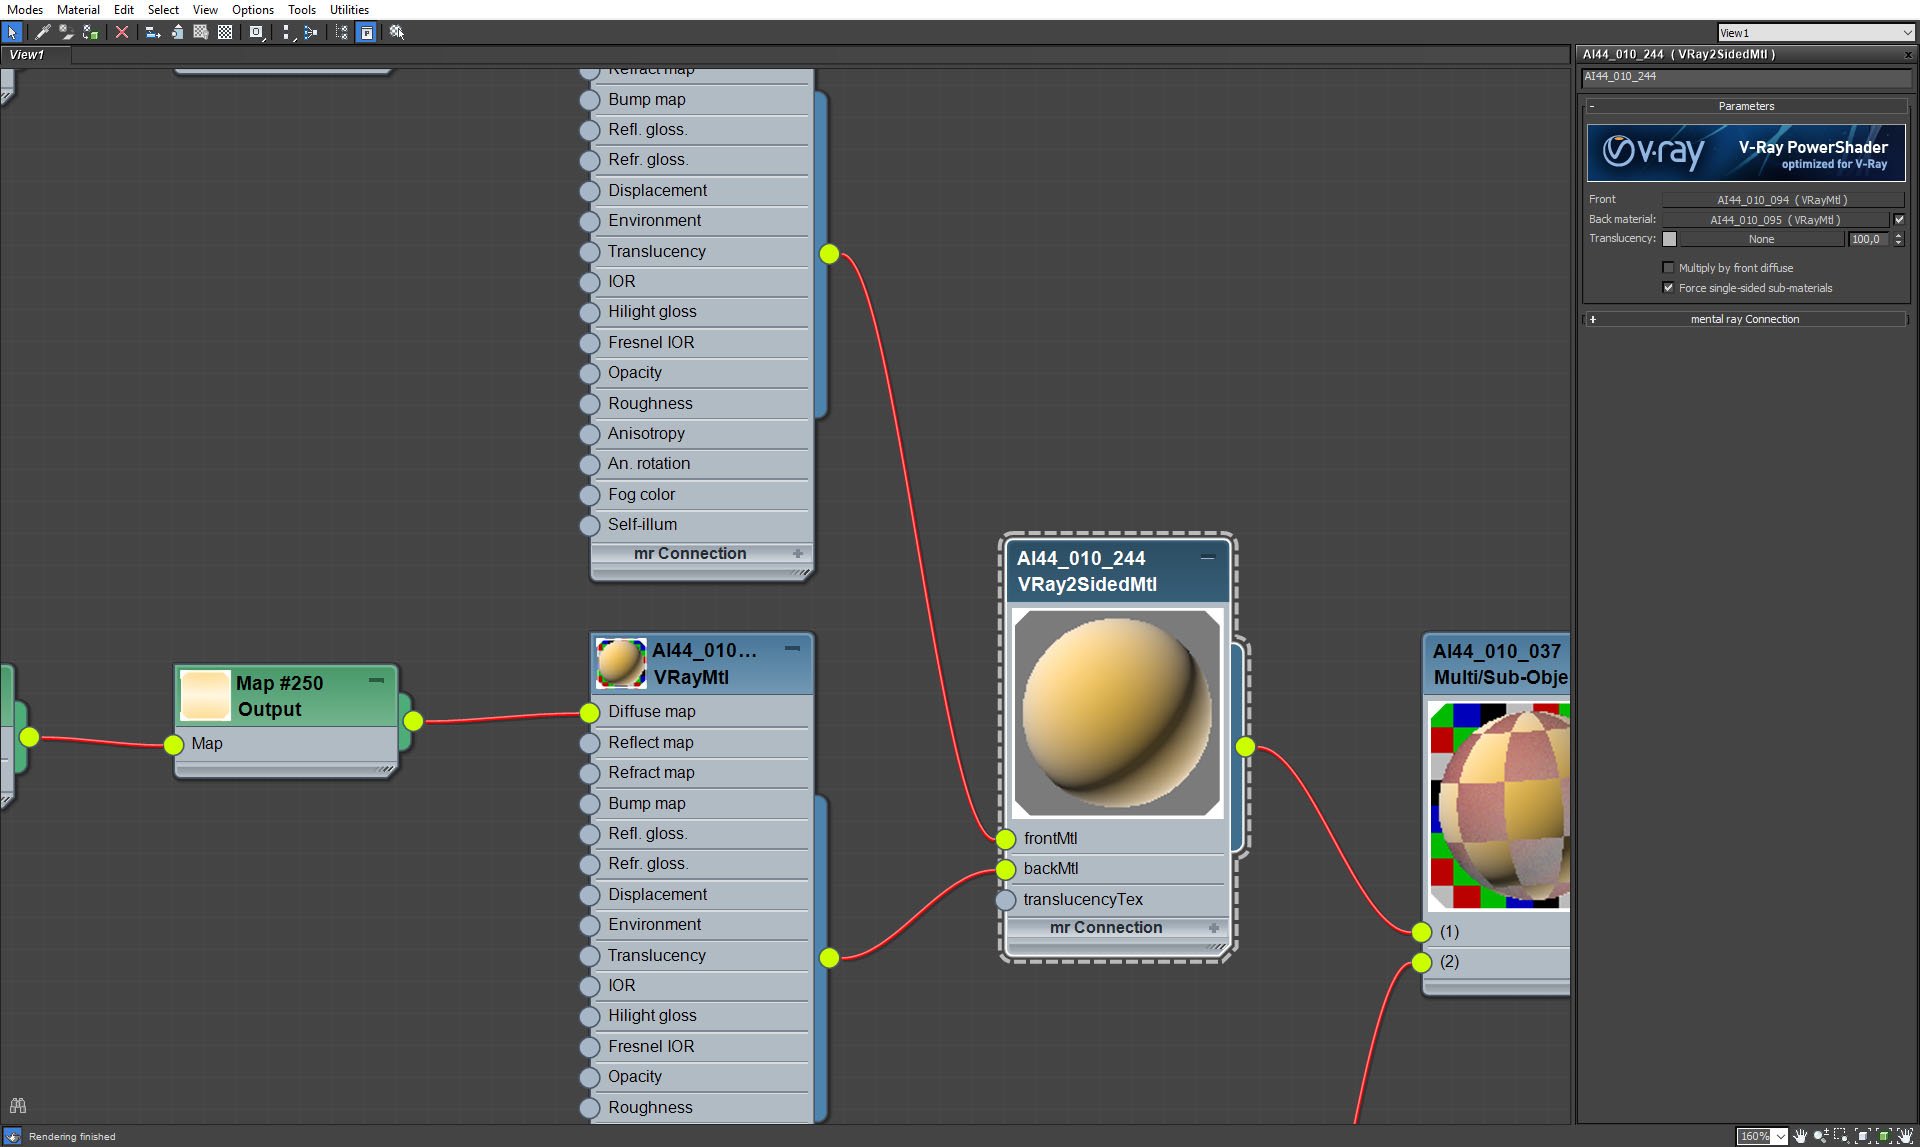
We assigned two-sided Vray material for the main part of the curtain.
Click on image to enlarge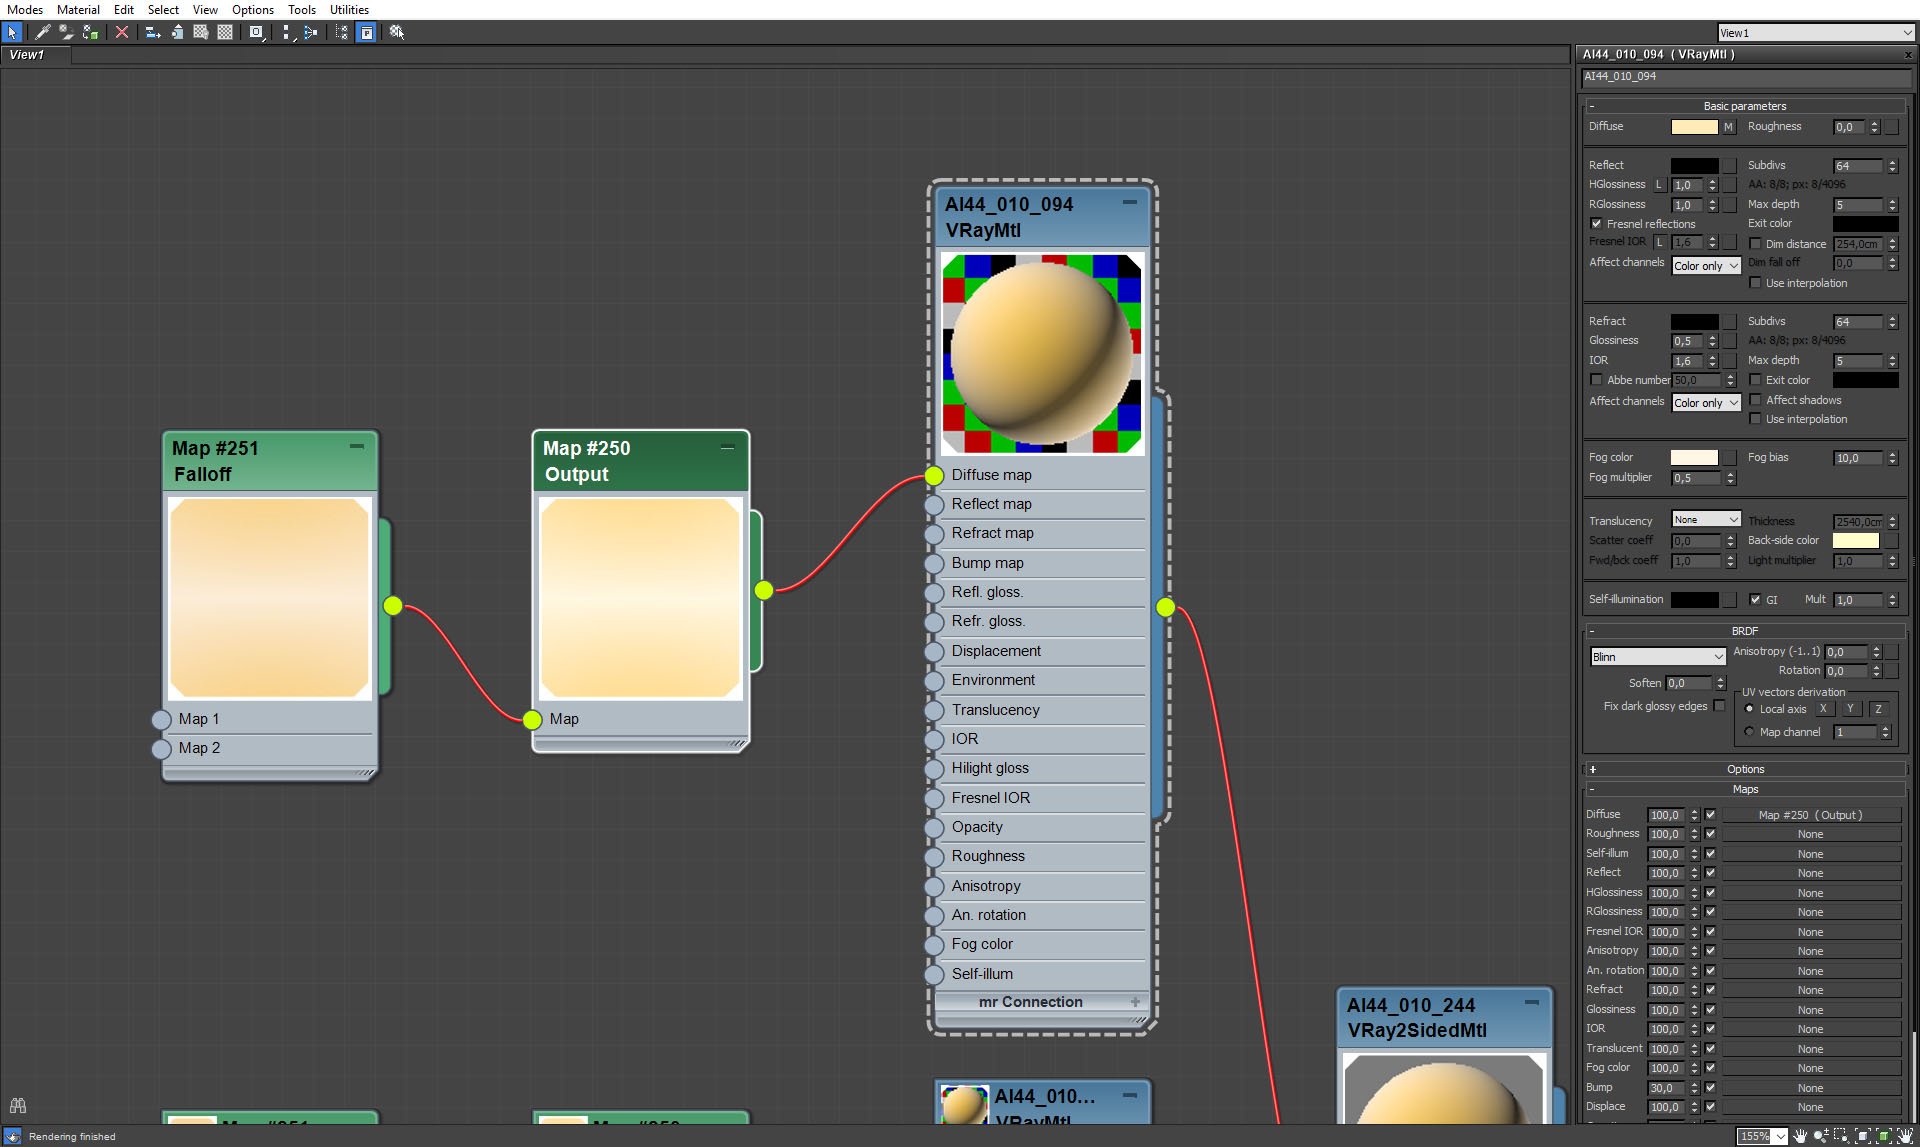
Curtain - side 1.
Click on image to enlarge
Curtain - side 1, falloff map settings.
Click on image to enlarge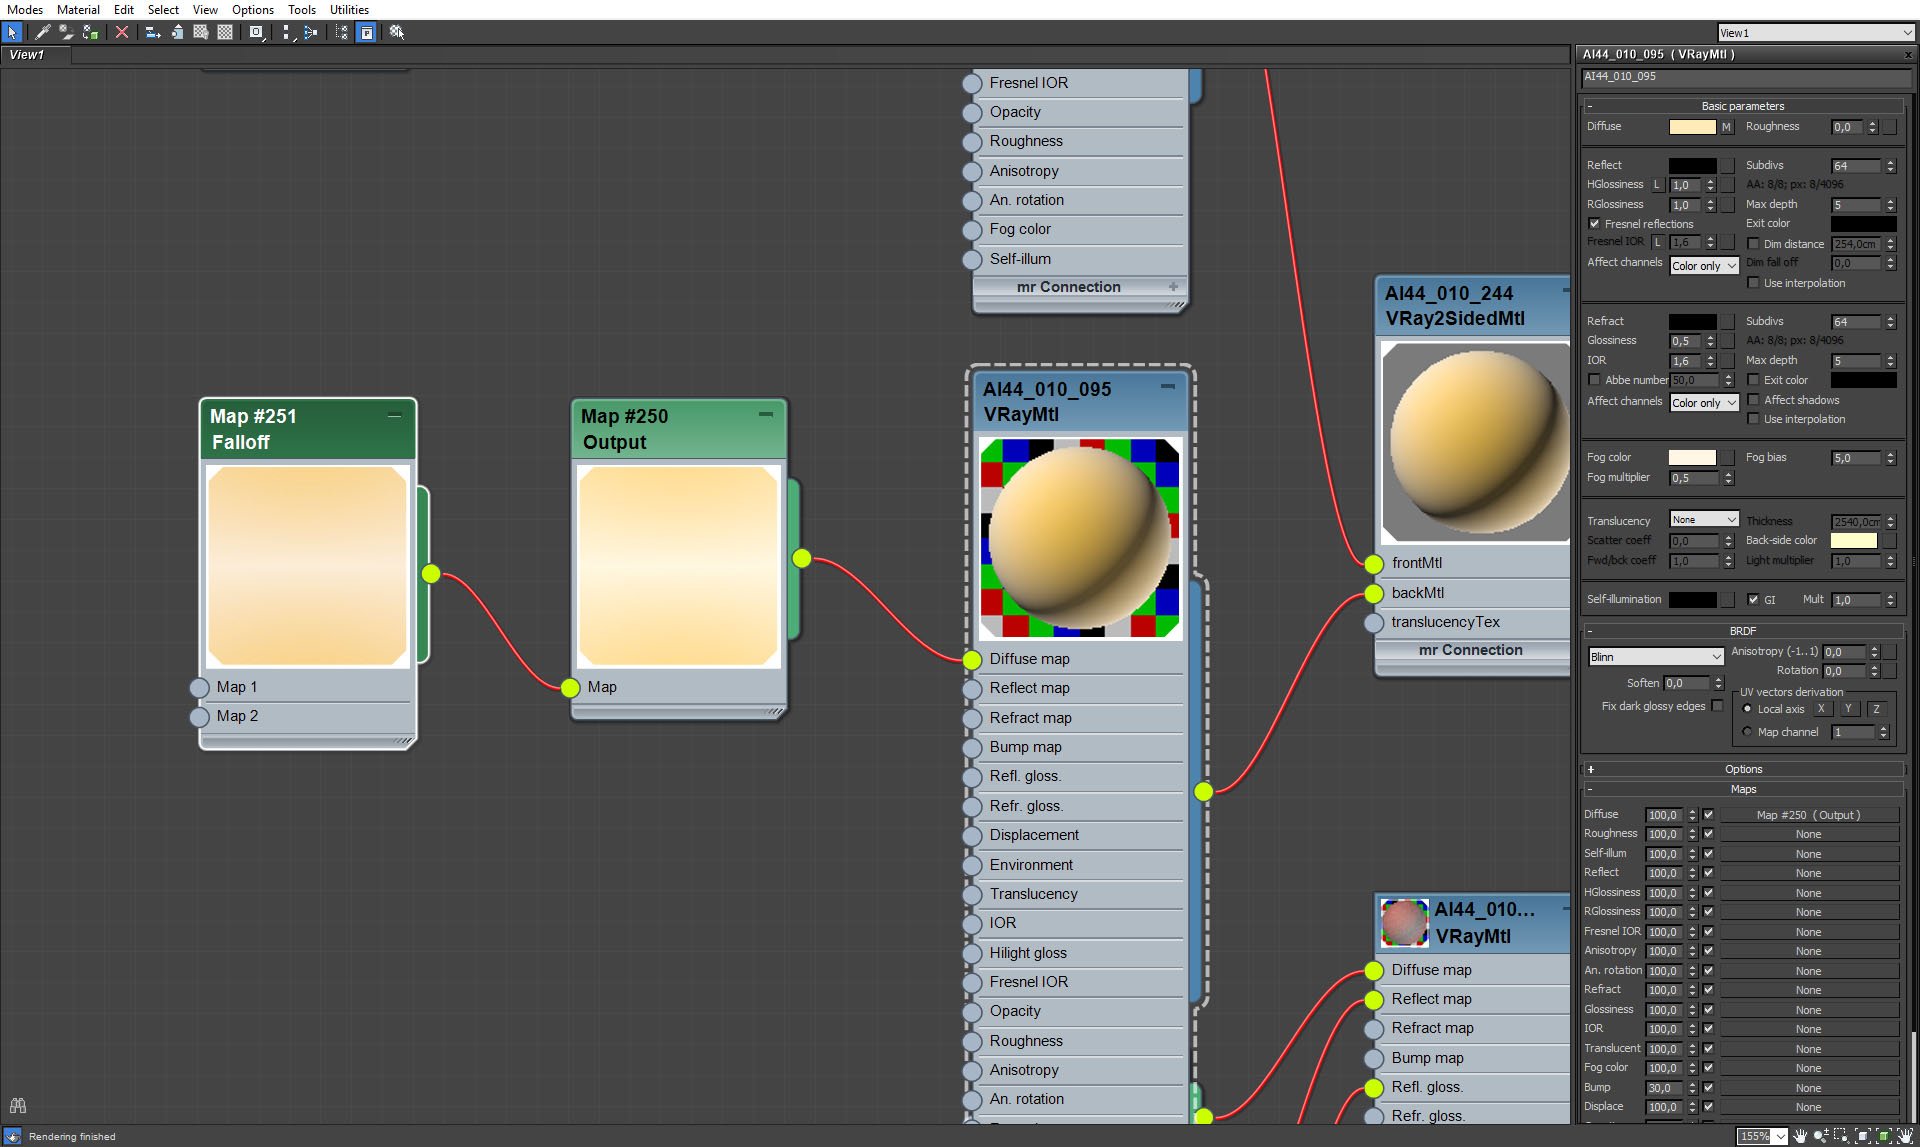
Curtain, side 2.
Click on image to enlarge
Curtain, side 2, fallof map settings.
Click on image to enlarge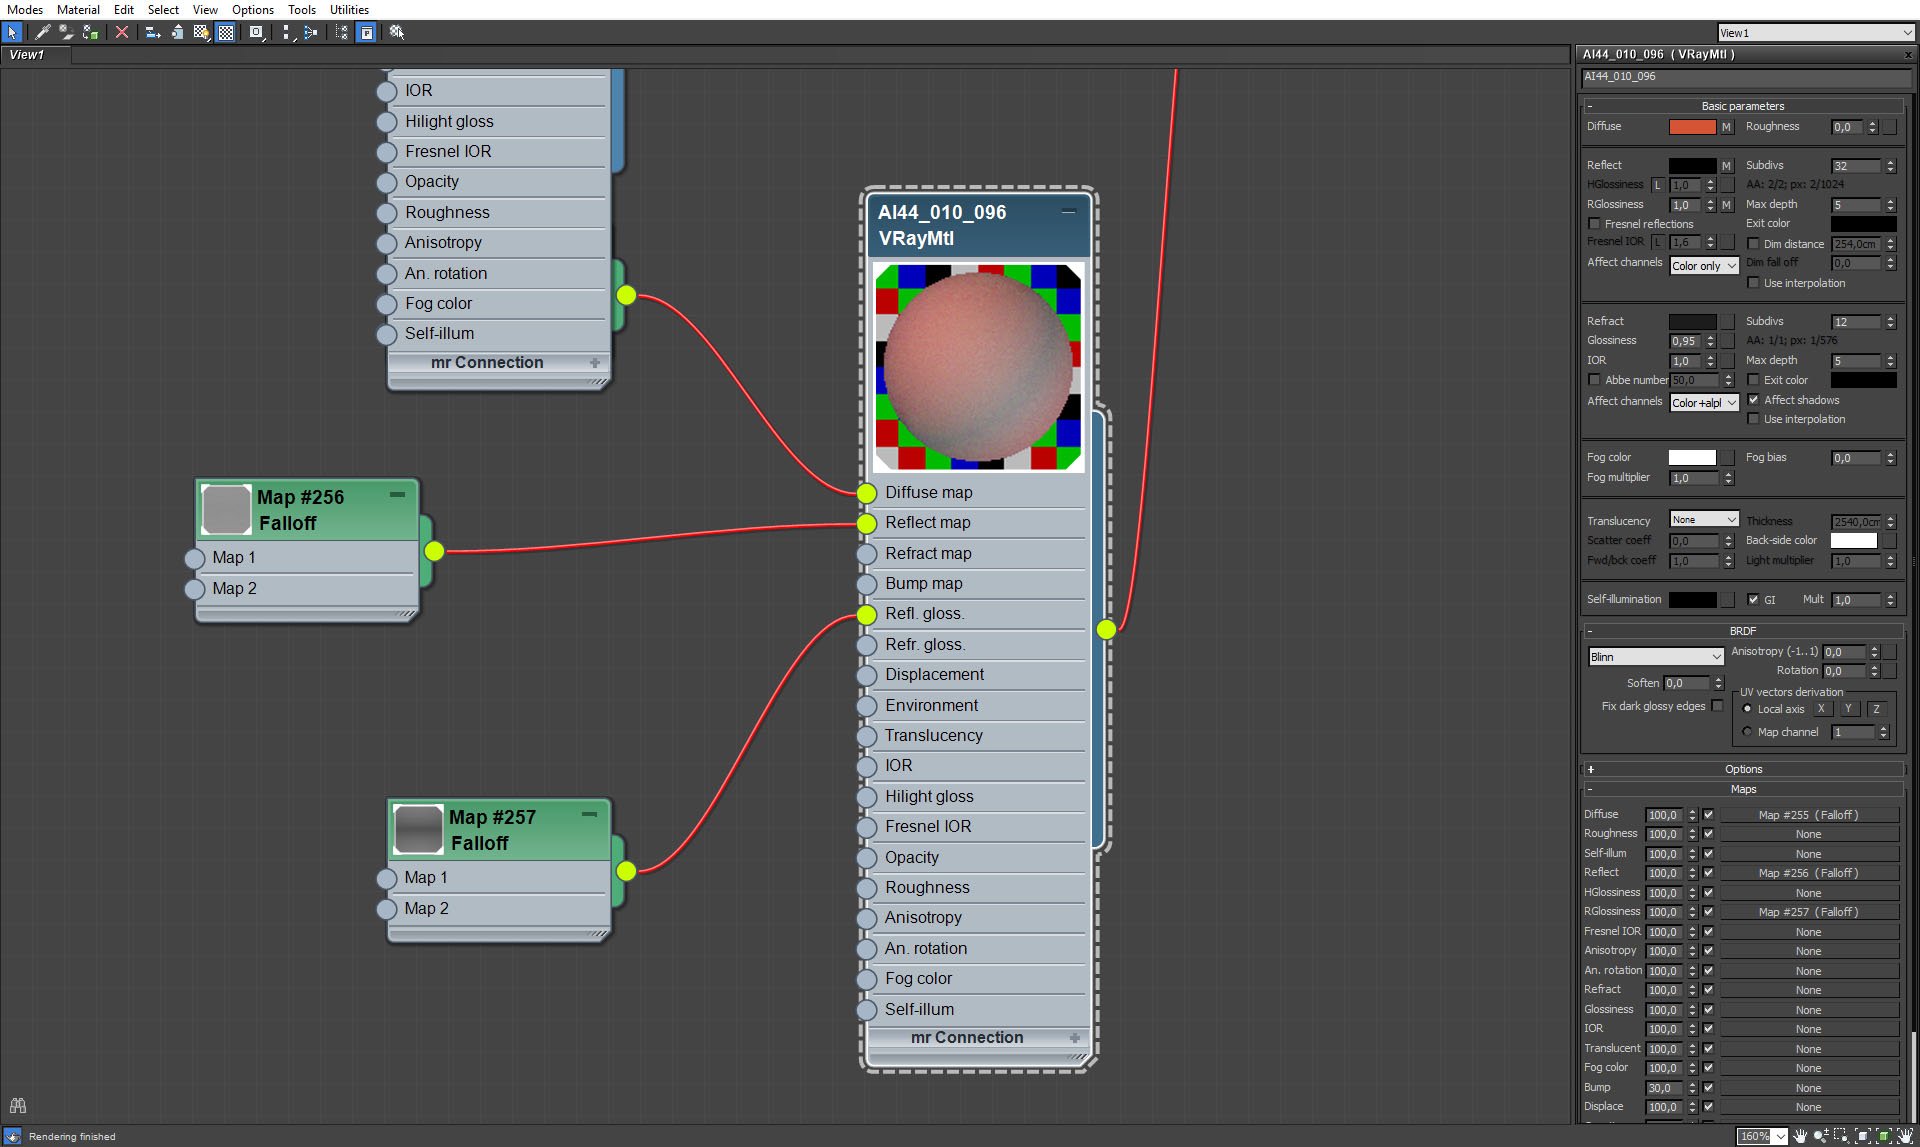
Curtain, red part material.
Click on image to enlarge
Curtain, red part, falloff map settings.
Click on image to enlarge
Curtain, red part, falloff map in reflection glossiness slot settings.
Click on image to enlarge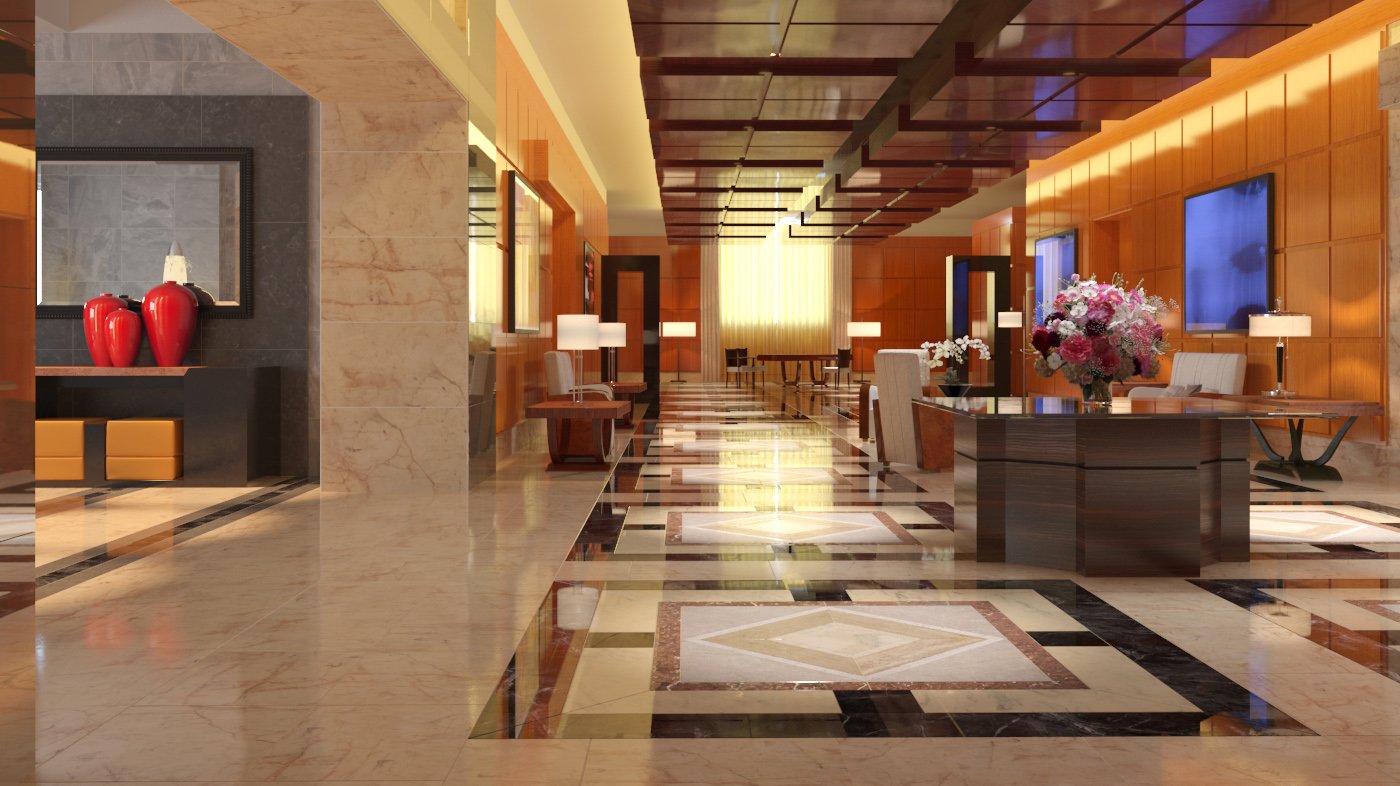
Final render.
Click on image to enlarge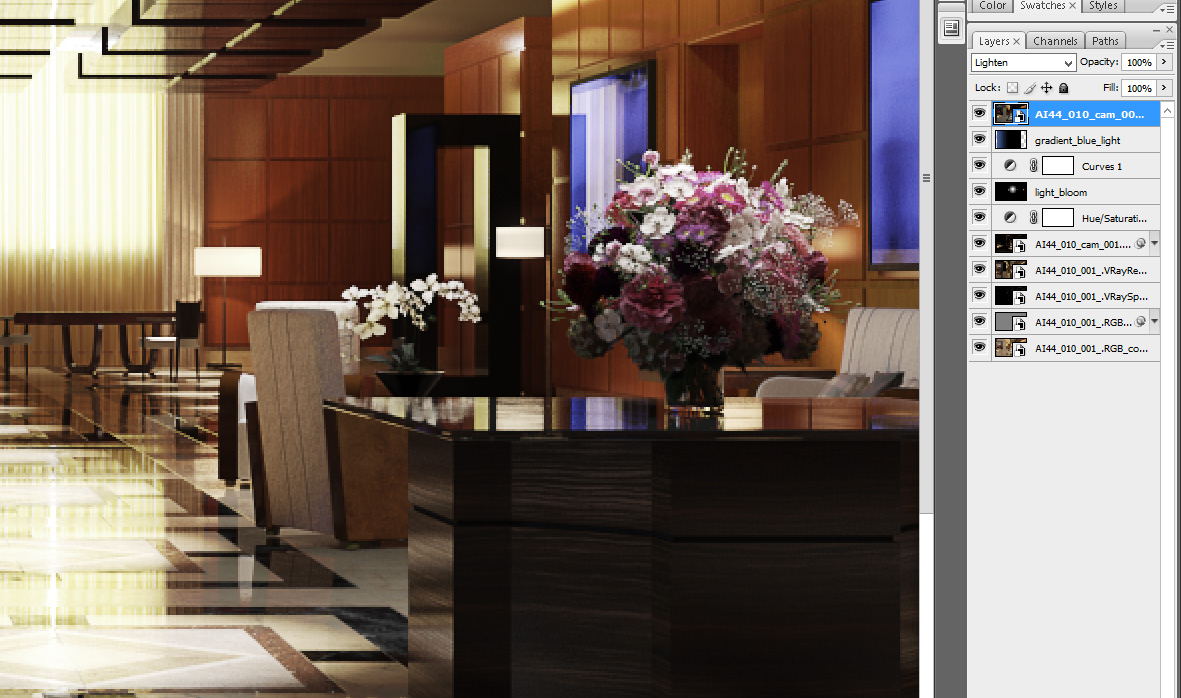
Photoshop stack from raw camera 1 image. The bottom layer is raw RGB render, next comes highpass filter for sharpening (radius 0.5 pixels), two next layers are specular and reflection passes (linear dodge and lighter color blending modes). After them we placed Motion Blur layer that enhances soft light reflections on the furniture and walls. Hue / Saturation layer desaturated image quite heavily (-34%), then we added light bloom, curves for greater contrast. Gradient layer makes the room on the left more blueish, at the top we have Lighting layer.
Click on image to enlarge
Camera 2 Photoshop stack. Sharpening with highpass filter, reflection and specular layers. Gradient light layer makes some light bloom near lamps. The last color adjustment layers increase contrast and desaturate image a bit.
Thanks for reading!
 Removing LUTs from Textures for better resultsRemove the LUT from a specific texture in order to get perfect looking textures in your render.
 Chaos Corona 12 ReleasedWhat new features landed in Corona 12?
 OCIO Color Management in 3ds Max 2024Color management is crucial for full control over your renders.
 A look at 3dsMax Video SequencerDo you know that you can edit your videos directly in 3ds Max? Renderram is showing some functionalities of 3ds Max's built in sequencer.
 FStorm Denoiser is here - First ImpressionsFirst look at new denoising tool in FStorm that will clean-up your renders.
 Unreal Engine 5.4: Nanite Tessellation in 10 MinutesThis tutorial takes you through creating a stunning desert scene, complete with realistic tire tracks, using Nanite for landscapes, Gaea for terrain sculpting, and an awesome slope masking auto material.
Customer zone
Your special offers
Your orders
Edit account
Add project
Liked projects
View your artist profile




COMMENTS