This scene is a part of our Archinteriors vol. 44 - modern lobbies collection. It is available in Evermotion Shop. You can purchase this single scene or entire Archinteriors vol. 44 collection (10 scenes). This scene was made by Kuba Dąbrowski from Evermotion.
Click on image to enlarge
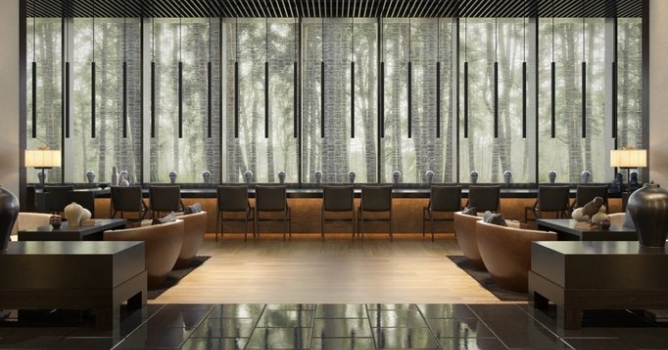
Final image after post-production, as seen by camera 1.
Click on image to see 360 panorama
Click then drag your mouse to see 360 panorama of the scene.
Click on image to enlarge
Final image after post-production - camera 2.
Click on image to enlarge
A view from 3ds Max viewport - camera 2.
Click on image to enlarge
Camera 2. Viewport with "Materials Color" option enabled (right top corner).
Click on image to enlarge
In front of the building we placed two planes with bitmaps.
Click on image to enlarge
We also placed some 3d trees models by the side of the building.
Click on image to enlarge
Trees bitmaps in front of the building.
Click on image to enlarge
Two bitmaps - one of them is trees image and the second is a mask. Mask is needed to enhance light that comes from behind the trees. Simply put: black areas have lower opacity, thanks to that the light can penetrate bitmap easier in these areas. The result - trees are darker, sky behind them is lighter. This "HDR" effect couldn't be achieved with a single VrayLight material.
Click on image to enlarge
VrayLight material of trees planes.
Click on image to enlarge
Trees - light color bitmap.
Click on image to enlarge
One of trees models used in this scene.
Click on image to enlarge
External light is provided by target direct light.
Click on image to enlarge
We placed skylight simple portals in the windows.
Click on image to enlarge
Another skylight portal.
Click on image to enlarge
We placed many spotlights above the tables.
Click on image to enlarge
VrayPhysicalCamera (camera 1).
Click on image to enlarge
Camera 1, from another angle.
Click on image to enlarge
Window framing elements.
Click on image to enlarge
Frame material. The same material is shared by the ceiling.
Click on image to enlarge
There is a subtle curtain in the window.
Click on image to enlarge
Window curtain - We used some translucent and opacity maps to make this material.
Click on image to enlarge
Window curtain material (continued).
Click on image to enlarge
There are some decorative elements standing on the windowsill.
Click on image to enlarge
More lights in the corridor.
Click on image to enlarge
Main building is made of many elements.
Click on image to enlarge
Ribbing in the ceiling beneath the window.
Click on image to enlarge
Part of the floor in the lobby - teracotta.
Click on image to enlarge
Floor close-up.
Click on image to enlarge
Floor material. Looks complicated at the first sight, but it is just VrayMaterial with five, carefully tweaked maps for diffuse, reflection, bump, glossiness and glossiness highlight.
Click on image to enlarge
Diffuse material - almost black, but with some imperfections.
Click on image to enlarge
Floor - composite map settings.
Click on image to enlarge
Some IES lights above the tables.
Click on image to enlarge
Wooden floor material.
Click on image to enlarge
Wooden floor diffuse bitmap.
Click on image to enlarge
Spherical environment map.
Click on image to enlarge
Render settings.
Click on image to enlarge
Post-production - camera 2. Above RGB layer we have a slight chromatic abberation layer that affetcs only edges of the image. We have subtle vignette above, then harpening of the center of the image. Curves and levels layers give more contrast correction, hue/saturation layer takes down "greens" slider. Above is specular layer and a layer that enhances spotlights. the last layers enhance soft light, reflection and give a small bloom around ceiling lamps.
Click on image to enlarge
Post-production - camera 1. Post-production is very similar to the second camera, except from two top layers. Scatter layer gives more light coming from the window and top frame makes the ceiling a bit darker.
Click on image to enlarge
Final image - camera 1.
Click on image to enlarge
Final image - camera 2.
This scene is a part of our Archinteriors vol. 44 - modern lobbies collection. It is available in Evermotion Shop. You can purchase this single scene or entire Archinteriors vol. 44 collection (10 scenes).
Customer zone
Your special offers
Your orders
Edit account
Add project
Liked projects
View your artist profile


COMMENTS