We have added new 3D Scanned Assets

Shop Now
Search
Cart
Sign in
  • offerCustomer zone
  • offerYour special offers
  • offerYour orders
  • offerEdit account

  • offerAdd project
  • offerLiked projects
  • offerView your artist profile

  • Dark mode

Information Clause

In accordance with the art. 13 section 1 and 2 of the European Parliament and Council Regulation 2016/679 of the 27th April, 2016 on the protection of natural persons, with regard to the processing of personal data and on the free movement of such data, and repealing Directive 95/46/EC (General Data Protection Regulation), hereafter RODO, I hereby inform that:

1. EVERMOTION S.C., 8 Przędzalniana Str., 15-688 Białystok, Poland is the Administrator of your Personal Data (APD)

2. Data Protection Inspector can be reached through e-mail: iod@evermotion.org

3. Your personal data are to be processed on the basis of art. 6 section 1 letter a, b and f of RODO in order to:
a) prepare, conclude and execute the agreement and for other purposes approved by you,
b) to execute the legitimate interest like marketing of products and the agreement, claim assertion or defence against claims resulting from the law regulations.
4. Entities entitled to the reception of your personal data may be the authorised public bodies; mail providers; providers of the services covered by the agreement; responsible for debt recovery, keeping the archives, document utilization, legal consulting, technical services, IT services and accountancy.

5. Your personal data shall not be transferred to the third country, nor to the international bodies.

6. Your personal data shall be processed within the period of the agreement and upon your additional consent until you withdraw it. APD shall keep the data for the period of any civil law claim execution connected with the agreement.

7. You have the right to demand an access to your personal data, to correct or to delete the data if there is no other basis for the processing or any other purpose of such processing or to limit the processing of the data, to transfer the data to another administrator and to raise objections to the further data processing if there is no legal basis for further processing and to withdraw any previous consent.

8. You provide the personal data voluntarily, however they are necessary to conclude the agreement. The refusal of providing such data may result in the refusal of the agreement conclusion.

9. You have the right to lodge a complaint to the Personal Data Protection Office when in your opinion the data processing violates the regulations of General Data Protection Regulation of the 27 April, 2016 (RODO).

10. Your data will be automatically processed, including the form of profiling.
11. You are obligated to forward above mentioned information to your representative, especially if you appointed this person in the agreement as the contact person or as the representative for the agreement execution.

OK

Making of a warm loft - Tip of the Week

Michał Franczak 2015-08-20 15:17 tutorial  > 3ds MAX  > texturing

Breakdown of a scene from Archinteriors vol. 42.

This scene is available in Archinteriors vol. 42 collection.

Click on image to enlarge

nr_AI42_001_camera_001_PP_357.jpg

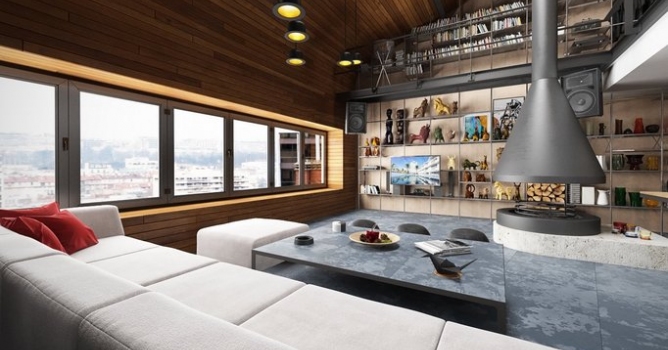
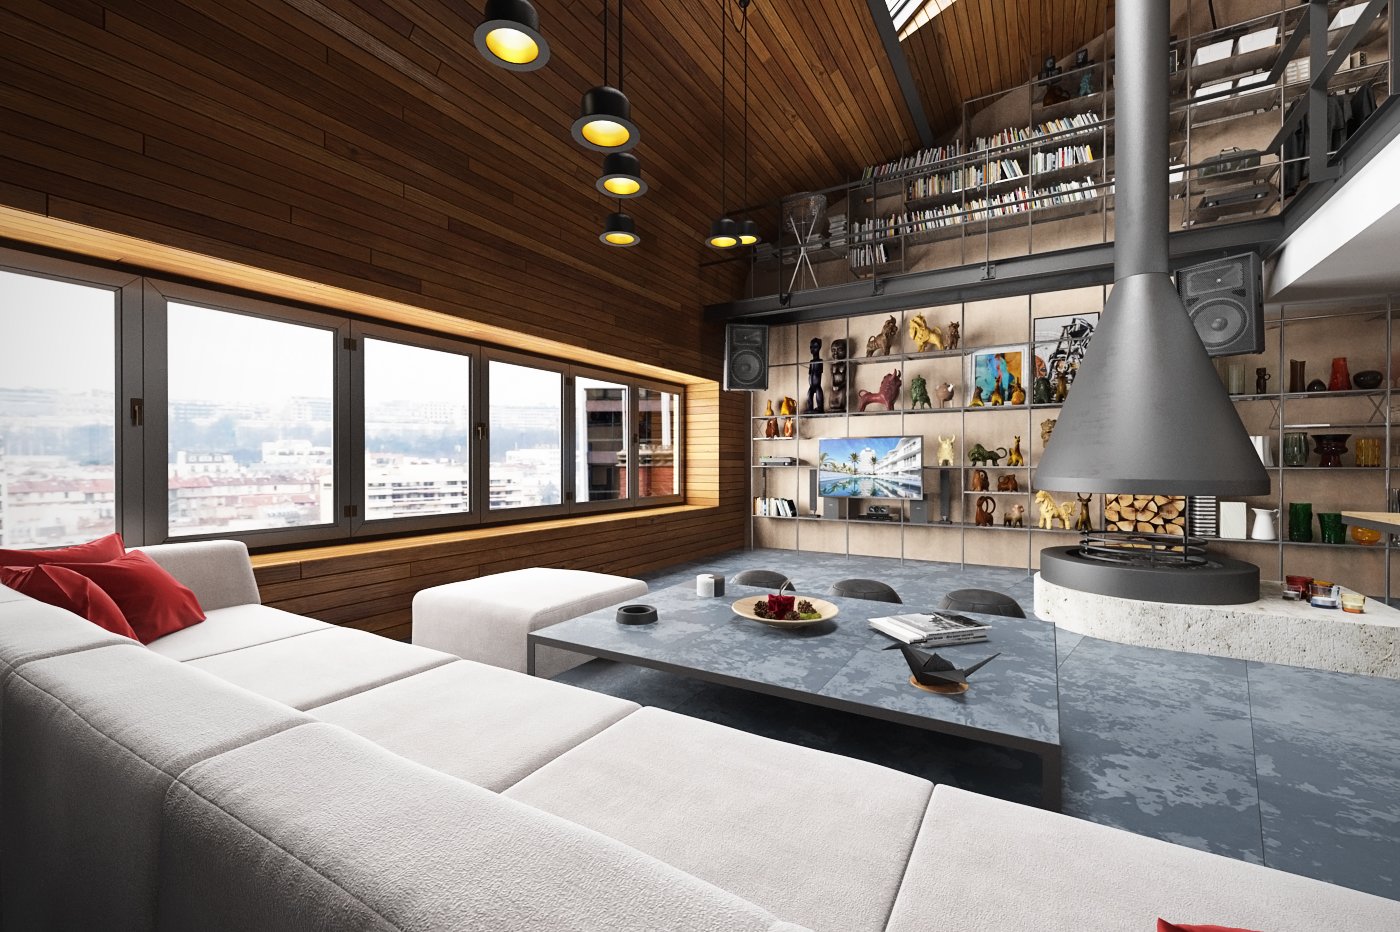
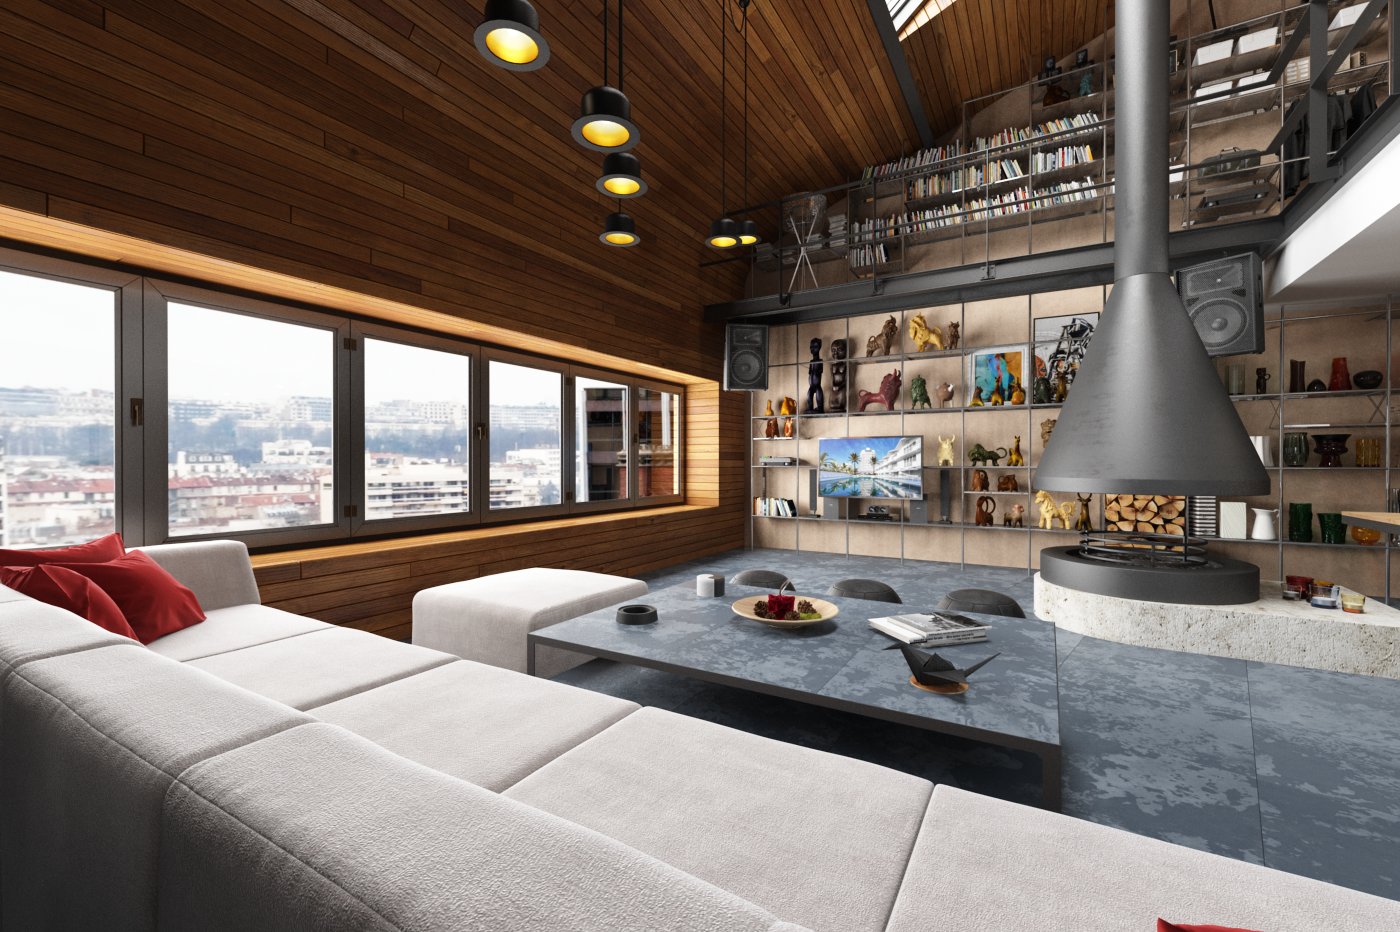
Final render after post-production.


Click on image to enlarge nr_AI42_001_camera_002_PP_358.jpg

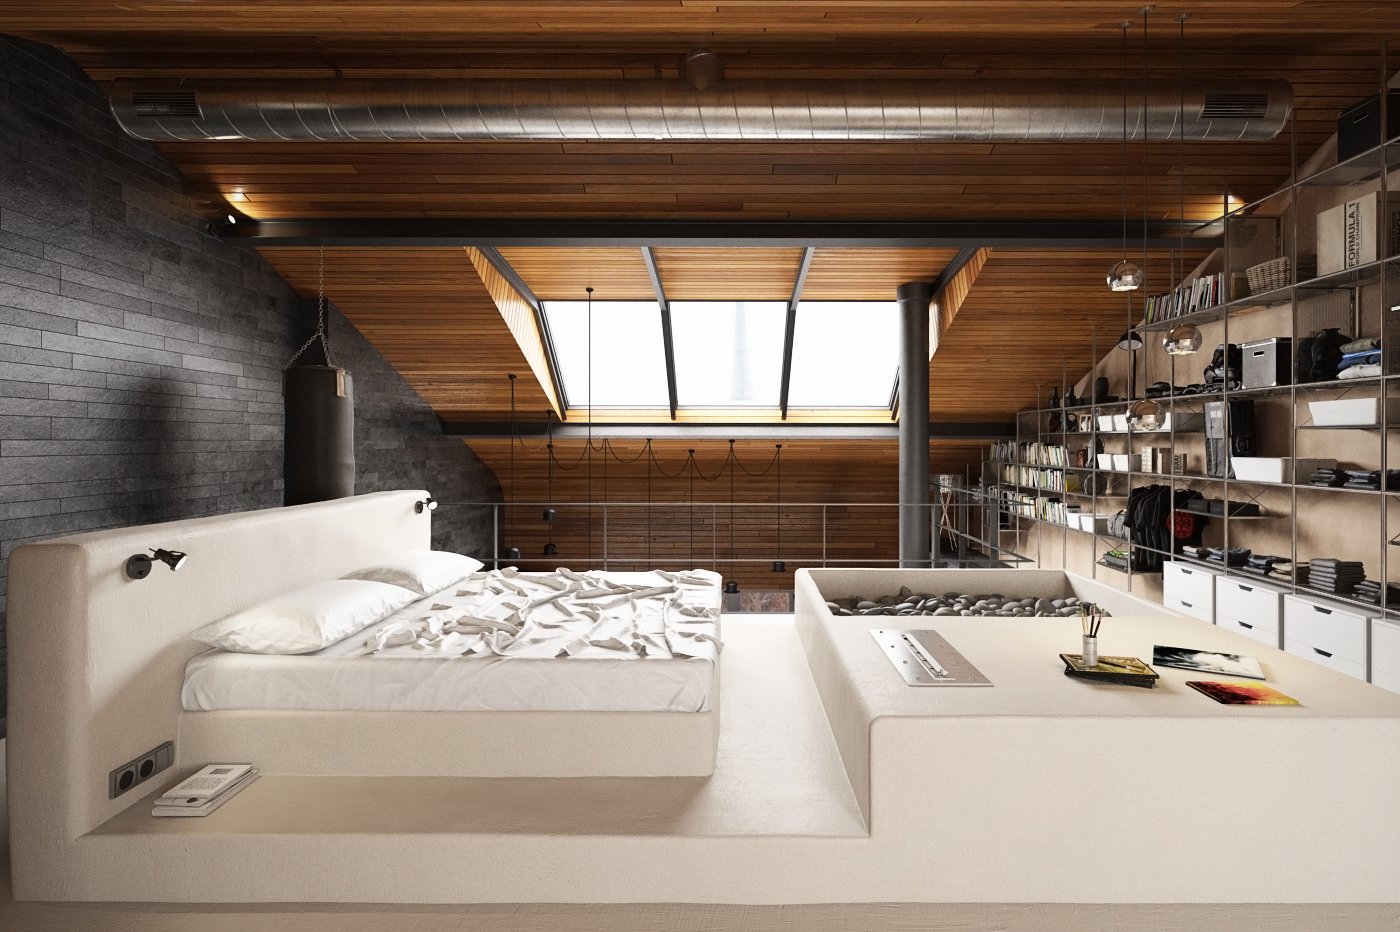
Final render - camera 2.


Click on image to enlarge nr_AI42_001_camera_top_359.jpg

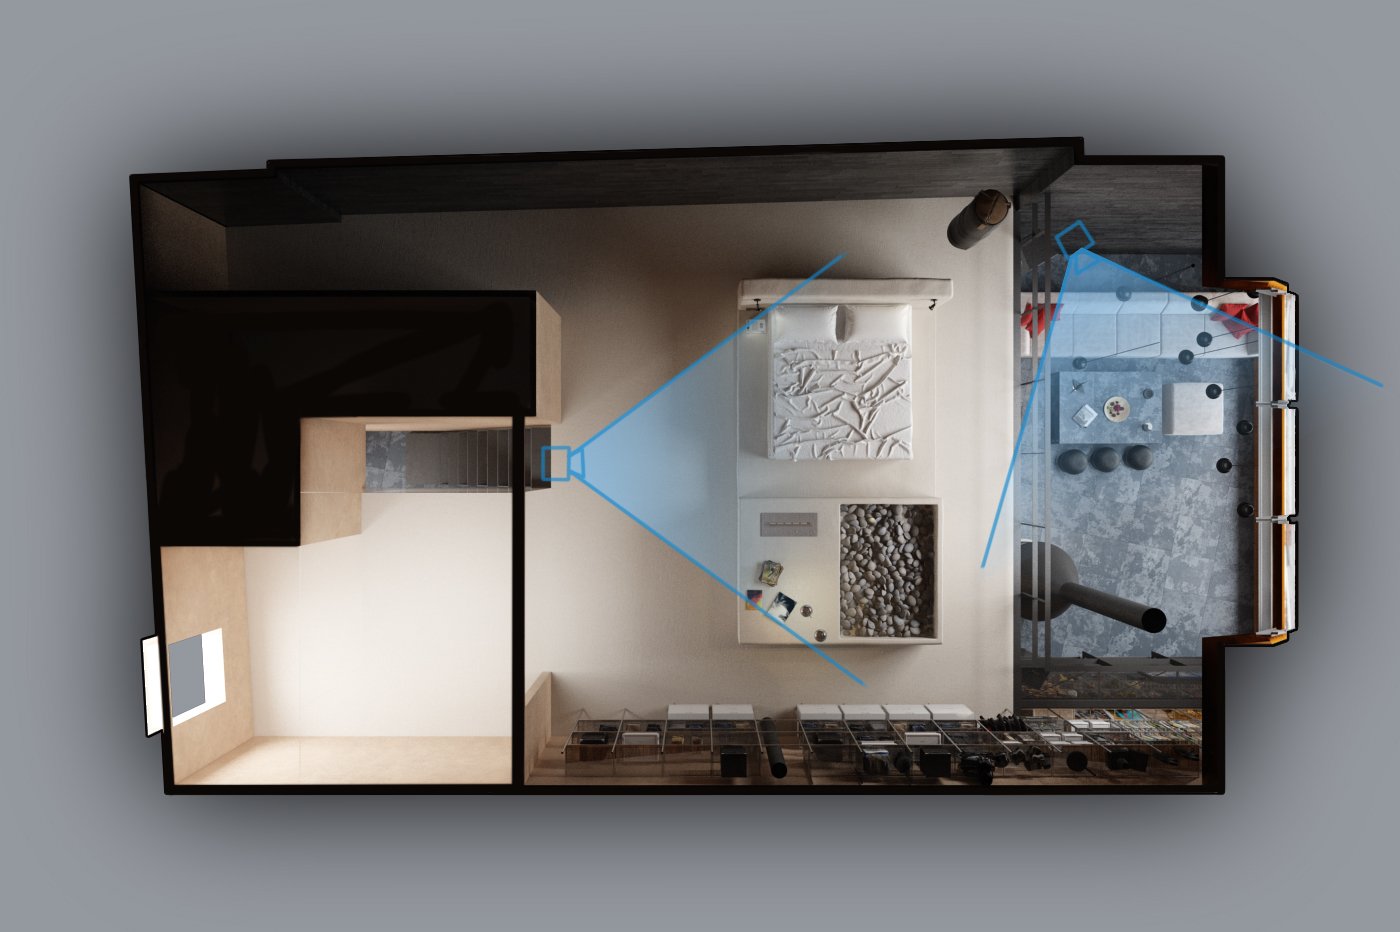
View from top.


Click on image to enlarge nr_AI42_01_0022_Layer_1_356.jpg

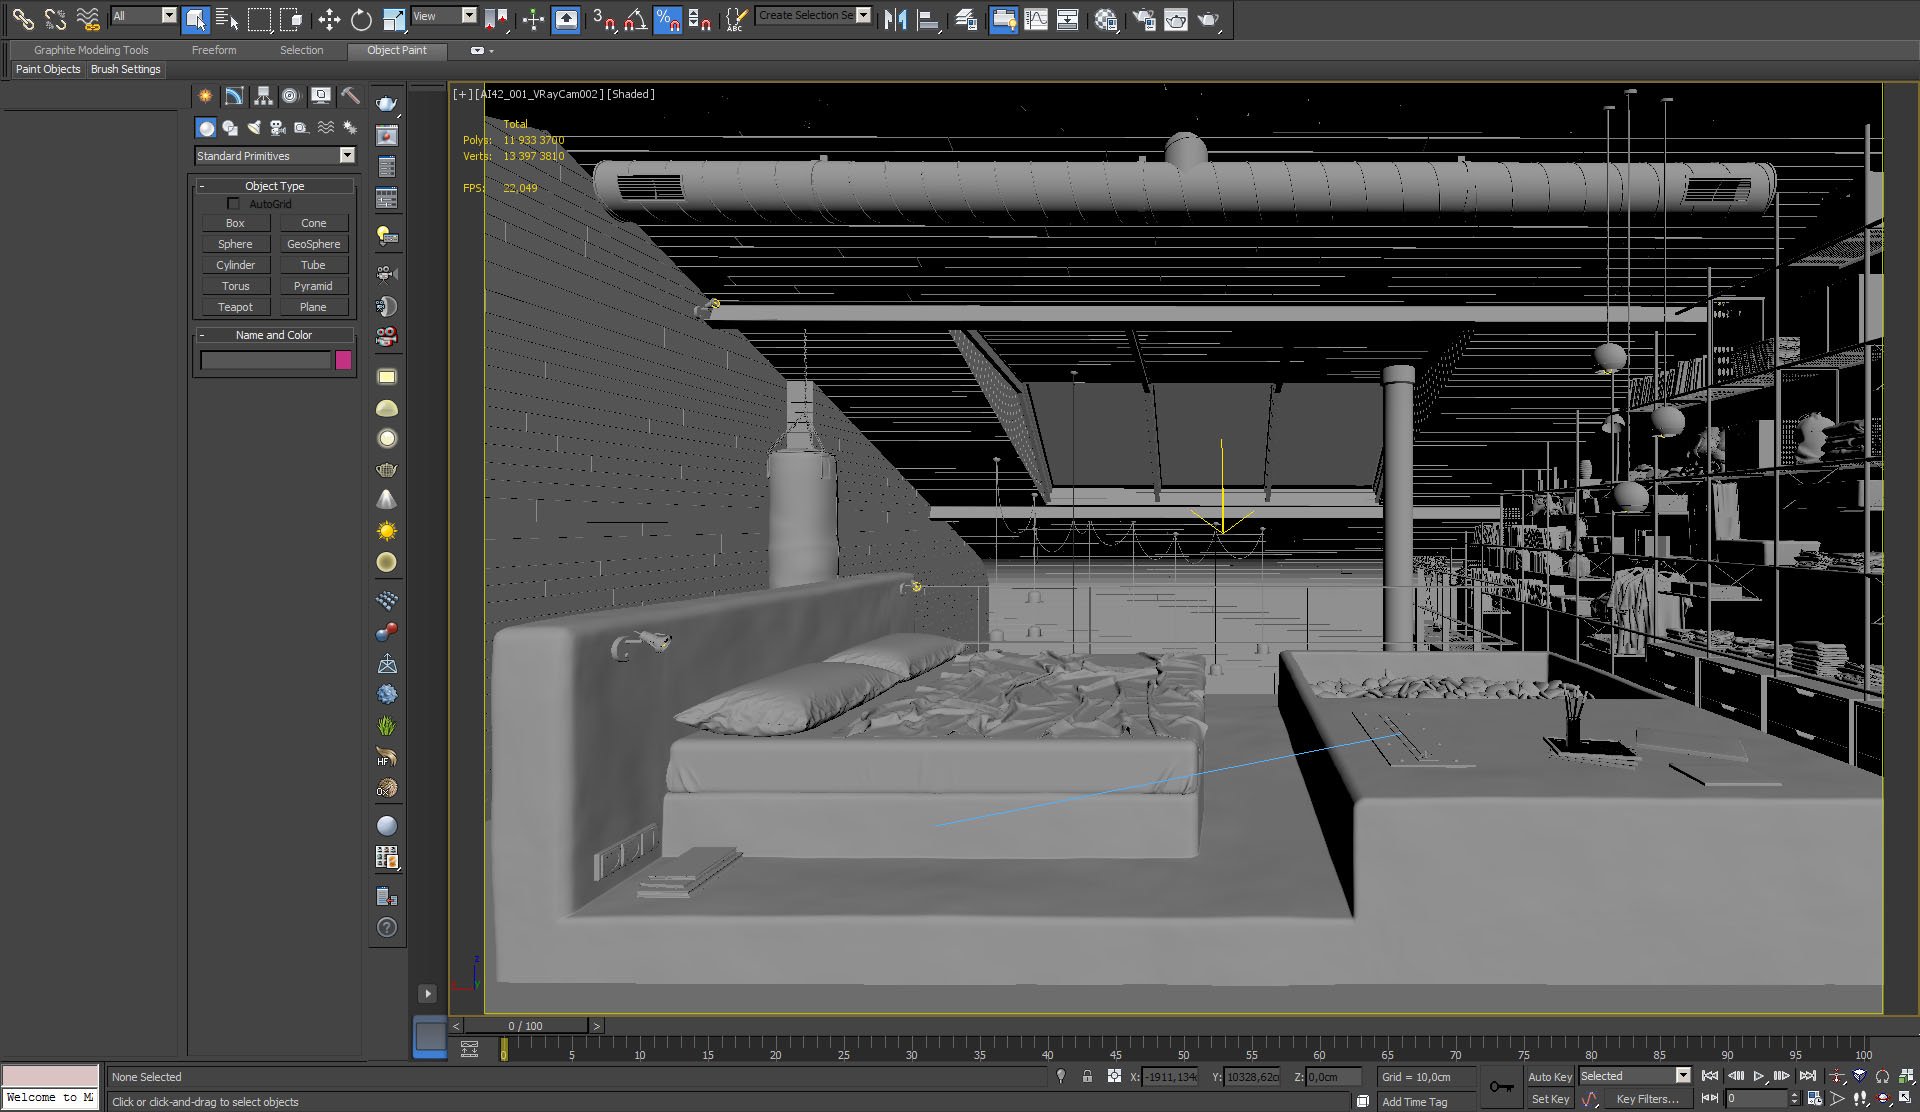
View from camera 1, as seen through 3ds Max viewport.


Click on image to enlarge nr_AI42_01_0021_Layer_2_355.jpg

View from camera 2, 3ds Max viewport.


Click on image to enlarge nr_AI42_01_0020_Layer_3_354.jpg

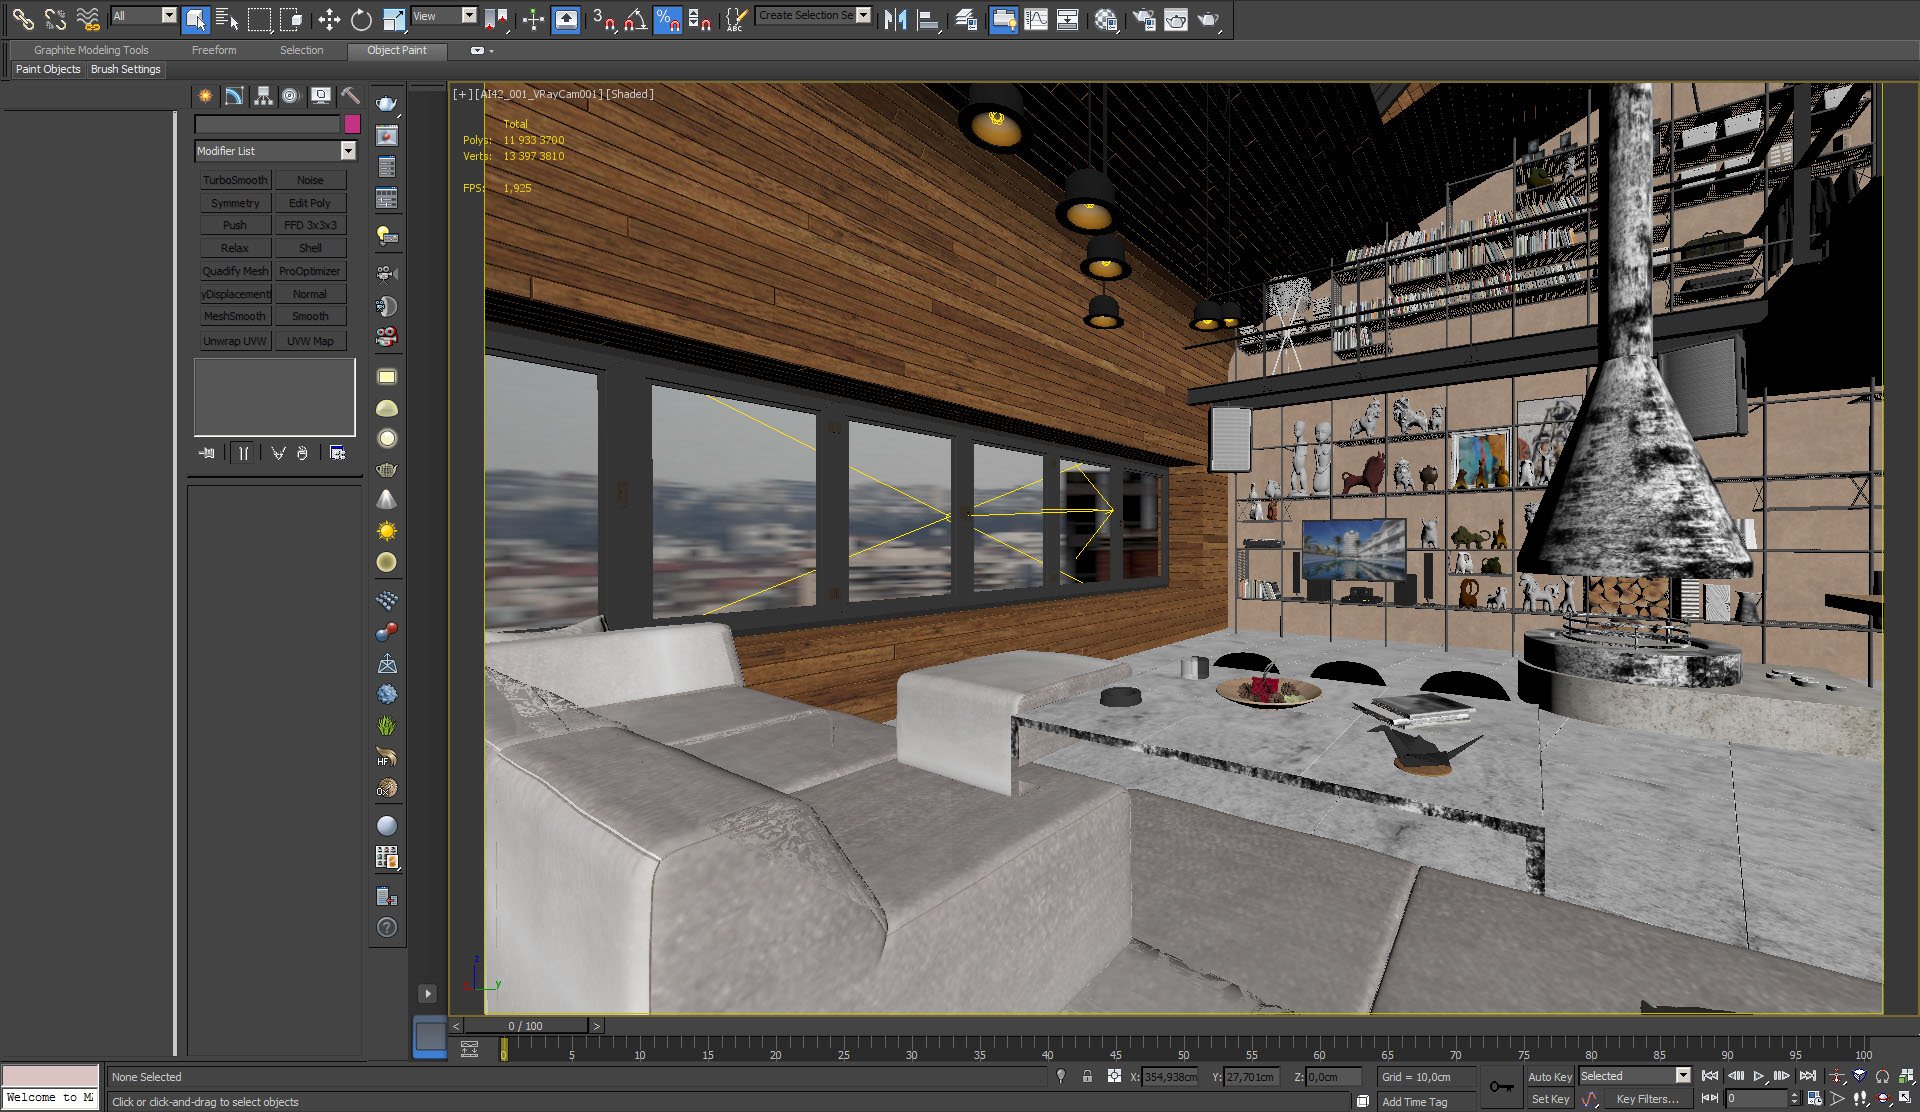
View from camera 1, material and object color enabled in viewport.


Click on image to enlarge nr_AI42_01_0019_Layer_4_353.jpg

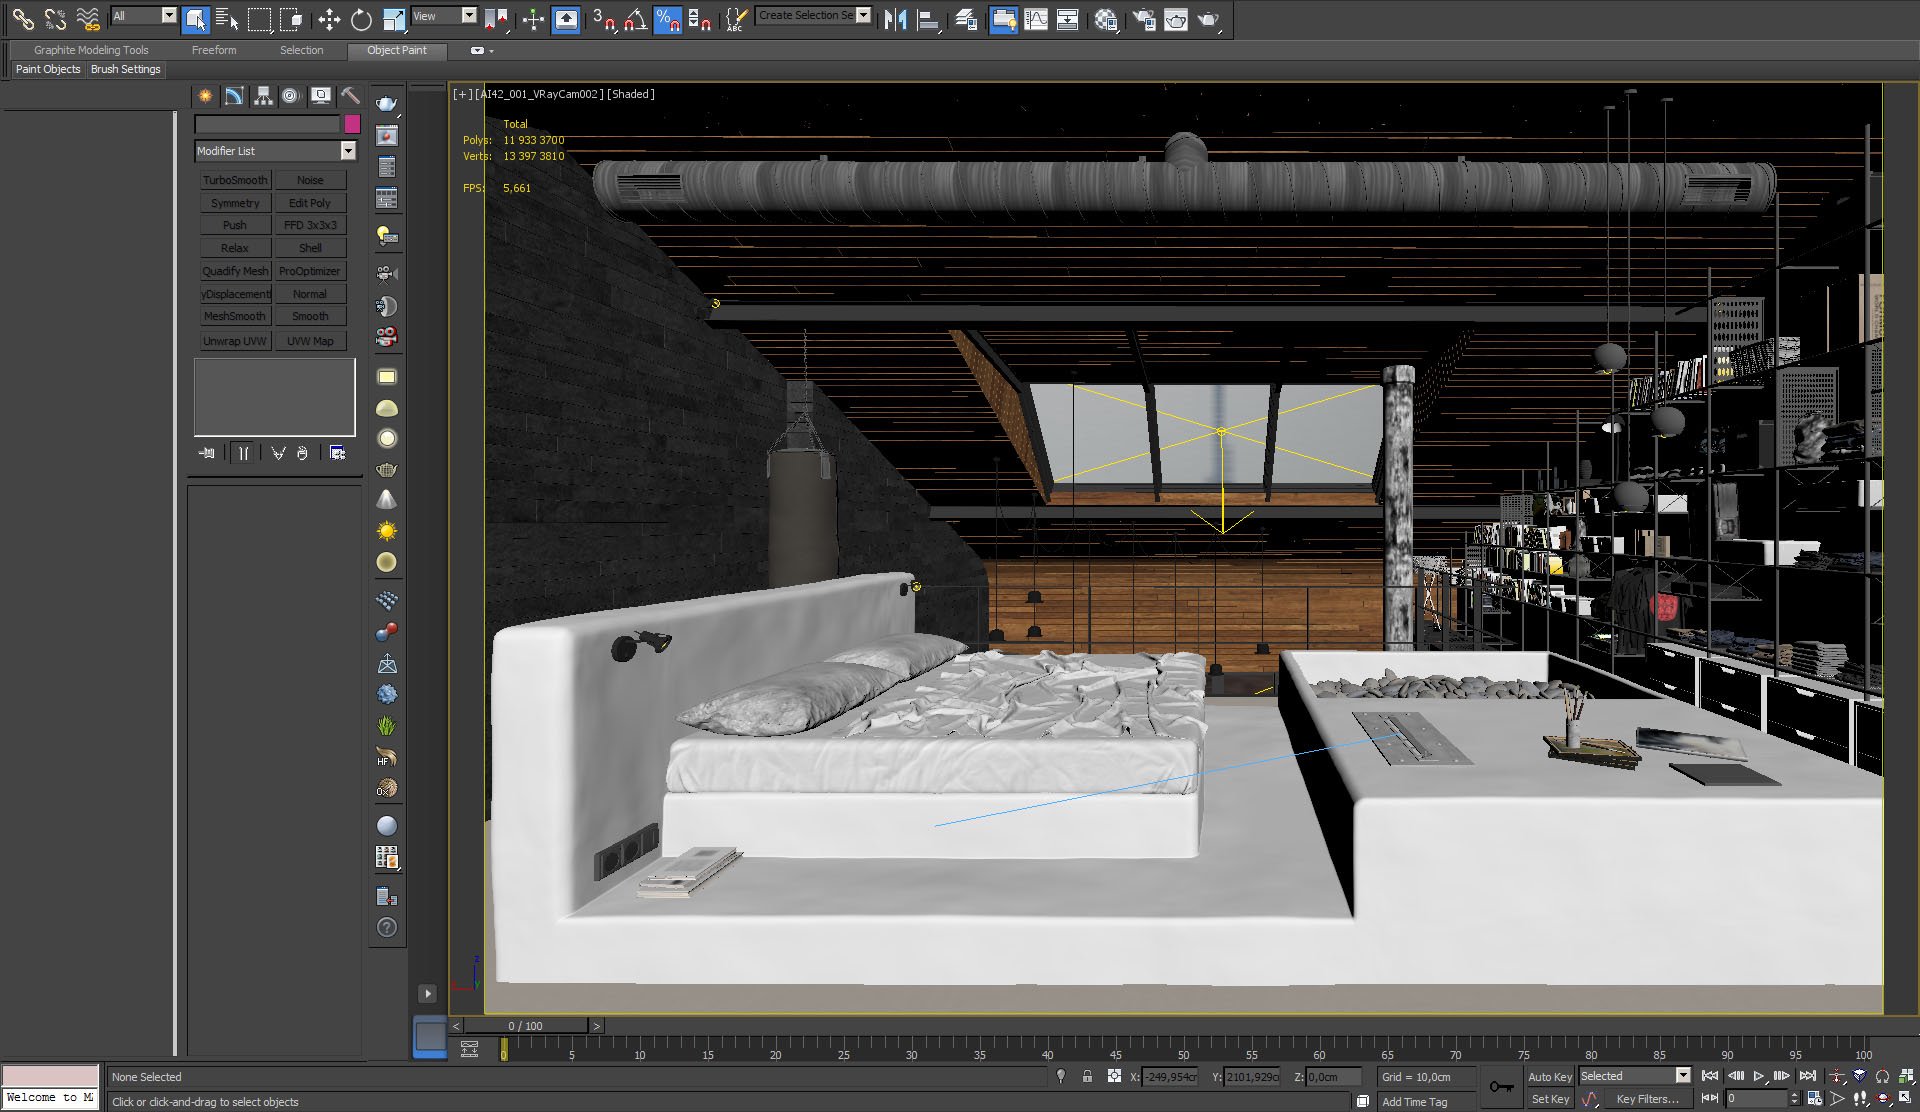
View from camera 2, material and object color enabled.


Click on image to enlarge nr_AI42_01_0018_Layer_5_352.jpg

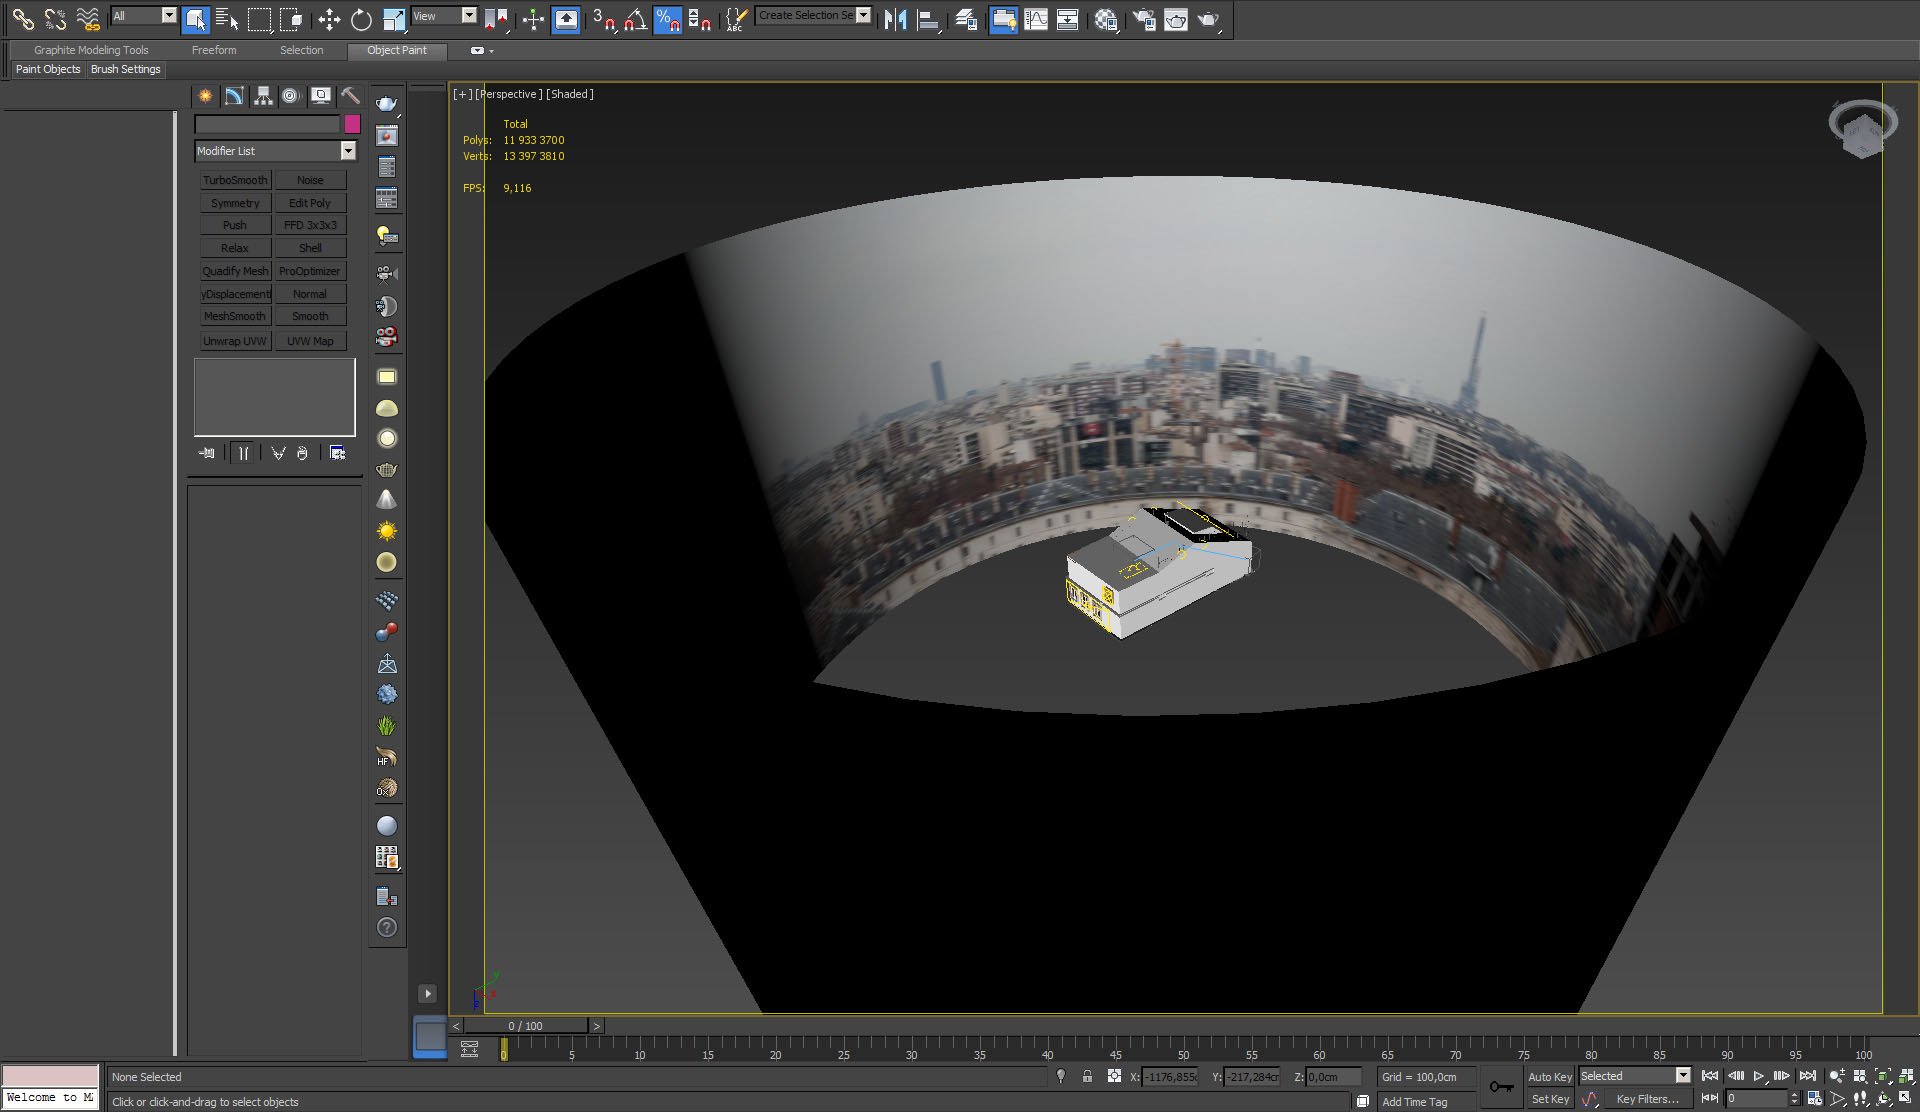
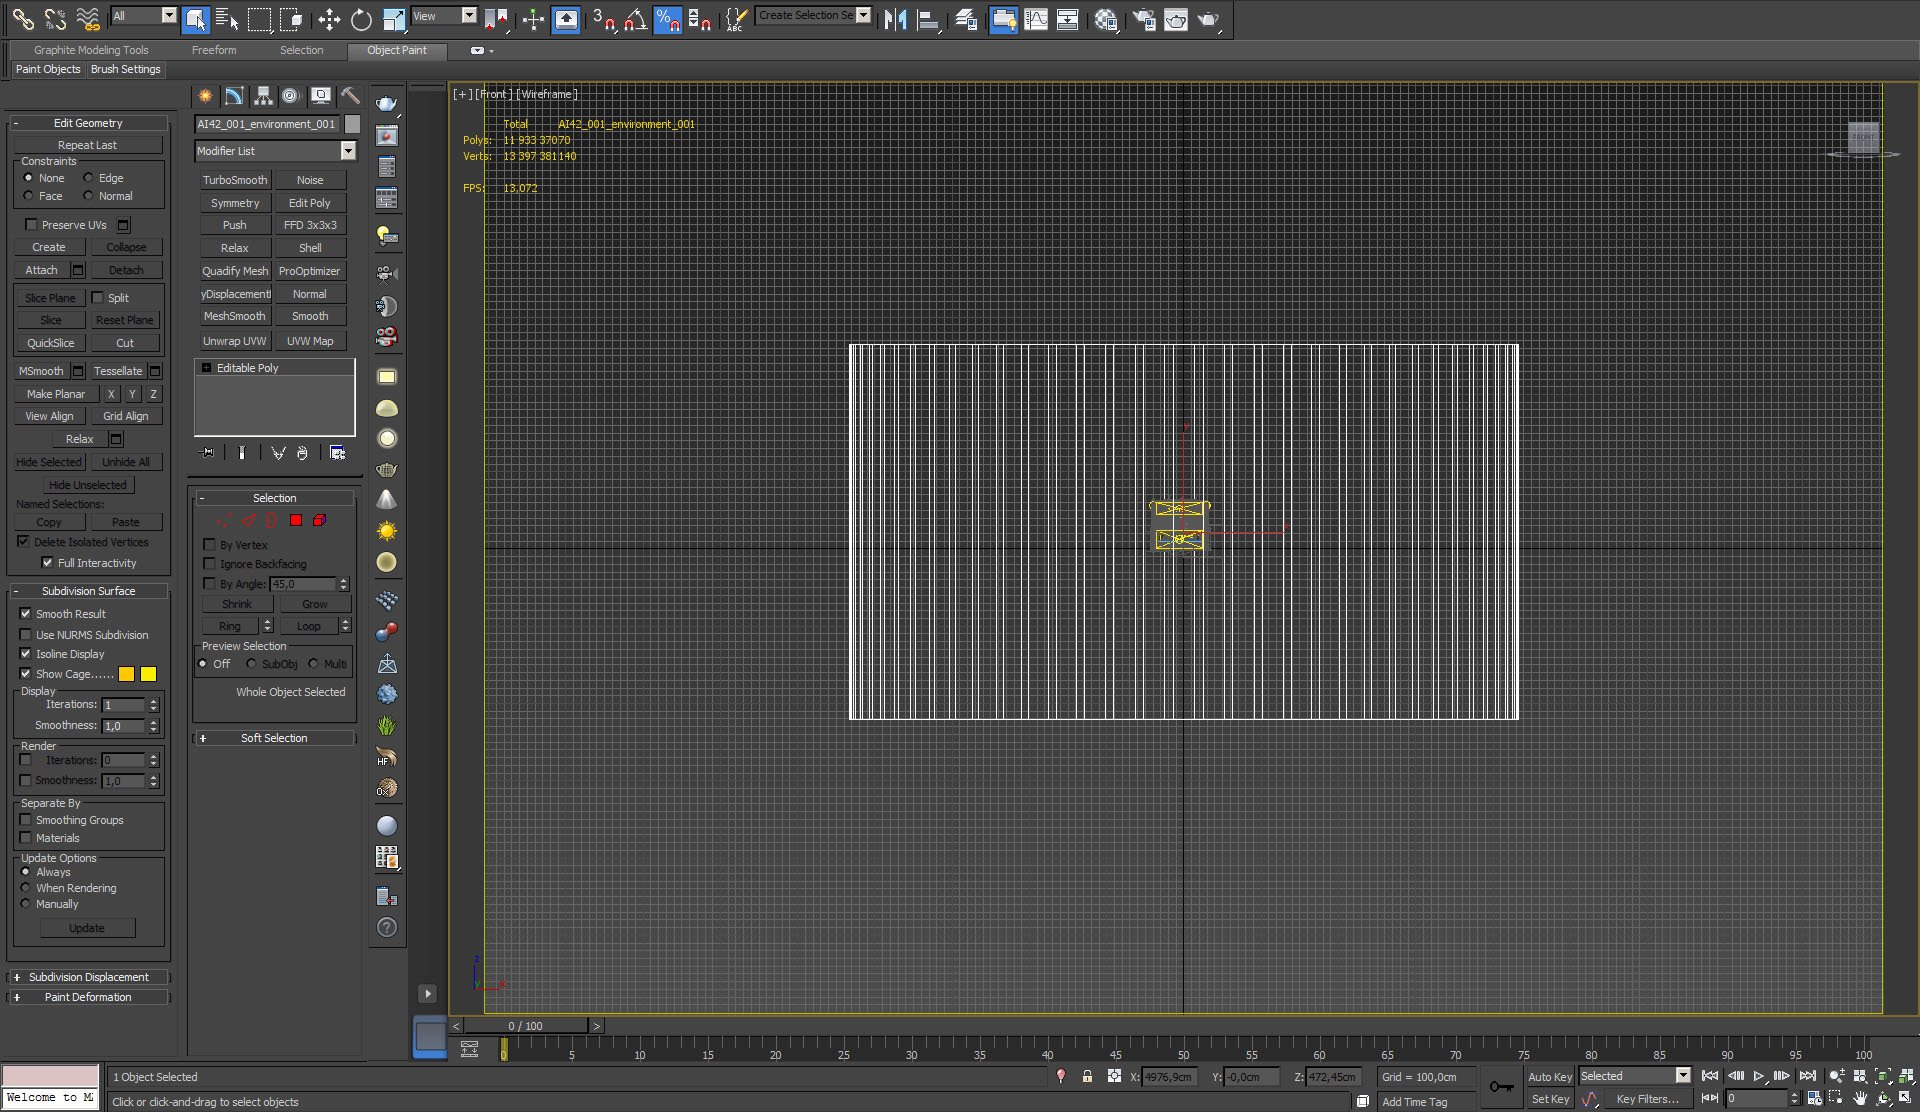
Surrounding cylinder contains background map - a common way to deal with far plane in architectural visualziations. This cylinder does not accept shadows, of course.


Click on image to enlarge nr_AI42_01_0017_Layer_6_351.jpg

Cylinder seen from front view.


Click on image to enlarge nr_AI42_01_0016_Layer_7_350.jpg

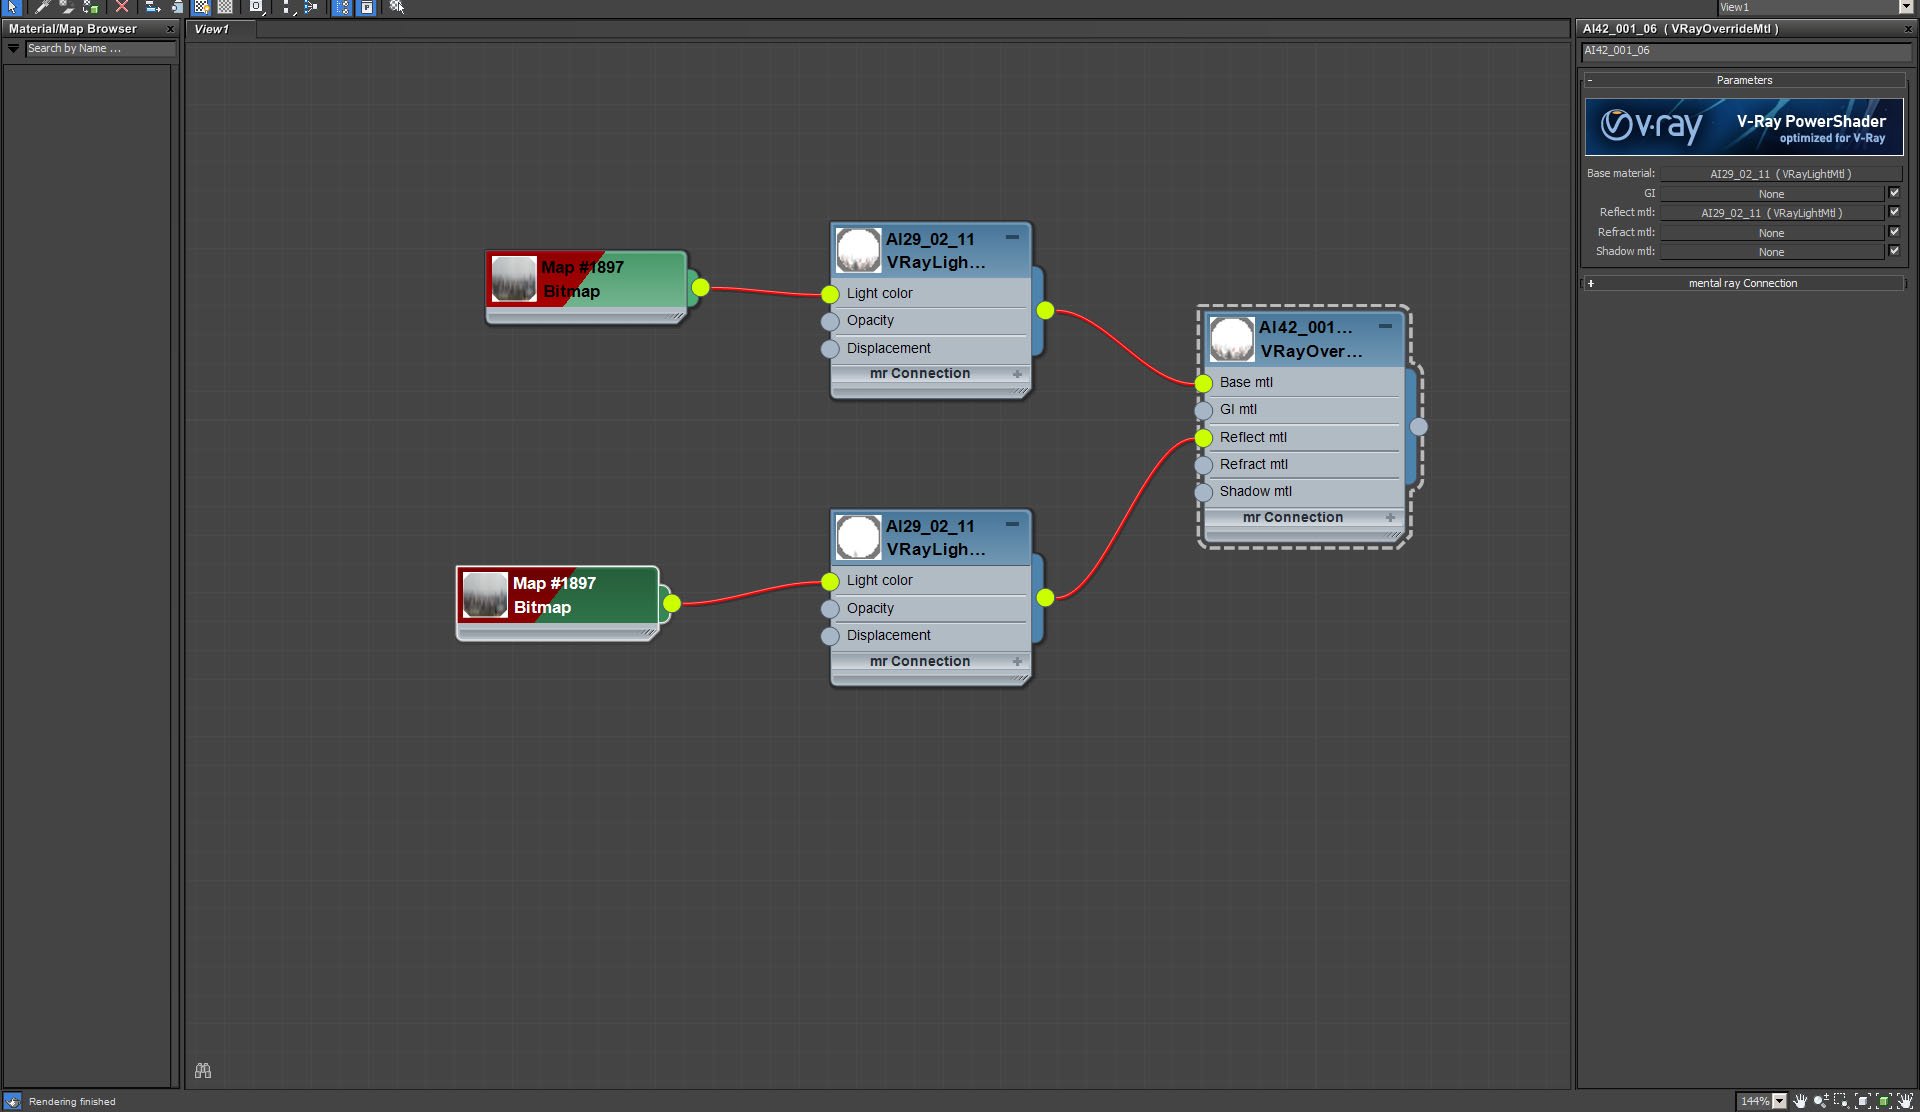
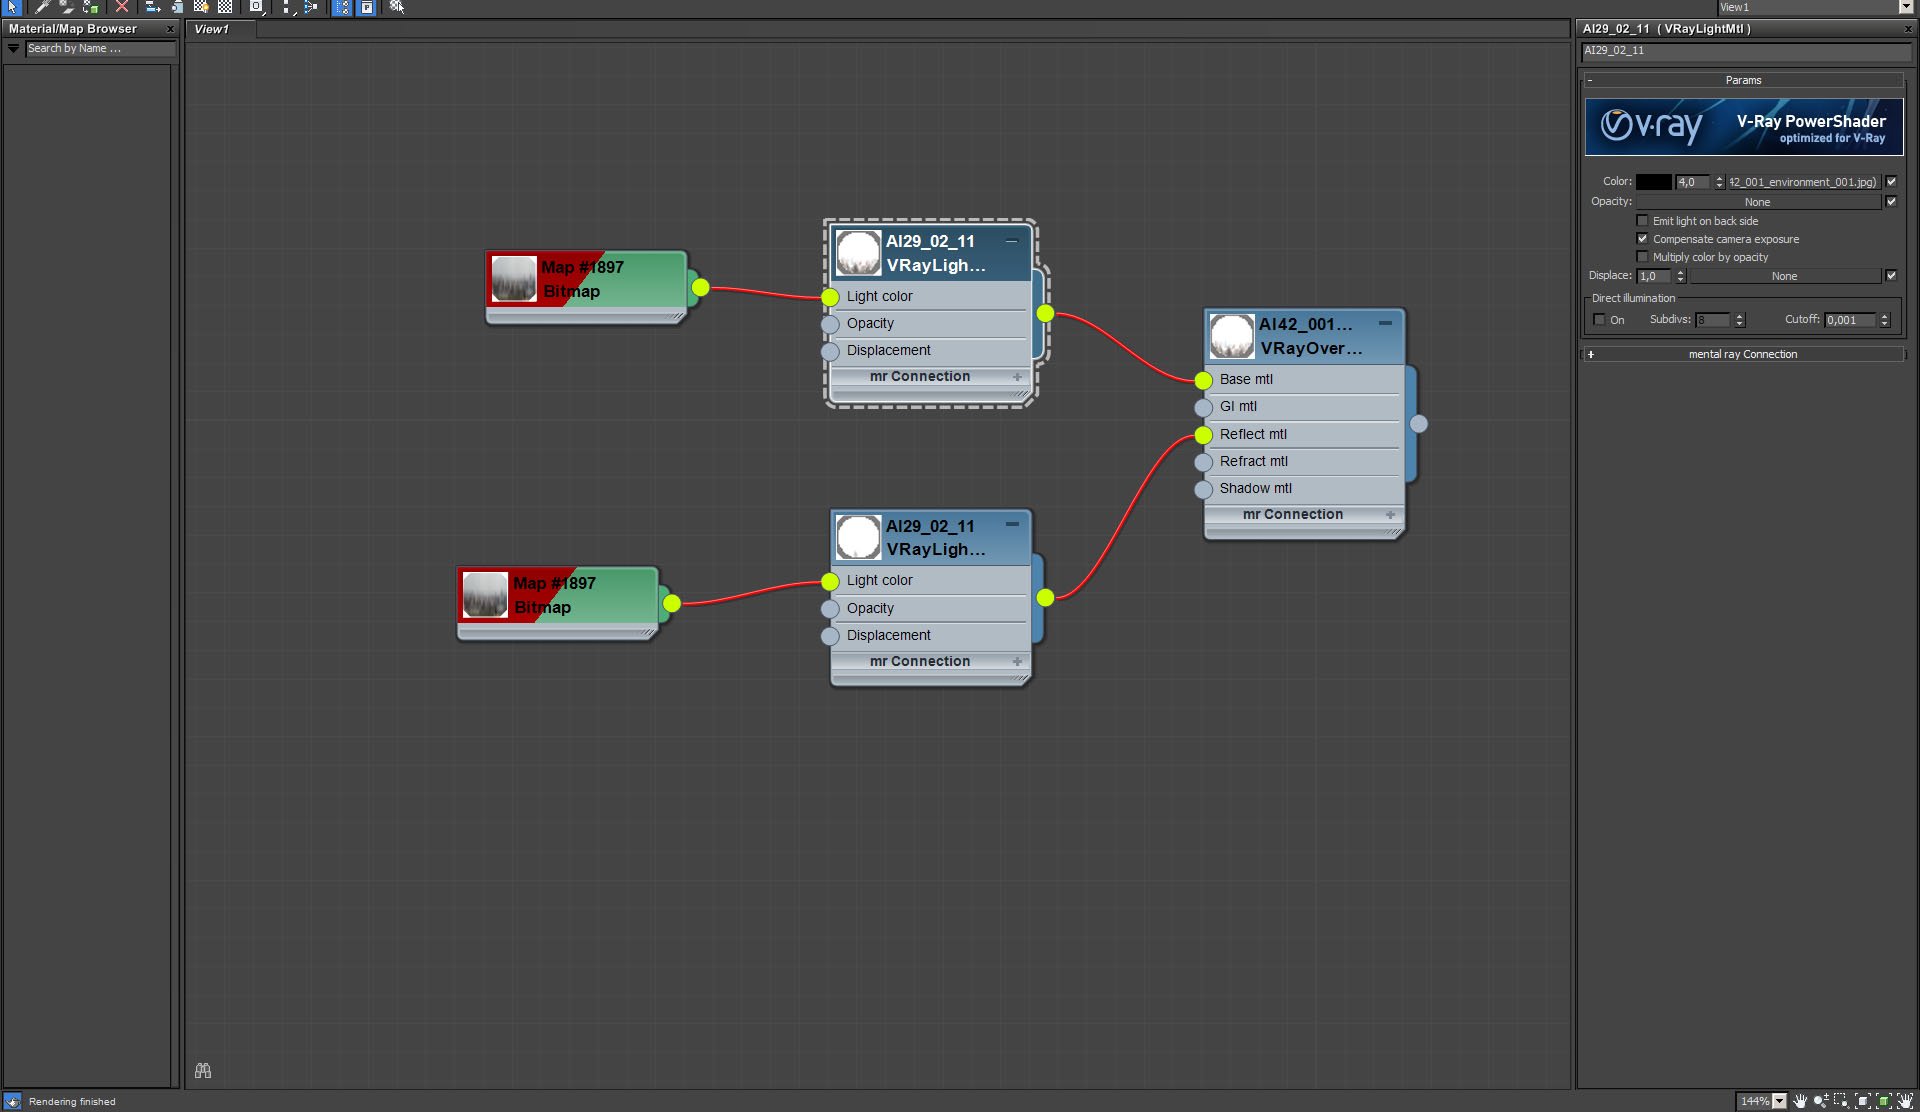
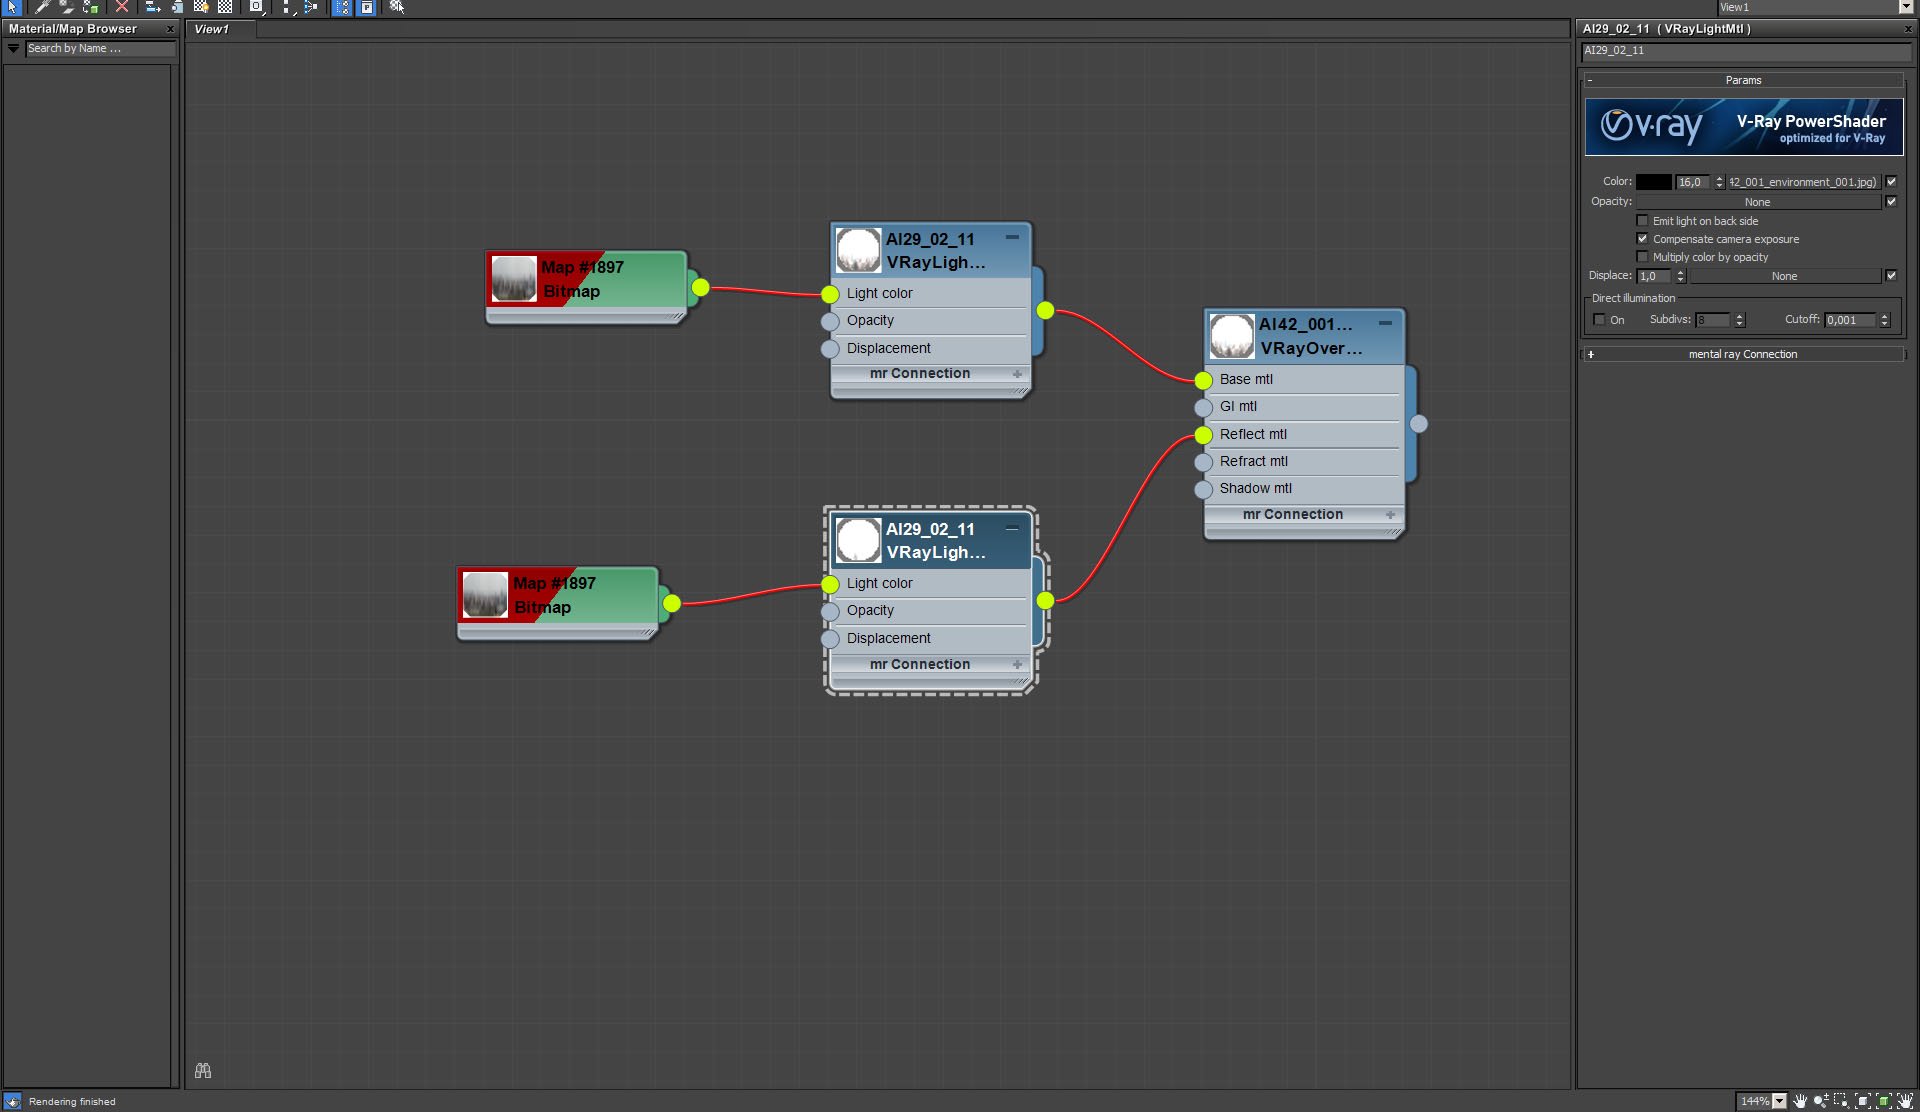
Cylinder material with background bitmap. For better reflections control, we used two versions of the bitmap that slightly differ with intensity.


Click on image to enlarge nr_AI42_01_0015_Layer_8_349.jpg

Bitmap for base material (color - 4,0)


Click on image to enlarge nr_AI42_01_0014_Layer_9_348.jpg

Bitmap for reflect material (color - 16,0)


Click on image to enlarge nr_AI42_01_0011_Layer_12_345.jpg

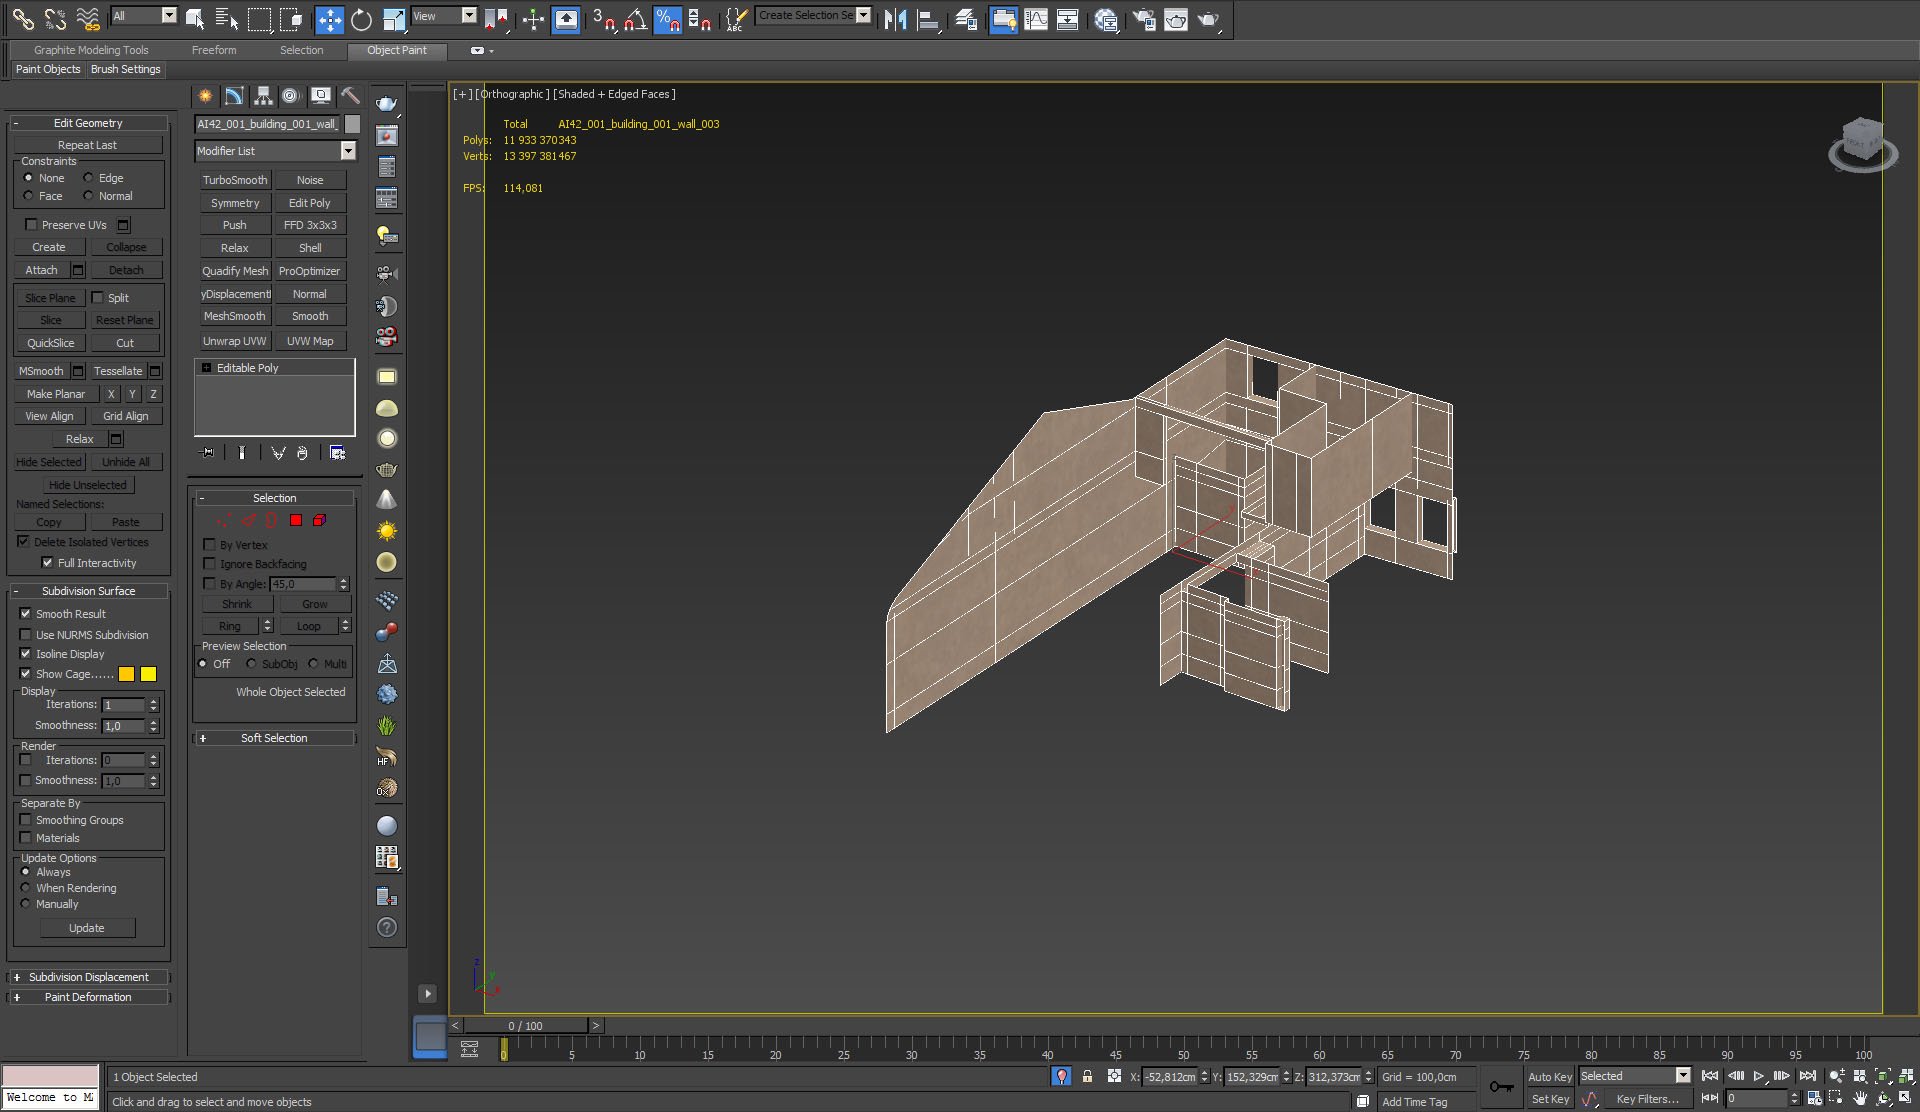
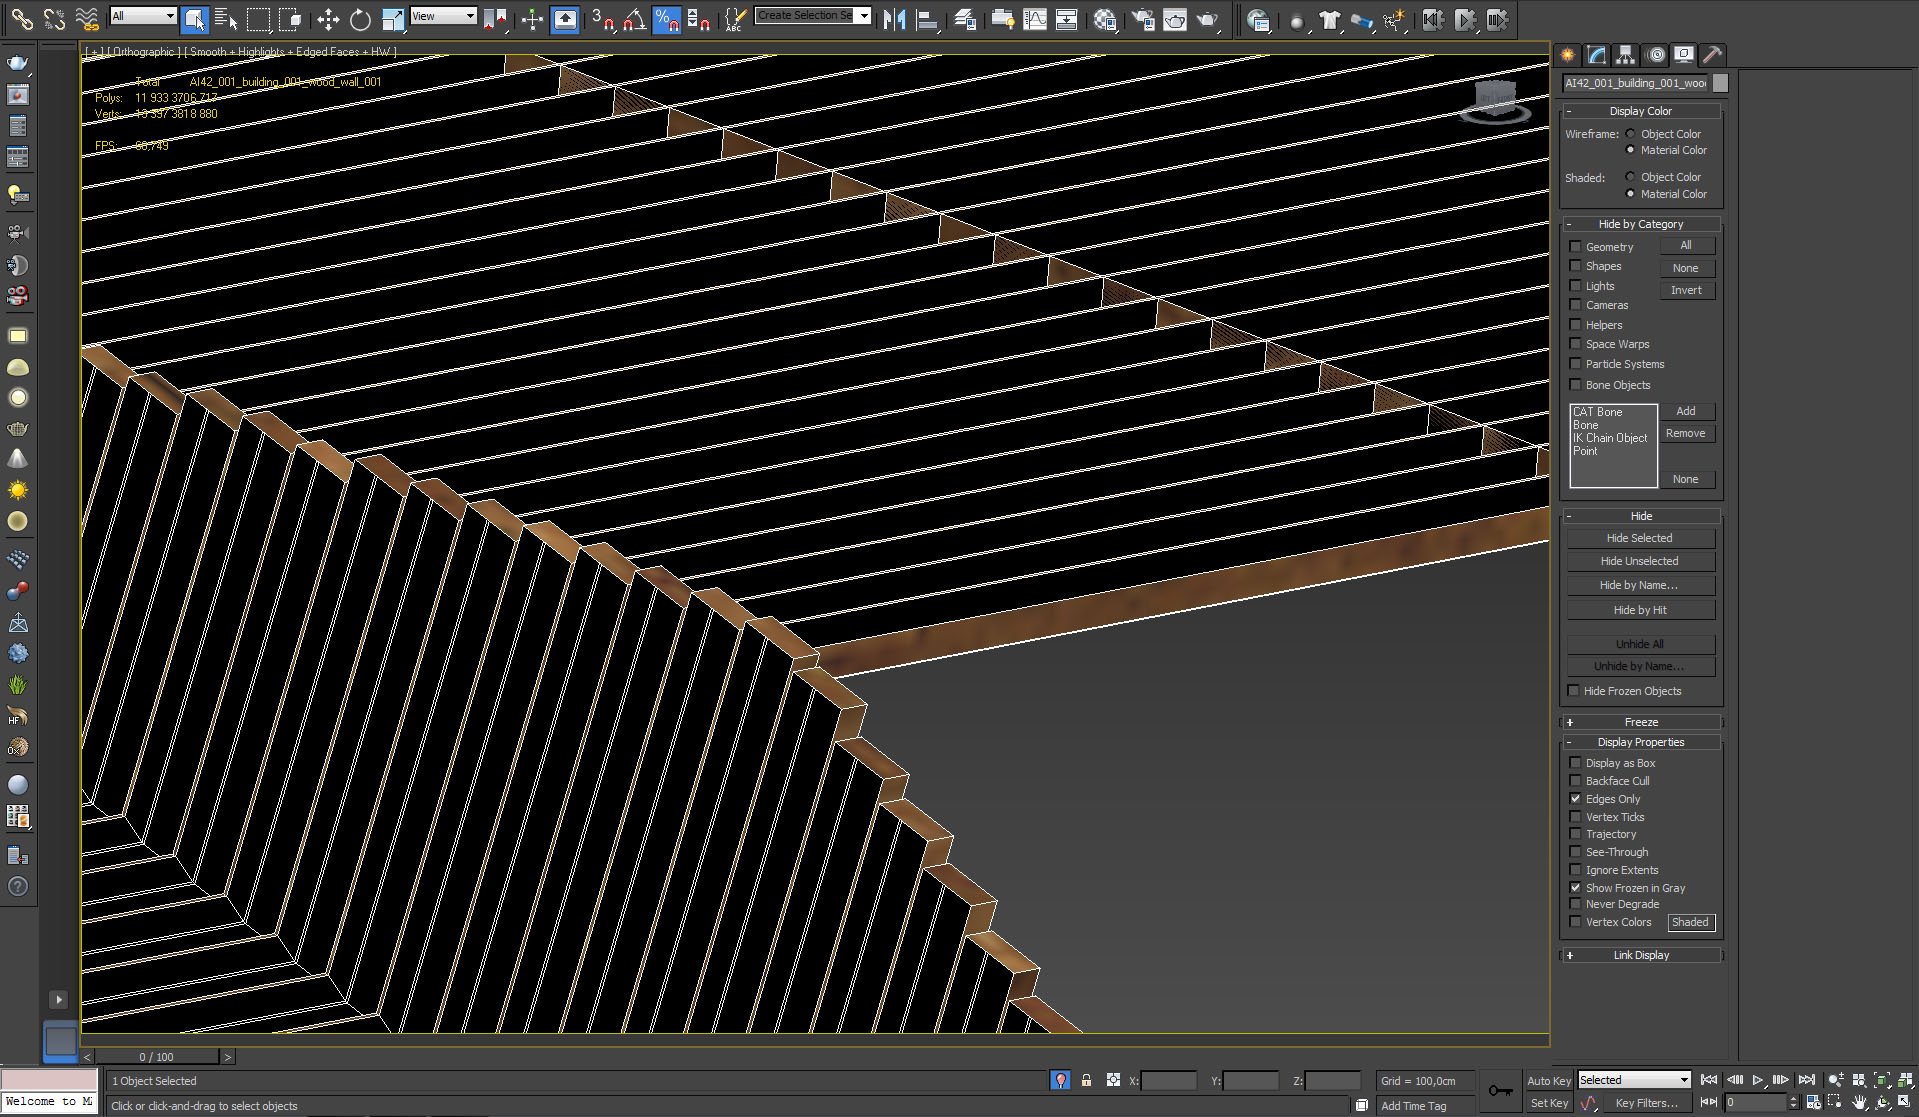
The building is made of many layers. On the image above you can see inside walls.


Click on image to enlargenr_AI42_01_0010_Layer_13_344.jpg

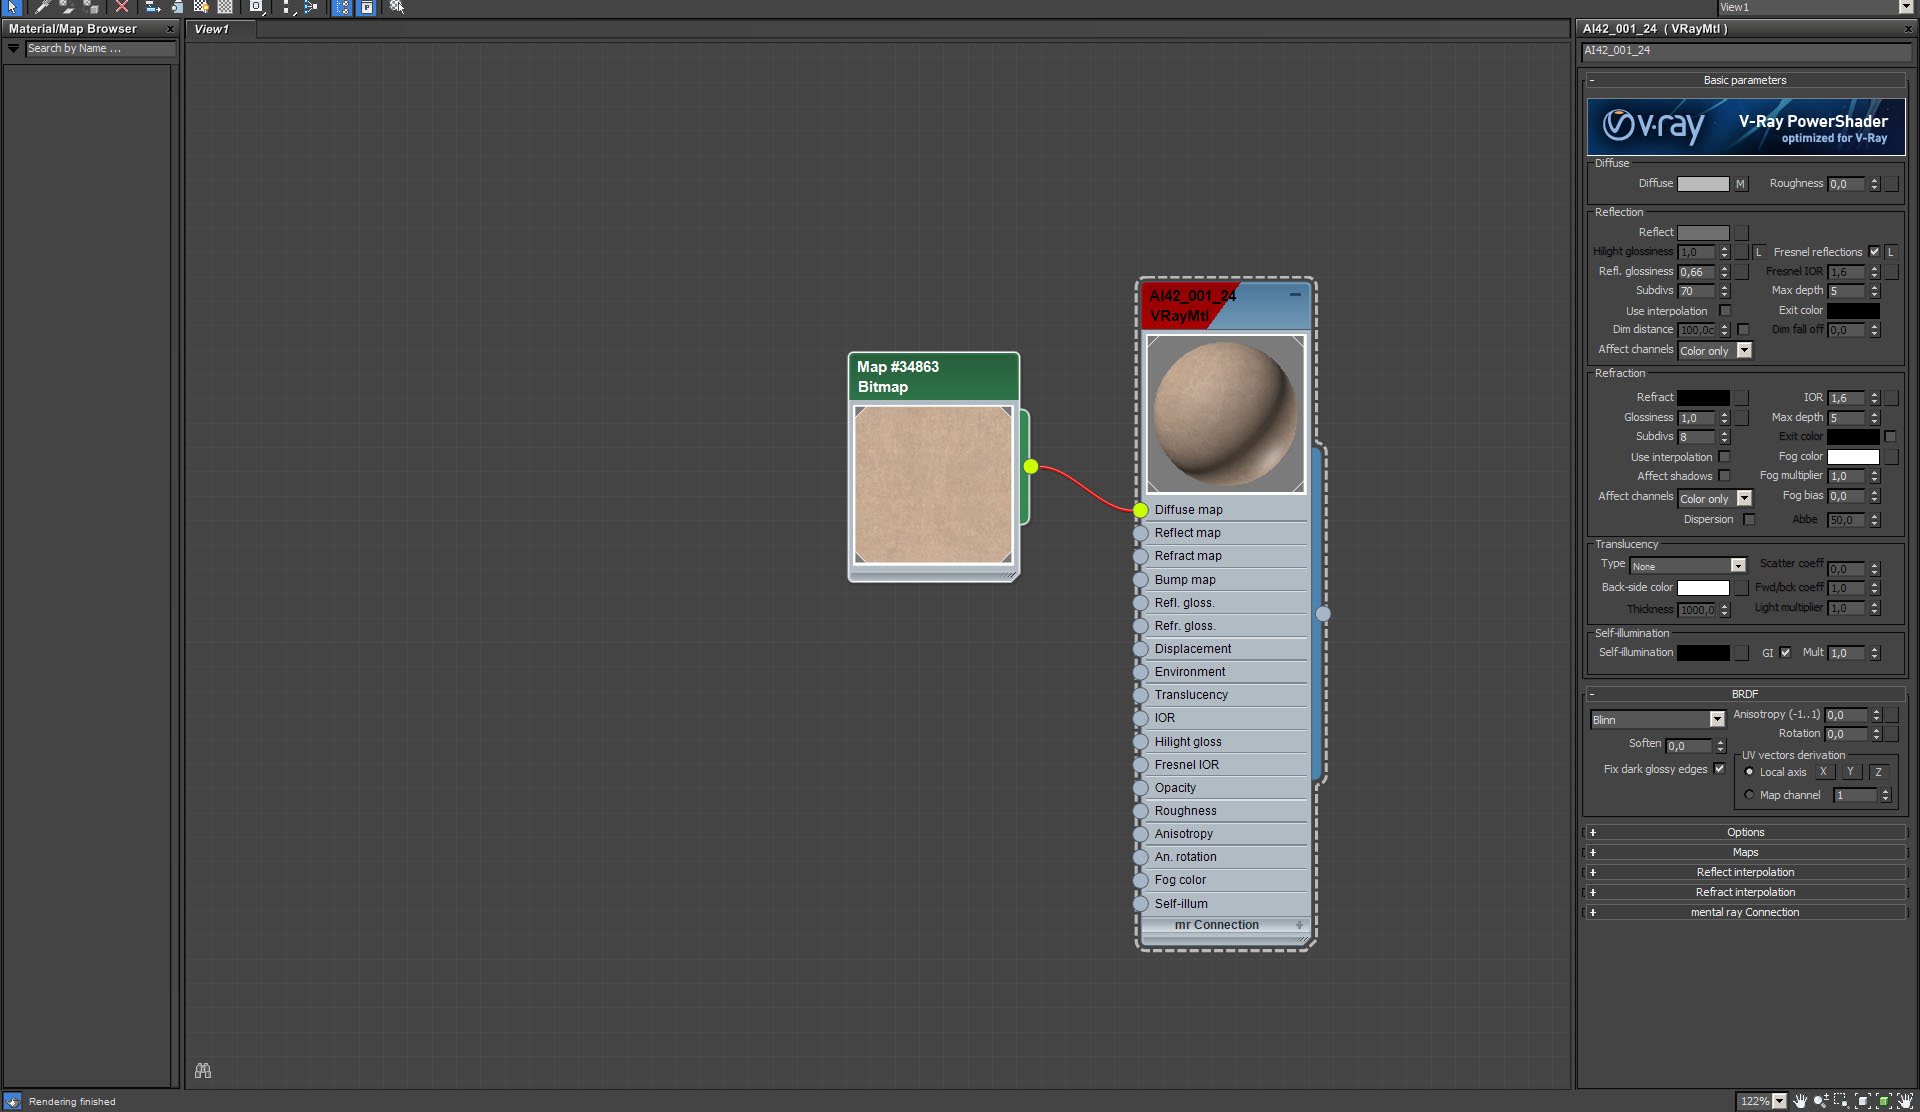
Walls material.


Click on image to enlargenr_AI42_01_0009_Layer_14_363.jpg

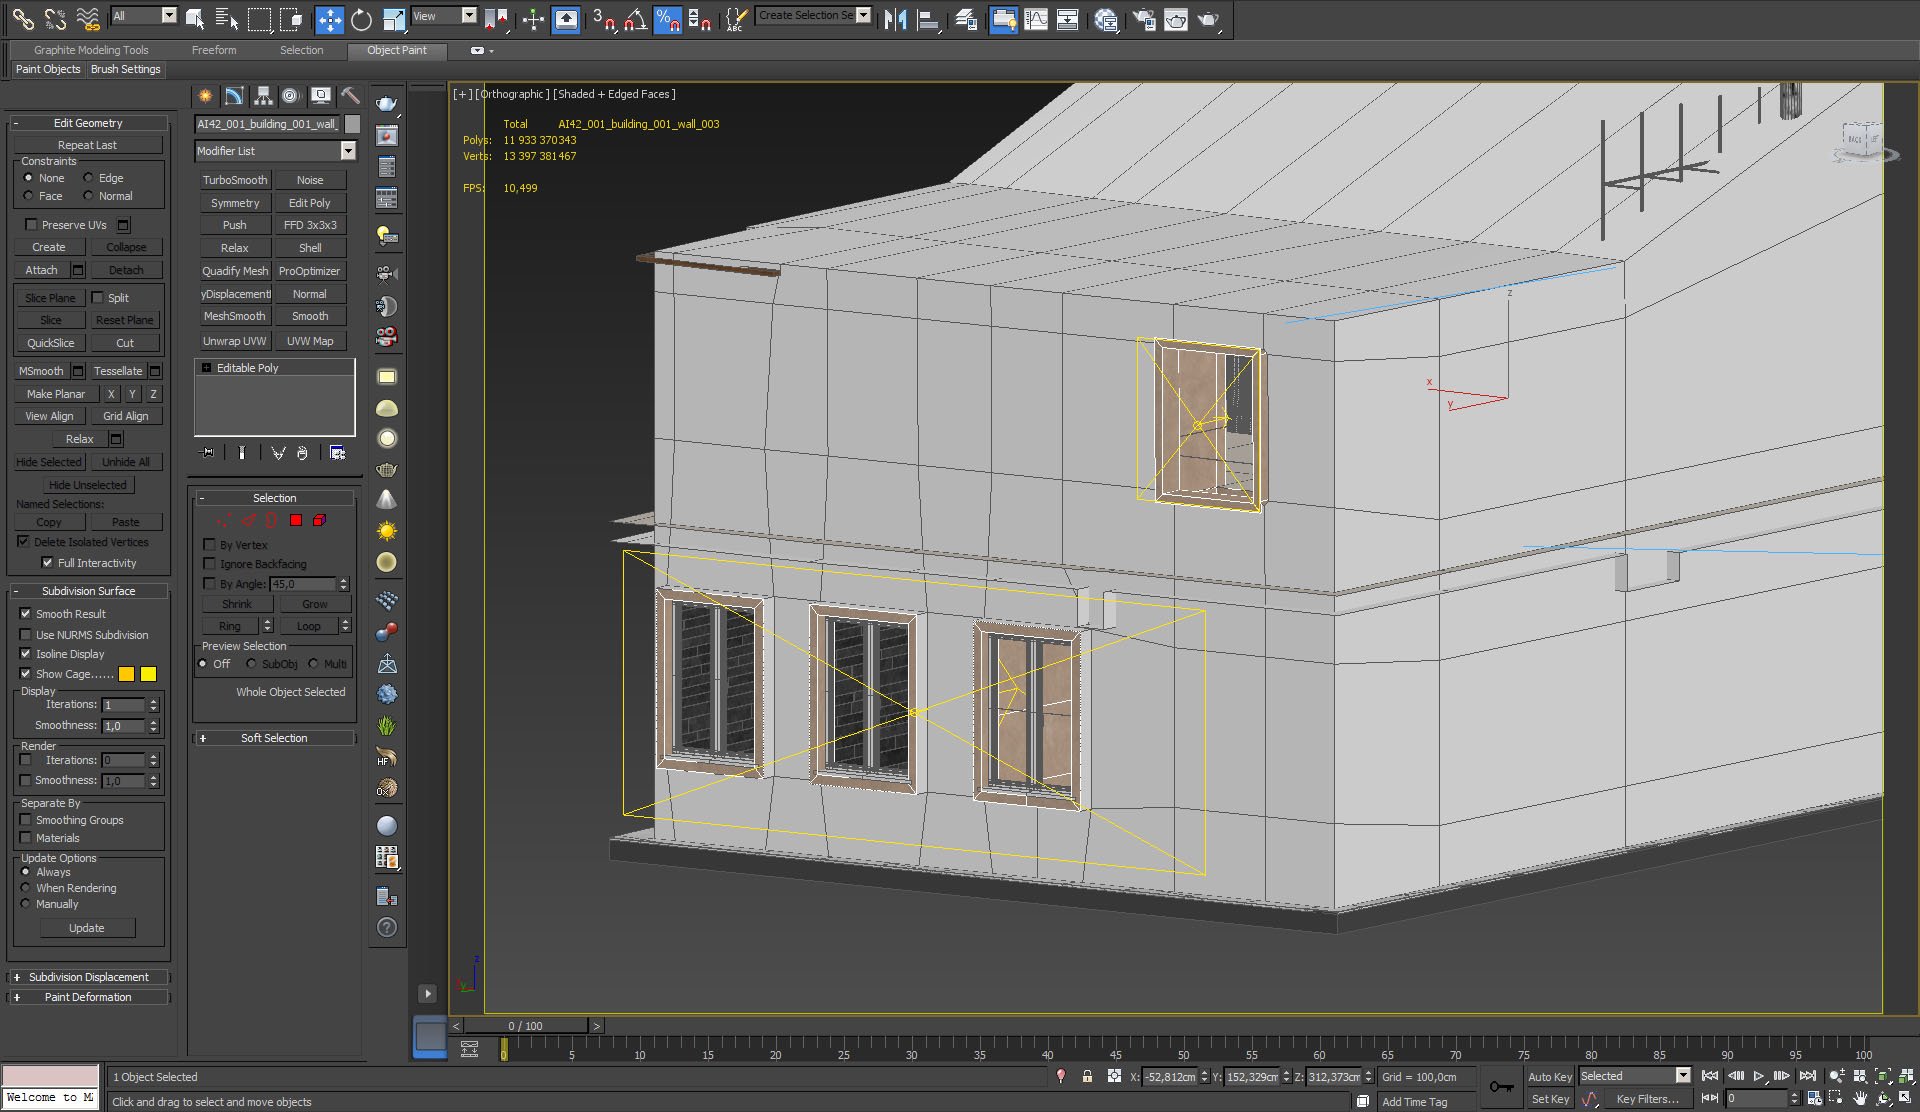
Building elevation - it is not seen by camera, so it's standard V-ray material.


Click on image to enlargenr_AI42_01B_0030_Layer_1_405.jpg

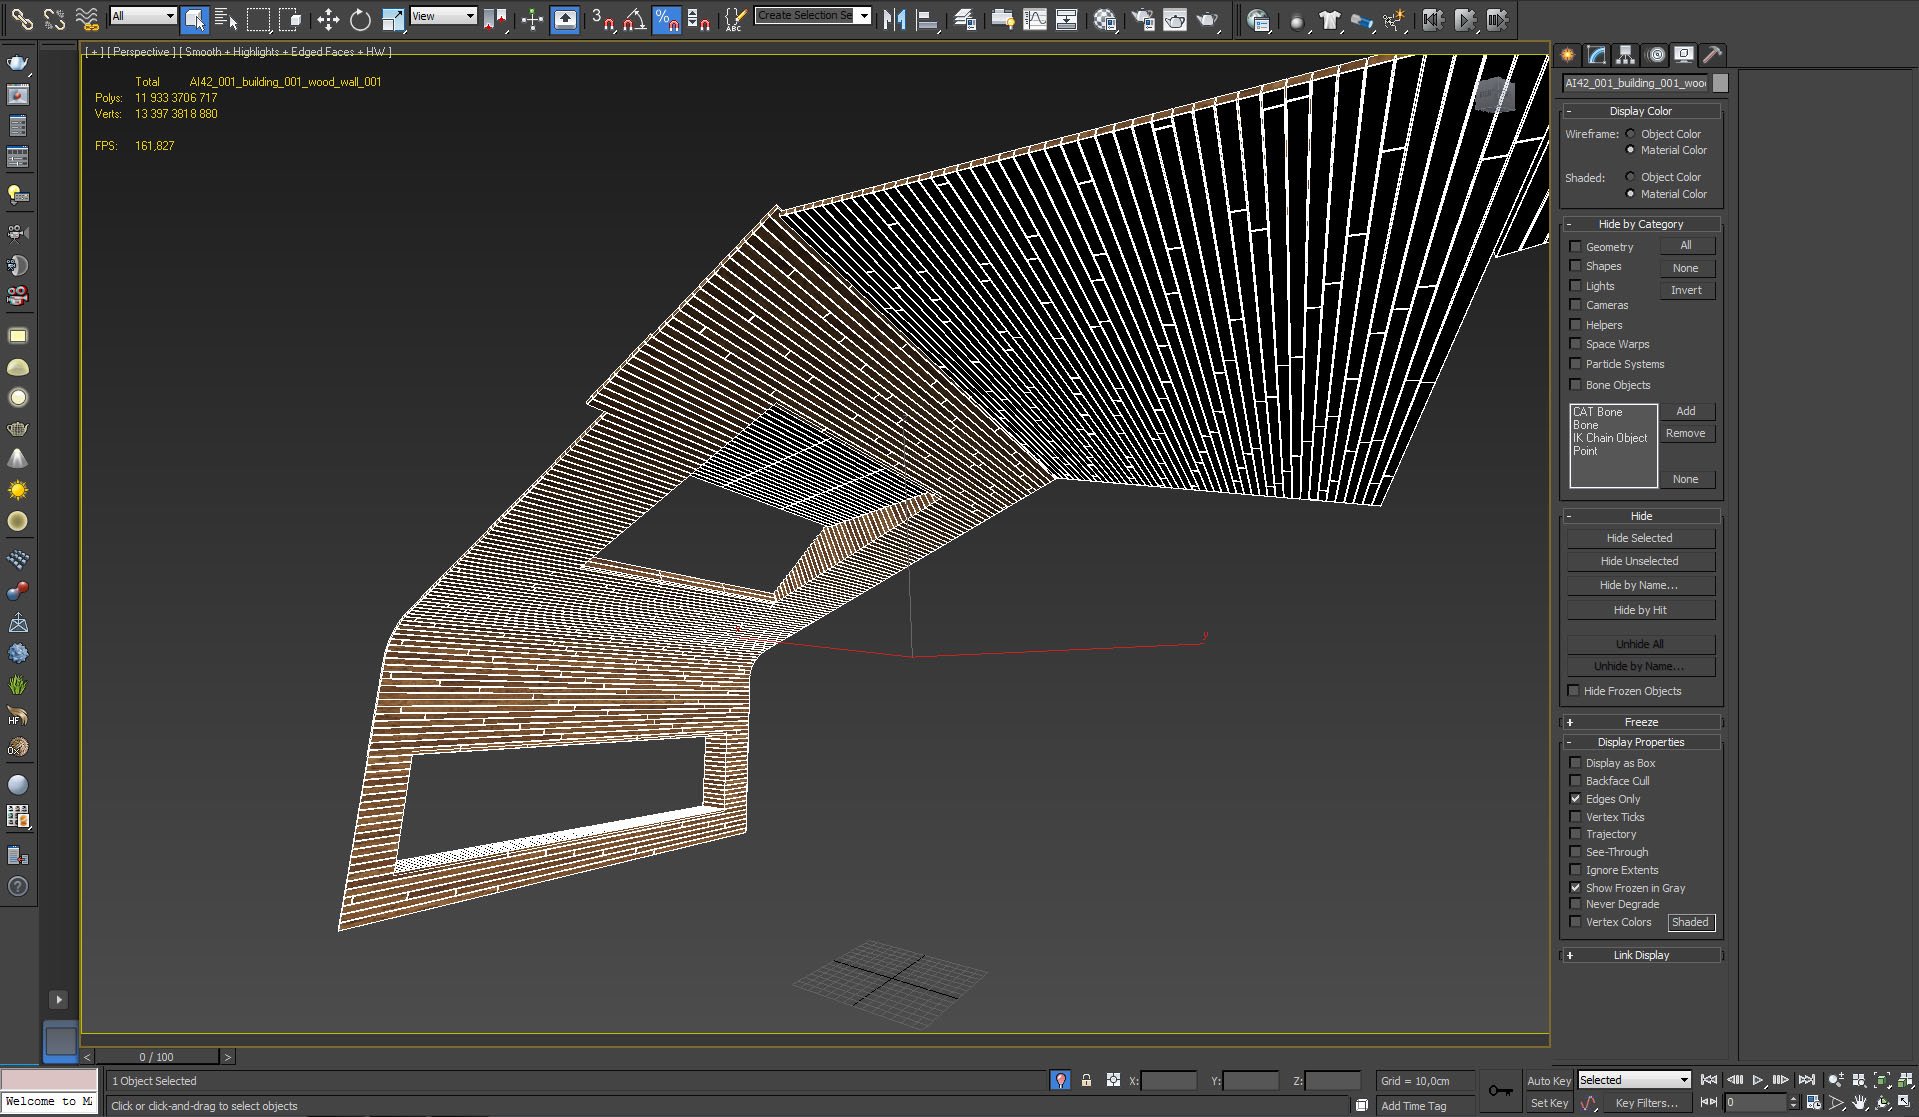
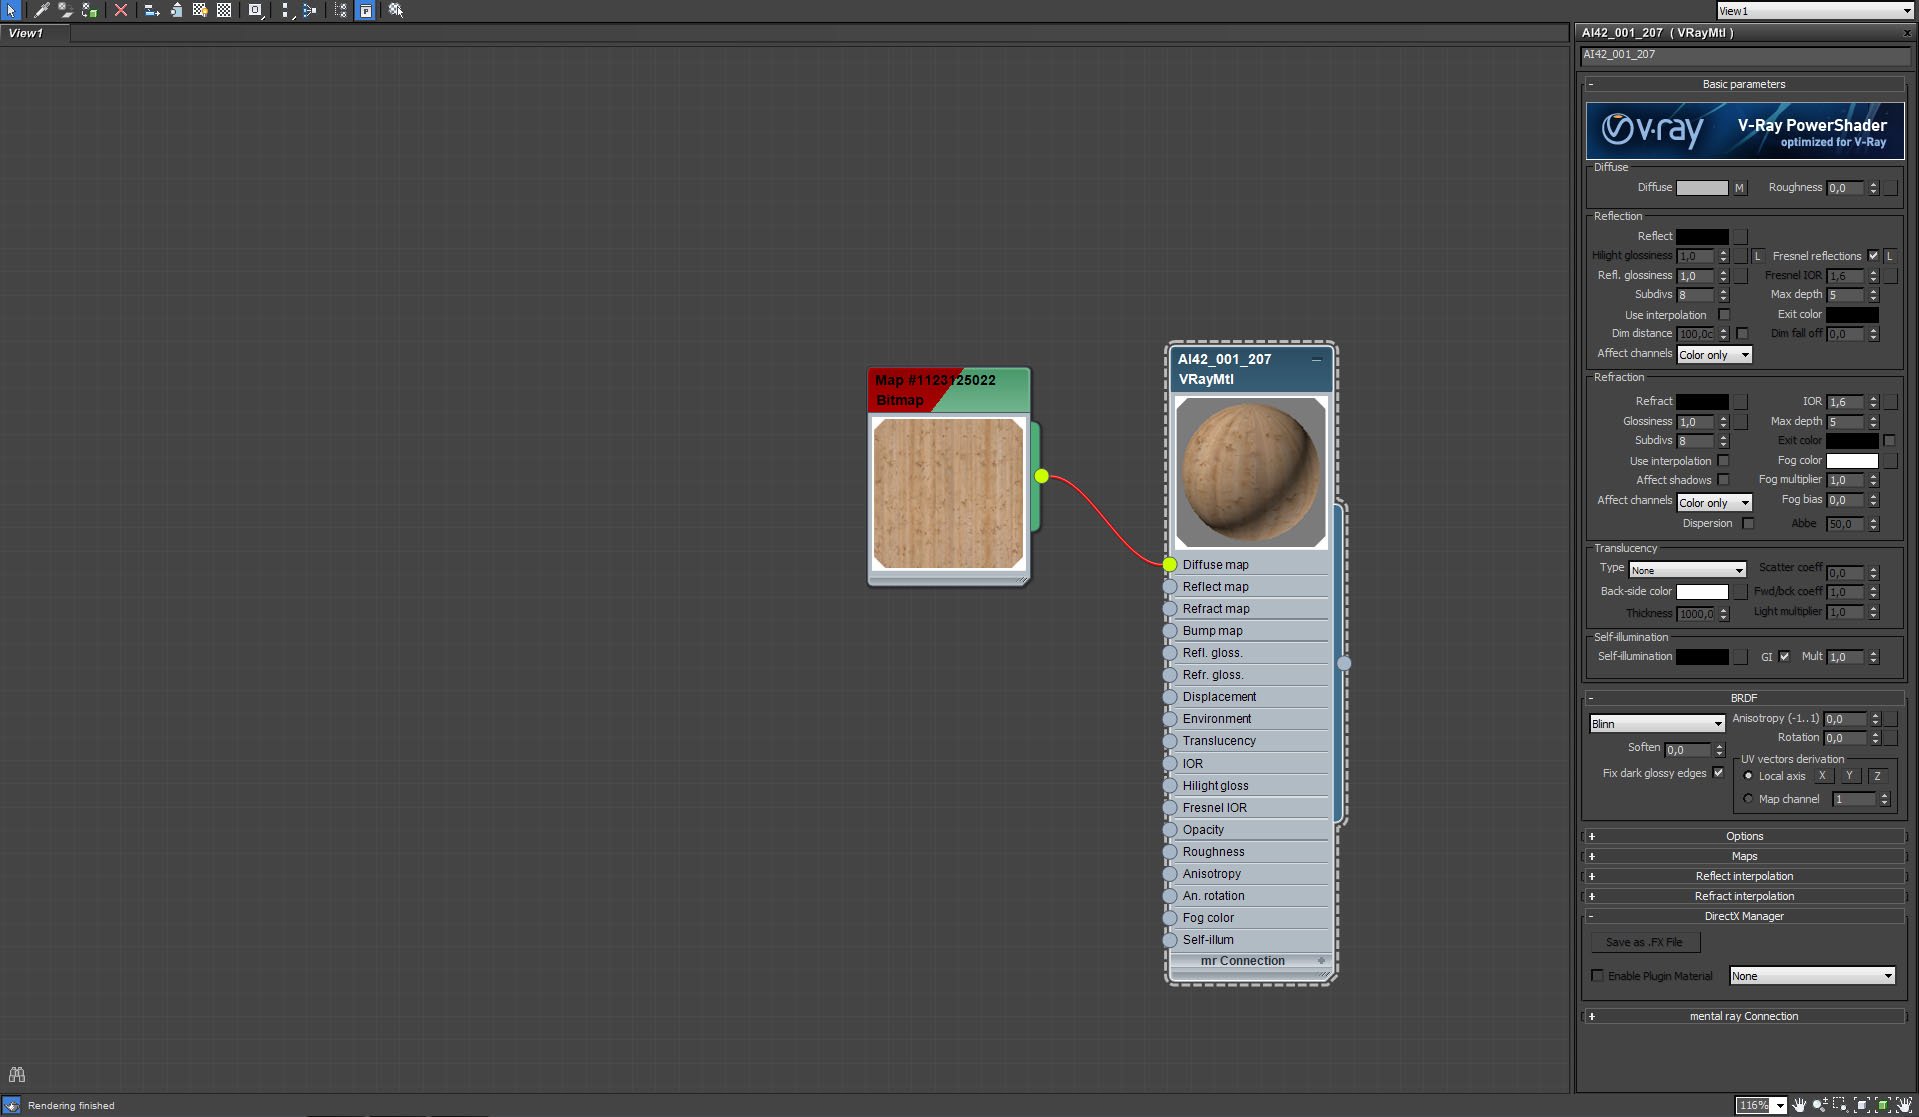
Wooden planks are covering big surface inside the loft.


Click on image to enlargenr_AI42_01B_0029_Layer_2_404.jpg

Planks - close up.


Click on image to enlargenr_AI42_01B_0028_Layer_3_403.jpg

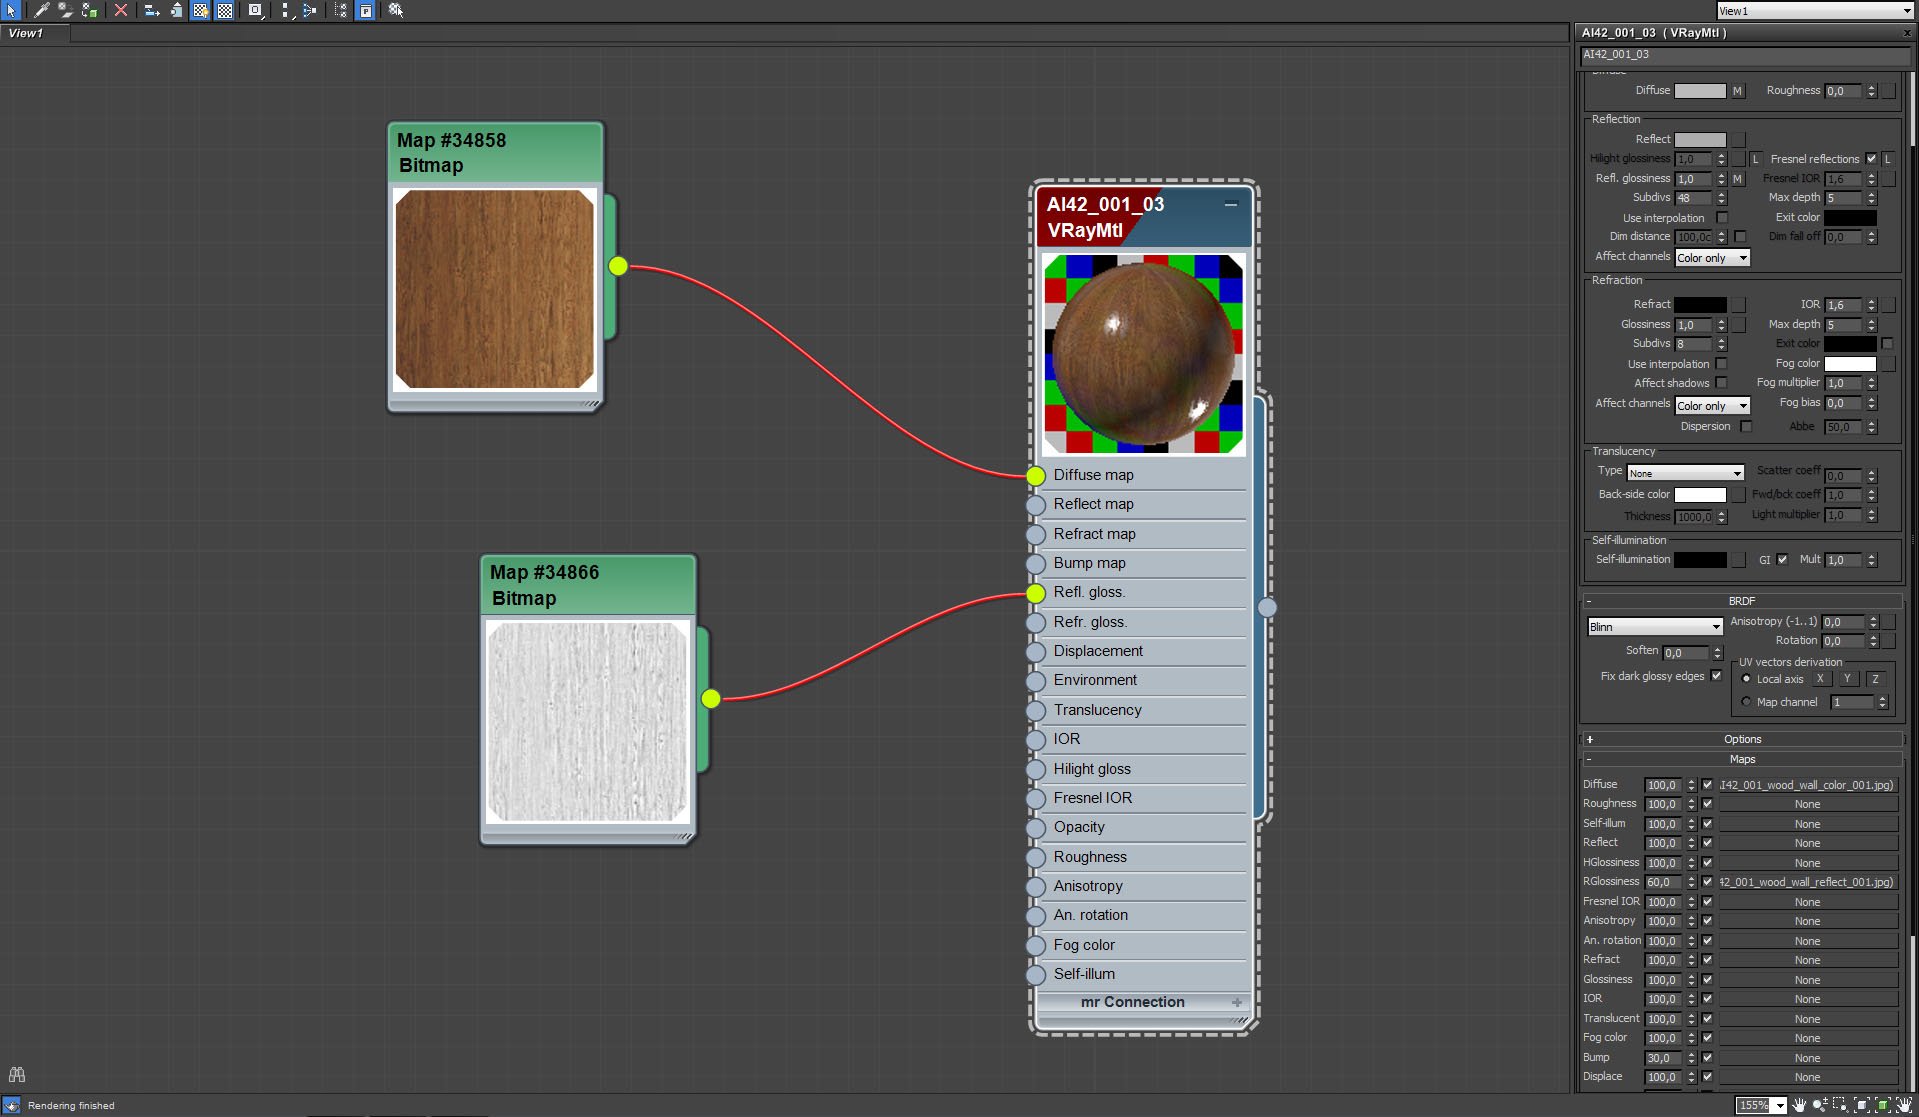
Planks material.


Click on image to enlargenr_AI42_01B_0027_Layer_4_402.jpg

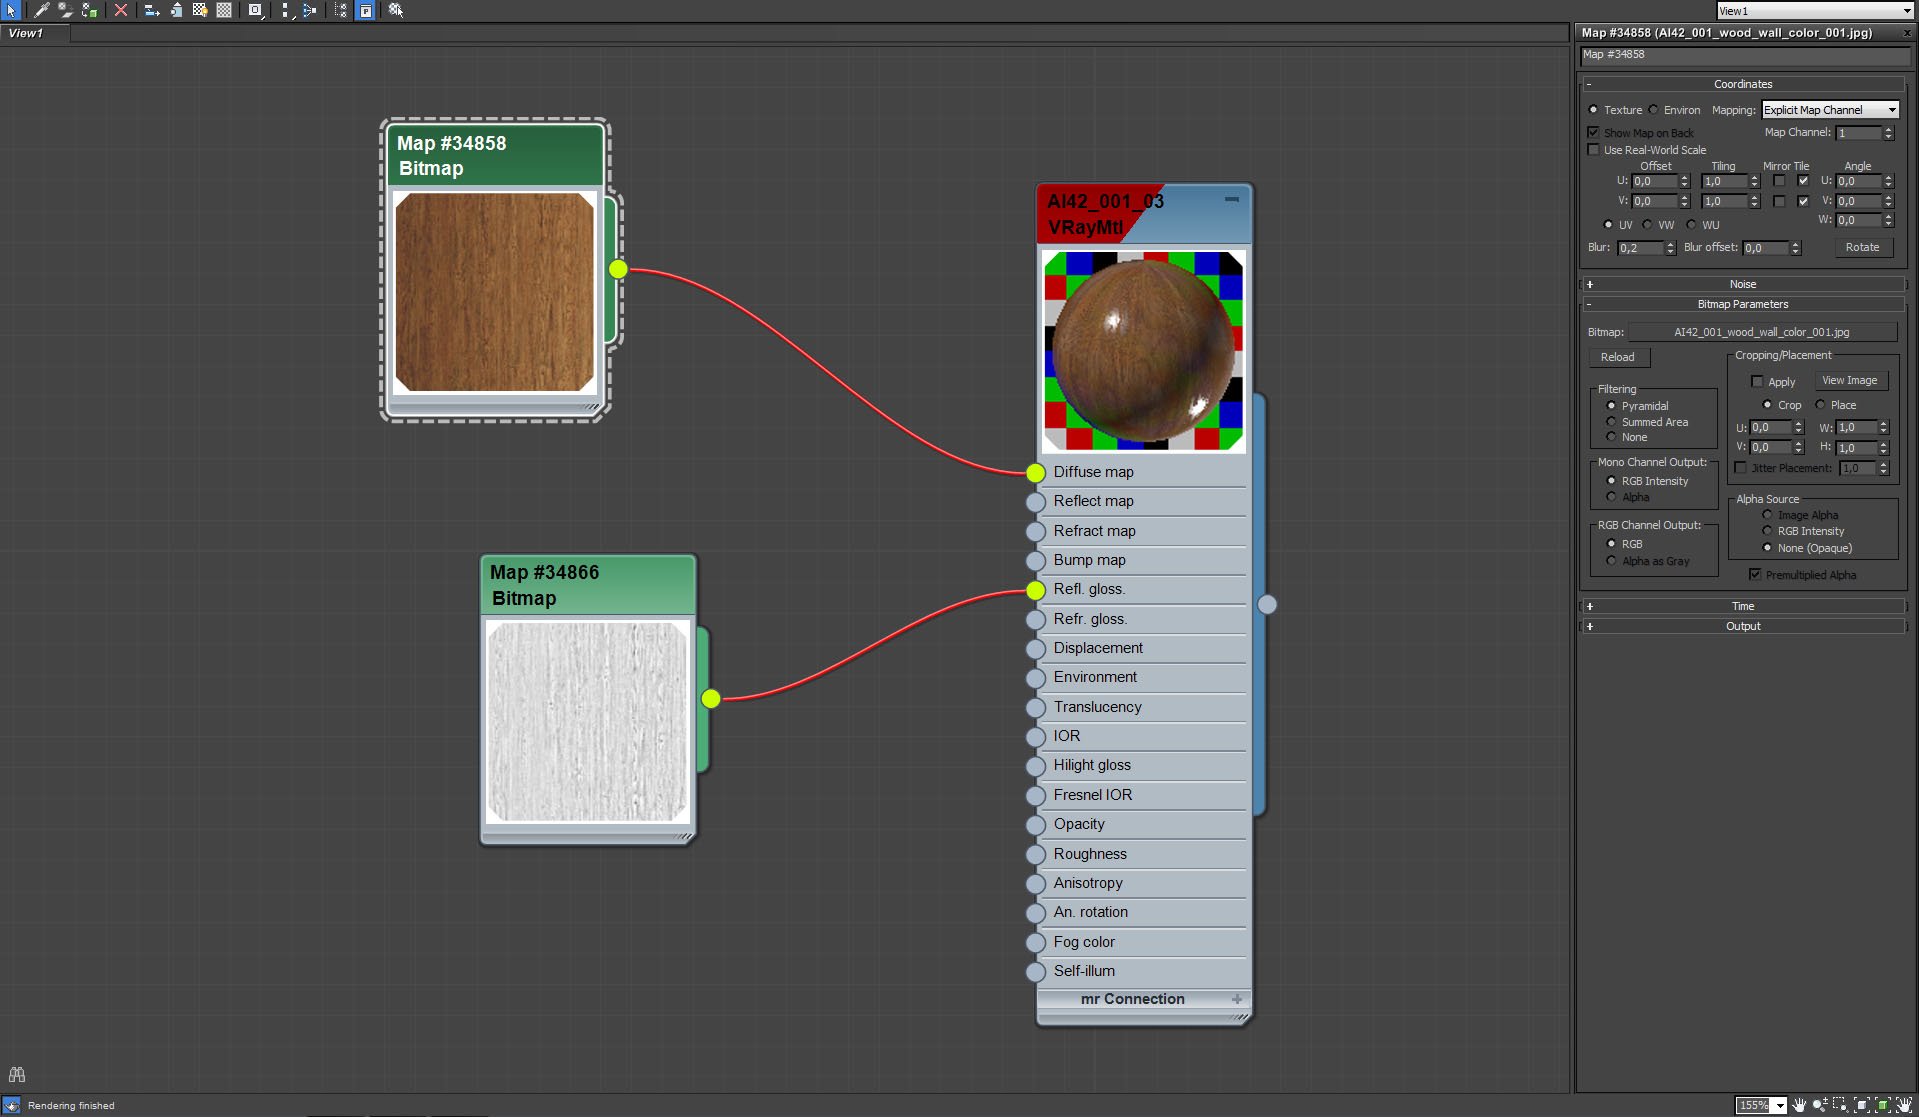
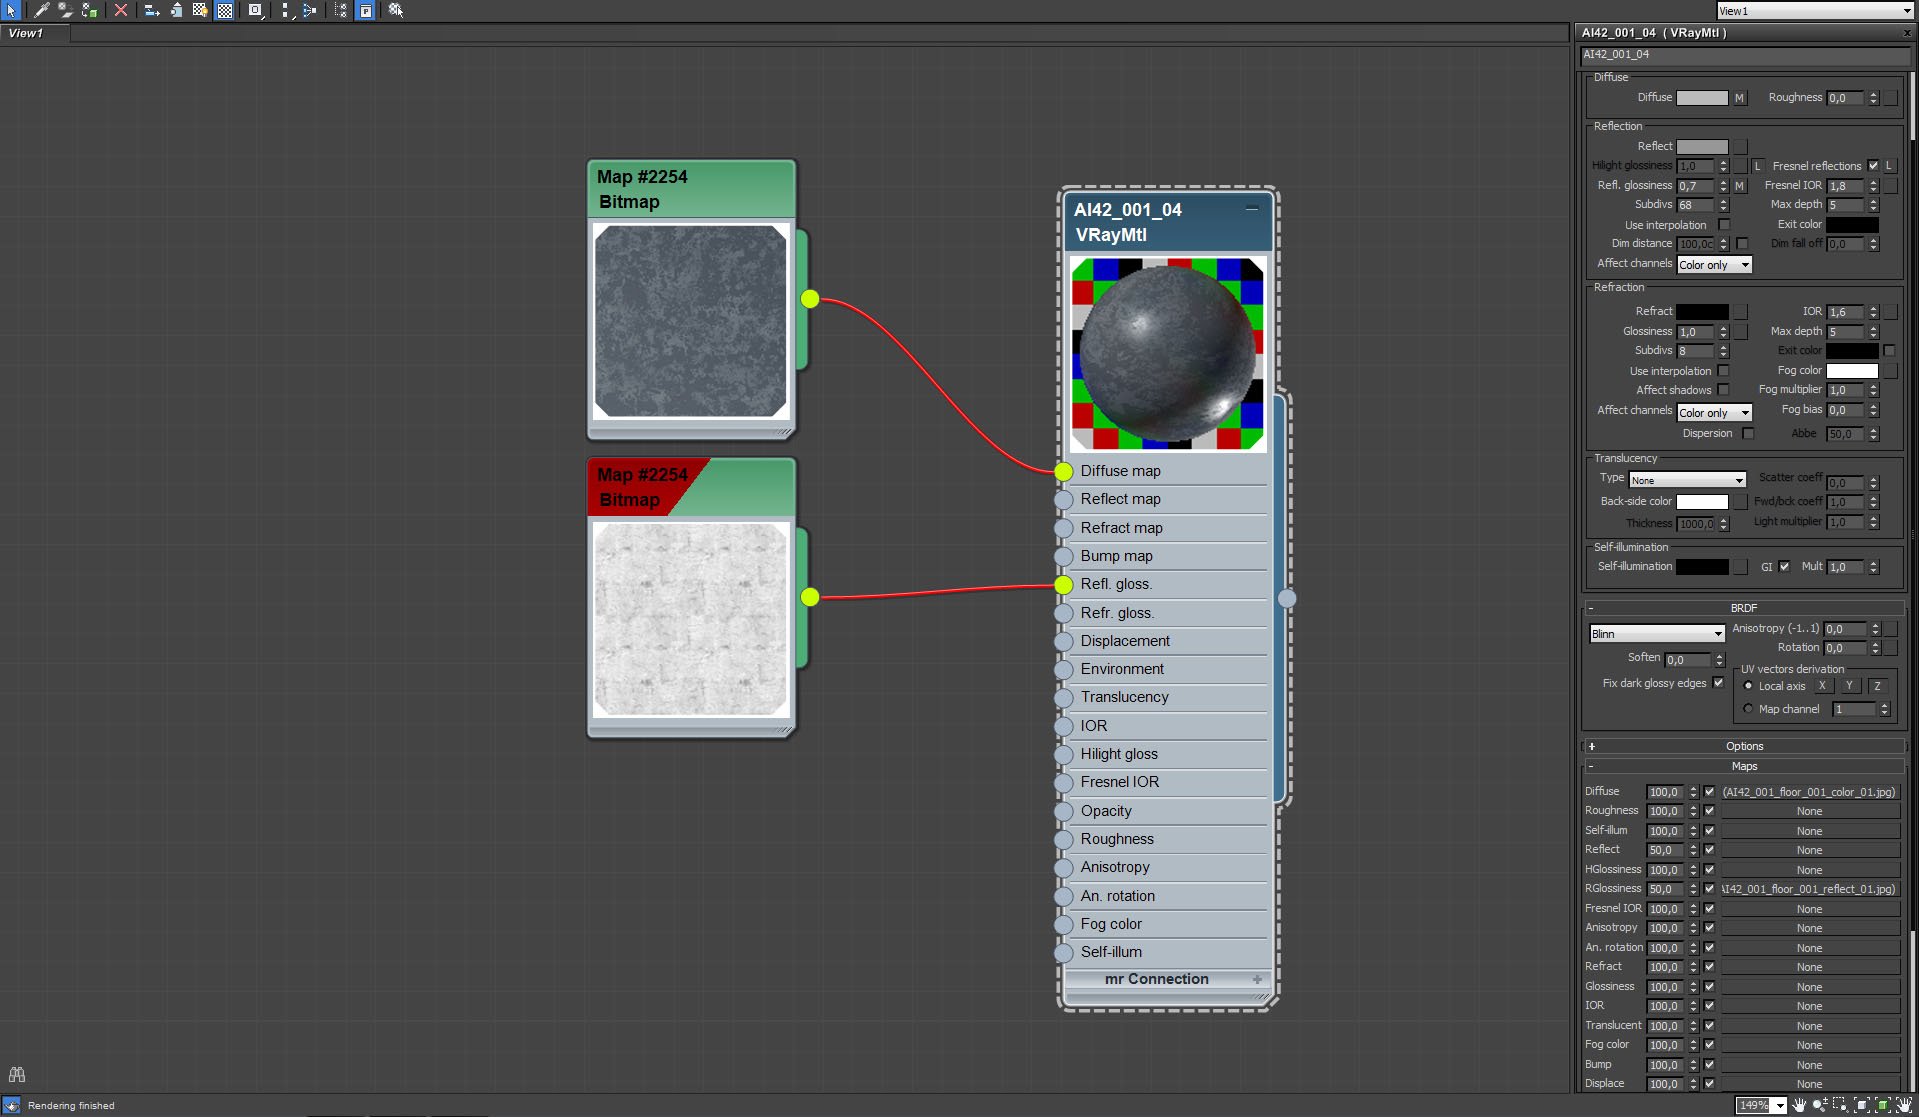
Planks material, bitmap settings.


Click on image to enlargenr_AI42_01B_0026_Layer_5_401.jpg

Planks material - reflection glossiness bitmap settings.


Click on image to enlargenr_AI42_01B_0025_Layer_6_400.jpg

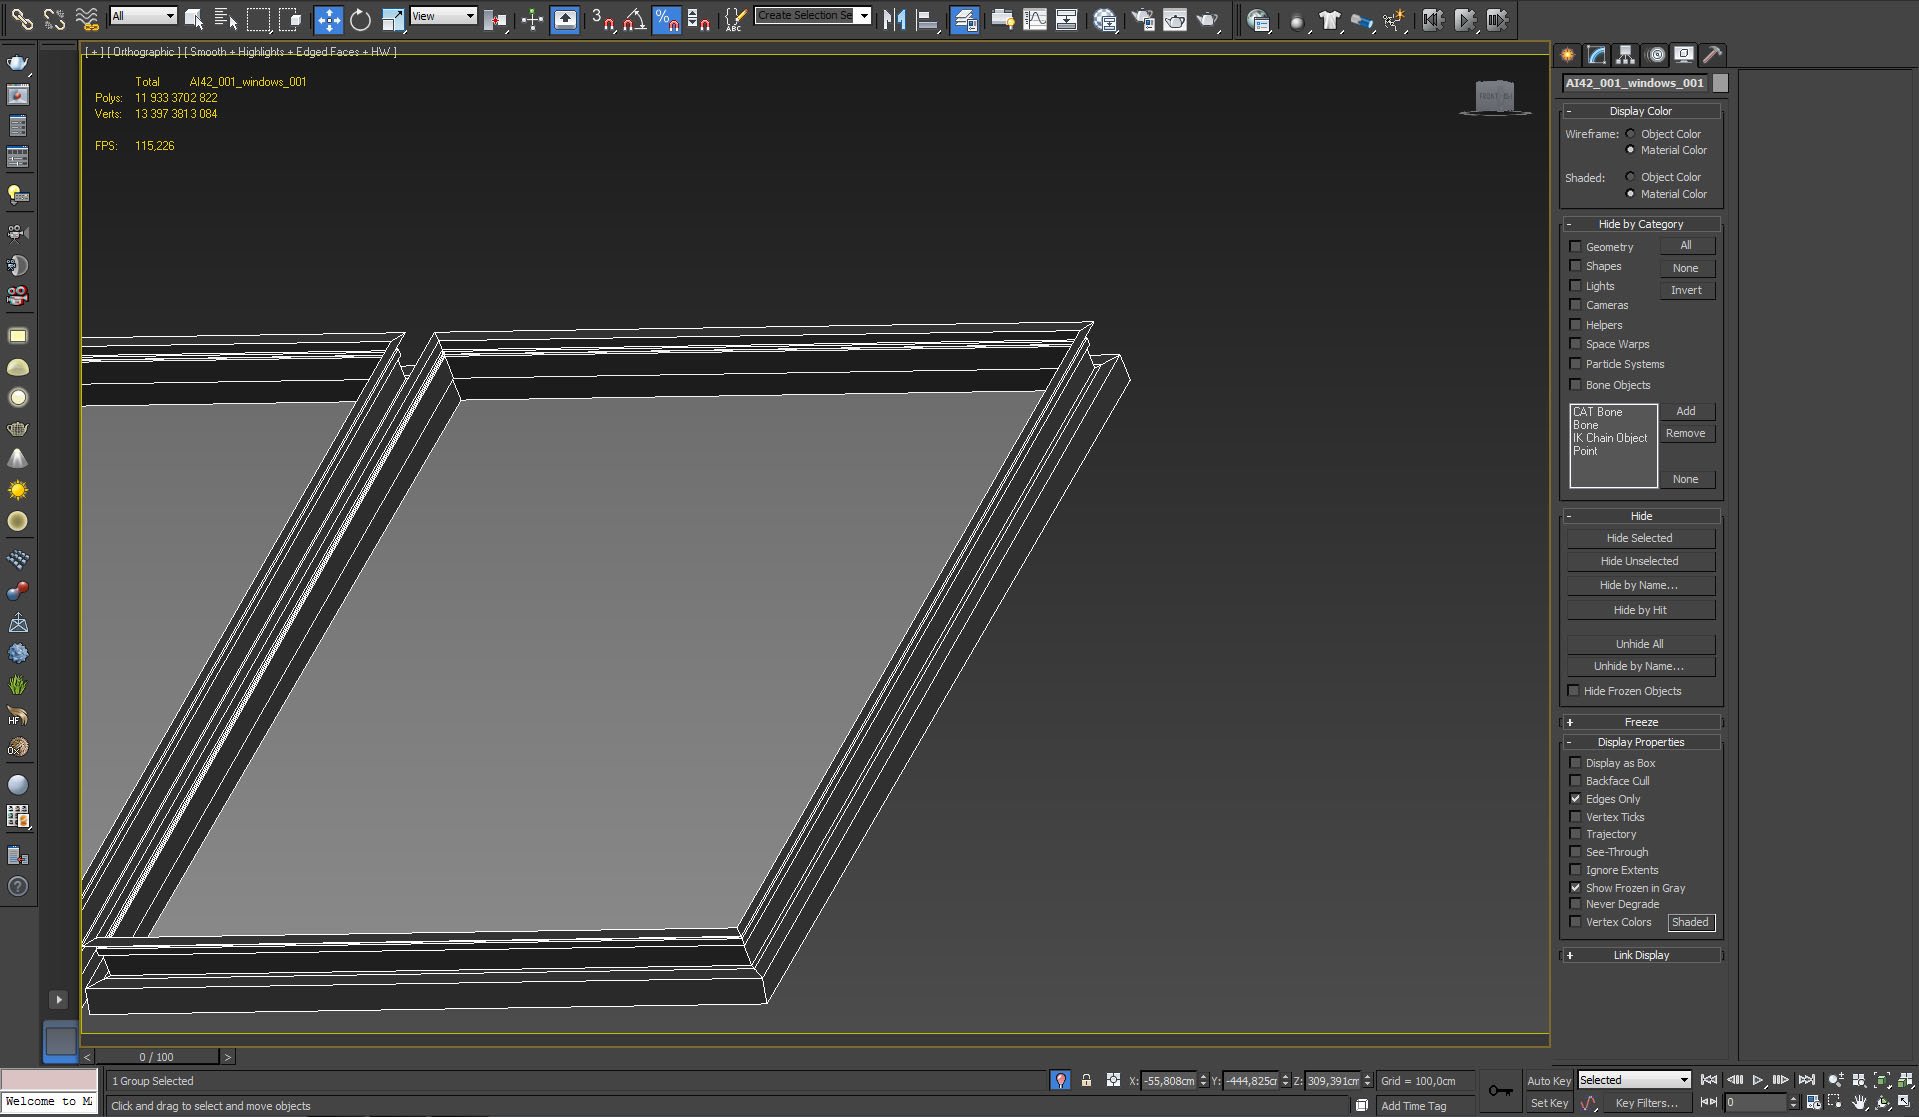
Windows in the roof.


Click on image to enlargenr_AI42_01B_0024_Layer_7_399.jpg

Windows - glass material - standard refractive material with 1,0 glossiness.


Click on image to enlargenr_AI42_01B_0023_Layer_8_398.jpg

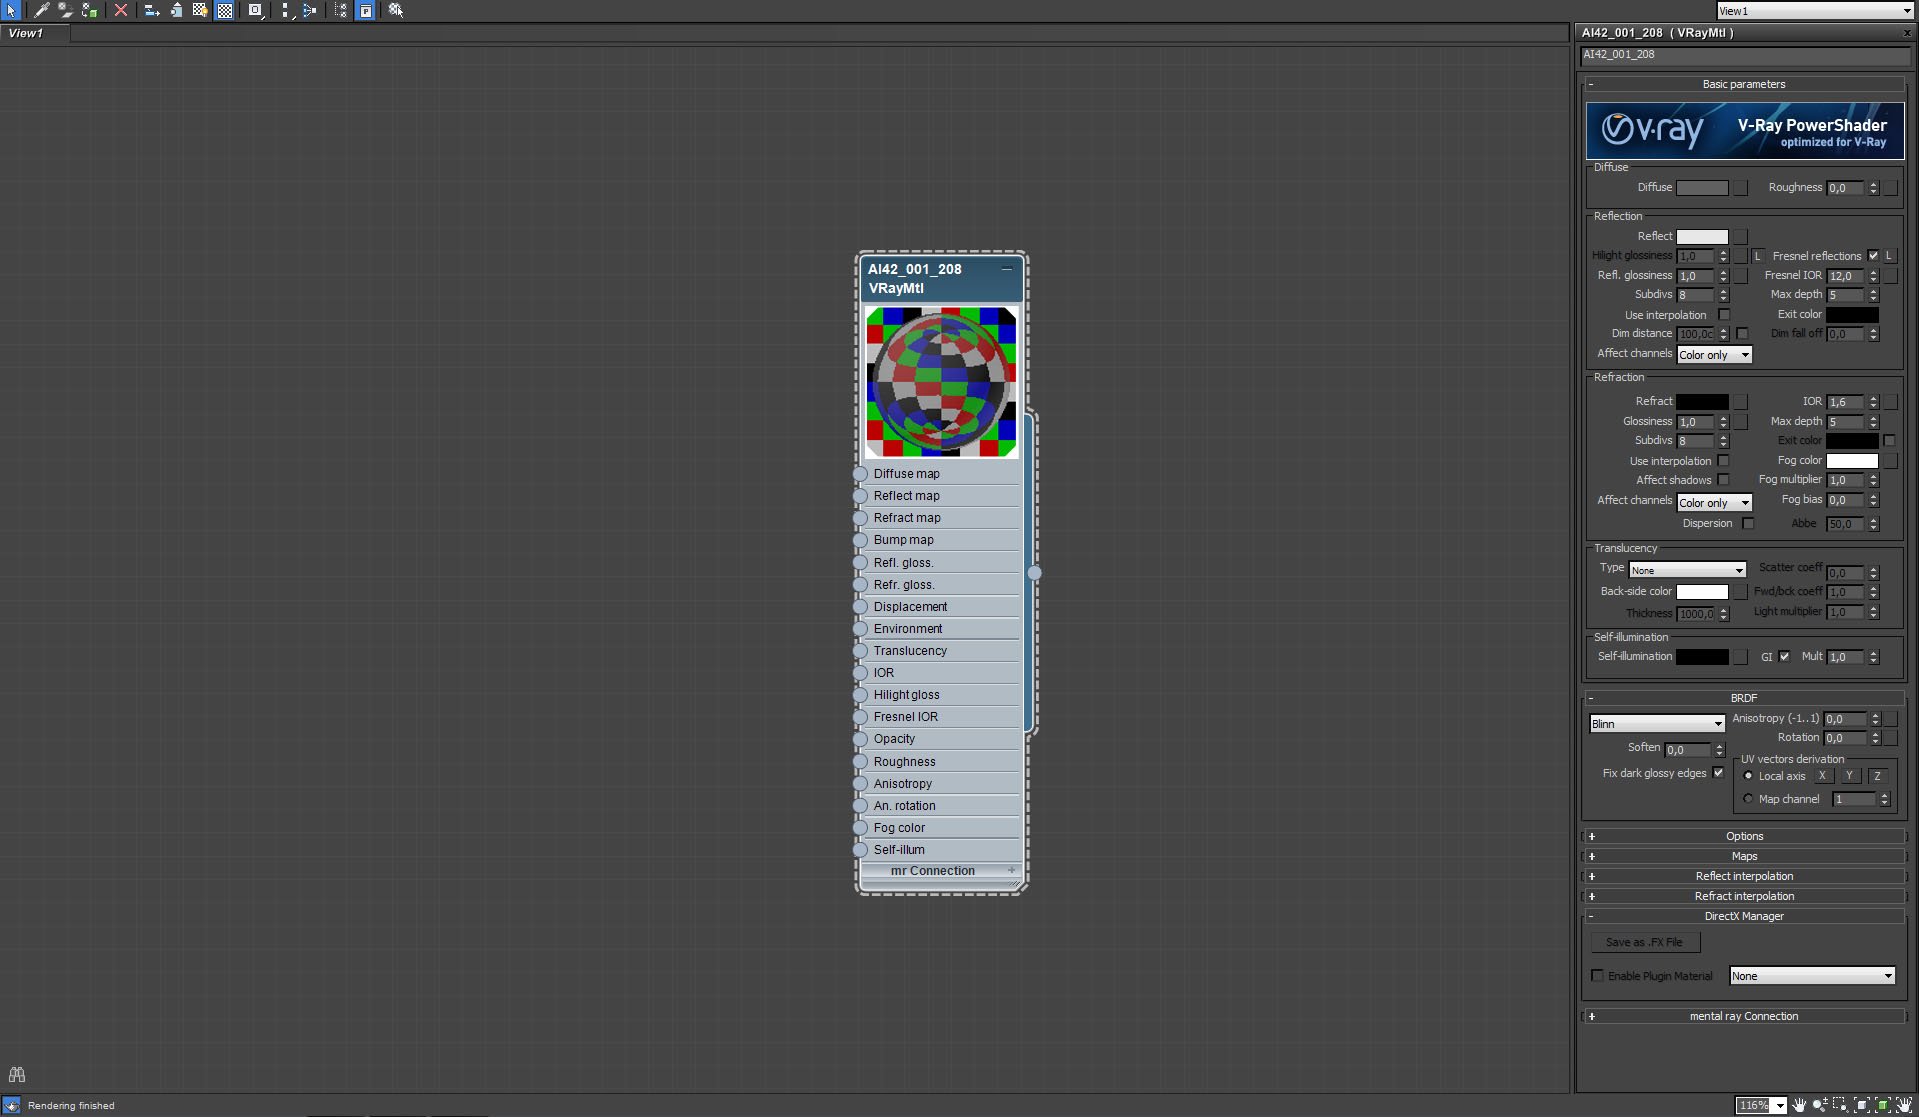
Windows frame material.


Click on image to enlargenr_AI42_01B_0027_Layer_4_402.jpg

Building layers - gif animation.


Click on image to enlargenr_AI42_01B_0016_Layer_15_391.jpg

Floor.


Click on image to enlargenr_AI42_01B_0015_Layer_16_390.jpg

Floor material.


Click on image to enlargenr_AI42_01B_0014_Layer_17_389.jpg

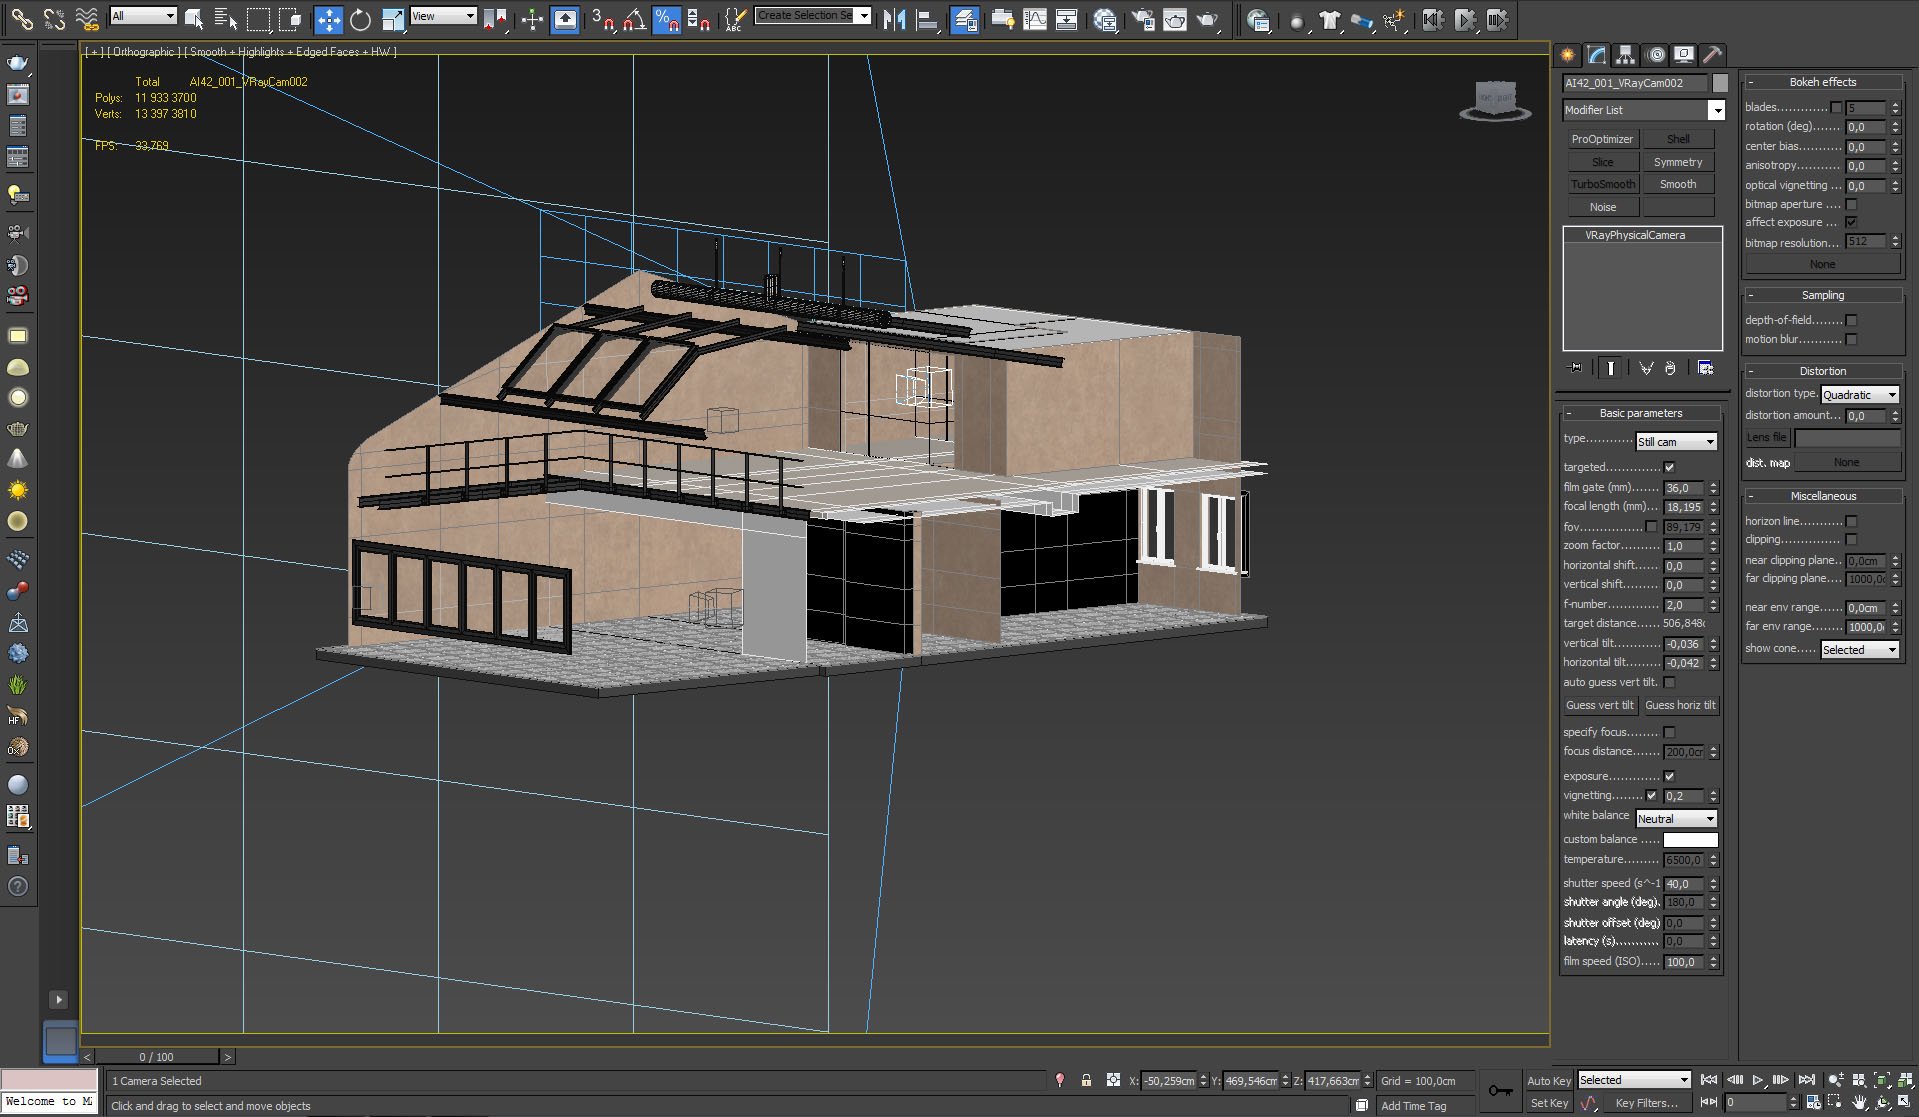
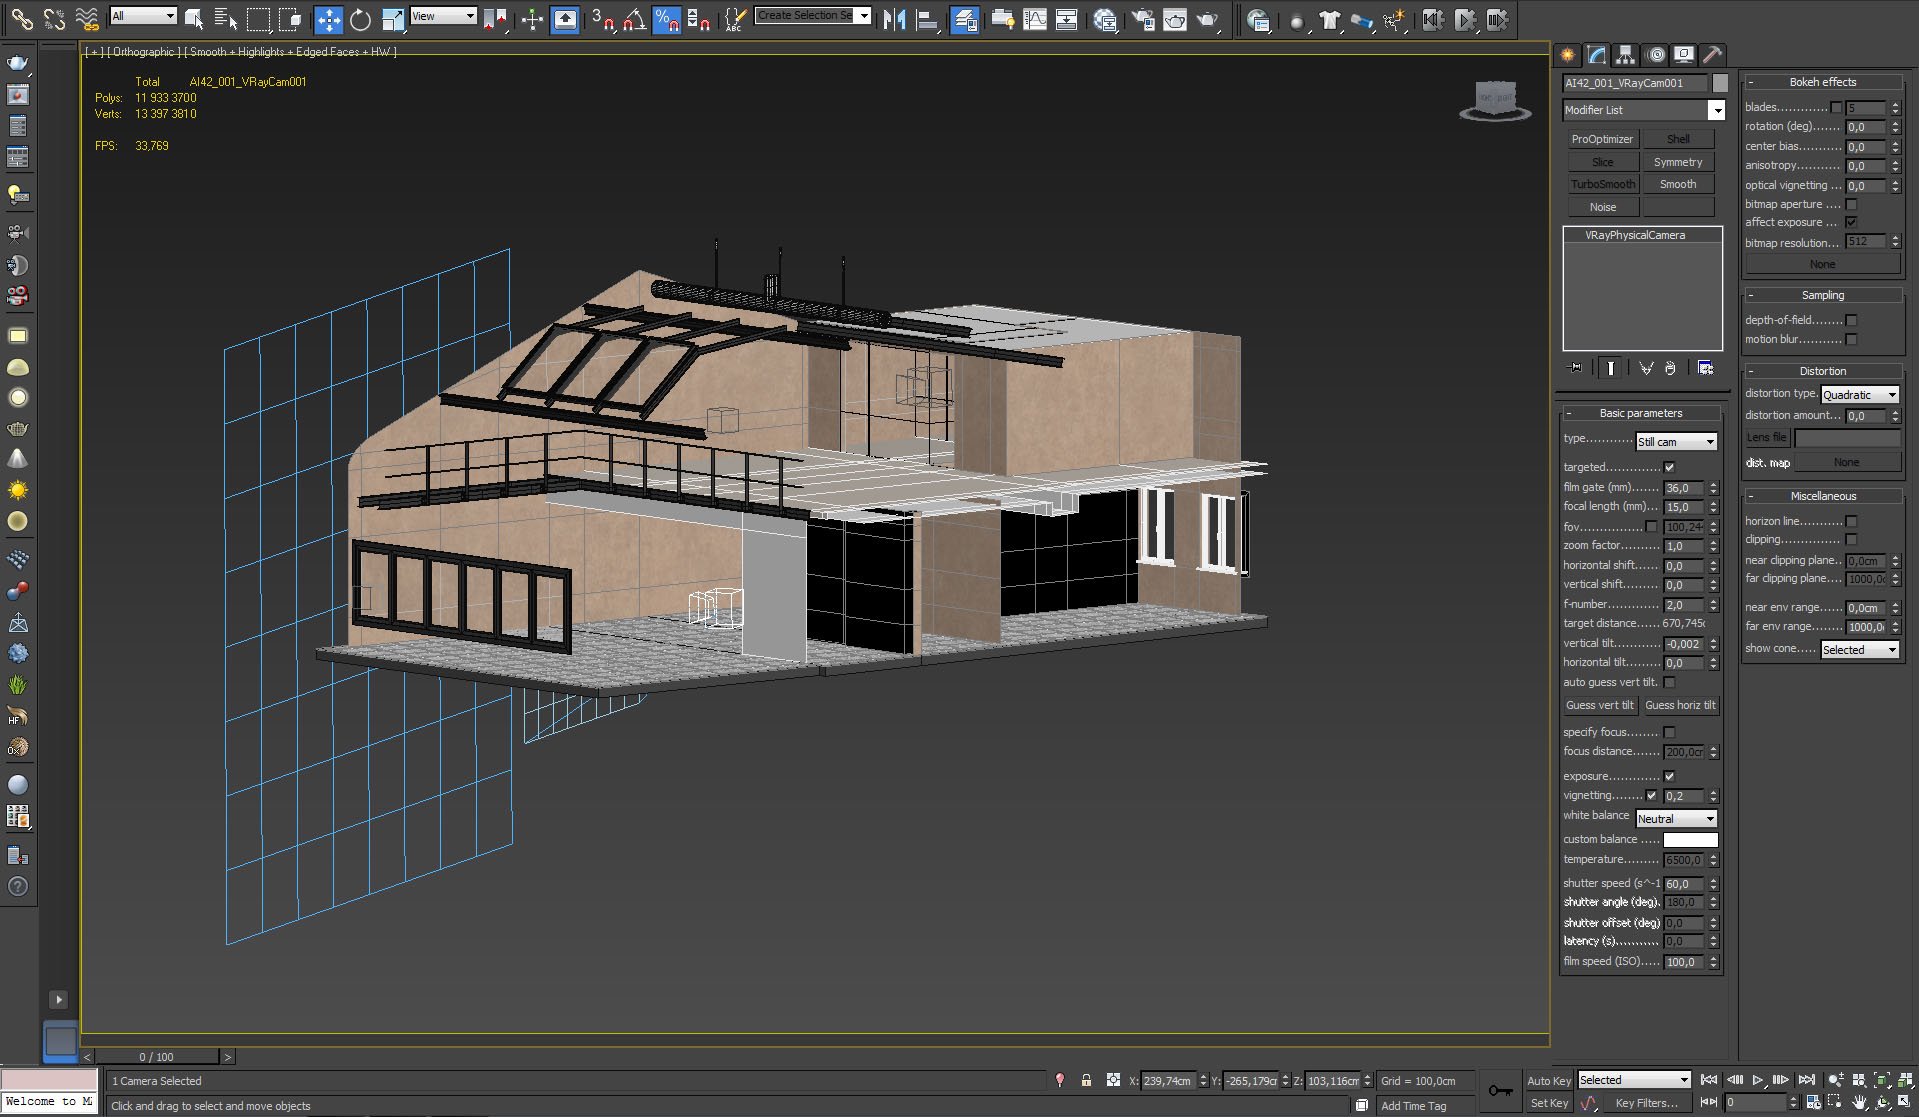
Camera 2 settings.


Click on image to enlargenr_AI42_01B_0013_Layer_18_388.jpg

Camera 1 settings.


Click on image to enlargenr_AI42_01B_0012_Layer_19_387.jpg

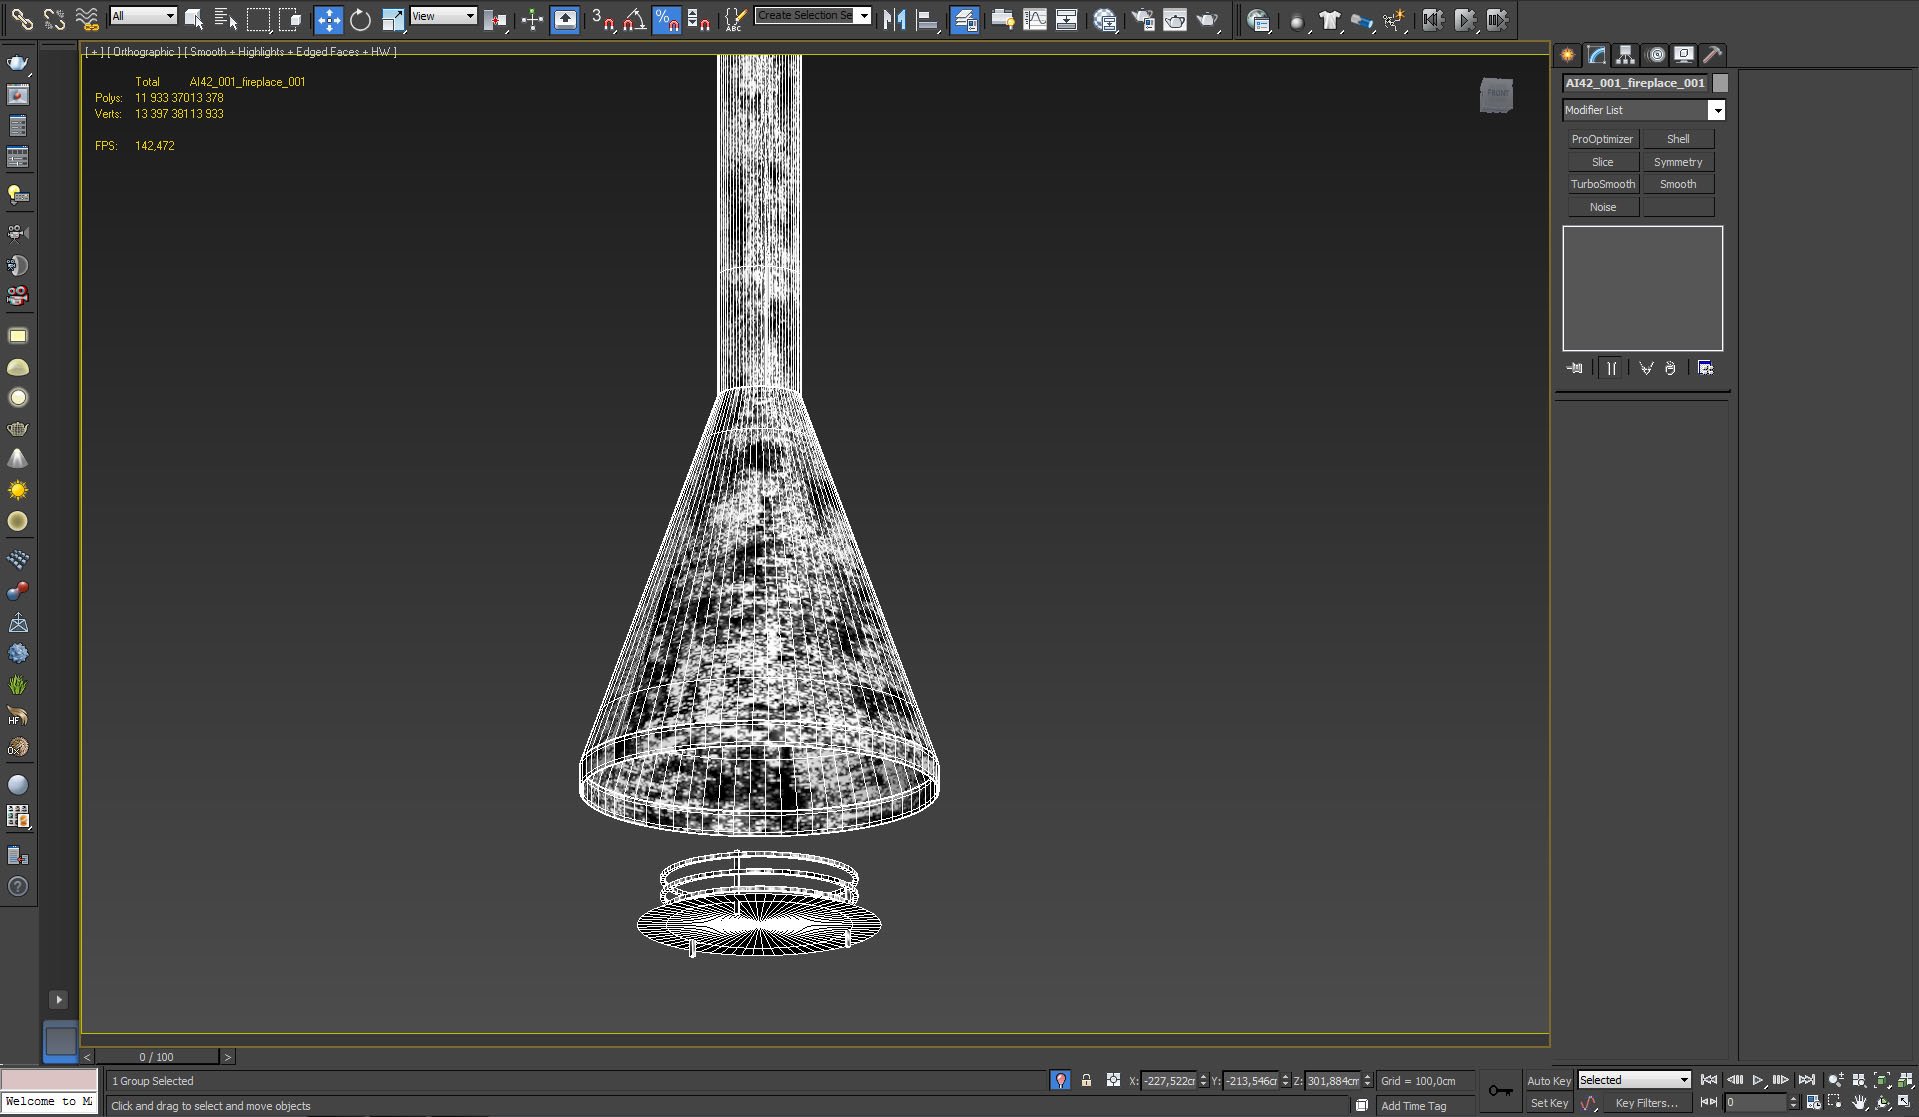
Fireplace model.


Click on image to enlargenr_AI42_01B_0011_Layer_20_386.jpg

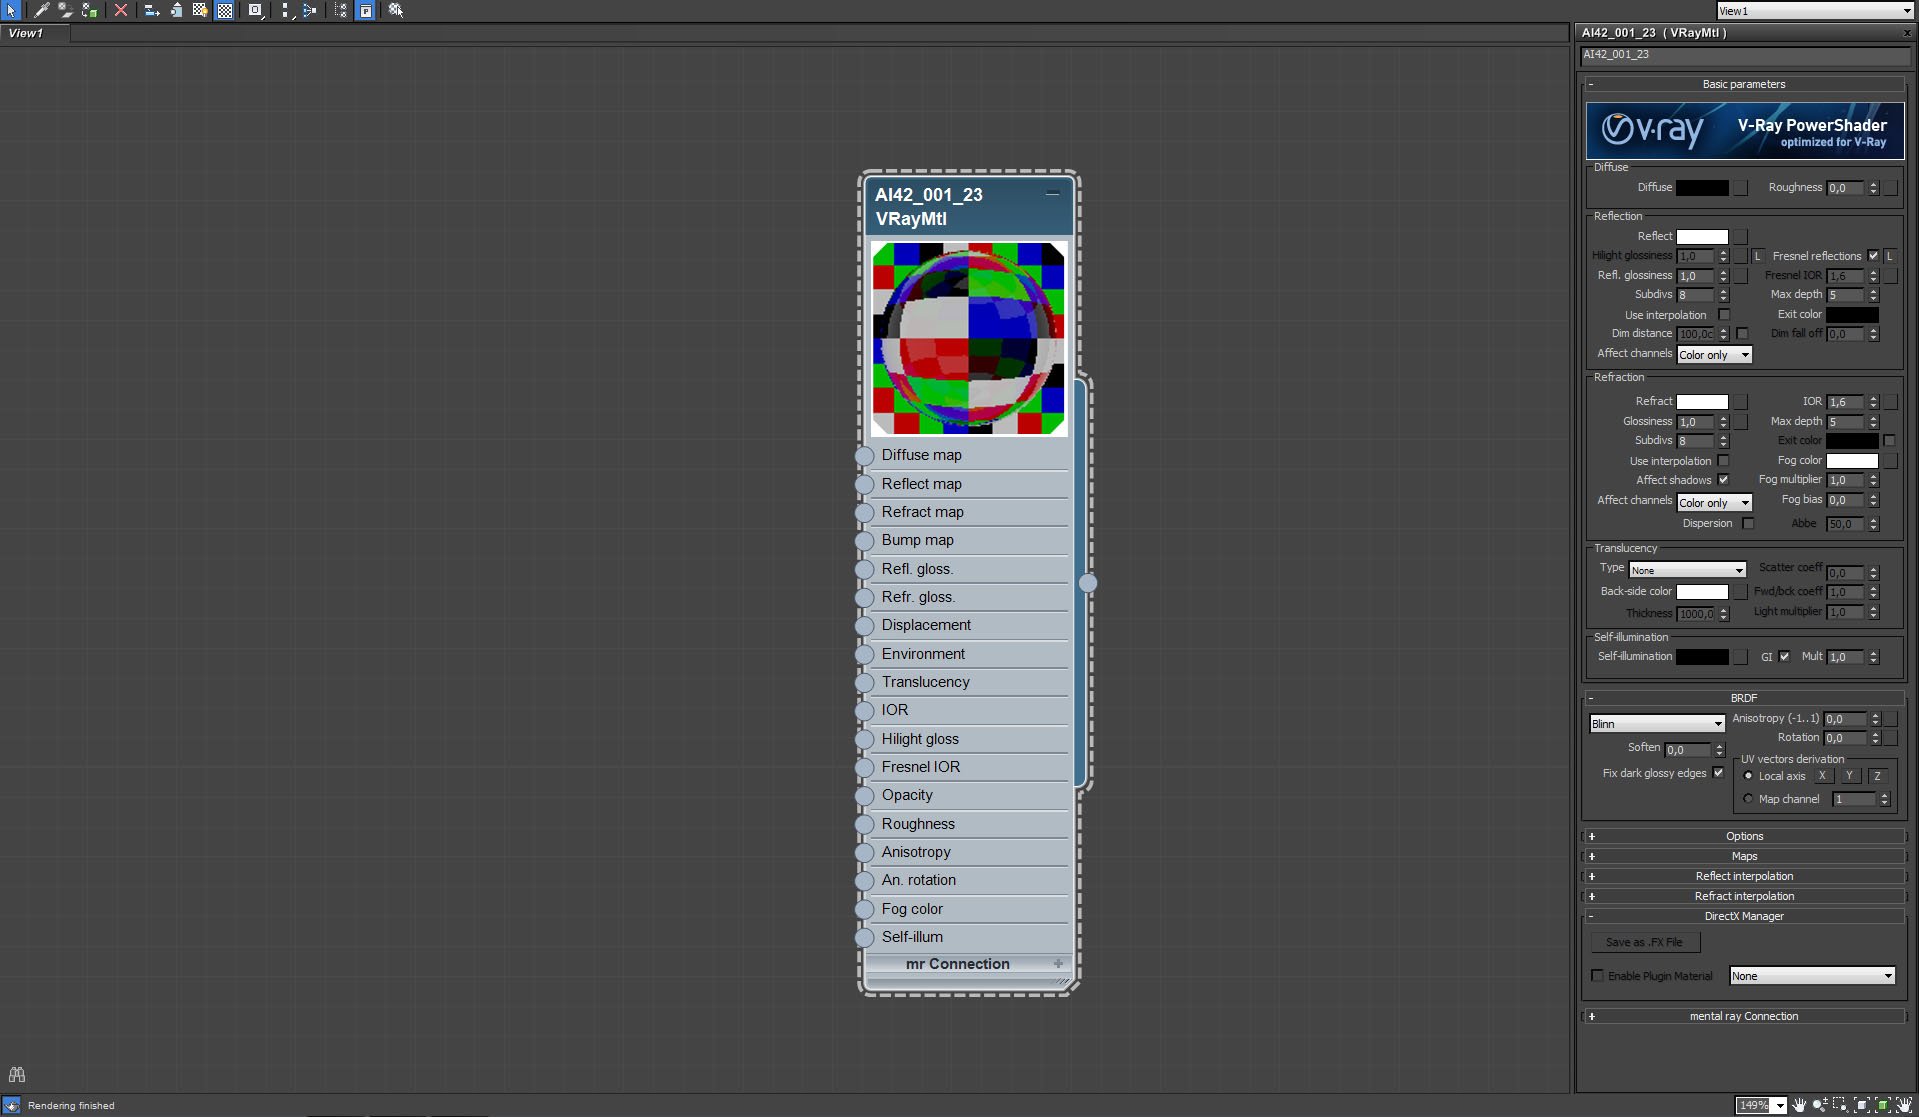
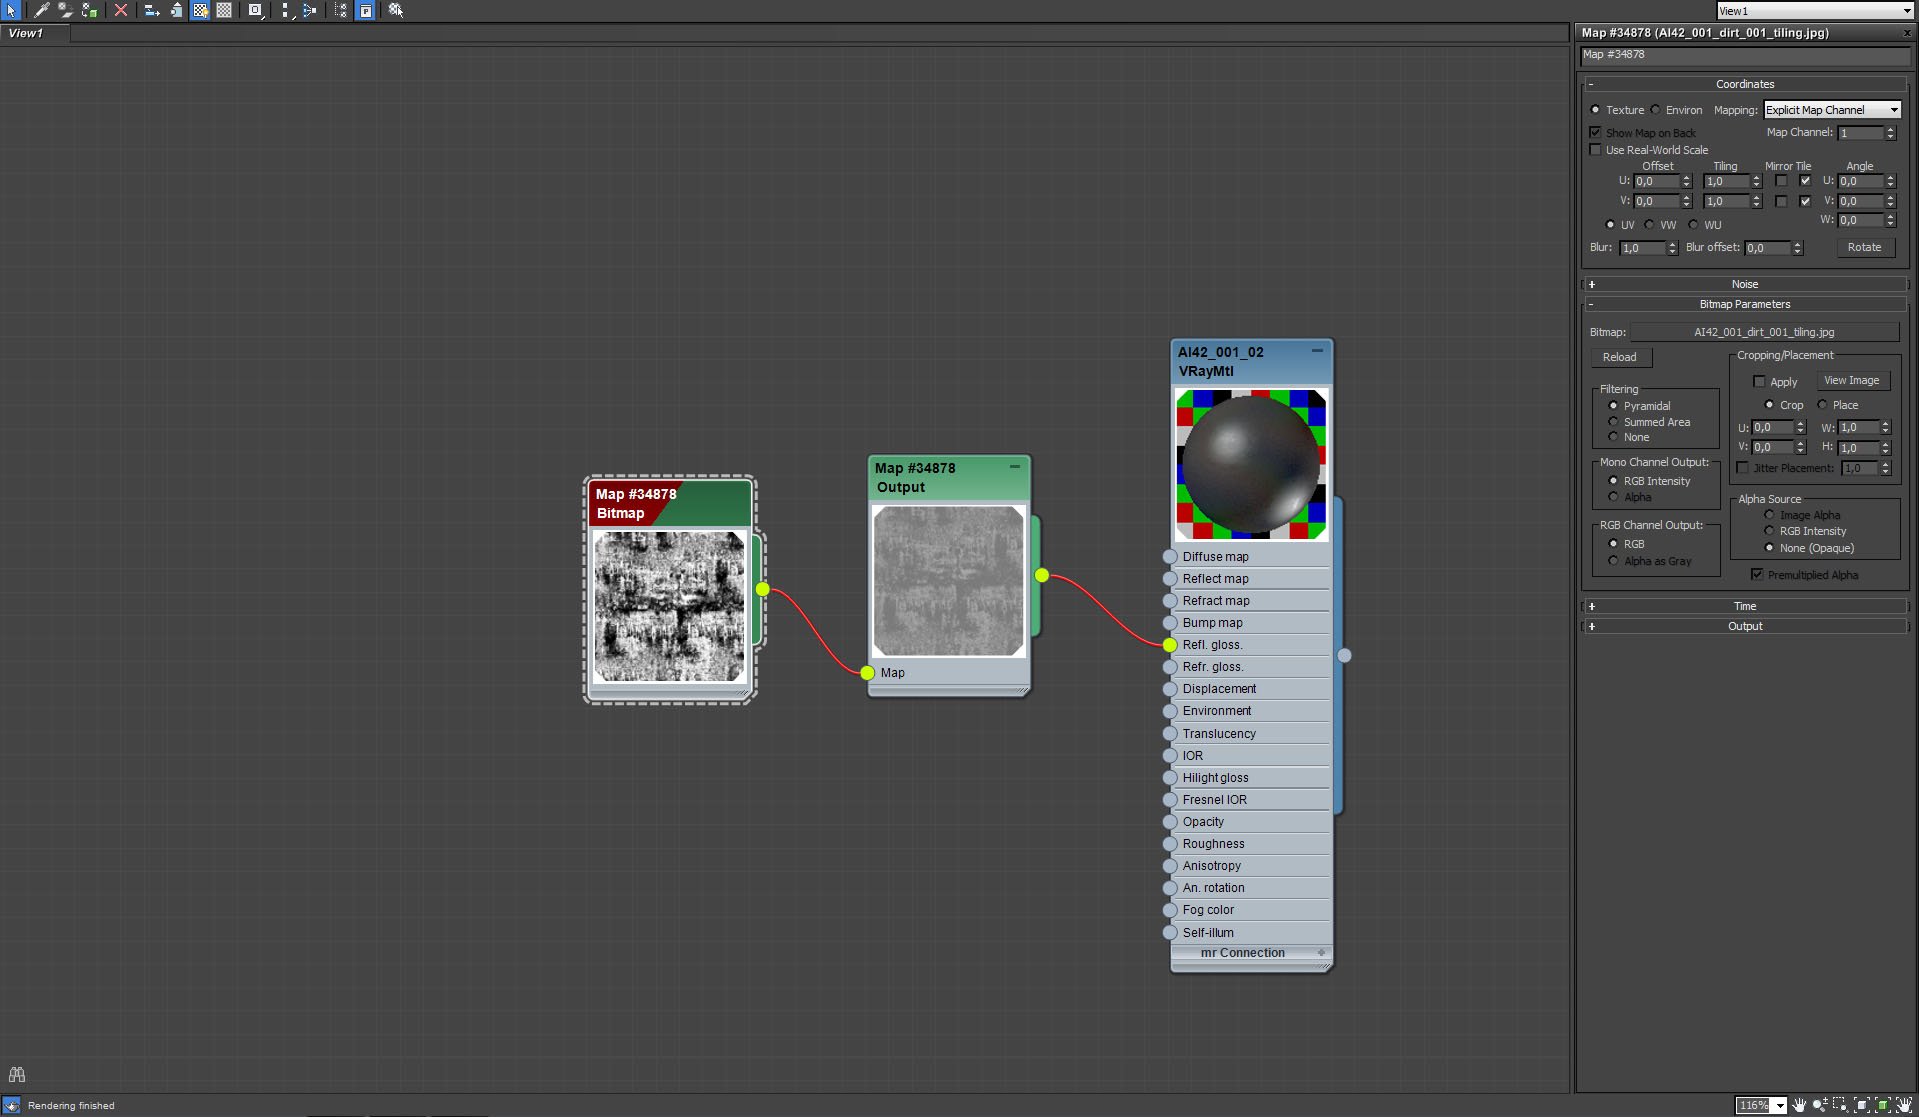
Fireplace material.


Click on image to enlargenr_AI42_01B_0010_Layer_21_385.jpg

Fireplace material - bitmap settings.


Click on image to enlargenr_AI42_01B_0009_Layer_22_384.jpg

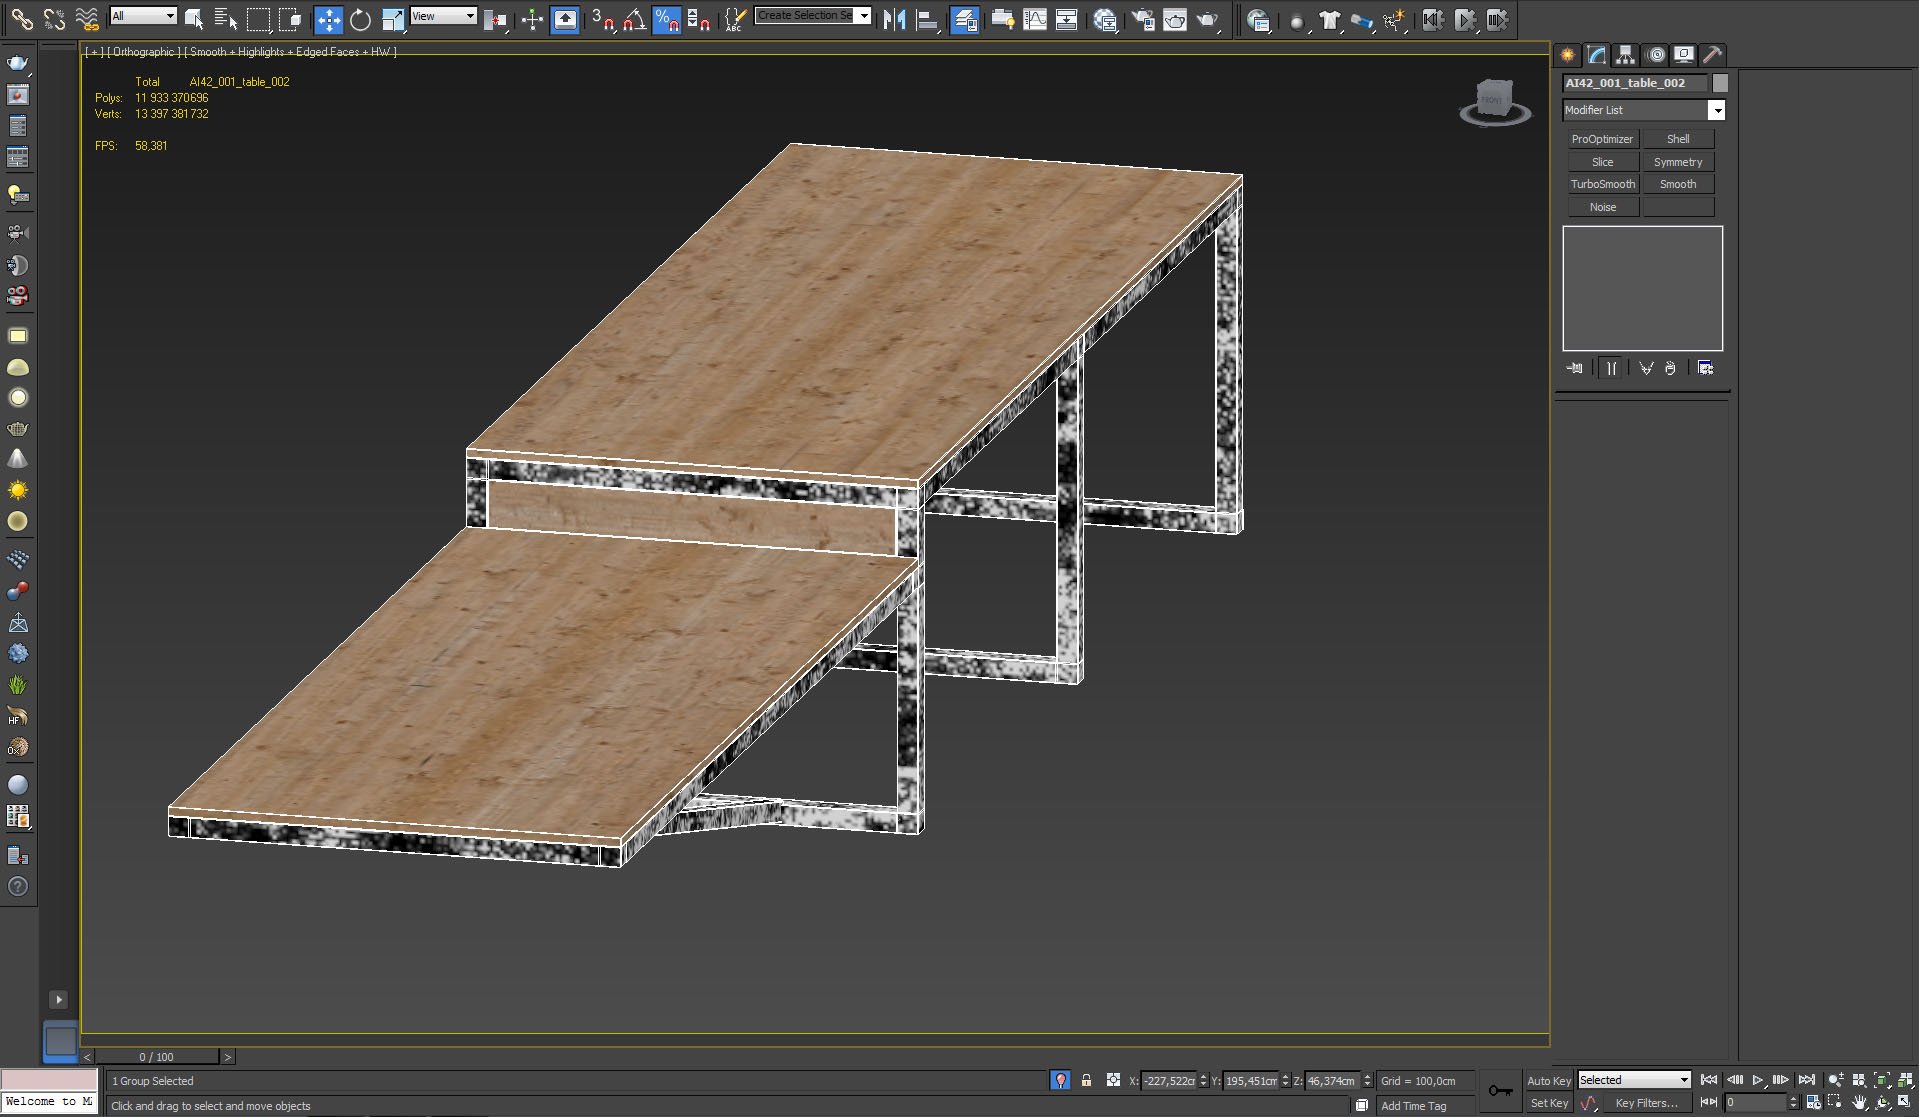
A bench model.


Click on image to enlargenr_AI42_01B_0008_Layer_23_383.jpg

Bench surface material.


Click on image to enlargenr_AI42_01B_0007_Layer_24_382.jpg

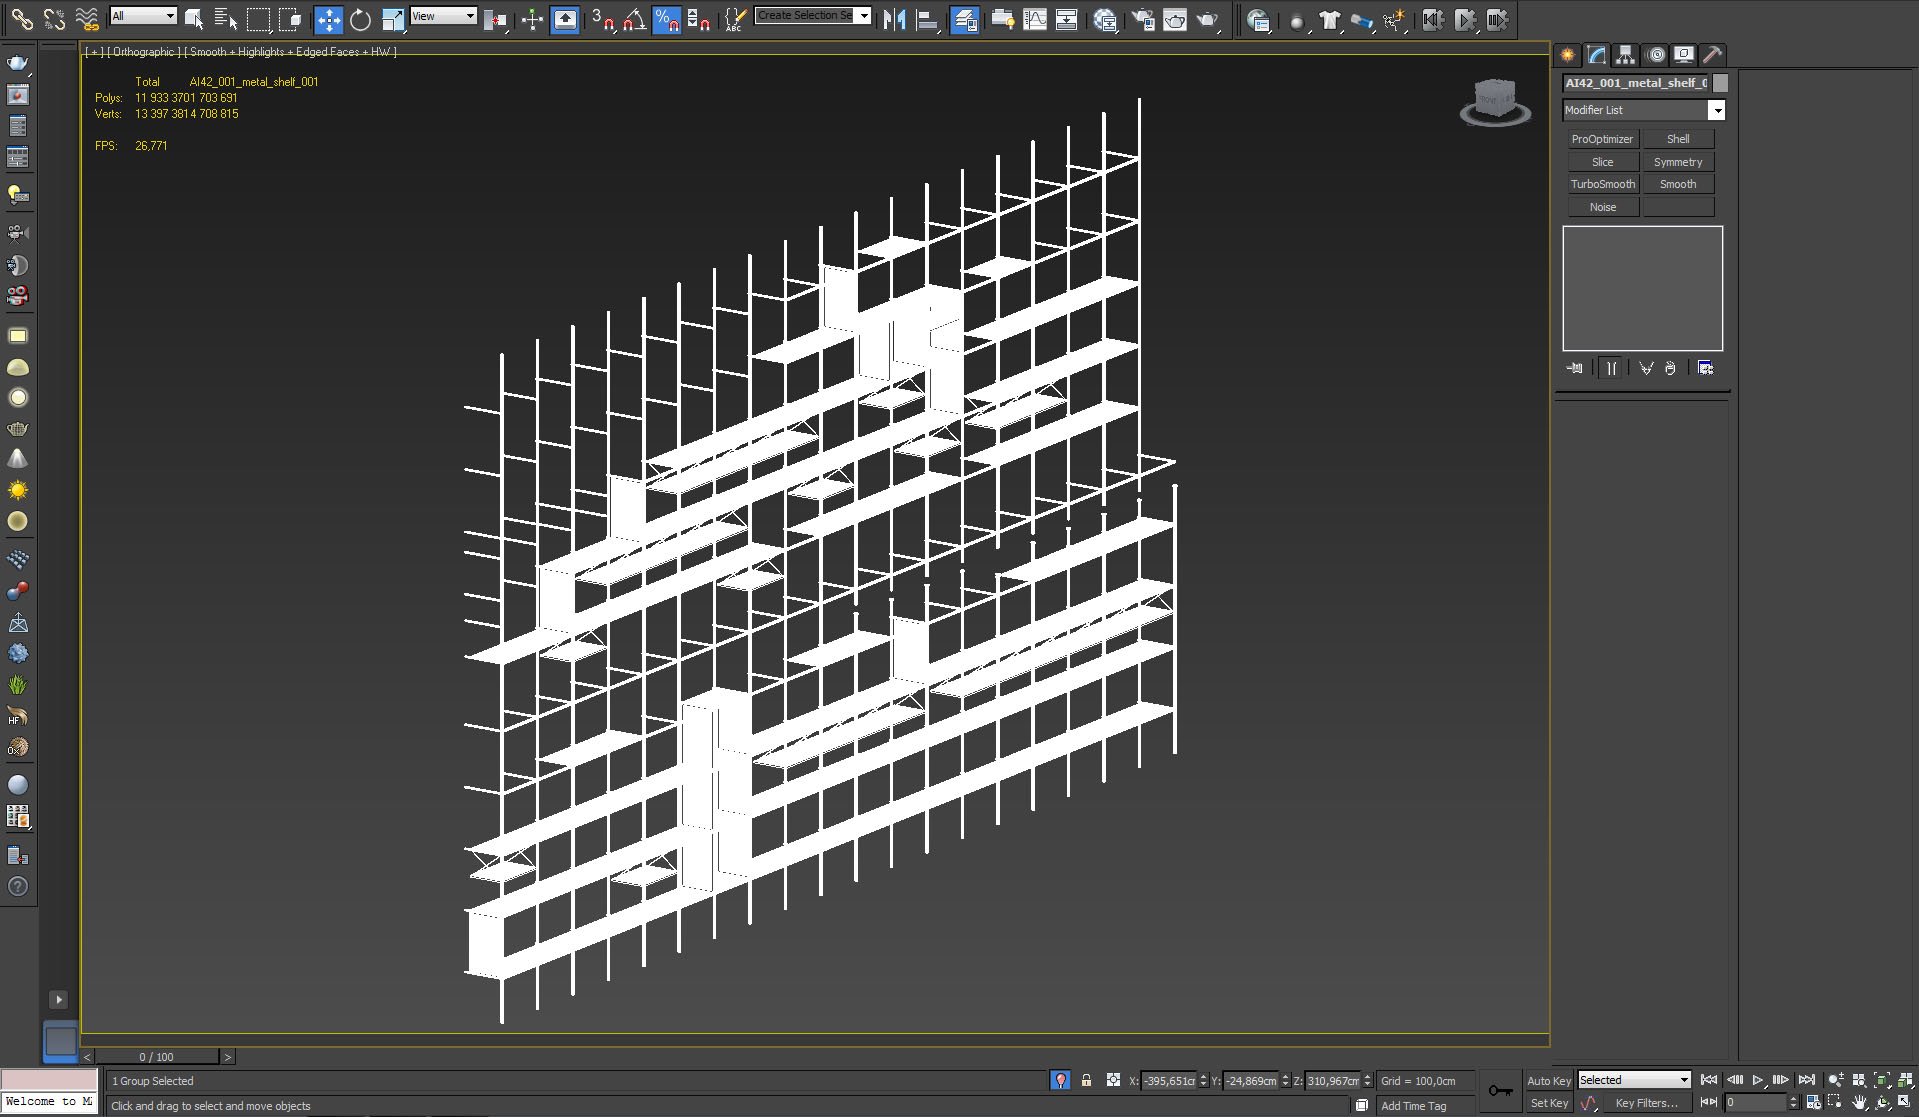
Shelves.


Click on image to enlargenr_AI42_01B_0006_Layer_25_381.jpg

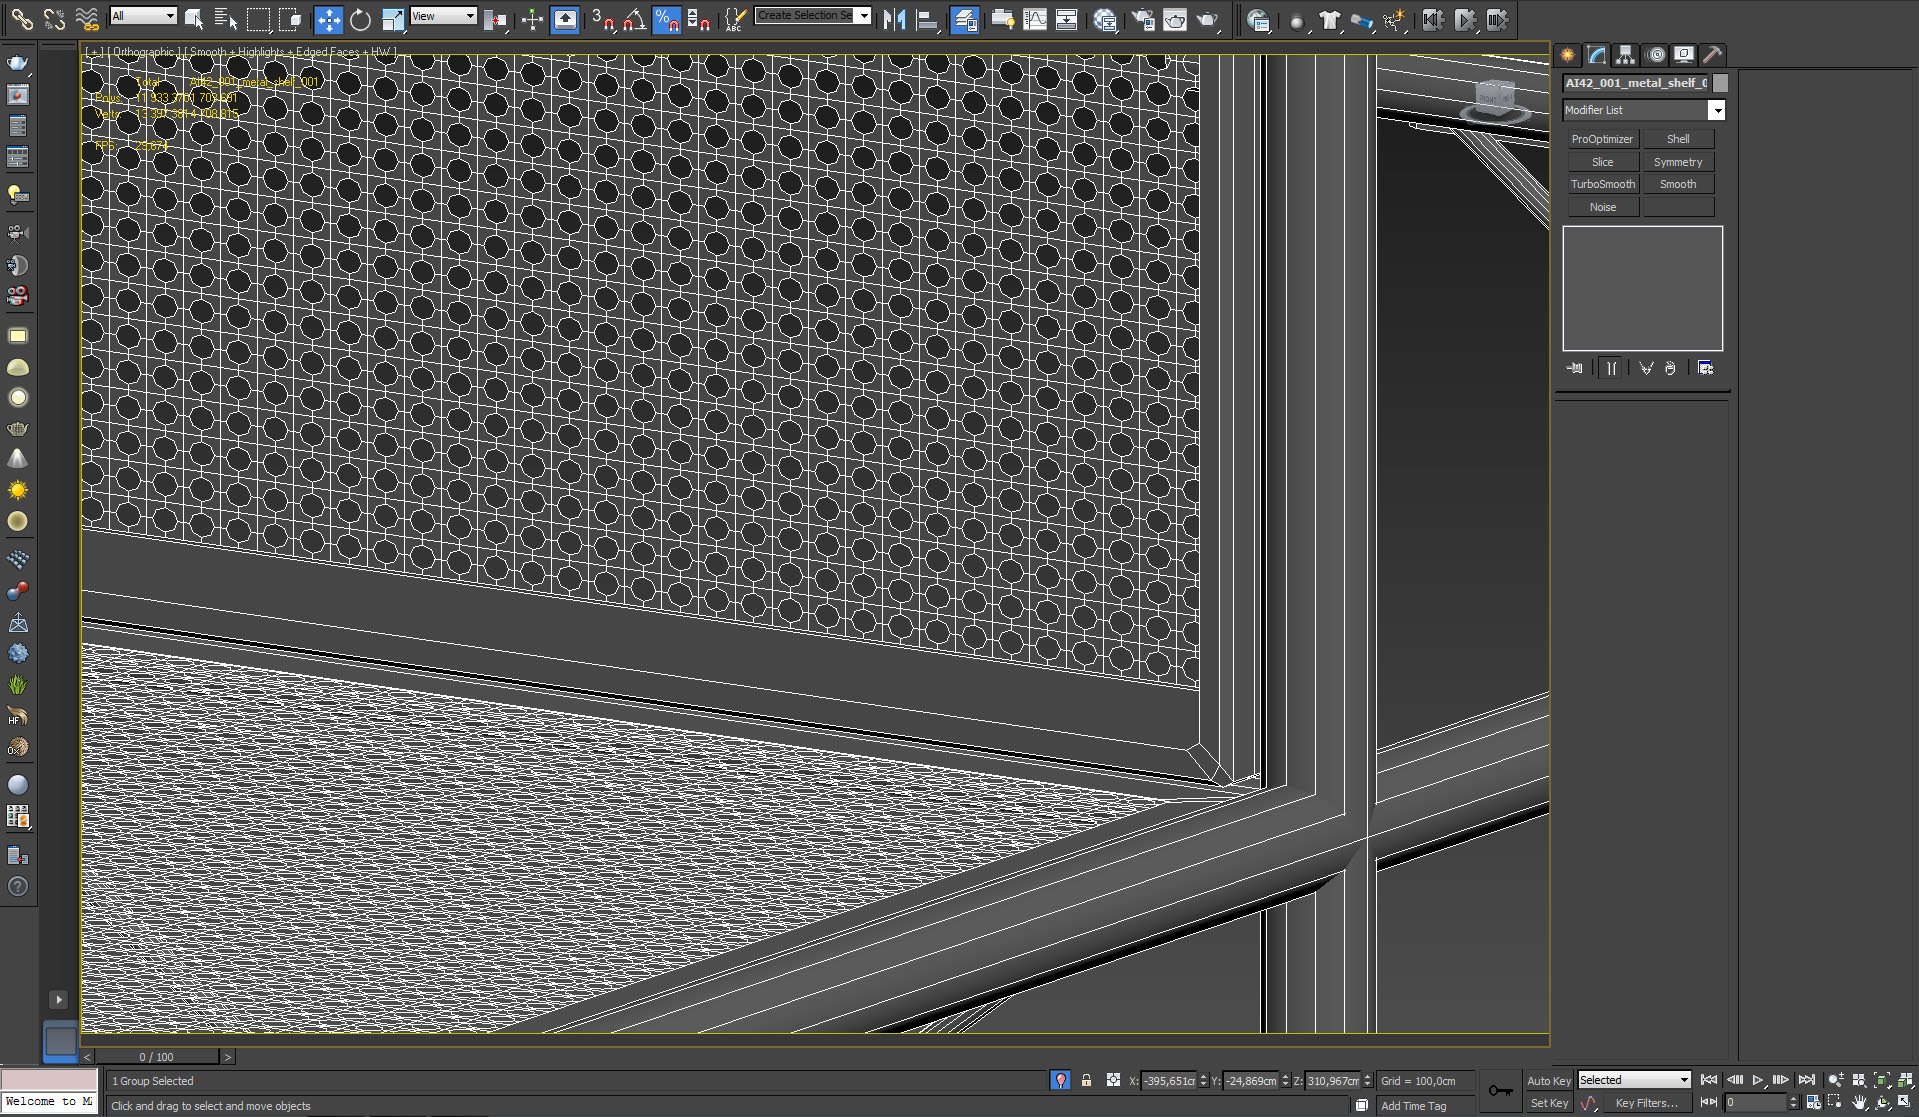
Shelves have holey surfaces. Close-up. 


Click on image to enlargenr_AI42_01B_0005_Layer_26_380.jpg

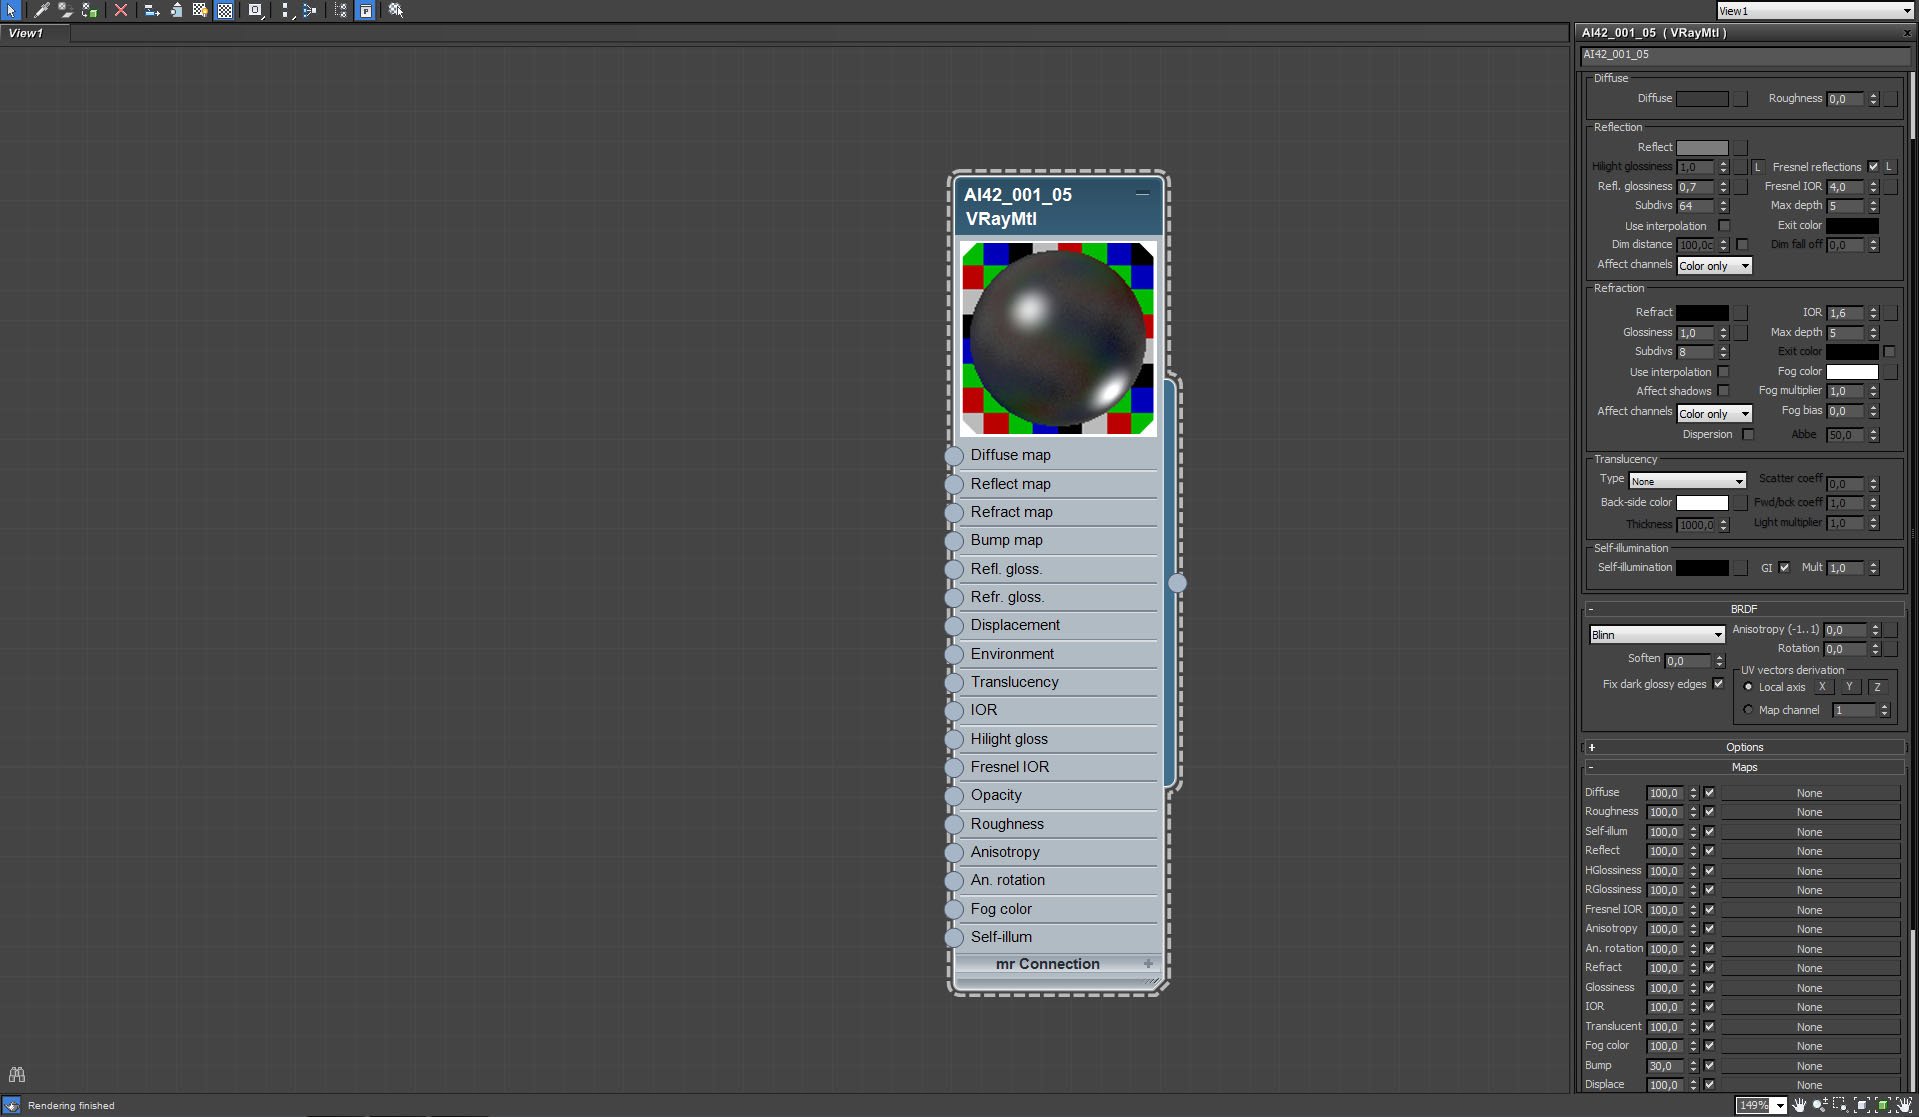
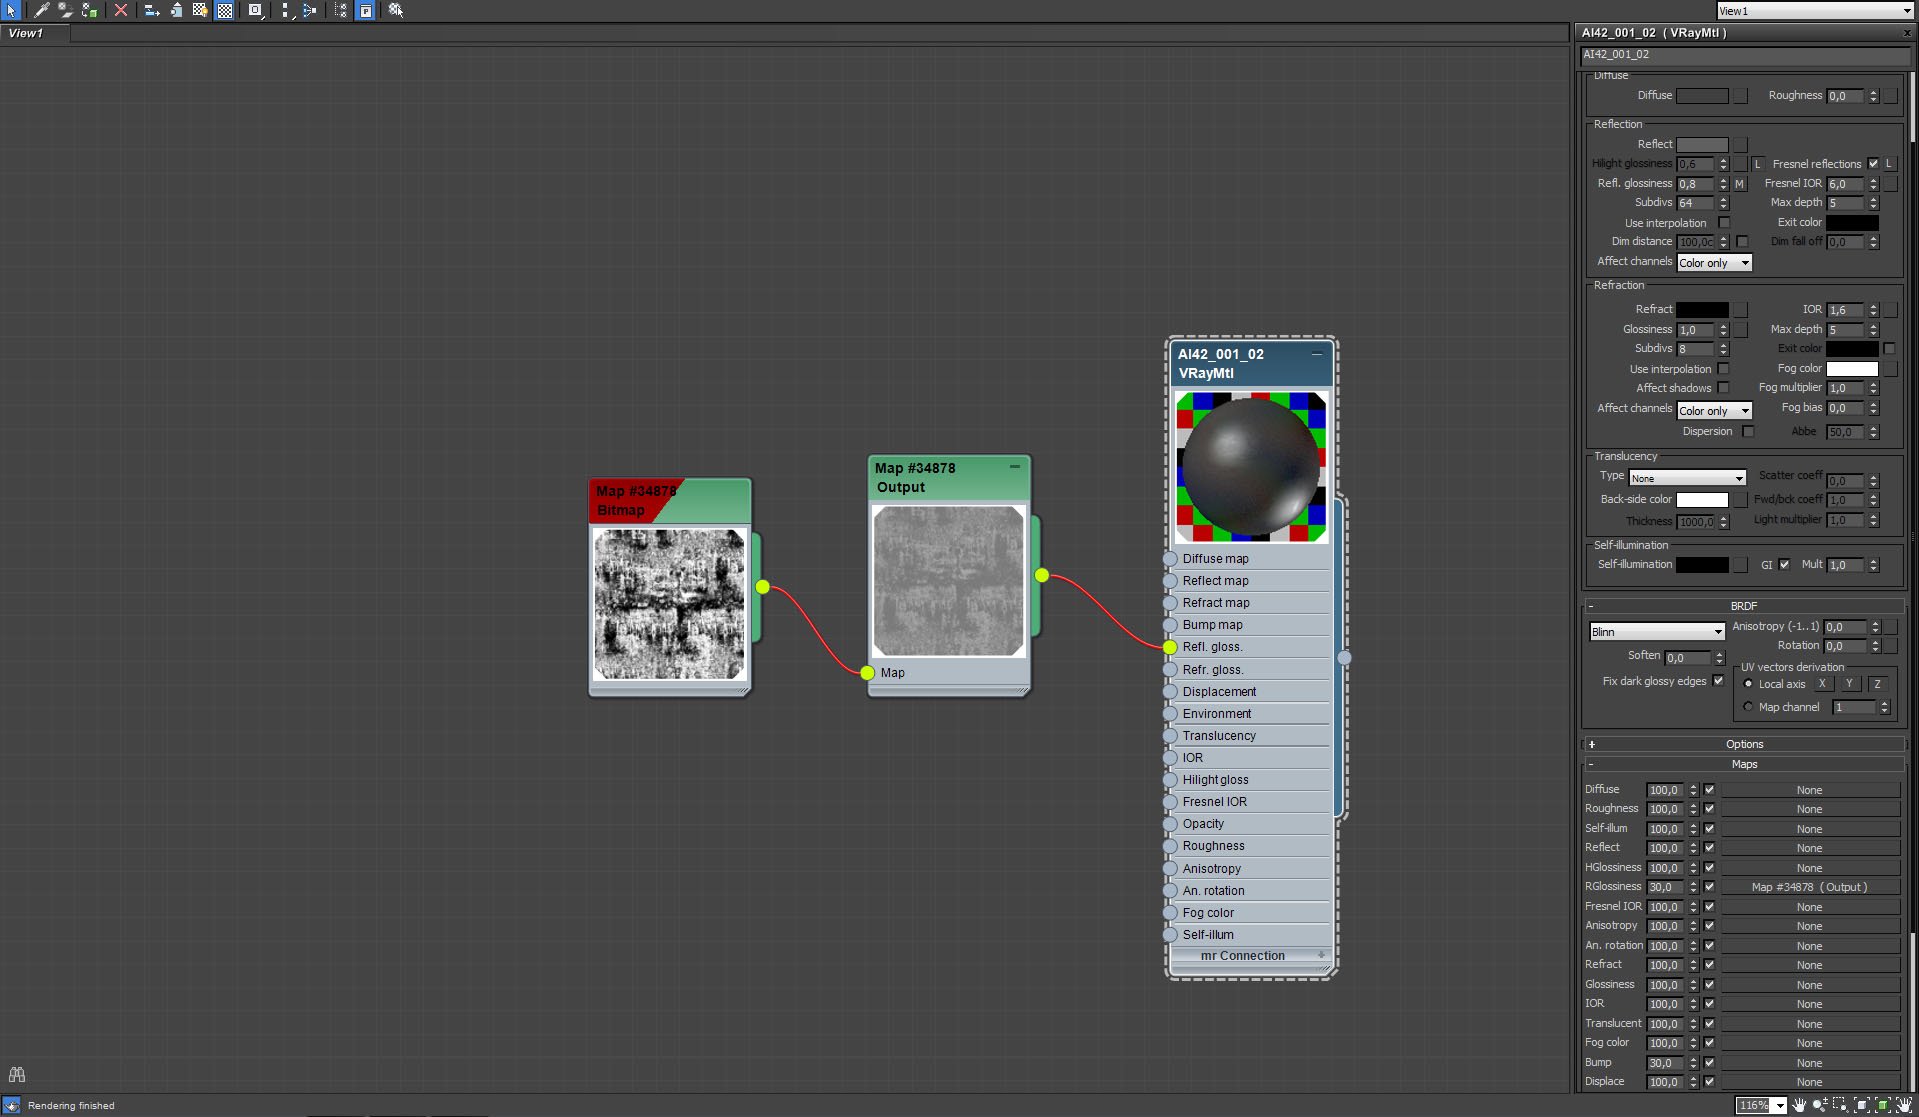
Shelves reflective material.


Click on image to enlargenr_AI42_01B_0004_Layer_27_379.jpg

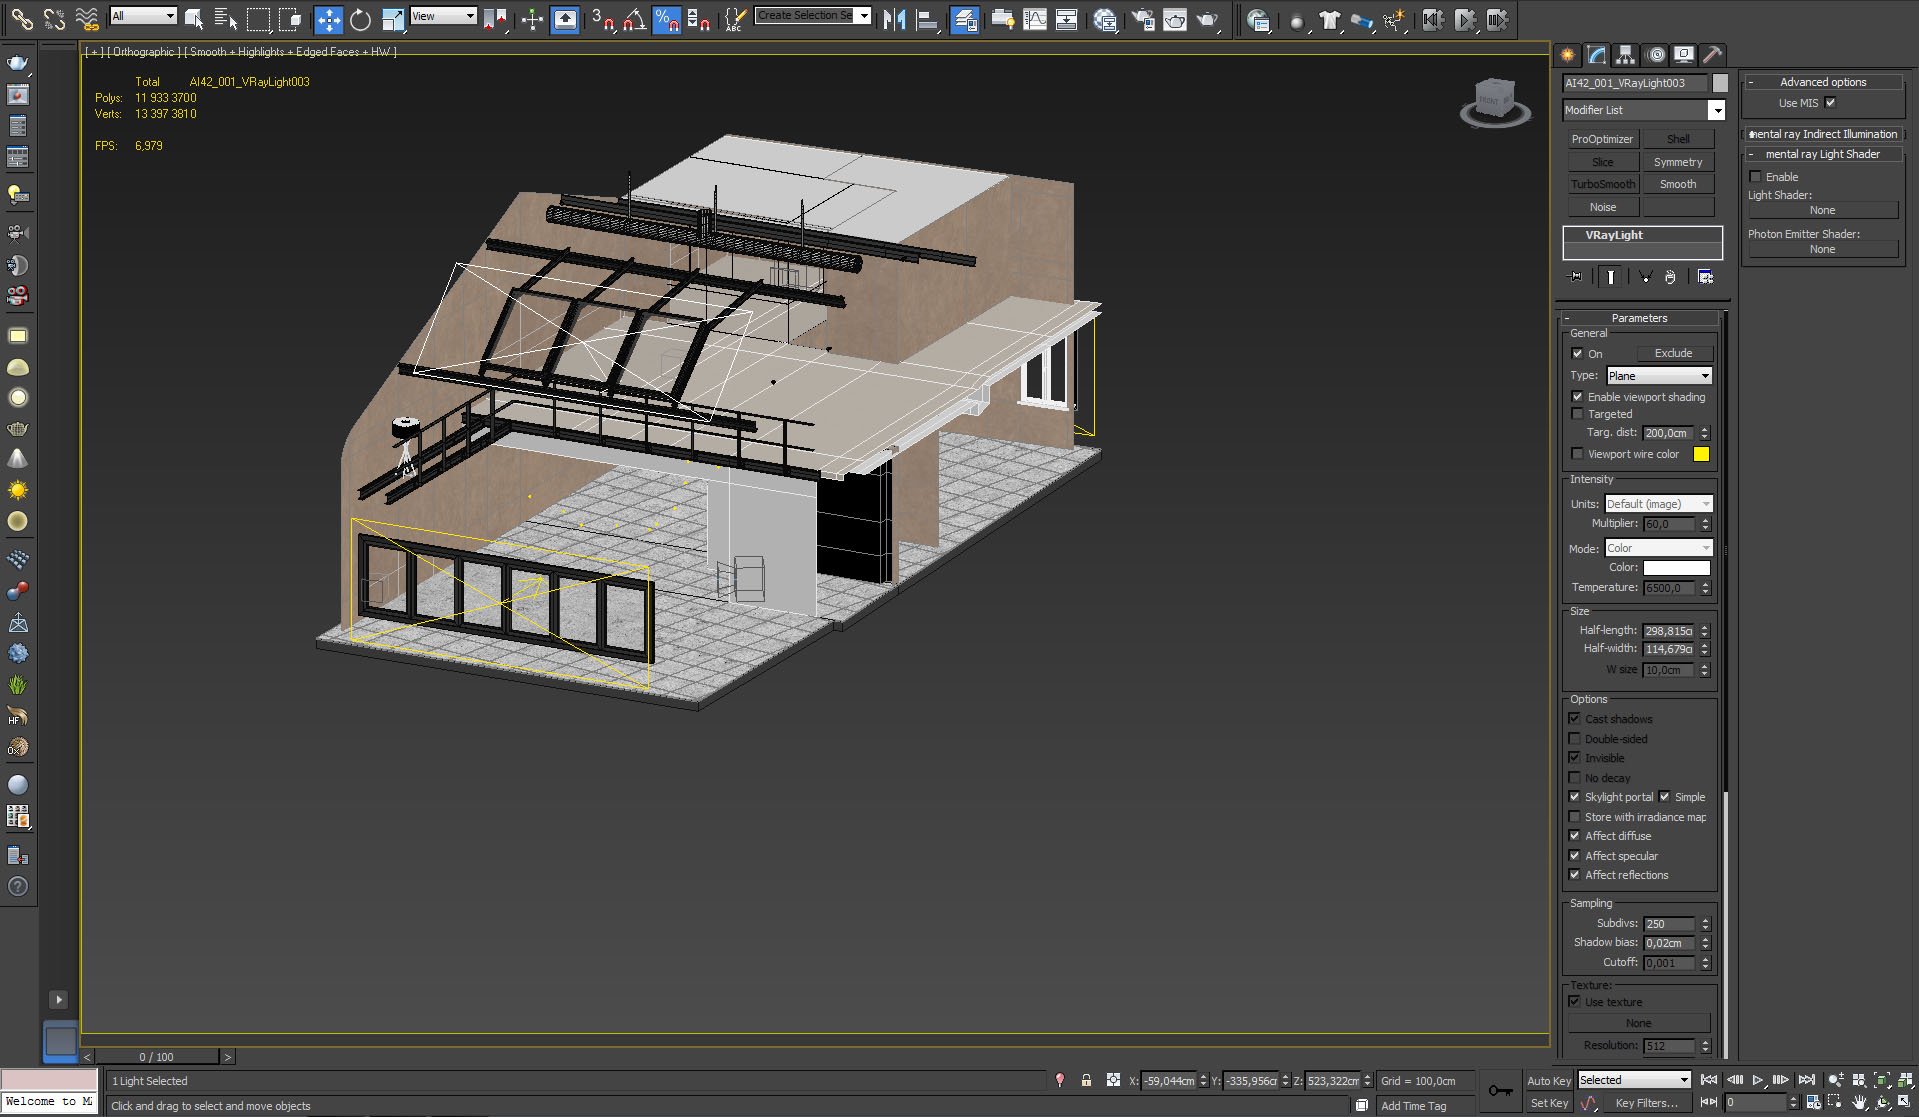
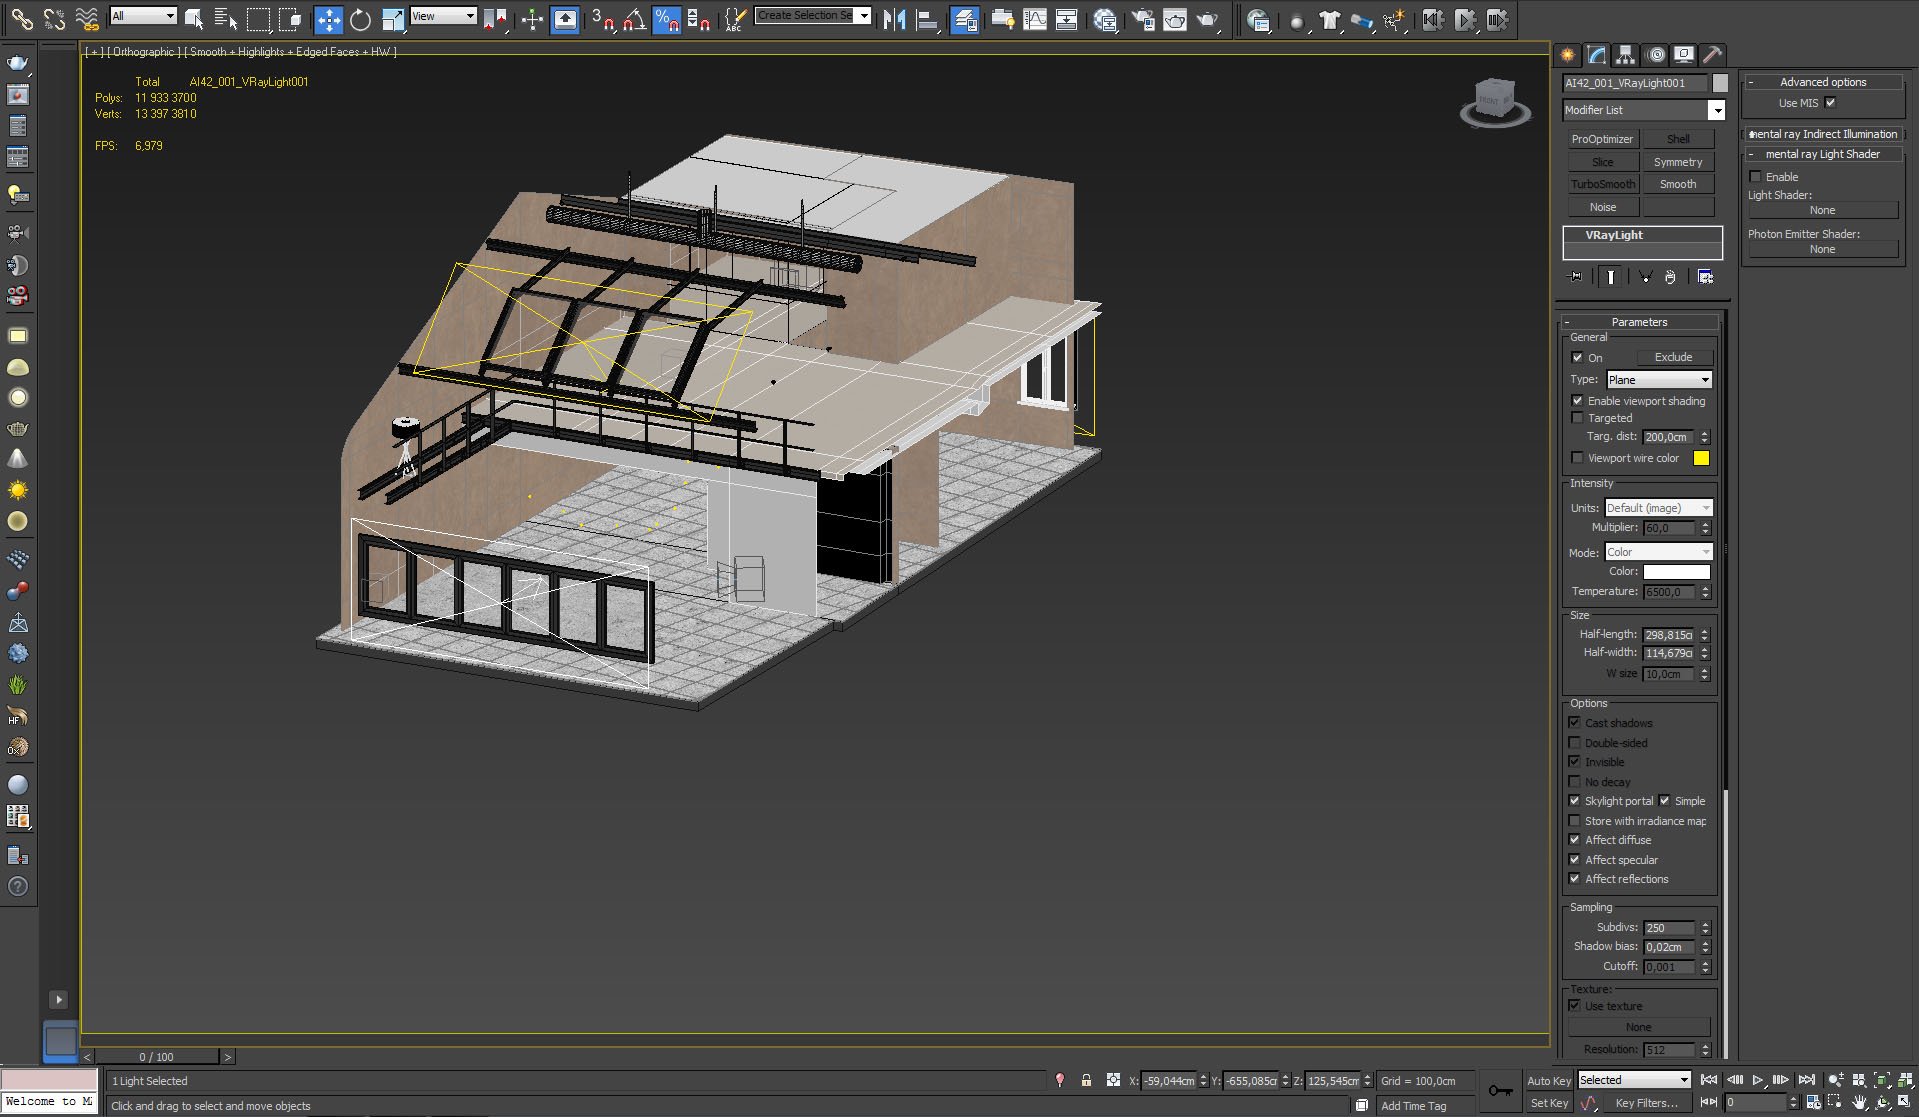
Top light settings - it's skylight portal.


Click on image to enlargenr_AI42_01B_0003_Layer_28_378.jpg

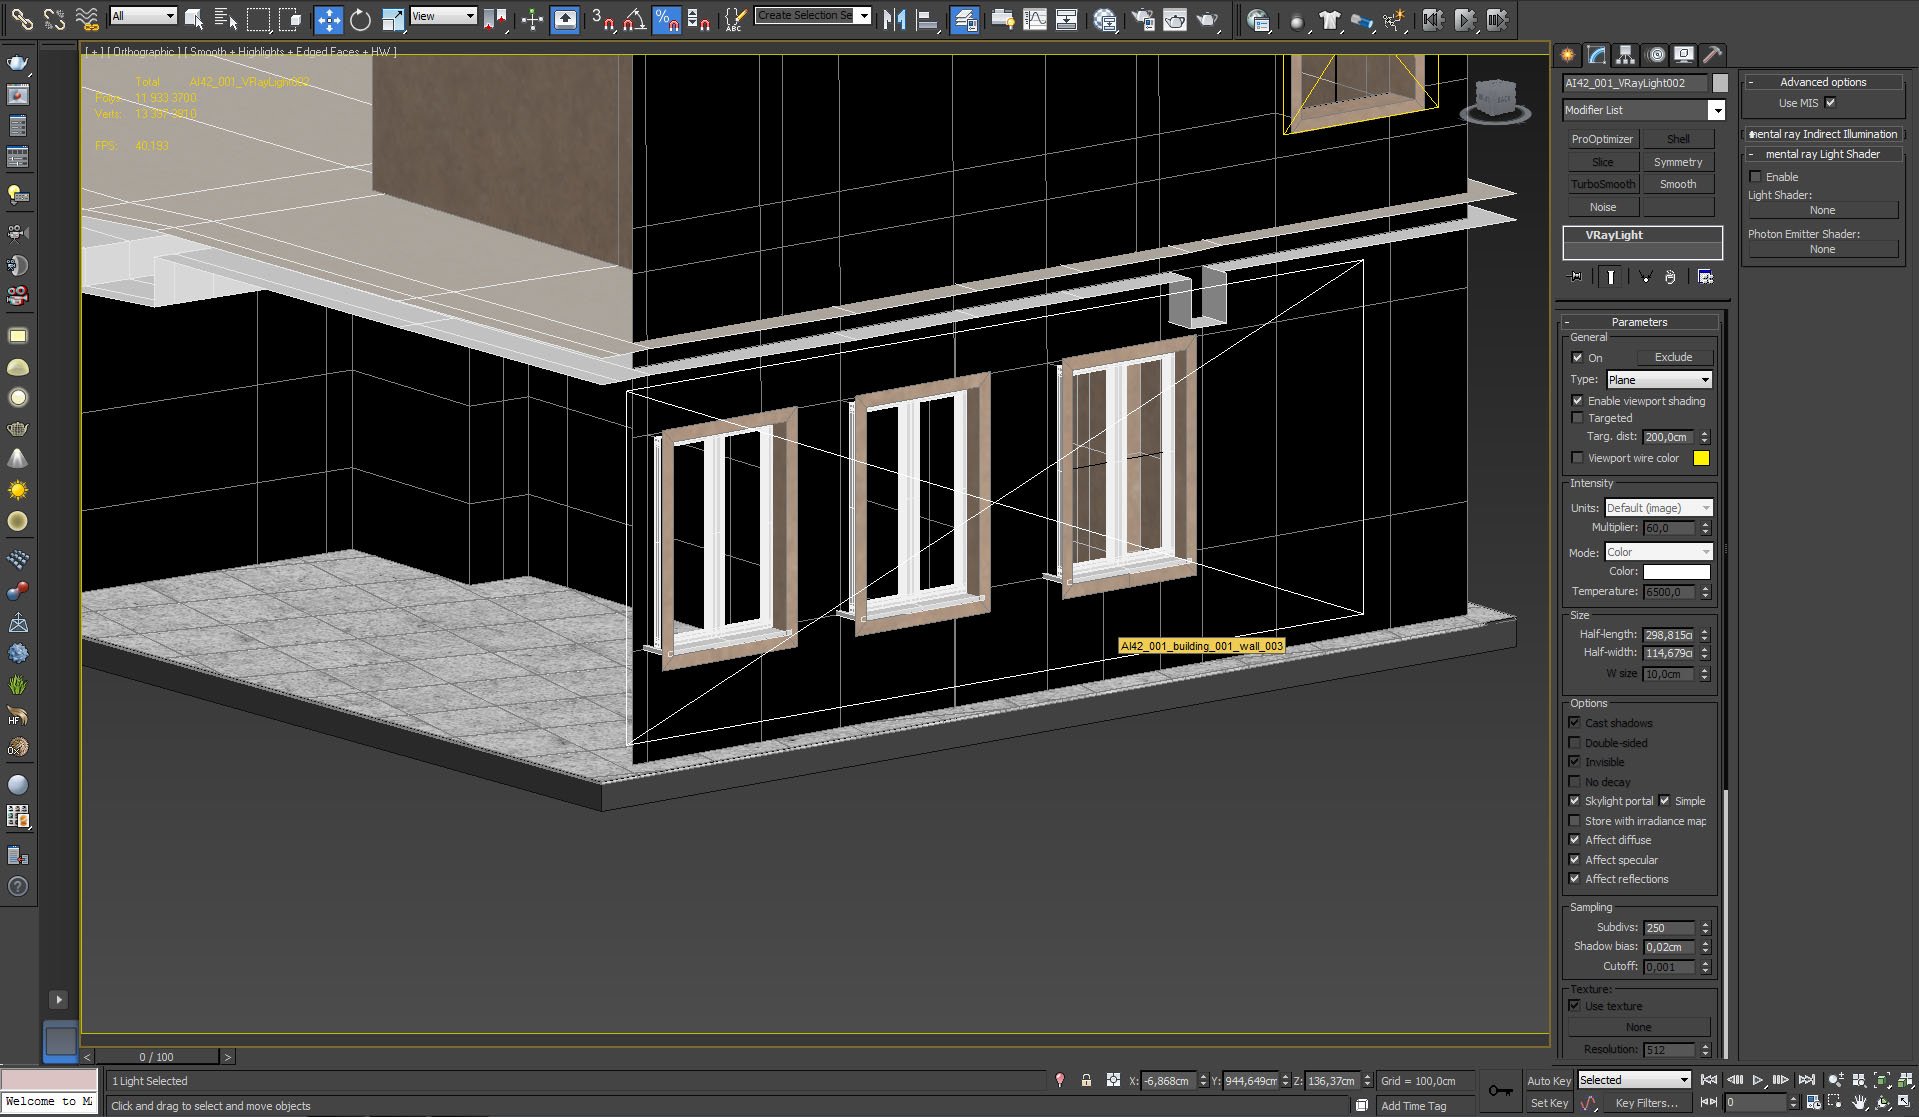
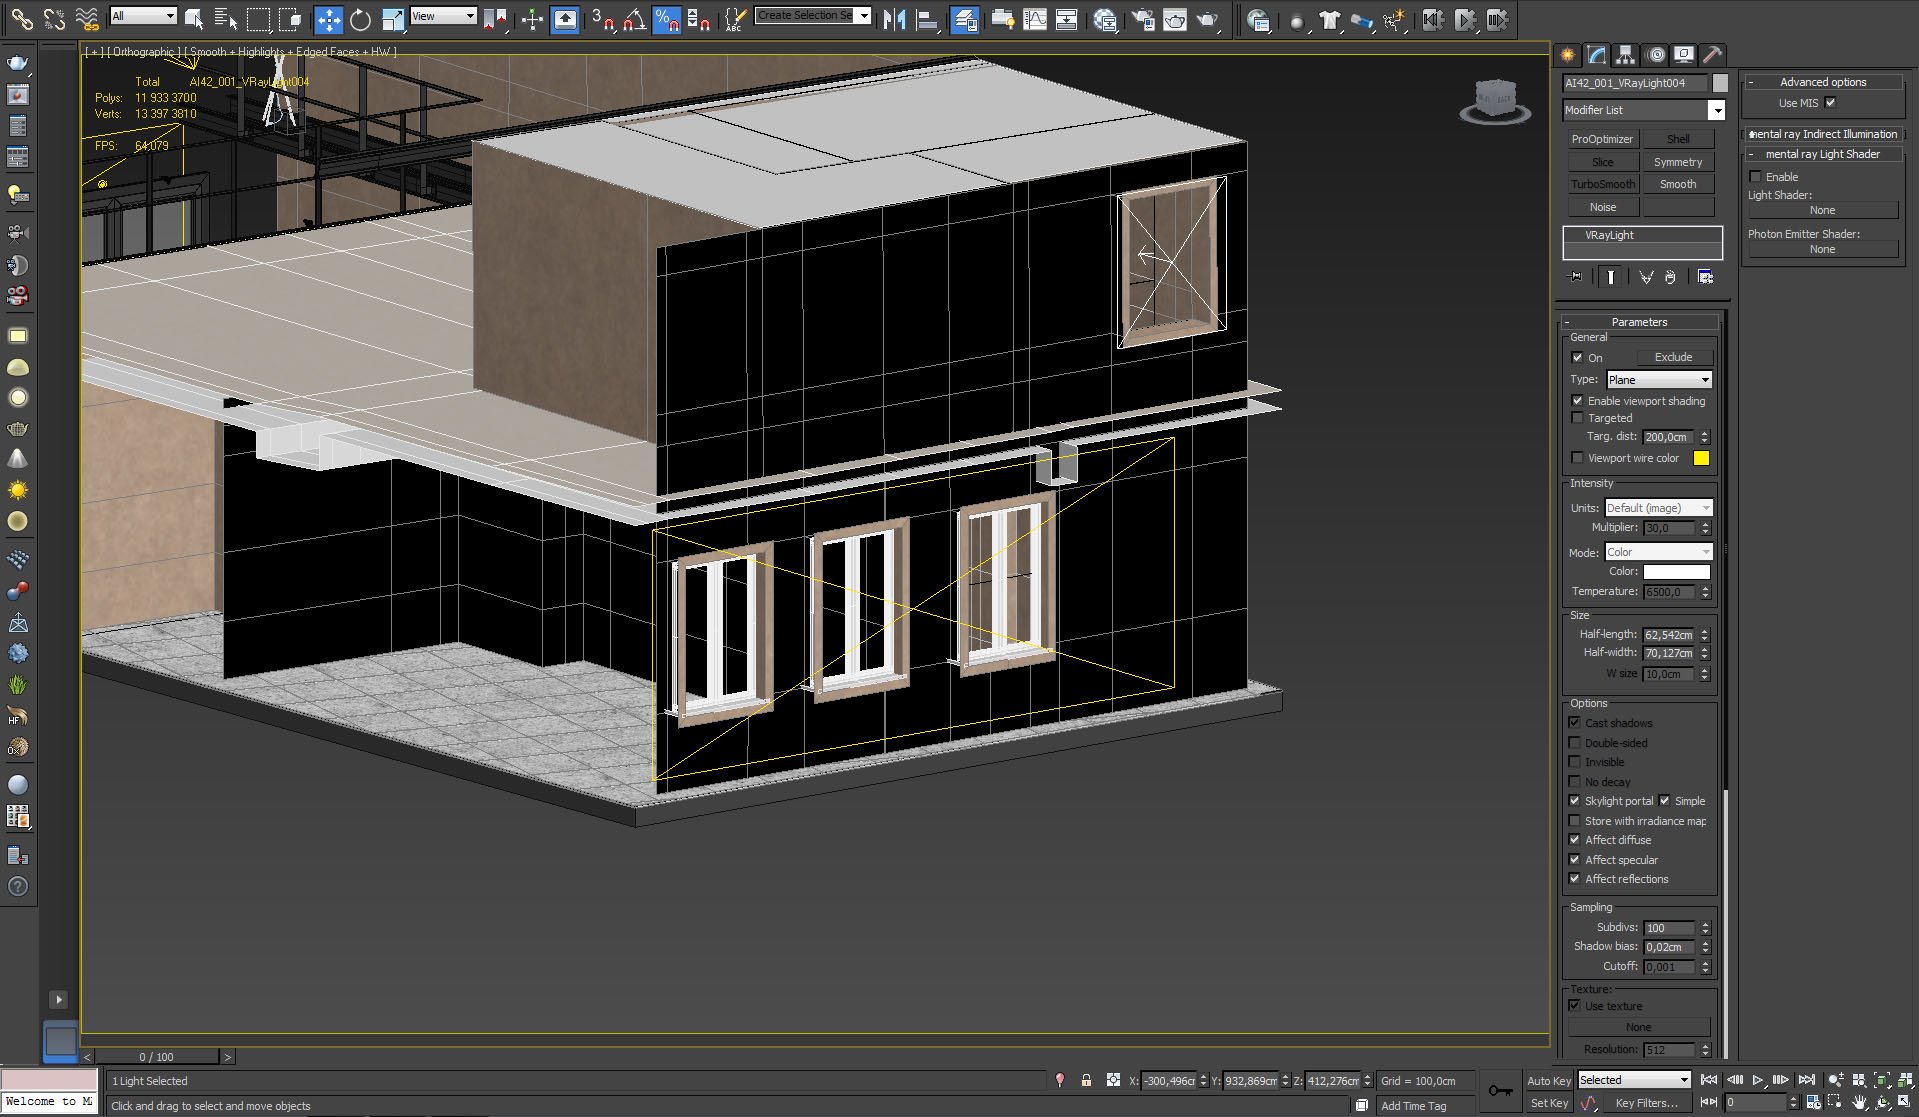
Another skylight portal behind front windows.


Click on image to enlargenr_AI42_01B_0002_Layer_29_377.jpg

Skylight portal behind the building.


Click on image to enlargenr_AI42_01B_0001_Layer_30_376.jpg

And the last skylight portal in small window.


Click on image to enlargenr_AI42_01B_0000_Layer_31_375.jpg

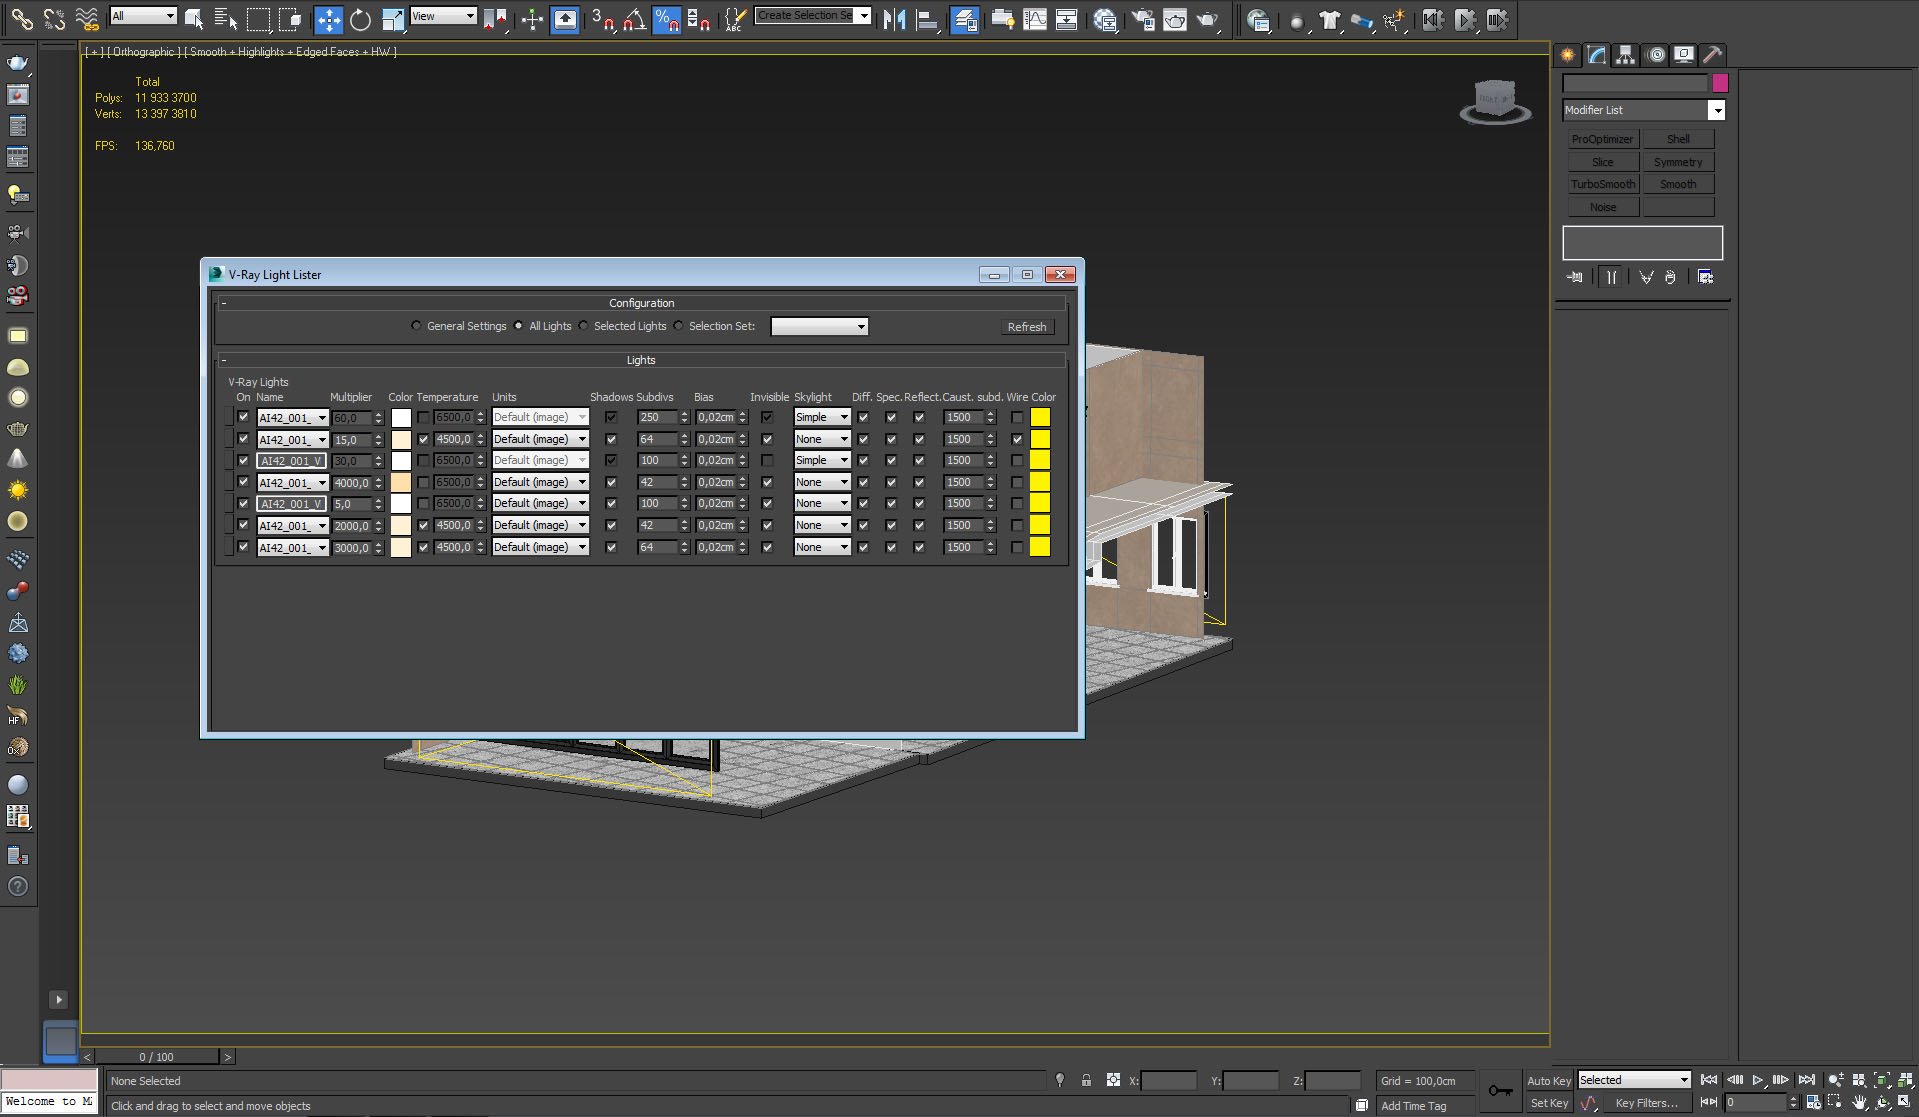
V-ray light lister.


Click on image to enlargesky_1.JPG

Main light source is put in Environment slot - it is VraySky.


Click on image to enlargesky_2.JPG

VraySky is desaturated with color correction node.


Click on image to enlargerender_settings.JPG

Render settings.


Click on image to enlargenr_AI42_001_camera_001_RGB_color_406.jpg

Raw render.


Click on image to enlargenr_Untitled_407.jpg

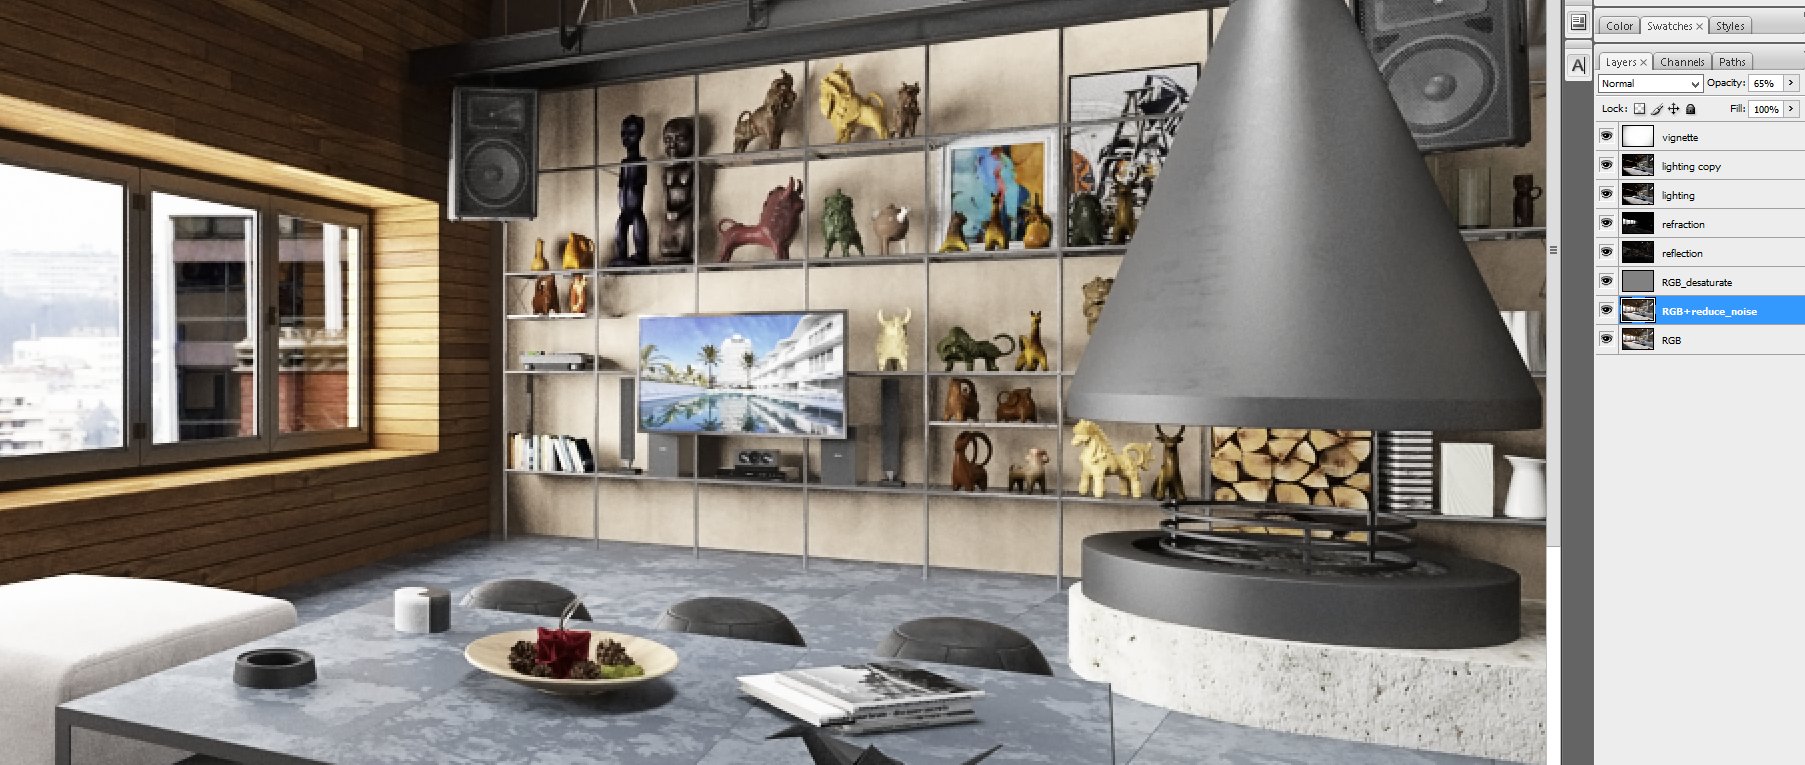
Post-production in Photoshop. At the bottom you can see RGB layer. Next layer softens image a bit, above is desaturation layer with very small desaturation amount. reflection and refraction layers are put in screen mode. First lighting layer (mode: screen) adds brightness to image, second (mode: overlay) increases contrast. At the top we have vignette.


Click on image to enlargenr_AI42_001_camera_001_PP_357.jpg

Final render. Thanks for reading! :)
 
This scene is available in Archinteriors vol. 42 collection.
 
Author: Michał Franczak Editor: Michał Franczak
Tags: wooden loft tip warm
You may also like...
Tip Of The Week: uv channels

Tip Of The Week: uv channels

Learn how to bake maps from one uv channel into other and how to convert lots of maps into one big texture.
×

LEAVE A COMMENT

You need to be logged in to leave a comment. Don't have account? Register now.