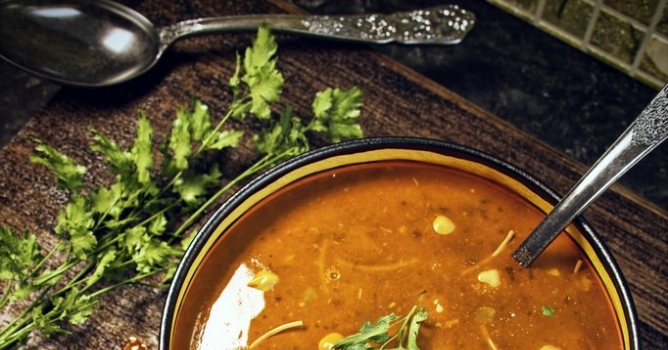
 Hi My name is Chakib Rabia a professional 3d Artist from Morocco, I have more than 11 years experience in CG industry and I would like to share with you a "Making of" my new personal work "Moroccan Food".
Since I like making CGI food scenes in my free time and the fasting month Ramadan is coming soon, I've decided to make a scene of different Moroccan dishes and food that I like to see on my table during this holy month. So I chose the Harira (soup) and Chebbakia (sweets), but in the near future I will make the whole Ramadan's Moroccan table with plenty of different food on it.
For this projet I decided to use the amazing Fstorm GPU renderer and I would recommend all artists to give it a try and enjoy their projects with its great speed and simplicity and, trust me ,you're gonna love it as much as I do.
So let's get started !
Click on image to enlarge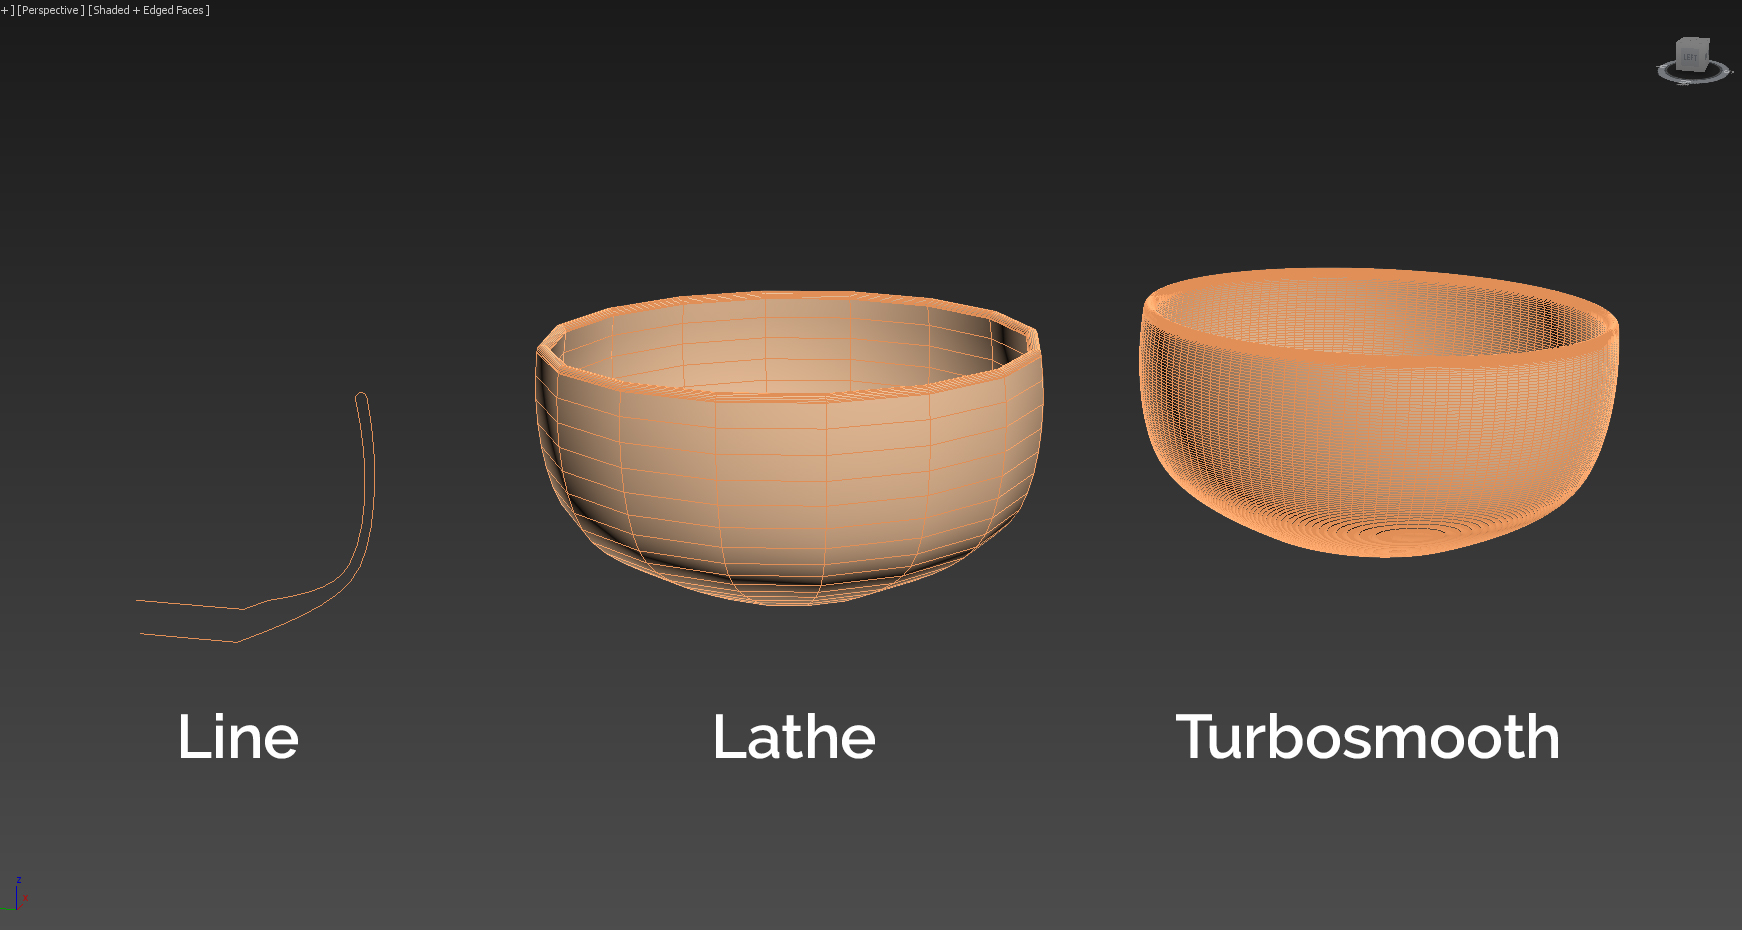
Bowl : I've made a simple line profile and added a Lathe & Turbosmooth modifiers.
Click on image to enlarge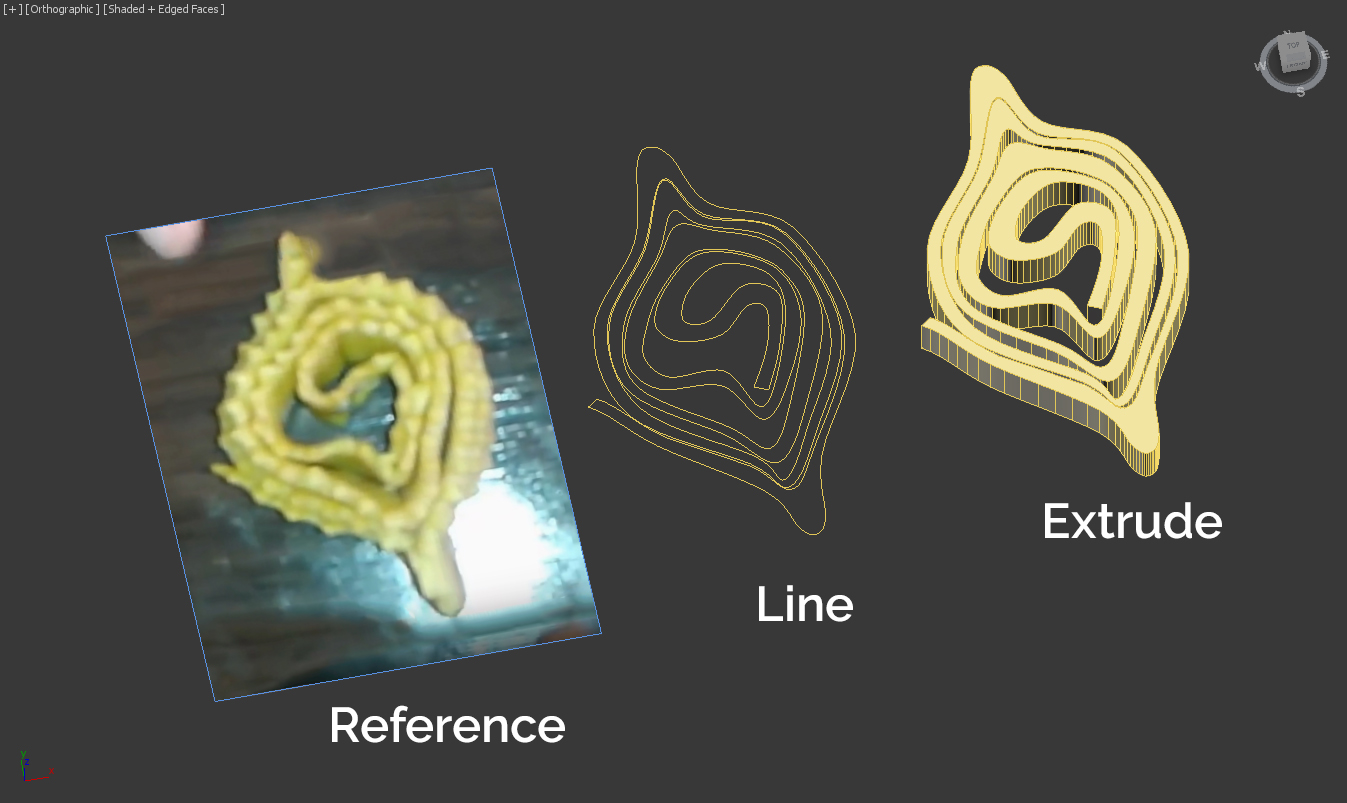
Chebbakia : I found a reference from the net of this Moroccan sweets called "Chebbakia" to trace it and added a simple Extrude modifier to it.
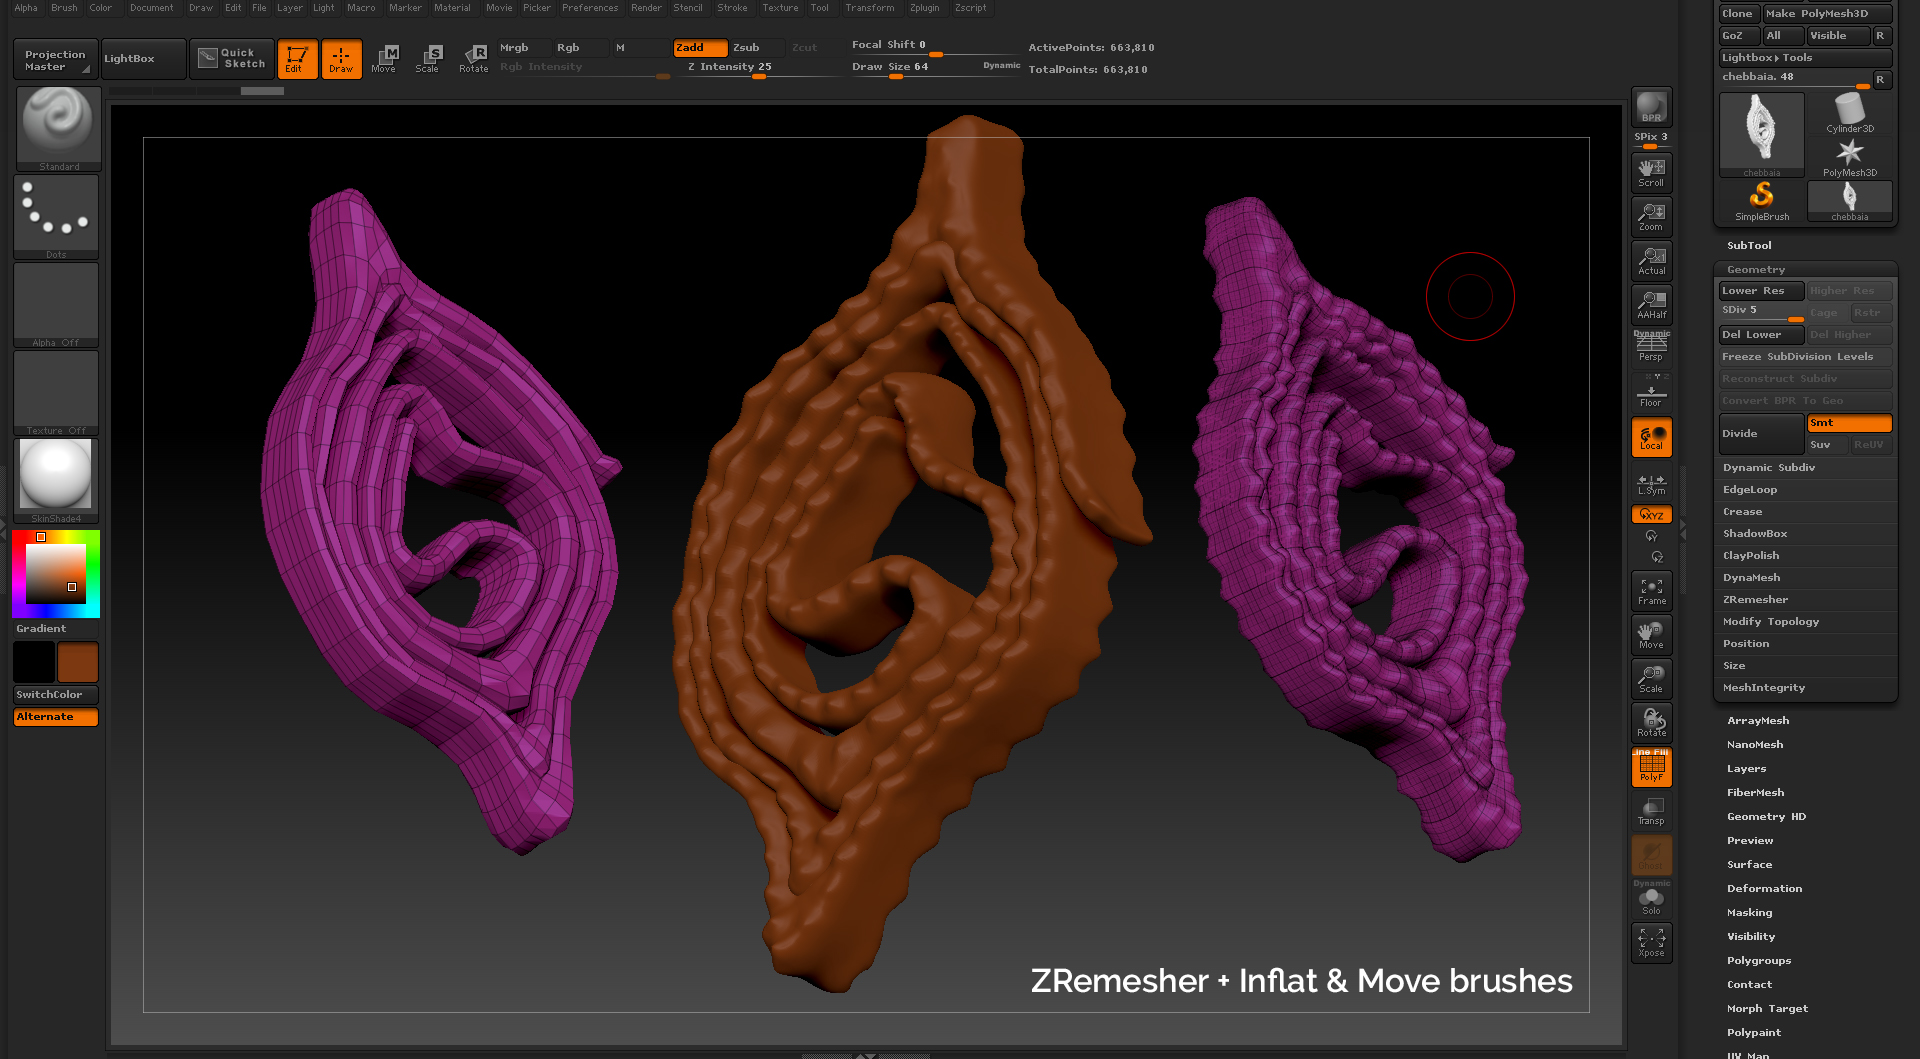
I imported basic shape into Zbrush then sculpted the details to make it more organic.
Click on image to enlarge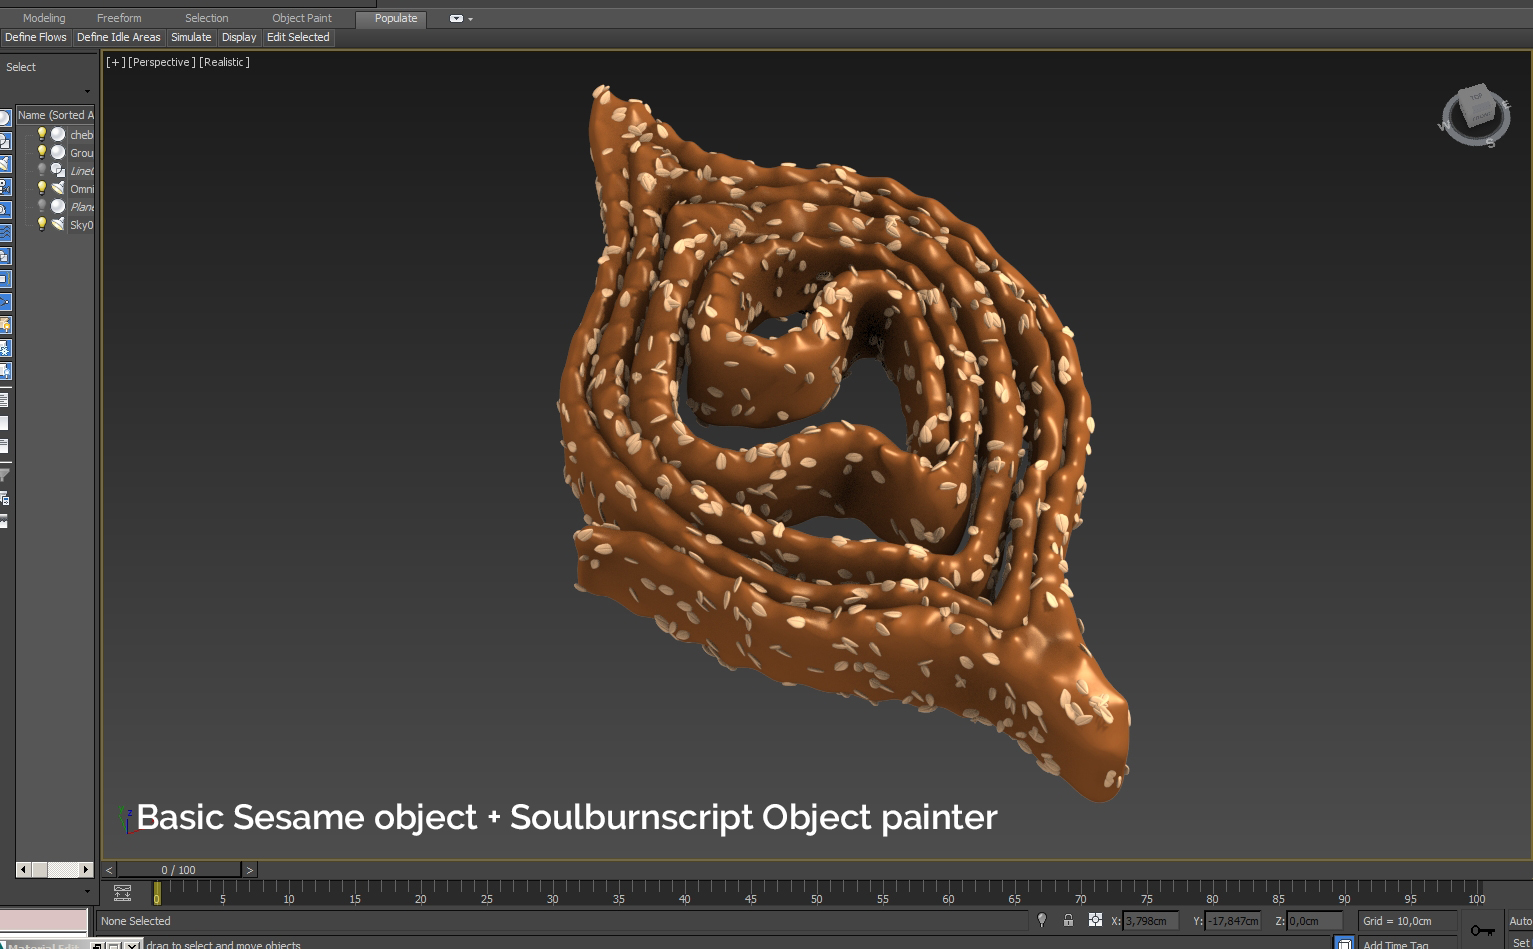
Chebbakia with Sesame : I made a very basic sesame shape in 3ds max and used the great Soulburn script - Object Painter to scatter it on the sweets ( you can use any scatter tool you want ).
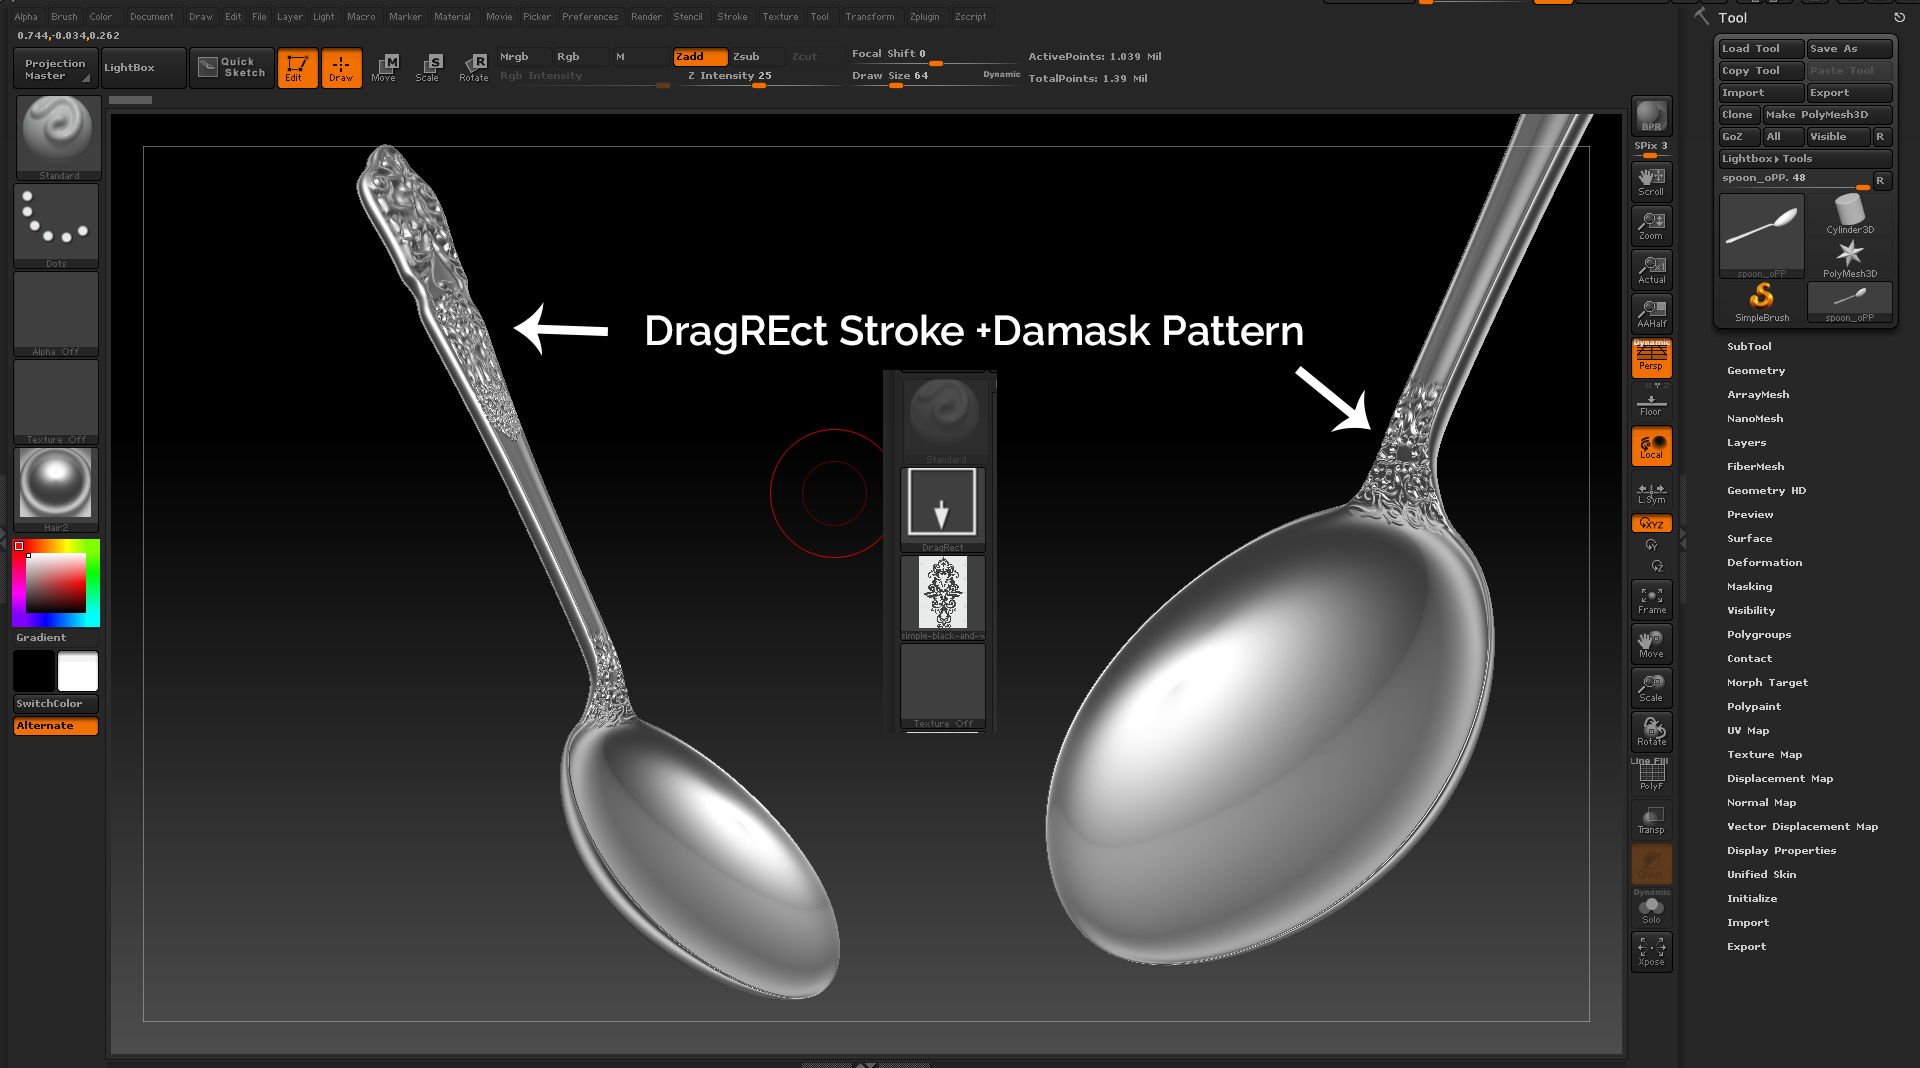
Spoon : I used a simple free spoon model from the net and heavily modified it in Max using FFD modifiers and Zbrush using the Move brush. Then I sculpted the details using a simple Damask pattern (You can find many online).
Click on image to enlarge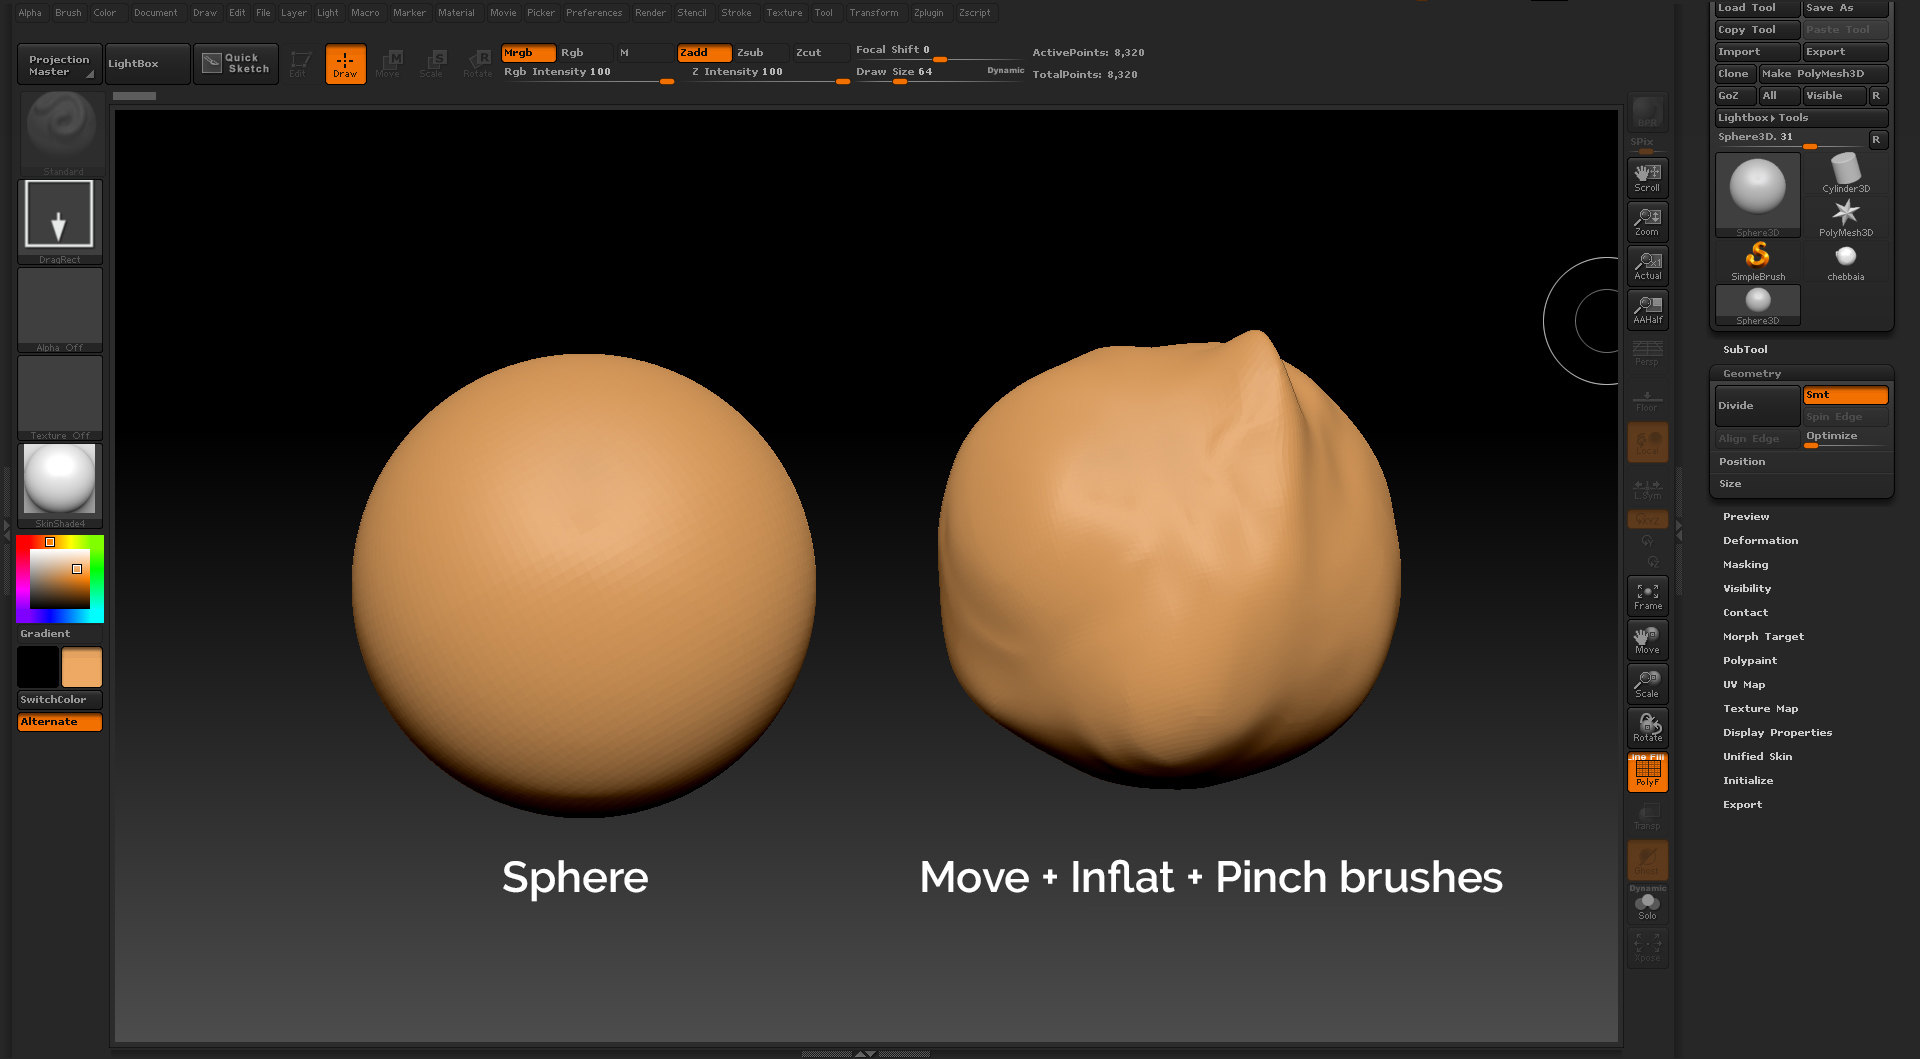
Chickpeas : For this one I used a Zbrush sphere and sculpted this basic shape using Move, Inflat & Pinch brushes and kept it really simple.
Click on image to enlarge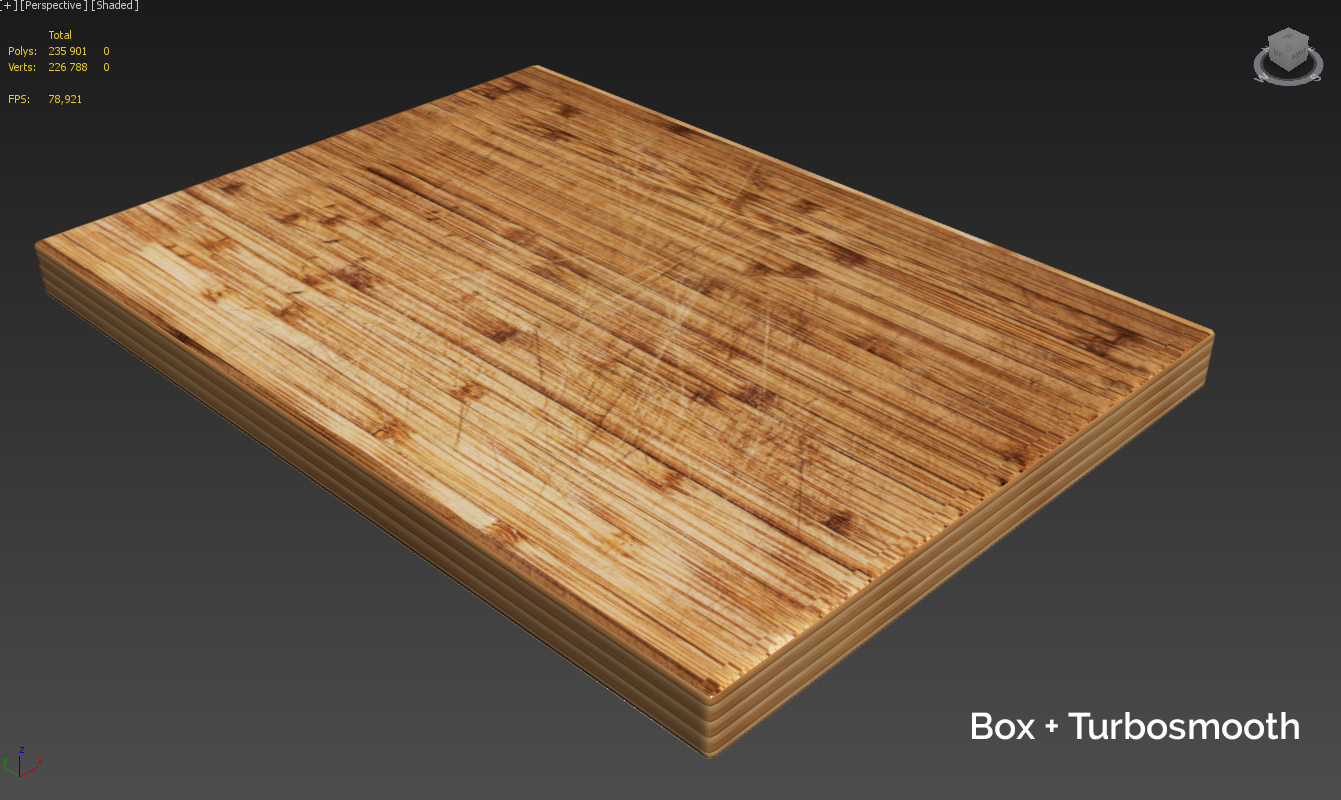
Wooden cutting board: I wanted to keep it simple, so I used simple box with a Turbosmooth modifier to smooth the edges.
Click on image to enlarge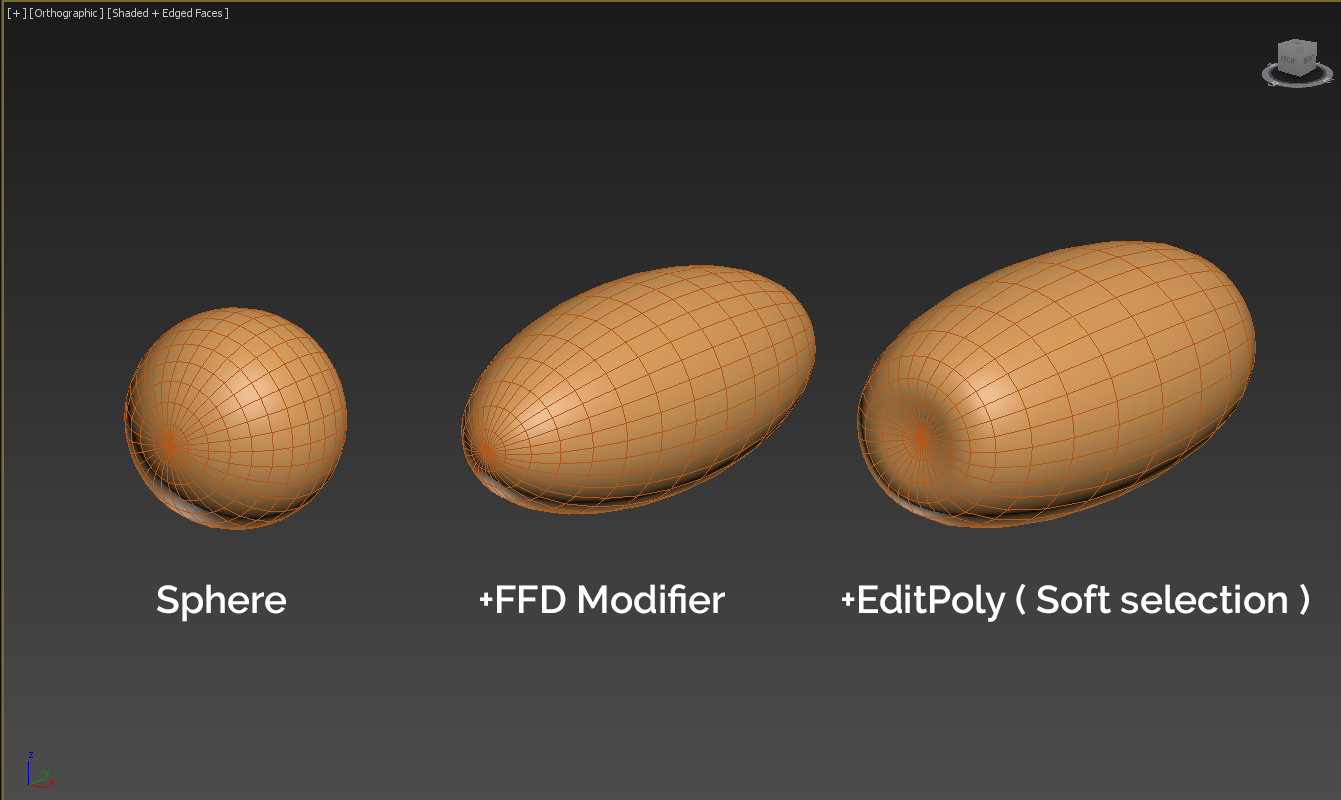
Date : I used a simple sphere object. I added an FFD modifier to reshape it a little bit, then added an EditPoly modifier to move some vertices using Soft selection.
Click on image to enlarge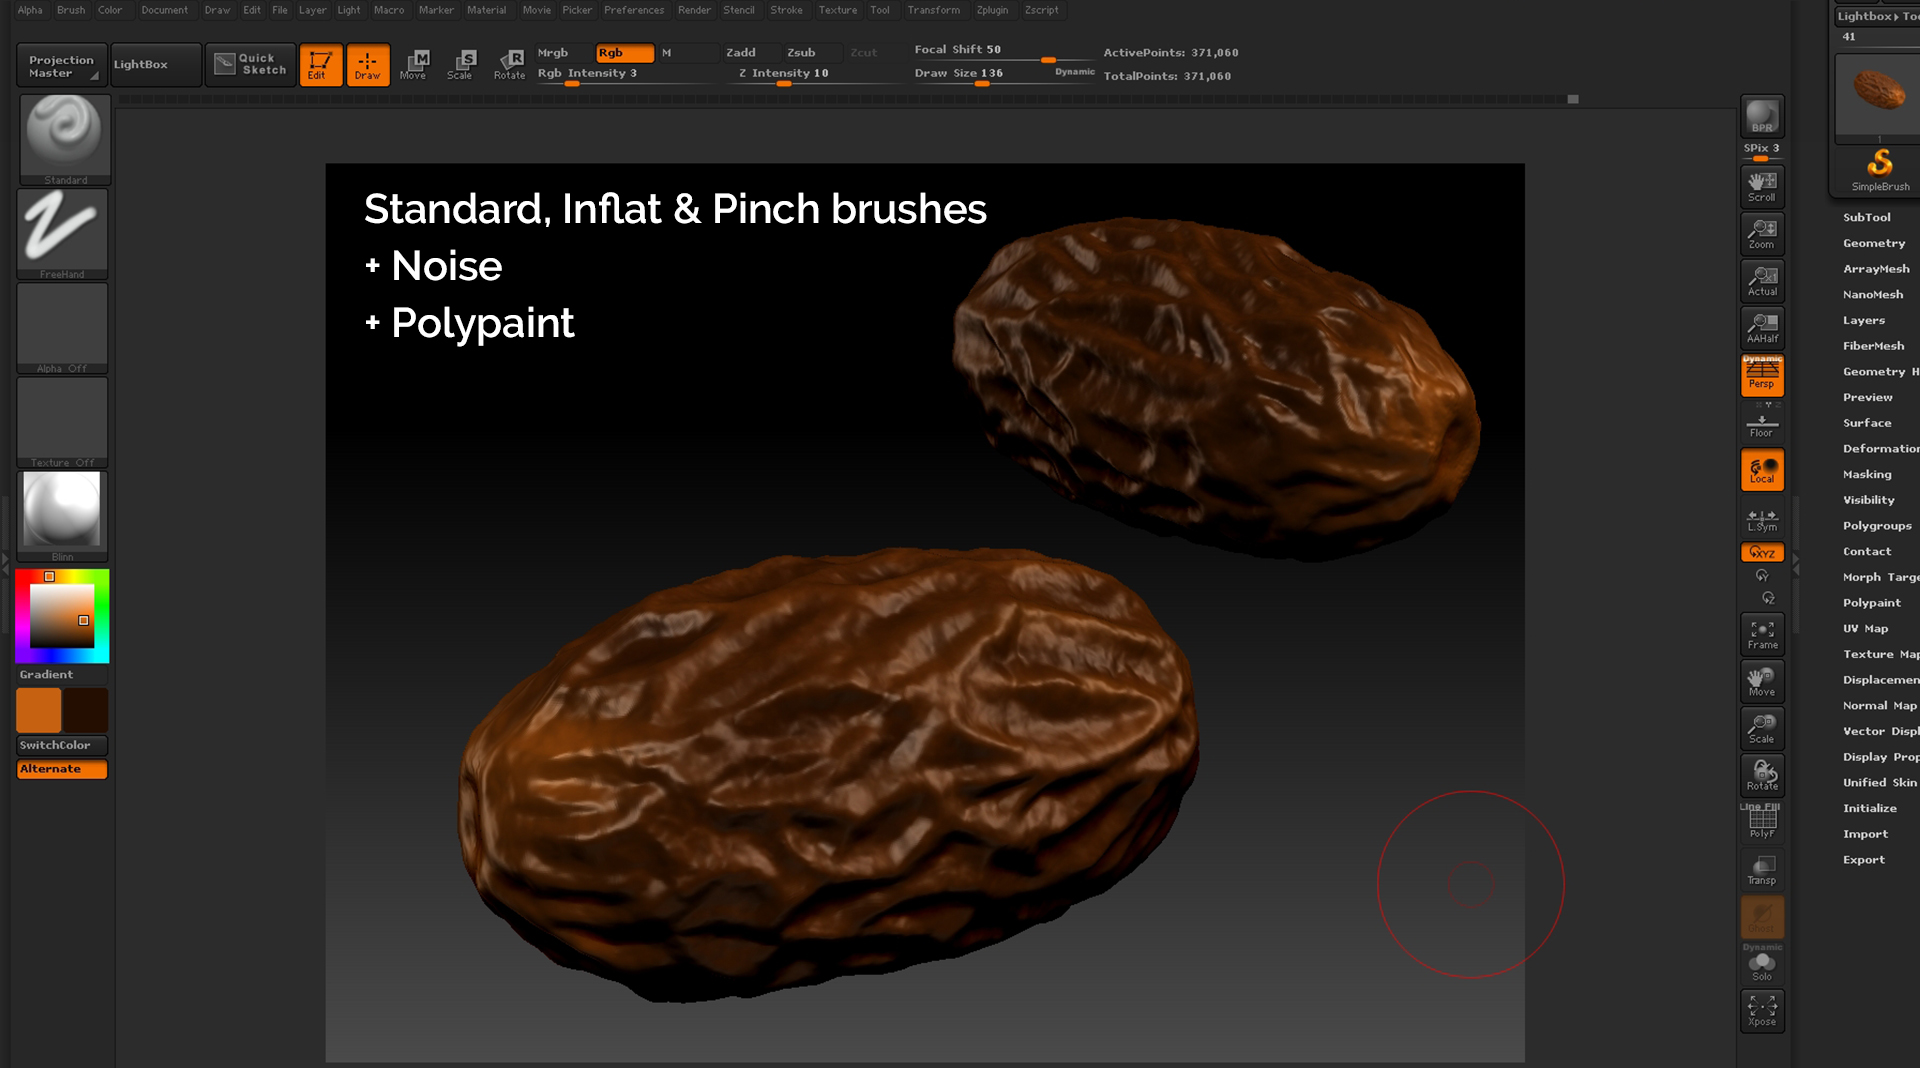
Date Zbrush : I've exported the basic shape in Zbrush, sculpted the details using Noise surface + Standard, Inflat & Pinch brushes, then painted the texture using Polypaint.
Click on image to enlarge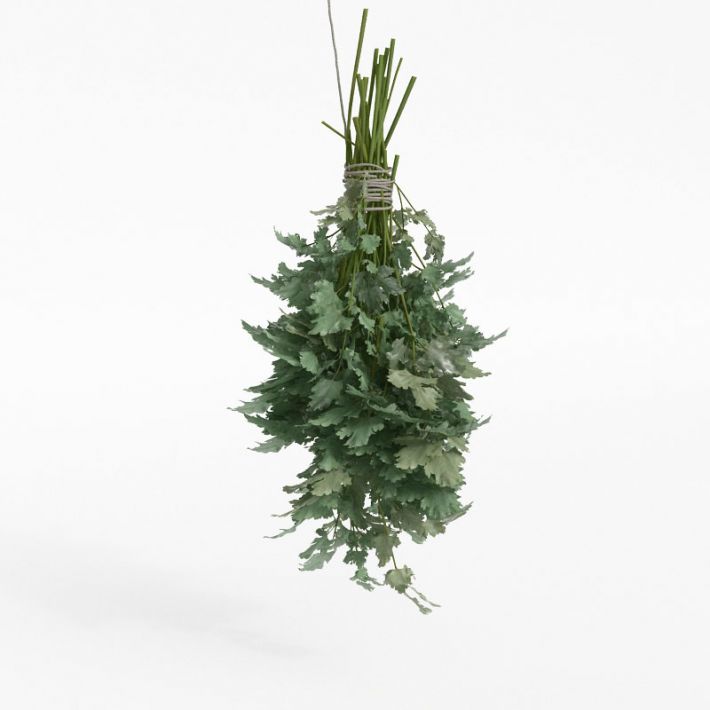
Parsley (
Evermotion 130 model 38) : I've used this great parsley model from Evermotion volume 130 to add the final touch for the soup like showned in references.
Click on image to enlarge
Bowl Painting texture : With Polypaint actived, I've used a Standard brush to paint manually the texture and try to make it close enough like the reference below.
Click on image to enlarge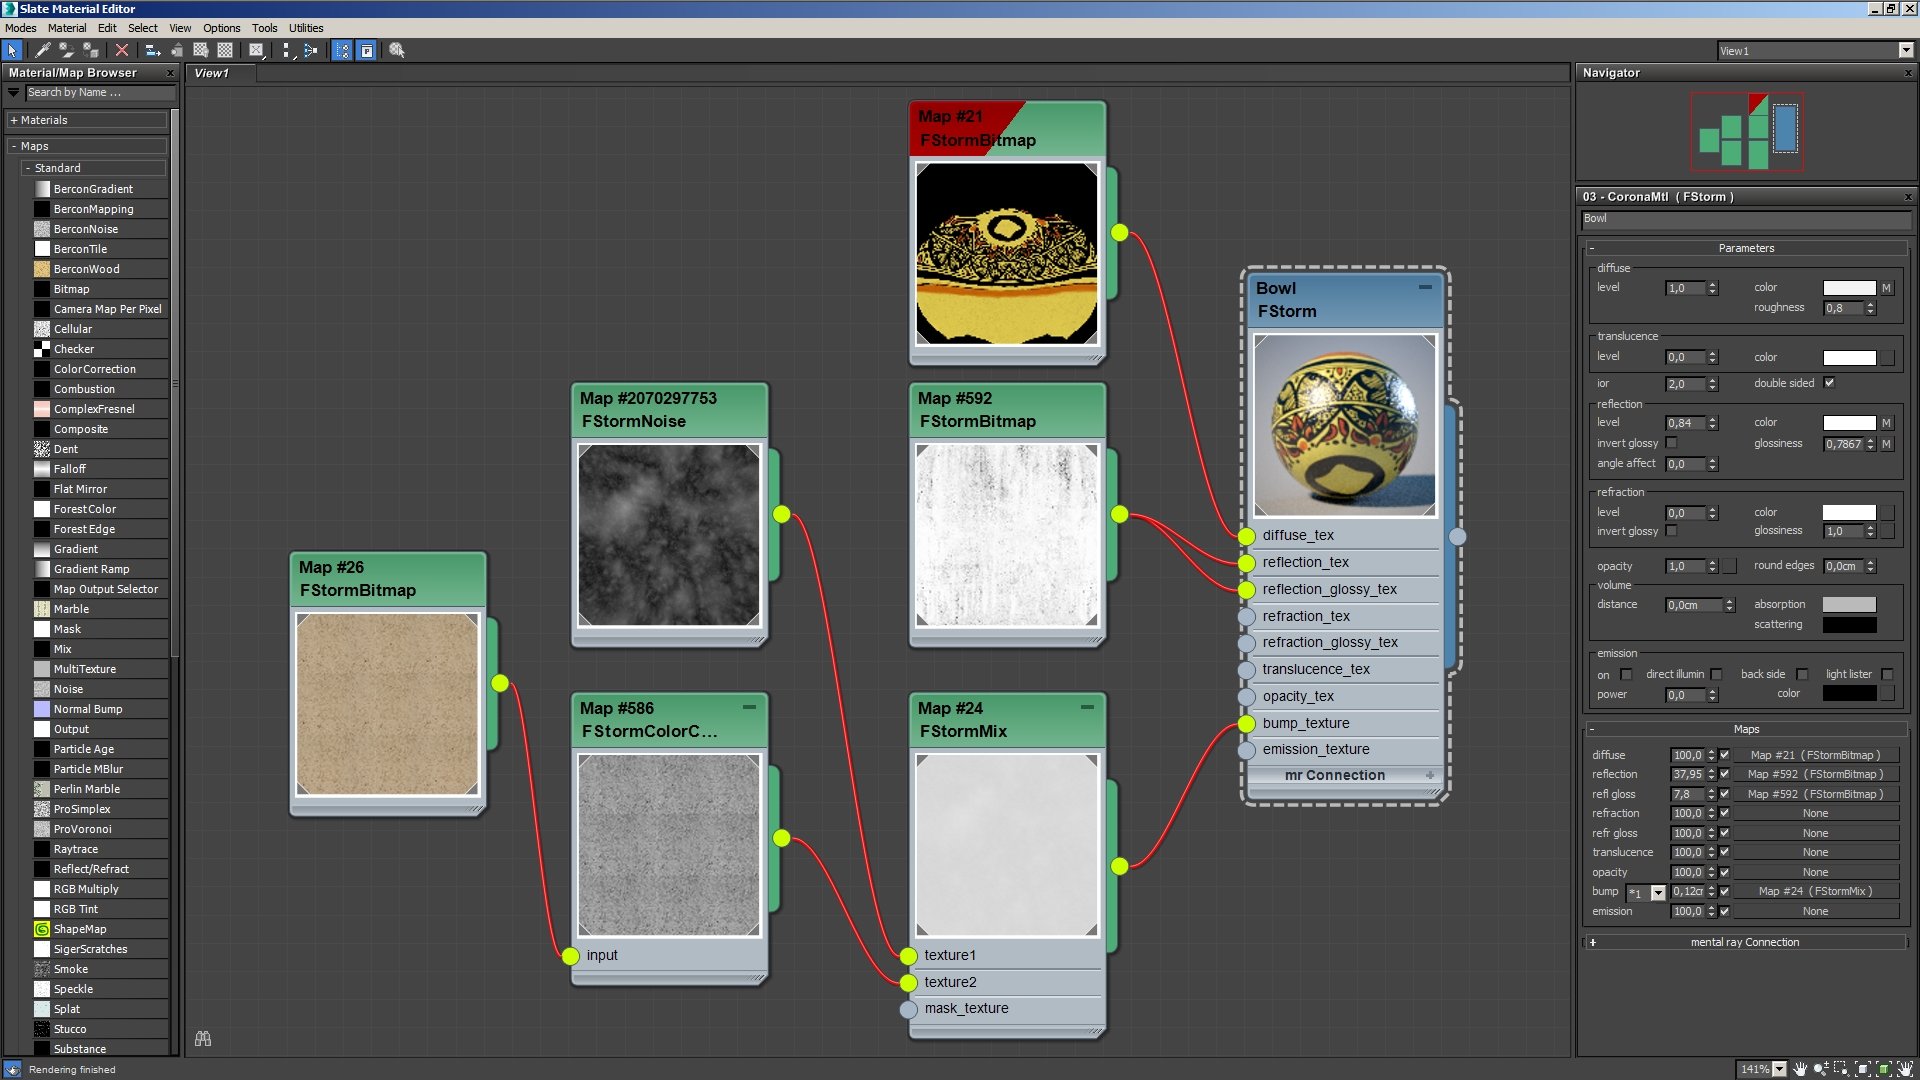
Bowl mat : The Bowl material.
Click on image to enlarge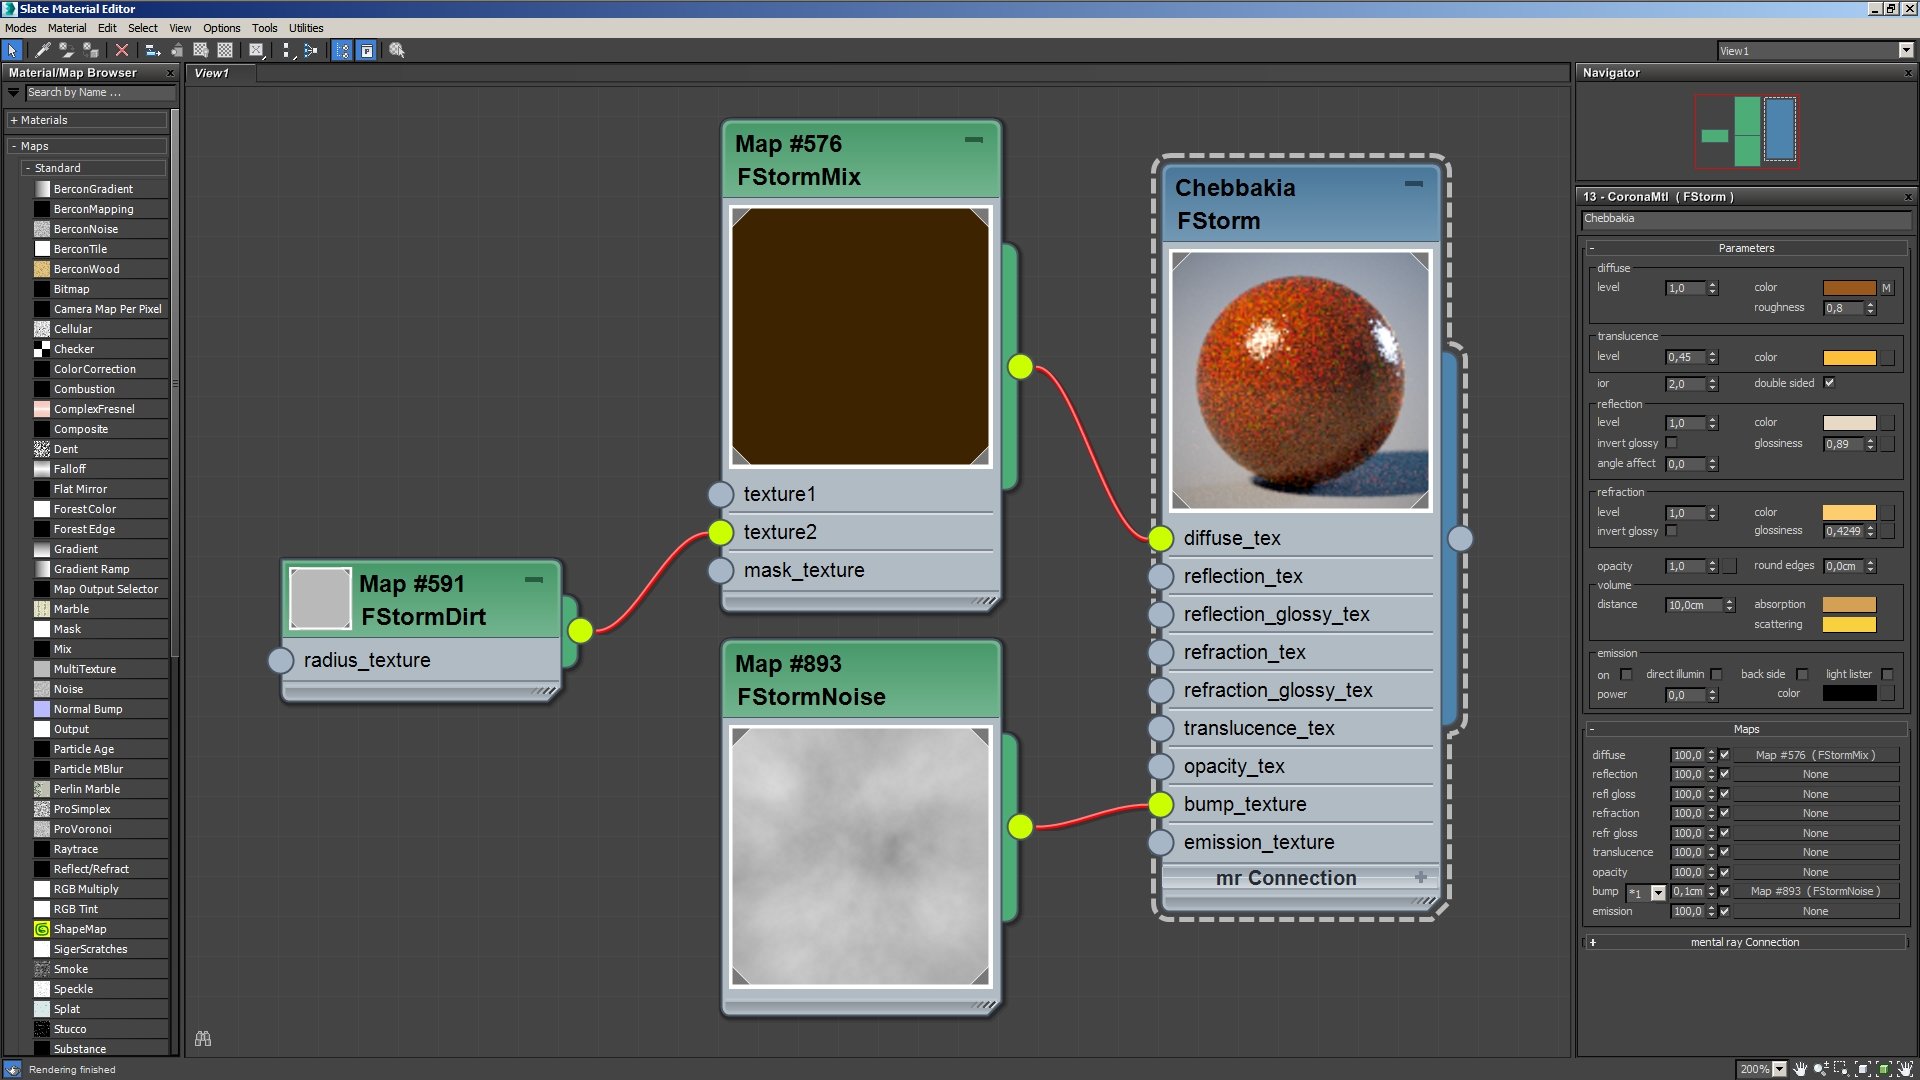
Chebbakia (sweets) mat : The Sweets material.
Click on image to enlarge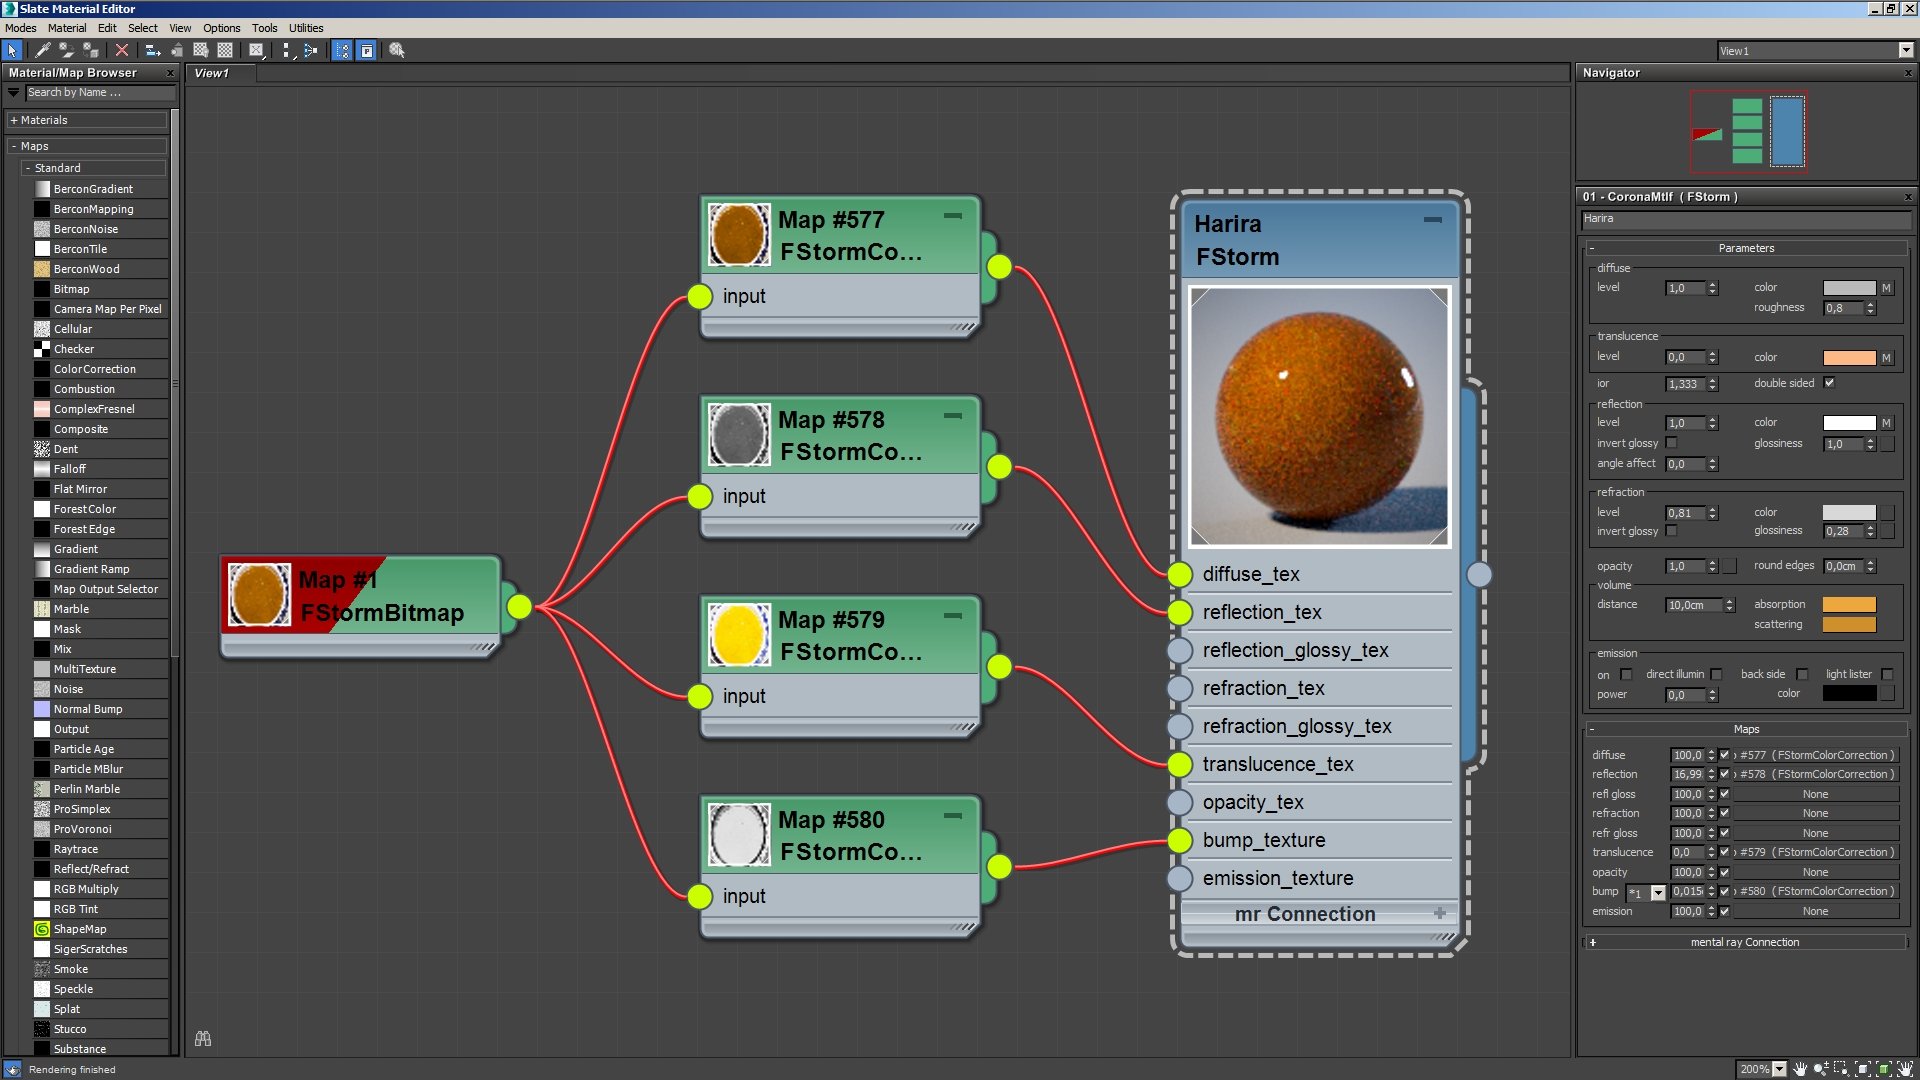
Harira (soup) mat : The Harira soup material.
Click on image to enlarge
Spoon mat : For the spoon I've used a simple scratches texture in bump slot and a dirt map in glossiness. This way I achieved old silver metal look.
Click on image to enlarge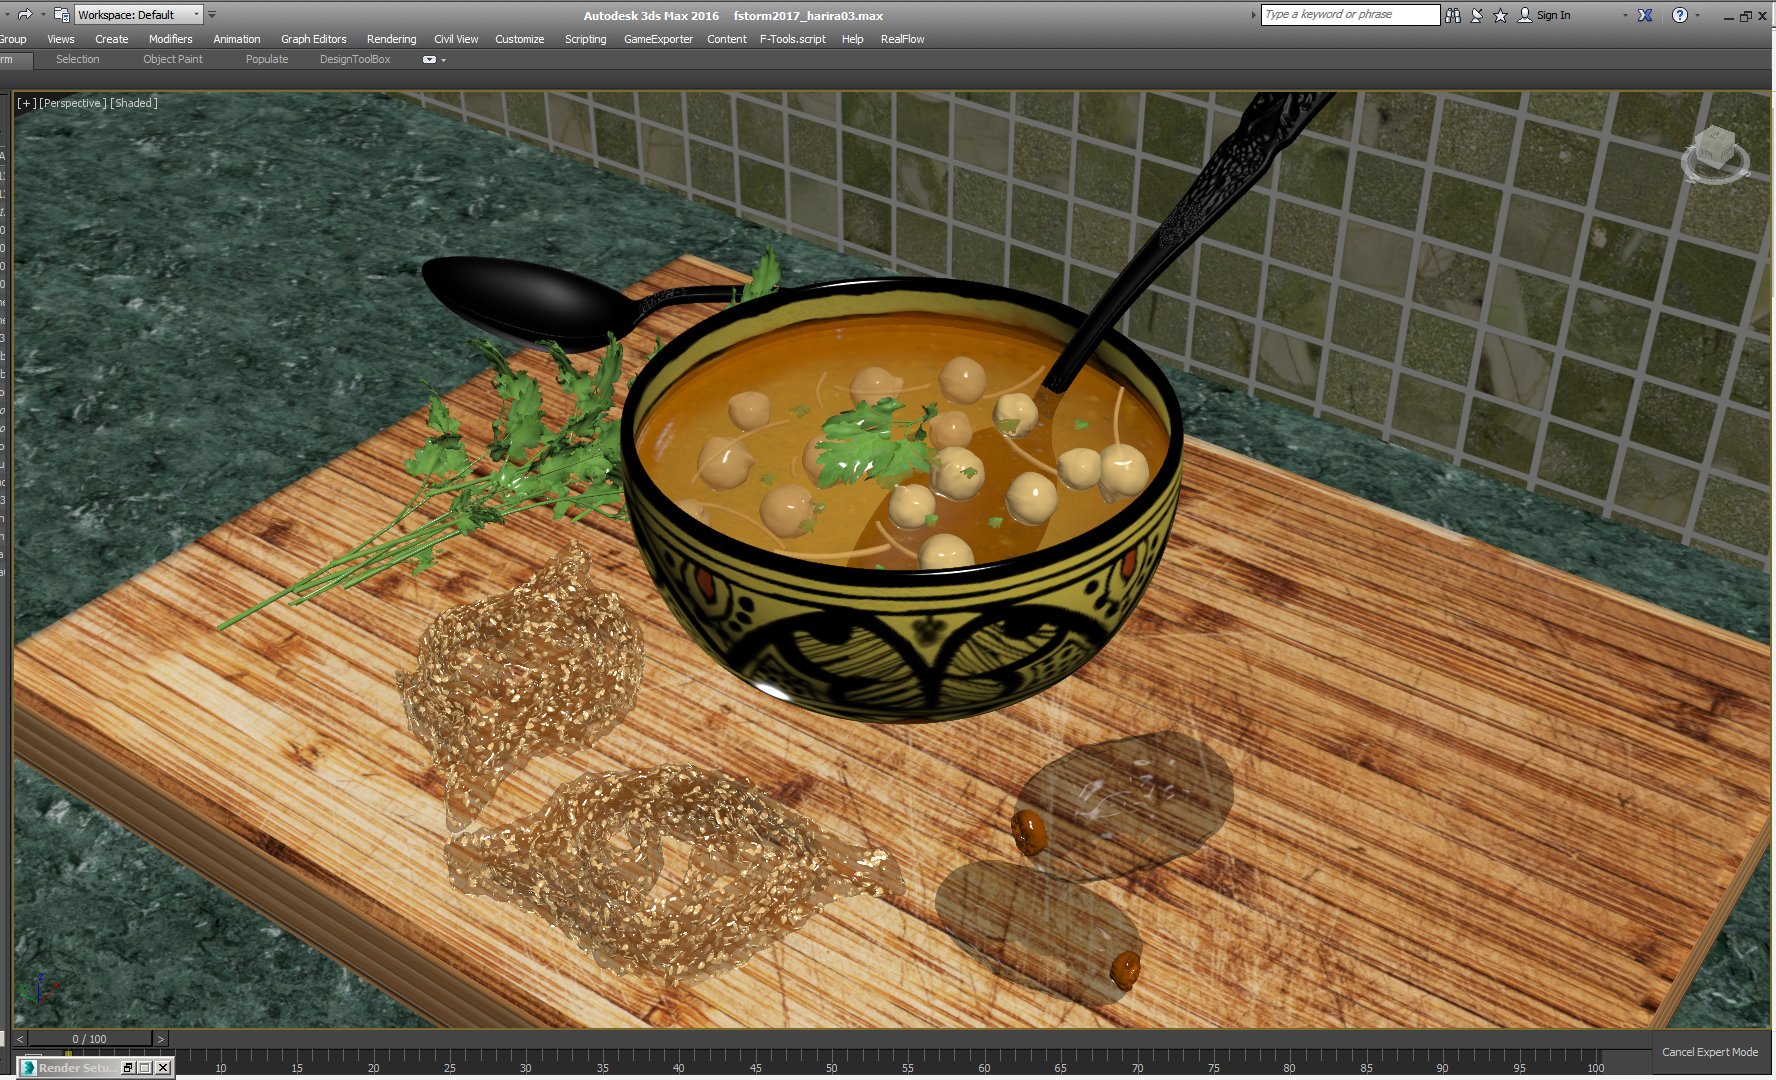
Viewport : A view of the scene with the textures.
Click on image to enlarge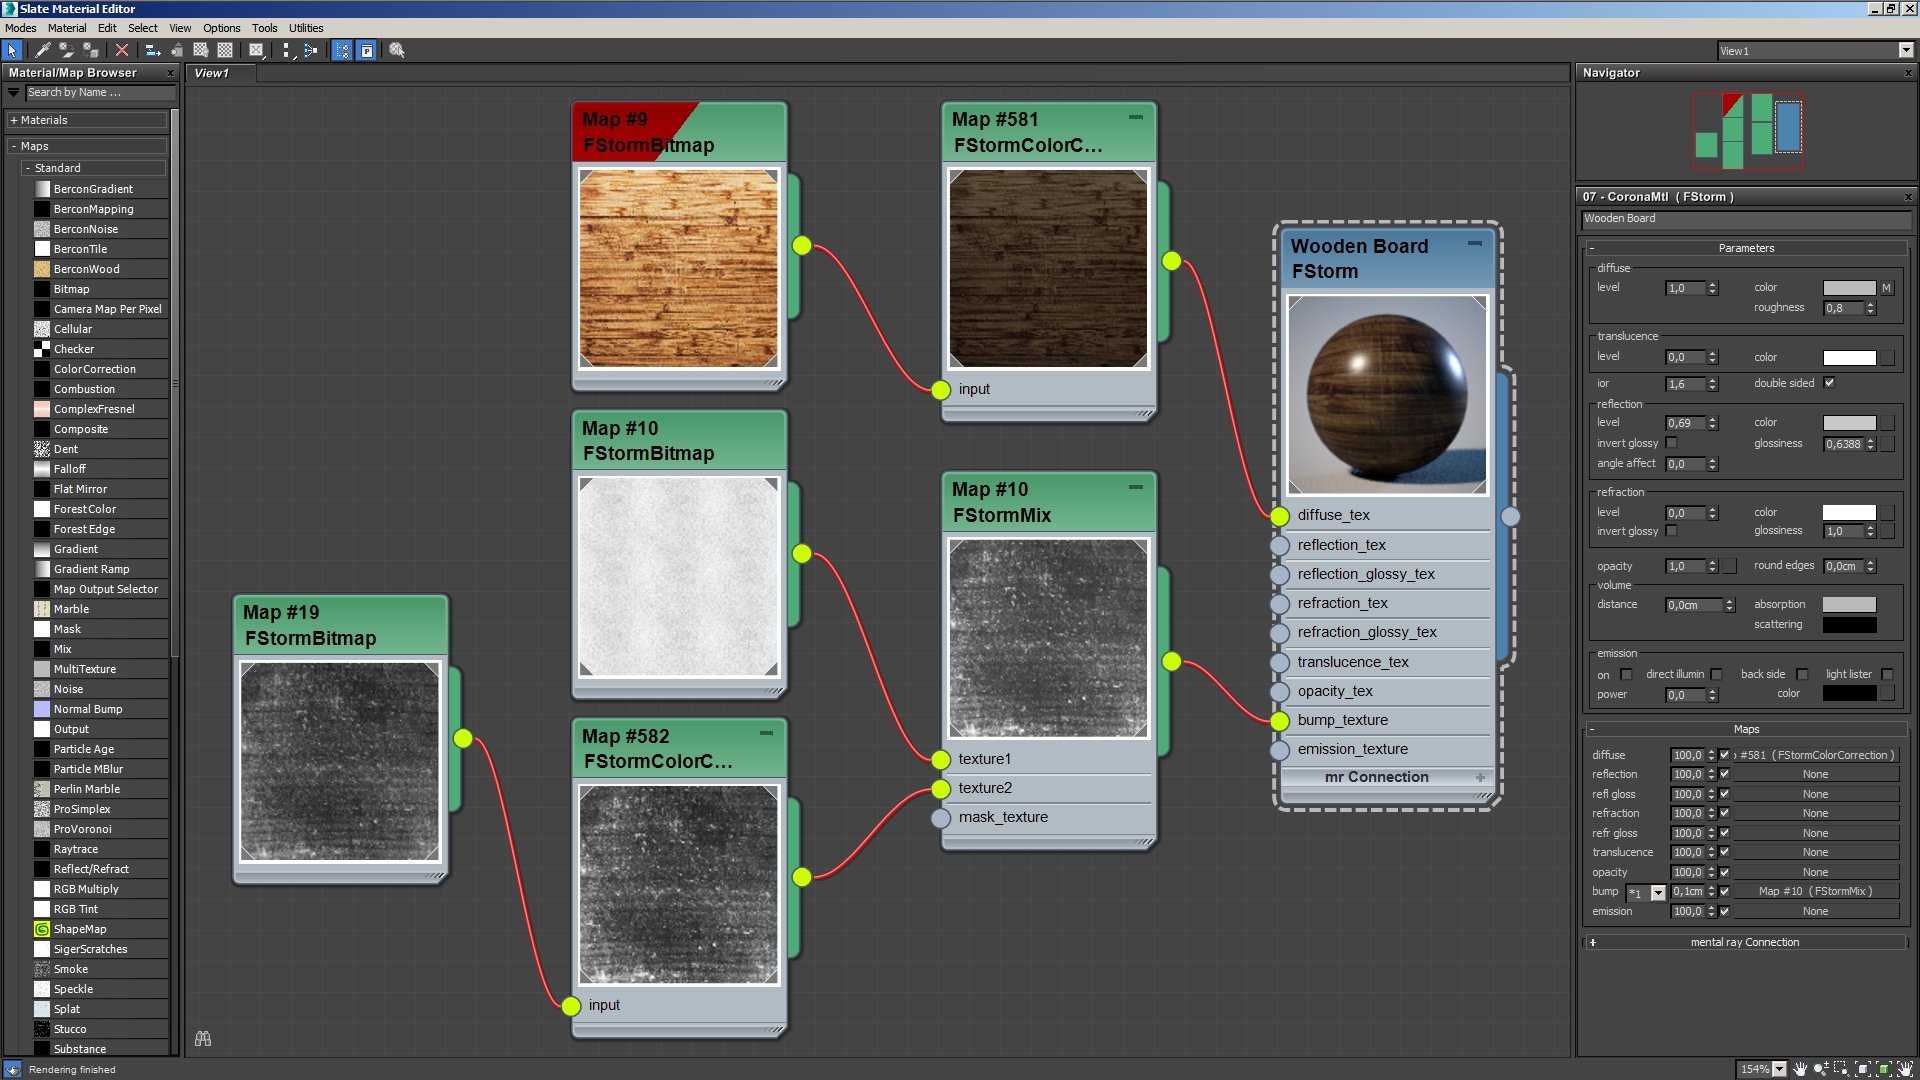
Wooden Board mat : The cutting board material.
Click on image to enlarge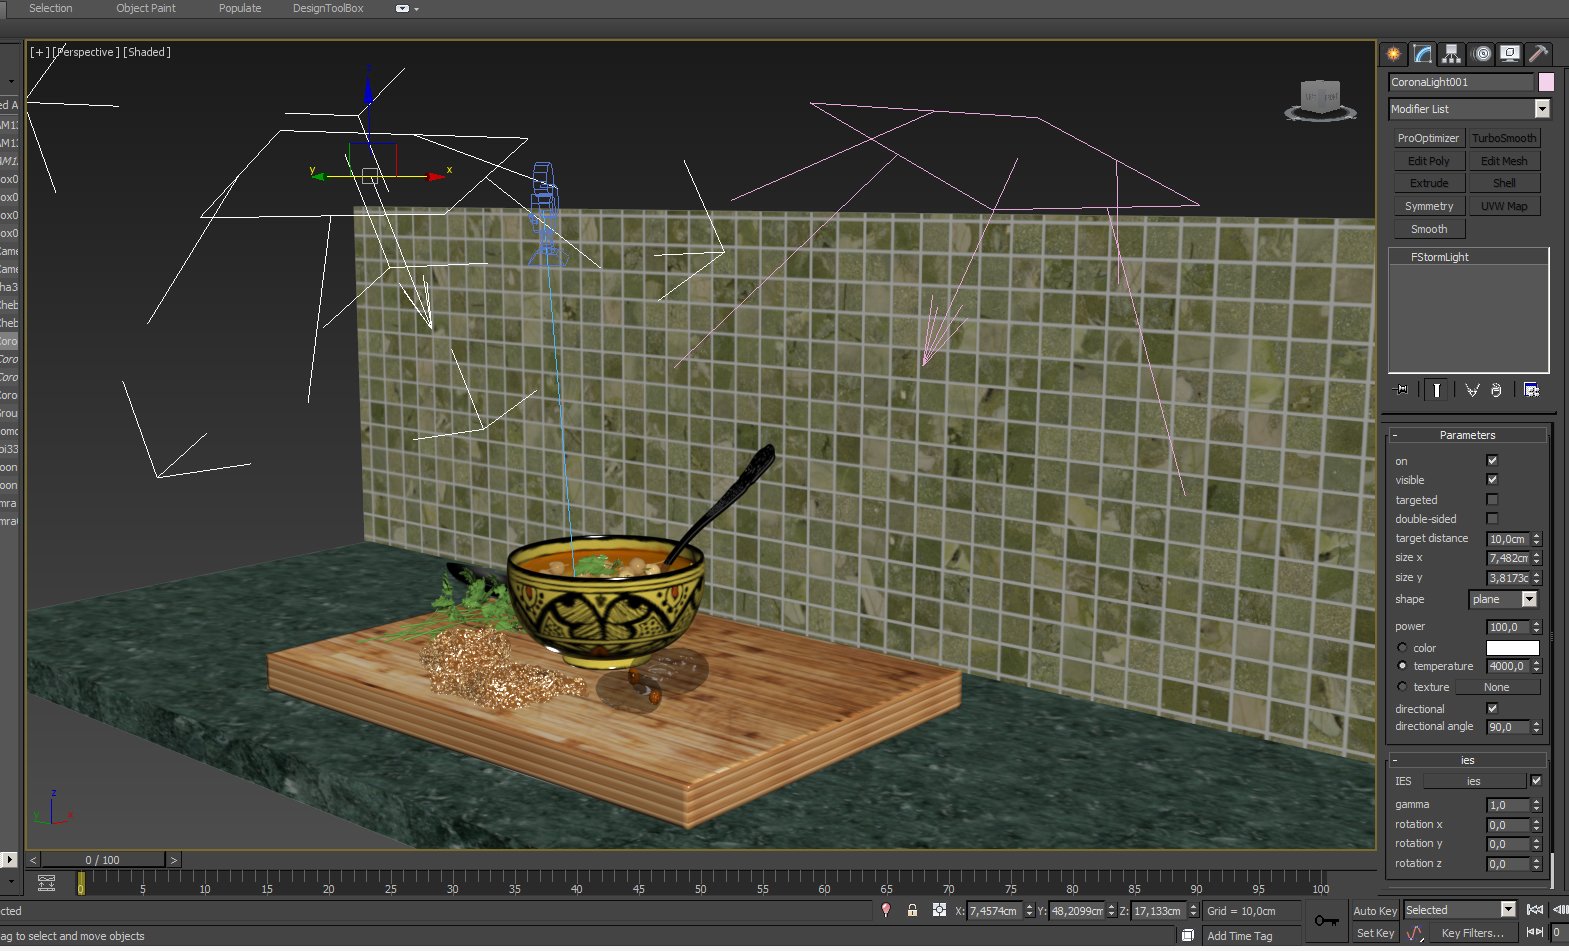
Fstorm Plane Light 1.
Click on image to enlarge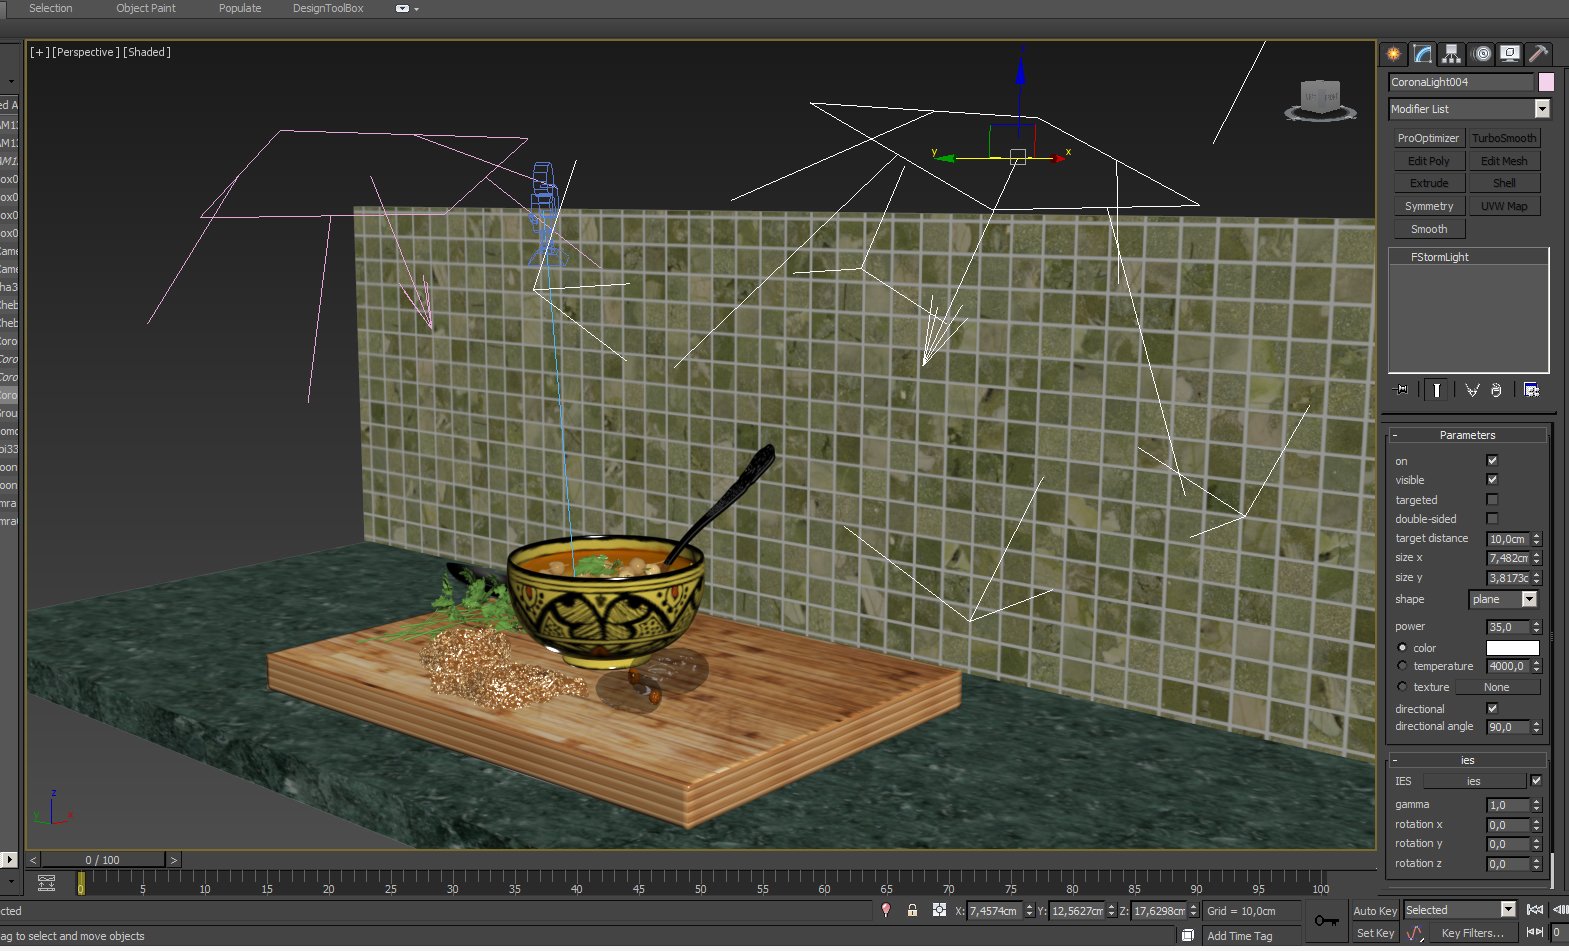
Fstorm Plane Light 2.
Click on image to enlarge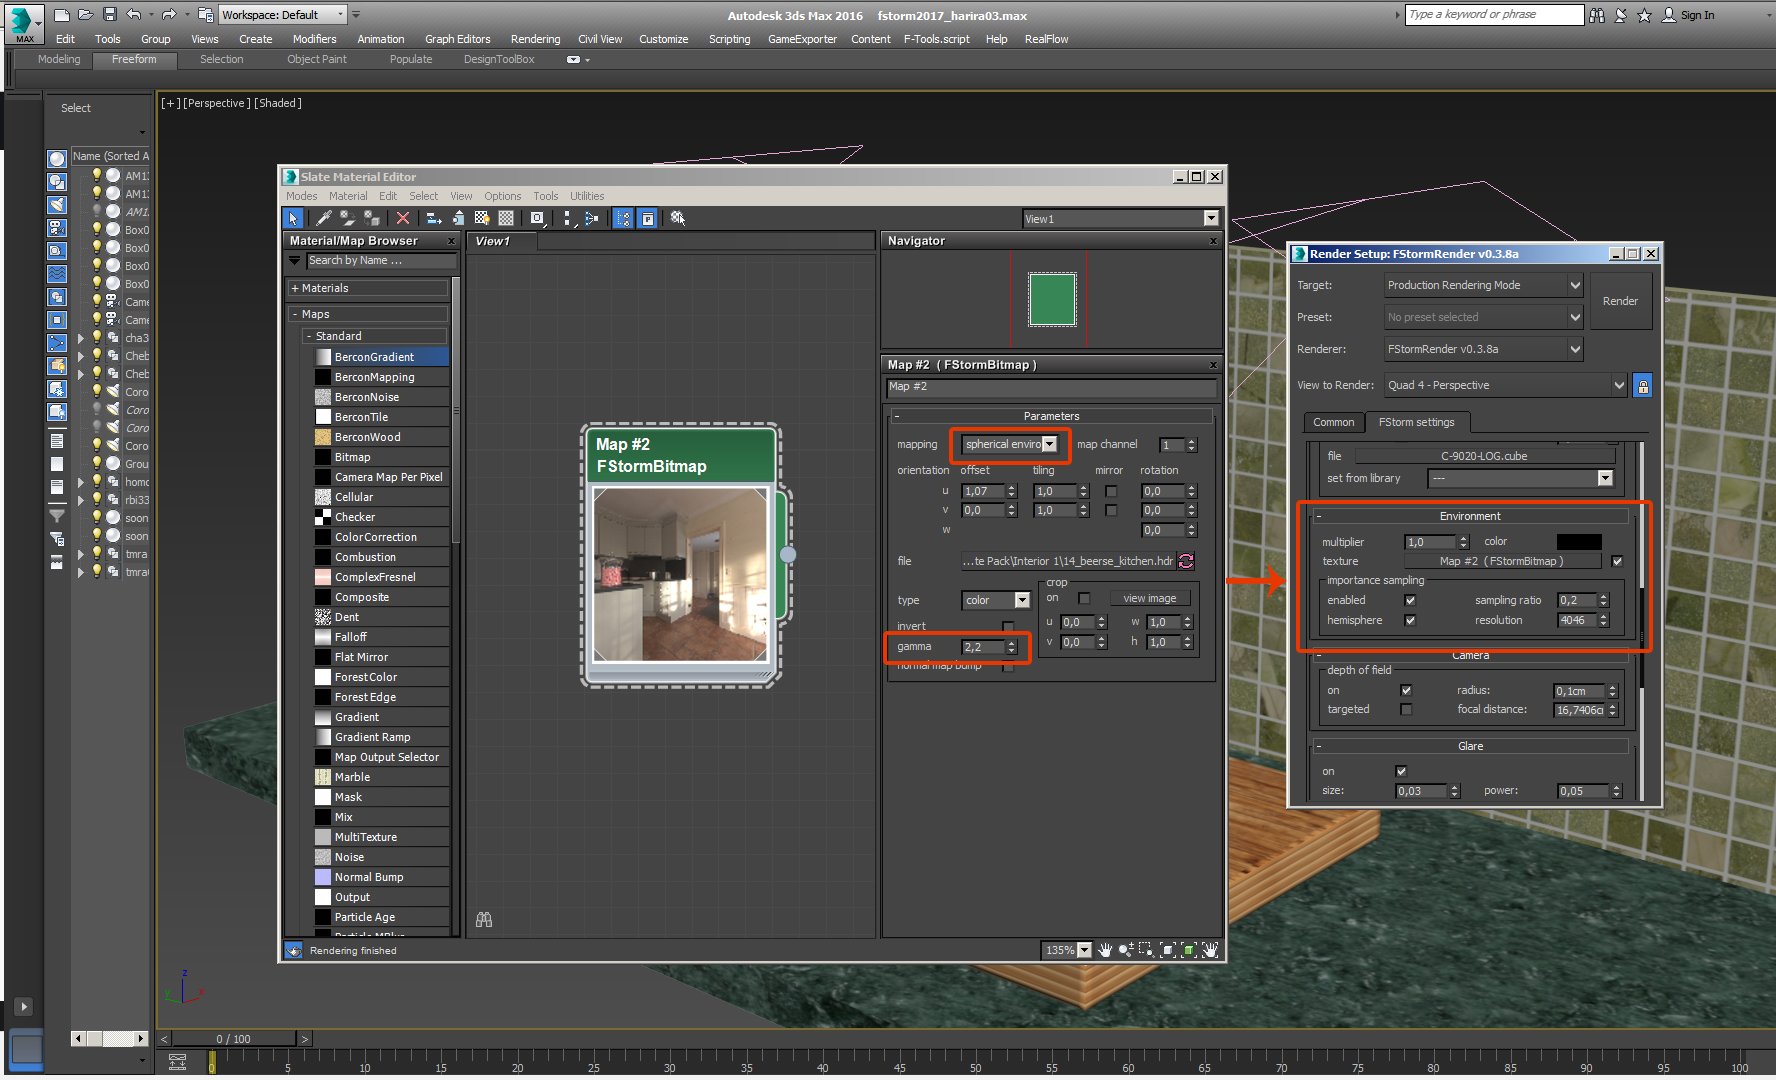
In this scene I used a simple kitchen Hdri map. Make sure you put 2.2 in Gamma and choose "Spherical envi " in Mapping. I dragged it then as an Instance in Fstorm Environment with "Importance sampling" is On.
Click on image to enlarge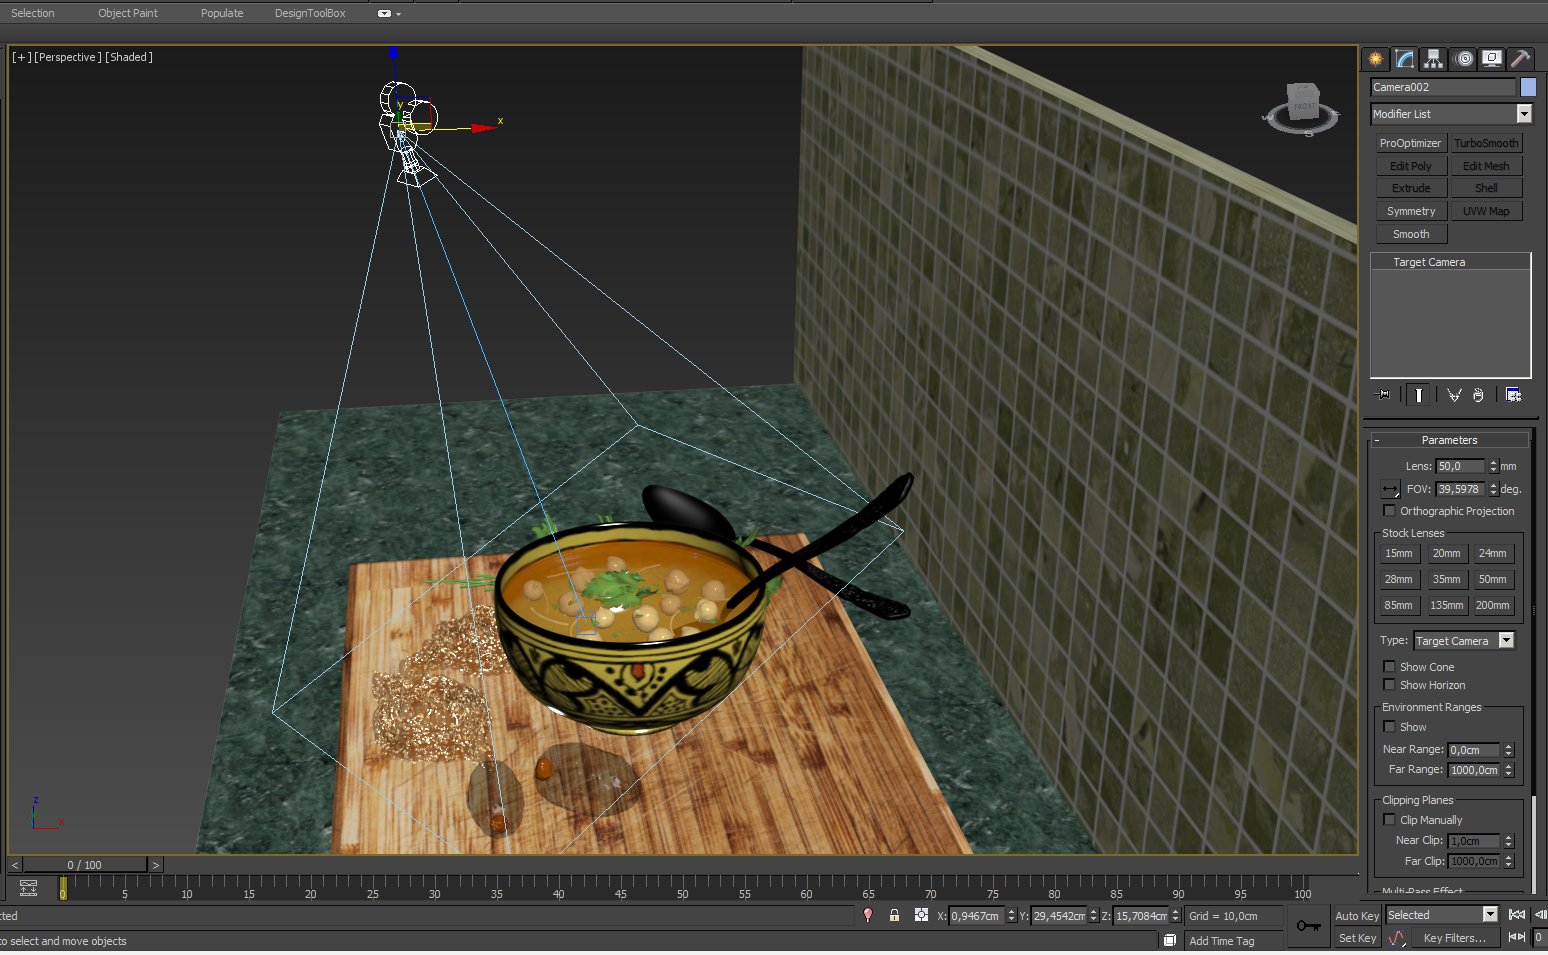
50mm Camera : For food photography I used here a simple 50 mm Target camera.
Click on image to enlarge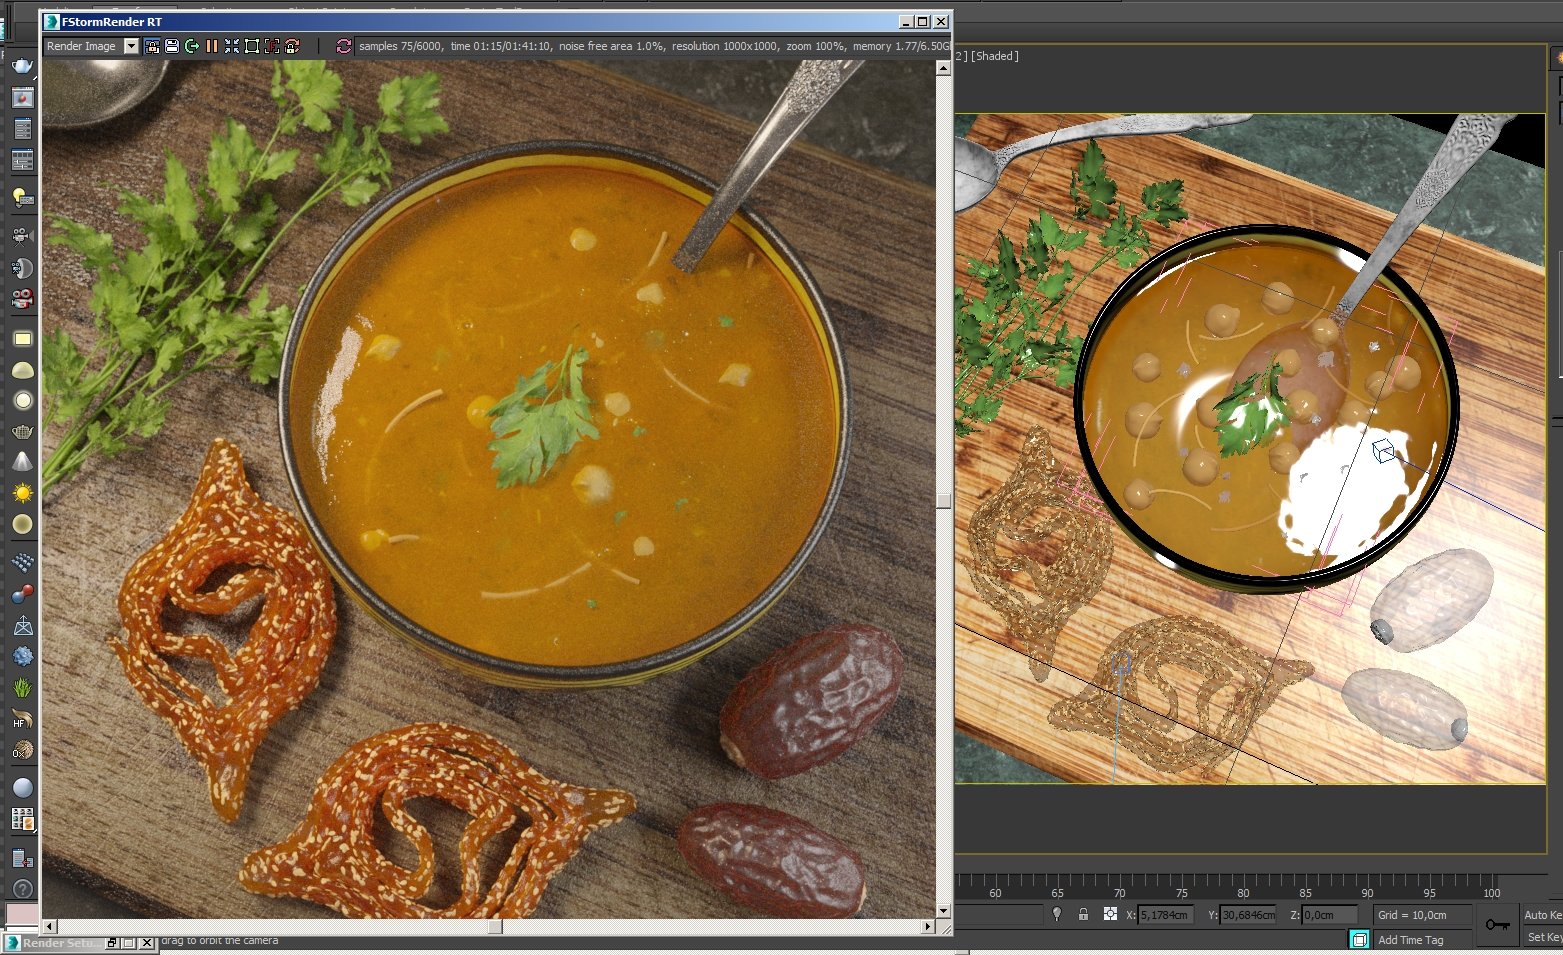
Fstorm in action
Click on image to enlarge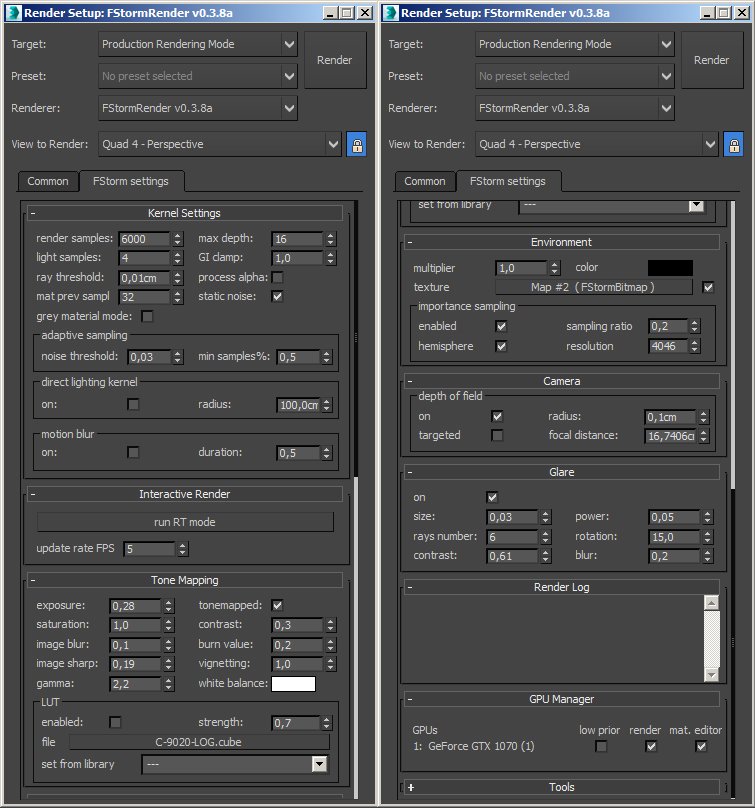
Rendering parameters
Click on image to enlarge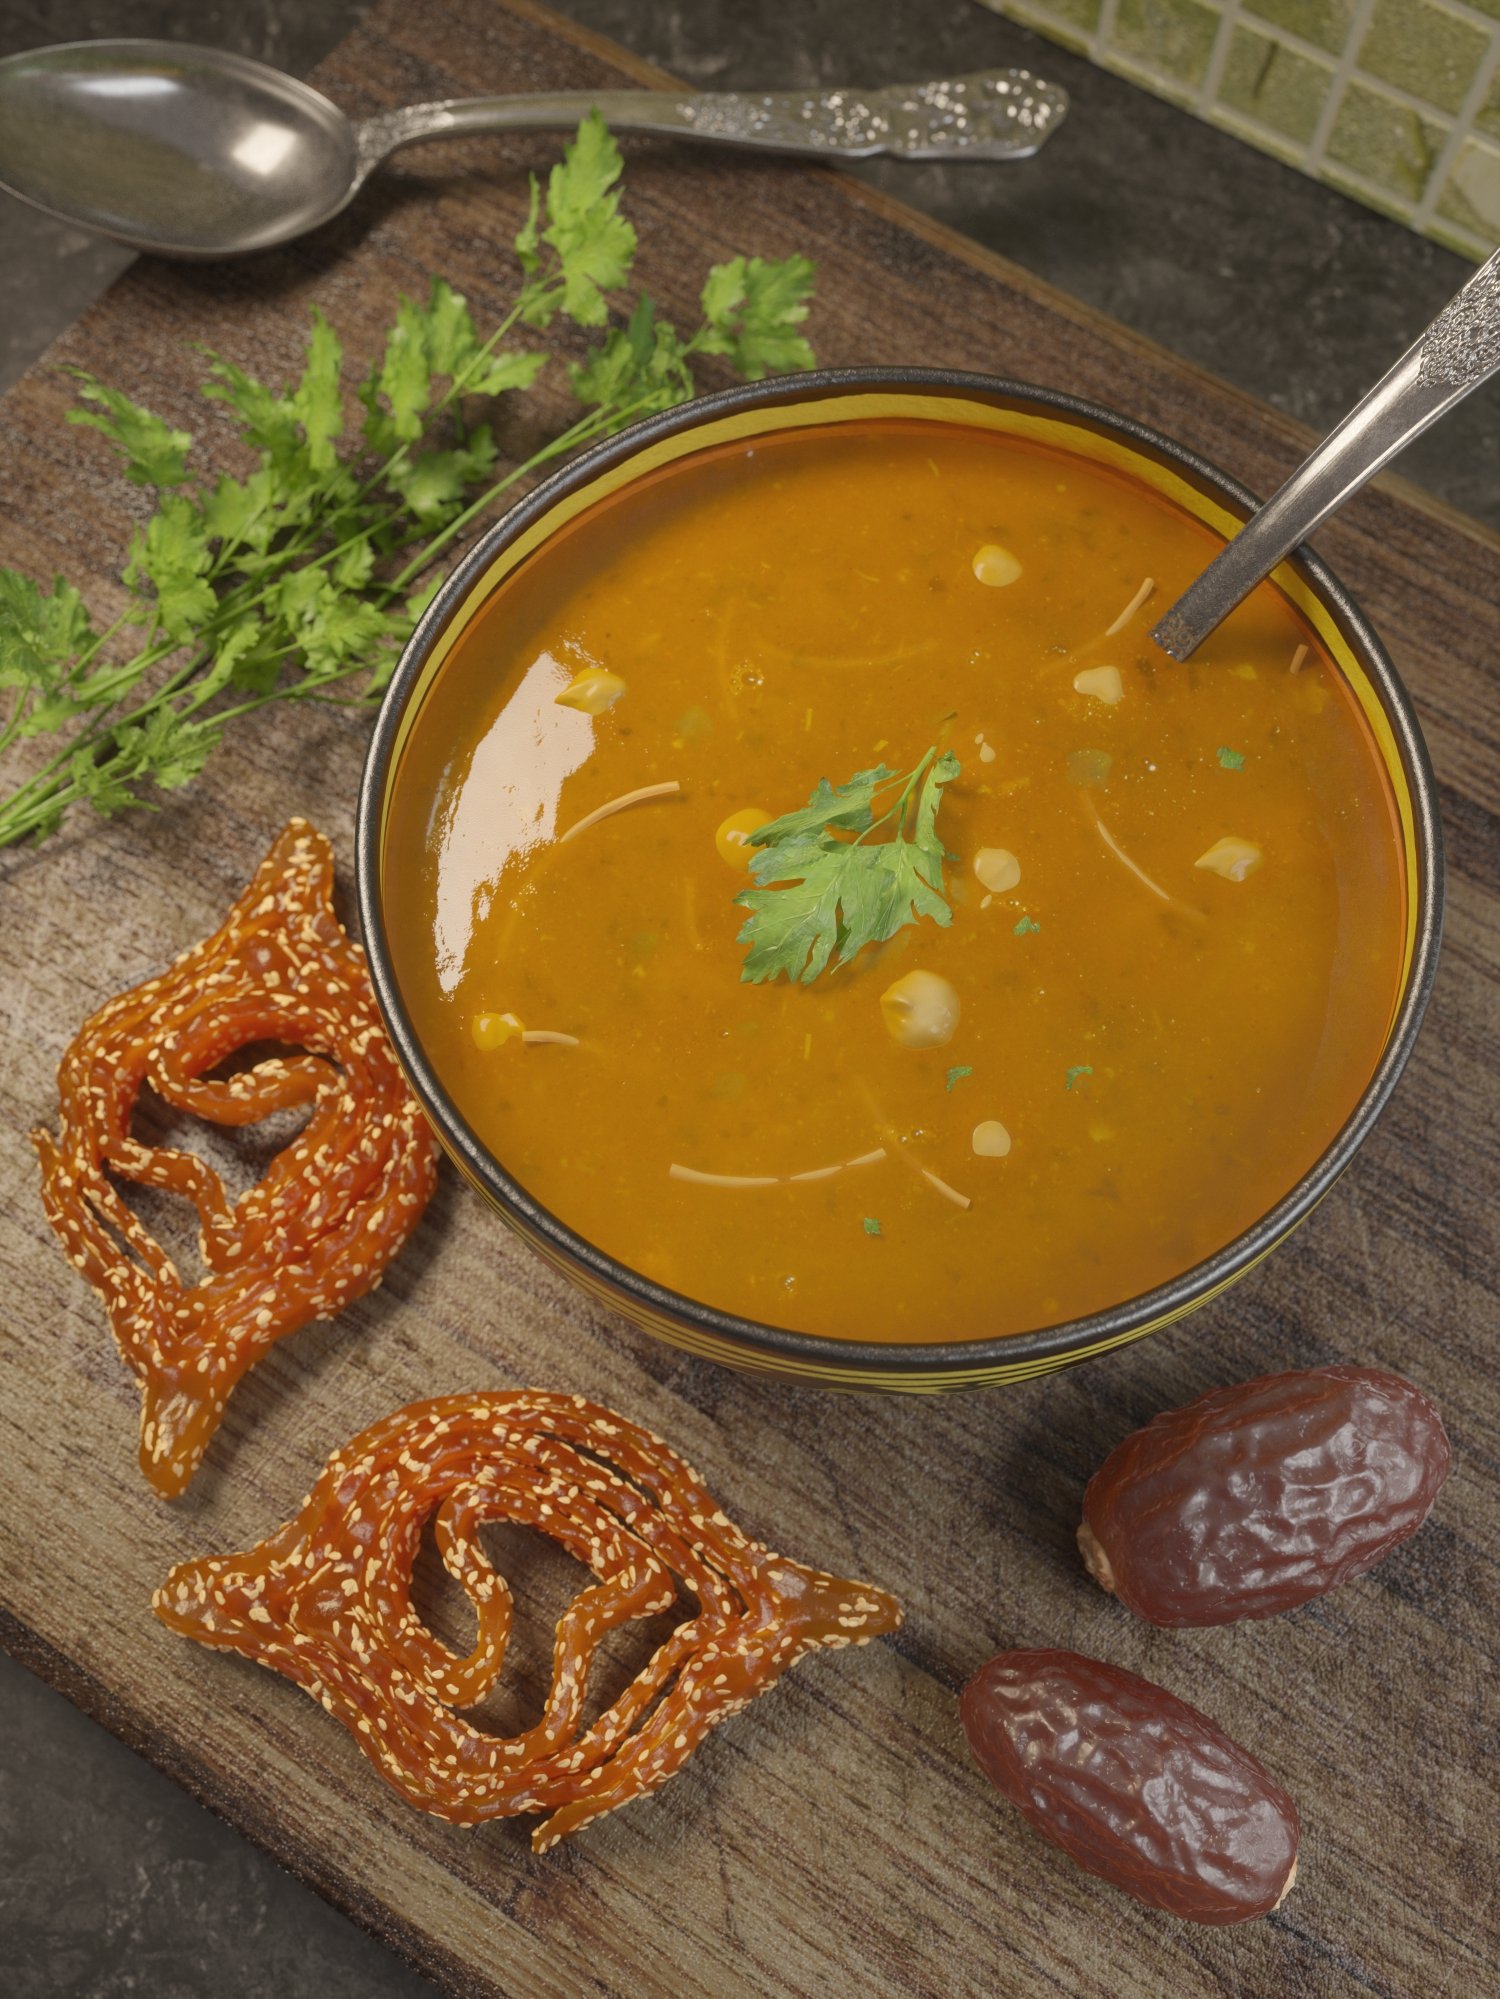
Raw render
Click on image to enlarge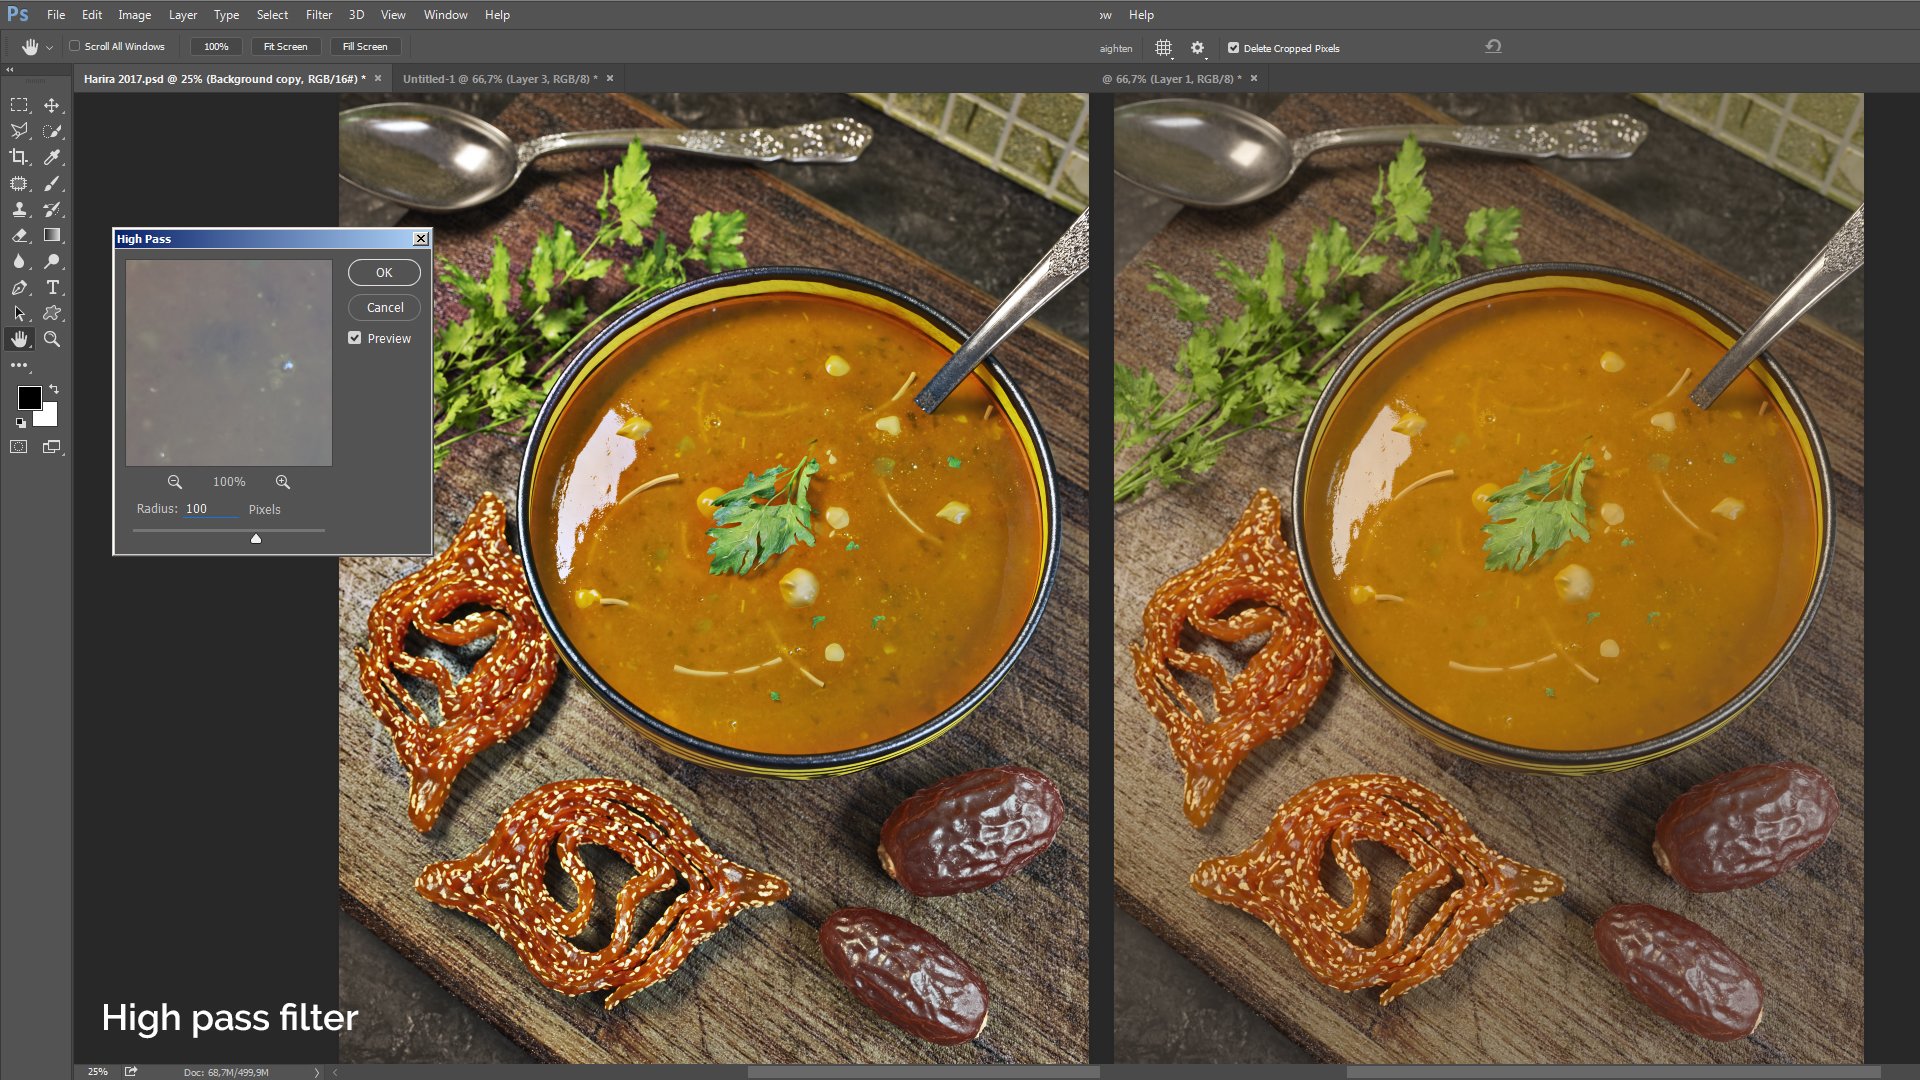
Using the High pass filter with a high value to bring out the details of this scene. Ie used a LUT file from my collection but you can test and play with yours, usually I don't render using LUT directly but I like to test them in Fstorm before I decide wich one I'll probably use in Photoshop.
Click on image to enlarge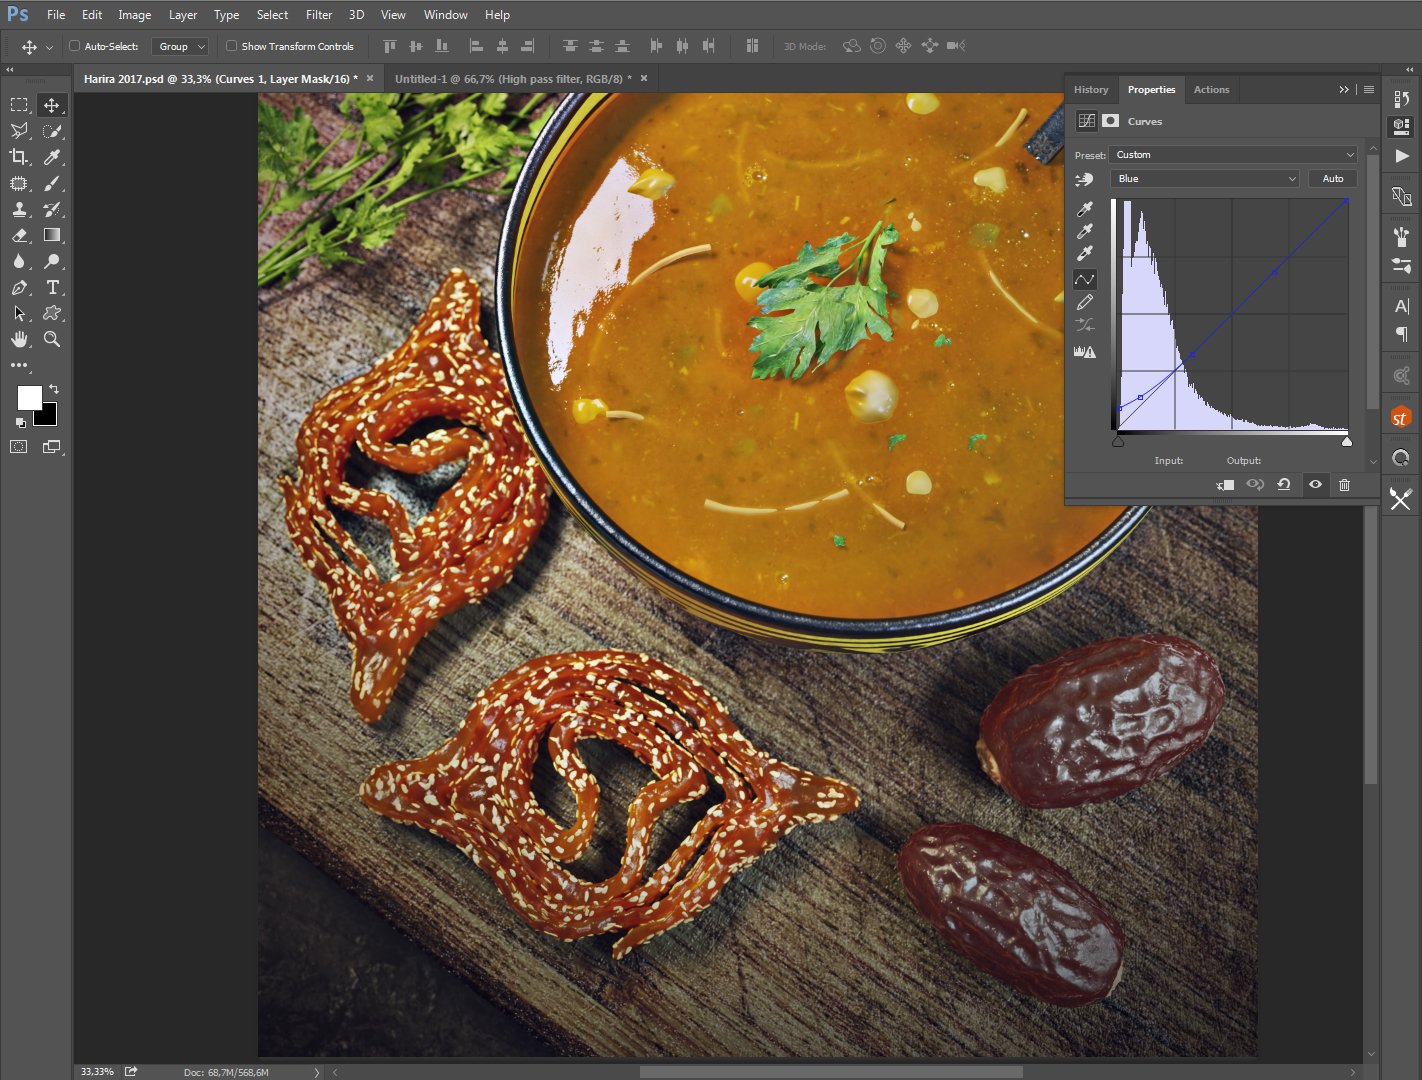
I've used "Selective color" to modify some red/yellow areas and boost it a little bit especially for the soup and reduce some green intensity of the parsley. I've added a little bit of blue using "Curves" and more contrast, then a Vignette layer and some Chromatic Aberration to add that photographic touch.
Click on image to enlarge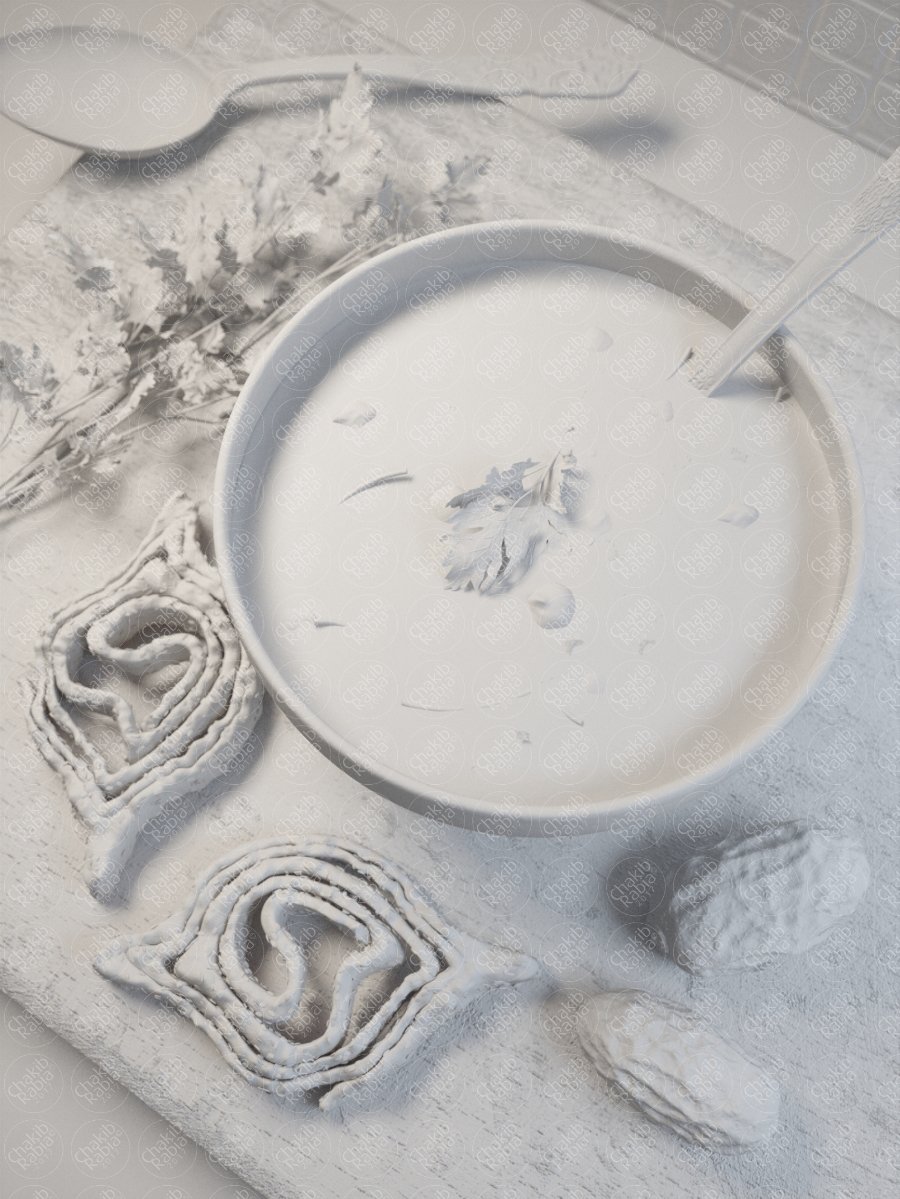
Clay render.
Click on image to enlarge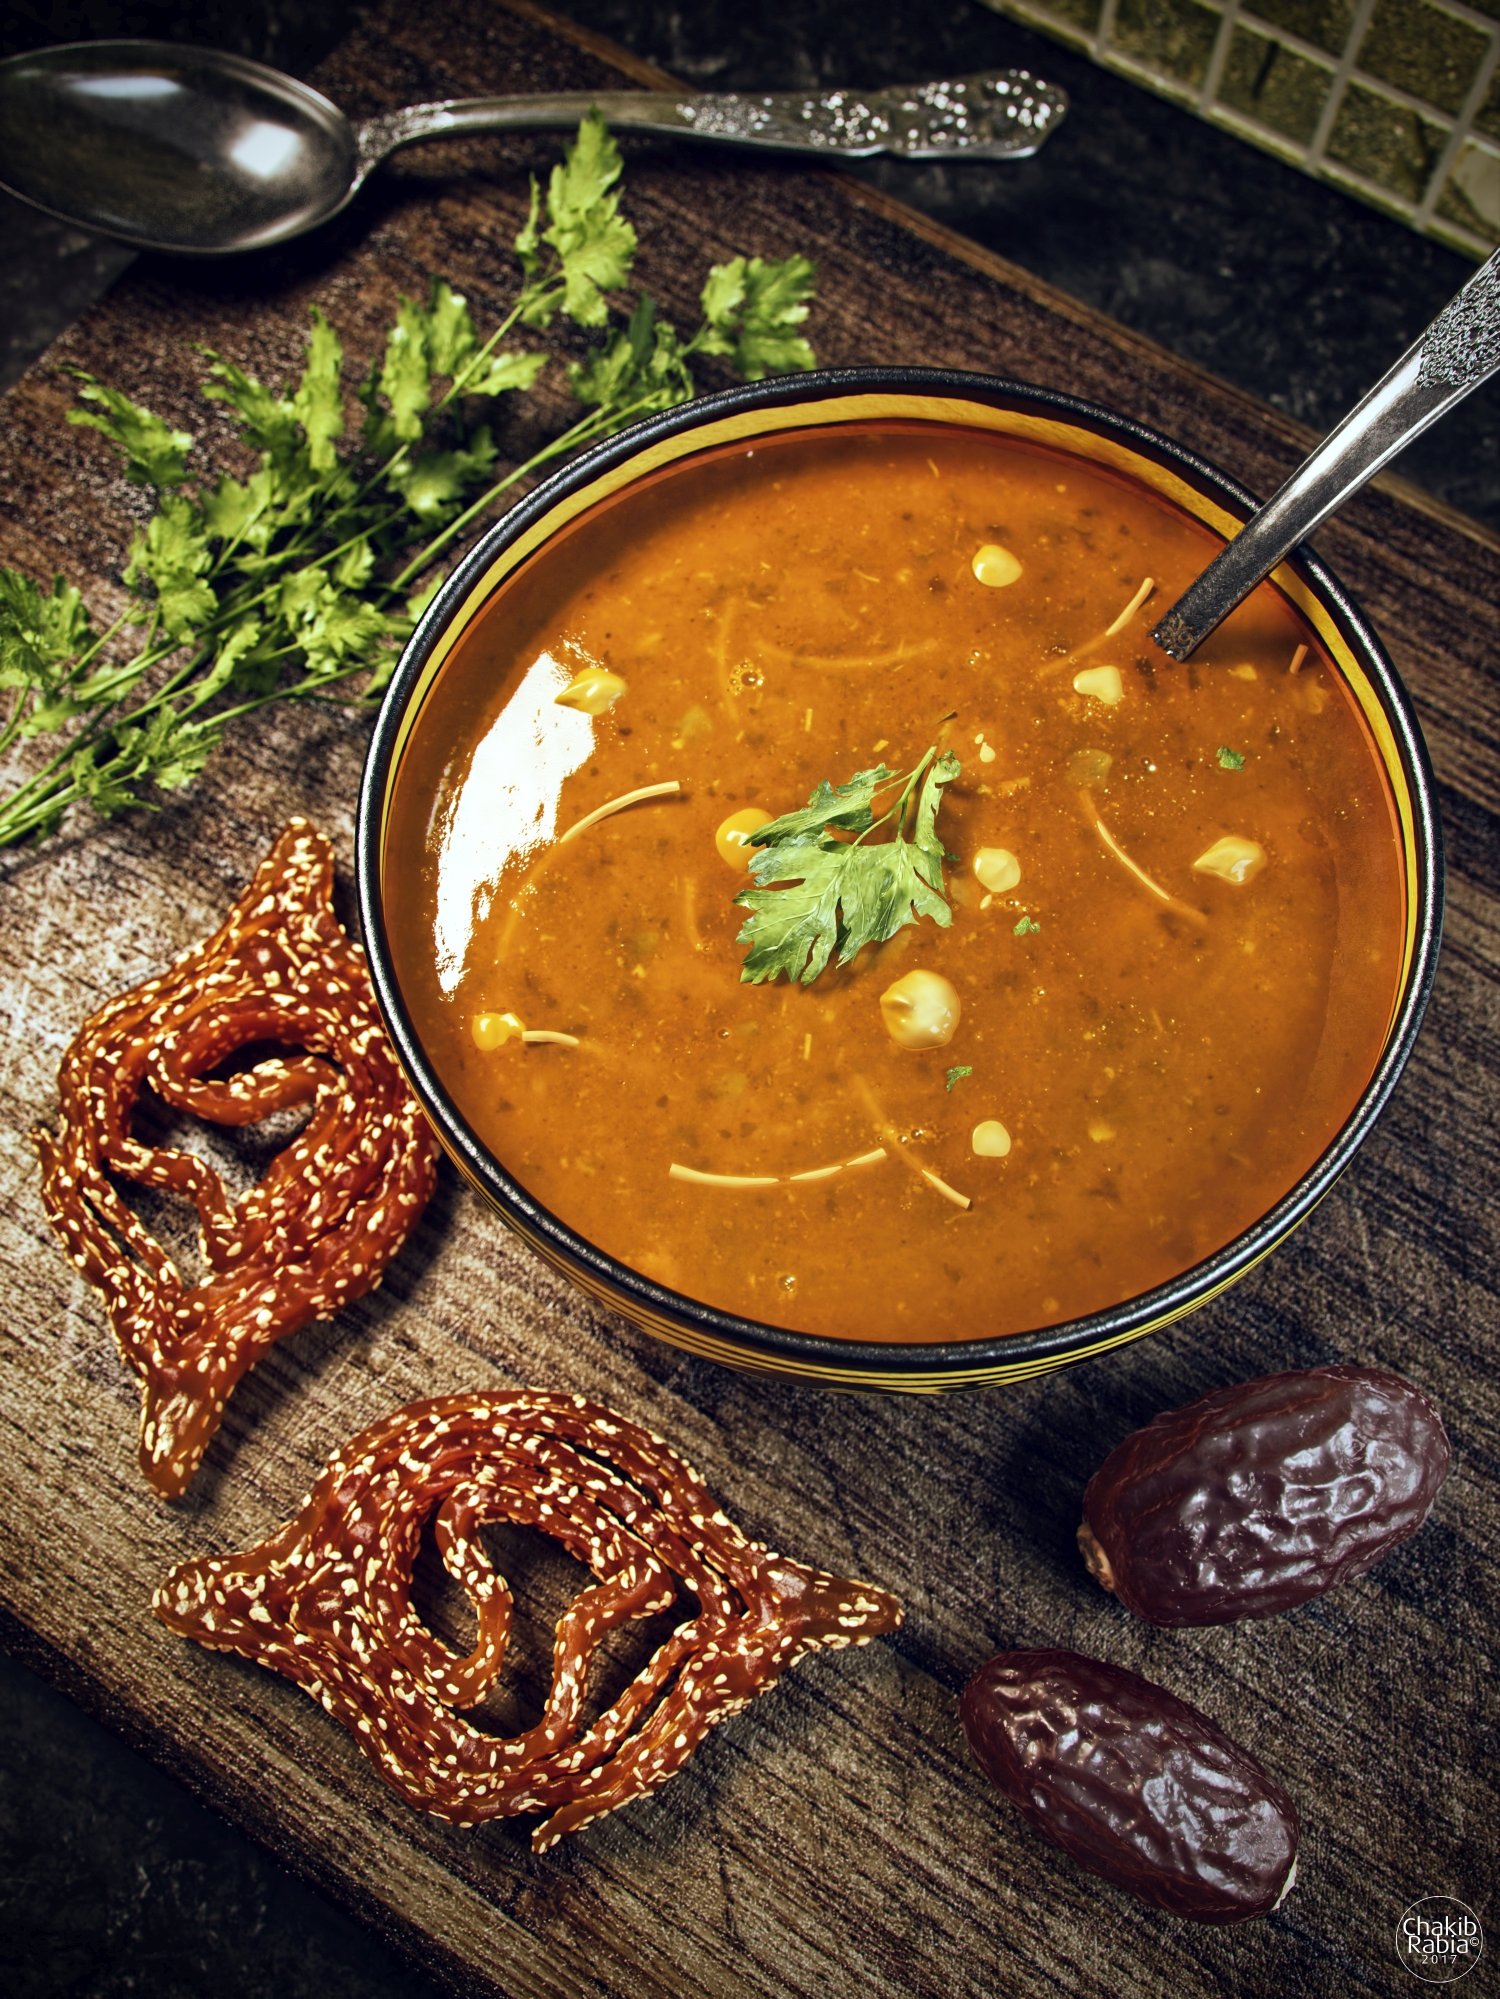
Final image
Click on image to enlarge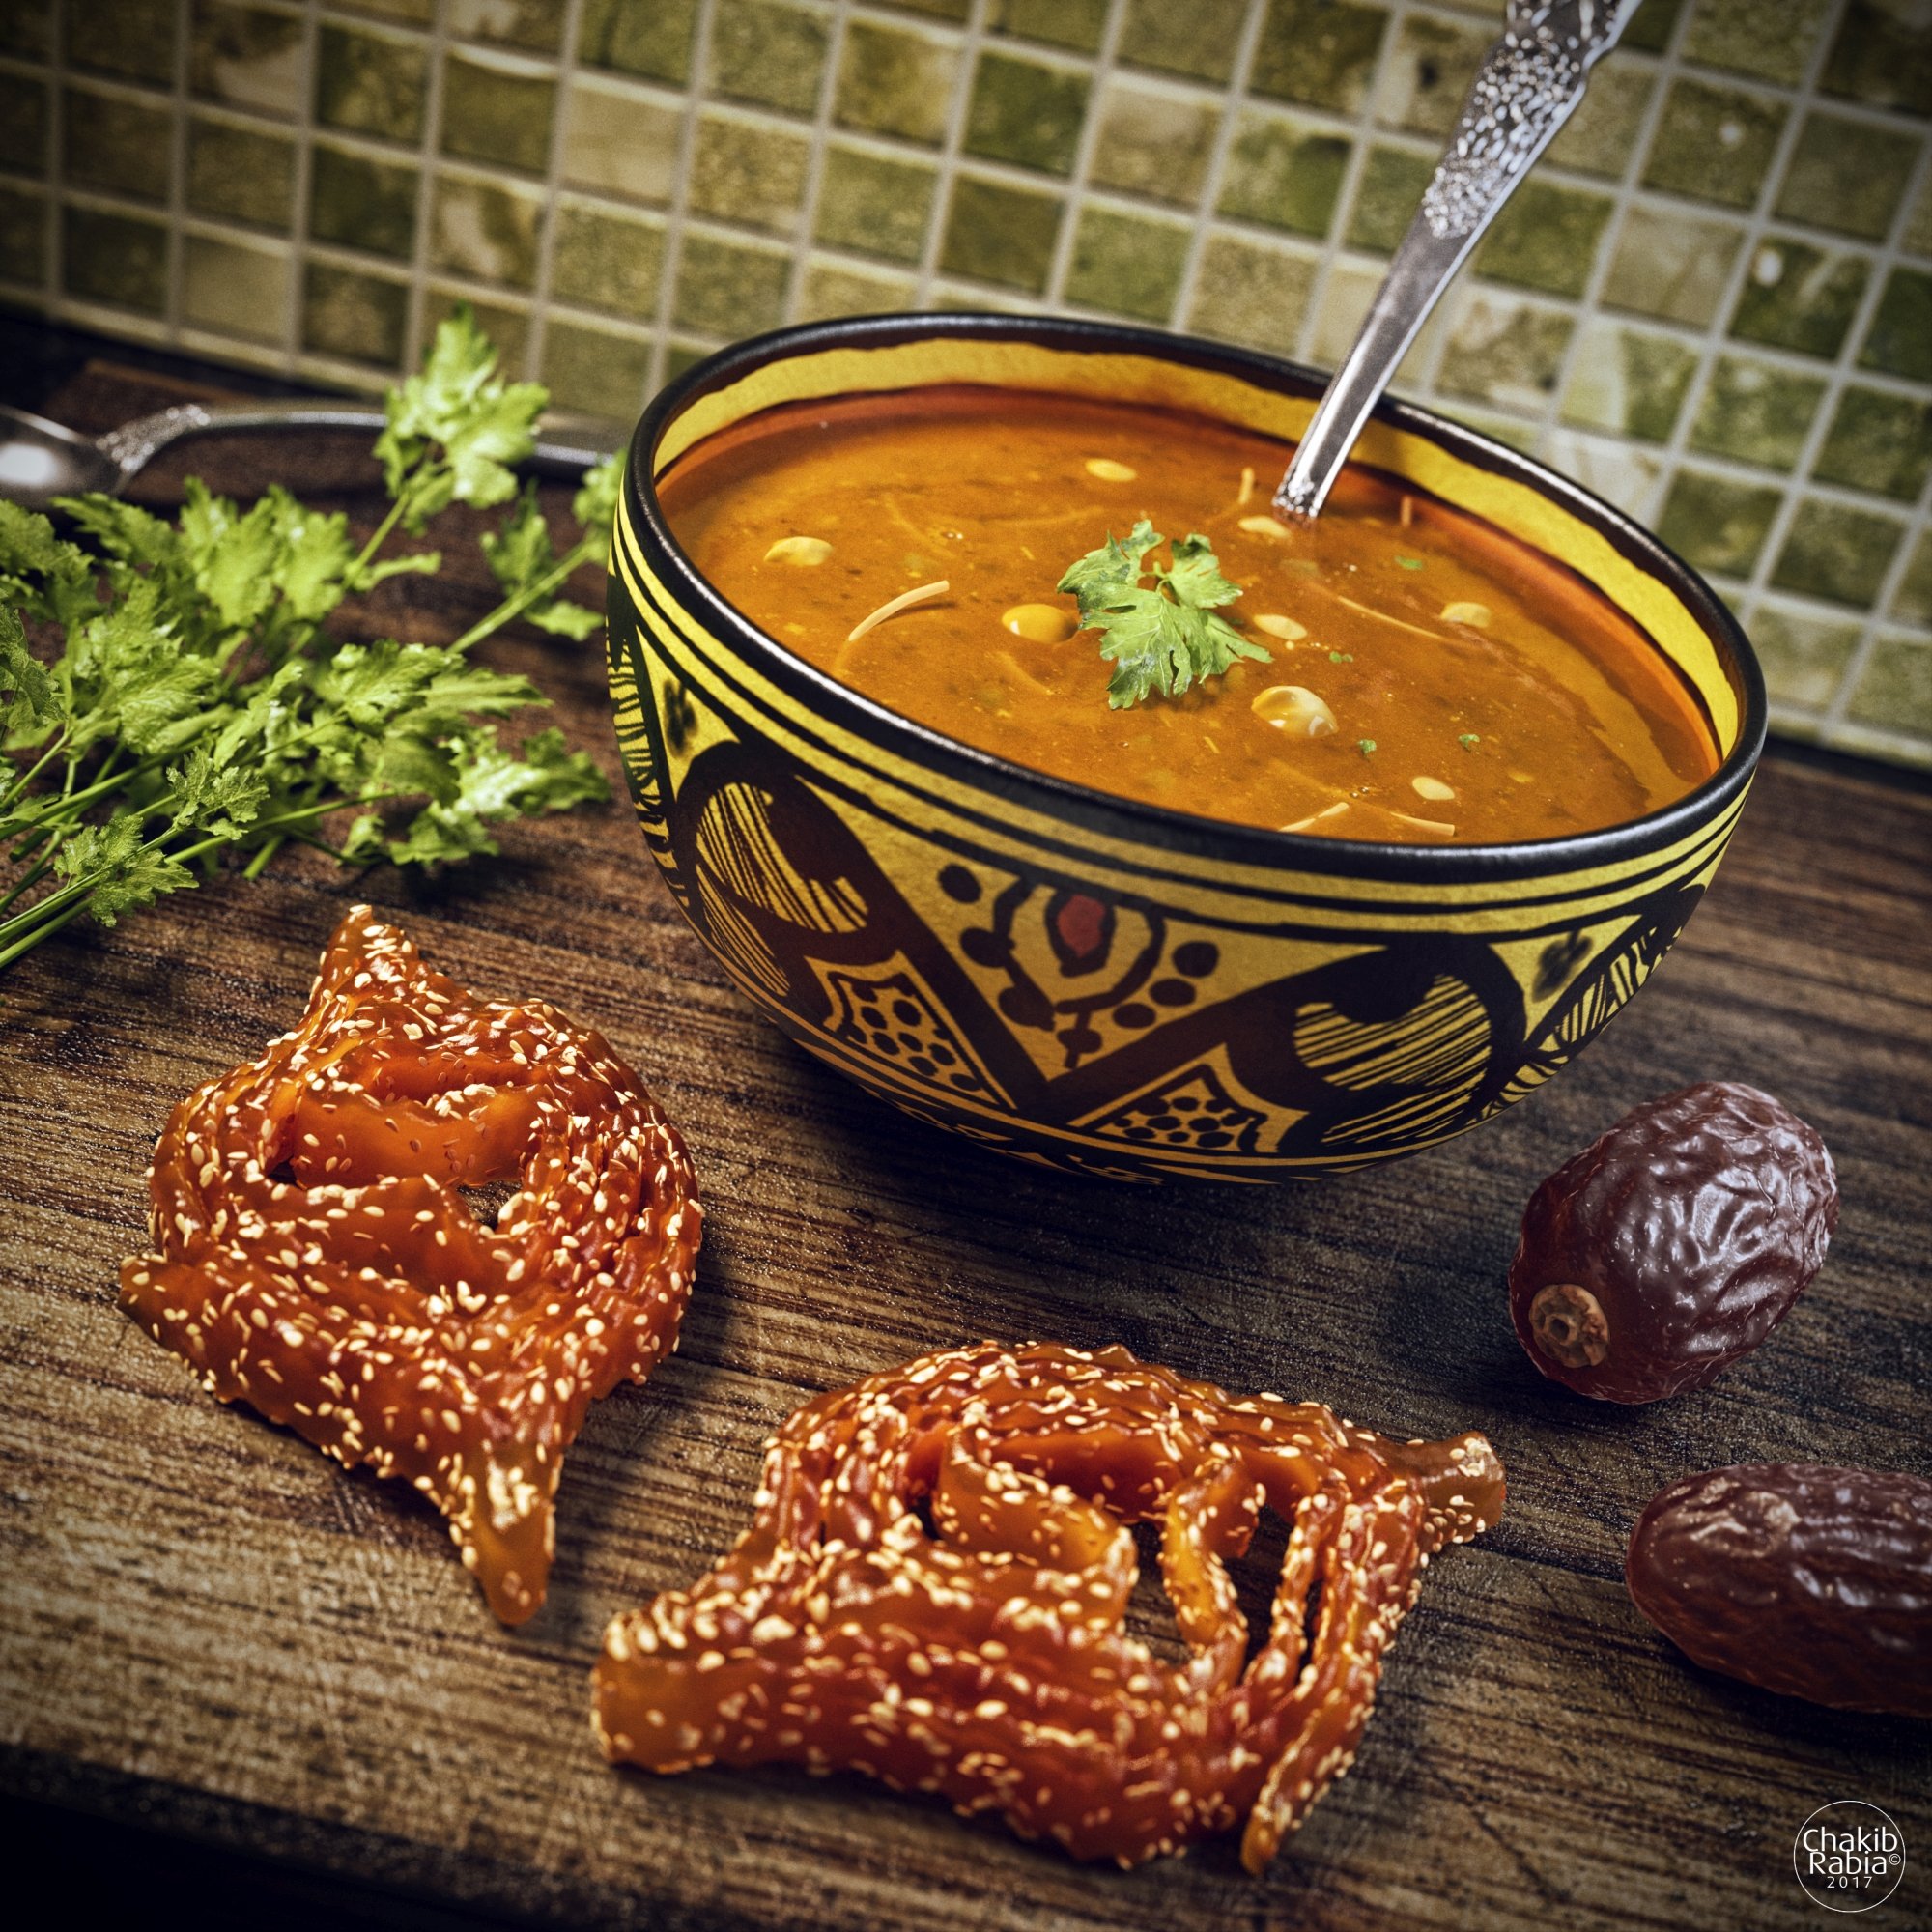
Final image
Click on image to enlarge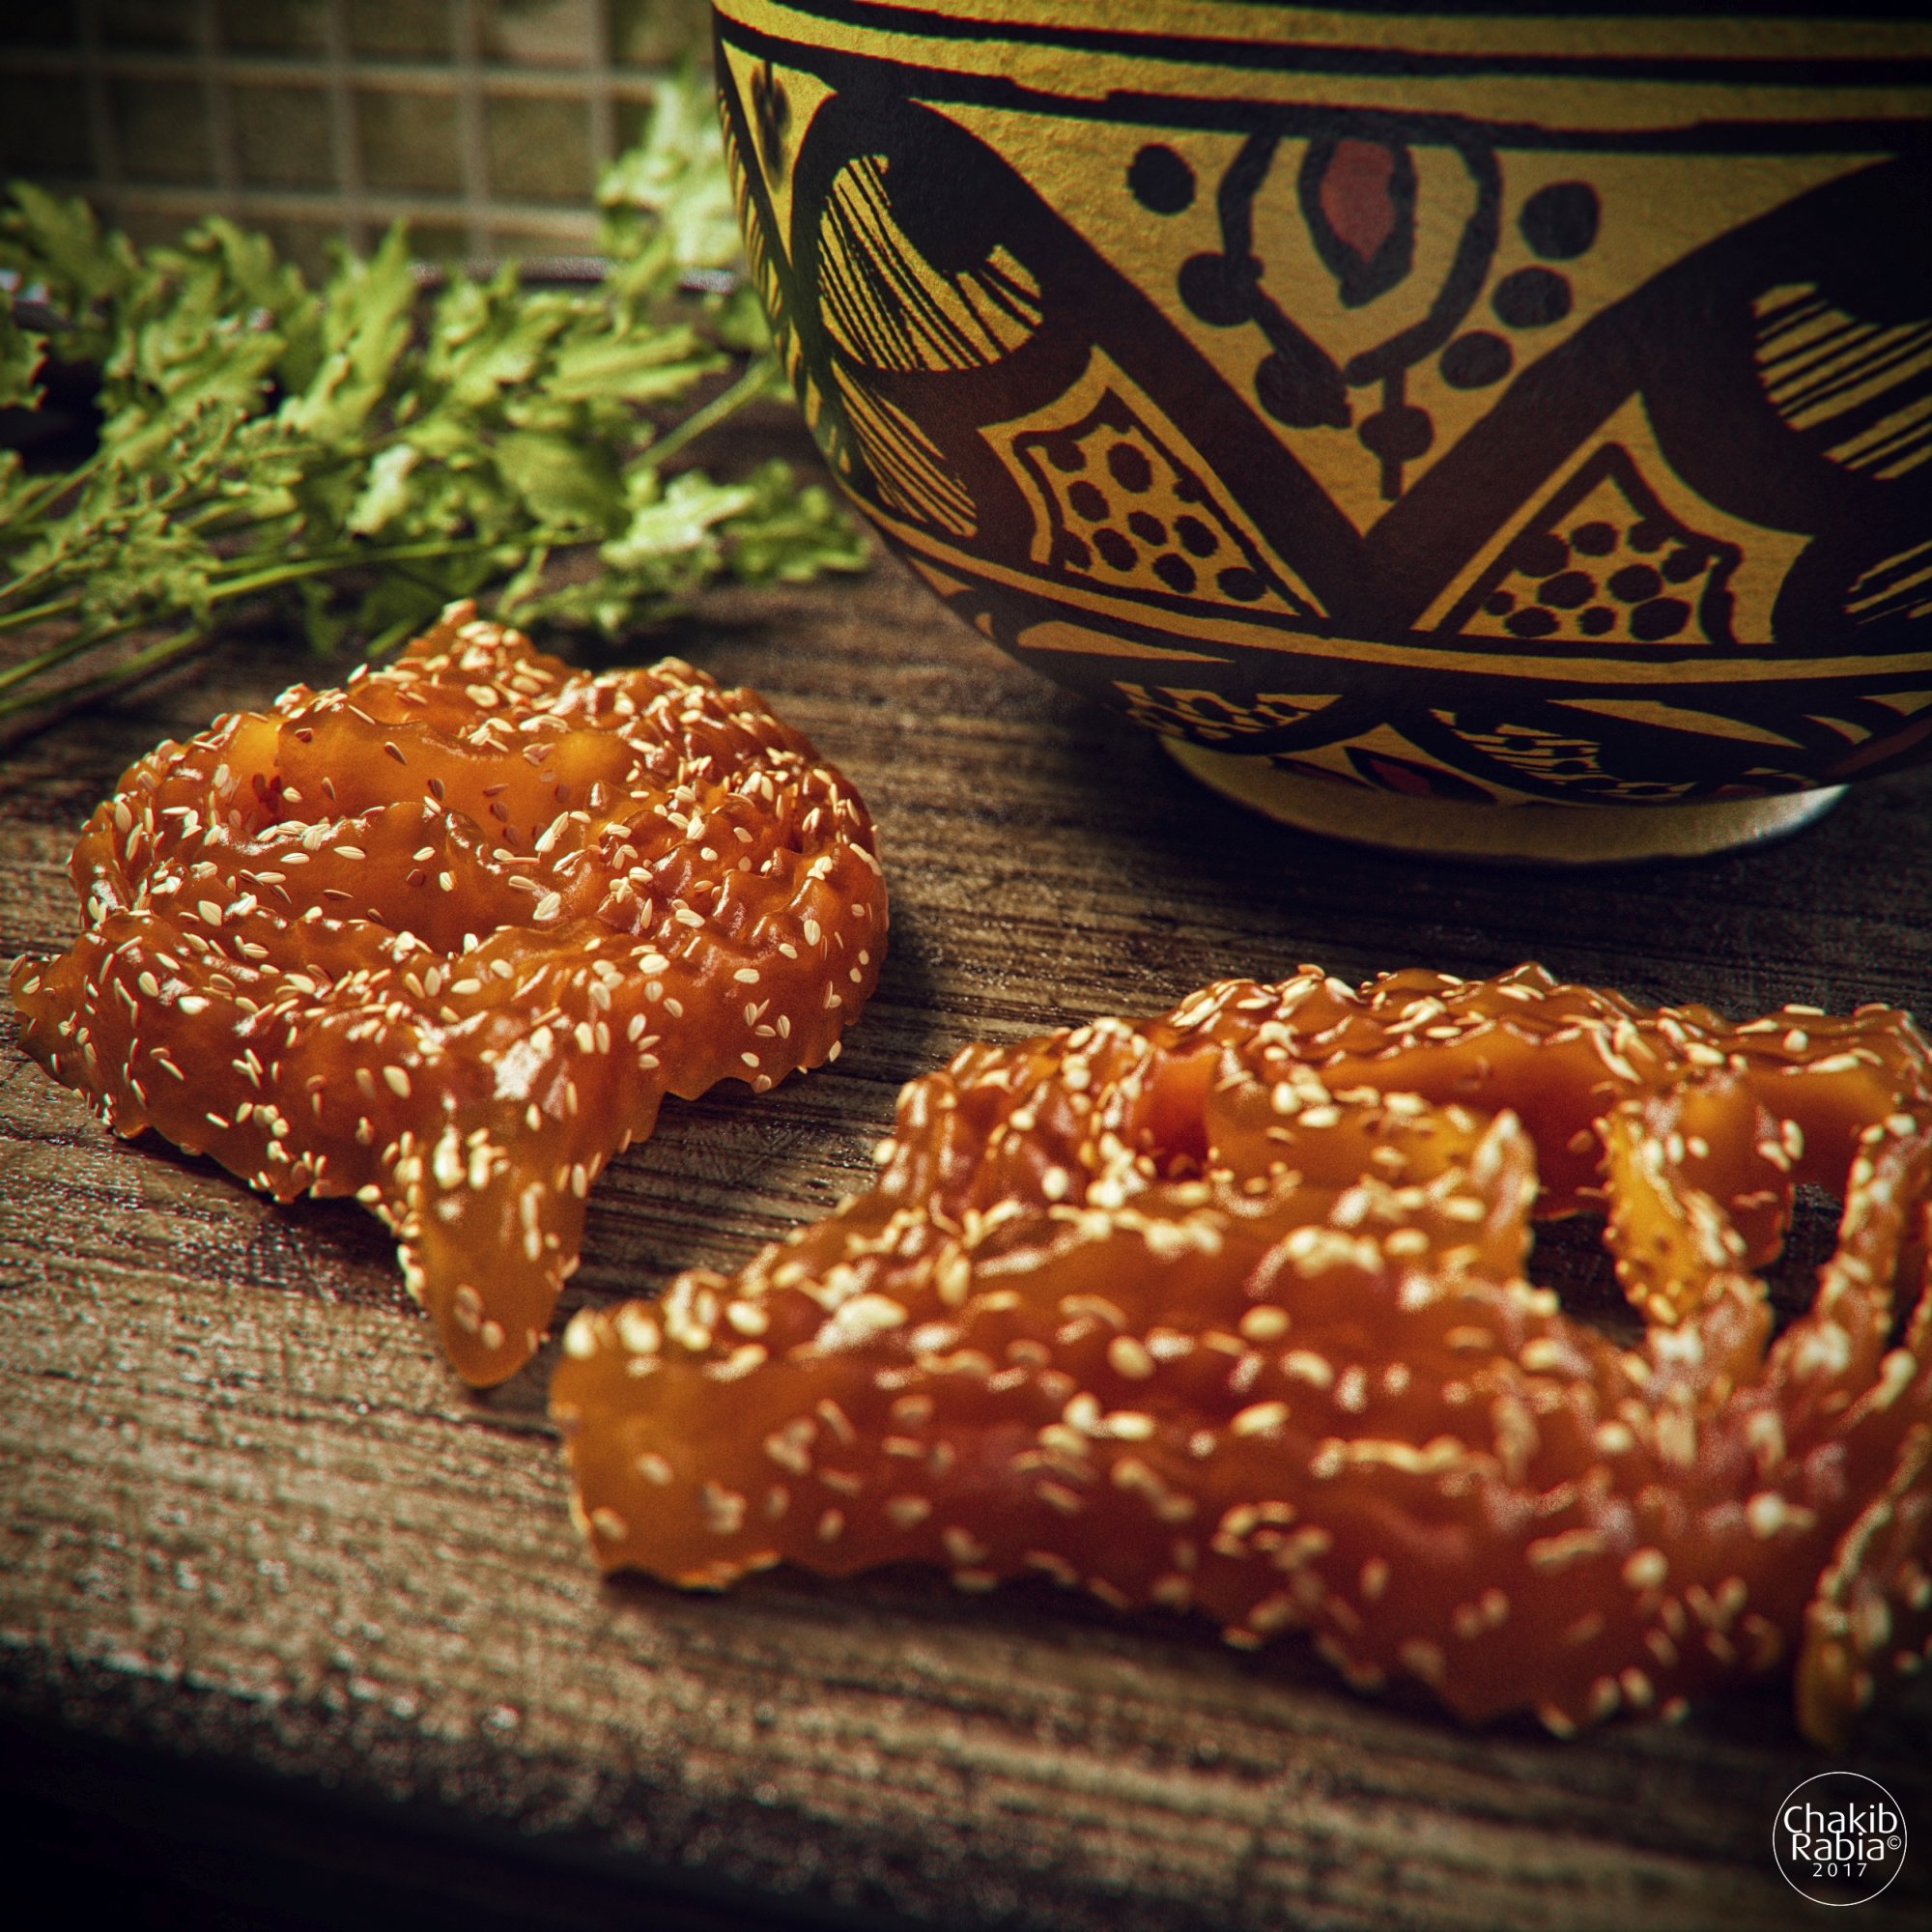
Final image
Click on image to enlarge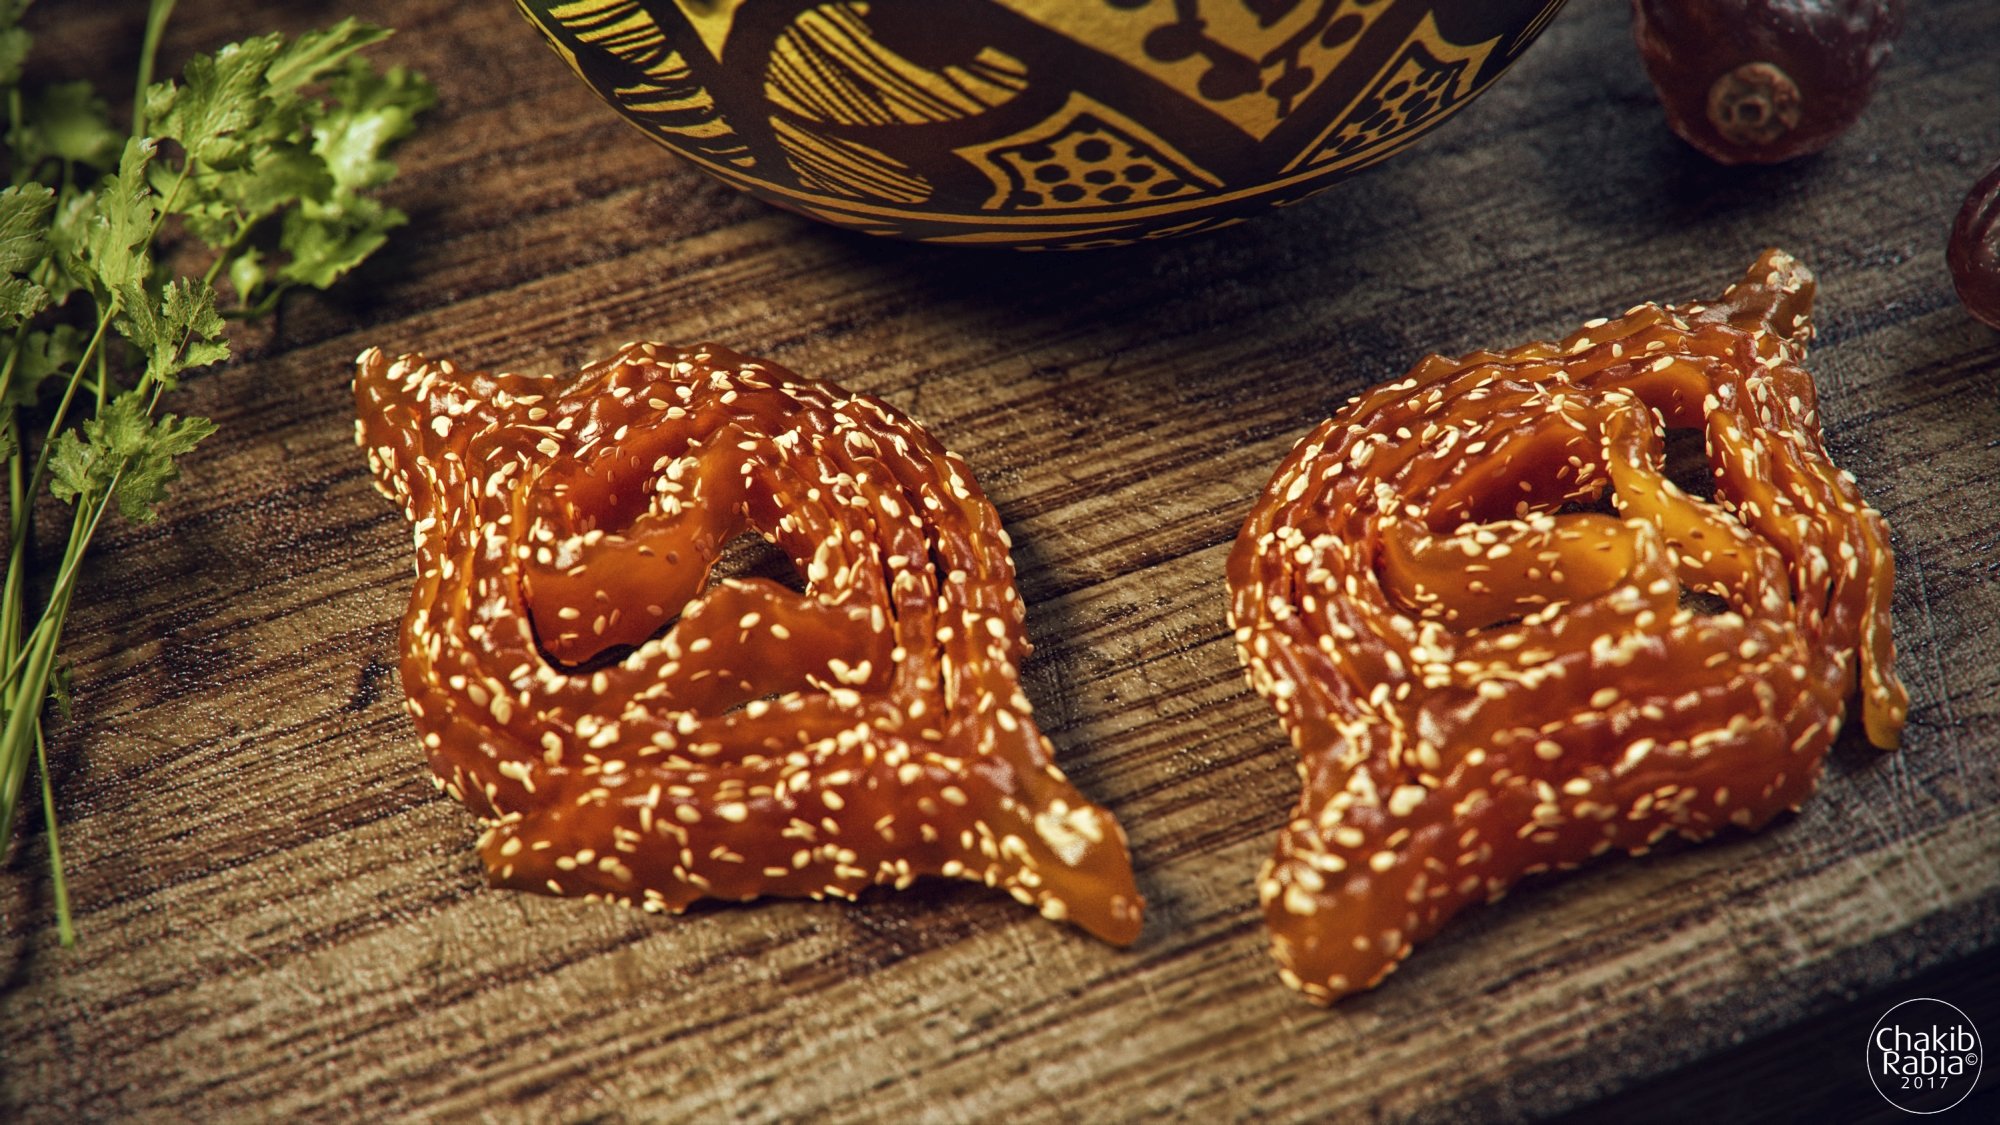
Final image
Click on image to enlarge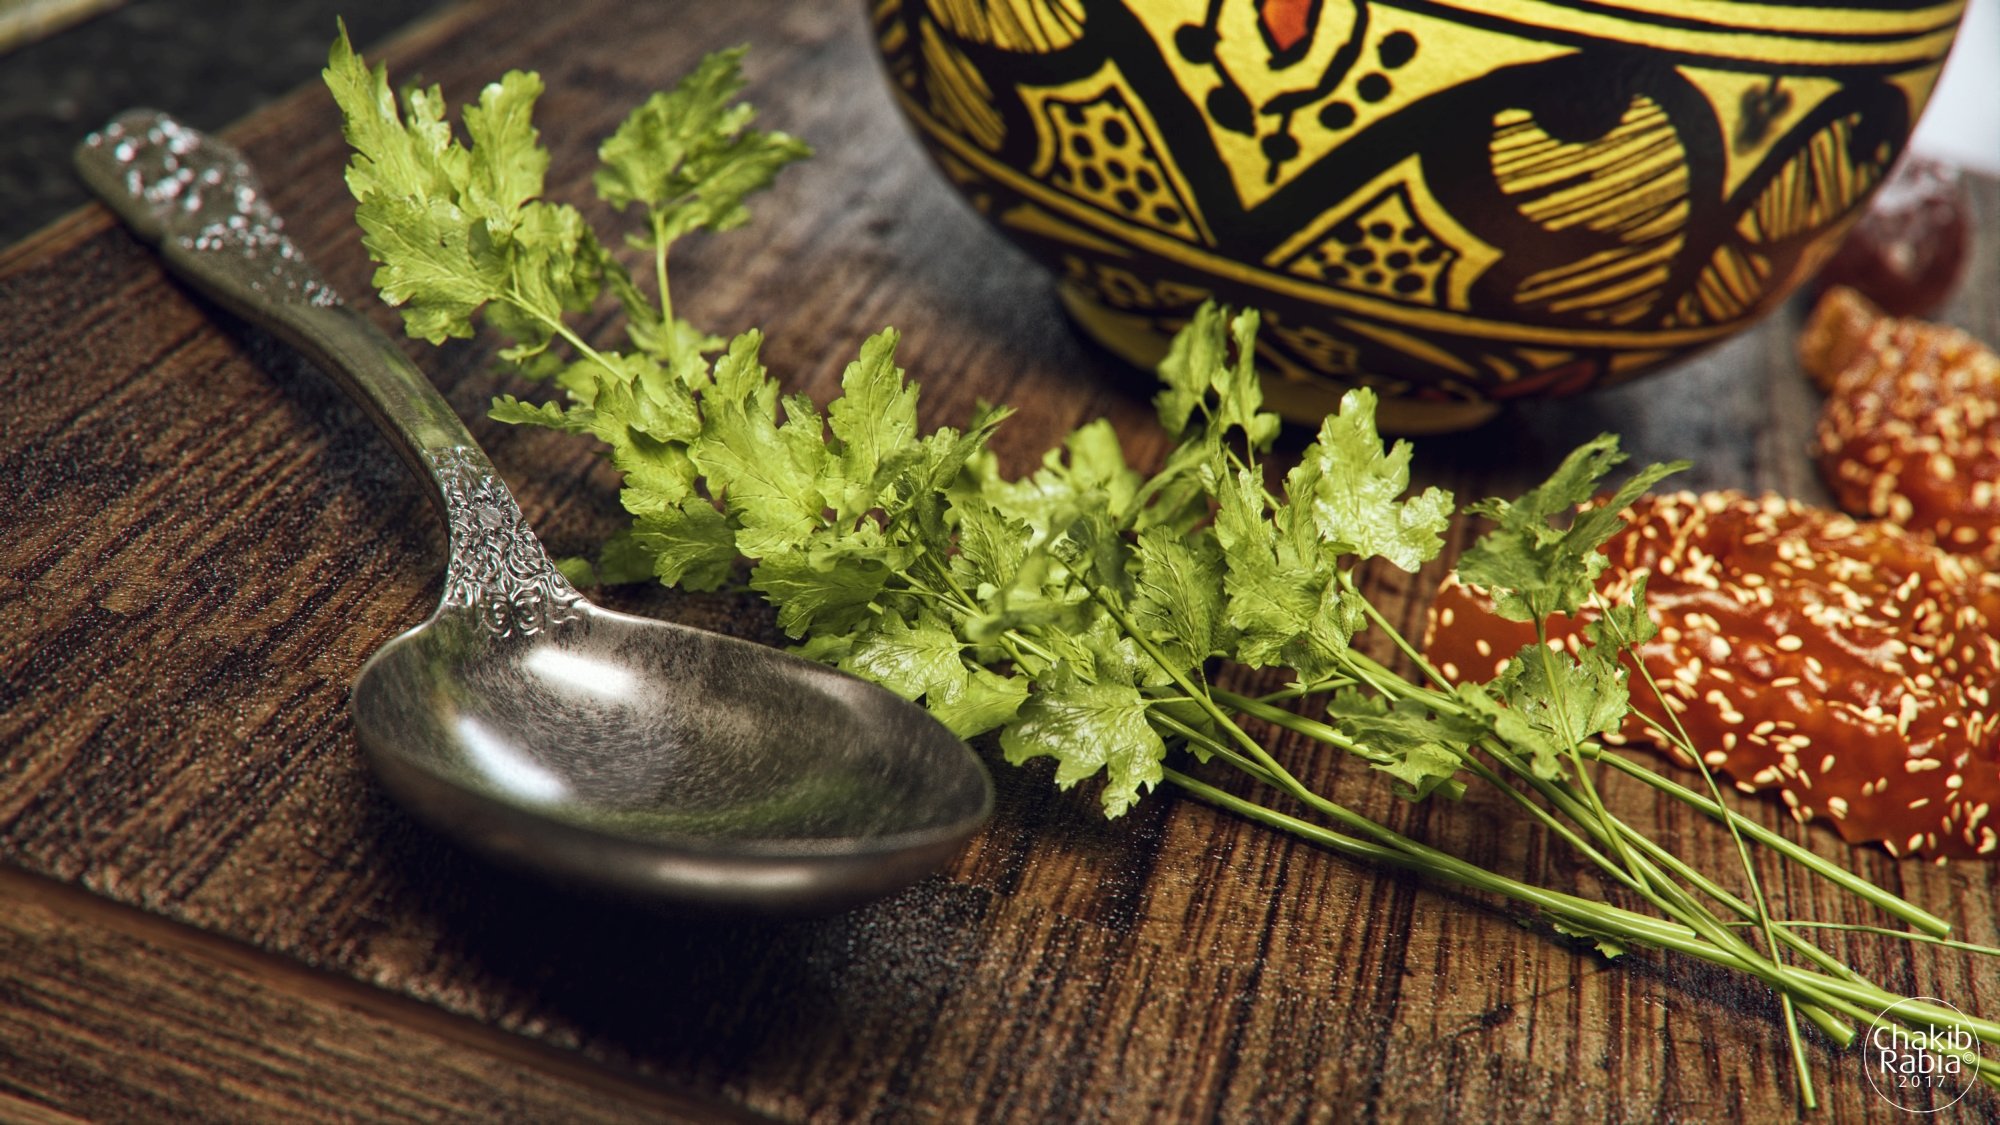
Final image
In addition, I would suggest that you try some Photoshop plugins like Topaz collection and ArionFx - they are great post-production tools. I hope you enjoyed this "Making of"
Best regards!
Chakib Rabia
Customer zone
Your special offers
Your orders
Edit account
Add project
Liked projects
View your artist profile


 Hi My name is Chakib Rabia a professional 3d Artist from Morocco, I have more than 11 years experience in CG industry and I would like to share with you a "Making of" my new personal work "Moroccan Food".







COMMENTS