This interior scene was made by Evermotion in 3ds Max and V-Ray. It is a scene 6 from Archinteriors vol. 30.
Click on image to enlarge 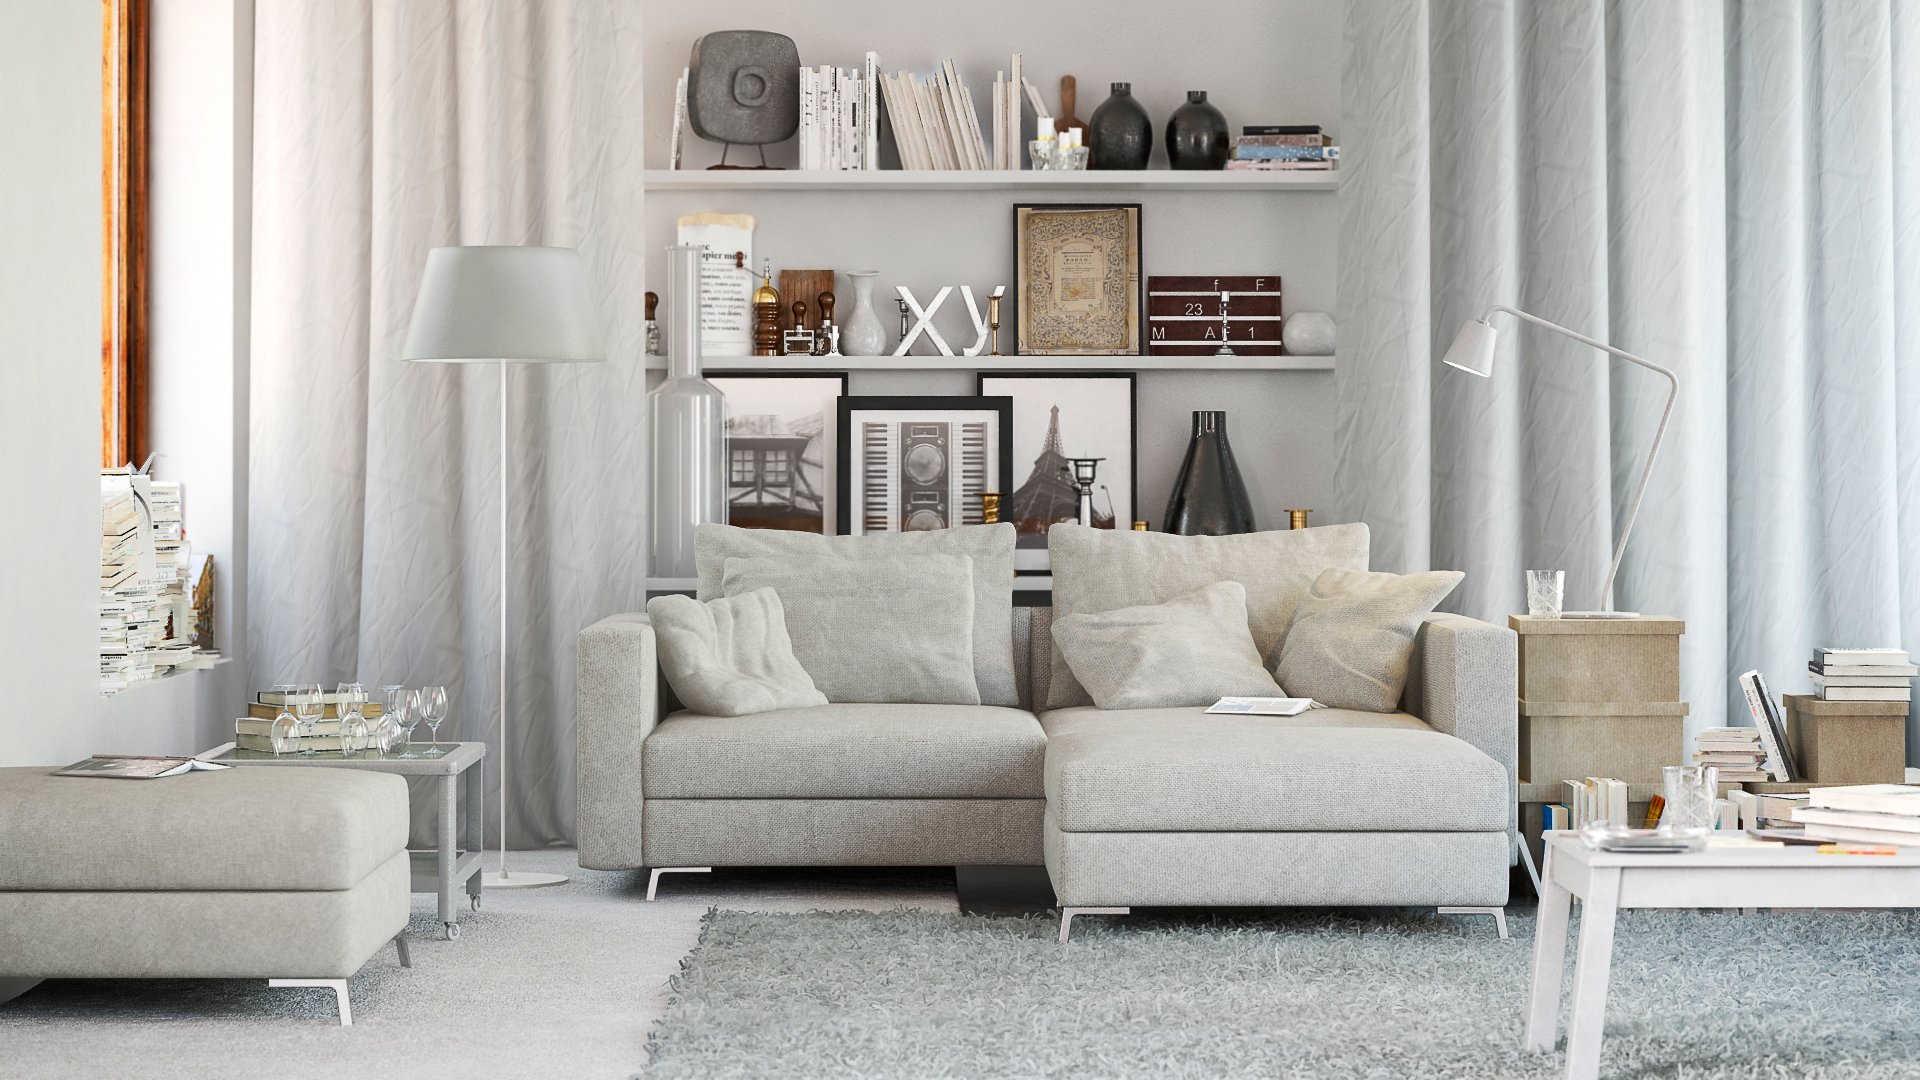
This is the final image after post-production. this is simple living room scene with prominent curtains, some props and subtle lighting.
Click on image to enlarge 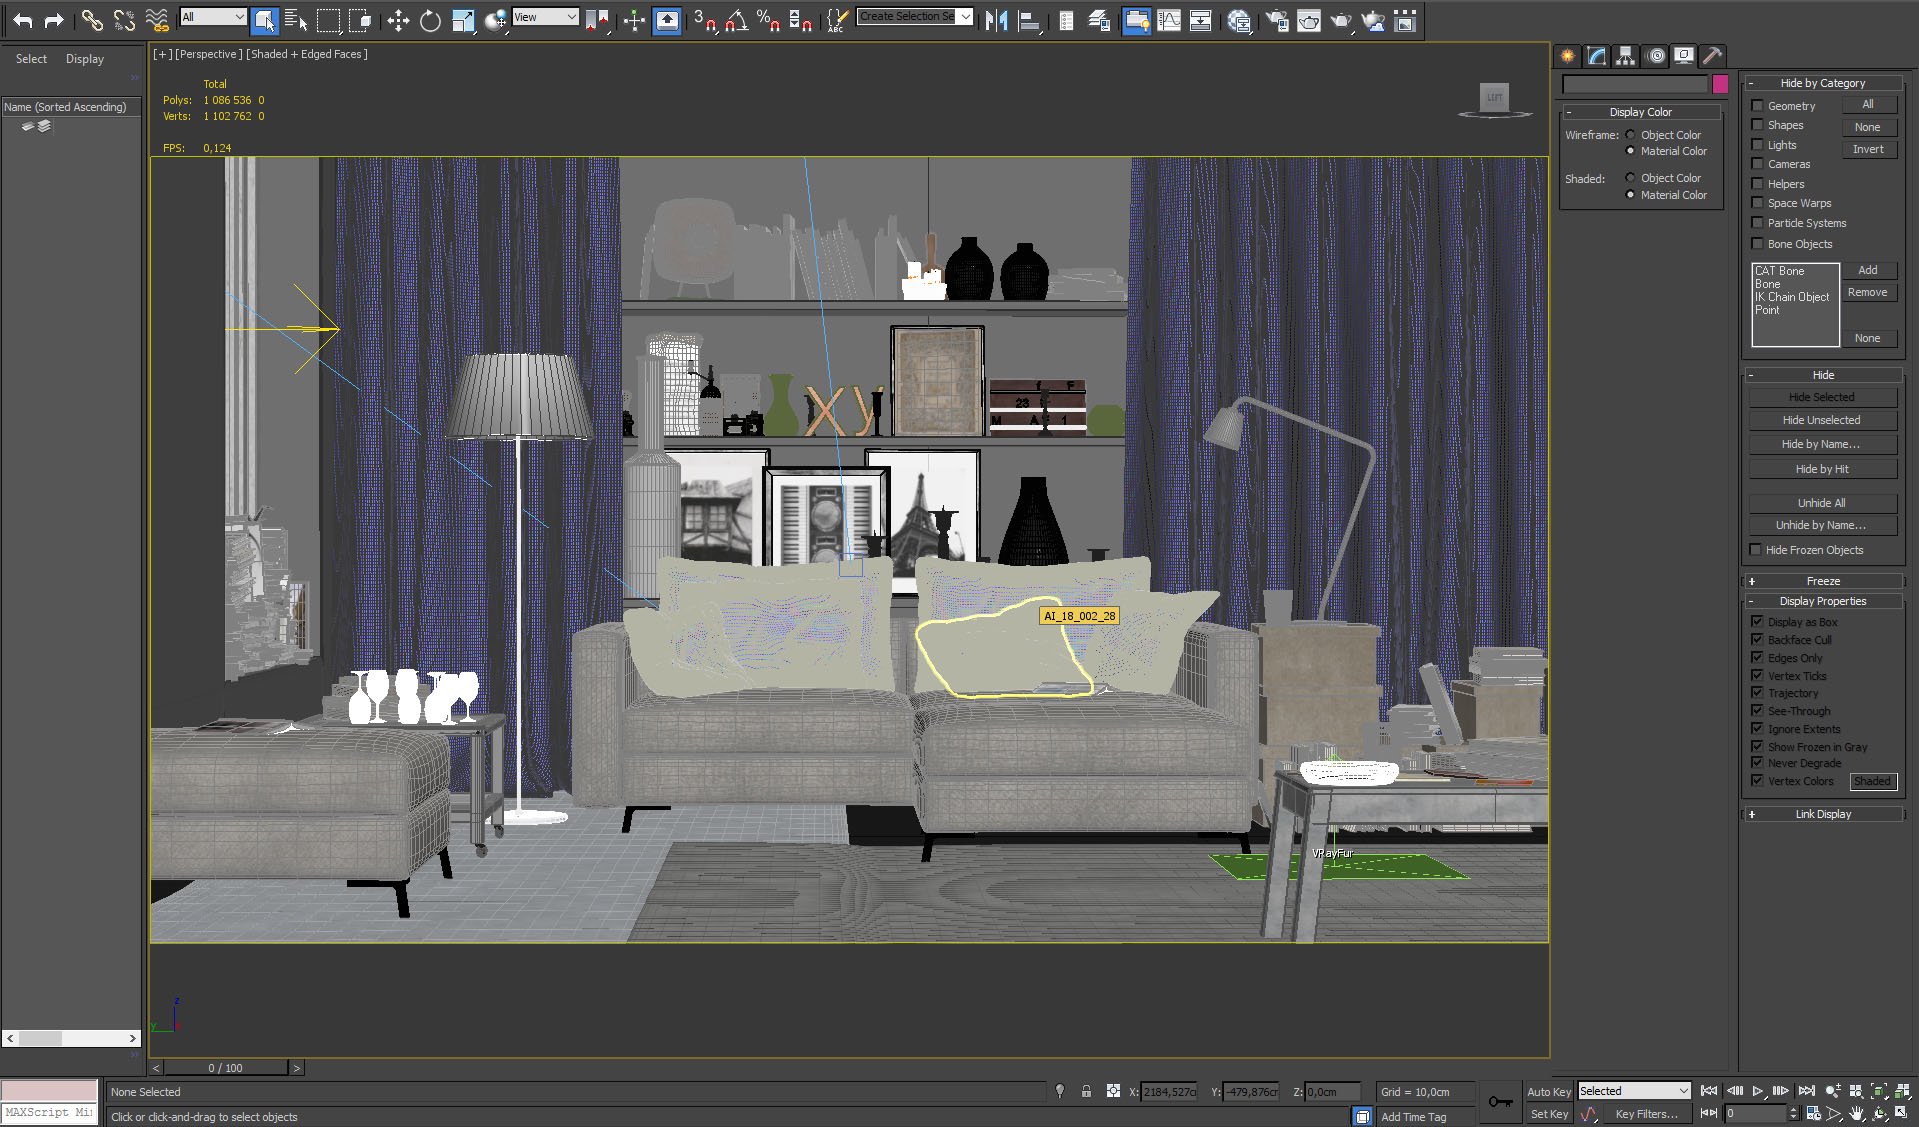
Scene visible through Vray camera in 3ds Max Viewport.
Click on image to enlarge 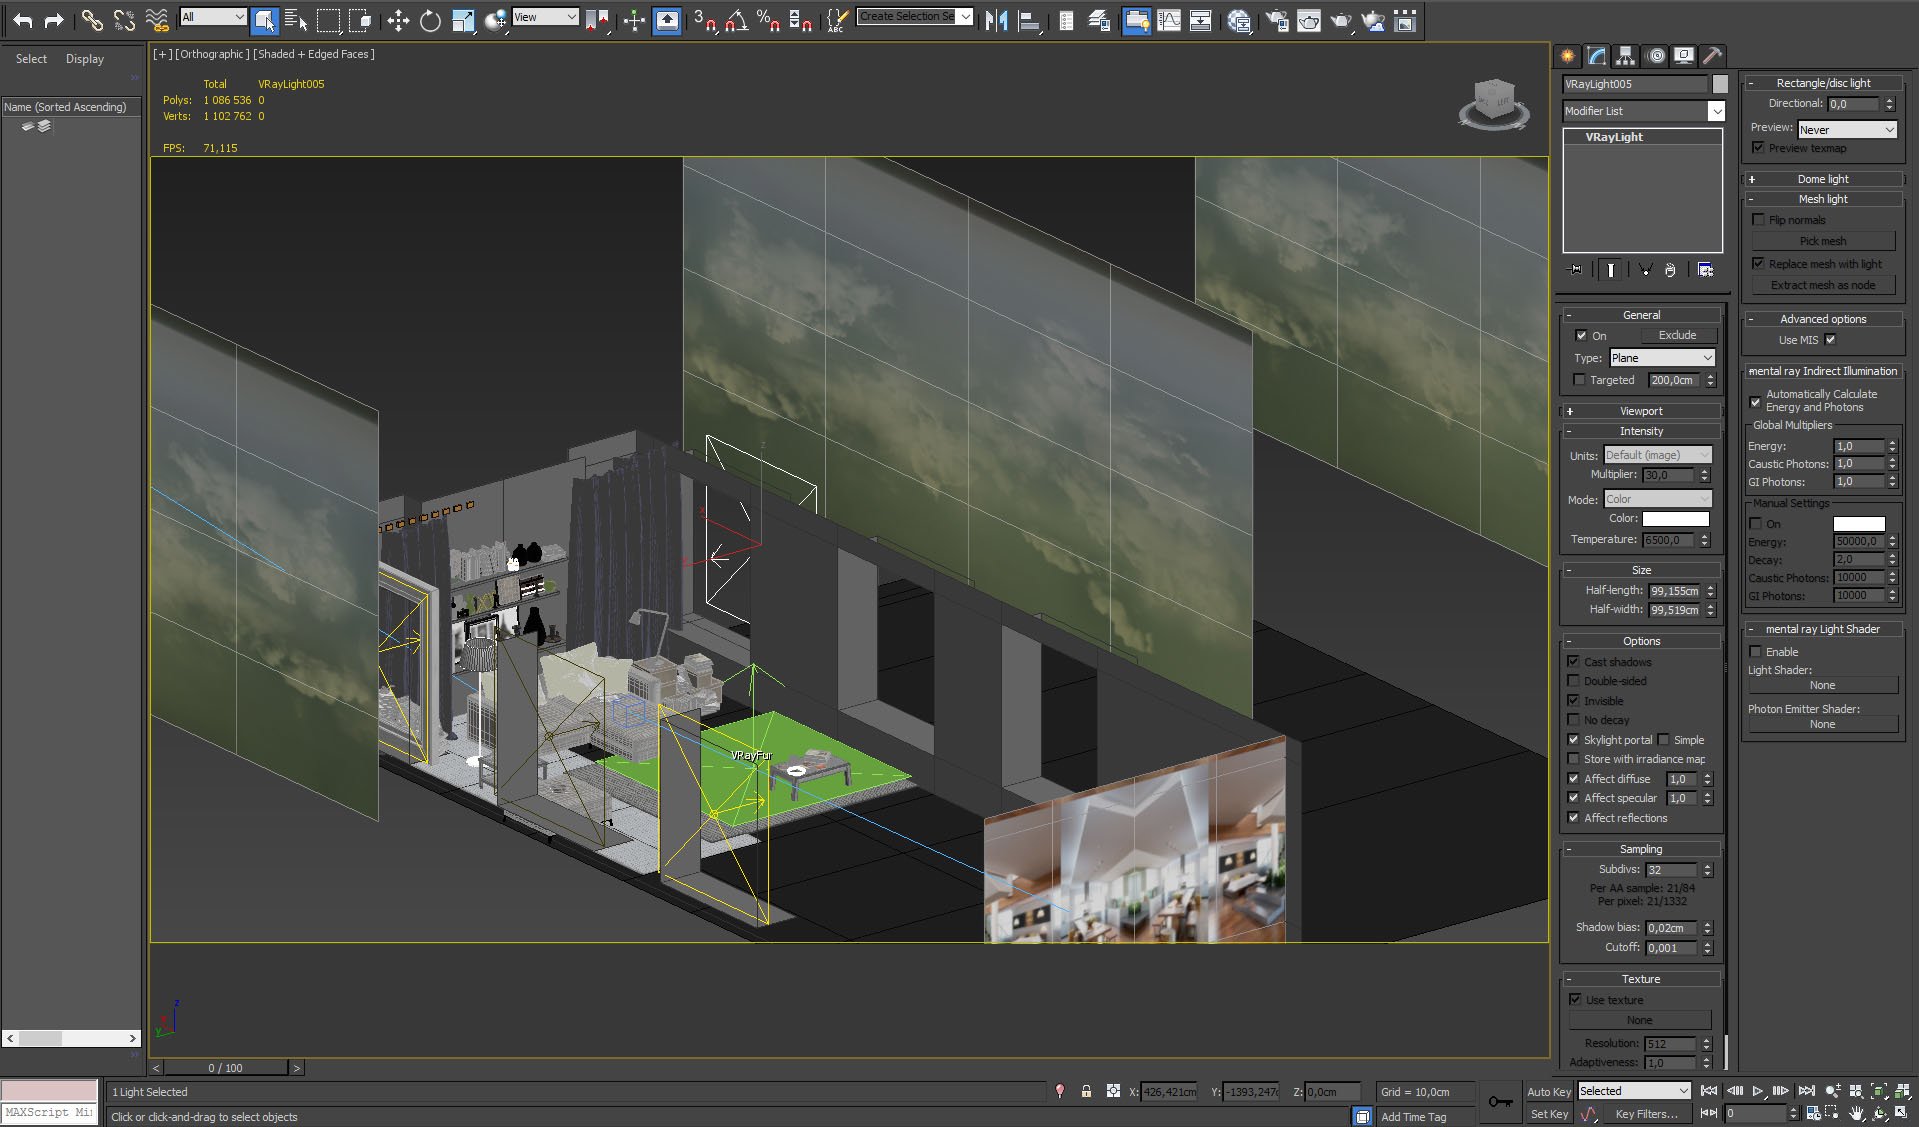
VrayLight settings. It's a light portal. Background map behind it gives a subtle tint to interior.
Click on image to enlarge 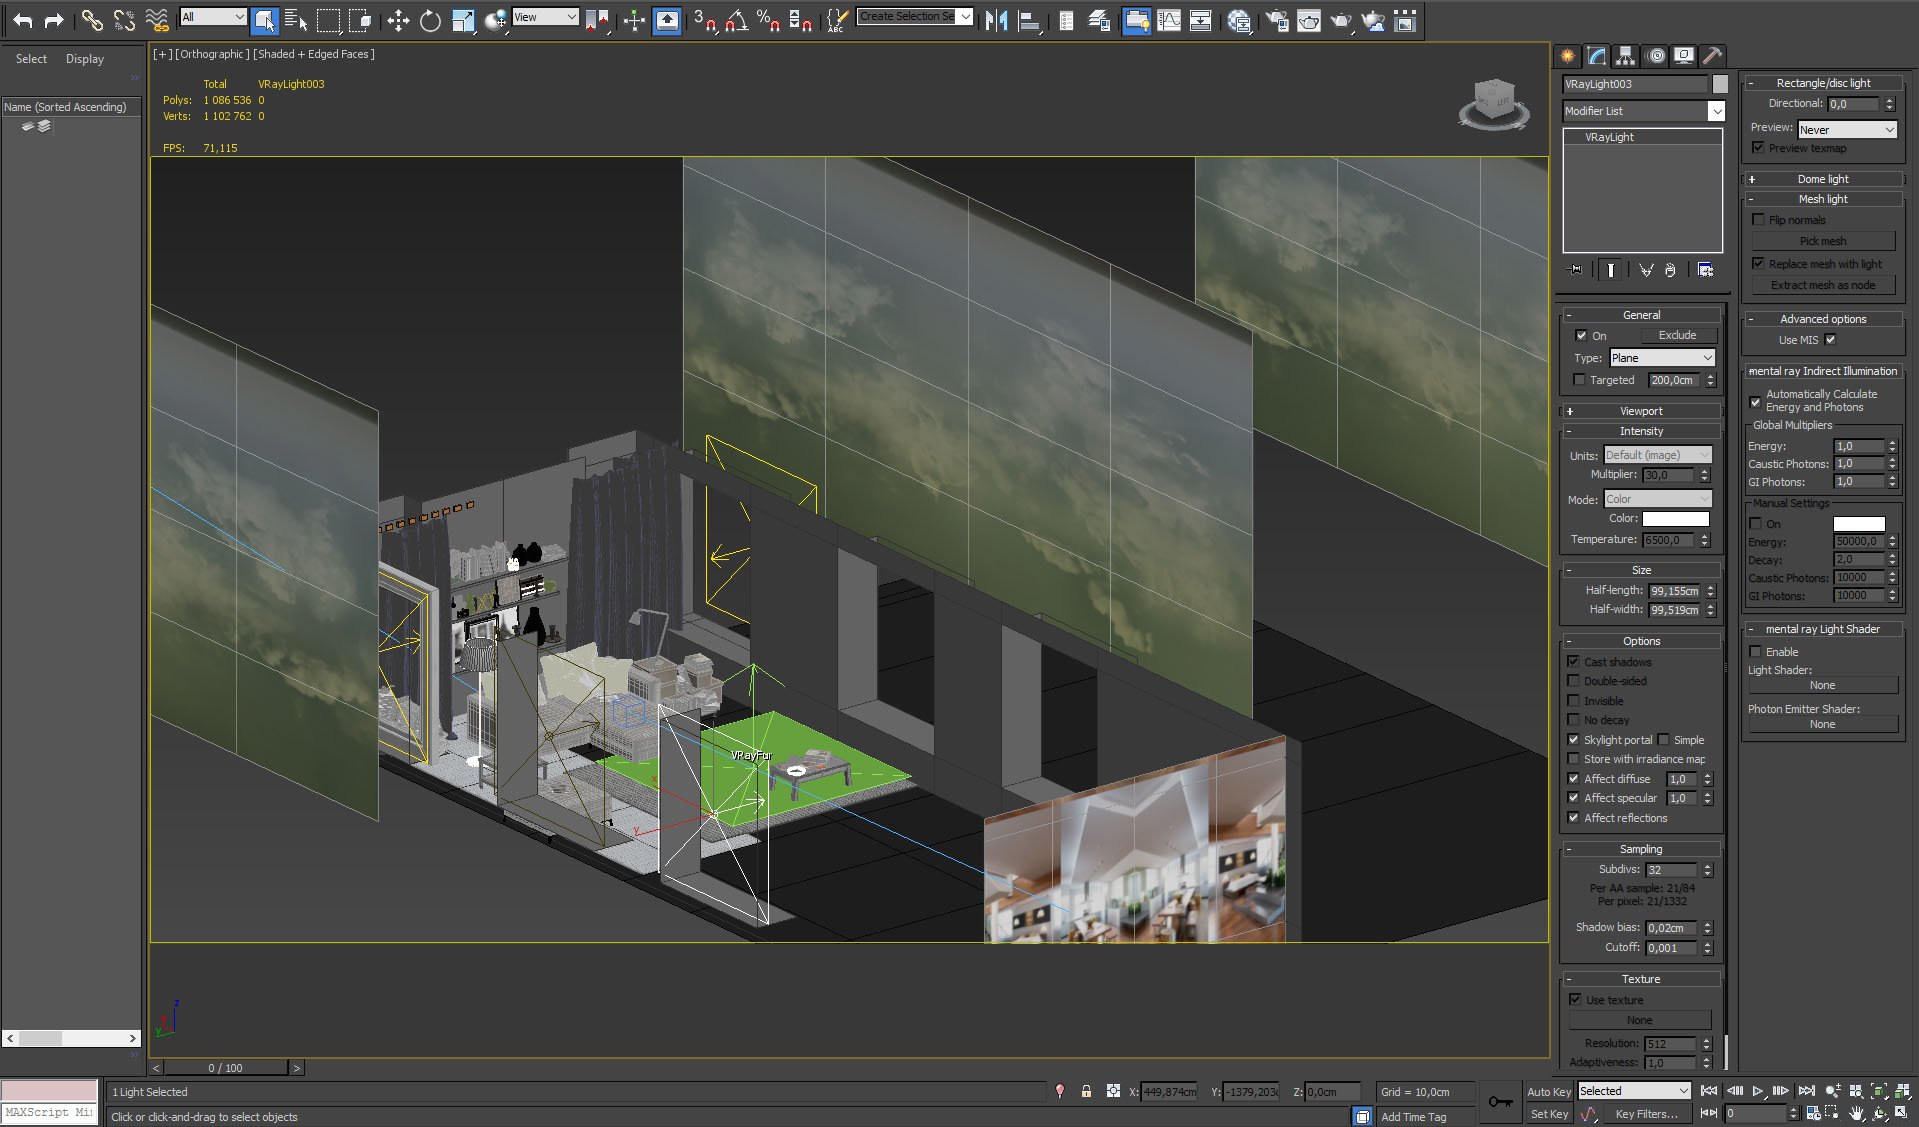
VrayLight settings.
Click on image to enlarge 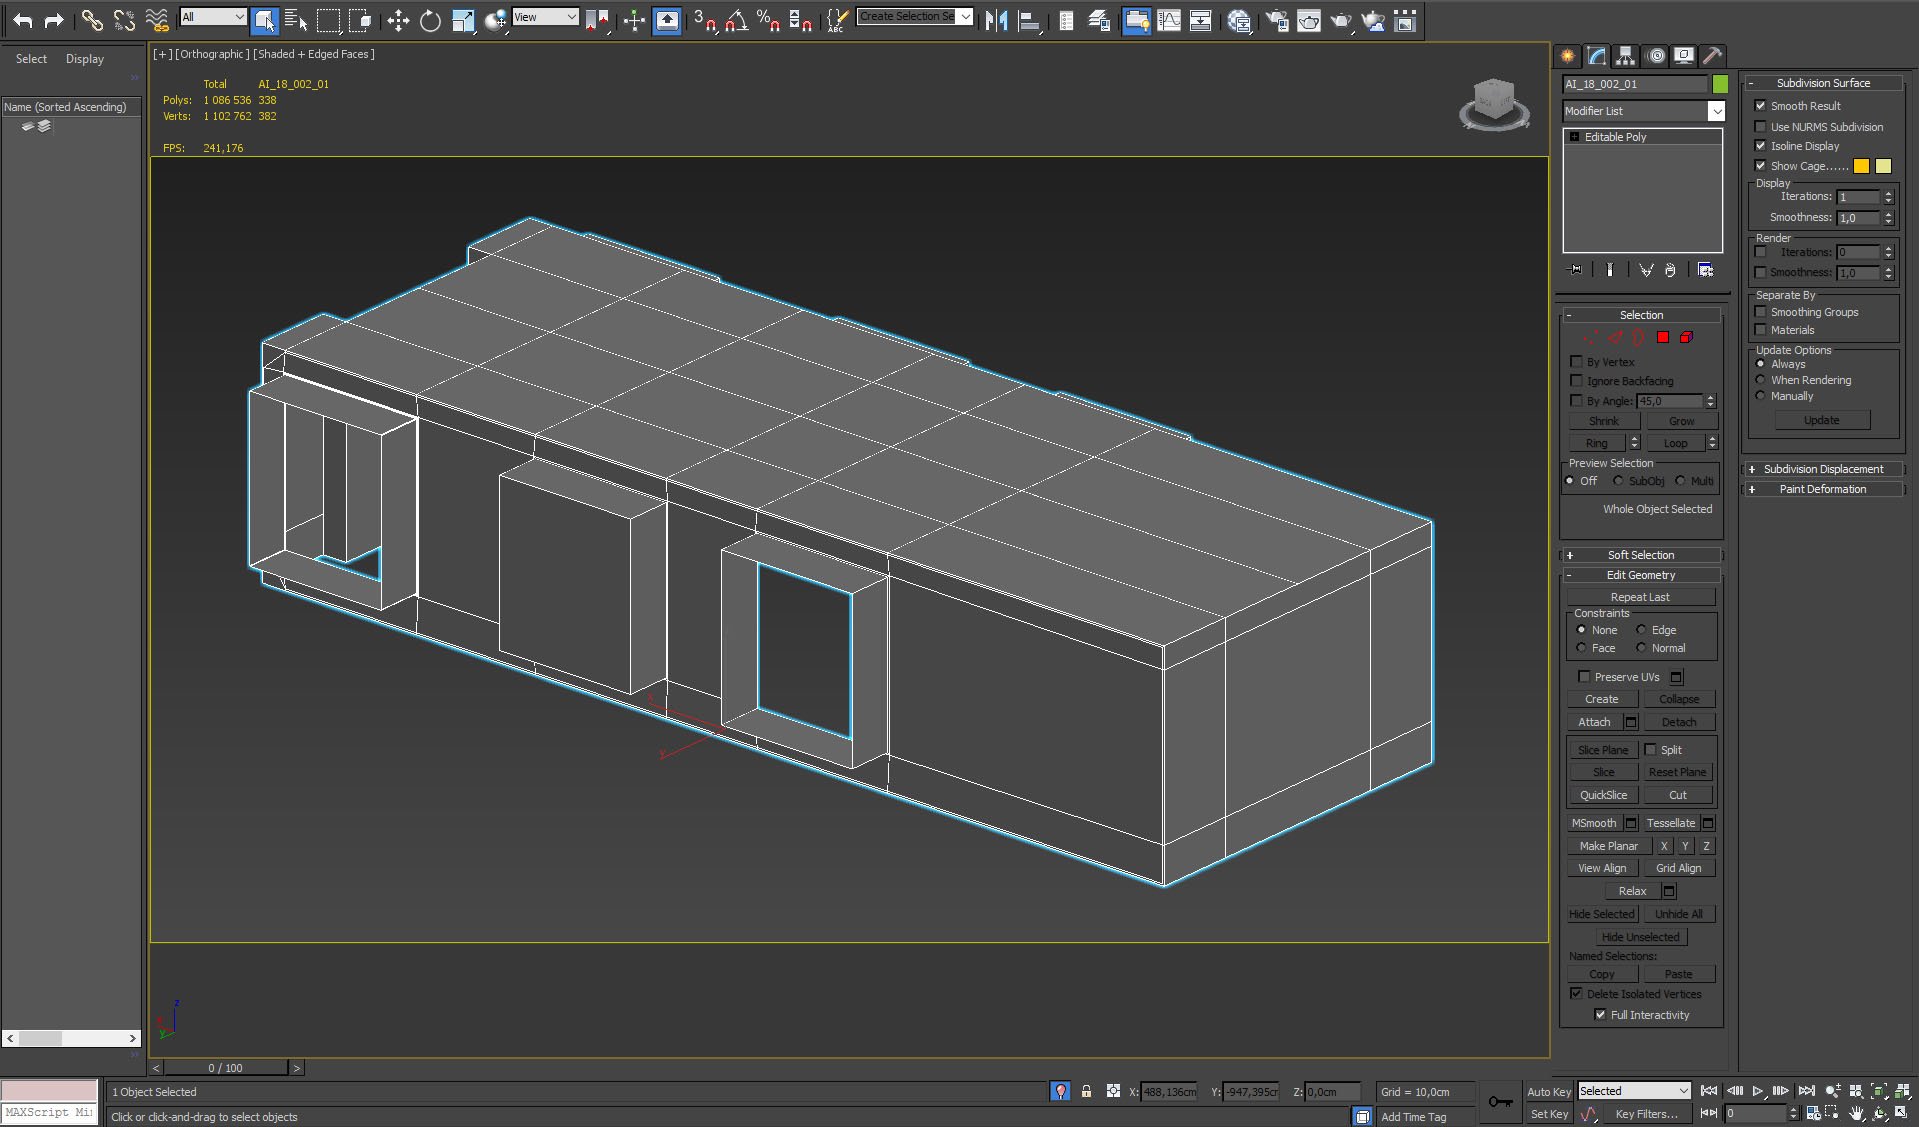
Main mesh is very simple.
Click on image to enlarge 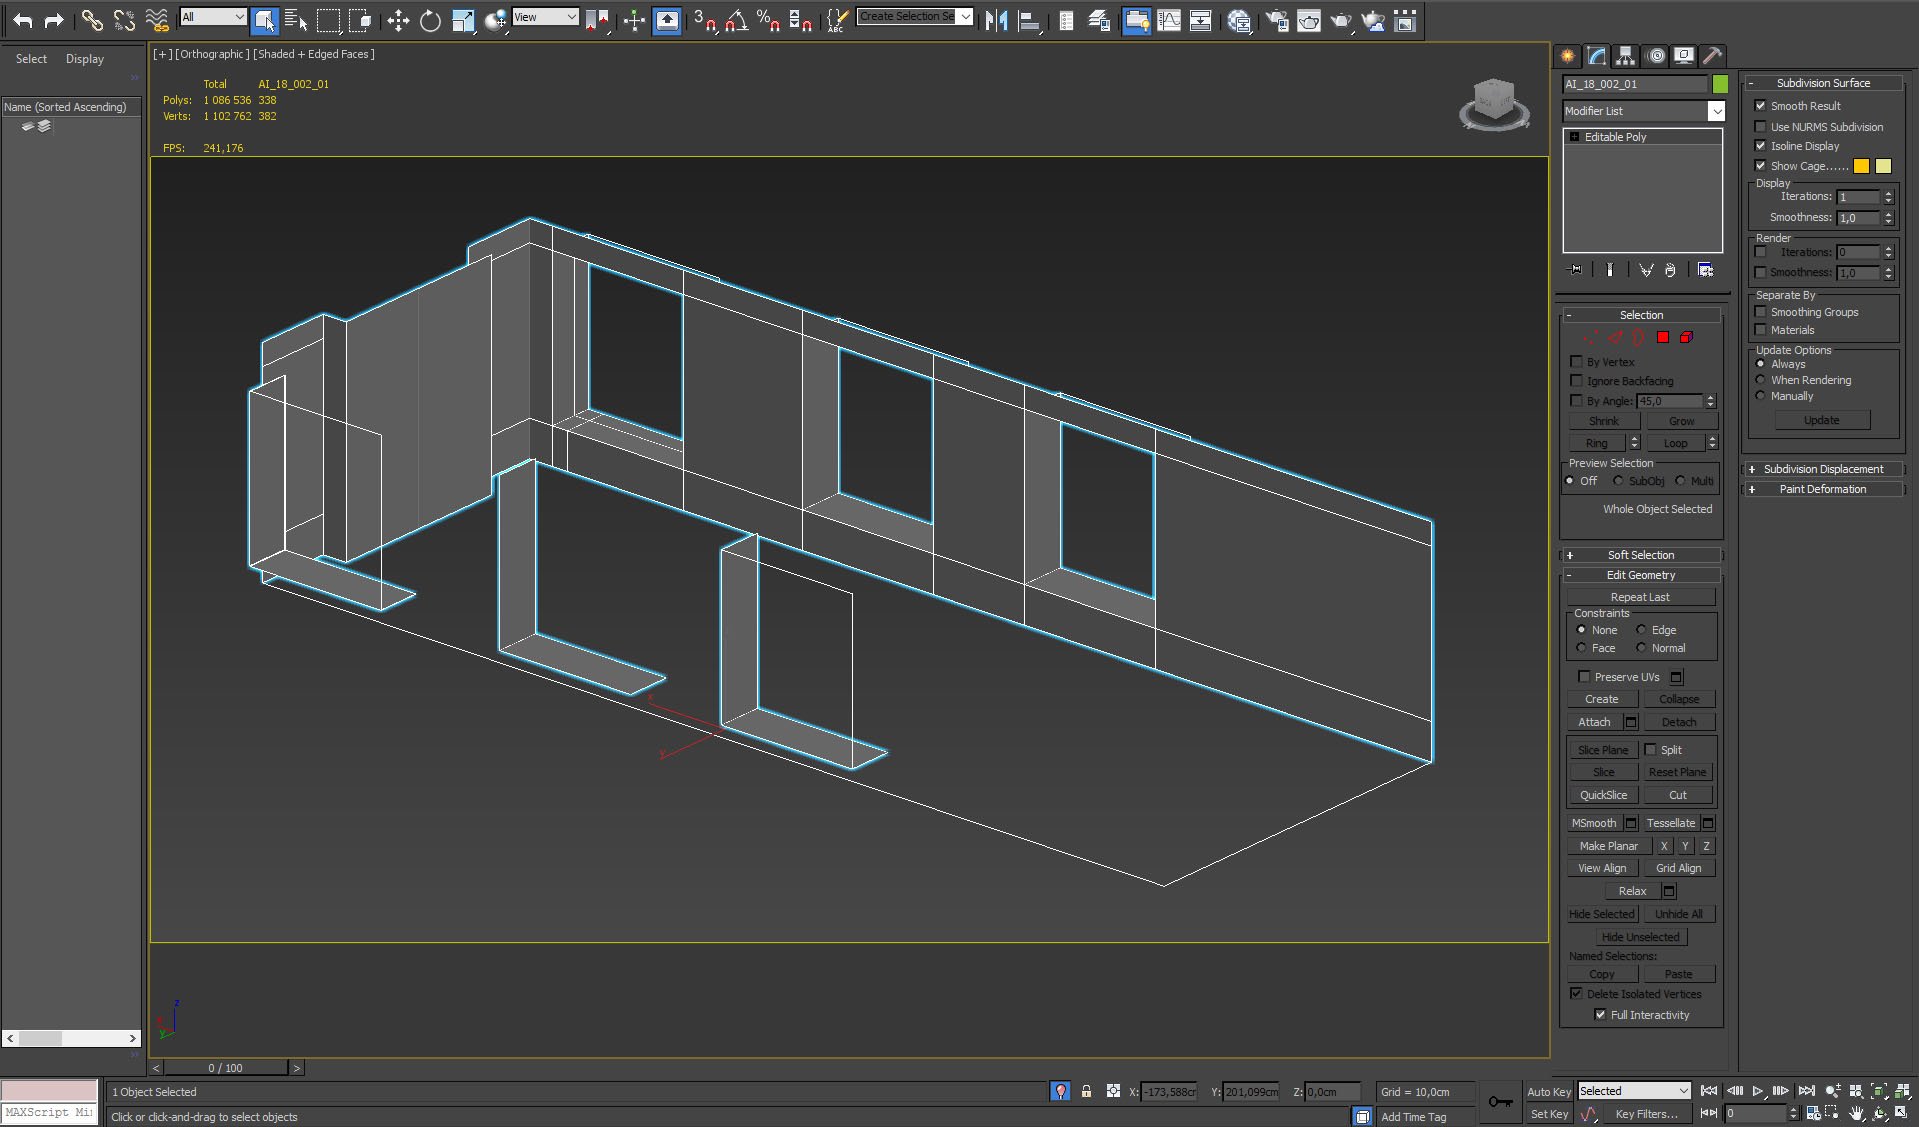
Main mesh (backface culling ON)
Click on image to enlarge 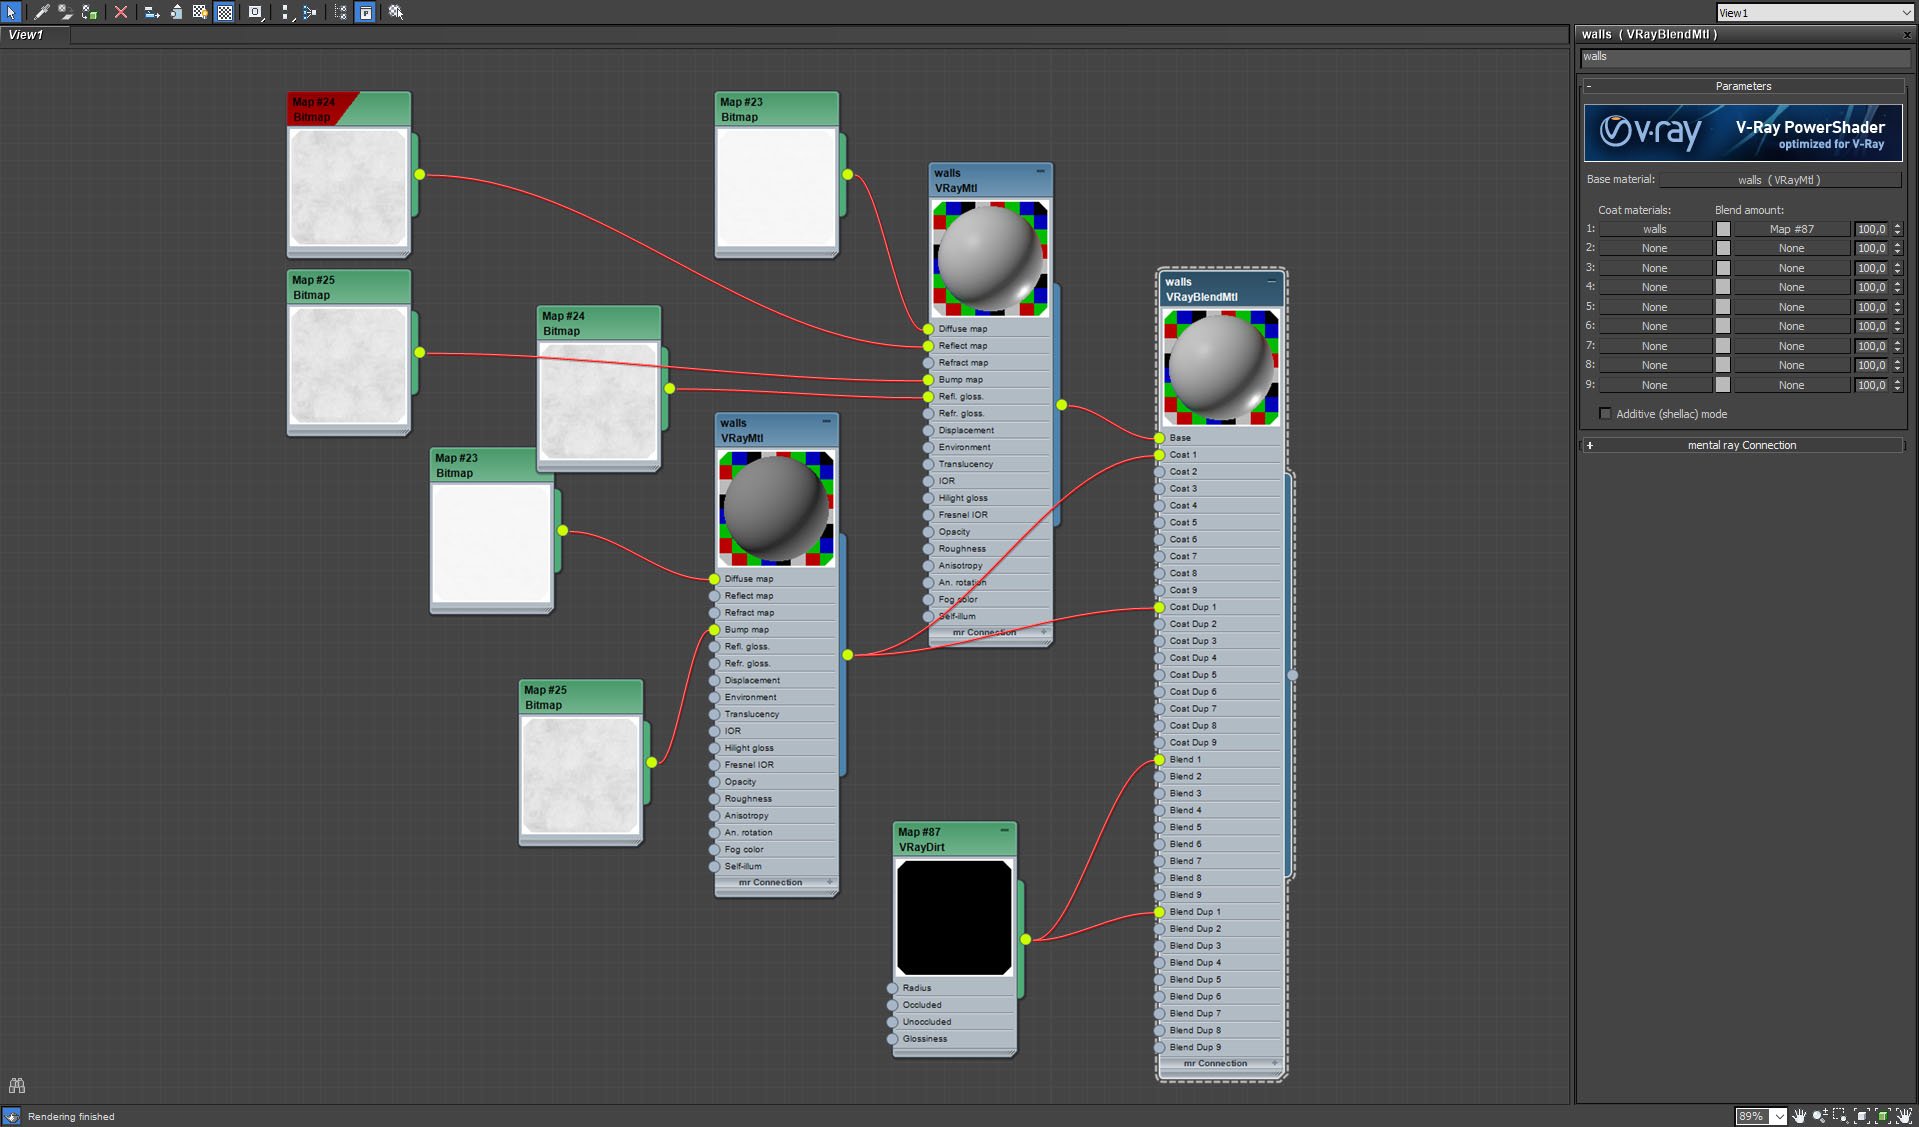
Main mesh material - VrayBlend Material settings.
Click on image to enlarge 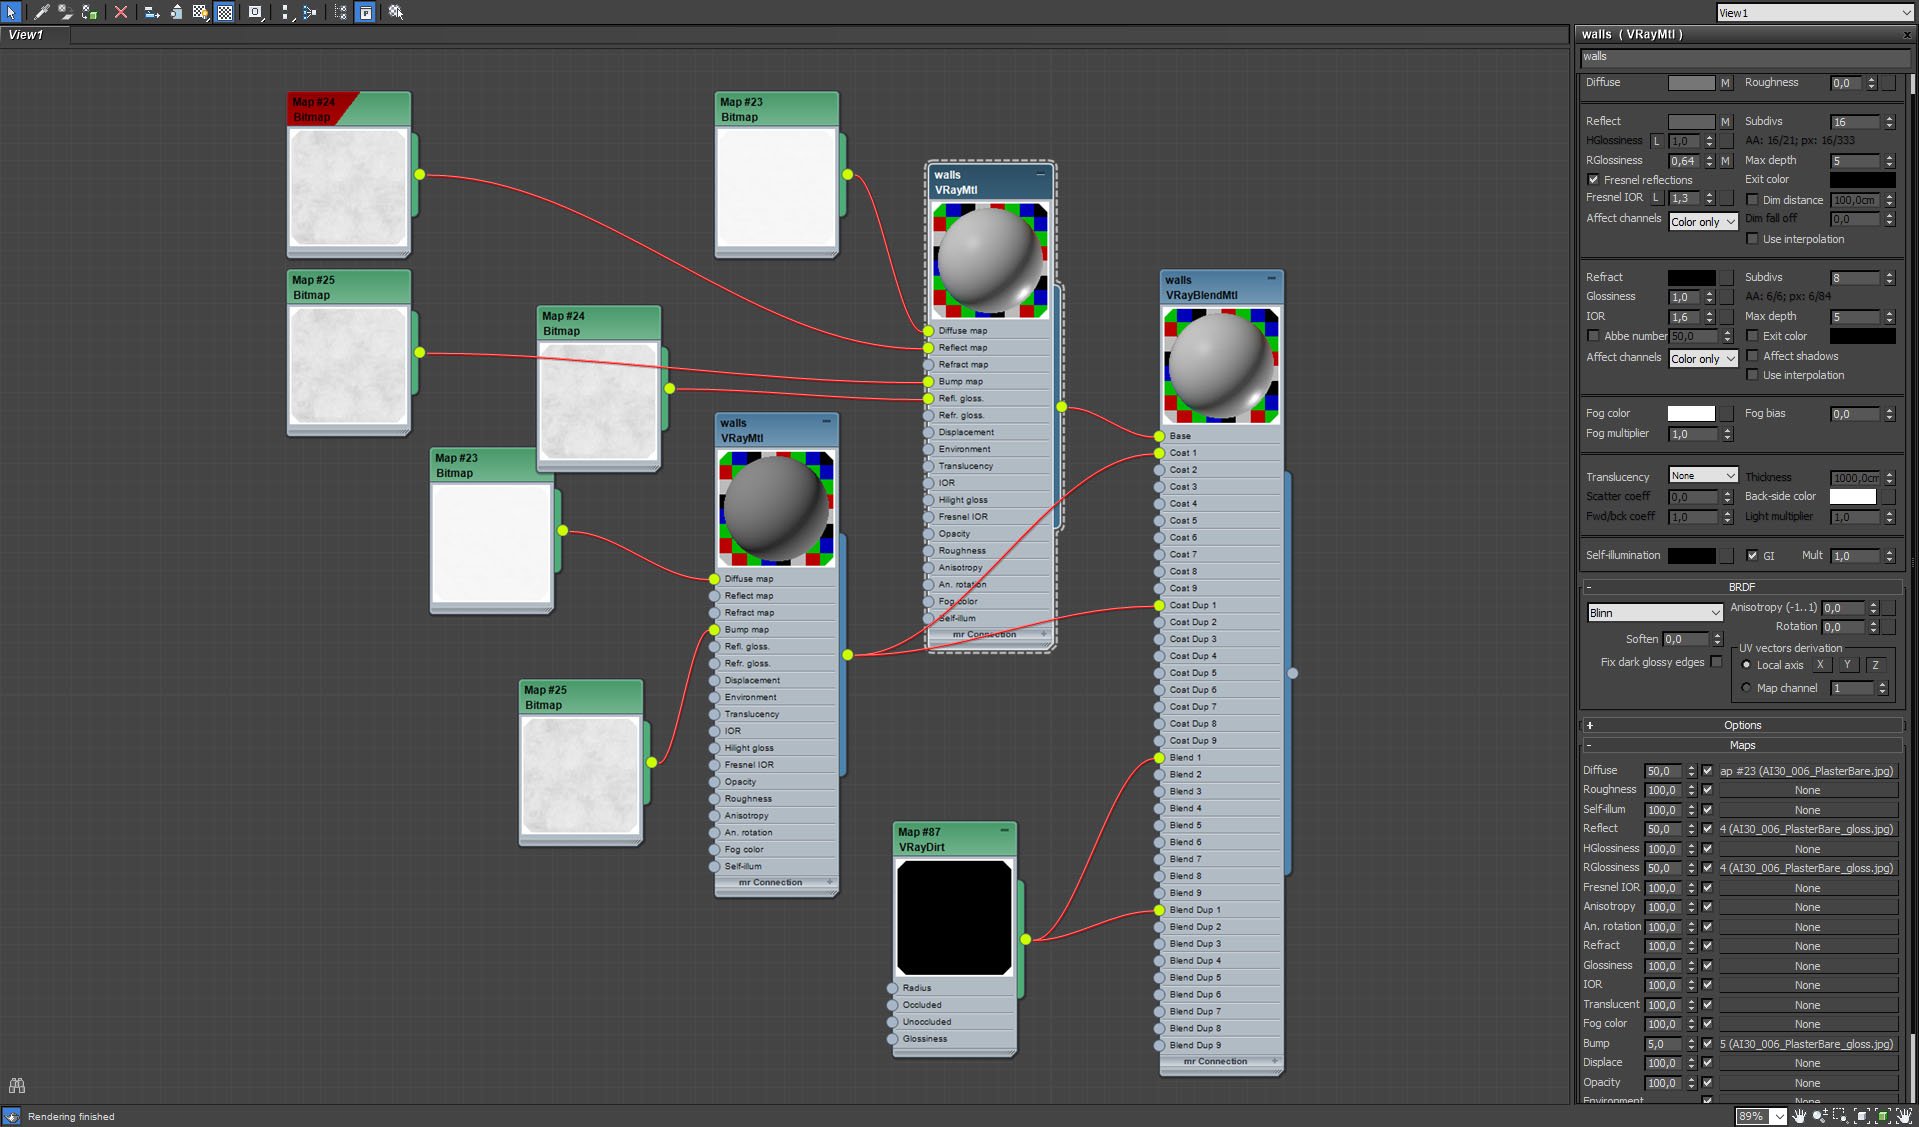
Main mesh material - base material settings.
Click on image to enlarge 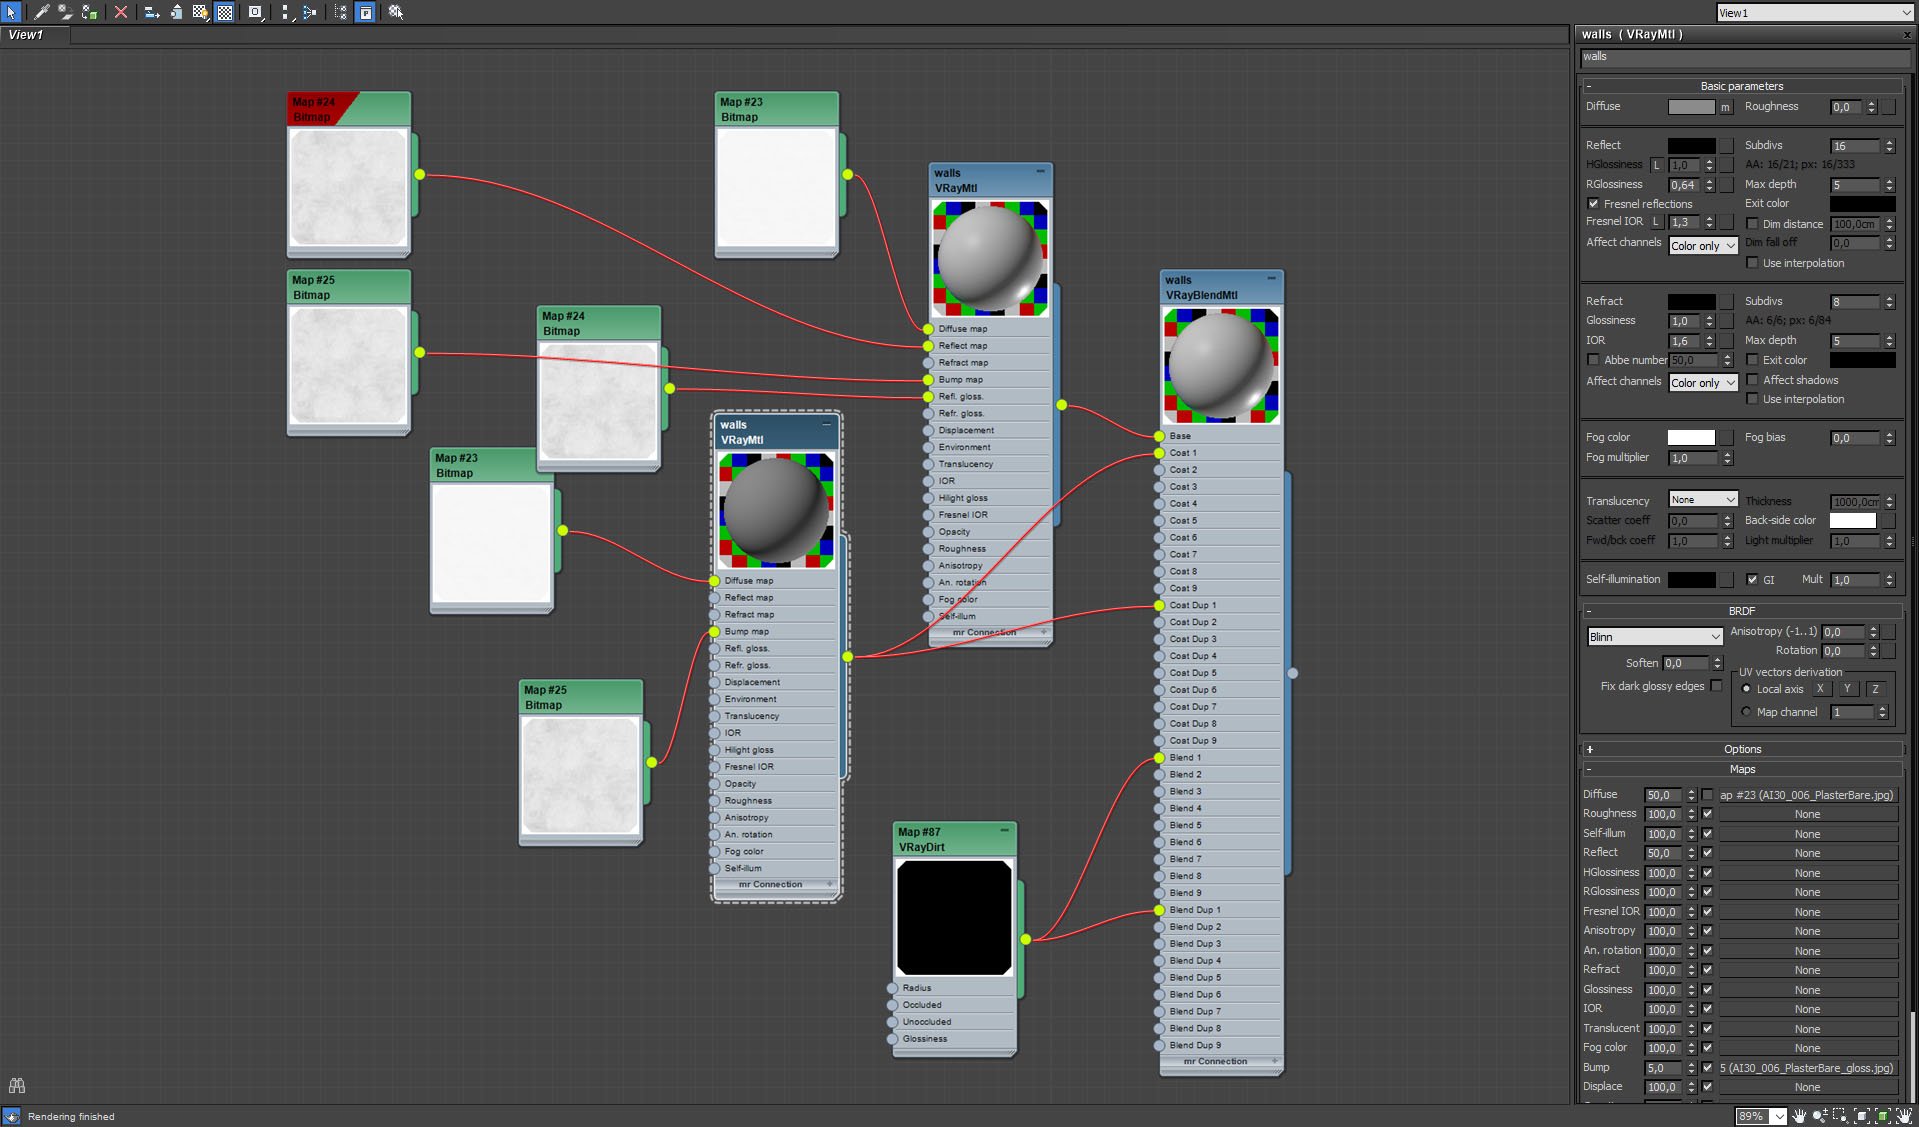
Main mesh material - coat material settings.
Click on image to enlarge 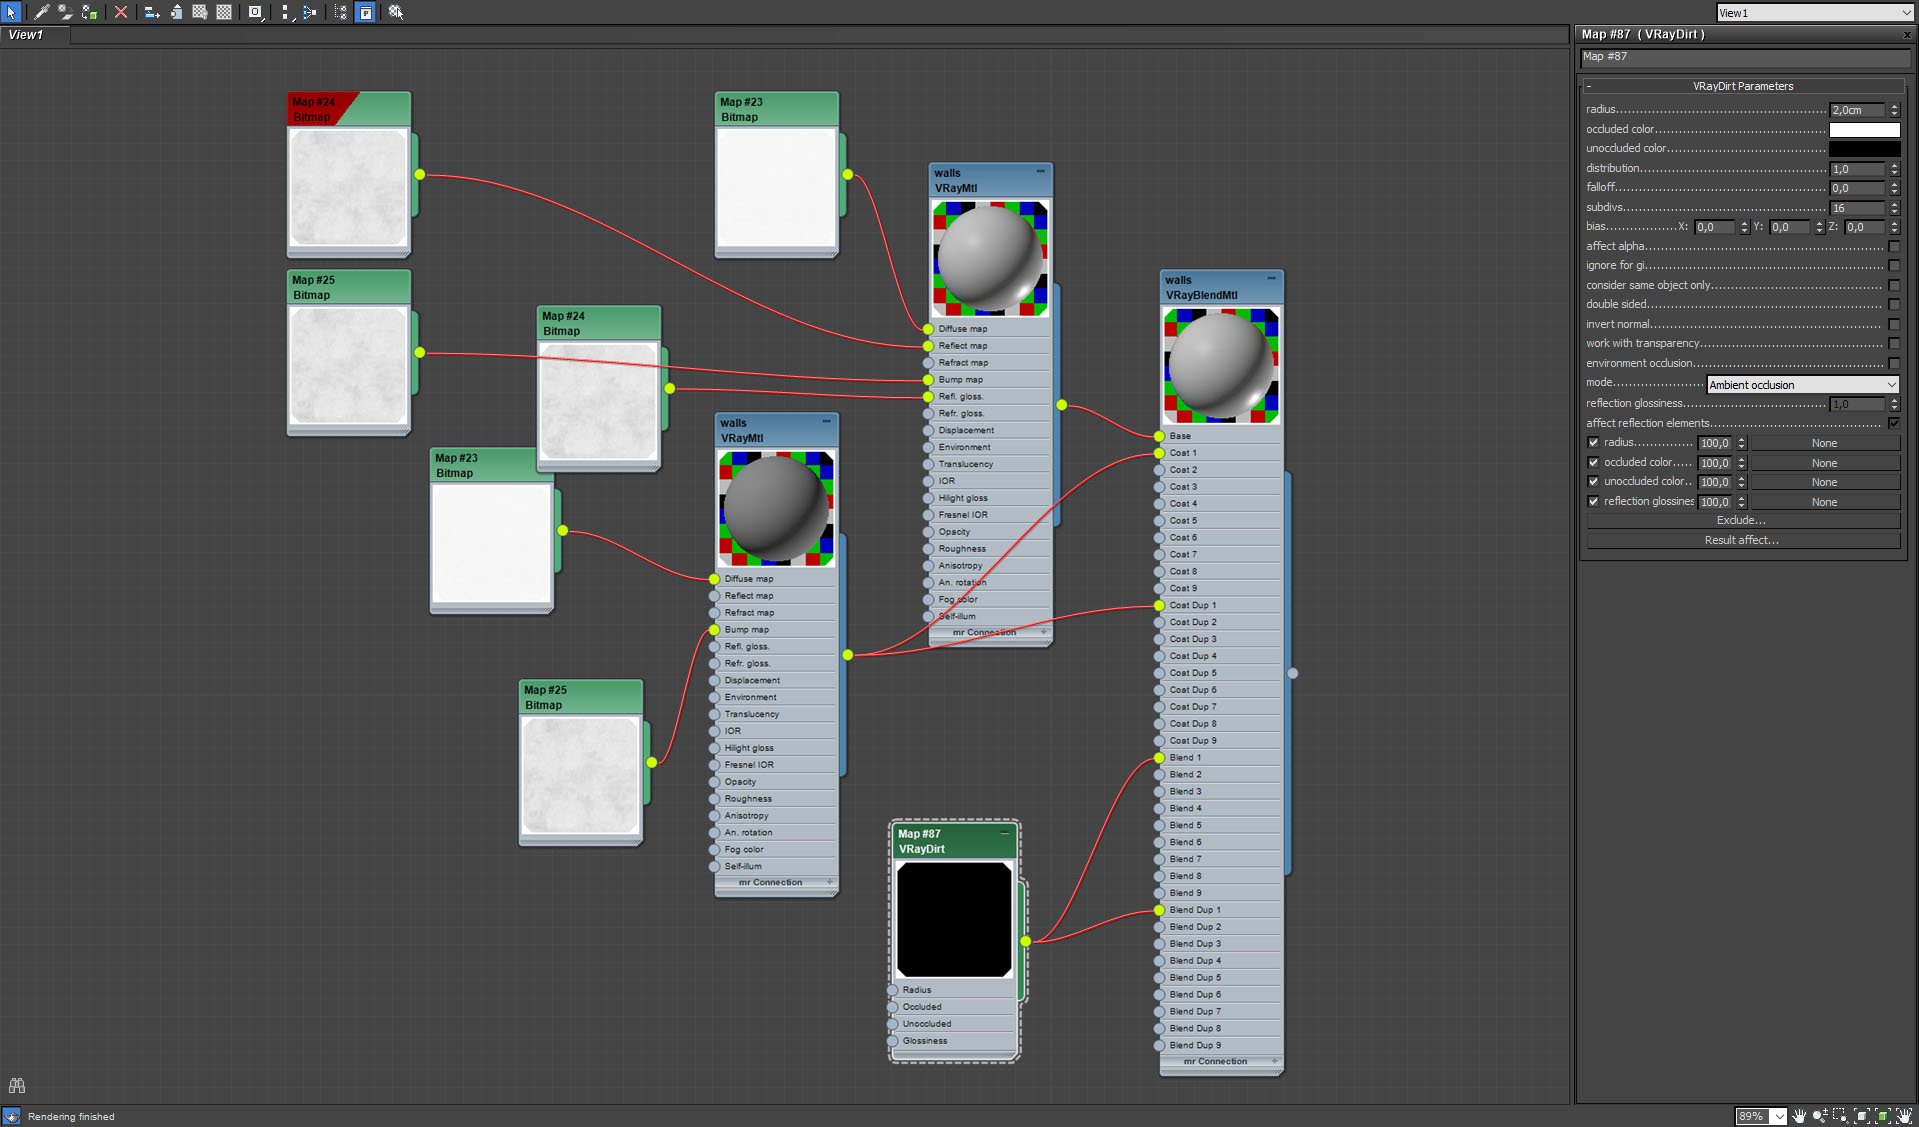
Main mesh material - VrayDirt settings.
Click on image to enlarge 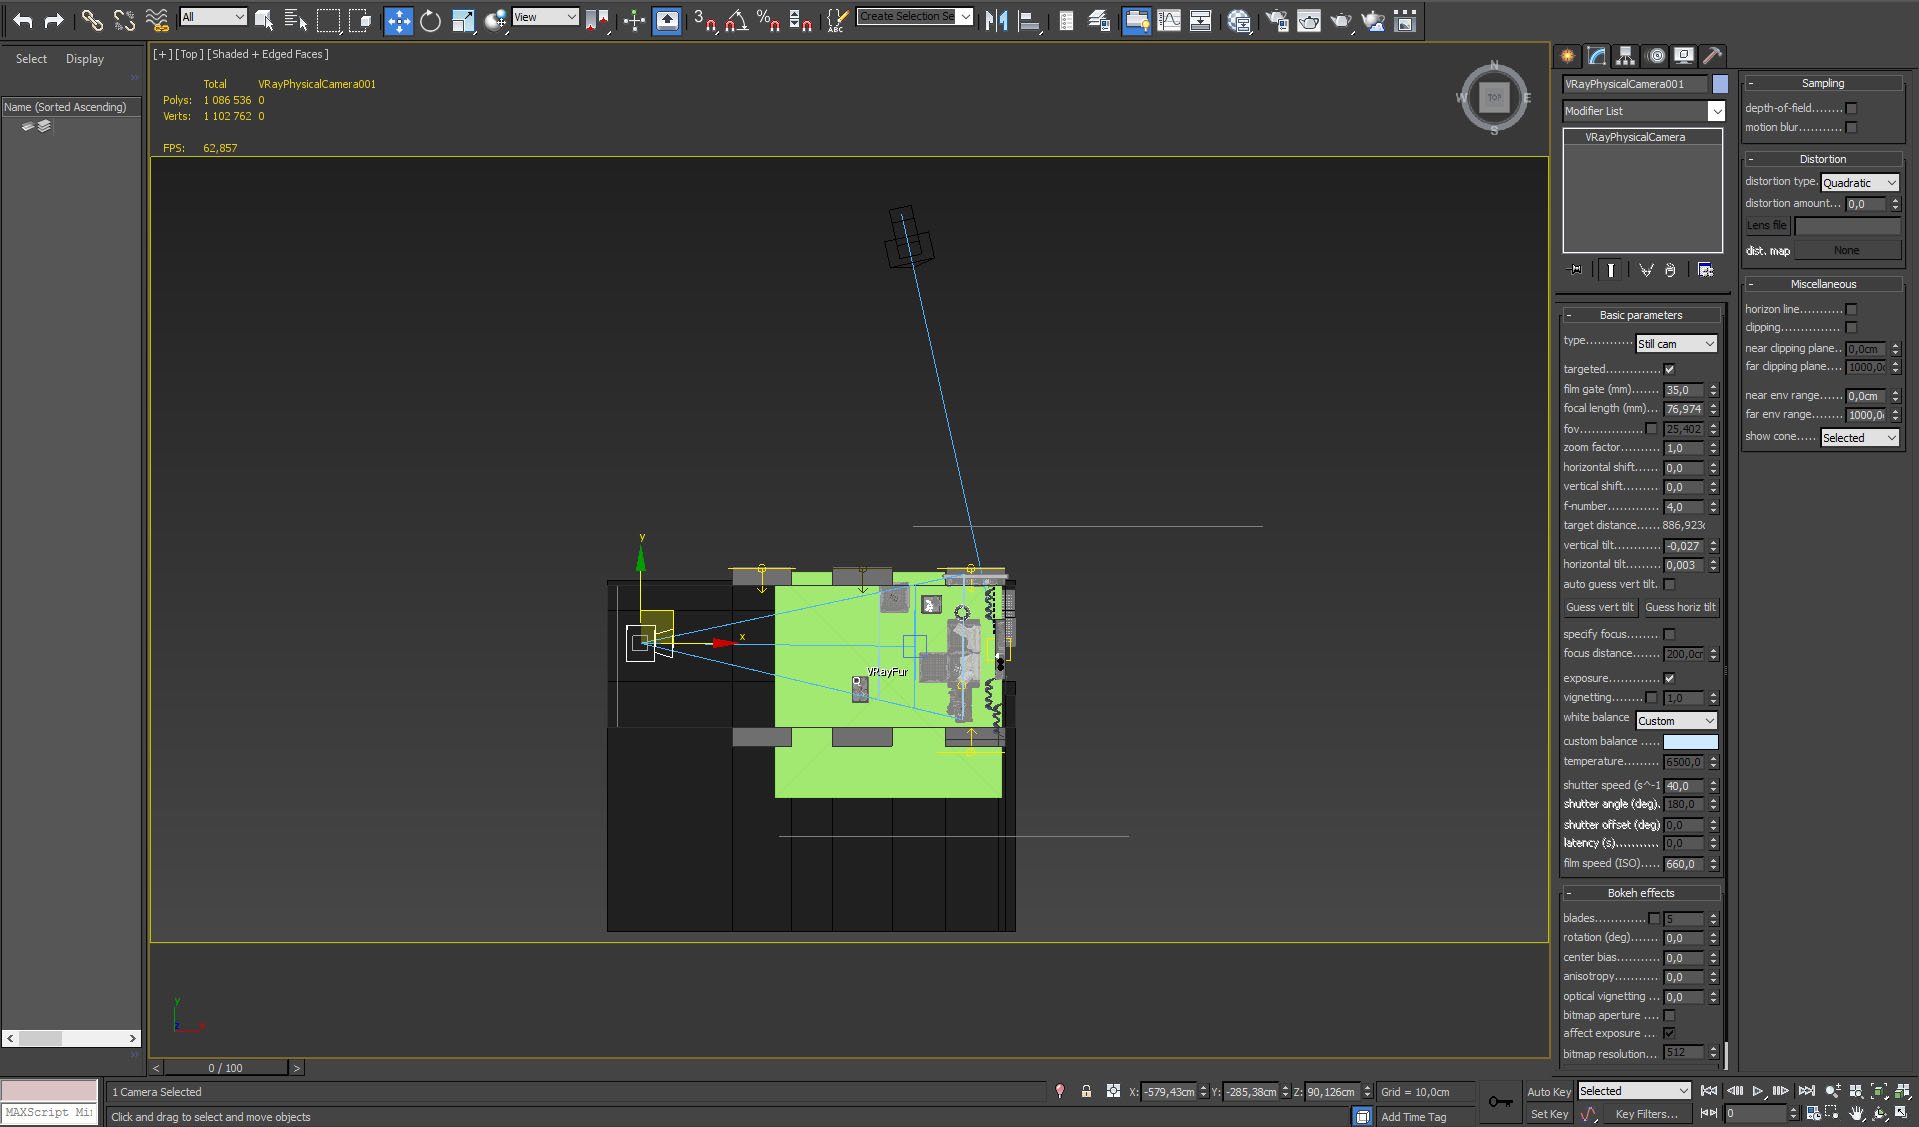
Camera settings and placement, top view.
Click on image to enlarge 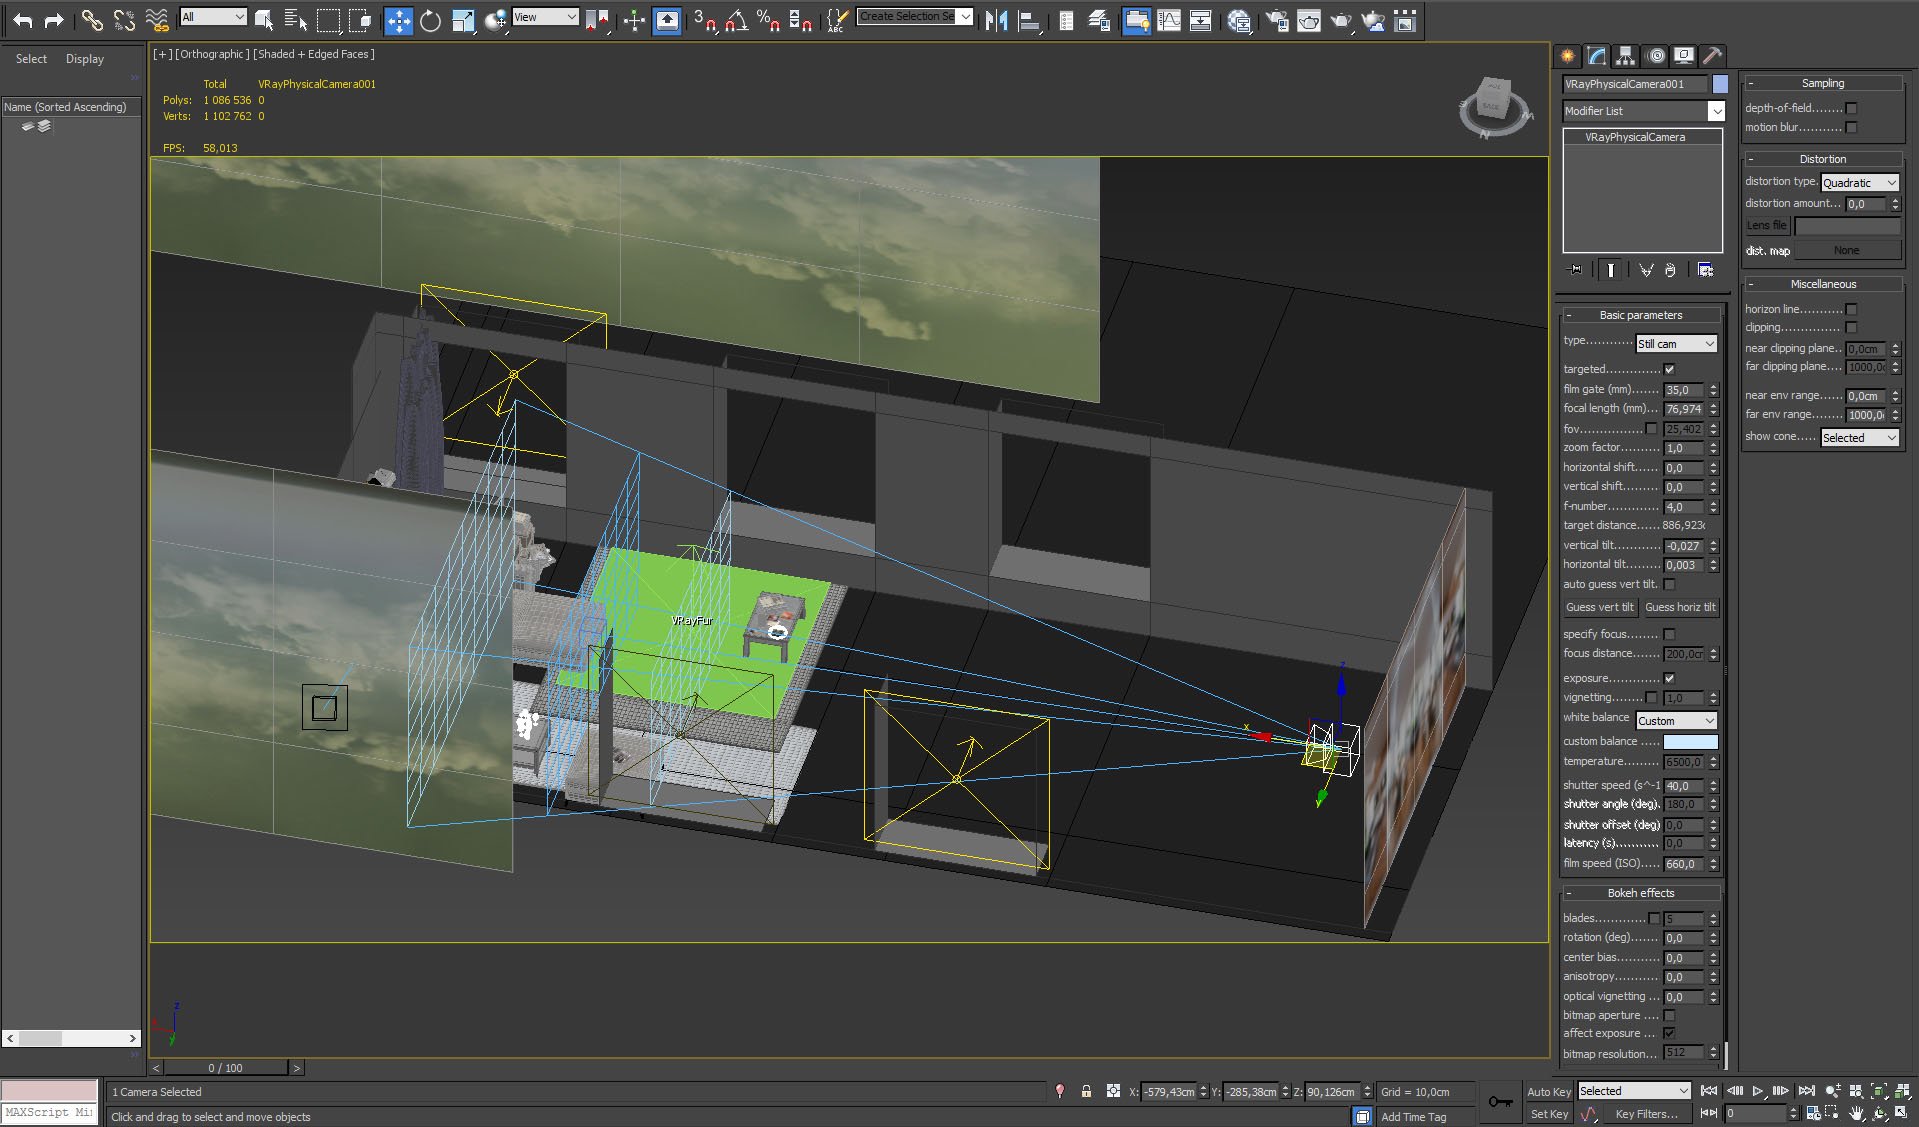
Camera settings and placement.
Click on image to enlarge 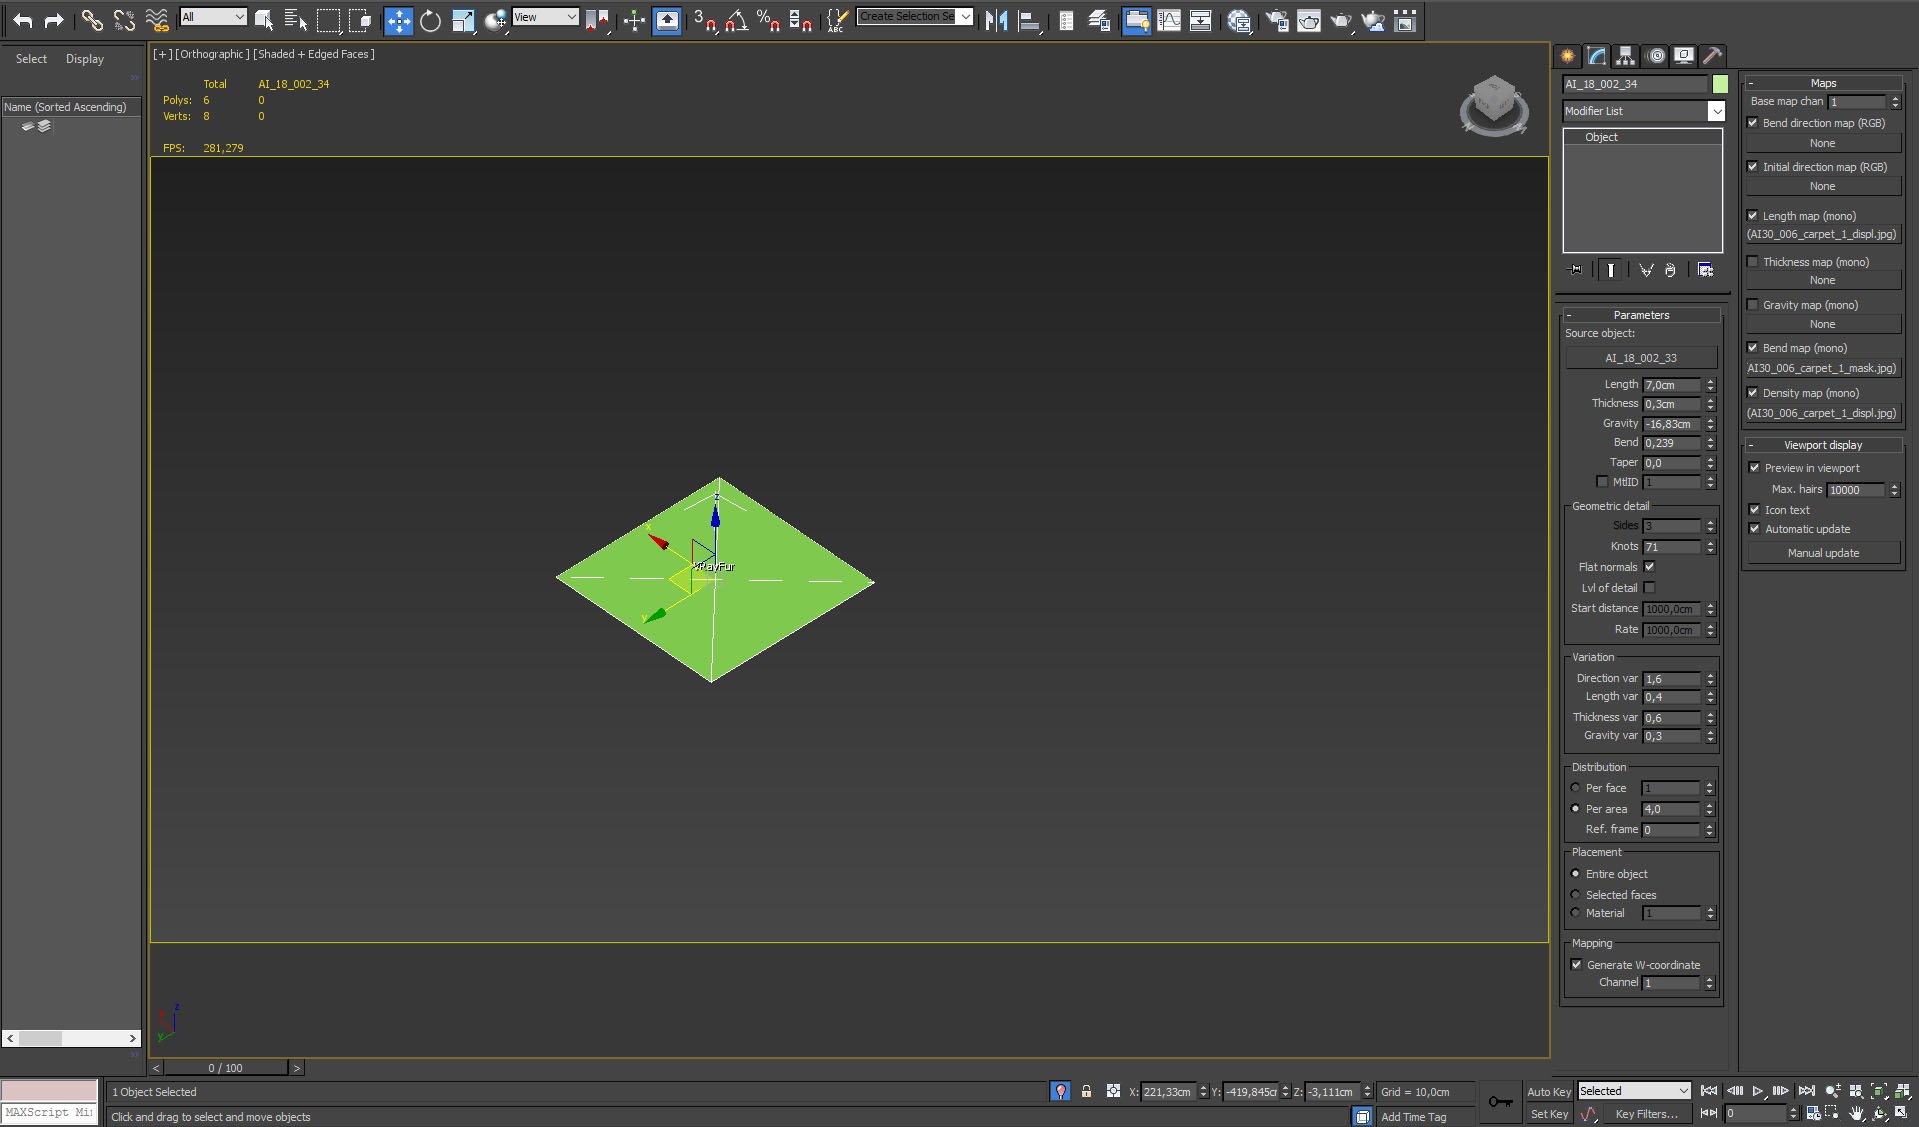
A carpet in the center of a scene was made with VrayFur.
Click on image to enlarge 
VrayFur uses a map for length and density of fur.
Click on image to enlarge 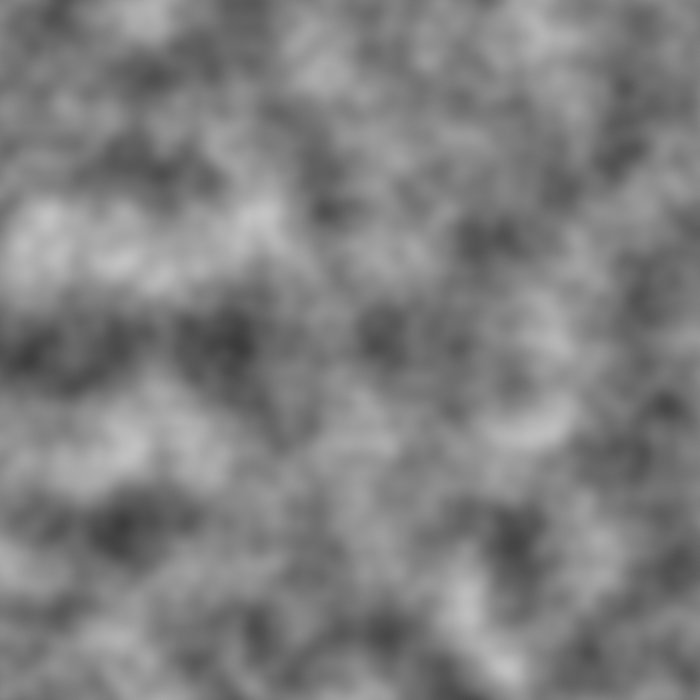
Another, blurred fractal noise map is used for controlling bending of fur.
Click on image to enlarge 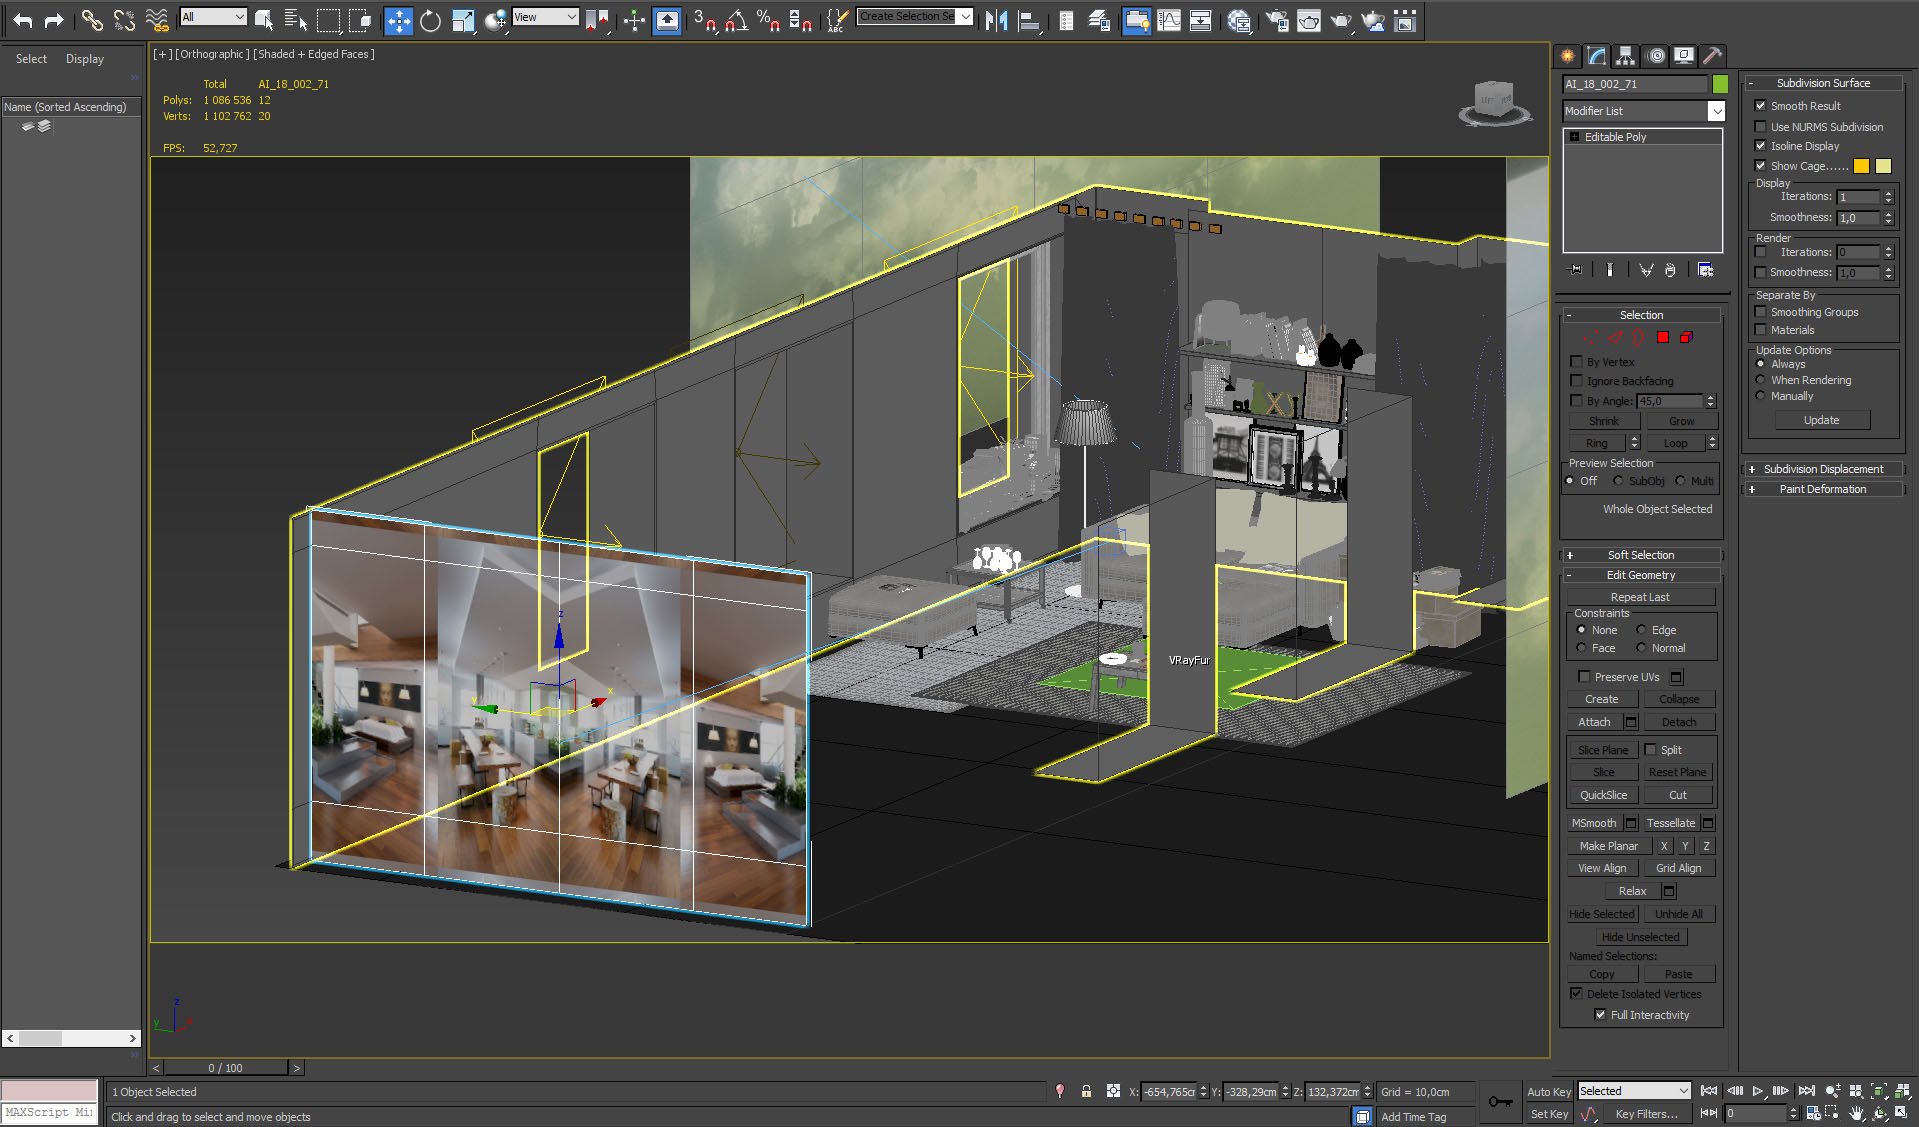
We used a plane with a room view. It is not an emitter, it was used to achieve some more interesting reflections on reflective props.
Click on image to enlarge 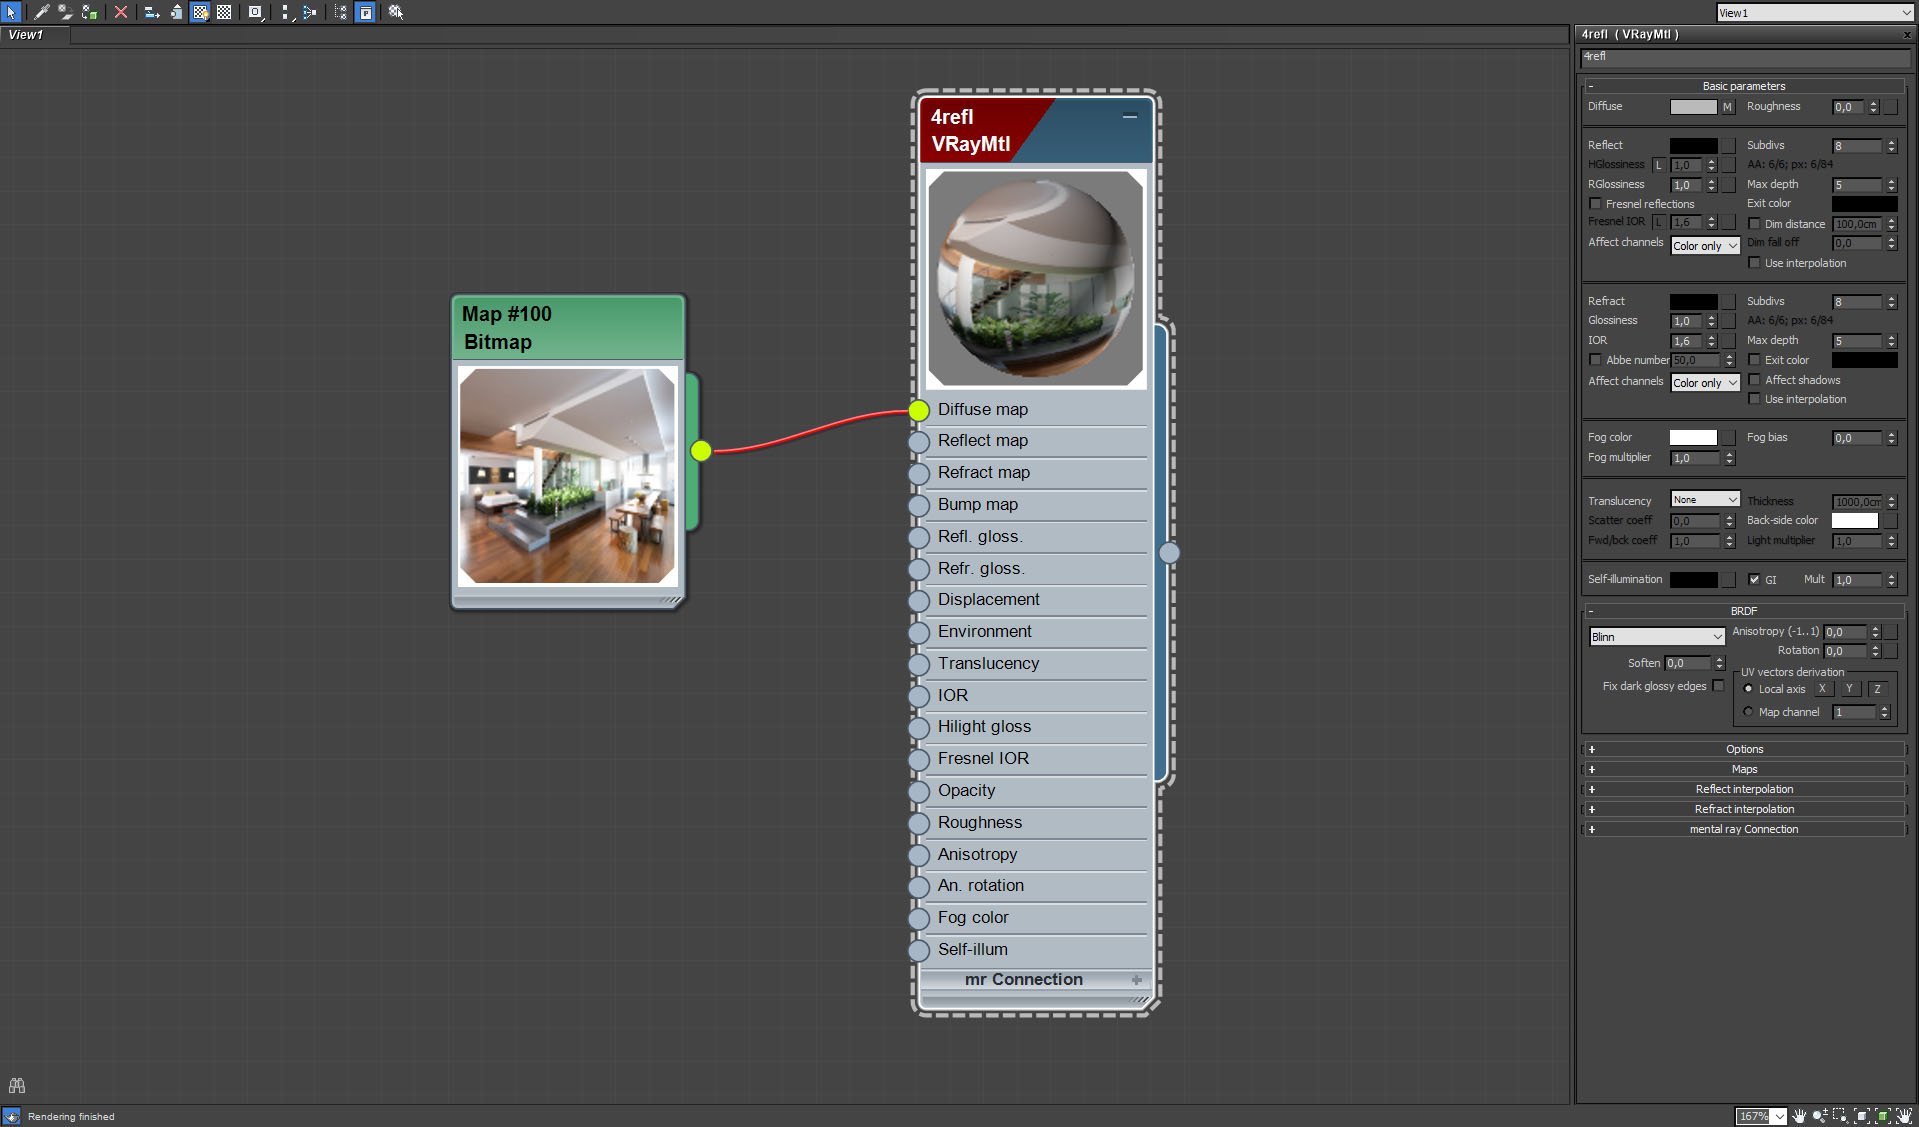
Material of a plane. We used an output of another Evermotion scene here.
Click on image to enlarge 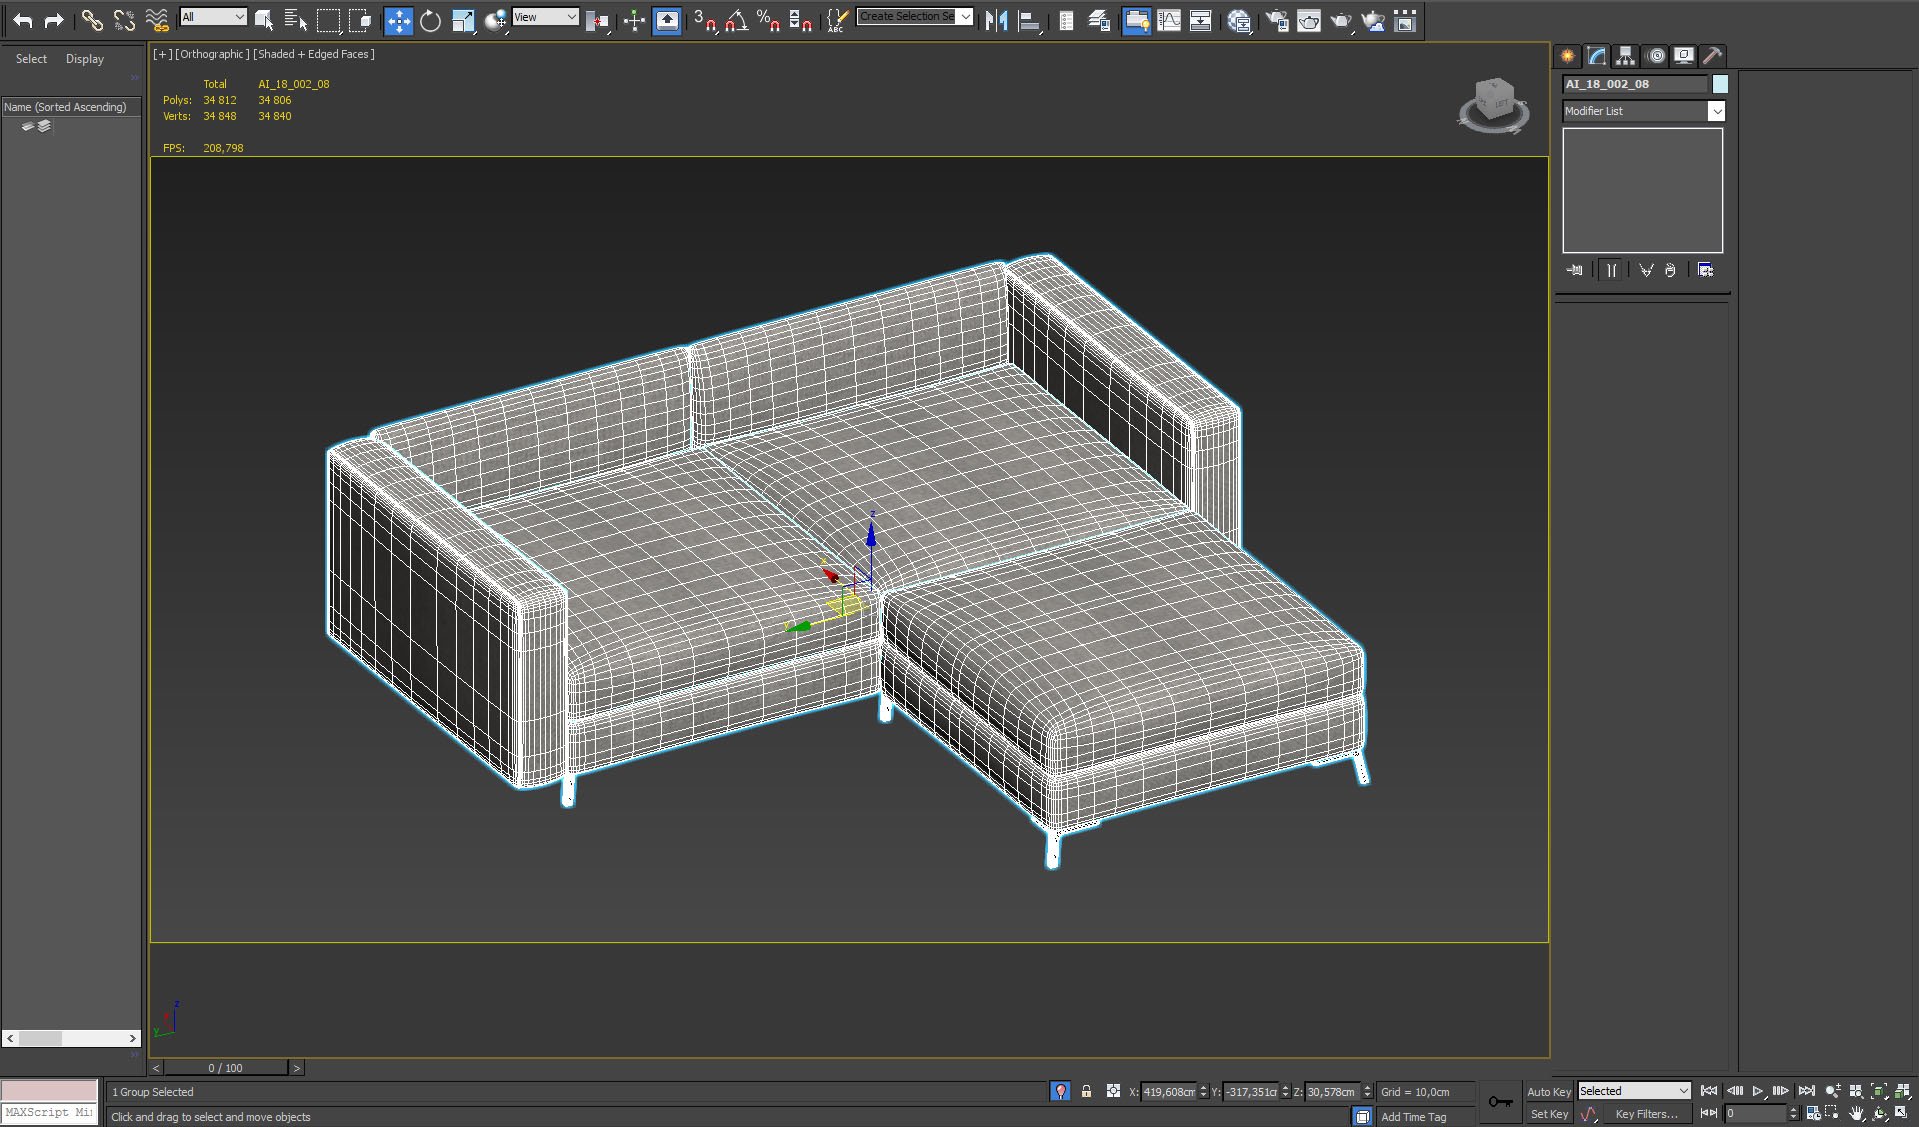
Couch mesh.
Click on image to enlarge 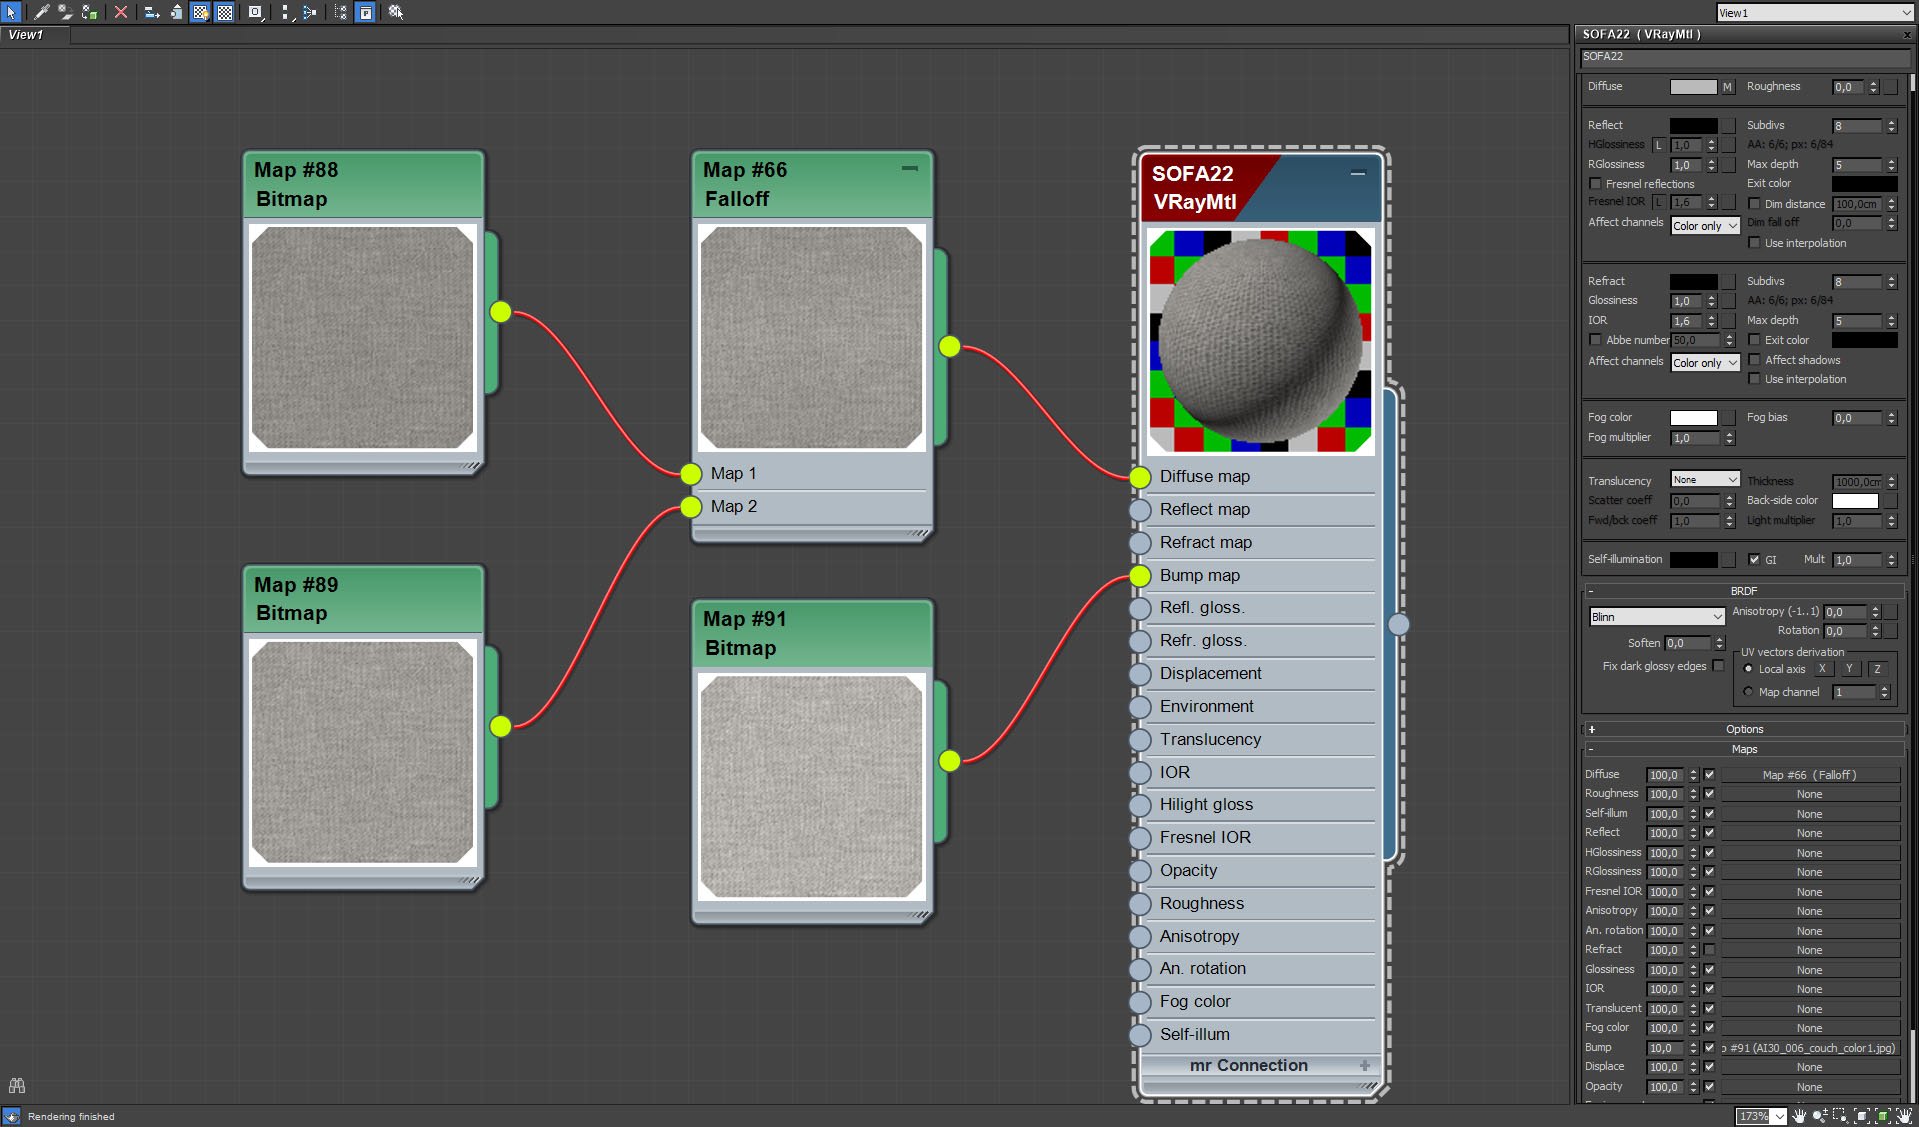
Couch material.
Click on image to enlarge 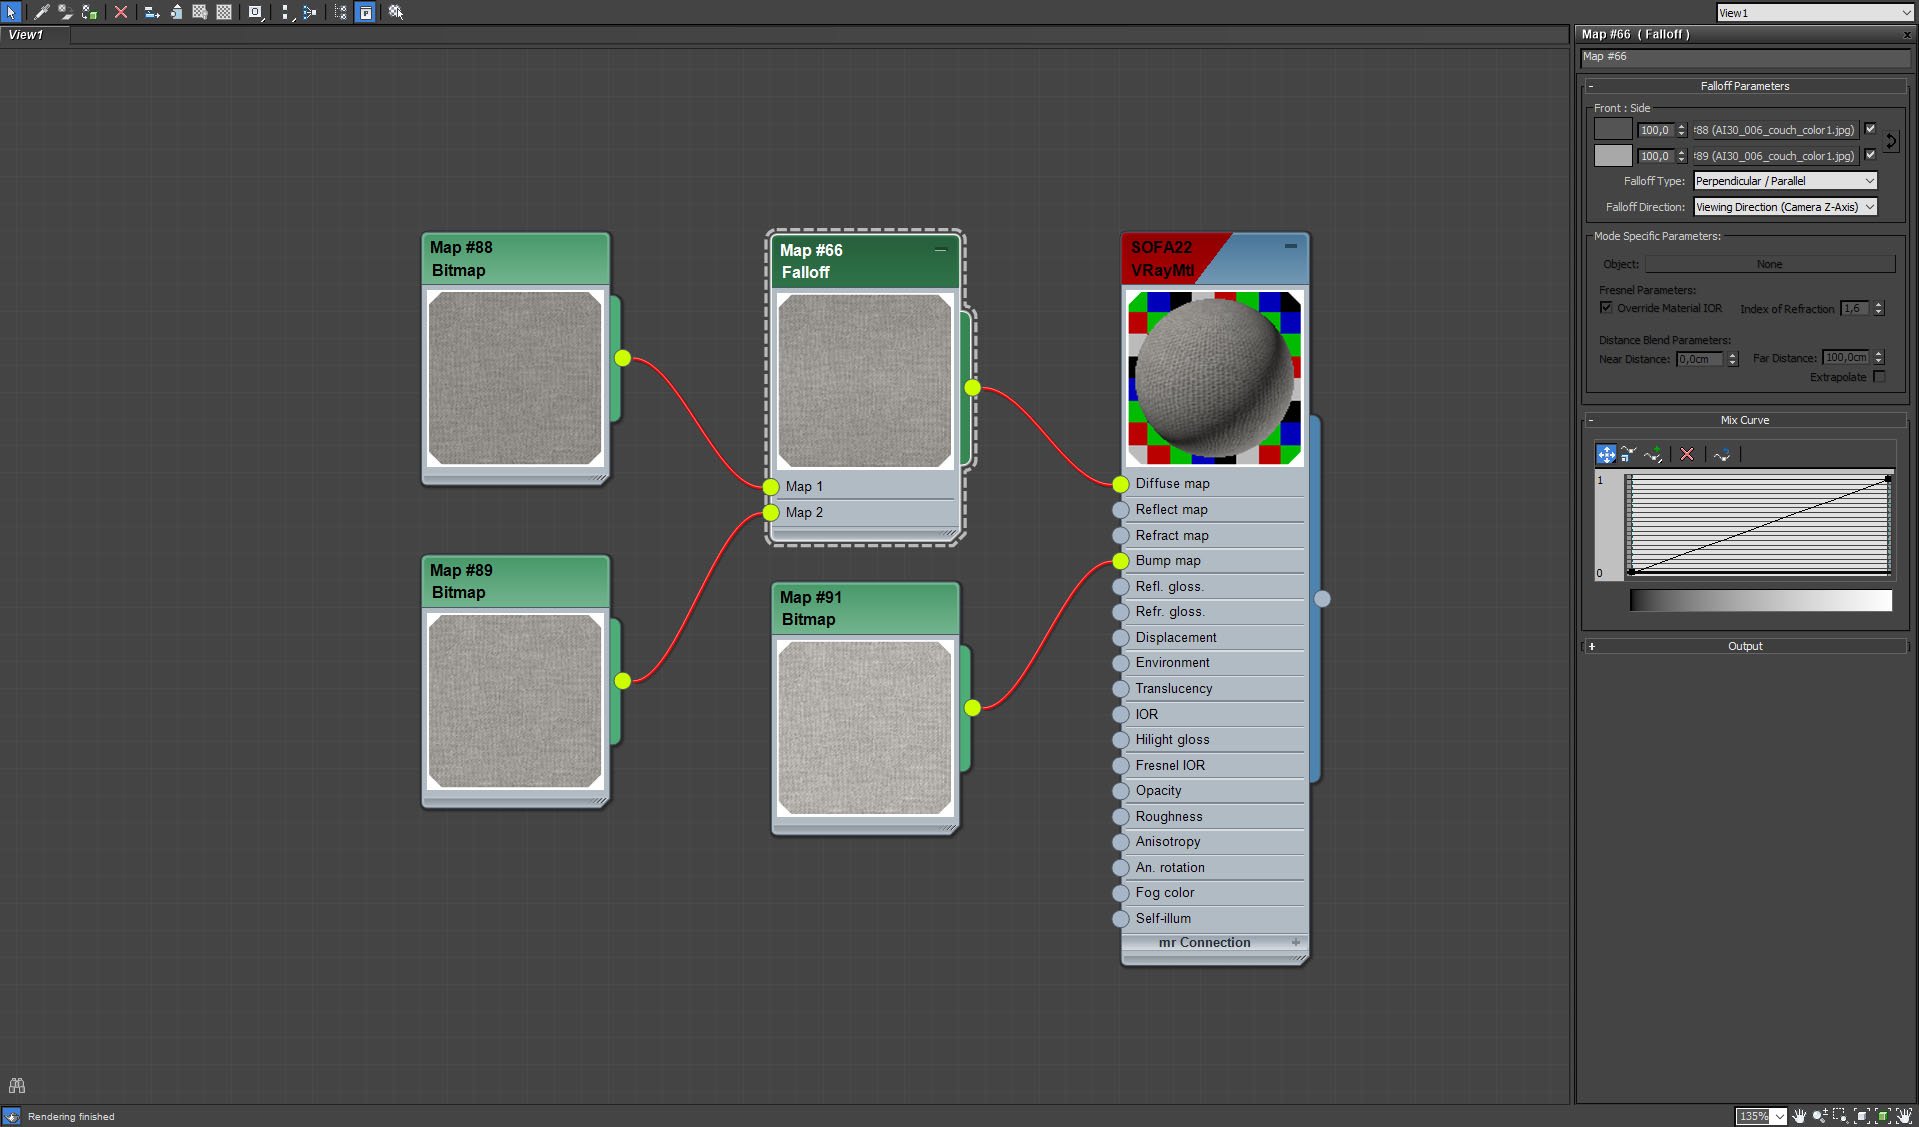
Couch material - falloff map settings.
Click on image to enlarge 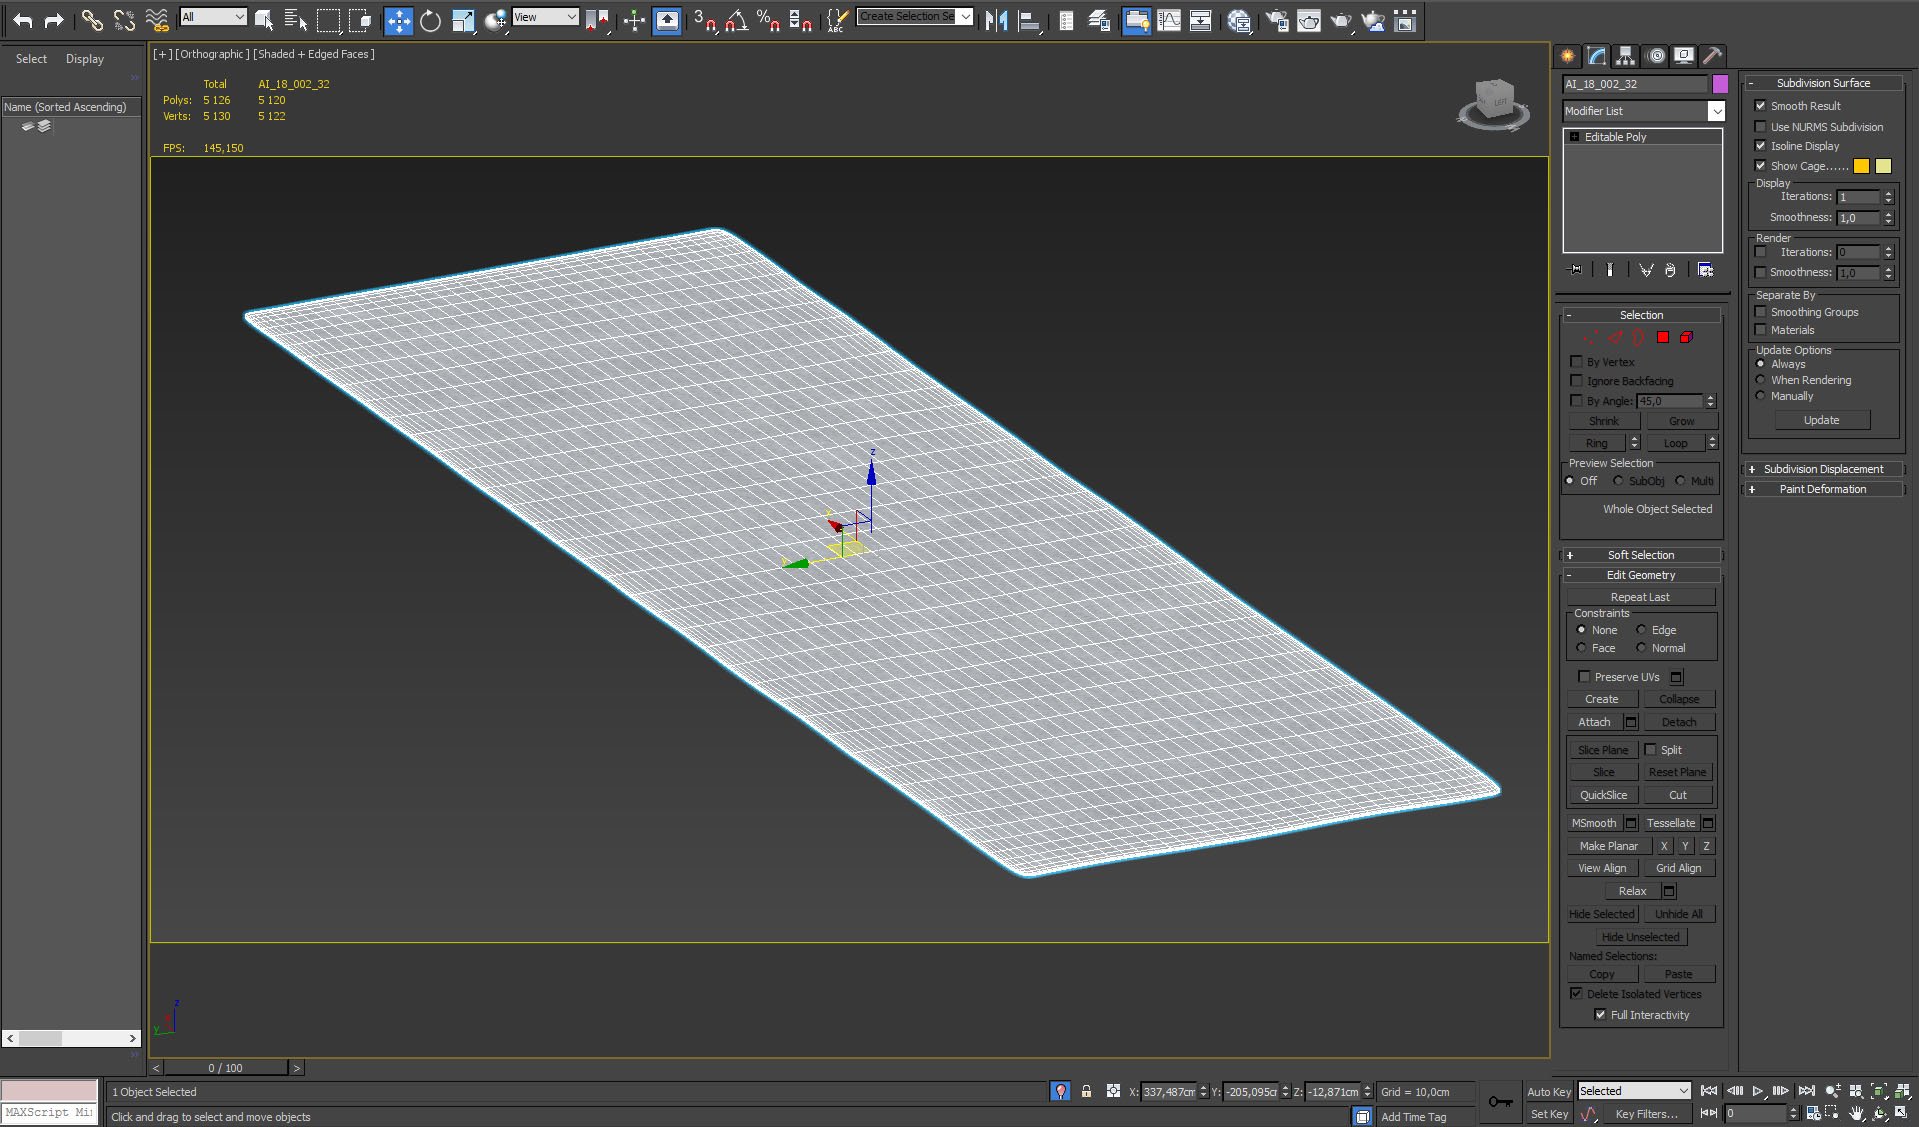
The second carpet (on the left of the scene).
Click on image to enlarge 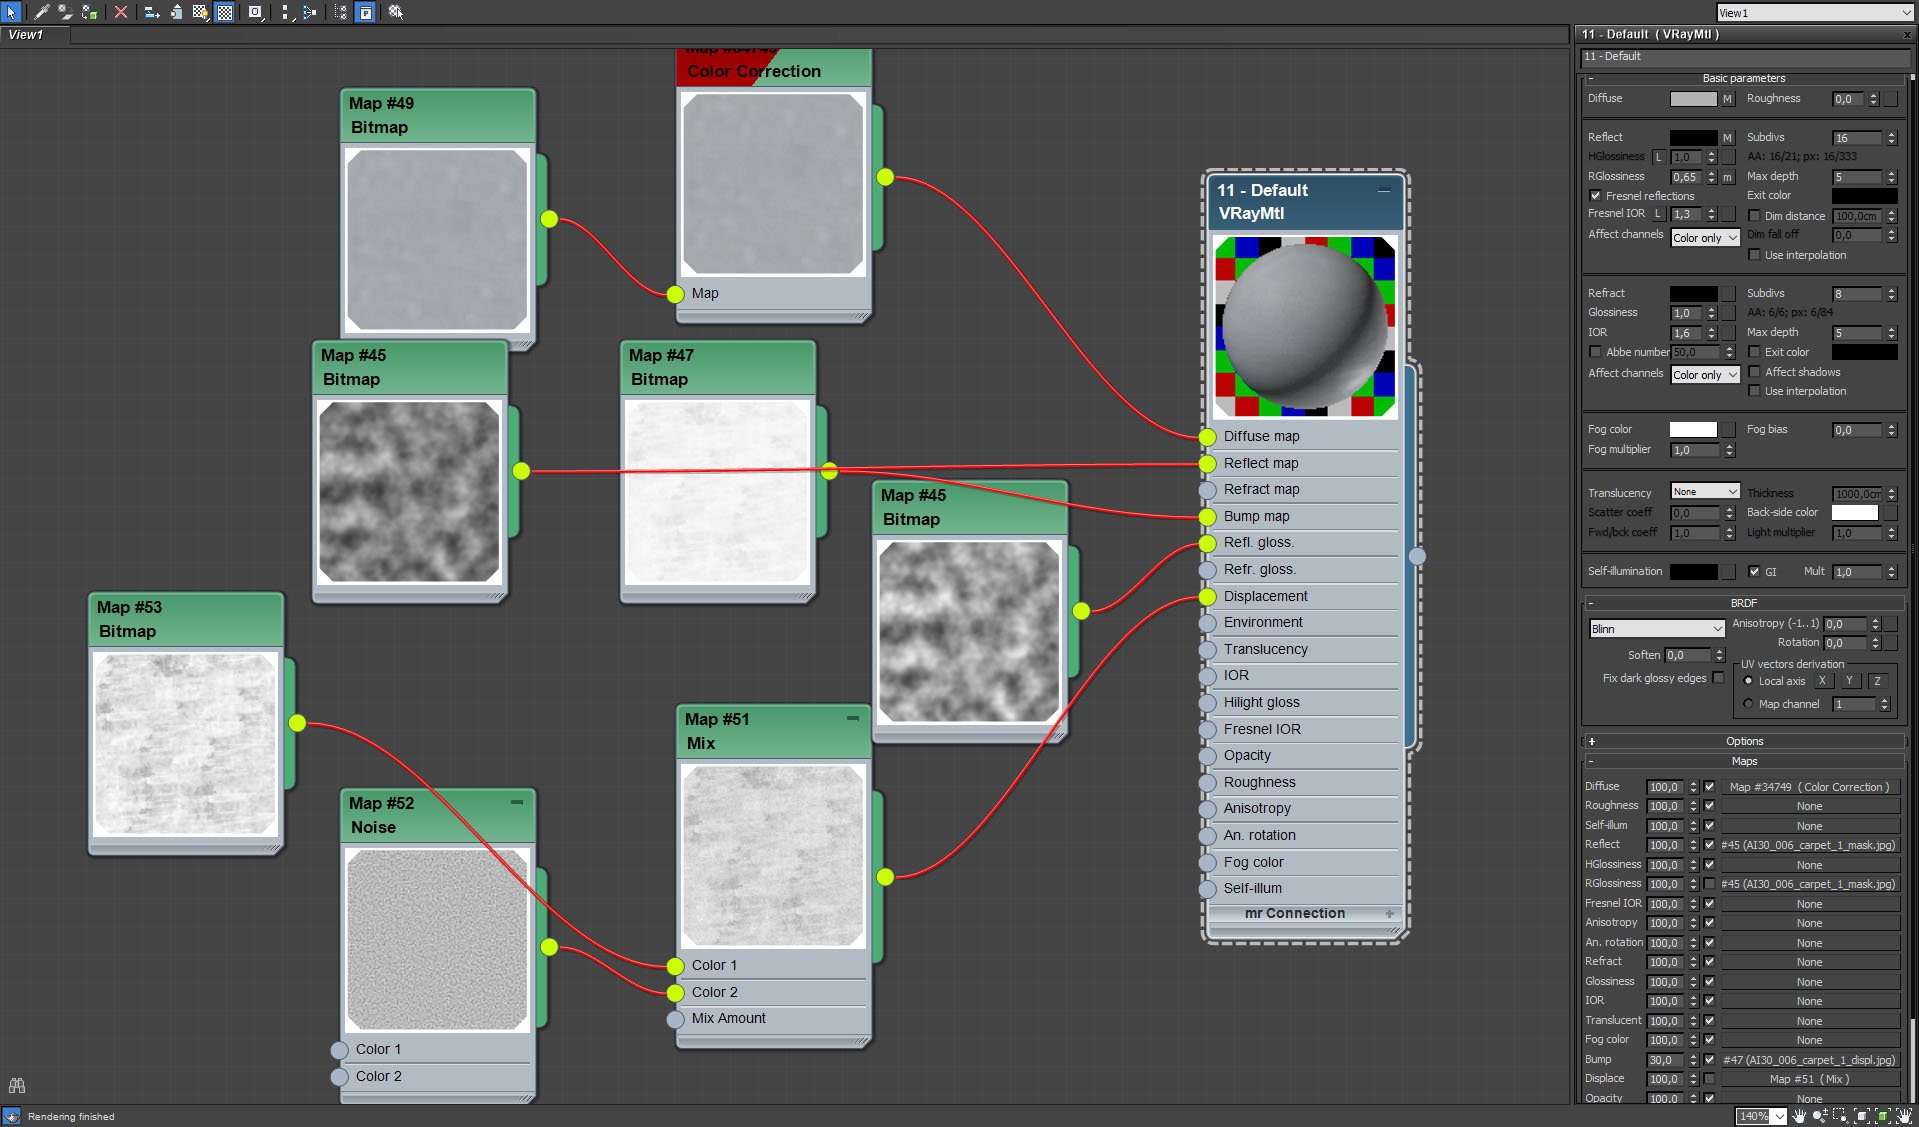
Second carpet material settings.
Click on image to enlarge 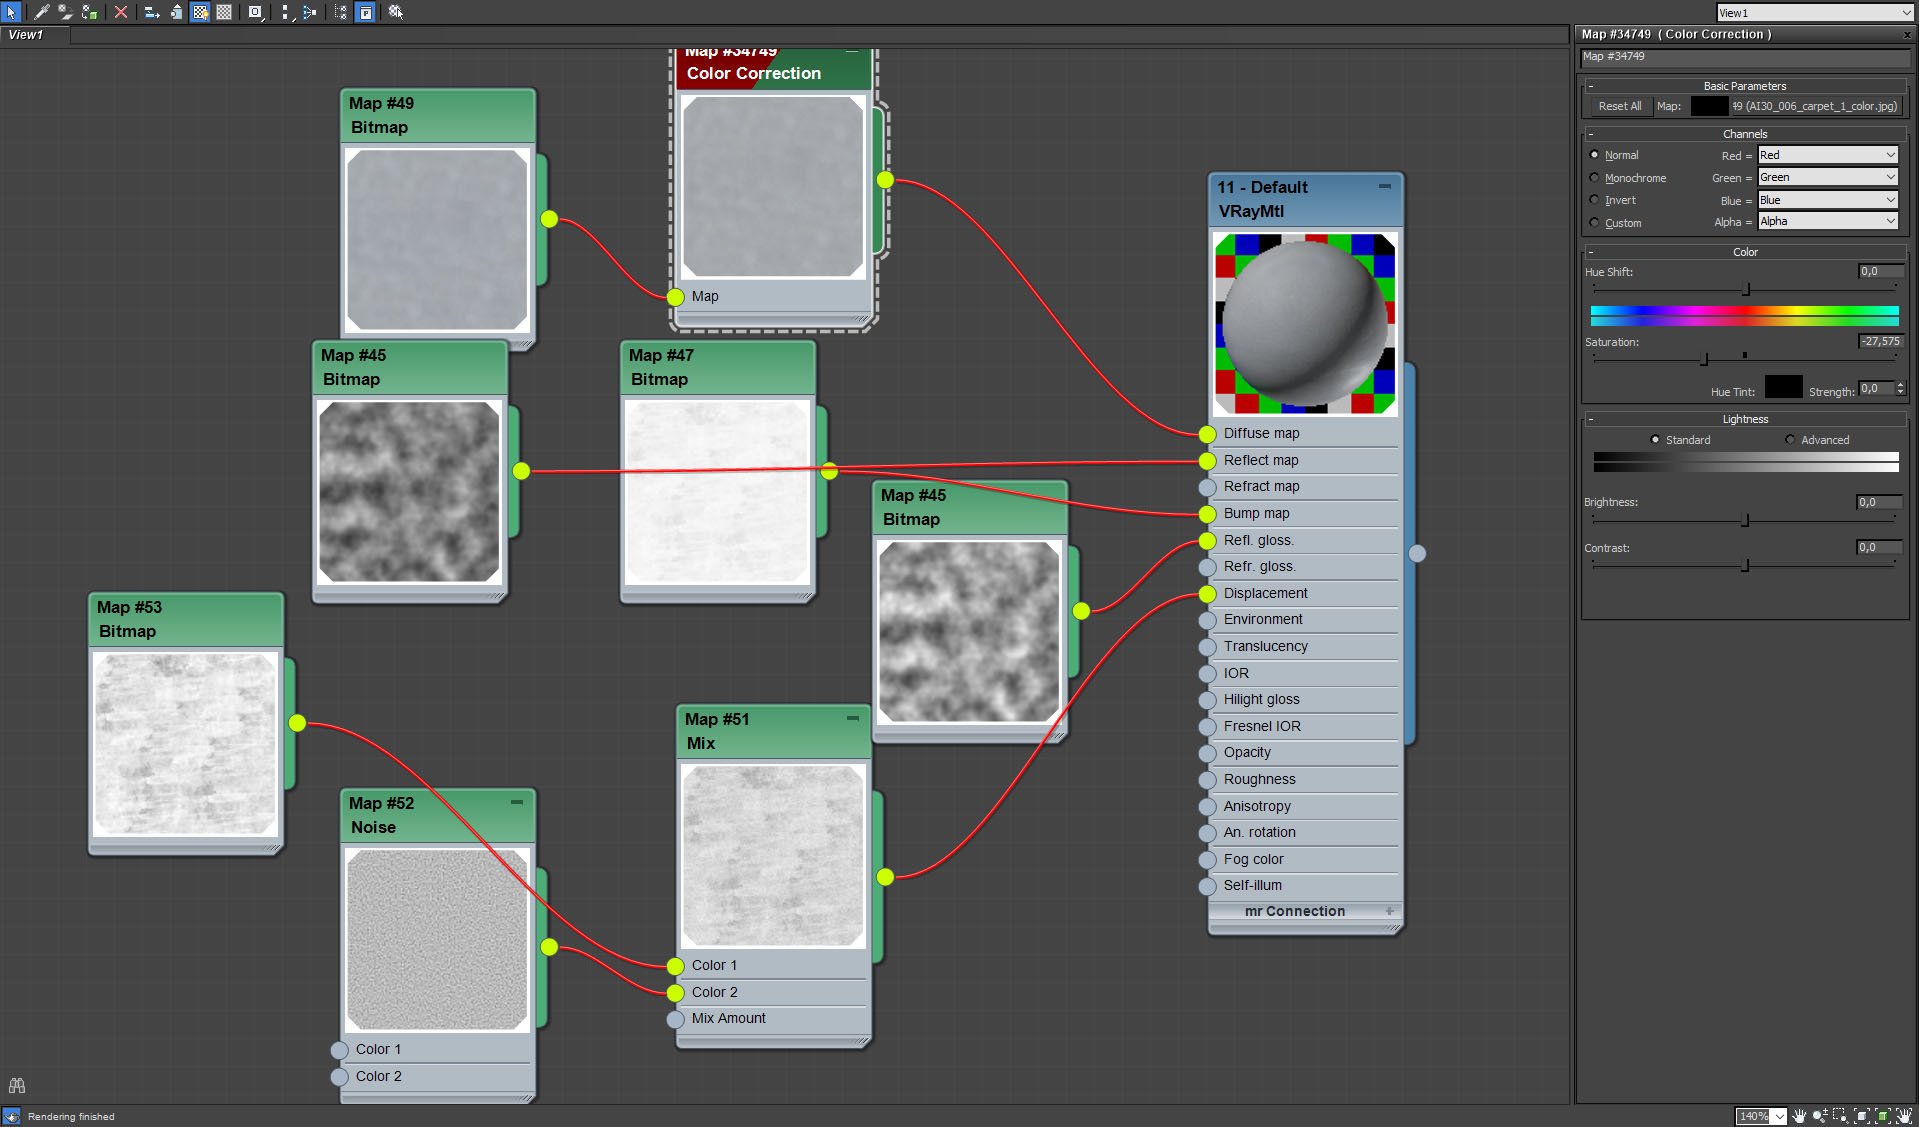
Second carpet material settings - color correction.
Click on image to enlarge 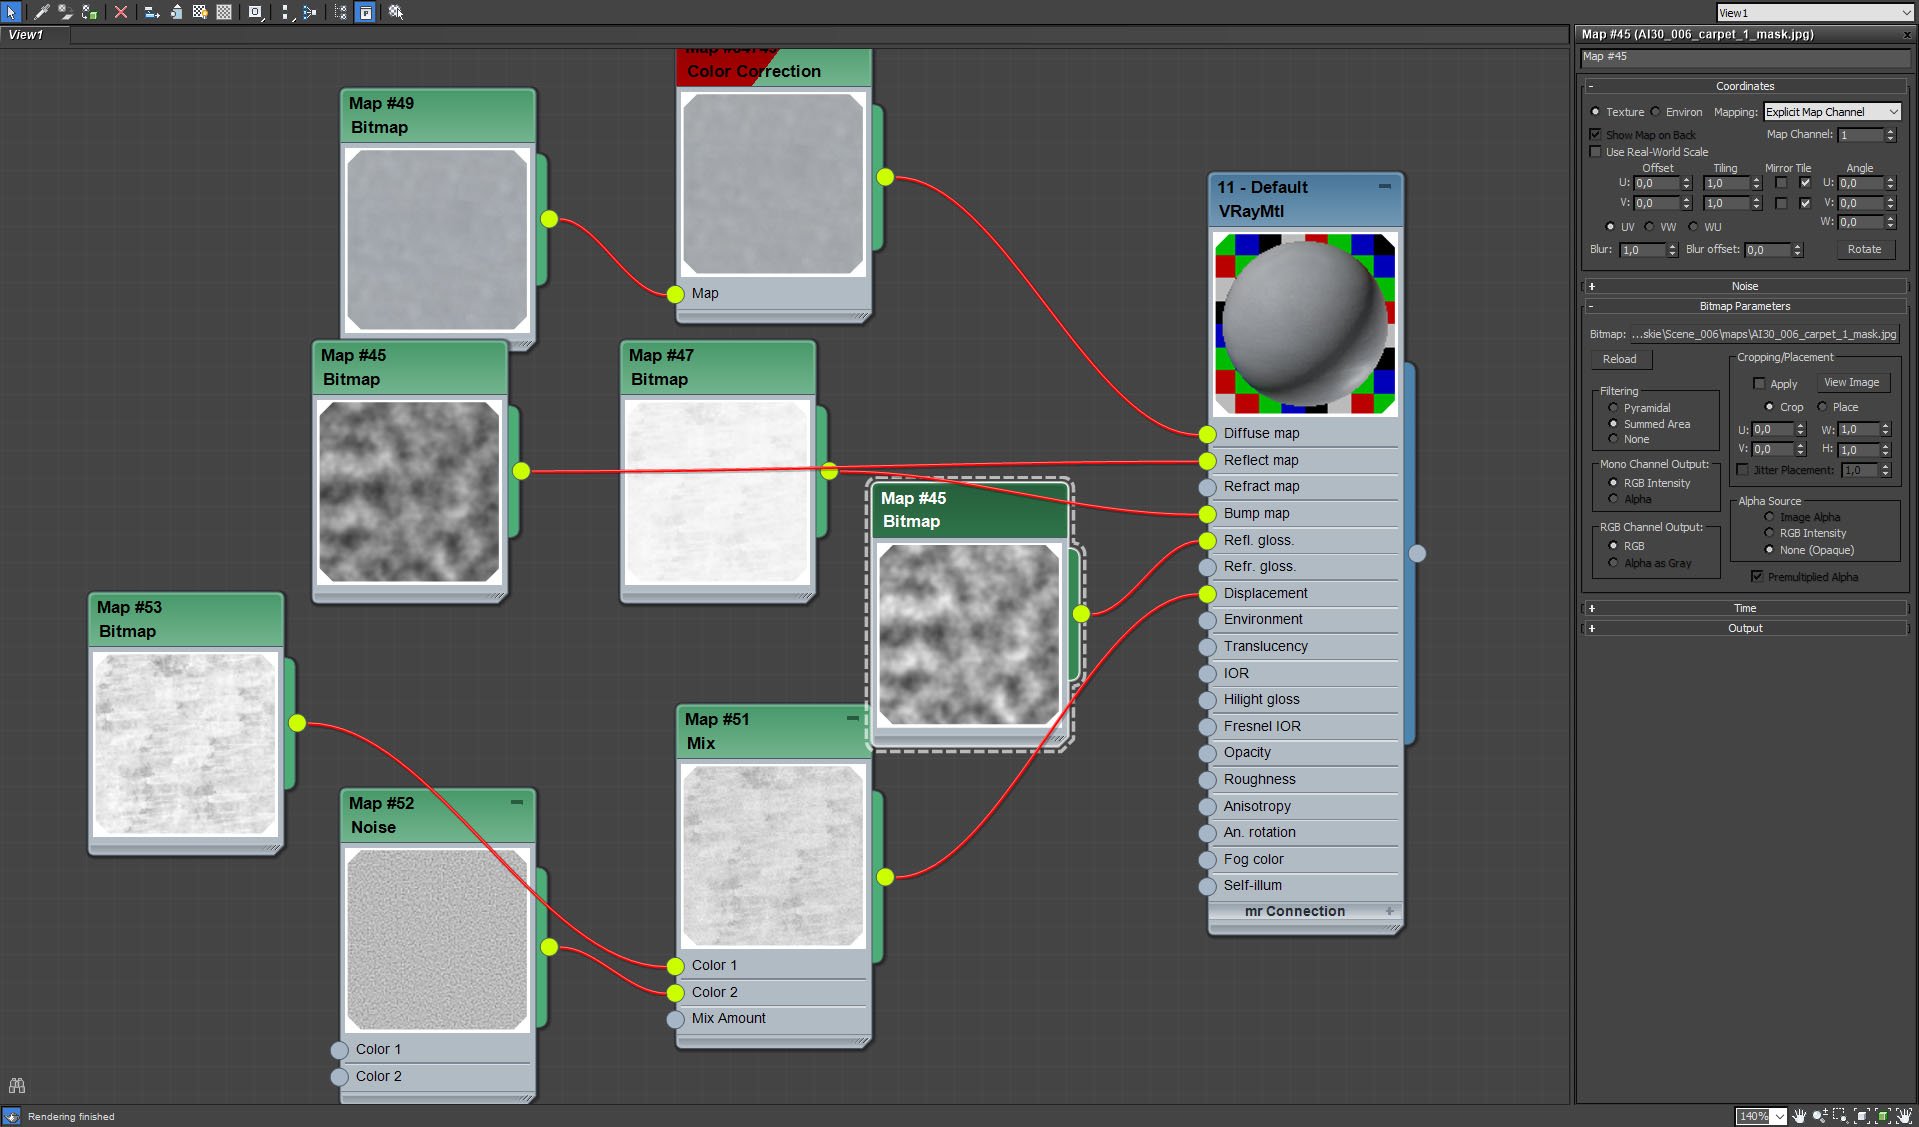
Second carpet material settings - reflection glossiness.
Click on image to enlarge 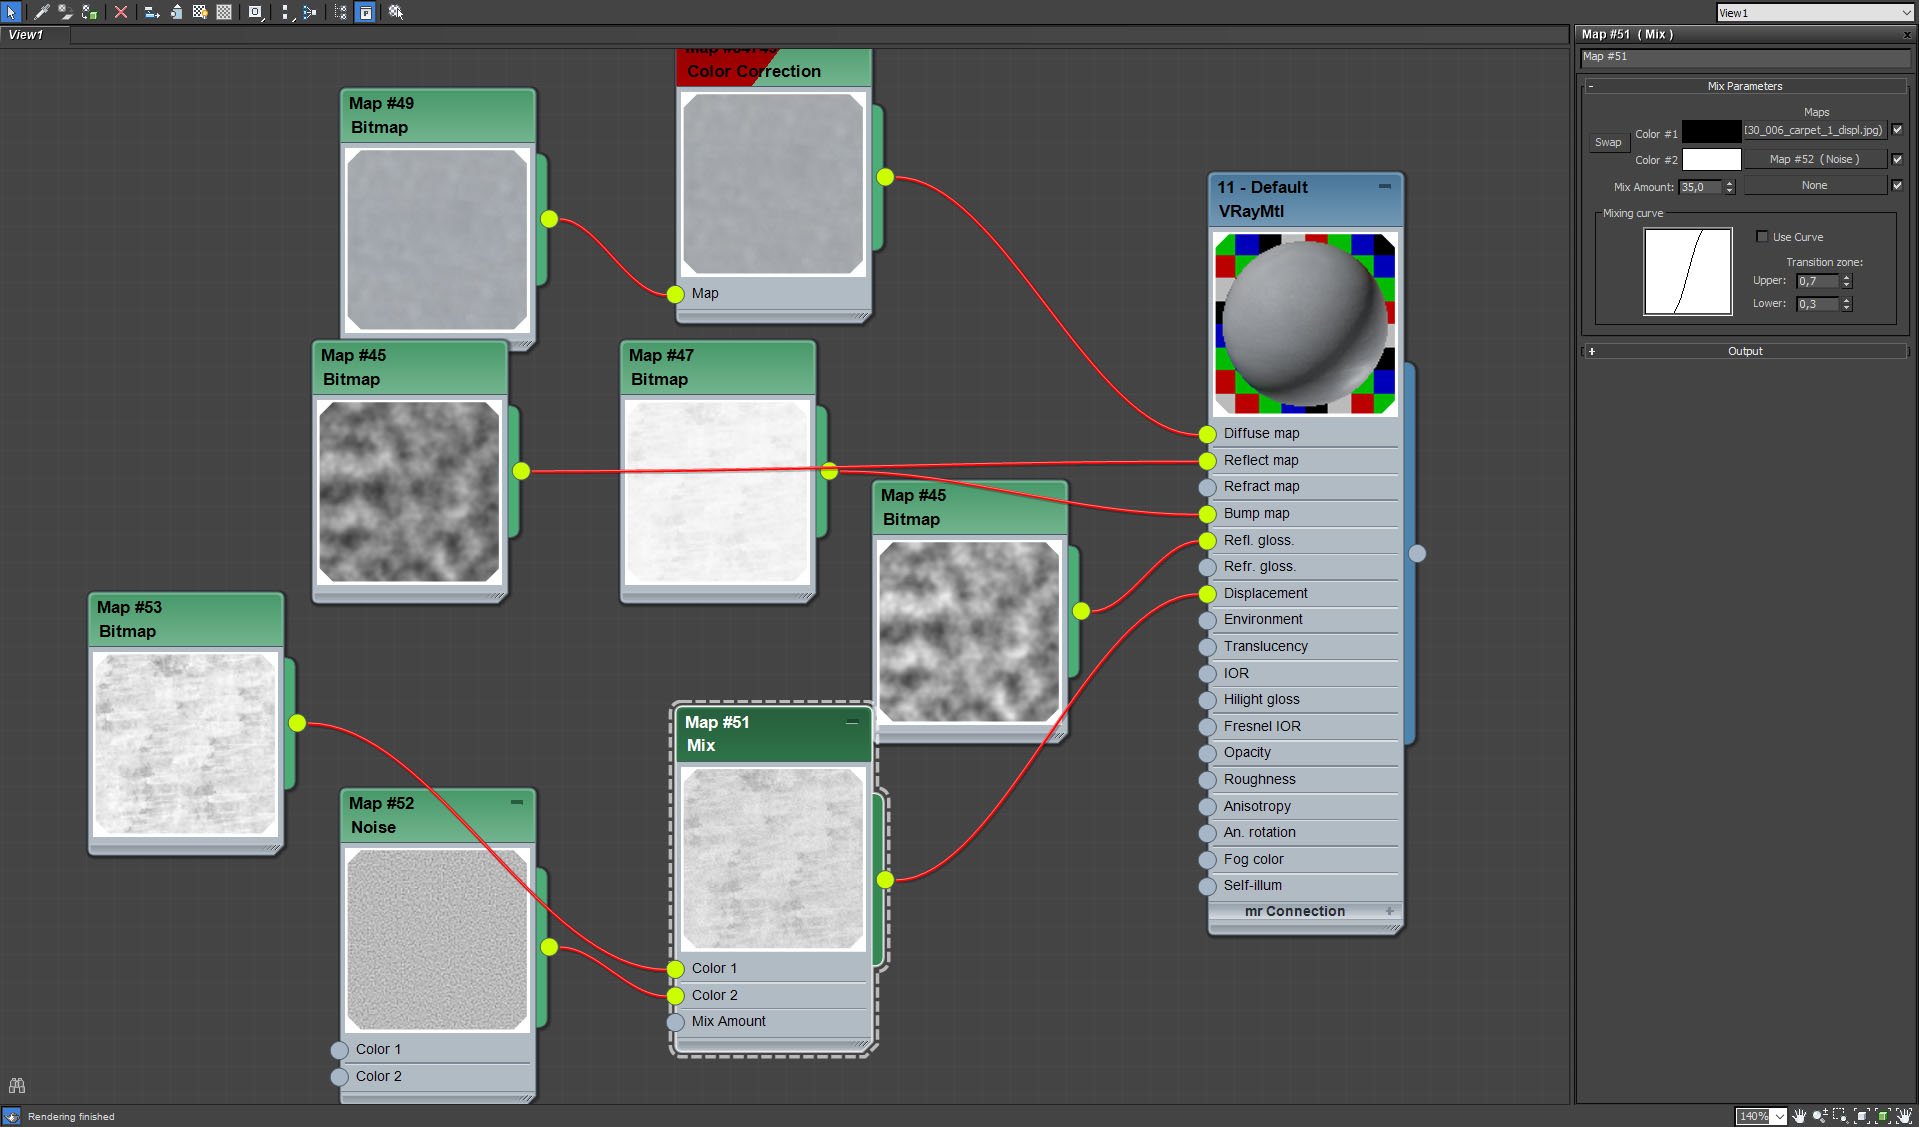
Second carpet material settings - displacement map is mix of two maps.
Click on image to enlarge 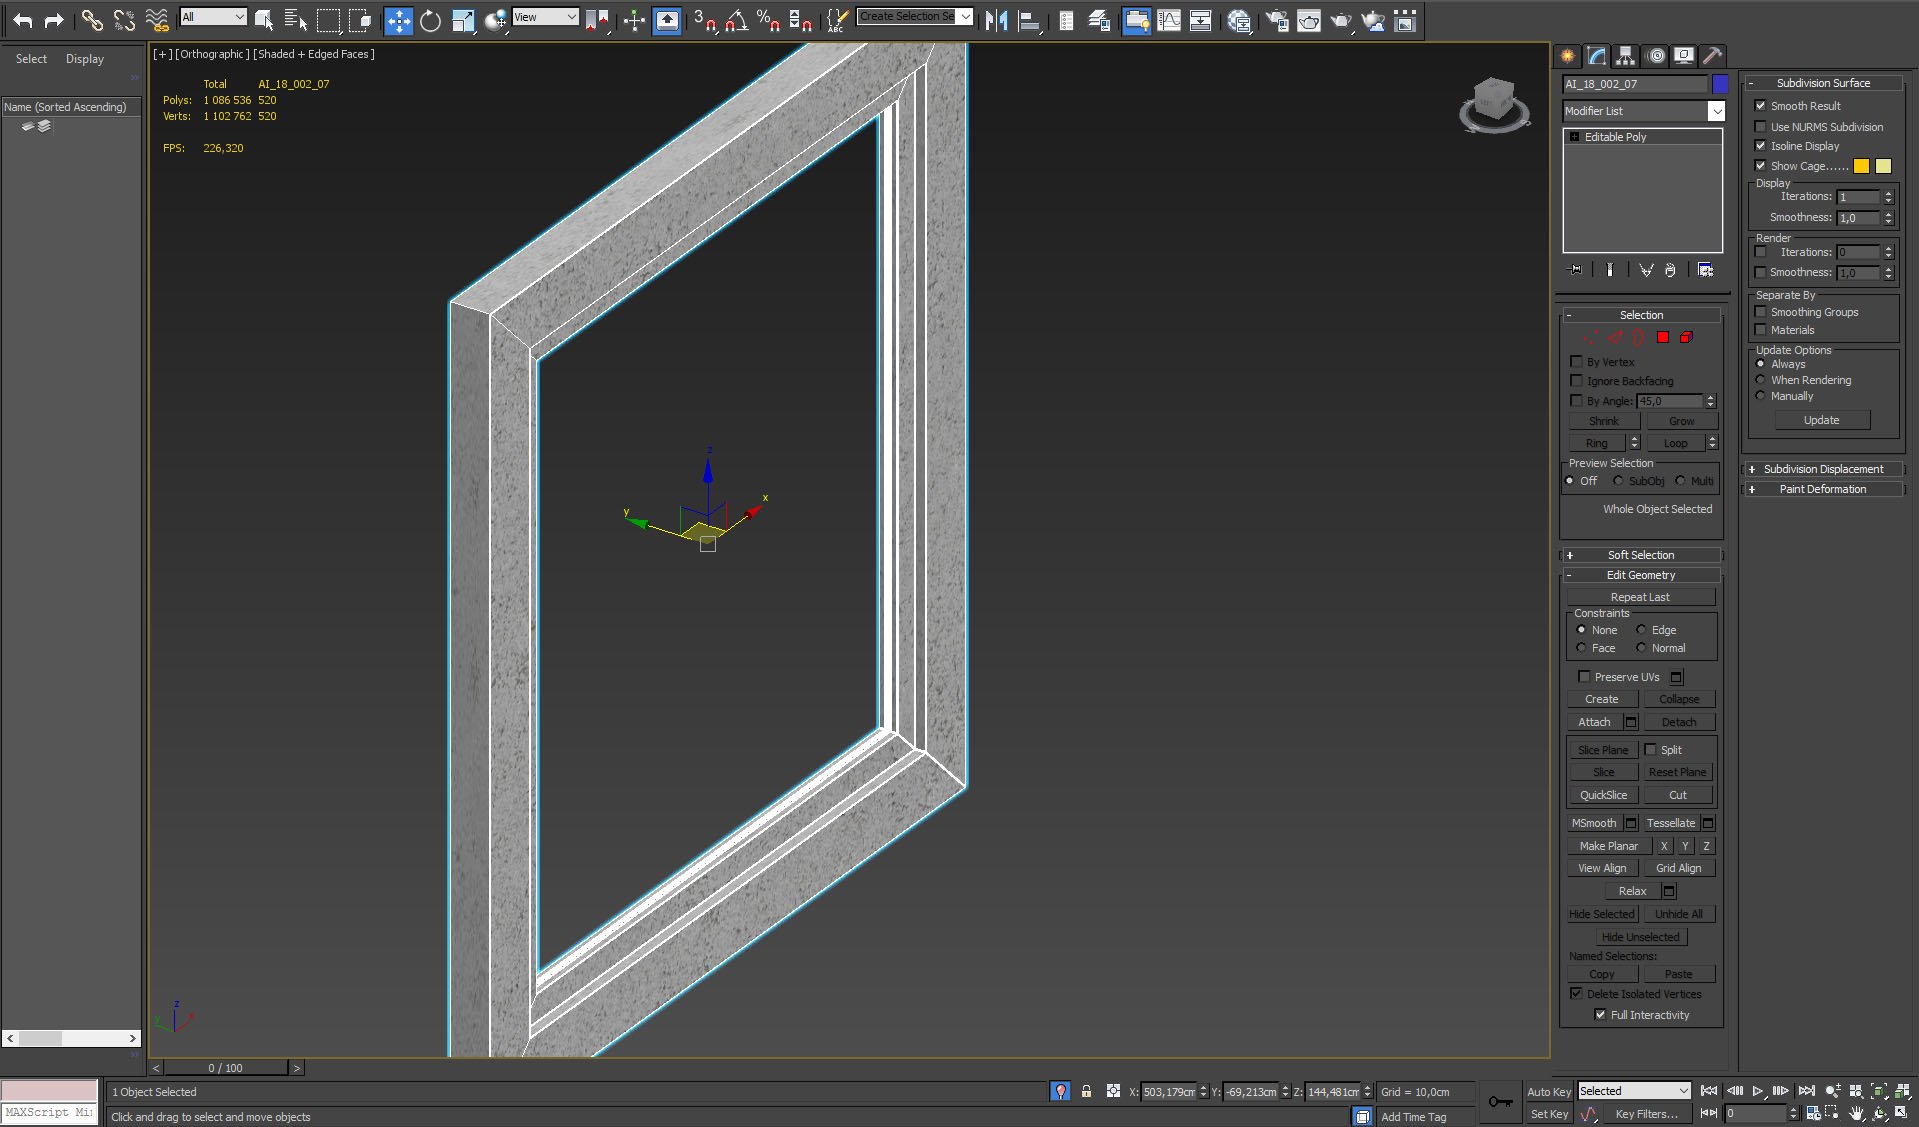
the only window frame that was modeled is placed in the window on the left - the rest of windows is not visible to the camera.
Click on image to enlarge 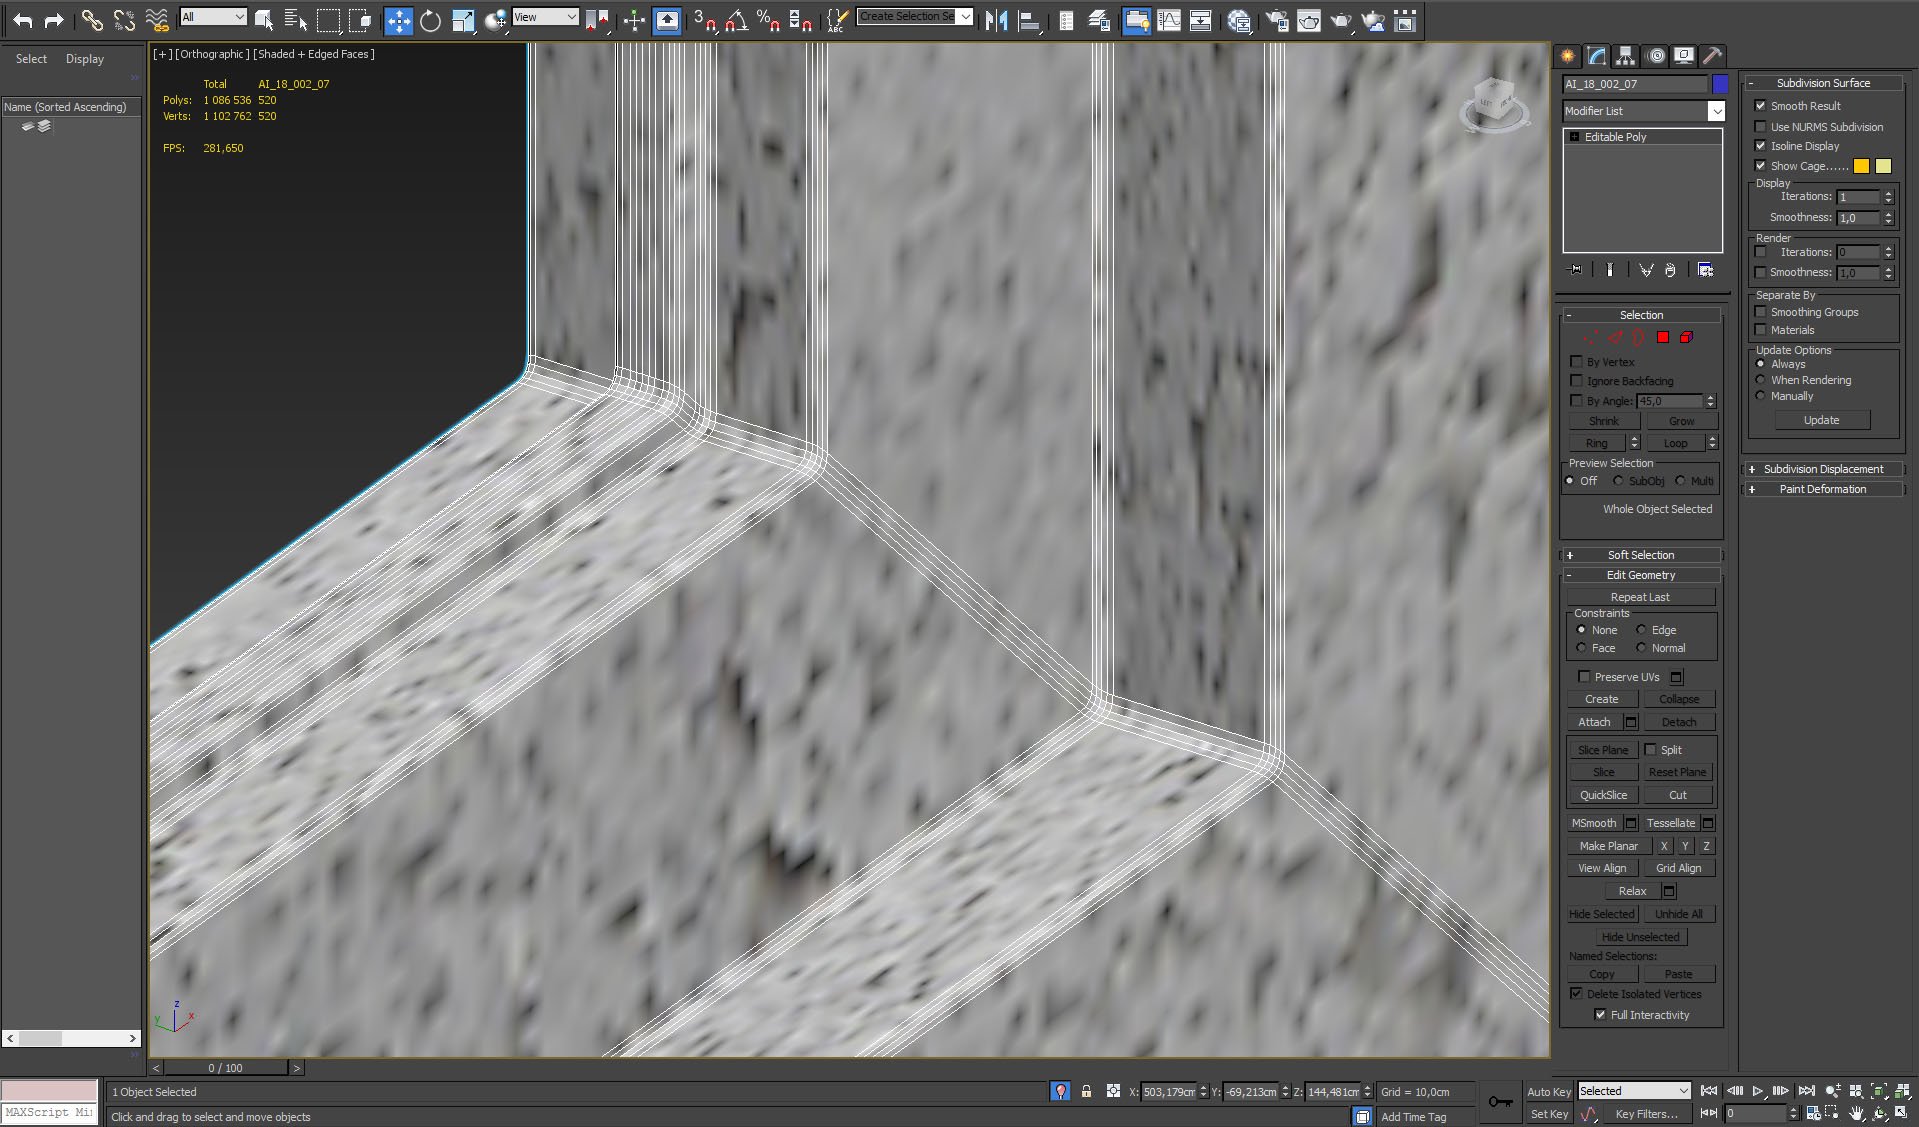
Click on image to enlarge 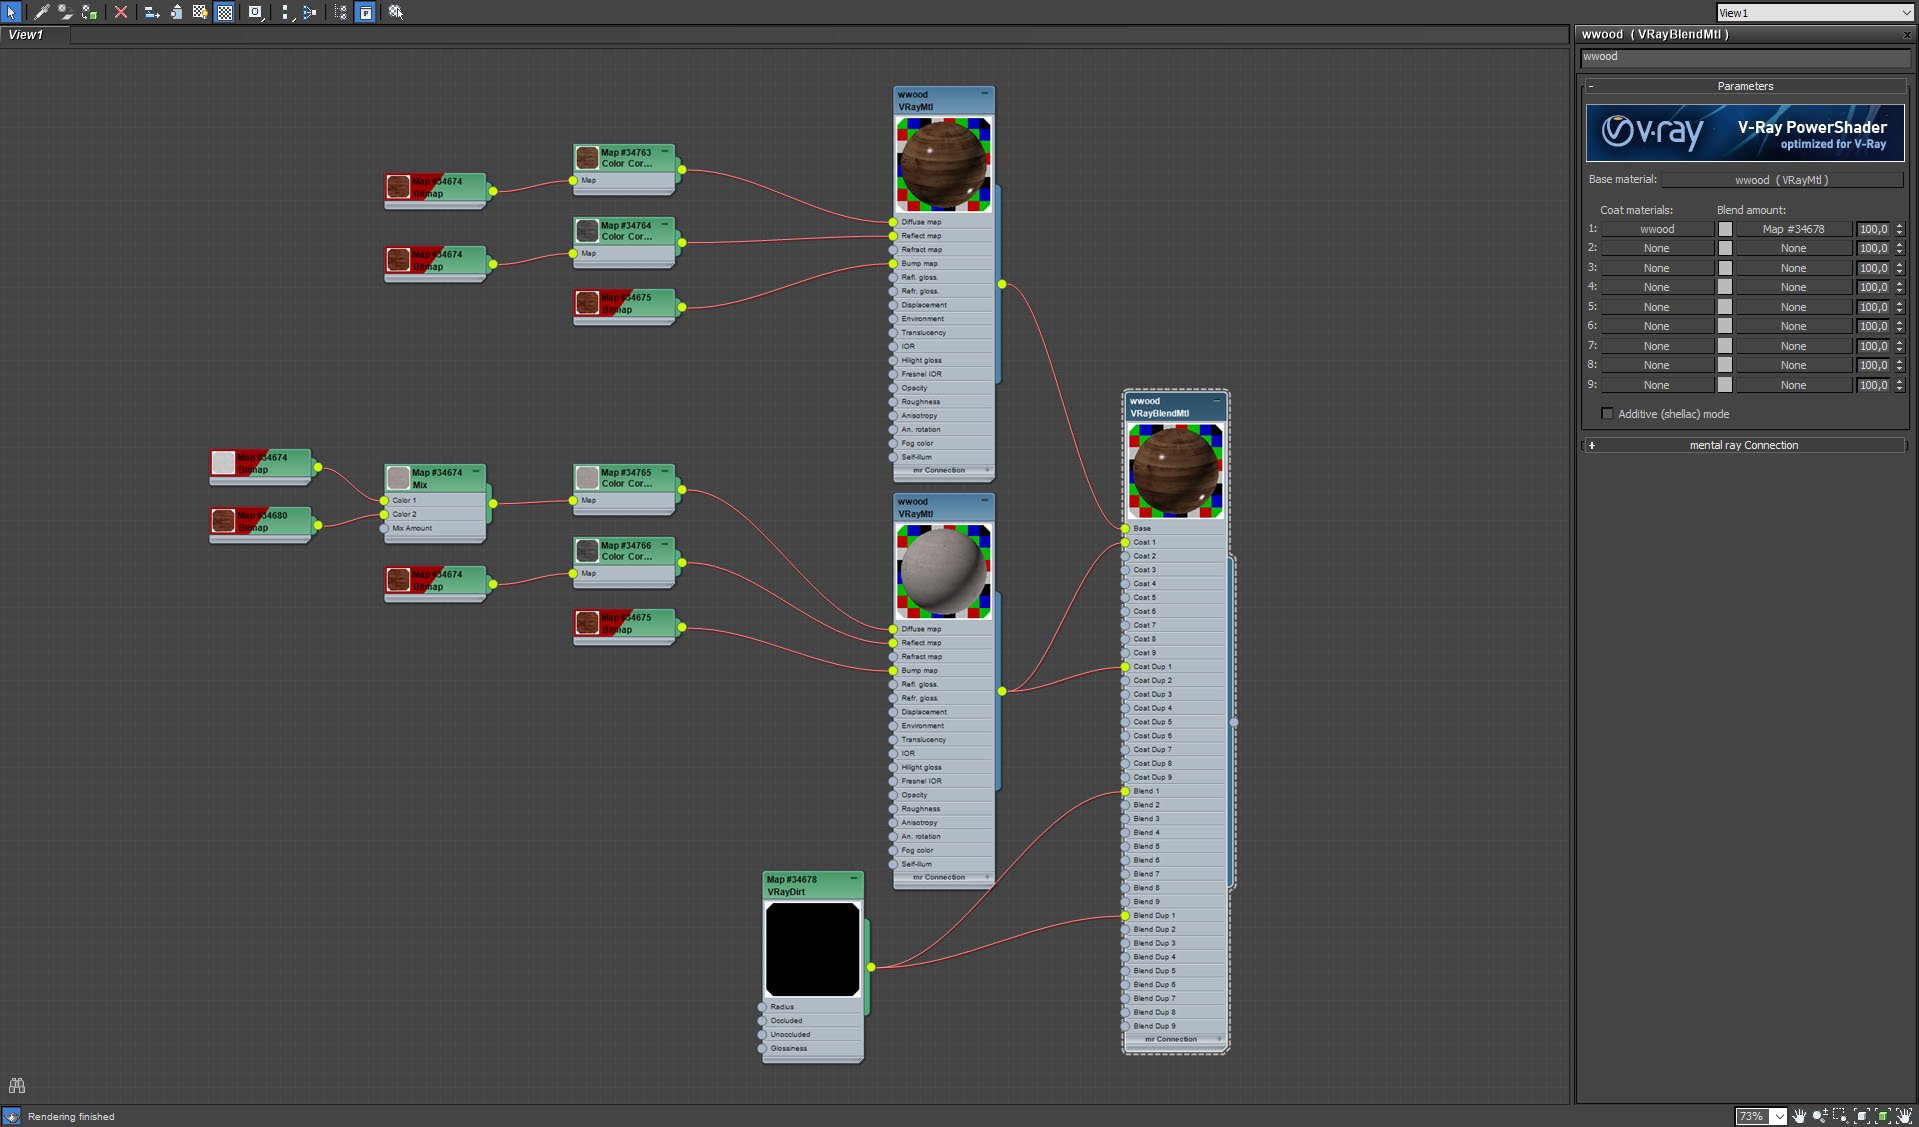
Window frame material.
Click on image to enlarge 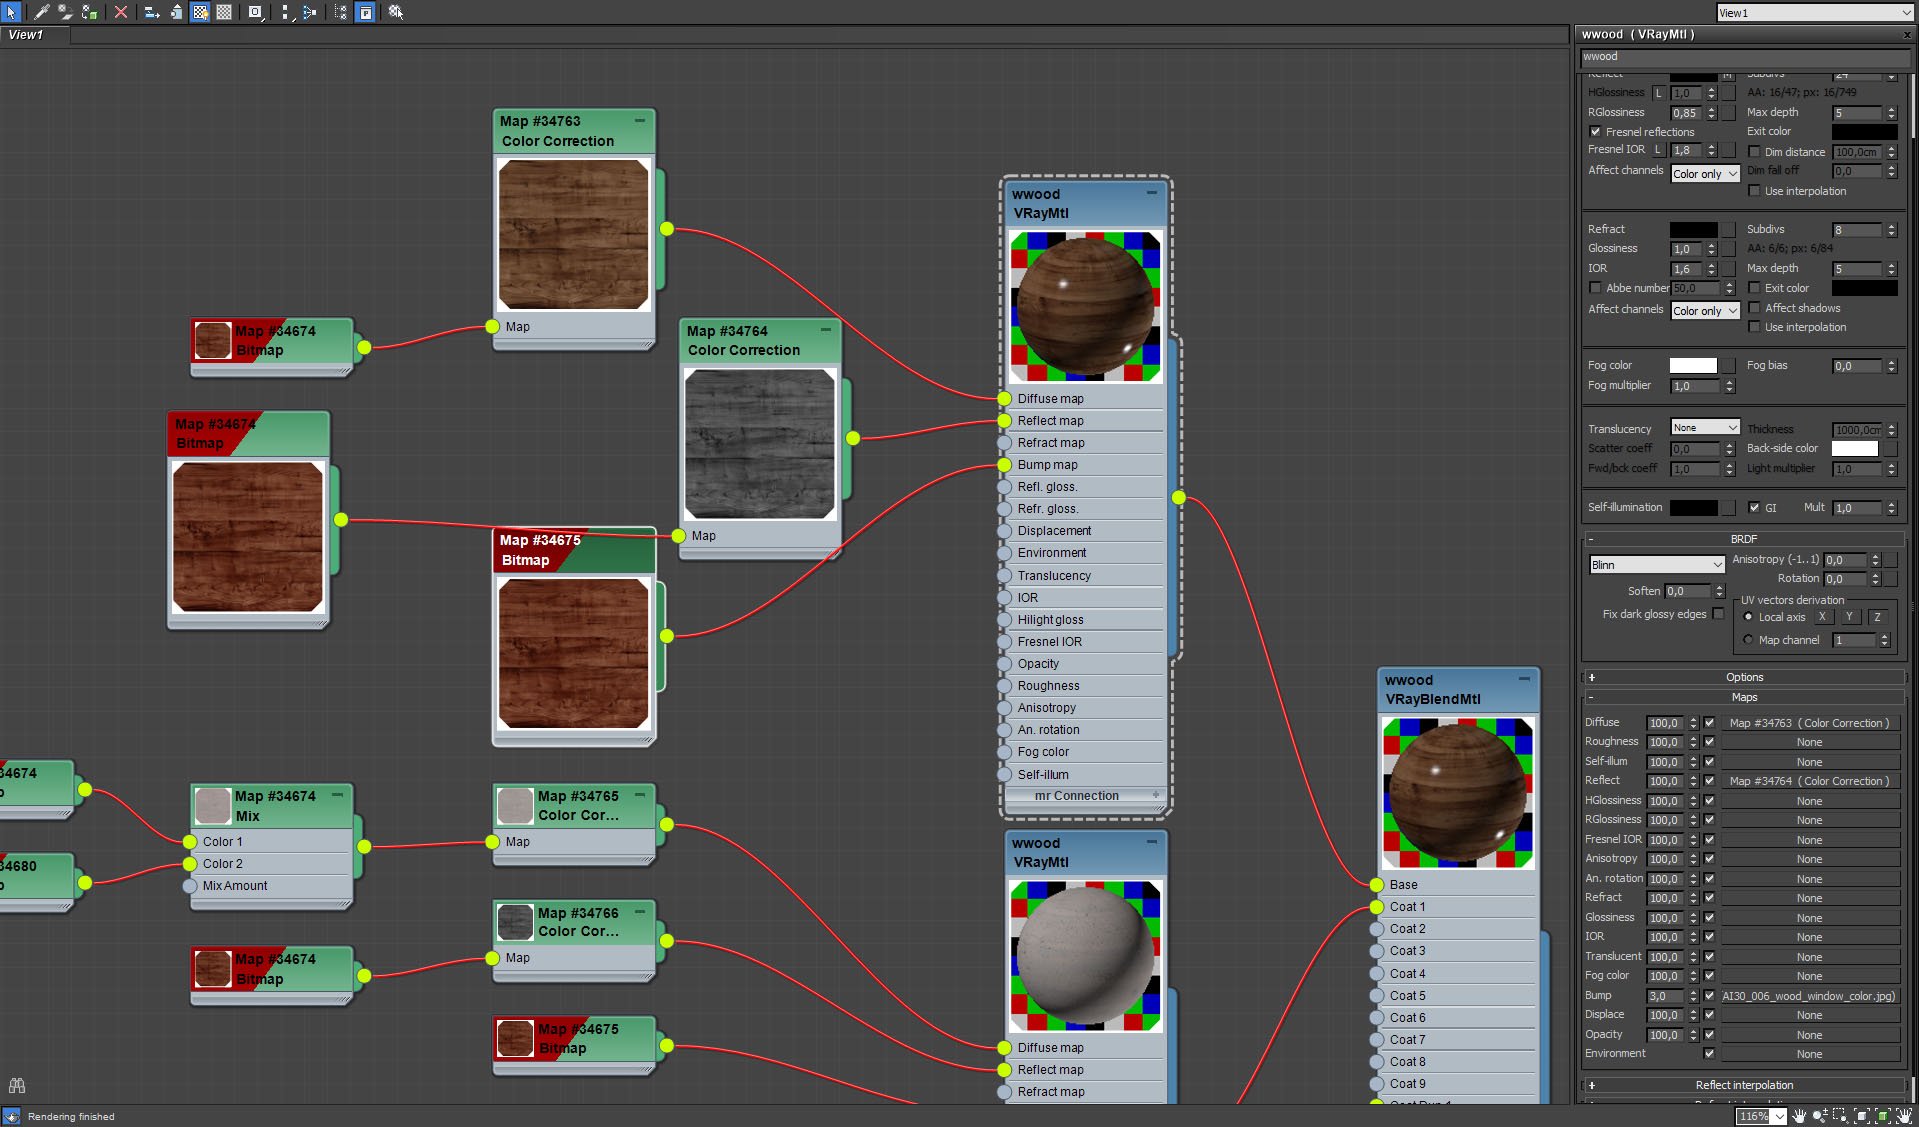
Window frame material - base material.
Click on image to enlarge 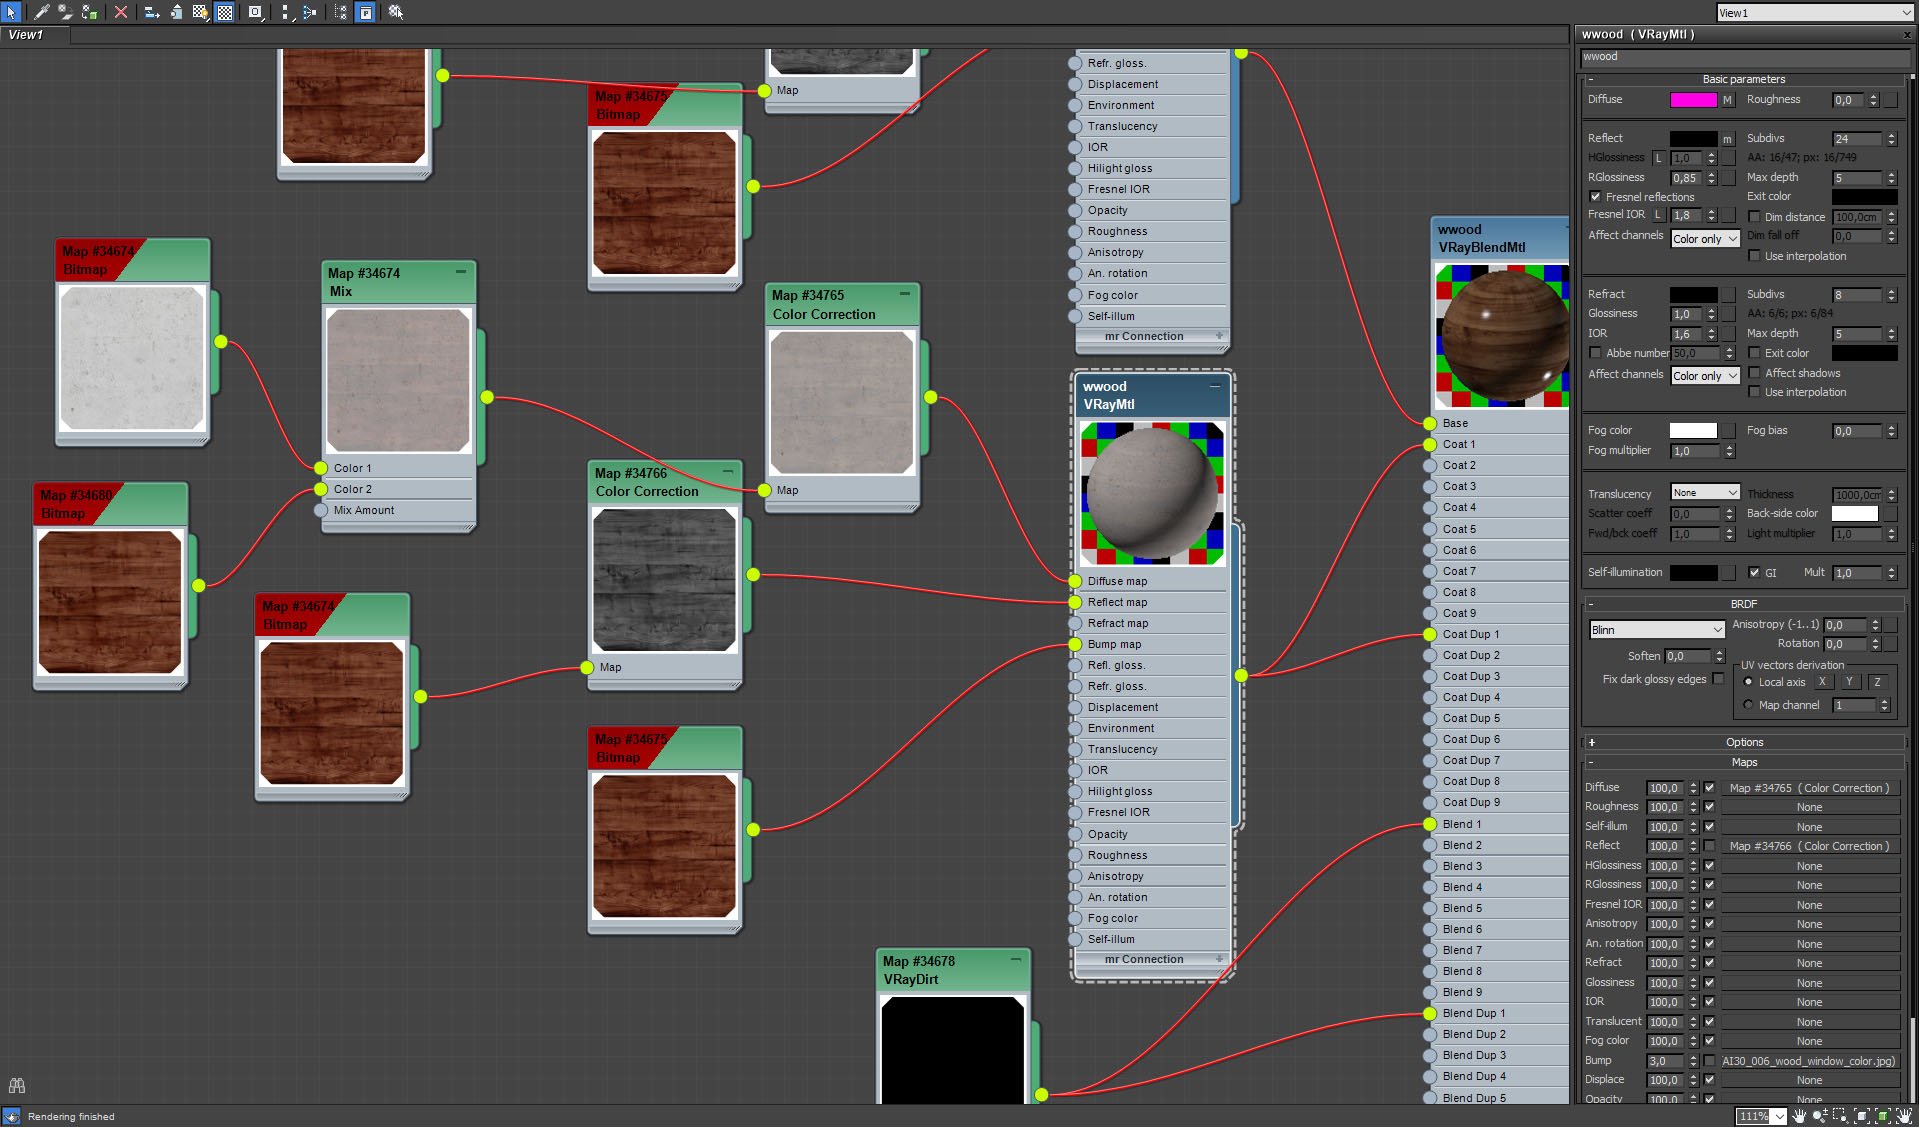
Window frame material - coat material.
Click on image to enlarge 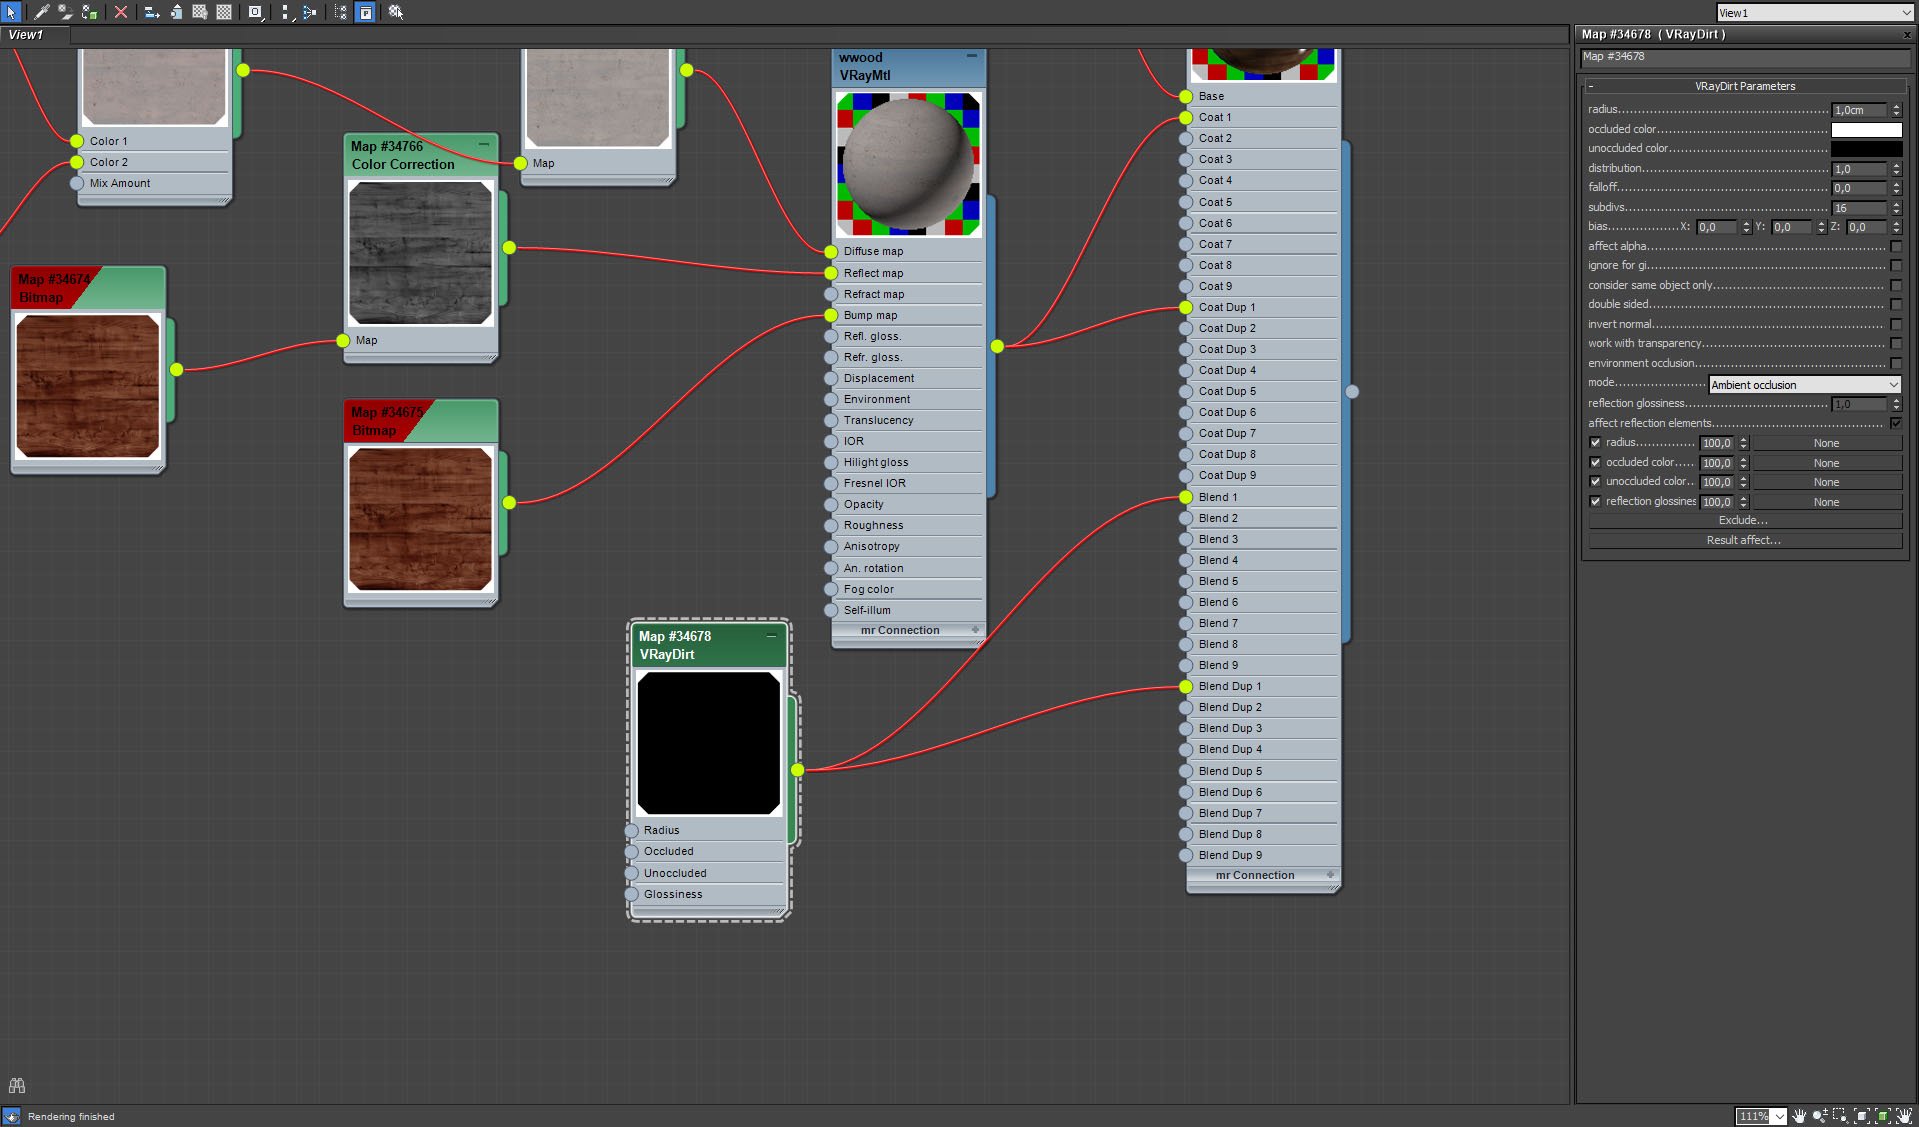
Window frame material - VrayDirt settings.
Click on image to enlarge 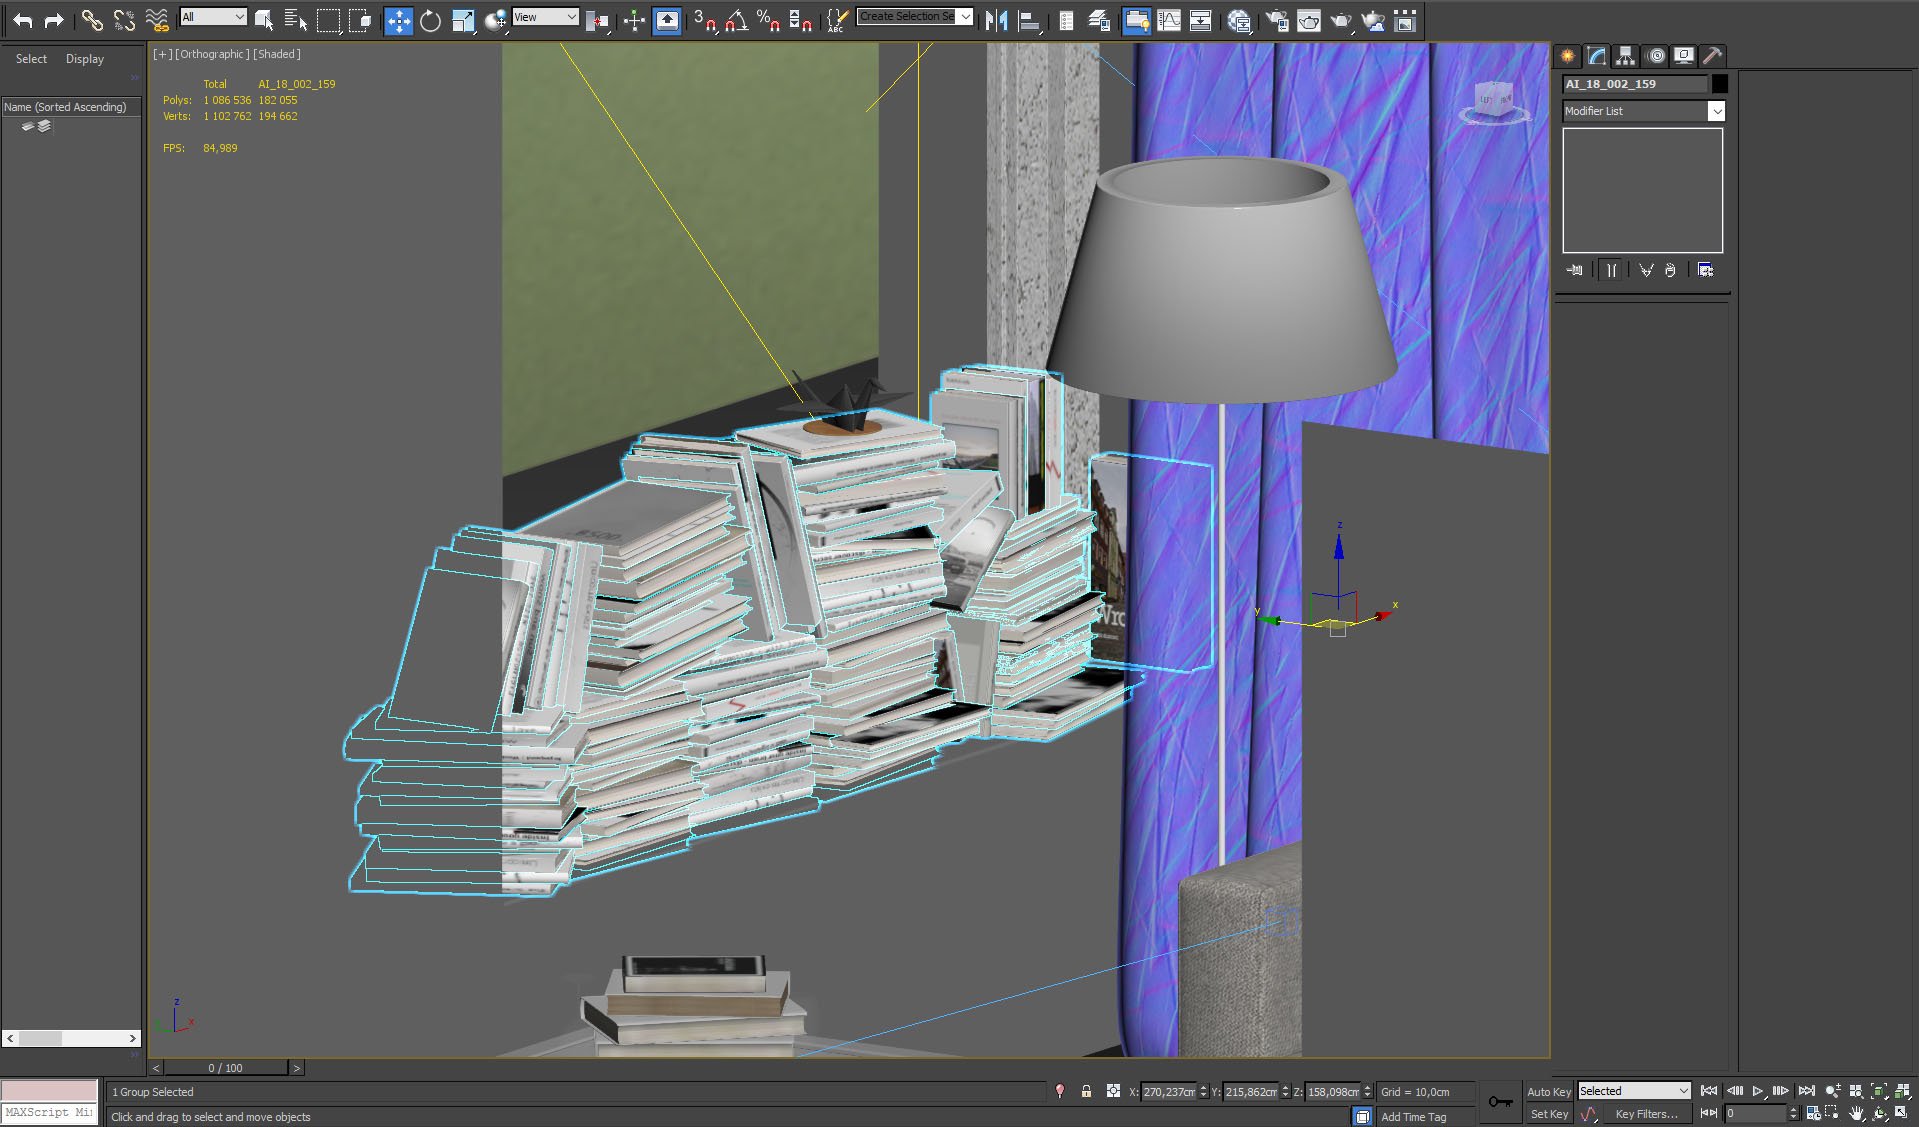
Some stockpiled books to achieve "messy look".
Click on image to enlarge 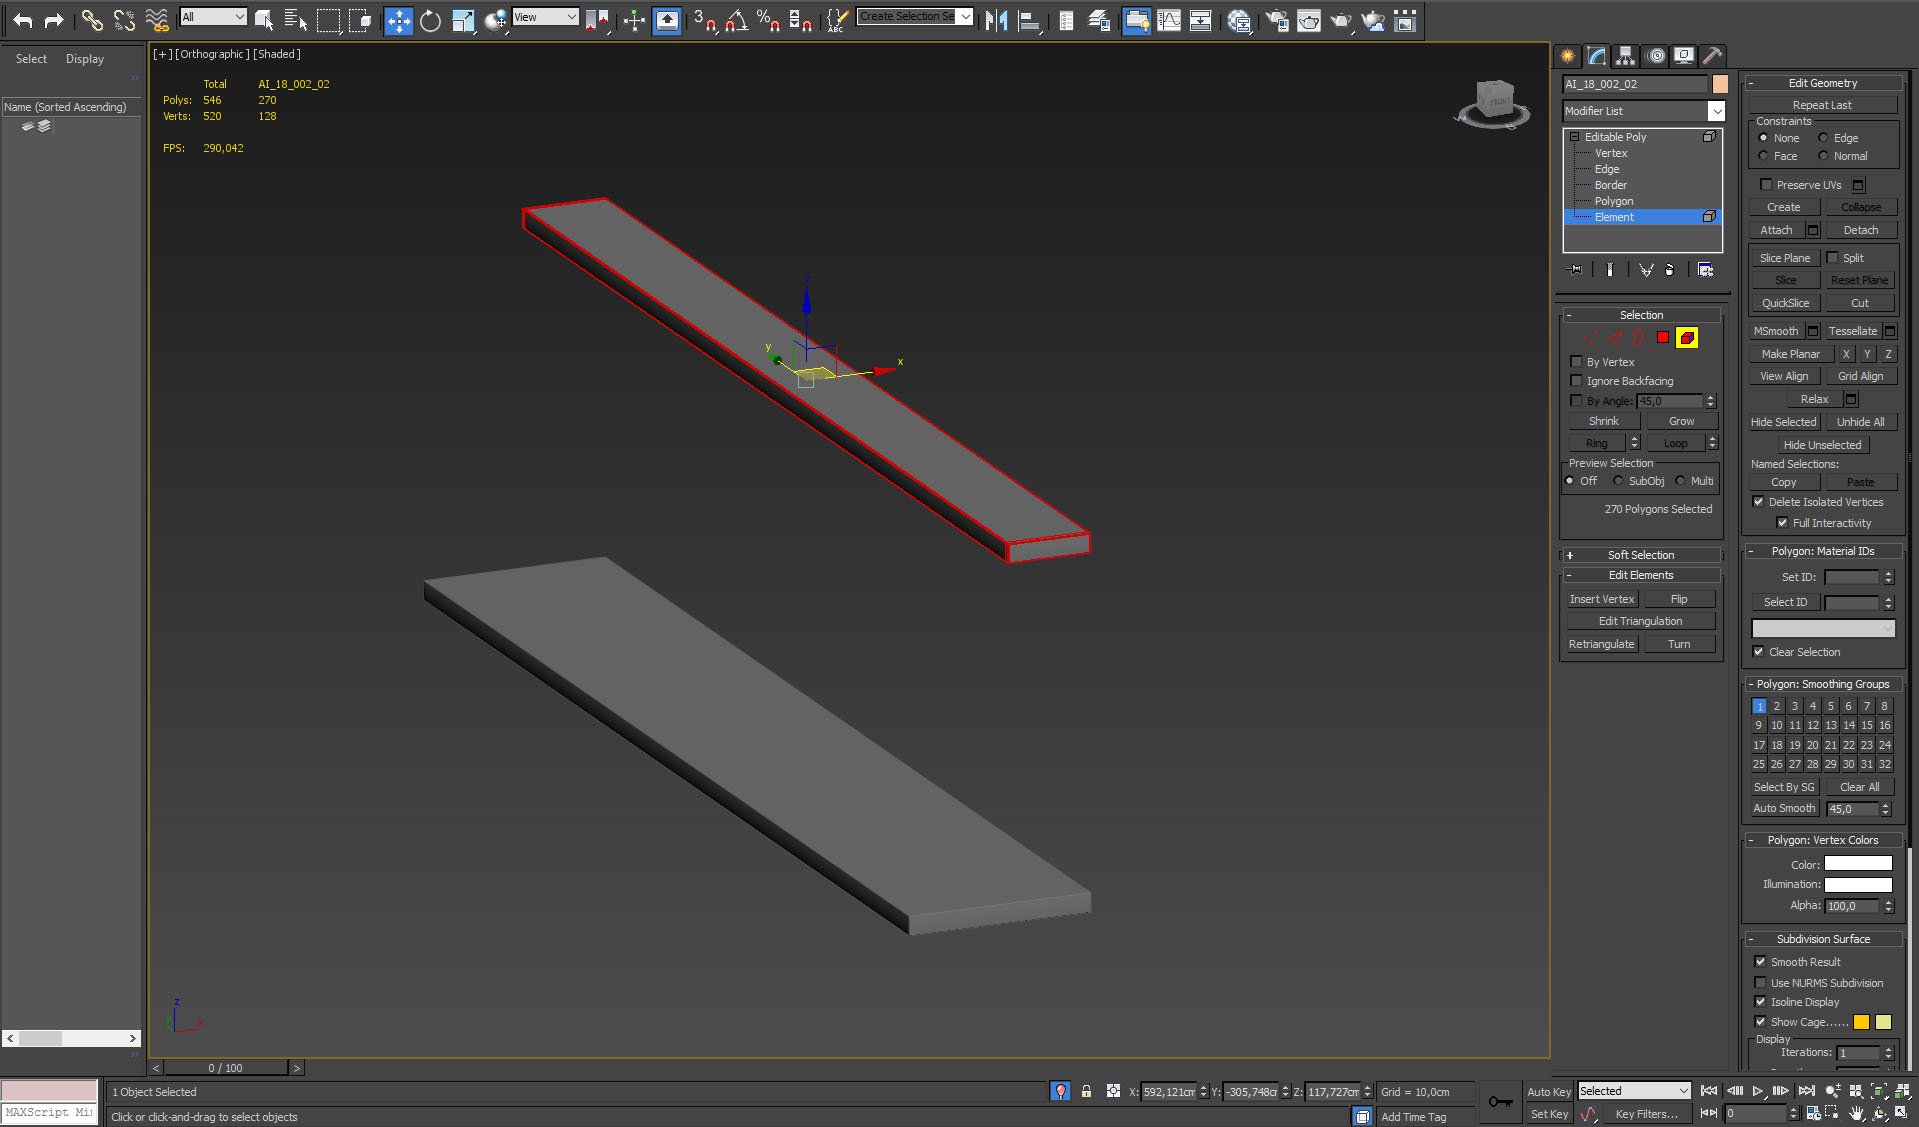
Click on image to enlarge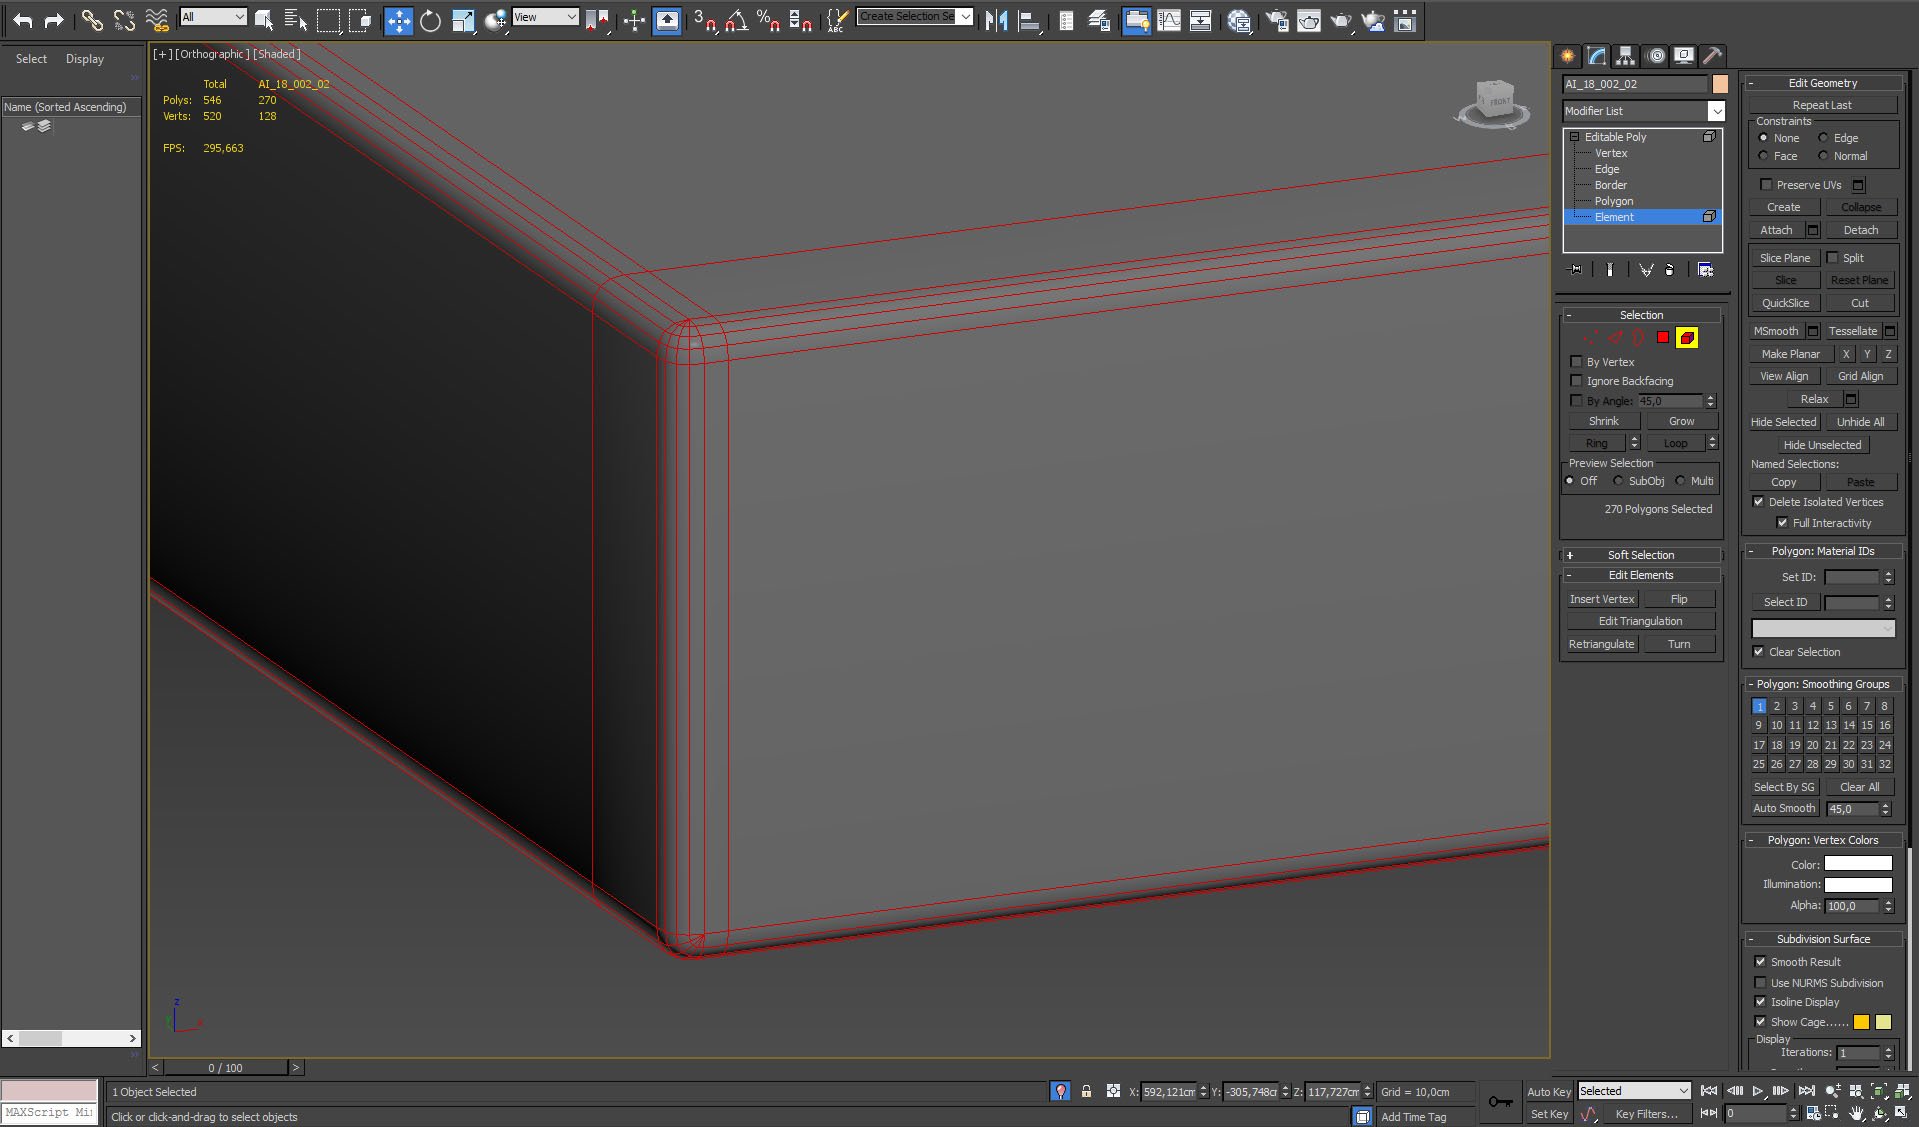
Shelves mesh close up.
Click on image to enlarge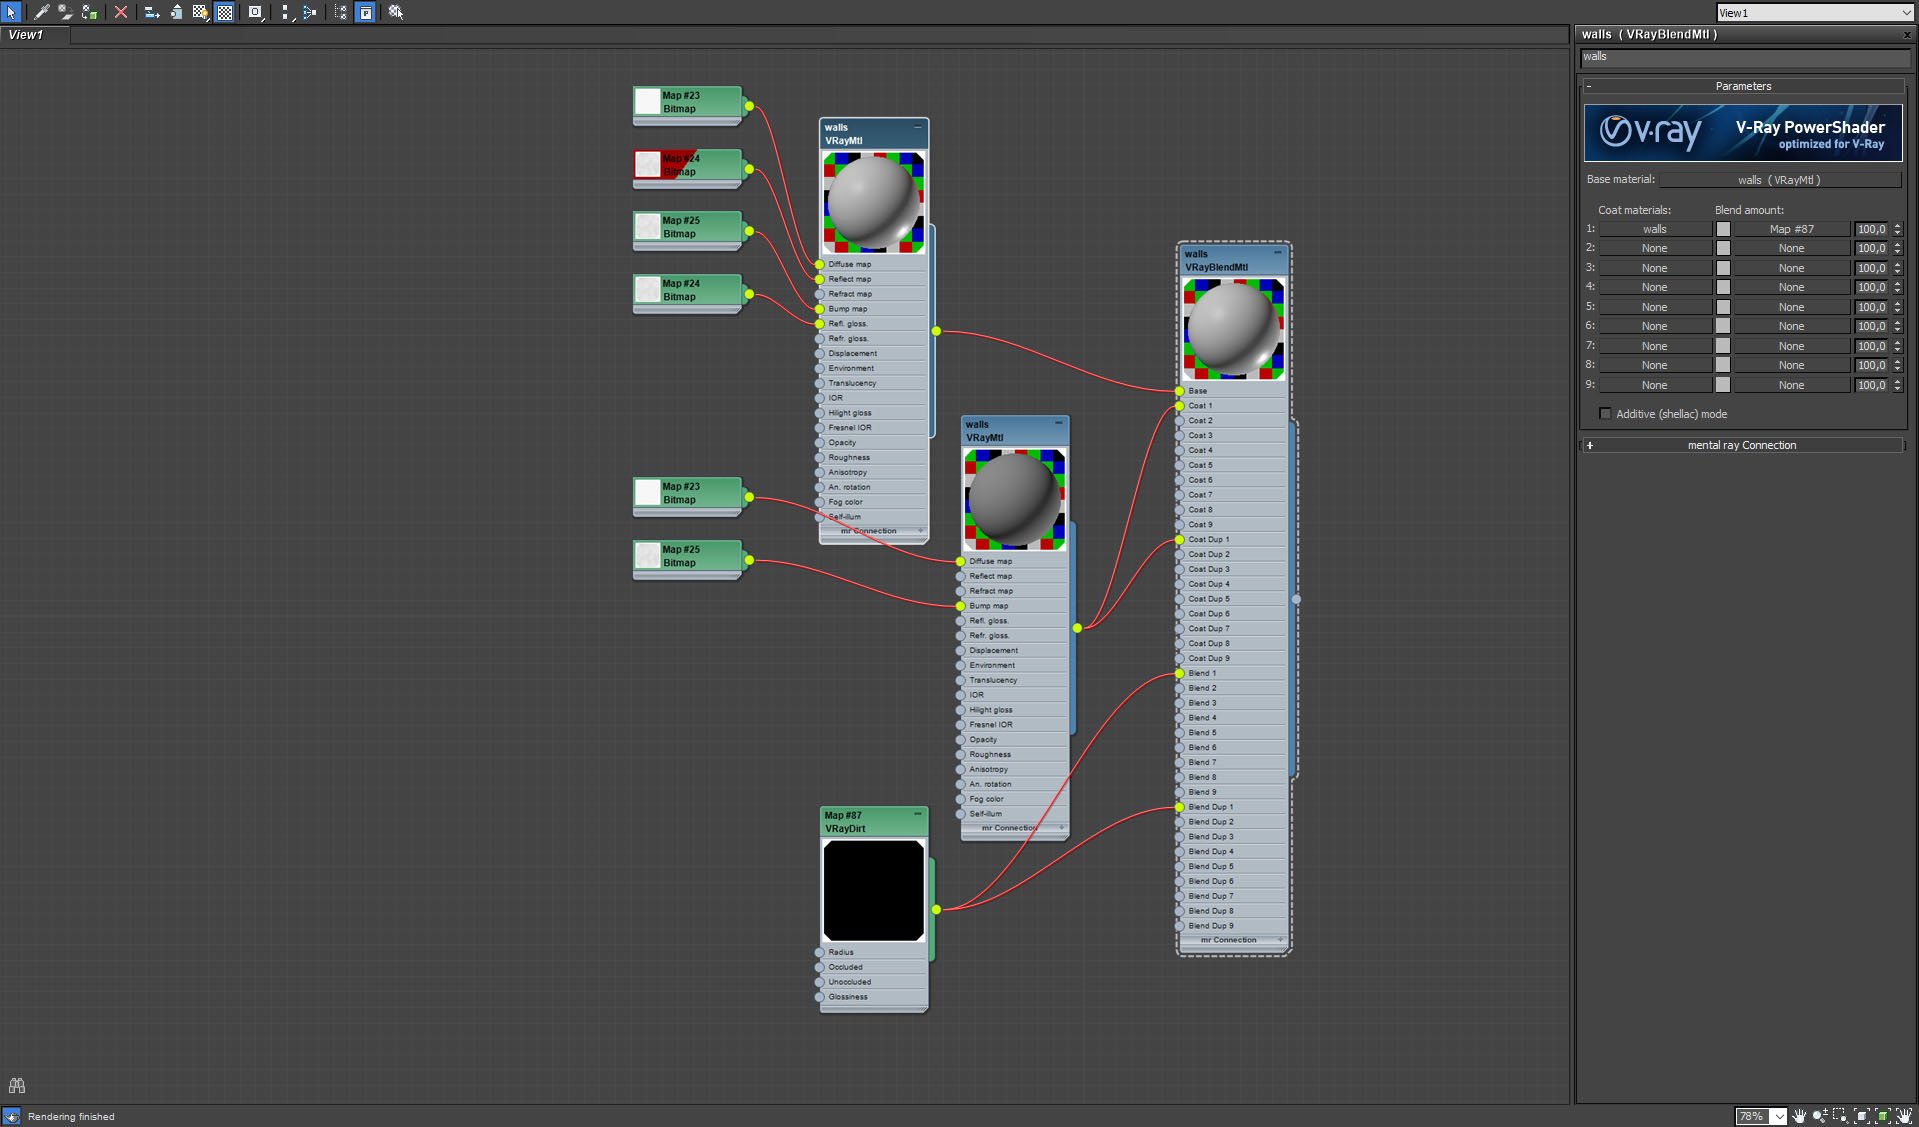
Shelves material.
Click on image to enlarge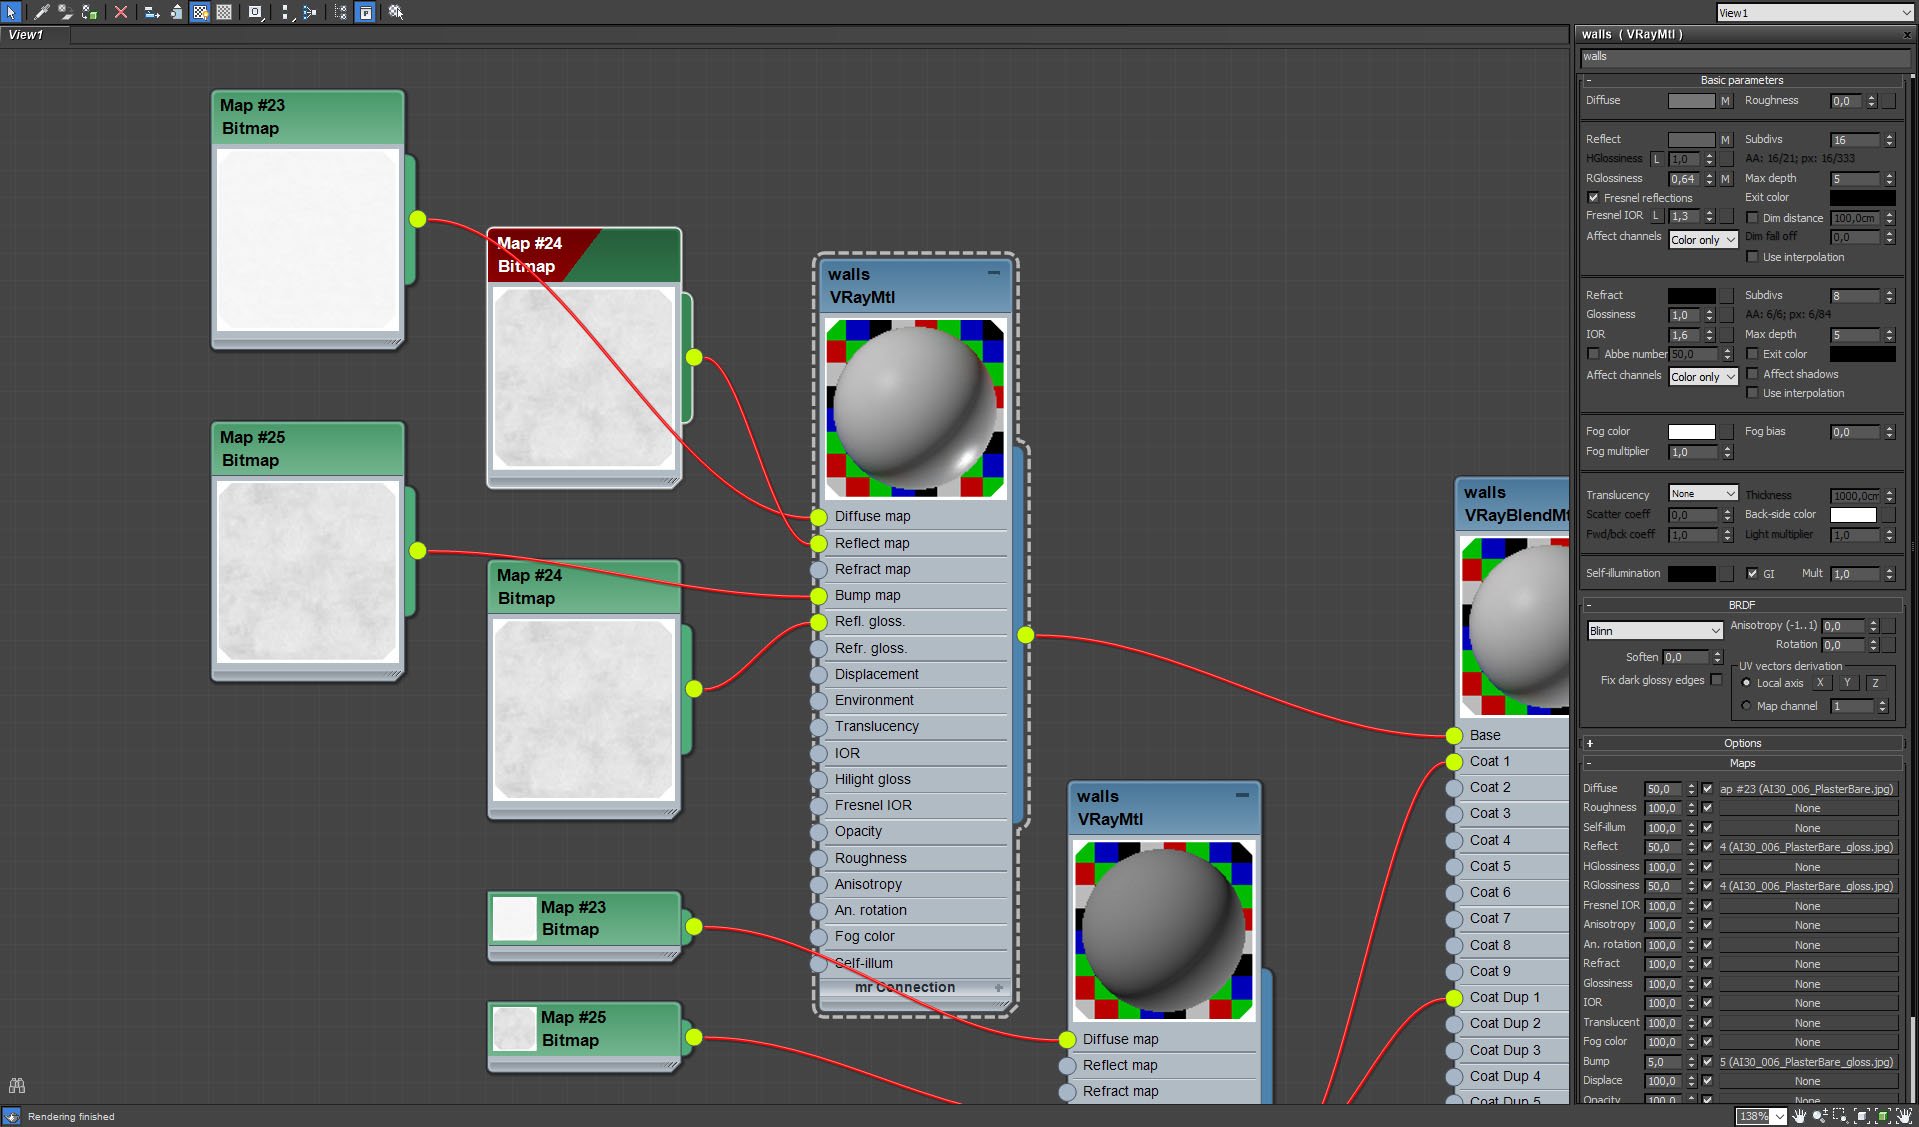
Shelves material - base.
Click on image to enlarge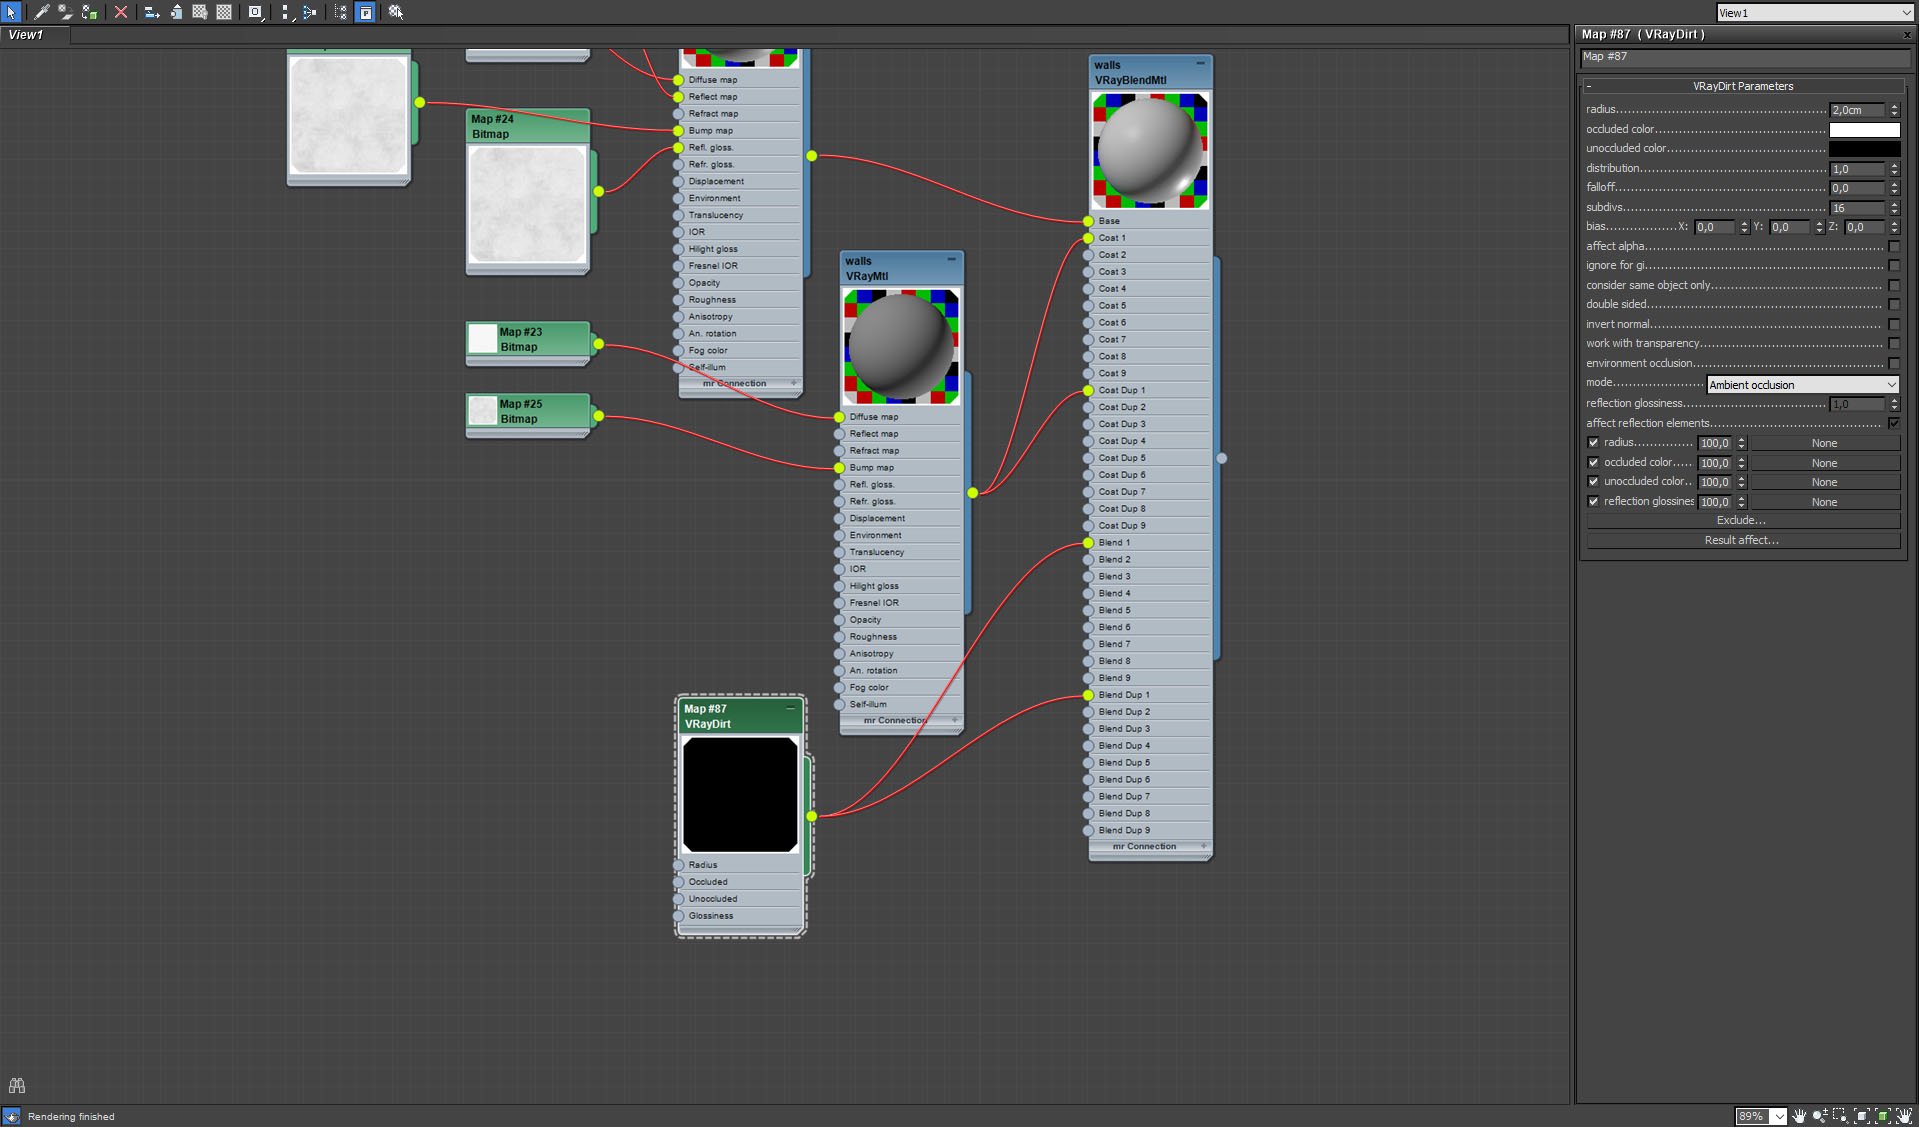
Shelves material - VrayDirt settings.
Click on image to enlarge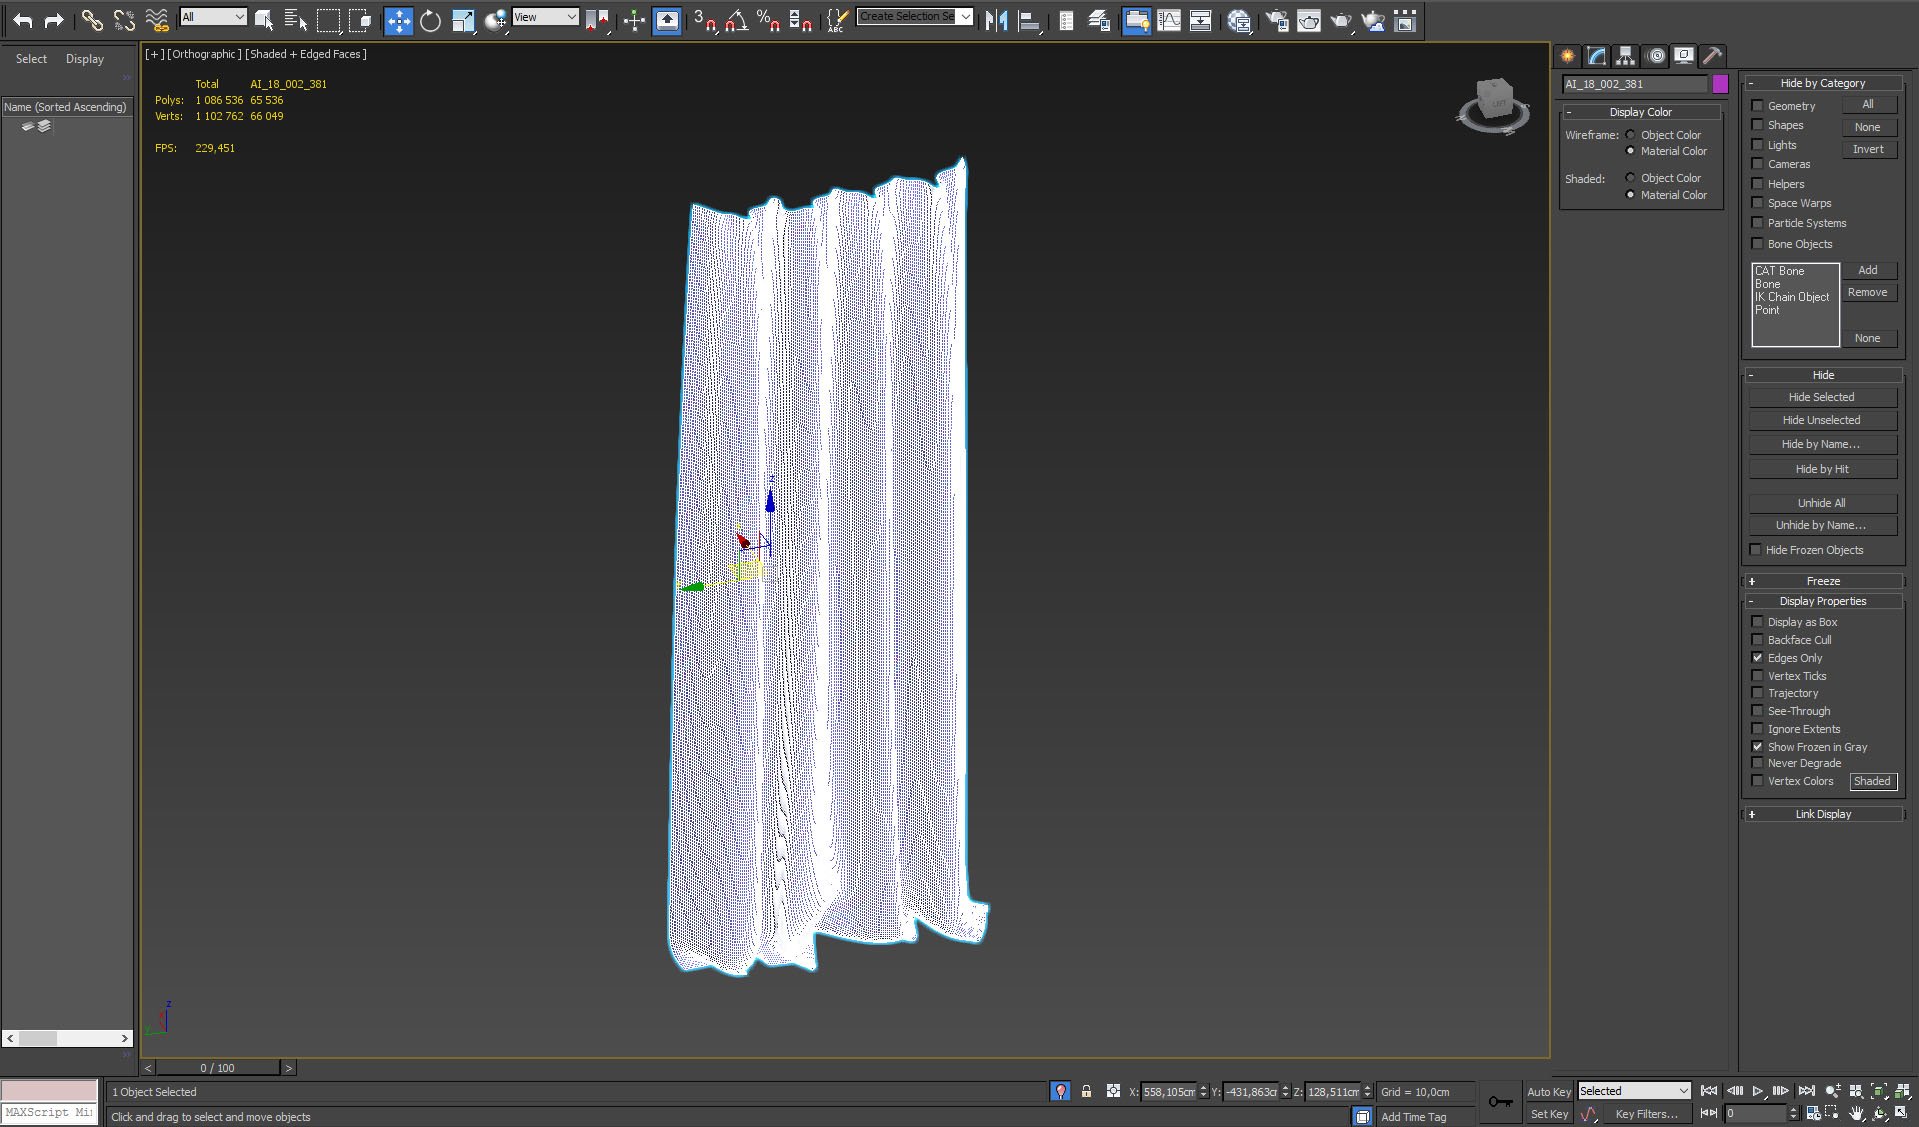
Curtain mesh. Just bended plane with turbosmooth and then simulated.
Click on image to enlarge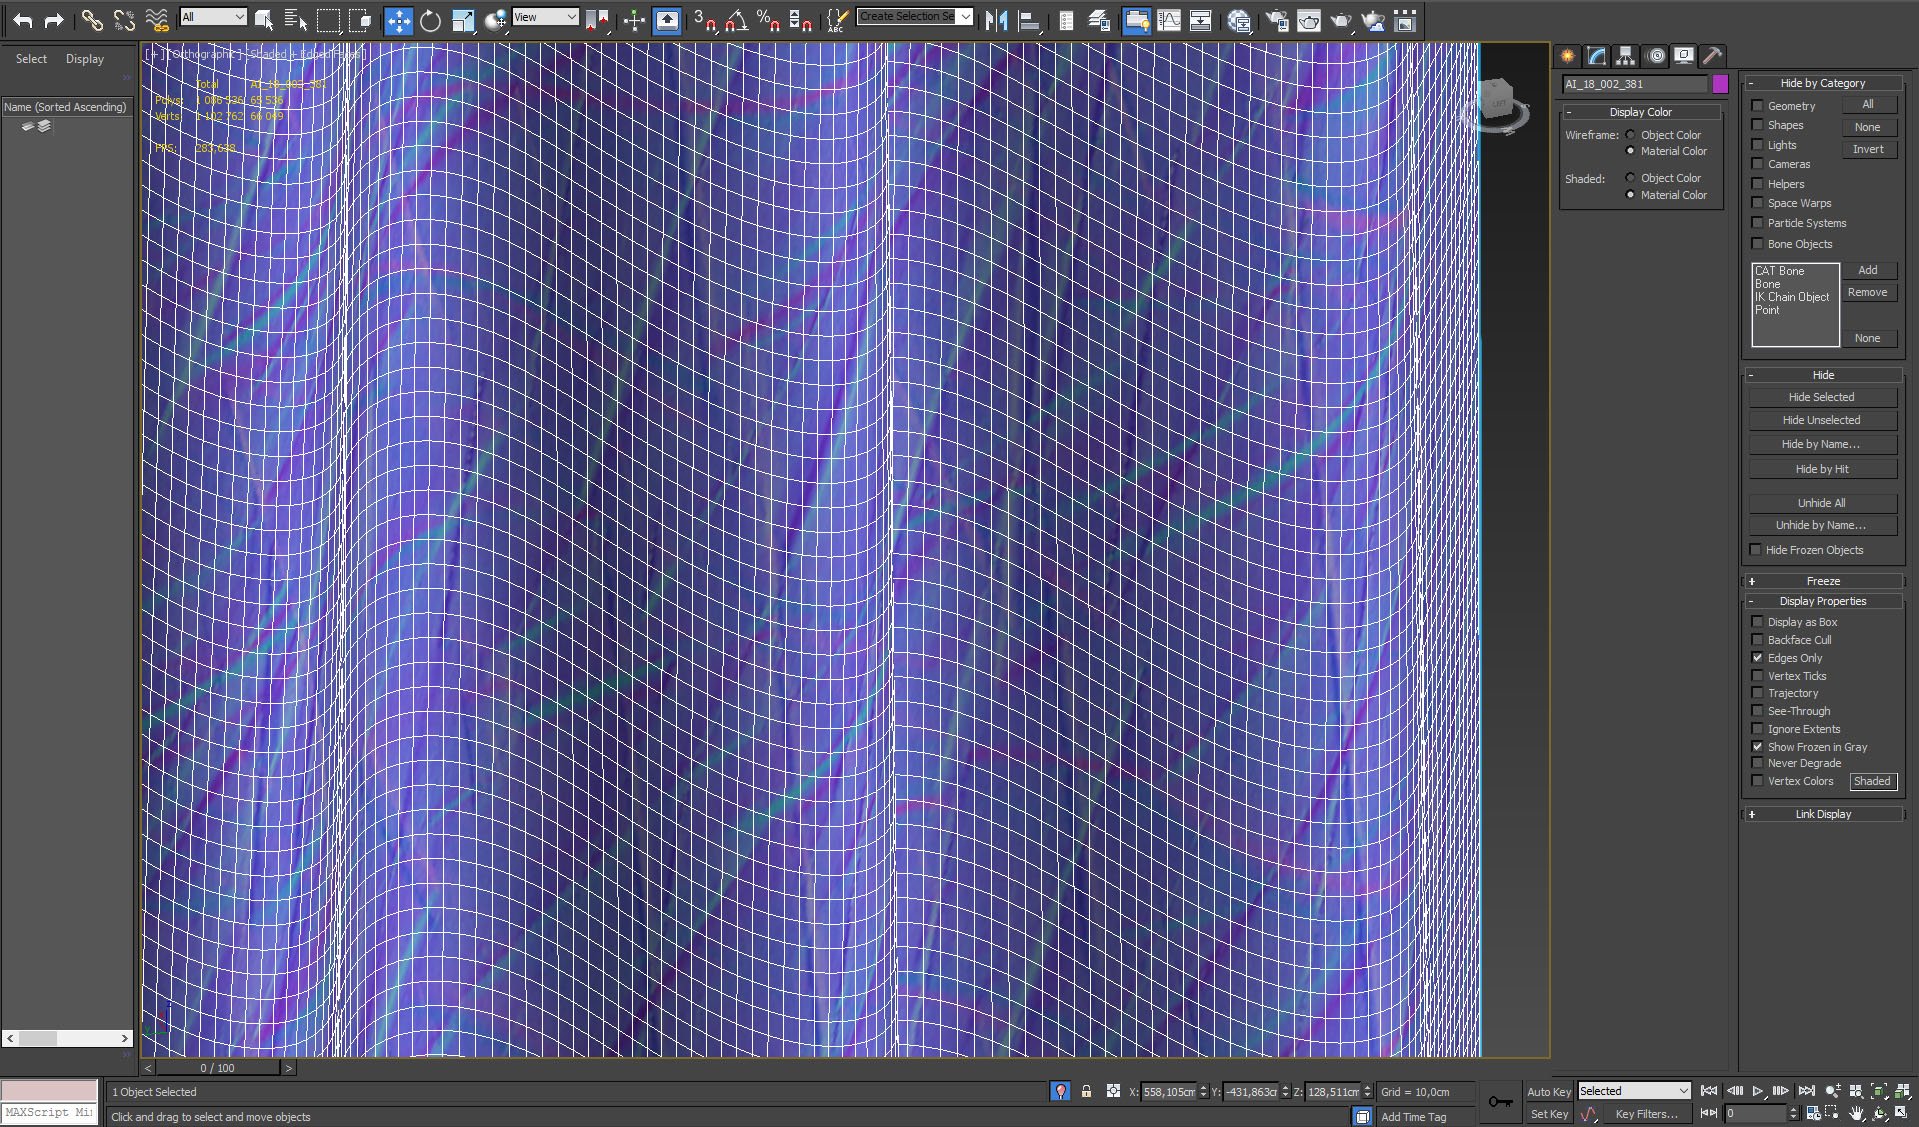
Curtain mesh, close-up.
Click on image to enlarge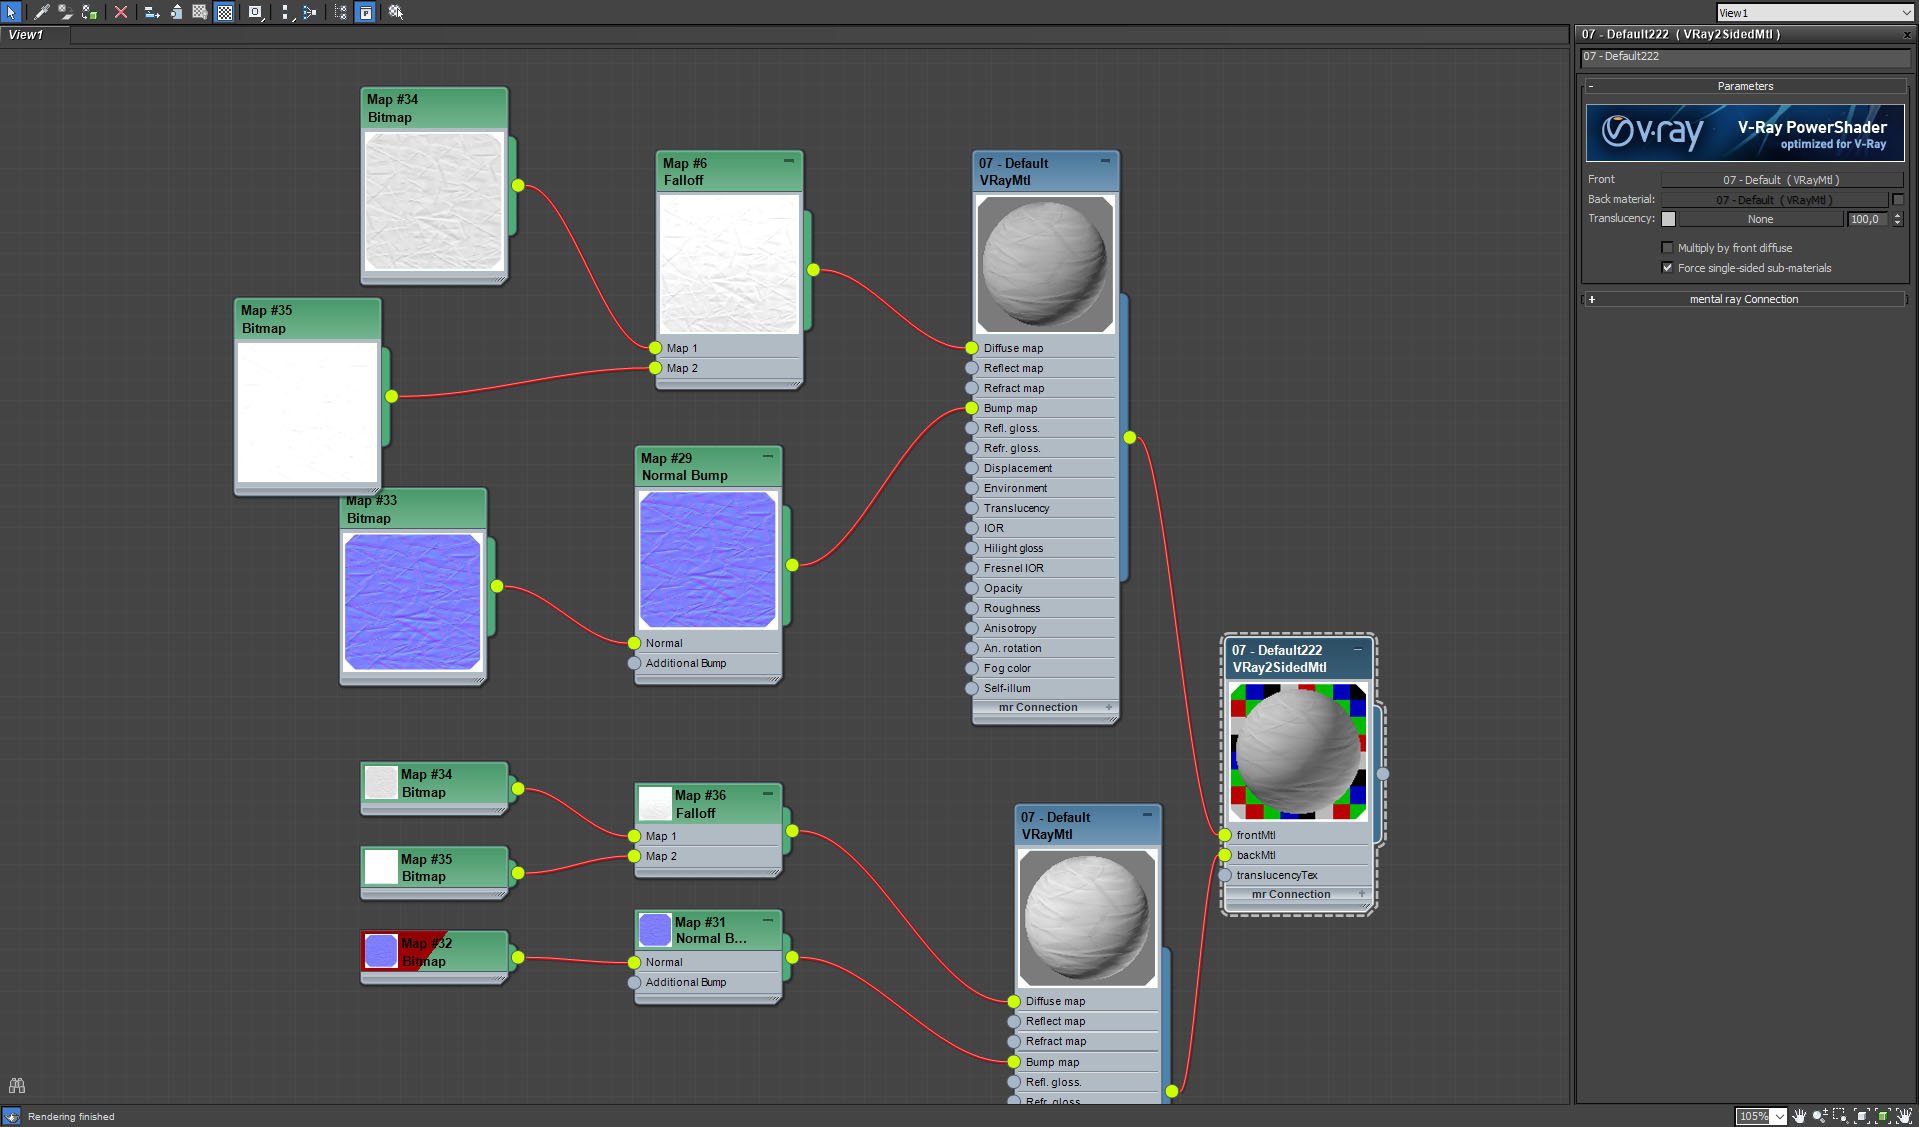
Curtain material is Vray2Sided Material.
Click on image to enlarge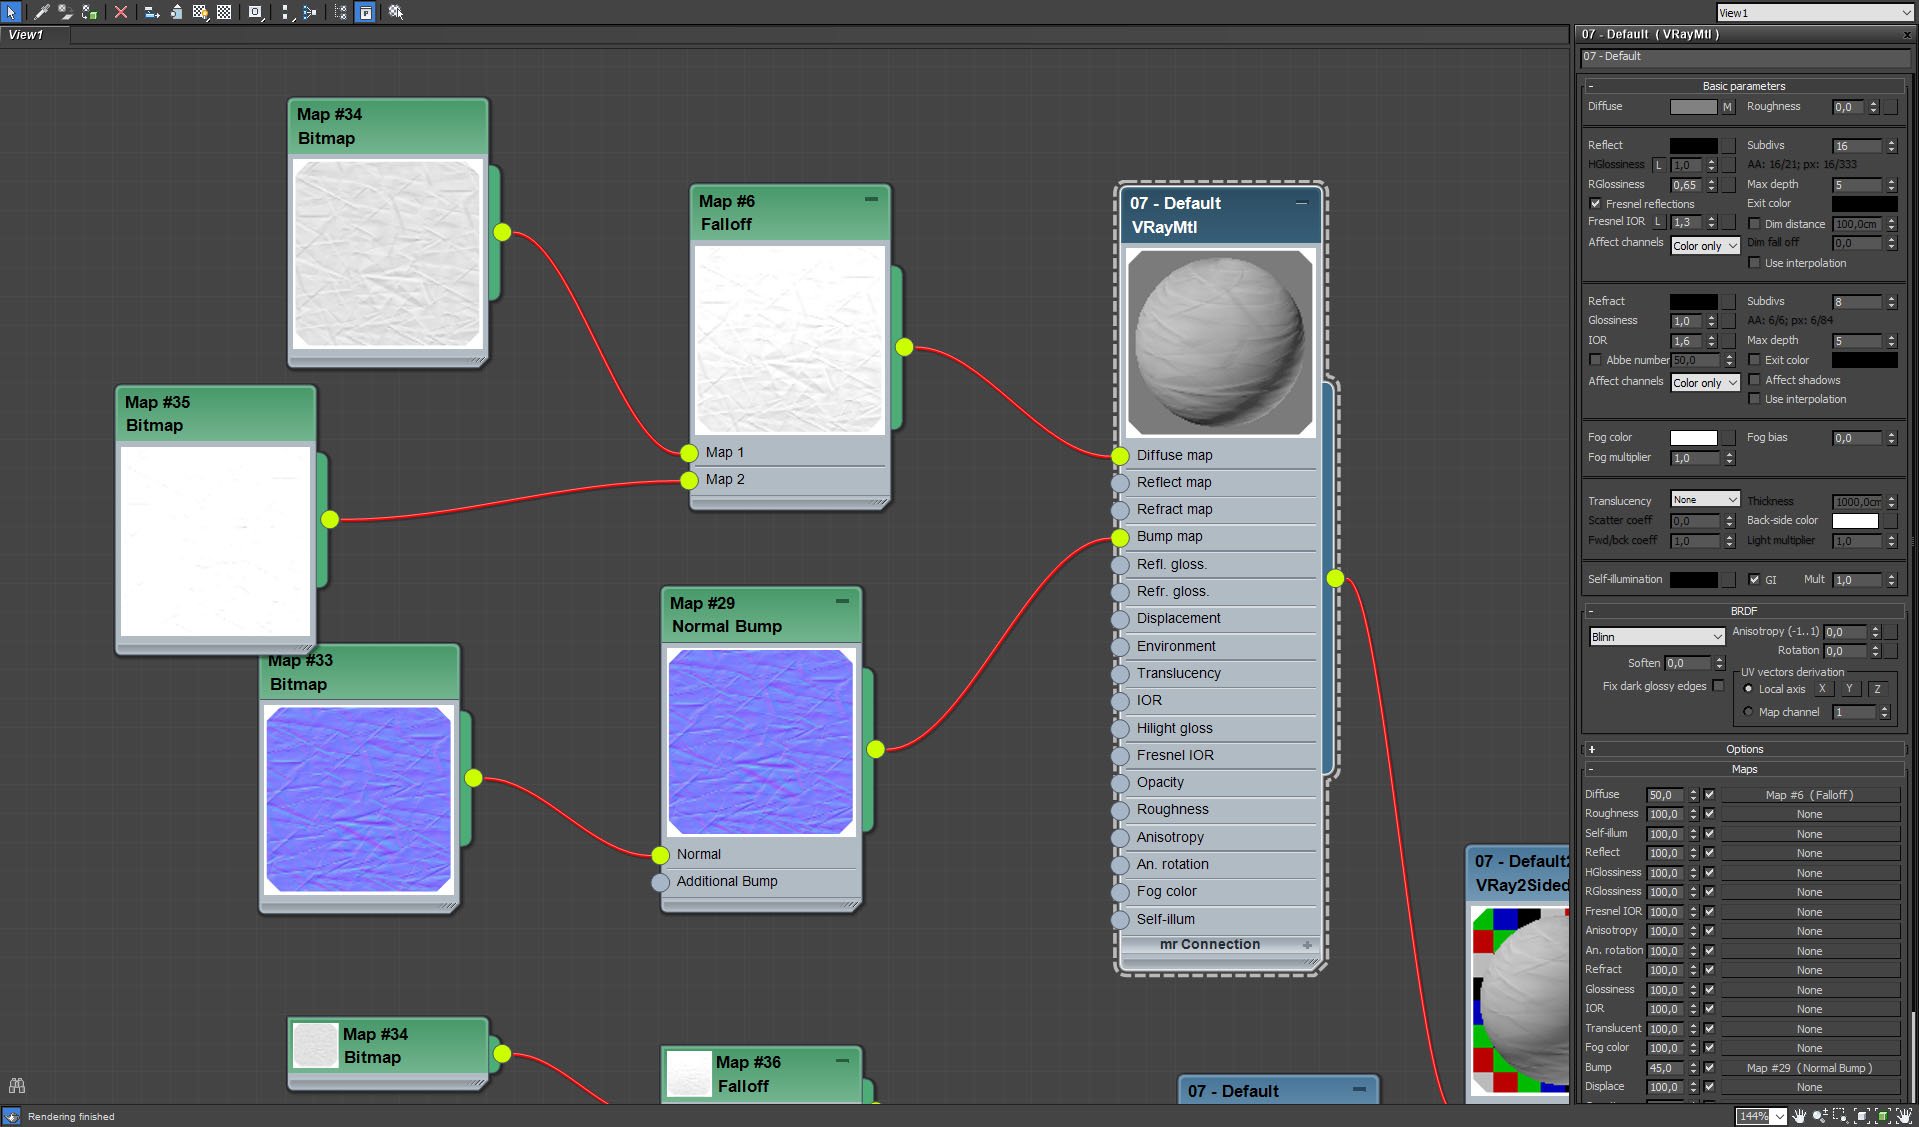
Curtain material - side one.
Click on image to enlarge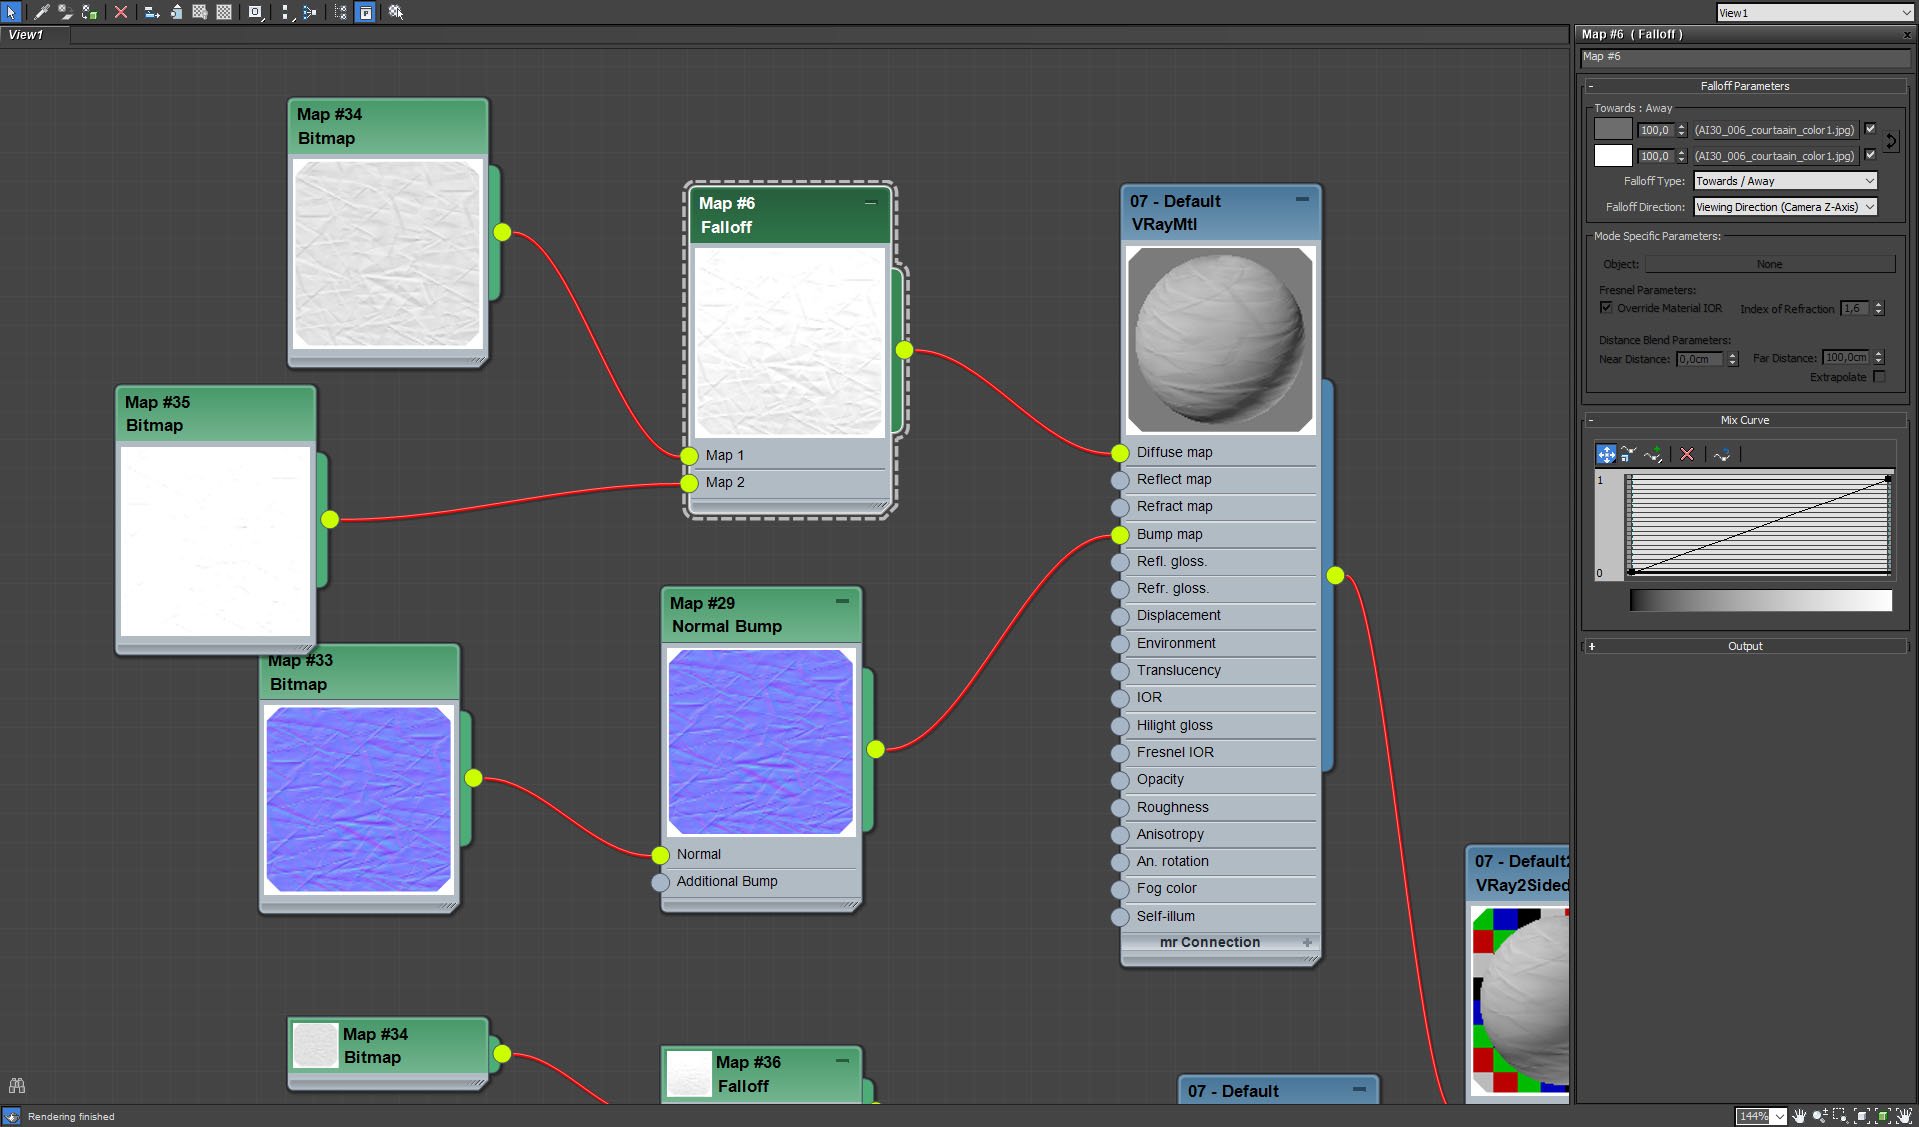
Curtain material - side one, falloff map settings.
Click on image to enlarge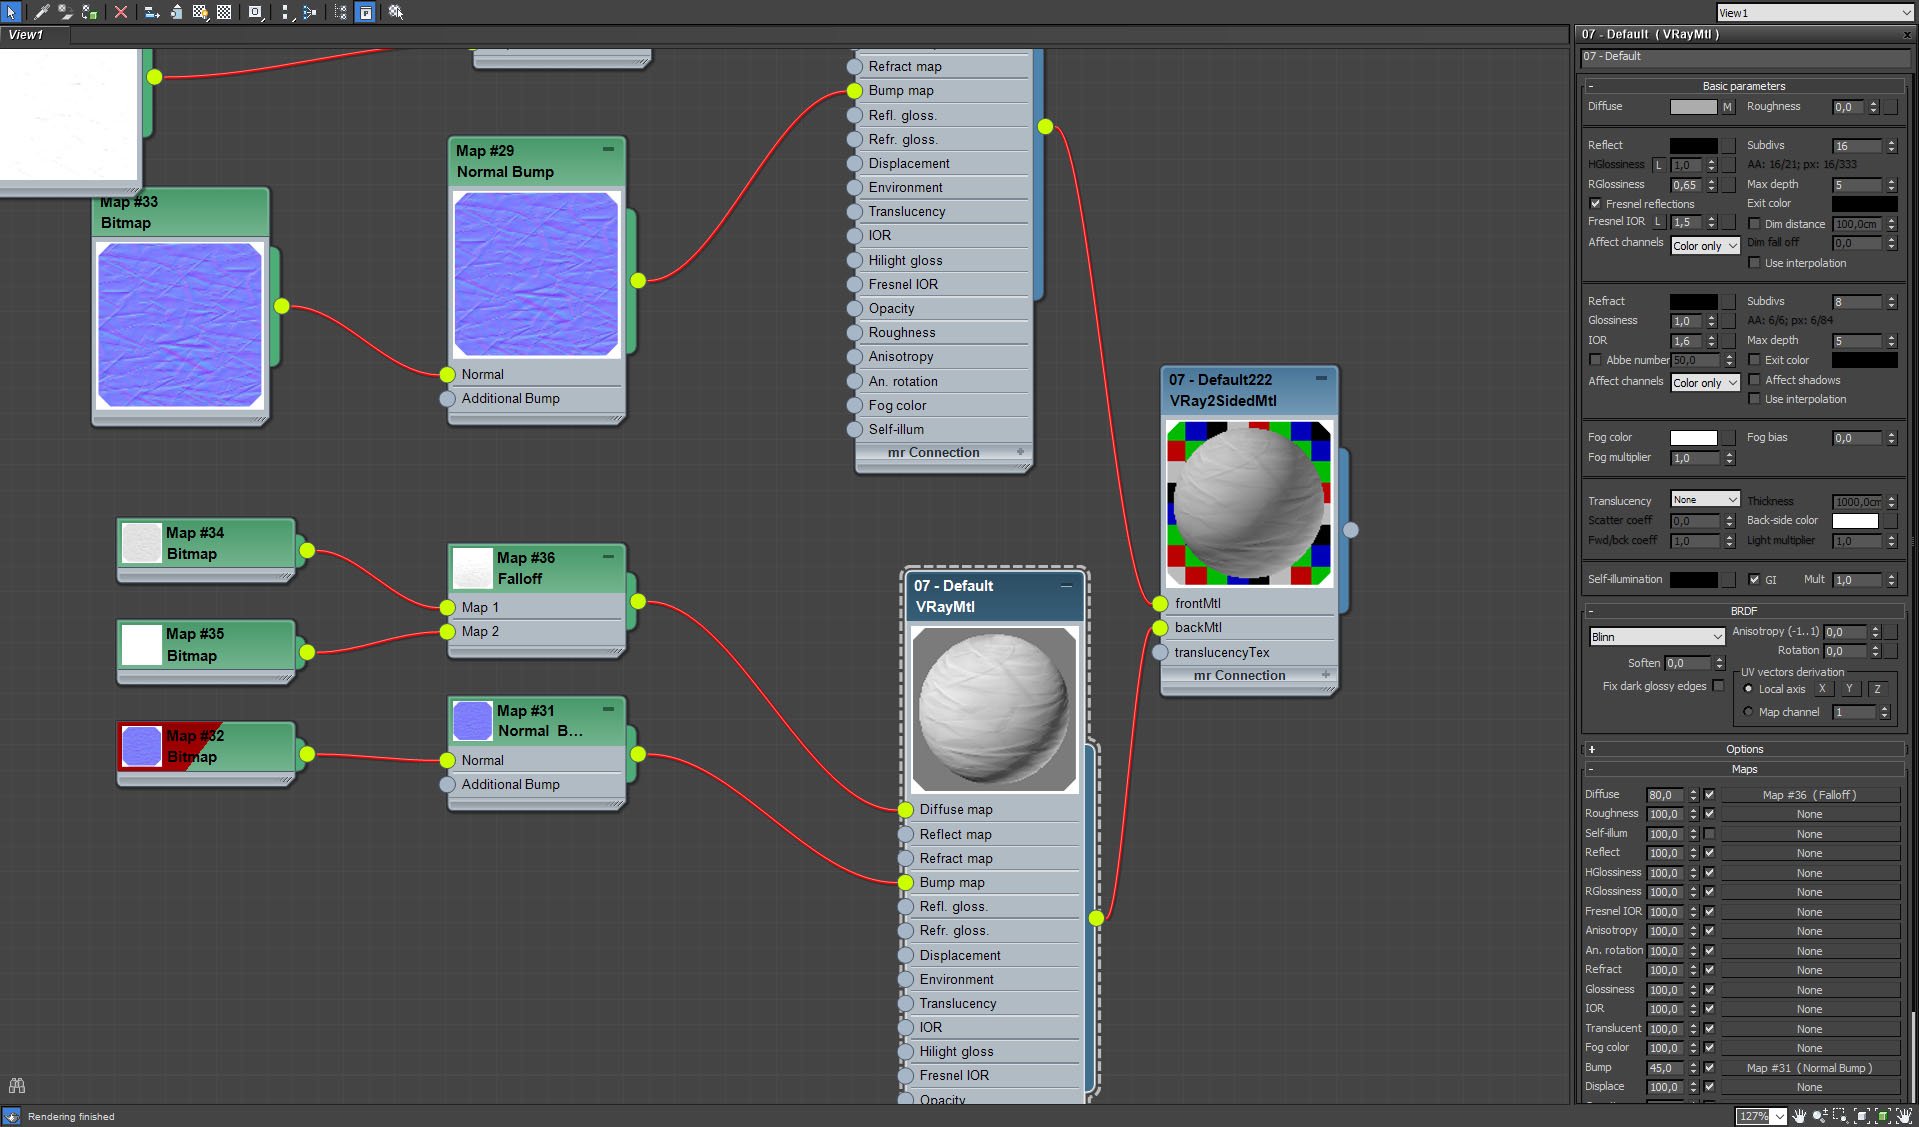
Curtain material, backside.
Click on image to enlarge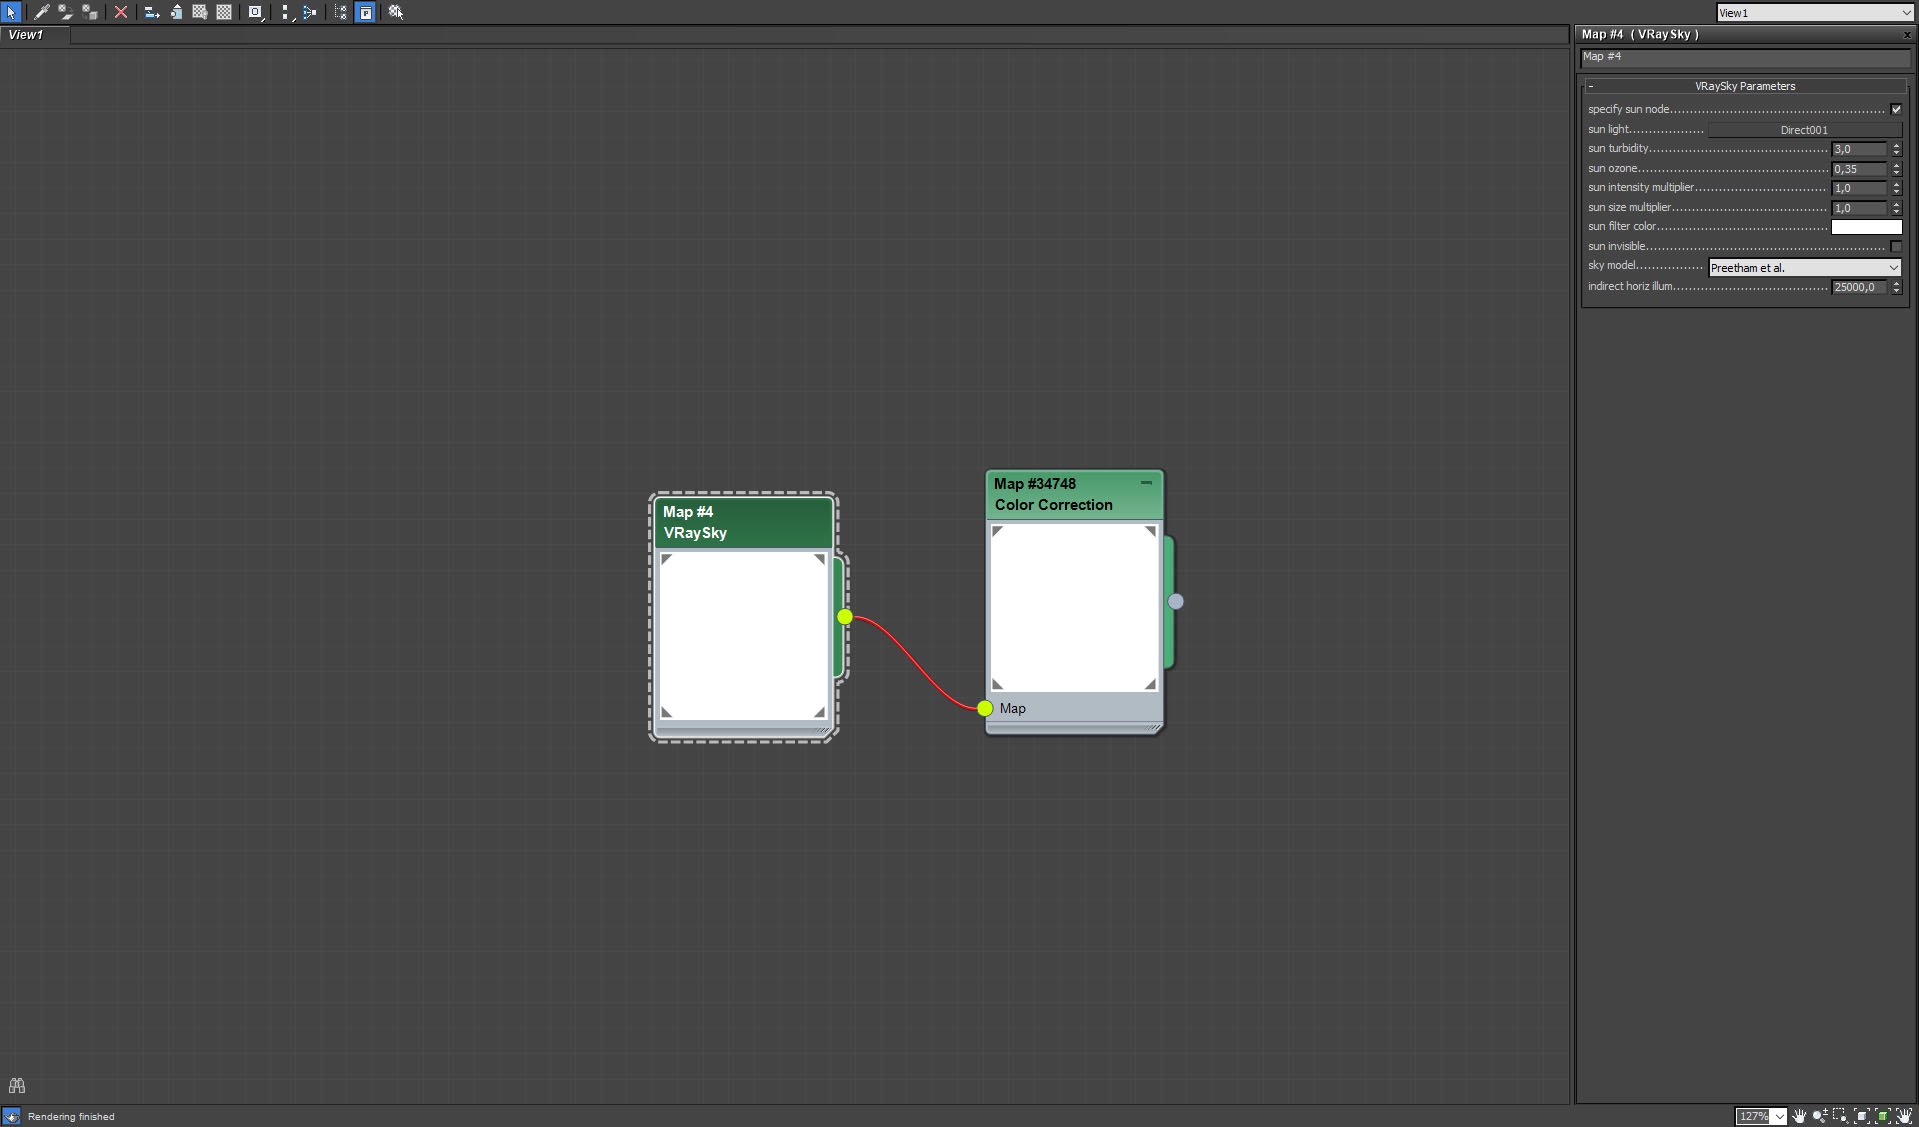
We used VraySky to lit the scene. It is our only light source, no VraySun added. This way we achieved soft lighting.
Click on image to enlarge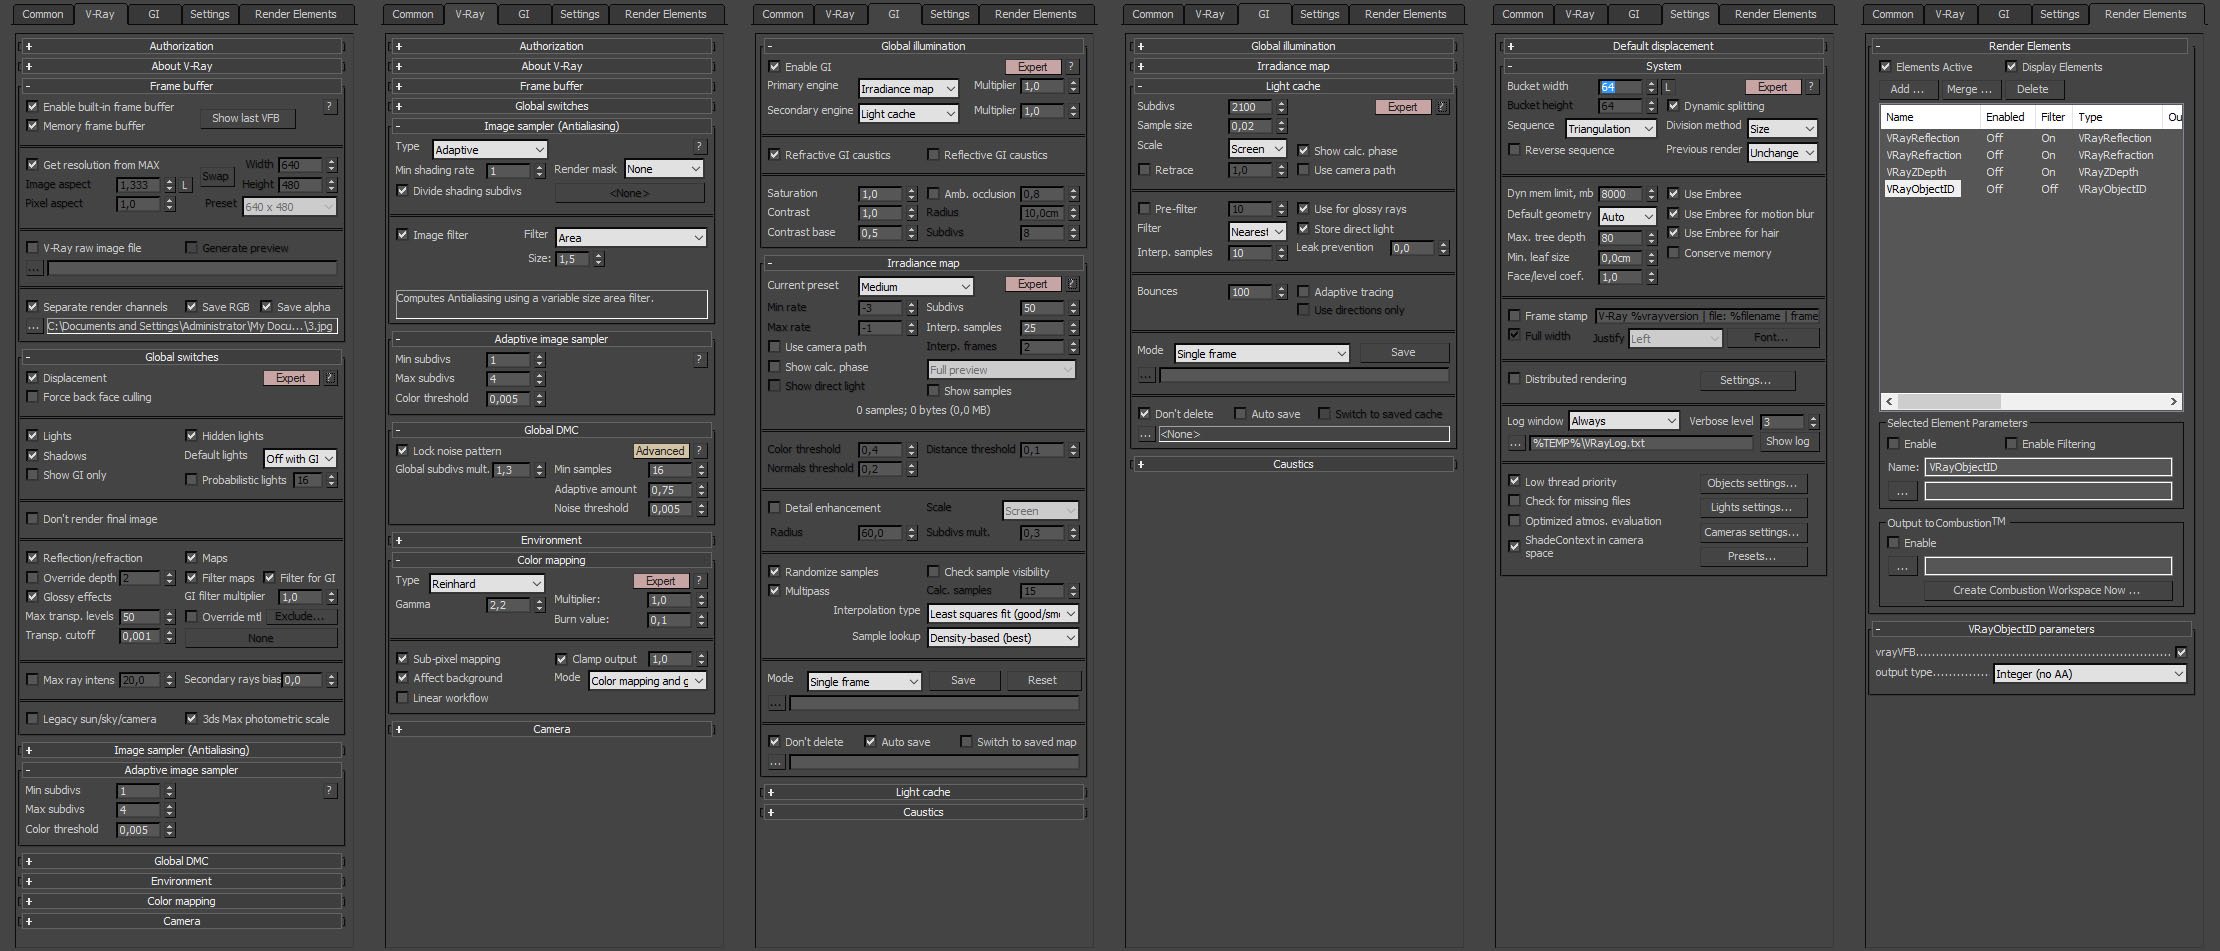
Render settings.
Click on image to enlarge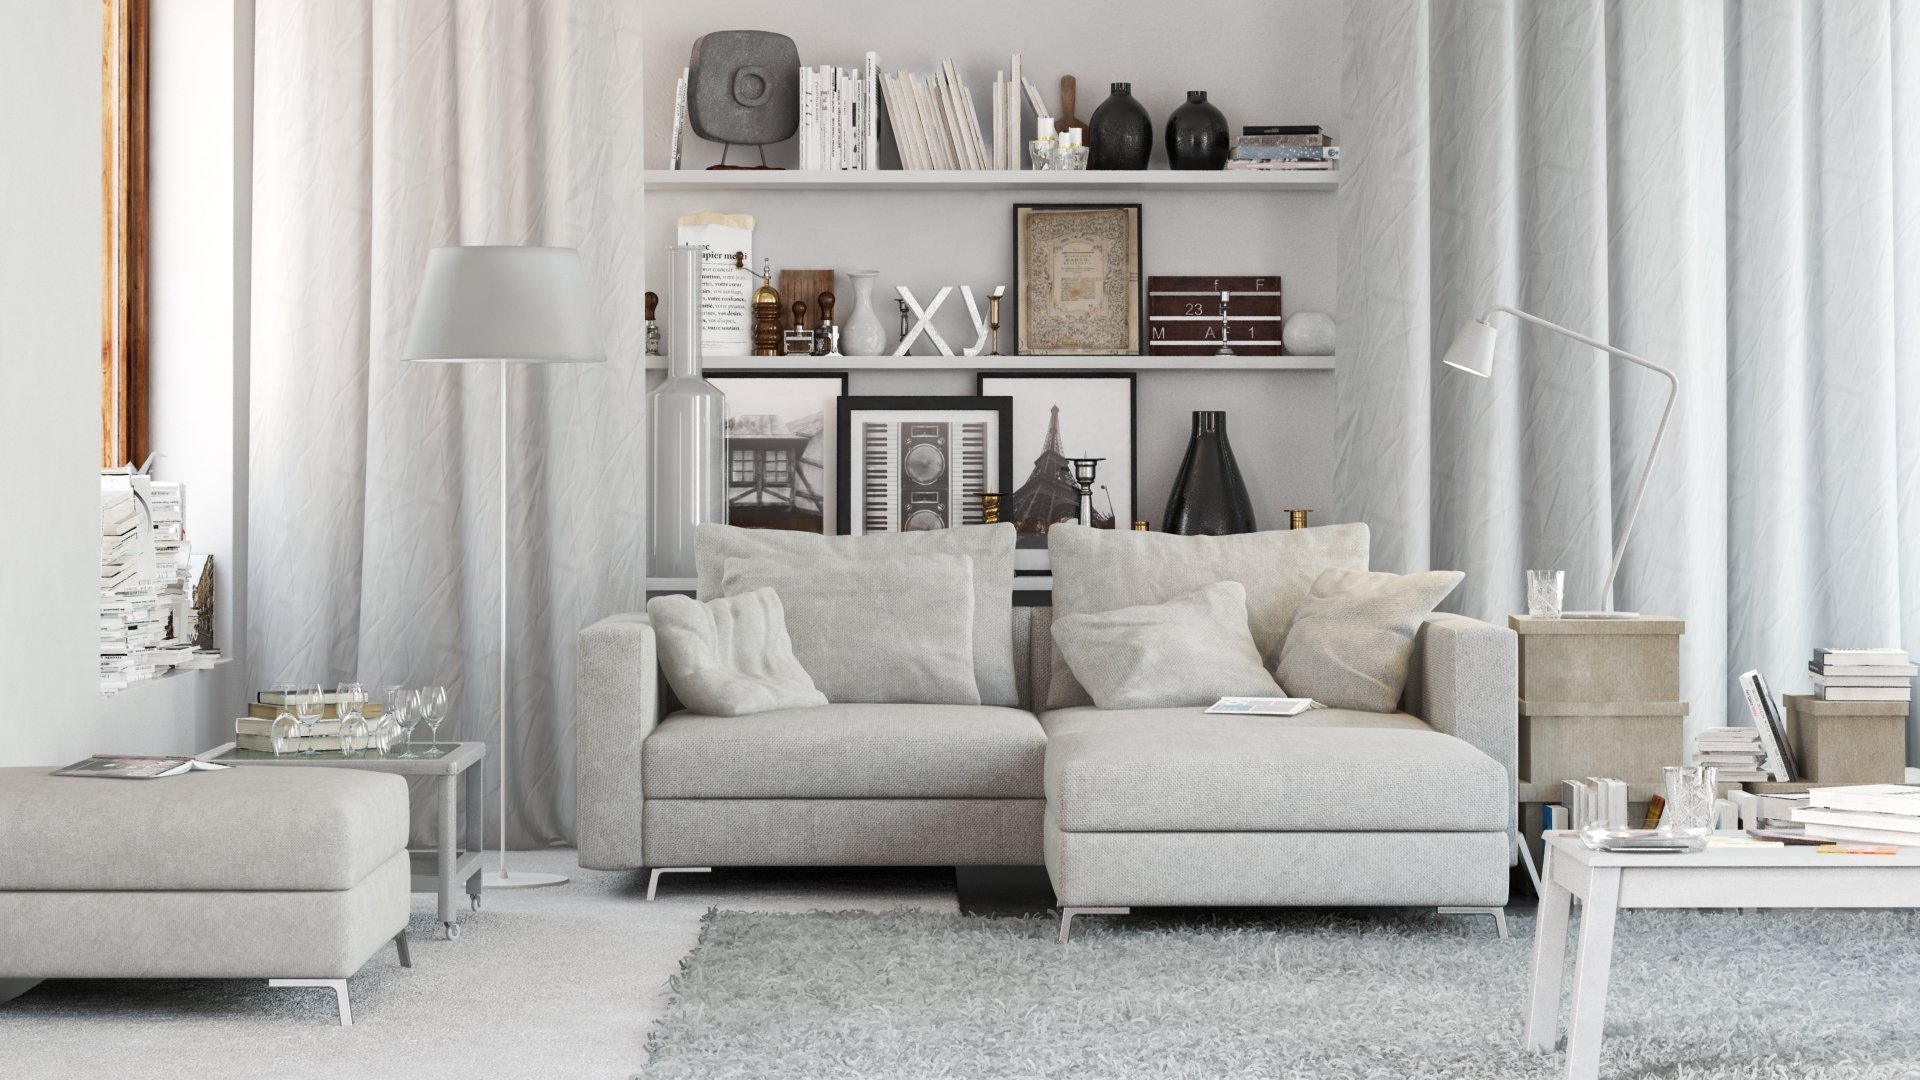
Raw render.
Click on image to enlarge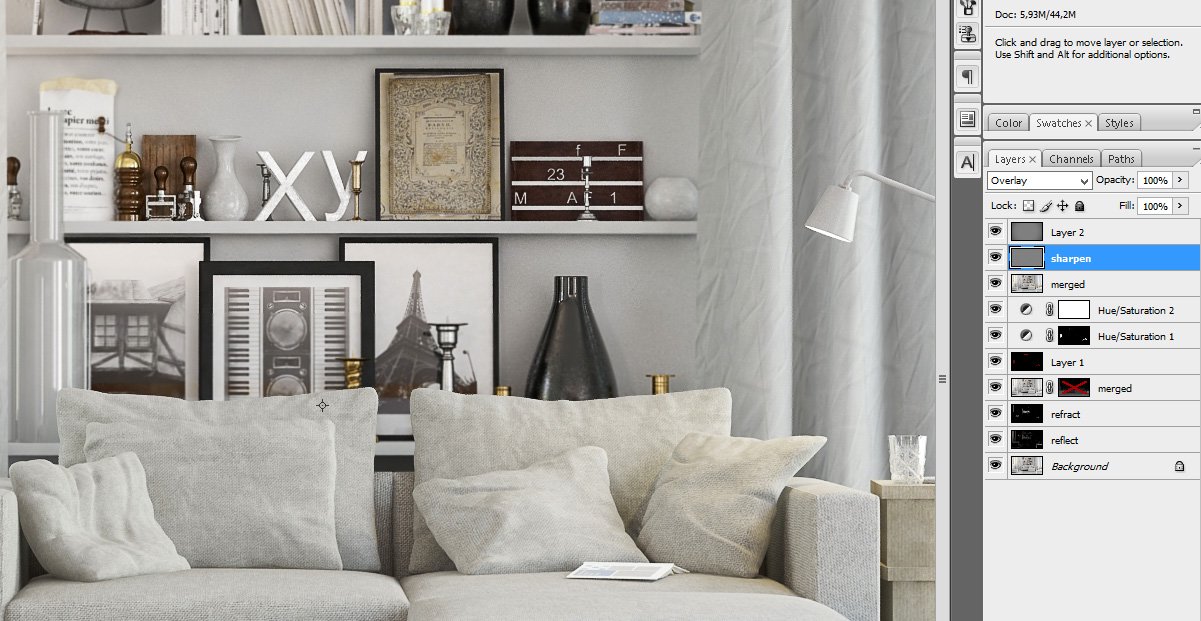
Photoshop stack. First, we added reflect layer to increase the reflections. then refract layer that does the same for refractions.Both were added in "screen" mode. Another layer merges reflections with overall image brightness, two hue / saturation layers do basically the same - they increase saturation in master channel. At the top goes sharpening layer and vignette.
Click on image to enlarge
Final image after post-production.
This interior scene was made by Evermotion in 3ds Max and V-Ray. It is a scene 6 from Archinteriors vol. 30.
Customer zone
Your special offers
Your orders
Edit account
Add project
Liked projects
View your artist profile


COMMENTS