We add new 3D SCANS every week

Shop Now
Search
Cart
Sign in
  • offerCustomer zone
  • offerYour special offers
  • offerYour orders
  • offerEdit account

  • offerAdd project
  • offerLiked projects
  • offerView your artist profile

  • Dark mode

Information Clause

In accordance with the art. 13 section 1 and 2 of the European Parliament and Council Regulation 2016/679 of the 27th April, 2016 on the protection of natural persons, with regard to the processing of personal data and on the free movement of such data, and repealing Directive 95/46/EC (General Data Protection Regulation), hereafter RODO, I hereby inform that:

1. EVERMOTION S.C., 8 Przędzalniana Str., 15-688 Białystok, Poland is the Administrator of your Personal Data (APD)

2. Data Protection Inspector can be reached through e-mail: iod@evermotion.org

3. Your personal data are to be processed on the basis of art. 6 section 1 letter a, b and f of RODO in order to:
a) prepare, conclude and execute the agreement and for other purposes approved by you,
b) to execute the legitimate interest like marketing of products and the agreement, claim assertion or defence against claims resulting from the law regulations.

4. Entities entitled to the reception of your personal data may be the authorised public bodies; mail providers; providers of the services covered by the agreement; responsible for debt recovery, keeping the archives, document utilization, legal consulting, technical services, IT services and accountancy.

5. Your personal data shall not be transferred to the third country, nor to the international bodies.

6. Your personal data shall be processed within the period of the agreement and upon your additional consent until you withdraw it. APD shall keep the data for the period of any civil law claim execution connected with the agreement.

7. You have the right to demand an access to your personal data, to correct or to delete the data if there is no other basis for the processing or any other purpose of such processing or to limit the processing of the data, to transfer the data to another administrator and to raise objections to the further data processing if there is no legal basis for further processing and to withdraw any previous consent.

8. You provide the personal data voluntarily, however they are necessary to conclude the agreement. The refusal of providing such data may result in the refusal of the agreement conclusion.

9. You have the right to lodge a complaint to the Personal Data Protection Office when in your opinion the data processing violates the regulations of General Data Protection Regulation of the 27 April, 2016 (RODO).

10. Your data will be automatically processed, including the form of profiling.
11. You are obligated to forward above mentioned information to your representative, especially if you appointed this person in the agreement as the contact person or as the representative for the agreement execution.

OK

Making of creative office - Tip of the Week

Michał Franczak 2015-07-03 10:32 tutorial  > 3ds MAX  > rendering

This is small office scene from Archinteriors vol. 40.

This interior scene was made by Evermotion in 3ds Max and V-Ray. It is scene 11 from Archinteriors vol. 40. You can purchase this single scene or entire Archinteriors vol. 40 collection in Evermotion Shop.

Click on image to enlarge nr_AI40_011_PP_497.jpg
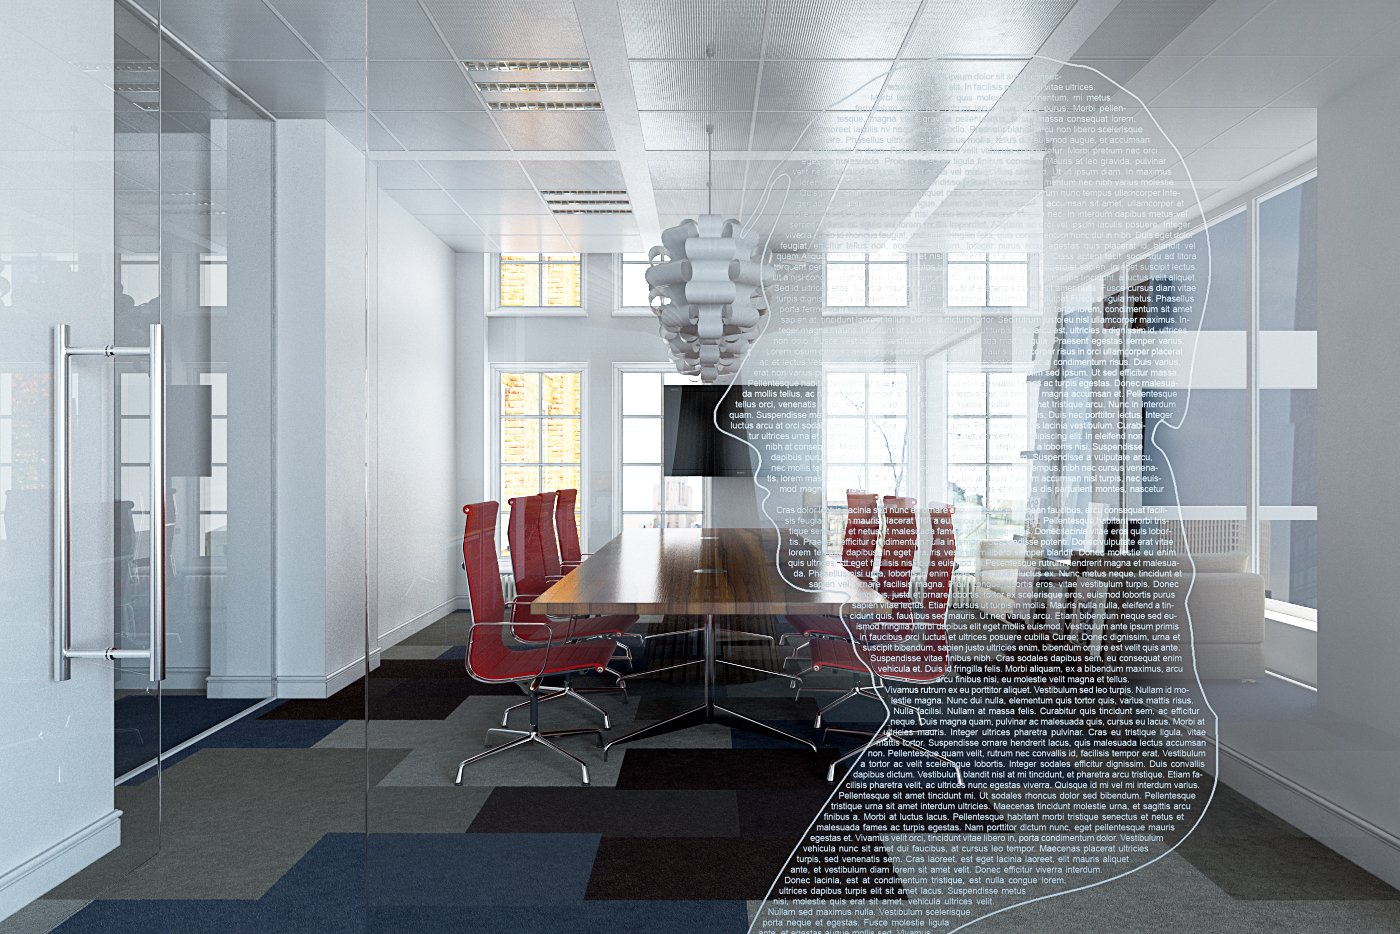
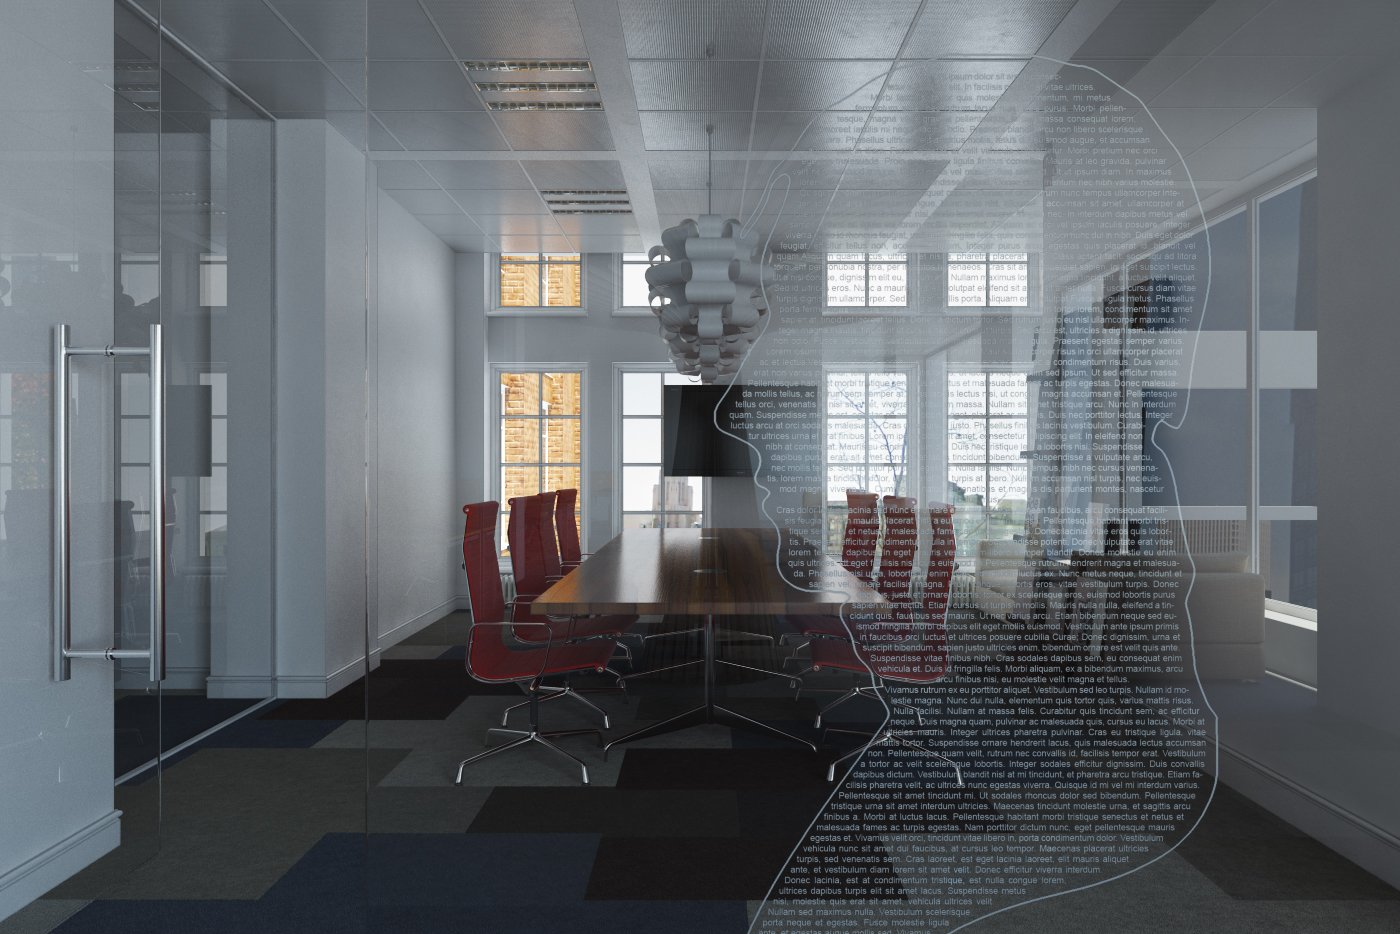
An interesting shot of small office interior. Clean, white walls and minimalistic glass doors are balanced with red modern chairs. also notice fancy chandelier on the top.


Click on image to enlarge nr_AI40_011_wires_521.jpg
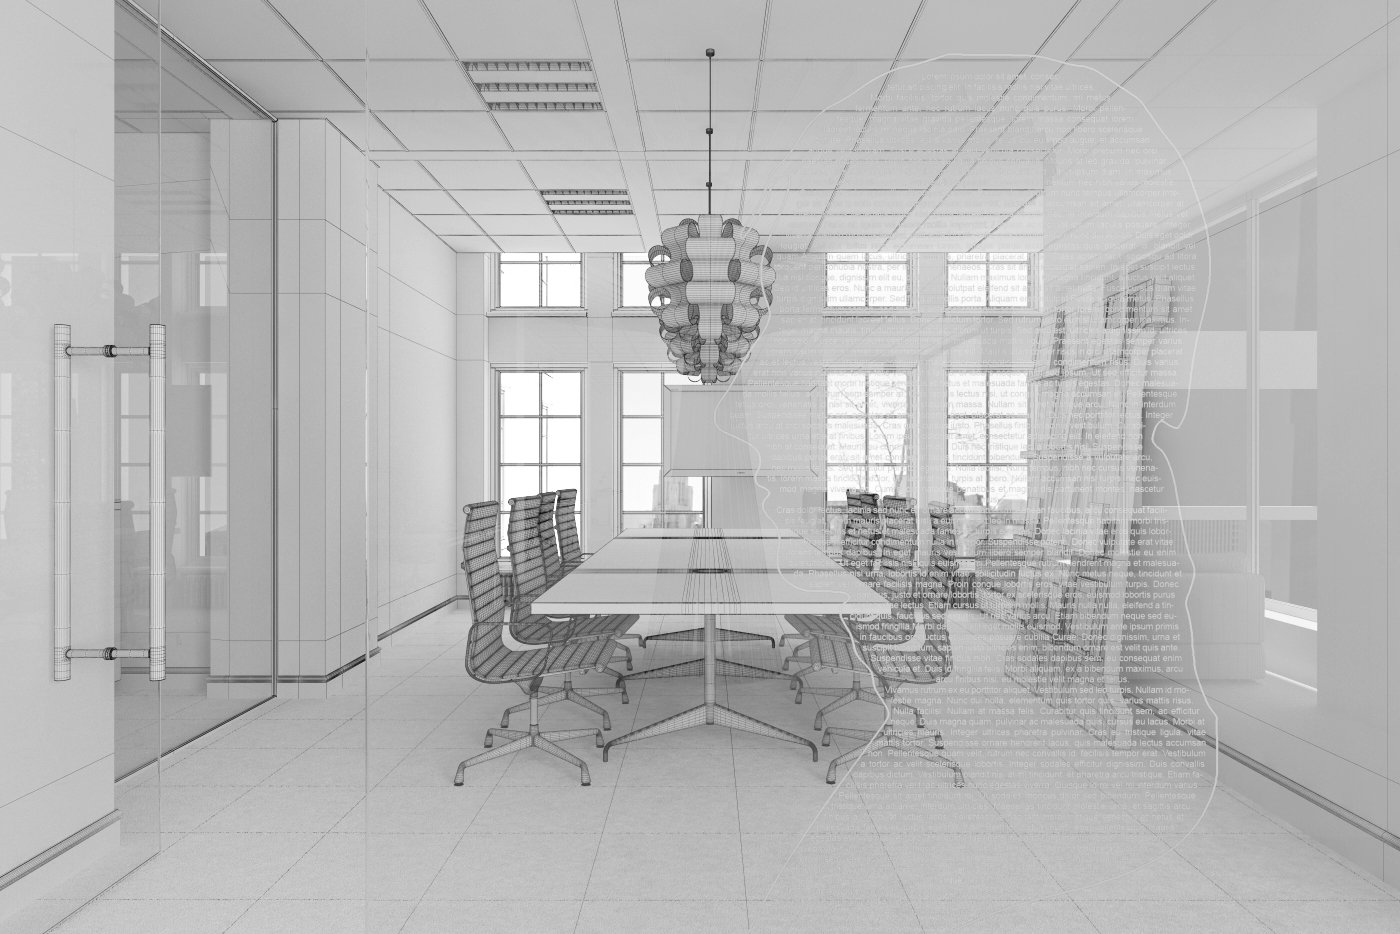
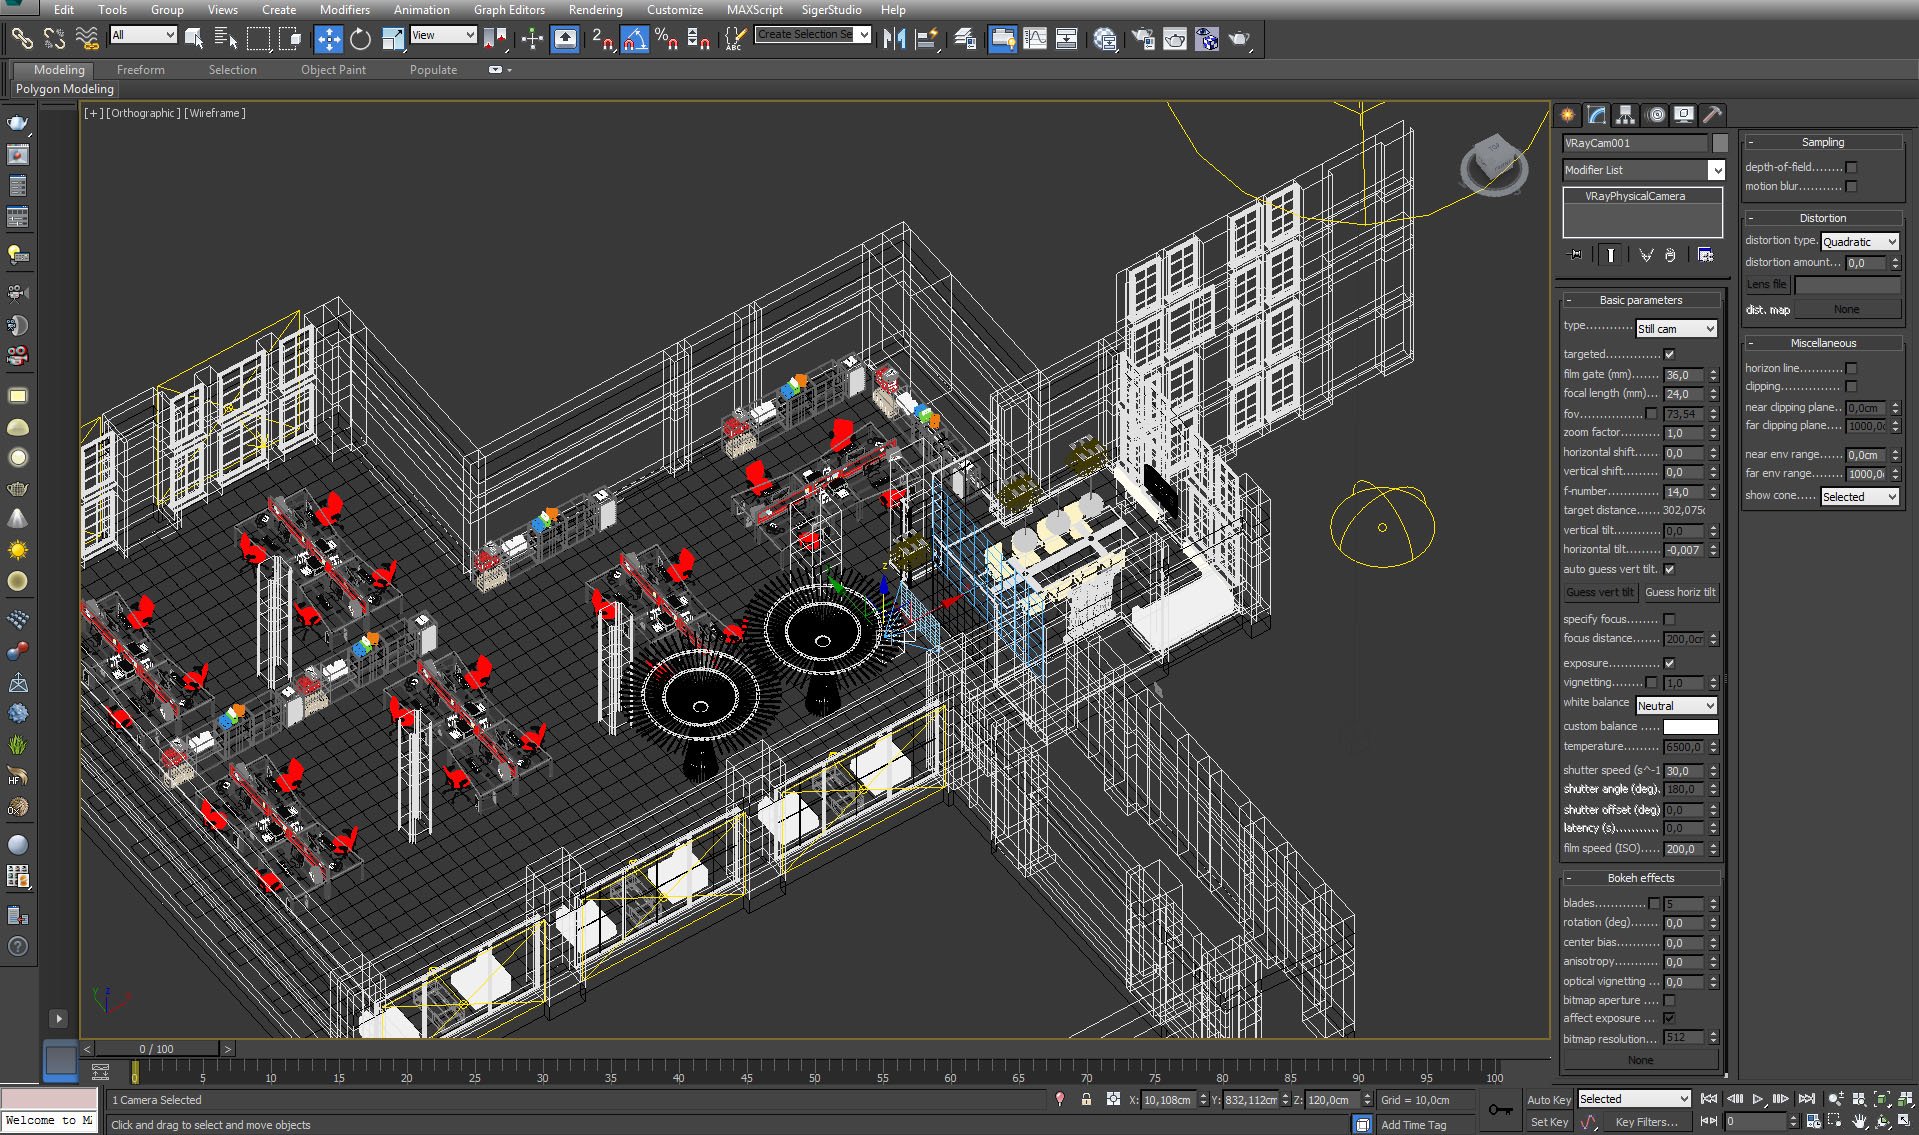
Wireframe view of the scene.


Click on image to enlarge nr_AI40S11_0053_Layer_1_494.jpg
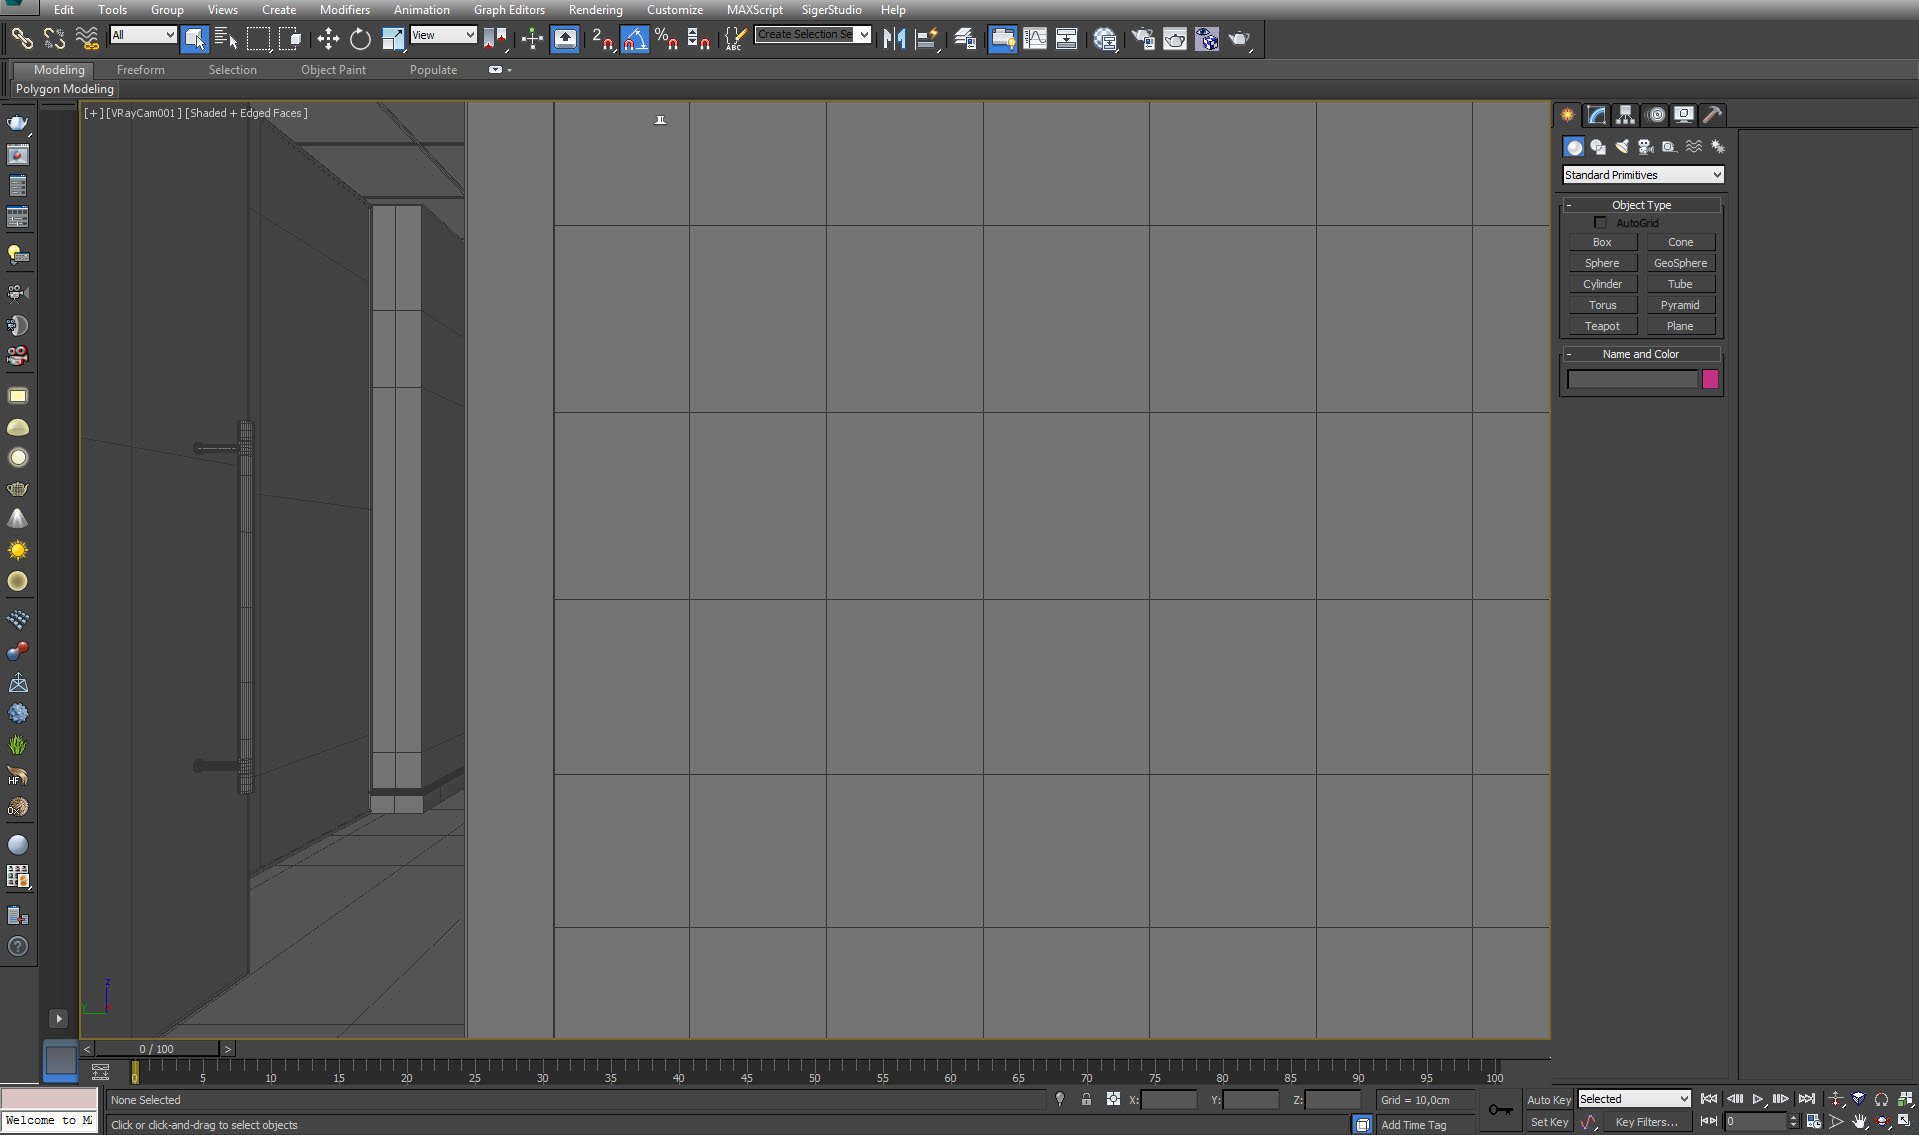
Viewport view. Not much to see here, because glass wall is in the way ;)


Click on image to enlarge nr_AI40S11_0052_Layer_2_493.jpg

View from camera with texture on glass enabled.


Click on image to enlarge nr_AI40S11_0051_Layer_3_492.jpg
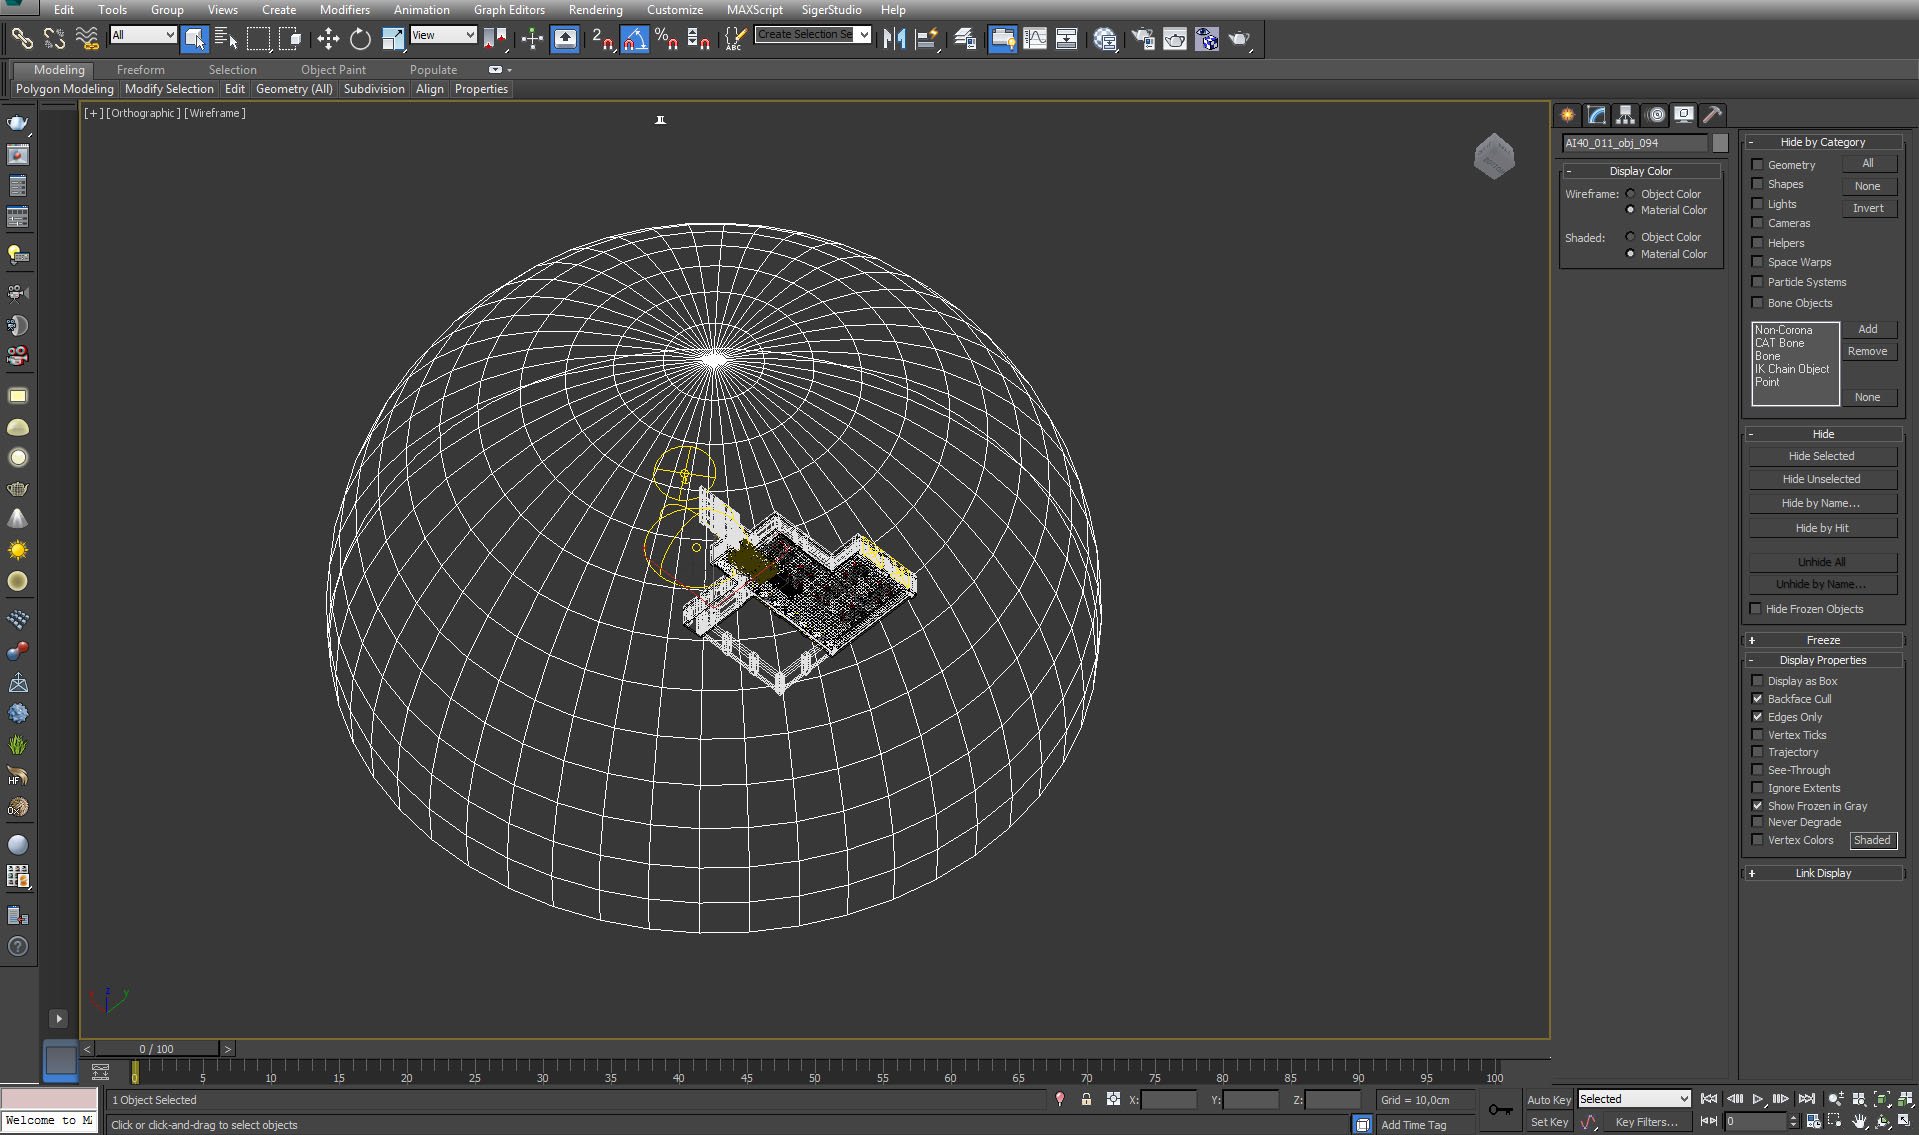
Exterior dome light with environment map.


Click on image to enlarge nr_AI40S11_0050_Layer_4_491.jpg
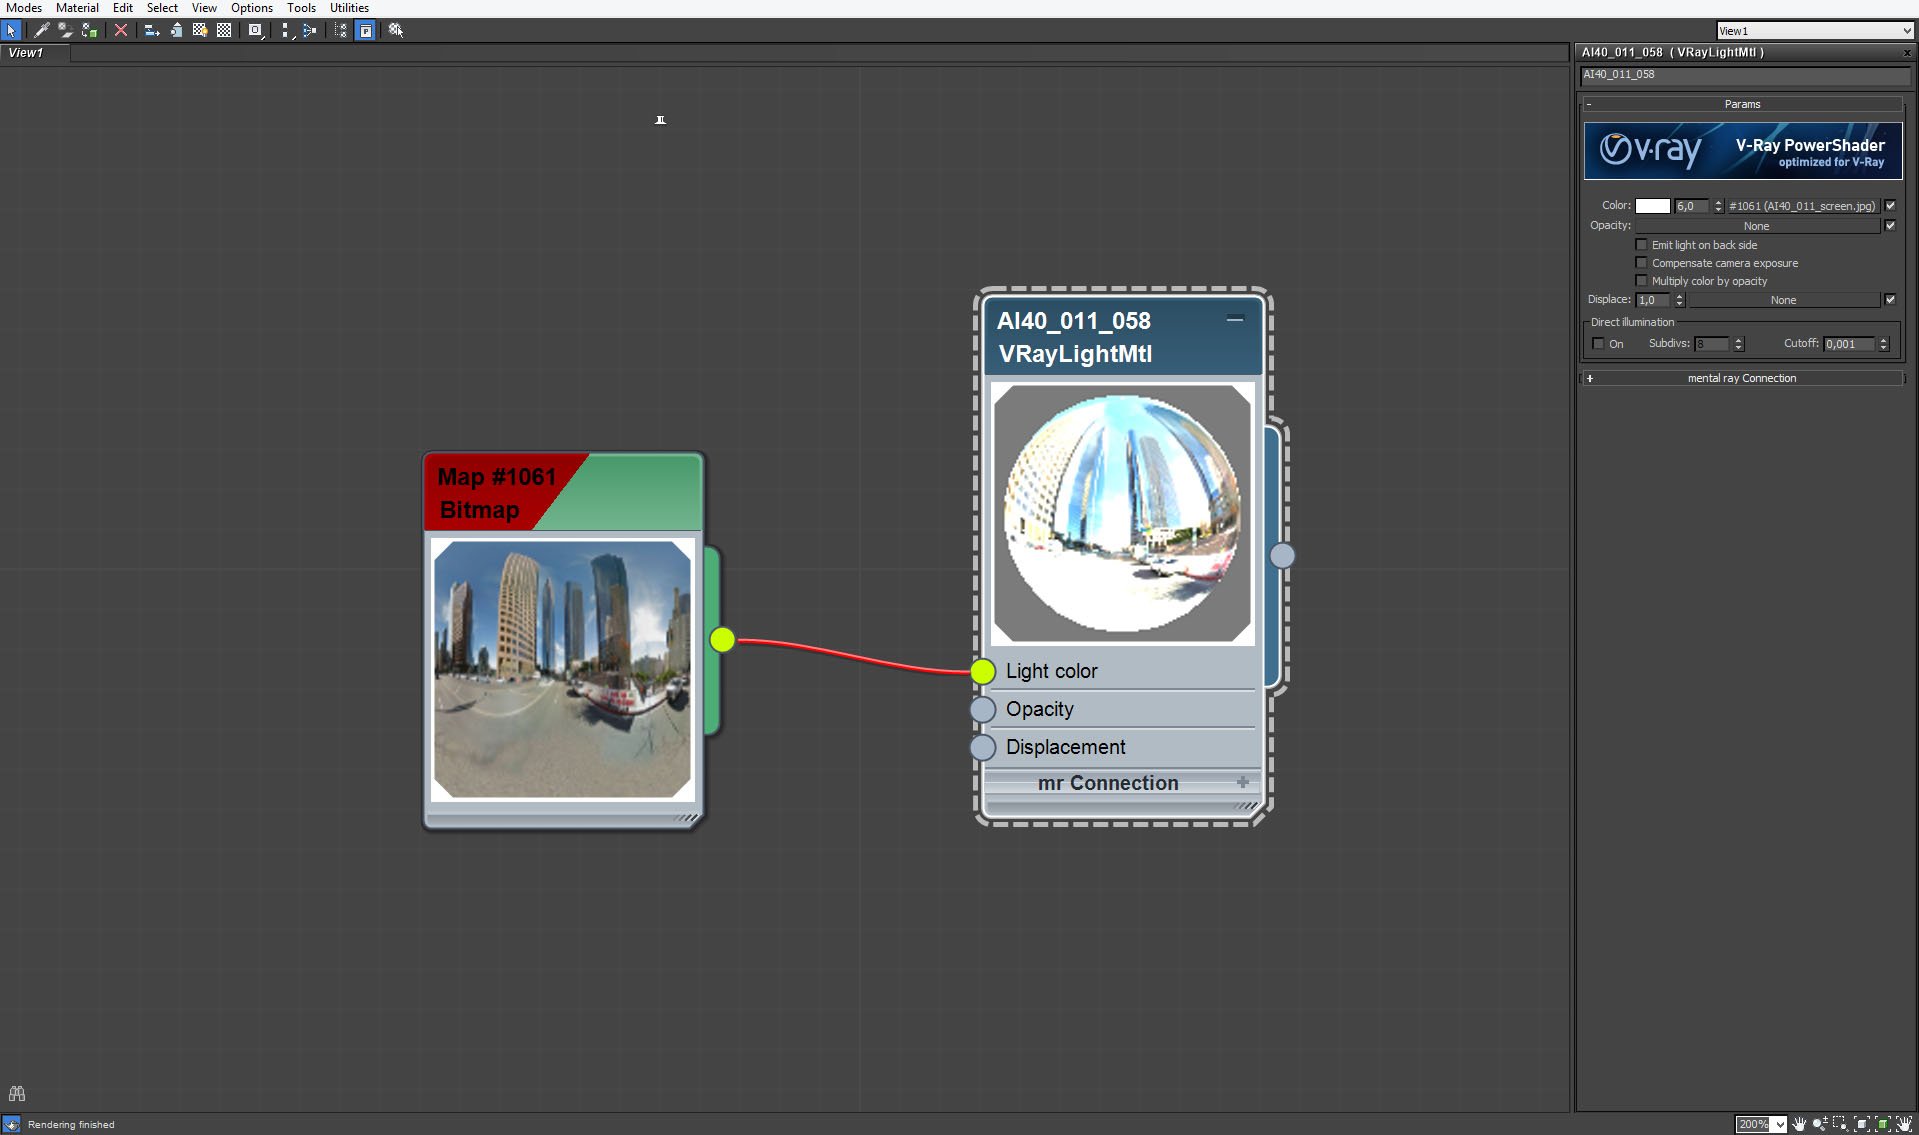
We put a city landscape as a light color of the dome material.


Click on image to enlarge ENVMAP.jpg

Dome material - a city landscape.


Click on image to enlarge nr_AI40S11_0049_Layer_5_490.jpg

VraySun is placed quite high, because it's a noon scene with hard light, not a romantic one.


Click on image to enlarge nr_AI40S11_0048_Layer_6_489.jpg
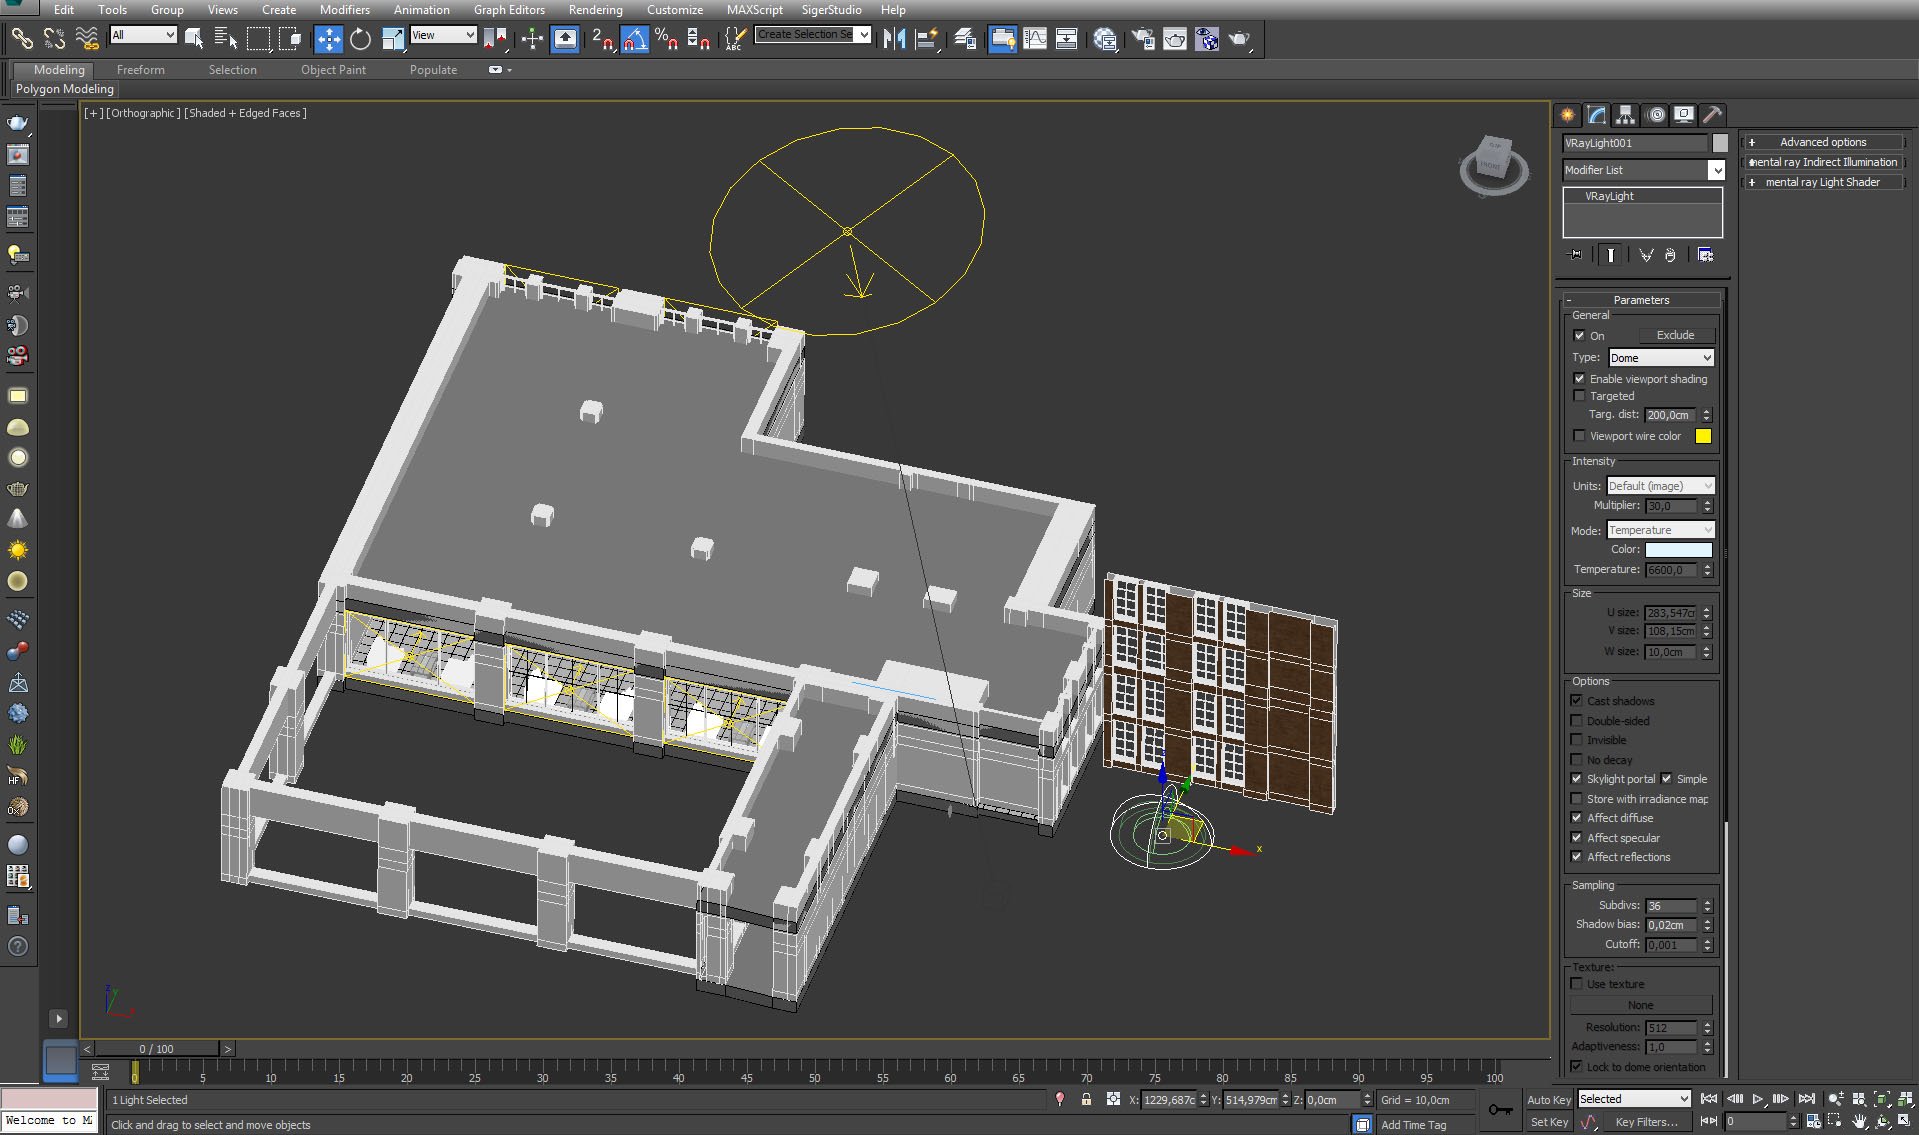
We also used VrayLight (dome) as an additional light.


Click on image to enlarge nr_AI40S11_0047_Layer_7_488.jpg
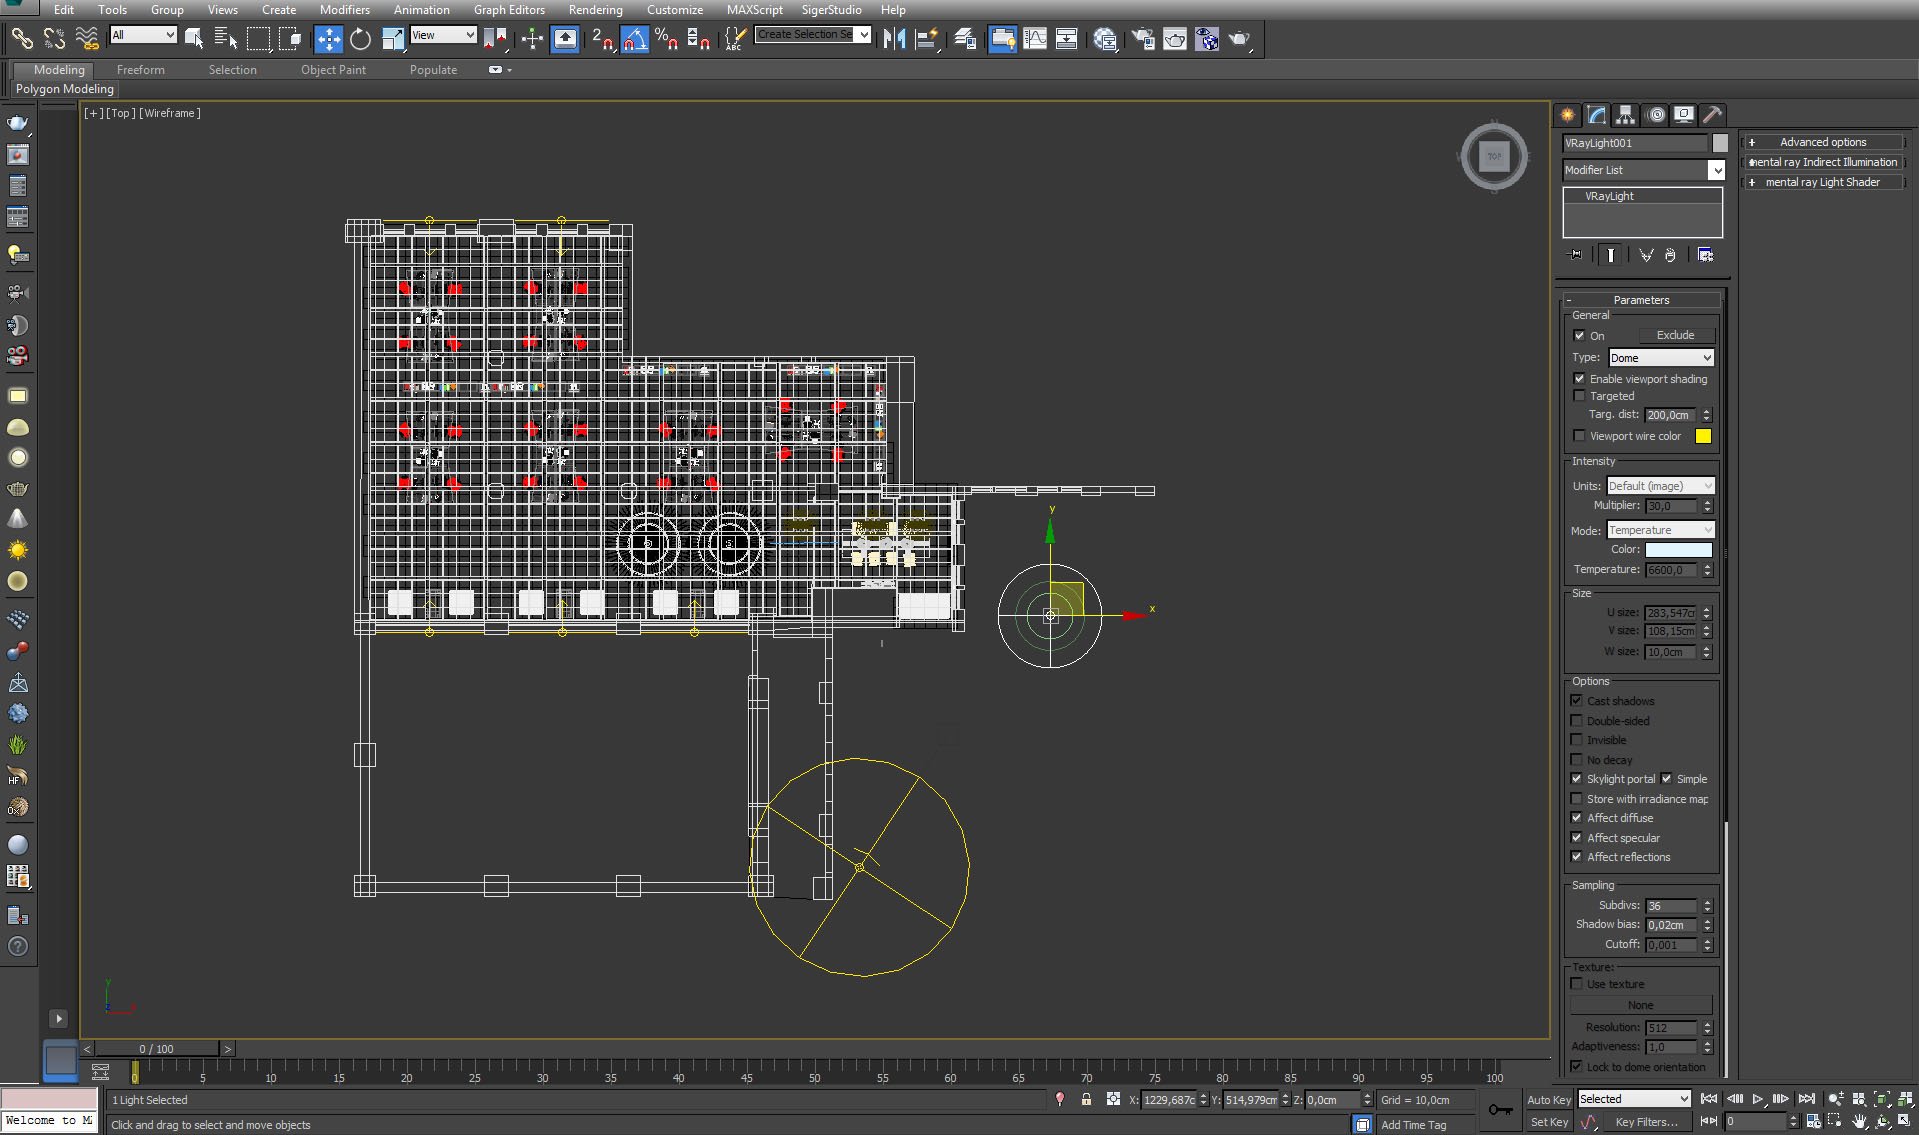
Top view - dome light settings.


Click on image to enlarge nr_AI40S11_0046_Layer_8_487.jpg
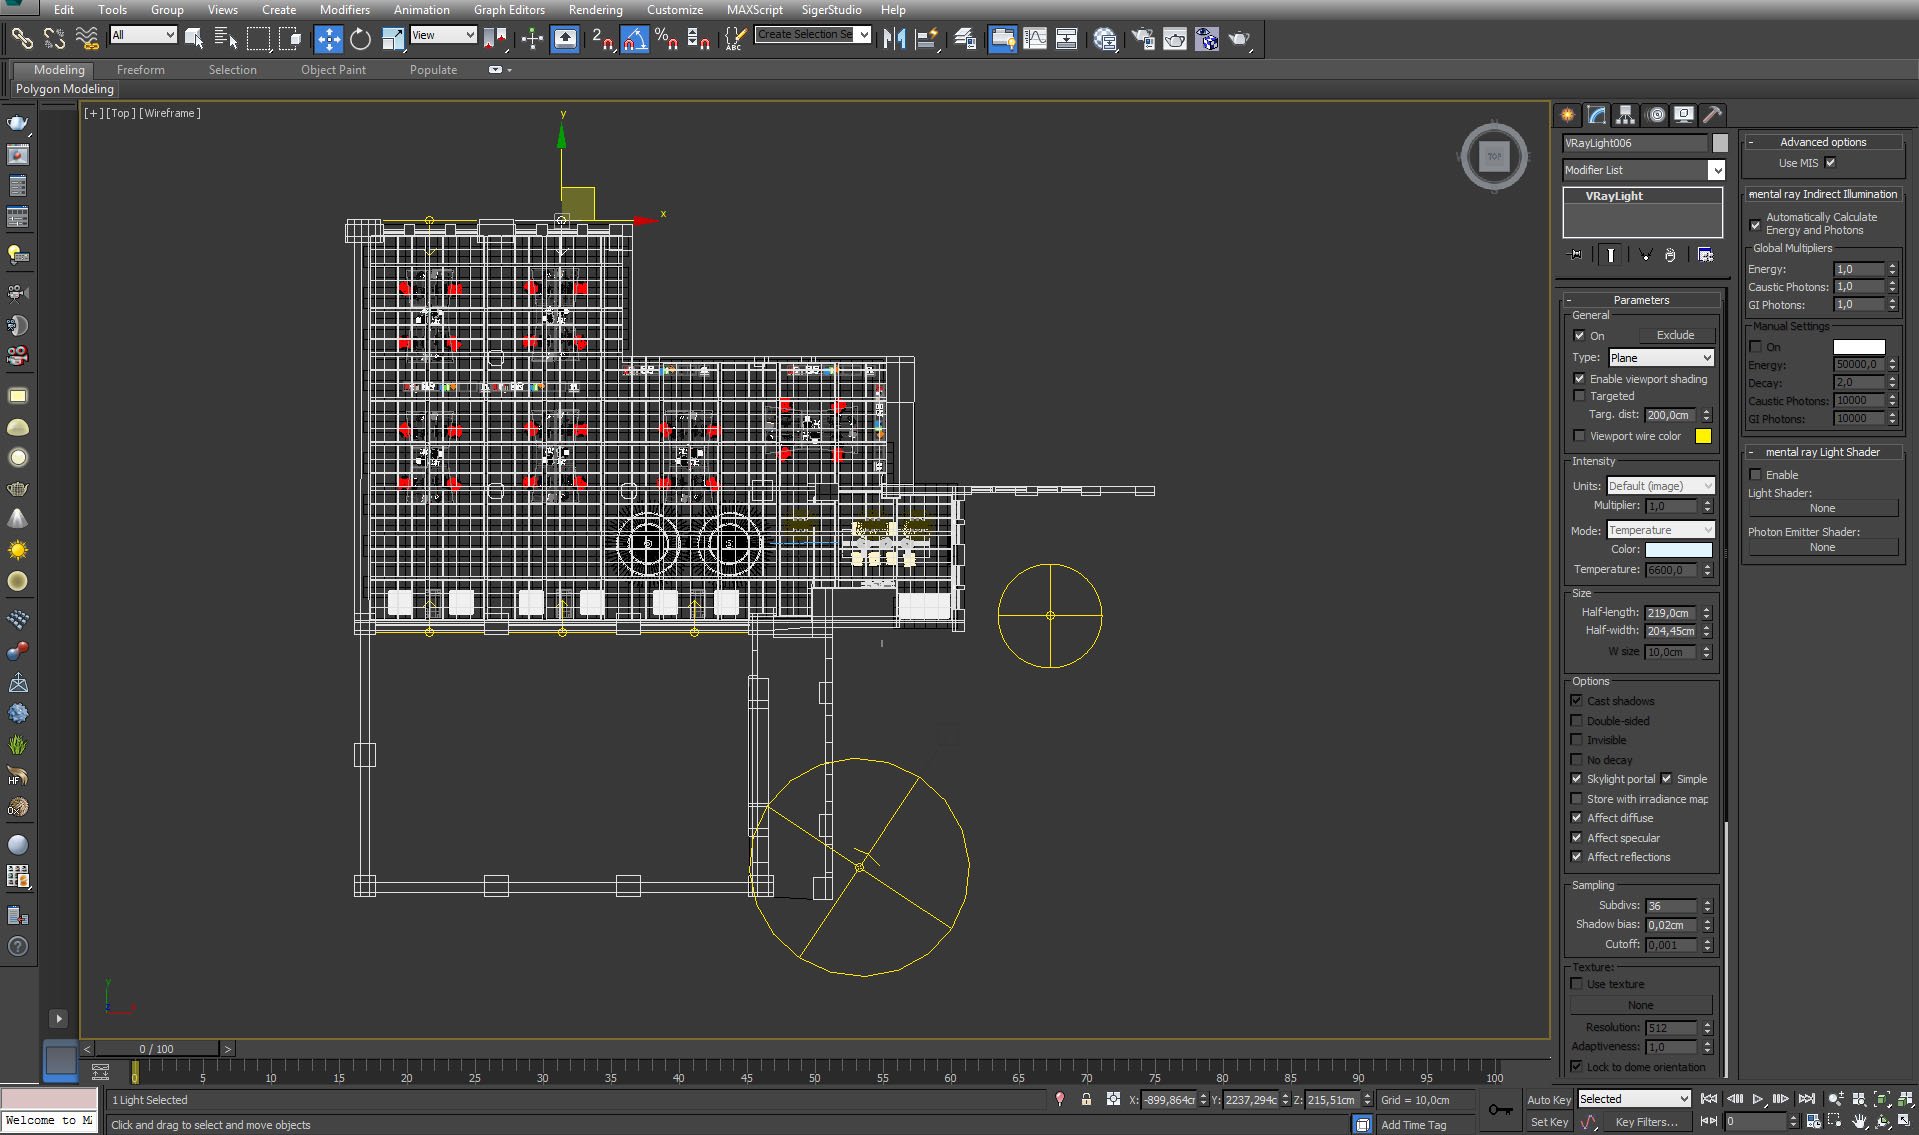
There are Vray Lights - skylight portals in the windows.


Click on image to enlarge nr_AI40S11_0043_Layer_11_484.jpg
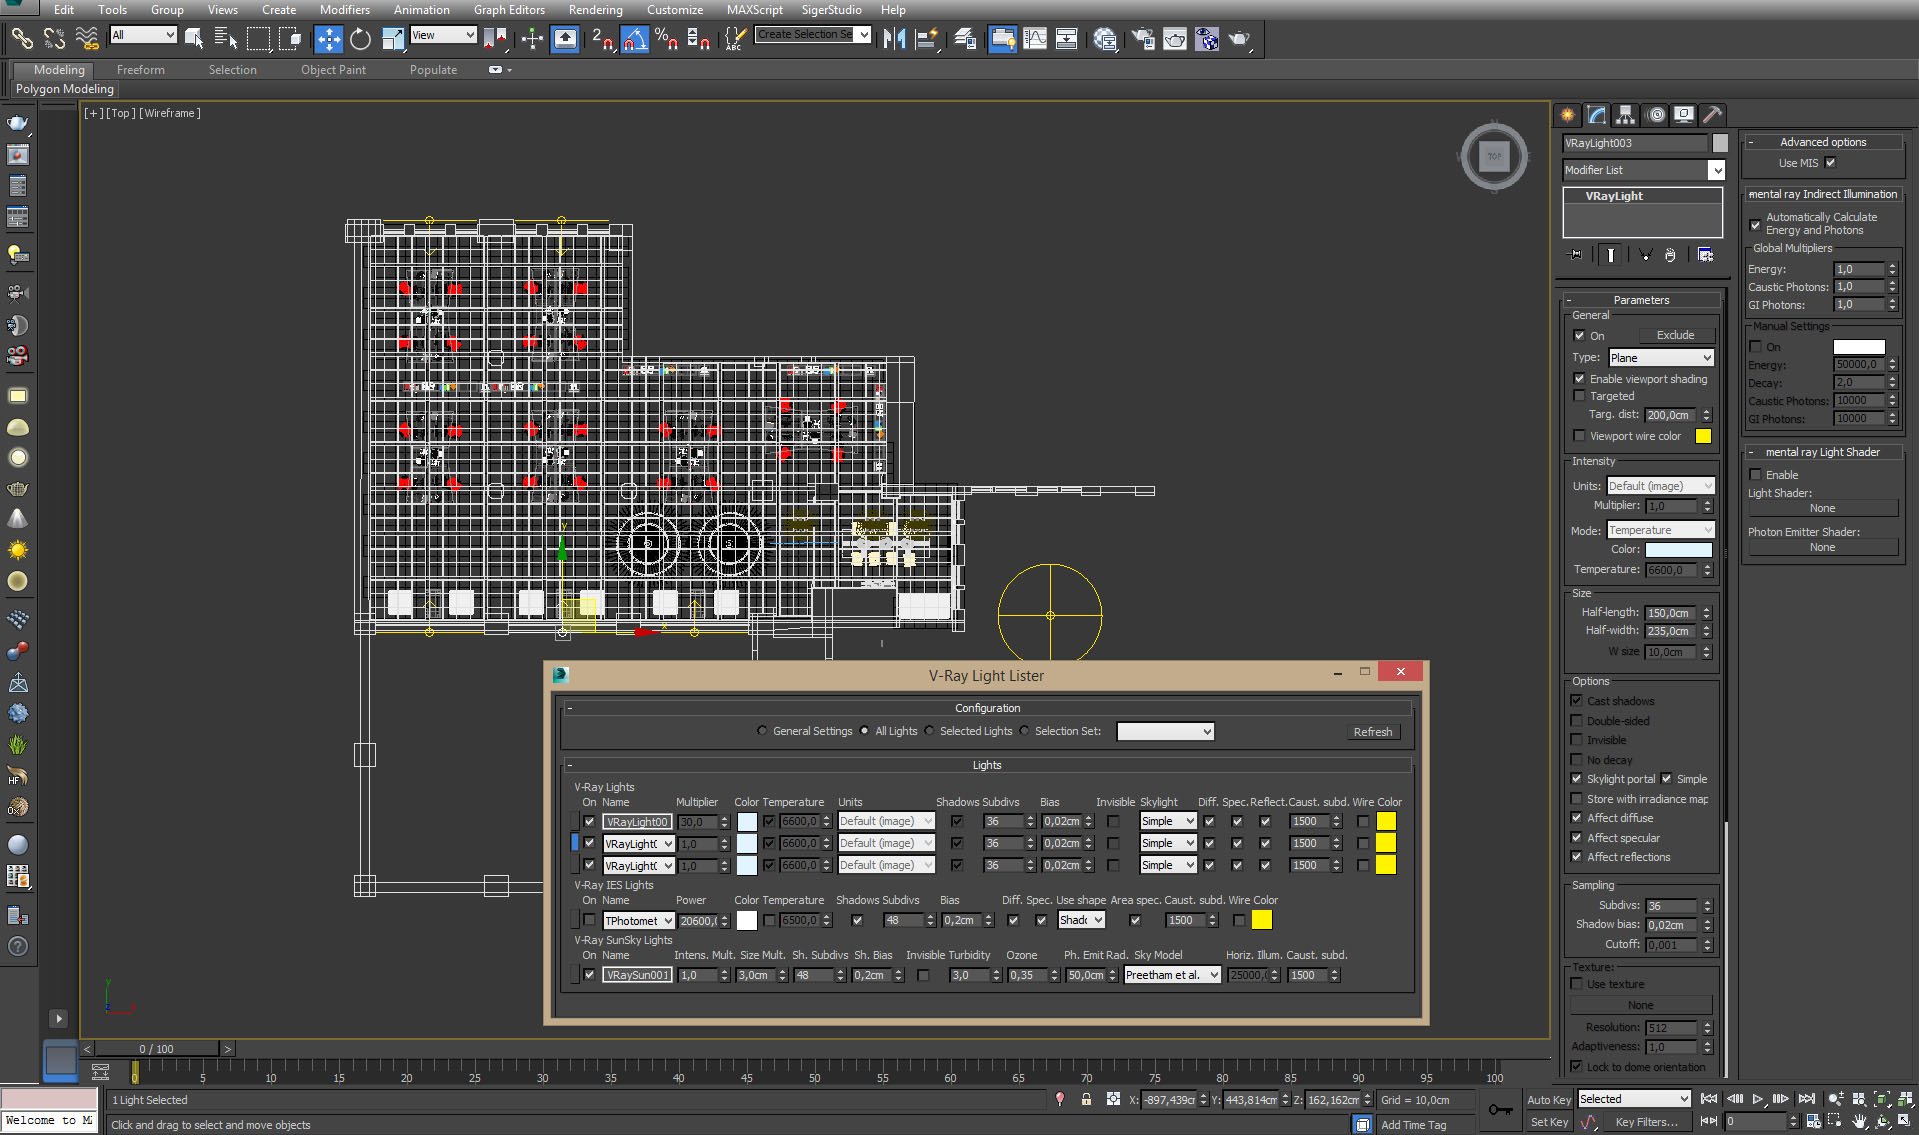
V-Ray Light Lister.


Click on image to enlarge nr_AI40S11_0042_Layer_12_483.jpg

As you can see, interior is much bigger than on final image. There is a big open space behind the camera, filled with desks, chairs, cabinets, etc. You can definetely make more of interesting shots using only contents of this scene.


Click on image to enlarge nr_AI40S11_0041_Layer_13_482.jpg
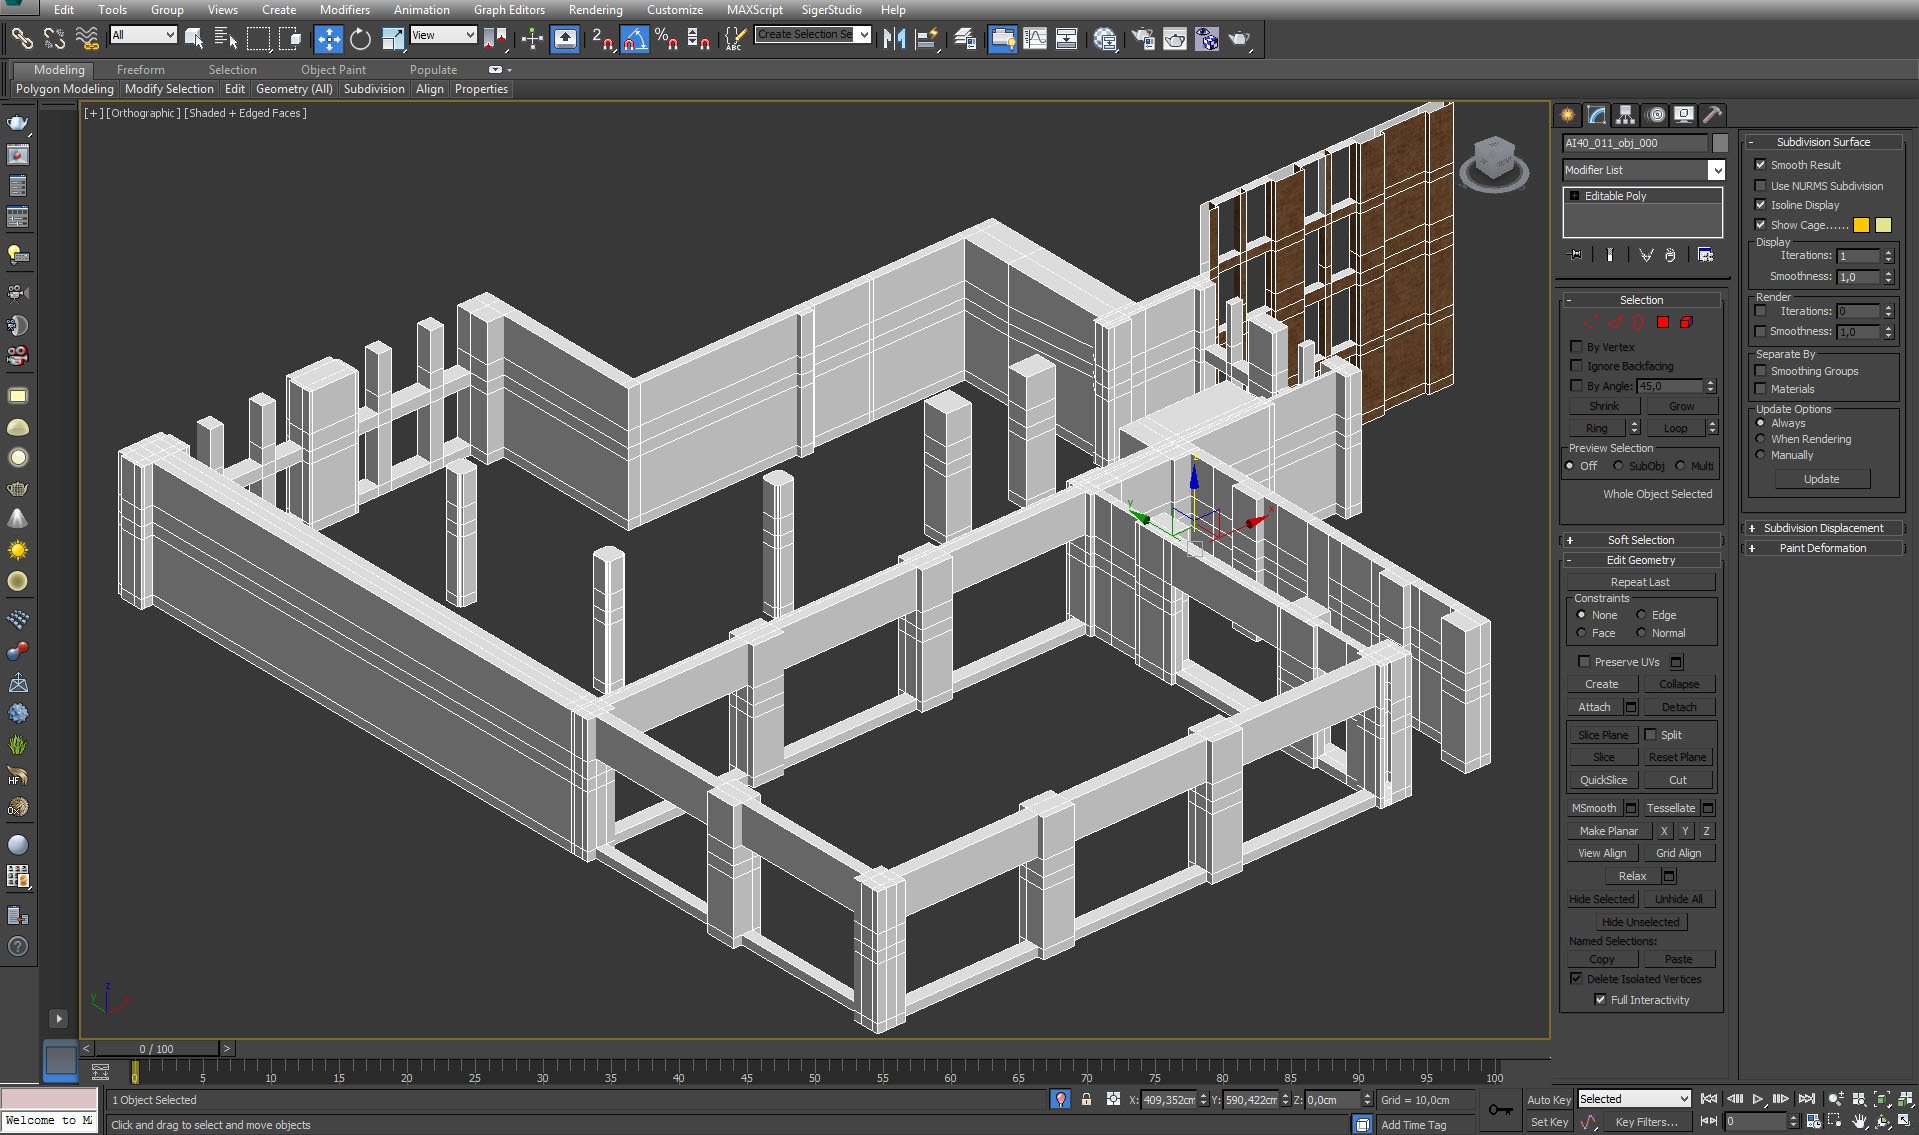
Walls (isolated view).


Click on image to enlarge nr_AI40S11_0040_Layer_14_481.jpg

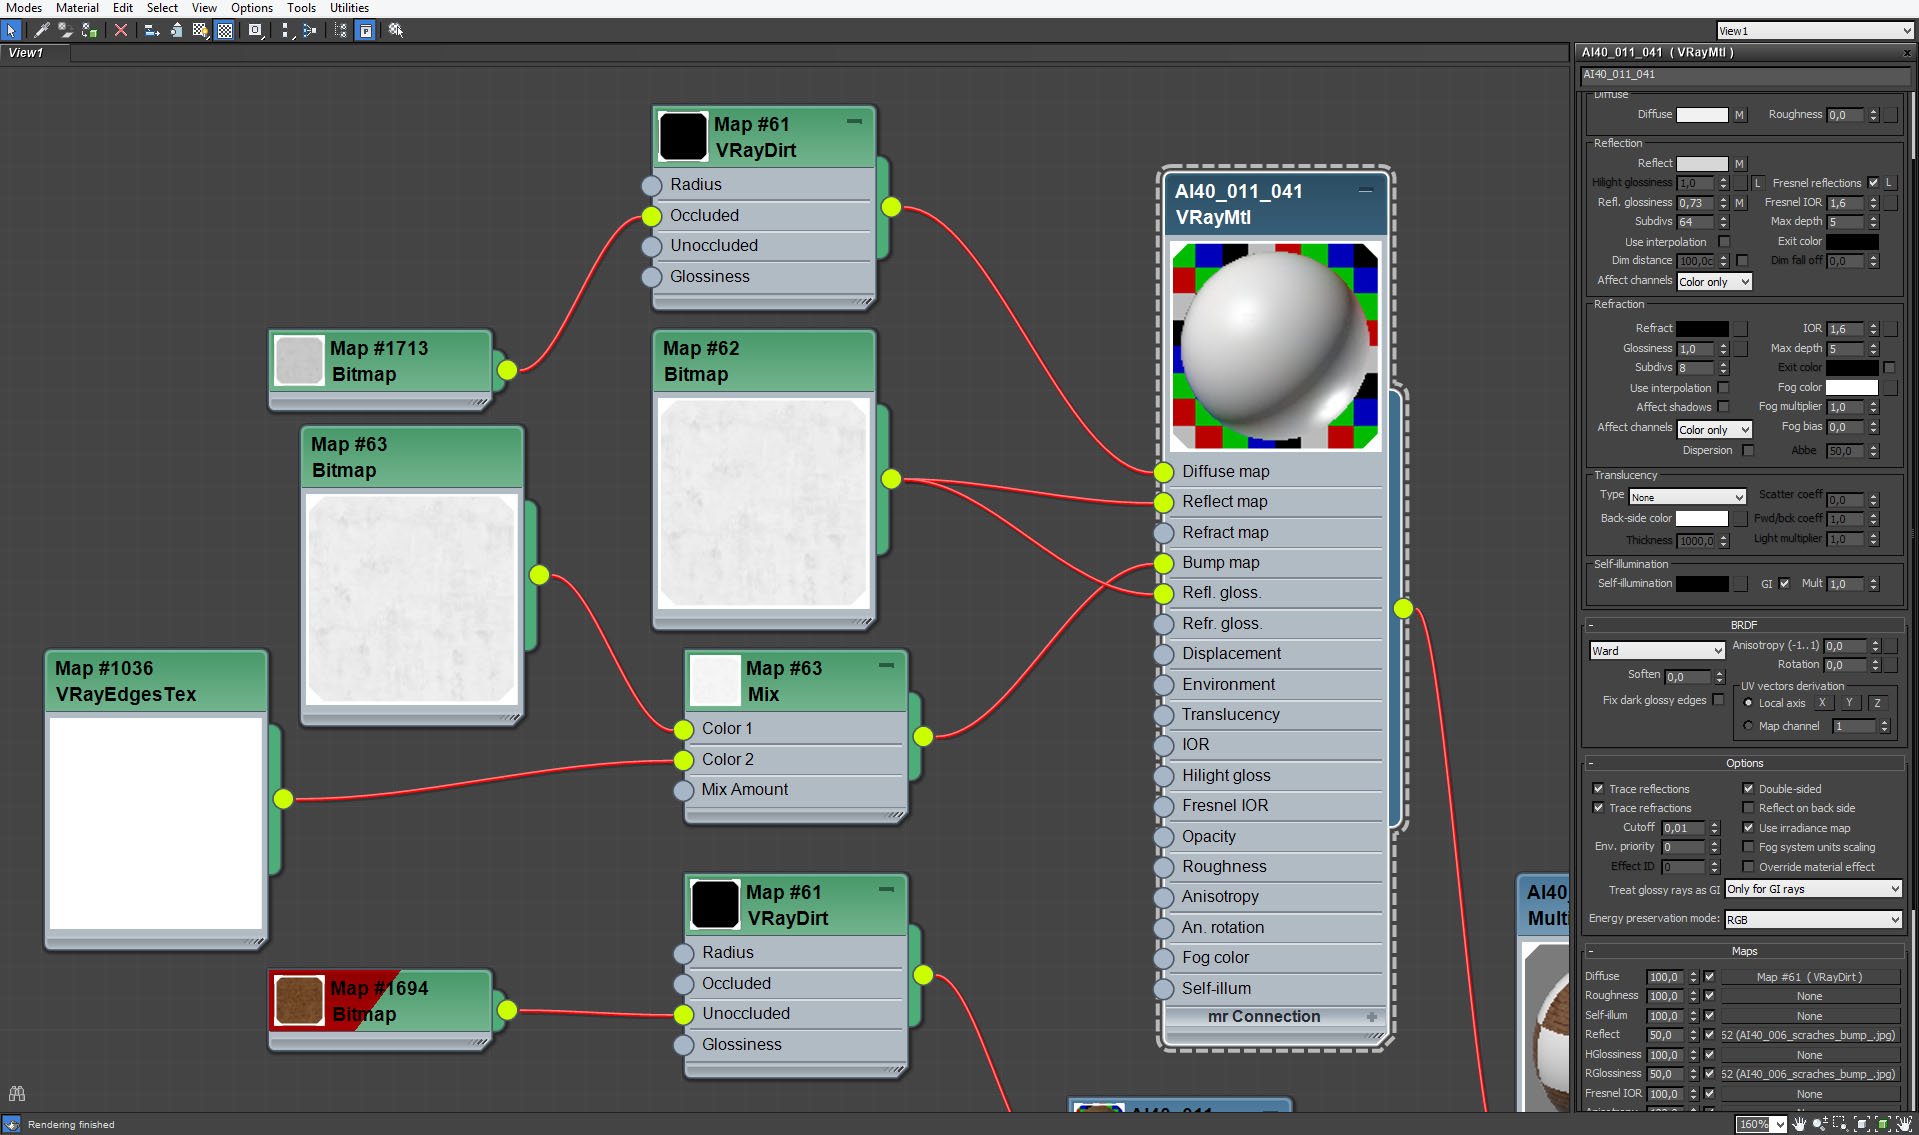
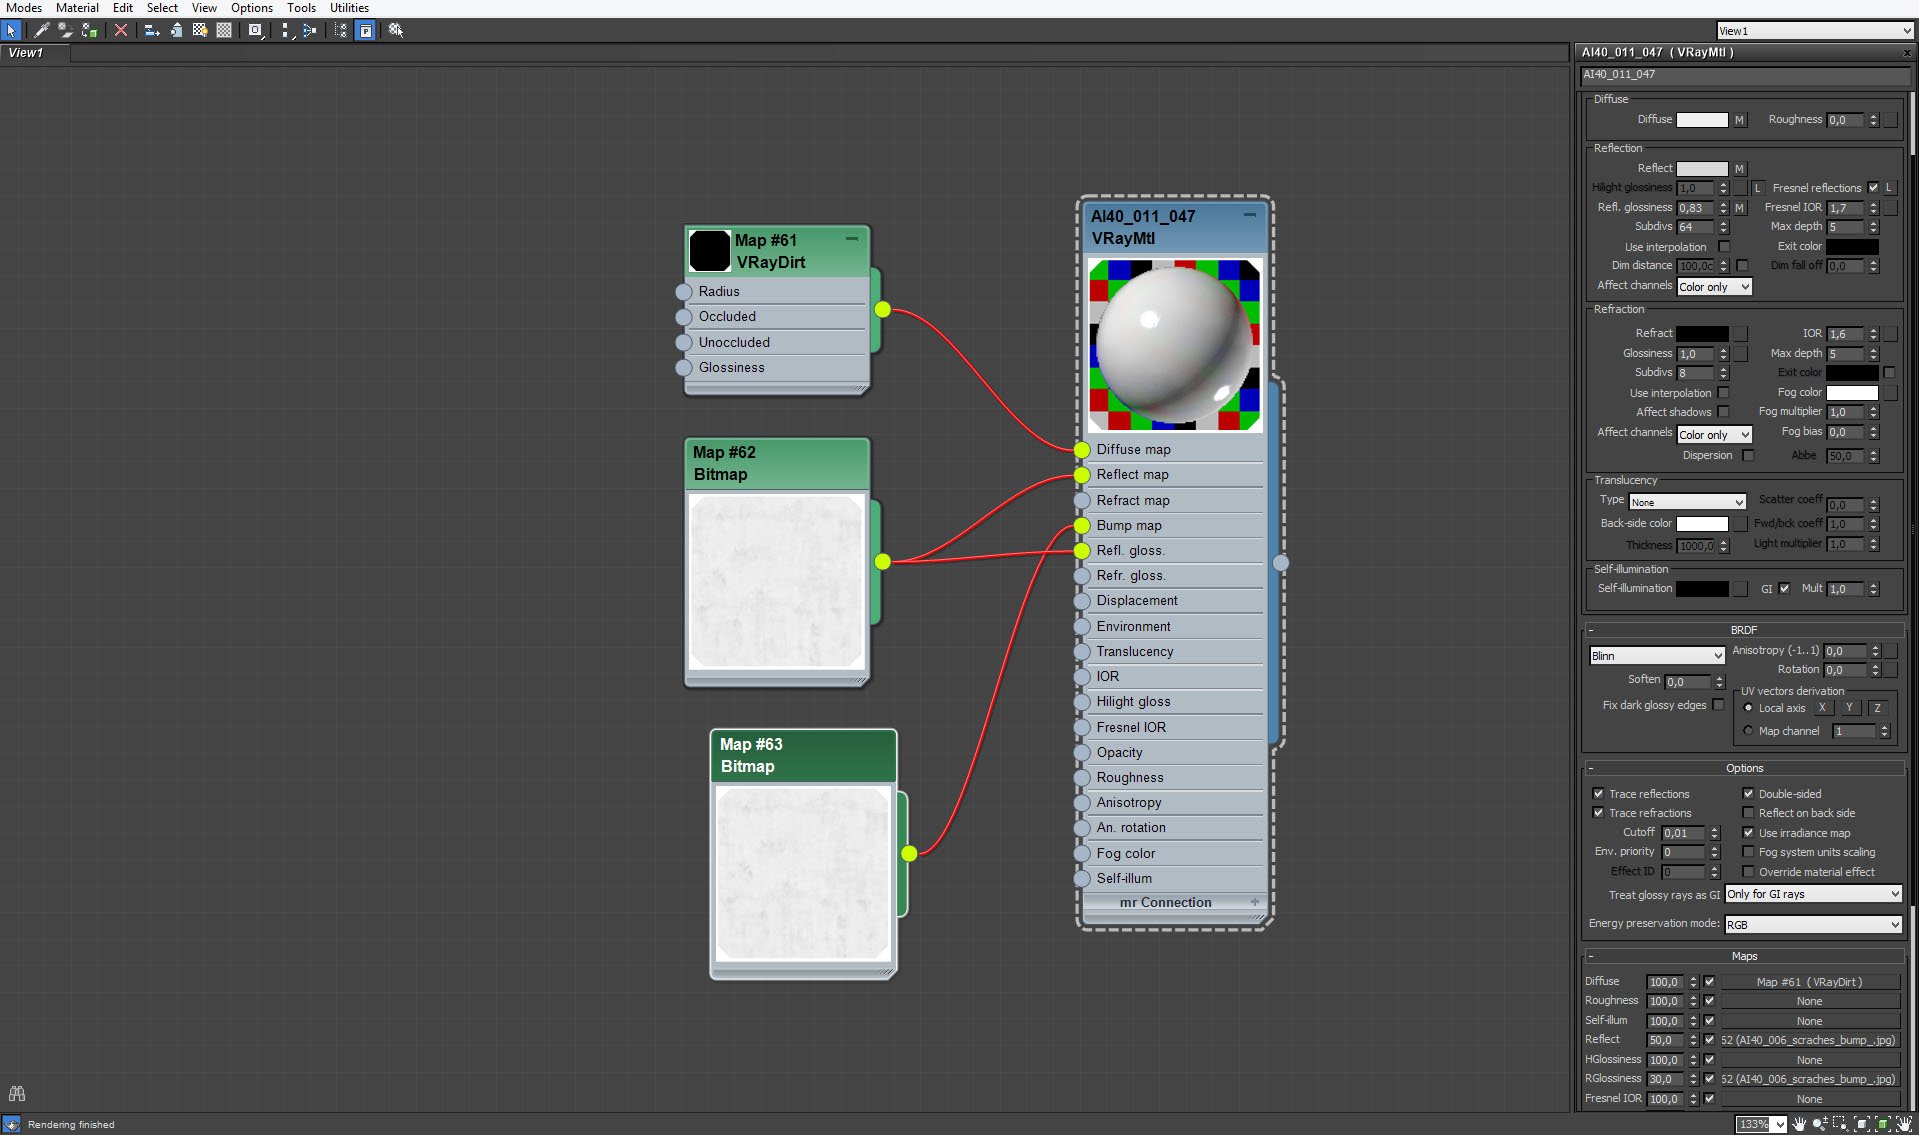
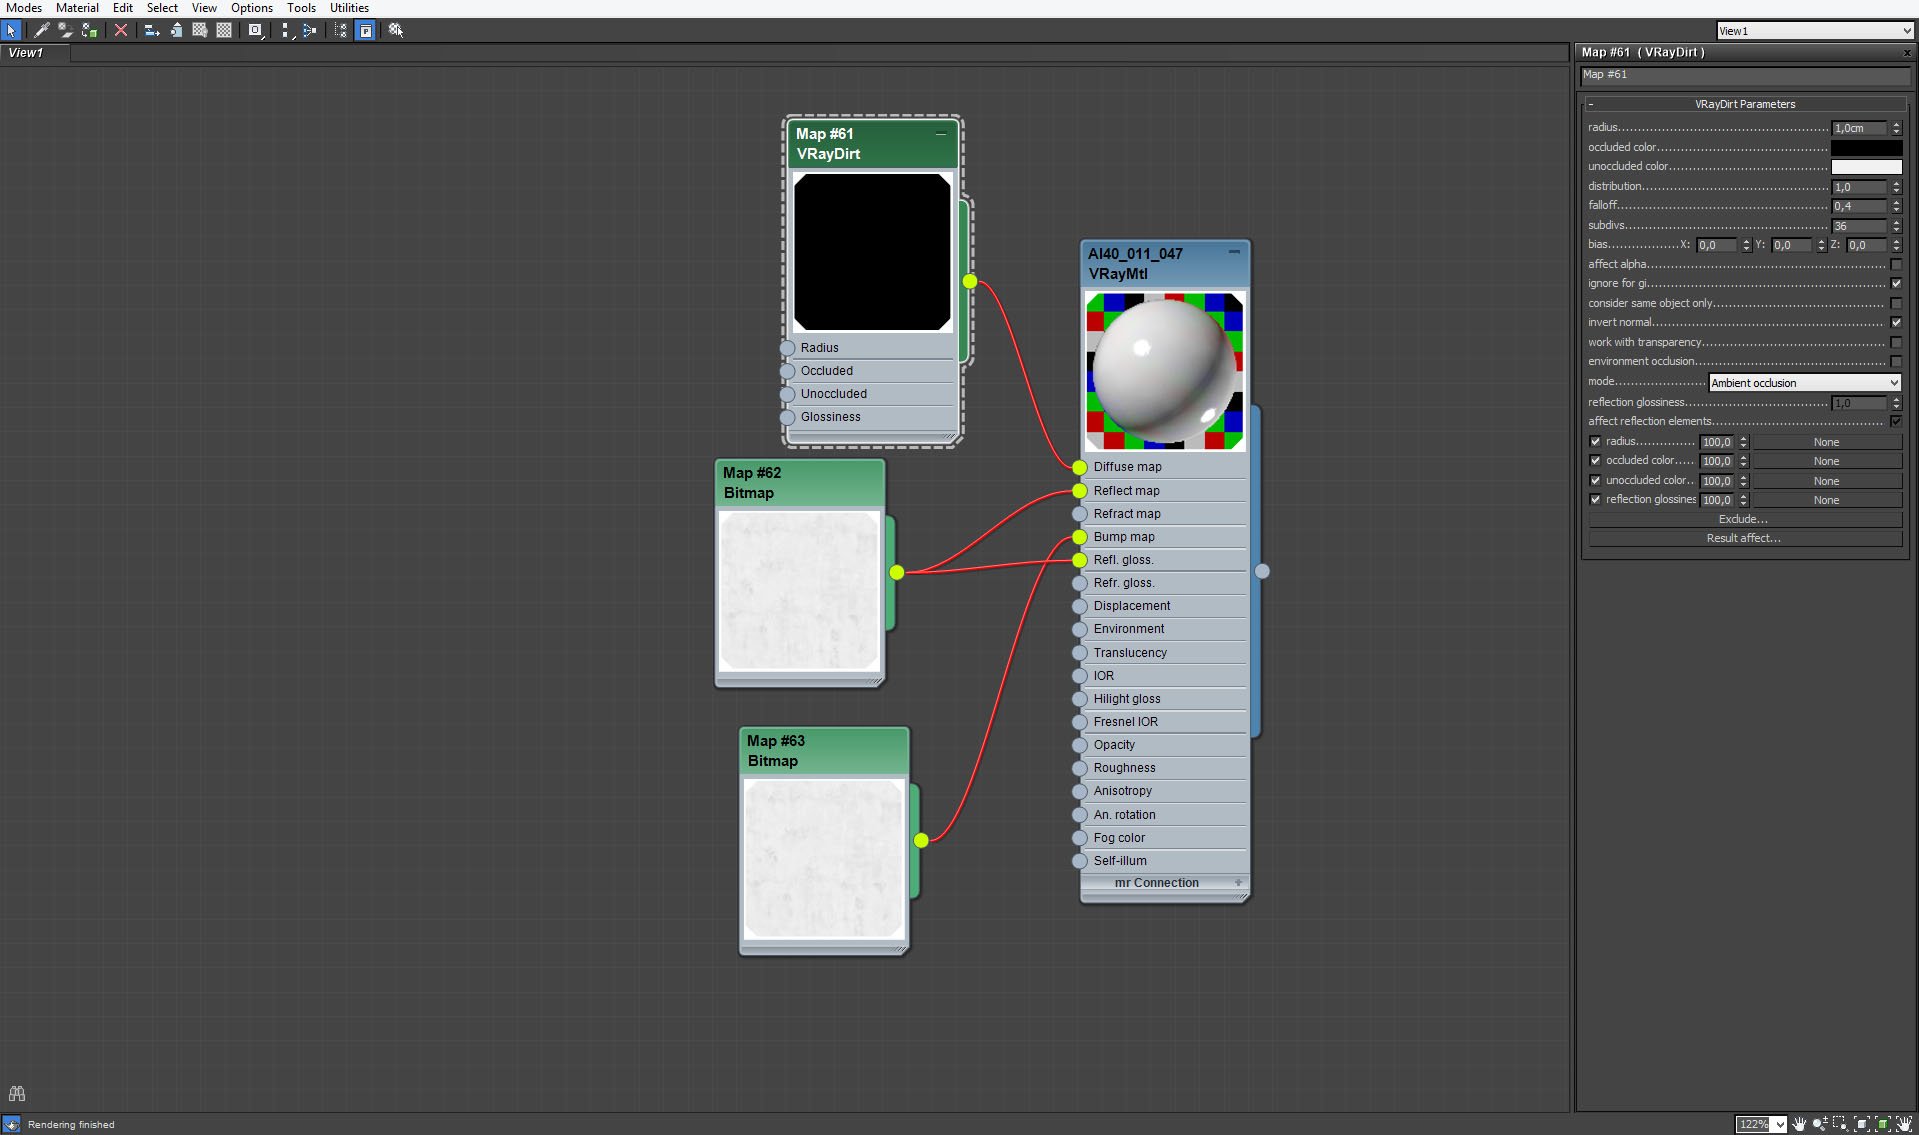
Walls material is a part of Multi / Sub-Object Material. It's quite usual white plaster material with a small amount of reflection glossines map and V-Ray Dirt.


Click on image to enlarge nr_AI40S11_0039_Layer_15_480.jpg
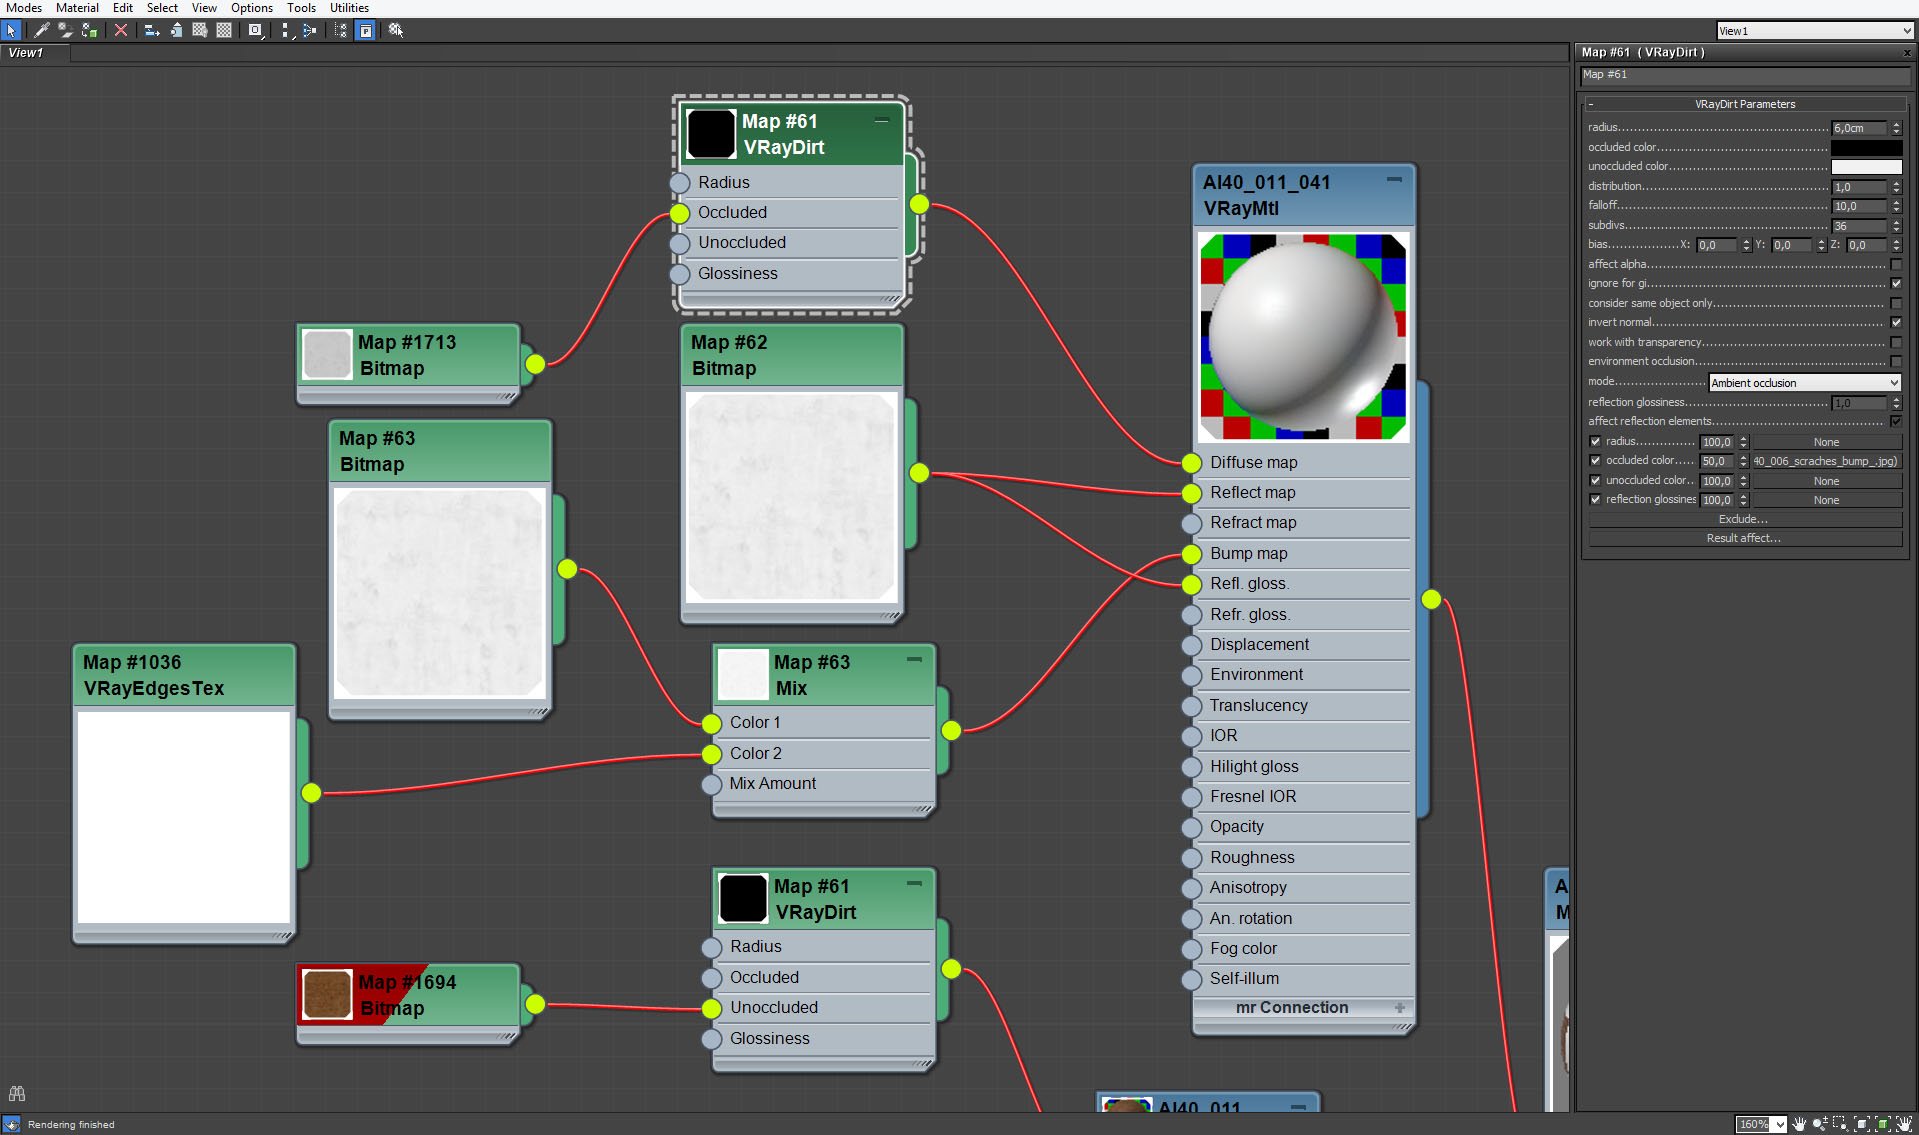
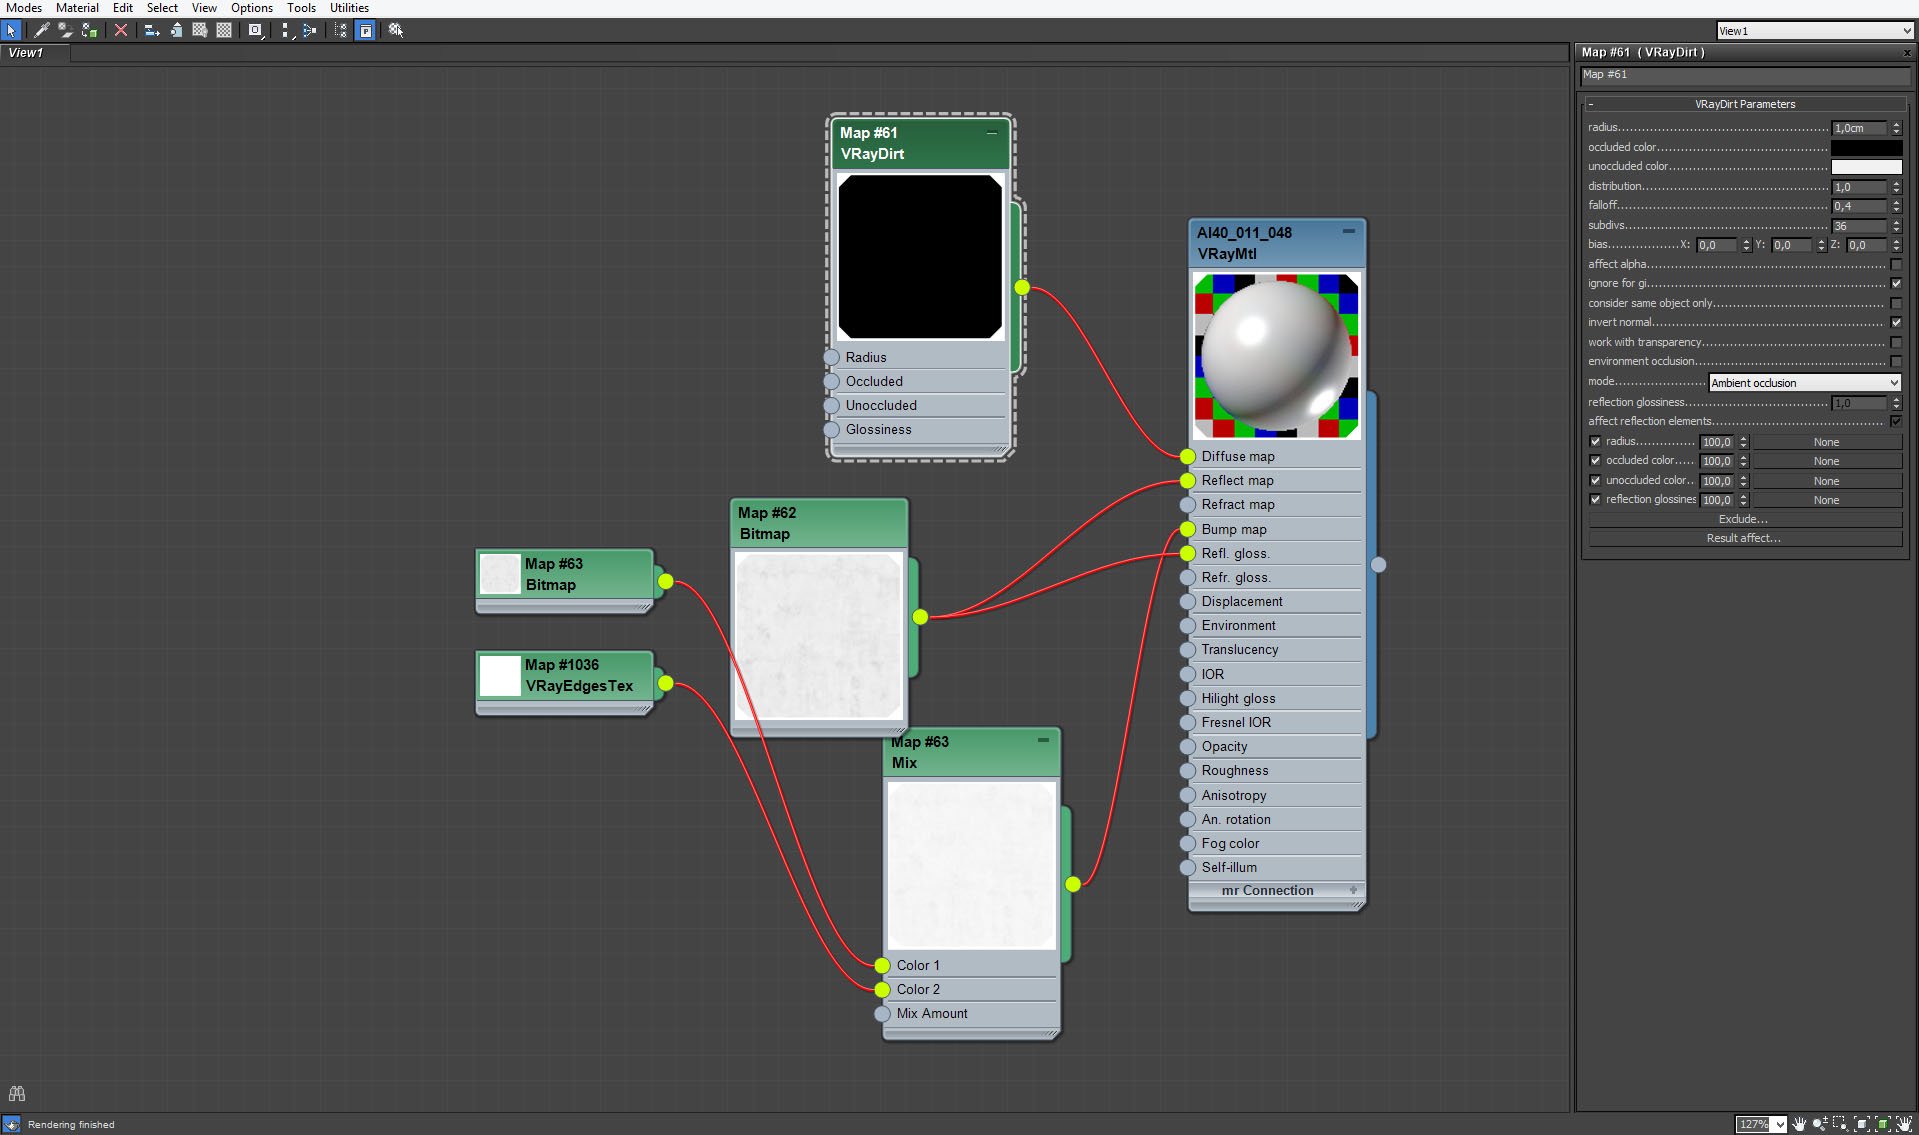
Walls material - V-Ray dirt settings.


Click on image to enlarge nr_AI40S11_0038_Layer_16_479.jpg
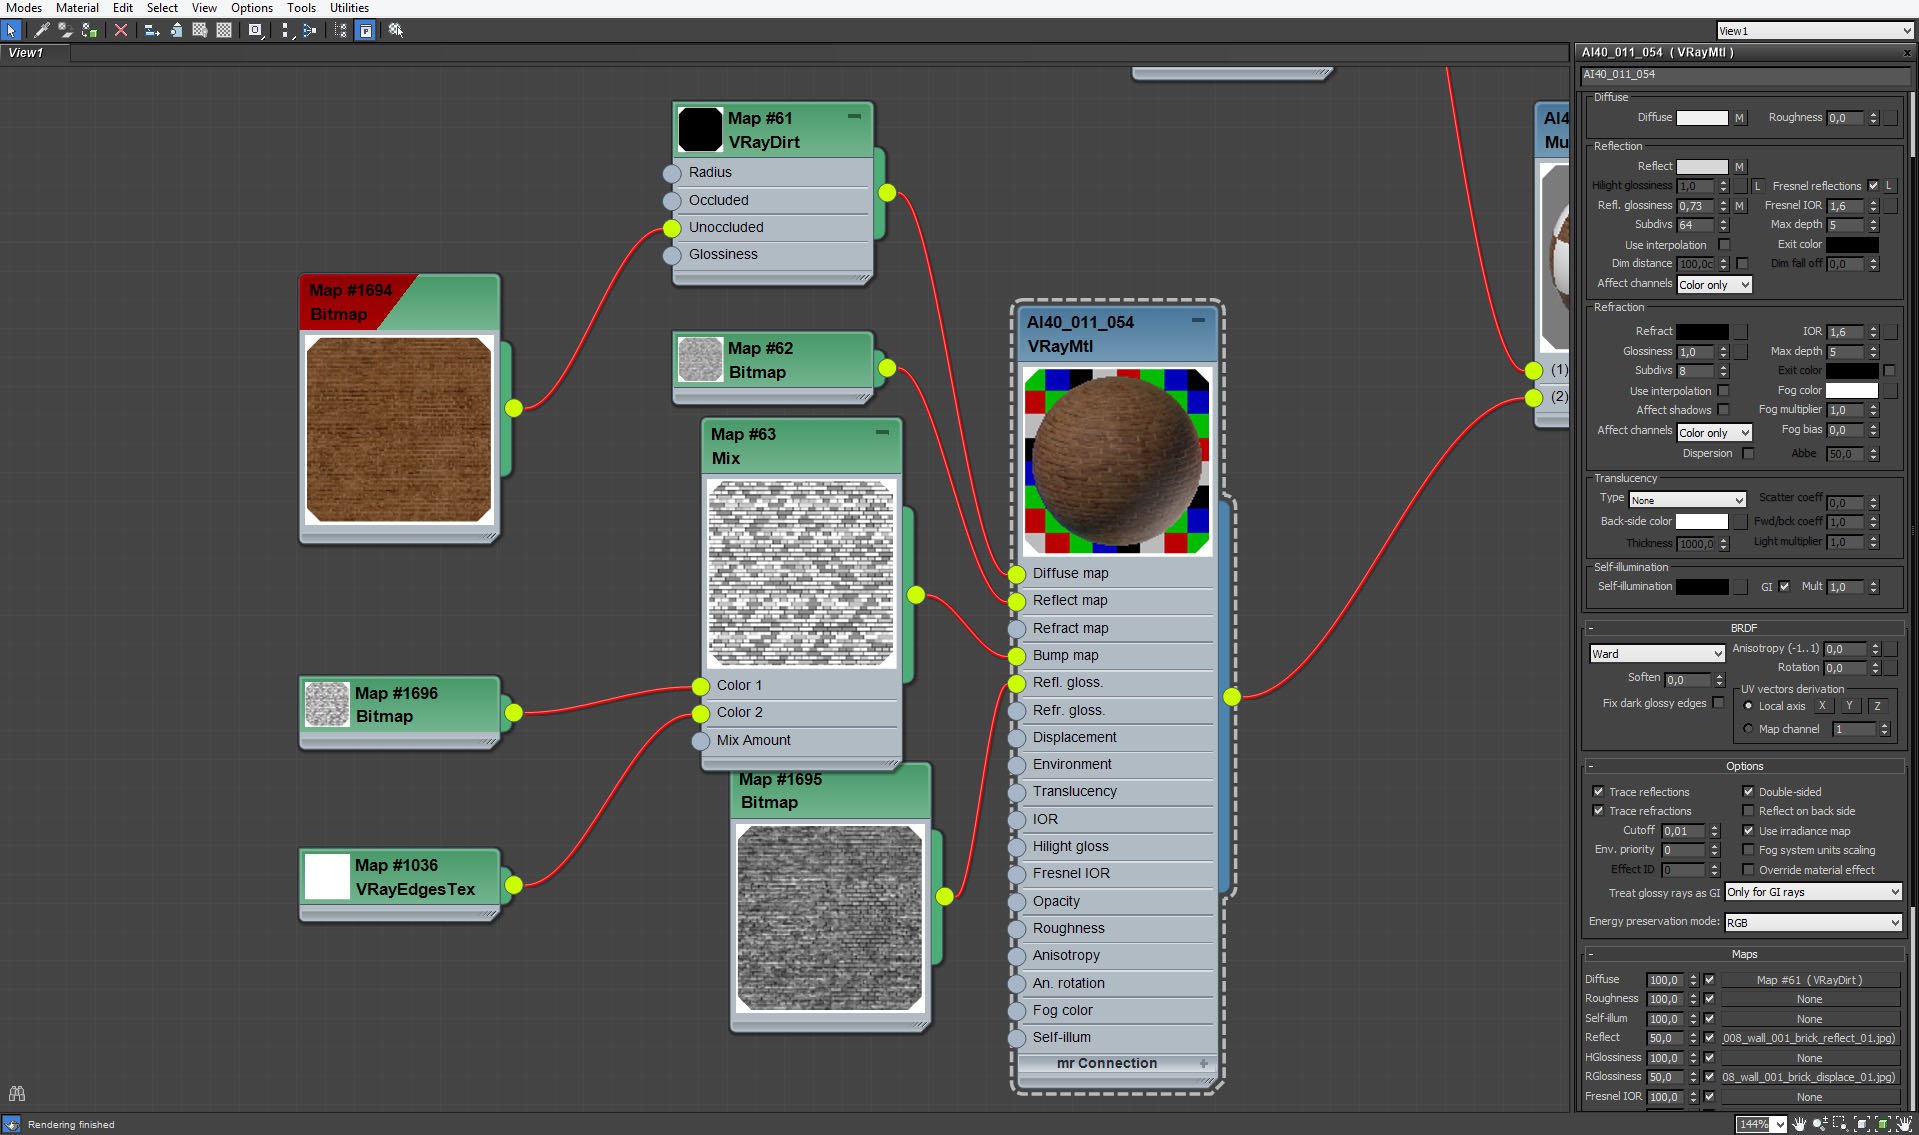
Another submaterial is a shader put on a brick wall that is visible throught the window. Normally we would use just some brick house image, but this wall was meant to be placed very close to the window, so we couldn't fake it with bitmap. We created 3d model of building elevation and assigned a brickwall material to it.


Click on image to enlarge nr_AI40S11_0013_Layer_41_505.jpg
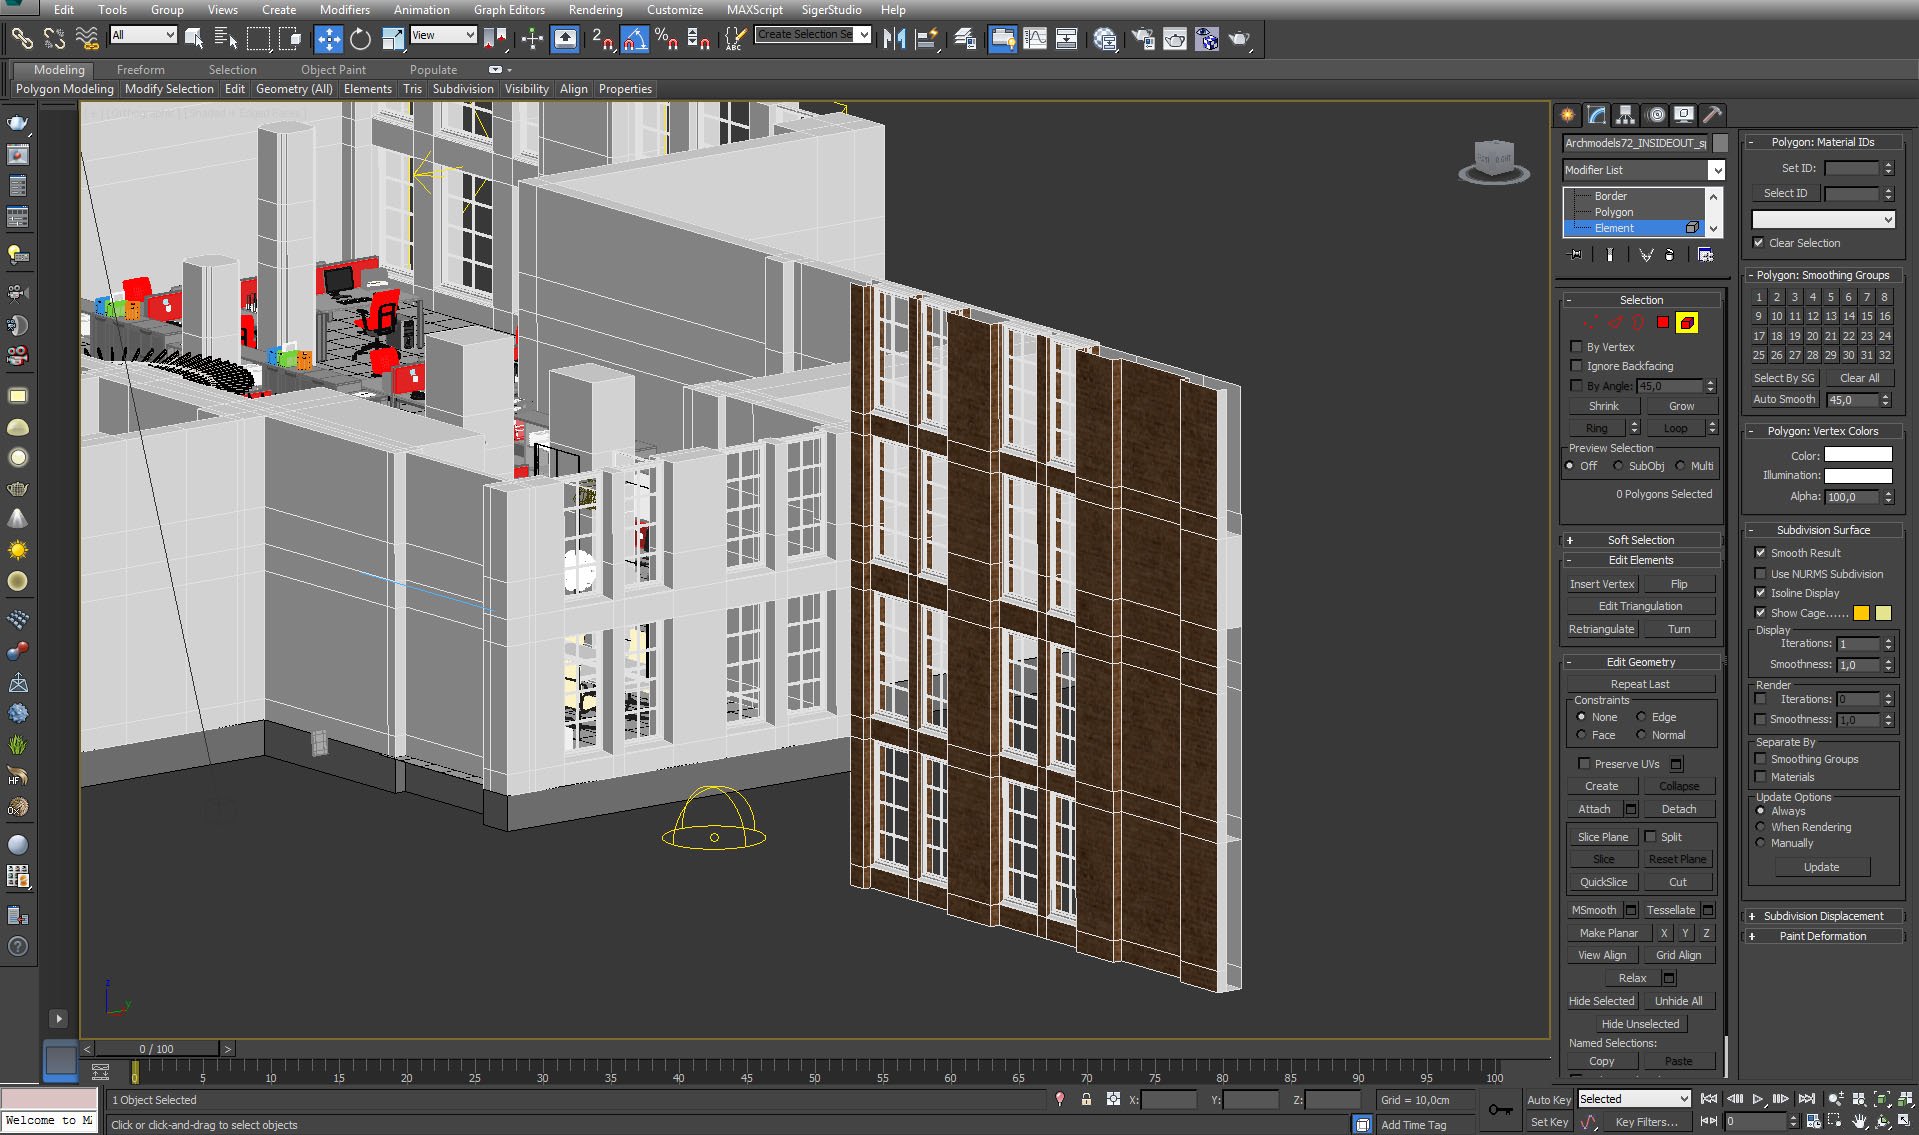
Brick wall behind the windows.


Click on image to enlarge nr_AI40S11_0037_Layer_17_478.jpg

Brick wall - VrayDirt settings.


Click on image to enlarge DESC_1.JPG

Ceiling is made of a few objects - it has a square pattern and two framing materials.


Click on image to enlarge nr_AI40S11_0035_Layer_19_476.jpg
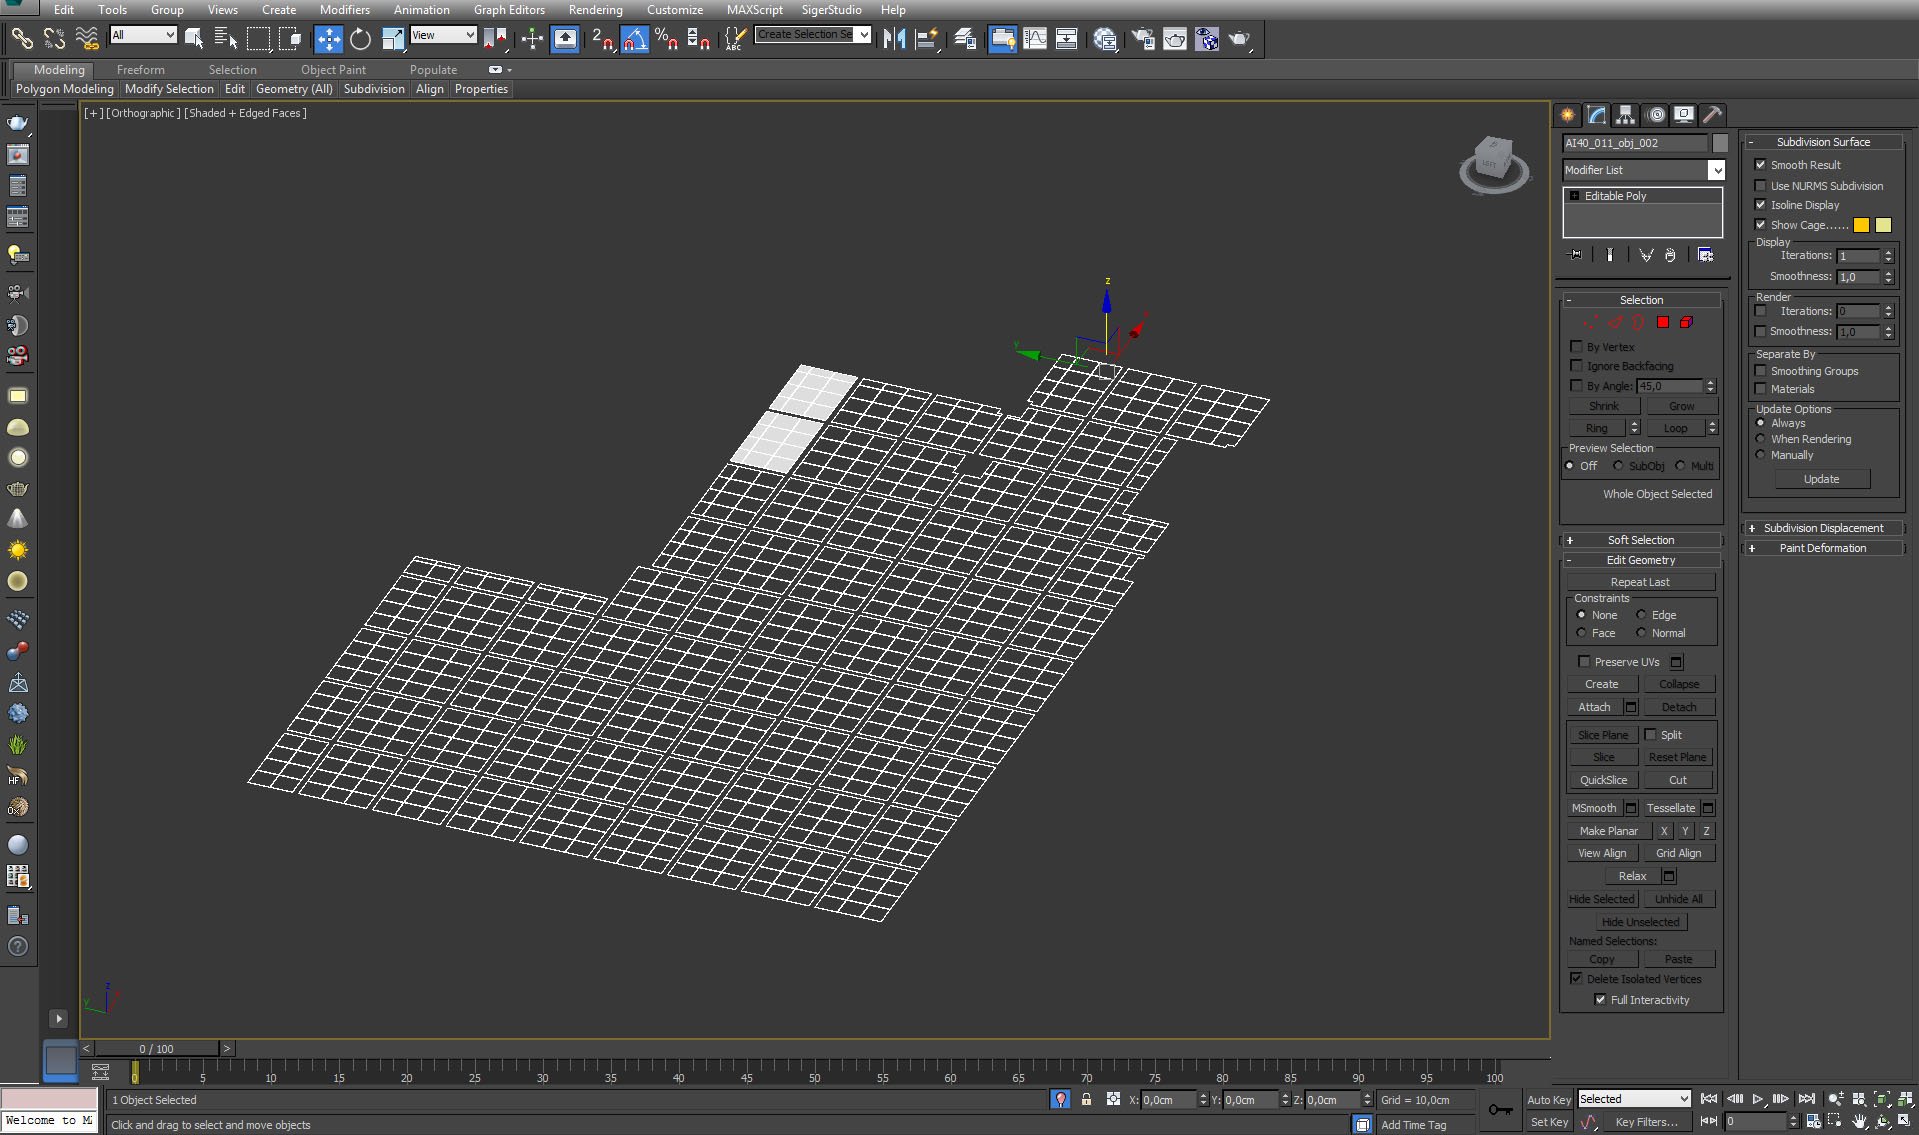
Framing 1 mesh.


Click on image to enlarge nr_AI40S11_0034_Layer_20_475.jpg

Framing 1 mesh (close-up)


Click on image to enlarge nr_AI40S11_0033_Layer_21_474.jpg
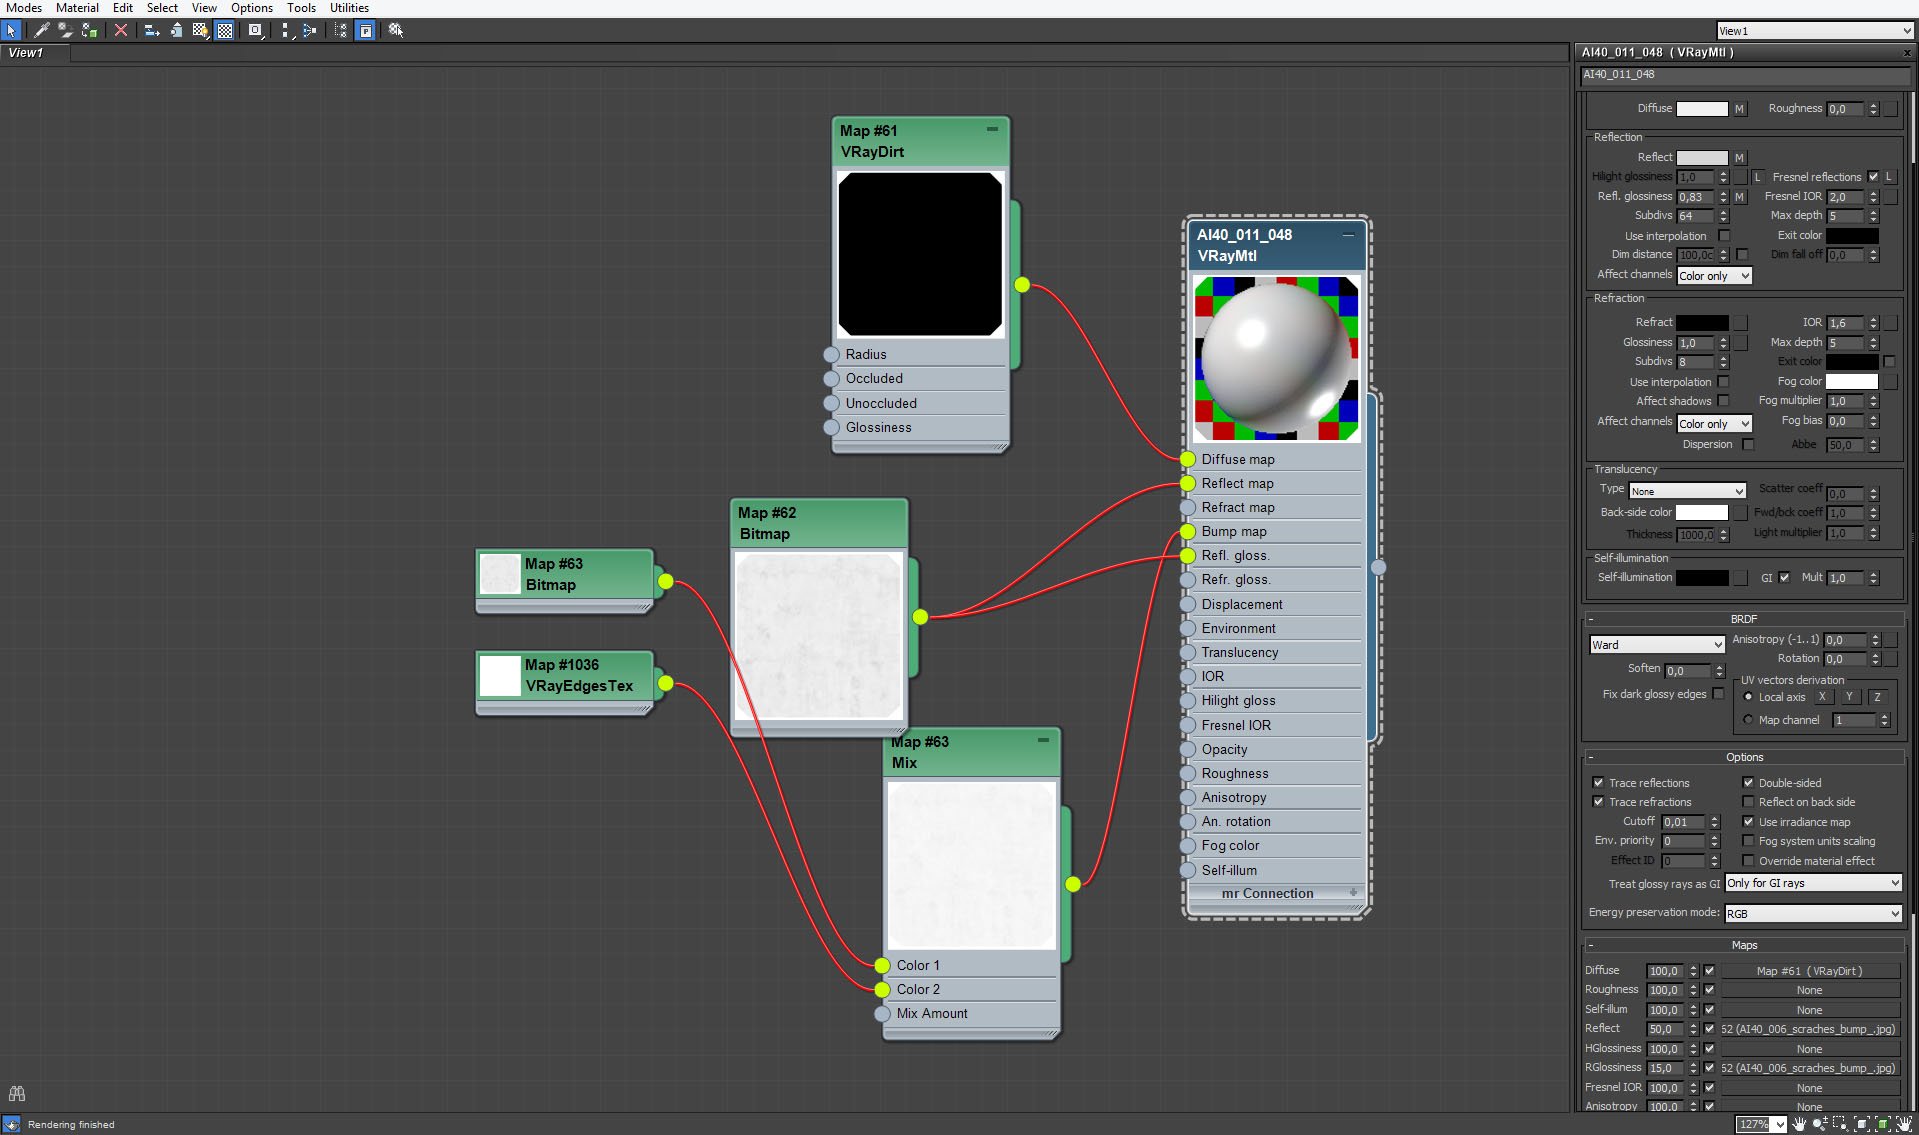
Framing material


Click on image to enlarge nr_AI40S11_0032_Layer_22_473.jpg

Framing material - VrayDirt settings.


Click on image to enlarge nr_AI40S11_0031_Layer_23_472.jpg
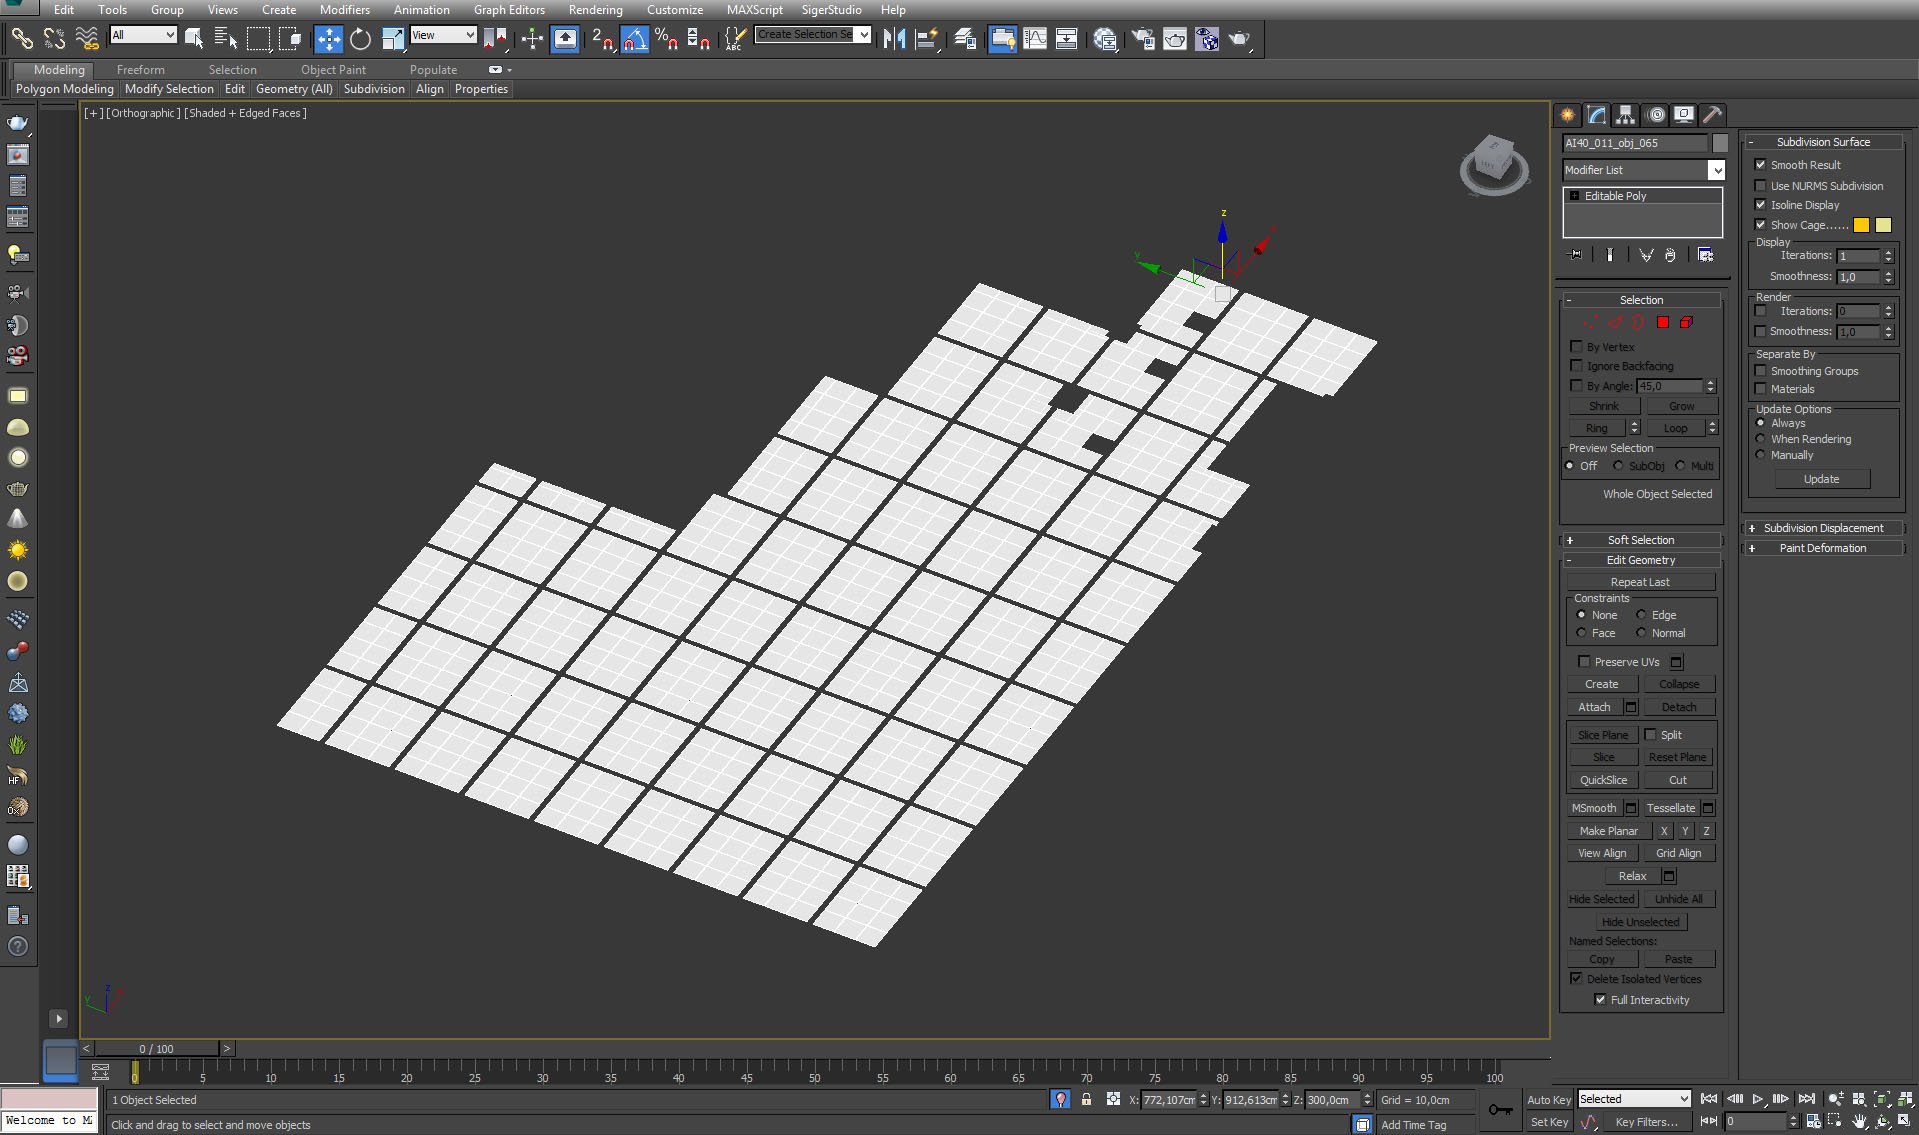
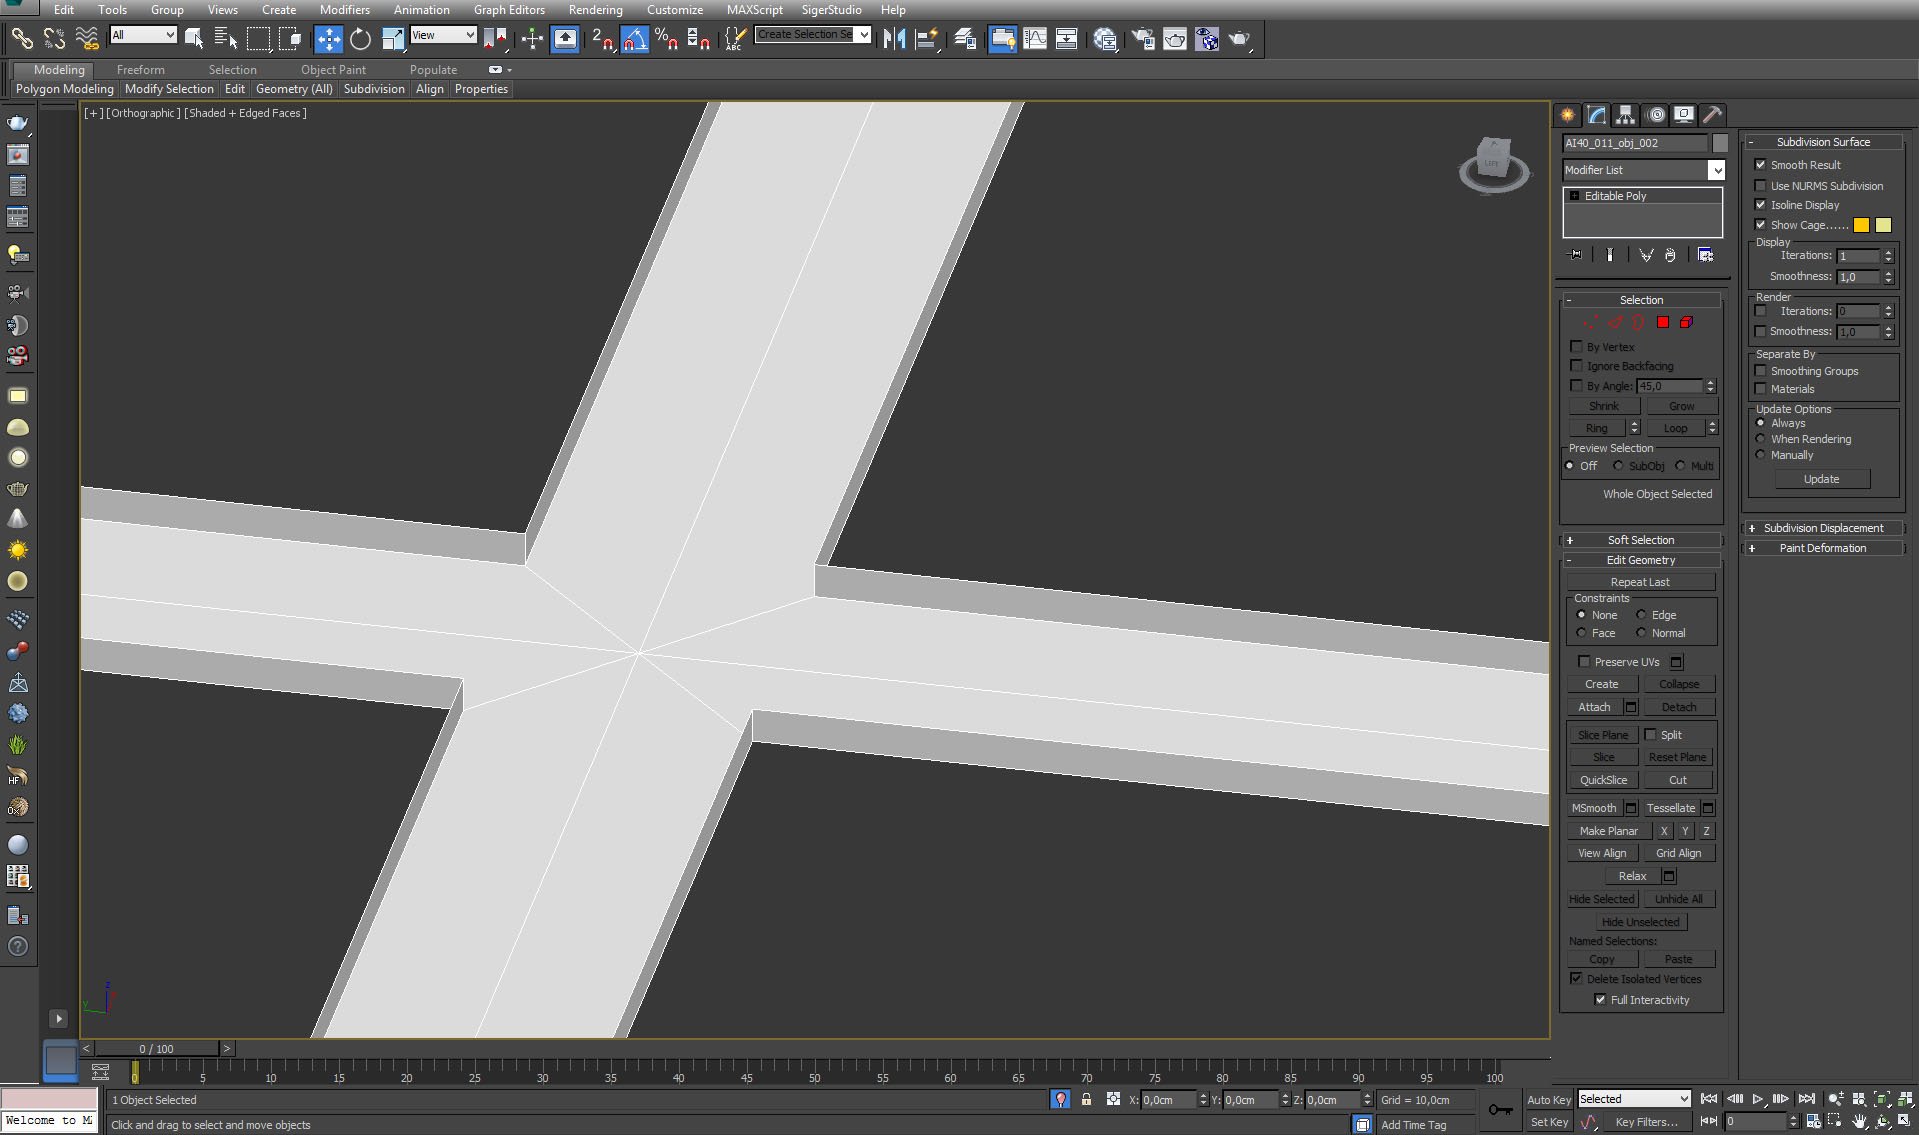
Square mesh.


Click on image to enlarge nr_AI40S11_0030_Layer_24_471.jpg

Square mesh material. We used gradient ramp maps for bump map and diffuse slots.


Click on image to enlarge nr_AI40S11_0029_Layer_25_470.jpg
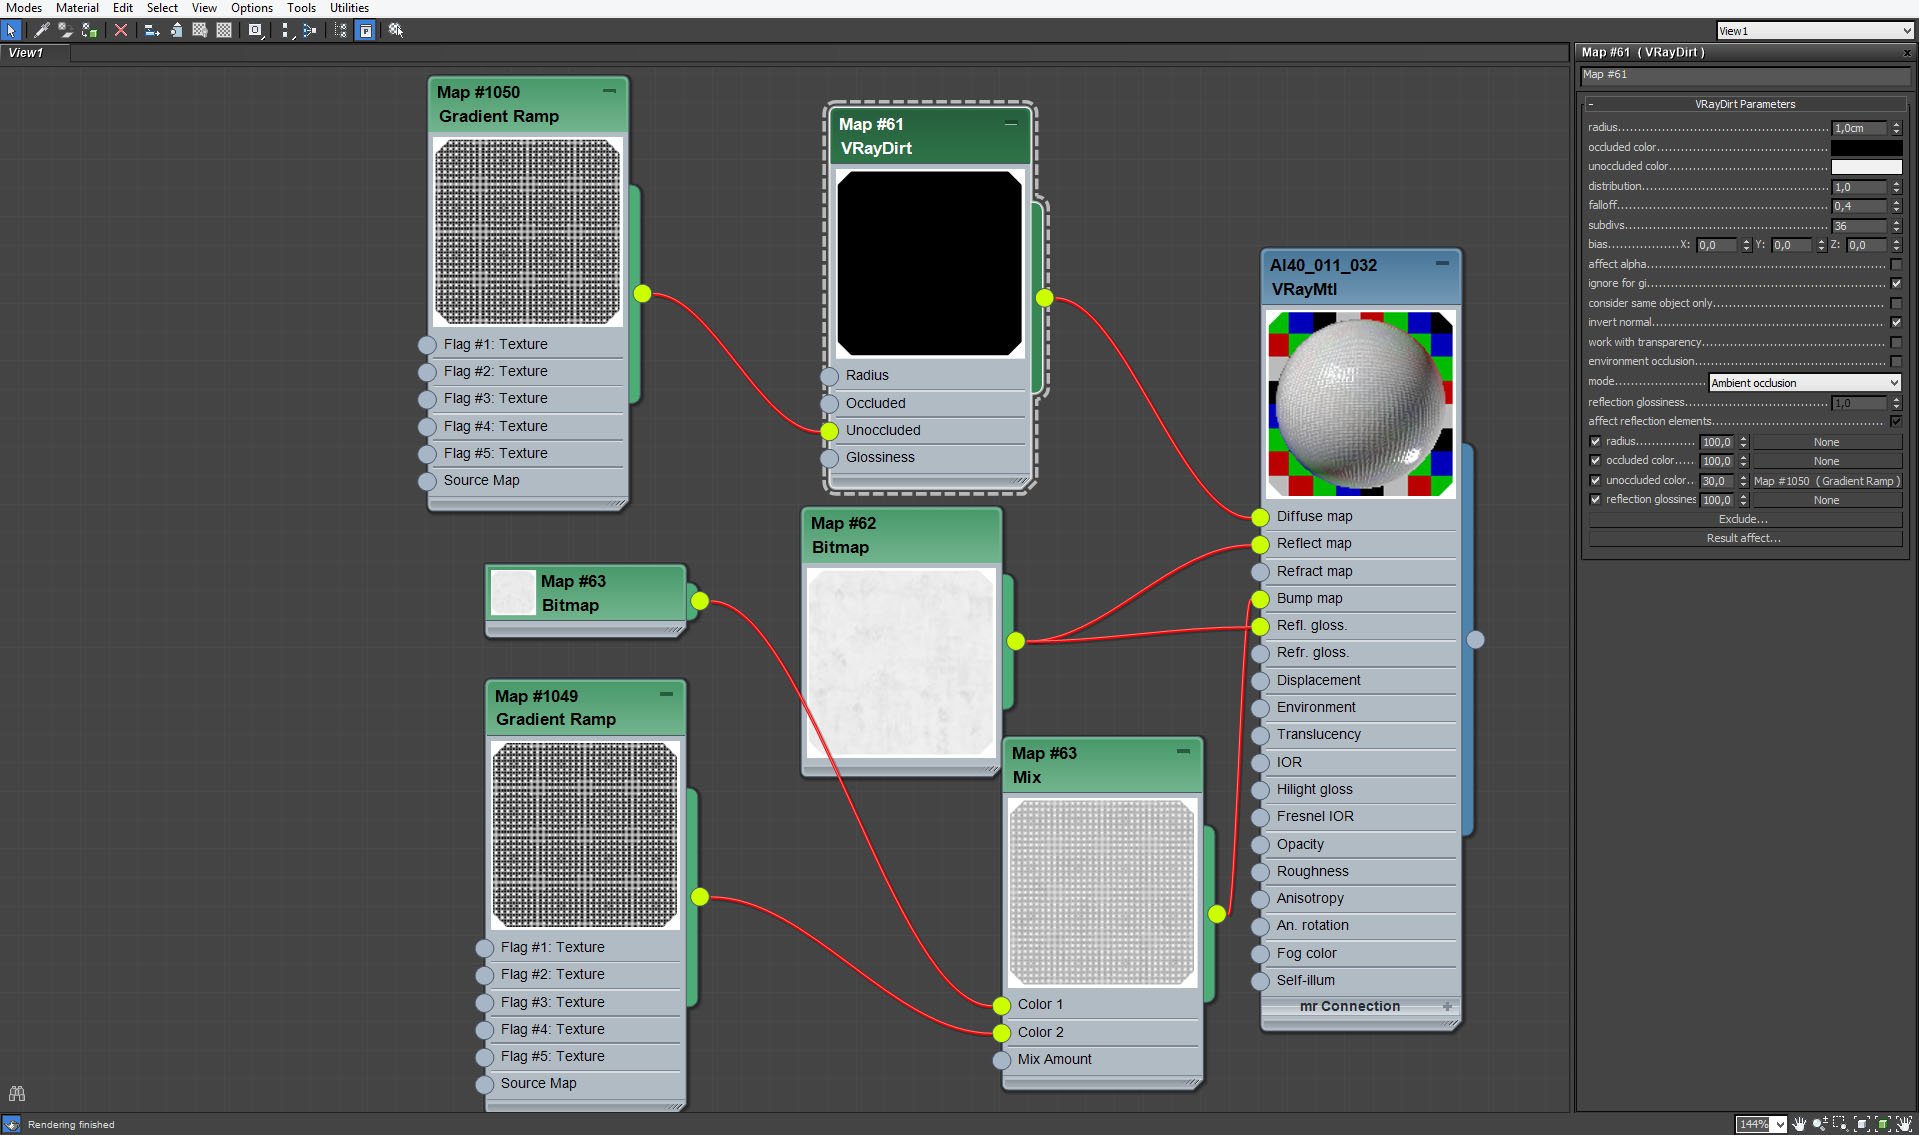
Square mesh material - VrayDirt map settings.


Click on image to enlarge nr_AI40S11_0028_Layer_26_469.jpg

Square mesh material - gradient ramp map in diffuse slot settings.


Click on image to enlarge nr_AI40S11_0027_Layer_27_519.jpg
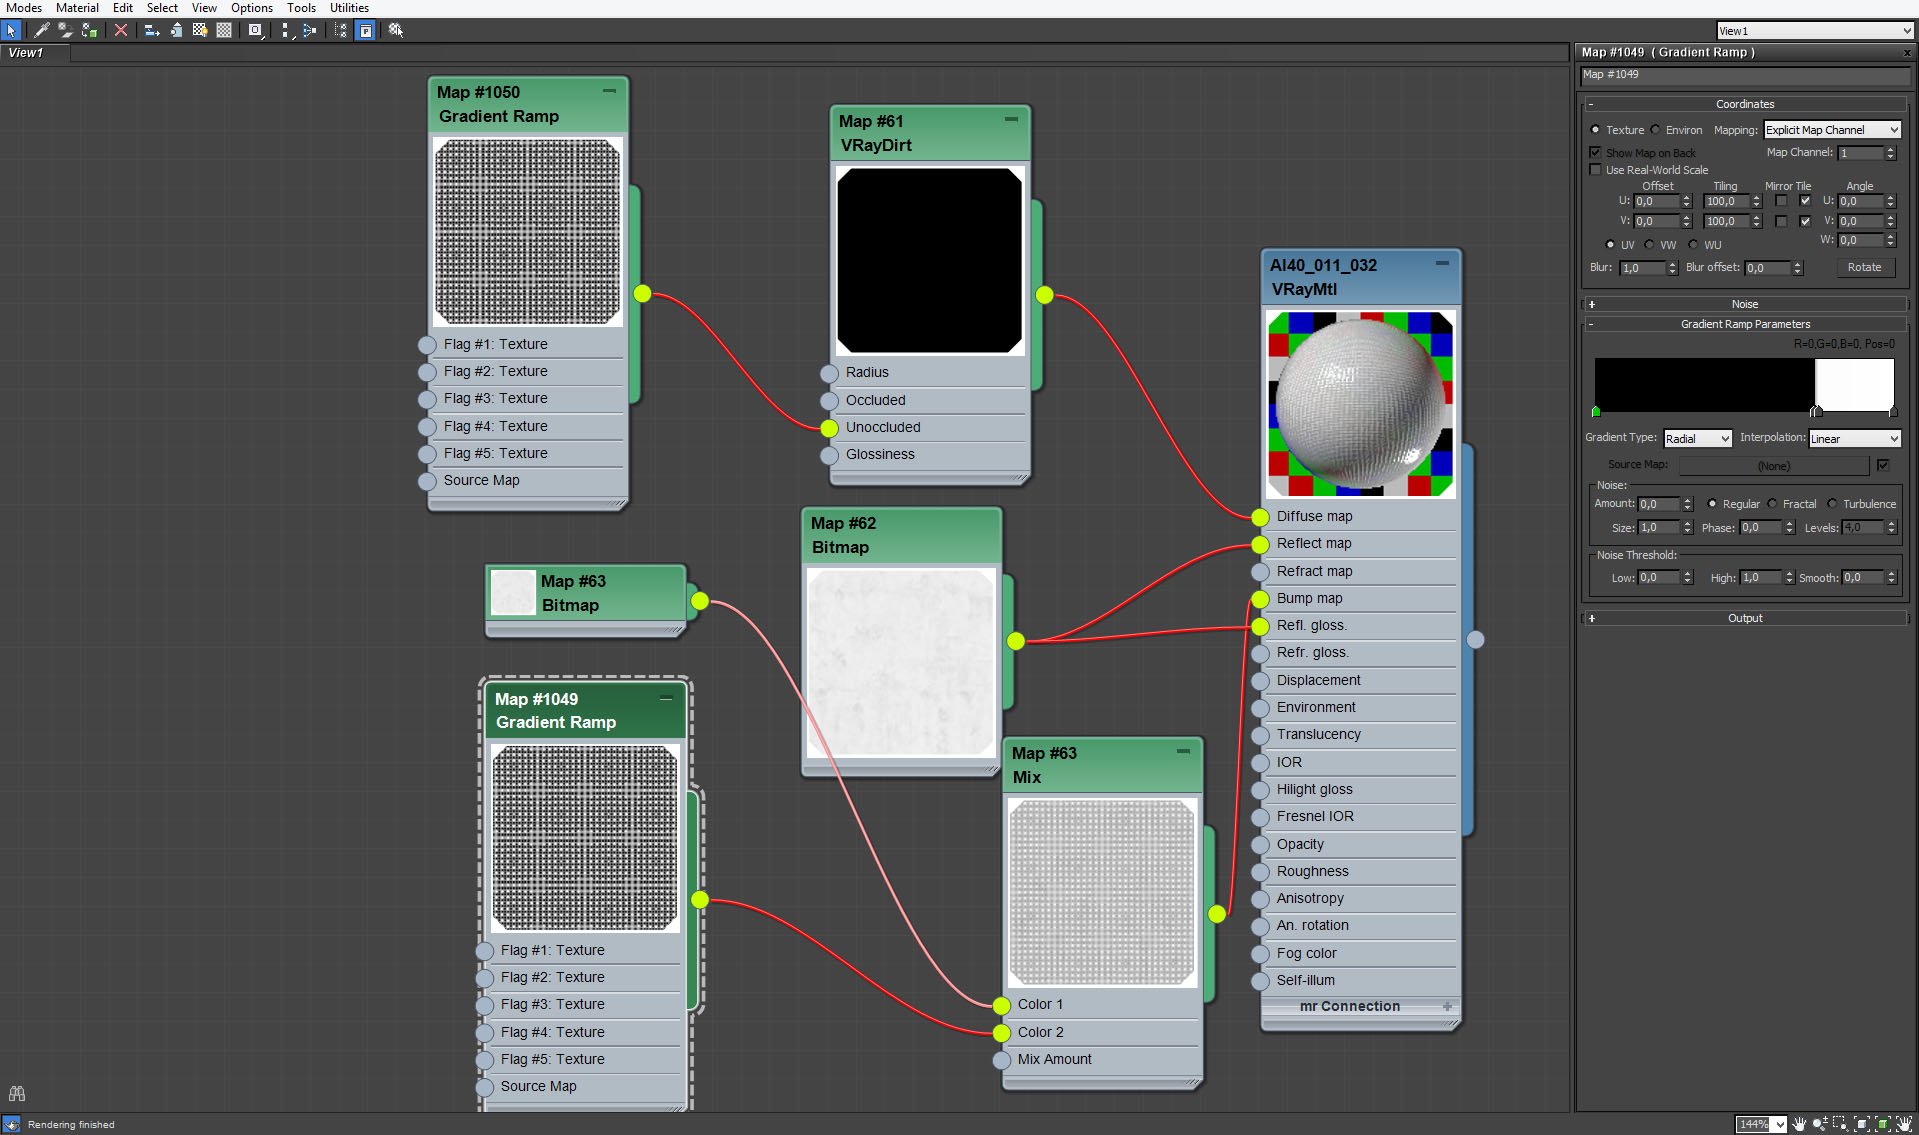
Square mesh material - gradient ramp map in bump slot settings.


Click on image to enlarge nr_AI40S11_0026_Layer_28_518.jpg
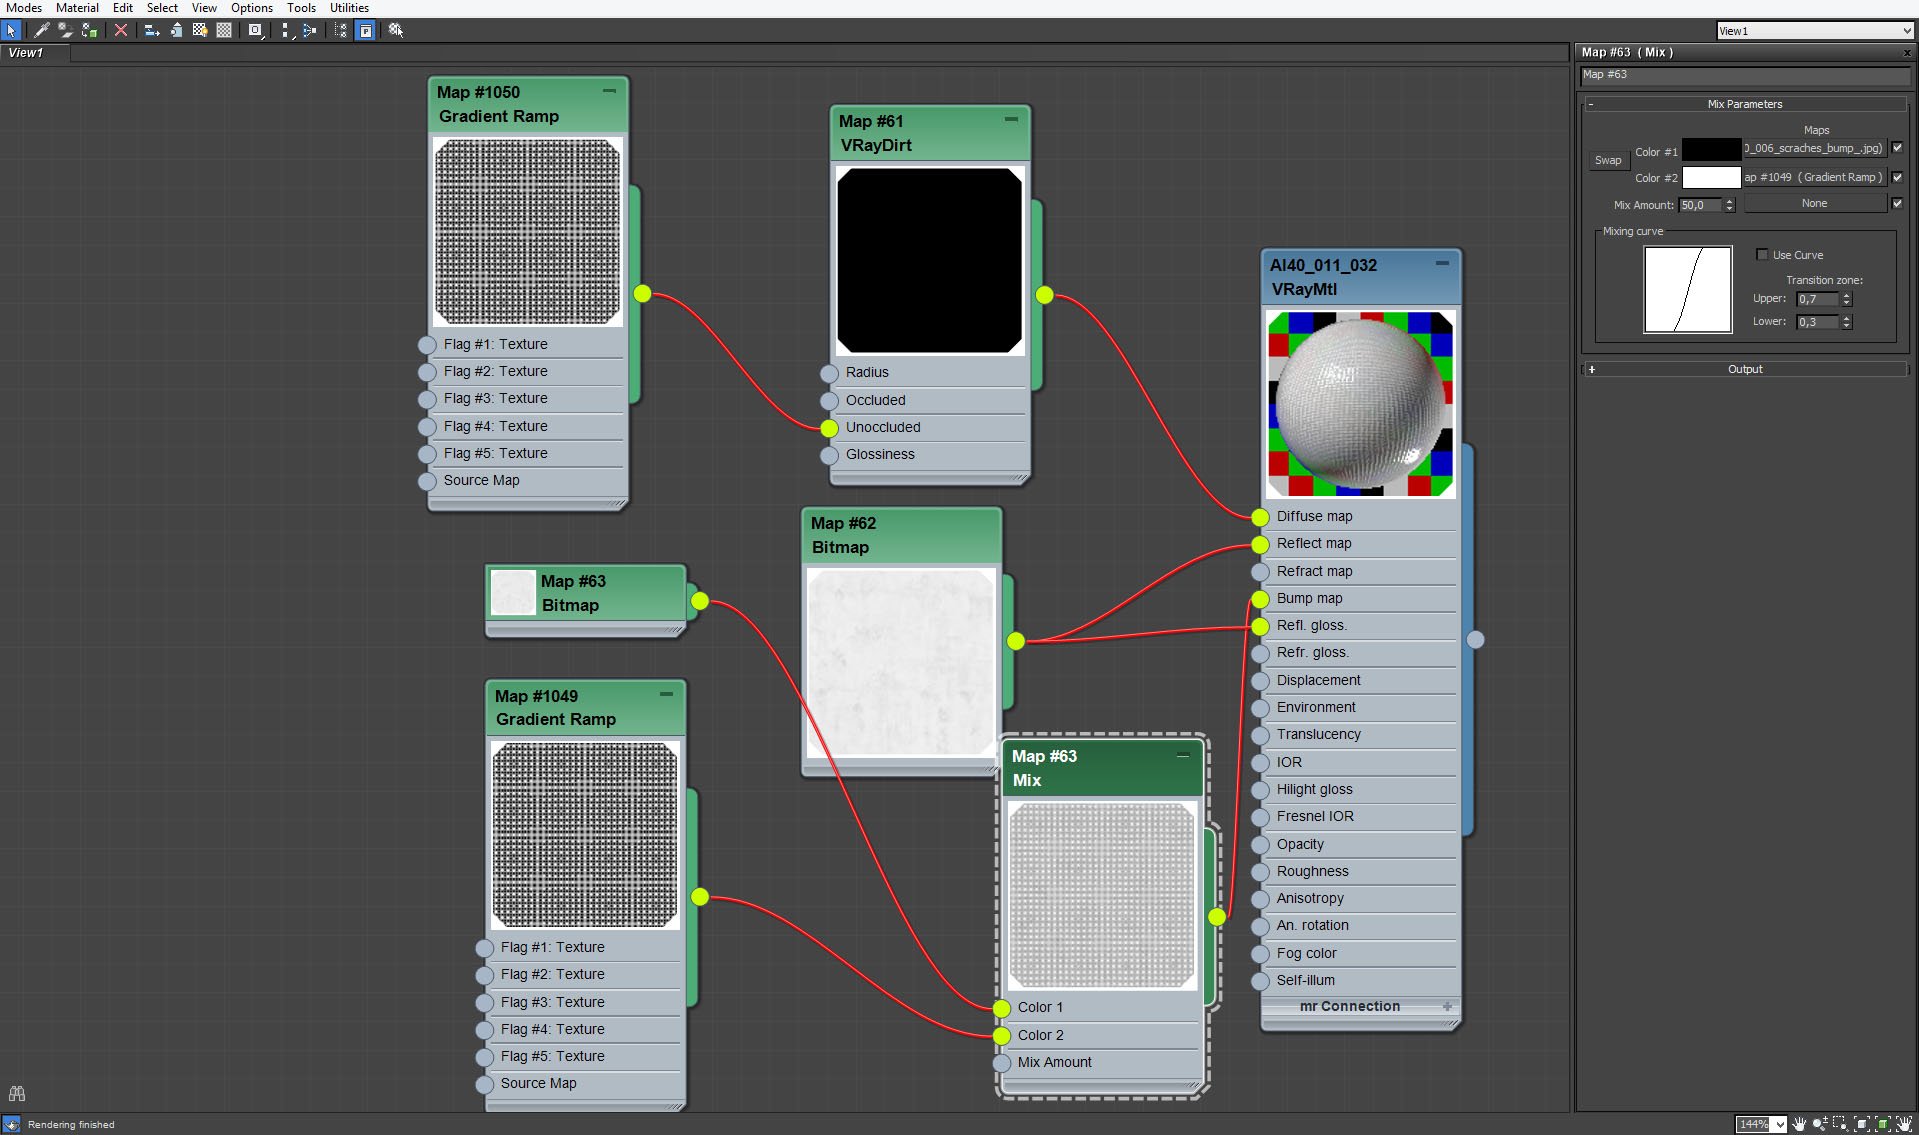
Square mesh material - bump map mix settings.


Click on image to enlarge nr_AI40S11_0024_Layer_30_516.jpg
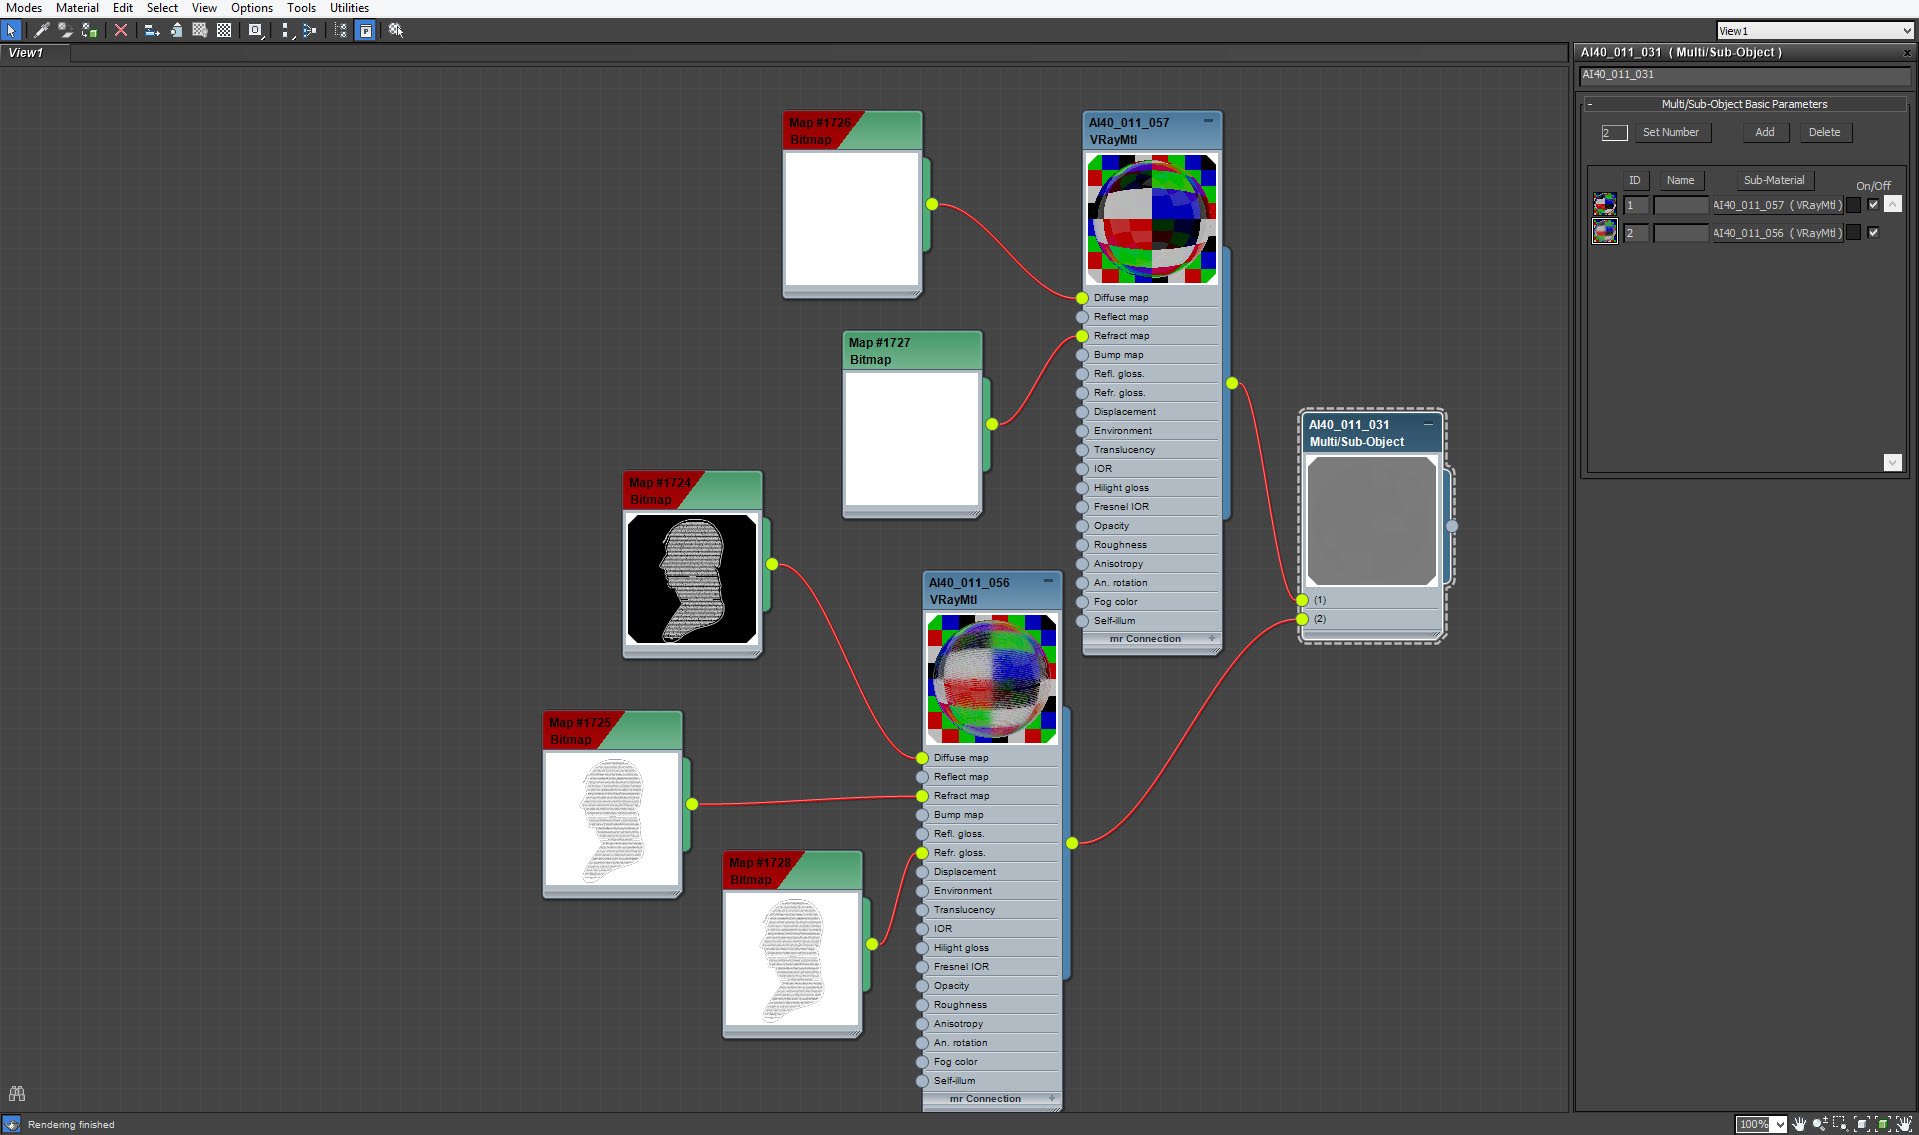
We have a glass wall and door just in front of a camera. Glass wall has a print. It was made with a bitmap in a diffuse slot and inverted version of the same bitmap in refraction and refraction glossiness slot. this way we achieved a white (diffuse map) print that does not pass the light (refract map).


Click on image to enlarge 900_522.jpg
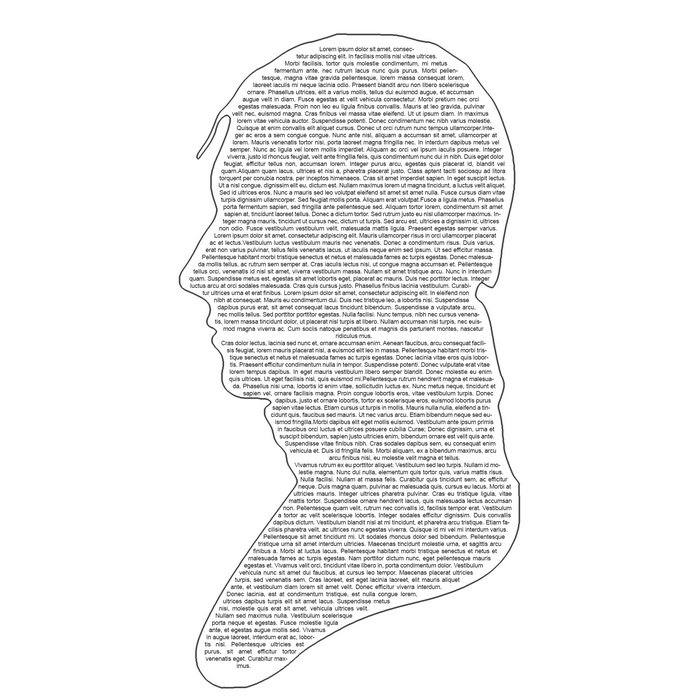
Glass print map.


Click on image to enlarge nr_AI40S11_0023_Layer_31_515.jpg

Clear glass material settings.


Click on image to enlarge nr_AI40S11_0022_Layer_32_514.jpg

Glass wall material settings.


Click on image to enlarge nr_AI40S11_0020_Layer_34_512.jpg
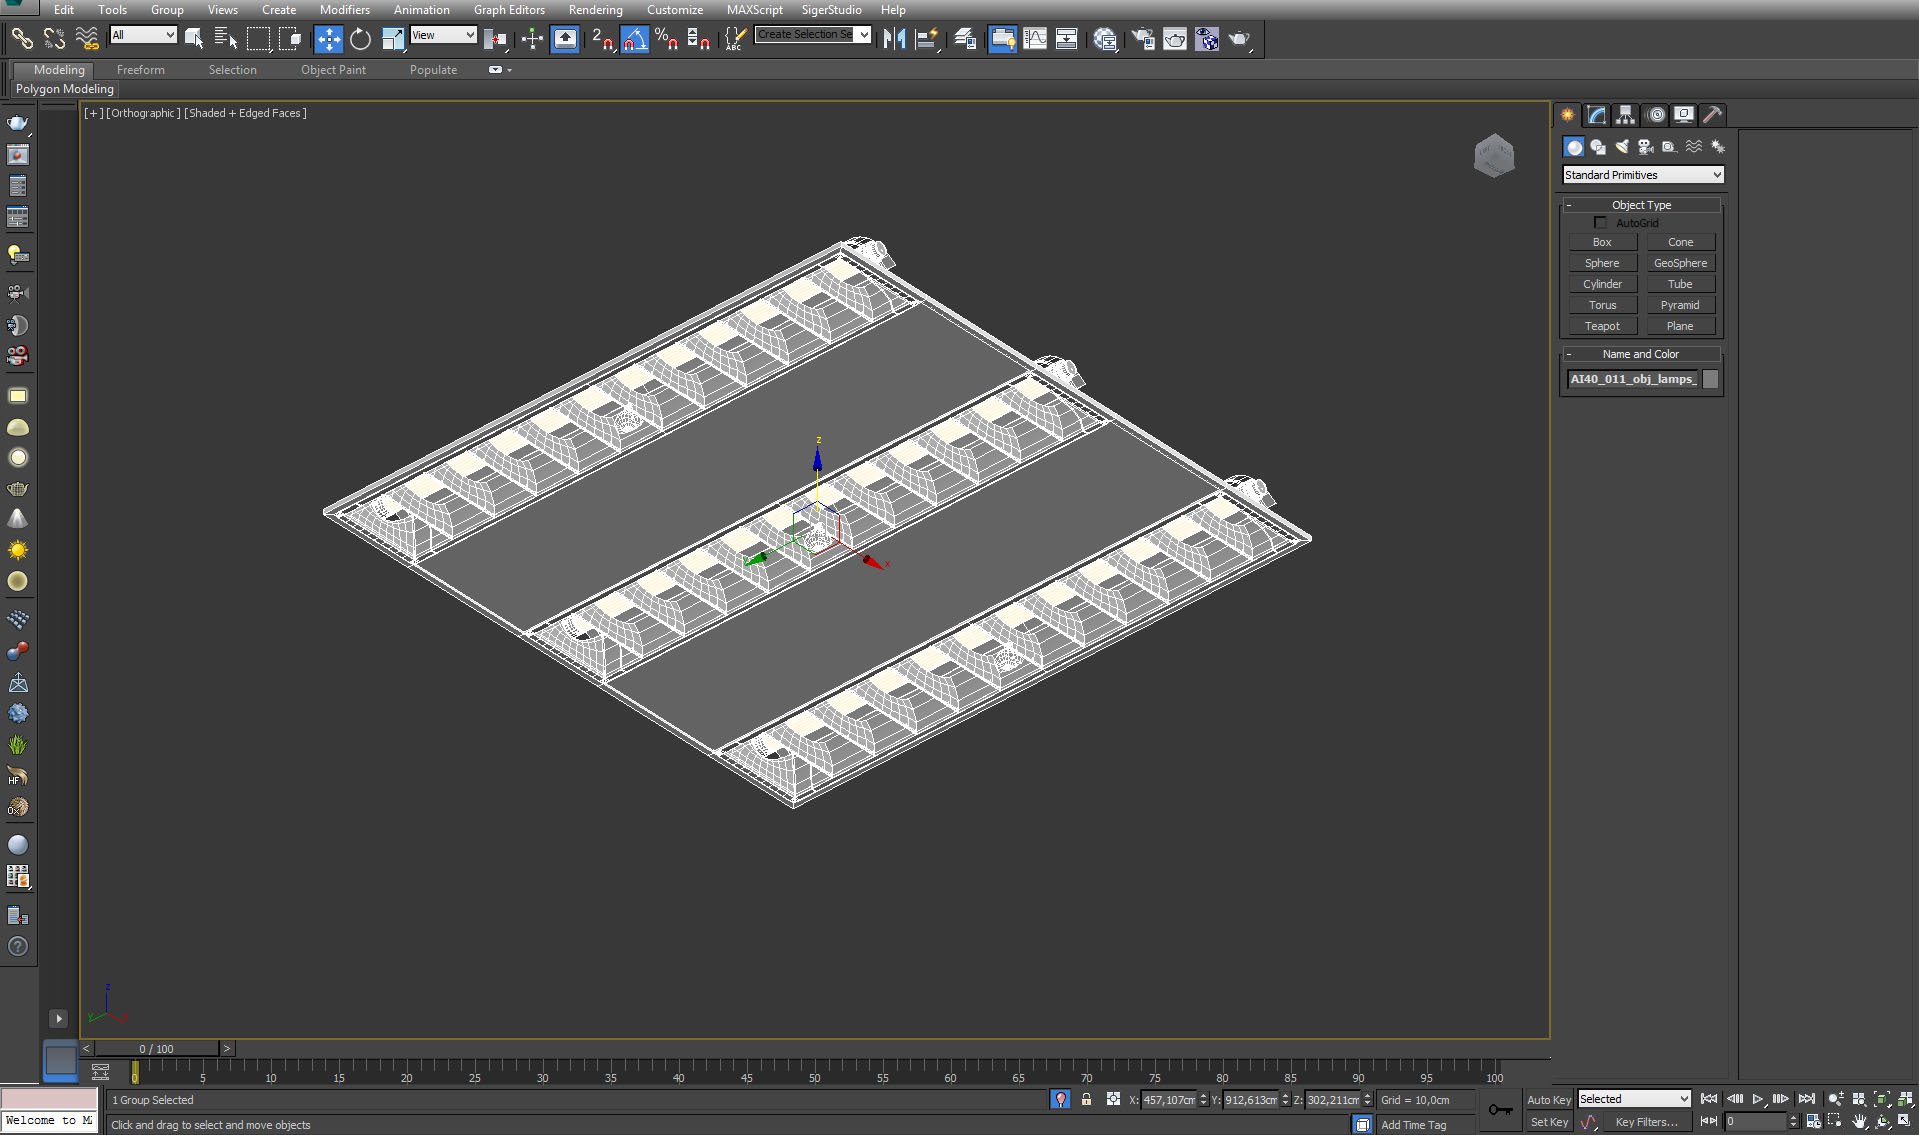
Ceiling lamp mesh.


Click on image to enlarge nr_AI40S11_0019_Layer_35_511.jpg

Ceiling lamp material.


Click on image to enlarge nr_AI40S11_0018_Layer_36_510.jpg

Ceiling lamp material, continued.


Click on image to enlarge nr_AI40S11_0017_Layer_37_509.jpg
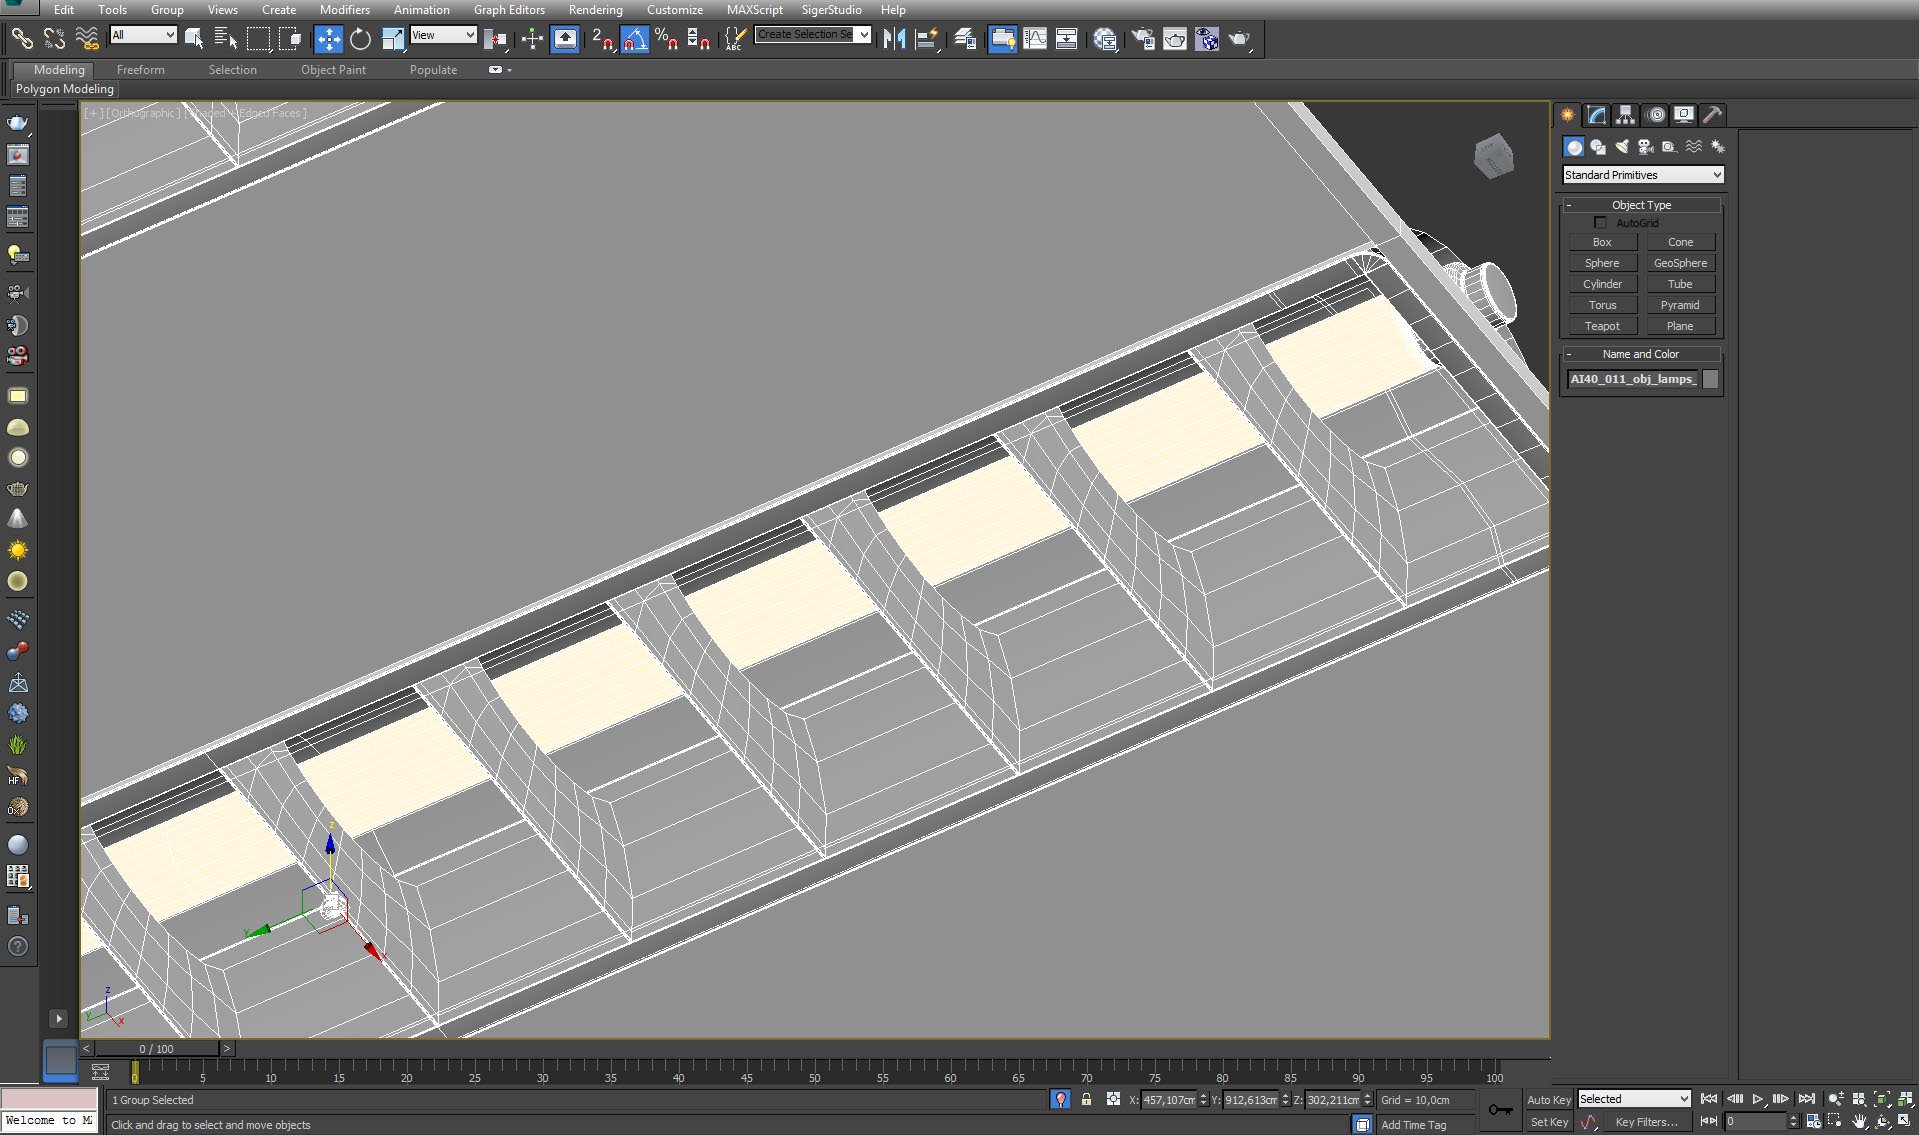
Ceiling lamp / fluorescent.


Click on image to enlarge nr_AI40S11_0016_Layer_38_508.jpg
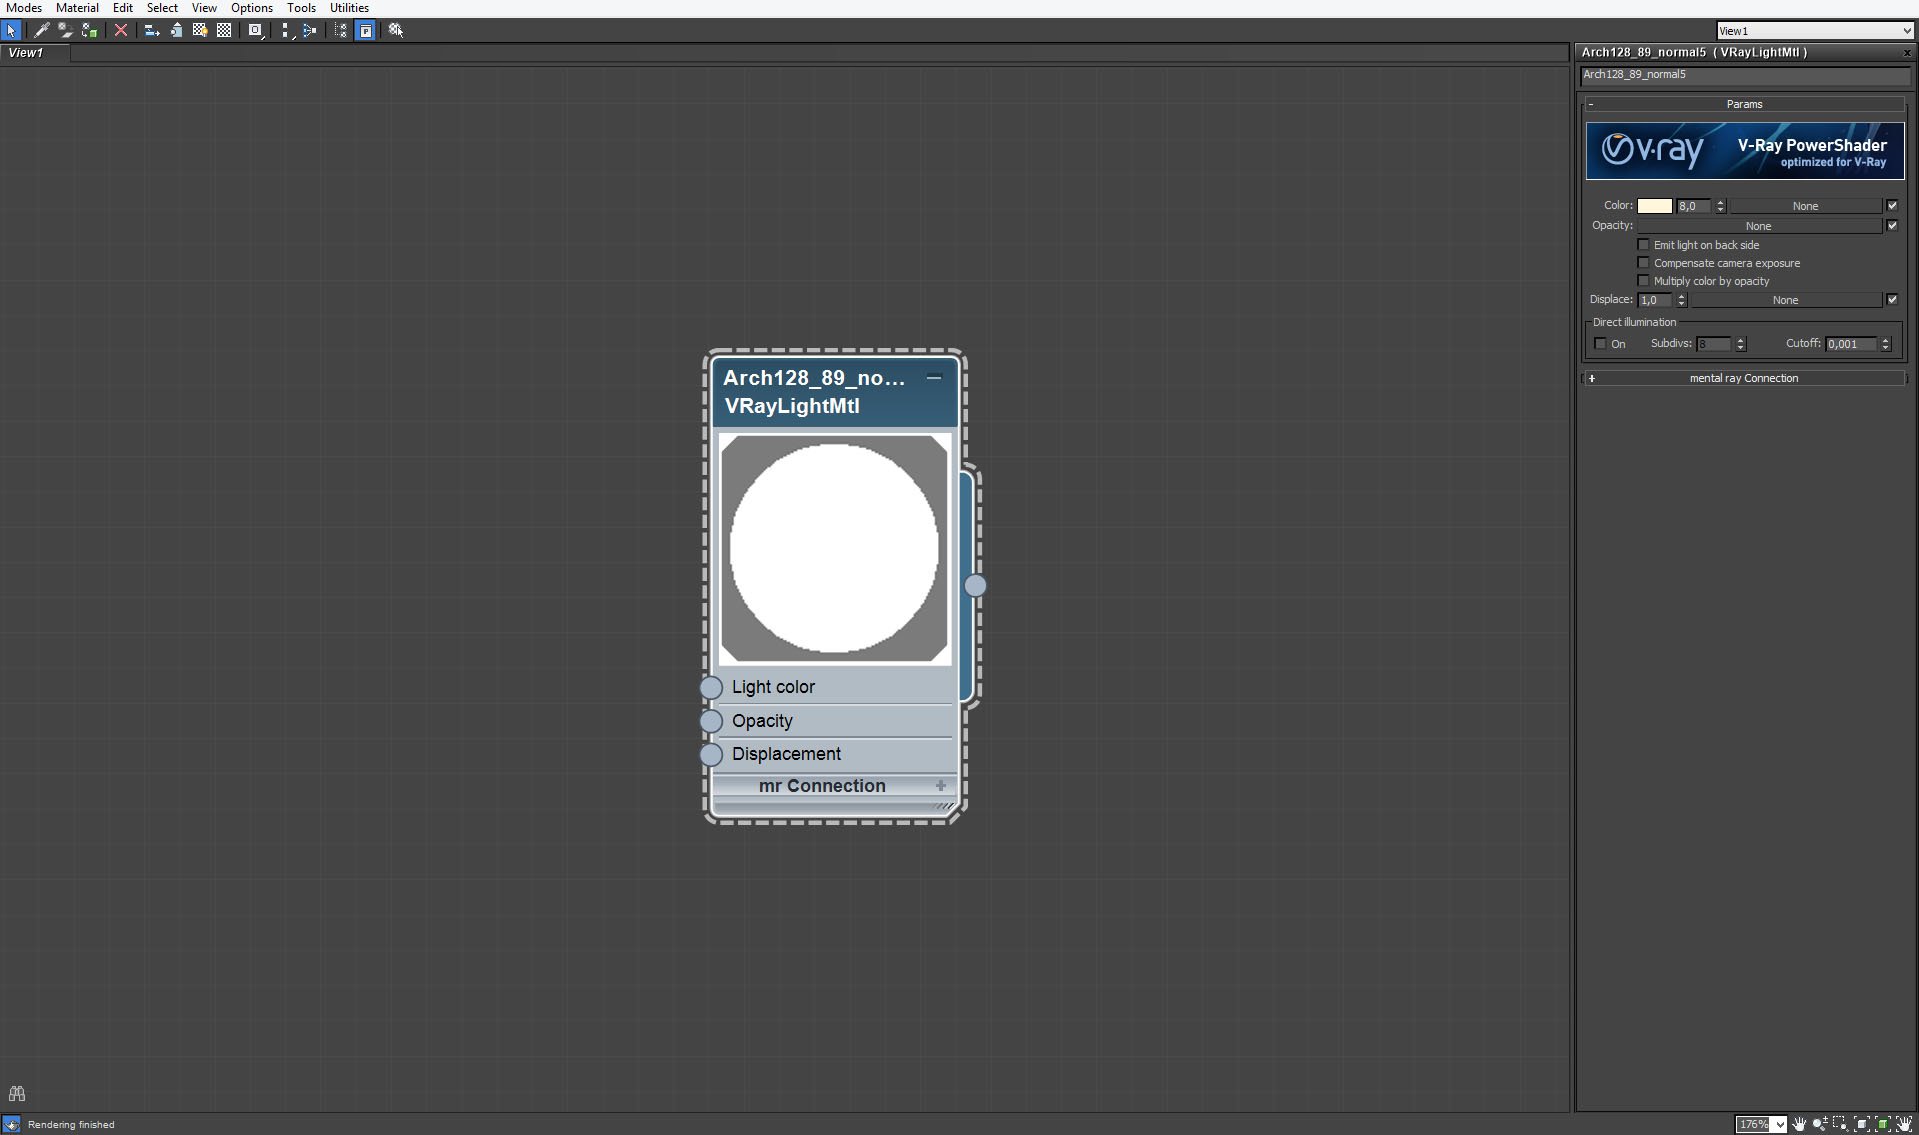
Fluorescent material.


Click on image to enlarge nr_AI40S11_0015_Layer_39_507.jpg

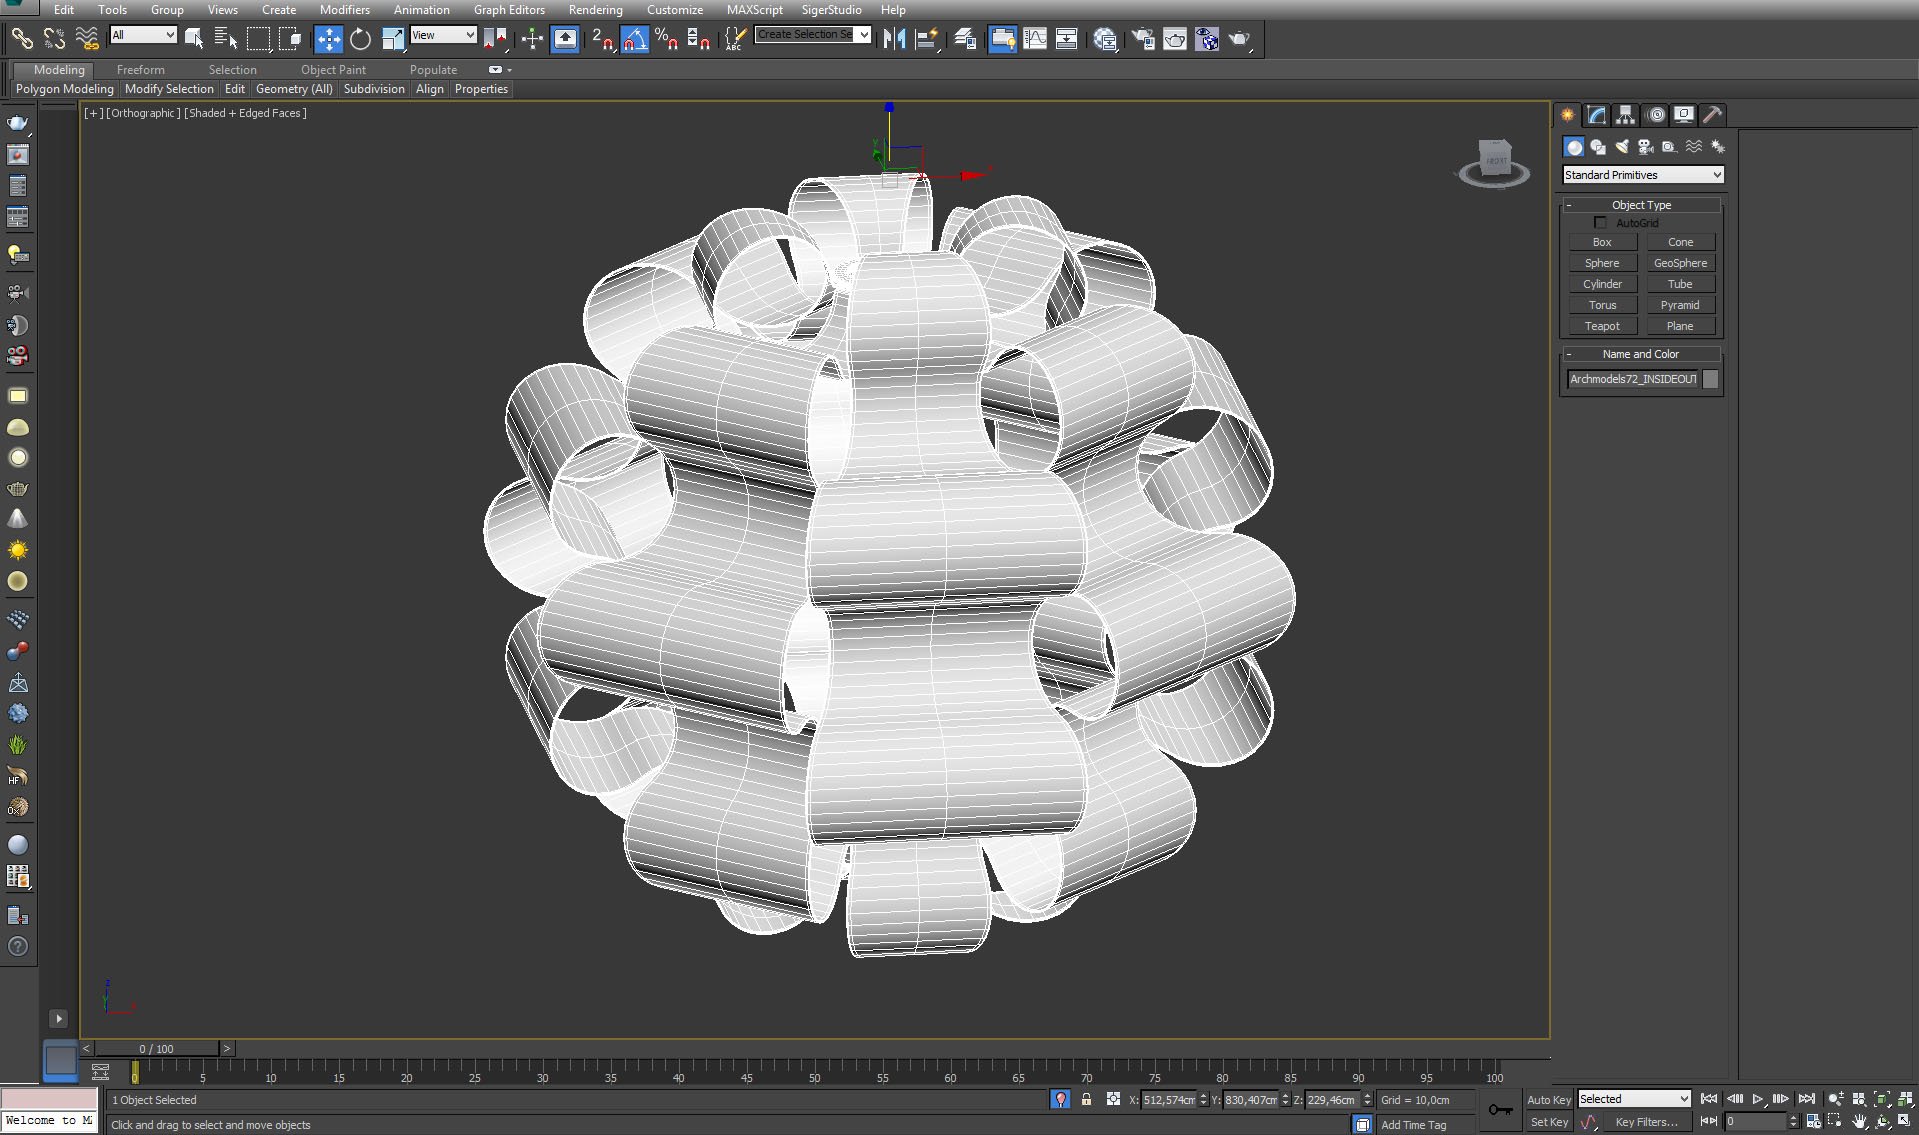
Chandelier mesh.


Click on image to enlarge nr_AI40S11_0014_Layer_40_506.jpg

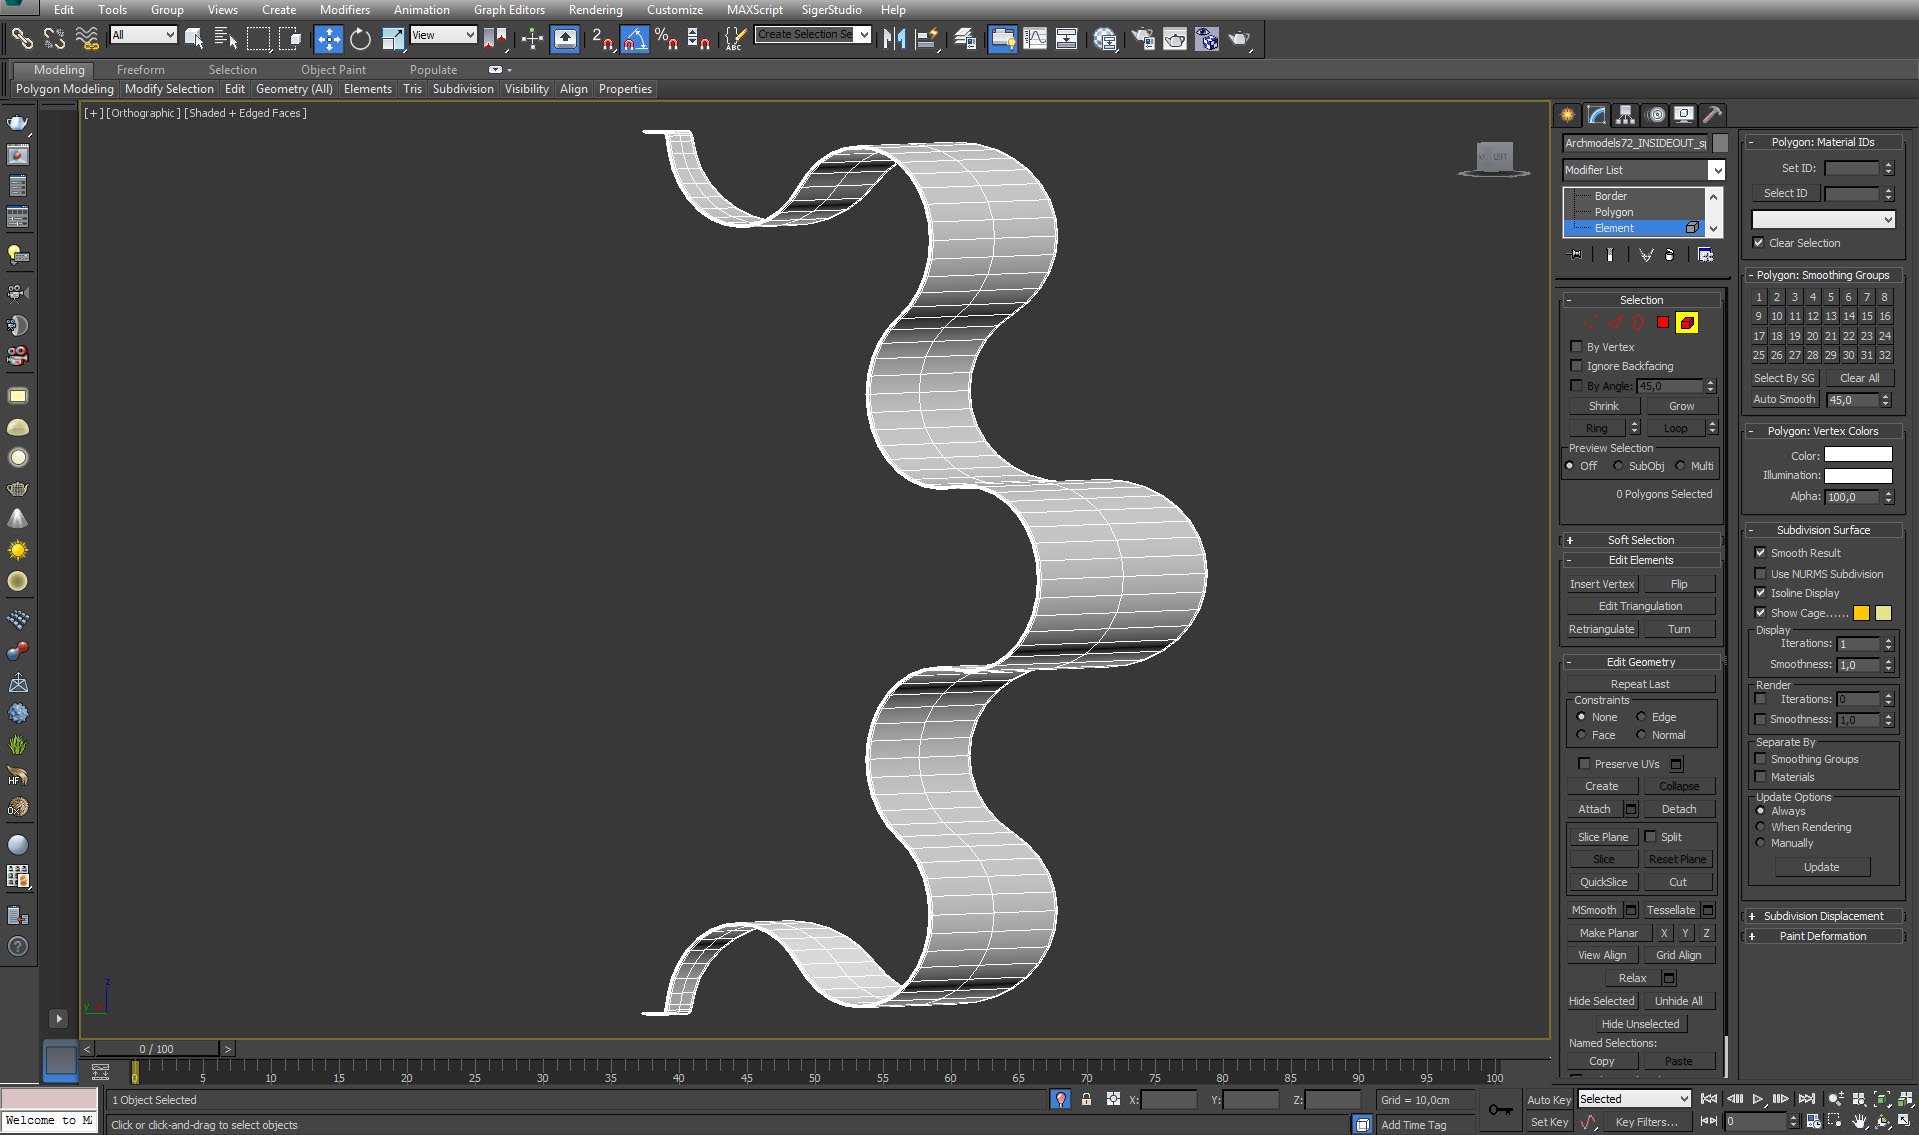
Chandelier was made of eight similar elements. It looks sophisticated, but it is relative simple modeling task. You can use circles, distribute them using array, remove unwanted segments to achieve arcs, connect those arcs and extrude them, the last task would be scalling the ends of the element and copying it eight times.


Click on image to enlarge nr_AI40S11_0012_Layer_42_504.jpg
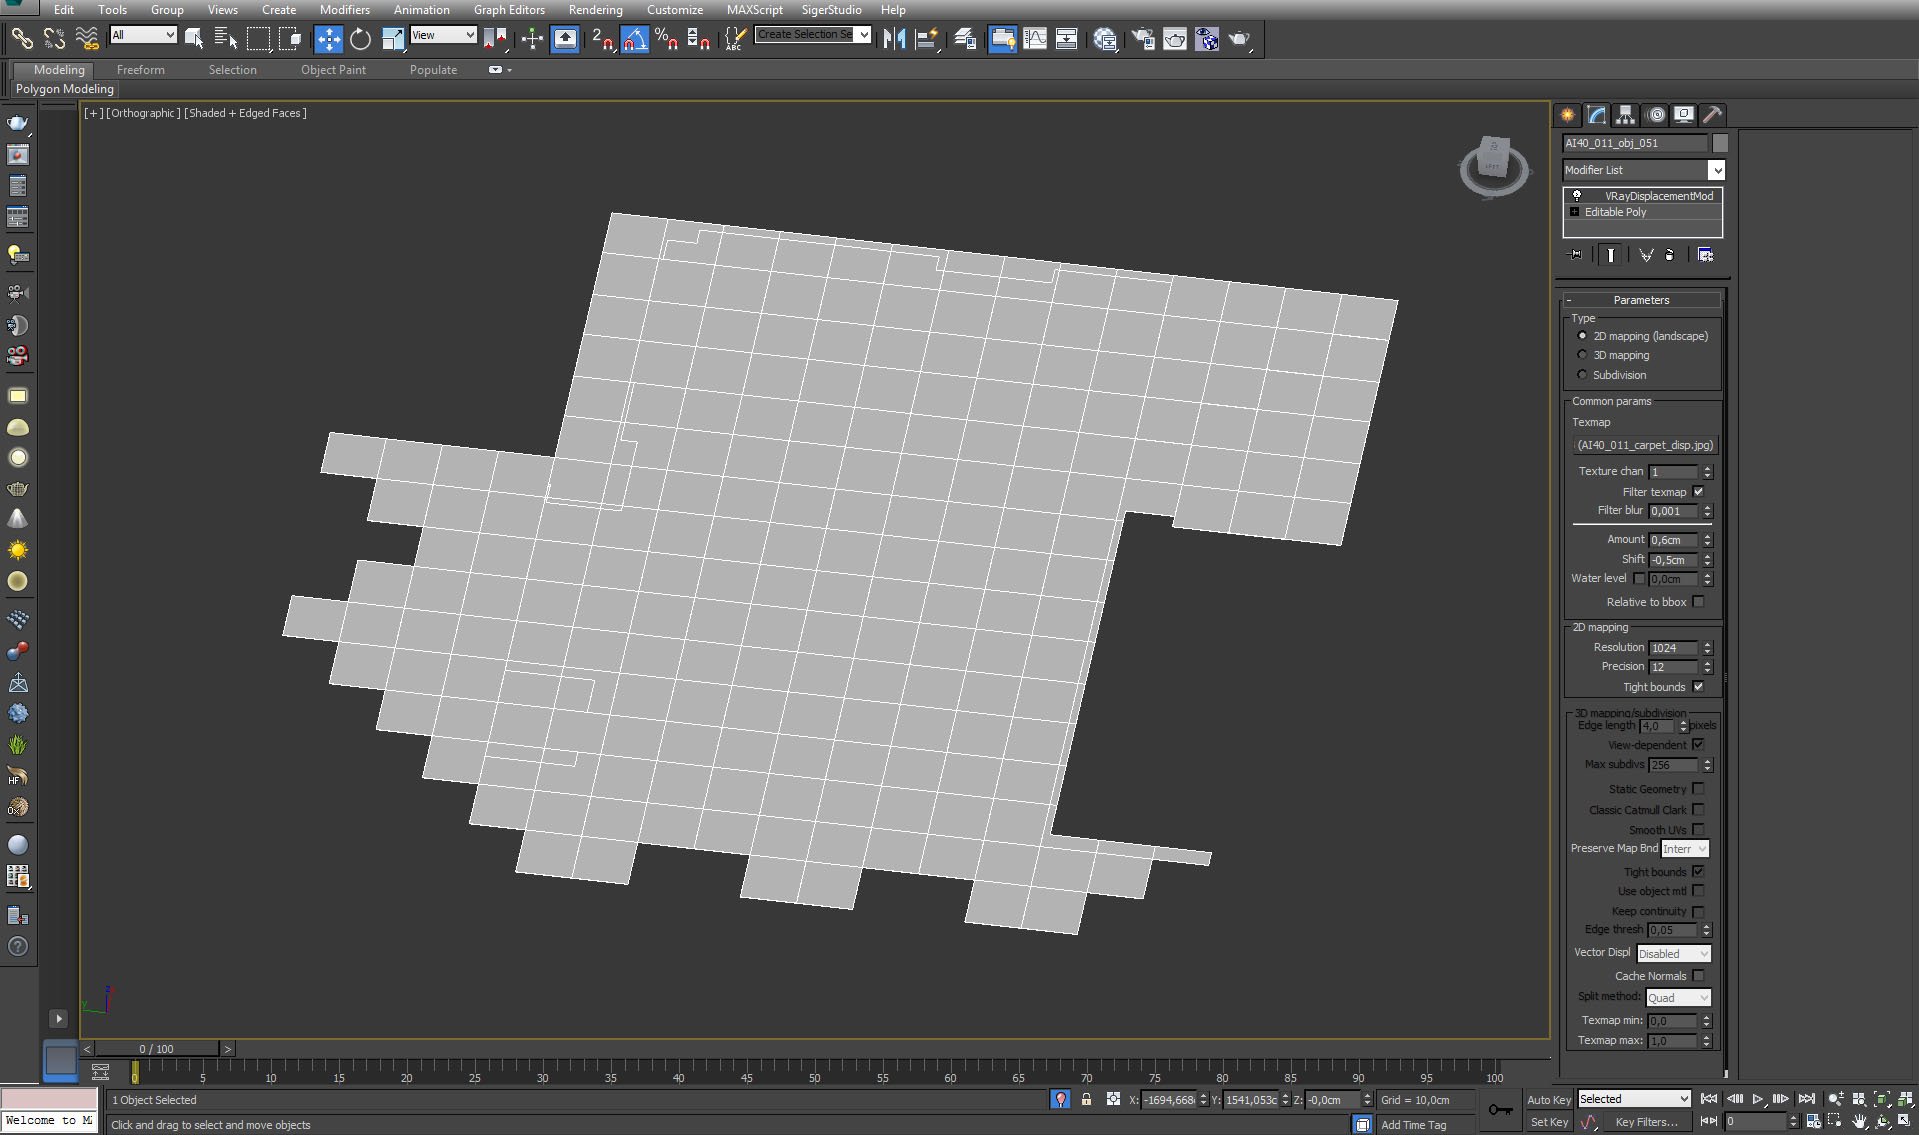
Floor covering mesh.


Click on image to enlarge nr_AI40S11_0011_Layer_43_503.jpg

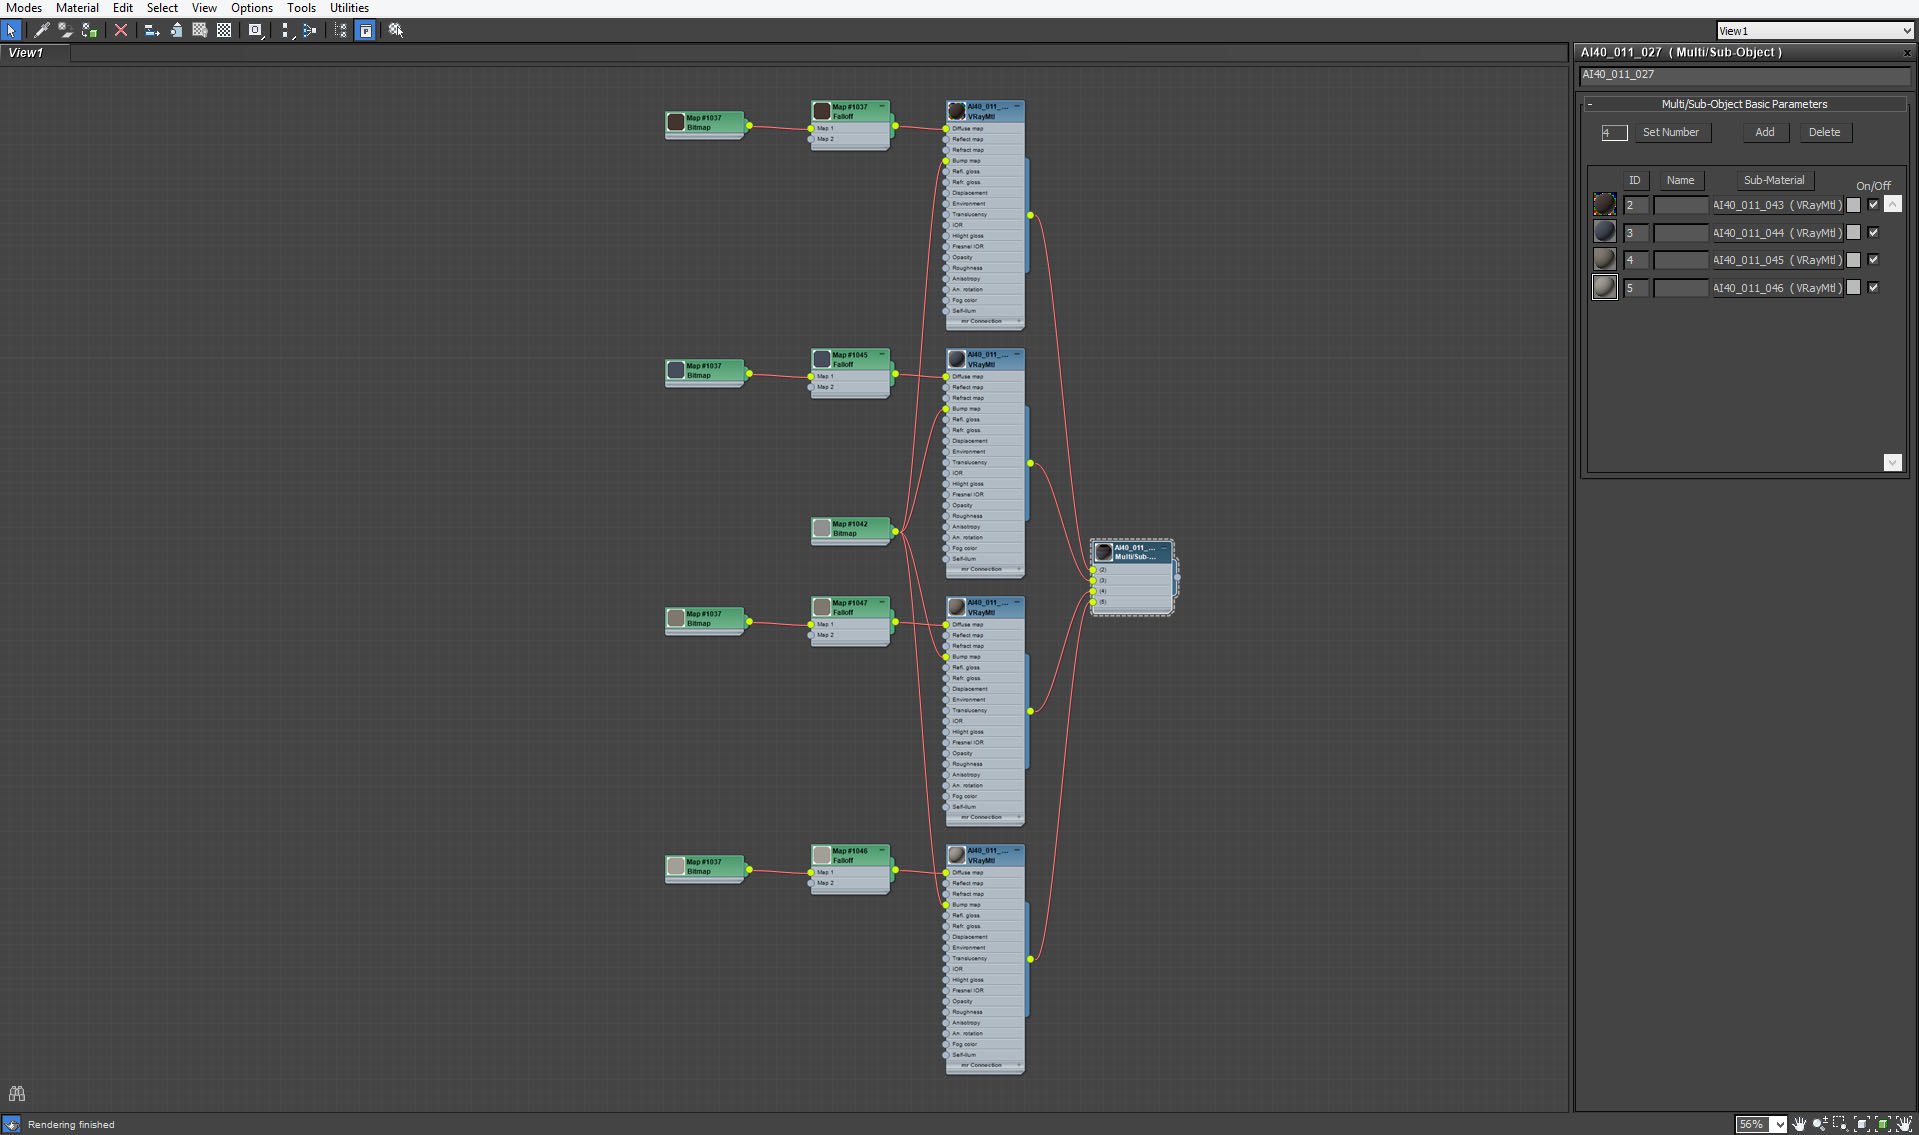
Floor covering material - it has four color variations, so we used Multi / Sub-Object material and assigned different sub-materials to different polygons.


Click on image to enlarge nr_AI40S11_0010_Layer_44_502.jpg

Floor covering material - color 1.


Click on image to enlarge nr_AI40S11_0009_Layer_45_501.jpg
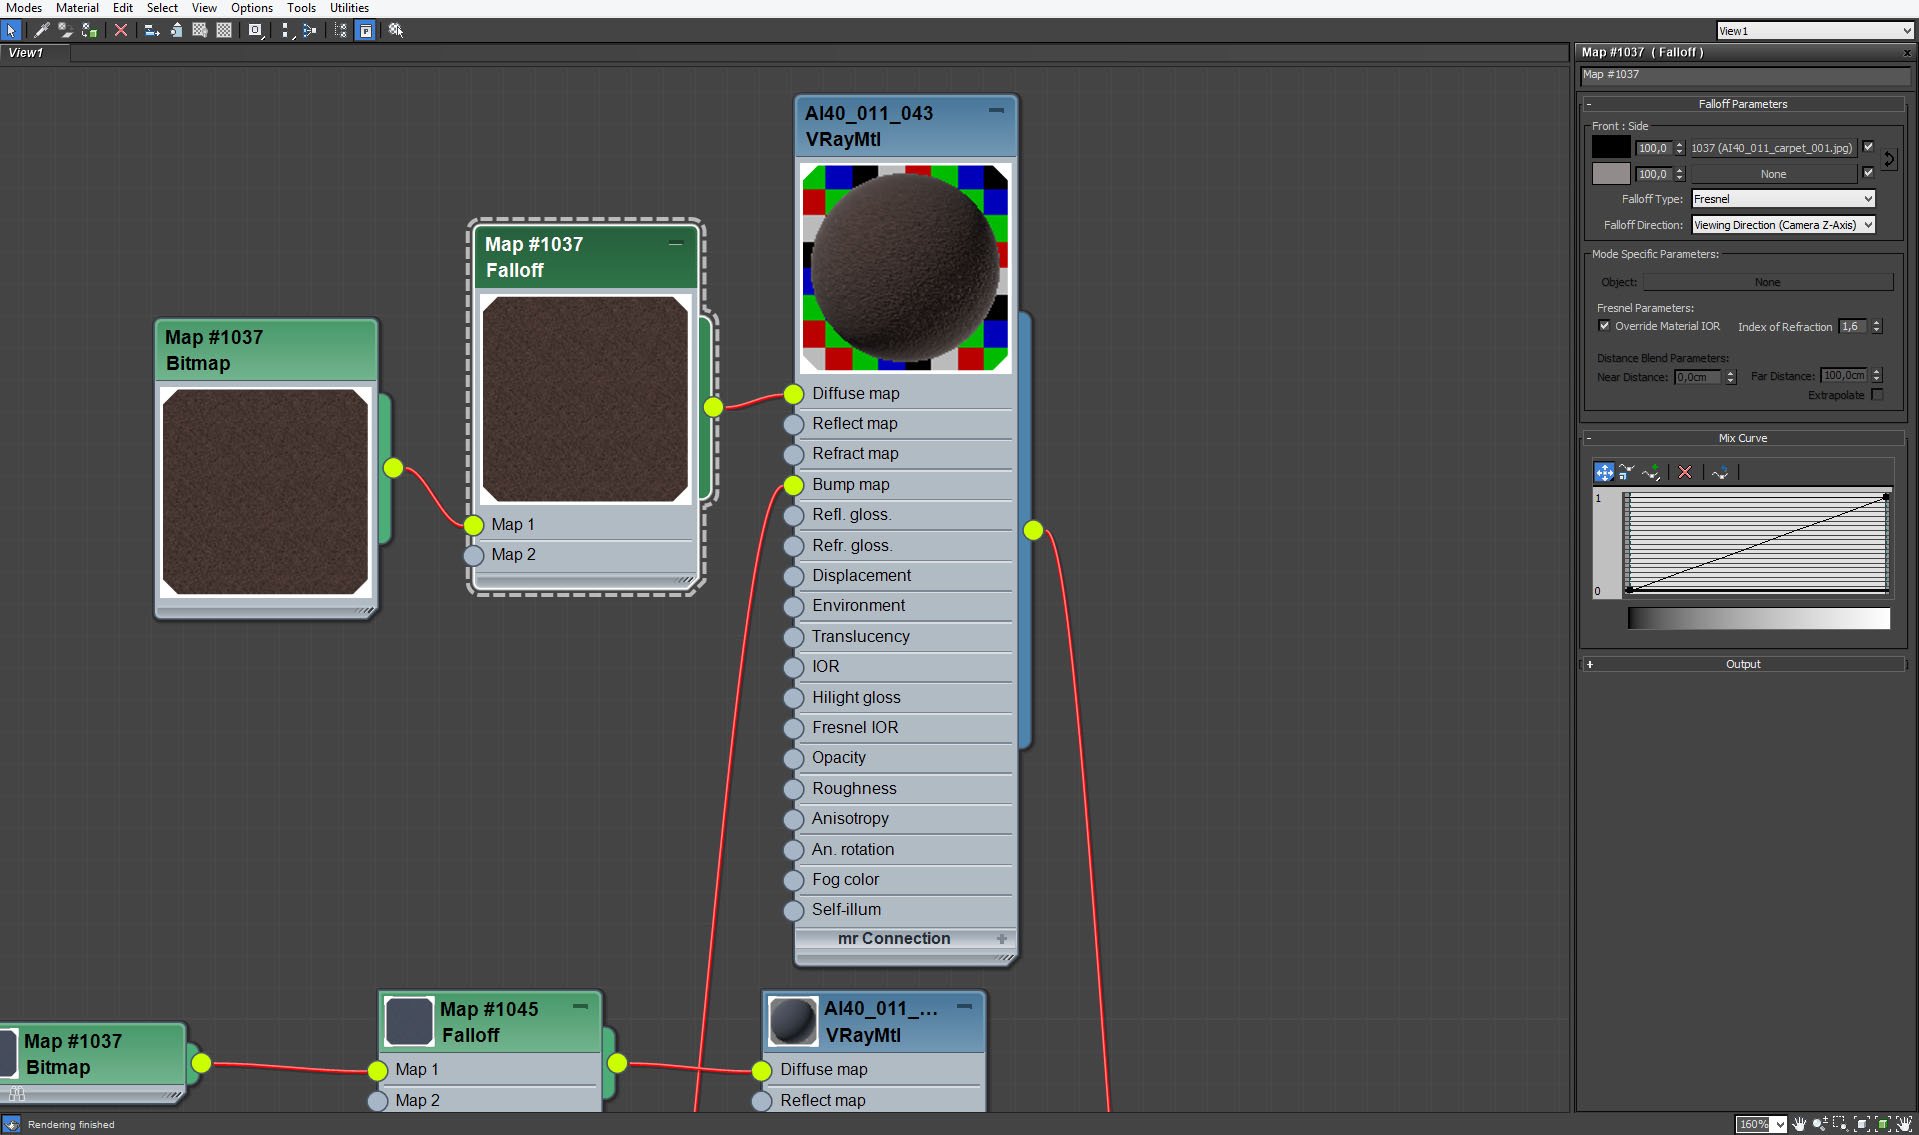
Floor covering material - color 1, falloff map.


Click on image to enlarge nr_AI40S11_0008_Layer_46_500.jpg
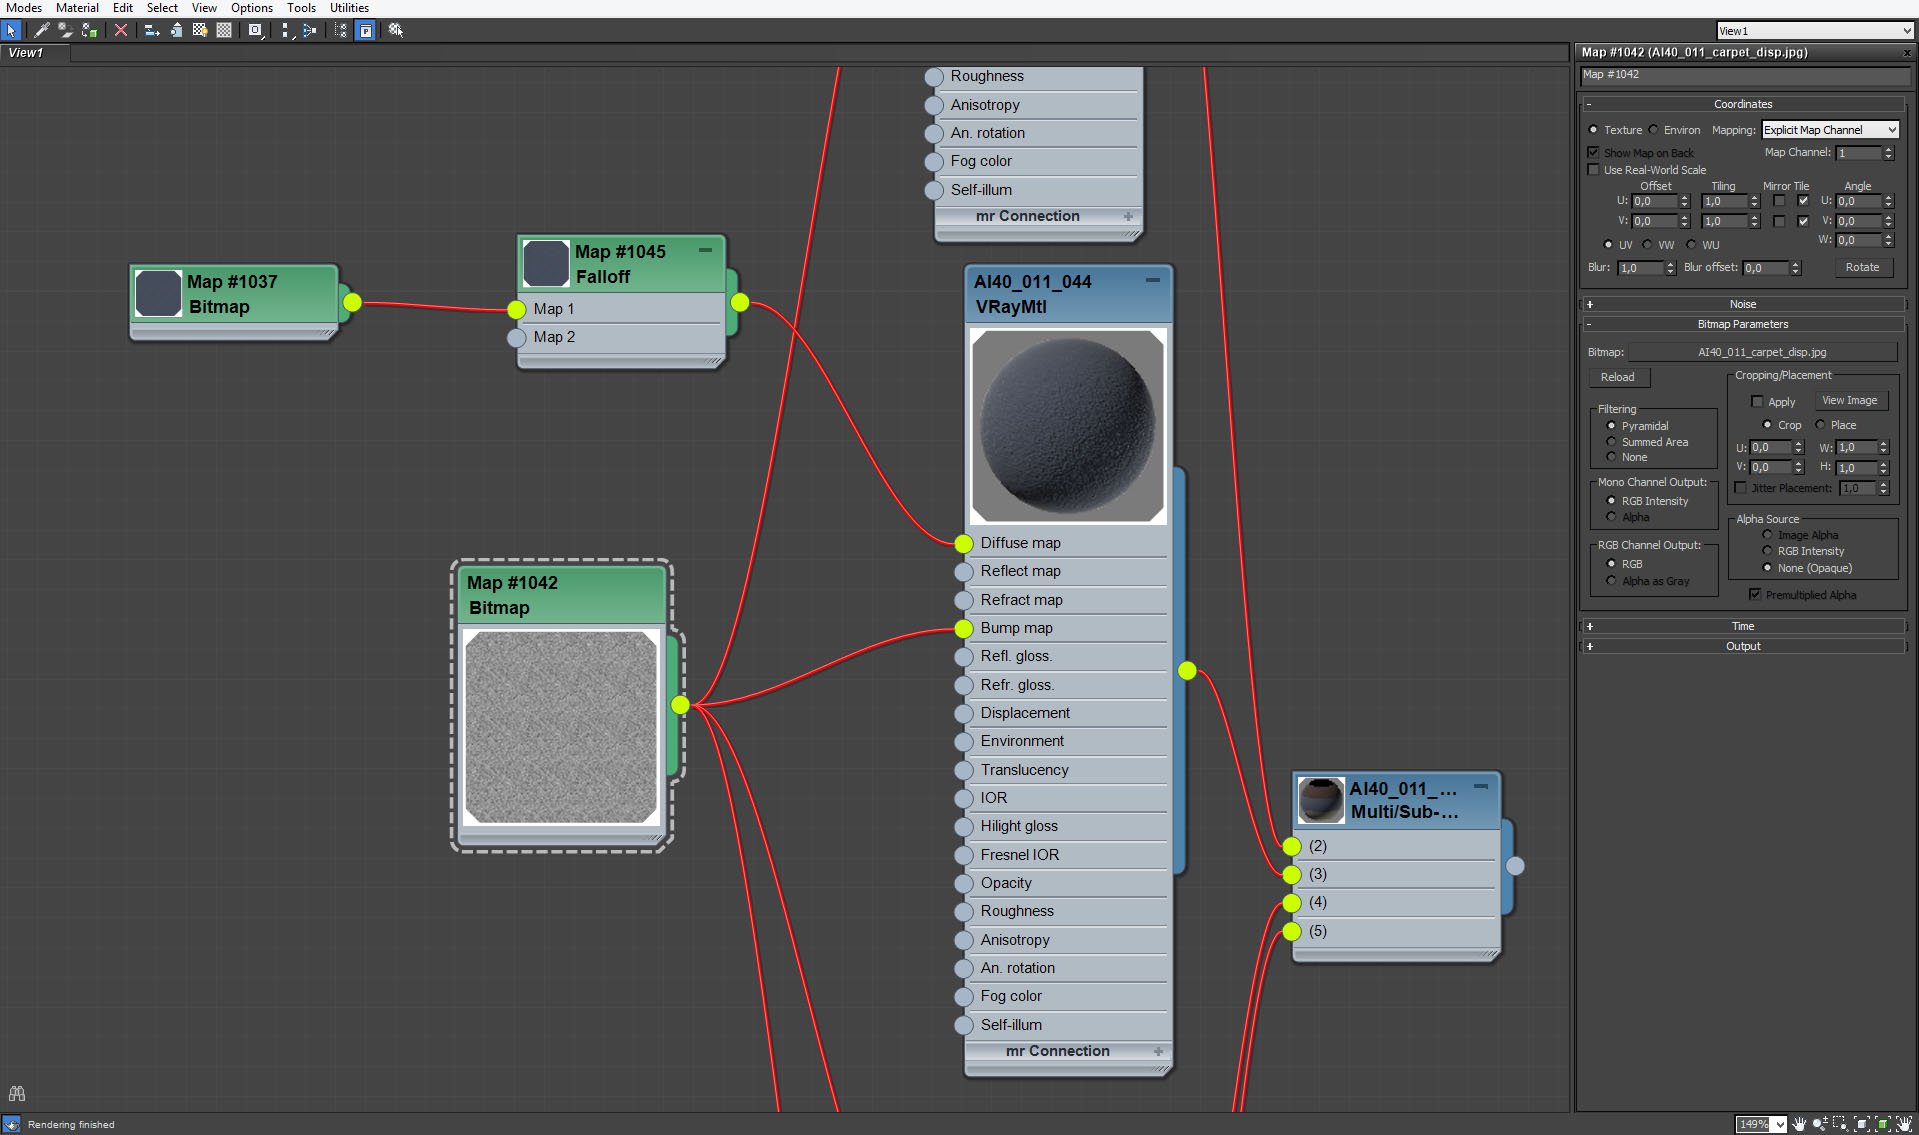
Floor covering material - bump map is common for all color variations.


Click on image to enlarge nr_AI40S11_0007_Layer_47_499.jpg
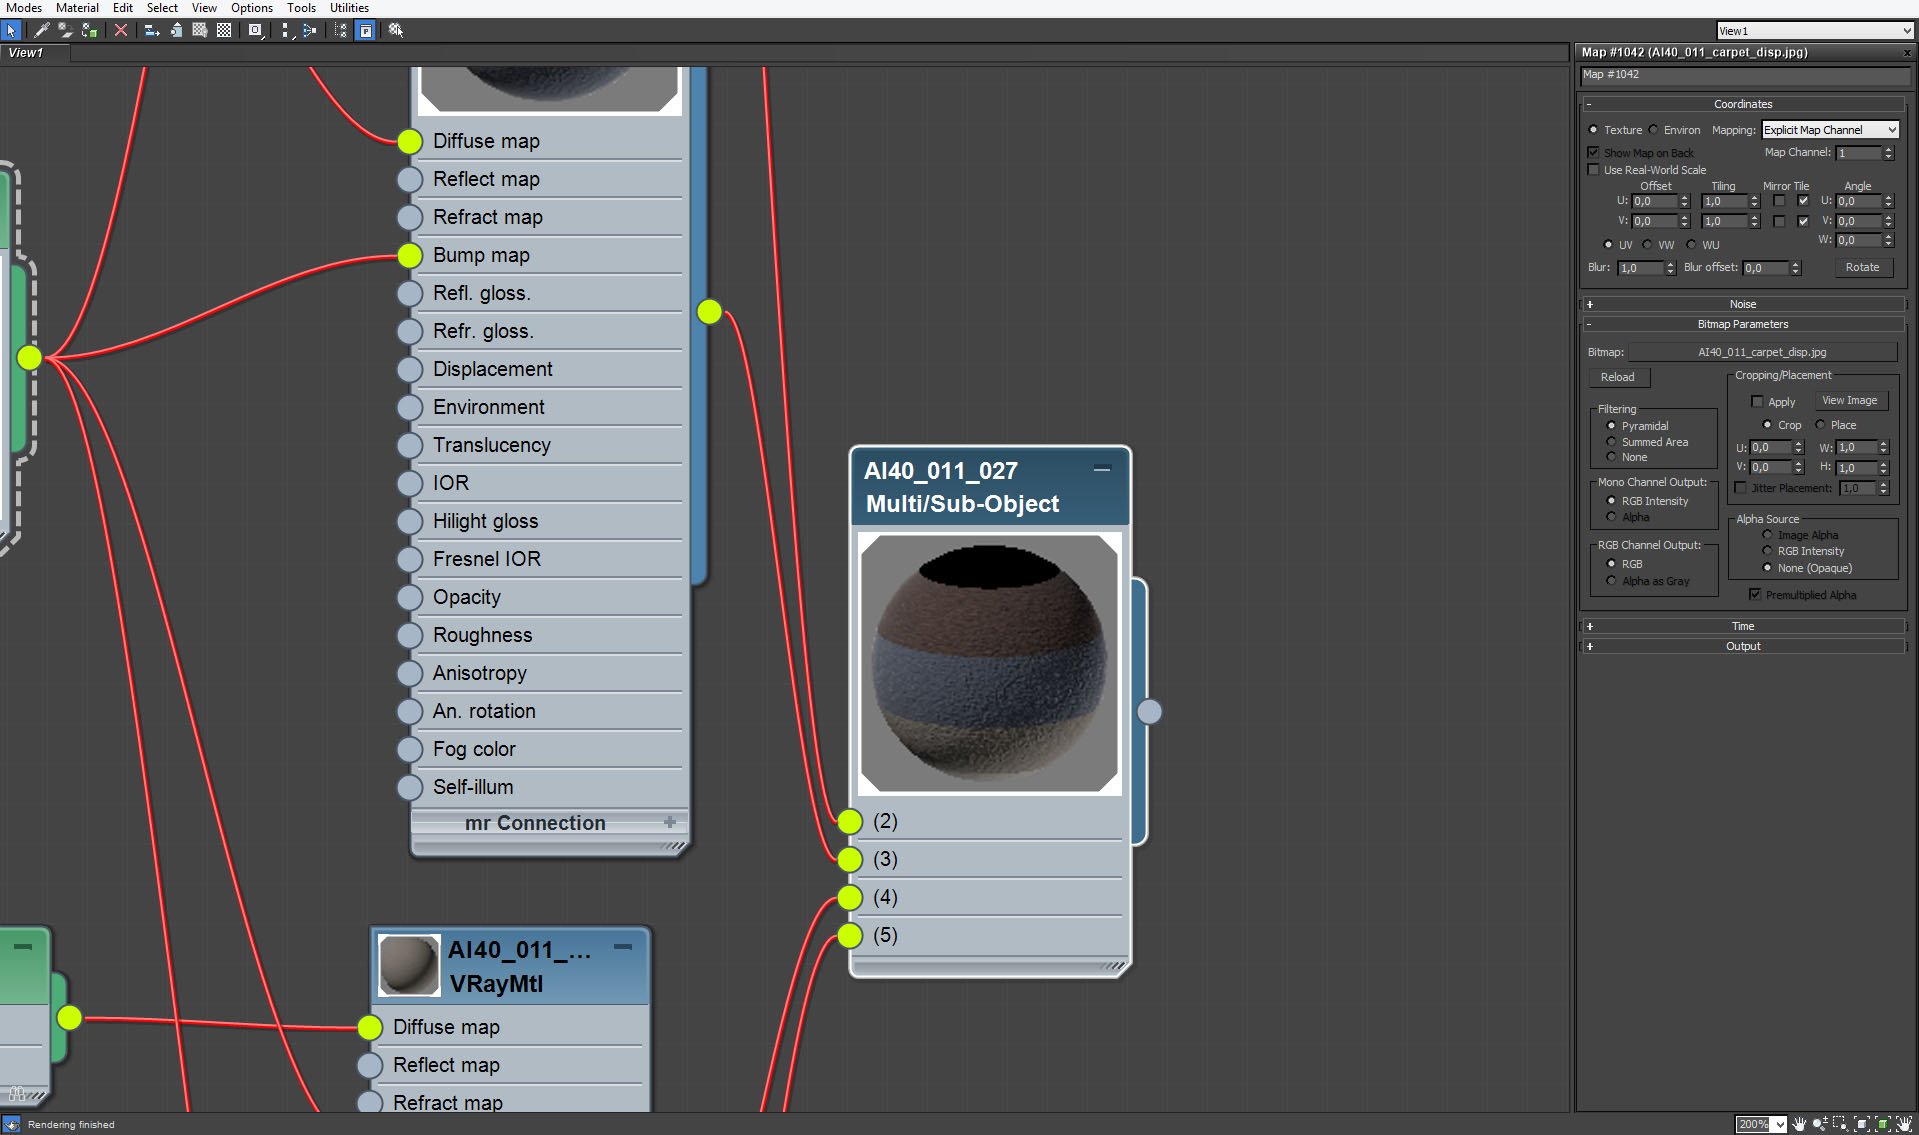
Floor covering material preview.


Click on image to enlarge nr_render_settings_496.jpg
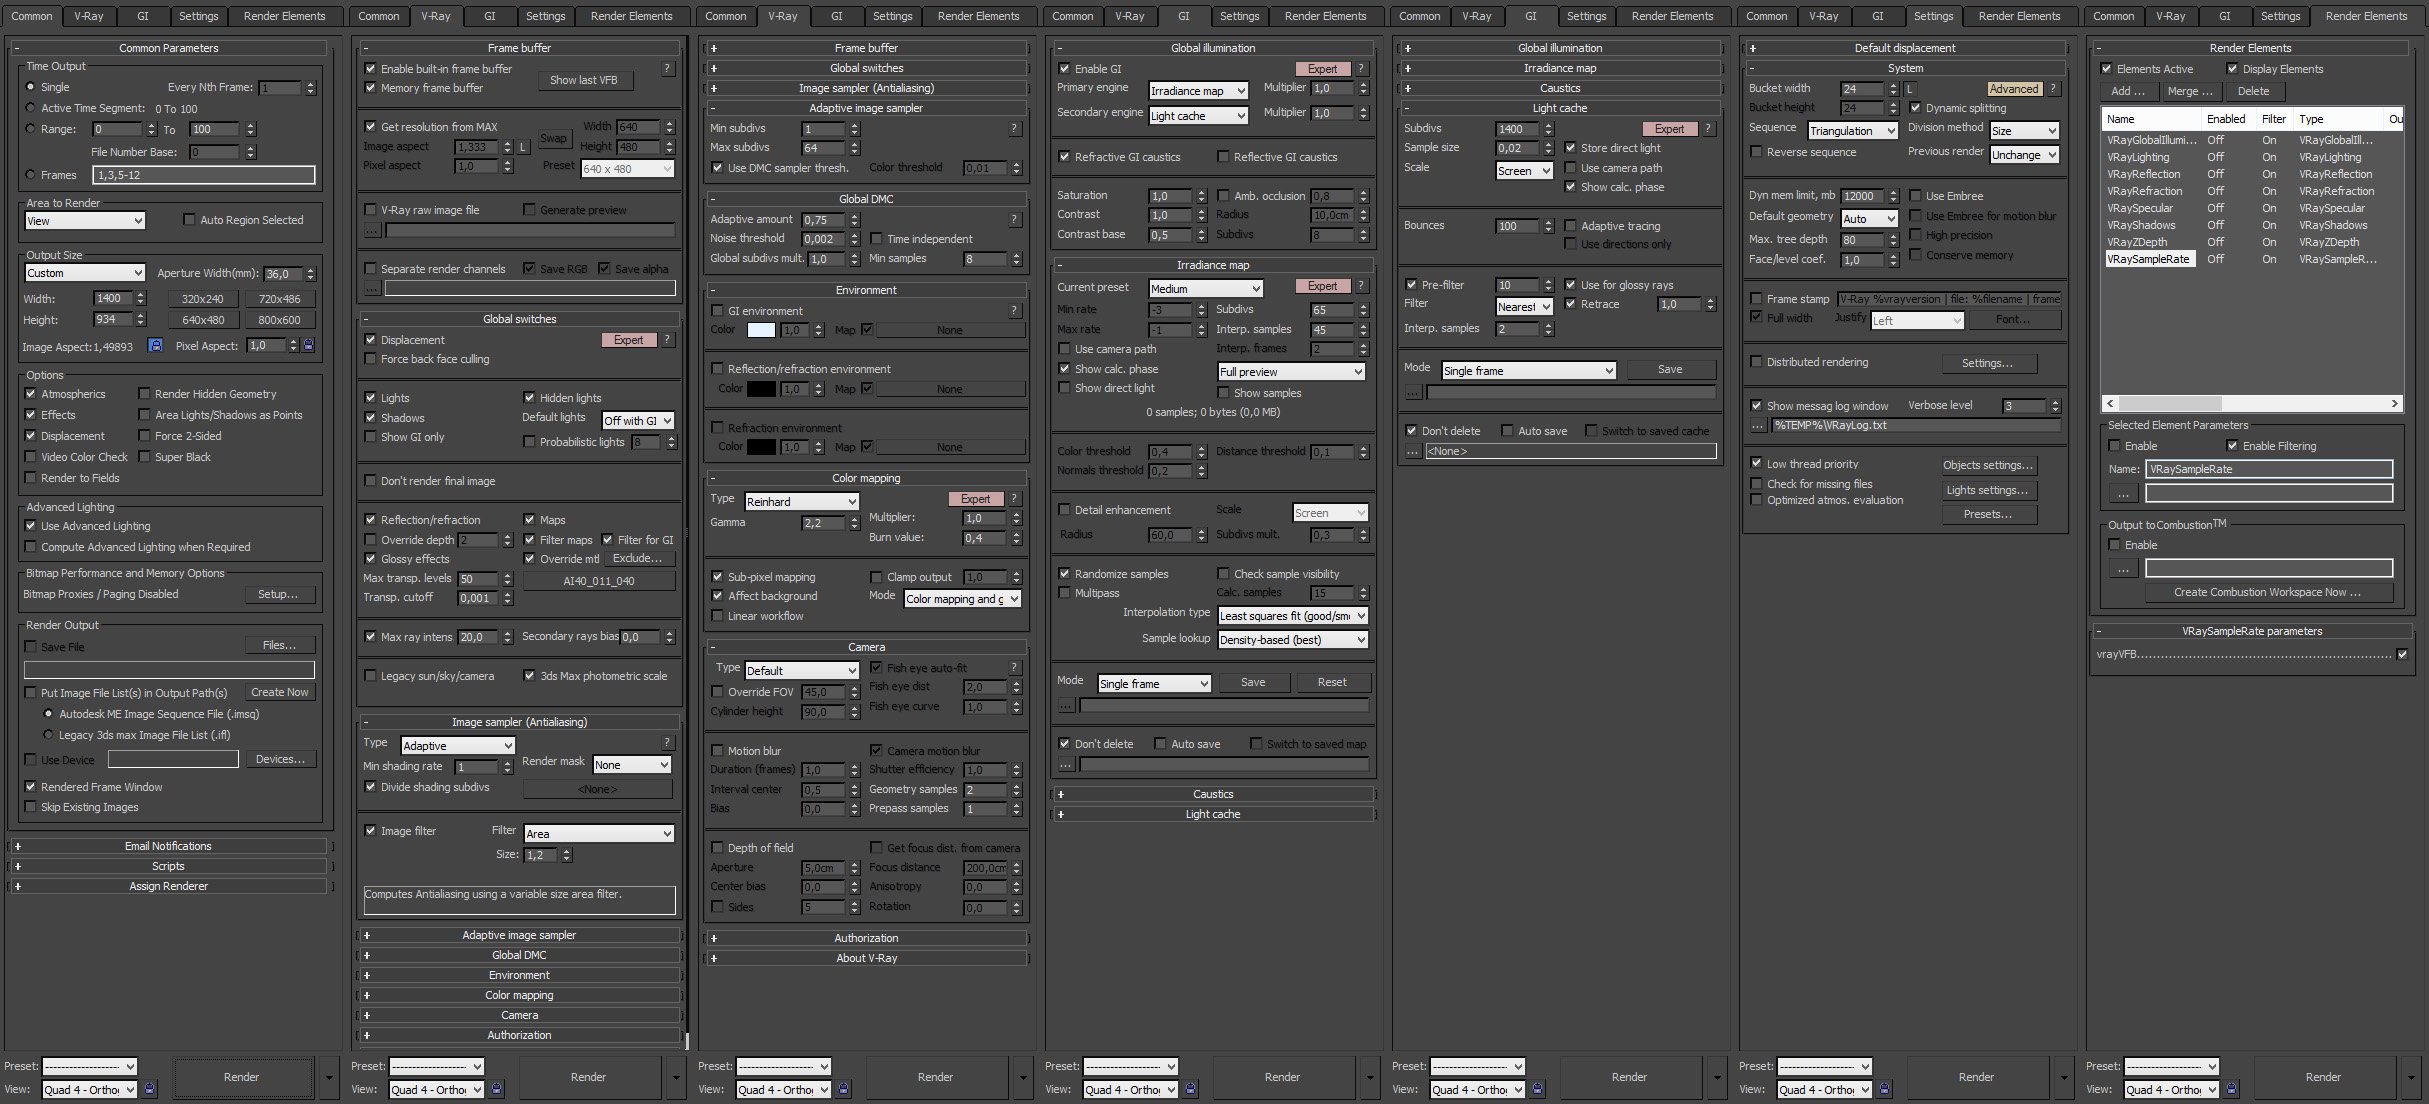
Render settings.


Click on image to enlarge nr_AI40_011_raw_498.jpg

Raw render came out a little dark, so wee need to improve brightness and contrast in Photoshop.


Click on image to enlarge nr_ps_stack_495.jpg
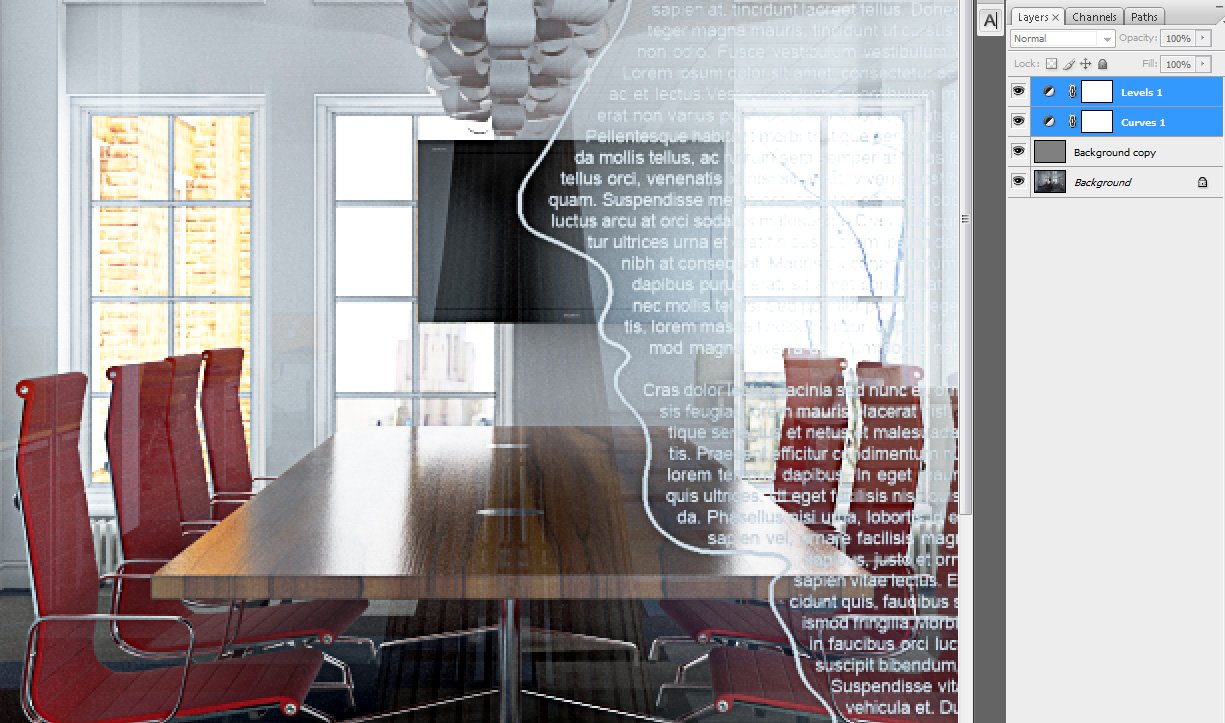
Simple post-production - curves and levels for increasing the contrast.


Click on image to enlarge nr_AI40_011_PP_497.jpg

Final render after post-production. Thanks for reading! :)

This interior scene was made by Evermotion in 3ds Max and V-Ray. It is scene 11 from Archinteriors vol. 40. You can purchase this single scene or entire Archinteriors vol. 40 collection in Evermotion Shop.
 

Author: Michał Franczak Editor: Michał Franczak
Tags: archinteriors office glass small creative vol.40 ai40
You may also like...
Tip of the Week. V-ray blend material

Tip of the Week. V-ray blend material

This is the next part of a V-ray materials tip of the week series. In this part You can learn how to achieve some cool multimaterials effect by using V-ray blend material.
×

LEAVE A COMMENT

You need to be logged in to leave a comment. Don't have account? Register now.

Olivoist 04:50:55  |  20-09-2015
Hello, thanks for your "print on glass" technique. Regards.