Evermotion: More Than an Asset Library
How Evermotion became a full-scale production partner for archviz, automotive and synthetic data.


Total: € 0
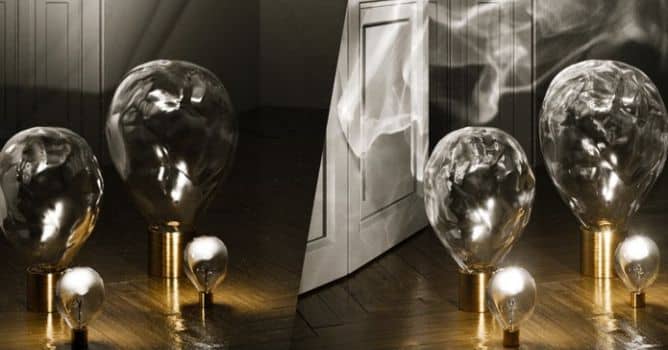

State of Art Academy posted new tutorial about the latest feature in Corona 4 renderer - caustics! Caustics are optic phenomena caused by the refraction and reflection of light rays. This effect is clearly visible on the floor of a swimming pool lighted by the sun.

Modeling
To achieve a convincing effect and simulate caustics and glass distortion in the proper way, it is necessary to model the object with a realistic thickness. We also have to change the model’s surface to make it uneven (in our example we’ll use a Displacement map made with Substance Designer).
Lamp modeling starting with a box + turbosmooth and next free form deformation. The shell modifier was added to add thickness to the glass.
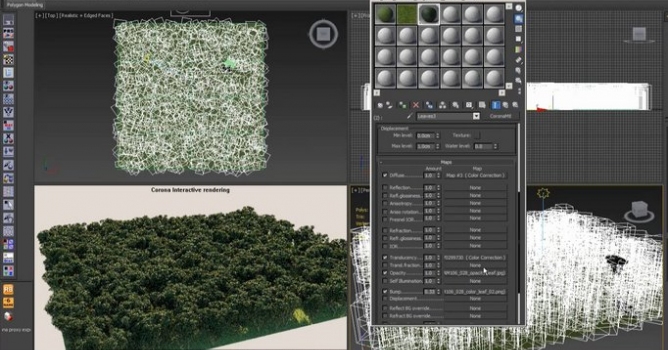
Creation of the Displacement map
It’s very easy to create a displacement map with Substance Designer because every noise can be repeated. In our example we tried to reproduce the same kind of glass surface as the one in the reference photo with the use of an inverted Cellular. You can download the 3d model and the final texture by clicking on this link.
Without wasting precious time with the unwrap, we used the CoronaTriplanarMap to project our Displacement texture on the model and thanks to the rendering in realtime, we found the exact values for dimension and height.
The final values are: Displacement (min amount 0 – max amount 0,3cm) and Scale of the CoronaTriplanarMap (15cm).
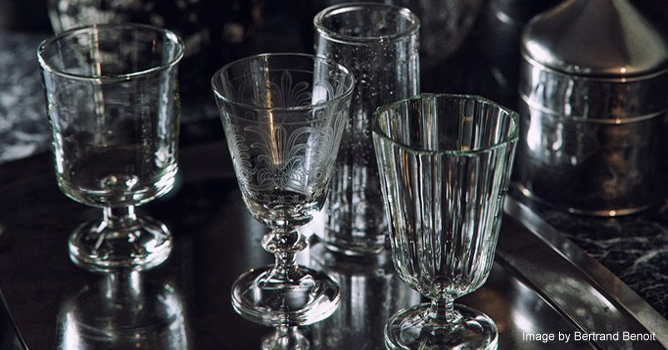
Glass material
The glass belongs to the dielectric family; it will therefore have a soft reflection on the front and an increasing reflection while we watch it from the side. To keep control on this behavior, we need to act on the FRESNEL IOR (in transparent materials, it coincides with IOR) by setting it on 1.54.
This glass is Diffuse (0,0,0) Reflection level (1.0) IOR and FRESNEL IOR (1.54) Volumetric scattering (Dispersion color HEX:b3c7ba, Distance 2cm).
Scene setup
We made an interior scene with some models of glass lamps that use this principle to create particular lighting effects. If you don’t enable the new Caustics Solver, the lamps’ glasses will remain transparent to light and won’t generate the desired effect.
The new Caustics solver has to be enabled in the Performance tab in Corona. In this way we’ll get an image with reflection caustics generated by the lamp’s glass.
To visualize the full effect , you need to enable the refraction caustics in the glass material’s parameters. In this scene there are two different type of glass material: one for the empty lamps and one for the lighted lamps. The parameters have to be set on both materials.
By default caustics are rendered in the beauty pass (if you use the realtime rendering – IPR – caustics are shown from the 4 pass).
By activating the Caustic Solver you’ll get only the reflection caustics; by activating also the “Caustics (slow)” checkbox in the single materials you’ll get also the refraction caustics.
Caustics as a separate pass
One can decide to include caustics directly in the Beauty pass or make them visible only in the dedicated Render Element. The latter case is useful to manage in post the intensity of the effect or mas kit in some parts, if necessary
To visualize it only in the render element, you have to enable the “Only in caustics element” checkbox in the Caustics solver’s properties and enable the CShading_Caustics pass.
The caustics’ render pass has to overlap the beauty pass in 32bit by using the Linear Dodge blend node (Add).
We hope this mini-tutorial was useful and we take the opportunity to remind you about our Corona Renderer course!


LEAVE A COMMENT


|

|

|

|

|
 Customer zone
 Your orders
 Edit account
 Add project
 Liked projects
 View your artist profile
COMMENTS