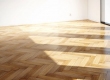
Removing LUTs from Textures for better results
Remove the LUT from a specific texture in order to get perfect looking textures in your render.
Total: € 0
Continue Shopping
In accordance with the art. 13 section 1 and 2 of the European Parliament and Council Regulation 2016/679 of the 27th April, 2016 on the protection of natural persons, with regard to the processing of personal data and on the free movement of such data, and repealing Directive 95/46/EC (General Data Protection Regulation), hereafter RODO, I hereby inform that:
1. EVERMOTION S.C., 8 Przędzalniana Str., 15-688 Białystok, Poland is the Administrator of your Personal Data (APD)
2. Data Protection Inspector can be reached through e-mail: iod@evermotion.org
3. Your personal data are to be processed on the basis of art. 6 section 1 letter a, b and f of RODO in order to:
a) prepare, conclude and execute the agreement and for other purposes approved by you,
b) to execute the legitimate interest like marketing of products and the agreement, claim assertion or defence against claims resulting from the law regulations.
4. Entities entitled to the reception of your personal data may be the authorised public bodies; mail providers; providers of the services covered by the agreement; responsible for debt recovery, keeping the archives, document utilization, legal consulting, technical services, IT services and accountancy.
5. Your personal data shall not be transferred to the third country, nor to the international bodies.
6. Your personal data shall be processed within the period of the agreement and upon your additional consent until you withdraw it. APD shall keep the data for the period of any civil law claim execution connected with the agreement.
7. You have the right to demand an access to your personal data, to correct or to delete the data if there is no other basis for the processing or any other purpose of such processing or to limit the processing of the data, to transfer the data to another administrator and to raise objections to the further data processing if there is no legal basis for further processing and to withdraw any previous consent.
8. You provide the personal data voluntarily, however they are necessary to conclude the agreement. The refusal of providing such data may result in the refusal of the agreement conclusion.
9. You have the right to lodge a complaint to the Personal Data Protection Office when in your opinion the data processing violates the regulations of General Data Protection Regulation of the 27 April, 2016 (RODO).
10. Your data will be automatically processed, including the form of profiling.
11. You are obligated to forward above mentioned information to your representative, especially if you appointed this person in the agreement as the contact person or as the representative for the agreement execution.

Hi all, this is my first “Making of” and I hope you enjoy it. Feel free to ask me any questions in the comment section or through my pages.
I am Hassan Jaber, I’m an interior architect and 3d artist from Lebanon living and working in Dubai. I’ve being doing 3d visuals and interior designing over 12 years. My projects made it continuously to front pages of reputable 3d websites and design magazines.
Intro:
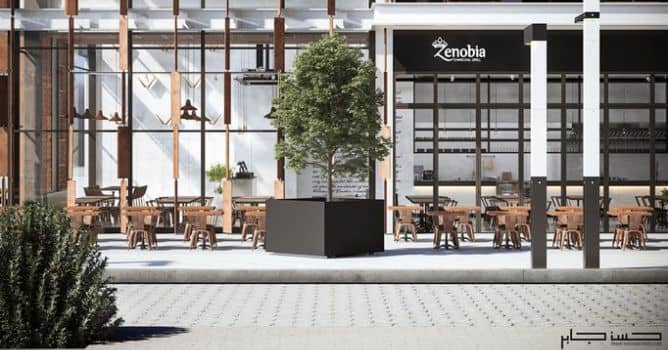
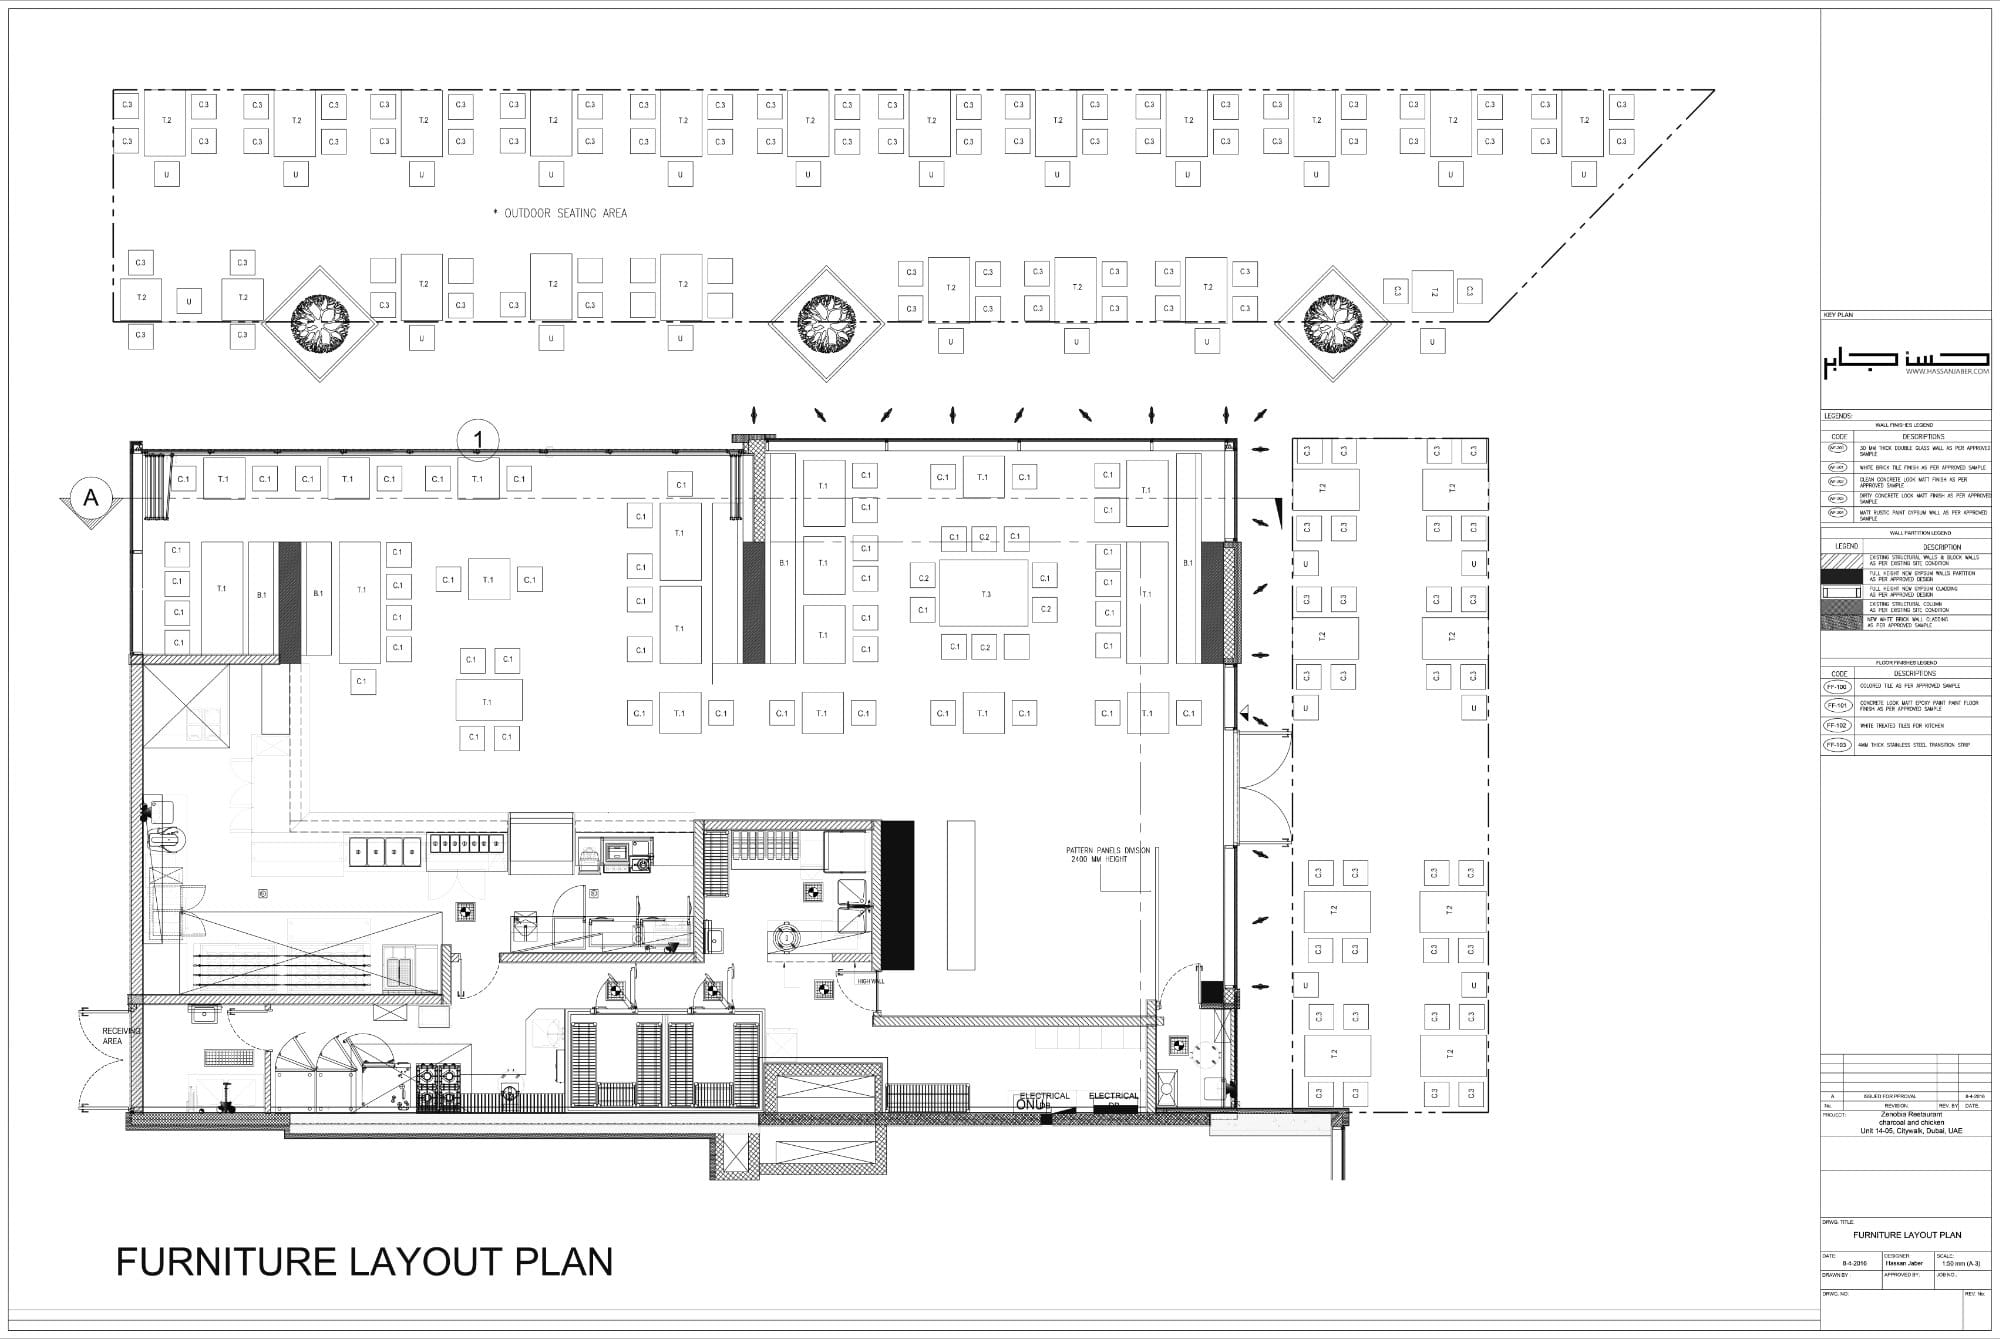
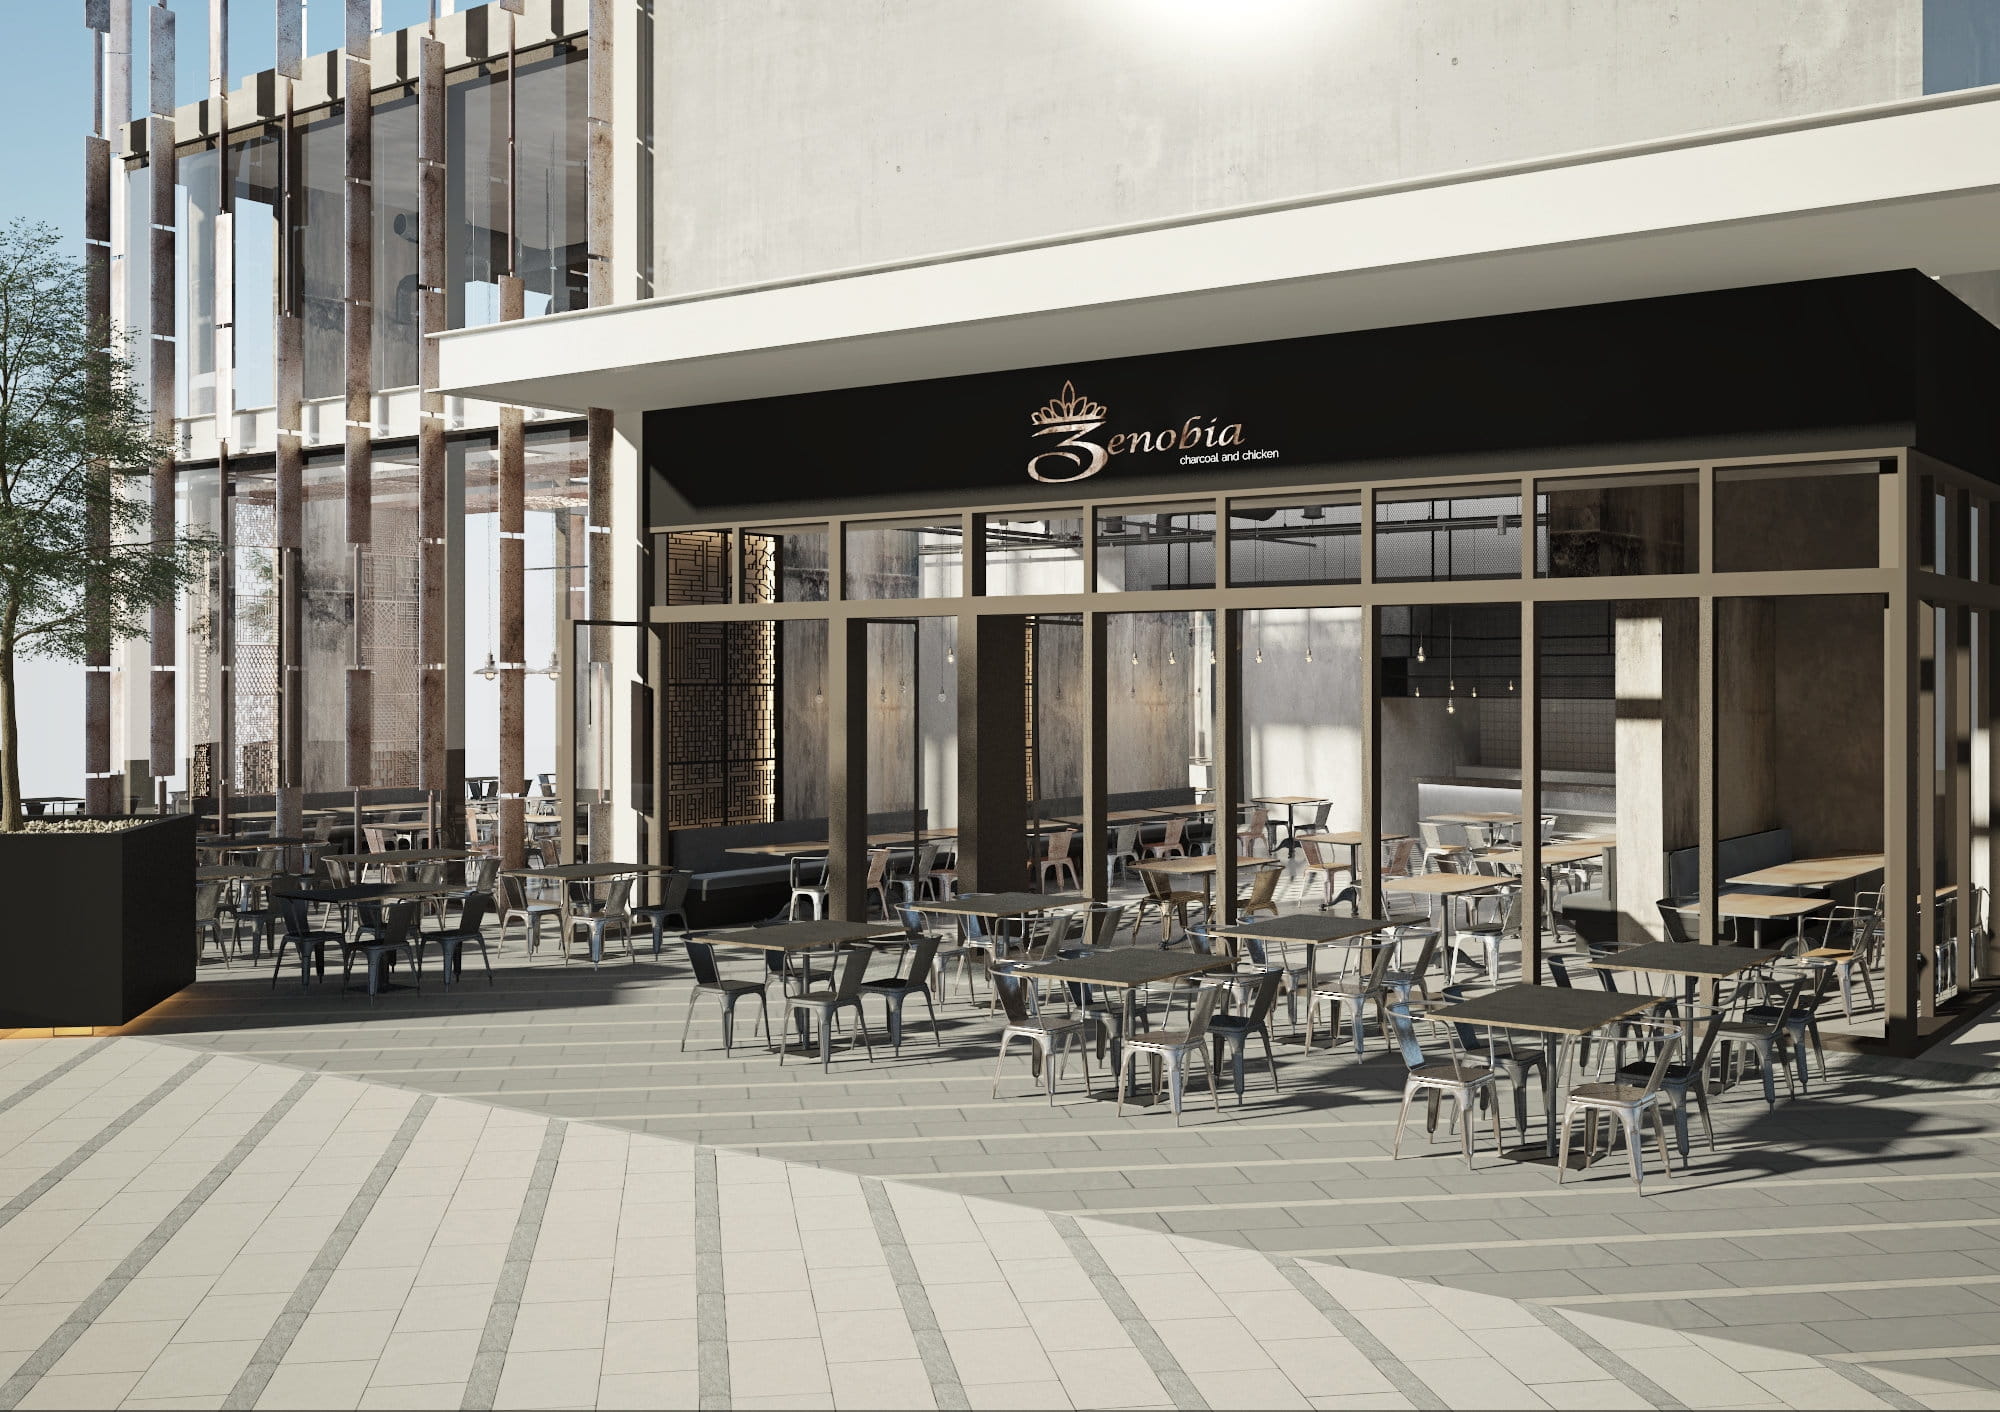
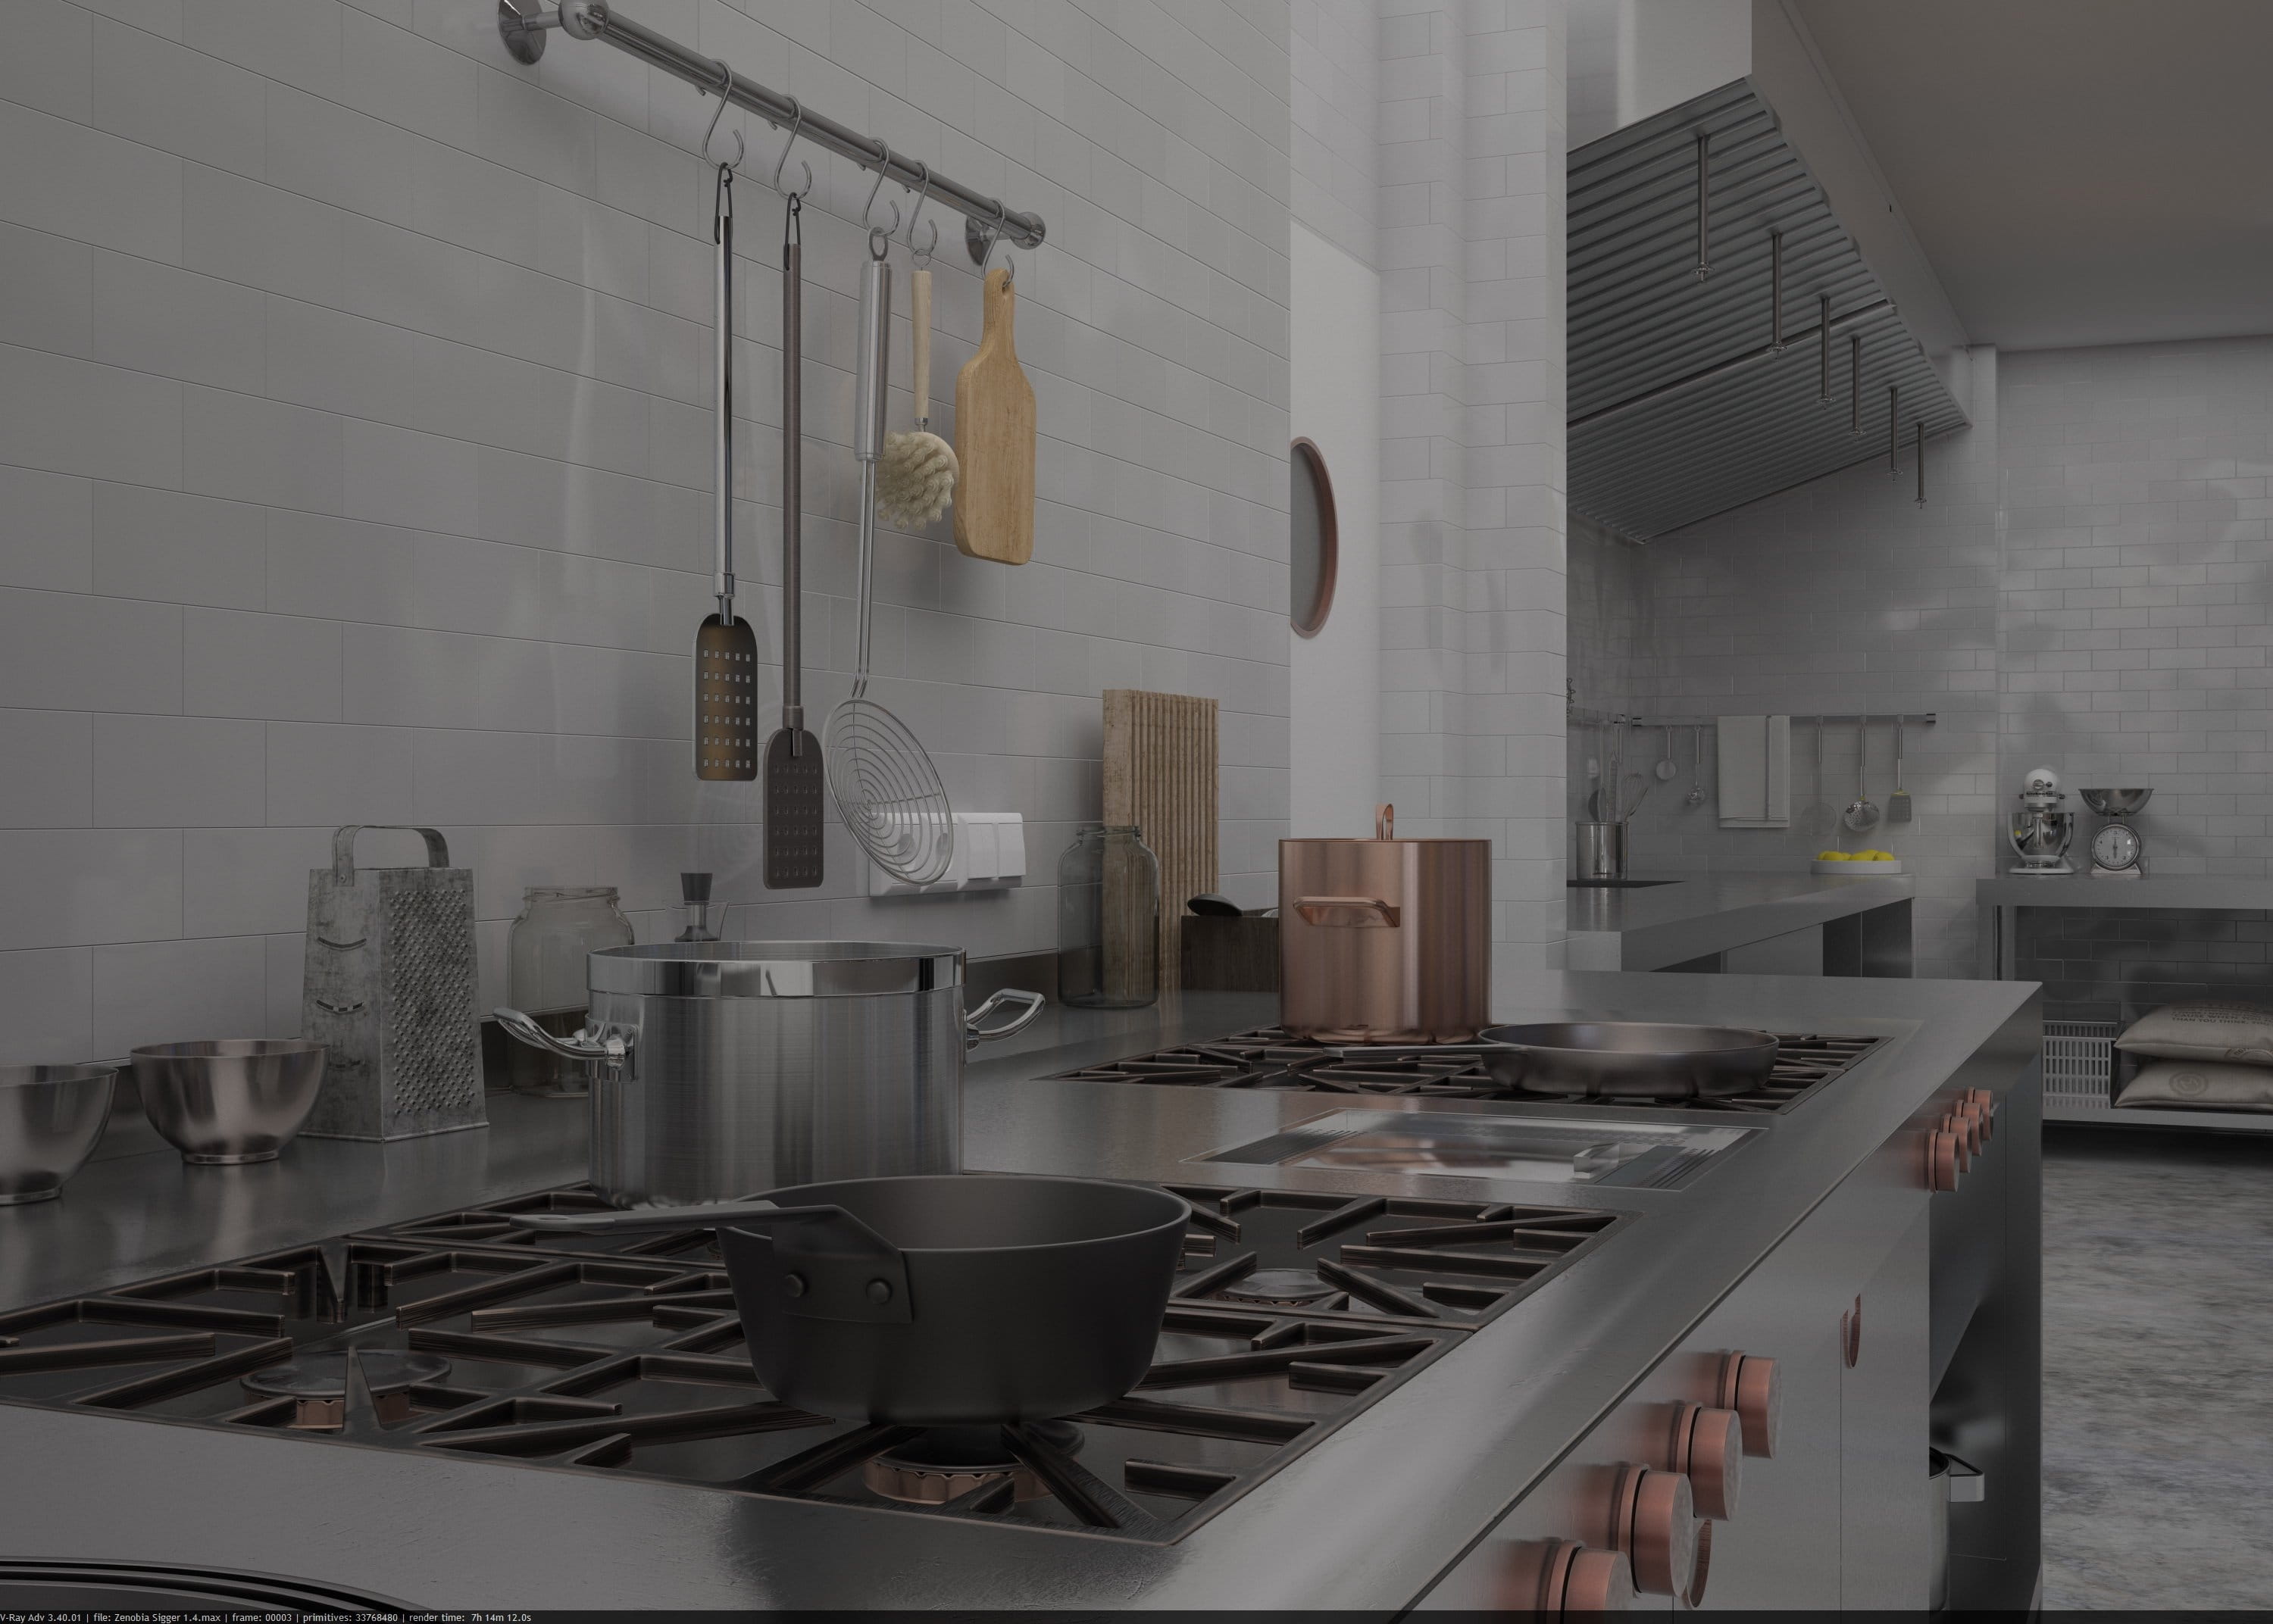
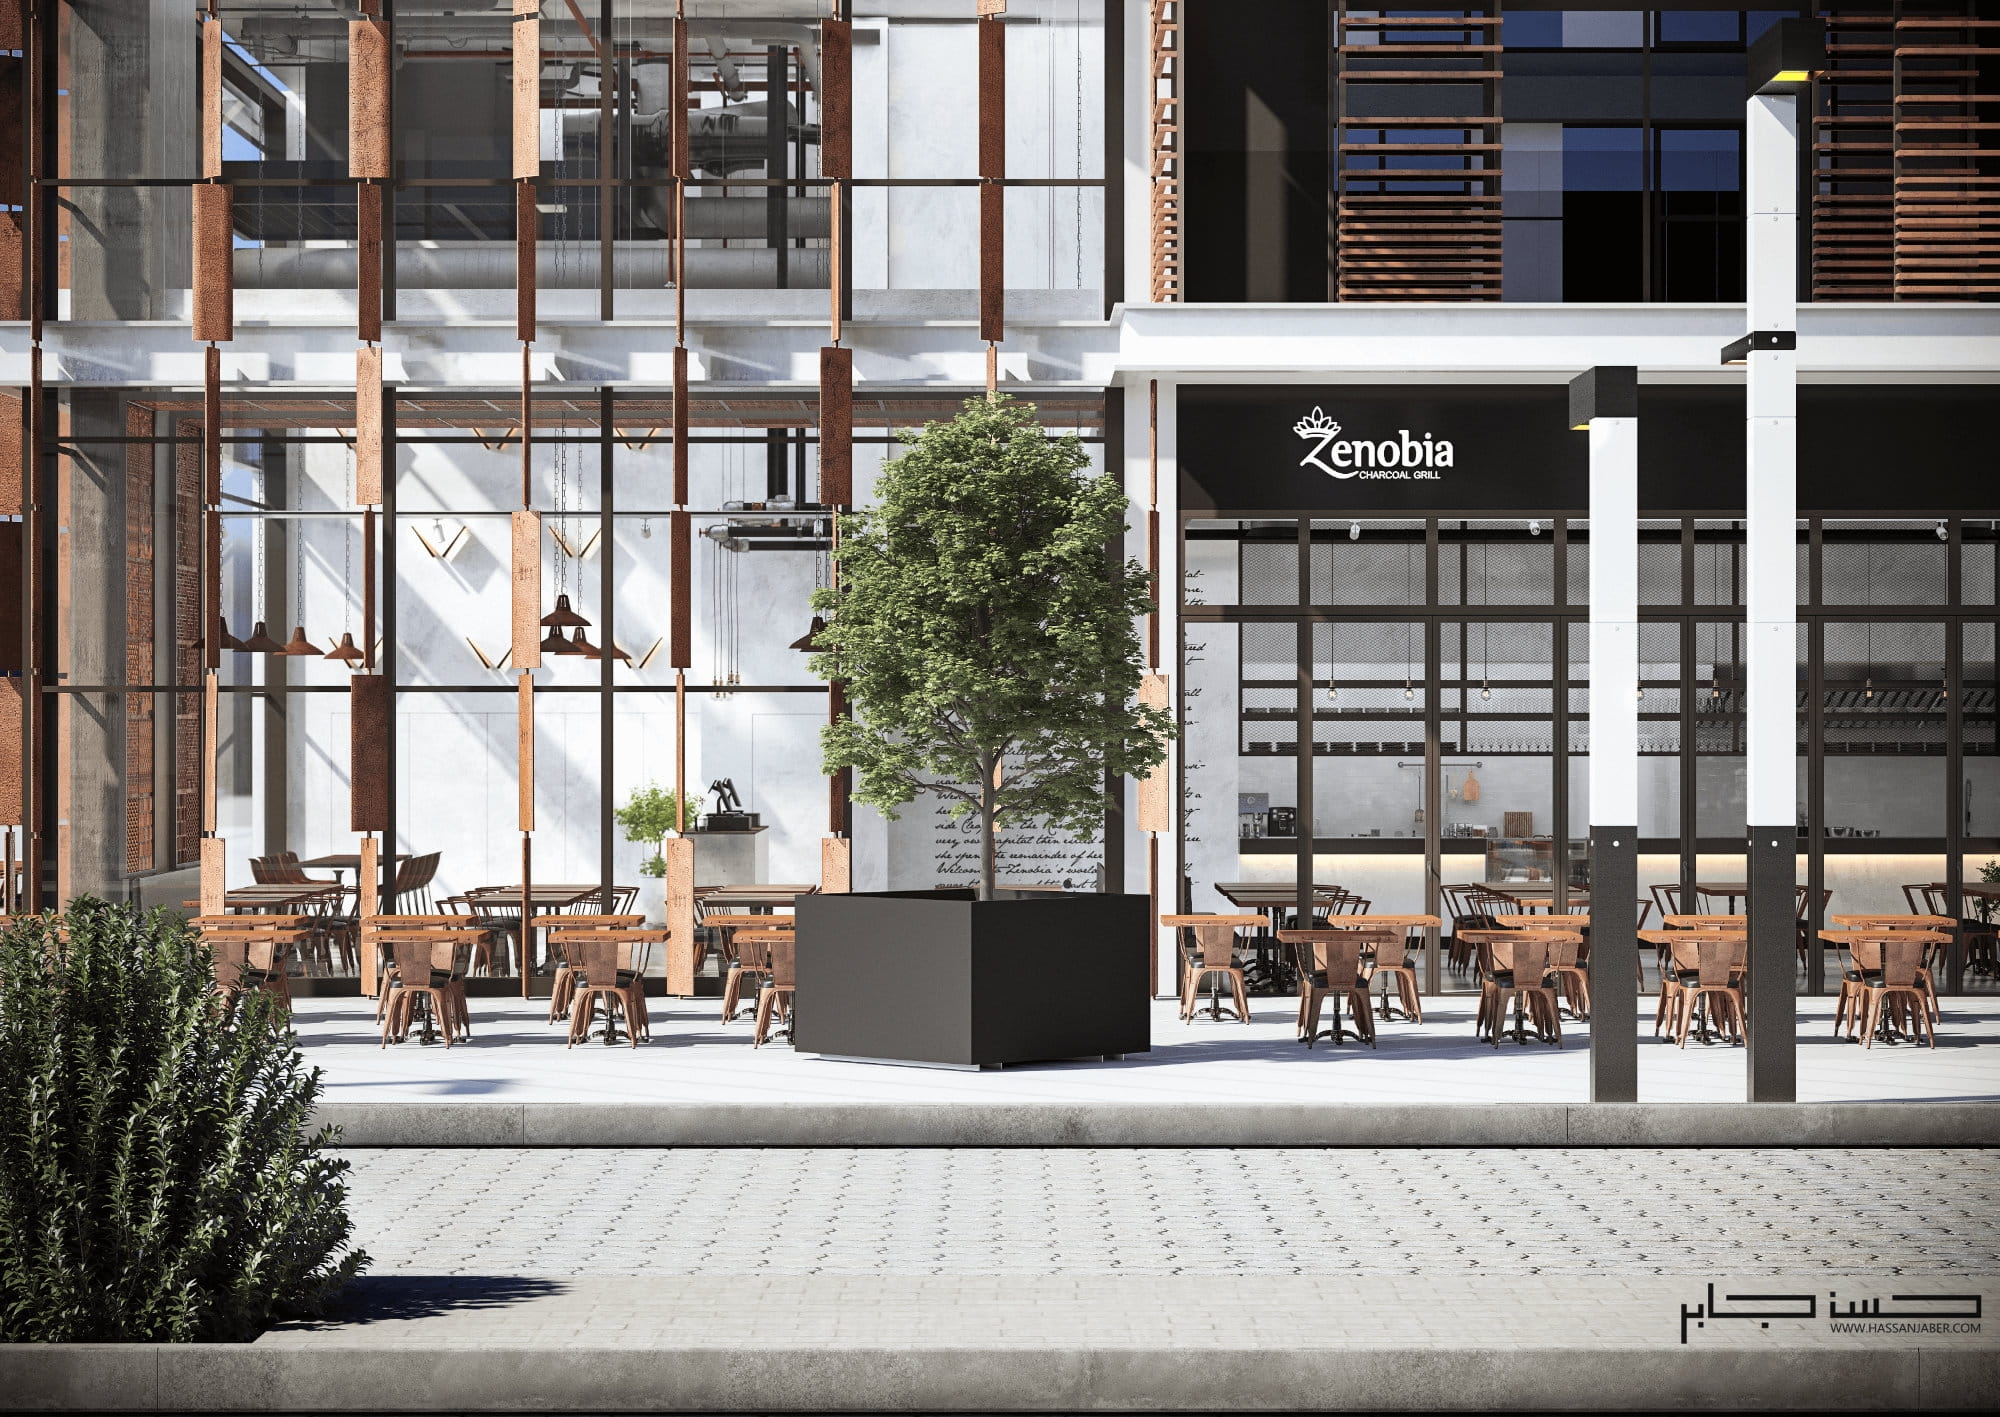
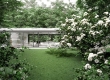
Designed and executed a High-end industrial restaurant (240 sqm). Located in City walk II, Dubai.
I was hired at the beginning to prepare a 3d rendering proposal for a restaurant. The client valued the realistic effect of my 3d rendering and hired me to fully work on the project (concept, plans & execution).
Project details:
Concept:
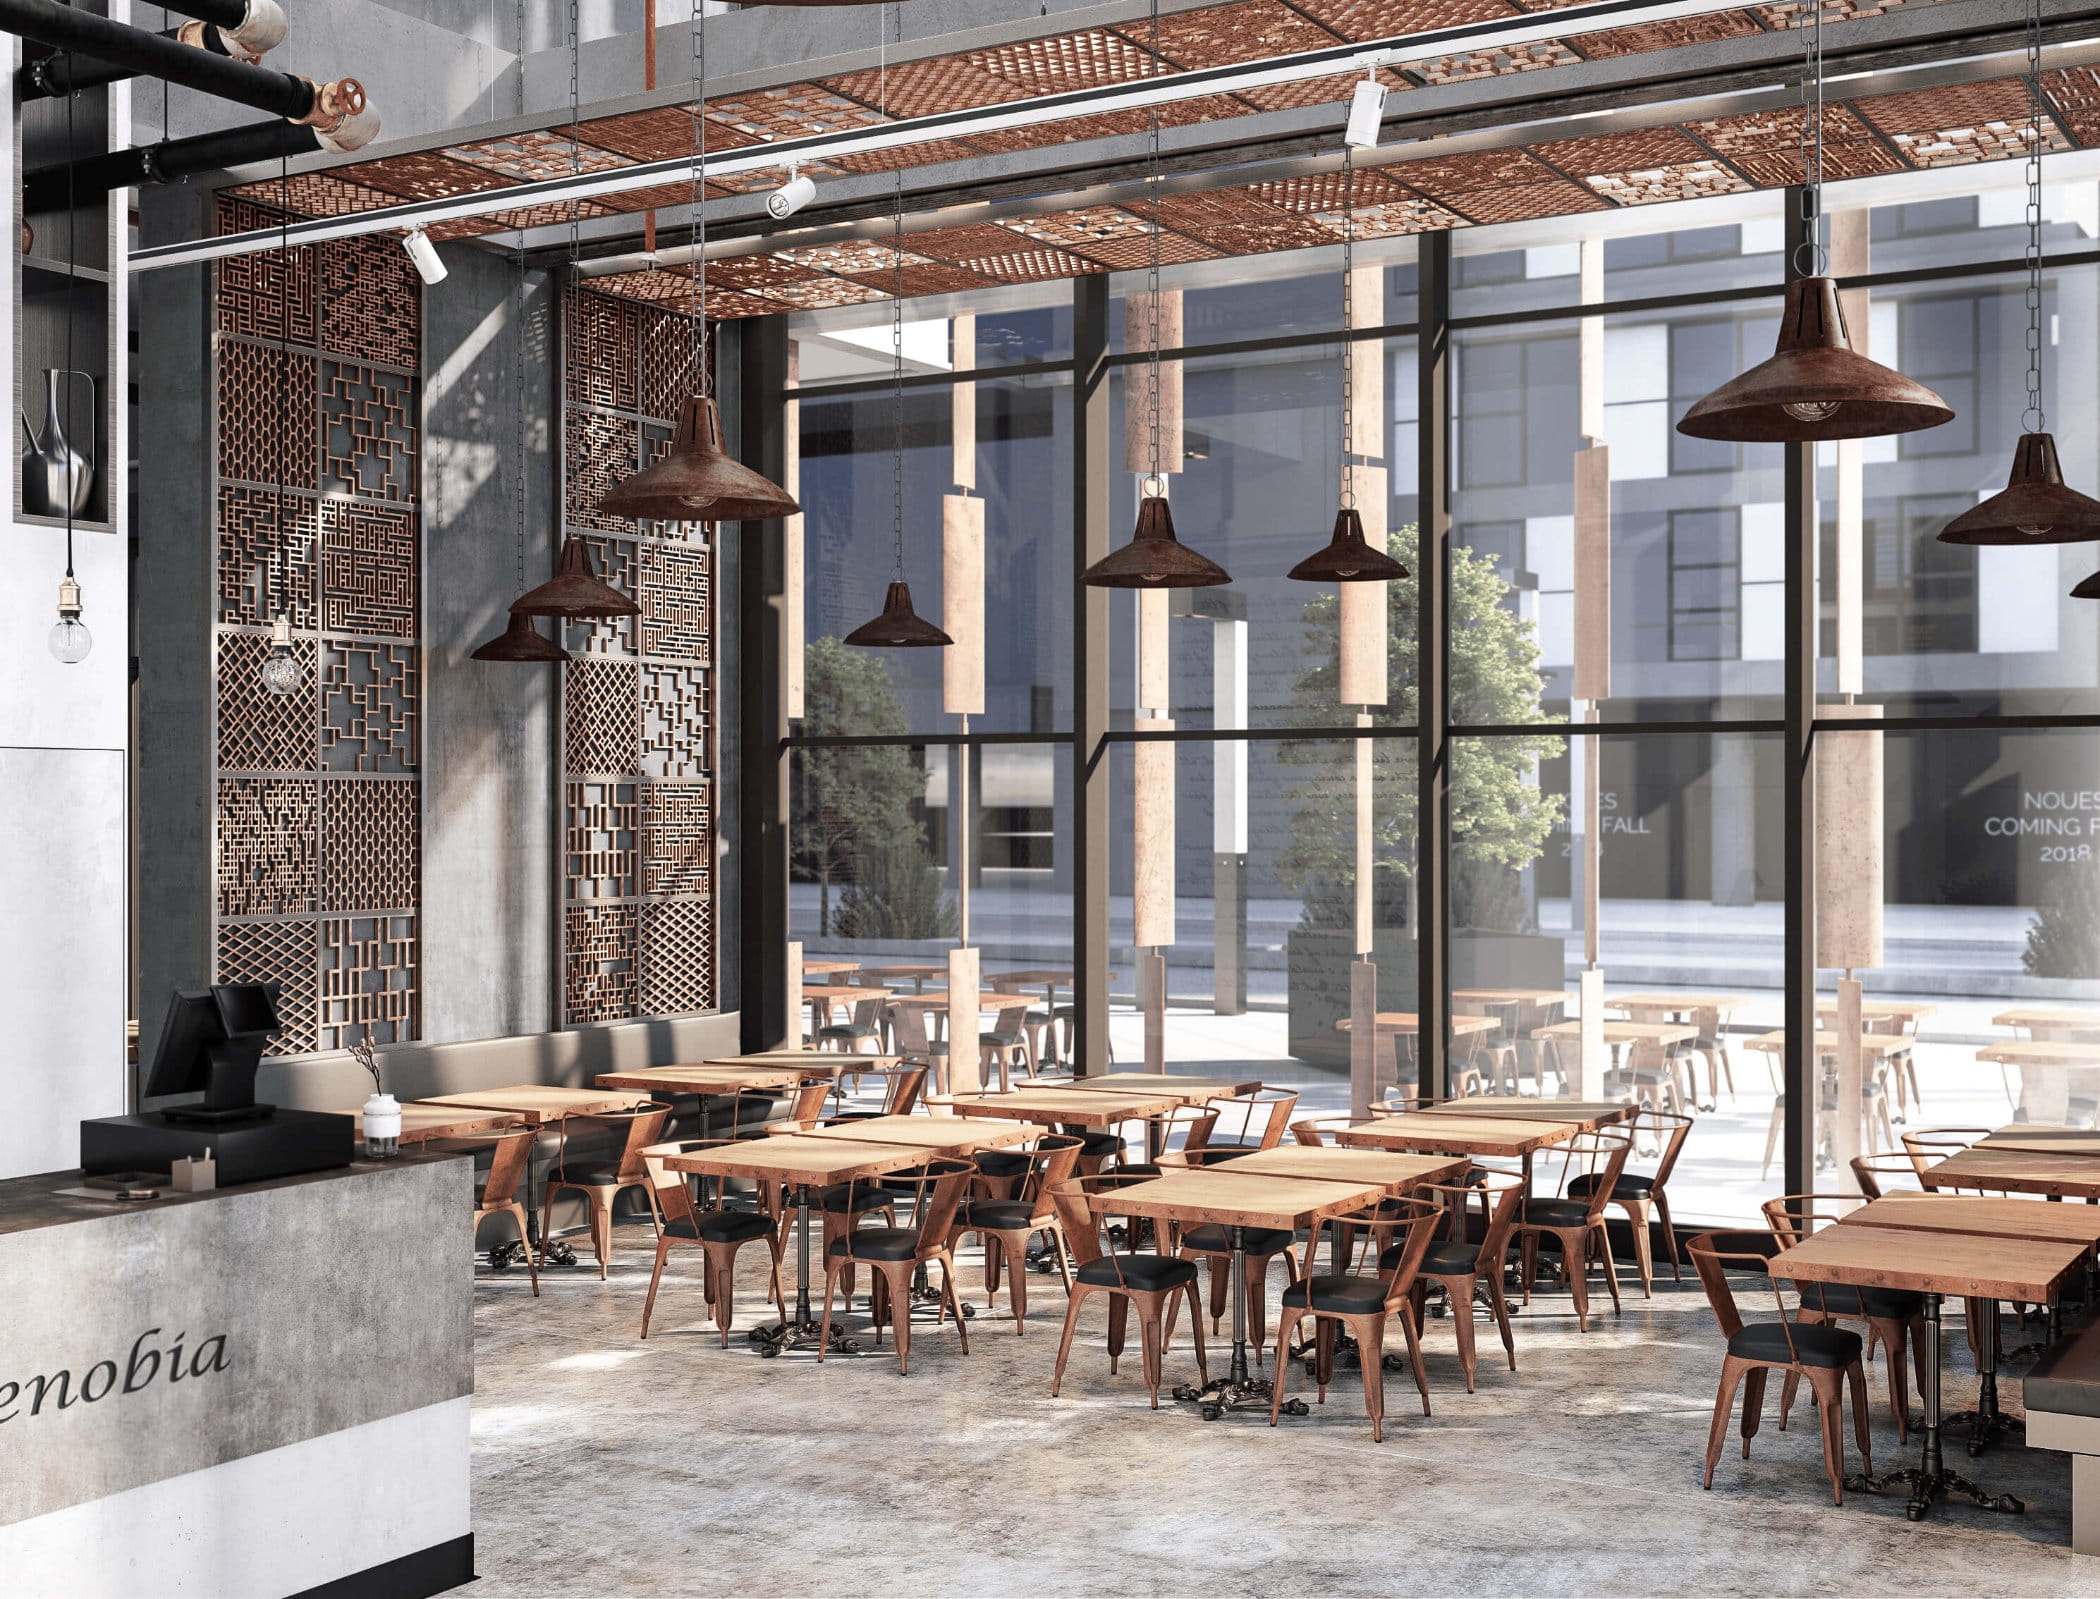
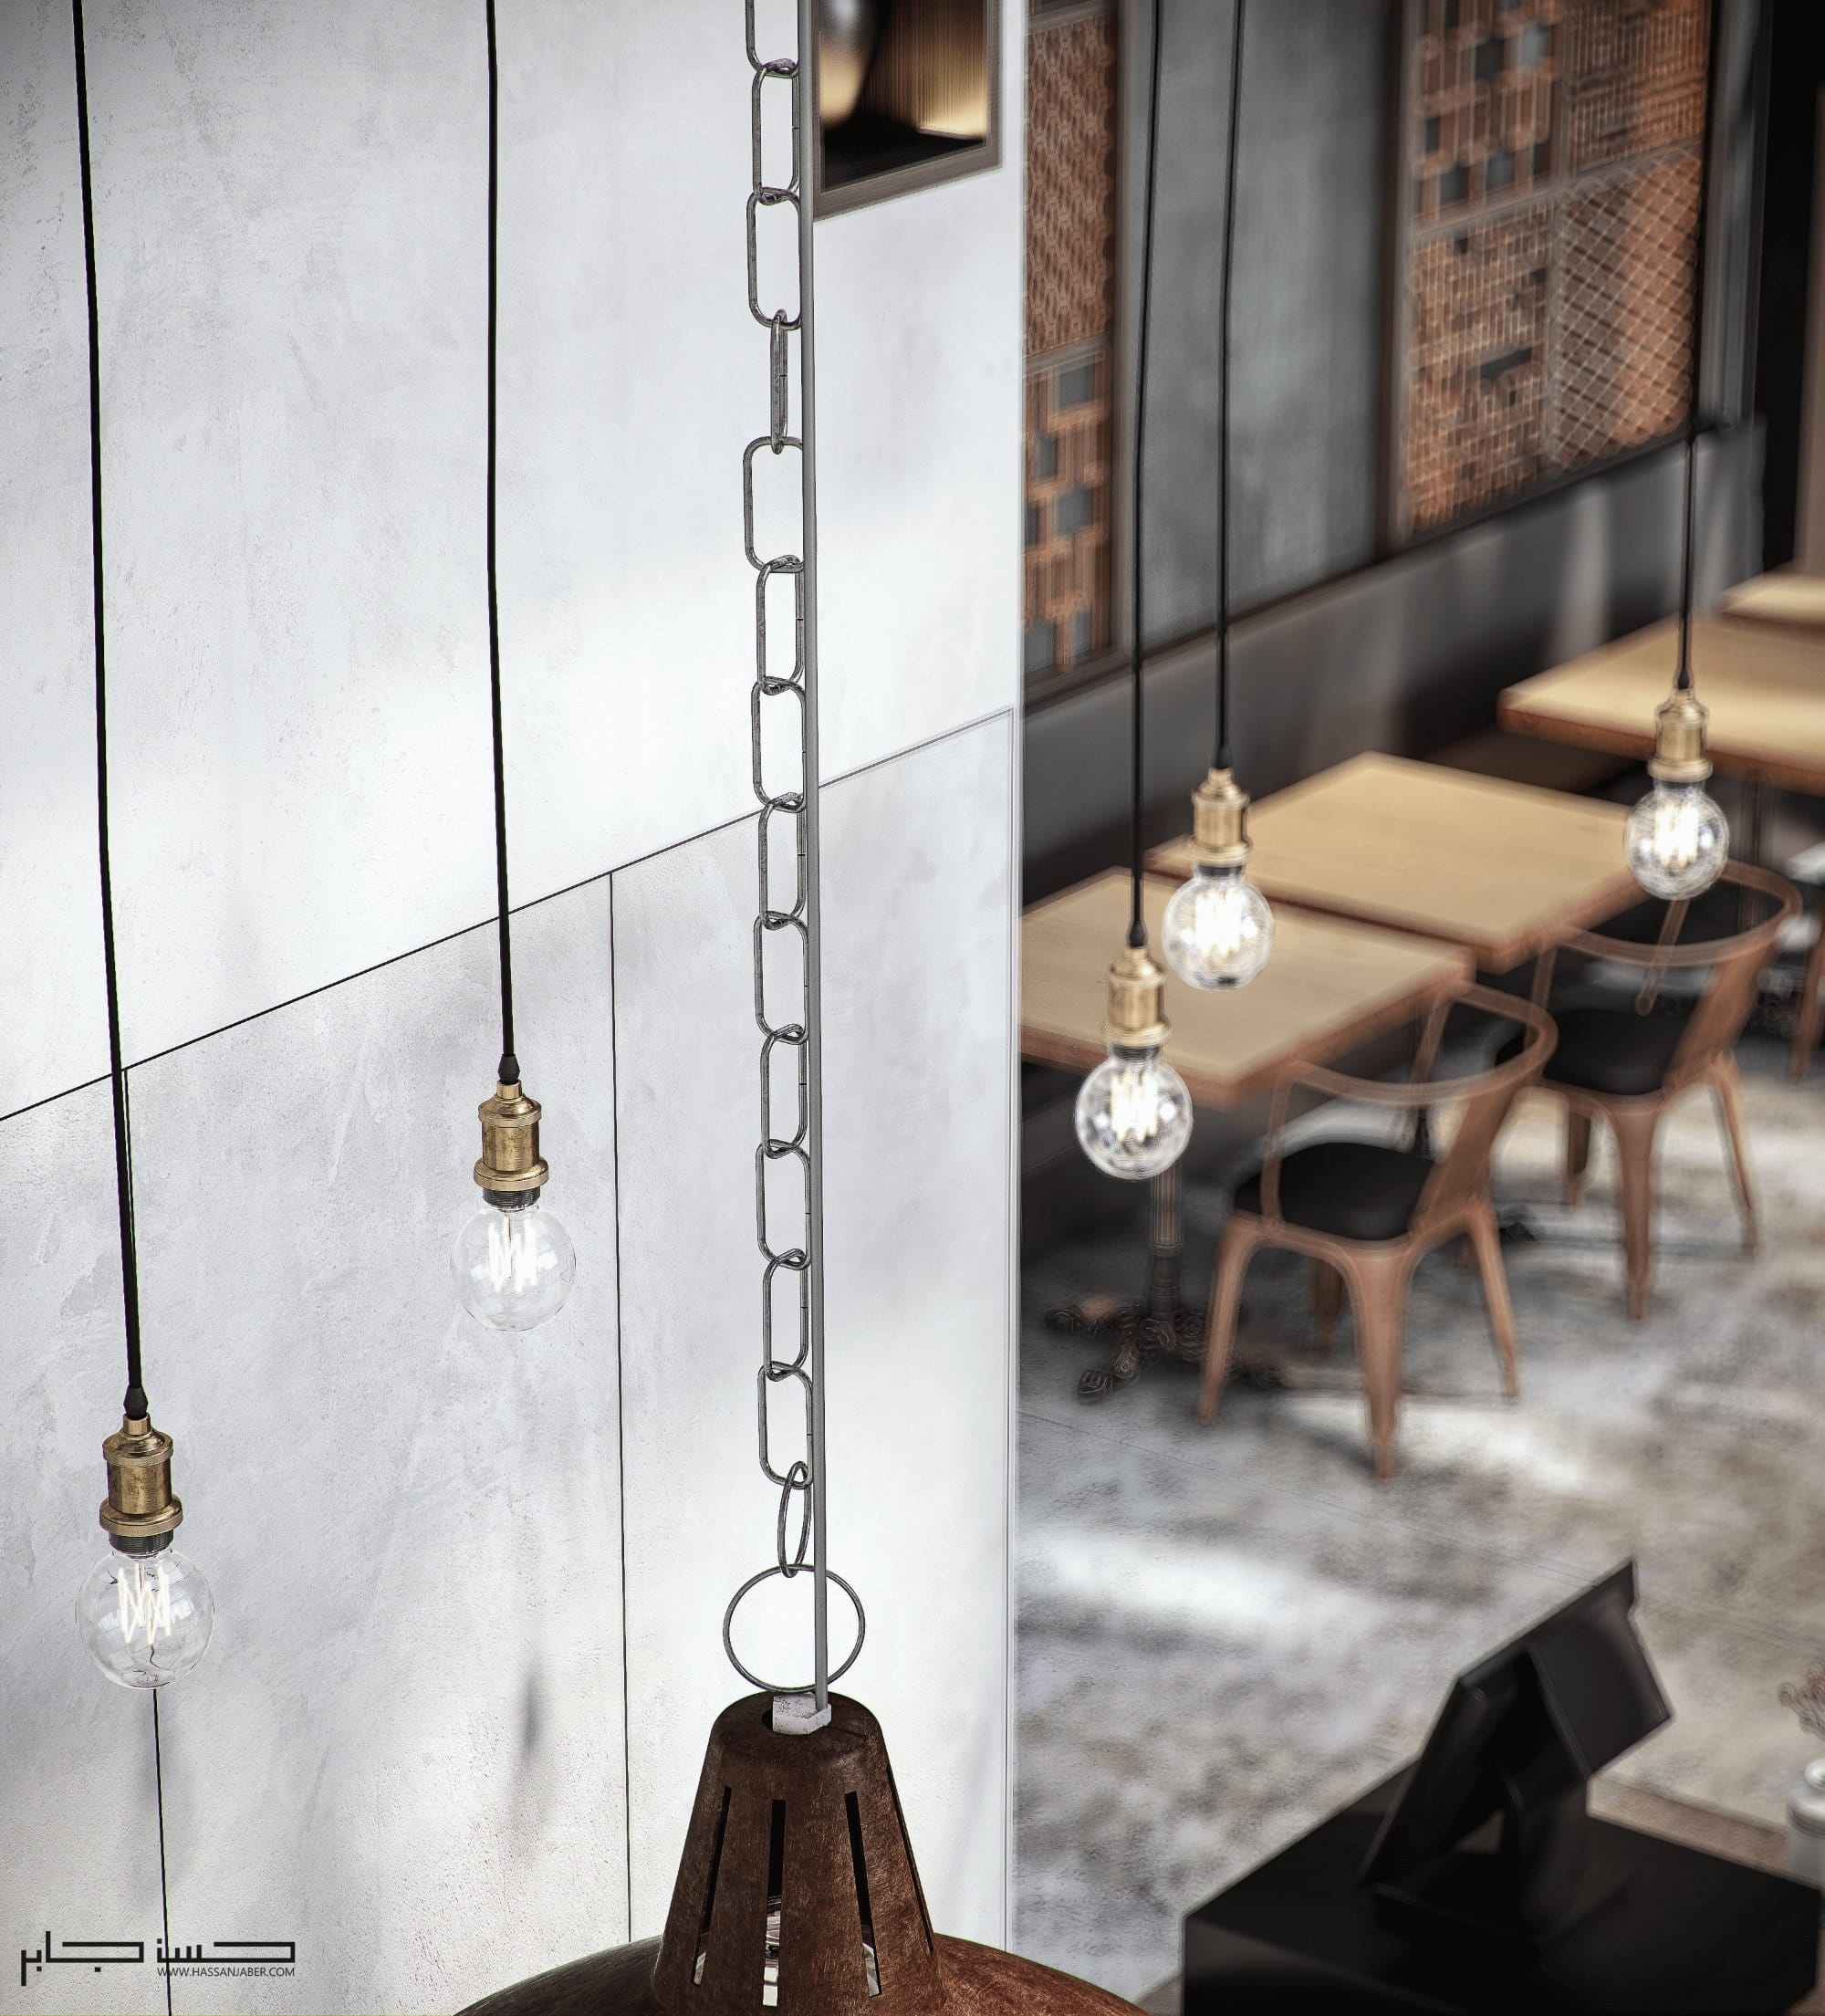
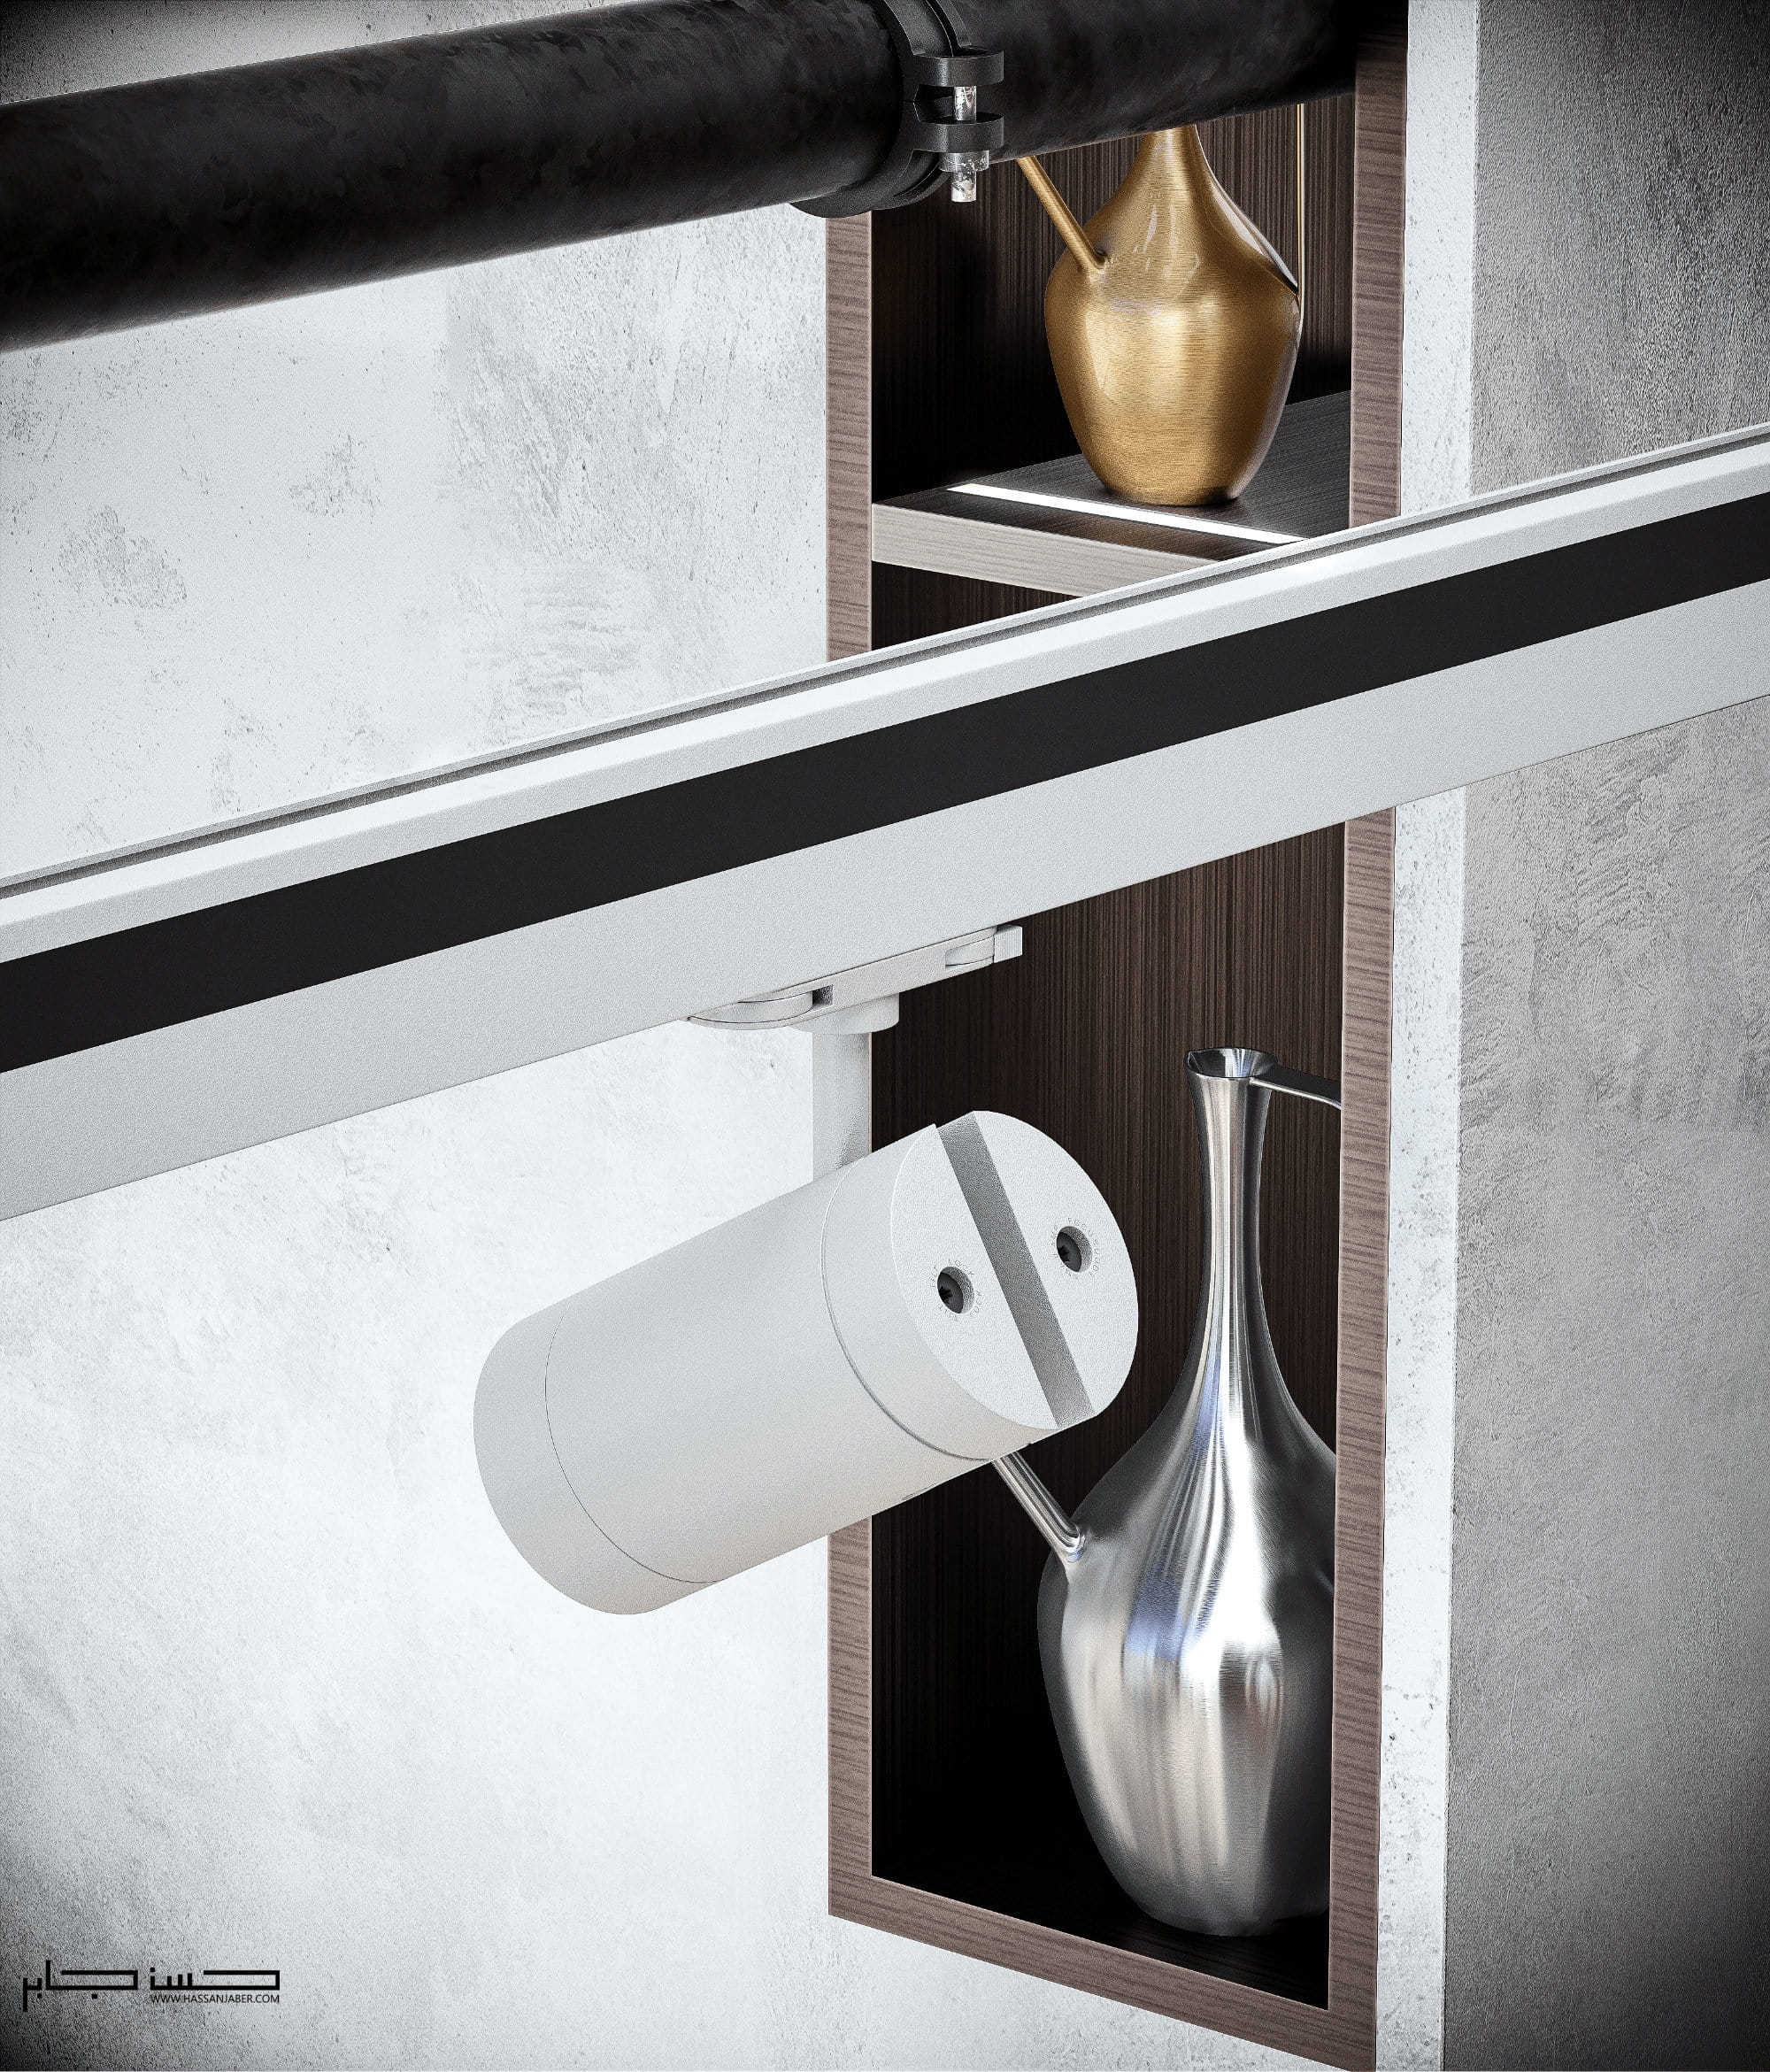
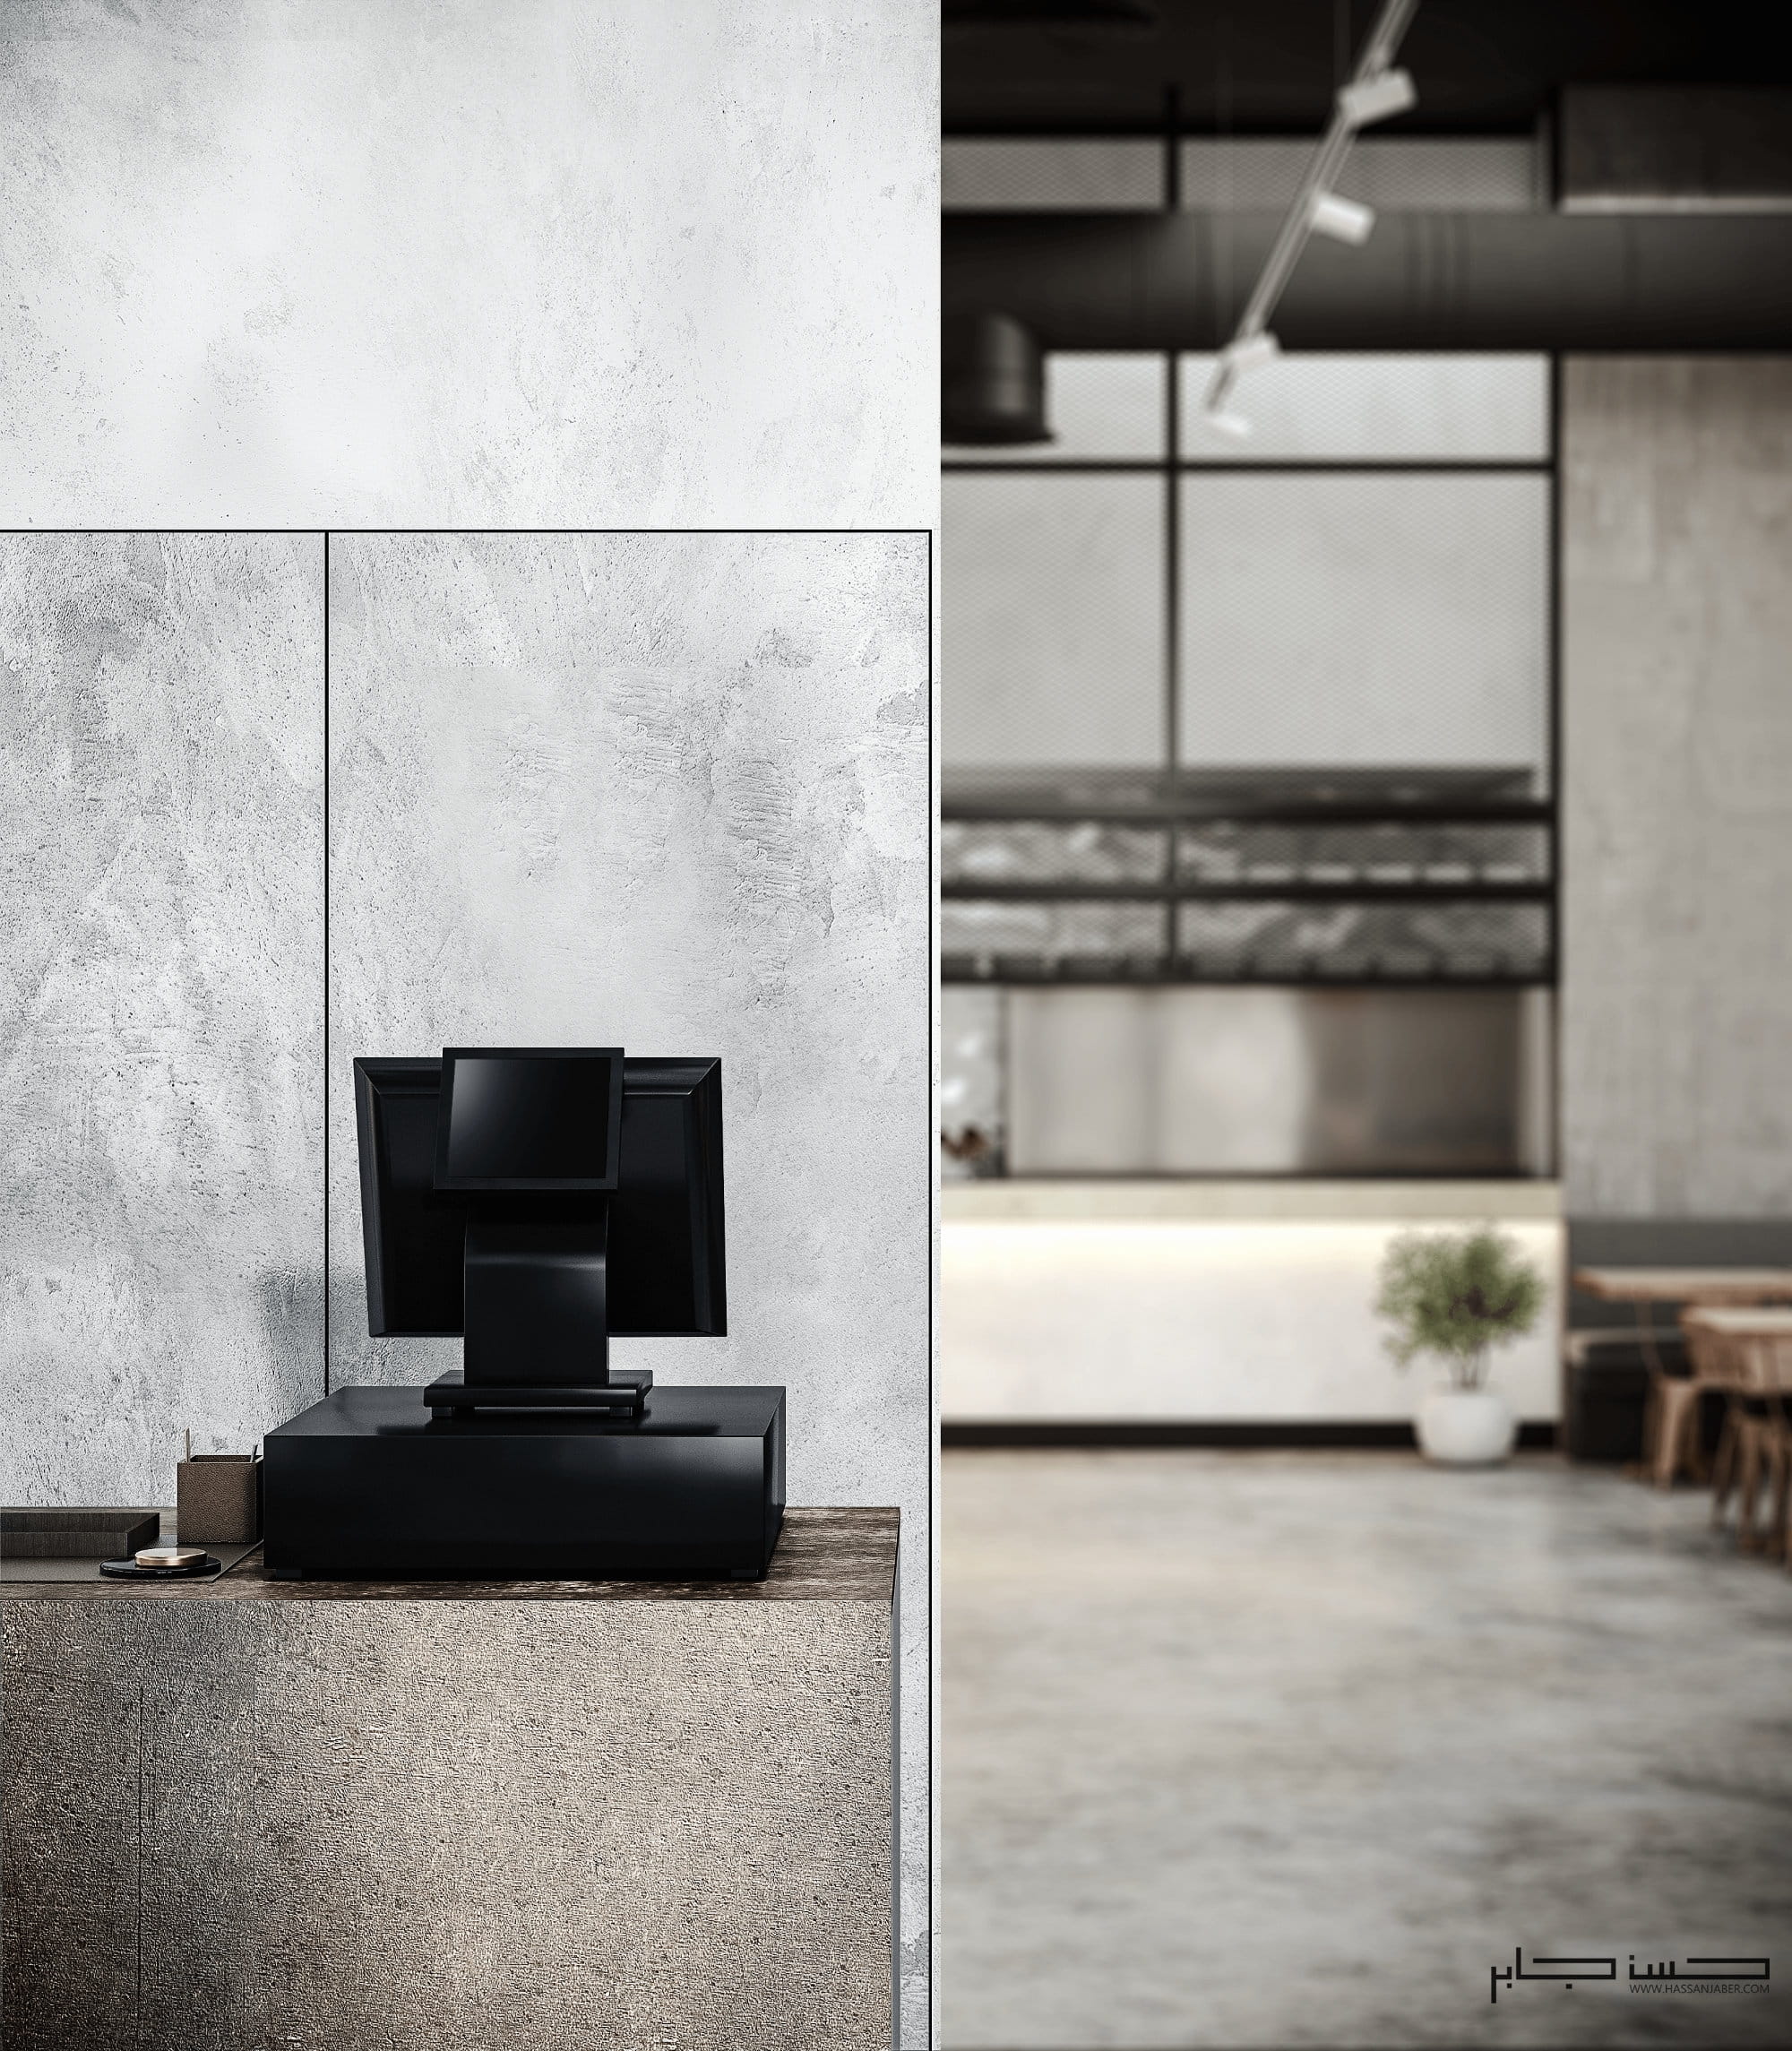
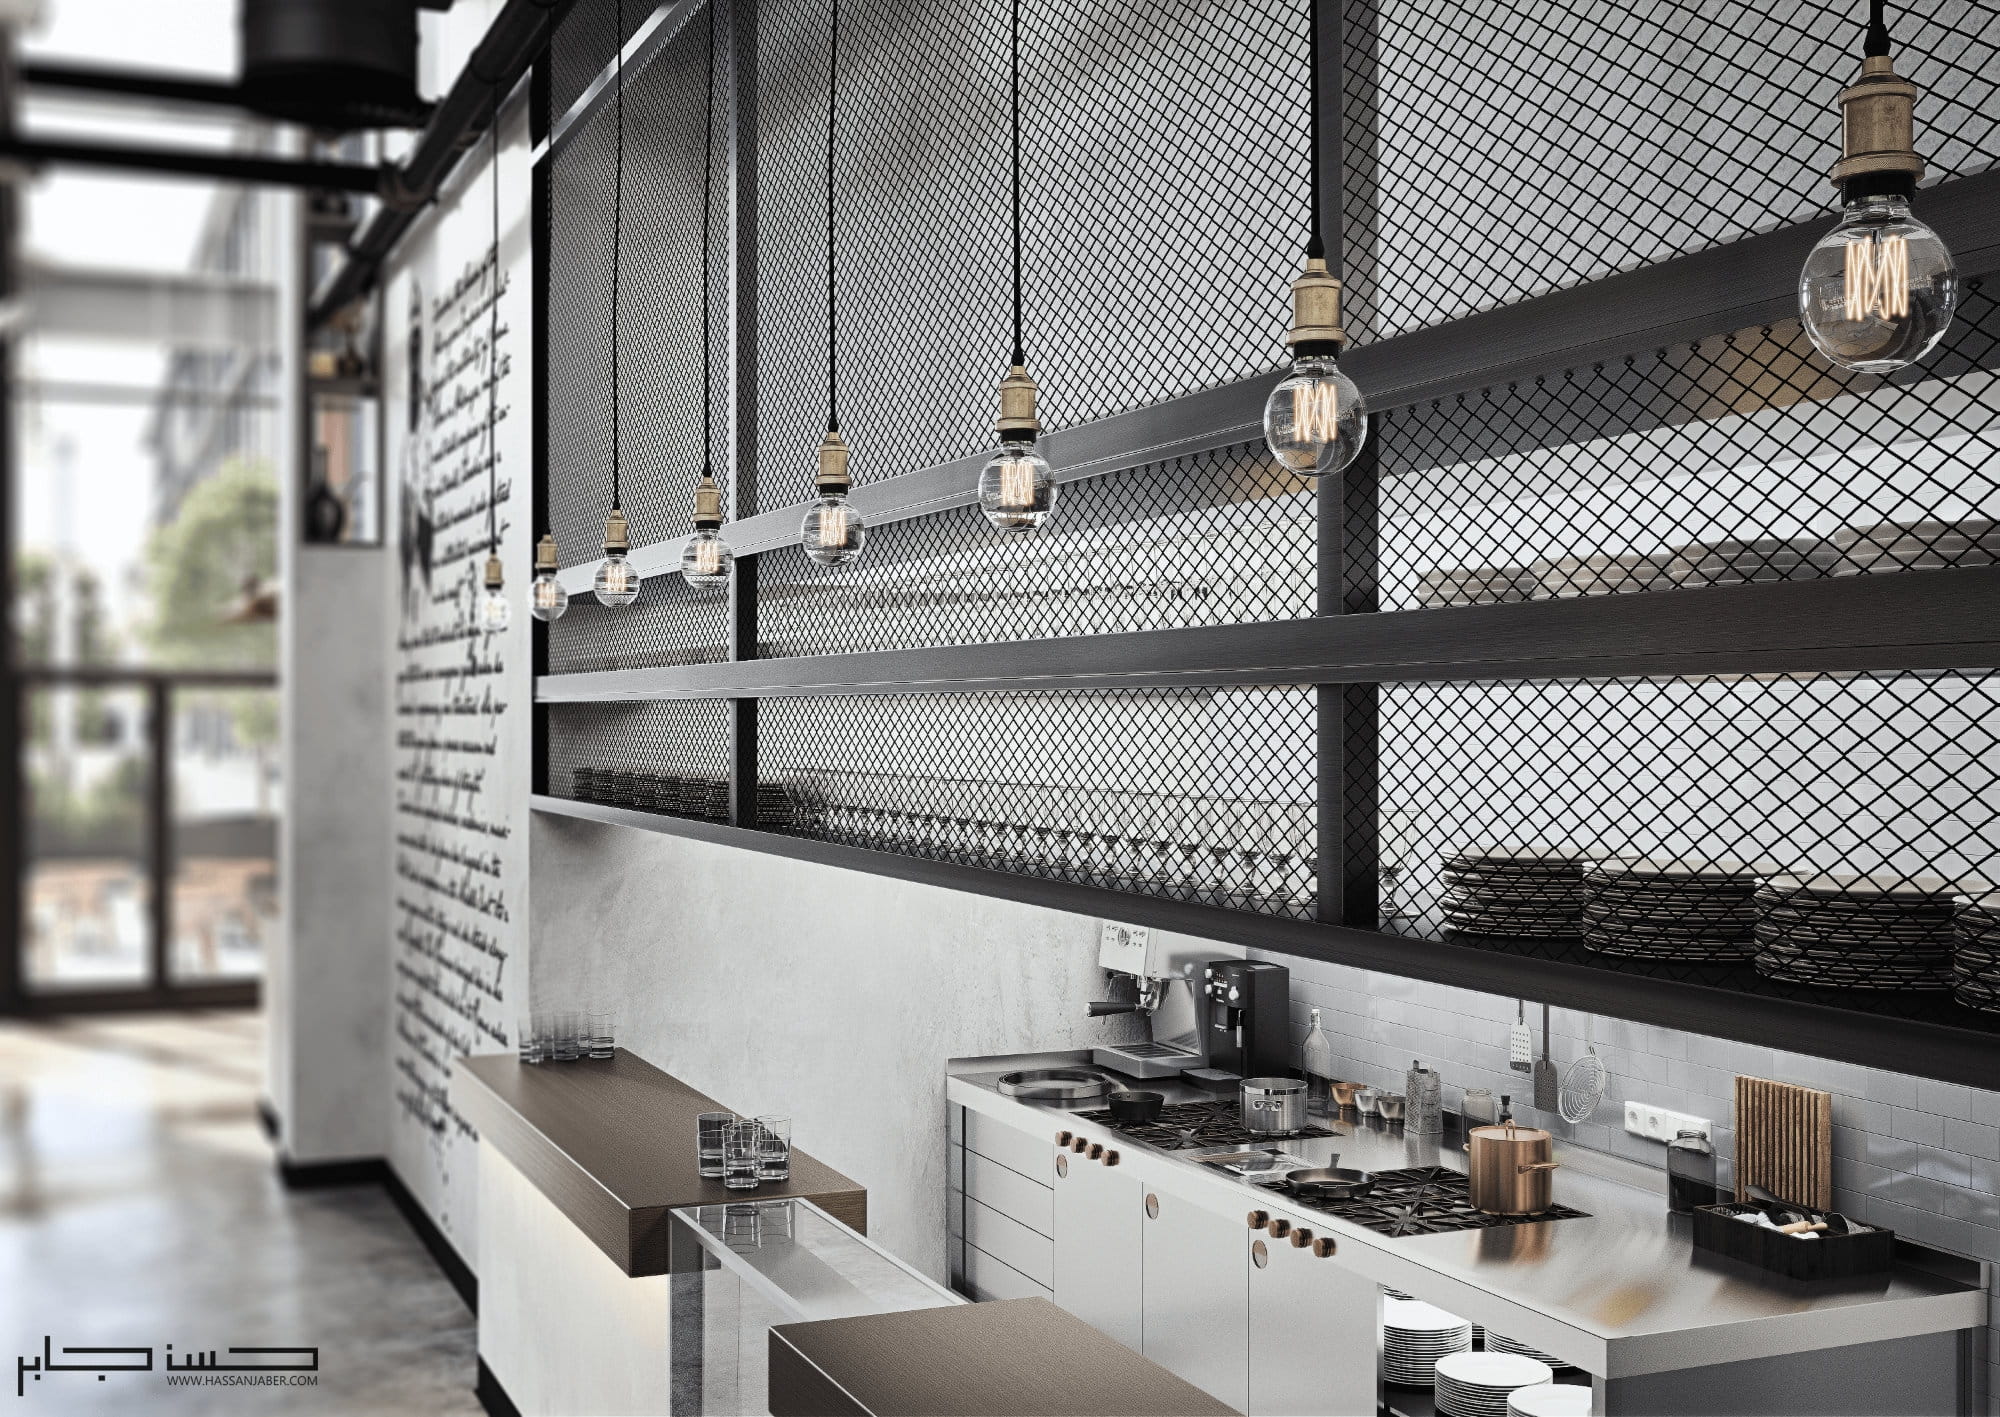
Main design concept and theme was to create an industrial modern looking restaurant. I attempted to keep the design mood natural and light. I chose dark and light grey for the walls, two high rustic U shaped pattern element were introduced. Concrete bare flooring combined with a main 9-meter decorative wall, and decorative hanged steel ducts were the main design elements & finishes used.
My 3d skills, photographic approach, and design experience played a big role in assuring that the 3d renders and the real project look 95% alike. And it helped in delivering diverse ideas and solutions during the design process.
Design Phase:
So, I started researching the style and decided to make a modern industrial design with basic clear element that connects the whole design together.
Researching: the most important step to start any project.
Researching tips are simple:

Developing a design concept: design concept must effectively convey your inspiration and vision for a space. It briefly addresses how you went about creating the design, what design path and style you chose, and how you handled specific design challenges.
My main design concept & theme was to create a modern looking restaurant with some industrial finishes.
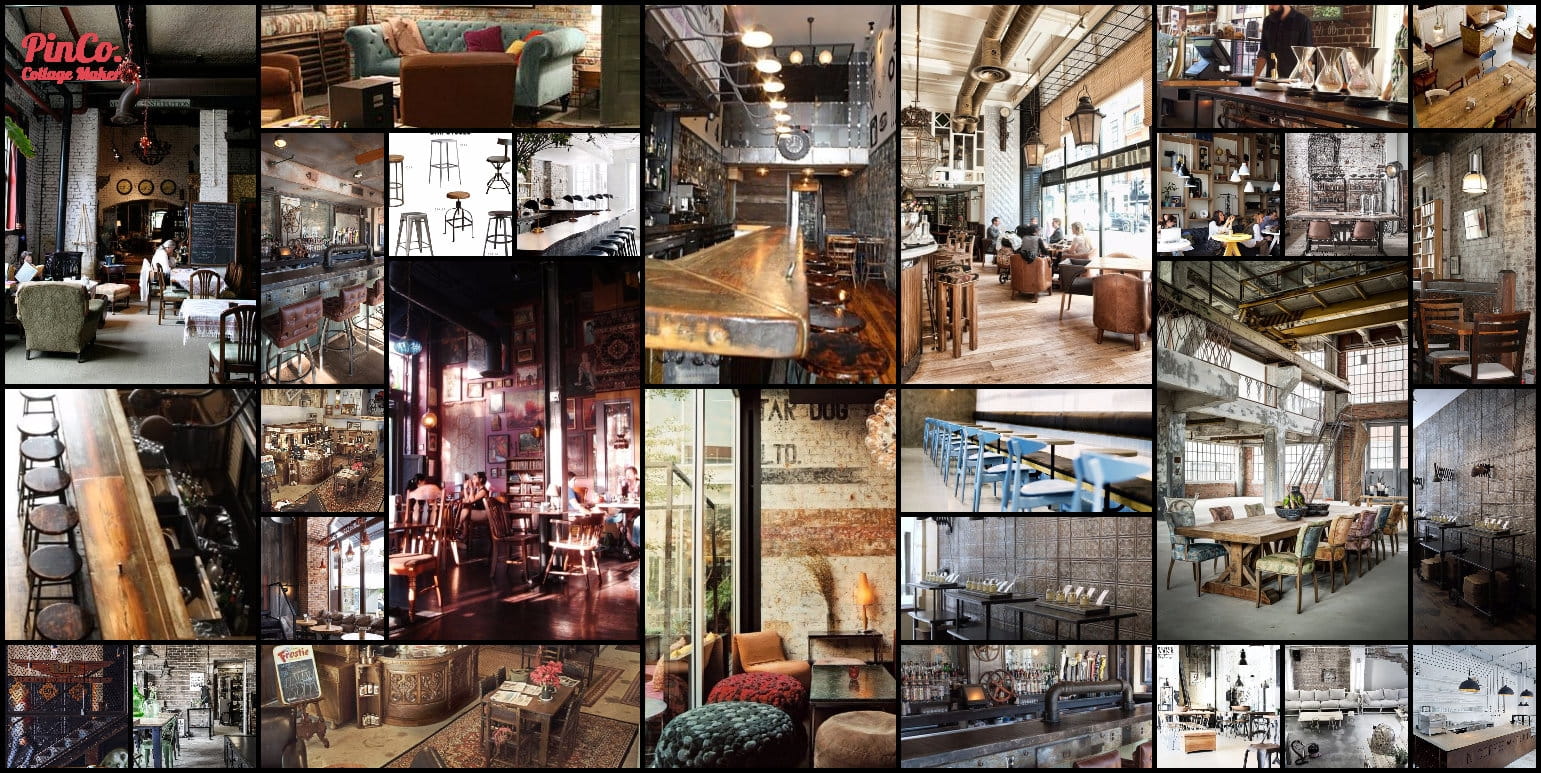
Mood board
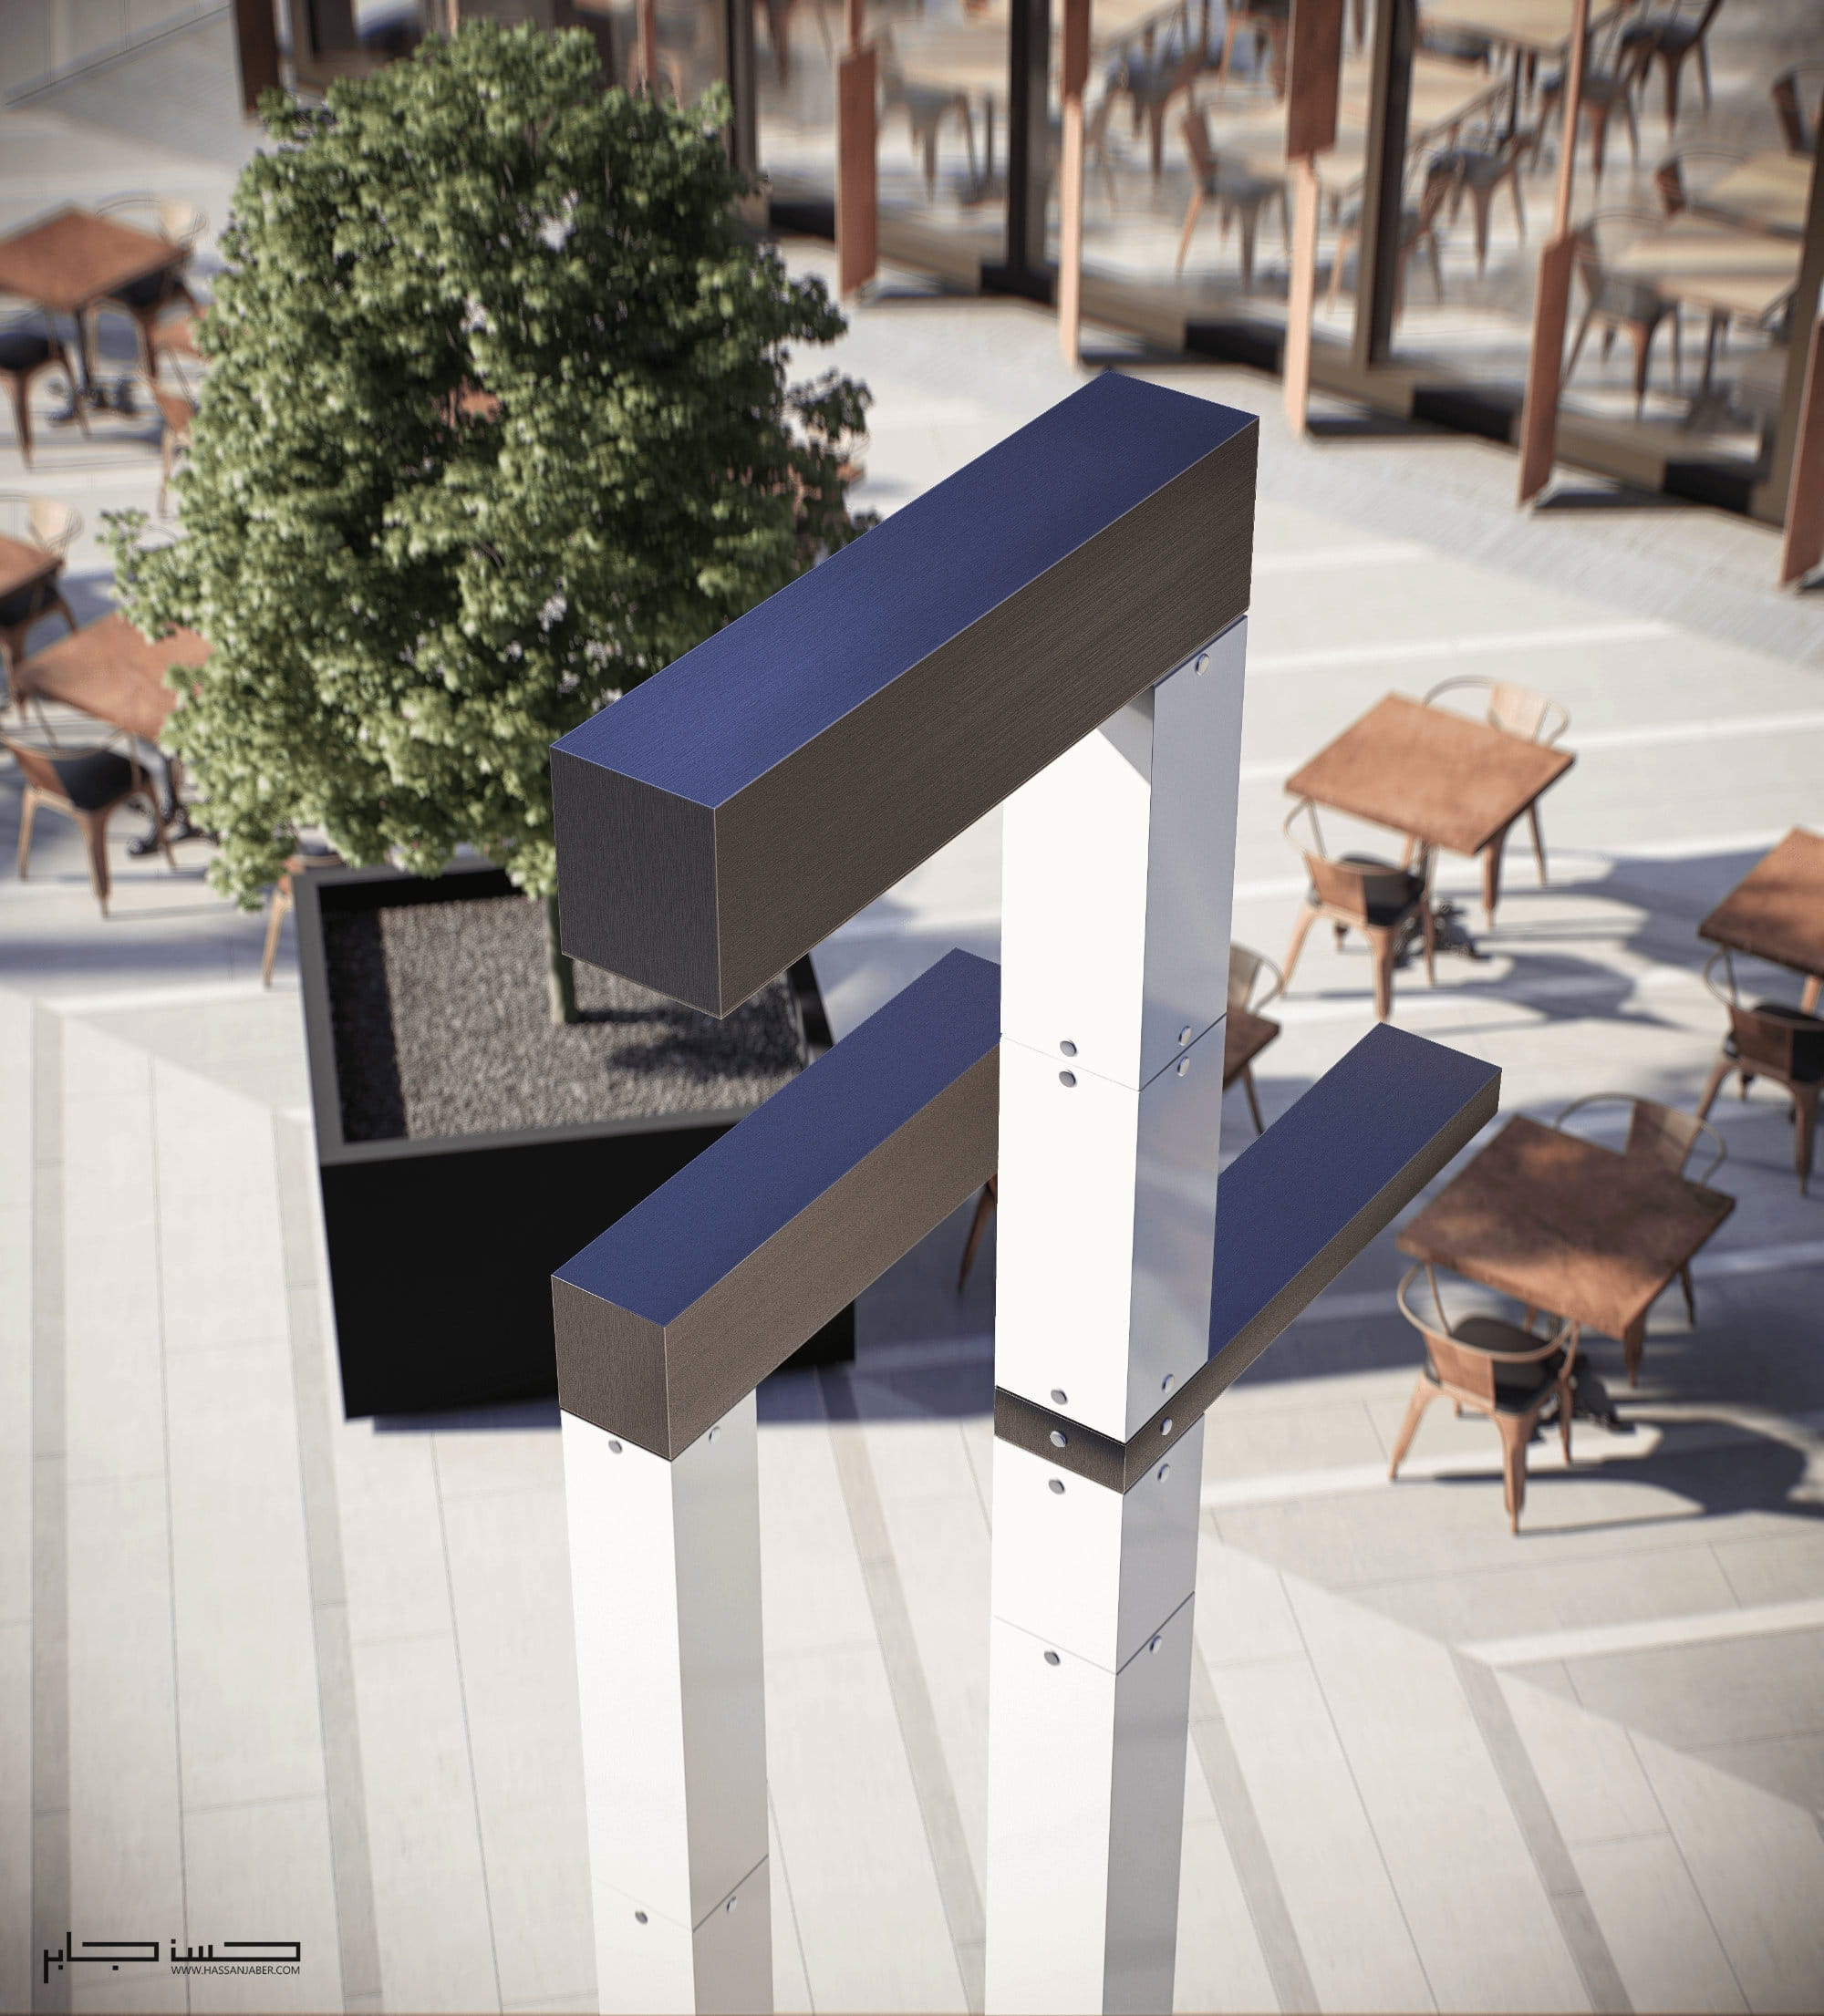
Introducing main eye catching components.

Connecting various components and functions together into one main Duct
Sketches & Cad + to do list
Sketching is a powerful process to use because it always helps discover the best ideas and solutions to tackle design problems. It’s an important step in the design and development process. I usually sketch very basic lines of what my design would be.
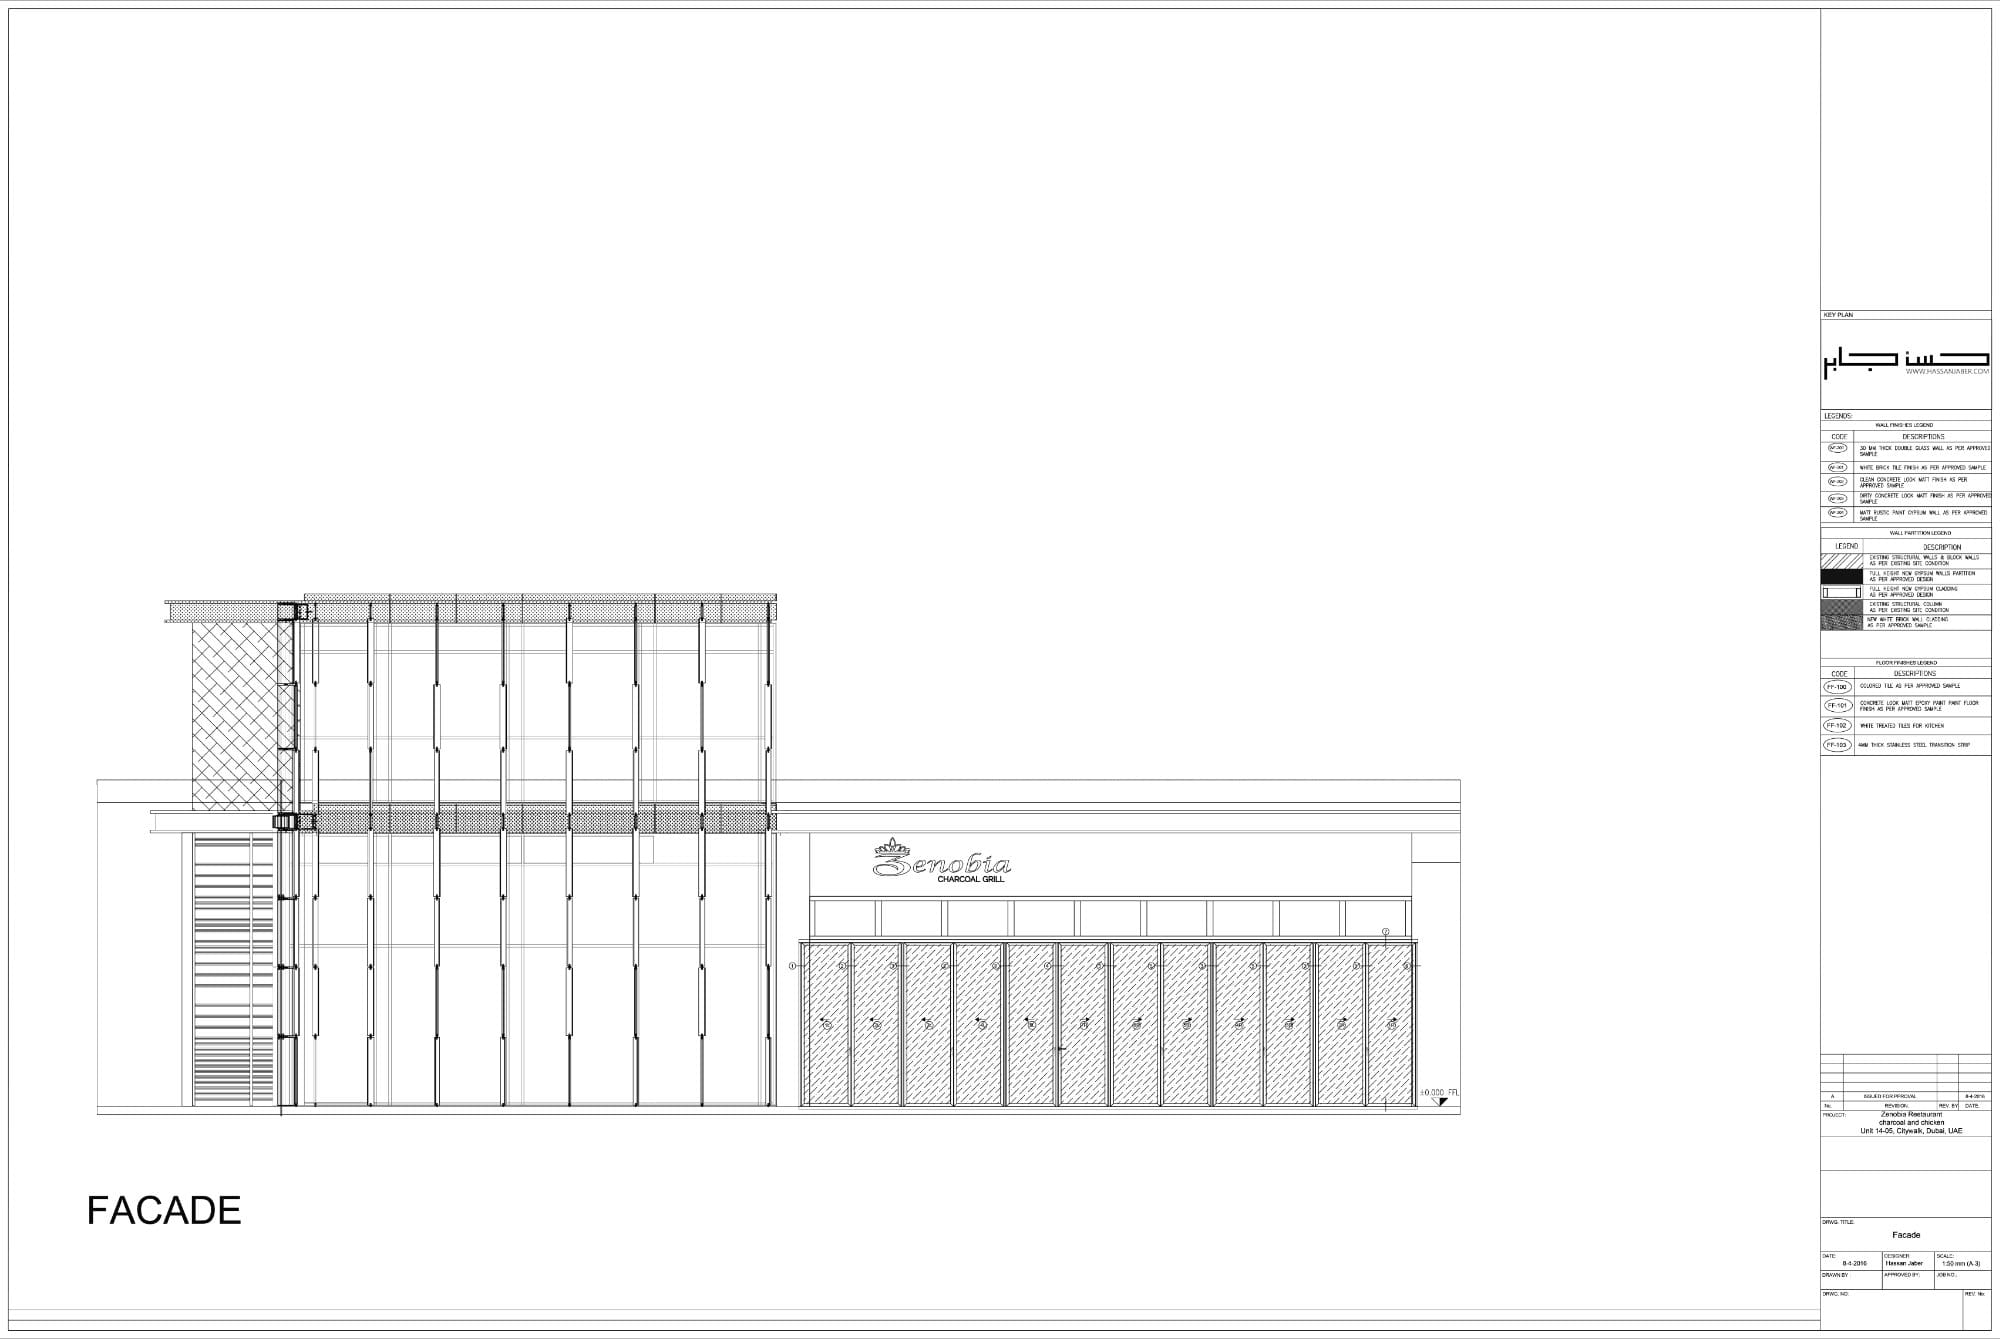
AutoCAD: Make sure to draw an enclosed polylines and name your layers so you don’t mess up your 3d files later on. Start by zoning plan: always make sure to keep space for moving around (don’t overload your space with furniture).
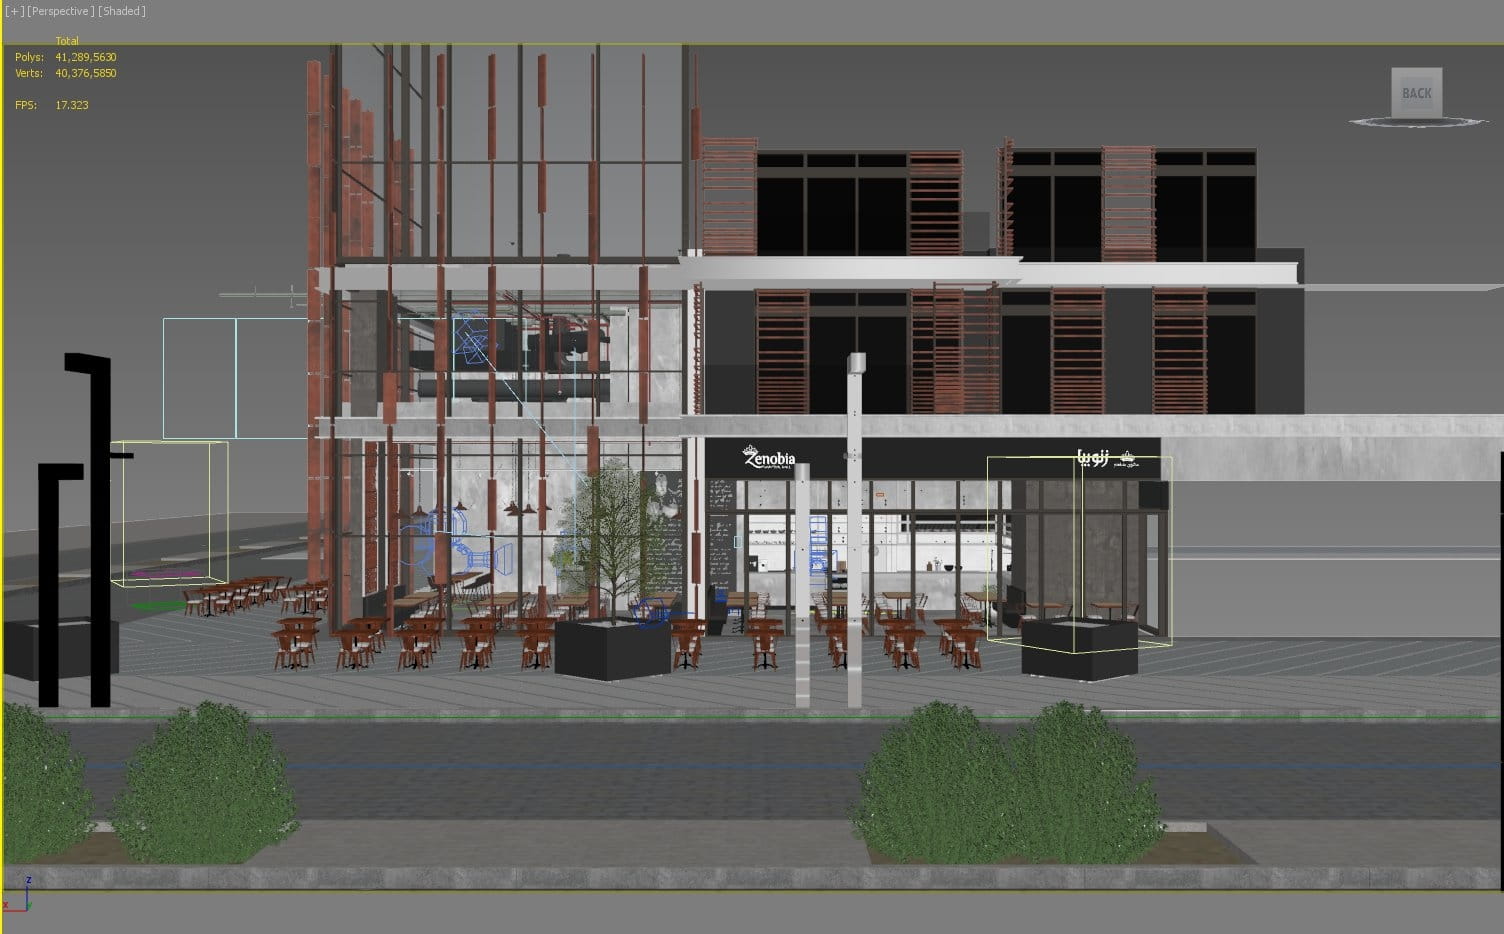
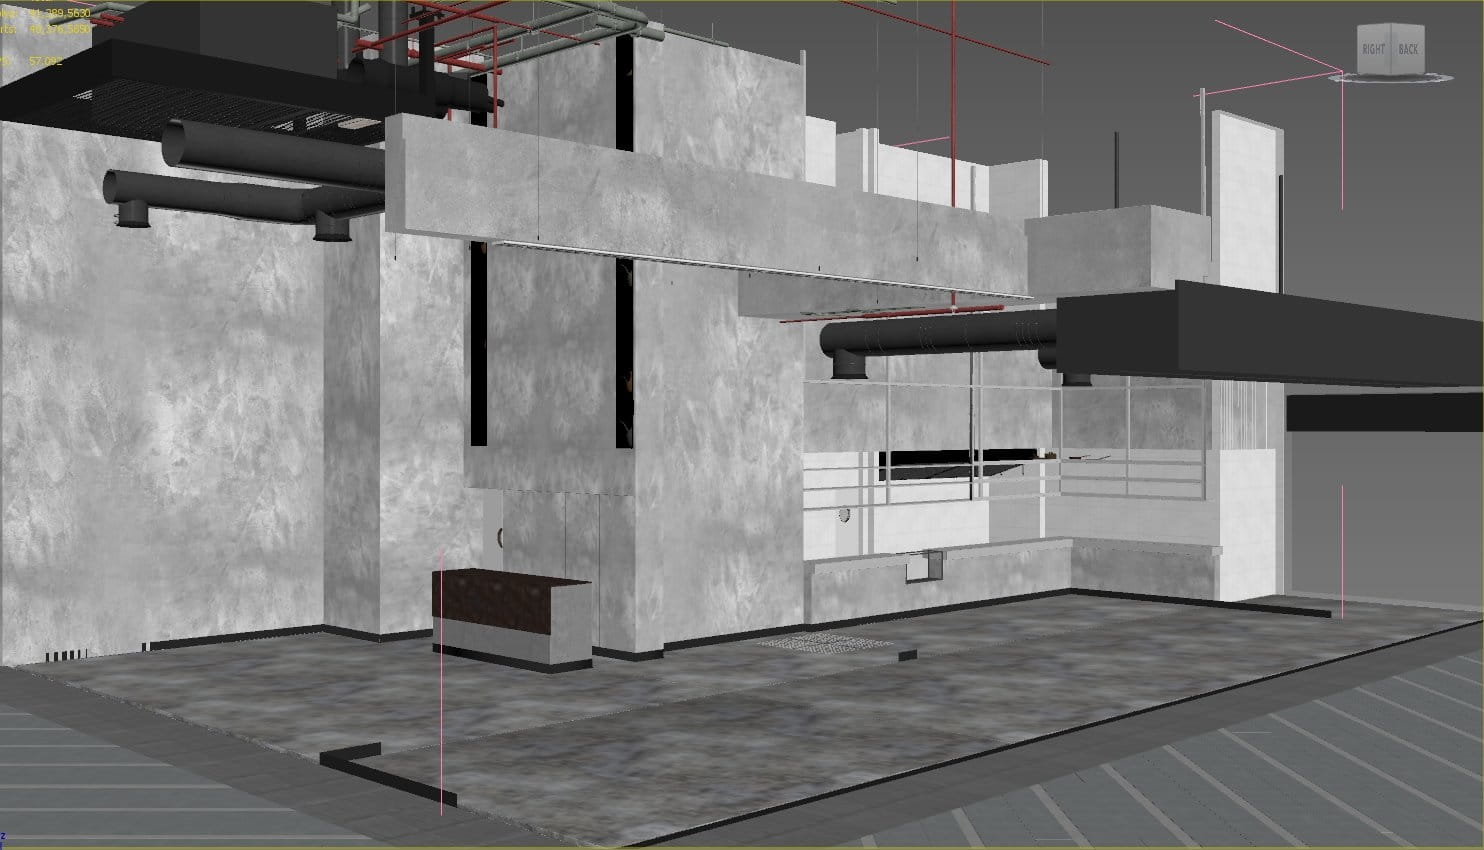
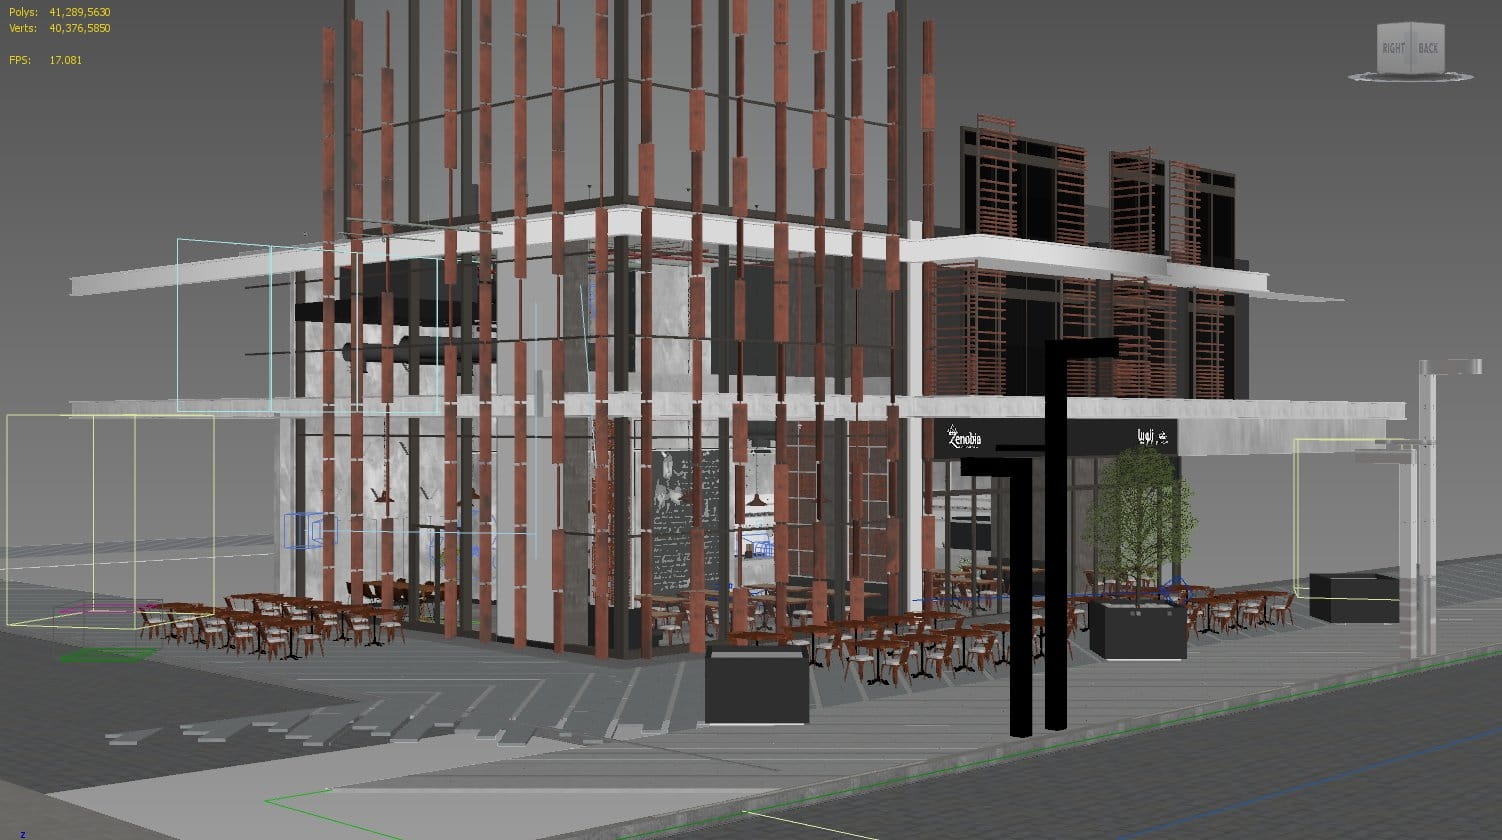
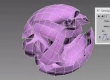
3D input + Design development: I mostly develop and change my designs in the 3d modeling phase. Here are some test shots showing how the design were developed.
Design development
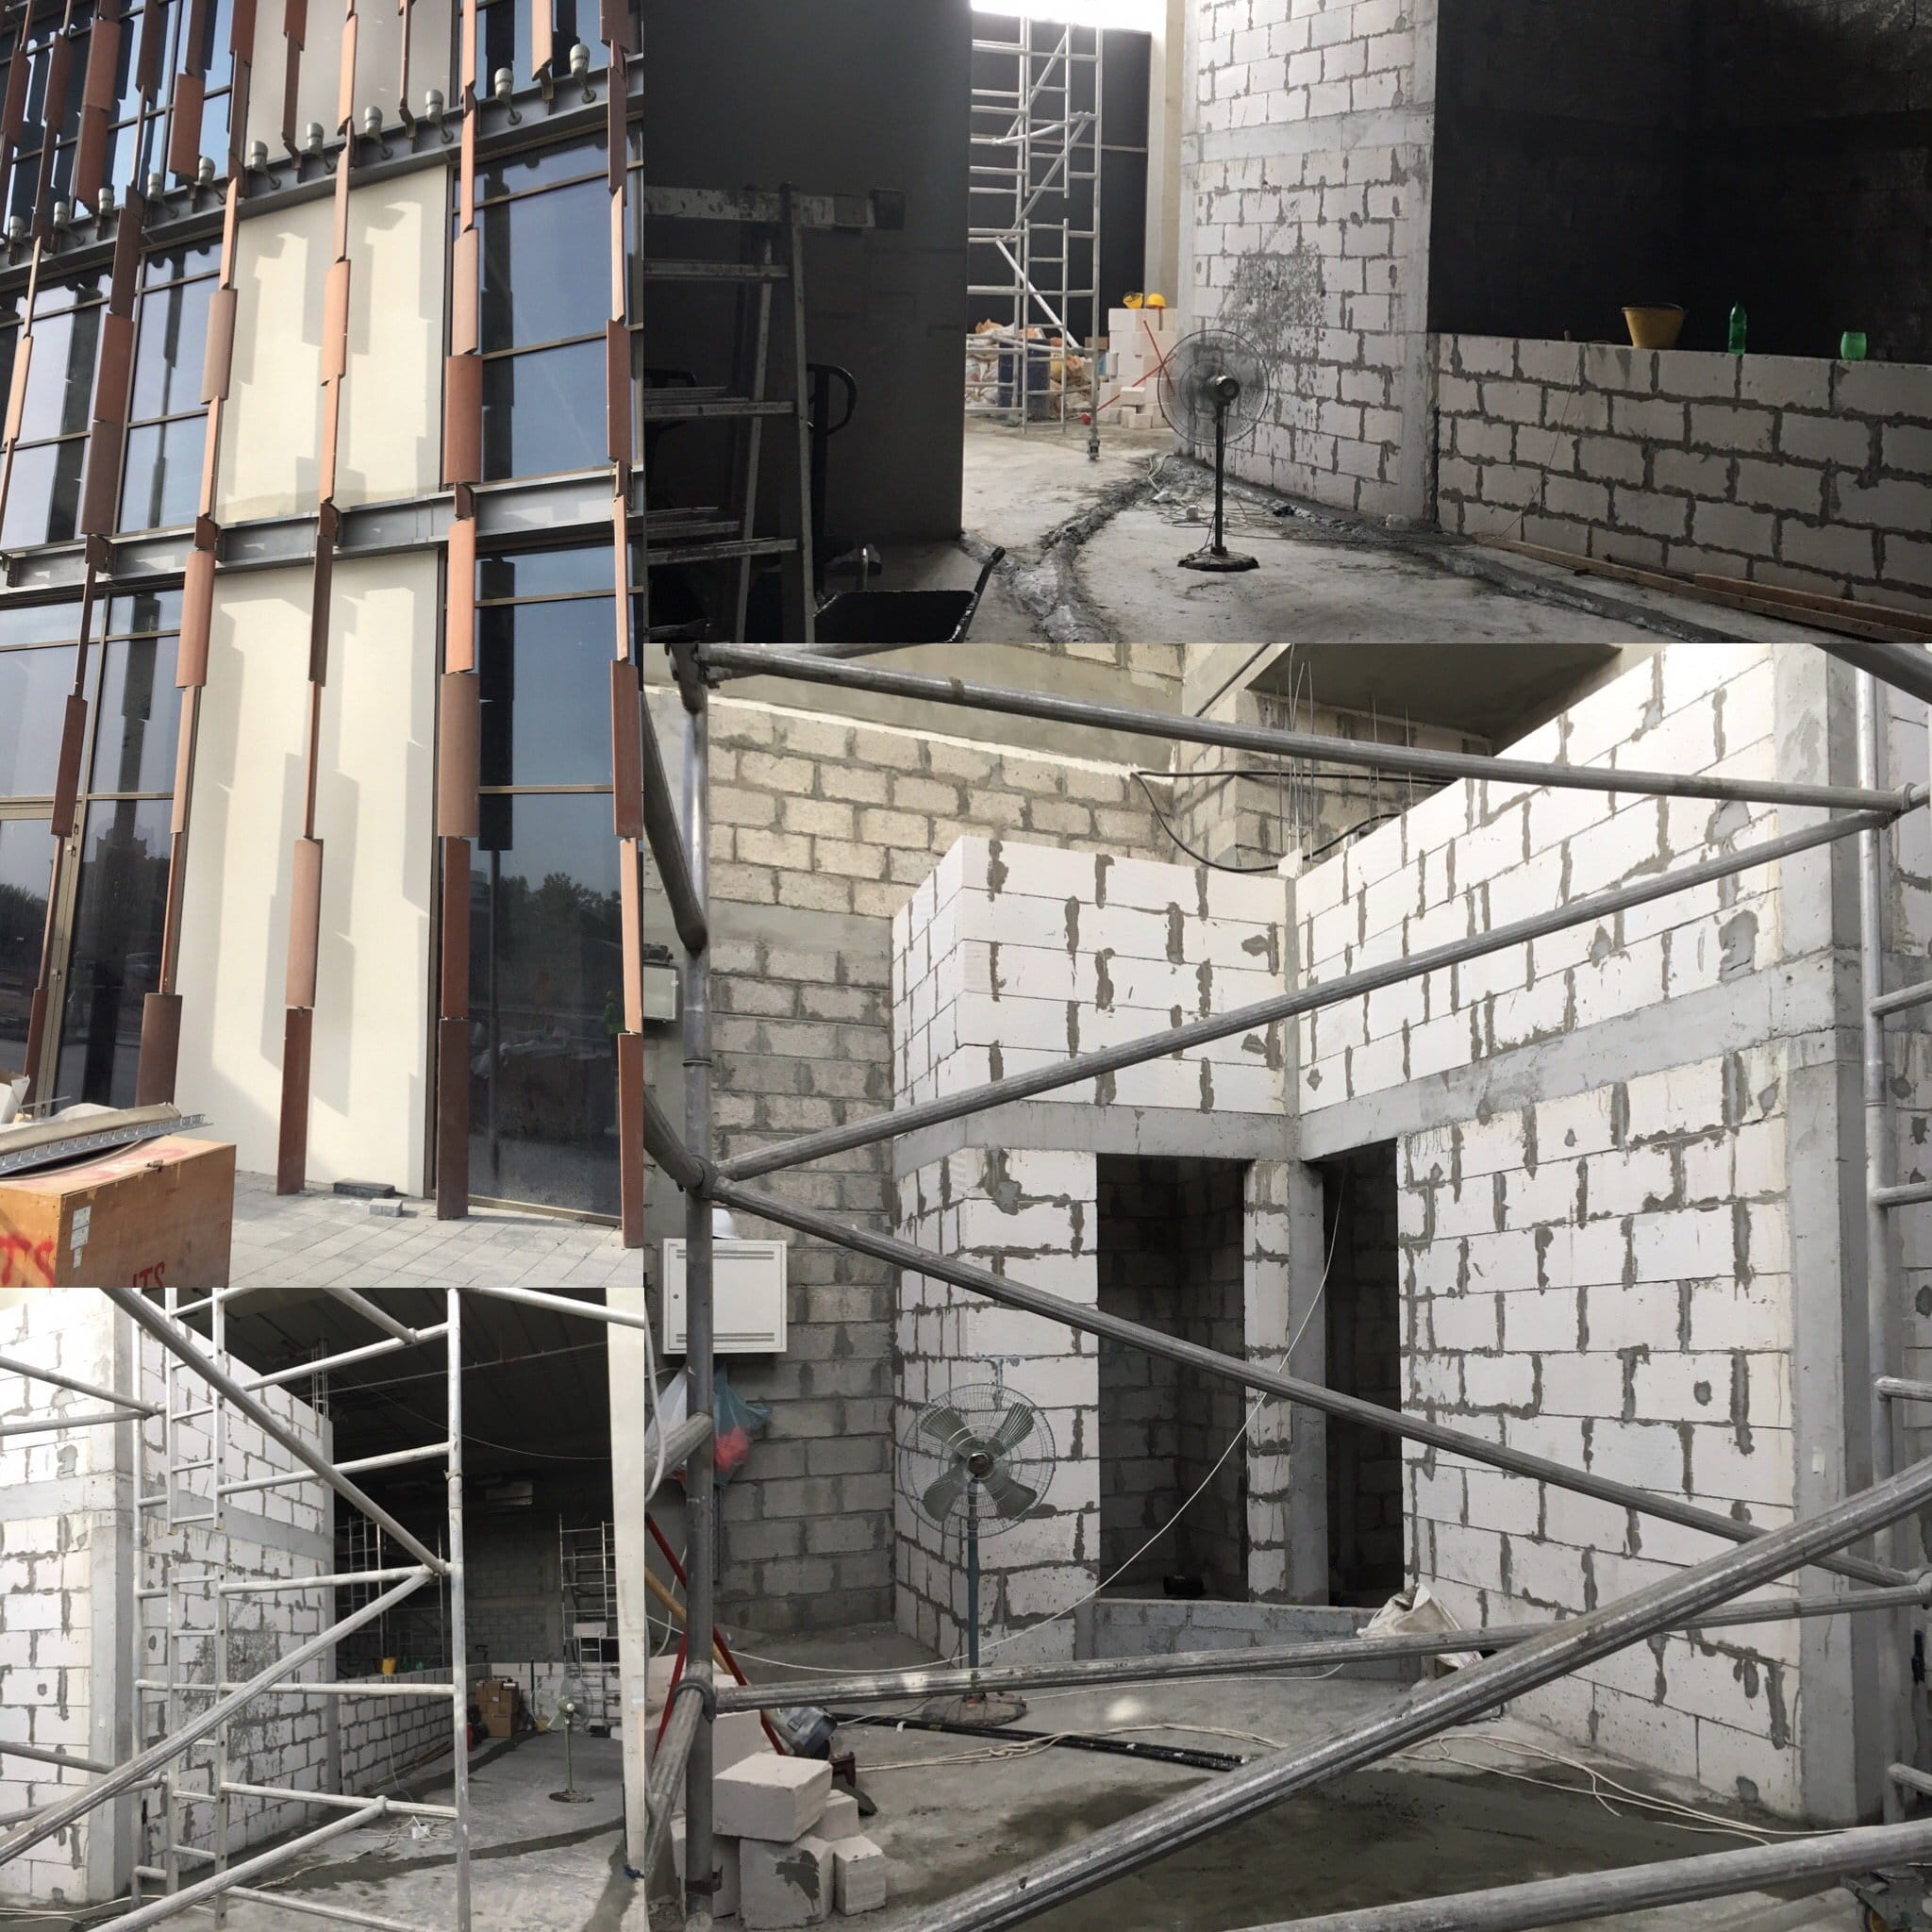
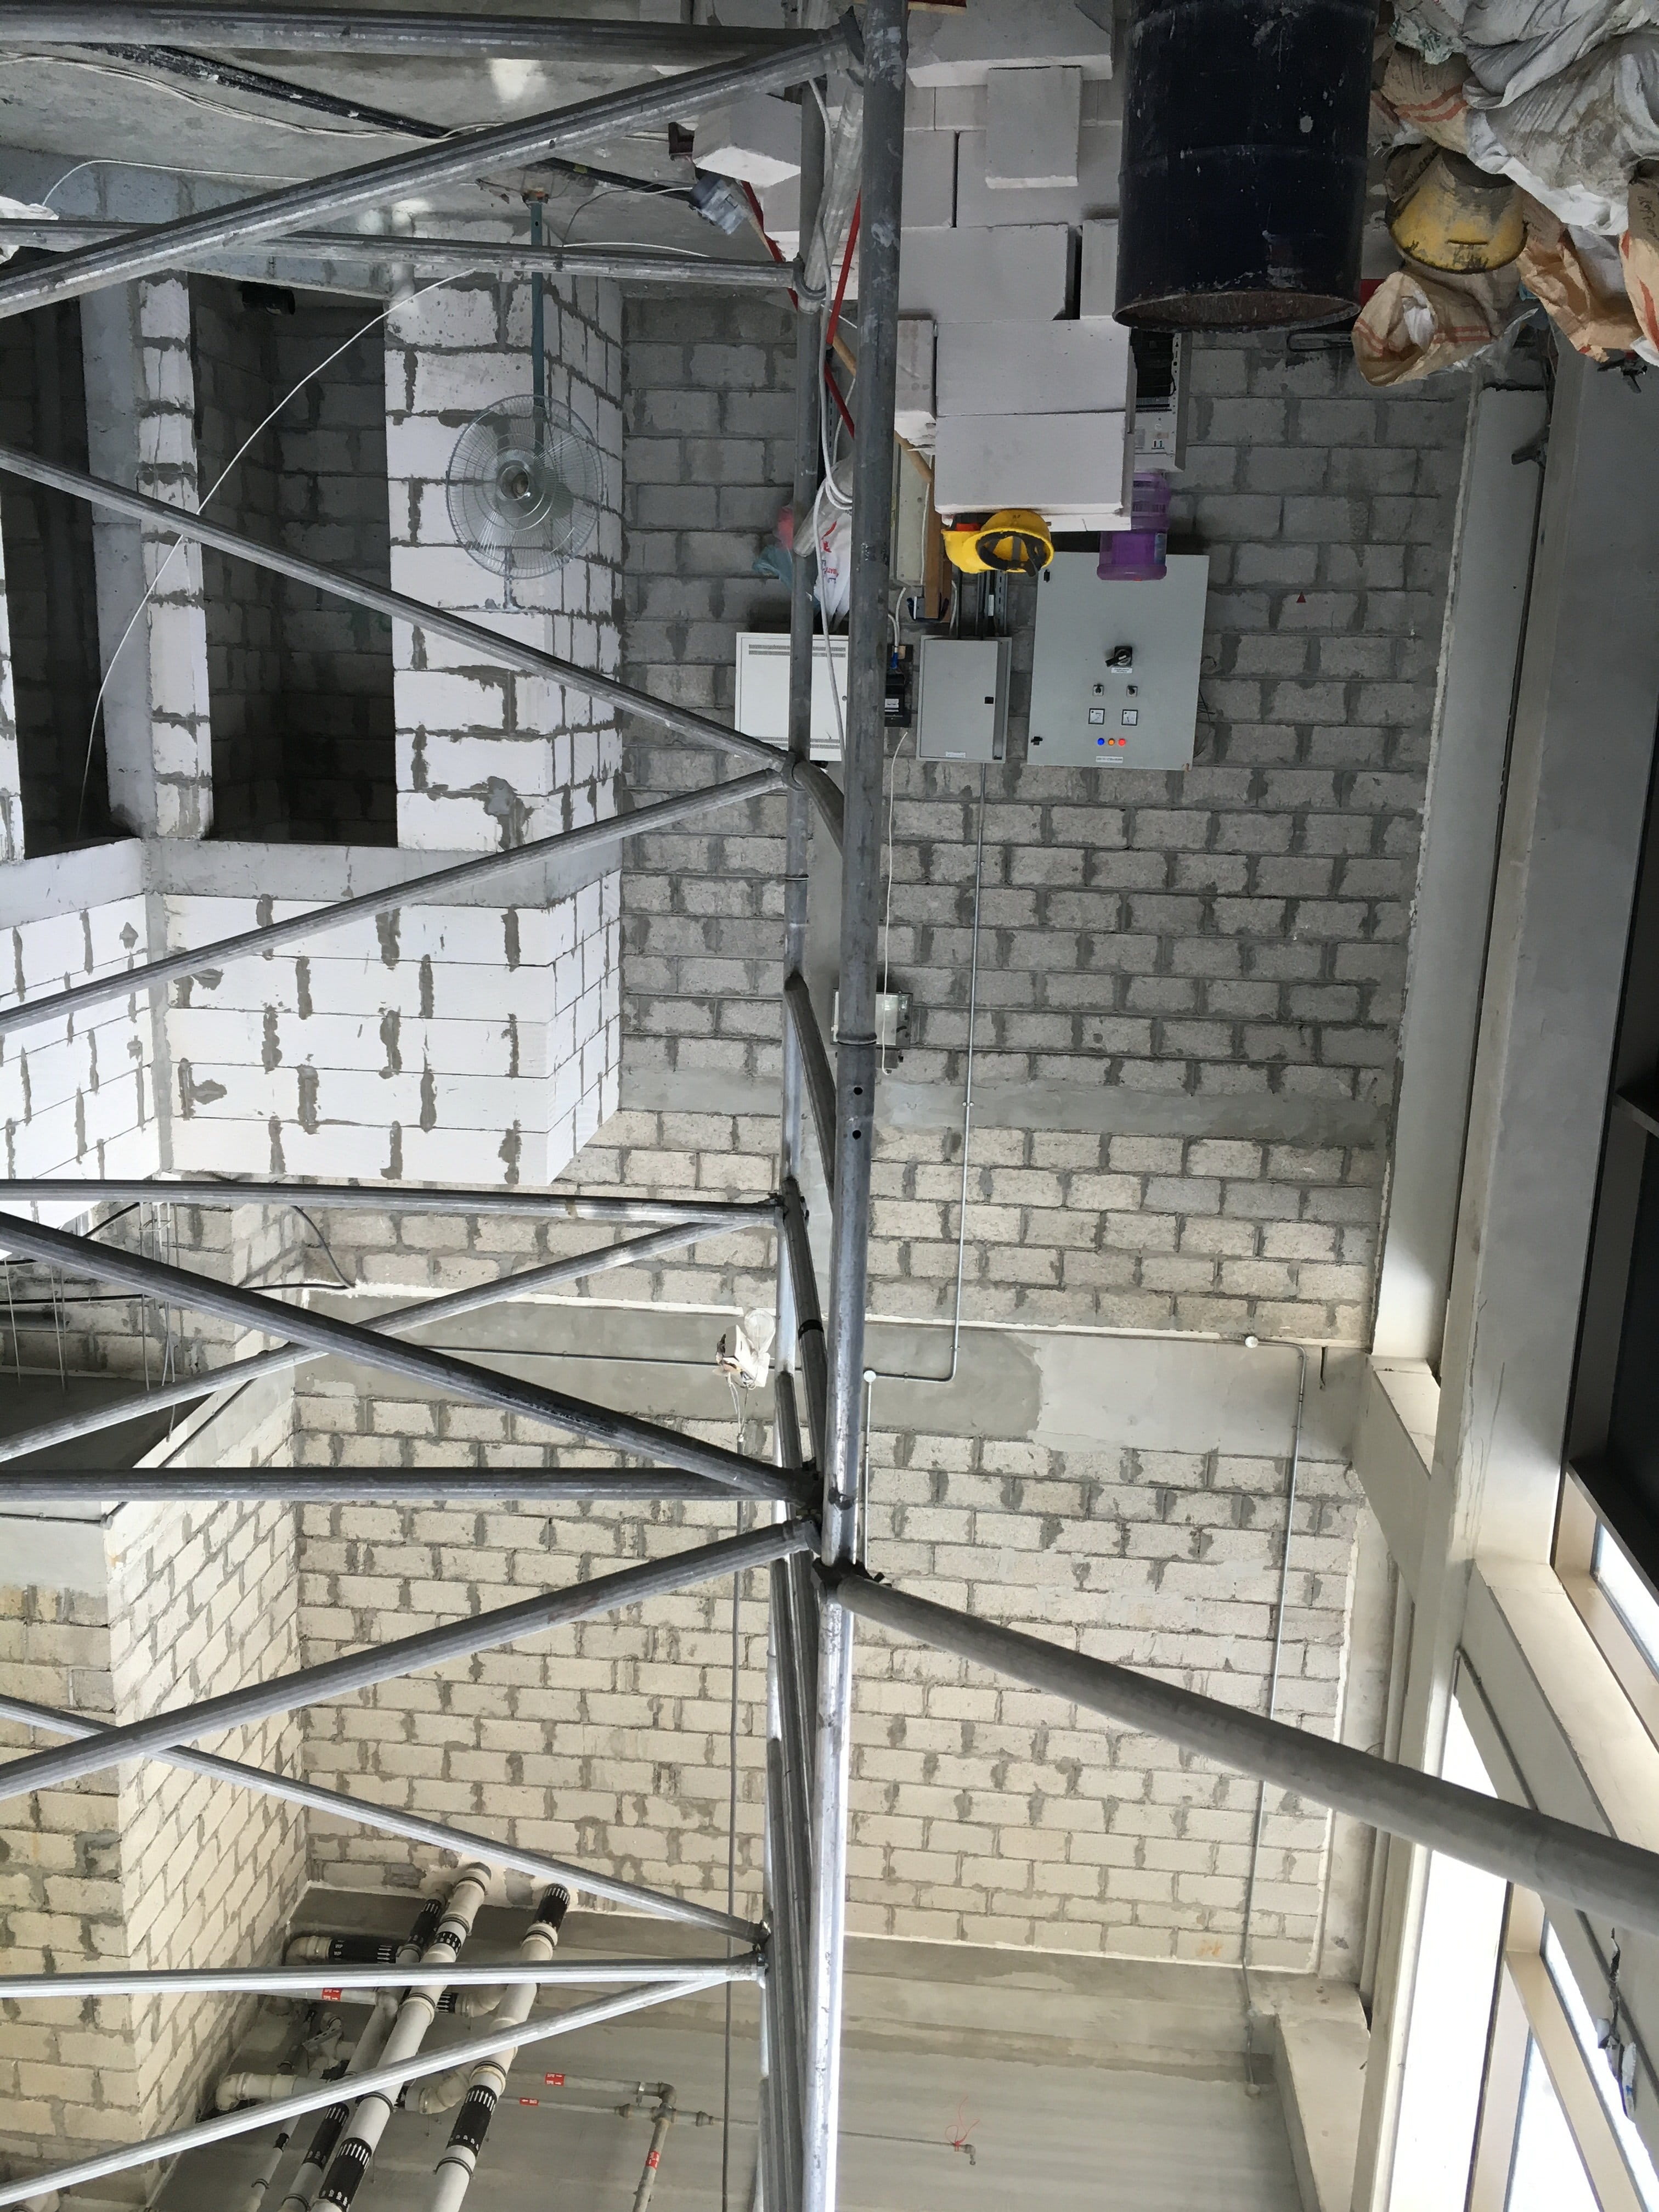
Execution: Final Step in which the plan designed in the prior phases of the project life is put into action. The purpose of project execution is to deliver the project expected results.


3D Phase
Basic Points:
Modeling:
Basic geometrical modeling for both interiors & exteriors.

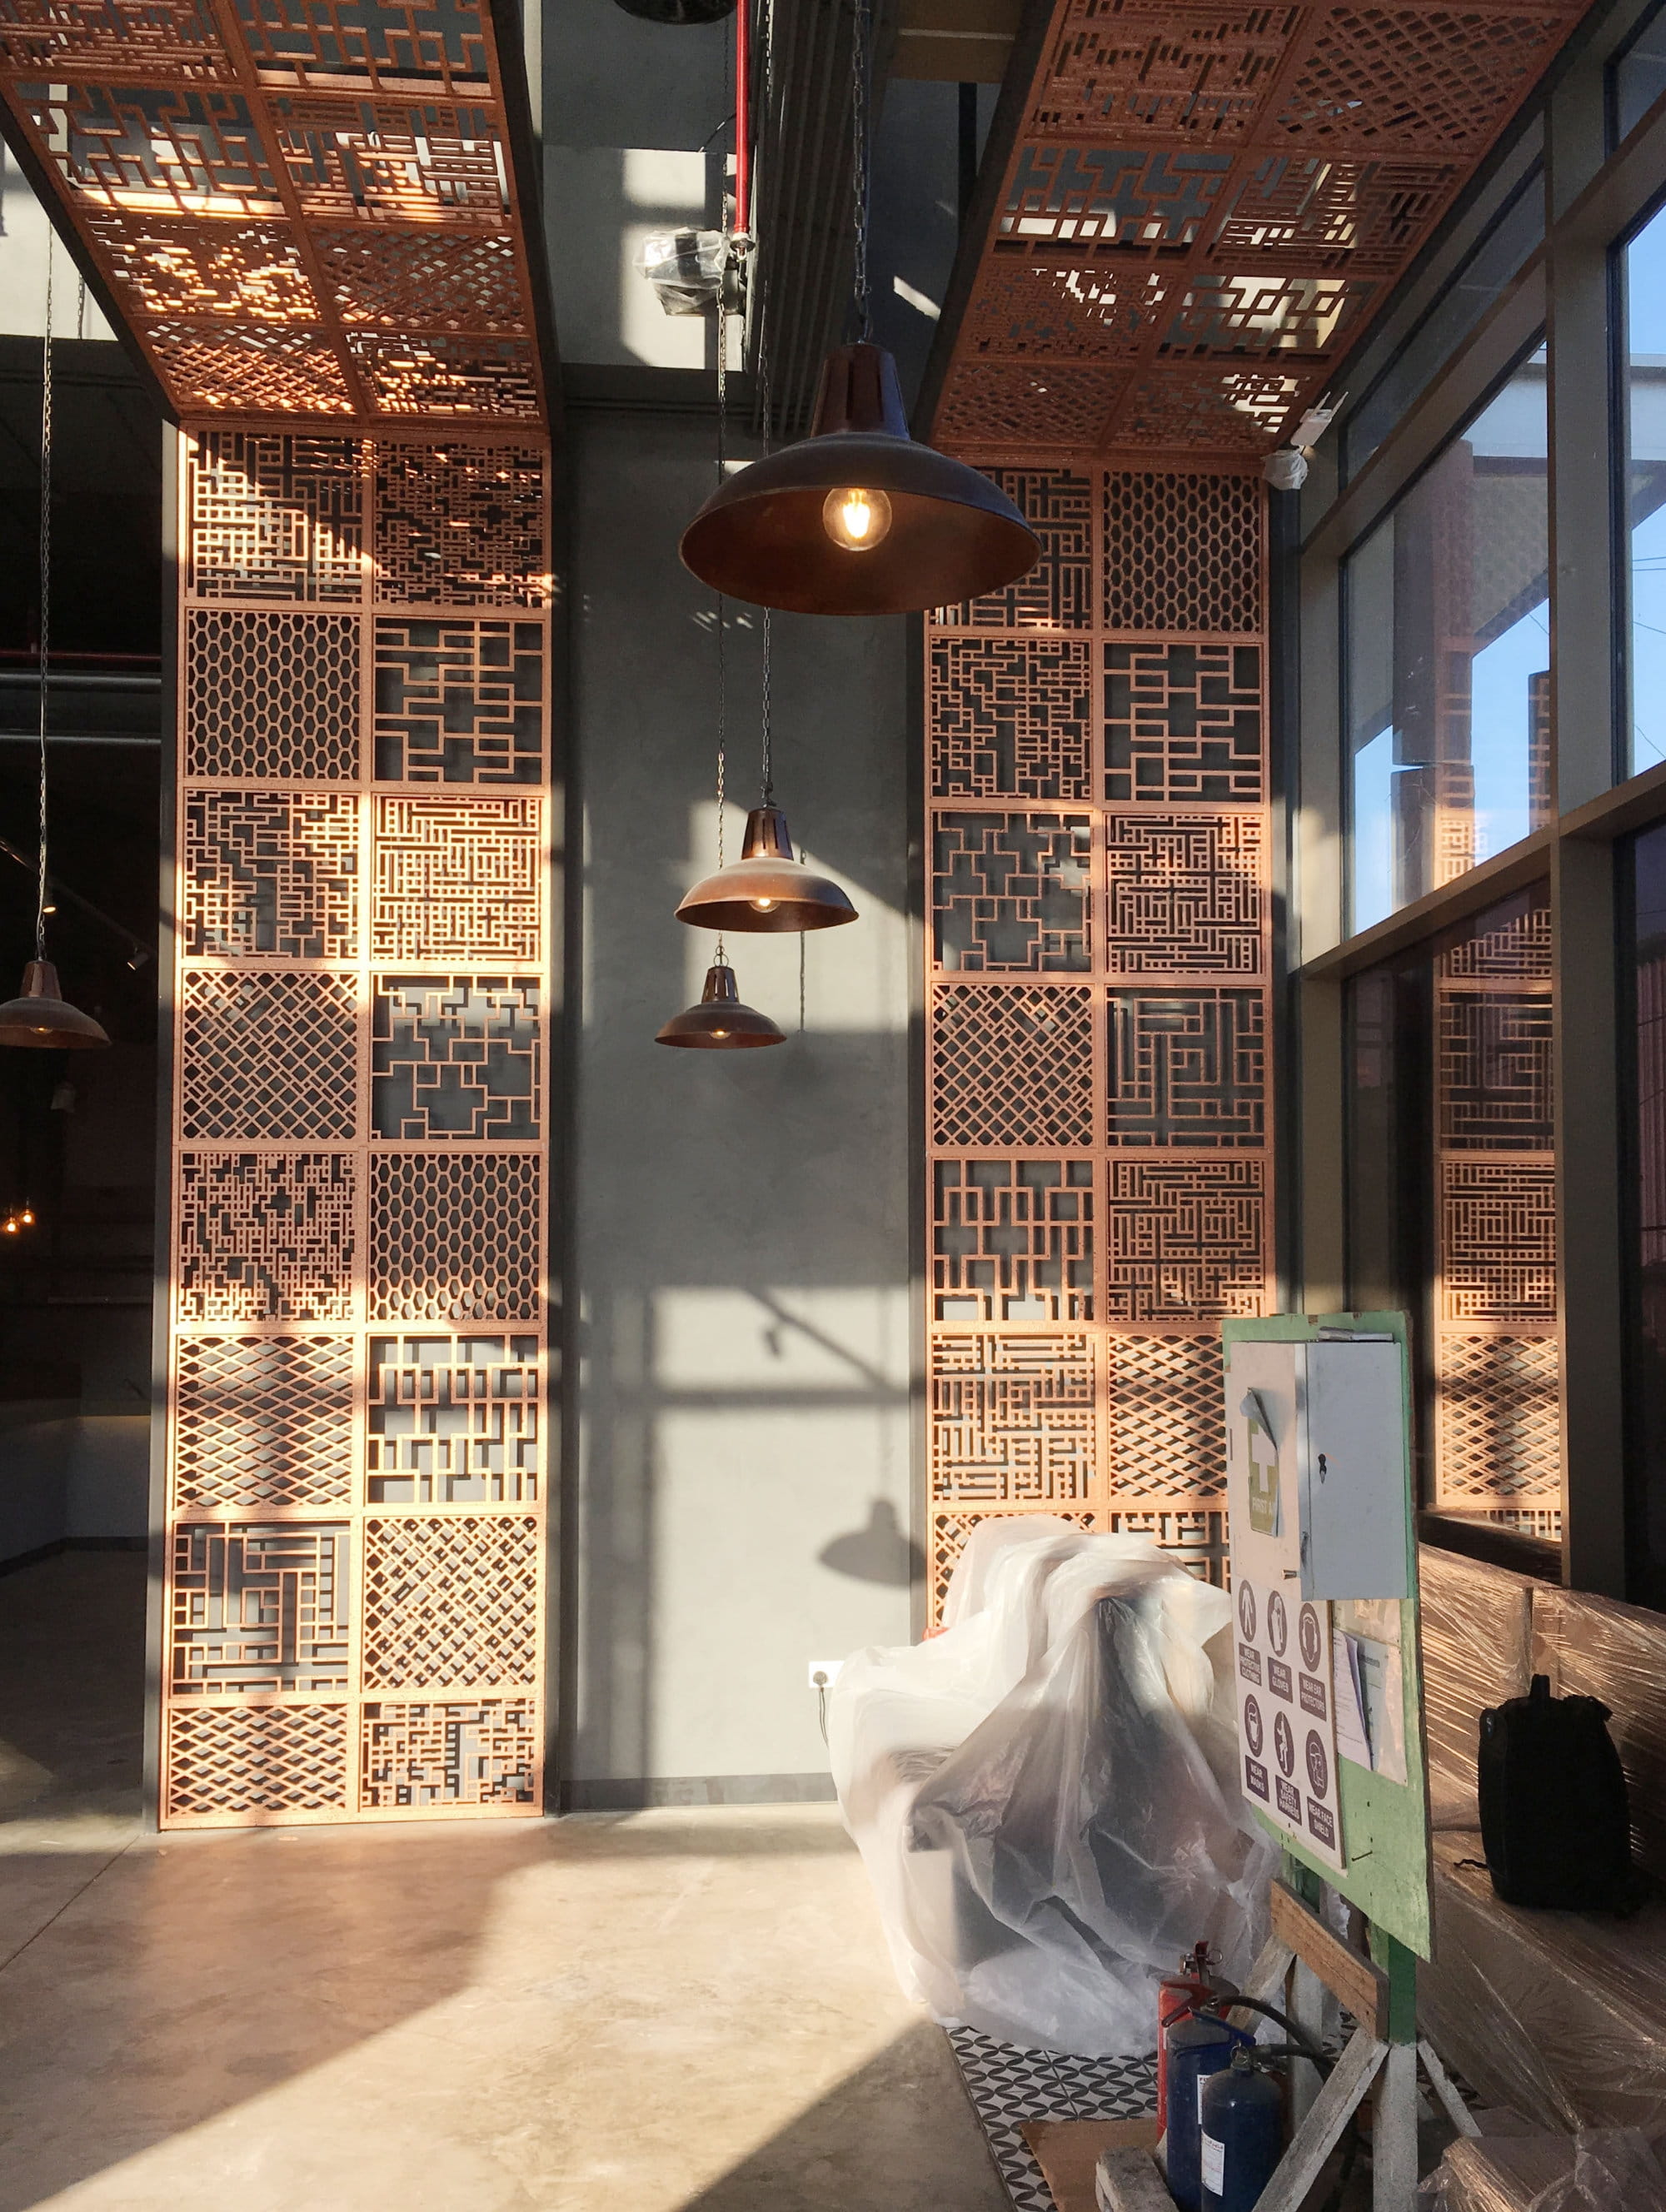
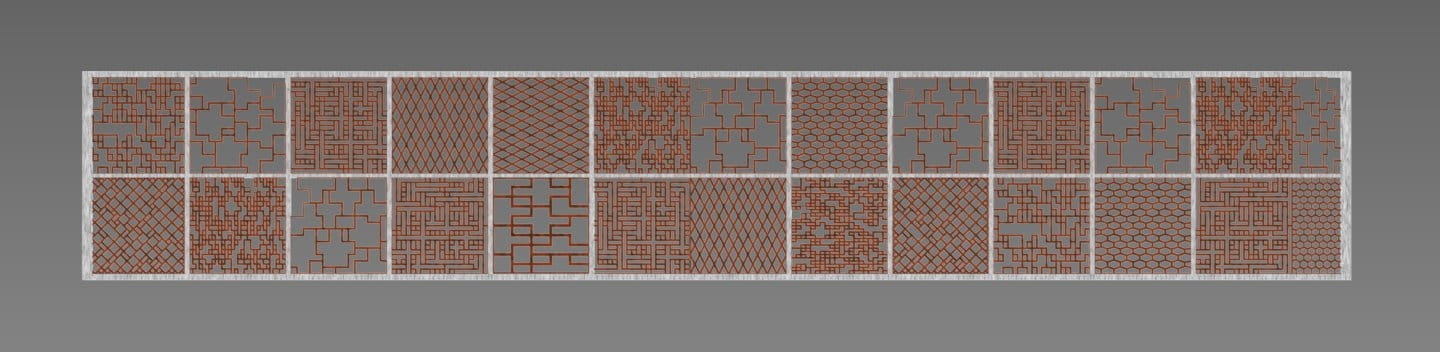
Panels Creation
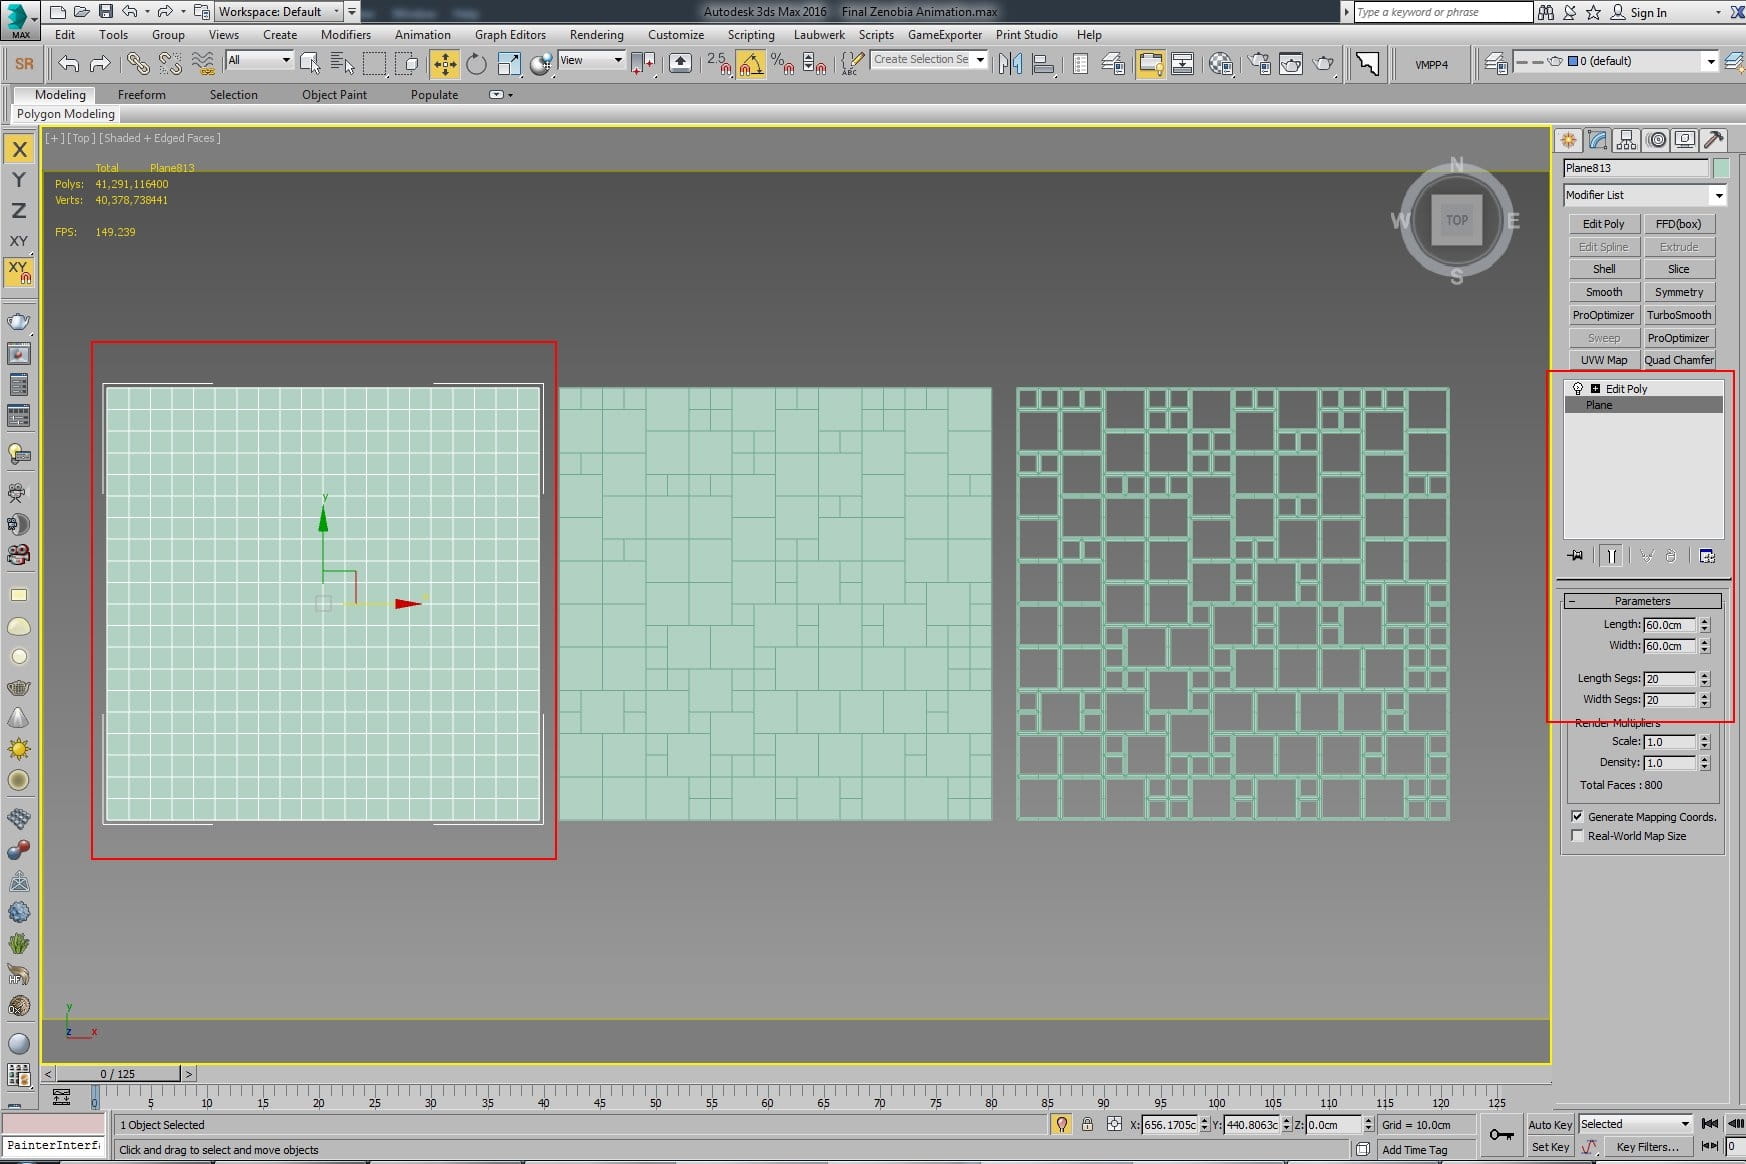
Create 60 X 60 plane.
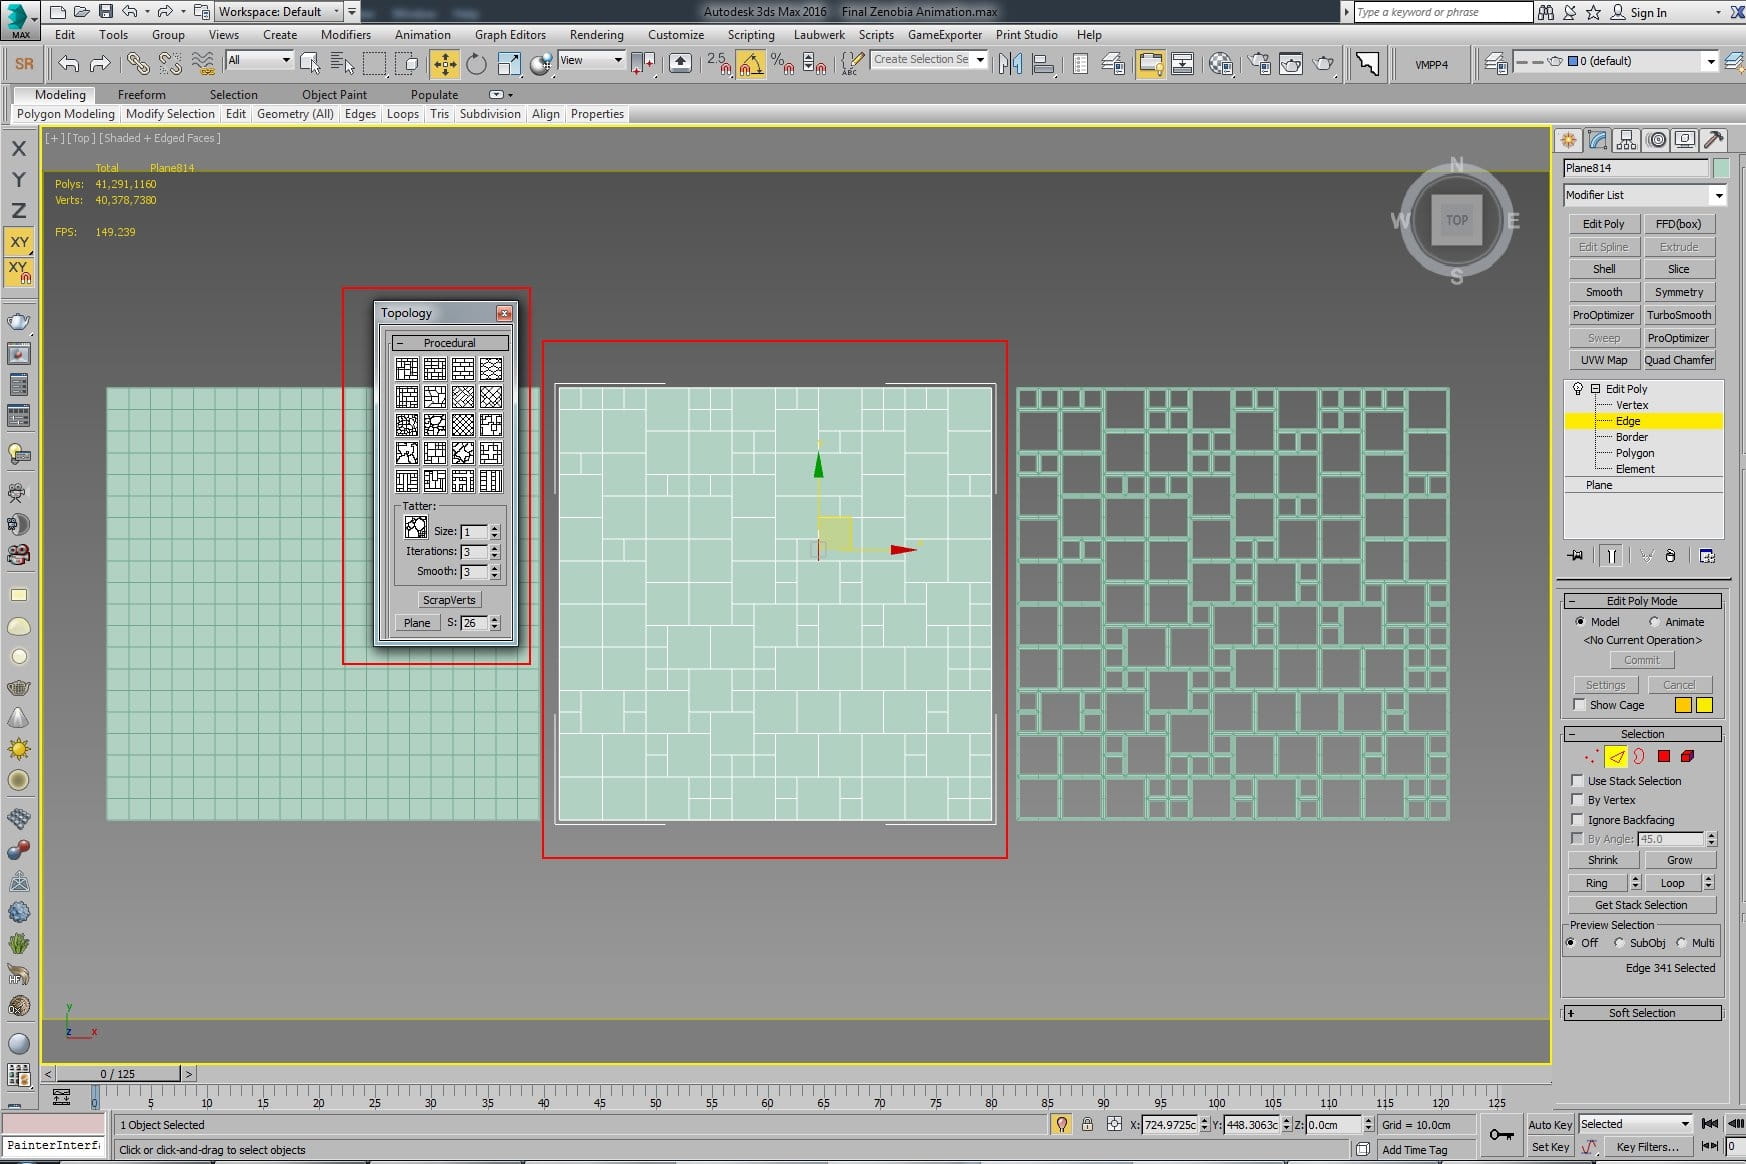
Graphite ribbon / polygon modeling /topology.
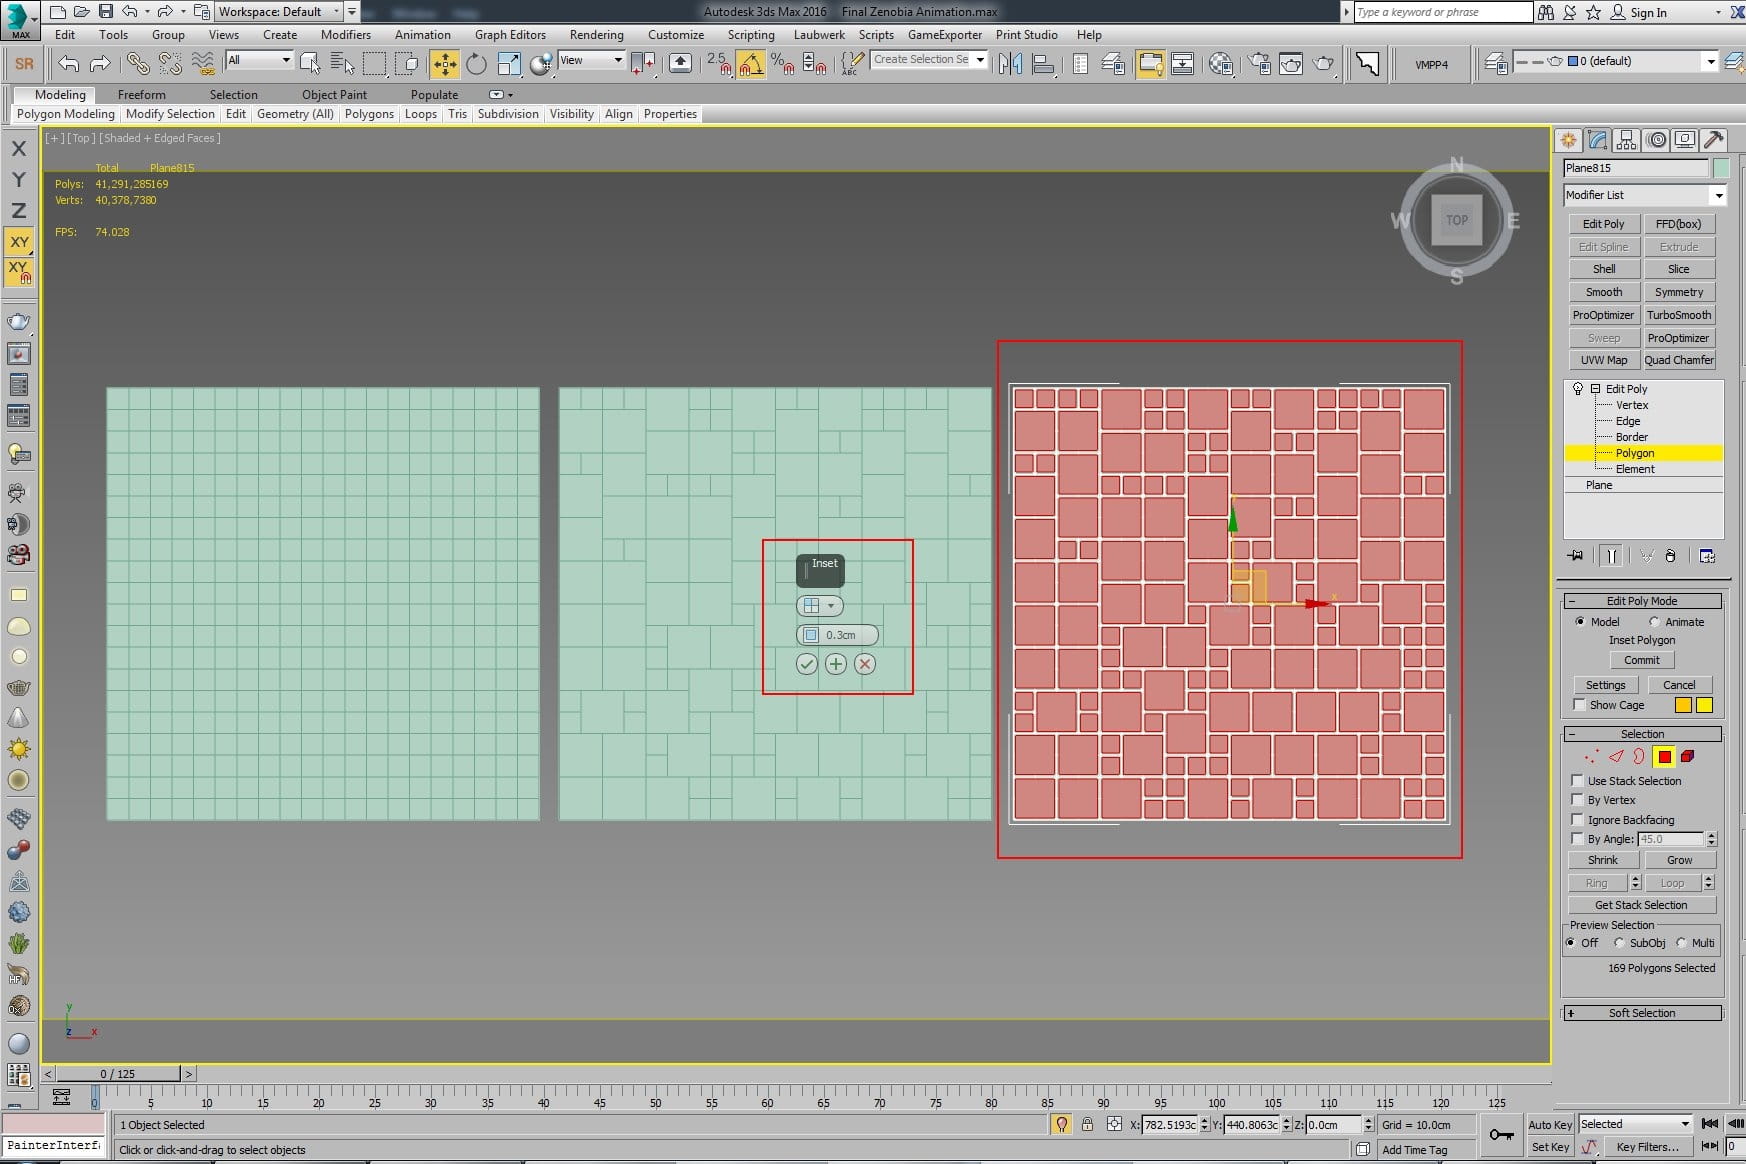
Inset the polygons & delete them.
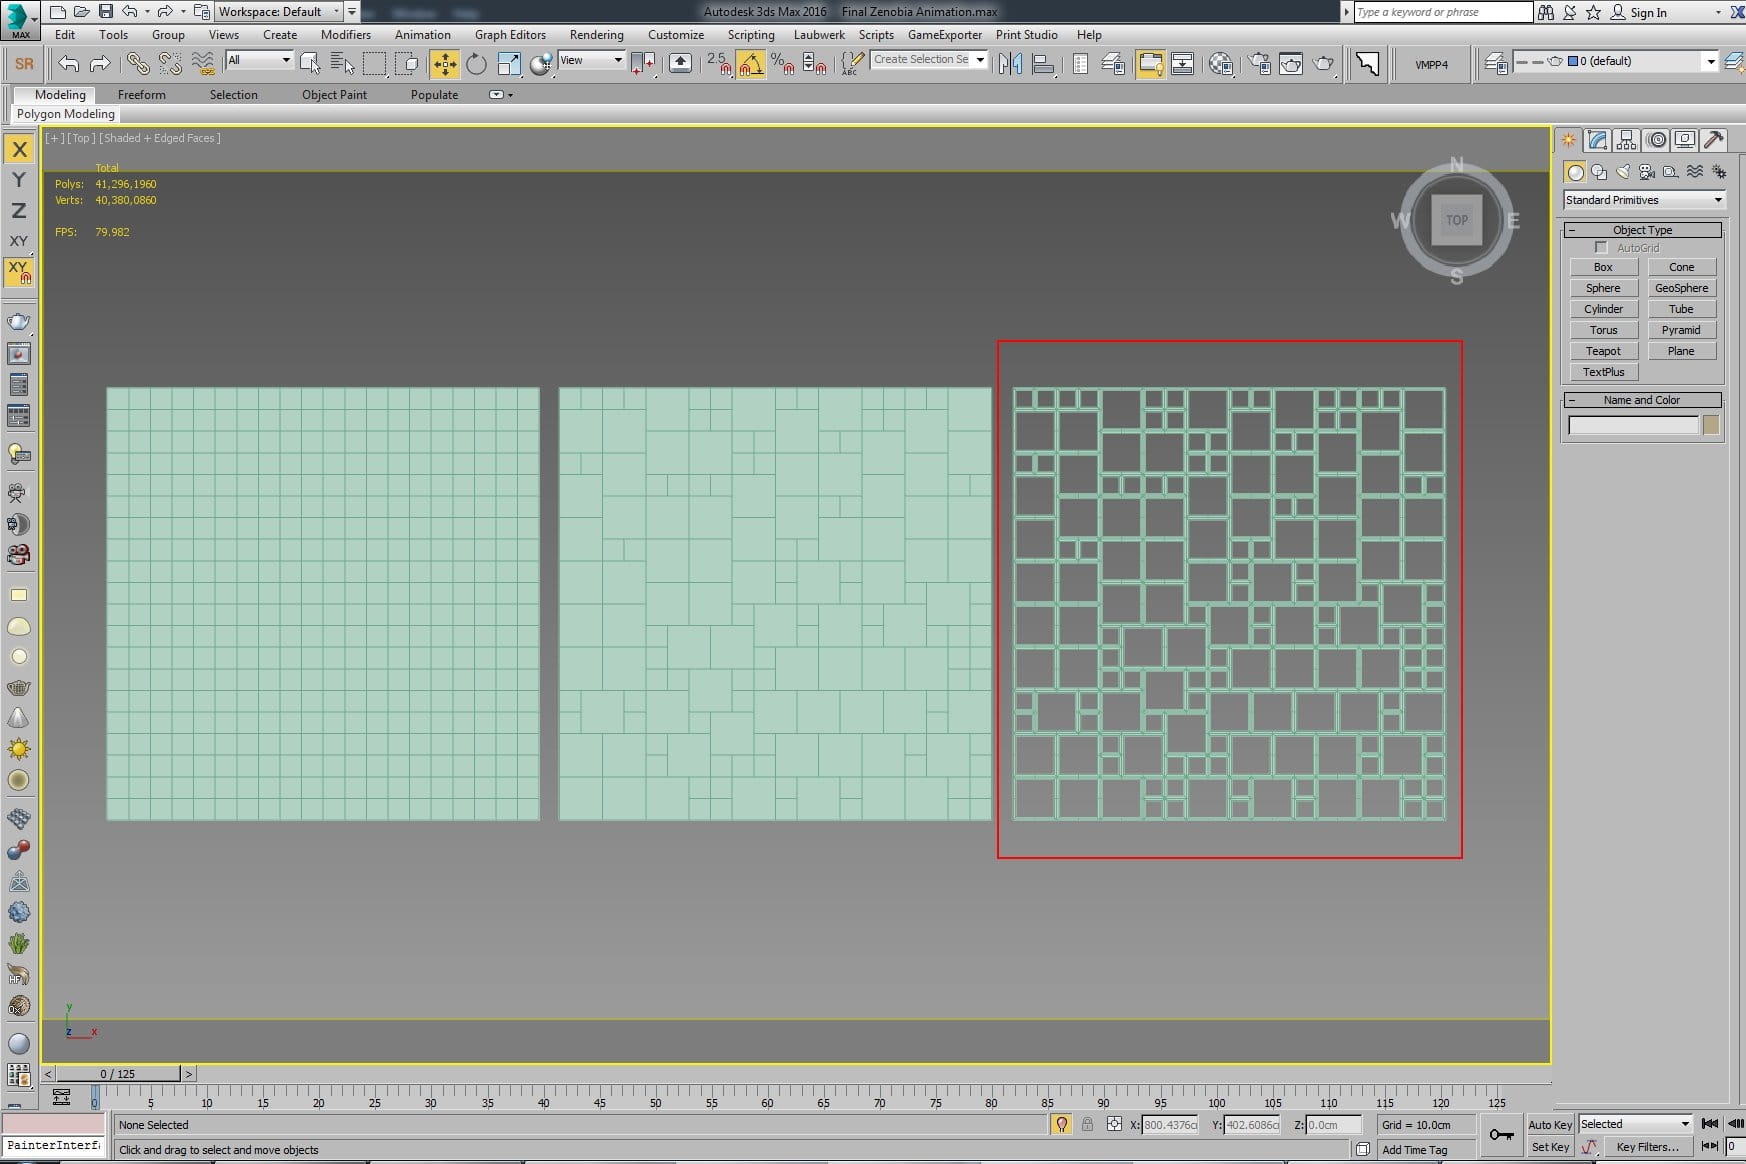
Use Shell modifier to achieve thickness.
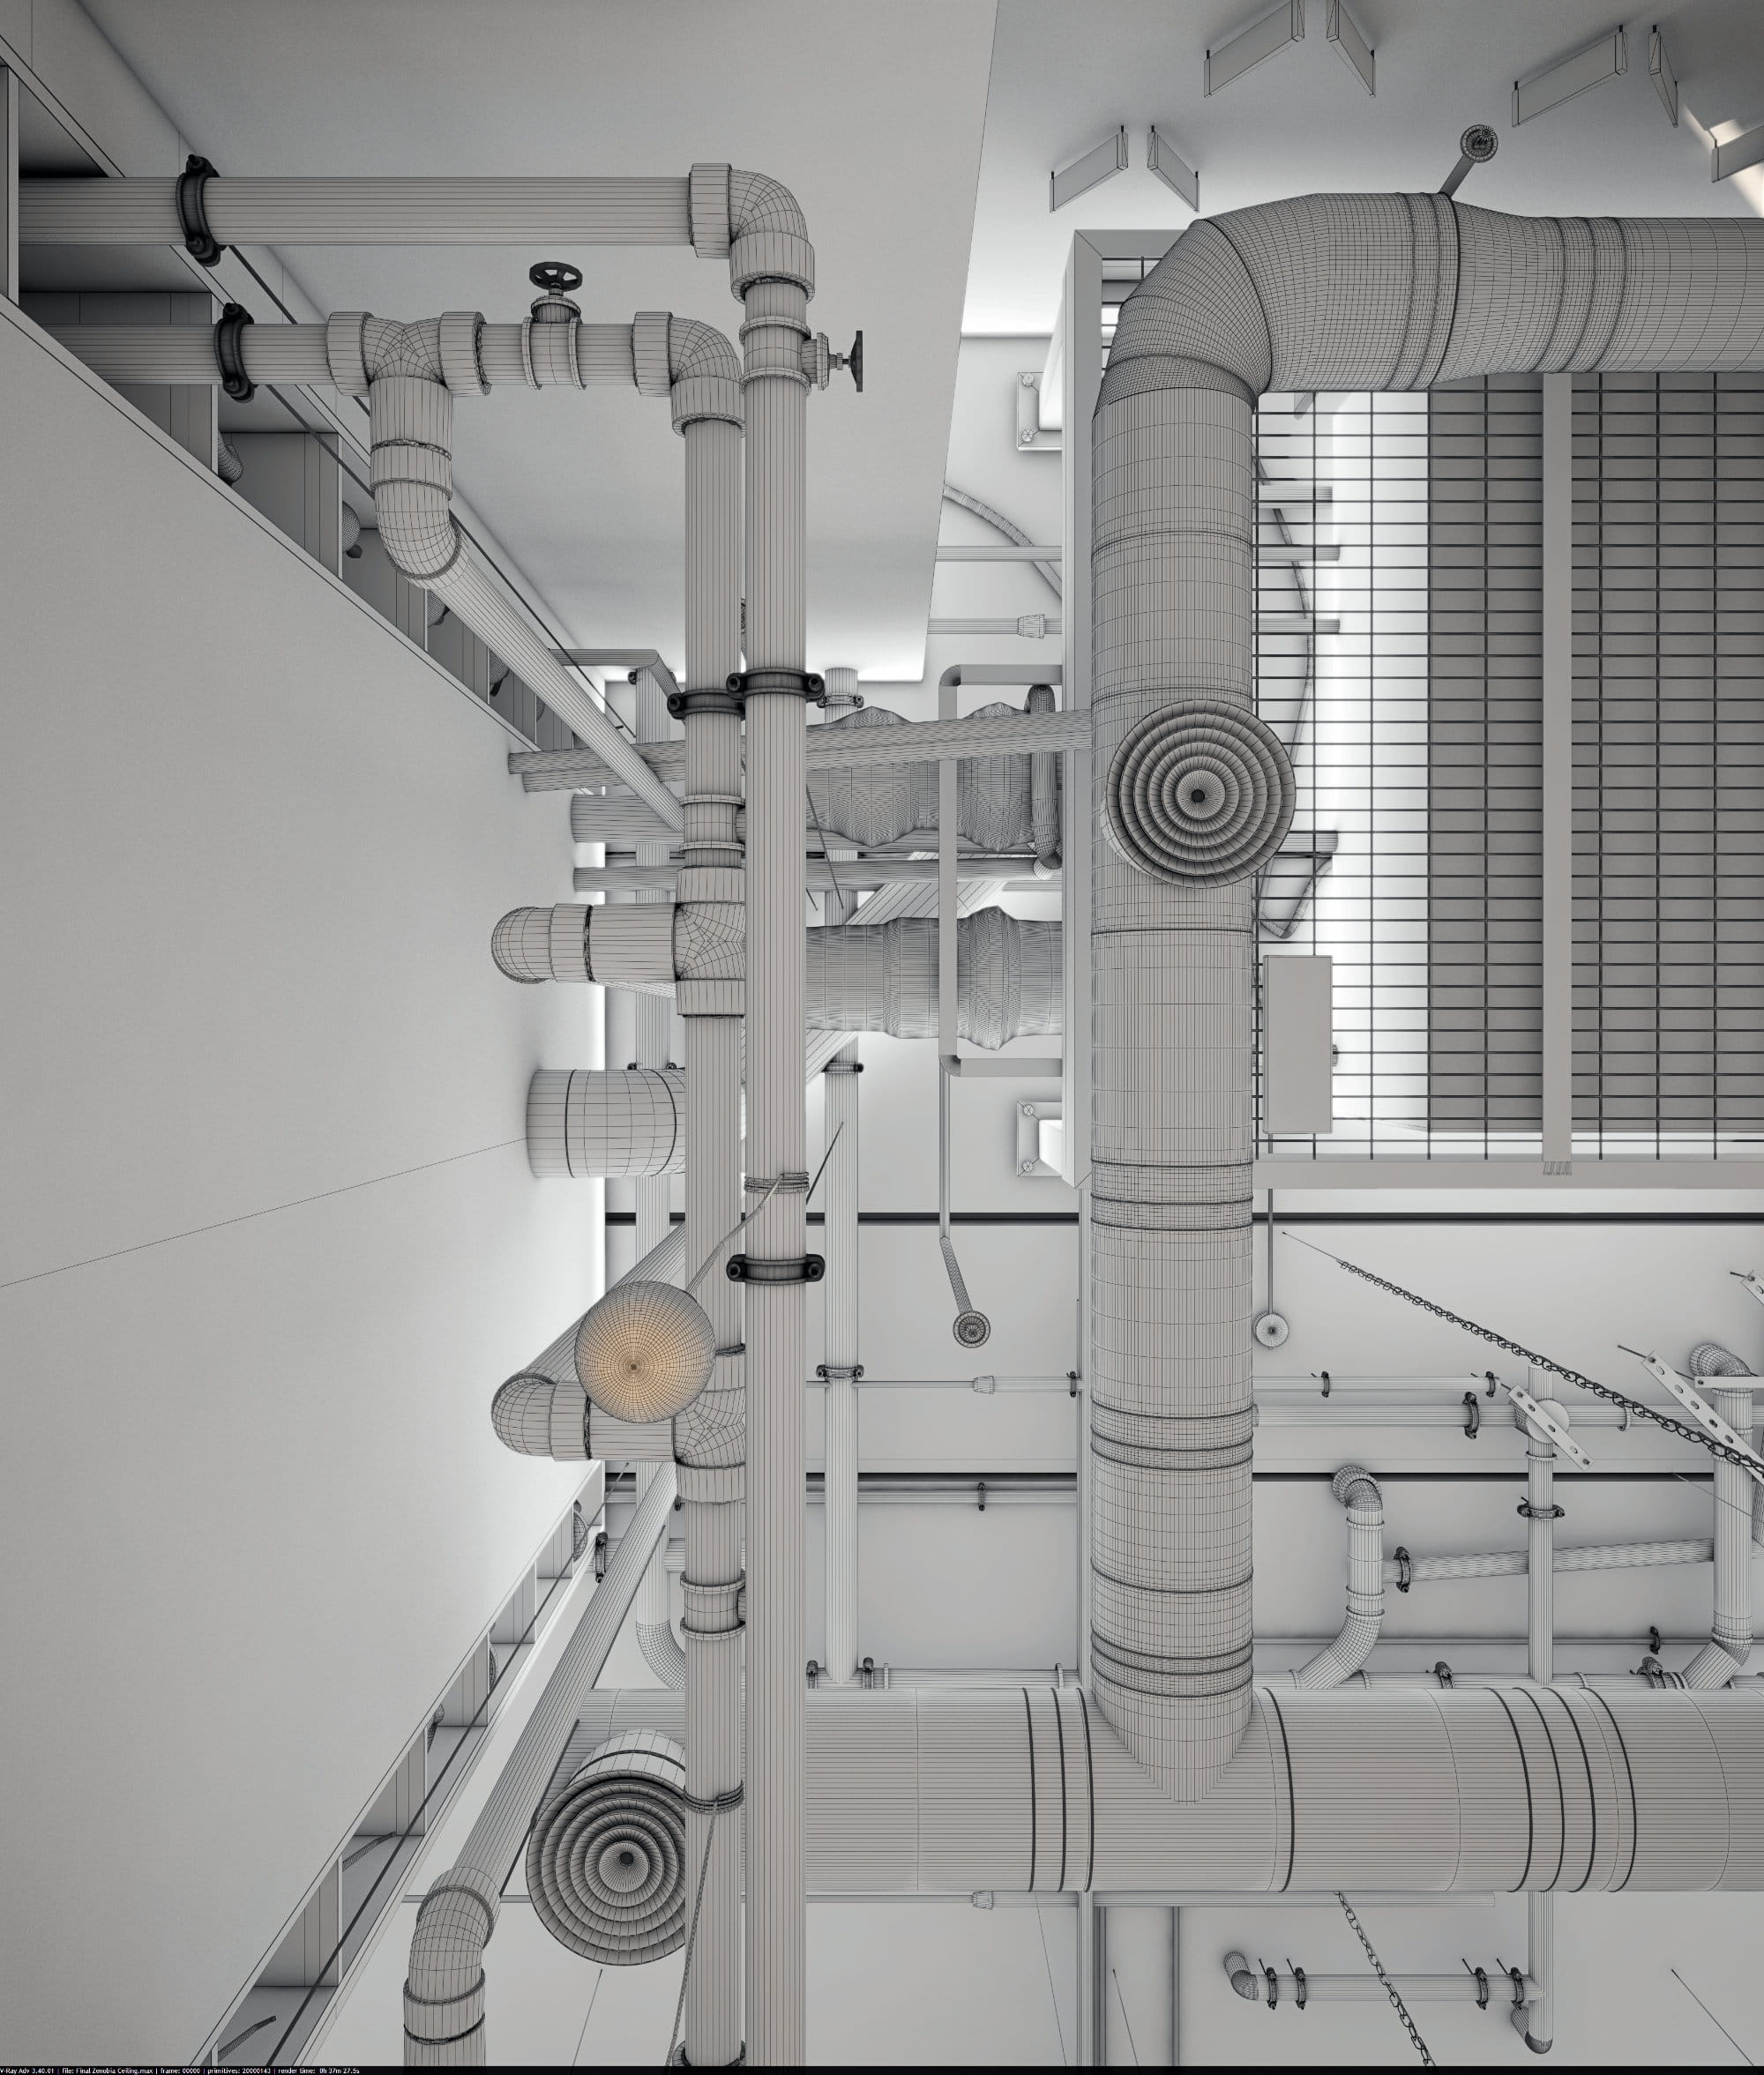
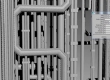
Ducts Modeling
It took me around 1 day to copy the exact constructed ducts.
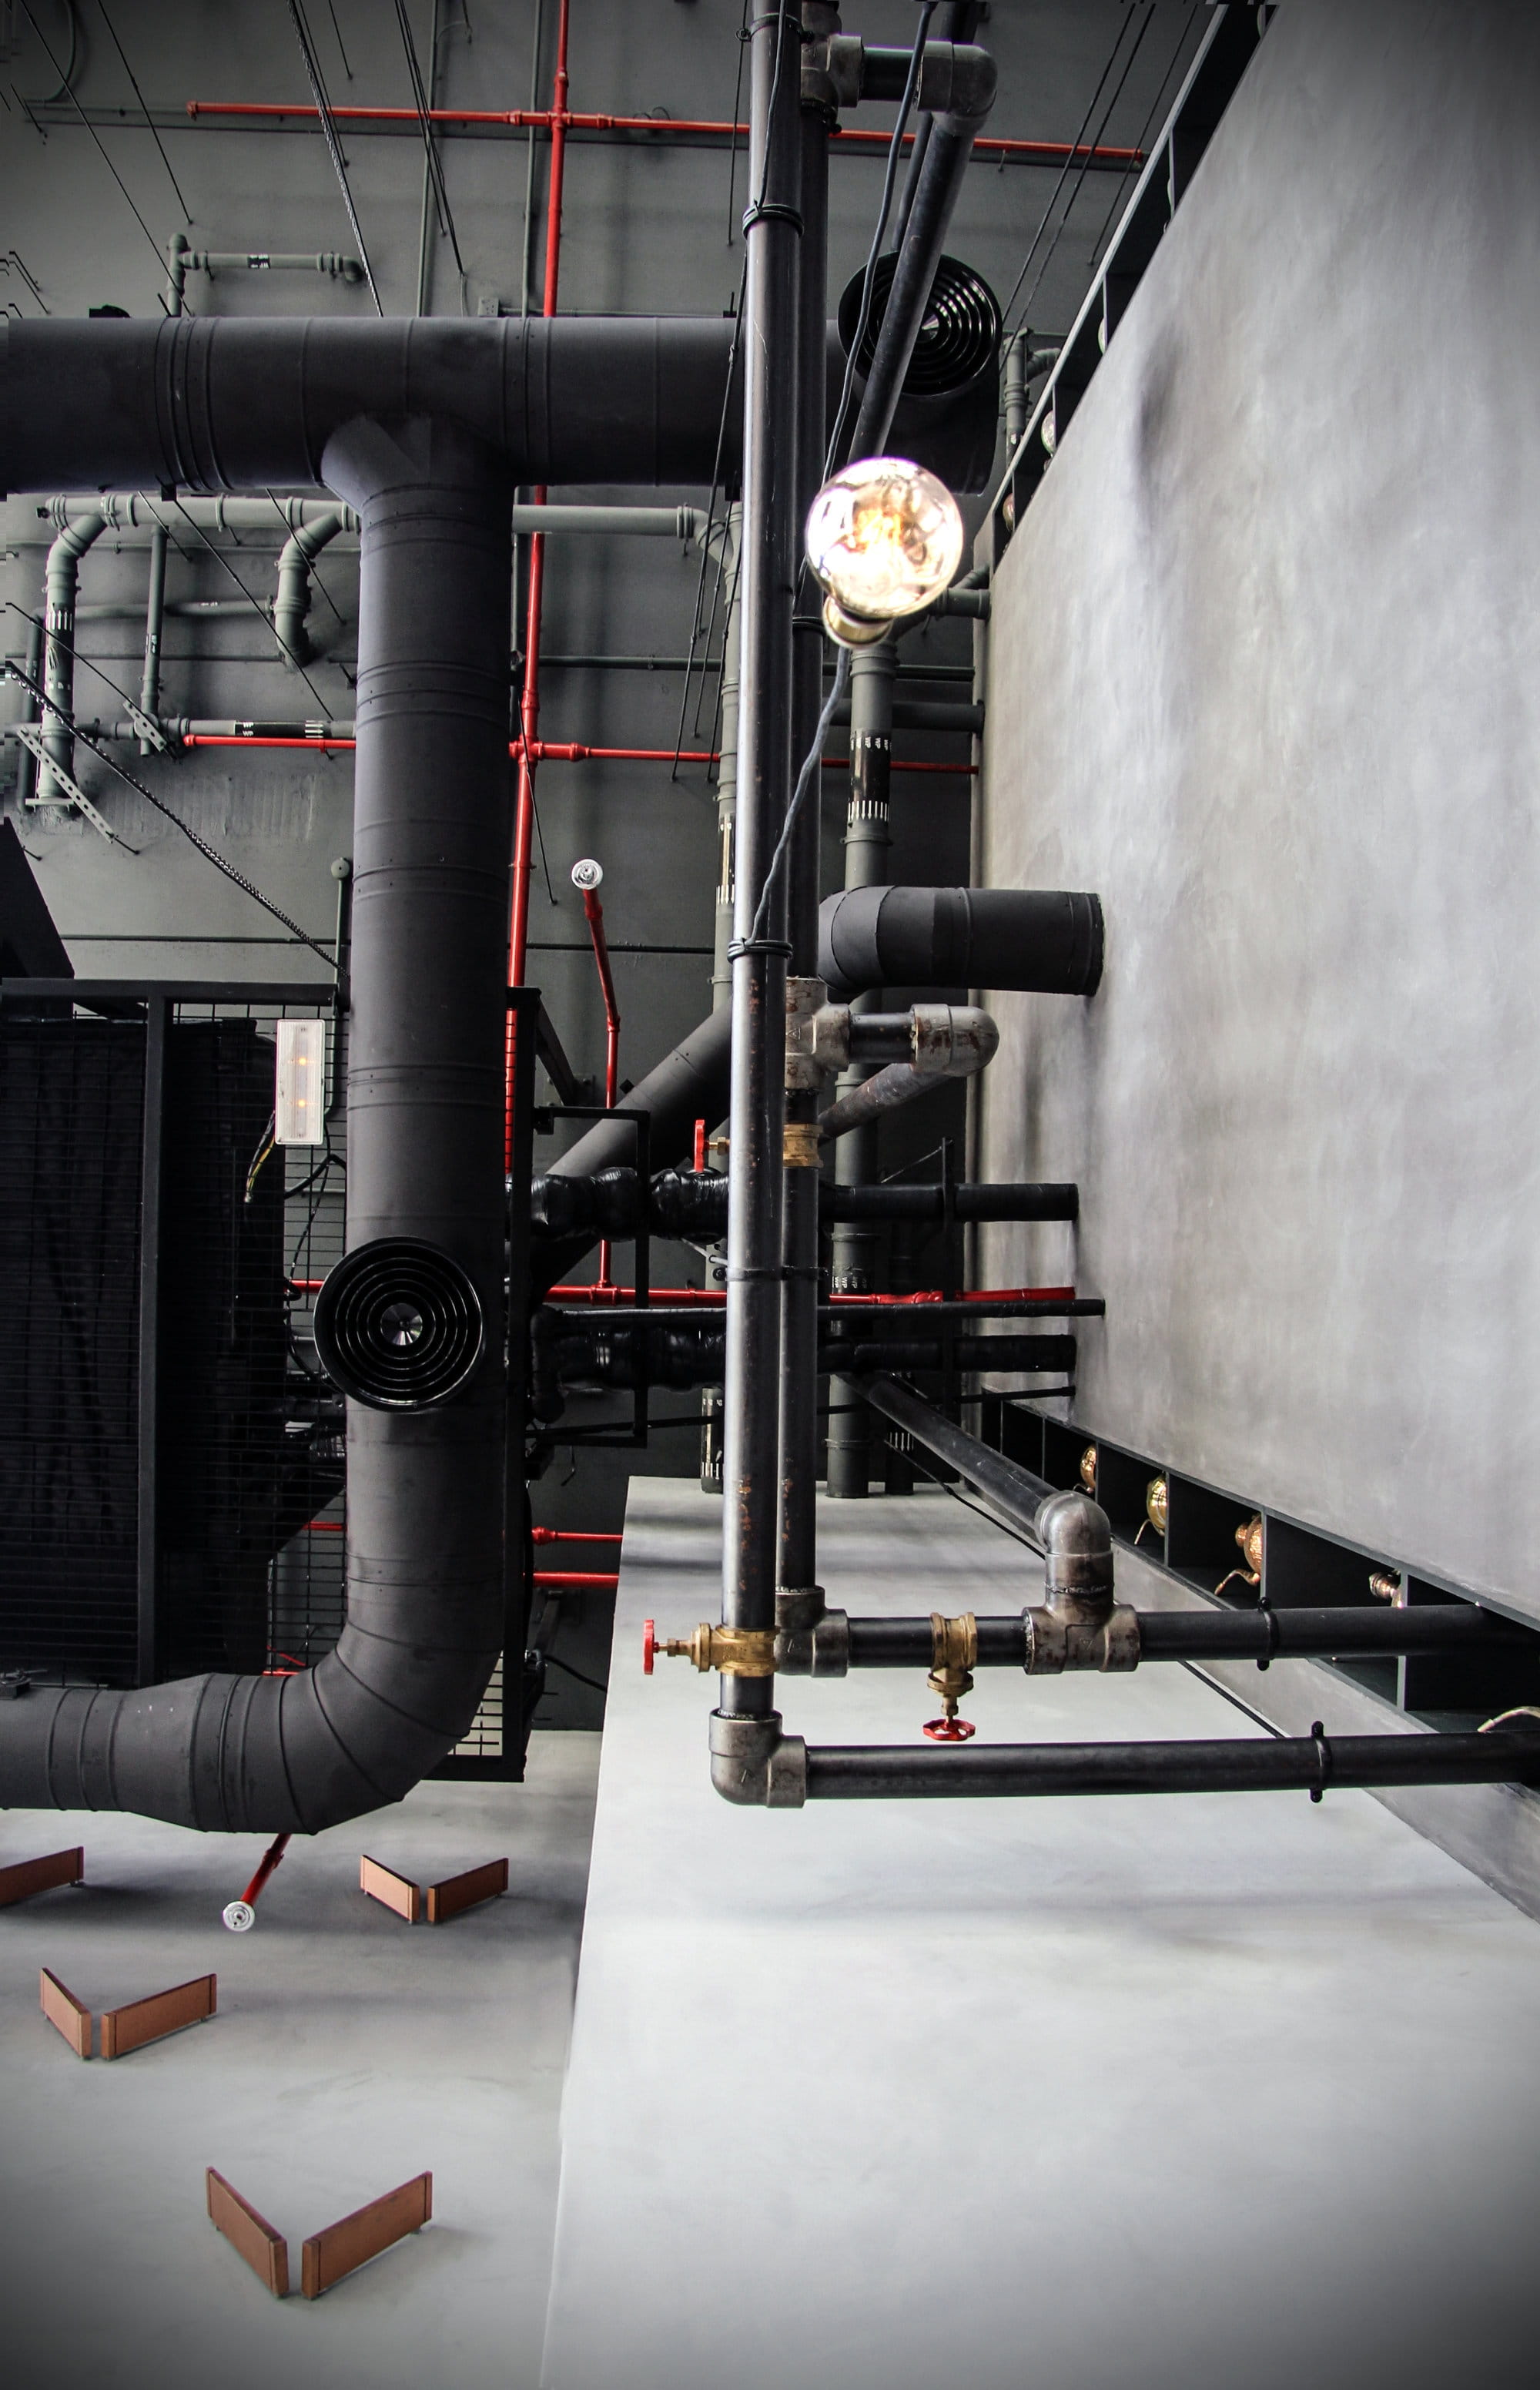

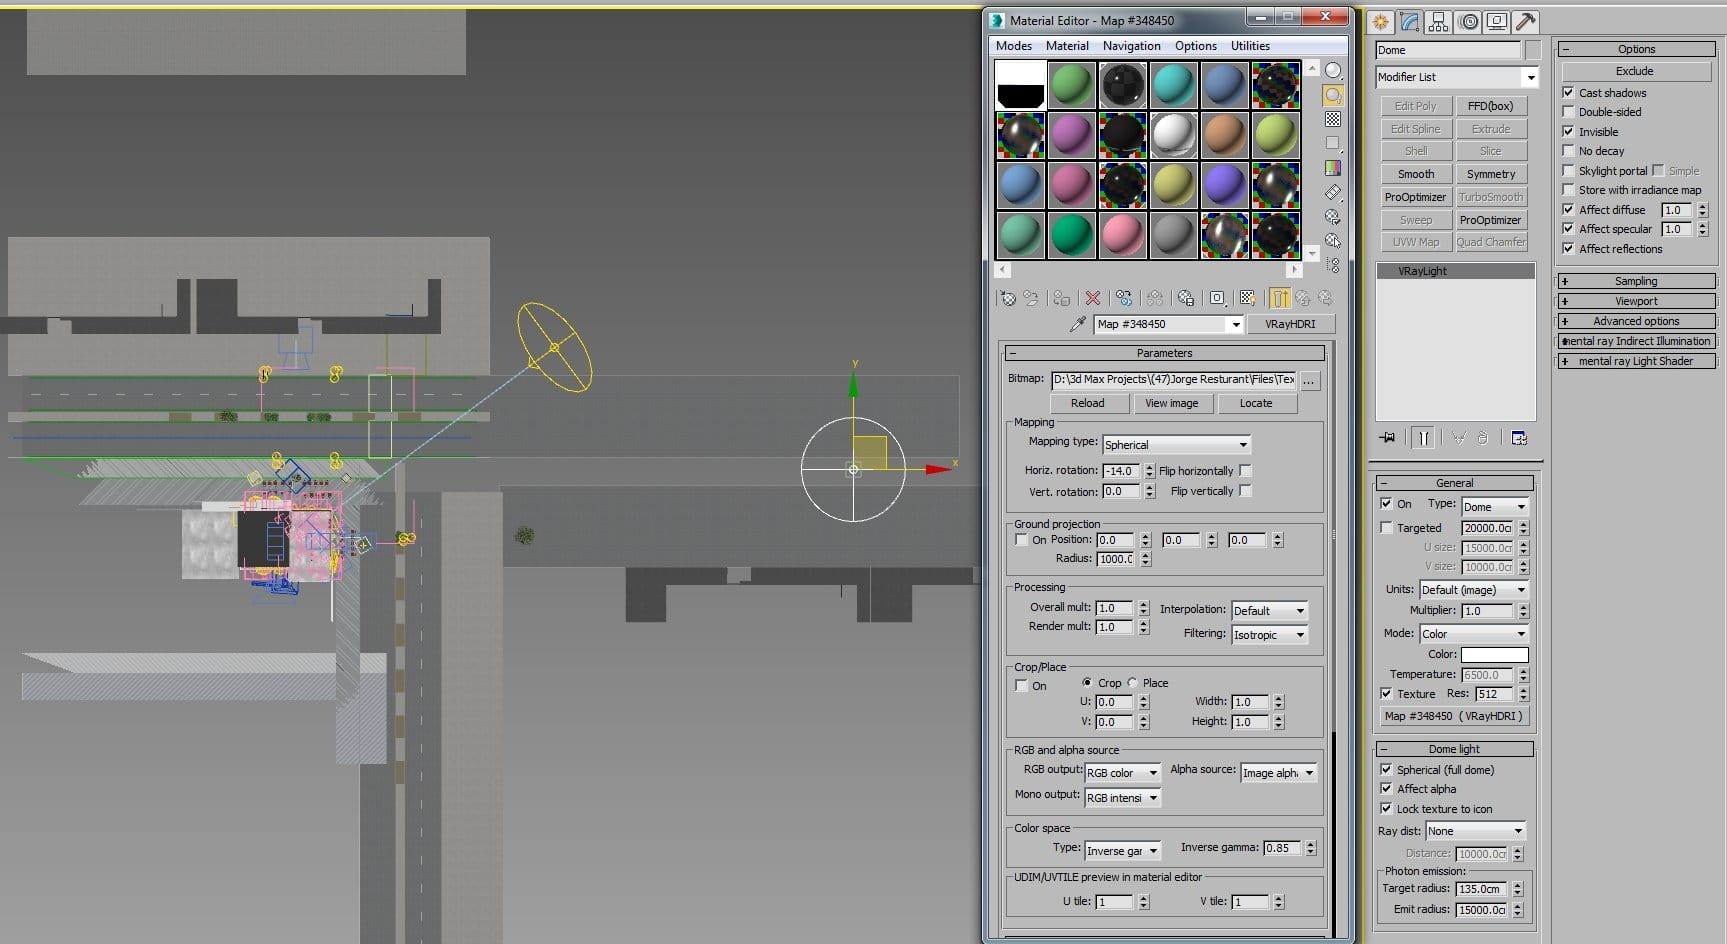
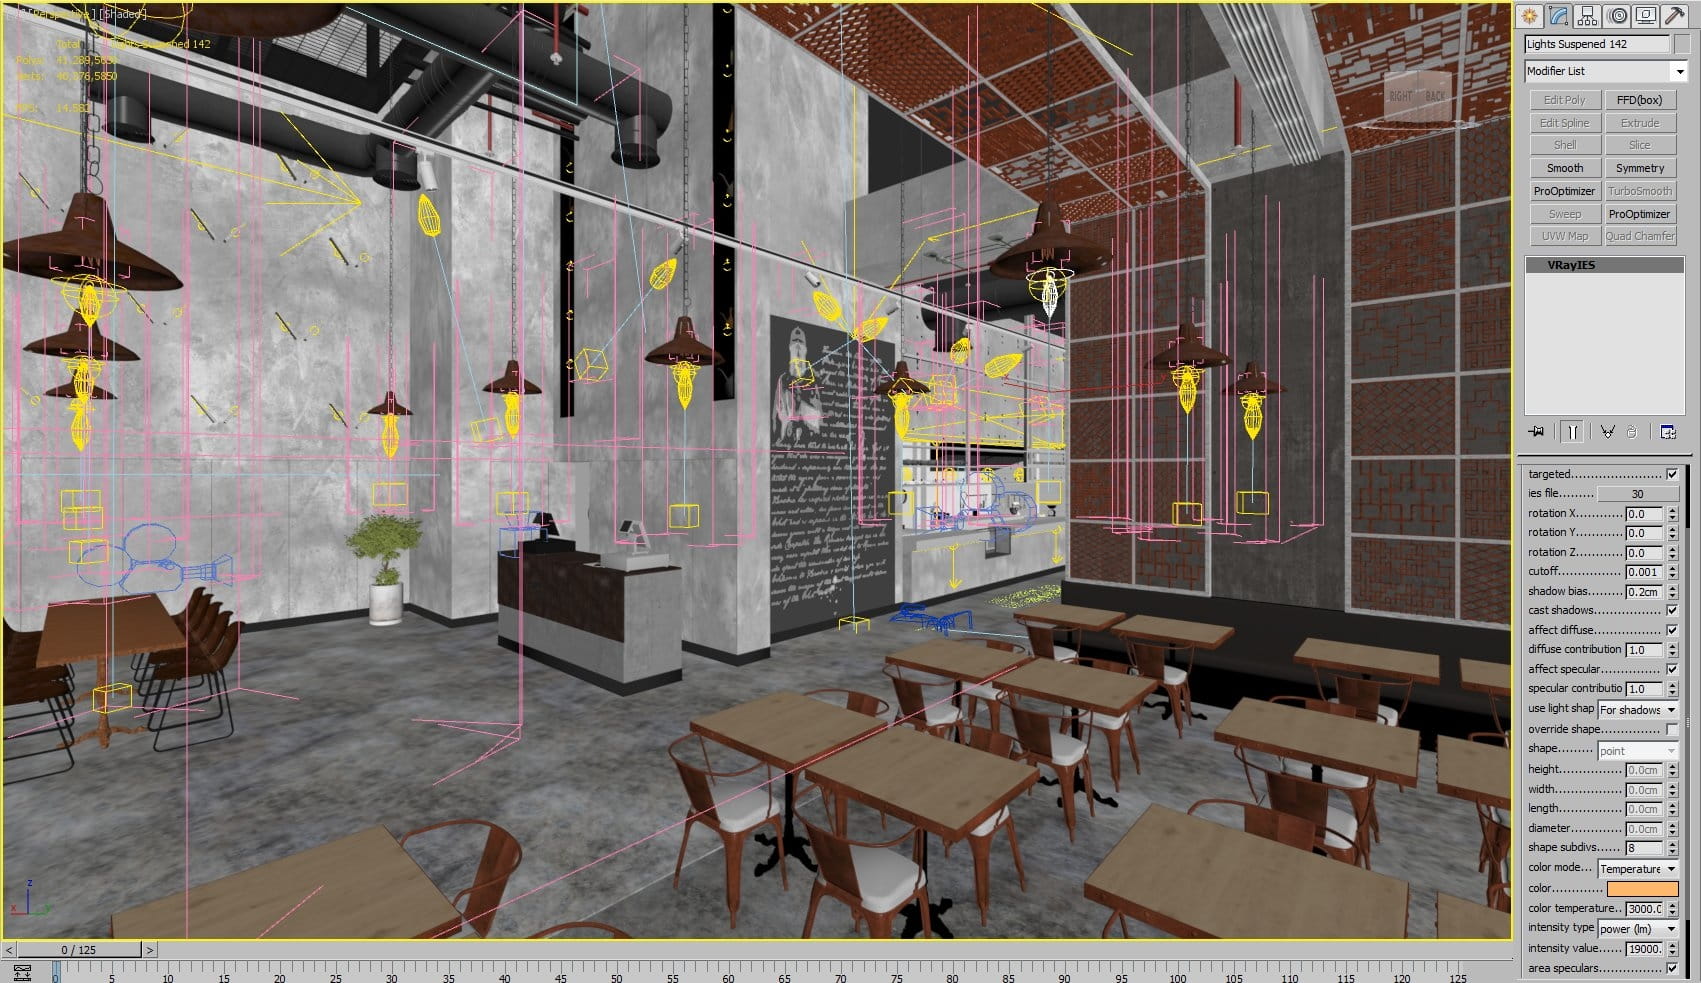
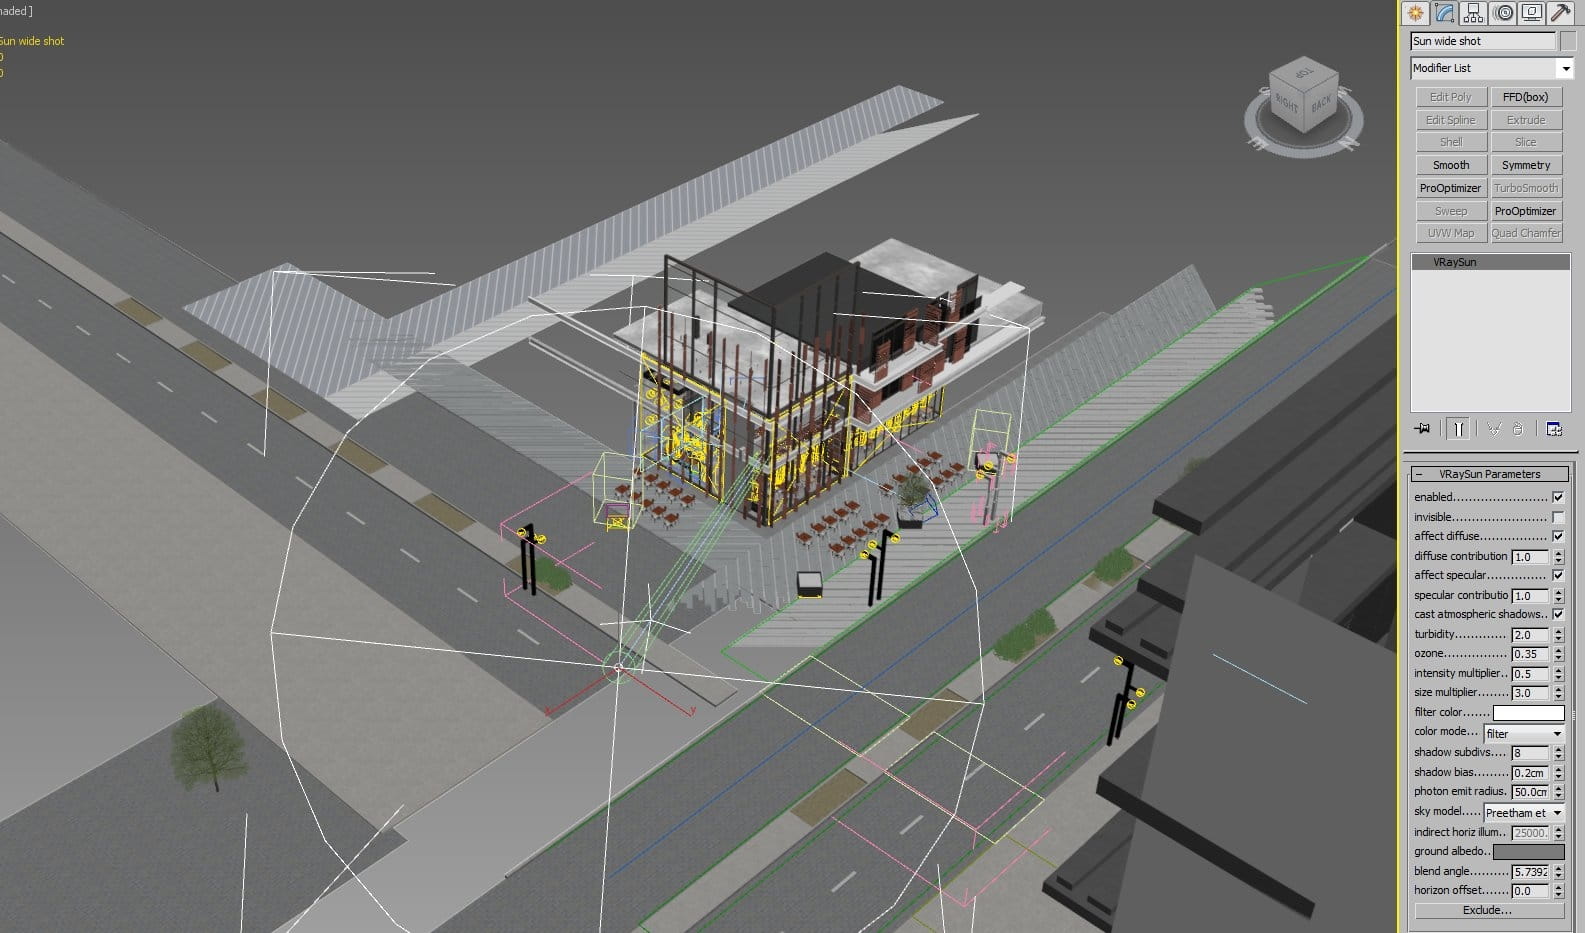
Lighting
I’ve used 1 main dome Light with HDRI MAP + Vray Sun + Vray Sky portal plane & Ies lights.

Texturing
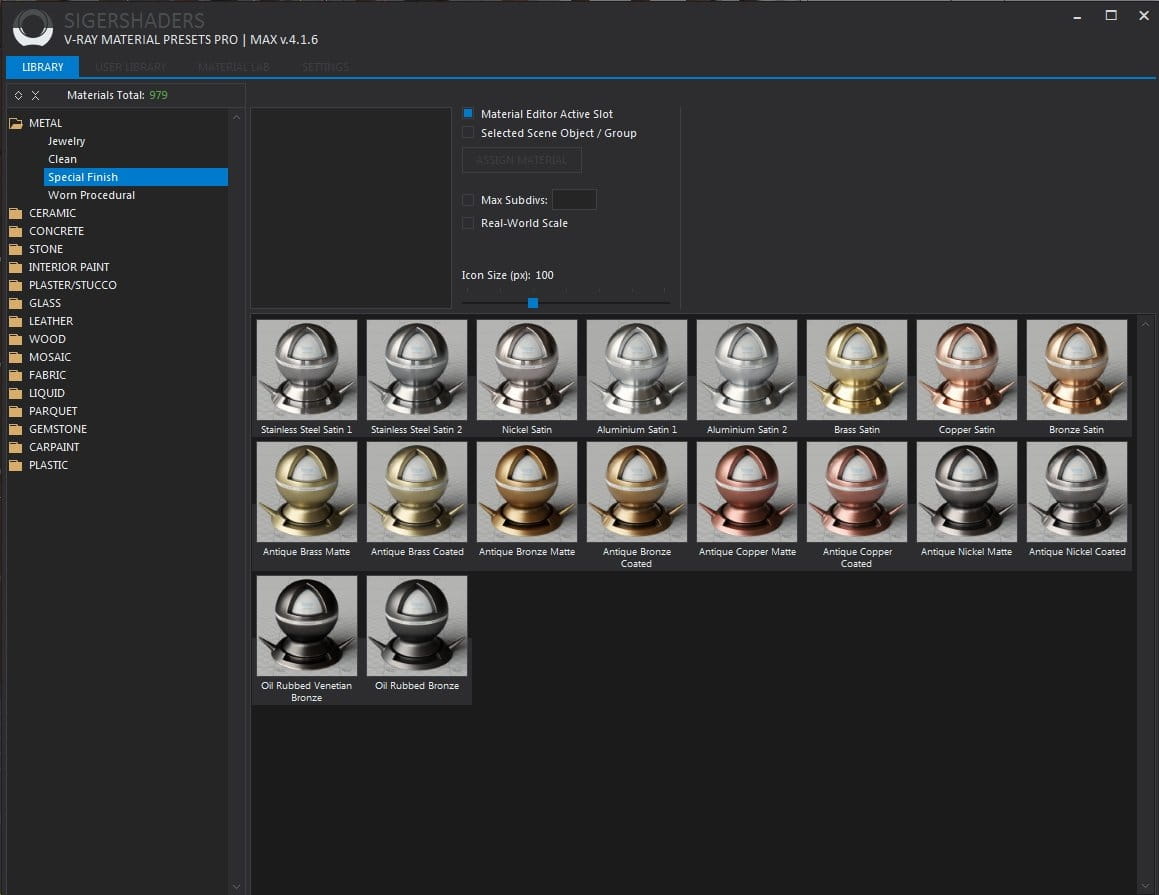
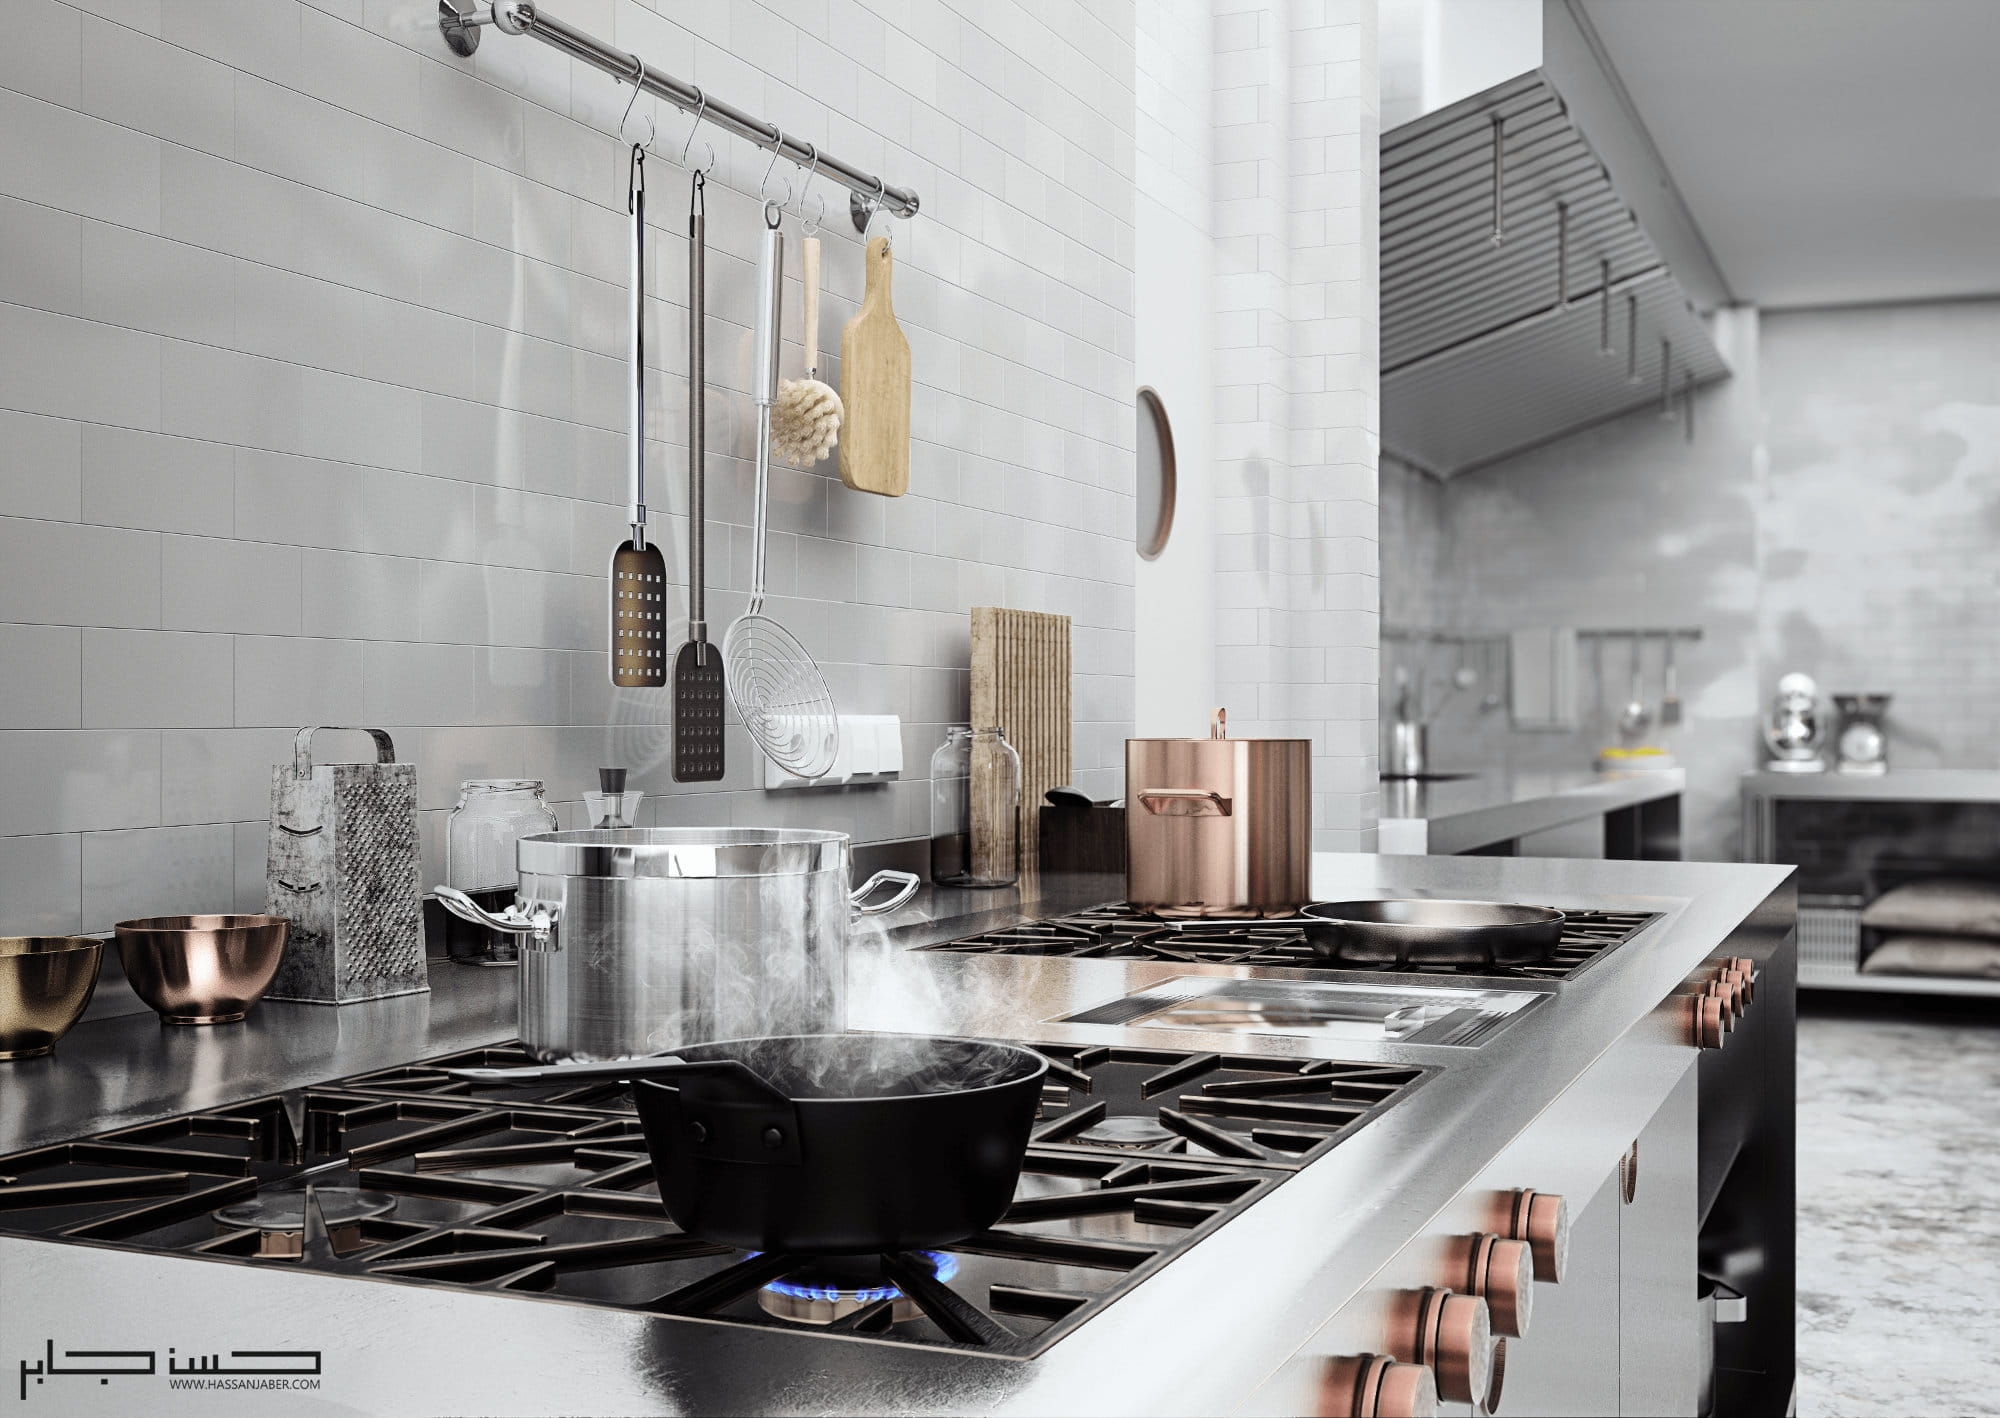
For metallic materials & some dirt effects i used SIGERSHADERS V-Ray Material Presets Pro. I definitely recommend it for any user as it’s a powerful accurate tool with over 900+ Material.

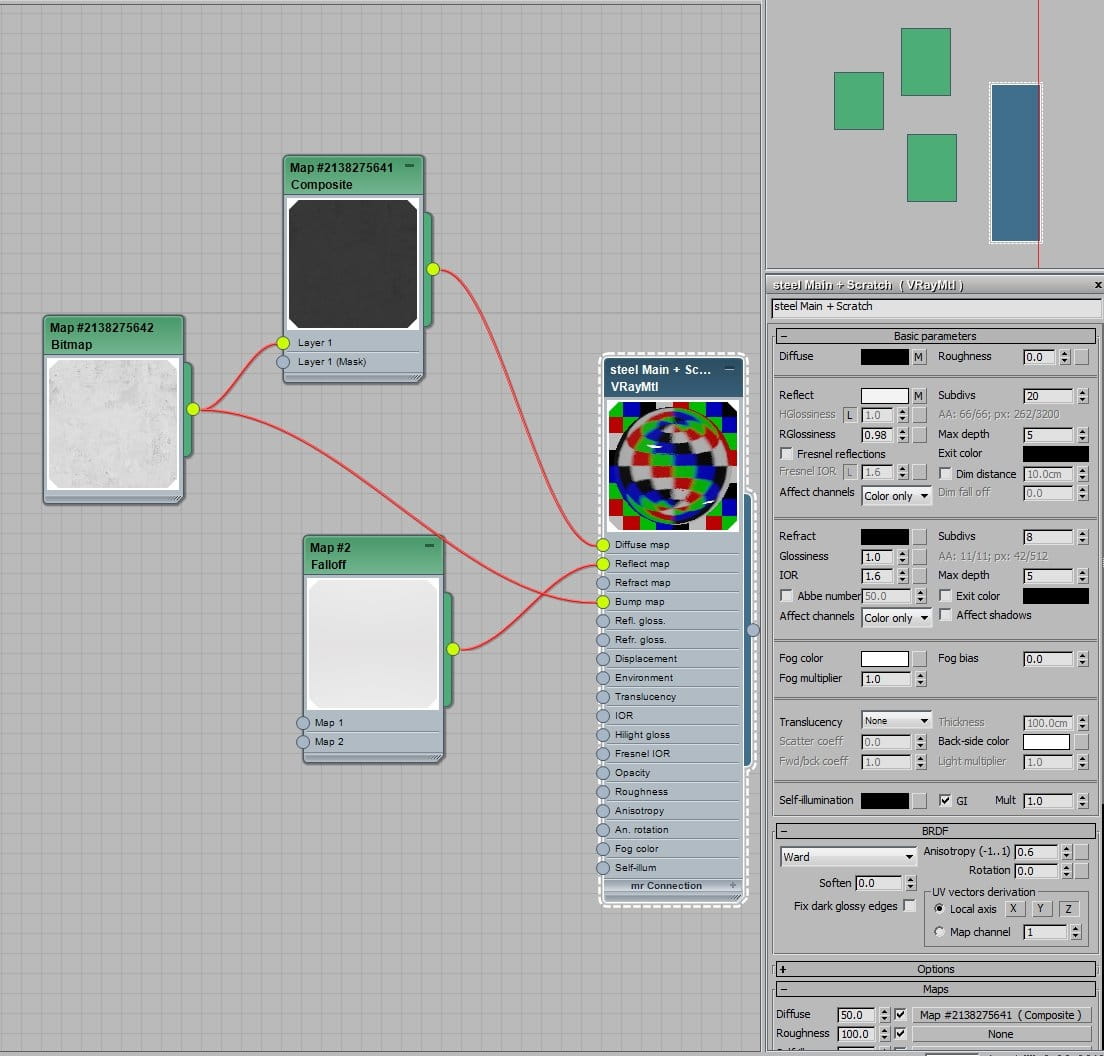
Steel Scratches
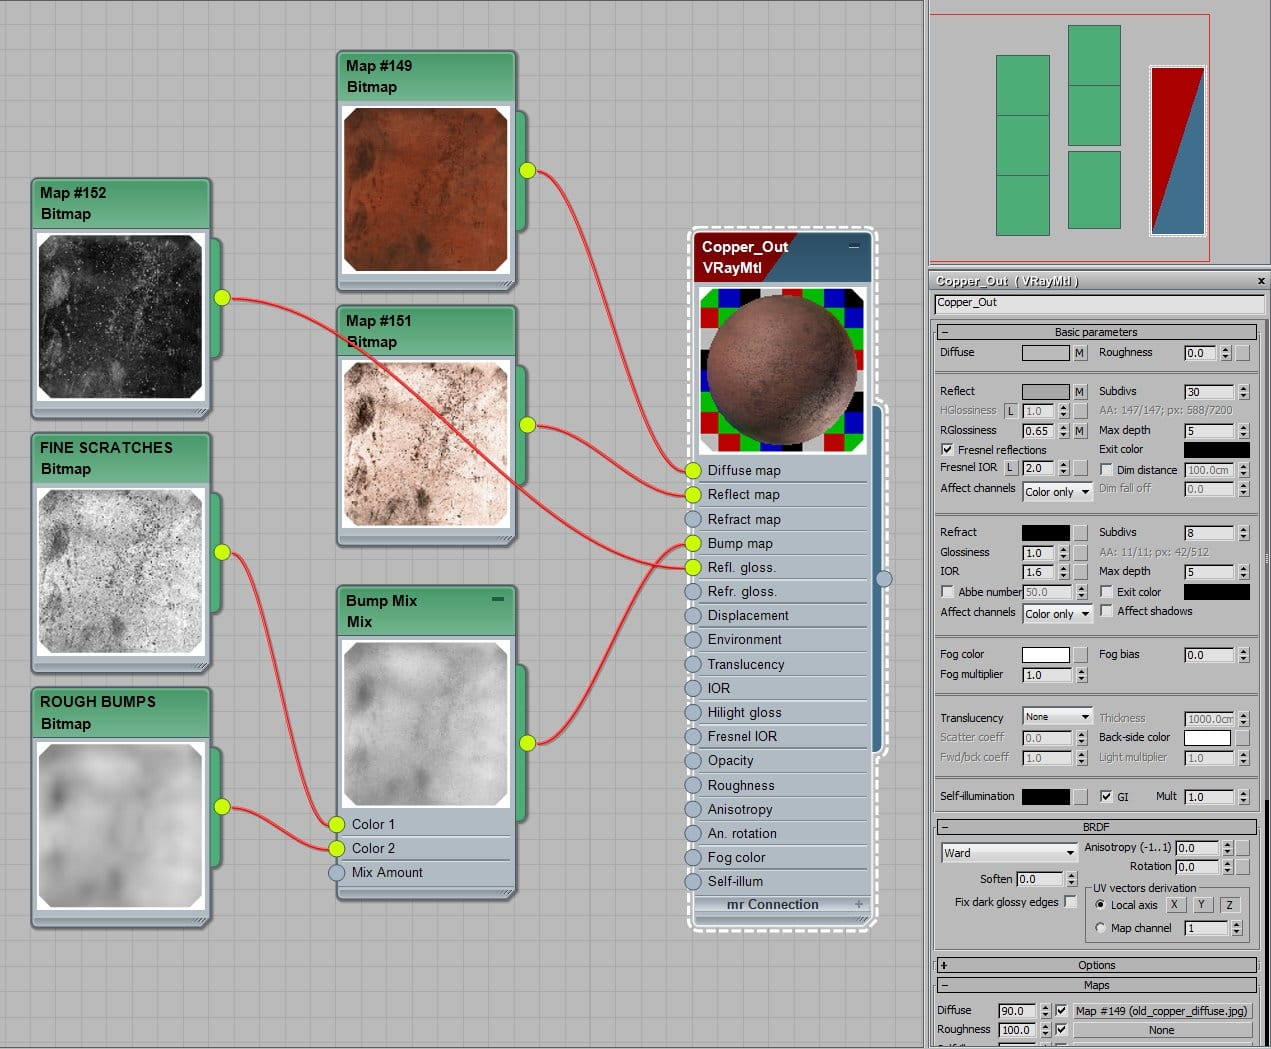
Rusted Copper
Composition
A good composition is what always make you stand out:
Try The imagecomphelper script It helps in better understanding your camera placement & composition.

Camera
I always create an animated camera with a different key stop frames “not a fan of using multiple camera’s & batch render “. The good point about this technique is that you just need to specify the frame numbers + choose output folder + press render and all your images with render elements will be named properly in one folder.
For this scene, I created 2 main cameras: Camera A .90 Ratio - Camera B 1.3 Ratio. I set my output folder & sent first Camera A shots through Backburner and did the same to Camera B shots using the same file. No need to save more than one file with different cameras.

Rendering
Average rendering time took around 3-12 hours. System specs: Boxx Apexx 4 - Intel(R) Xeon(R) CPU E5-2620 v3 @ 2.40GHz - 64 GB RAM.

Render settings
Post production
Raw Image
Color balance + Contrast

Fire & smoke effects

DofPro plugin with z depth layer
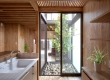
Final Result


Links:
LEAVE A COMMENT


|

|

|

|

|
 Customer zone
 Your special offers
 Your orders
 Edit account
 Add project
 Liked projects
 View your artist profile
COMMENTS