Evermotion: More Than an Asset Library
How Evermotion became a full-scale production partner for archviz, automotive and synthetic data.


Total: € 0

Hi everyone!
First of all, I want to thank the Corona Renderer and Evermotion teams for giving me the chance to write this “making of” article, and to thank you for the time you’ll spend reading it.
My name is Olga Alekseeva and I am a freelance artist from Moscow, Russia. I’ve been working in the field of architectural visualization since the beginning of 2015. I first got involved with architectural visualization when I was studying at University and felt the need for beautiful presentations of my student projects.
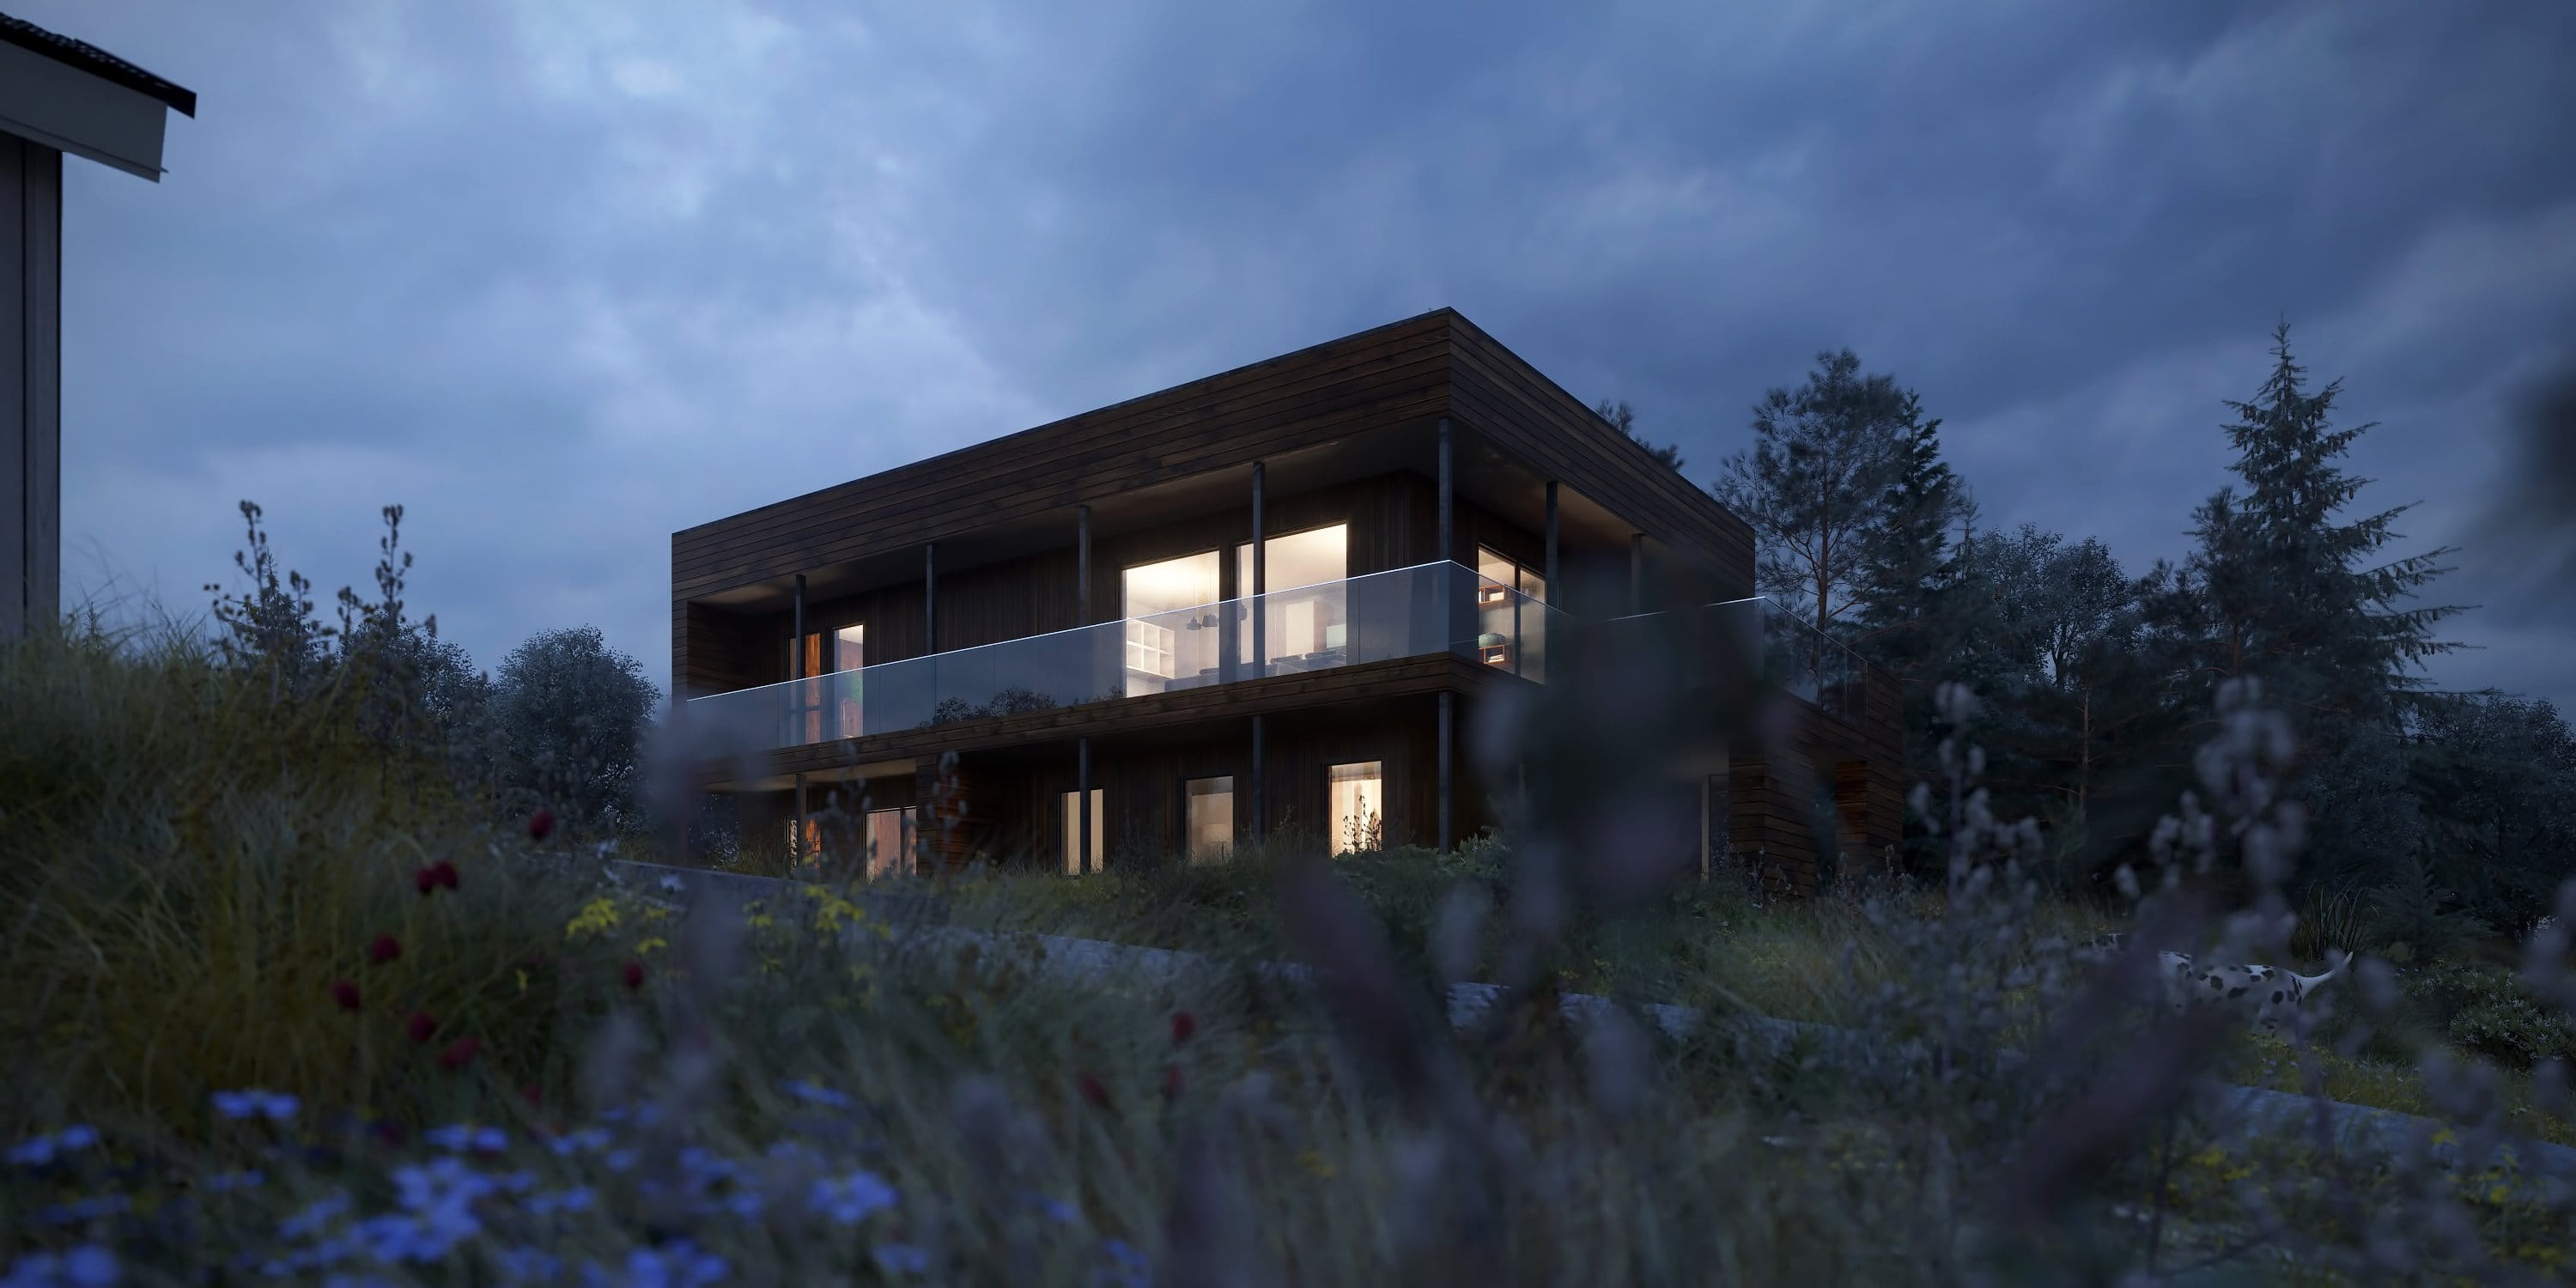
Initially, ‘The Lake House’ was a commercial project, but when I saw this terrain and its location near a lake on Google Maps, I fell in love with it and decided to continue working on it in my free time.
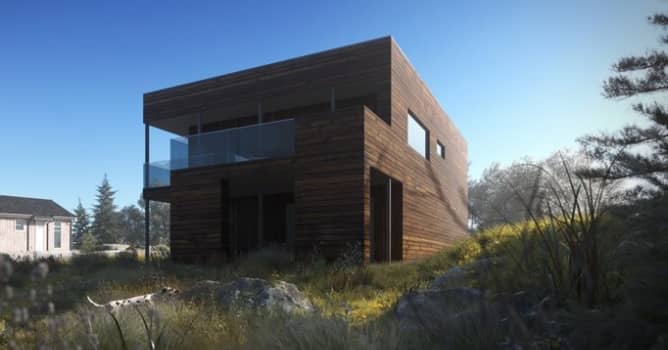
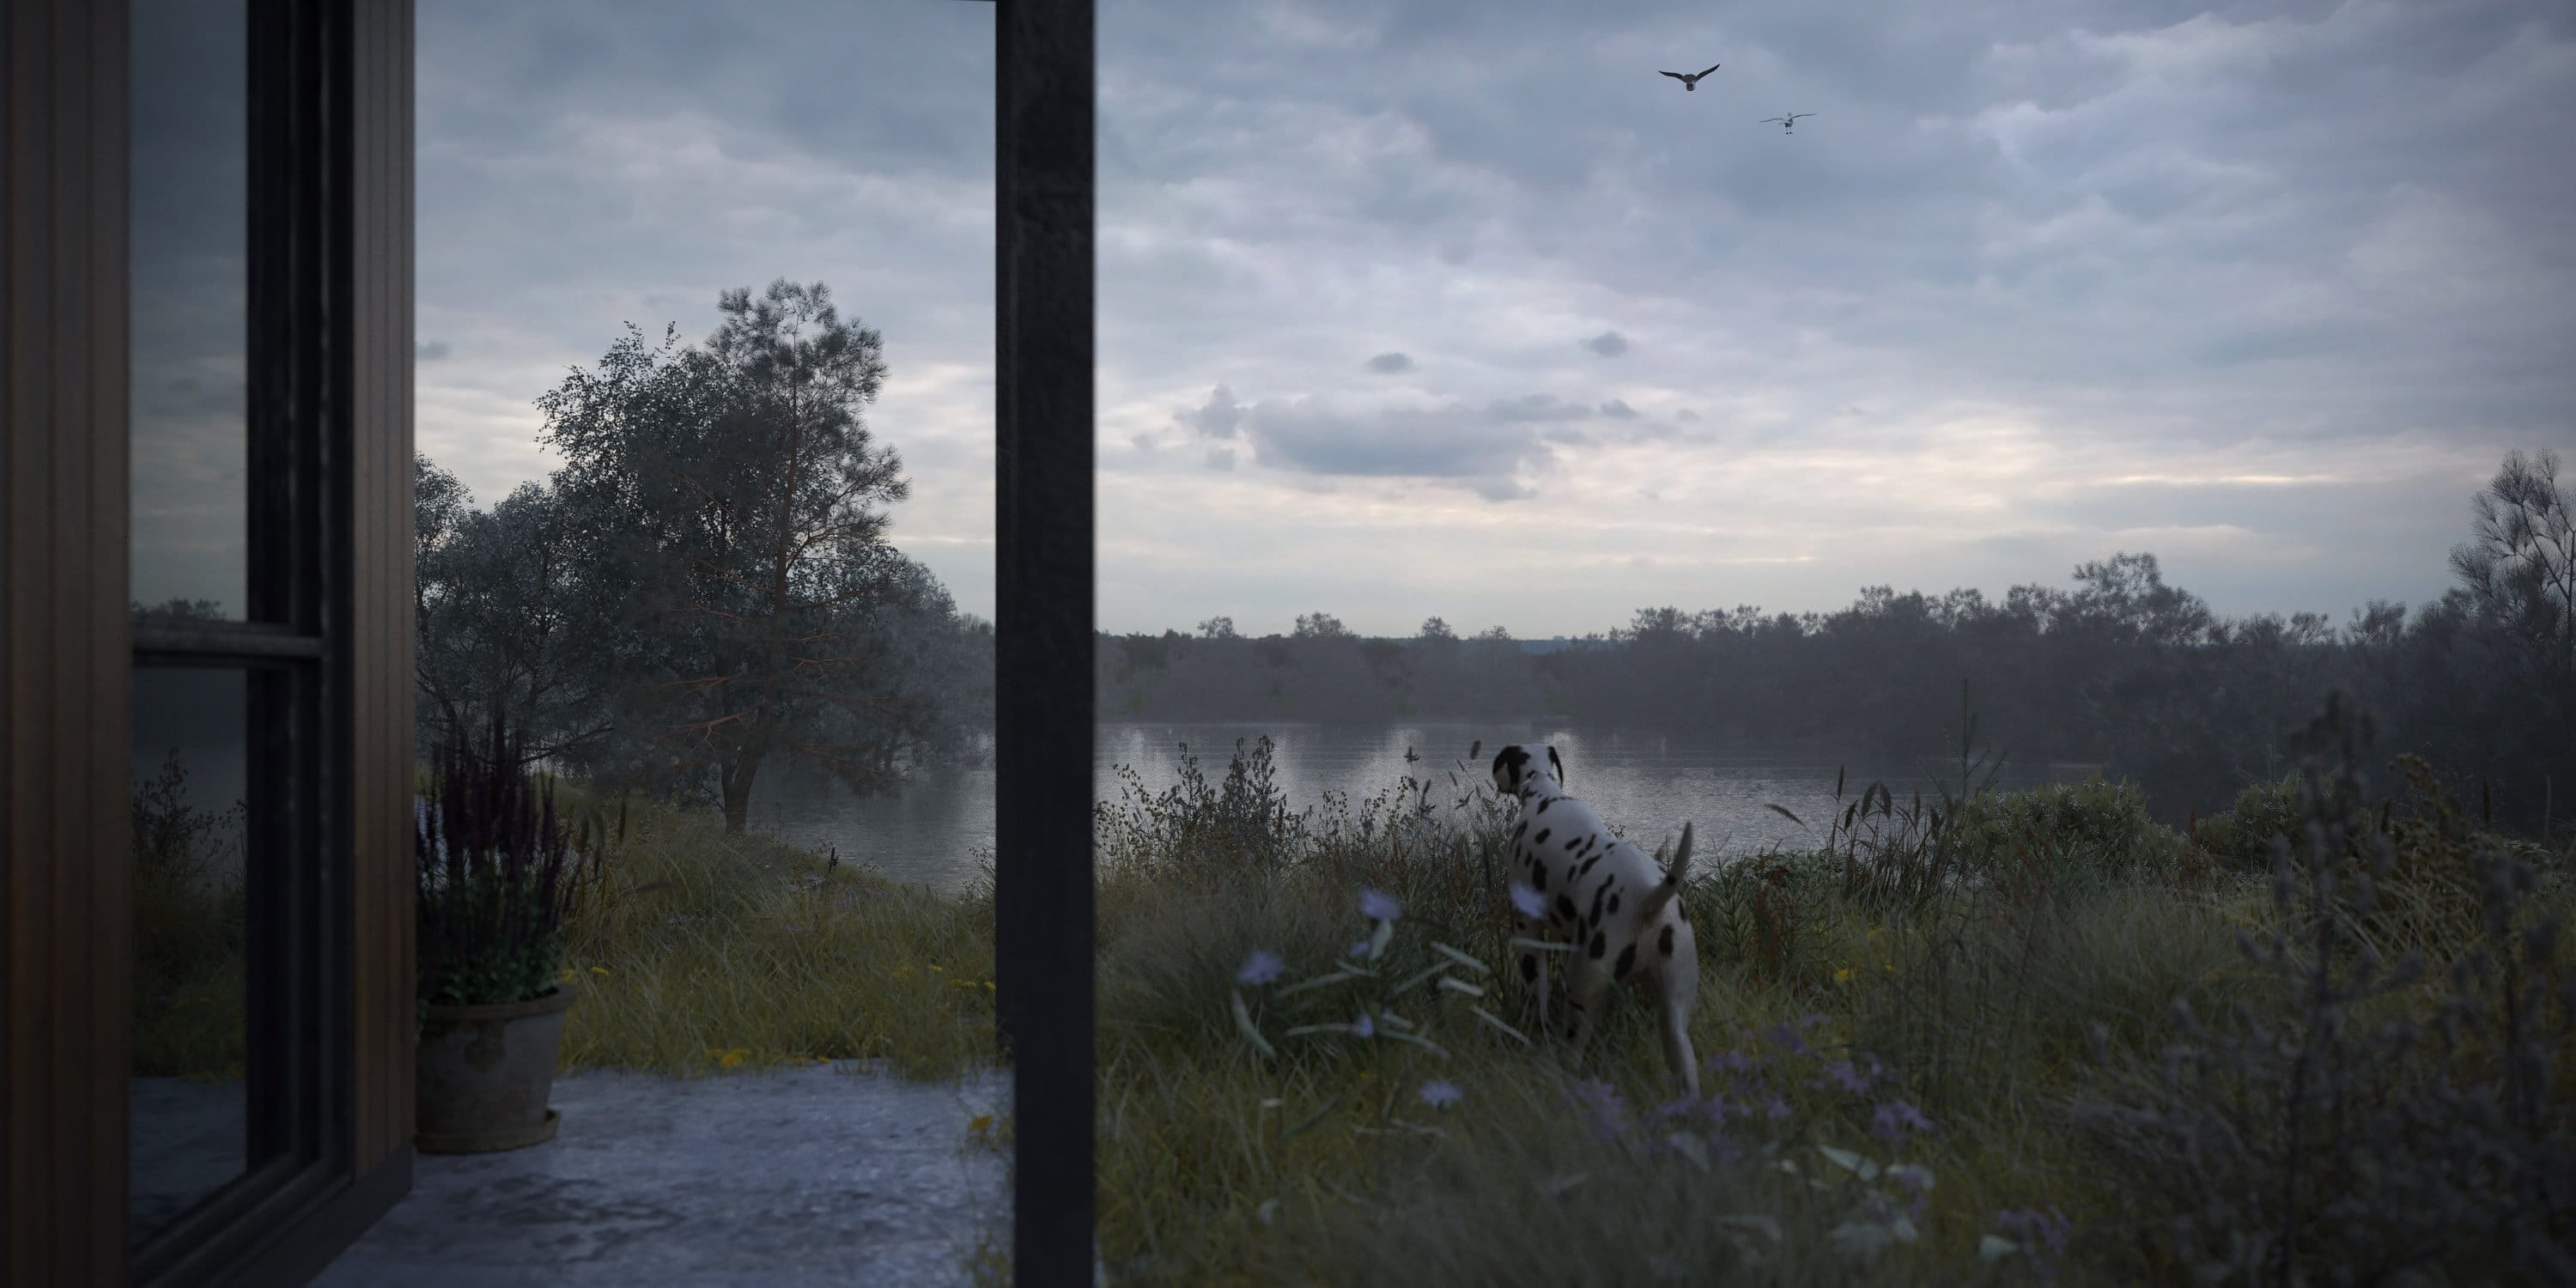
The scene and all the vegetation was made during the commercial stage and offered to the client, as seen below:
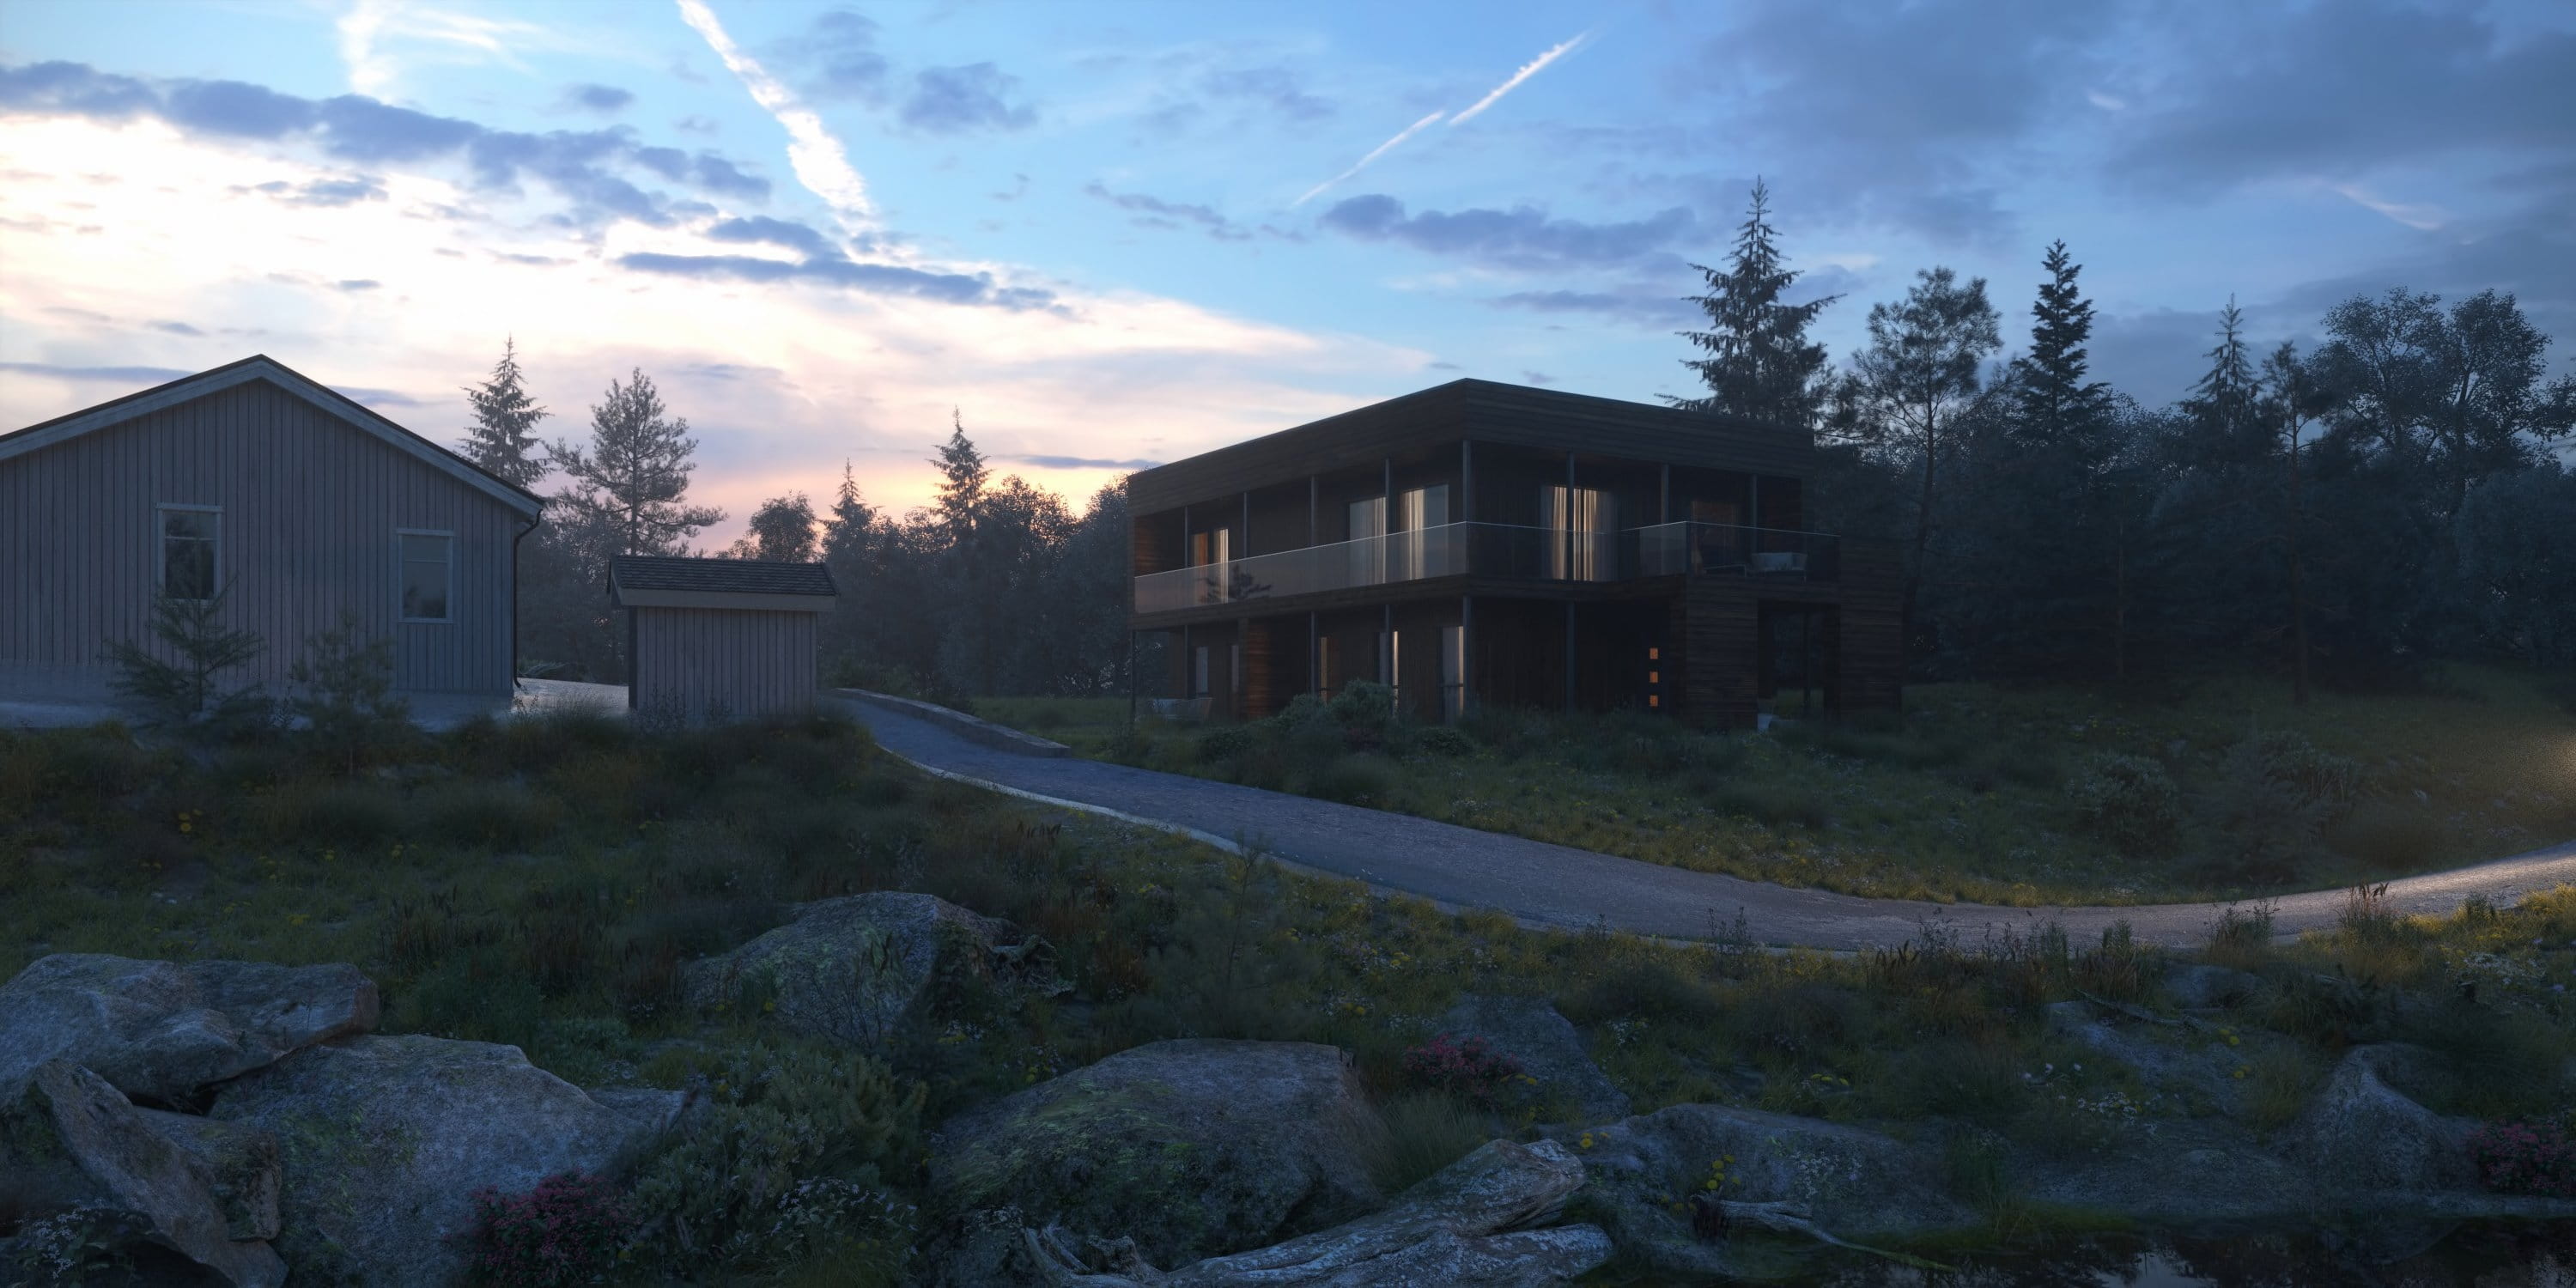
The client asked to crop the main image so that it wouldn’t be so wide, and so that we couldn’t see the neighboring house. The client preferred a more ordered look, so asked to replace the stones and the random vegetation with lawn grass, which gave us final renders as seen below:
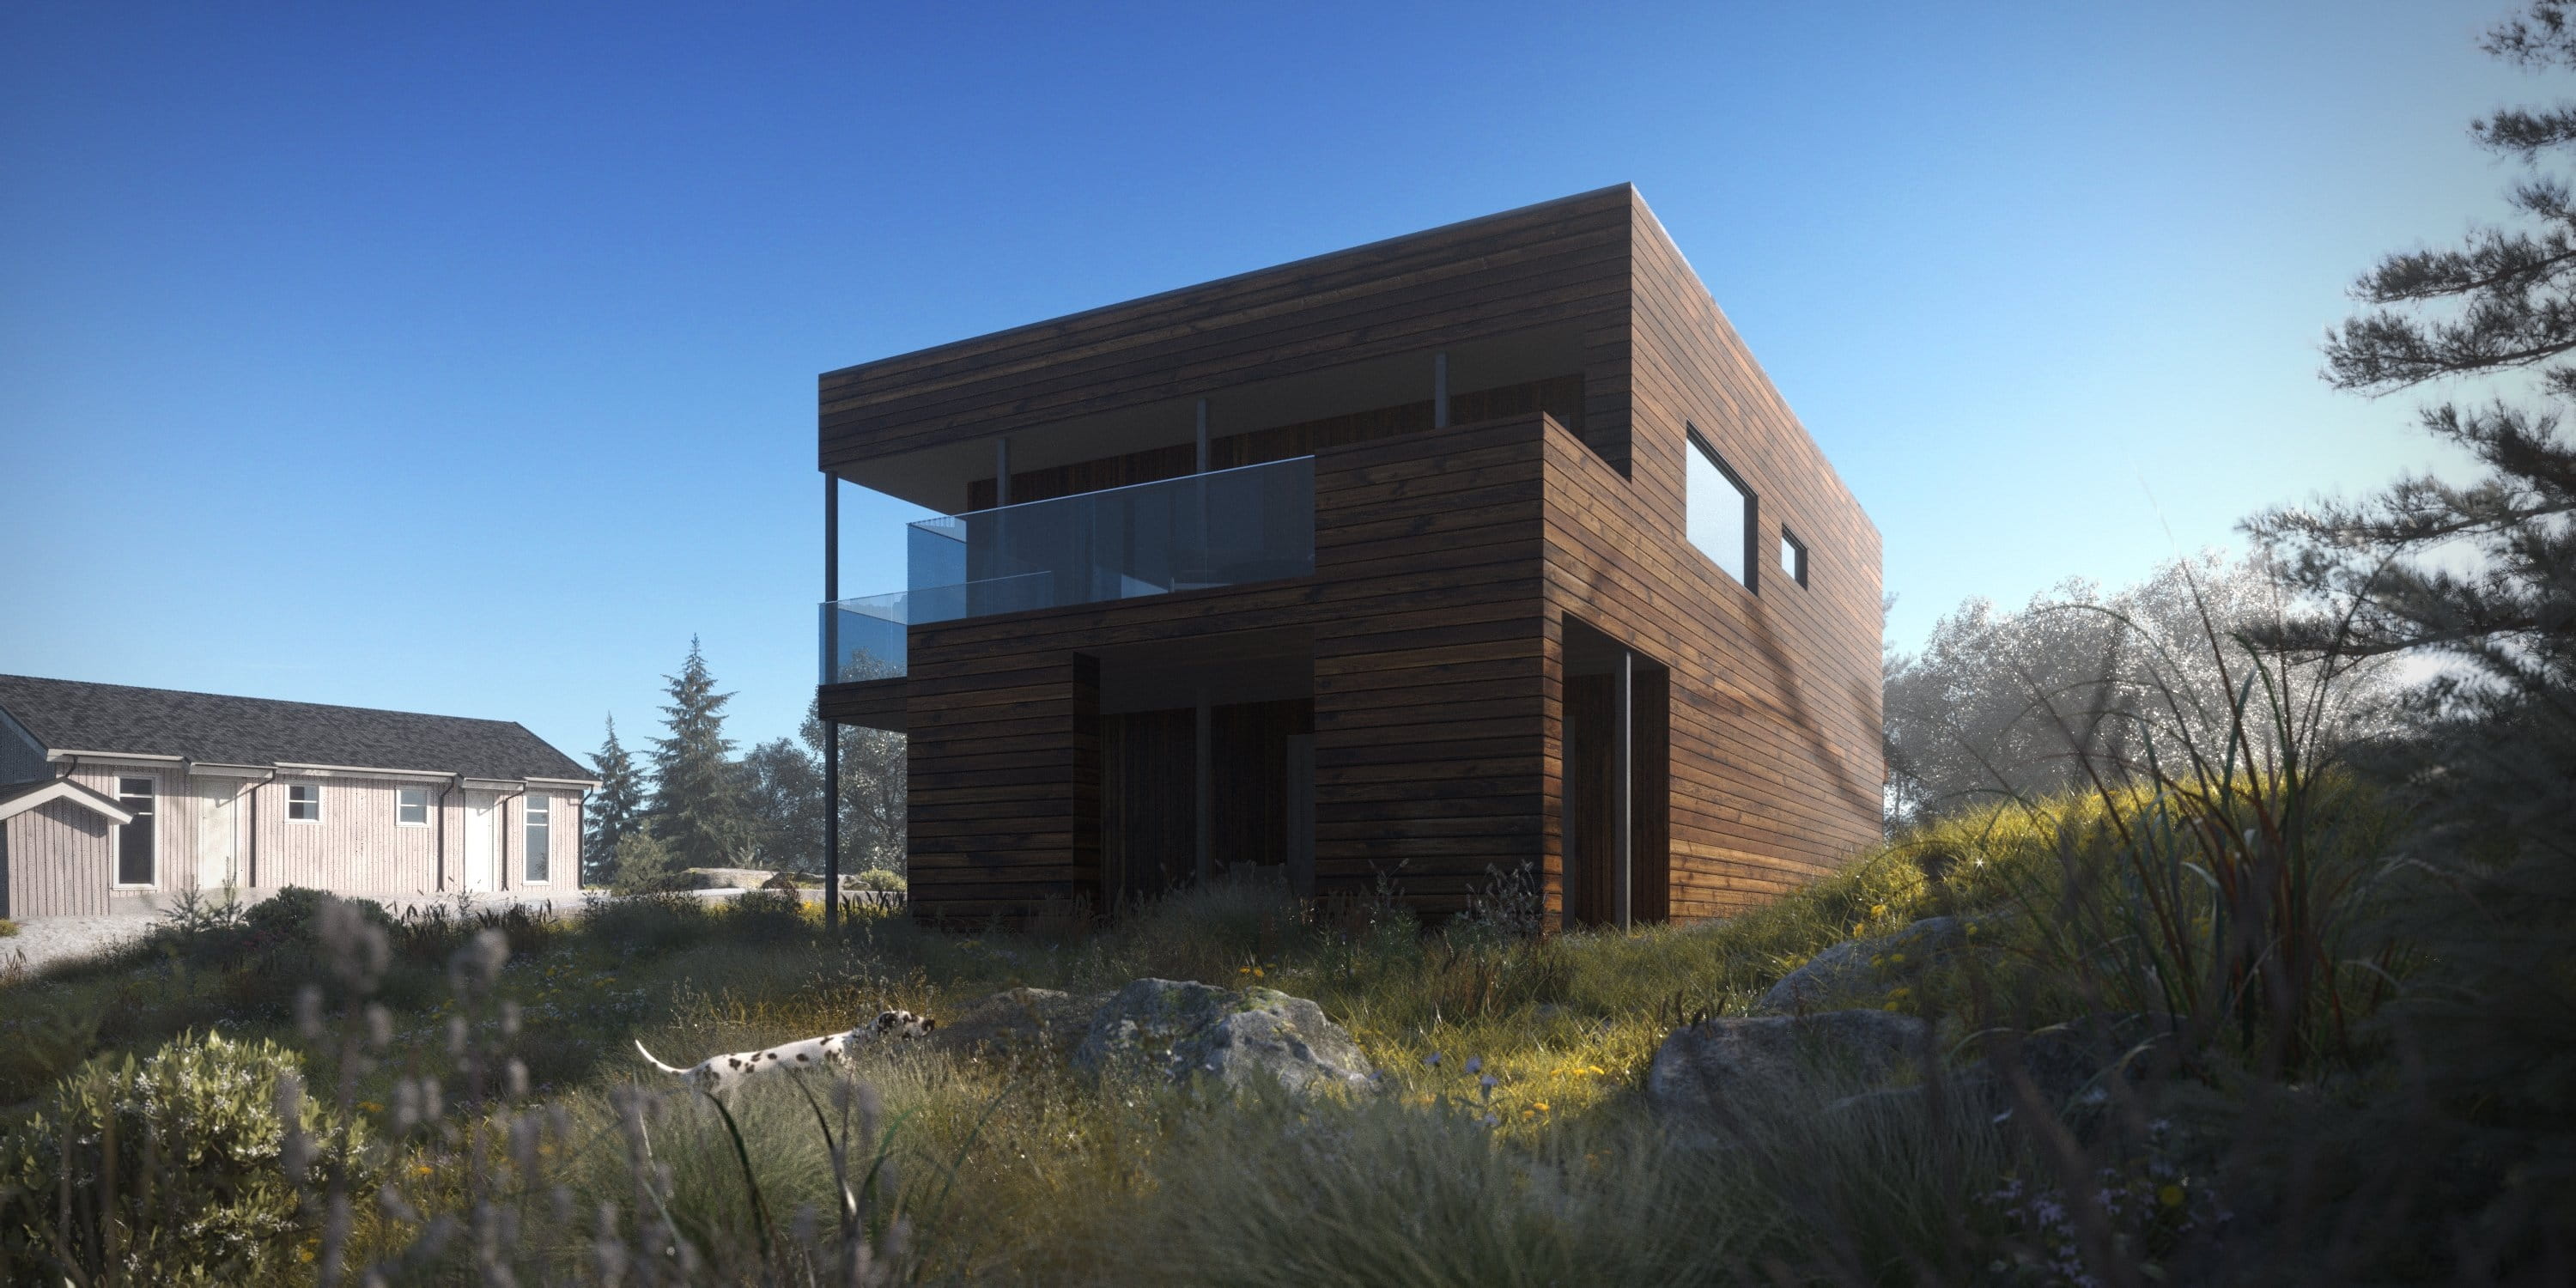


While this look fitted their needs, I saved my first version as I personally liked the look, and I returned to working on it for myself after the commercial project was complete.
Inspiration
‘The Lake House’ is an important project for me. After a long time working on architectural visualization projects, I had lost the ability to approach the architecture in a way that made a beautiful image, and eventually I had stopped getting pleasure from that kind of work.
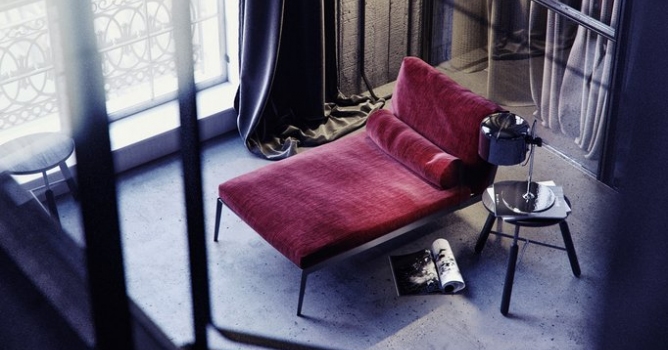
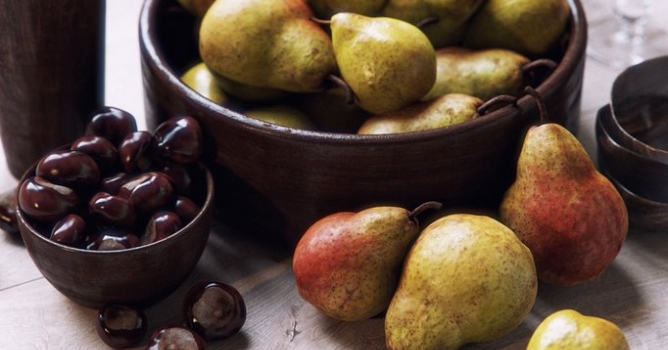
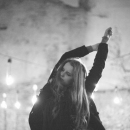
So I took a break for a few months, and having let time do its healing, I decided to try again. Choosing inspirational images, I focused mainly on beautiful architectural visualizations with different styles and tastes. I really wanted to follow their example and to practice with different lighting schemes, moods and camera angles. Below are some of the images that I turned to for inspiration:

Honestly, at first I was more interested in a good commercial picture, and so I did maybe a couple of regular sunny shots – but then I was drawn to work in a more atmospheric and artistic spirit, and that is how I continued my experiments.
I created the camera angles in my free time over three weeks, and in that time outside my window the mood was changing and the weather was changing too – so this was reflected in the footage.
For the location of this project, the beautiful place in one of the provinces of Norway played a role – it made me remember the time I had spent in my granny’s village in Russia back when I was a child, the feeling of walking on the fresh overgrown grass at different times of day and in different weather conditions. I remembered the smells of the different herbs, a stillness of nature, and the color of the sky changing overhead. It was a time and place where every flying bird attracts your attention and nature seems alive, in a dialogue with you. These memories became the source of my inspiration.
My mood was also influenced by the poem “The Letters to a Roman Friend” by Russian poet Joseph Brodsky. During these weeks, the poem wouldn’t leave my mind, especially some of the strophes, for example:
“Now is windy and the waves are cresting over
Fall is soon to come to change the place entirely.
Change of colors moves me, Postum, even stronger
Than a girlfriend while she’s changing her attire.”
(Translation, Maya Jouravel)
Modeling
I started by modeling the main house based on drawings. There is nothing special to say about it, so I won't linger on it!

I usually do not use tools such as Cut or Slice, but instead model with box elements so that I can quickly make changes if needed. All the objects are usually attached into one, with different IDs.
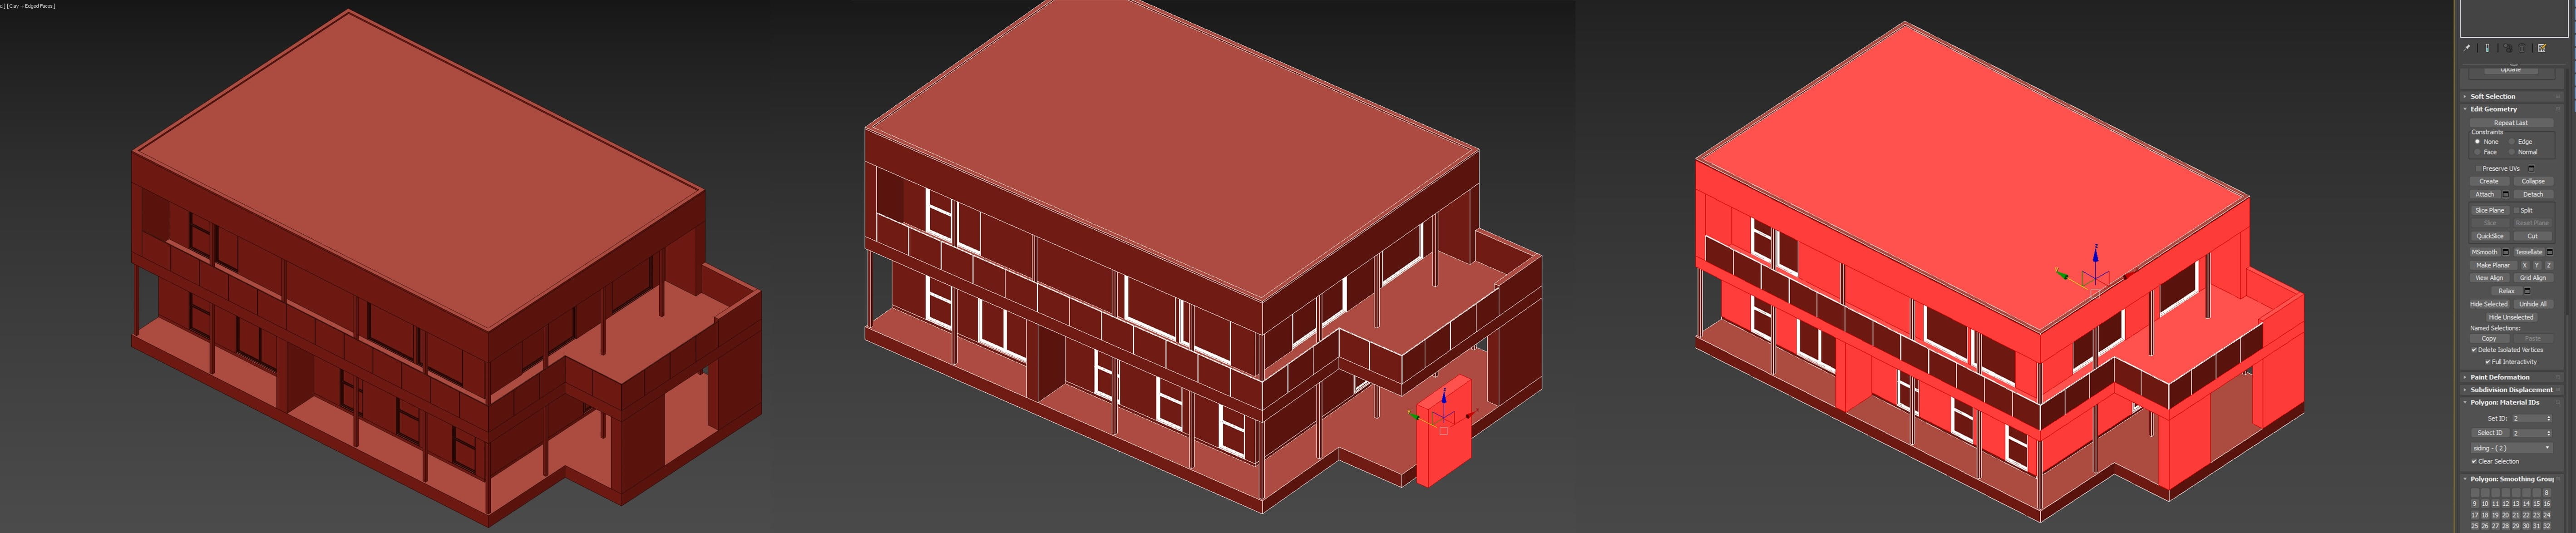
I try to make the seams thicker, so they can be seen from different angles and distances, and make a small Chamfer.

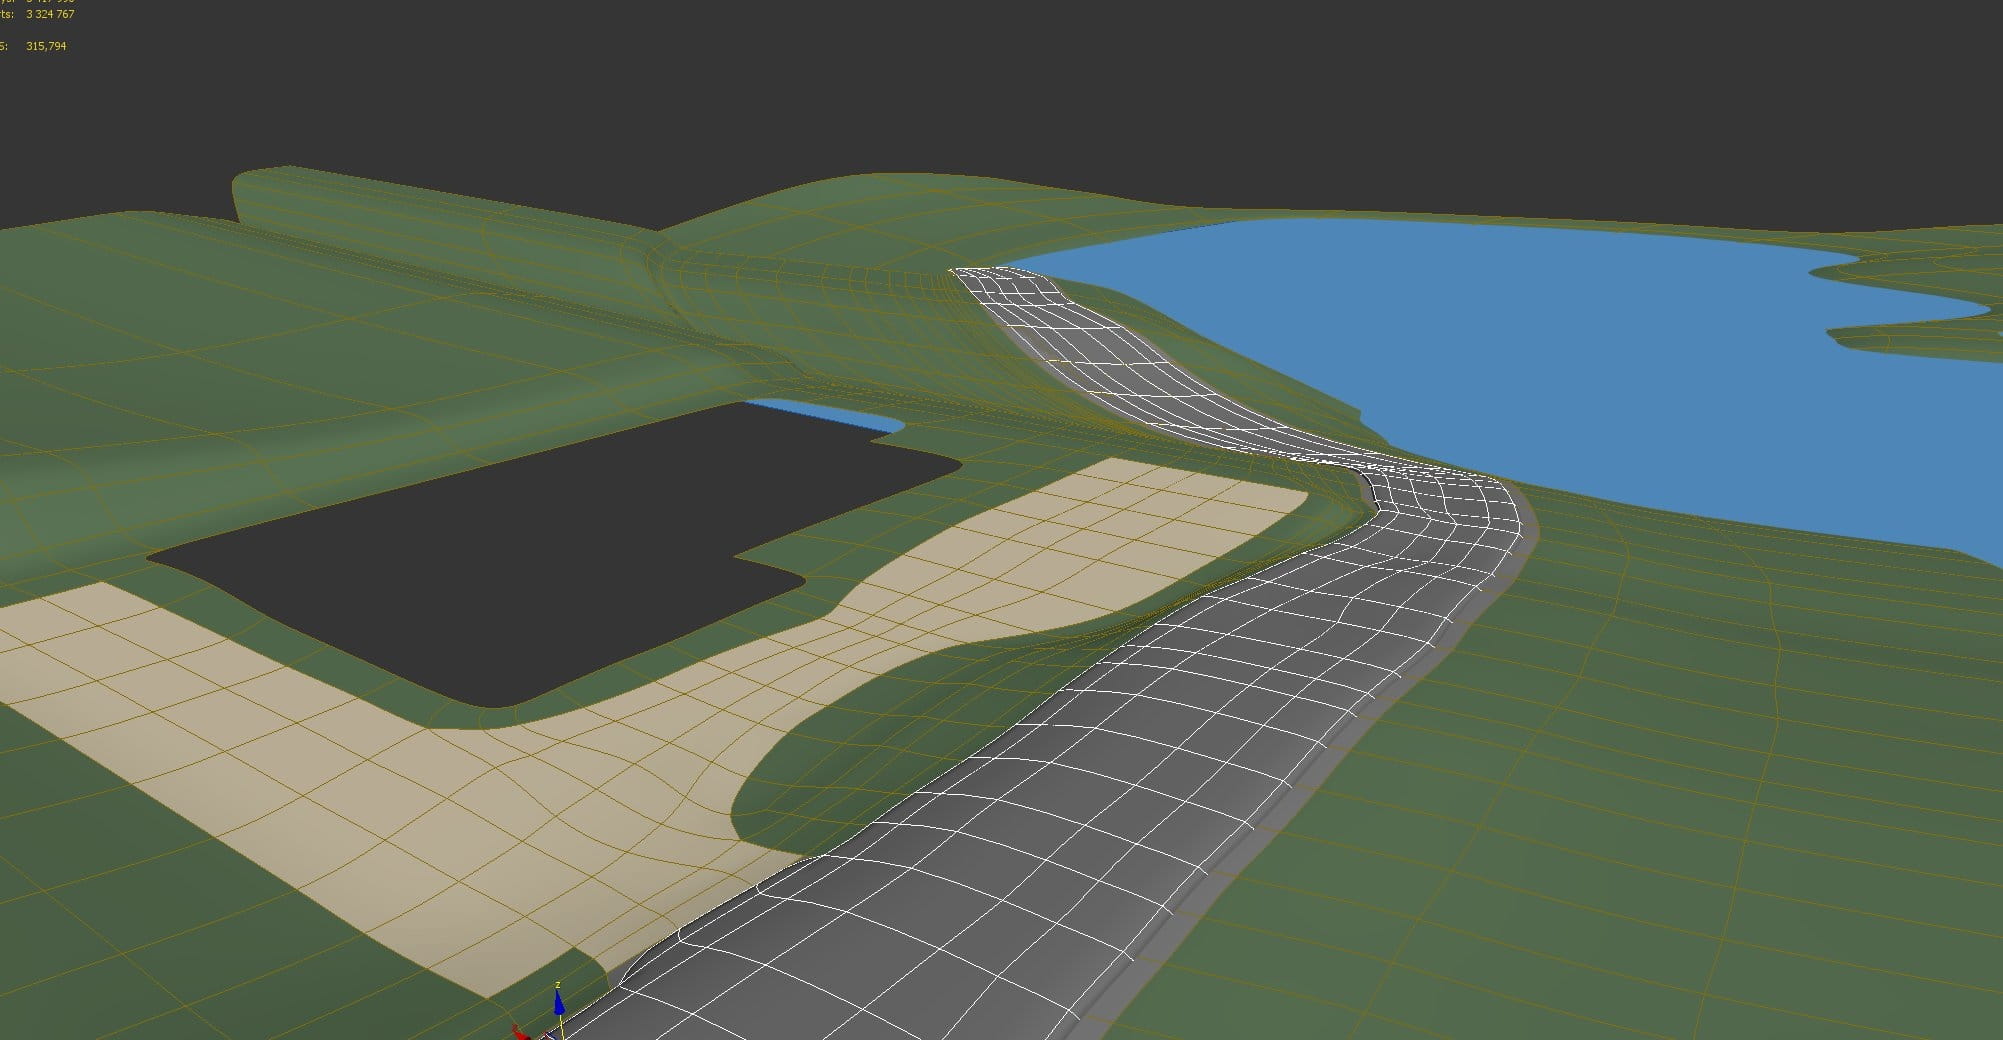
I used a poly modeling technique with Meshsmooth for making an accurate relief based on the heights I was provided with. I also had several photoshoots for a better understanding of the area.


I detached the polygons for the road, and added a Shell and a Meshsmooth so that I could make it look more like a “country road” than a totally flat and perfect “city road”. I also added some polygons for the landscape with the forest in the back. For the lake, I just created one plane and put it under the landscape.
For the neighboring house, I used a model from a project I had done earlier. The roof for that was modeled with ATiles here.
Additional Details
Animals, People and Objects
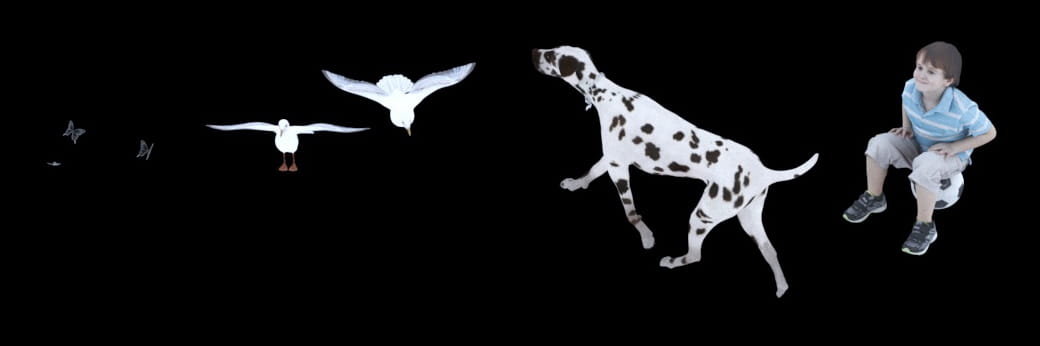
All the animals and the boy in my scene are 3D models. The dog and birds are from Evermotion Archmodels vol. 83, the boy from AXYZ People, and the butterflies downloaded from the internet.
There is also some outdoor stuff downloaded from the internet, and a car taken from Viz-People 3D Cars:
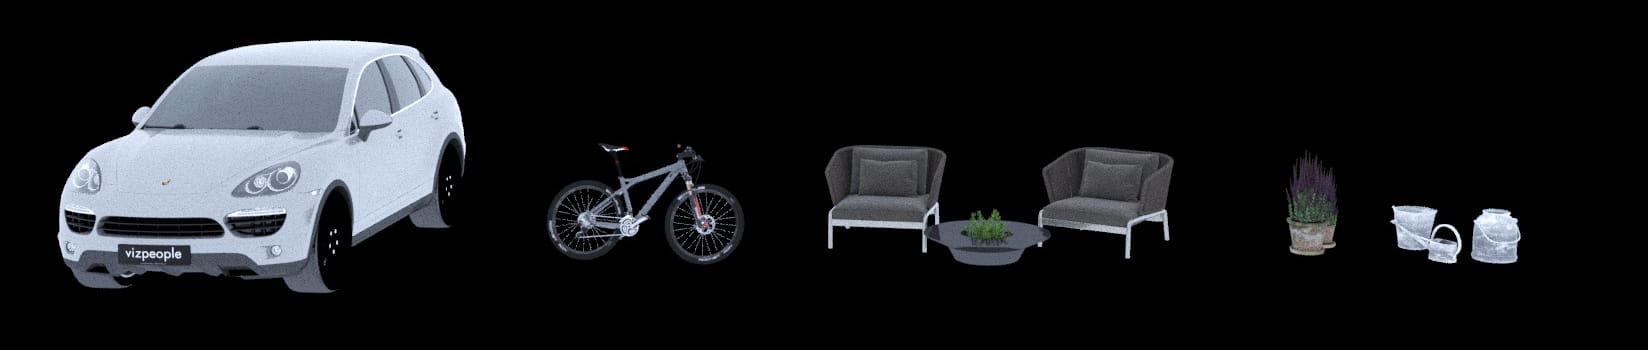
And indoor furniture downloaded from the internet:

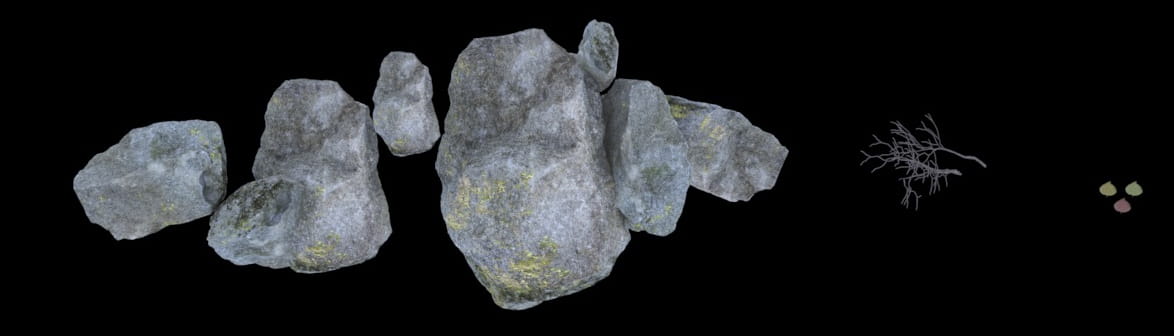
There are leaves scattered on the road, and branches on the ground, plus the stones which were taken from Evermotion archexteriors vol.30 with moss added:
Greenery
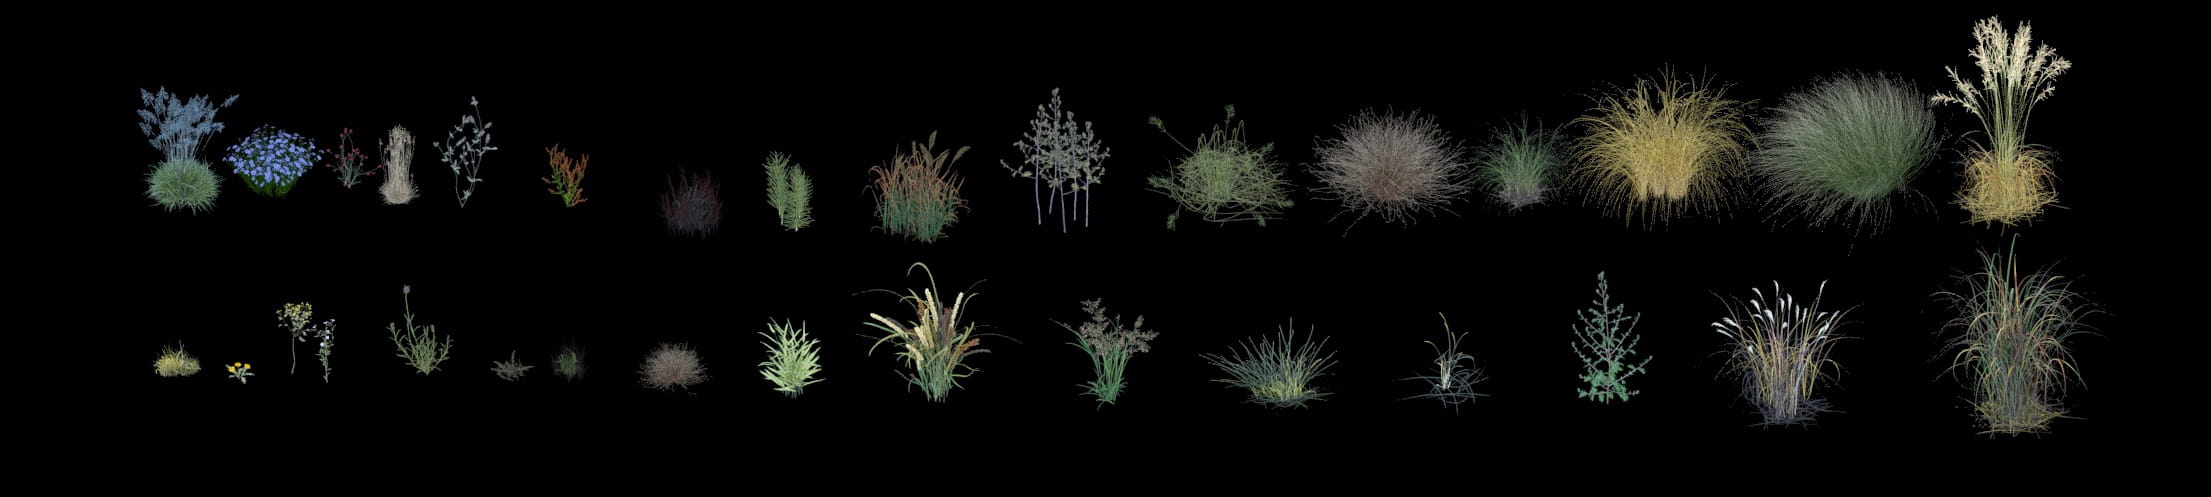
I used 32 types of plants from Evermotion Archmodels vol. 124 and Archmodels vol. 126, and some plants were from Evermotion Archmodels vol. 86 and IFlowers.
I used 11 types of bushes from R&D IBushes, Evermotion Archmodels vol. 117, vol. 61, vol. 52 and vol. 154:

And 11 types of trees taken from Evermotion Archmodels vol. 117 and vol. 106:

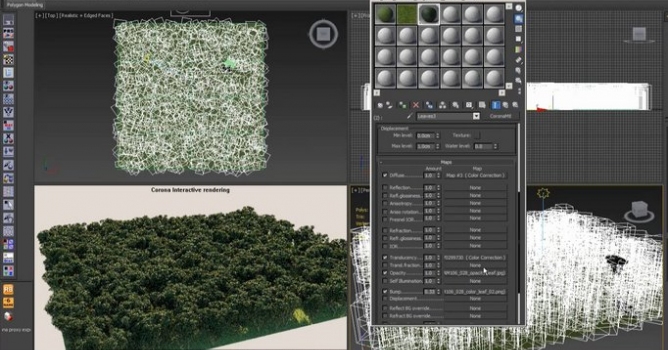
I left the default materials for the greenery, but for some of them I adjusted the Diffuse color with a color correction map and added Translucency. I converted all the models to Corona Proxies to reduce memory consumption and keep a responsive viewport.
The plants were scattered using Multiscatter. There was 1 Multiscatter with basic grass, 2 Multiscatters with flowers and 3 Multiscatters with different plants. I usually draw a mask for Multiscatter in Photoshop.
I can use 1 mask for several Multiscatters, just by rotating it in a random way, like the way grass usually grows in nature. I just put it in a free slot that I don’t need in the material, just to give the map a certain Map Channel and see how it will look on the object, then I can scale or rotate it using a UVWMap to get it looking the way I like.
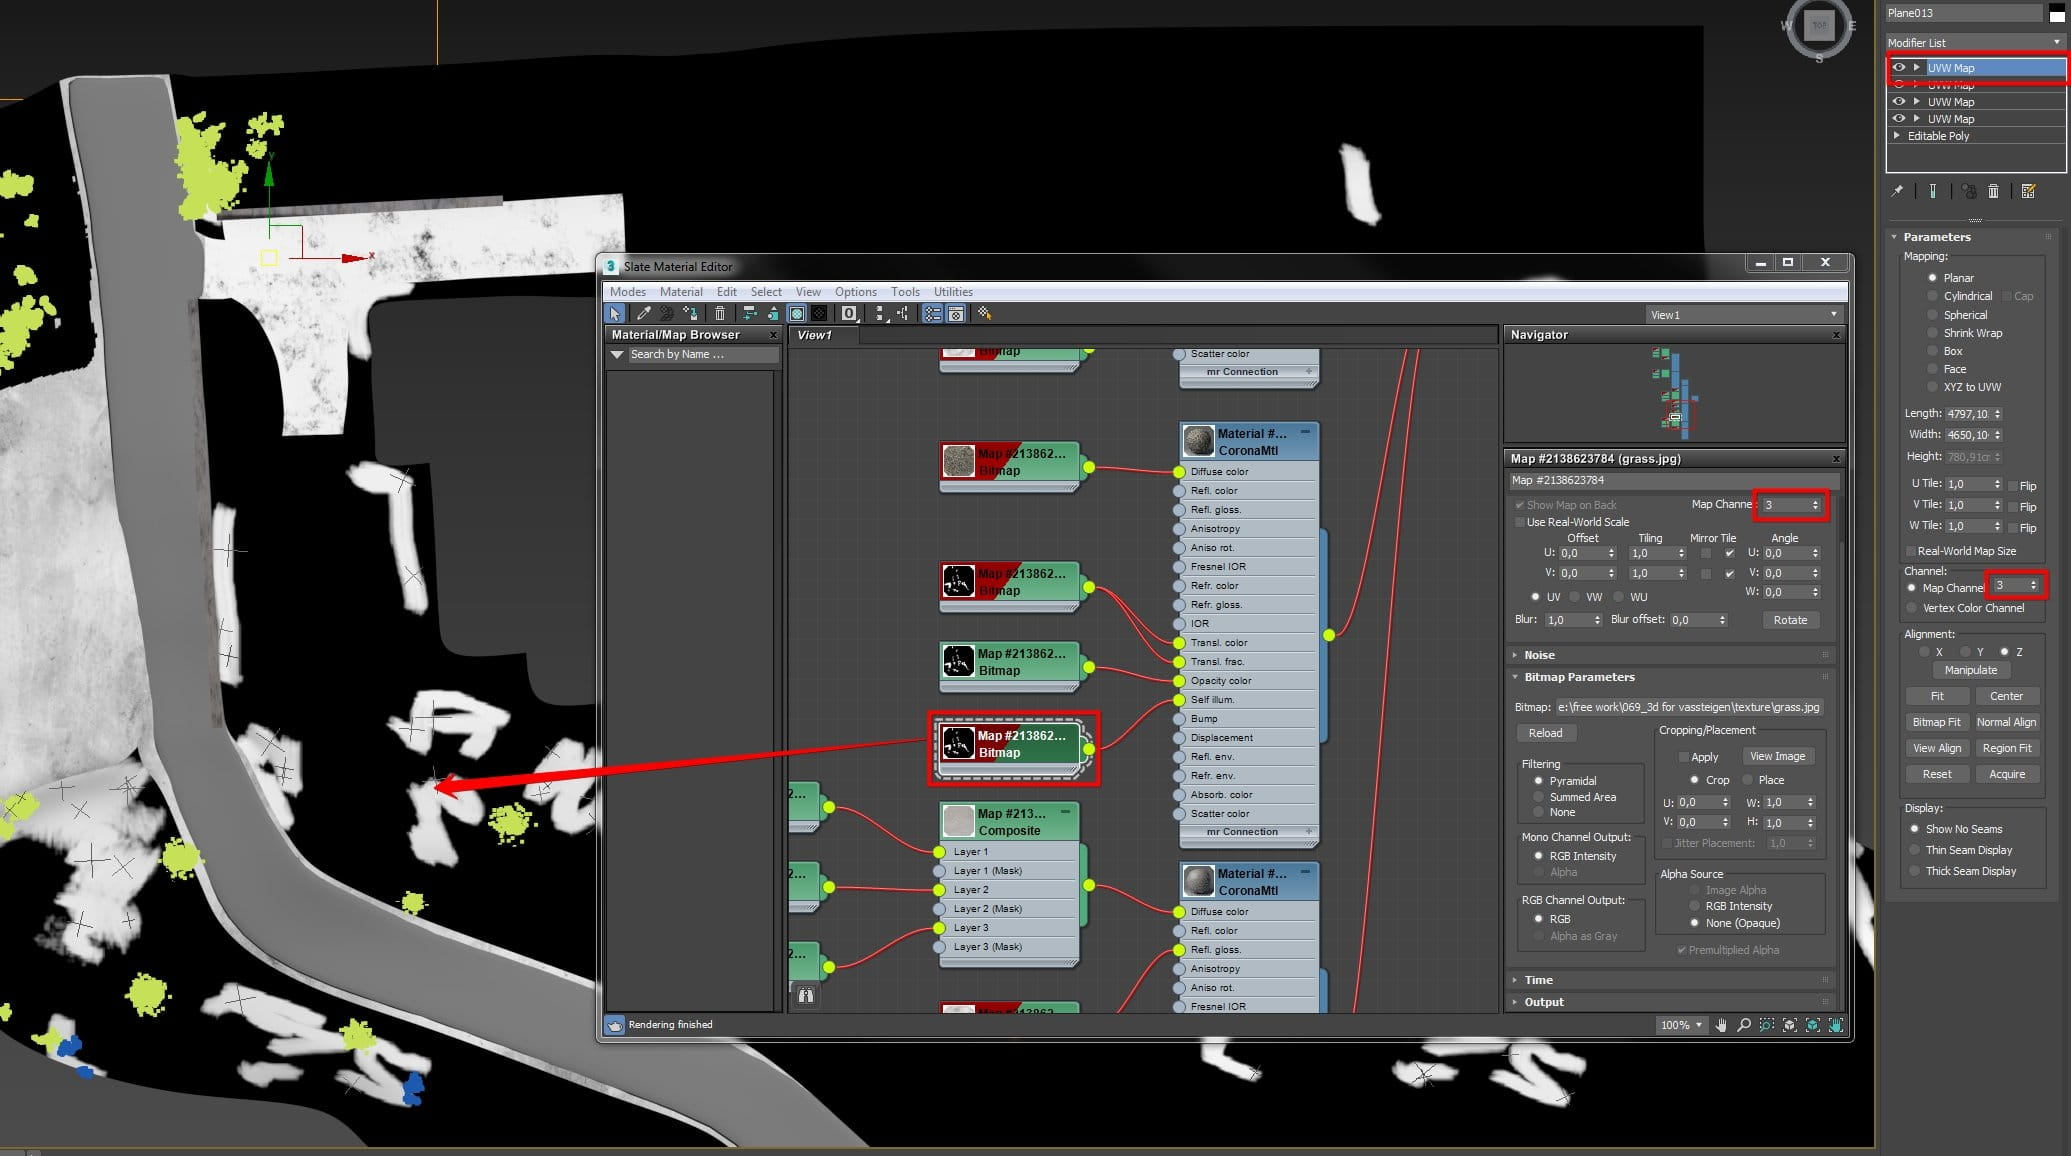
After that I drag and drop the map instance to the necessary slot in Multiscatter. I also play with scale, random rotation (by X and Y too) and sometimes Collision or Border Behavior if needed:

Some plants were placed in hand, especially flowers for close-up images. The trees were scattered in the back along the shores of the lake:
It is very important to work in Layers to keep everything organized and avoid clutter when there are many objects in scene.

Cameras
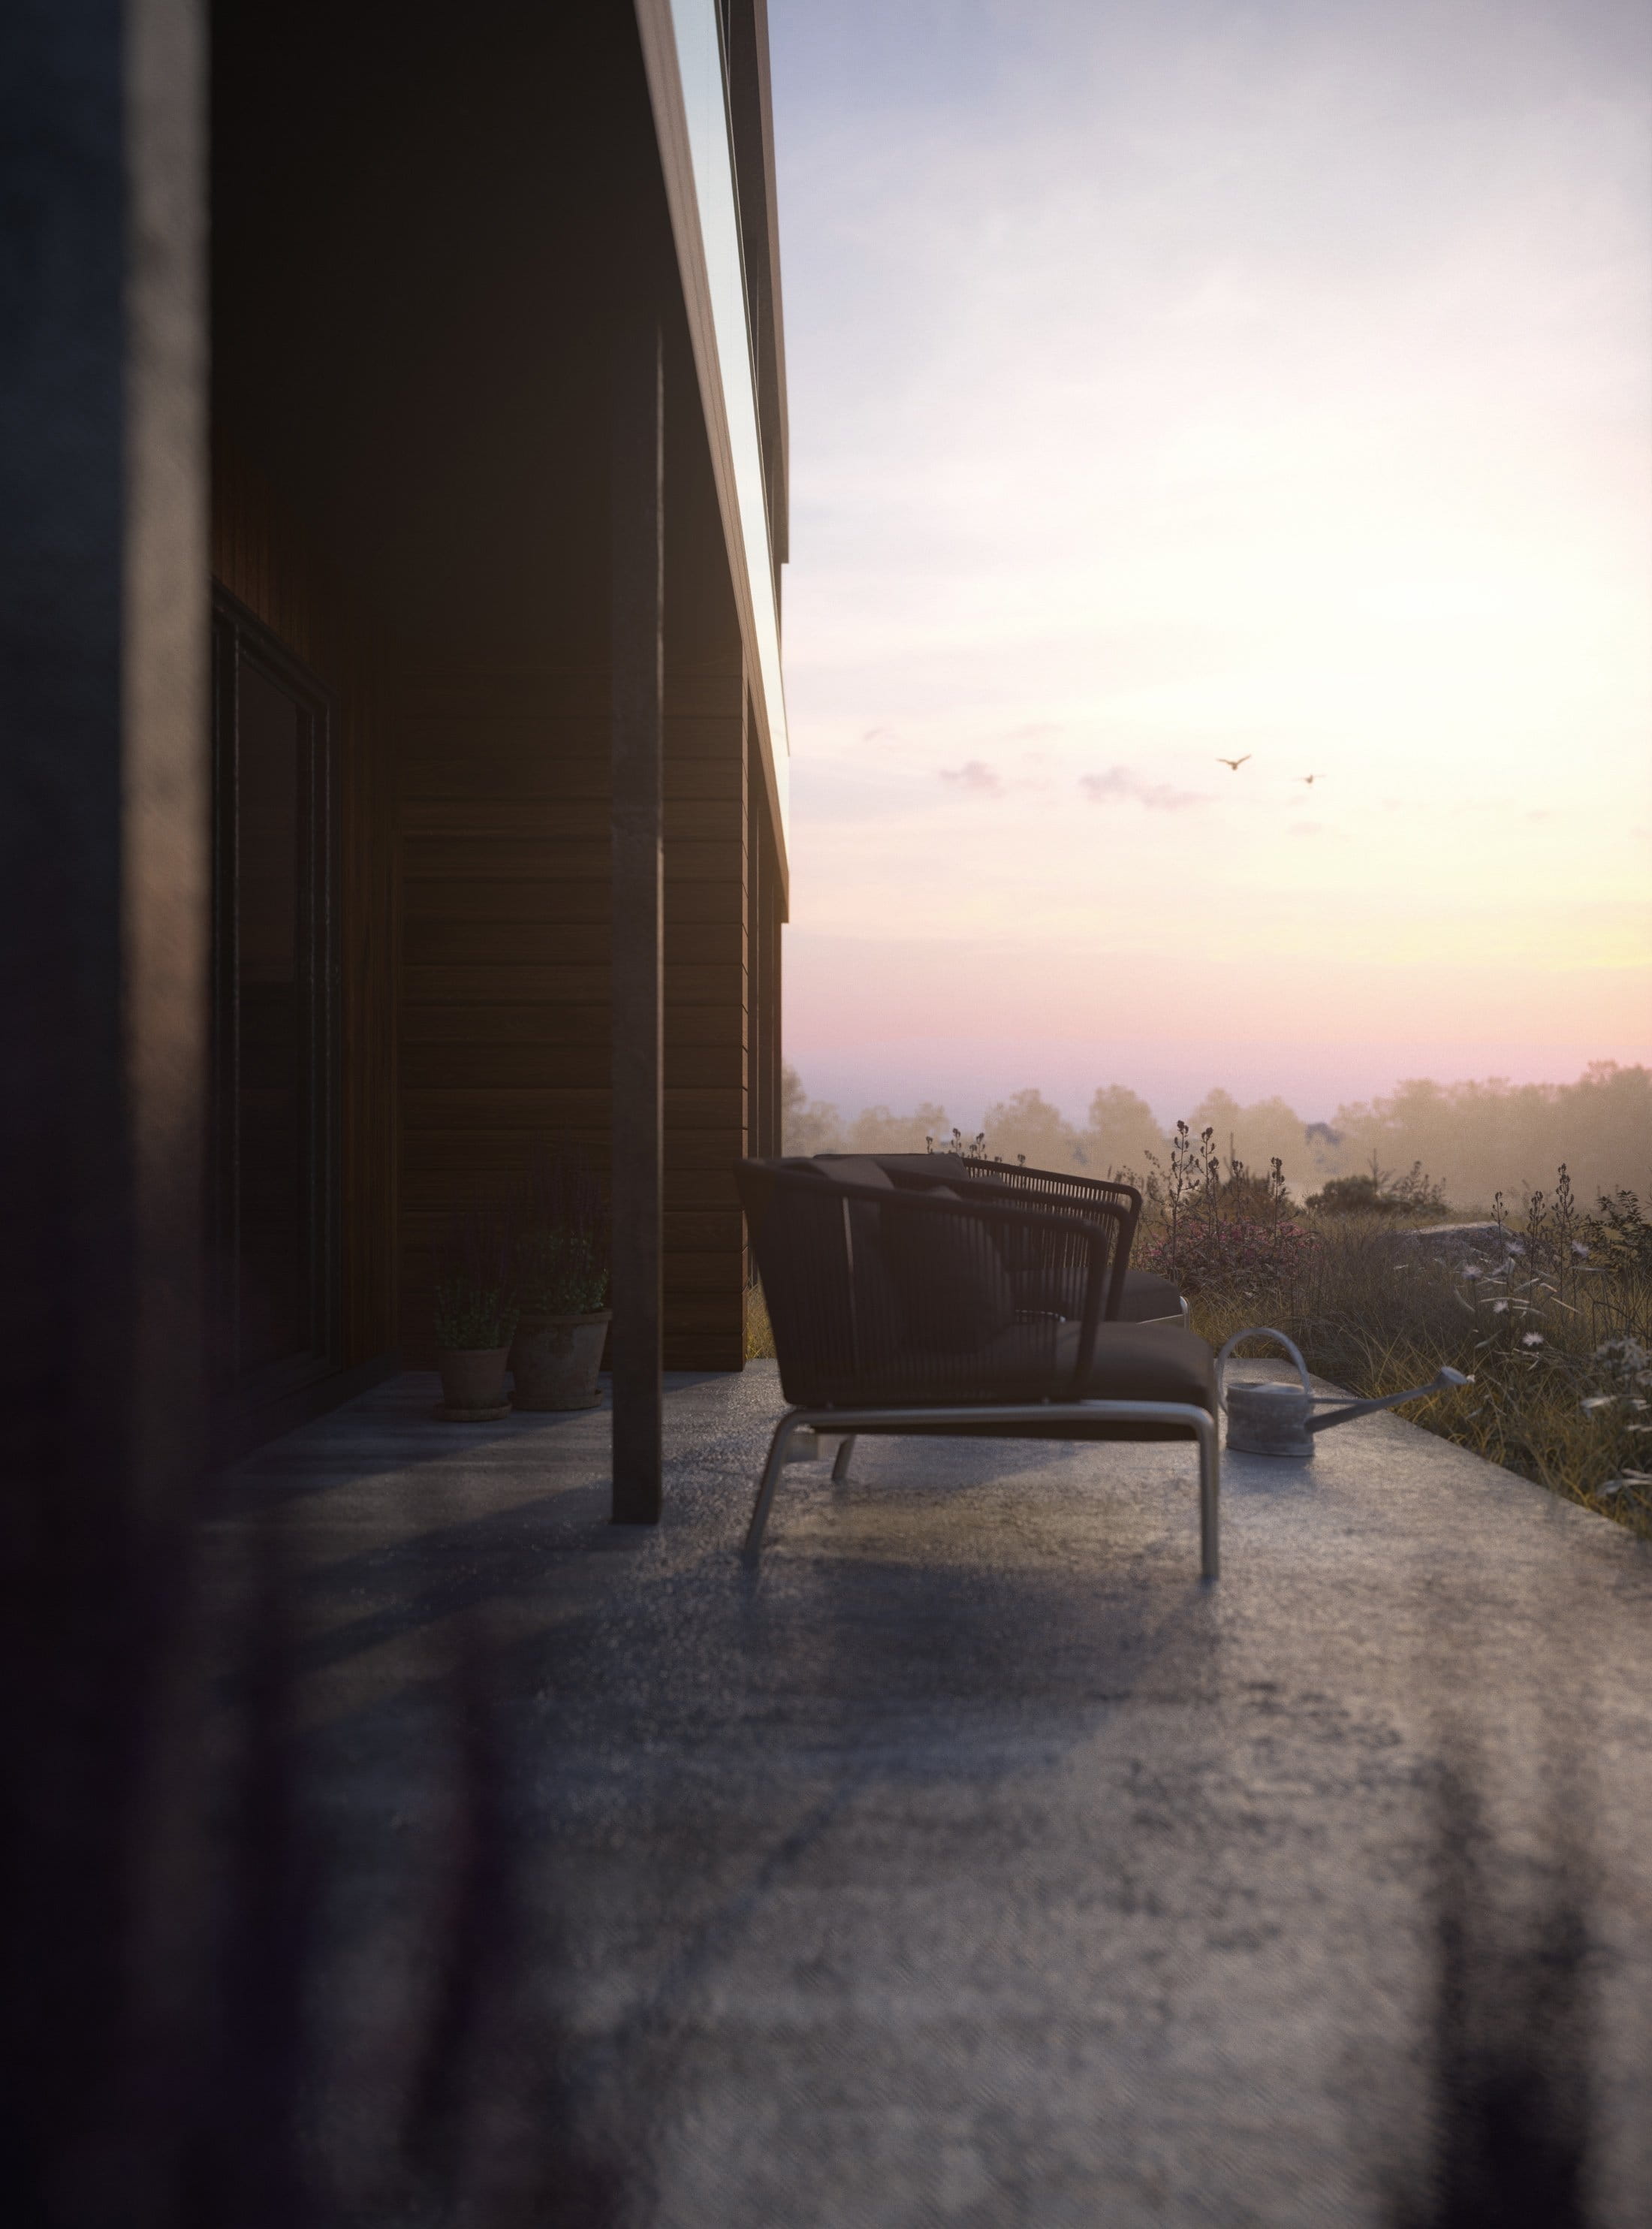
This is one of my favorite parts of making a render! In many ways, I came to 3D visualization because of the photography that I was doing before. Now with 3D, I can photograph the world that I create. Sometimes it may lack certain people or animals, but exploring the scene still fascinates me in the same way that exploring the real world does!
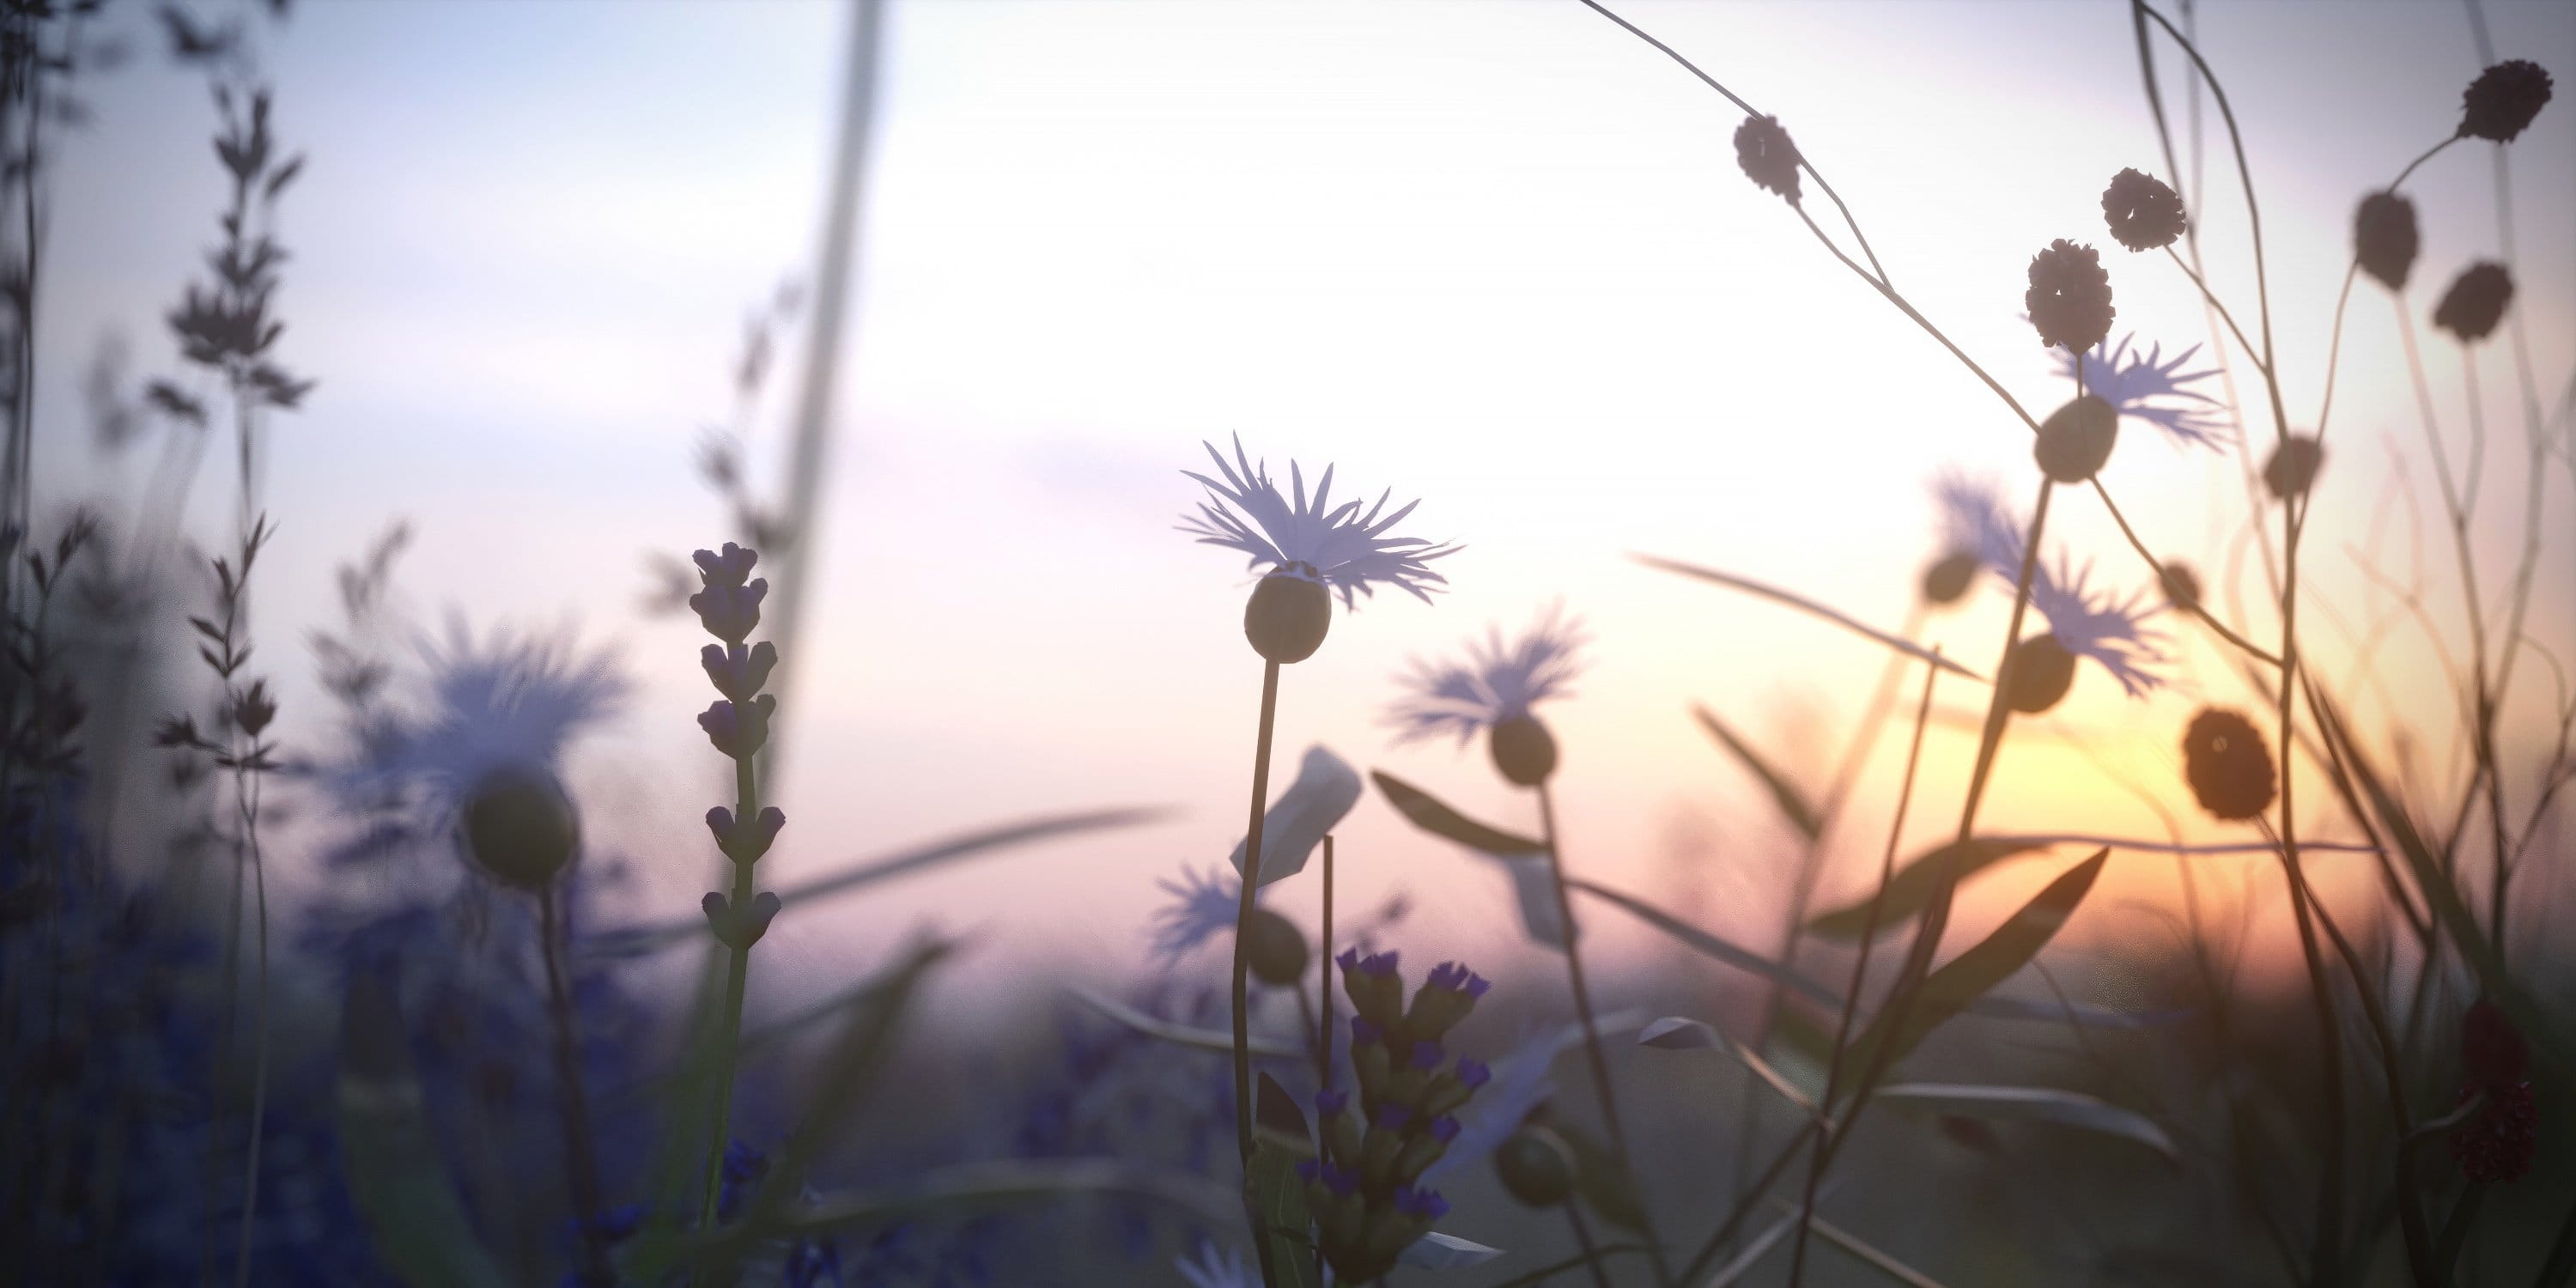
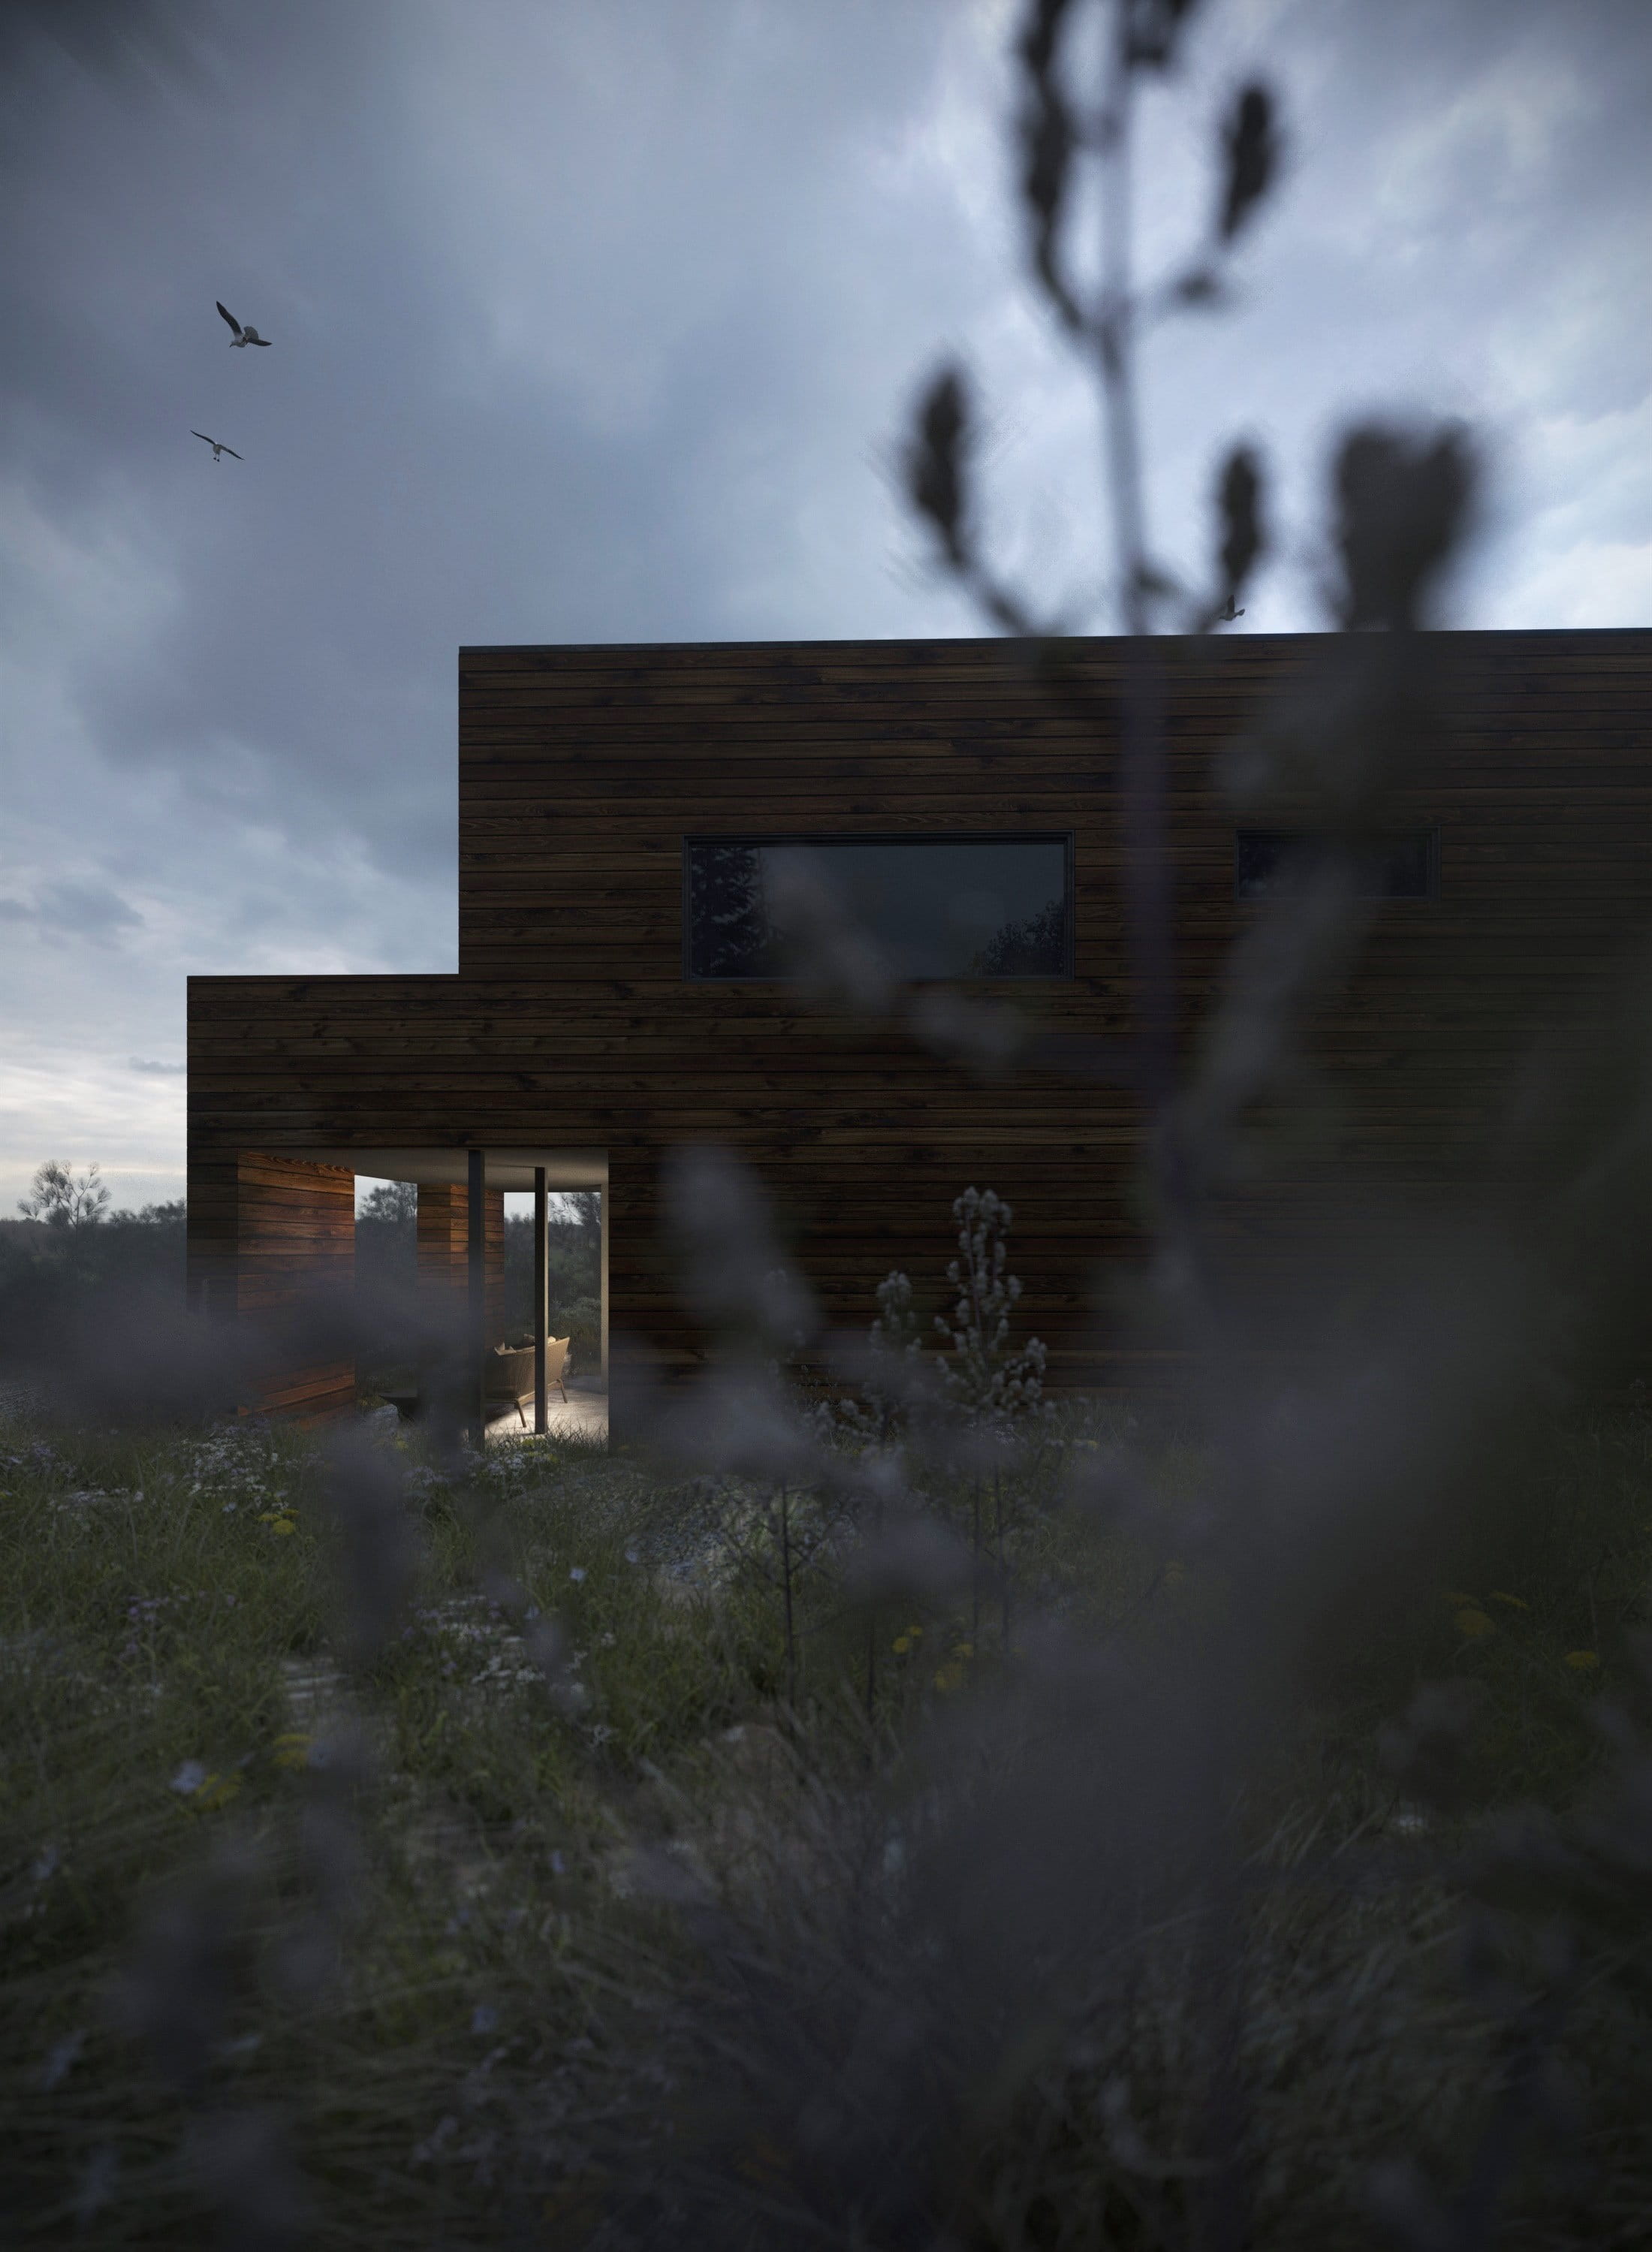
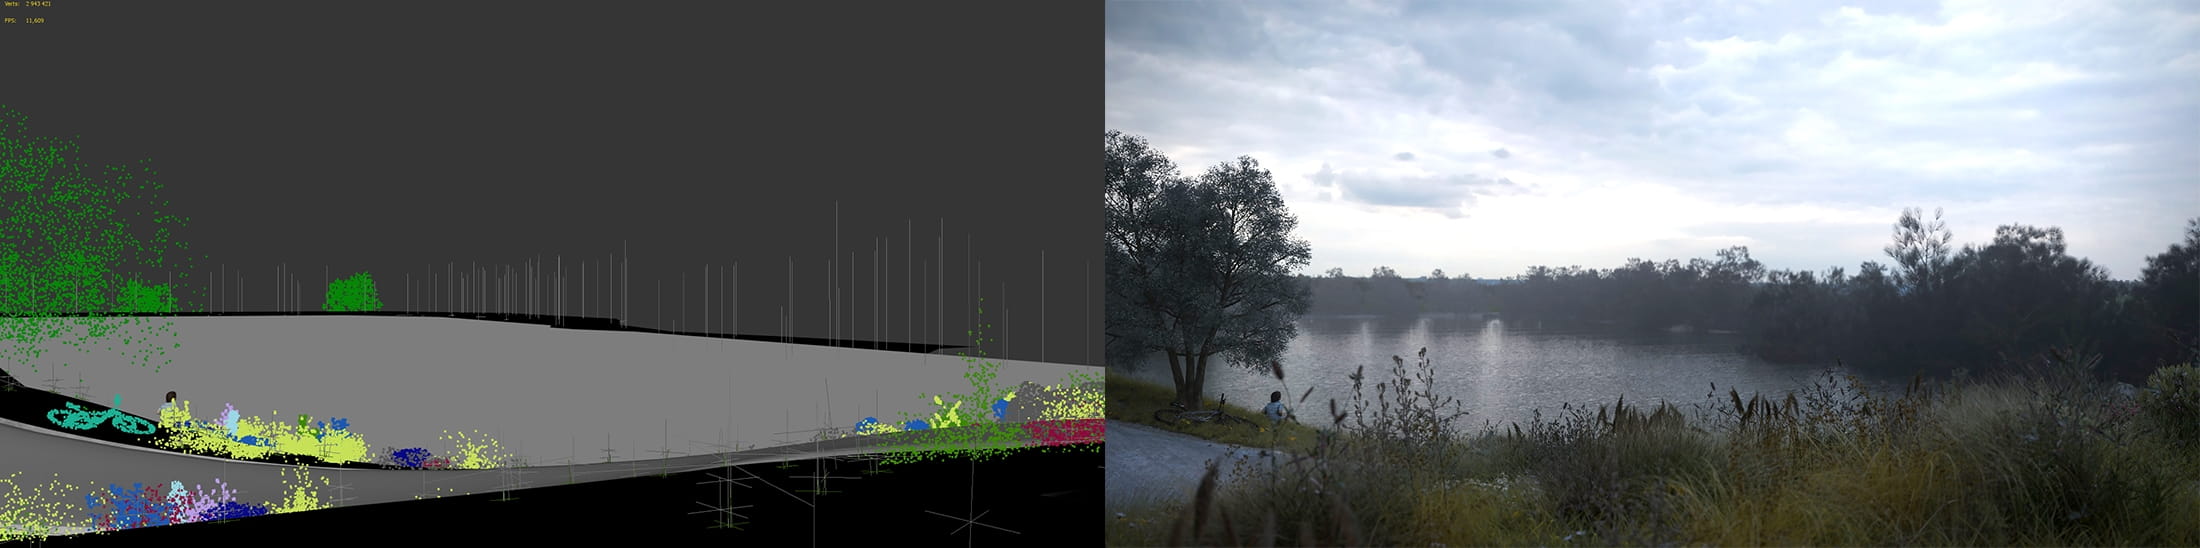
I often like to use low camera angles with plants in the foreground where the Depth of Field means they are out-of-focus and they frame the architecture or the scene in the distance. For me it is like a "moving camera" was paused in some random place. This moving camera has a certain trajectory in my mind, but the point of the camera is not to reveal a particular object, but instead to show the atmosphere of the place, its character. That’s the feel I aim for in my images, like it is a frozen scene from a film.

In practice, I start experiments with the cameras after the vegetation is created, so that we can walk among it.
In composing the shots, I need an object that is in focus, and then some “barrier” in the foreground. The subject in the foreground is blurred by the DOF, creating blurred color spots that create the atmosphere and depth for the image, and add some dynamics and movement.
In my head, I correlate the proportions of the main object and the obstructing object in the frame, and depending on what I want to achieve in this framing, I can allow the front object to almost completely block the main object. This gives the effect of a random picture, something like the Lomography genre in photography (with the motto “Don’t think, just shoot”) when life is shown in all its manifestations, for what it is. The shot should look natural, with no staging, just as we would see it in life - for example, as if we were an animal, who crept out of the forest and was watching through the grass.

Technically, regarding the DOF, there is nothing special, I put the camera target close to the object that needs to be in focus. The closer the blurred objects are to the camera, the greater the contrast between foreground and background will be. I usually use F-number – 2.0.
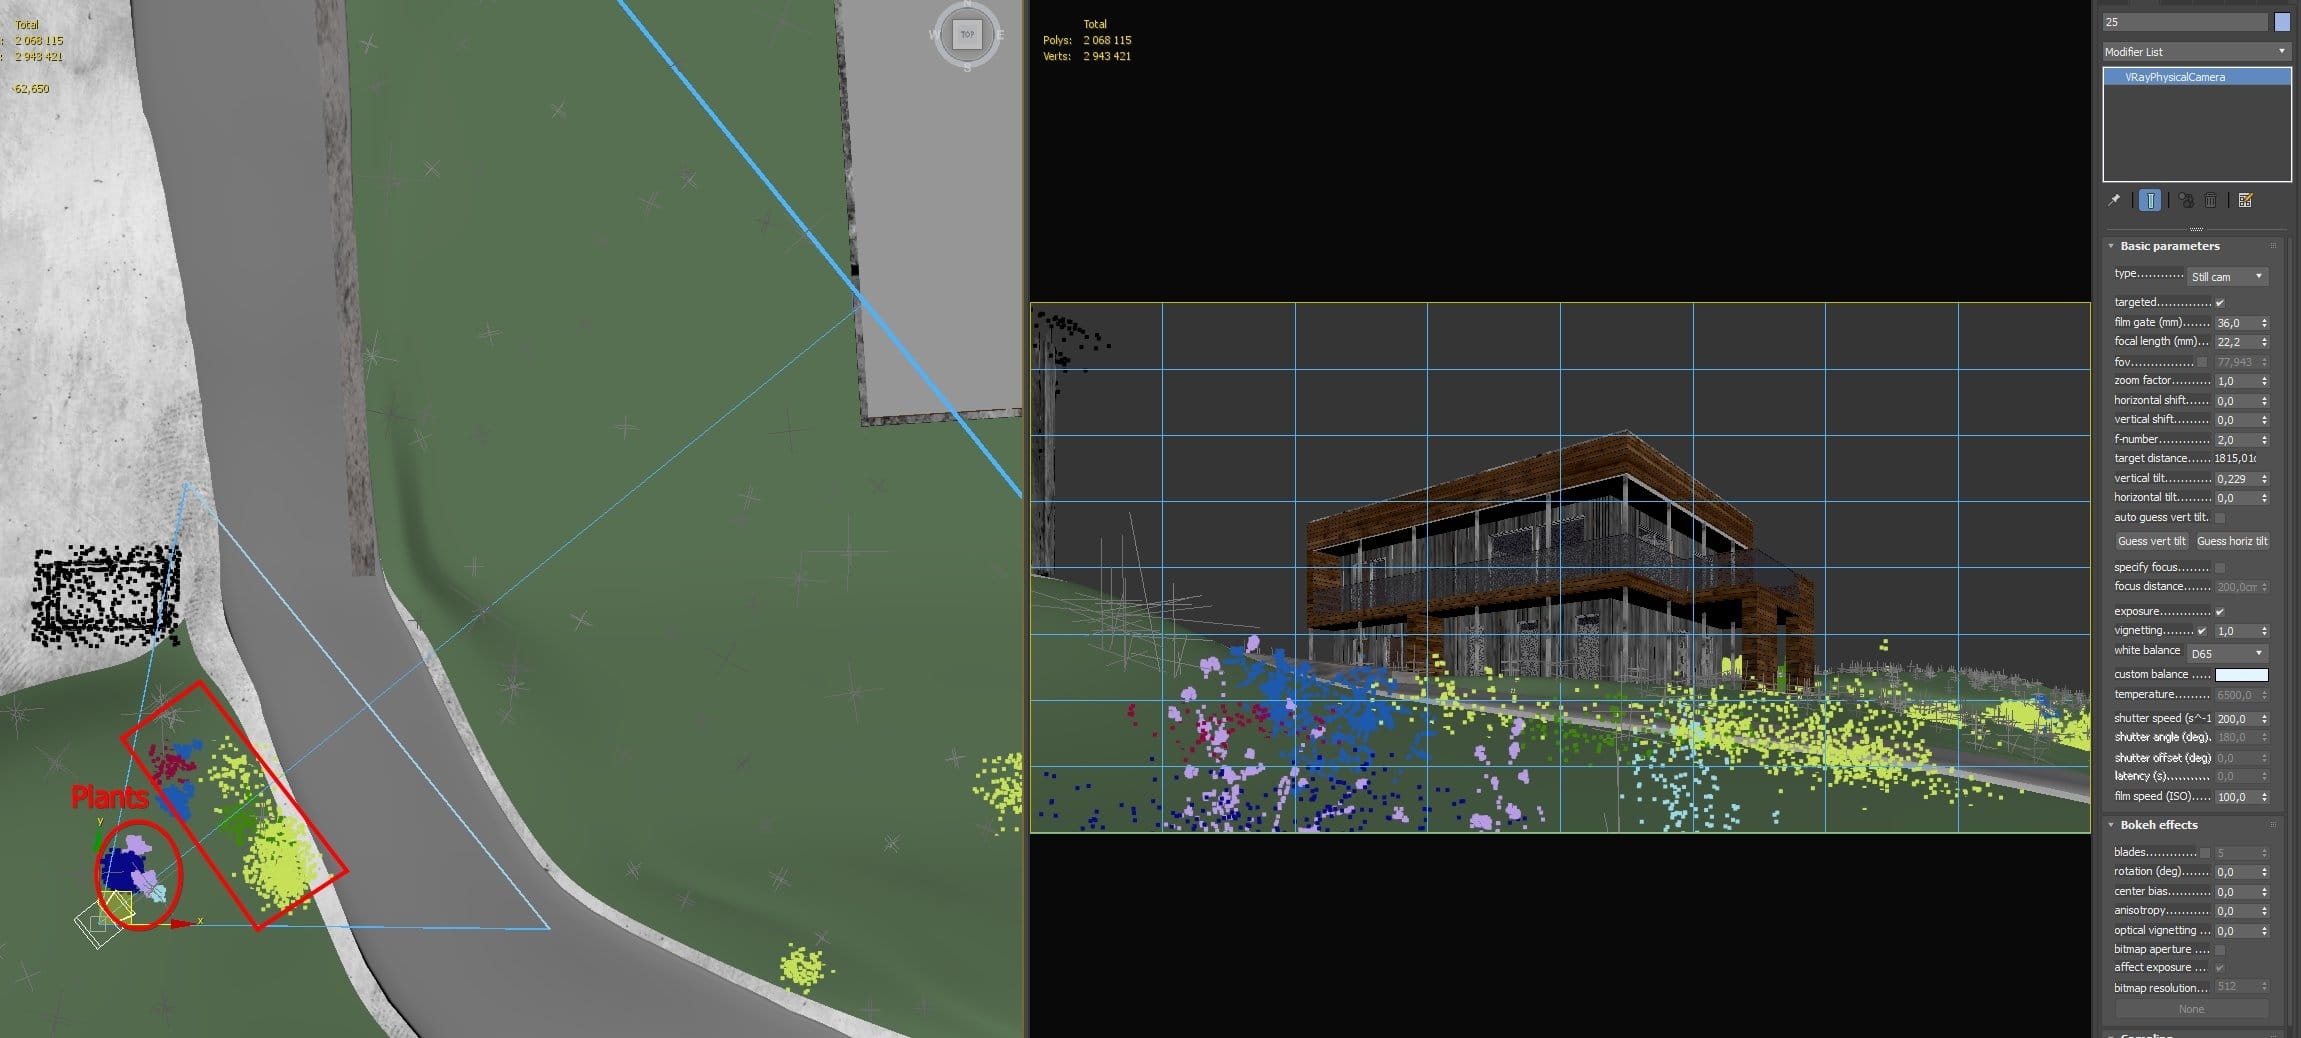
All the cameras are similar to each other with the only difference being the focal length, which varies from 22 to 50mm.
As mentioned earlier, I place the camera and play with the existing vegetation, but typically each individual frame needs additional improvement with some herbs, flowers, bushes etc. added specifically for that shot.
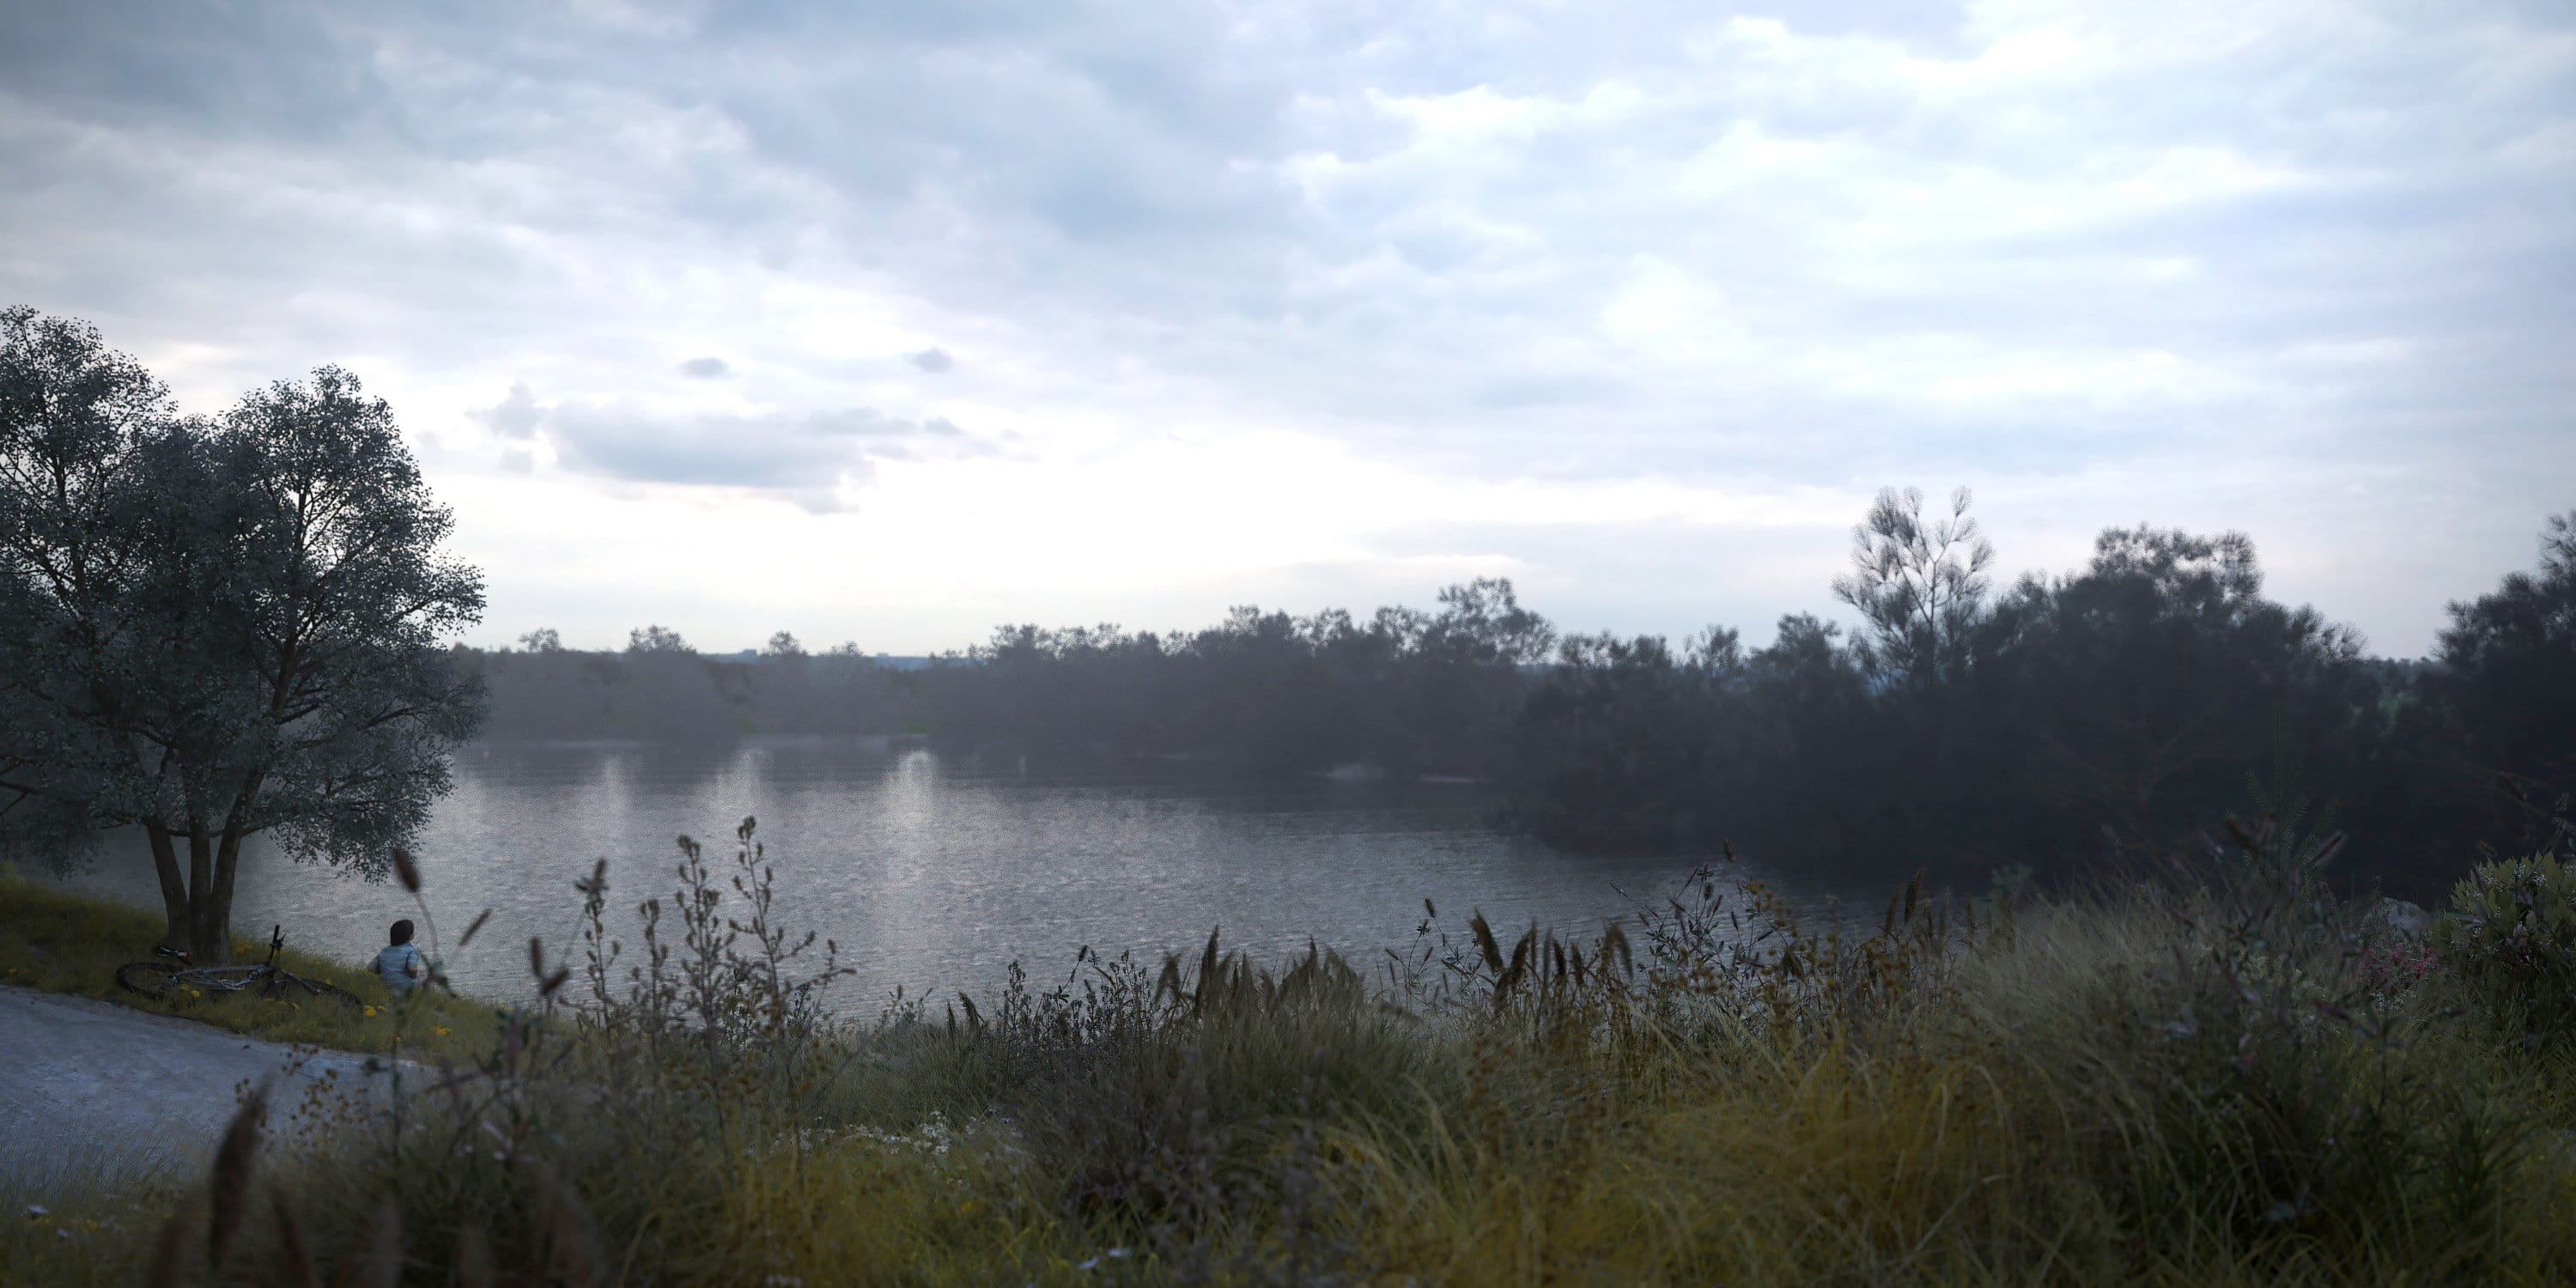
Sometimes in such searches for a good perspective, images are born and I complement the frame not with plants but with other components. For example, I added the boy on the lake shore, who came here by bike and left it under a tree near the road – he looks into the distance and dreams, waiting for something, but the weather gets worse as he waits…
When creating the flower close-ups, for those cameras I pick the plants,, light and butterflies specifically for that shot. First, I do a test on one flower and check how it will look:
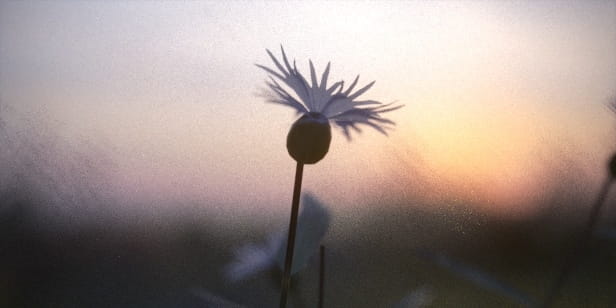
Then I create a floral arrangement. The plants need to be Meshsmoothed for these close camera angles.

For doing this kind of work, Corona Render’s Interactive Rendering and Render Regions help me a lot. They allow me to build a composition, taking into account the light and the materials, in real-time. It really saves time and allows you to create freely.
One more thing I want to mention - when you place some greenery for a specific camera, it can be unwanted on other cameras. To handle this sort of variation for different cameras, you can animate it. For example, if I want to place a group of plants for use with camera 25, I make a keyframe on frame 25 for that group of plants; then I enable Autokey, and move the greenery under the plain to hide it on keyframes 24 and 26. That way this group of plants will only be visible on frame 25, the frame number that matches the name of the camera:

Lighting
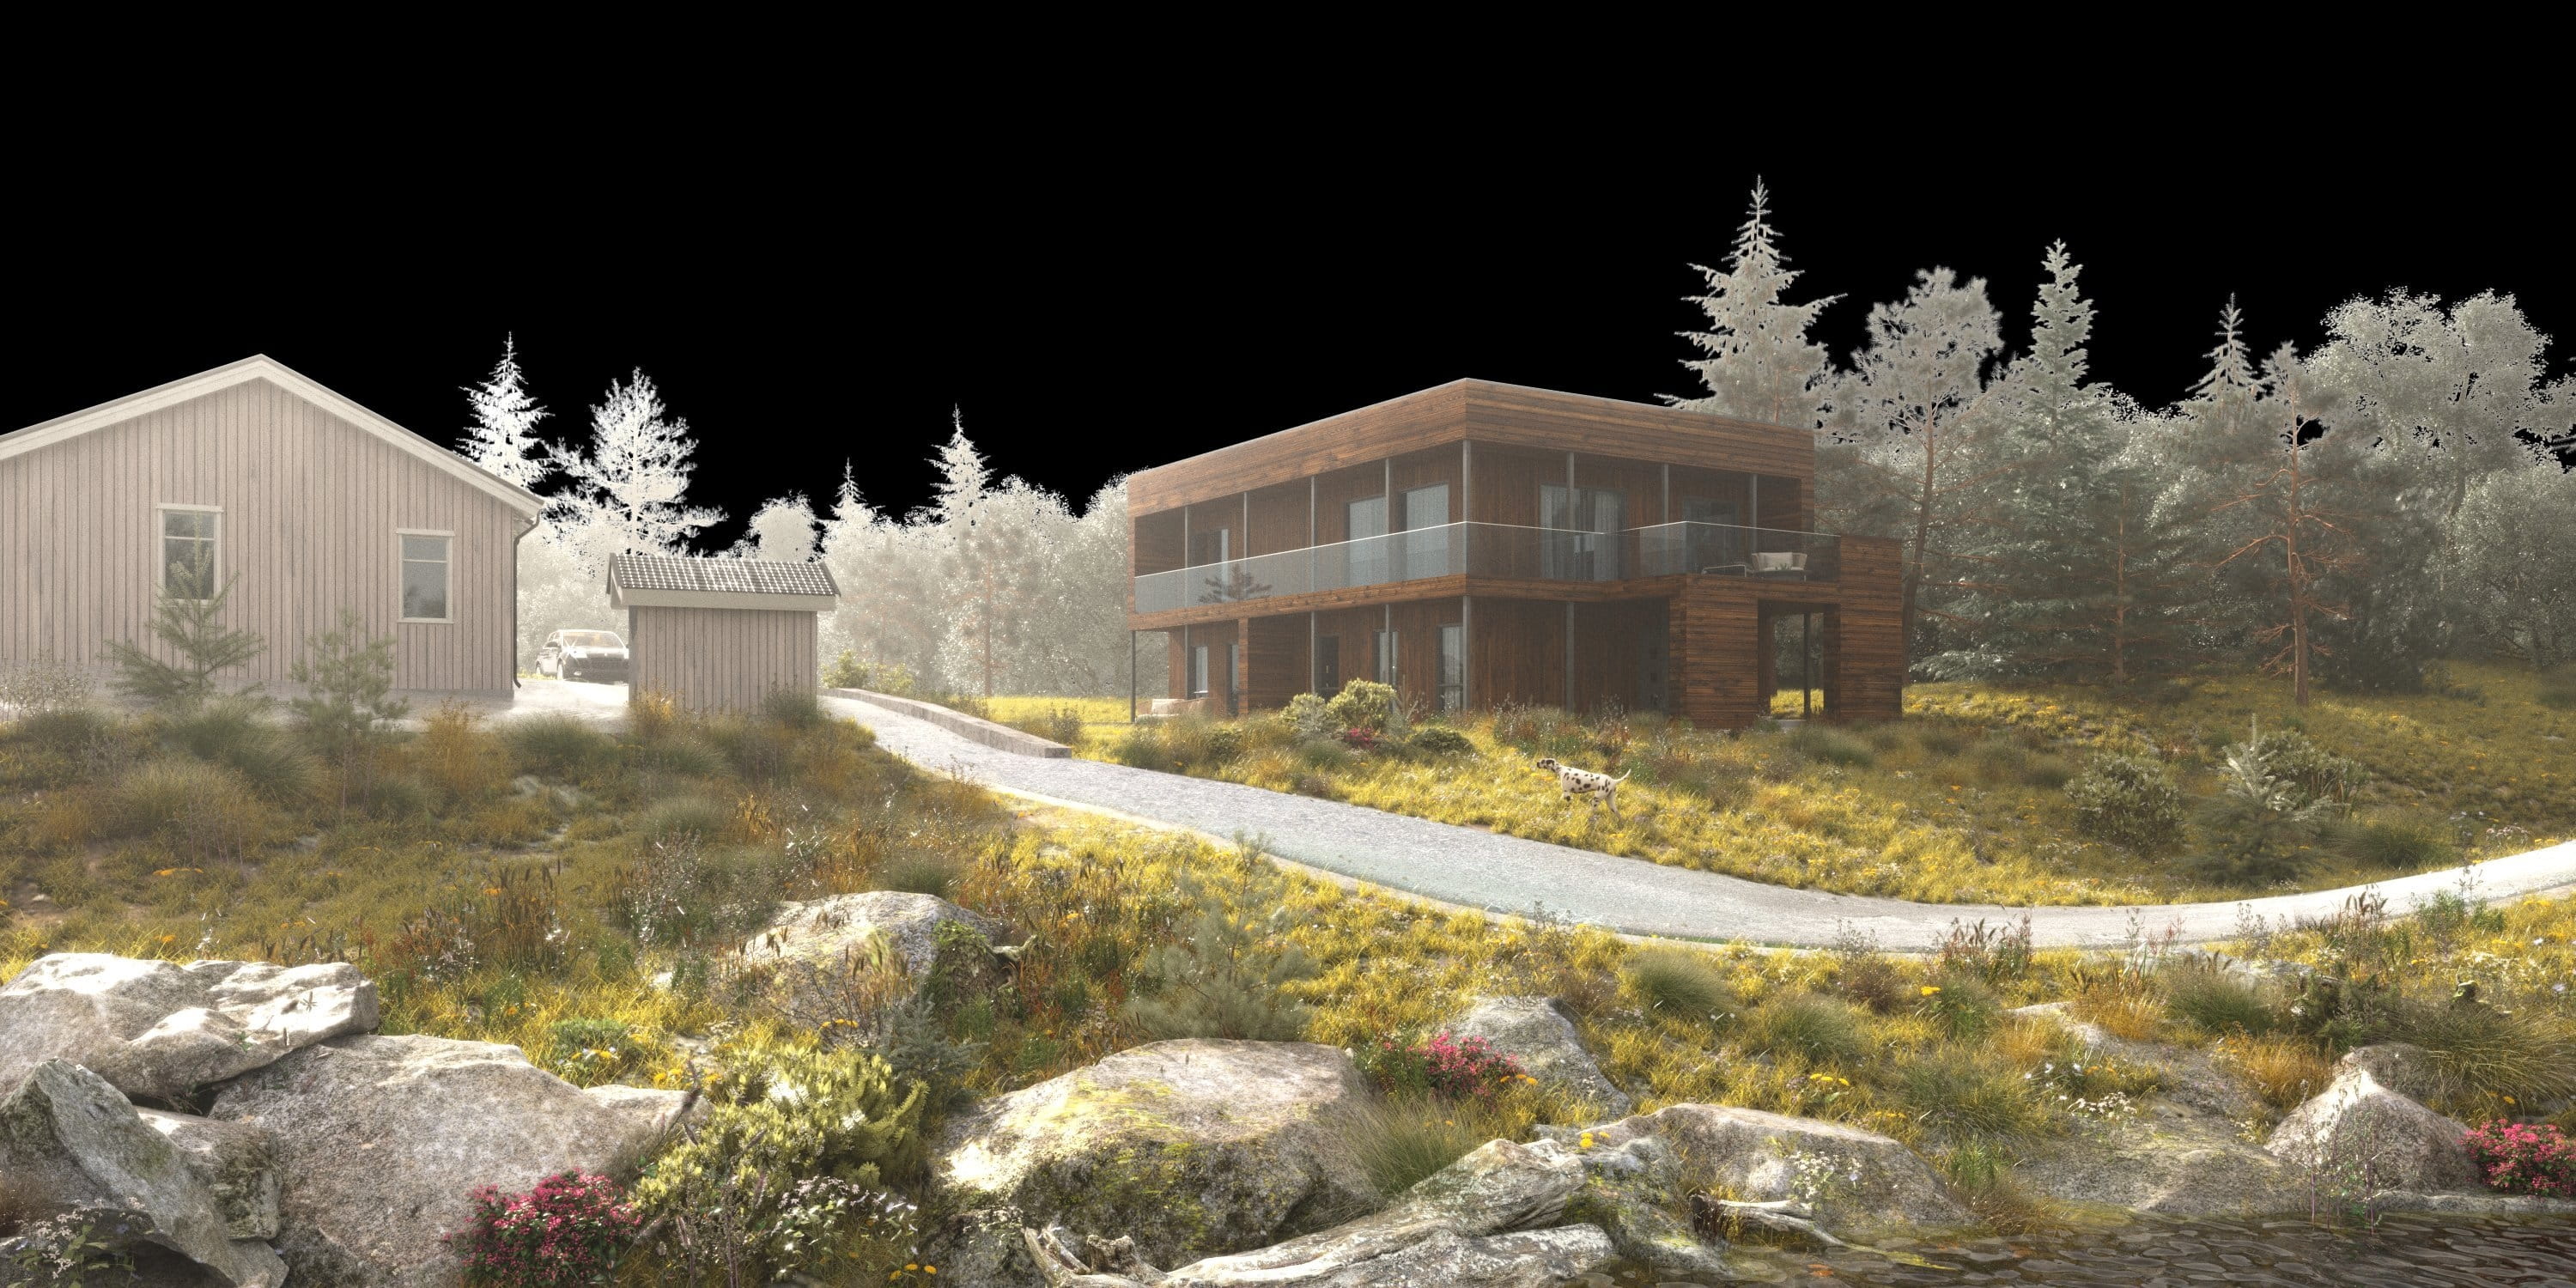
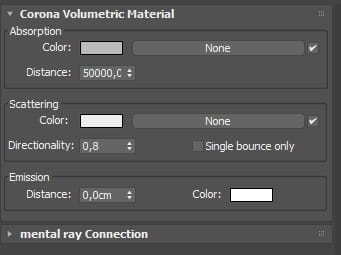
I use simple lighting schemes, just the sun or an hdri, and then use a Corona Volumetric material to achieve an atmospheric effect. I use the Volumetric material on all the shots, the only thing that changes is that the distances are different for some camera angles.
For this project, I used HDRs from NoEmotion and Peter Guthrie. Here are the lighting schemes for all angles:

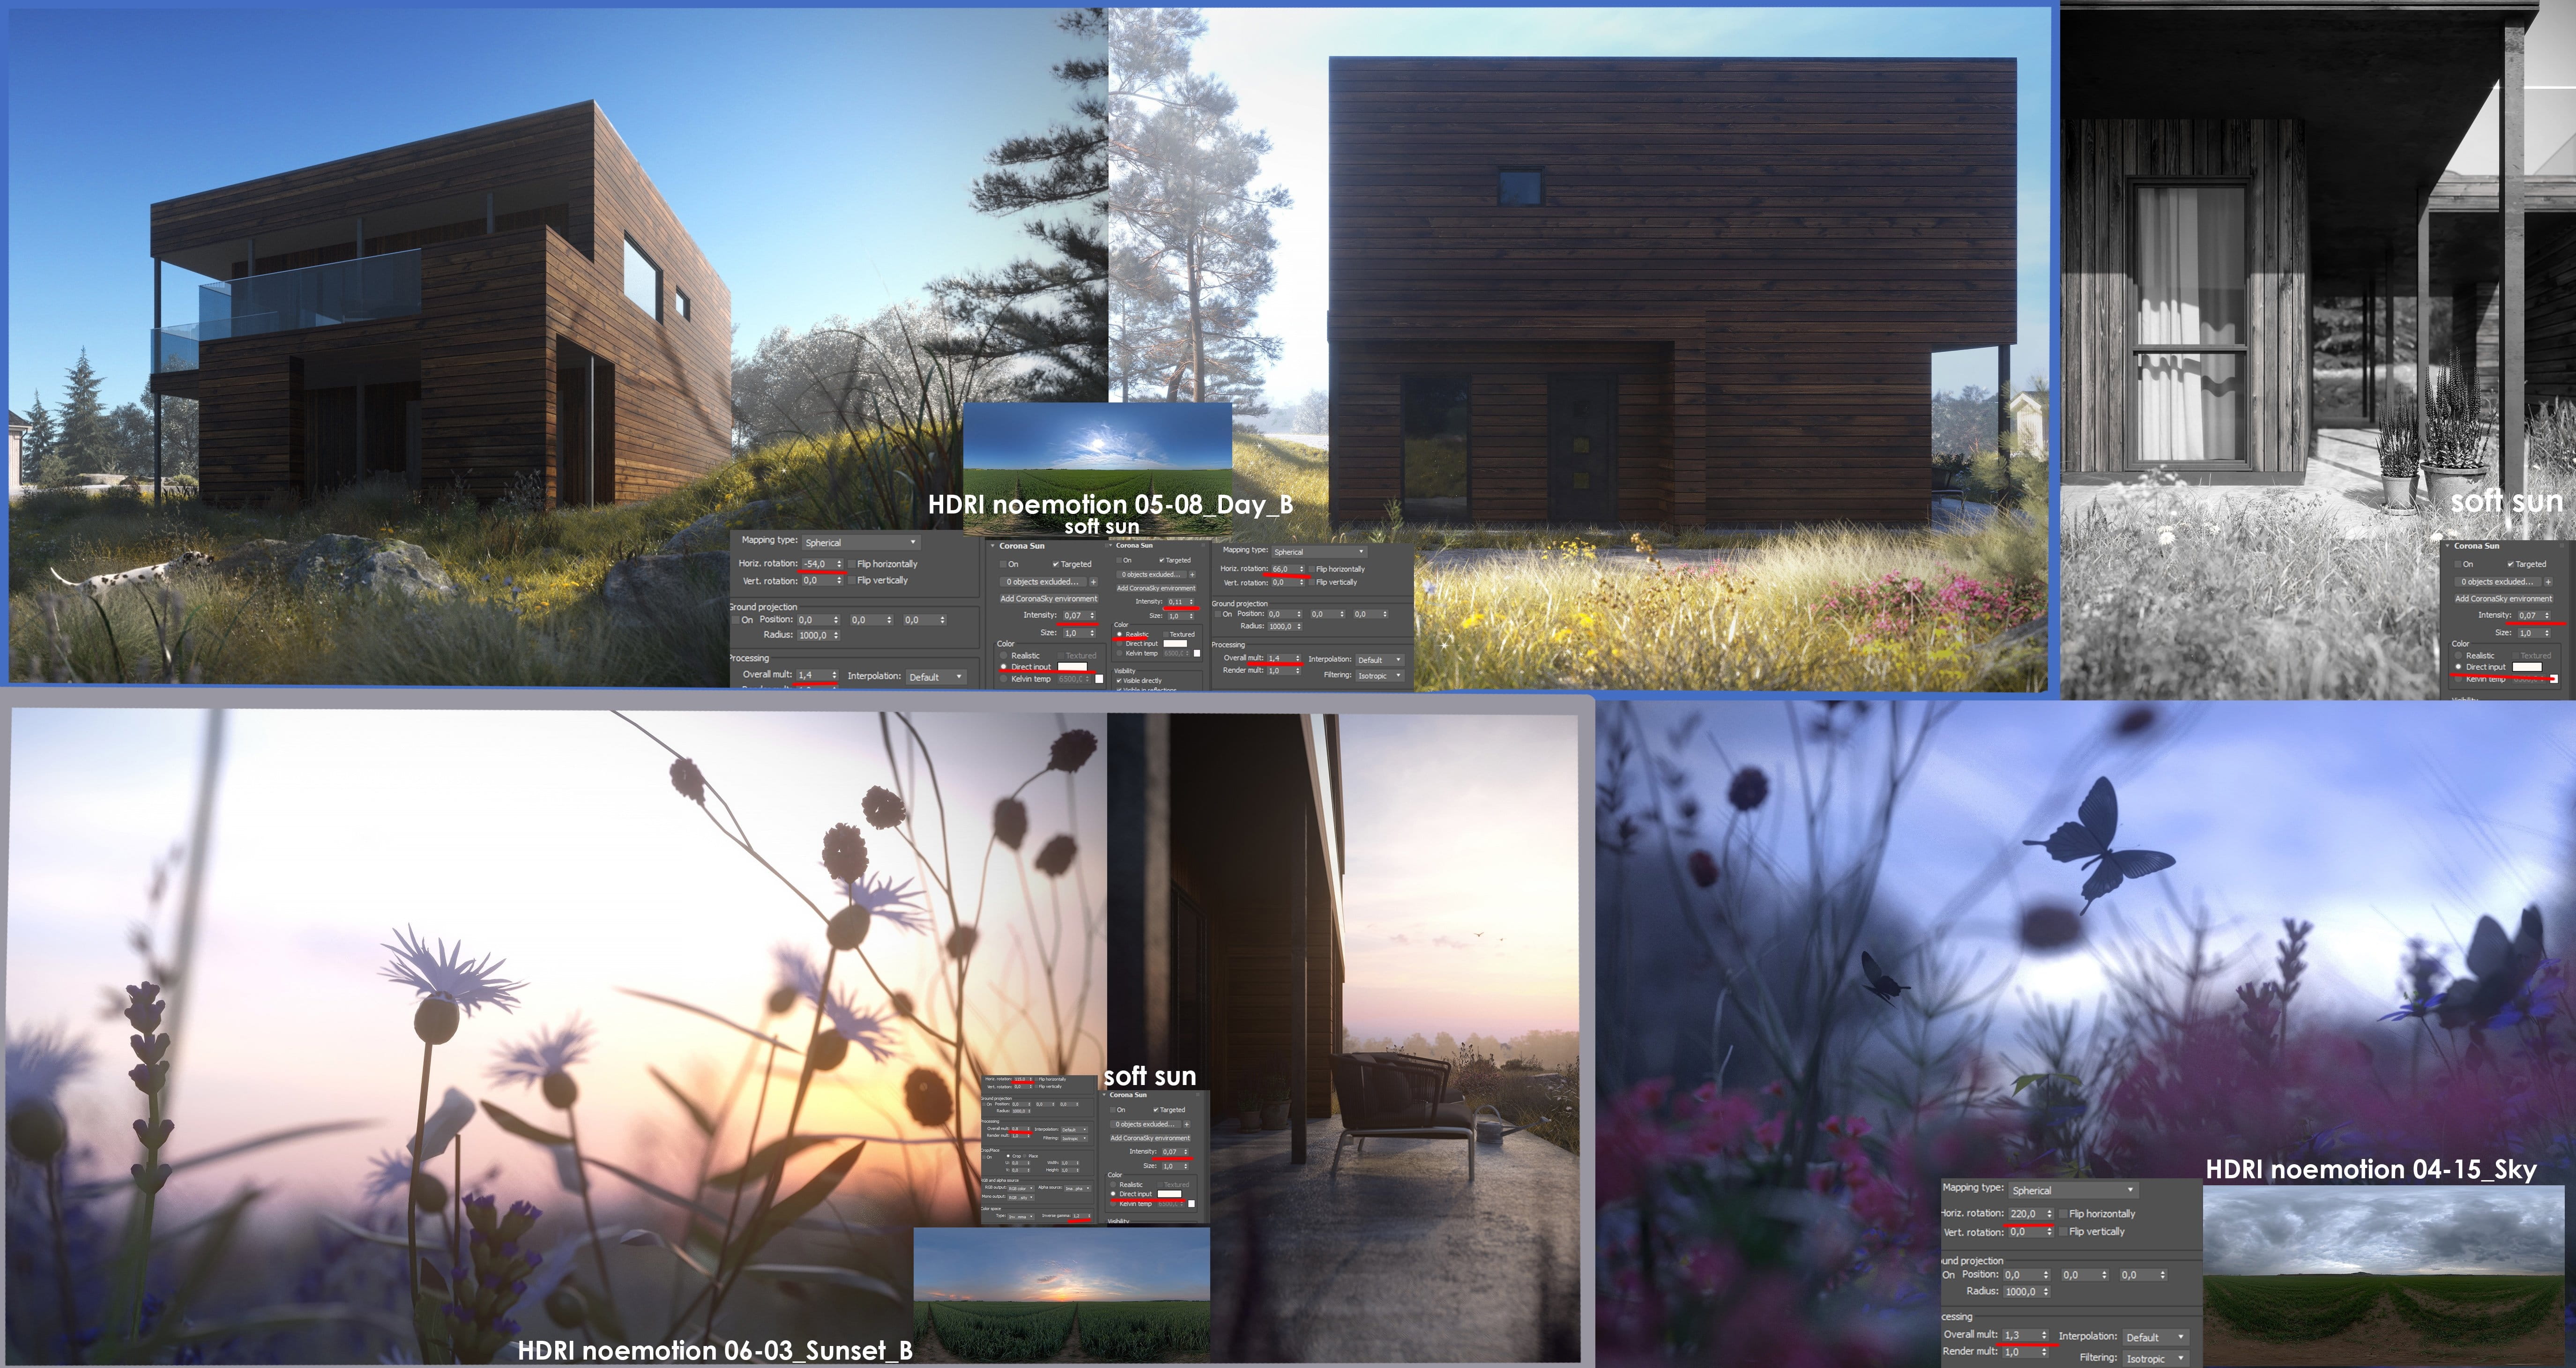
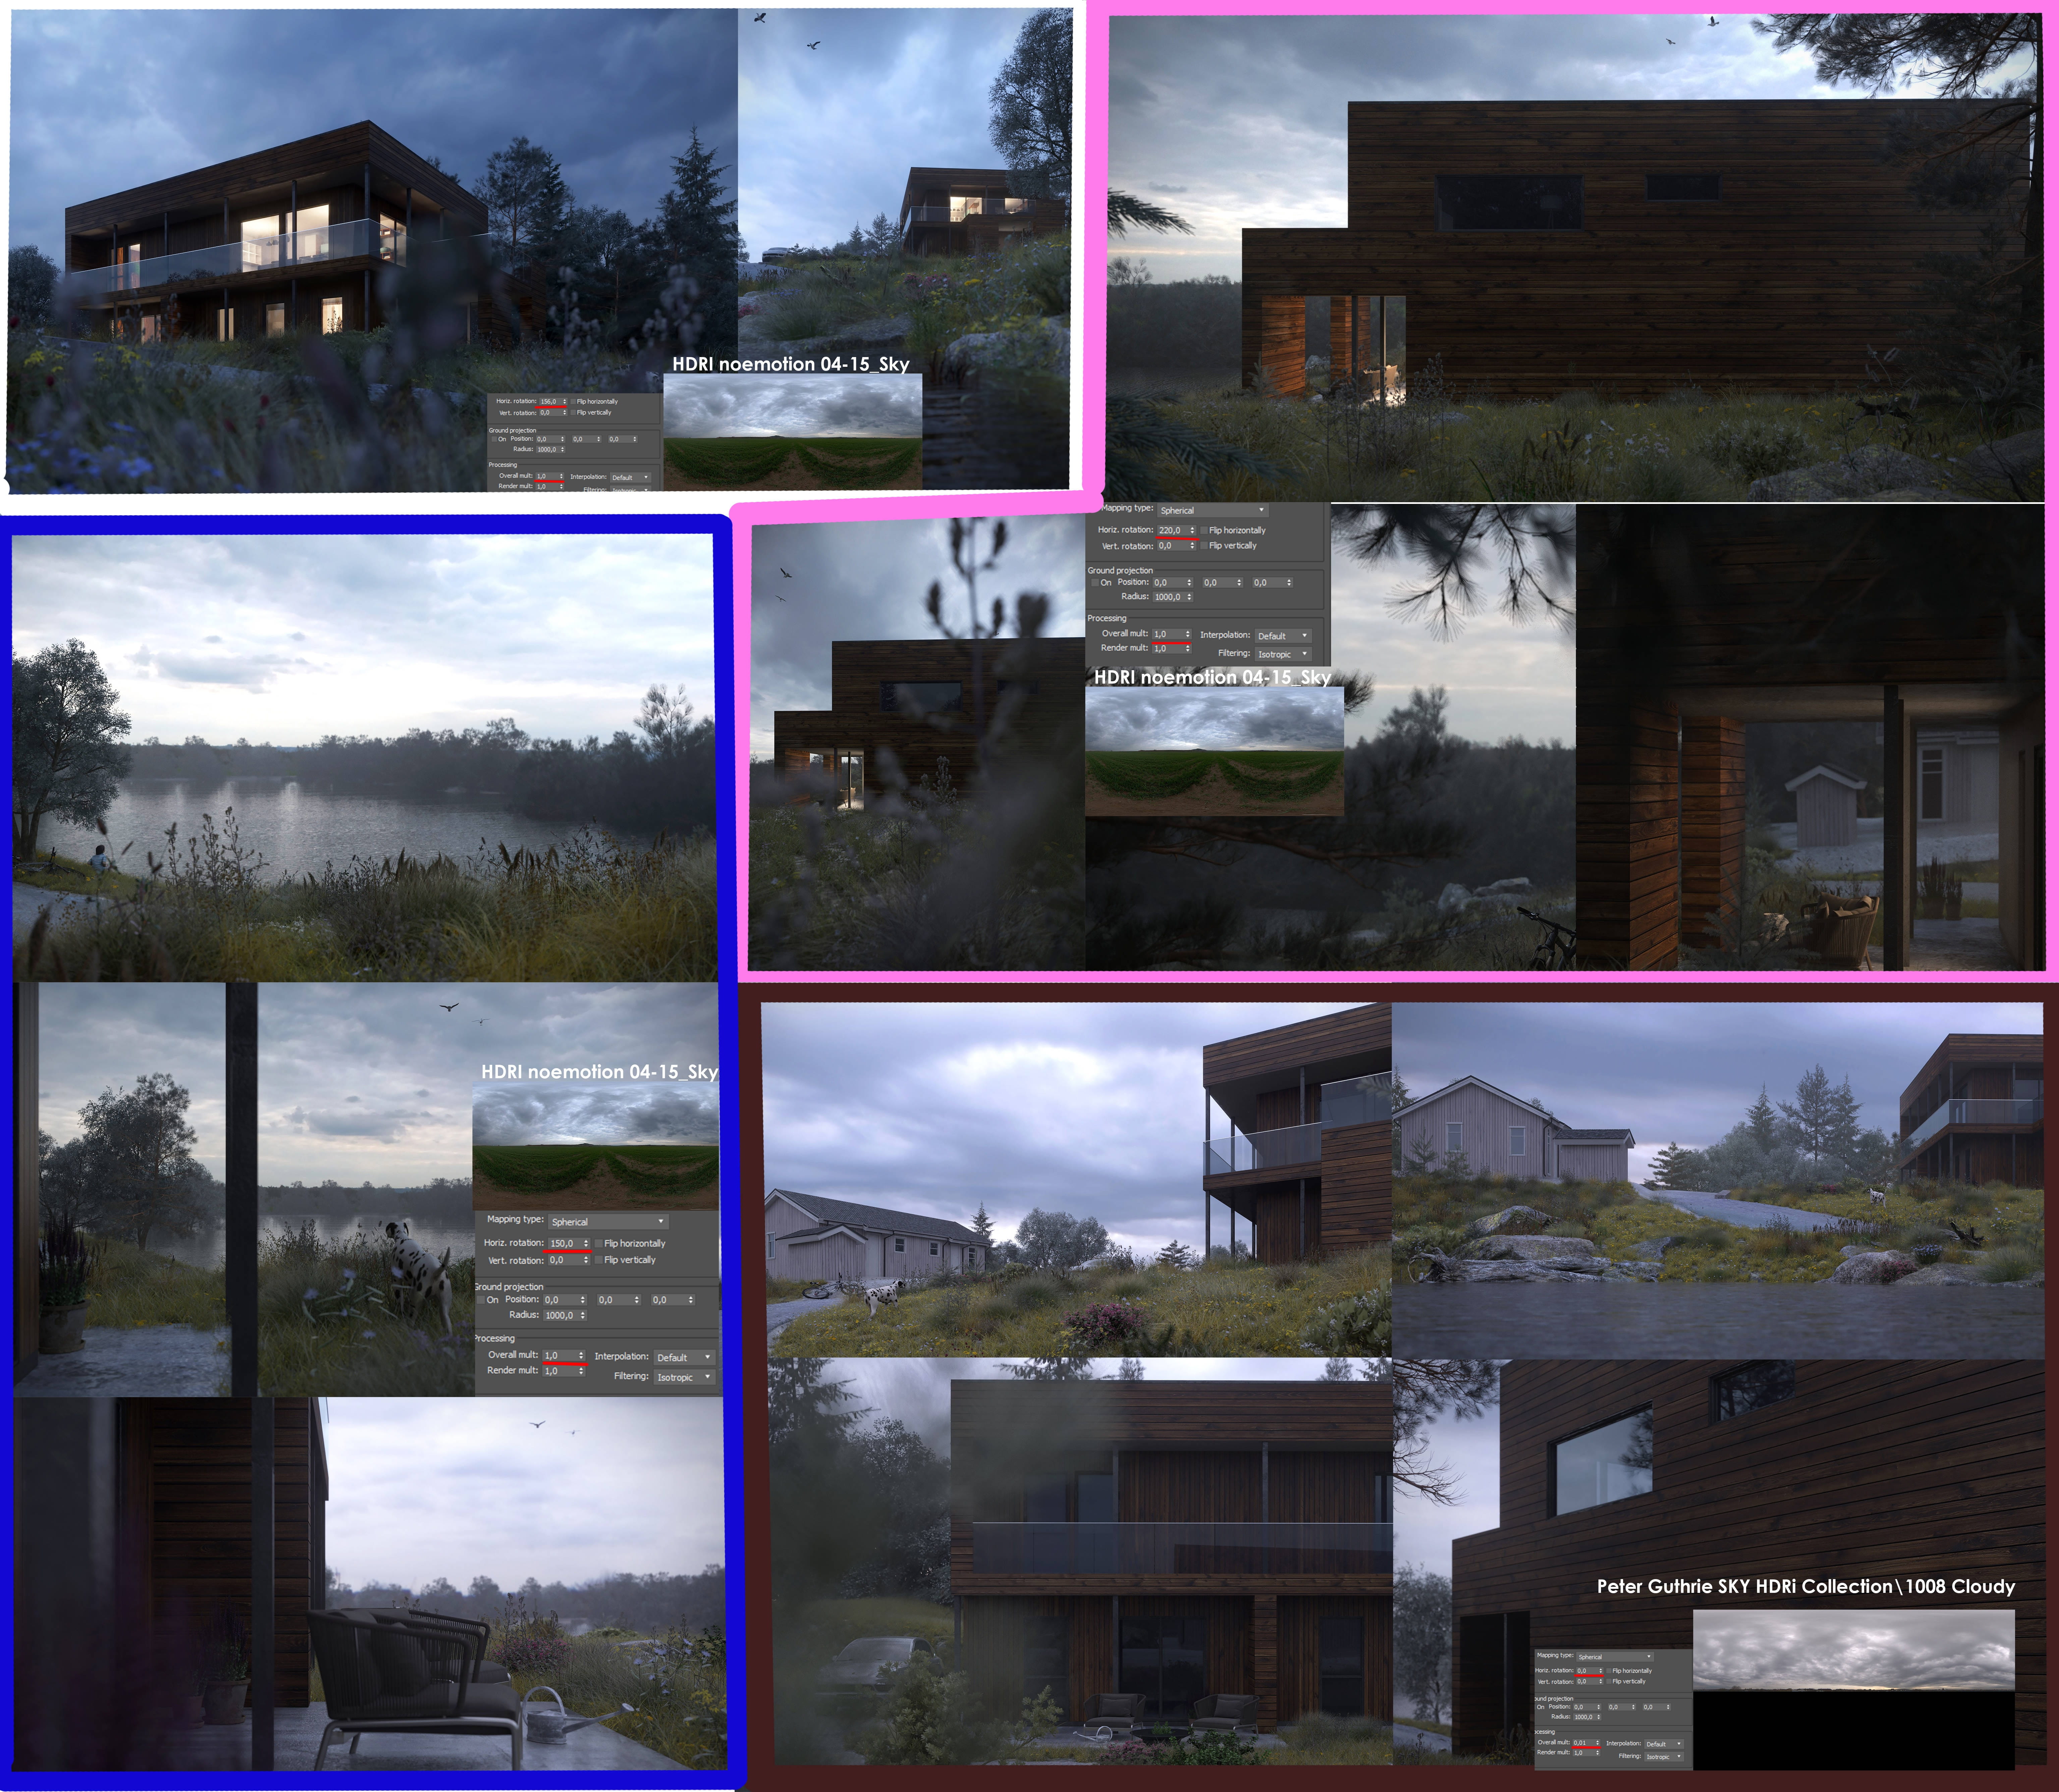
Though there are different lighting conditions, there was no special challenge in preparing the scene and materials for those to look good. I think that any problem with adjusting materials only comes up when you change the lighting from a calm grey or evening to a bright, direct sun. In my case the first angle was sunny and the others were soft, so the materials behave normally in all the shots. Moreover, different HDRIs add their color and hue to the scene and materials, tinting them, and sometimes this plays out well.
Materials
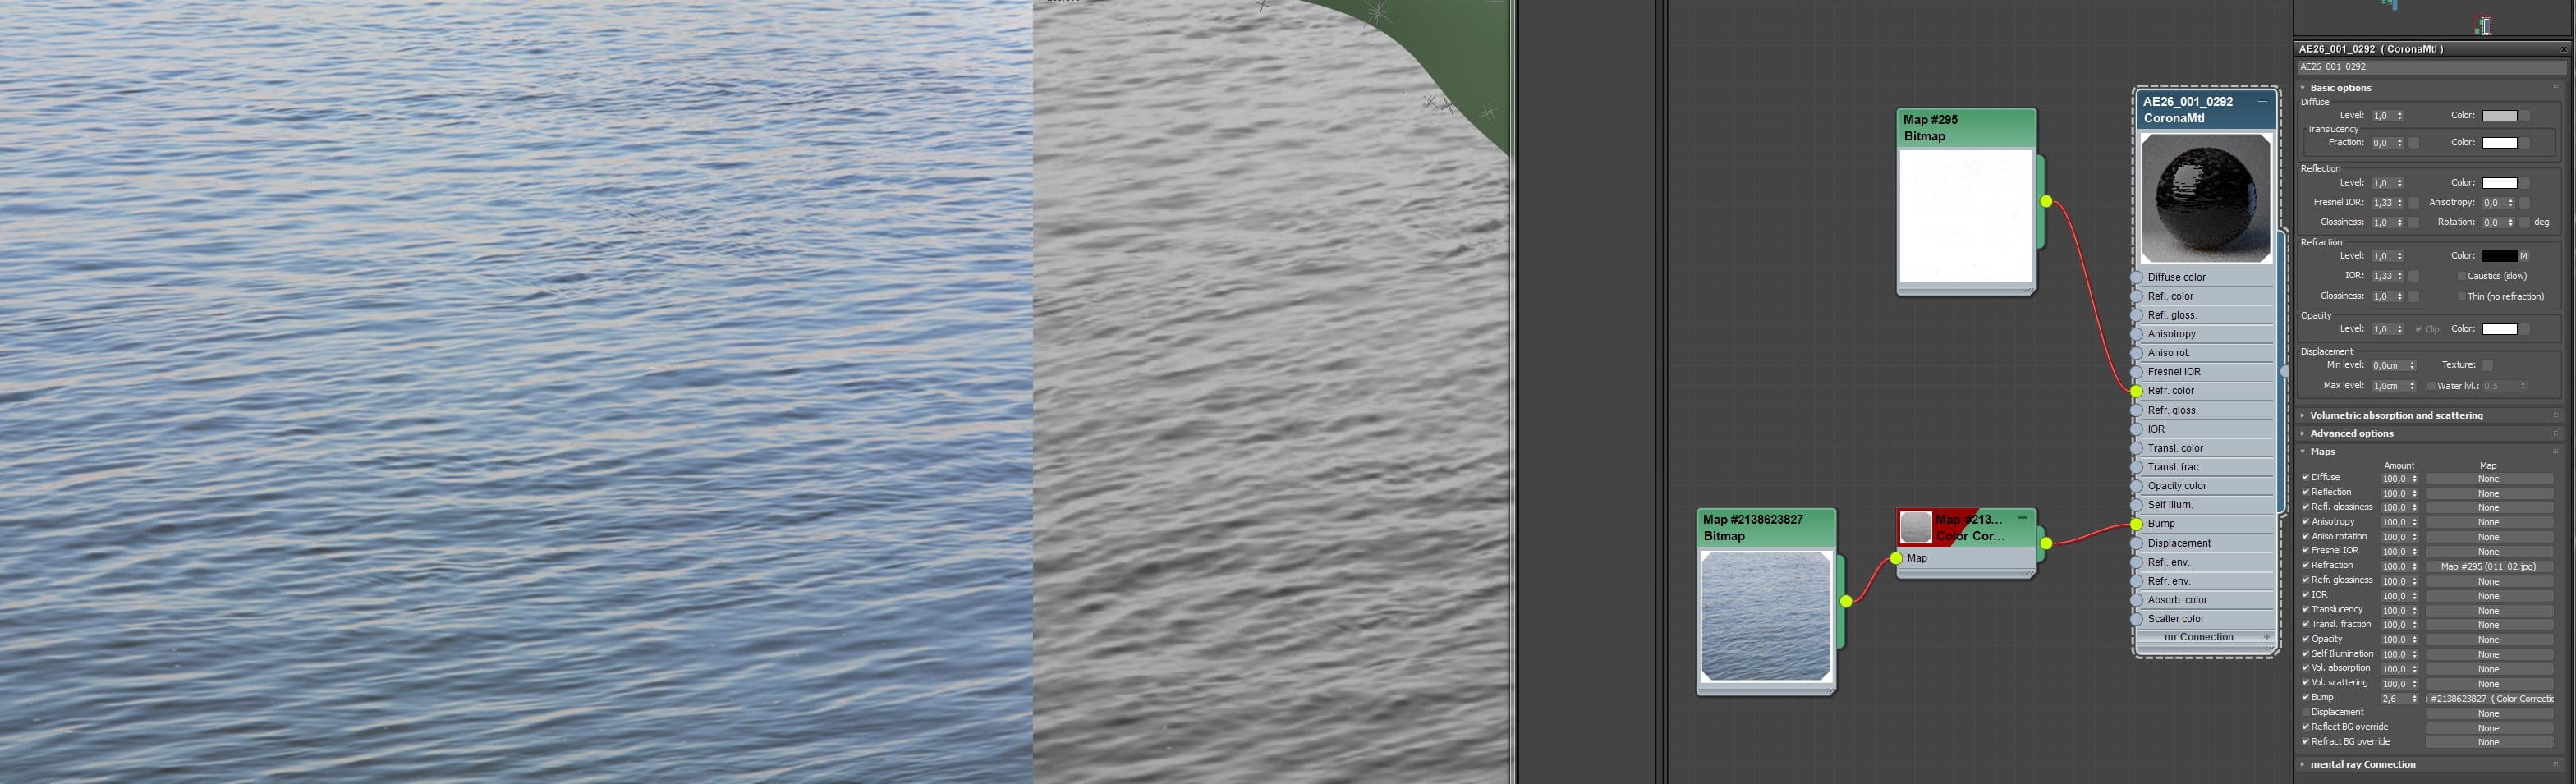
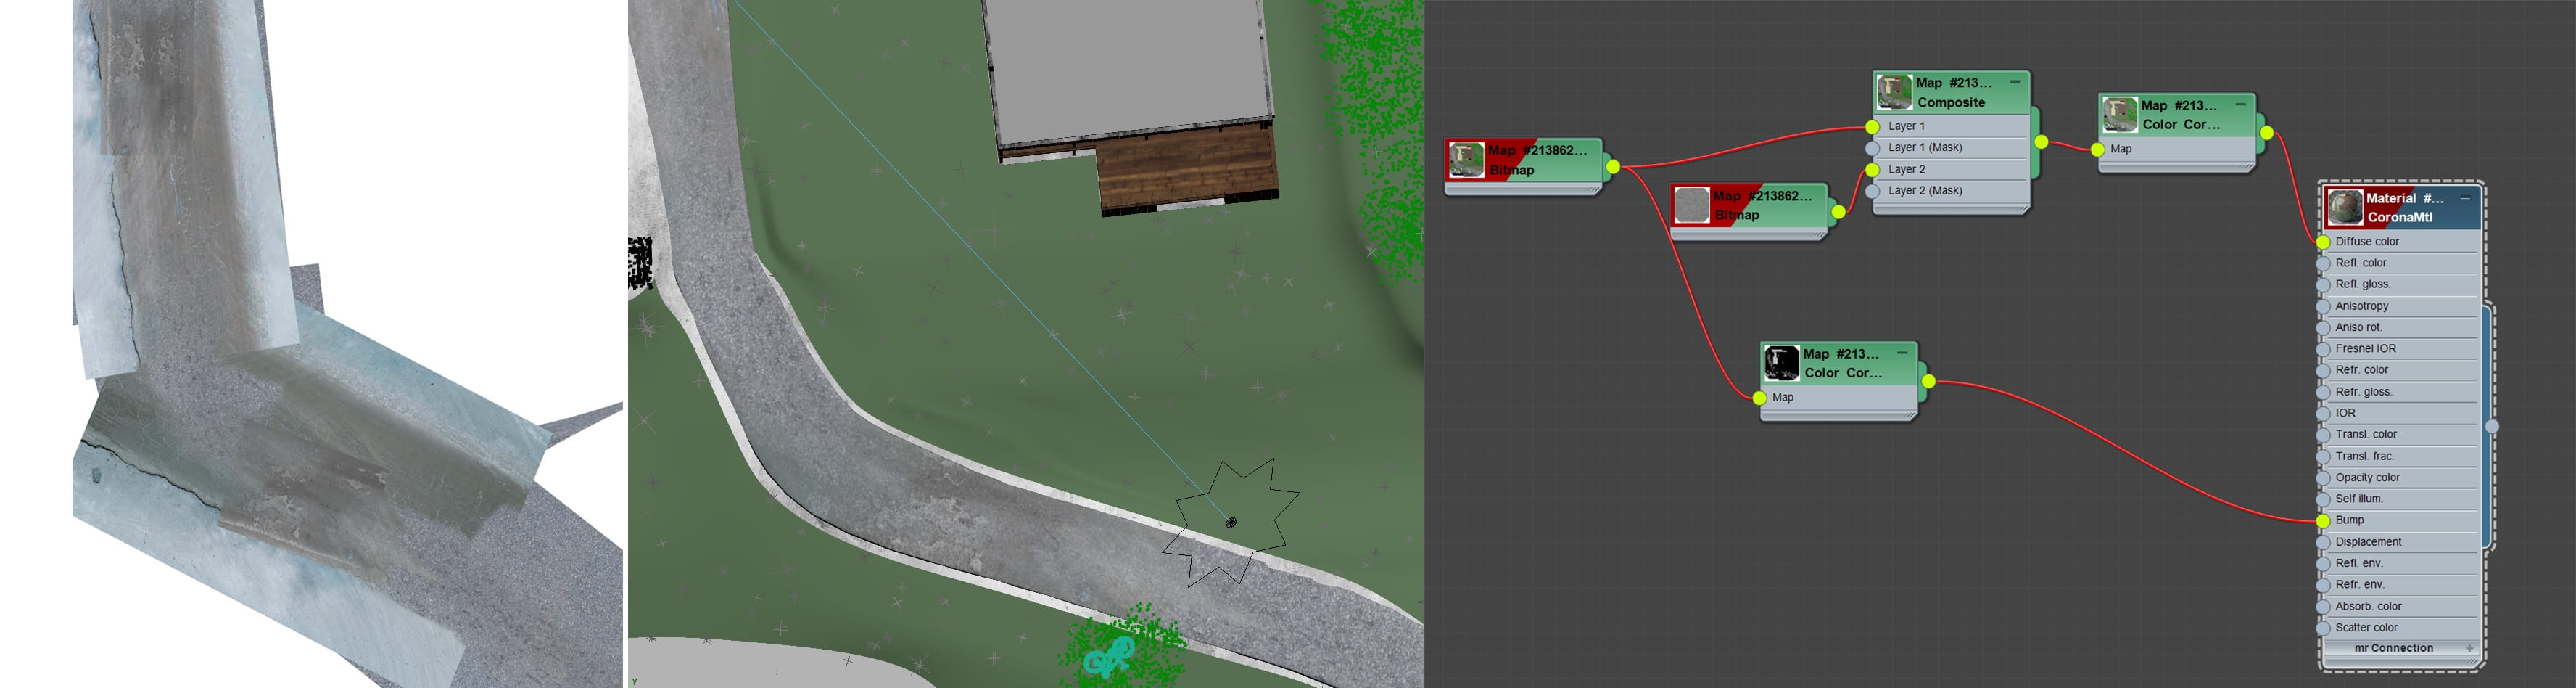
The materials in scene are quite simple. I used a texture as a Bump and Refraction Color map for the lake material:
The material for the road is quite simple too. I usually draw roads in Photoshop then use those images as Diffuse and Bump maps:
For the roof tiles, I used MaterialByElement with 3-4 ID count and a MultiSubObject material:
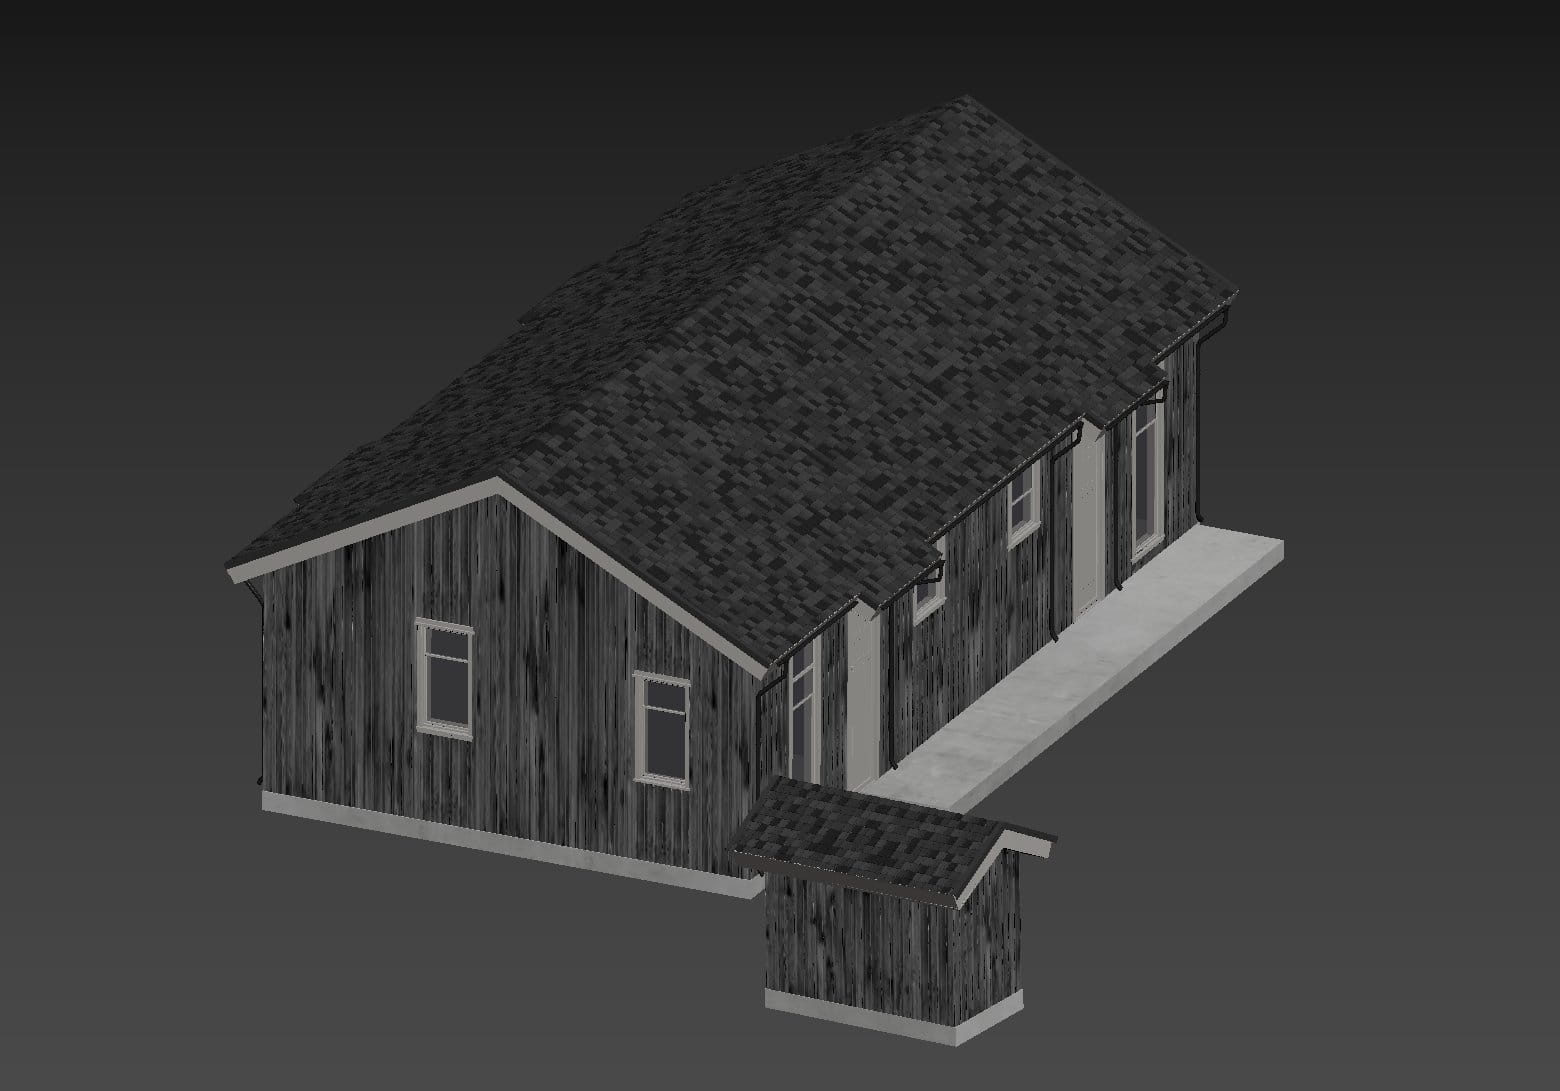
The wood material I also painted in Photoshop, using a small texture as a reference:

Post Production
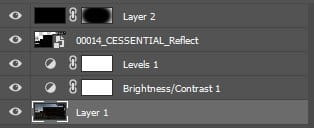
Here are some render elements that I usually use:

Almost all the images had no special correction in Photoshop, just some additional Brightness and Contrast or Levels, Vignette and Reflection mask, as seen below:
Corona settings
Though I don’t work with other renderers, having only tried them several times, I fell in love with Corona from the beginning when I could produce a good image just by placing a white color in the Environment slot. Its settings are very easy and friendly - you don’t need to think much about them, as they work by default, and that leaves you free to concentrate on your work.
There are some Corona Renderer features that help me a lot. For example, I use LightMix while rendering, and that helps me to change or correct the lighting scheme without interrupting the rendering process. That way I also always get the LightMix variant as an additional image along with the Beauty pass – 2 results while rendering one image!
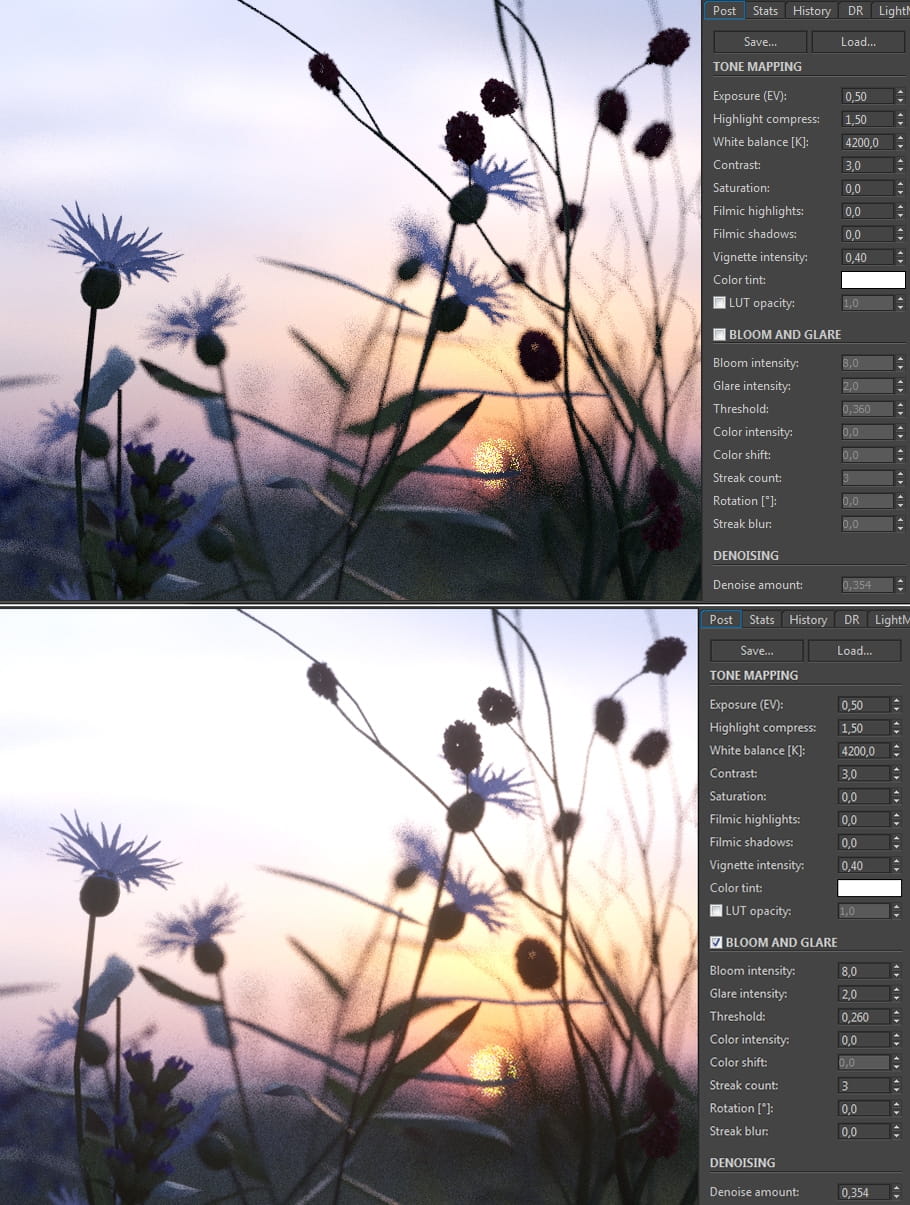
While making these different images, I played a lot with the Tone mapping. It is great that you can correct things such as highlight compression, white balance, saturation, filmic shadows and vignette during rendering, and that means there’s no special need to make big adjustments in Post Production as the images are almost ready when rendering completes.
I always keep a little Bloom and Glare turned on, even if it is not strongly pronounced and there is no specific purpose in using it - it just gives a feeling of airiness and brings the image alive:
As I said earlier, I couldn’t imagine my work without Corona’s Interactive Rendering– it is the only way I can “paint” in real time.
Conclusion
I want everyone to remember that our kind of work gives us a big opportunity to be artists and philosophers. Approach your projects with emotion and love. Let’s look for a loophole to add feeling even in our daily commercial projects, to give them more meaning and value from the point of view of art. and from the point of view of ourselves as artists.
I feel a sense of gratitude for the opportunity to share some of the background behind this project and to talk about my work - thank you very much for your time, and I hope you’ll find this article helpful and inspiring!
Best Regards,
Olga


LEAVE A COMMENT


|

|

|

|

|
 Customer zone
 Your orders
 Edit account
 Add project
 Liked projects
 View your artist profile
COMMENTS