Check Corona Renderer licenses prices in Evermotion Shop.
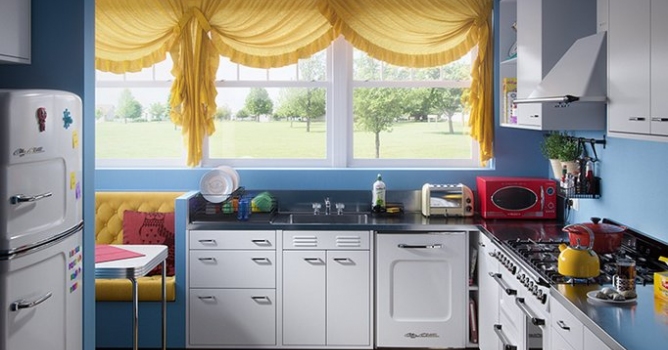
The main goal of „50's kitchen” was to recreate some old catalog illustration in 3D but with a rule of use appliances available in stores. The idea came naturally when I was washing the dishes (most of my ideas comes in during such oridnary actions). Besides I really like 50's. If I was in a posession of the DeLorean i'd set the timer back to 50's.
Click on image to enlarge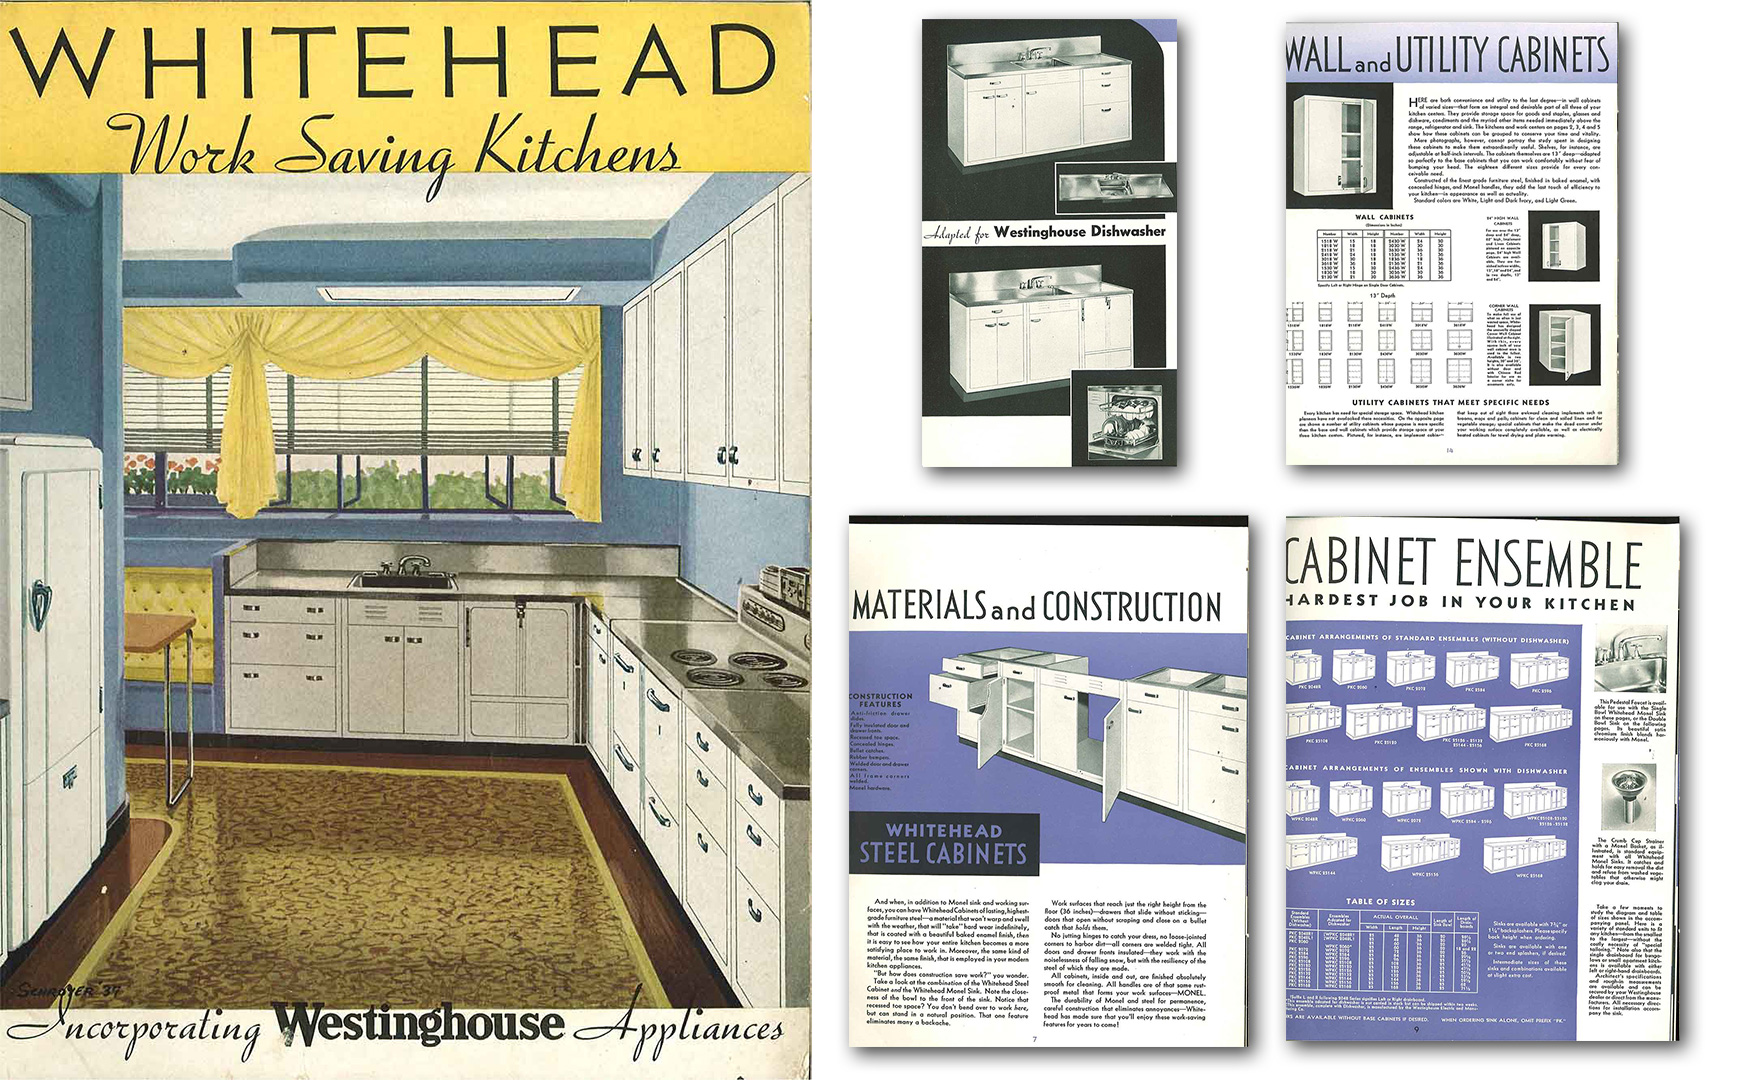
The first step was of course gathering the references, both for this particular interior scheme and for manufacturers who sales appliances with retro look.
Click on image to enlarge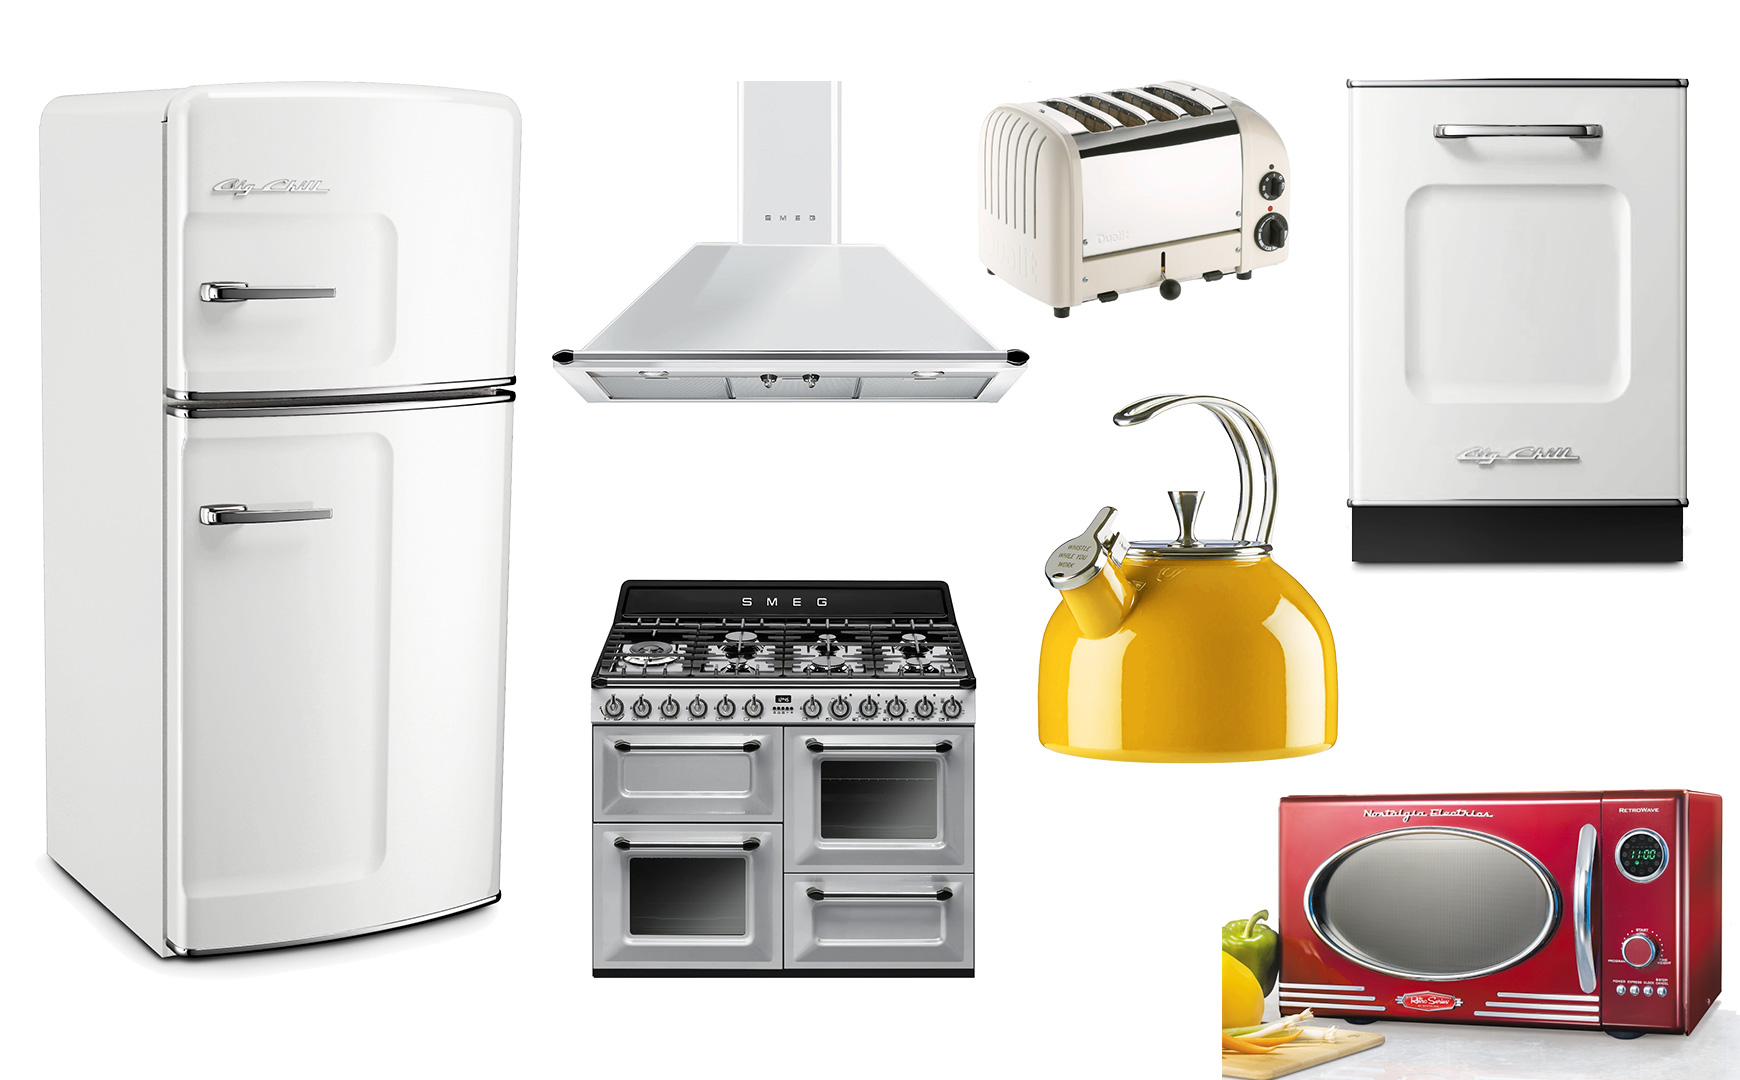
Appliances references.
Click on image to enlarge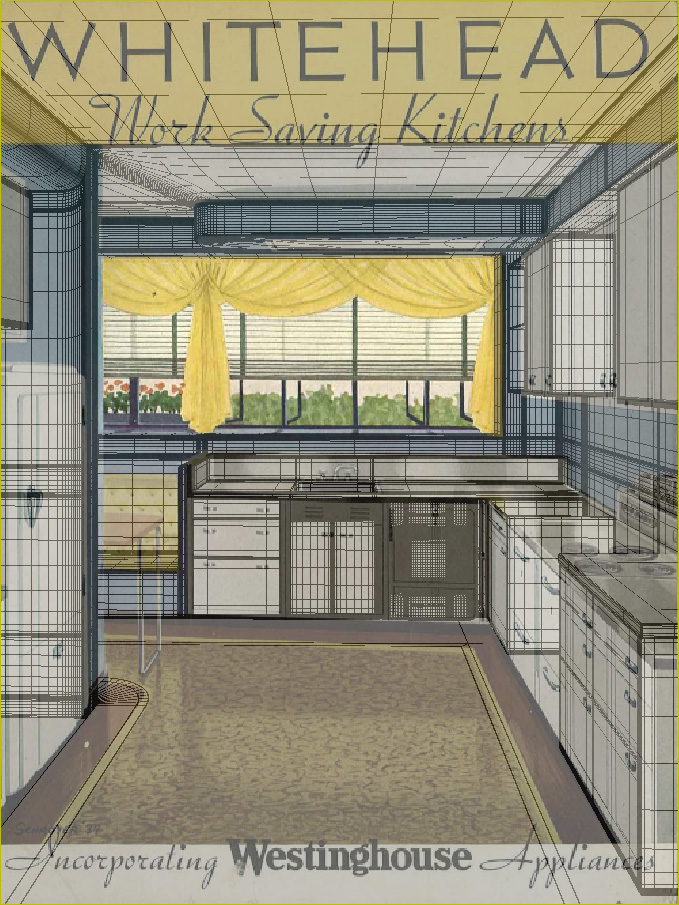
Once I've completed gathering of references I put illustration of the kitchen as a background image for the viewport and tweaked camera angle and focal to this illustration as close as possible. The trick was that the illustration was painted by hand so the exact camera matching was just impossible. To match the camera closest I could I modeled the walls, floor and furnitures and tweaked both camera and geometry simultaneously.
I'll let myself skip writing about how I modeled each thing because it's boring and propably you all know how to model. In this part I will just give You an overview and tips that are worth to mention. For modeling I used most common techniques except curtains, pillow (Marvelous Designer) and few of households (Rhino). Nurbs modeling comes really handy when there are some surfaces that seems to be more time consuming with classic polymodeling. Rhino gives you a way better solutions and natural surface flow with the addition of better UV mapping which is produced almost automatically.
Click on image to enlarge
An example of kettle body modeled and unwrapped with Rhino.
Click on image to enlarge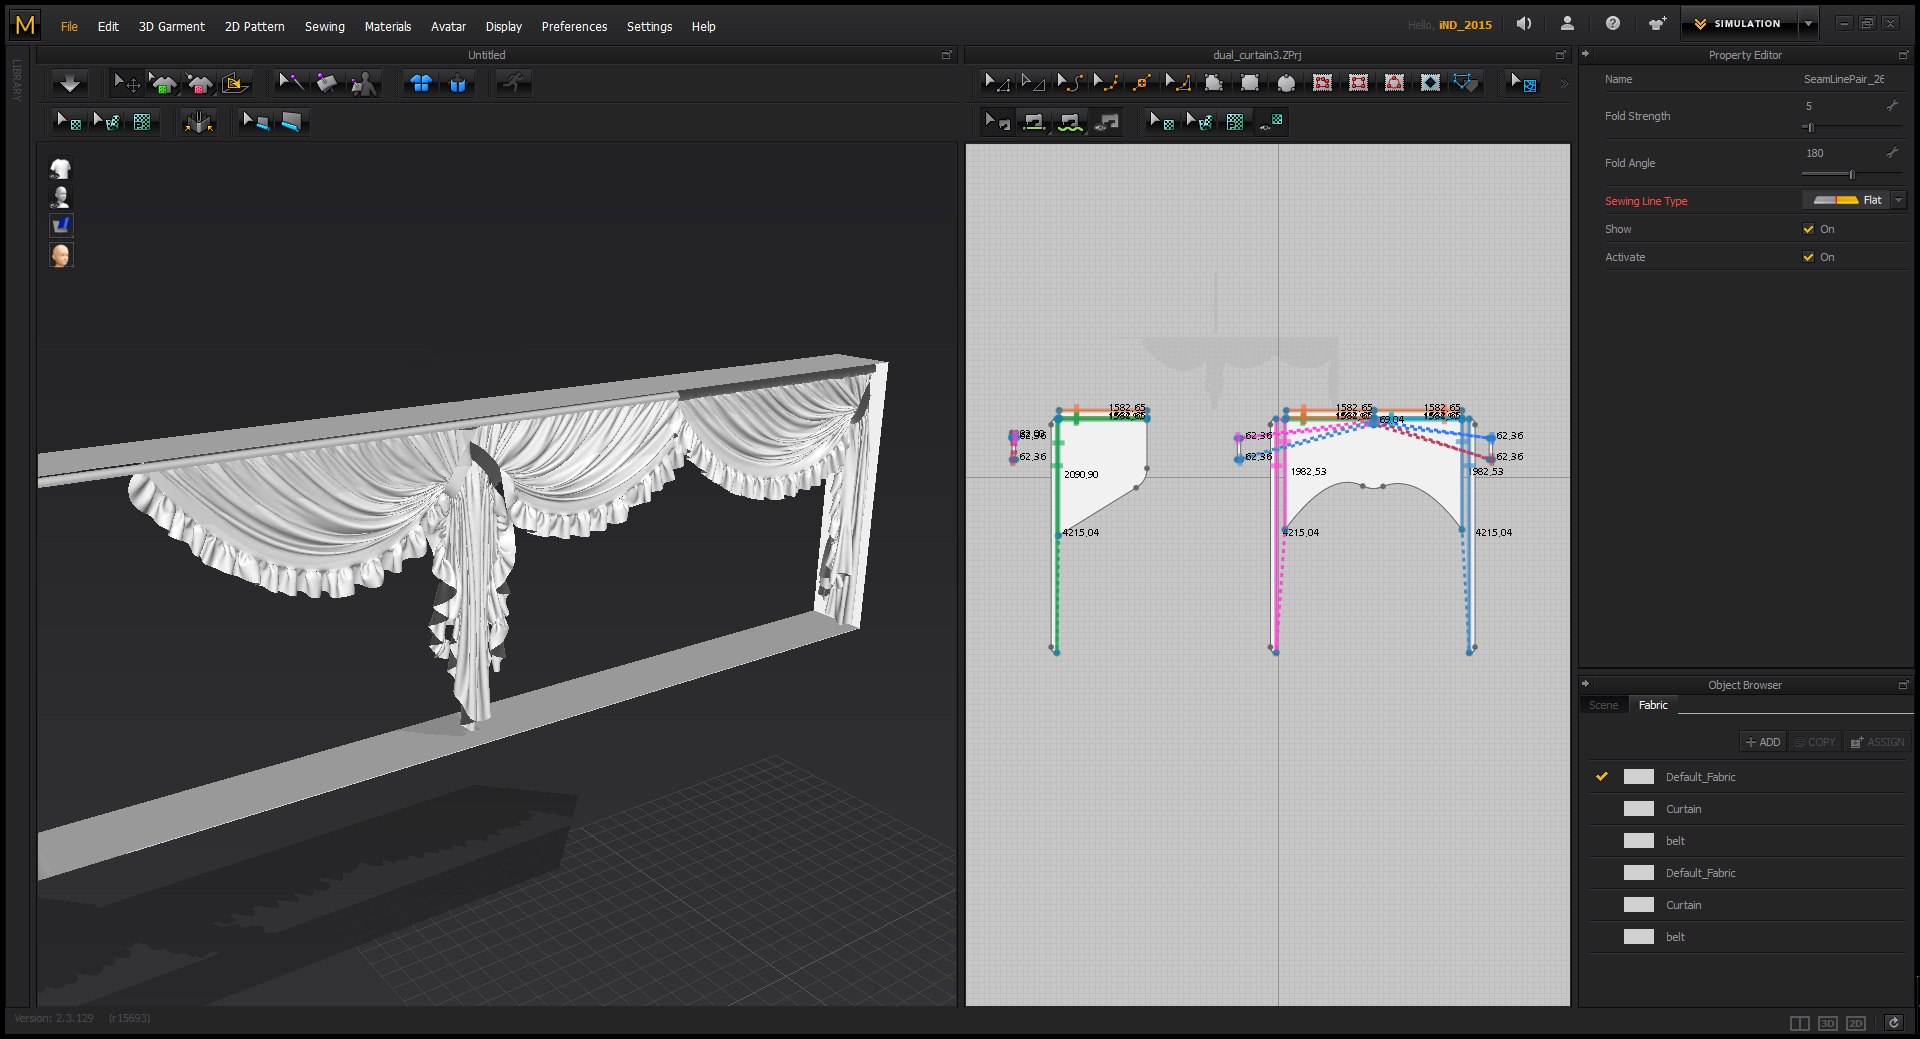
Curtains right after simulation was accomplished. For garments I used Marvelous Designer. Handling with MD requires some experience. It look simple on video tutorials but in fact it takes some time to manage simulation and it's parameters. There is some kind of „strategy” also that appears to come naturally with time spent with MD.
Click on image to enlarge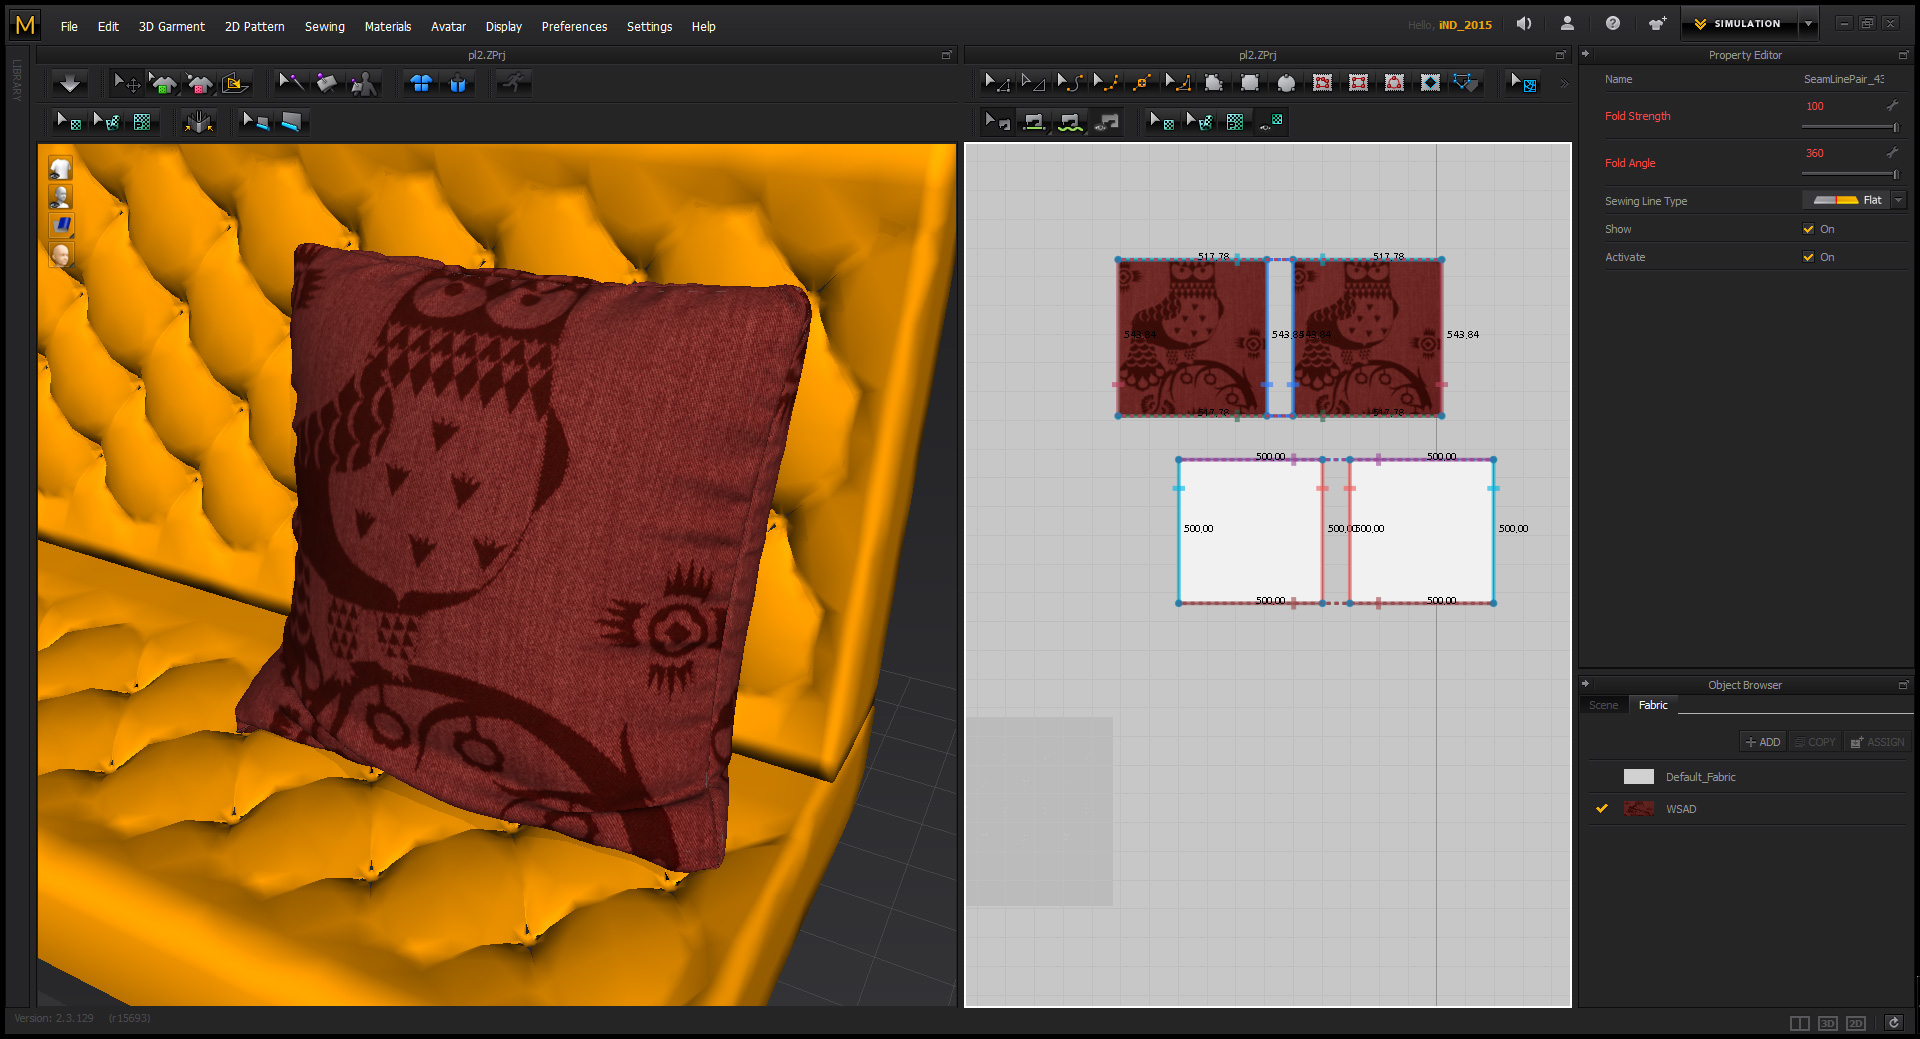
End result of a pillow simulation. It's also great that it gives you custom texture feedback in a viewport. Additional tip related with inflatable garments such as pillows or beddings – always, really ALWAYS simulate it with internal (puffed) and external (loosed) shell. It'll give you natural behavior of pillowcase.
Click on image to enlarge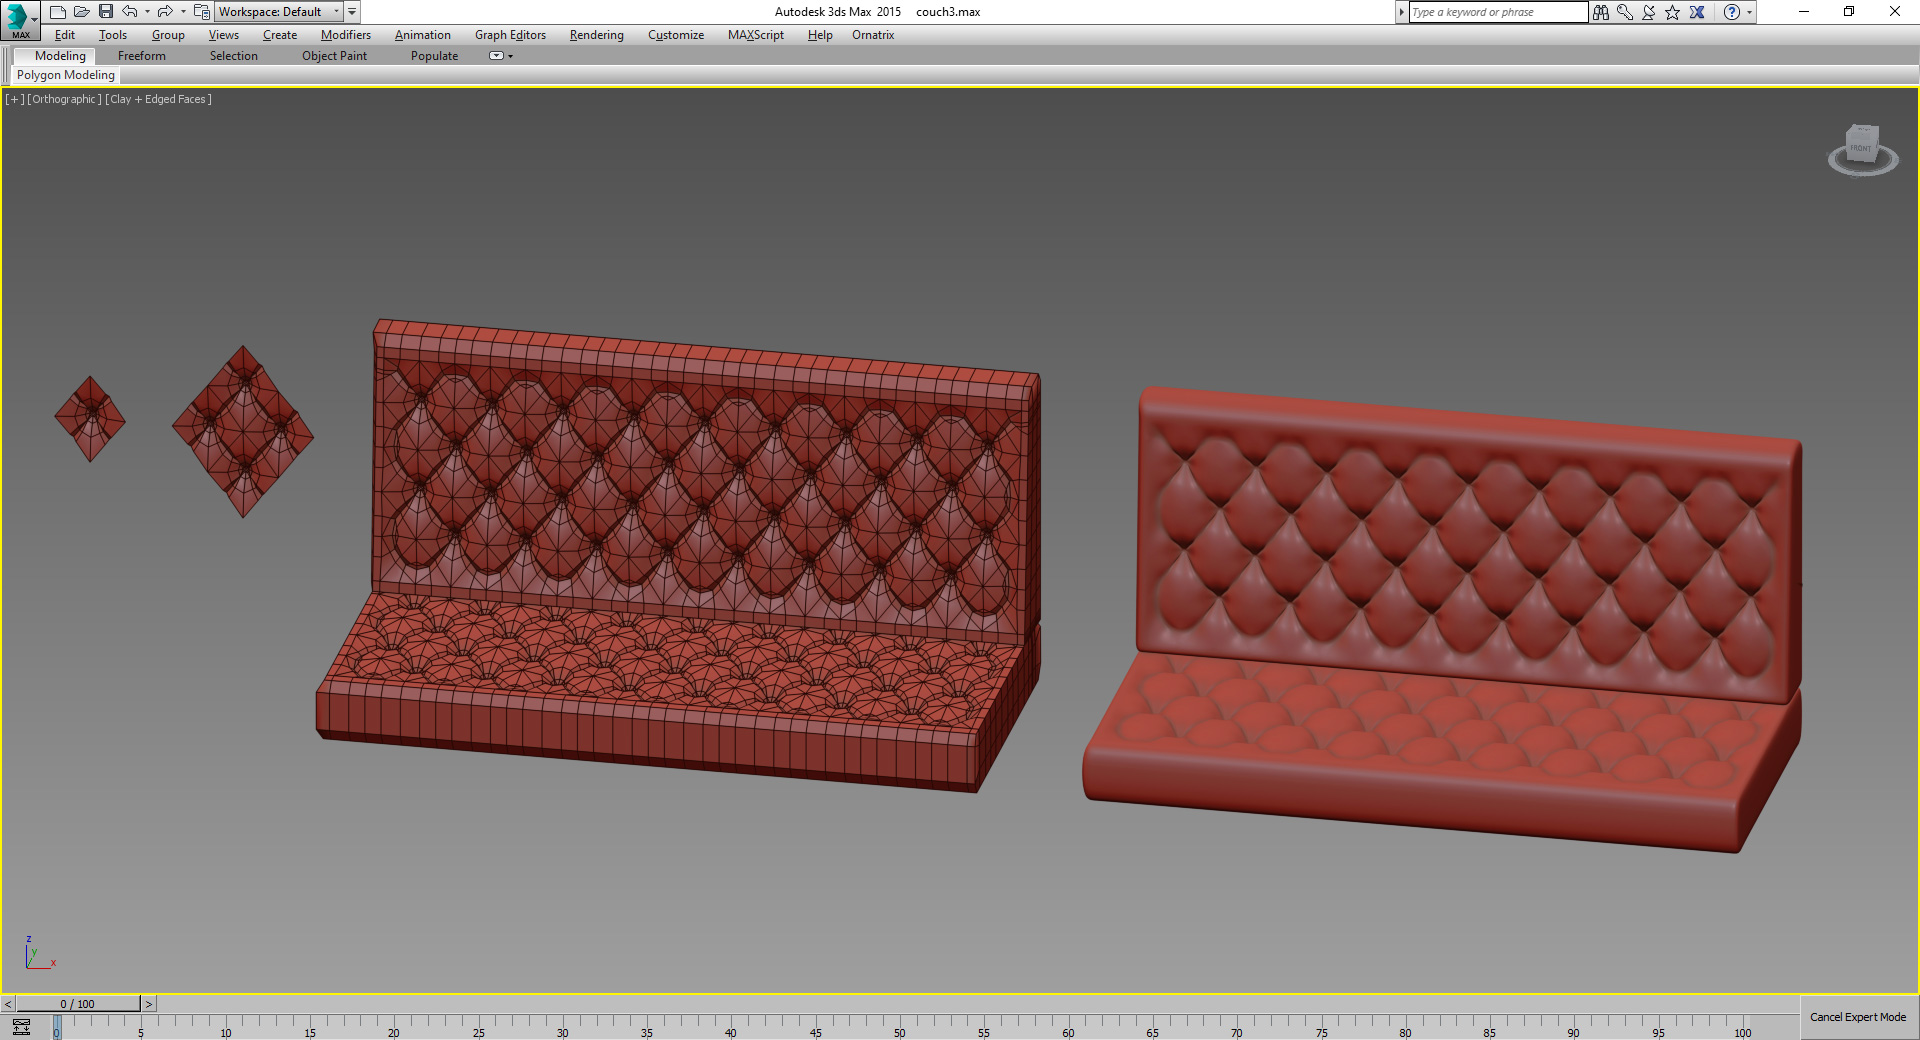
Couch modeled with classic method with a use of pre-prepared, repetitive element.
Click on image to enlarge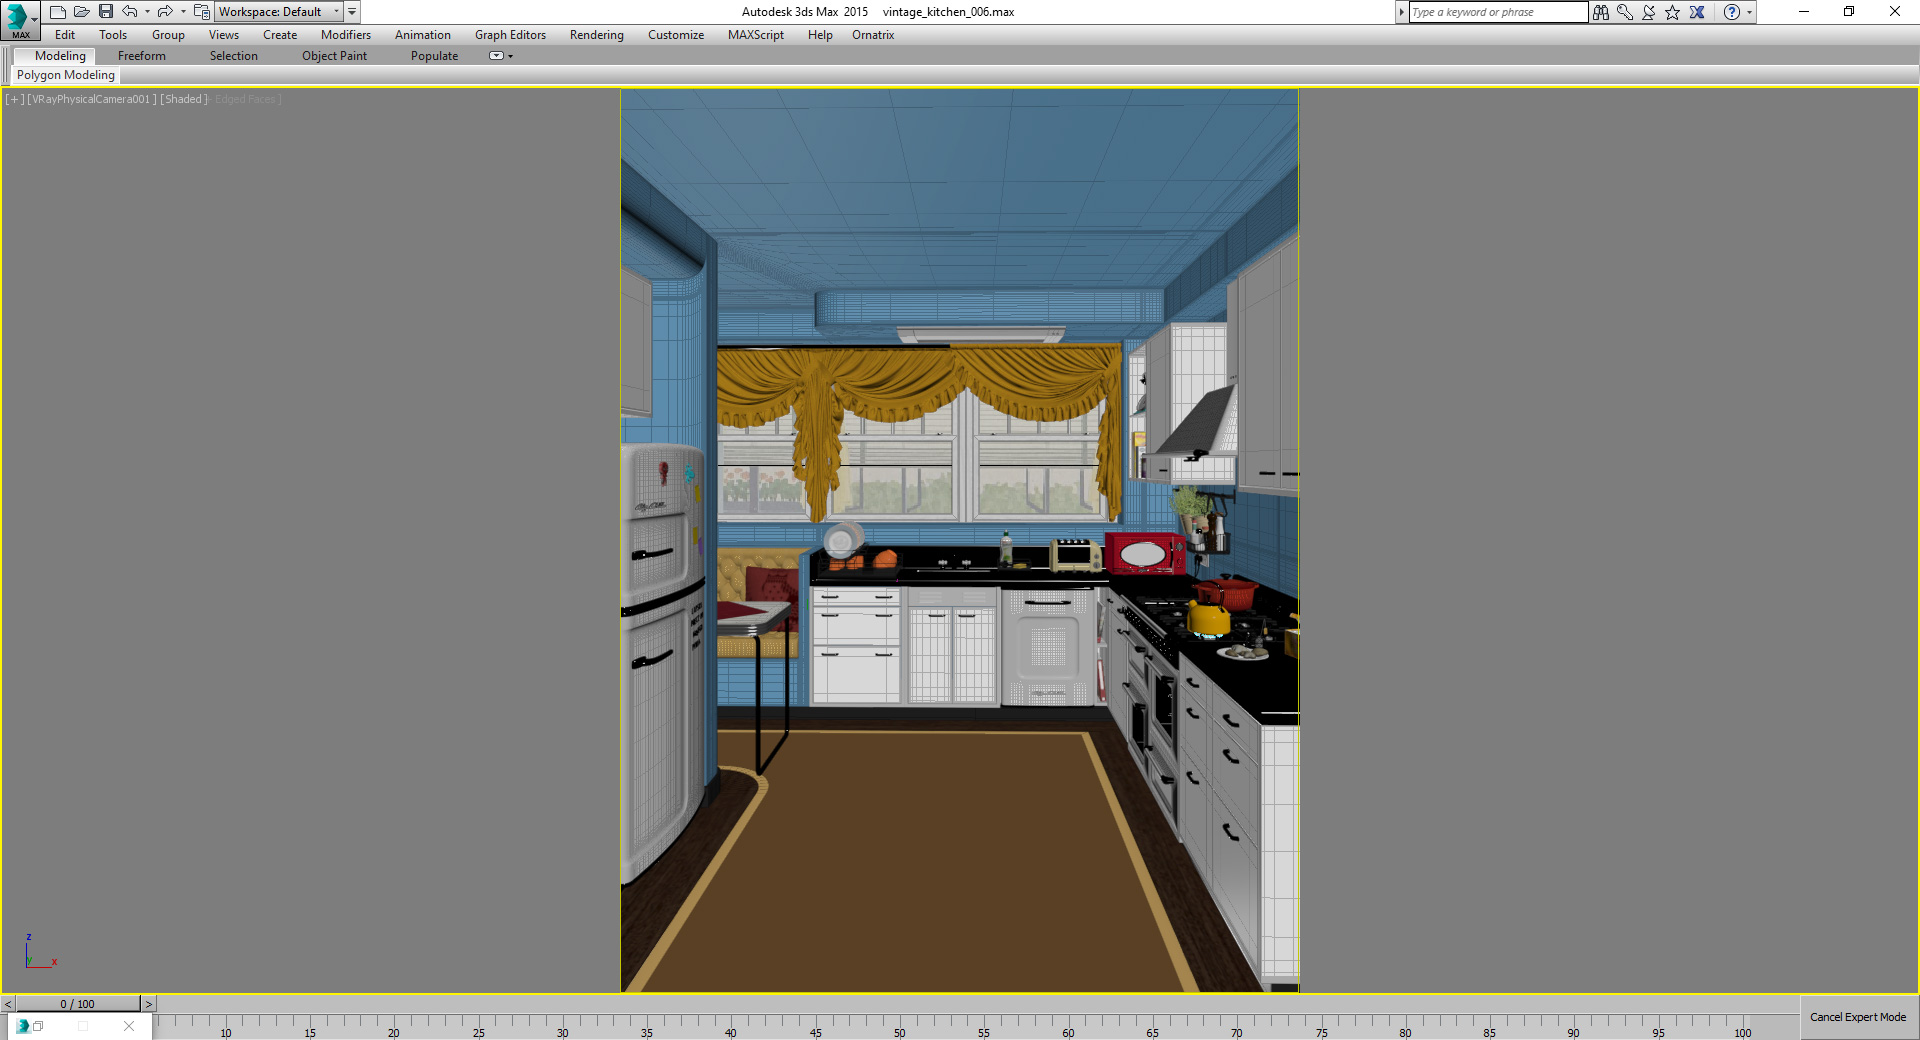
Whole scene after modeling
Like for modeling part I will skip unimportant things and briefly describe the shaders that in my opinion are the most interesting. The floor shader was the most tricky I believe. Once I've seen this PVC flooring in some store and couldn't find a manufacturer to obtain some references so I decided to build it from memory. I remembered that it was slightly sparkly just like a carpaint. To achieve the „exploited” look I used few bump maps, normal maps and specular maps that controls the final result.
Click on image to enlarge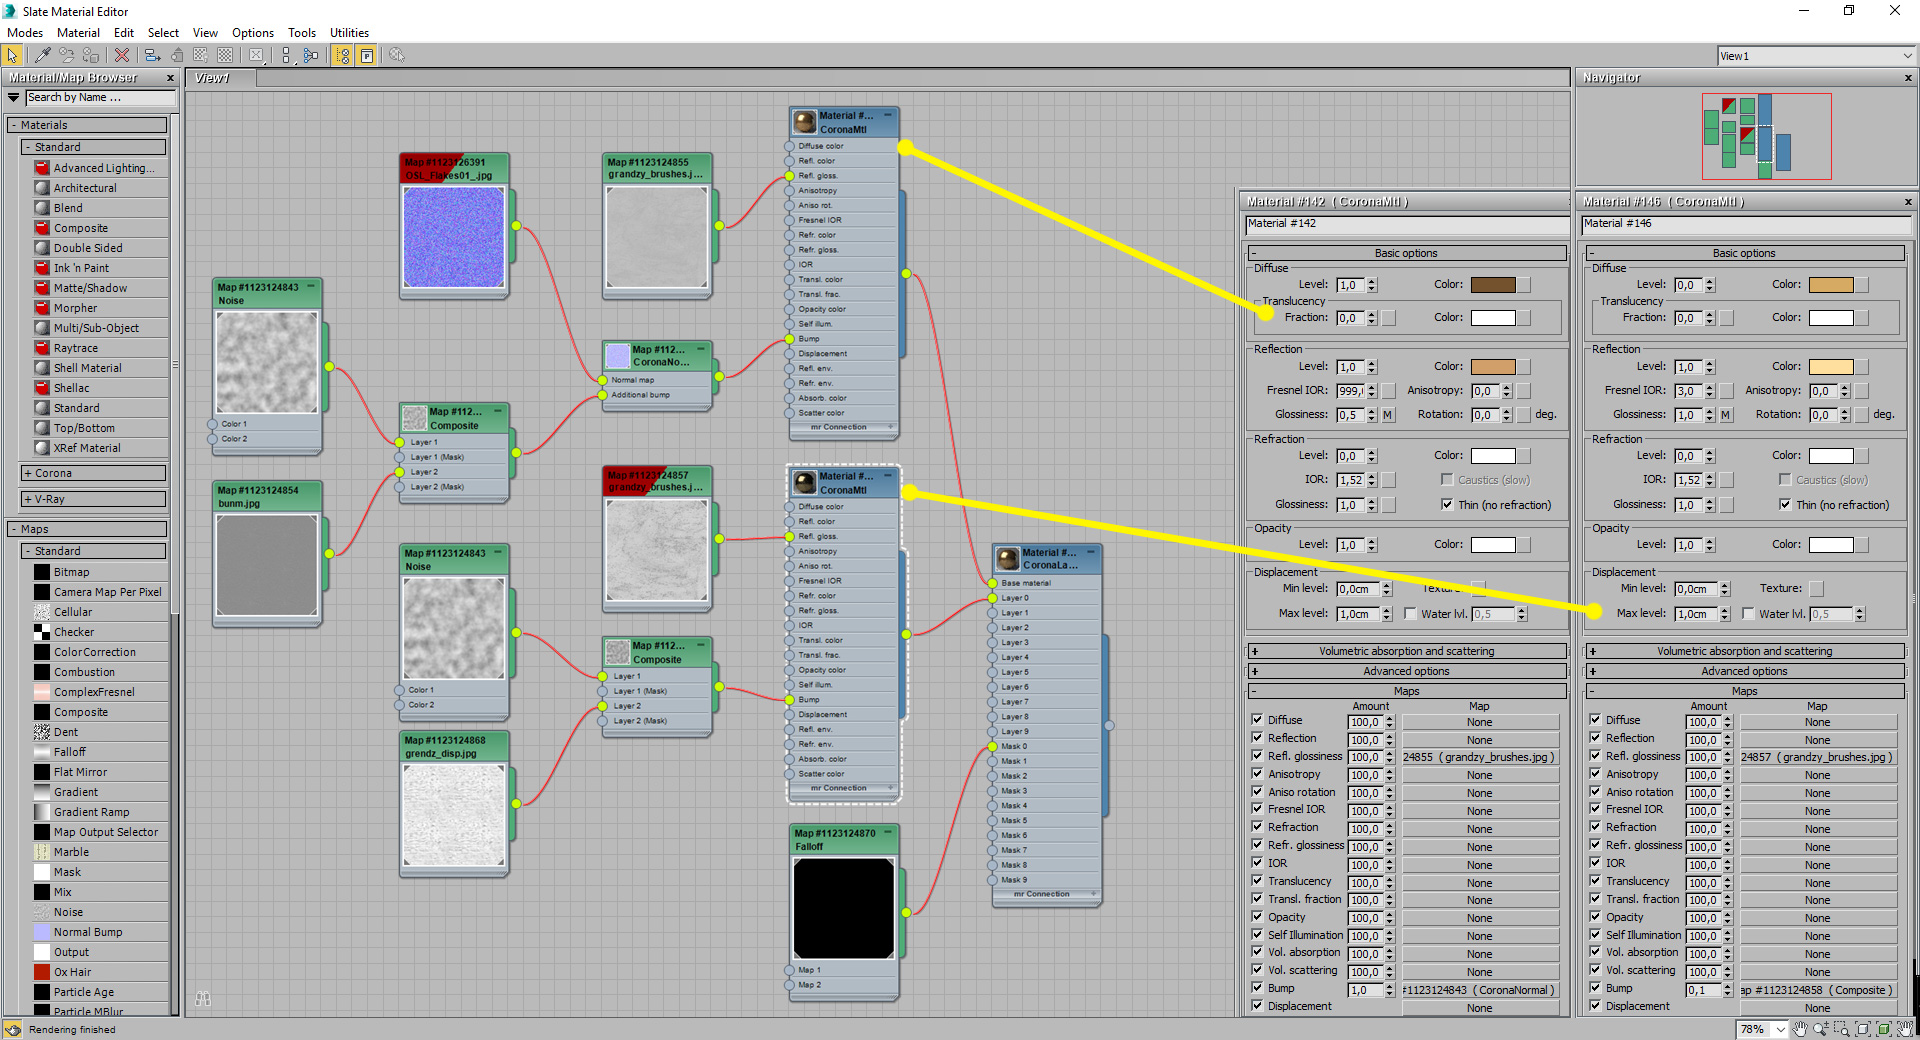
Material editor screenshot of floor shader
Click on image to enlarge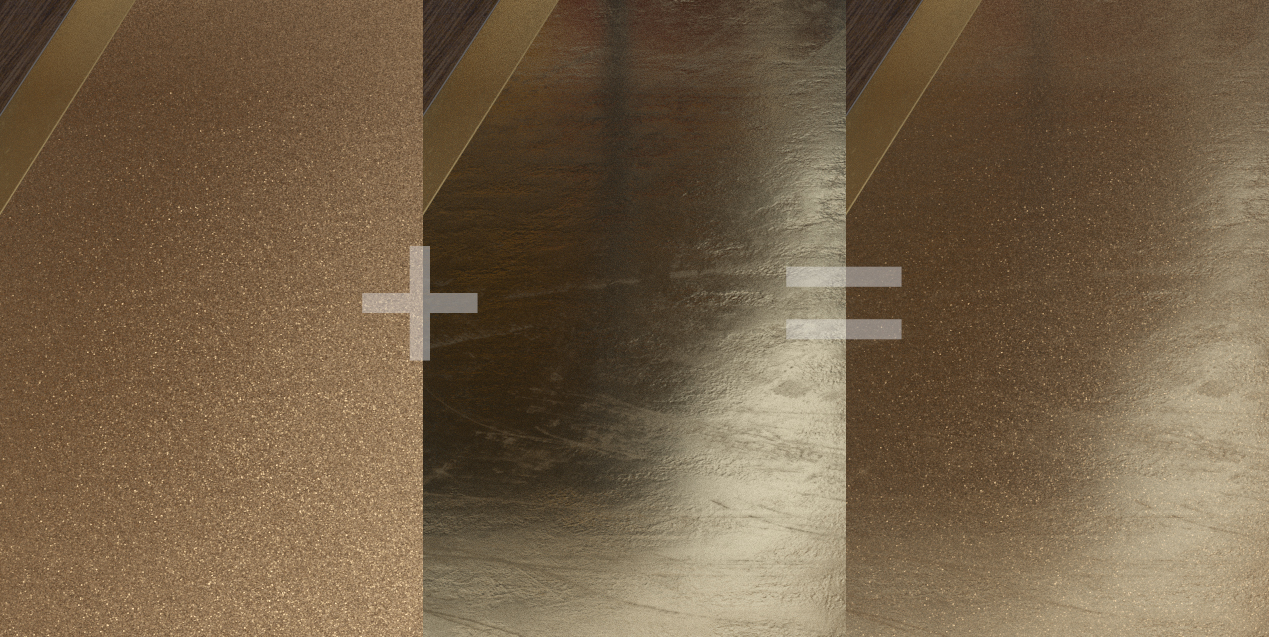
General explanation of floor shader
Click on image to enlarge
Similar method was also applied to a steel countertop. I wanted to achieve double anisotropy effect so I mixed two shaders as a layers with falloff blending.
Click on image to enlarge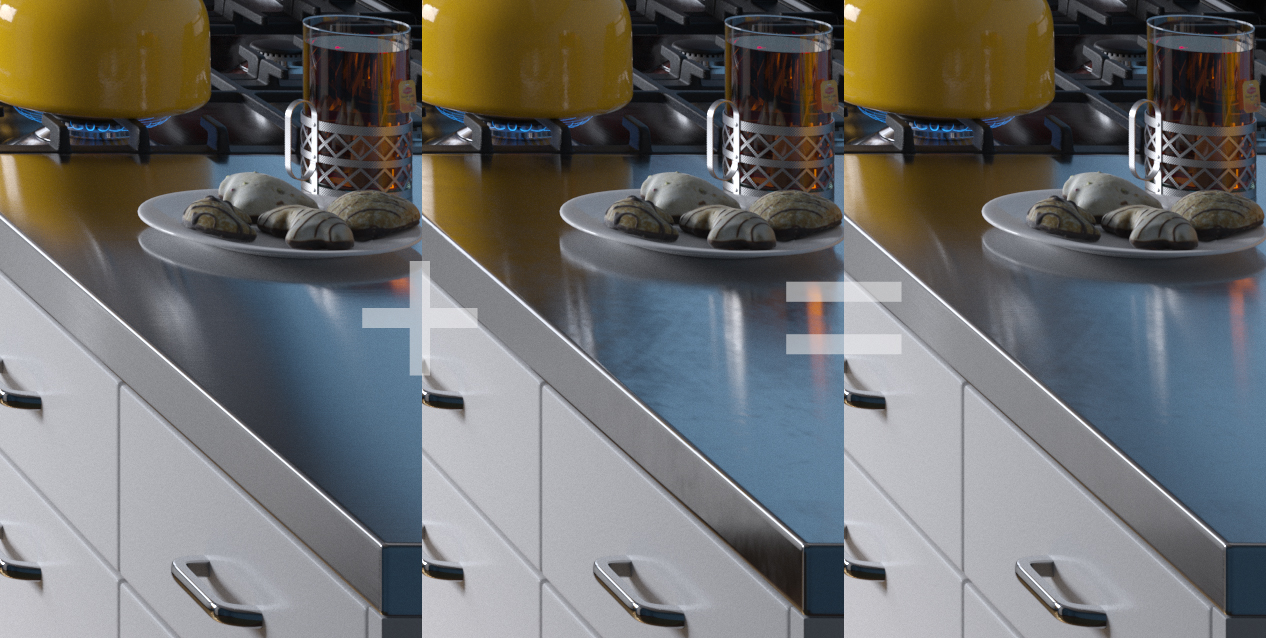
General explanation of countertop shader
Click on image to enlarge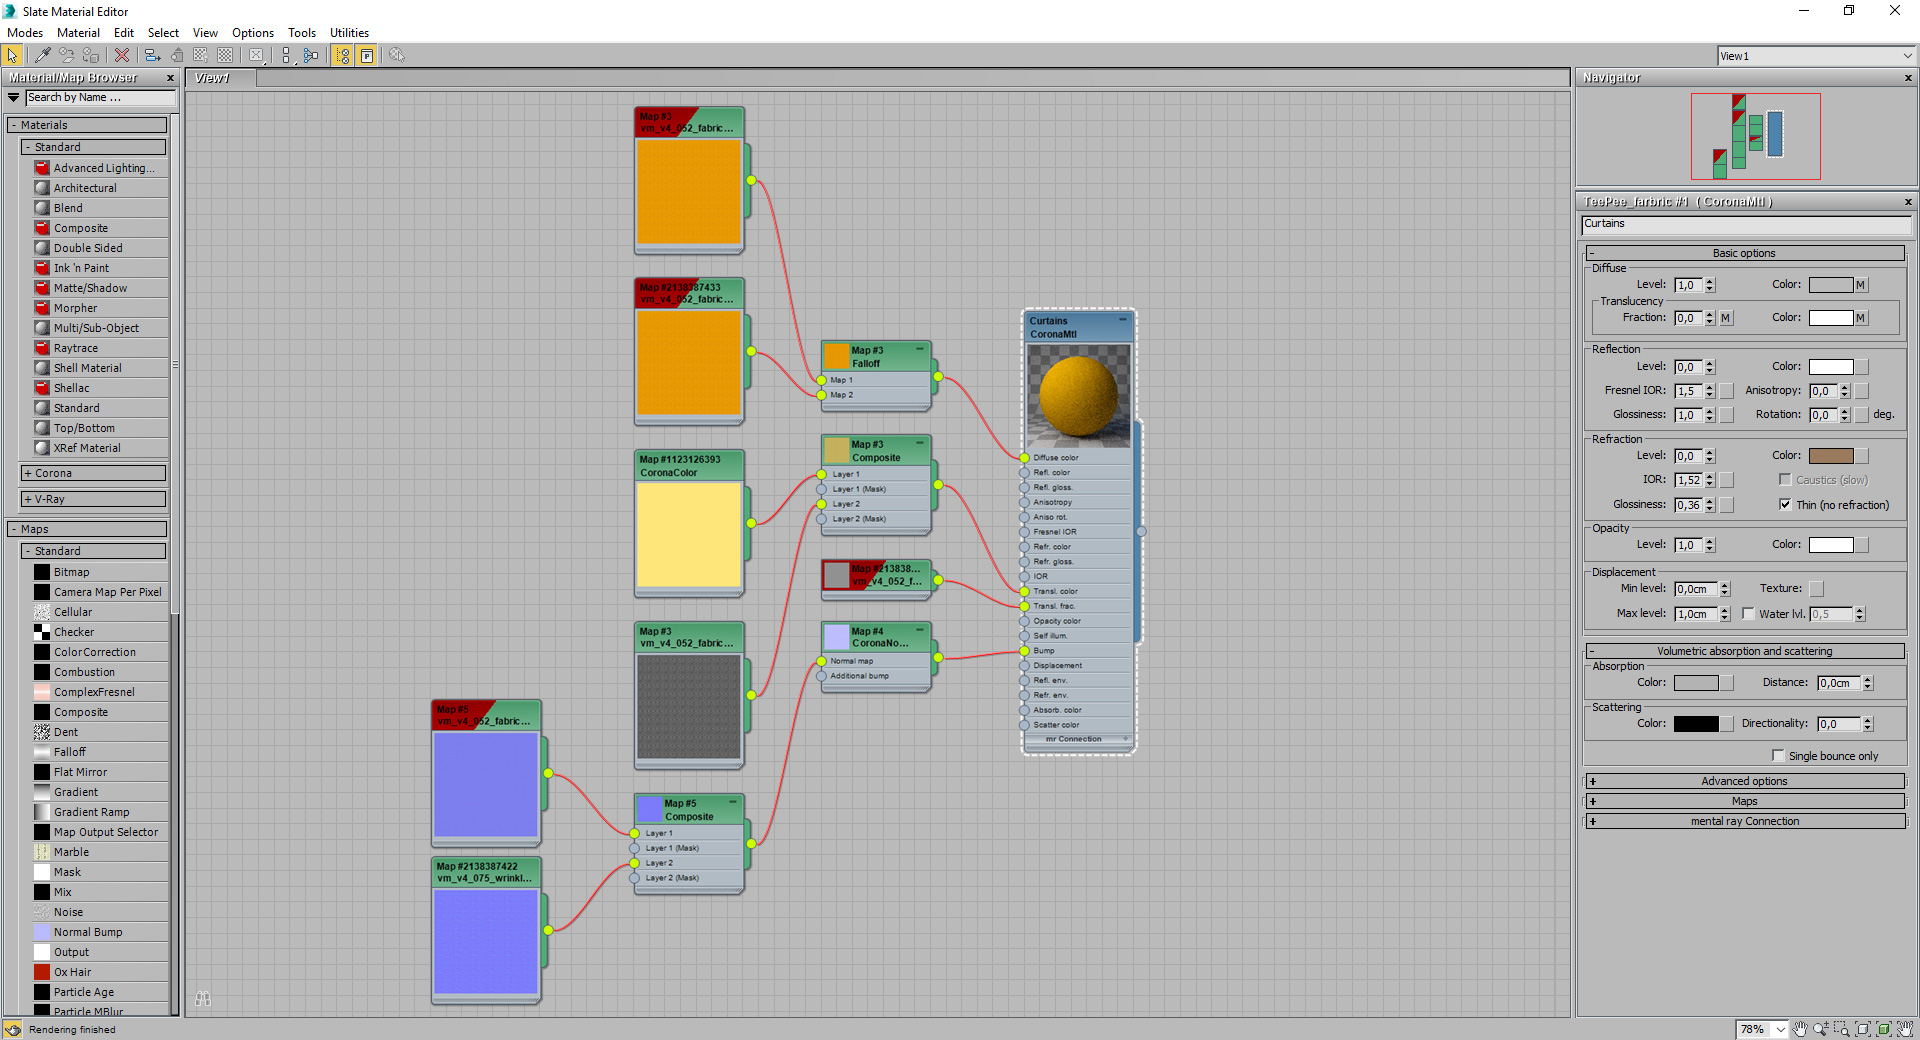
Curtain shader is pretty basic. It's a combination of a diffuse map, a translucency map and some normal maps to add a bumpiness.
Click on image to enlarge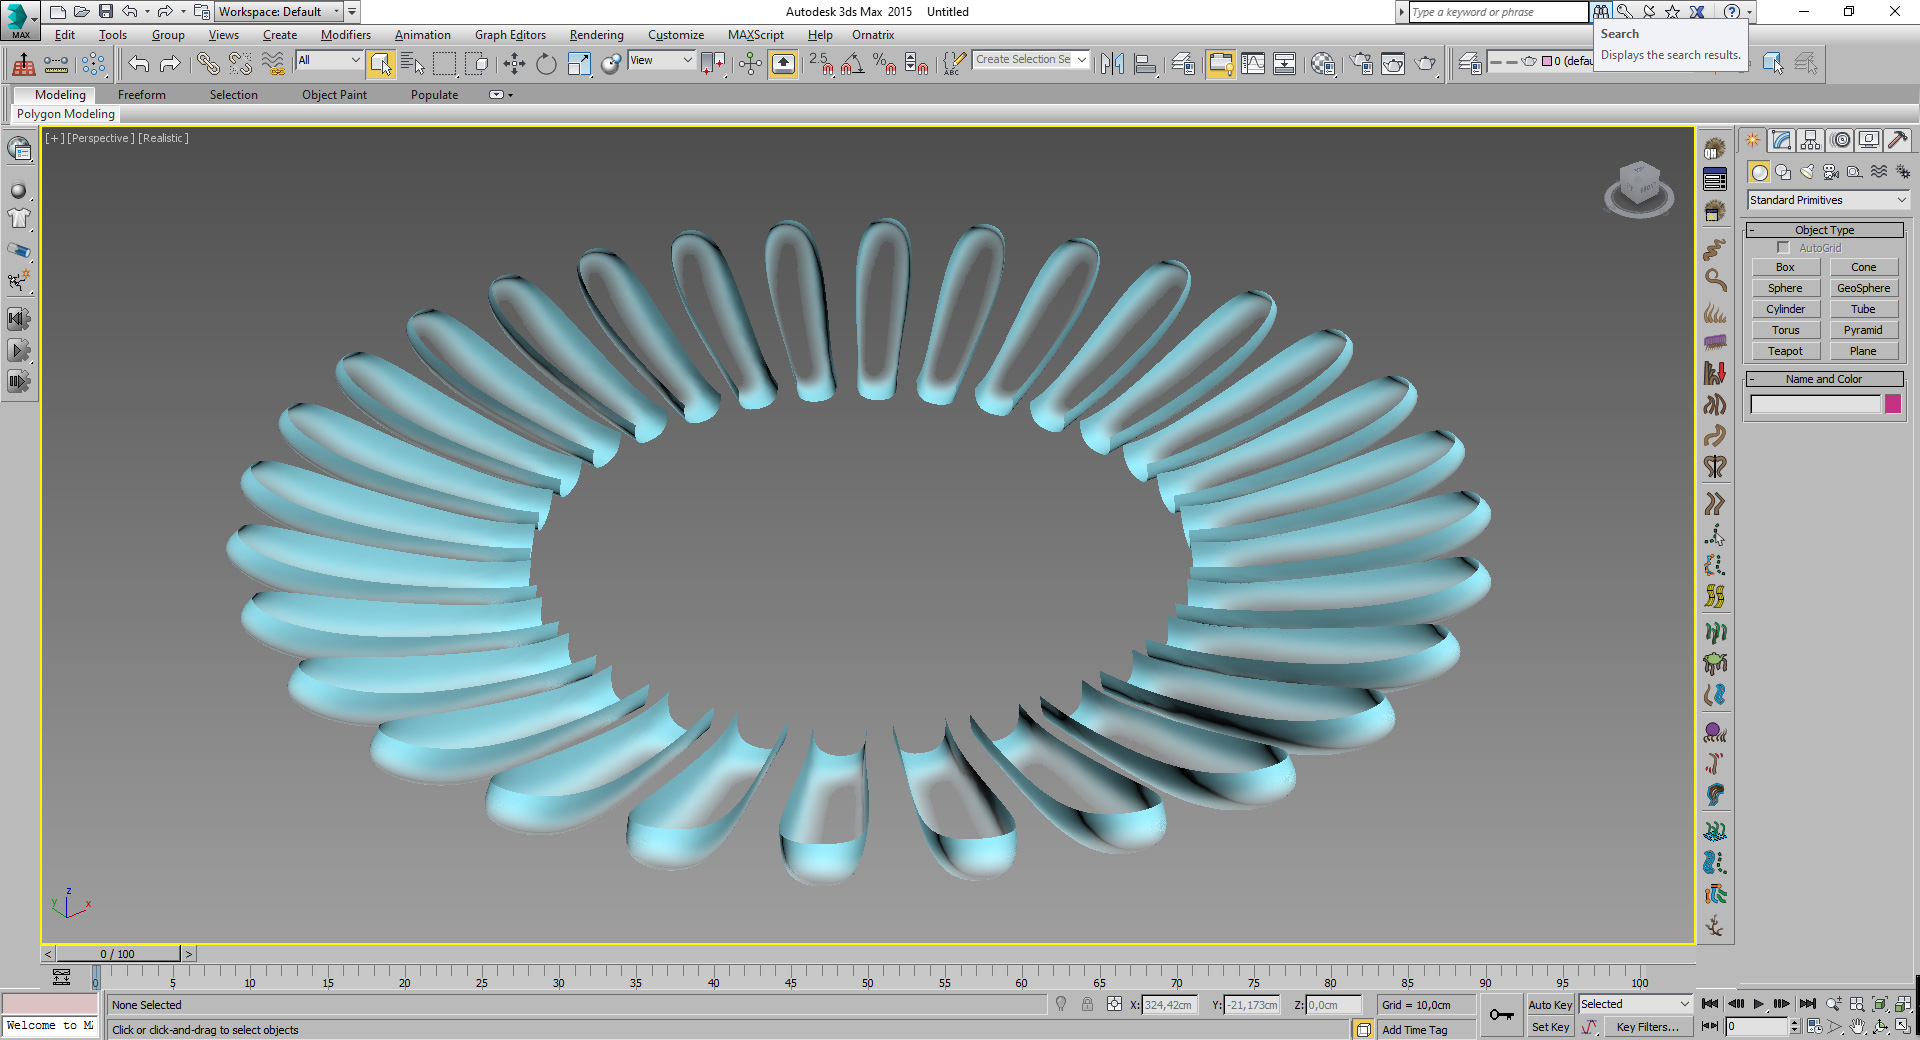
The stove flames is a simple geometry with pretty simple CoronaLightMaterial applied.
Click on image to enlarge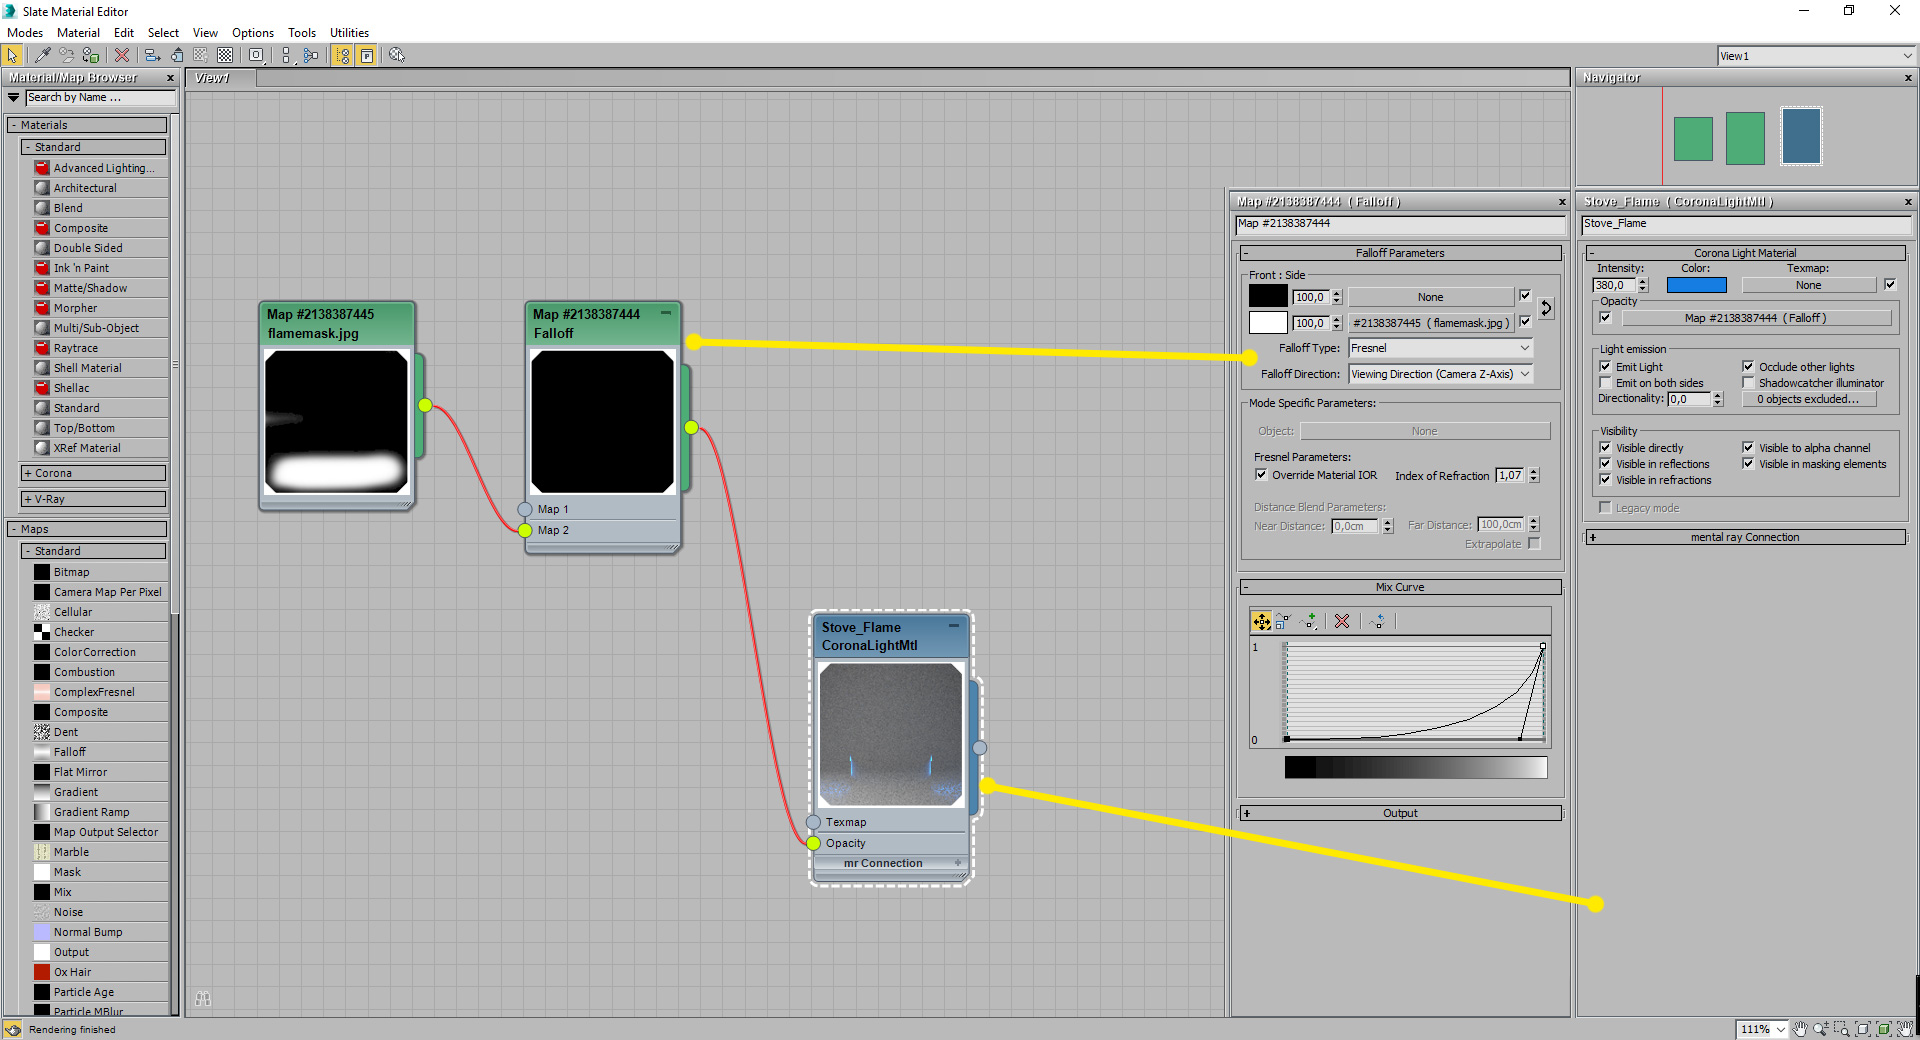
Material editor screenshot of flame shader.
I really like to treat 3D scene as real photography studio. Photographers don't hestiate to use additional light sources like softbox or deflector. You shouldn't either. In many cases the light that is coming from the outside (e. g. through the windows) is insufficient. The „50's kitchen” is an example how to handle that.
For general lighting I used one of Peter Guthrie's HDRI (https://www.pgskies.net/products/hdri0927). The only thing I've done with it was filtering through Color Correction map and sliding saturation down a bit. Additionaly I used two more spotlights. These are simple disc-shaped CoronaLight sources with directionality around 0.5.
Click on image to enlarge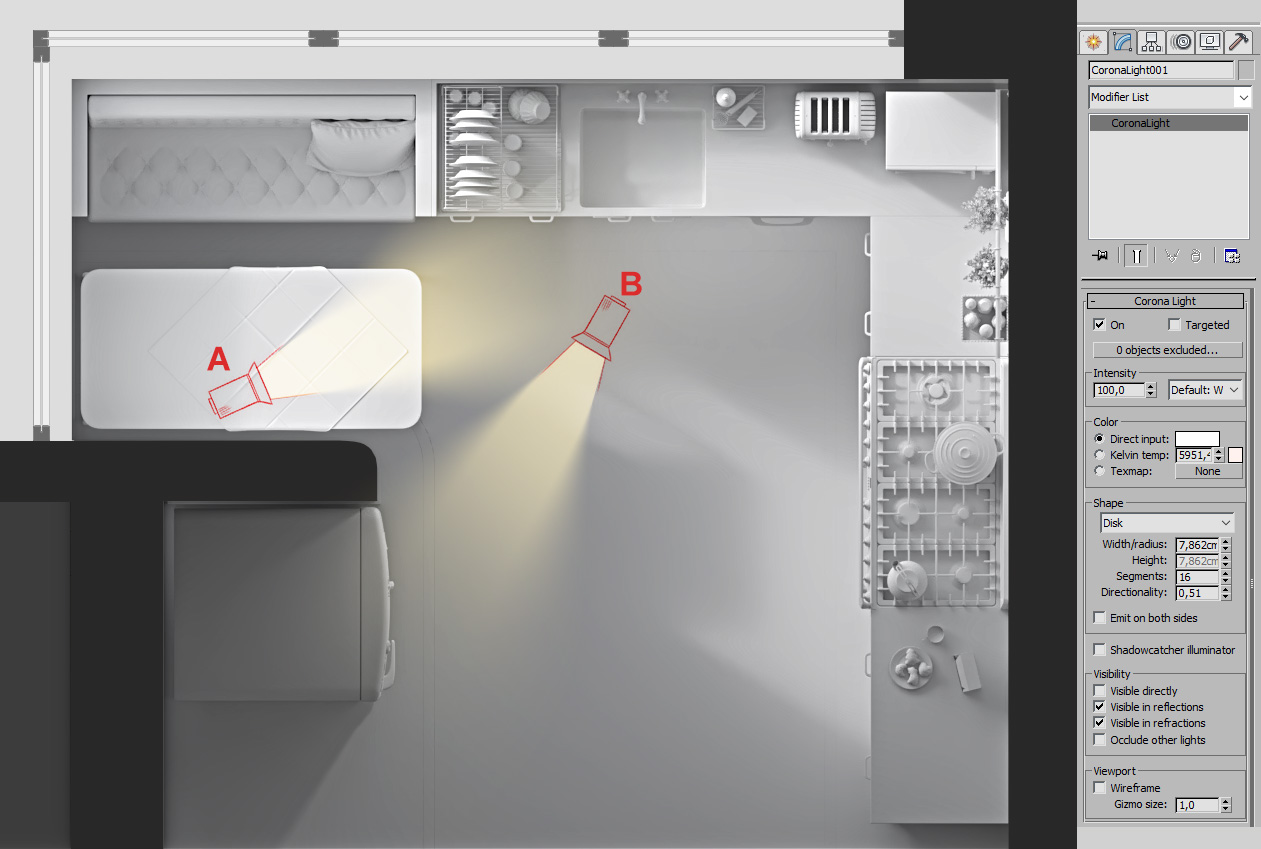
Spotlights setup
Click on image to enlarge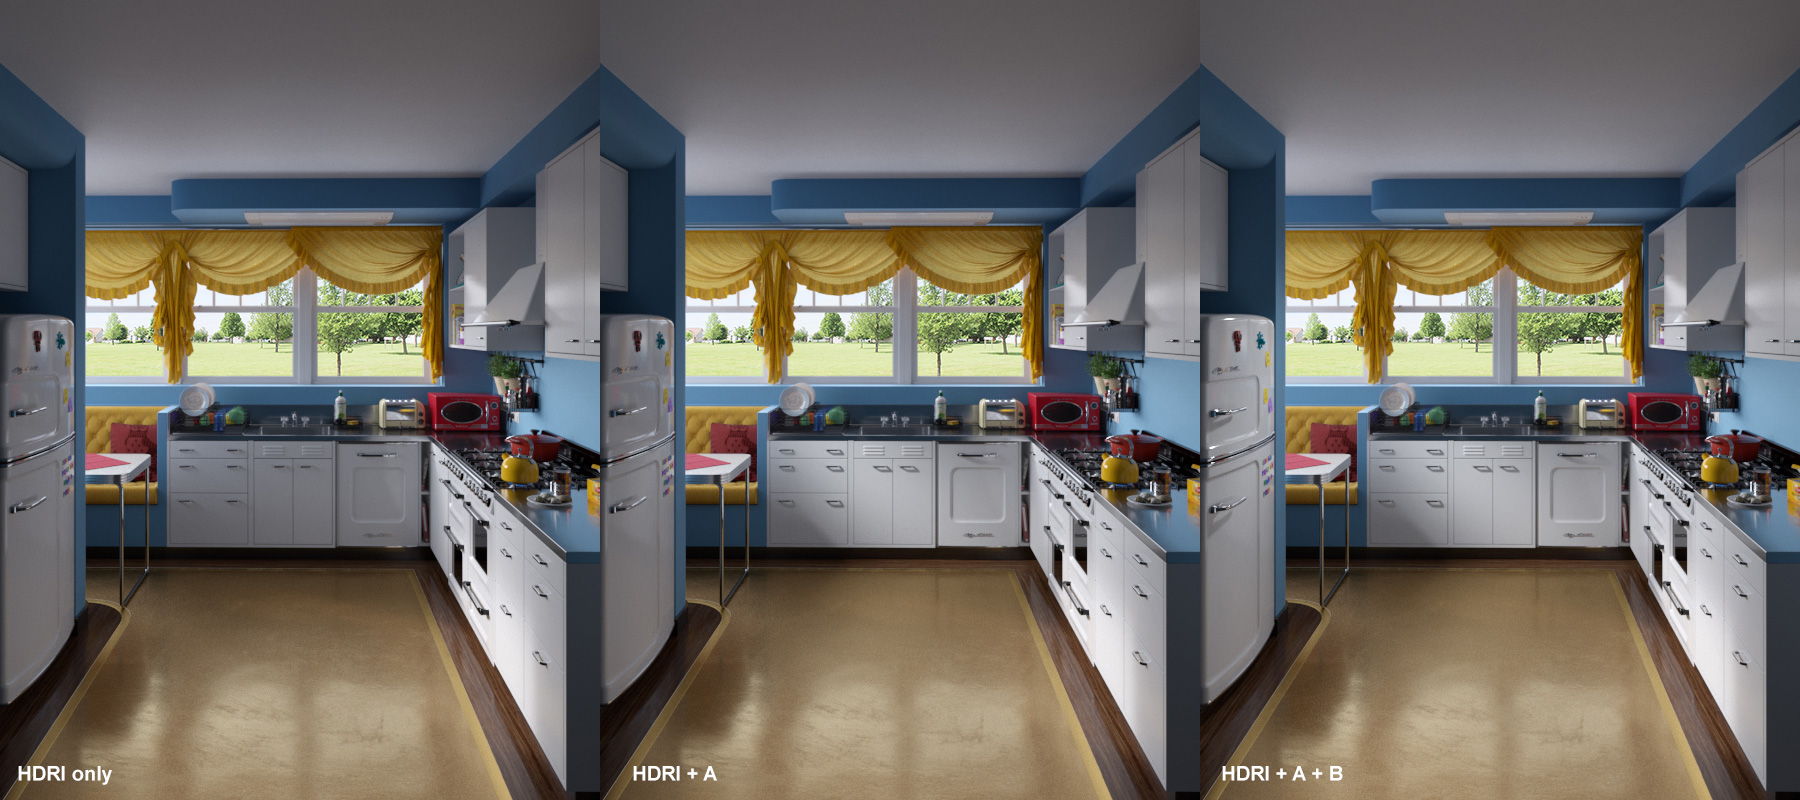
Comparison between lighting stages
The postproduction was pretty simple process. I don't like to overuse photoshop and I'm a real enemy of heavy color gradings when making an interior shot. Here you have some examples of postproductions stages:
Click on image to enlarge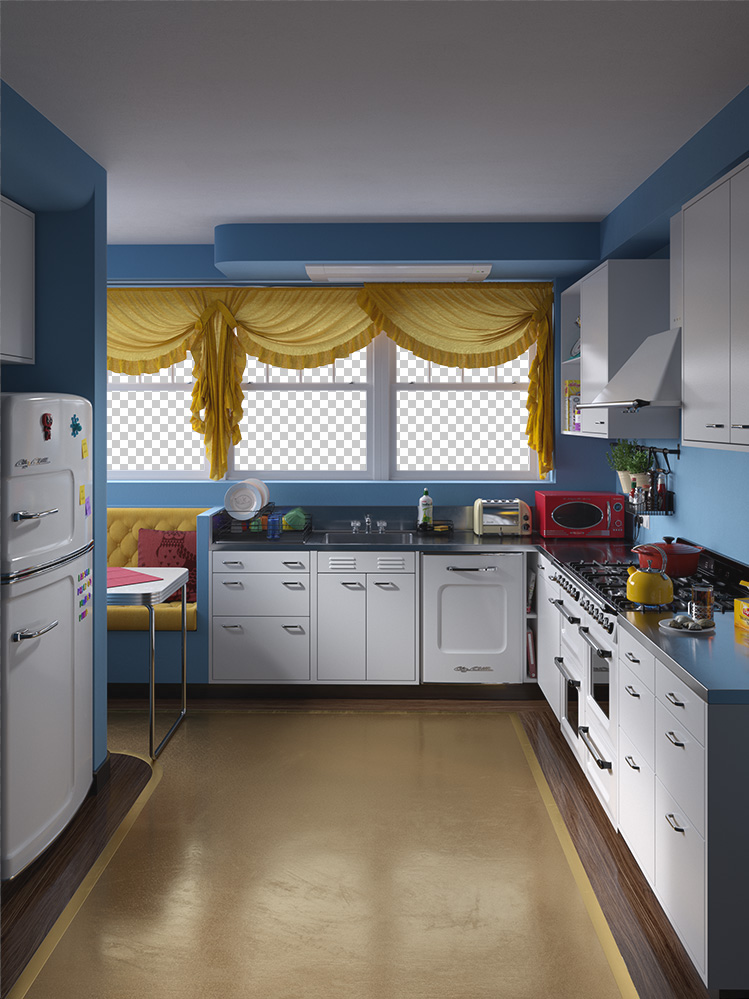
Raw render.
Click on image to enlarge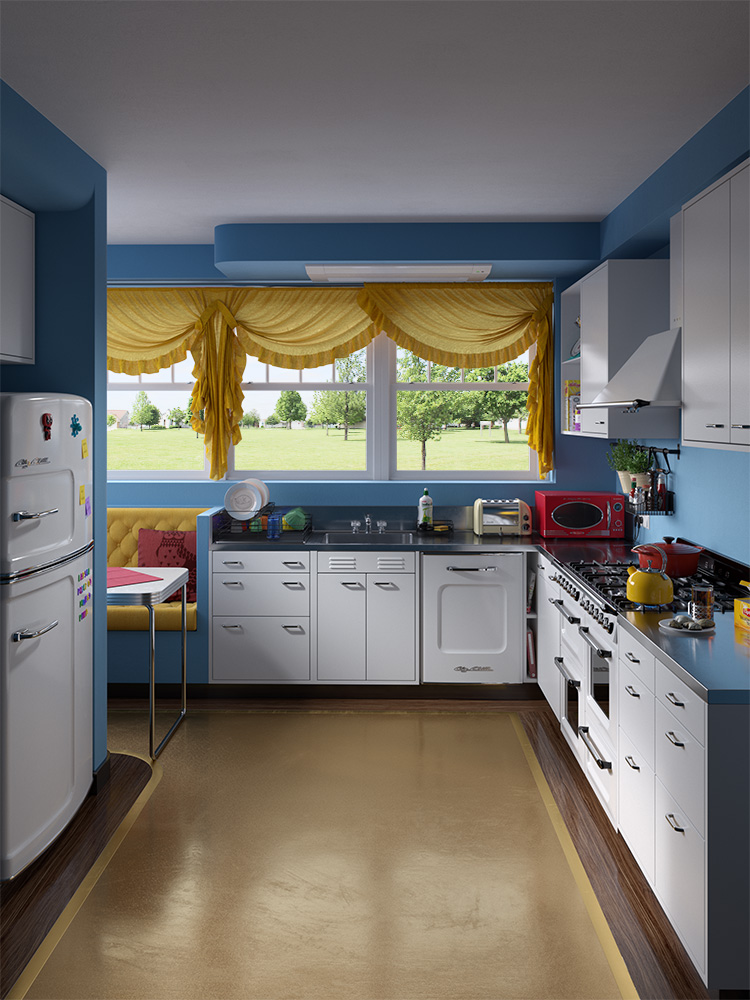
Added background.
Click on image to enlarge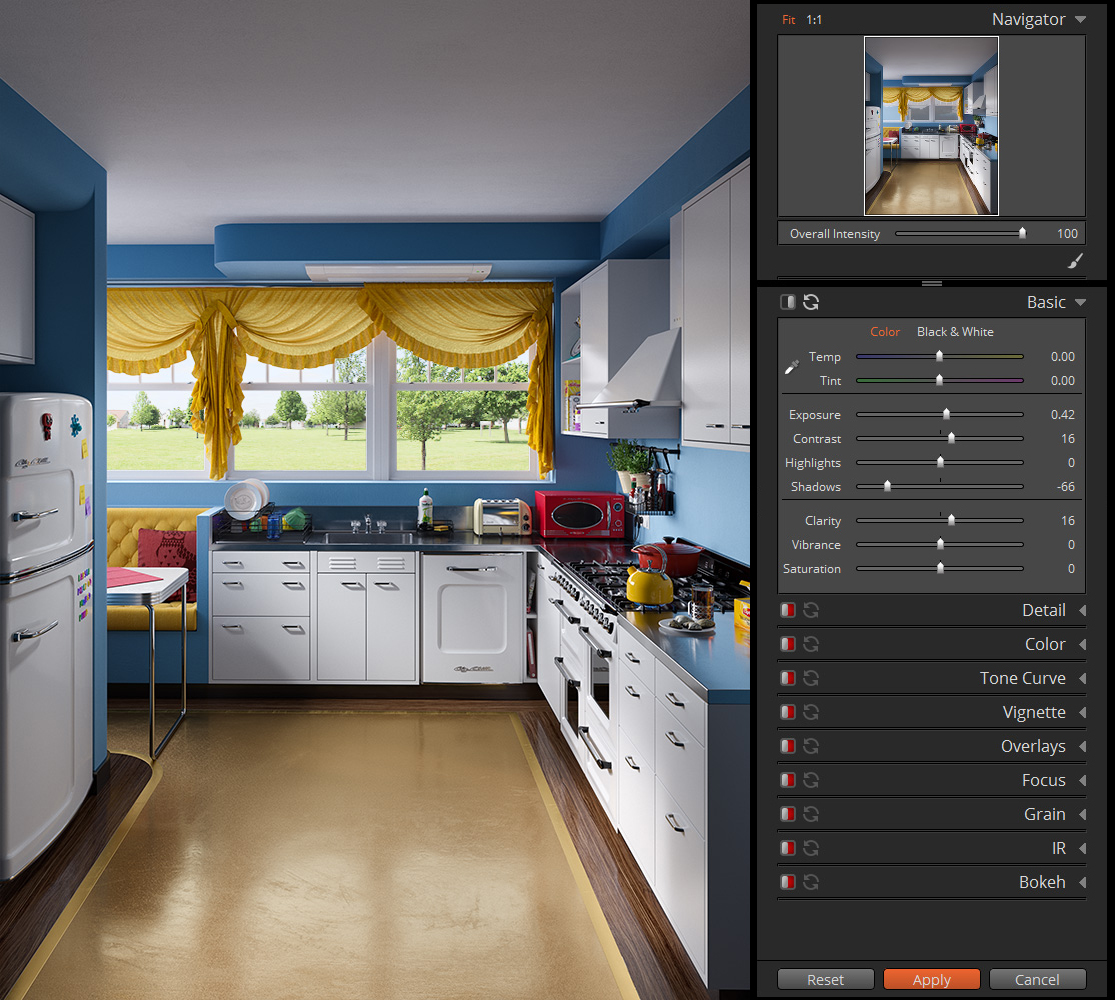
Alien Skin Exposure X tweaking
Click on image to enlarge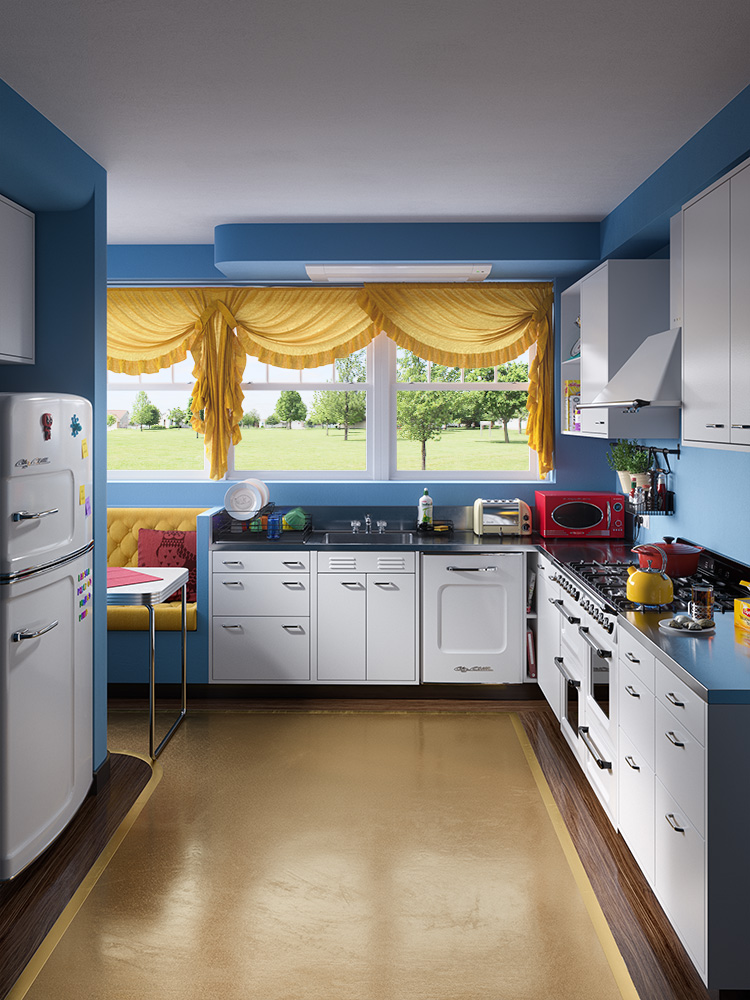
Soft window bloom.
Click on image to enlarge
Some selective curve adjustments.
Click on image to enlarge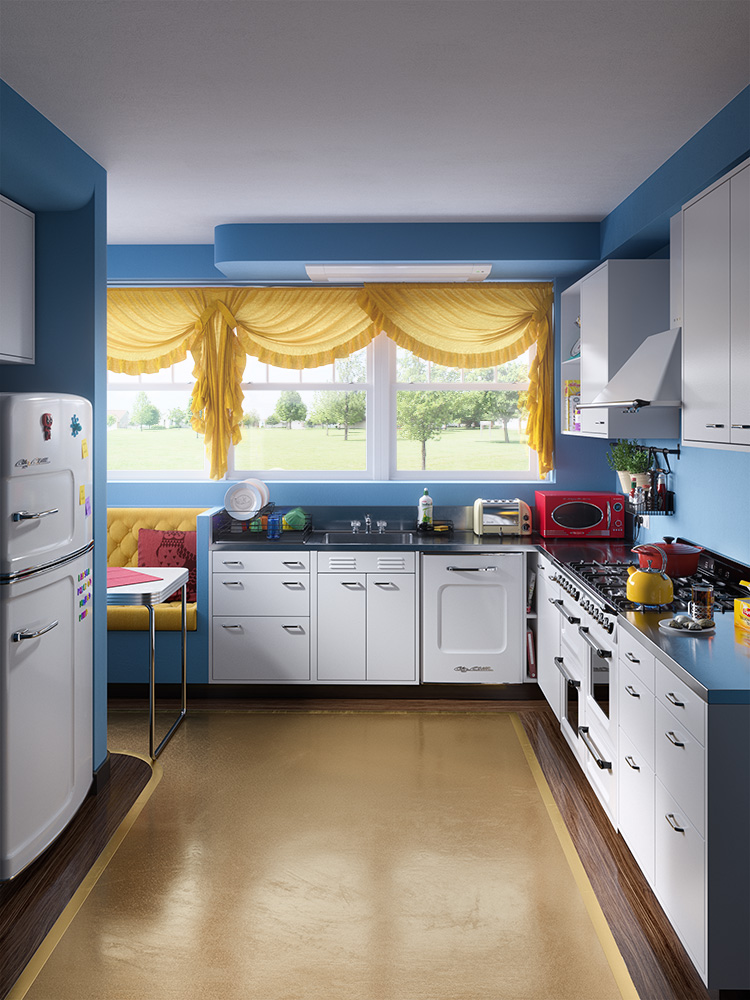
Even more window bloom
Click on image to enlarge
After adding vignette and really subtle chromaric aberration the image is complete!
Ummm… that's it. Hope You'll like it and you can use some ideas for your personal improvements. Good luck!
For more of my work take a look at: https://www.behance.net/KrzysztofStudzinski
Customer zone
Your special offers
Your orders
Edit account
Add project
Liked projects
View your artist profile


COMMENTS