Search
Cart
Sign in
  • offerCustomer zone
  • offerYour special offers
  • offerYour orders
  • offerEdit account

  • offerAdd project
  • offerLiked projects
  • offerView your artist profile

  • Dark mode

Information Clause

In accordance with the art. 13 section 1 and 2 of the European Parliament and Council Regulation 2016/679 of the 27th April, 2016 on the protection of natural persons, with regard to the processing of personal data and on the free movement of such data, and repealing Directive 95/46/EC (General Data Protection Regulation), hereafter RODO, I hereby inform that:

1. EVERMOTION S.C., 8 Przędzalniana Str., 15-688 Białystok, Poland is the Administrator of your Personal Data (APD)

2. Data Protection Inspector can be reached through e-mail: iod@evermotion.org

3. Your personal data are to be processed on the basis of art. 6 section 1 letter a, b and f of RODO in order to:
a) prepare, conclude and execute the agreement and for other purposes approved by you,
b) to execute the legitimate interest like marketing of products and the agreement, claim assertion or defence against claims resulting from the law regulations.

4. Entities entitled to the reception of your personal data may be the authorised public bodies; mail providers; providers of the services covered by the agreement; responsible for debt recovery, keeping the archives, document utilization, legal consulting, technical services, IT services and accountancy.

5. Your personal data shall not be transferred to the third country, nor to the international bodies.

6. Your personal data shall be processed within the period of the agreement and upon your additional consent until you withdraw it. APD shall keep the data for the period of any civil law claim execution connected with the agreement.

7. You have the right to demand an access to your personal data, to correct or to delete the data if there is no other basis for the processing or any other purpose of such processing or to limit the processing of the data, to transfer the data to another administrator and to raise objections to the further data processing if there is no legal basis for further processing and to withdraw any previous consent.

8. You provide the personal data voluntarily, however they are necessary to conclude the agreement. The refusal of providing such data may result in the refusal of the agreement conclusion.

9. You have the right to lodge a complaint to the Personal Data Protection Office when in your opinion the data processing violates the regulations of General Data Protection Regulation of the 27 April, 2016 (RODO).

10. Your data will be automatically processed, including the form of profiling.
11. You are obligated to forward above mentioned information to your representative, especially if you appointed this person in the agreement as the contact person or as the representative for the agreement execution.

OK

Making of a House on a Hill - Tip of the Week

Michał Franczak 2015-12-23 13:10 tutorial  > 3ds MAX  > texturing

Making of a scene 1 from Archexteriors vol. 26.

This exterior scene was made by Evermotion. It was set in 3ds Max and rendered in V-Ray. 

You can:

Click on image to enlargenr_AE26_001_cam001_PP_777.jpg
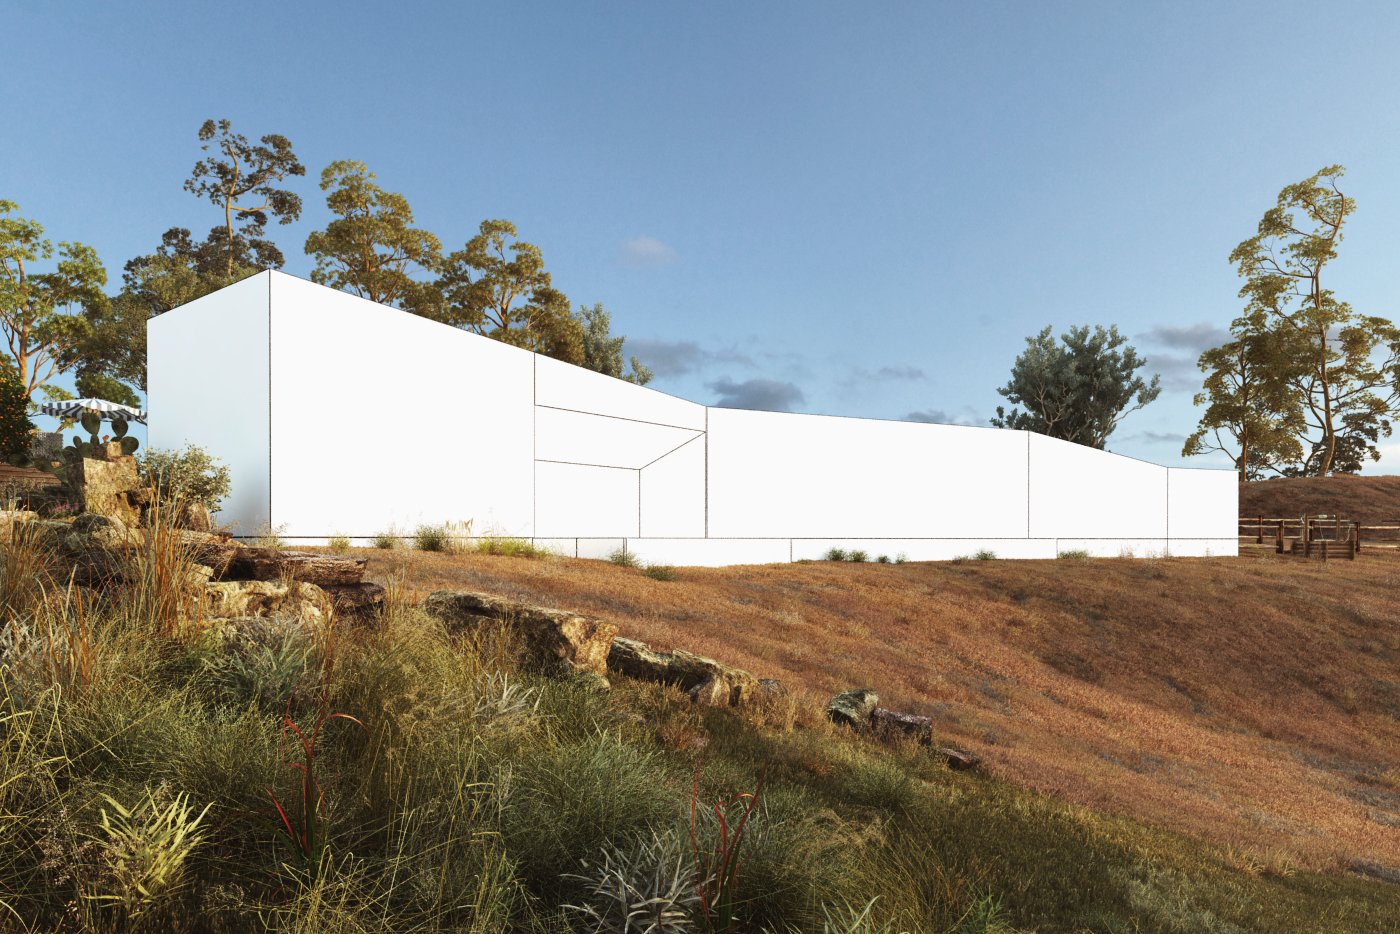
This if the final scene after post-production, as seen by the camera 1. All elements are 3d models. 


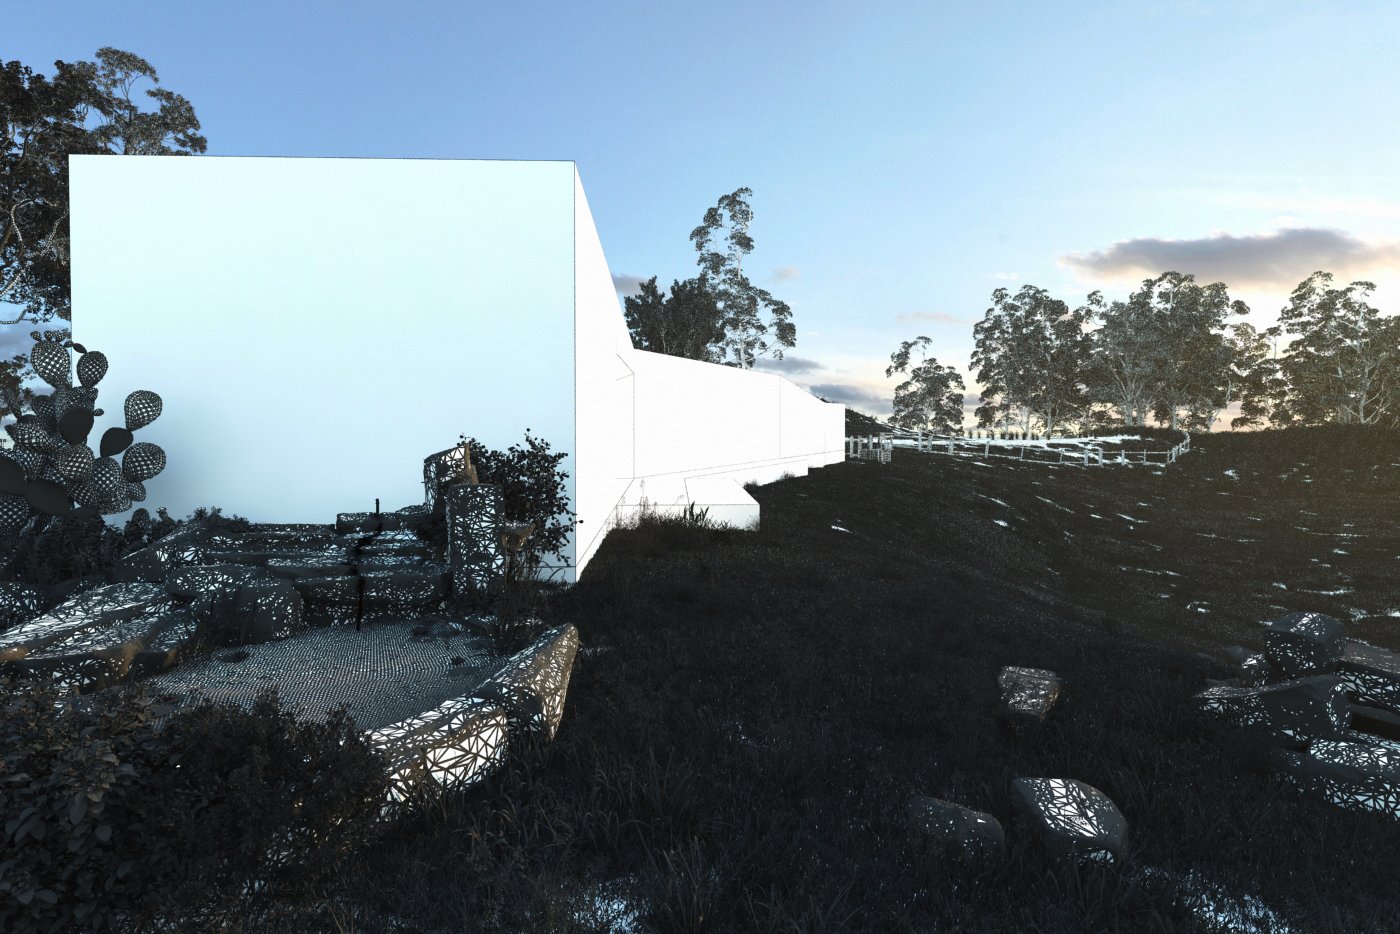
Click on image to enlarge nr_AE26_001_cam_001_wire_774.jpg
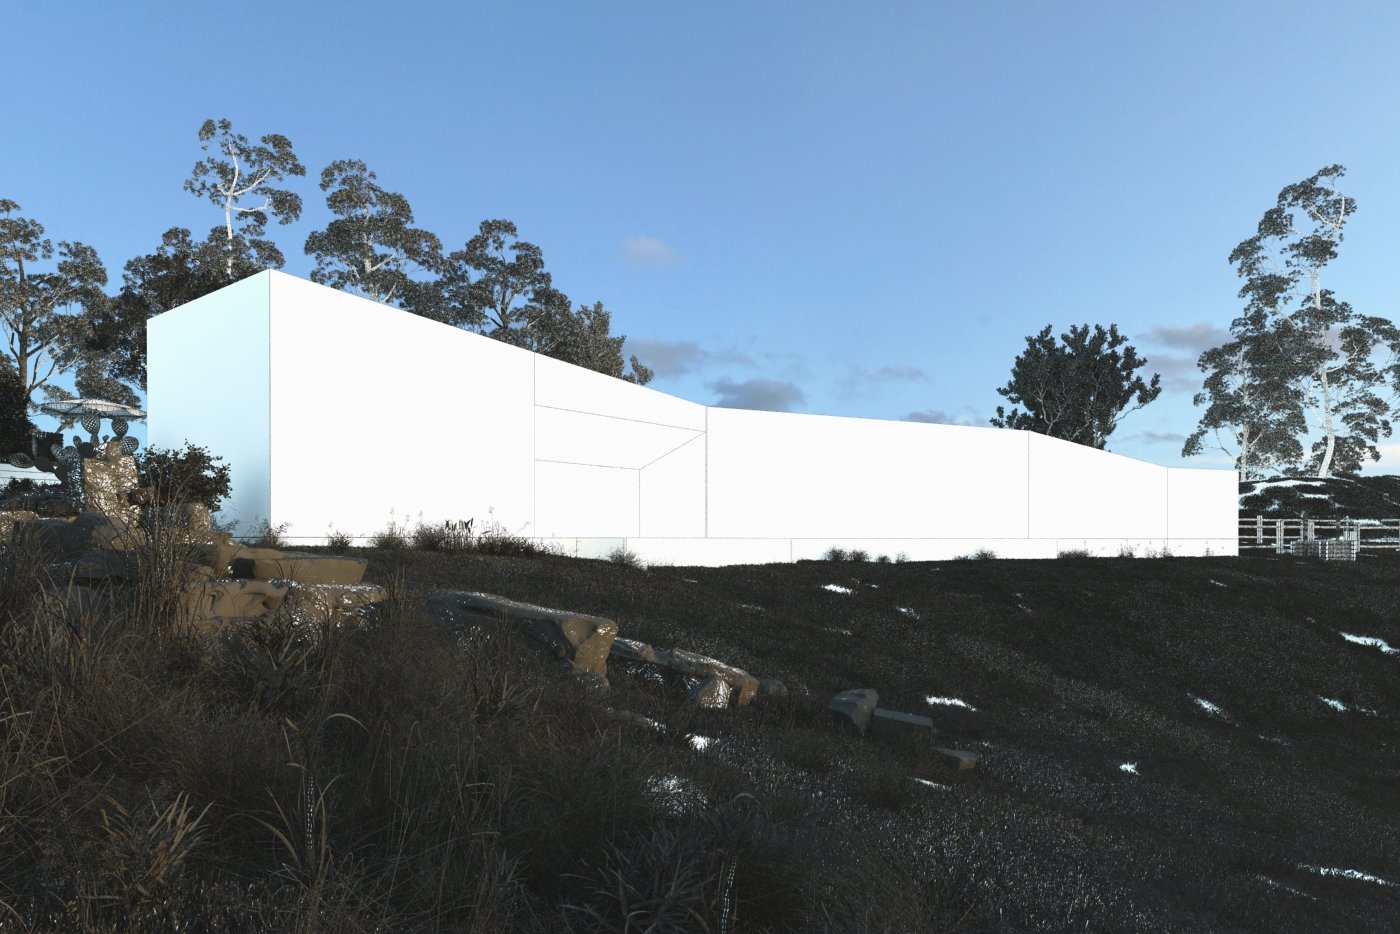
Camera 1 - wireframe view.


Click on image to enlarge nr_AE26_001_cam002_PP_779.jpg
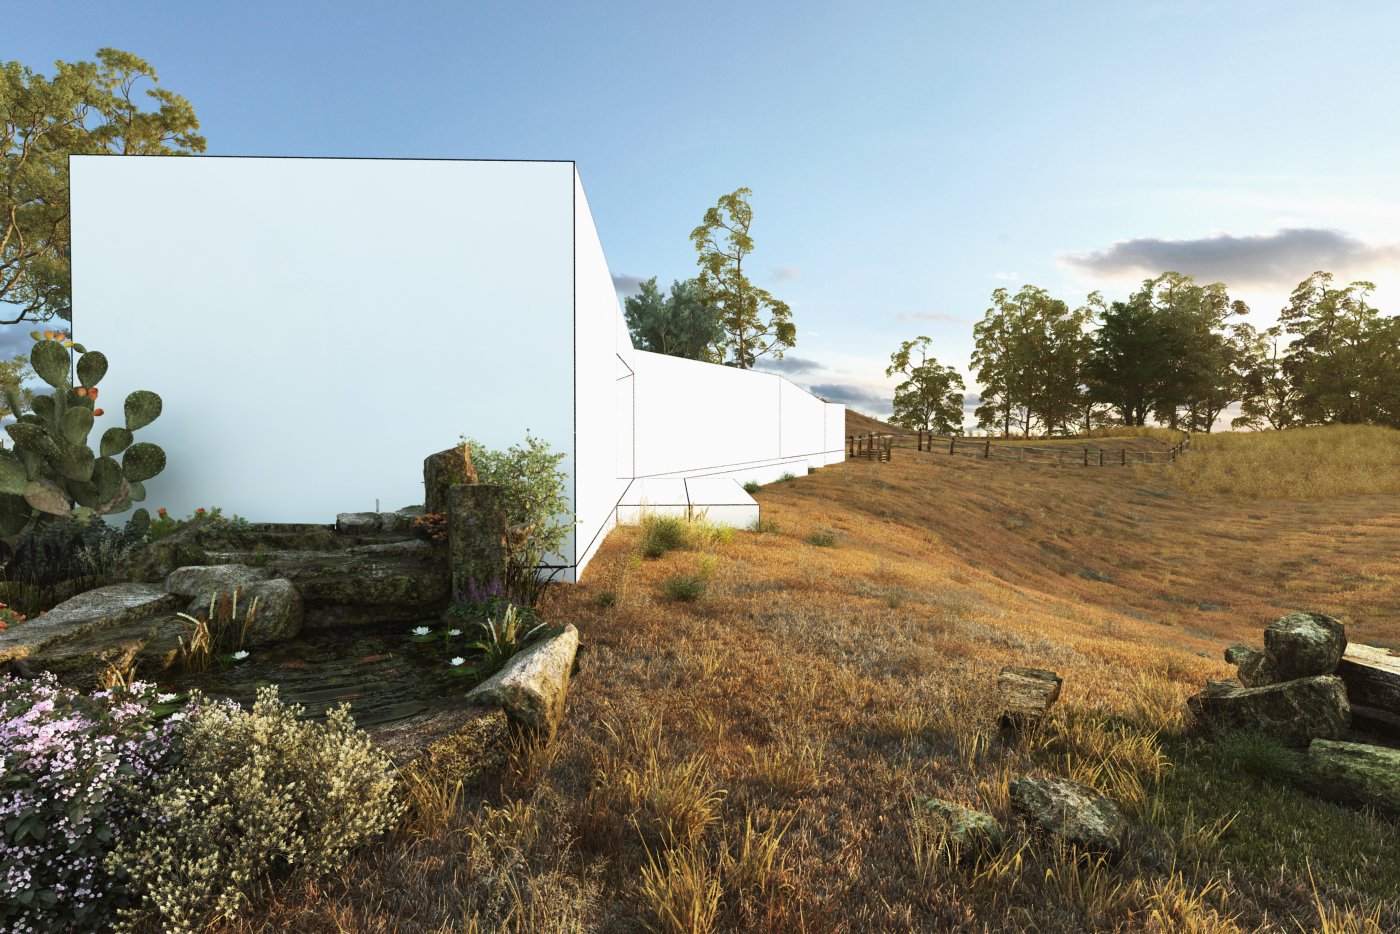
Final scene after post-production - camera 2, placed on the left of the scene.


Click on image to enlarge nr_AE26_001_cam_002_wire_775.jpg
Camera 2 - wireframe view. 


Click on image to enlarge nr_AE26_001_cam003_PP_781.jpg
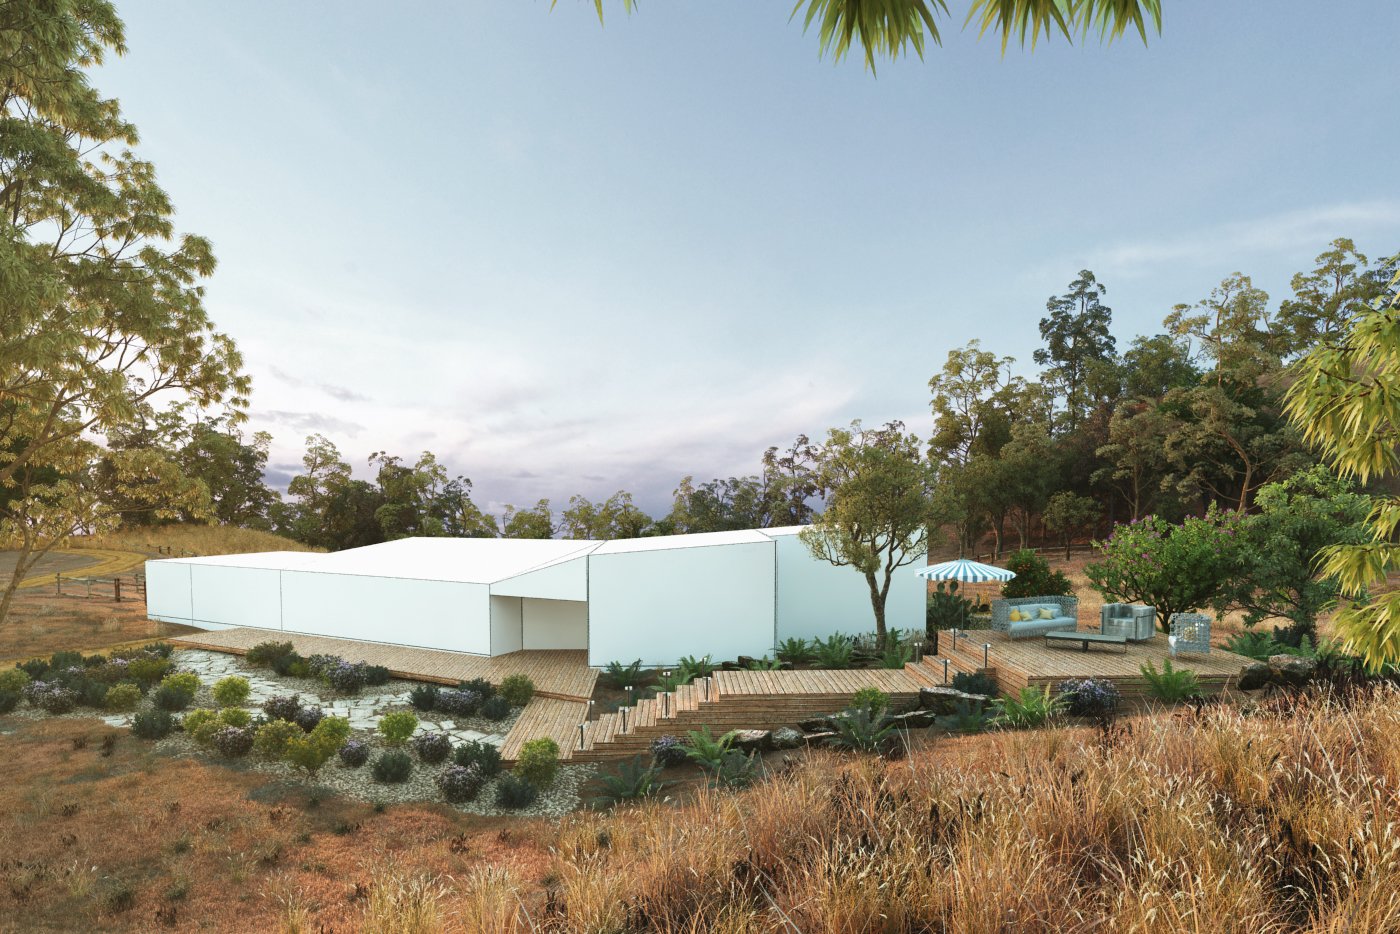
Final image after post-production - camera 3 is placed on a small hill, beneath a tree,


Click on image to enlarge nr_AE26_001_cam_003_wire_776.jpg
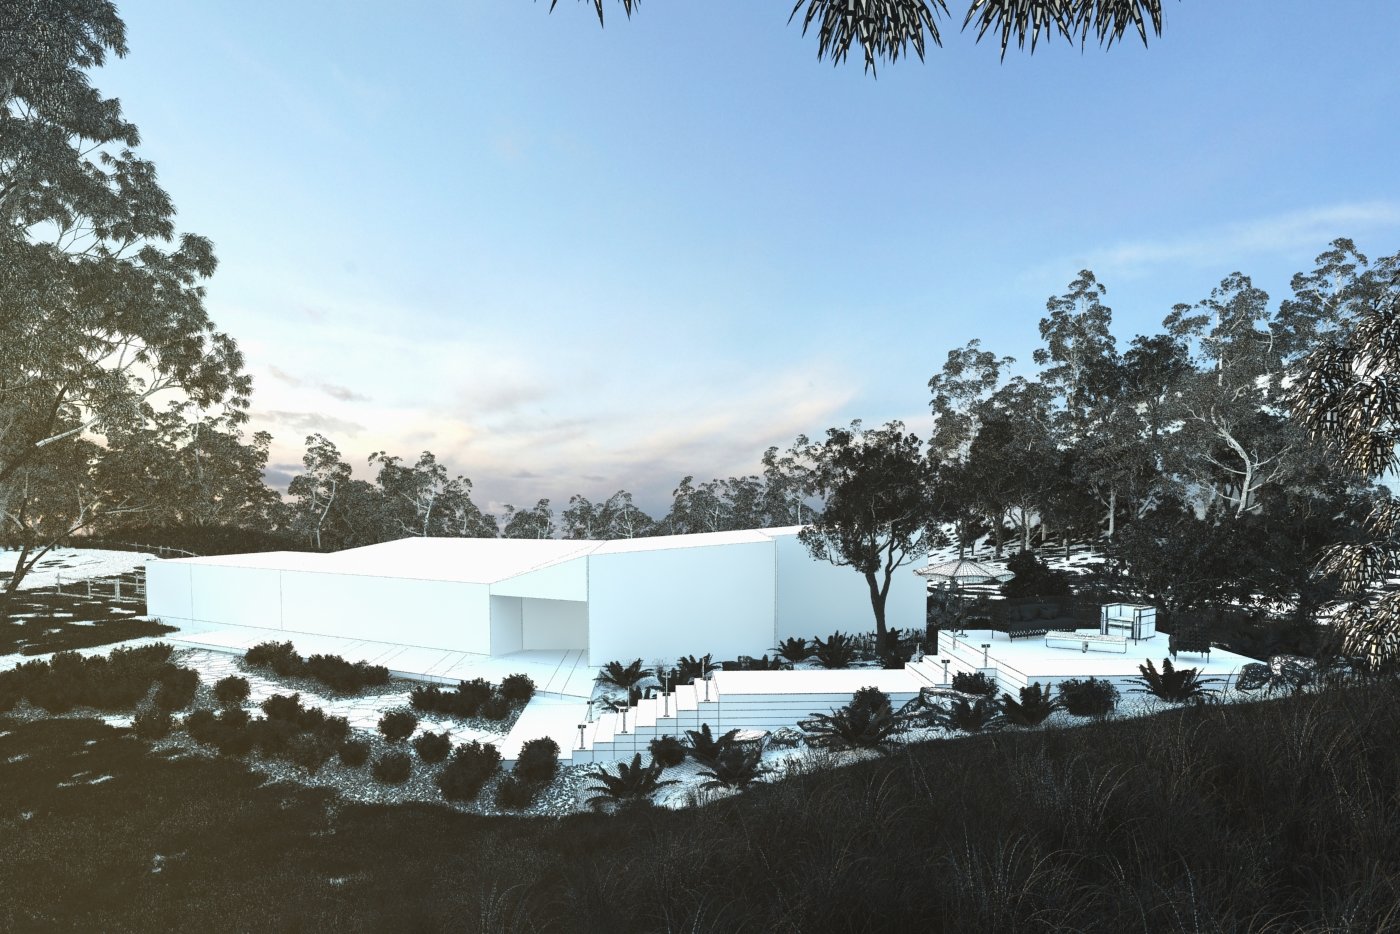
View from camera 3 - wireframe.


Click on image to enlarge nr_ai26_s01__0045_Layer_1_770.jpg
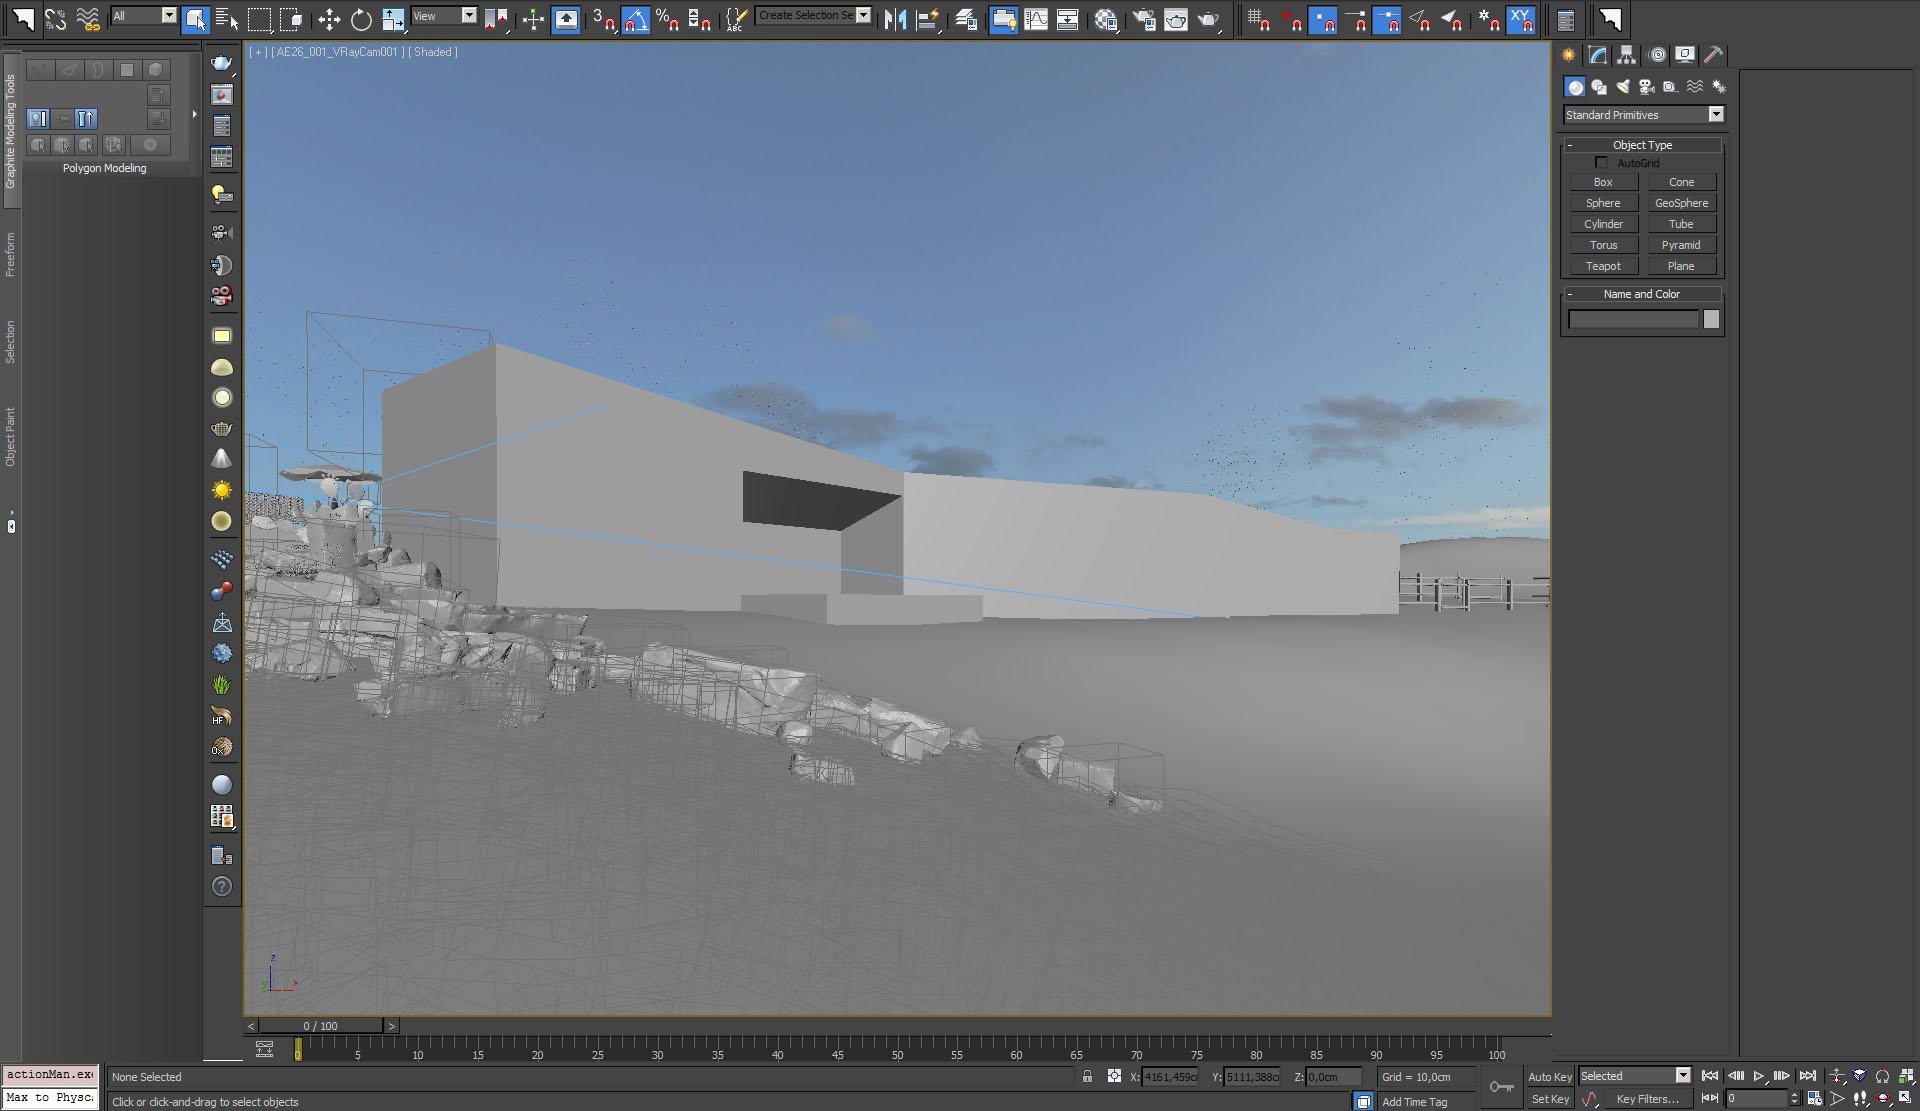
Camera 1 - view in 3ds Max viewport with material / object color off. 


Click on image to enlarge nr_ai26_s01__0044_Layer_2_769.jpg
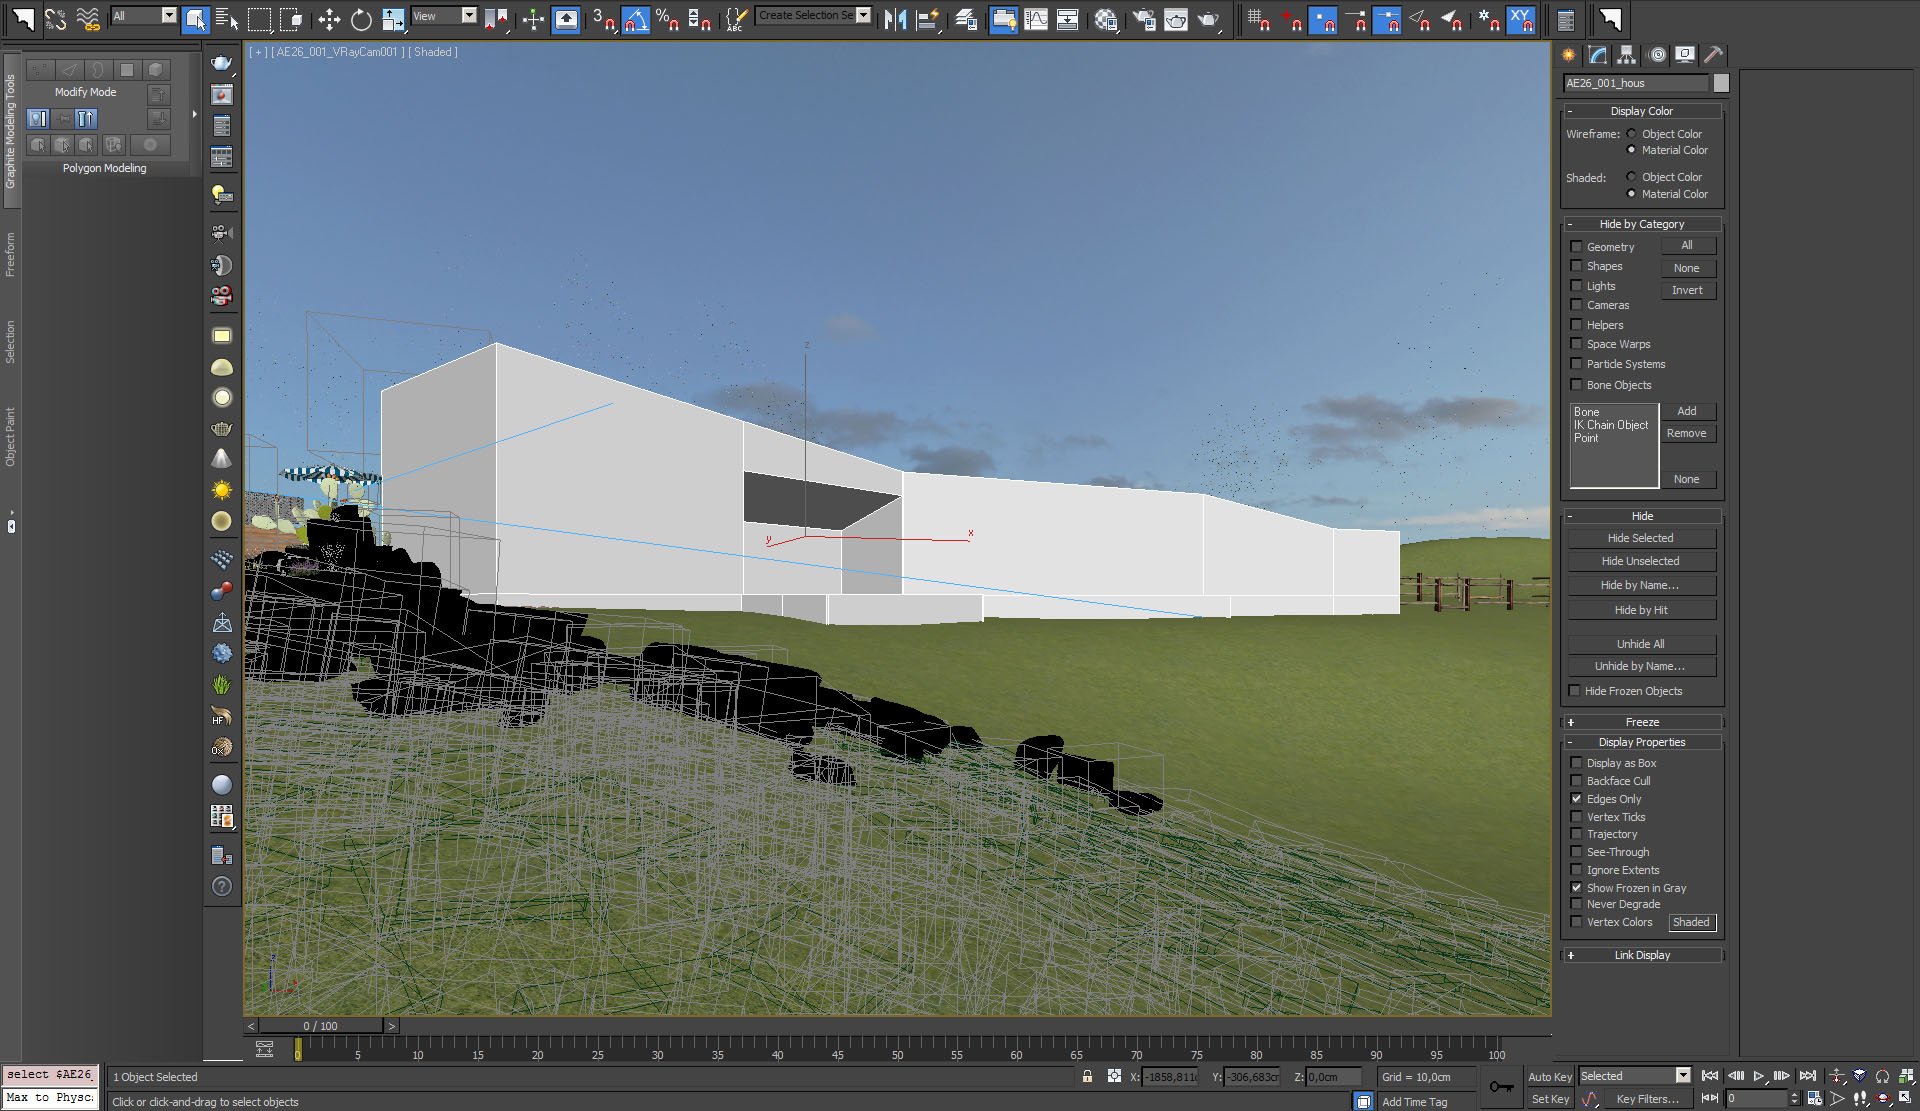
Camera 1 - view in 3ds Max viewport with material / object color on. 


Click on image to enlarge nr_ai26_s01__0043_Layer_3_768.jpg
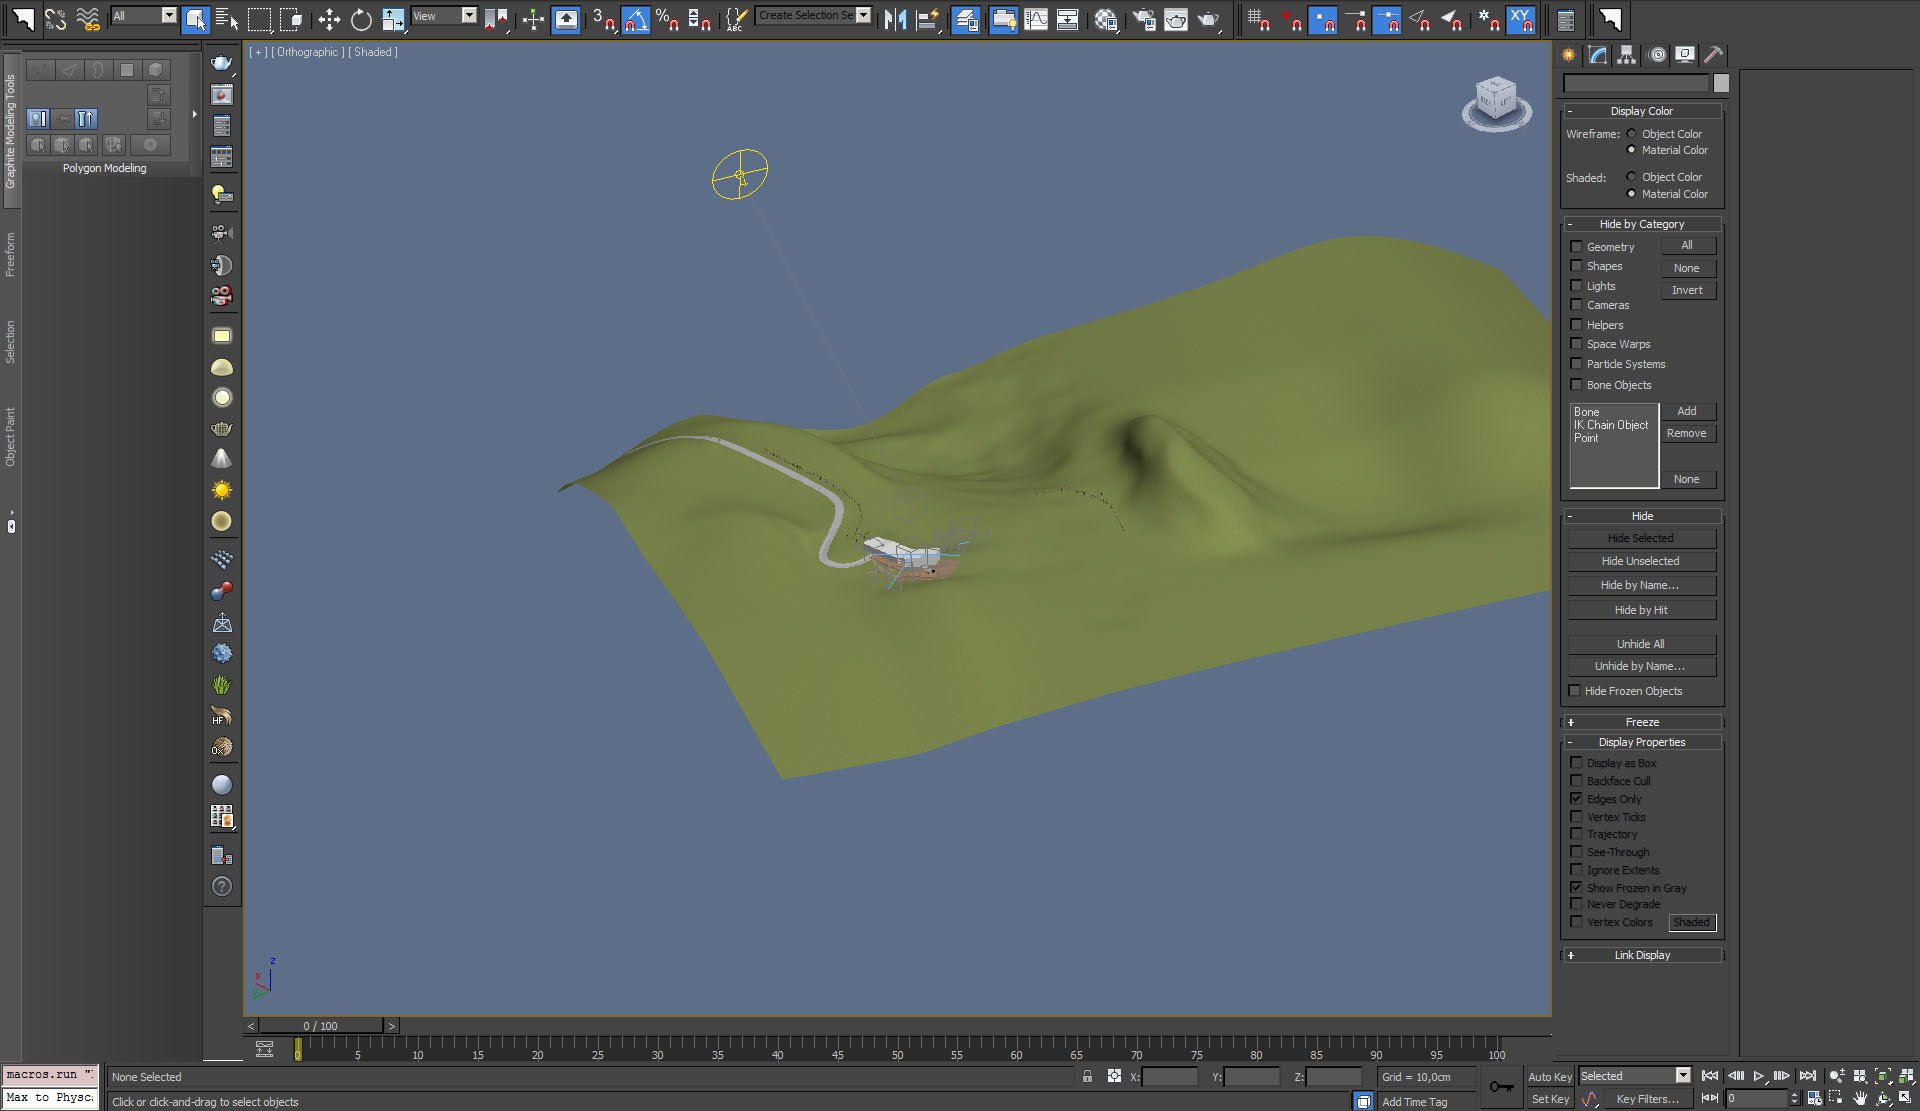
Overview of the scene. We made a big ground plane that surrounds our estate.


Click on image to enlarge nr_ai26_s01__0042_Layer_4_767.jpg
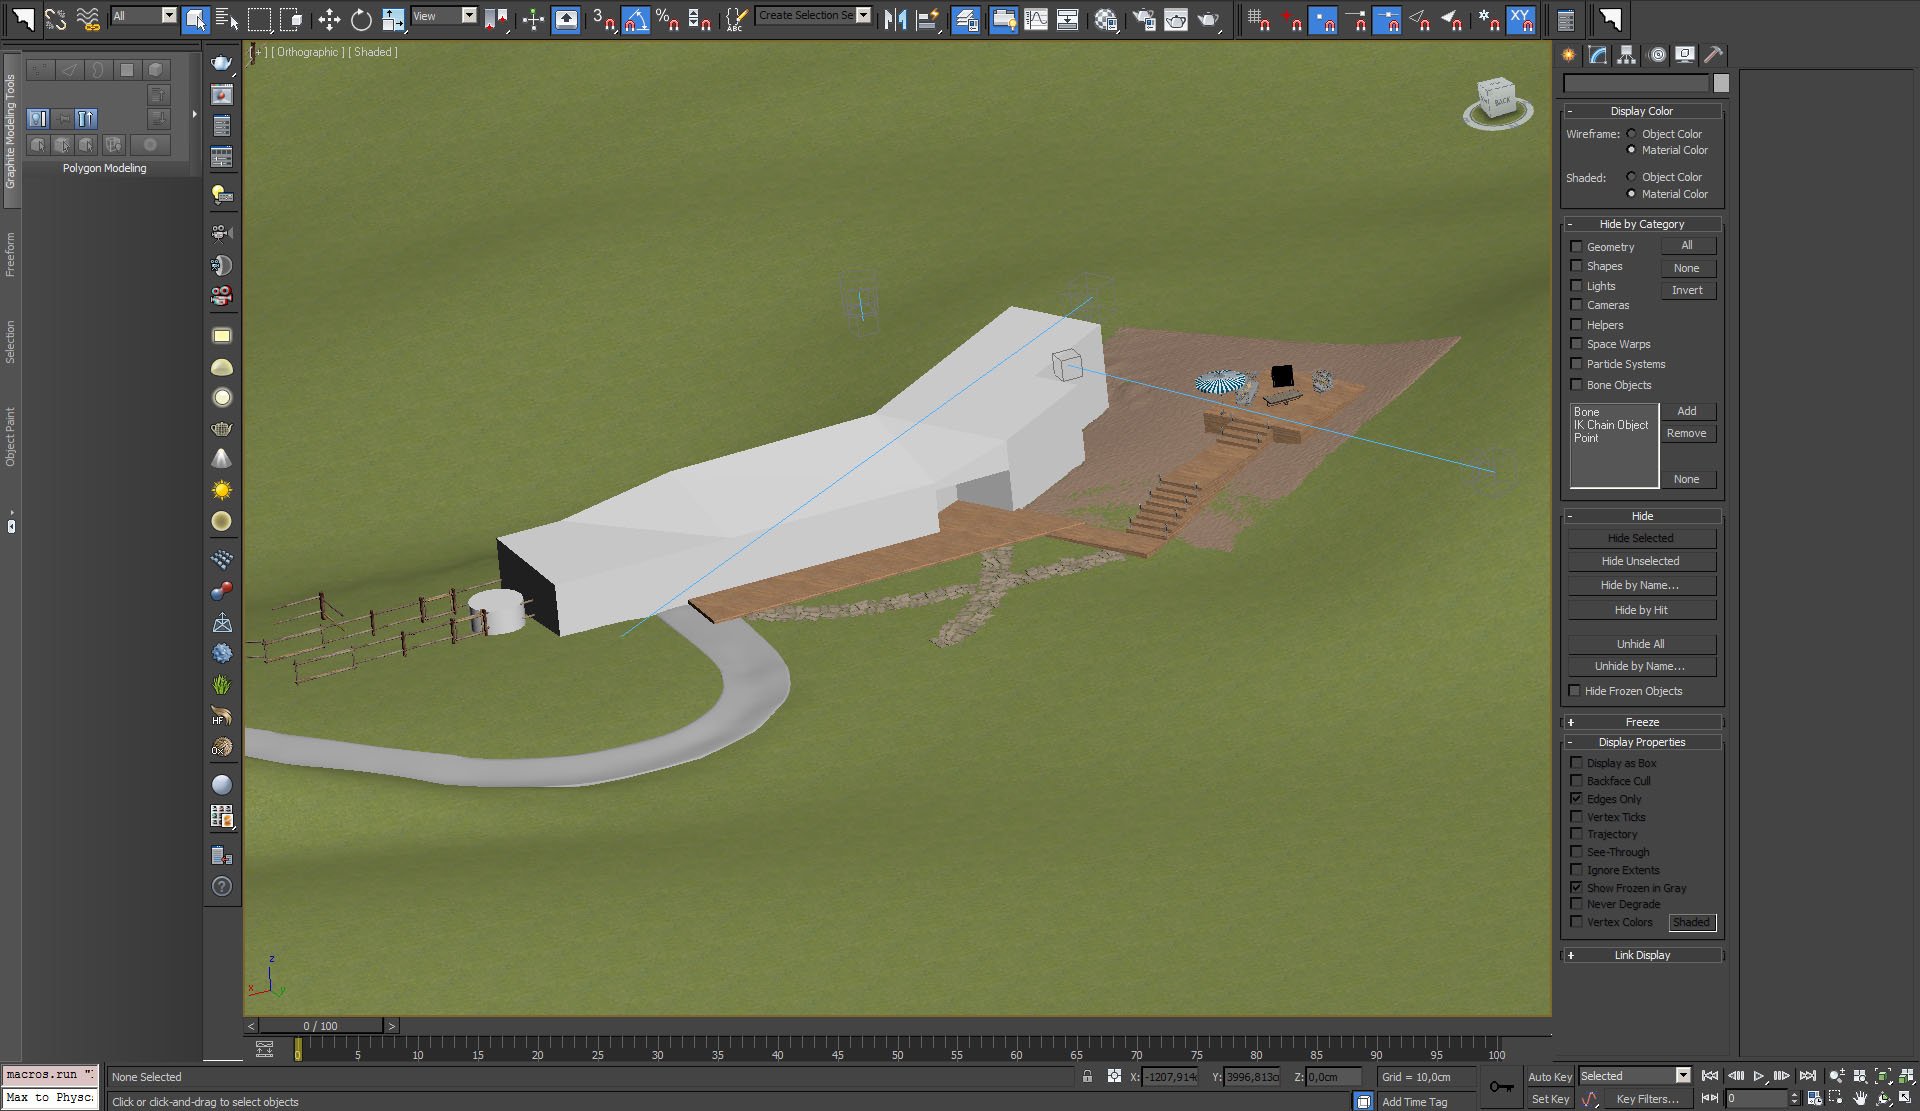
Our 3d elements in the scene - house template, driveway, wooden fence, stairs and some props. 


Click on image to enlarge nr_ai26_s01__0041_Layer_5_766.jpg
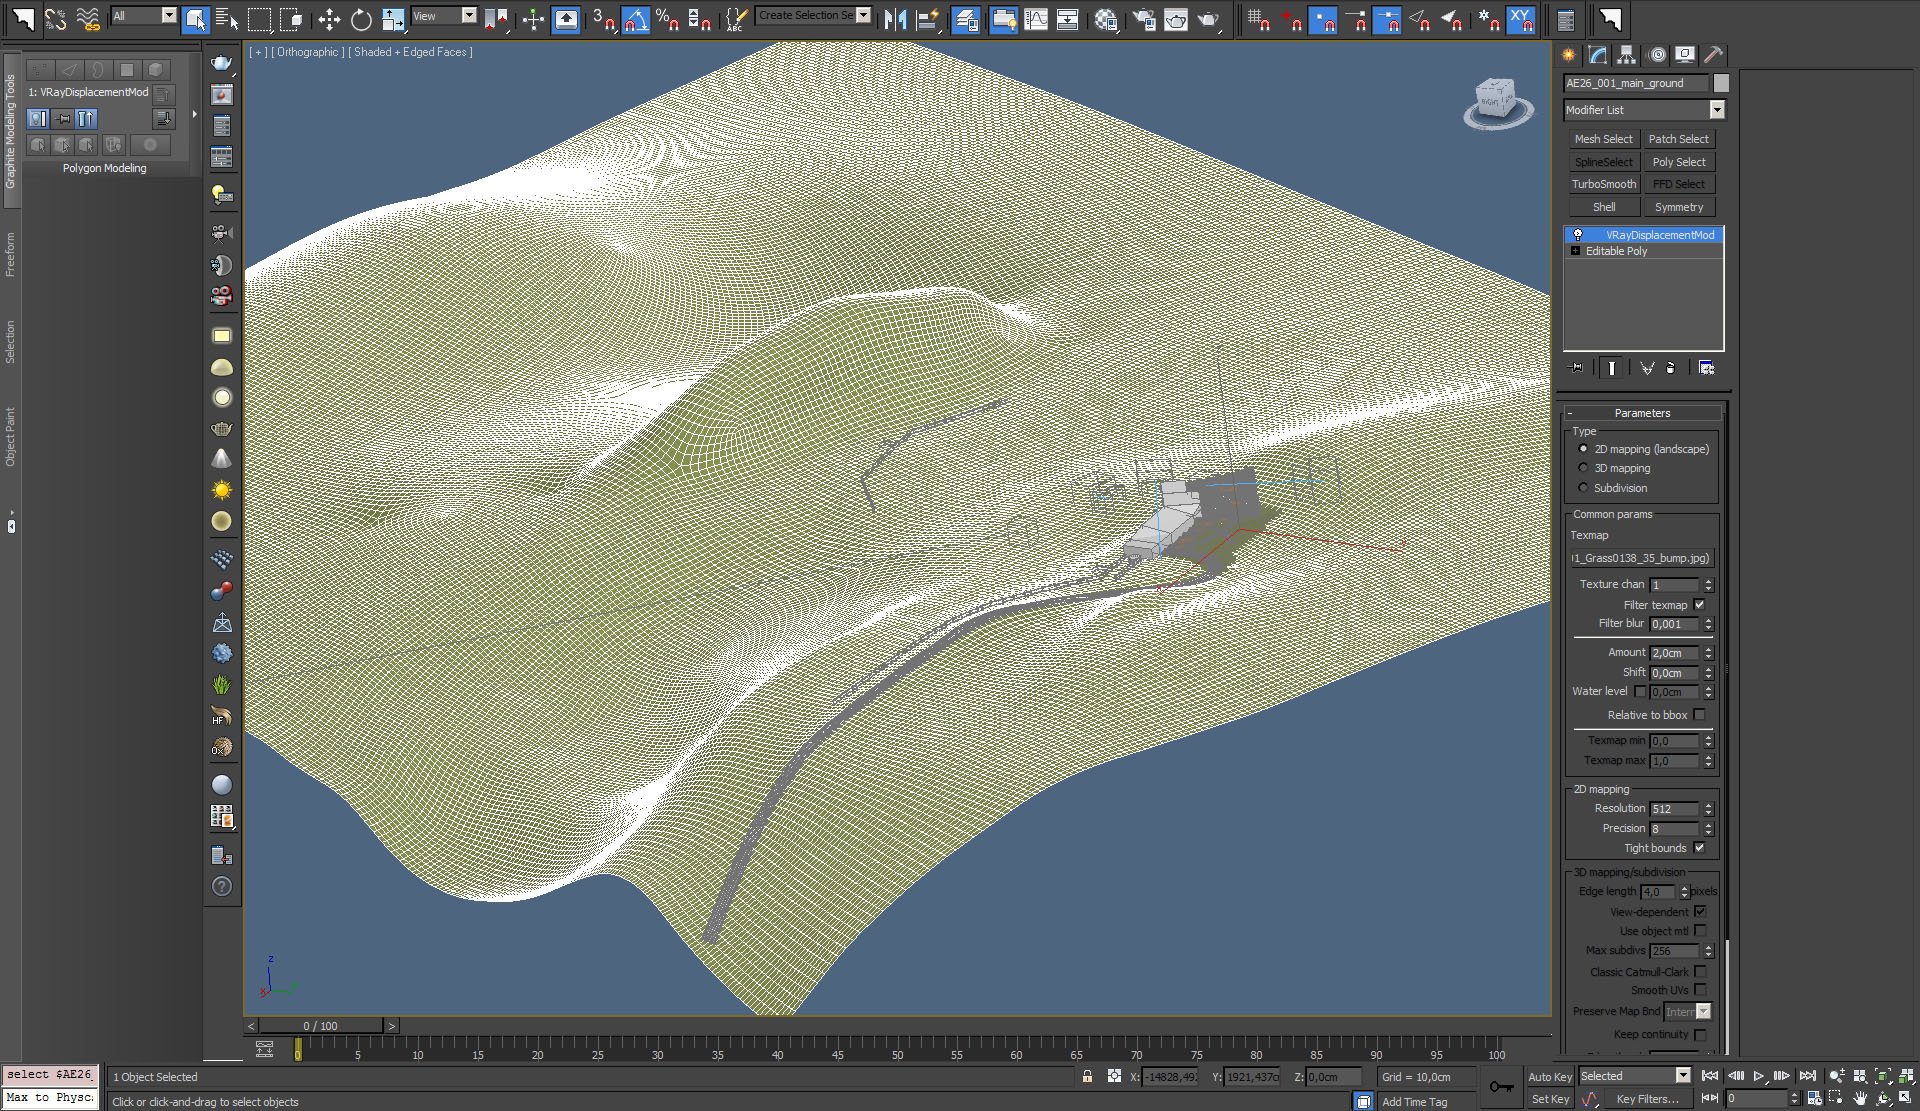
Ground mesh. We used VrayDisplacementMod for adding more curvature.


Click on image to enlarge nr_ai26_s01__0040_Layer_6_765.jpg
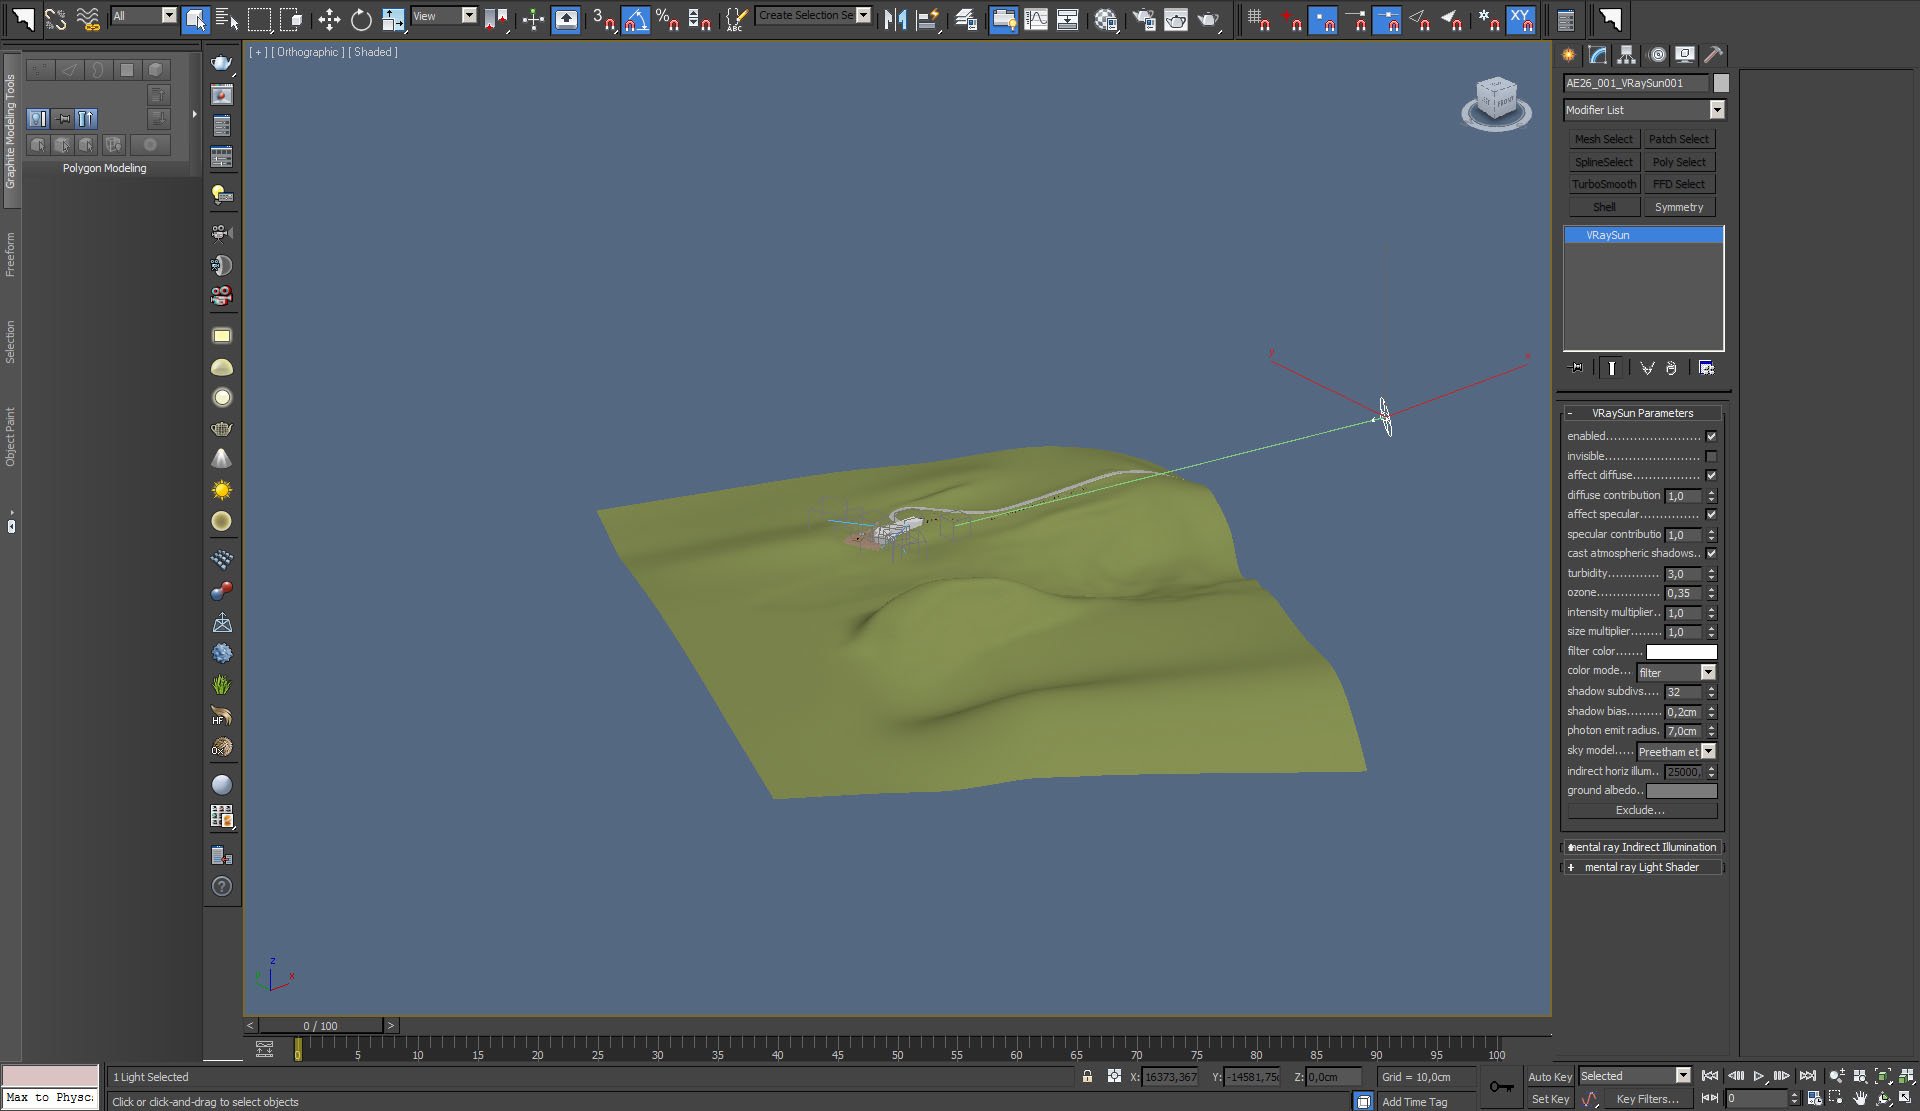
Scene is lit by VraySun, settings on the right.


Click on image to enlarge nr_ai26_s01__0039_Layer_7_764.jpg
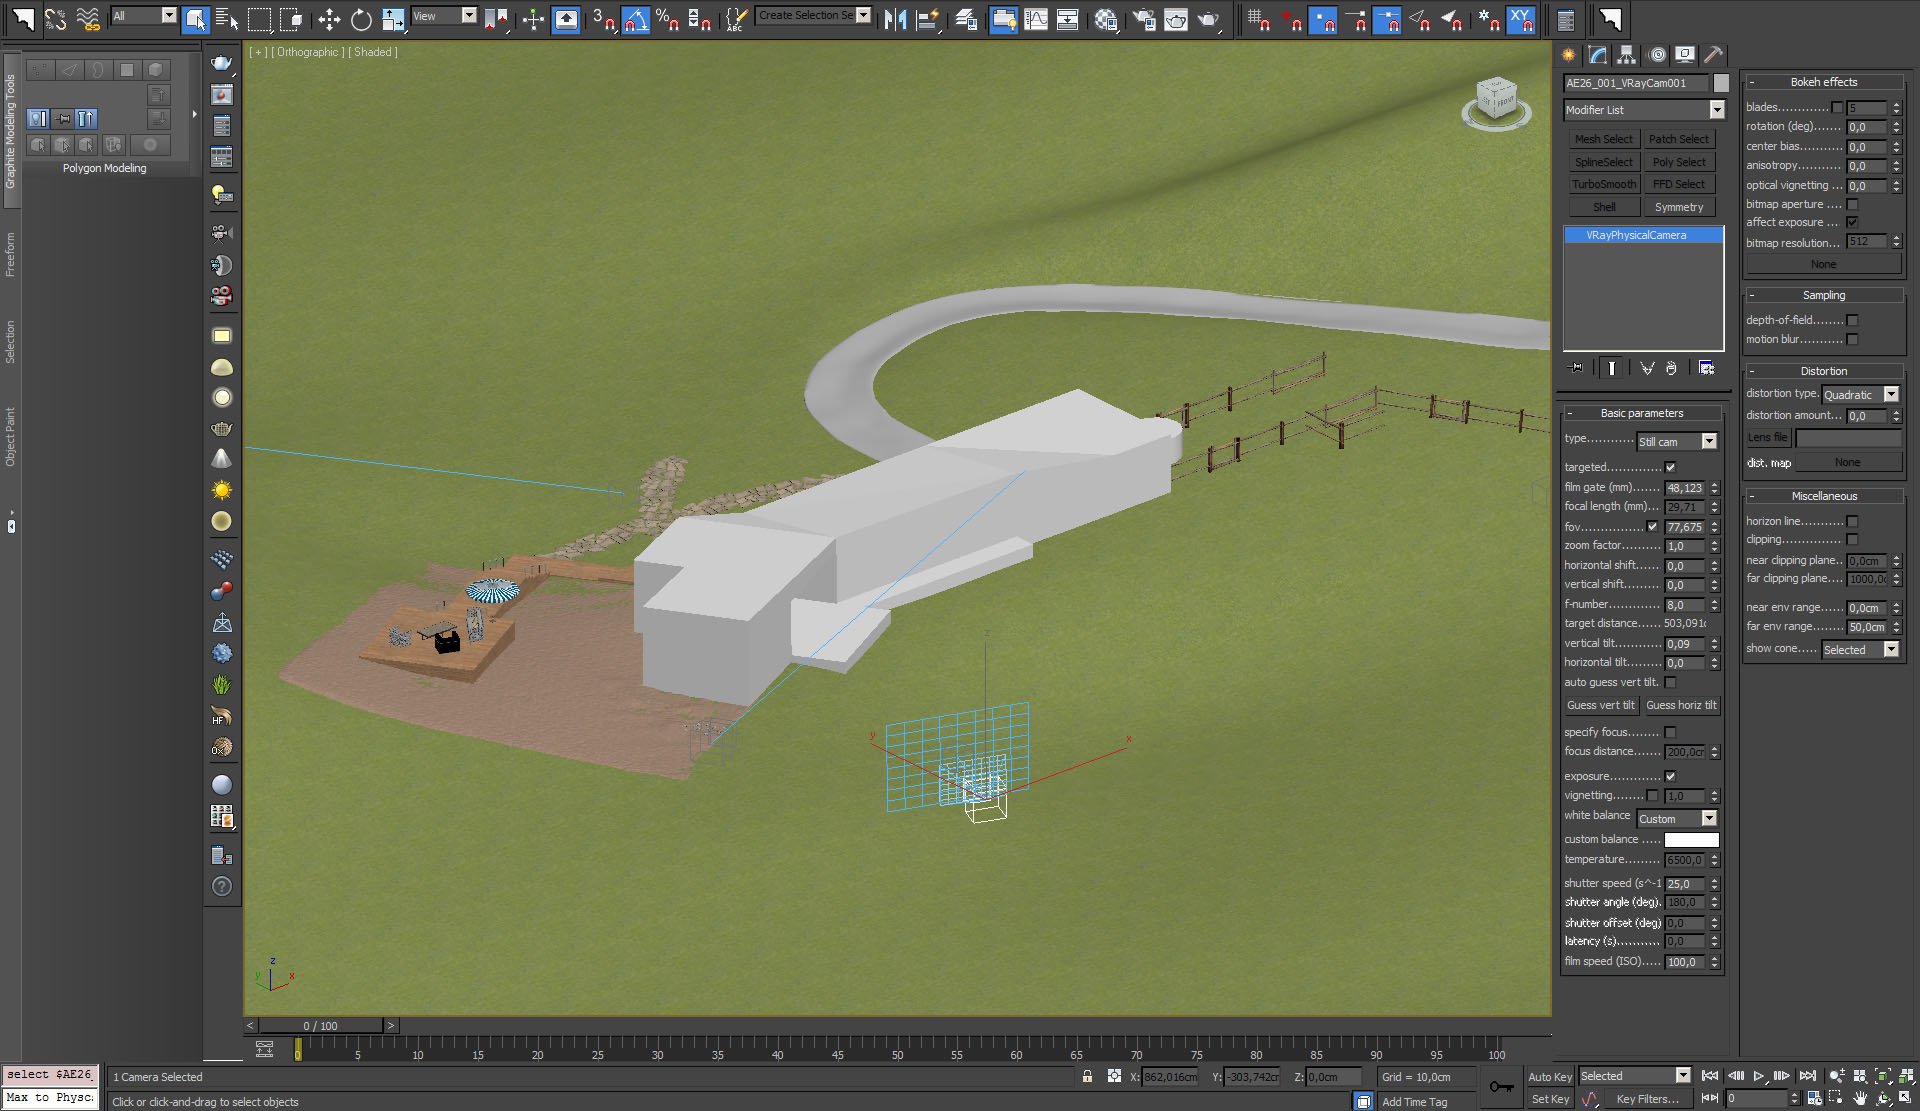
Camera 1 (VrayPhysicalCamera) settings.


Click on image to enlarge nr_ai26_s01__0038_Layer_8_763.jpg
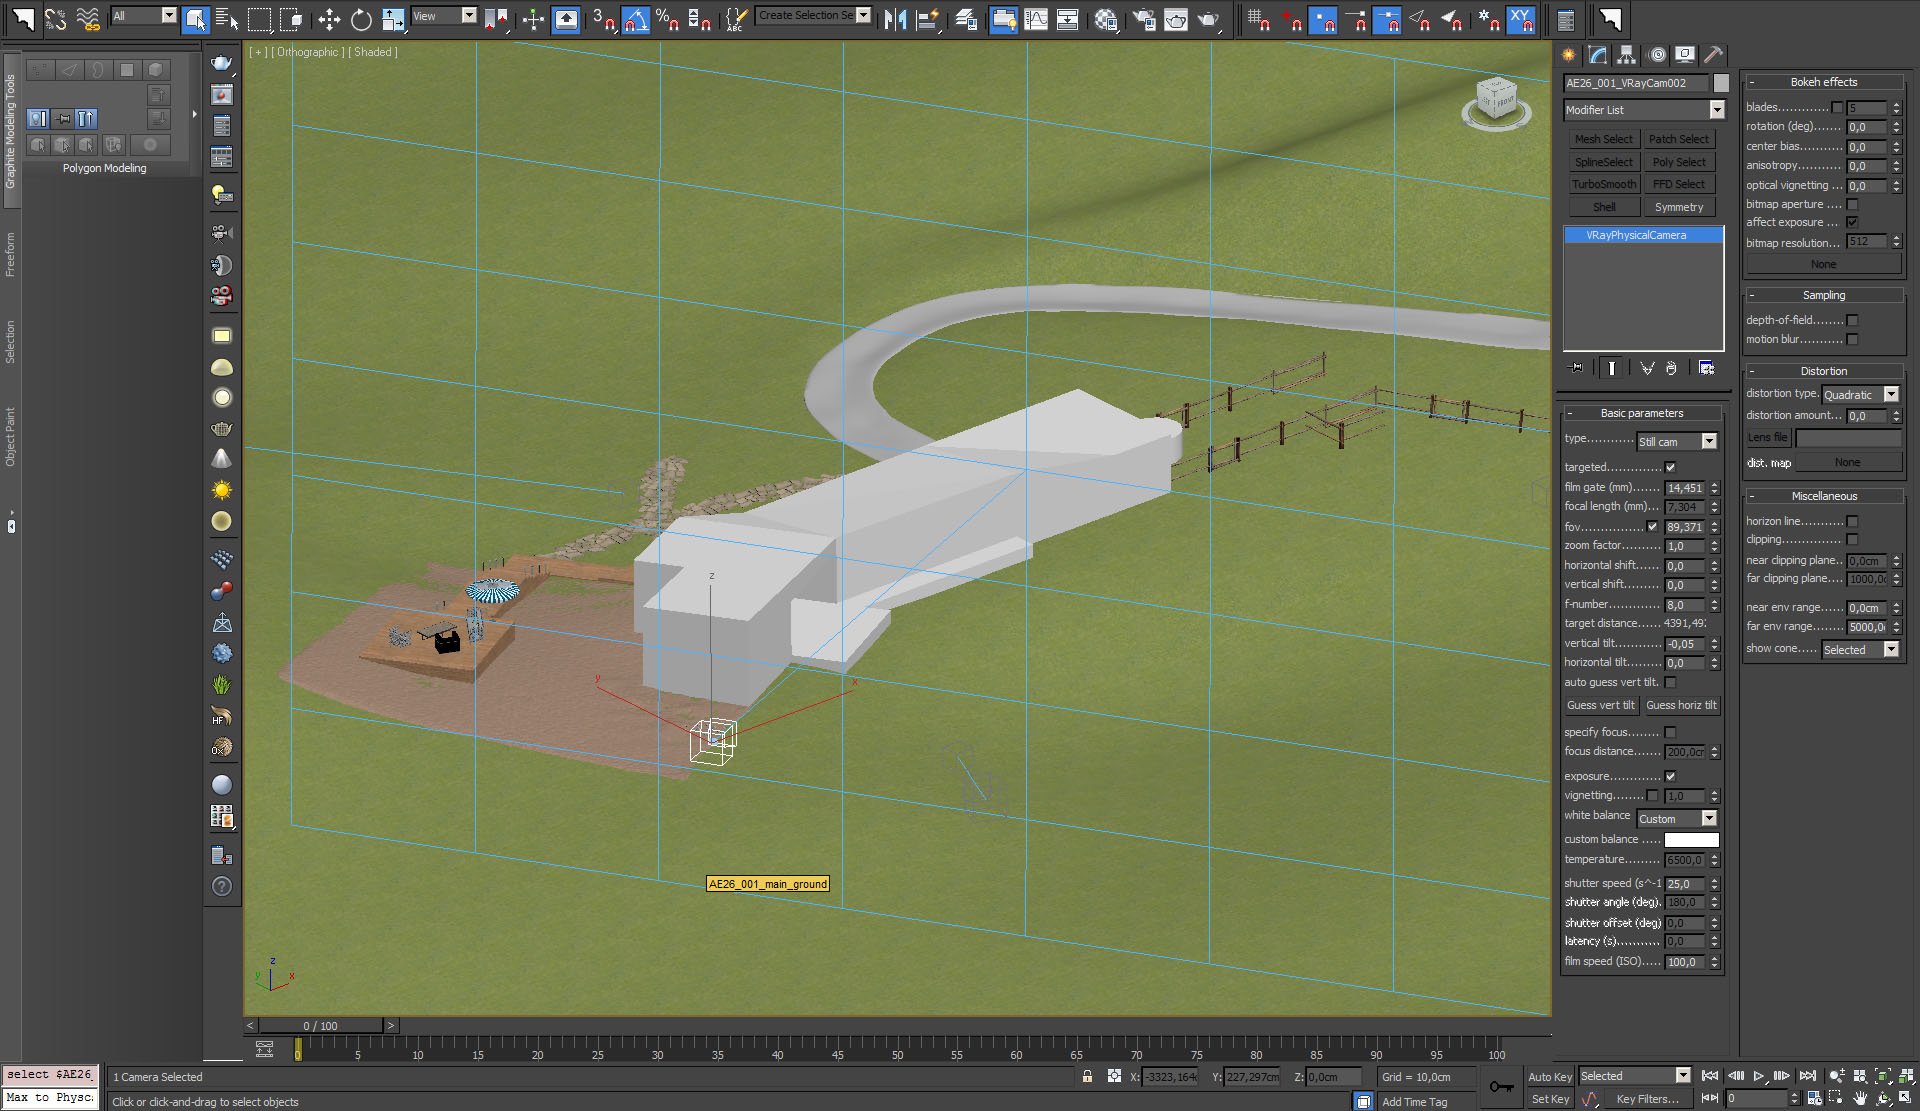
Camera 2 (VrayPhysicalCamera) settings.


Click on image to enlarge nr_ai26_s01__0037_Layer_9_762.jpg
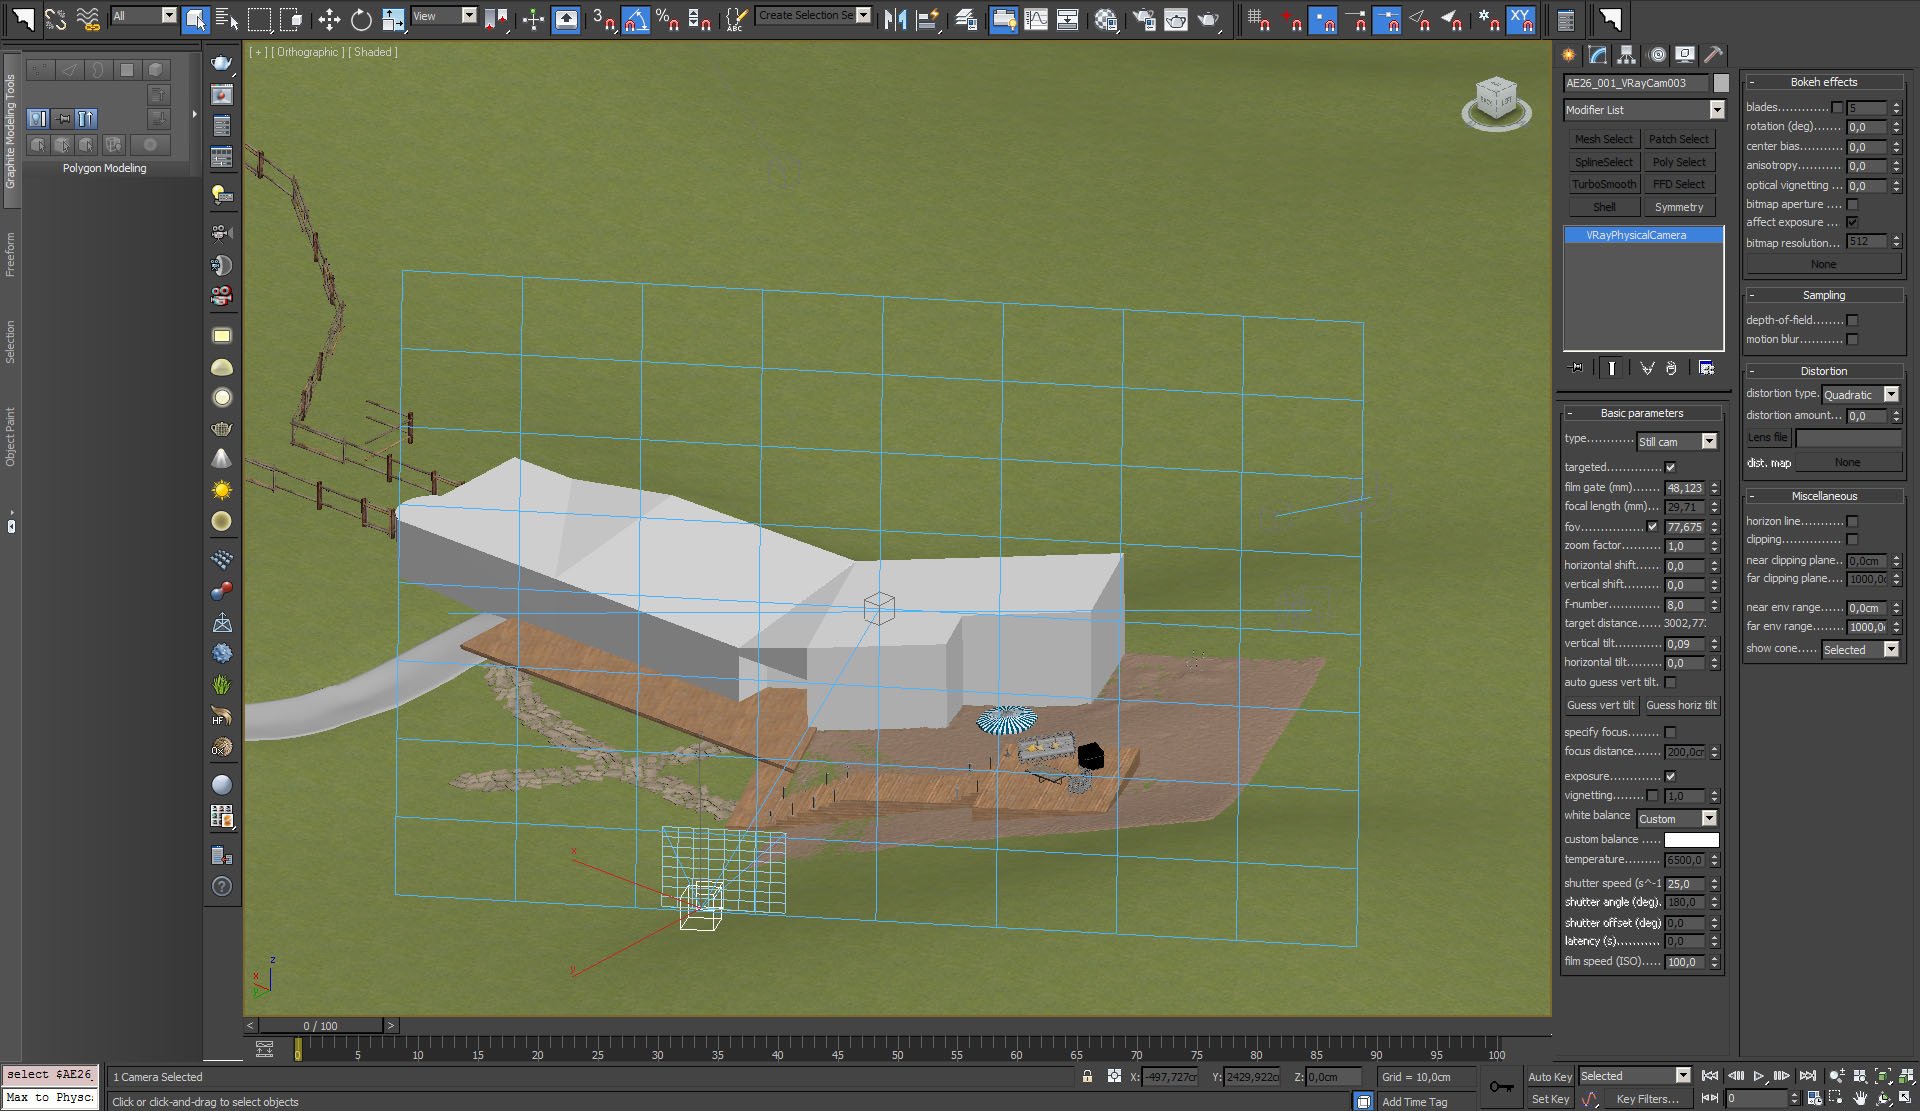
Camera 3 (VrayPhysicalCamera) settings.


Click on image to enlarge nr_ai26_s01__0036_Layer_10_761.jpg
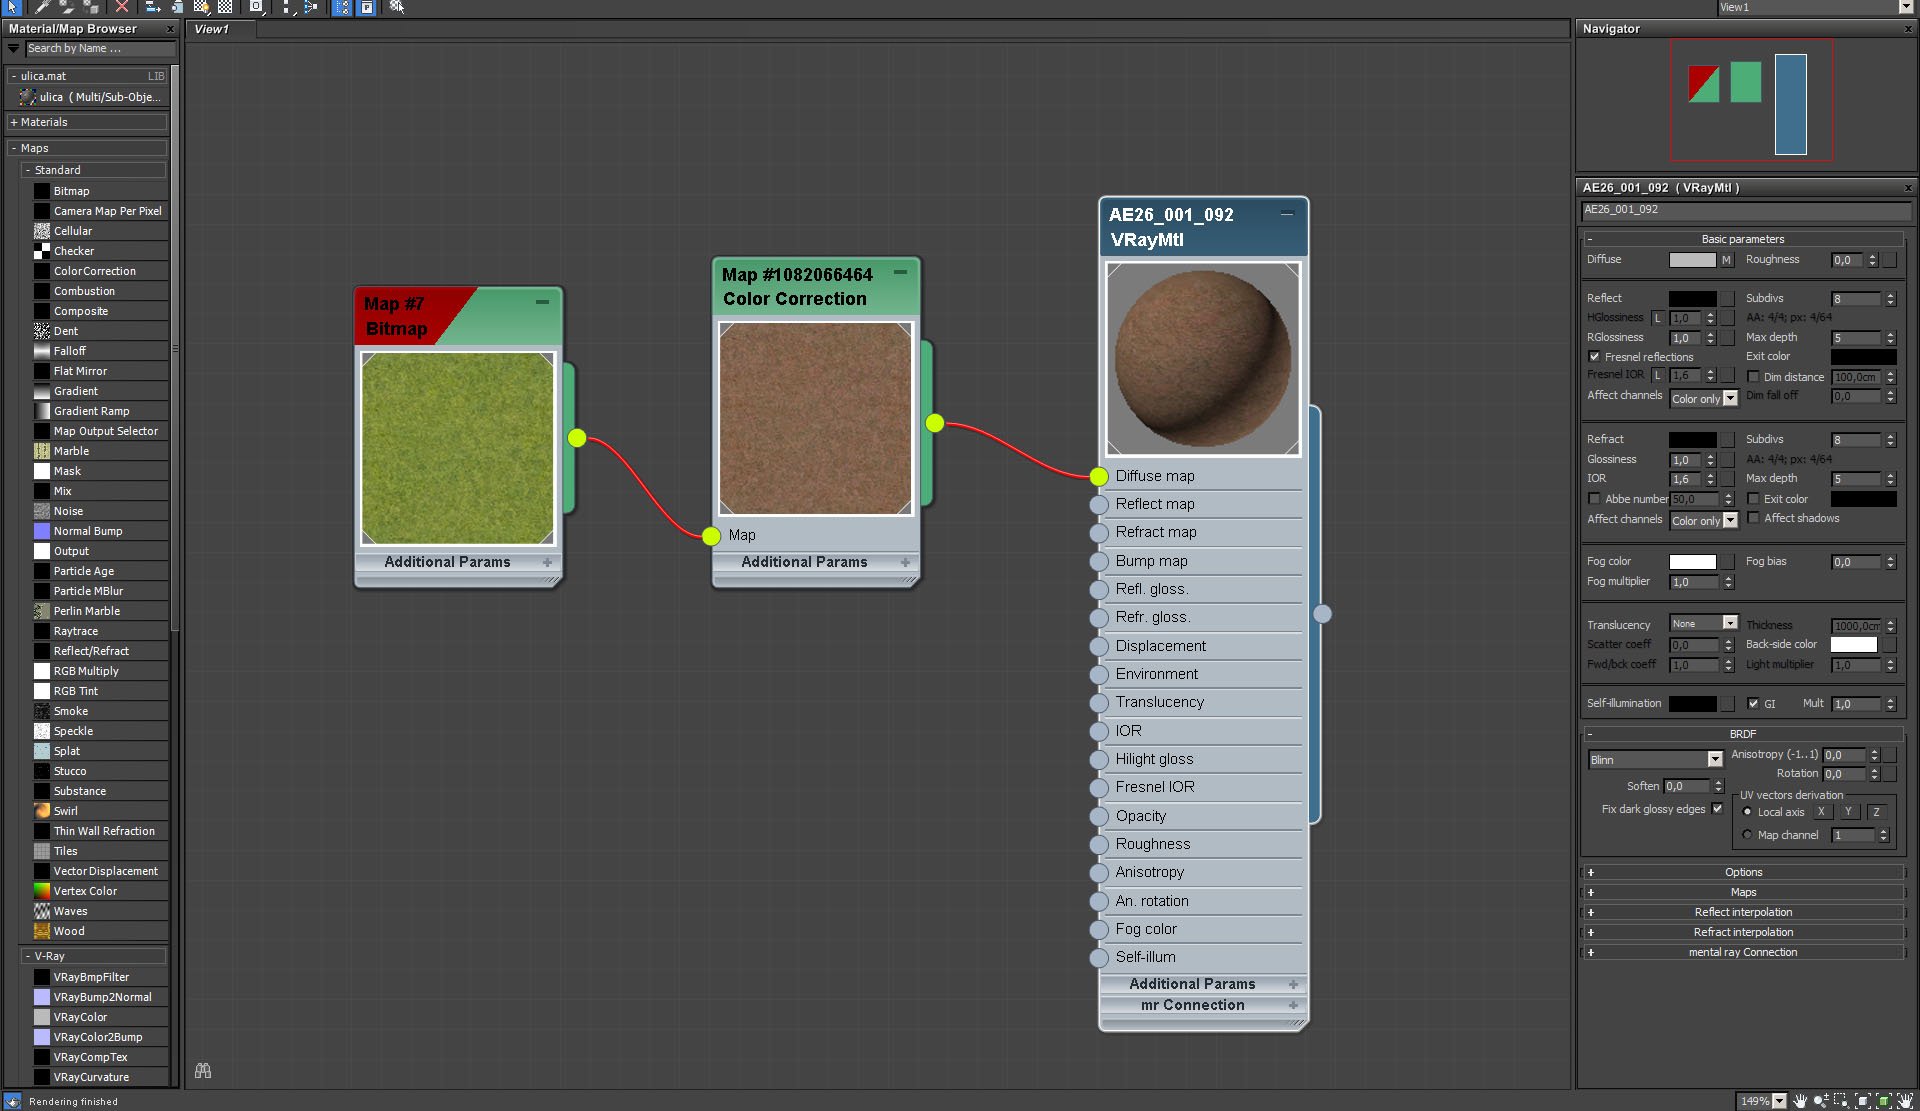
Ground plane material.


Click on image to enlarge nr_ai26_s01__0035_Layer_11_760.jpg
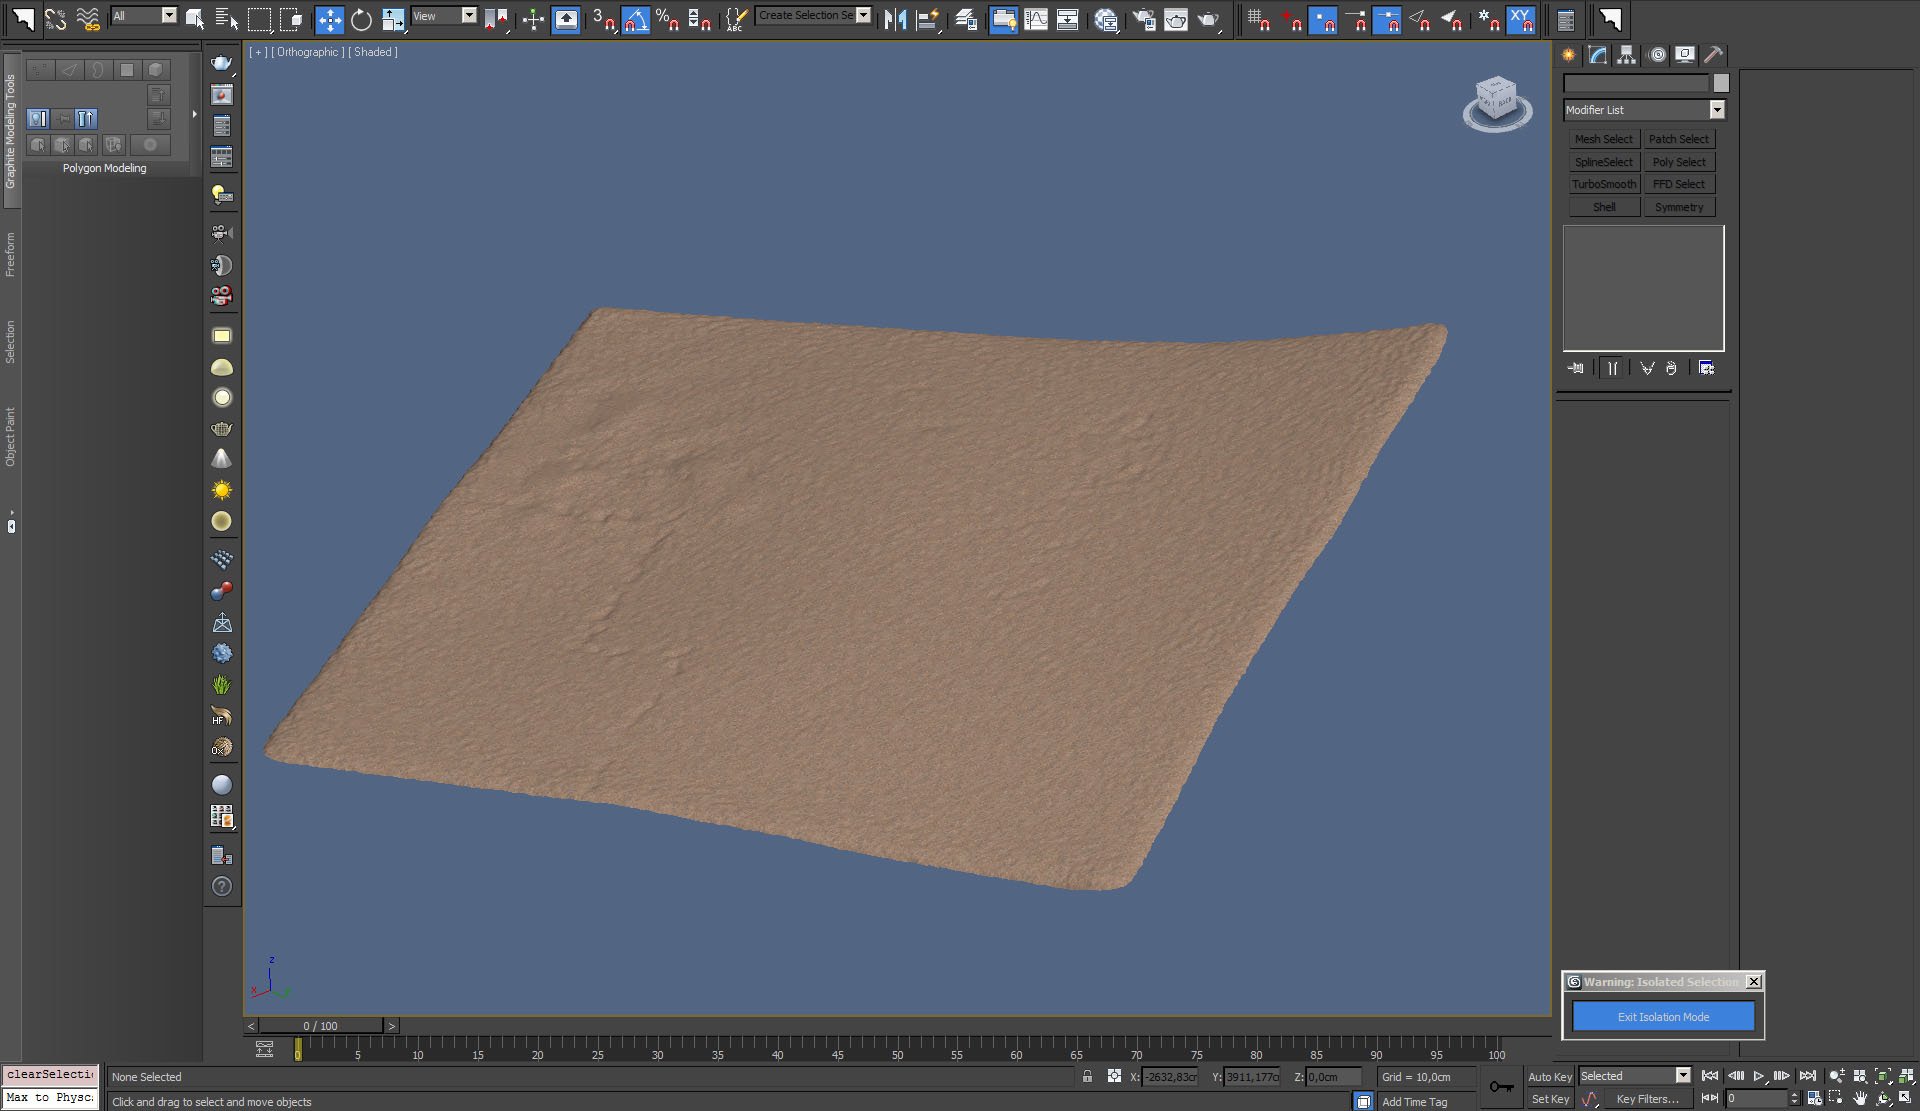
We used a turbosmoothed mesh to make a sand area.


Click on image to enlarge nr_ai26_s01__0034_Layer_12_759.jpg
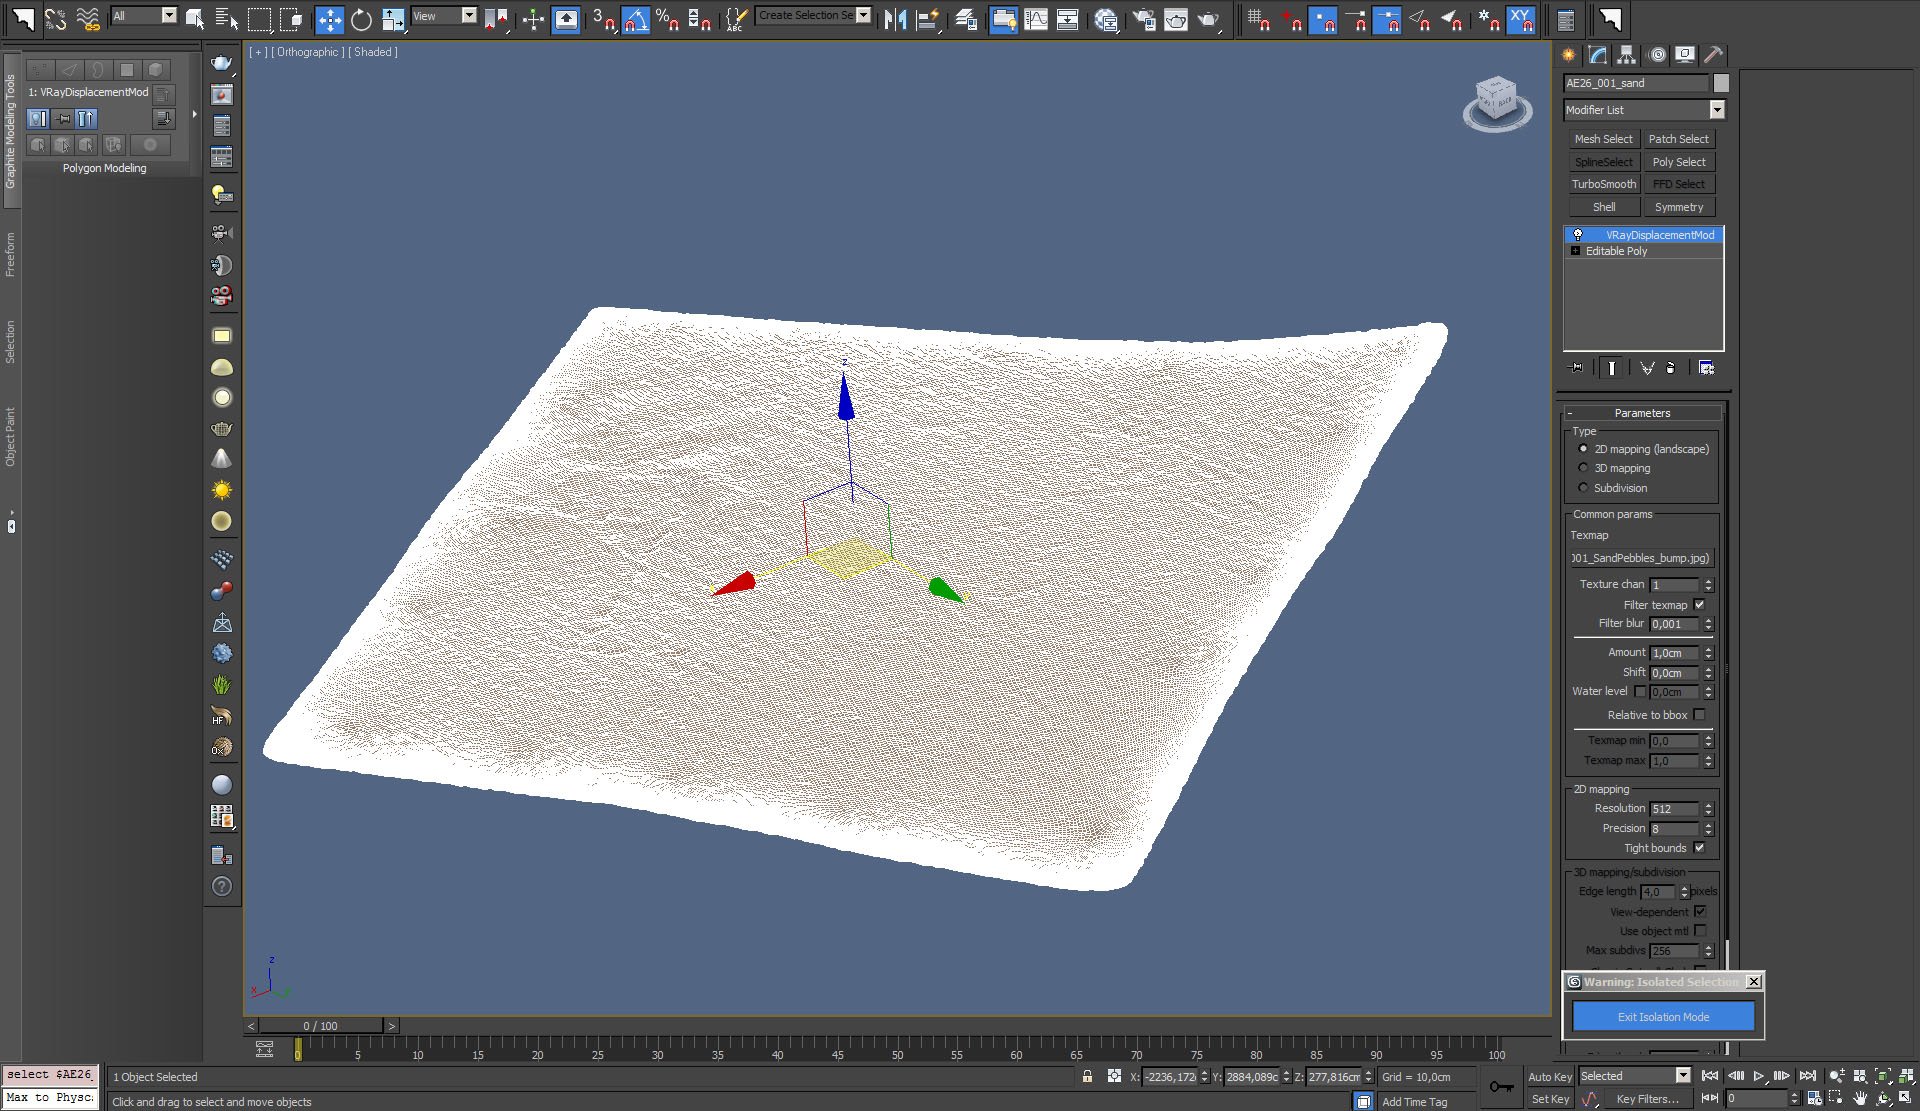
Sand - mesh. We placed VrayDisplacementMod here too.


Click on image to enlarge nr_ai26_s01__0033_Layer_13_809.jpg
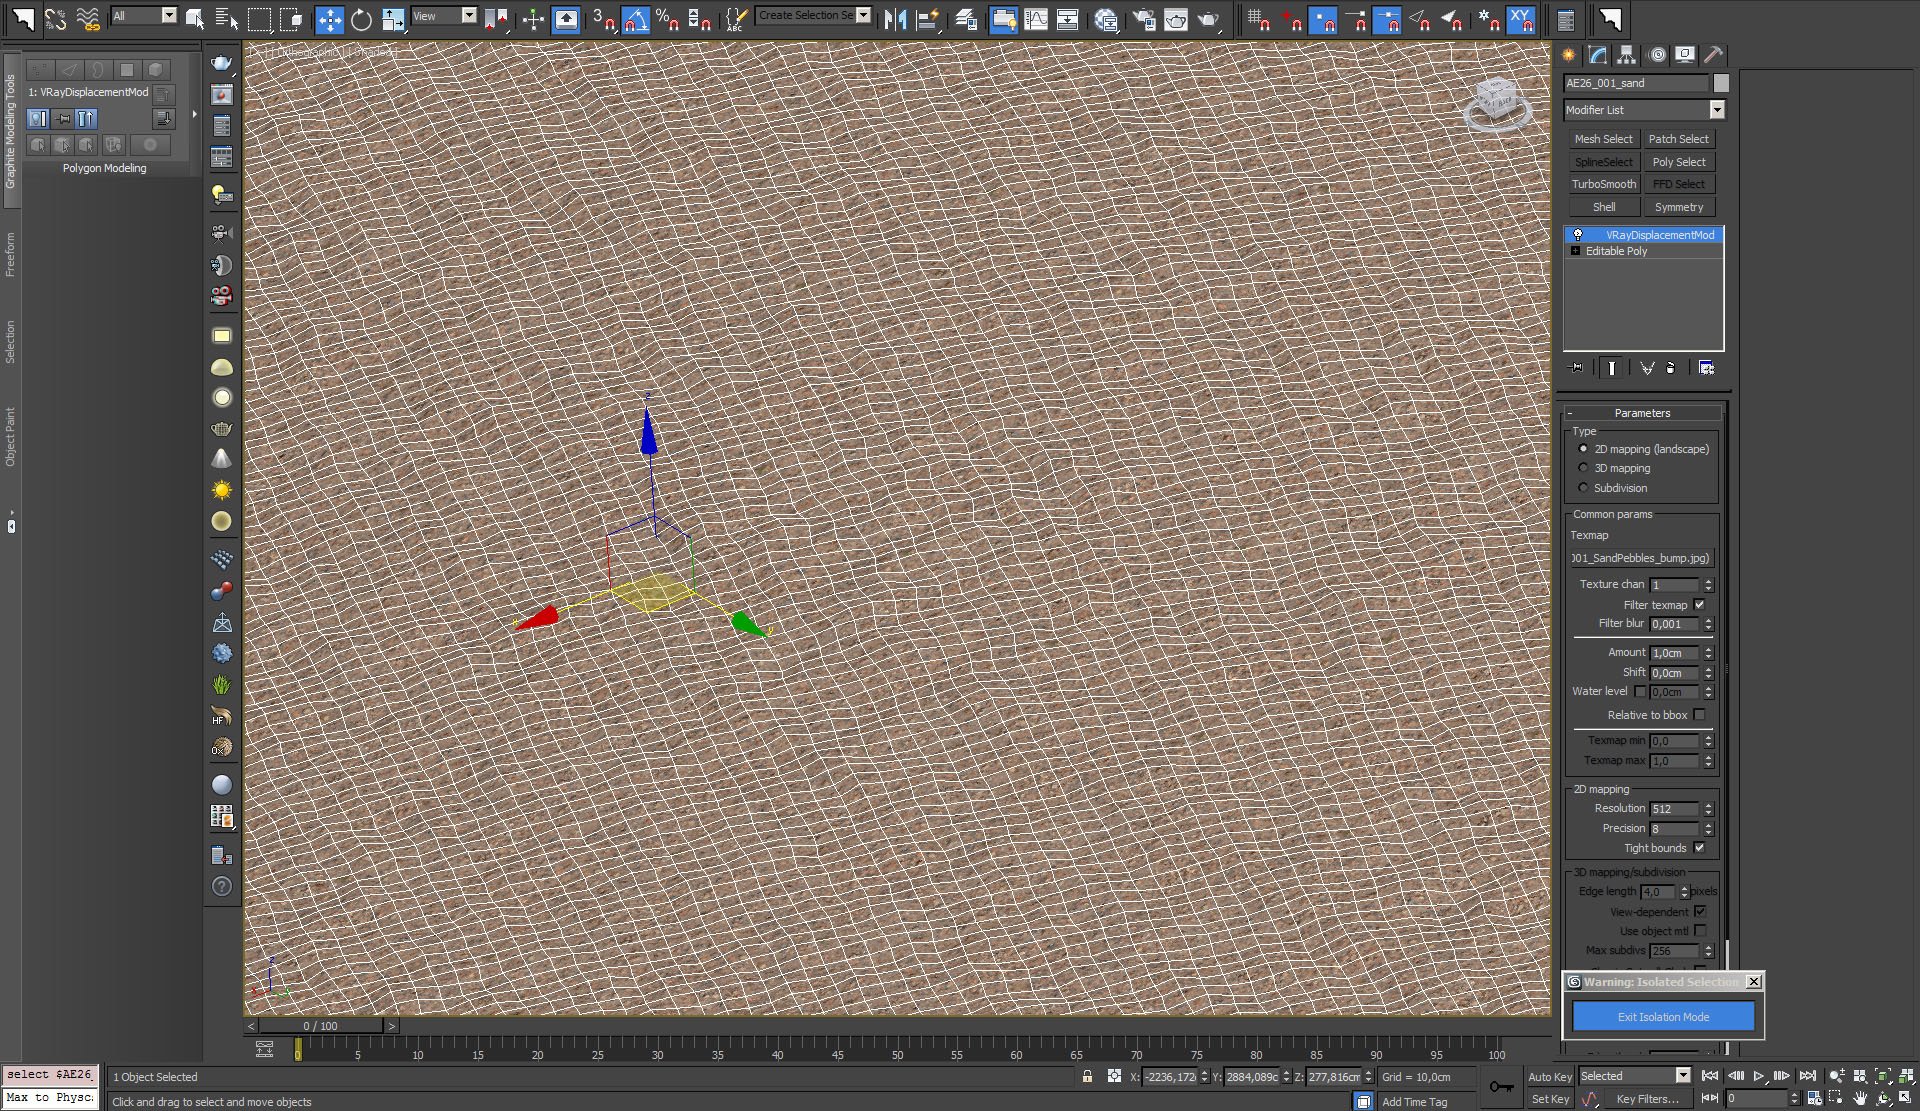
Sand mesh - close-up.


Click on image to enlargeai26_s01__0032_Layer_14.jpg
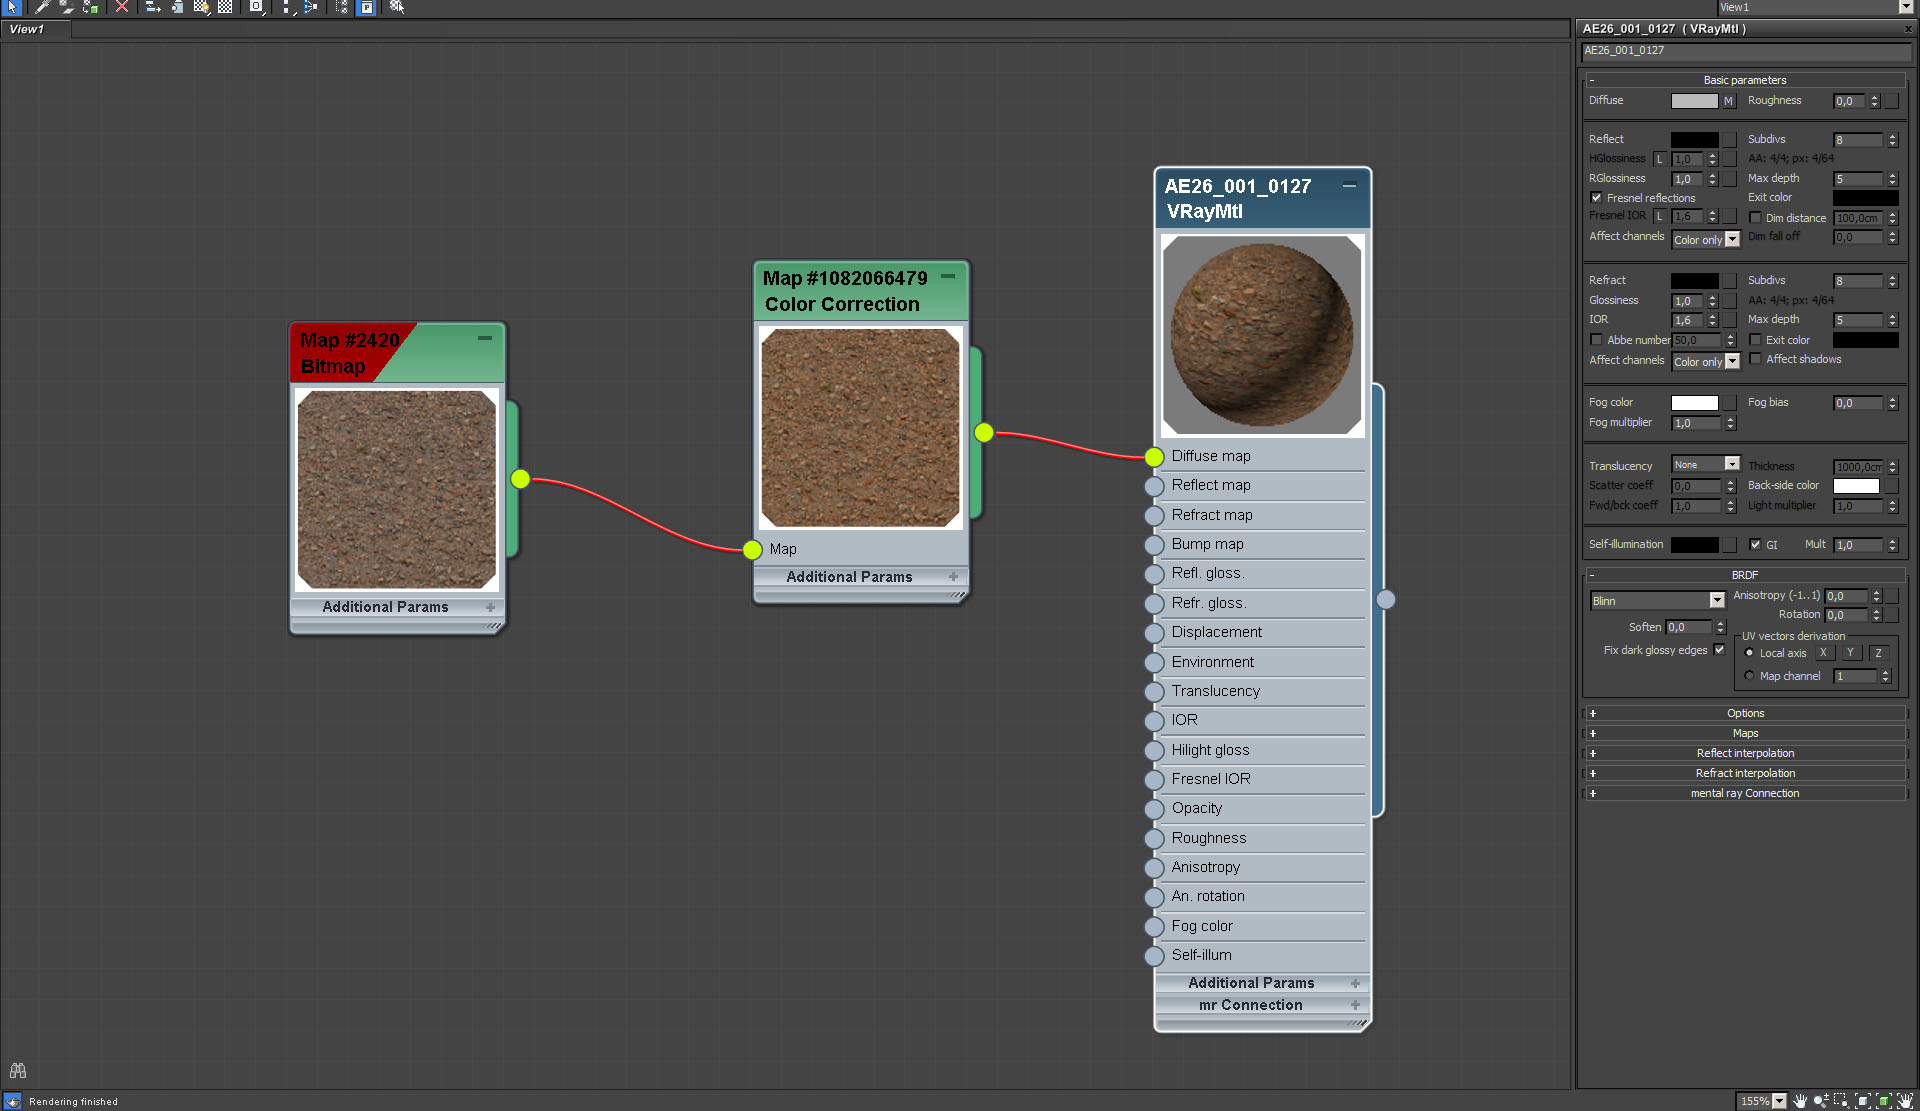
Sand material is rather simple.


Click on image to enlarge nr_ai26_s01__0031_Layer_15_807.jpg
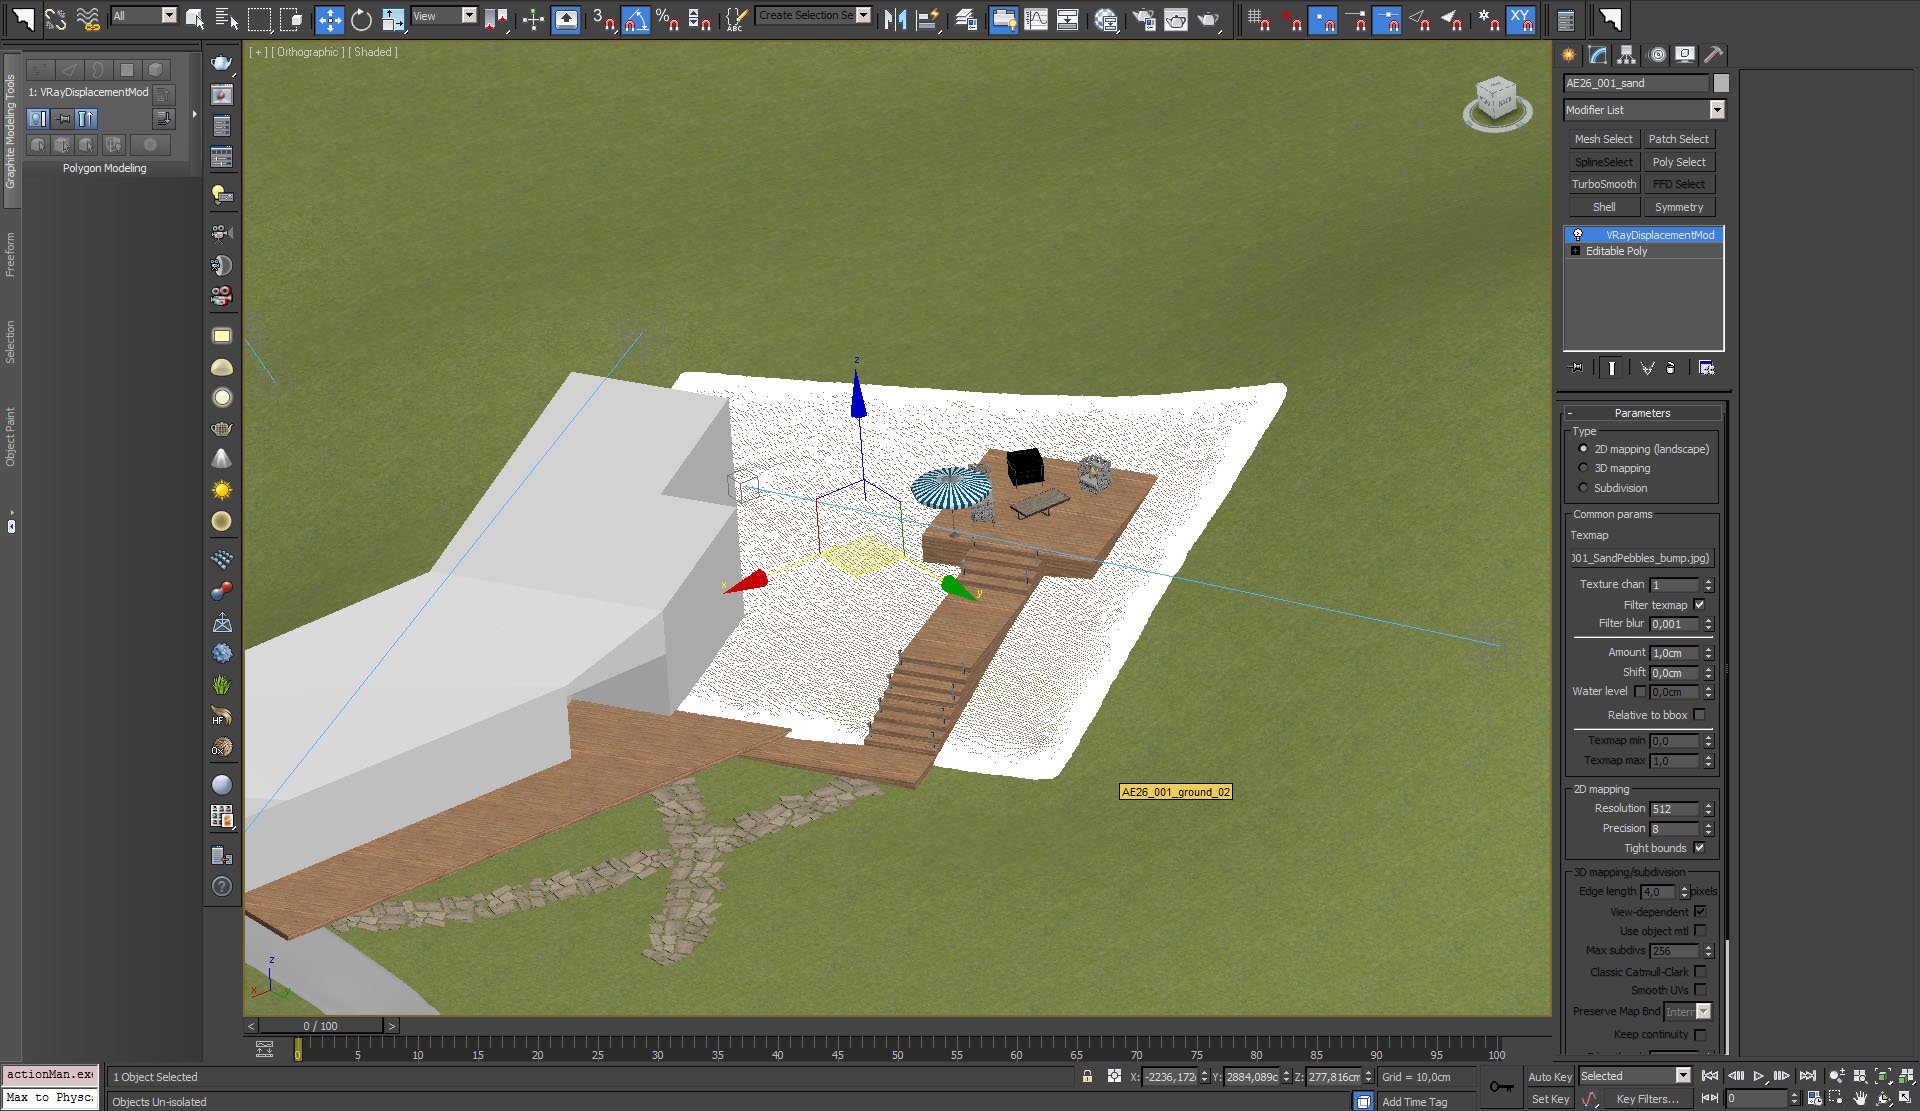
And this is where we placed our sand area.


Click on image to enlarge nr_ai26_s01__0030_Layer_16_806.jpg
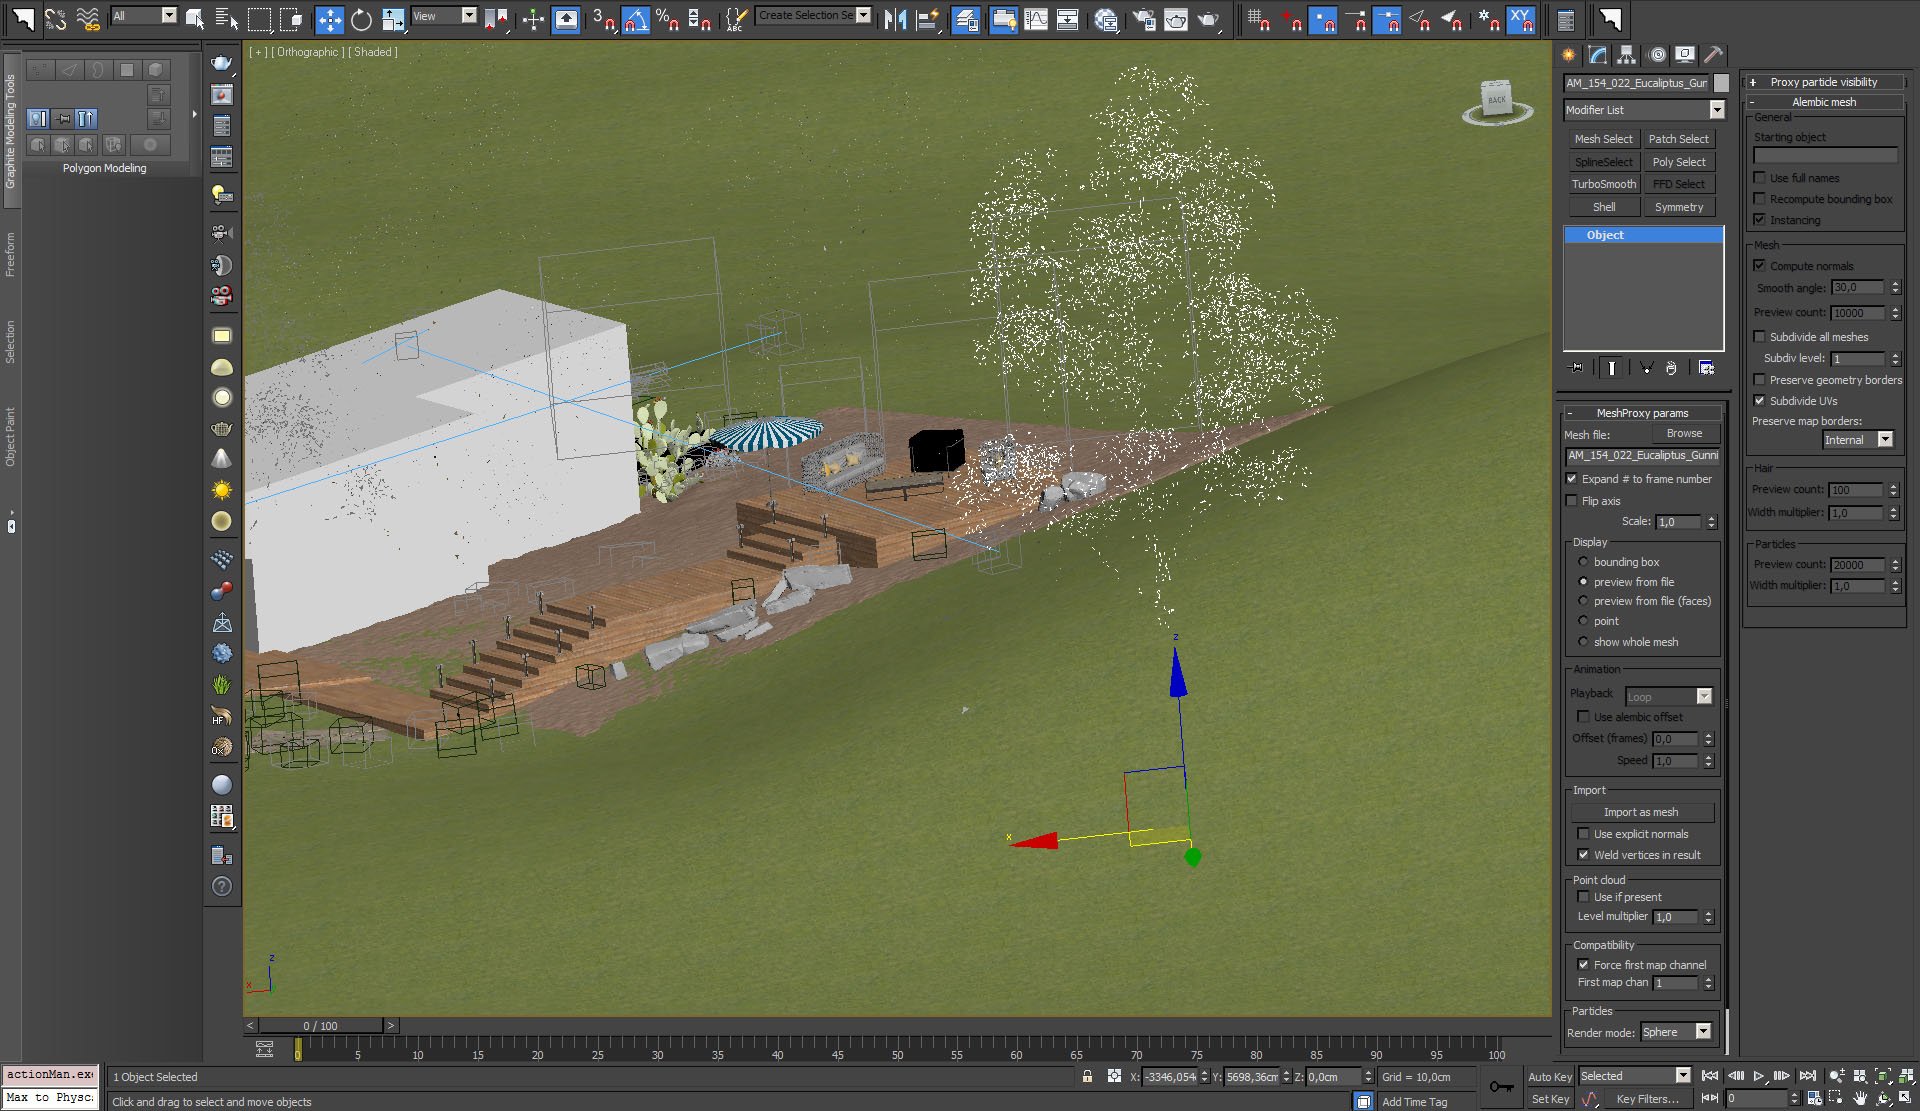
All trees and foliage are proxies in our scene. Proxy - Eucaliptus on the right.


Click on image to enlargenr_ai26_s01__0029_Layer_17_805.jpg
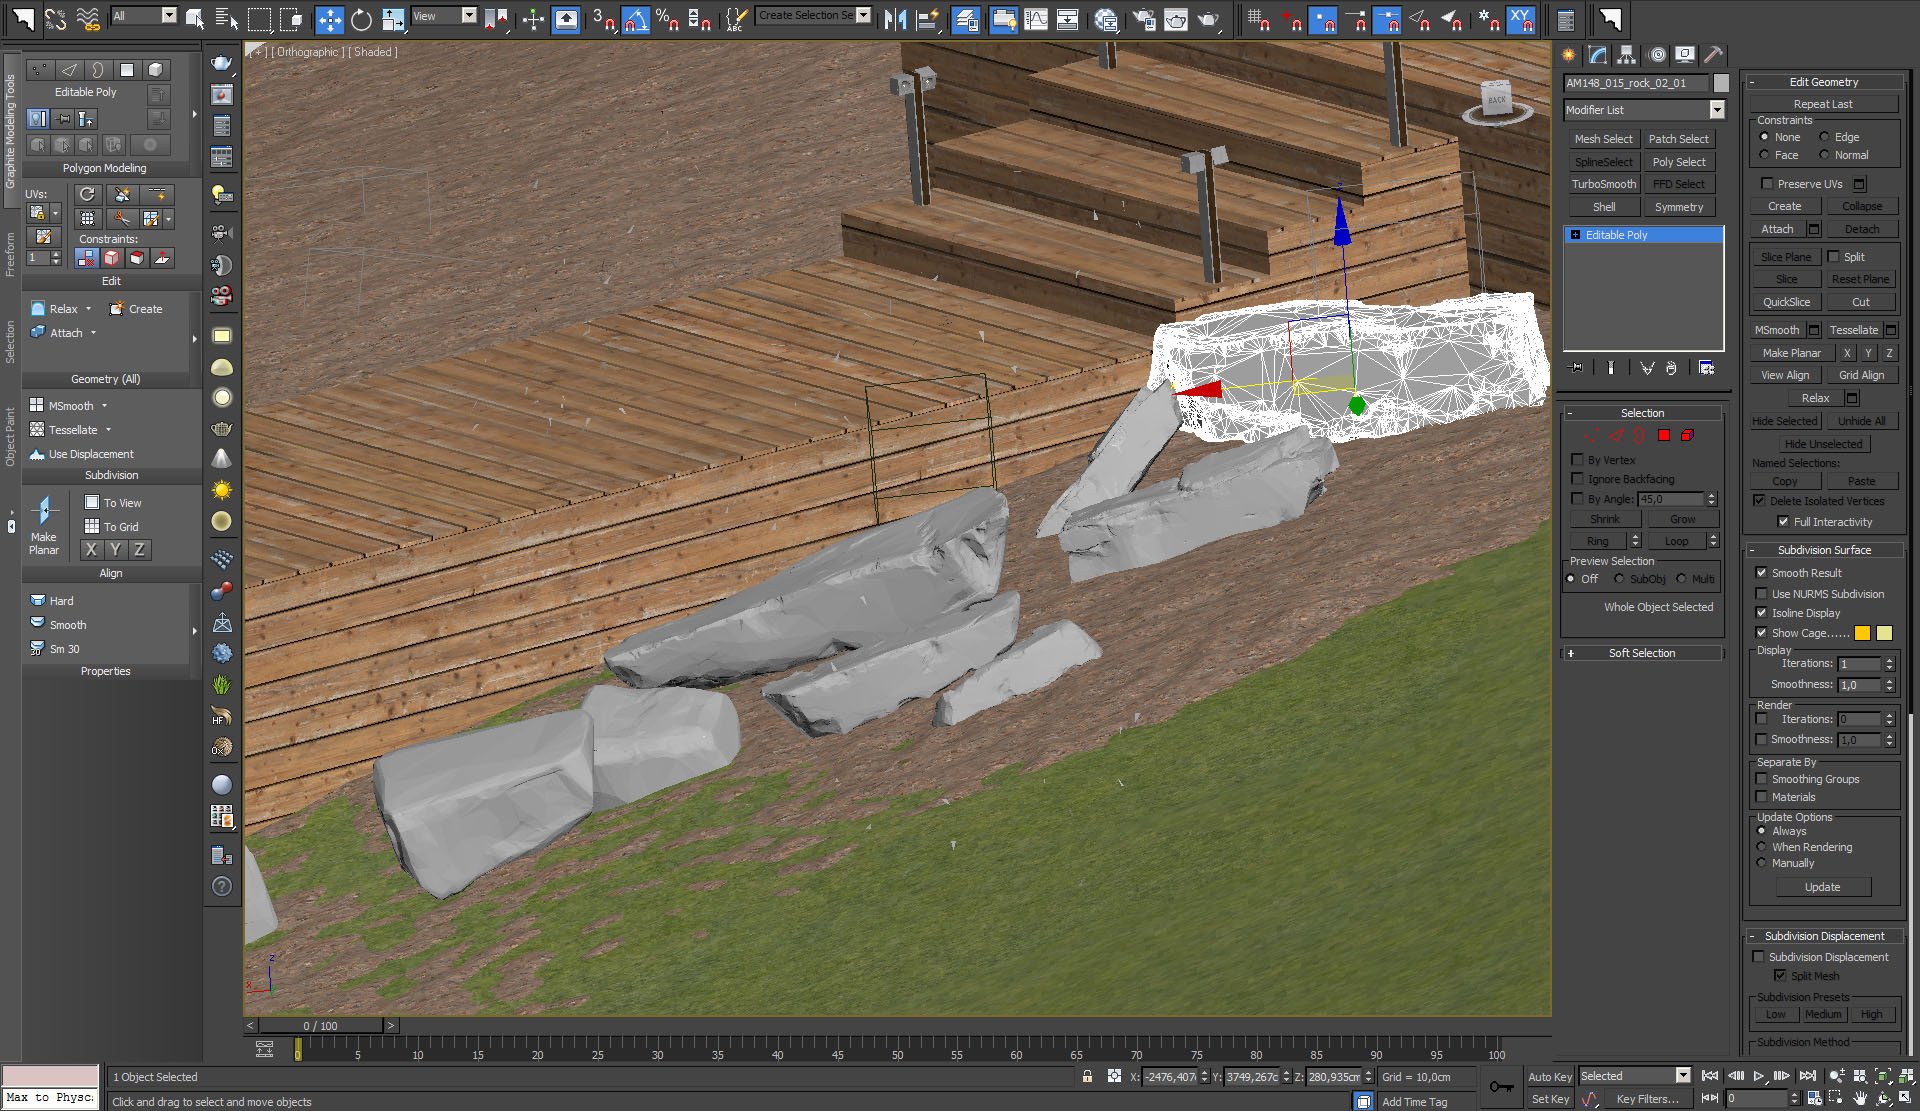
We placed some nice, natural rocks to the right of the stairs.


Click on image to enlarge nr_ai26_s01__0028_Layer_18_804.jpg
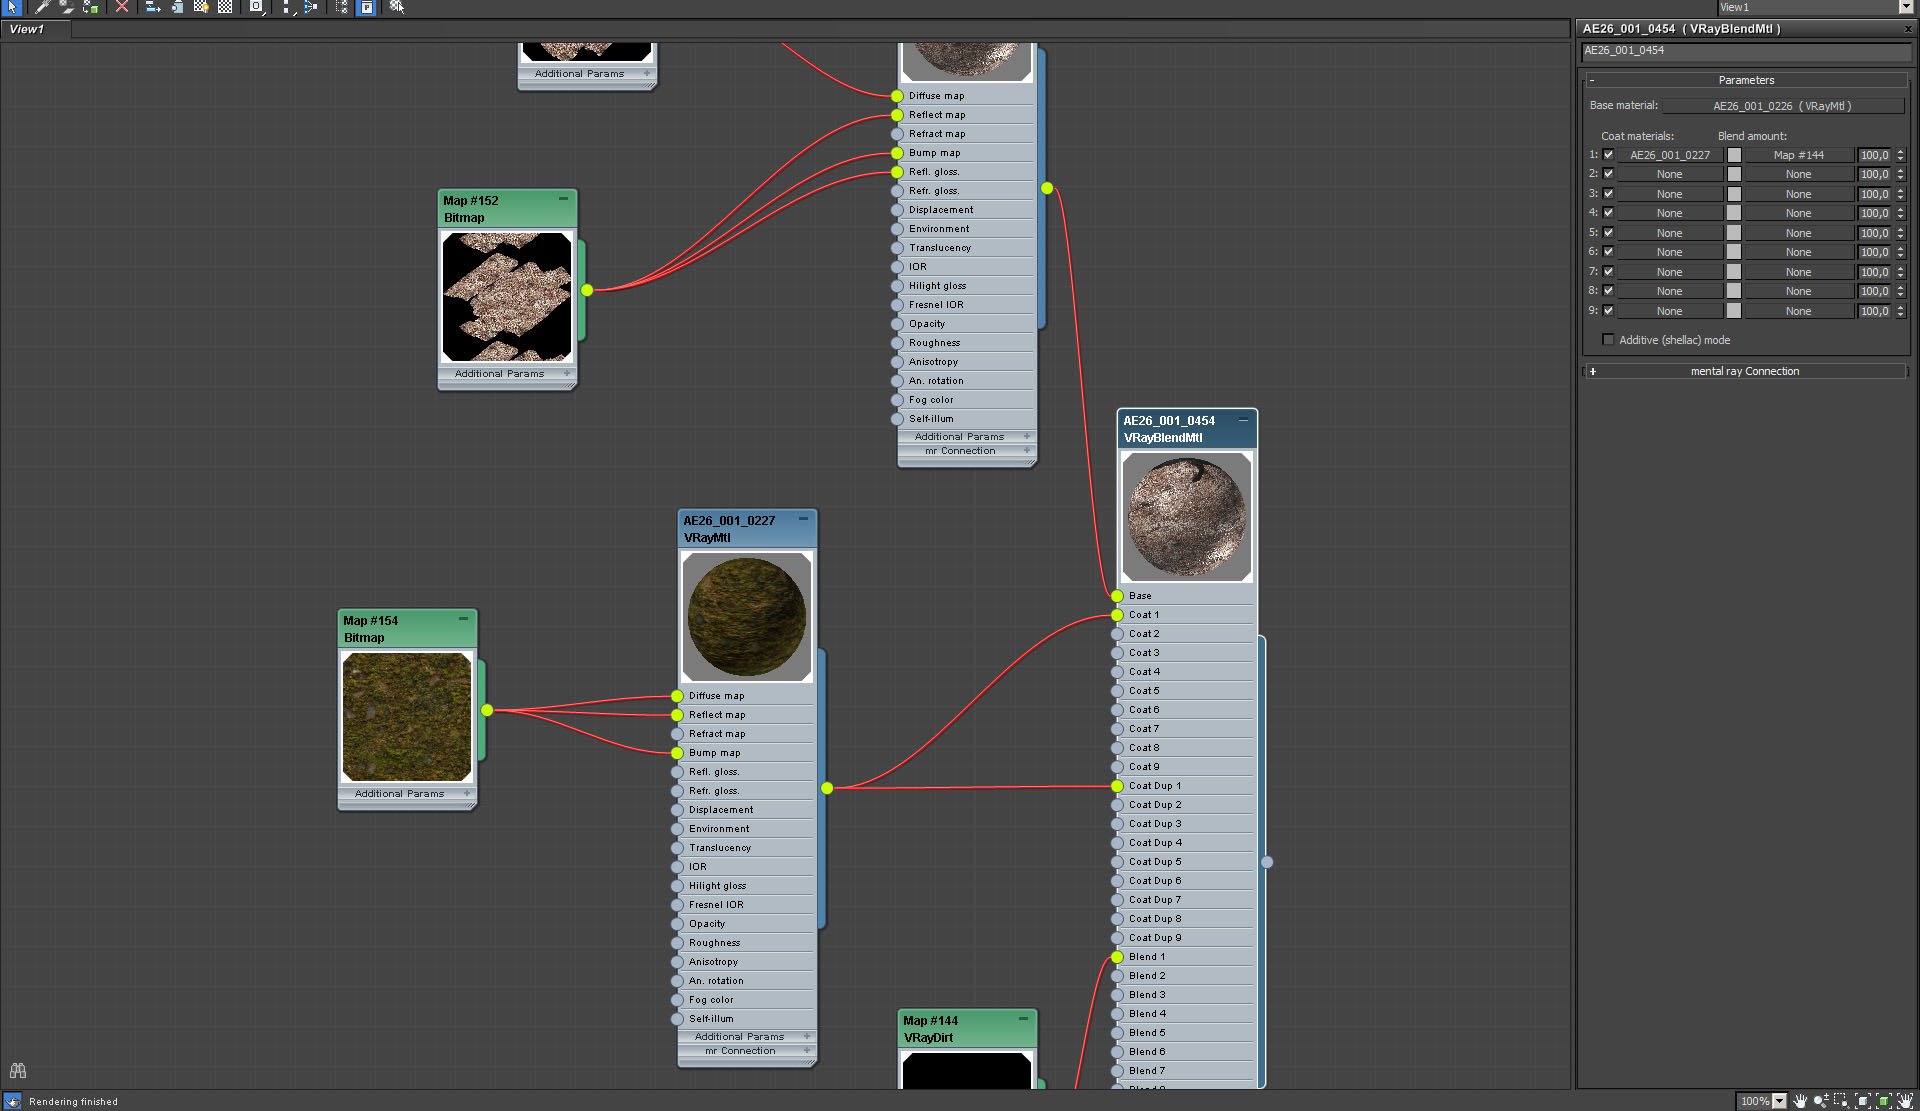
Stone material (VrayBlendMaterial).


Click on image to enlarge nr_ai26_s01__0027_Layer_19_803.jpg
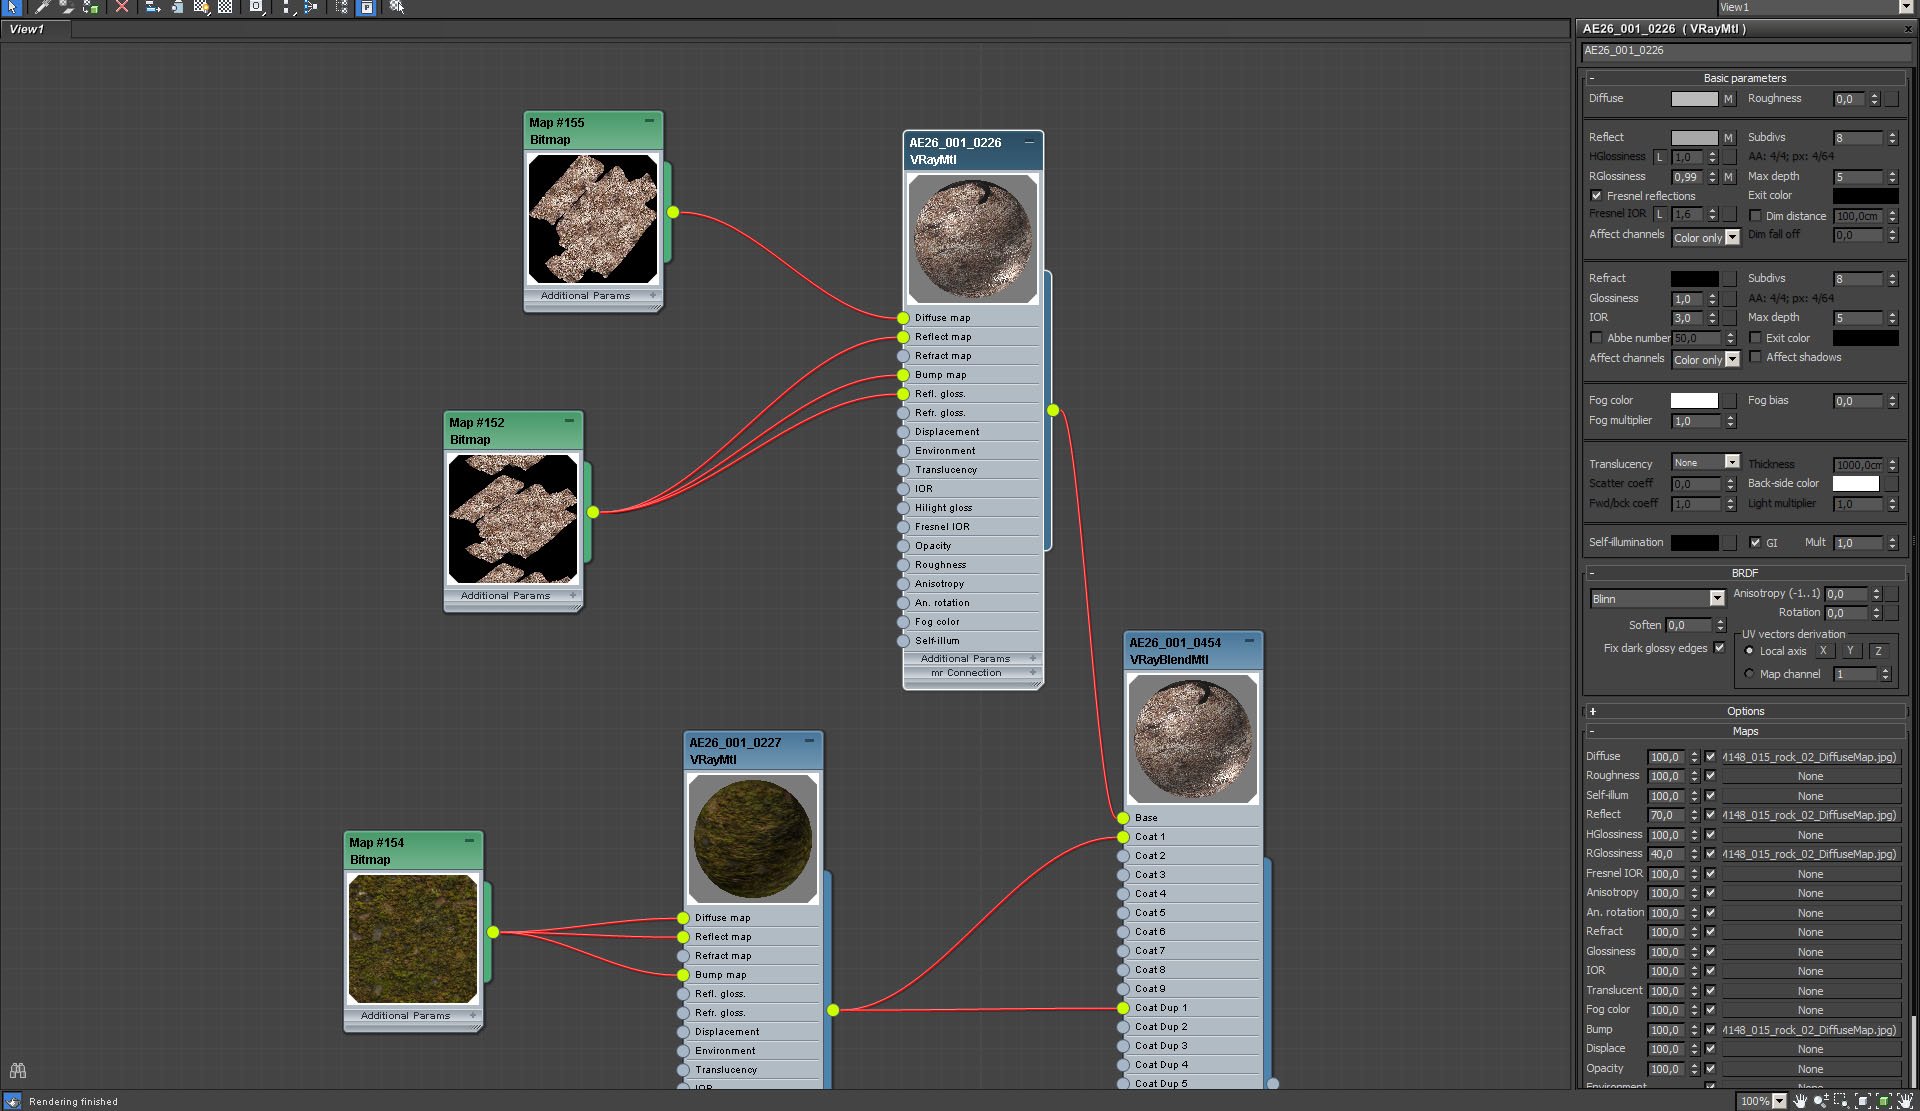
Stone material base - rock texture (VrayMaterial).


Click on image to enlarge nr_ai26_s01__0026_Layer_20_802.jpg
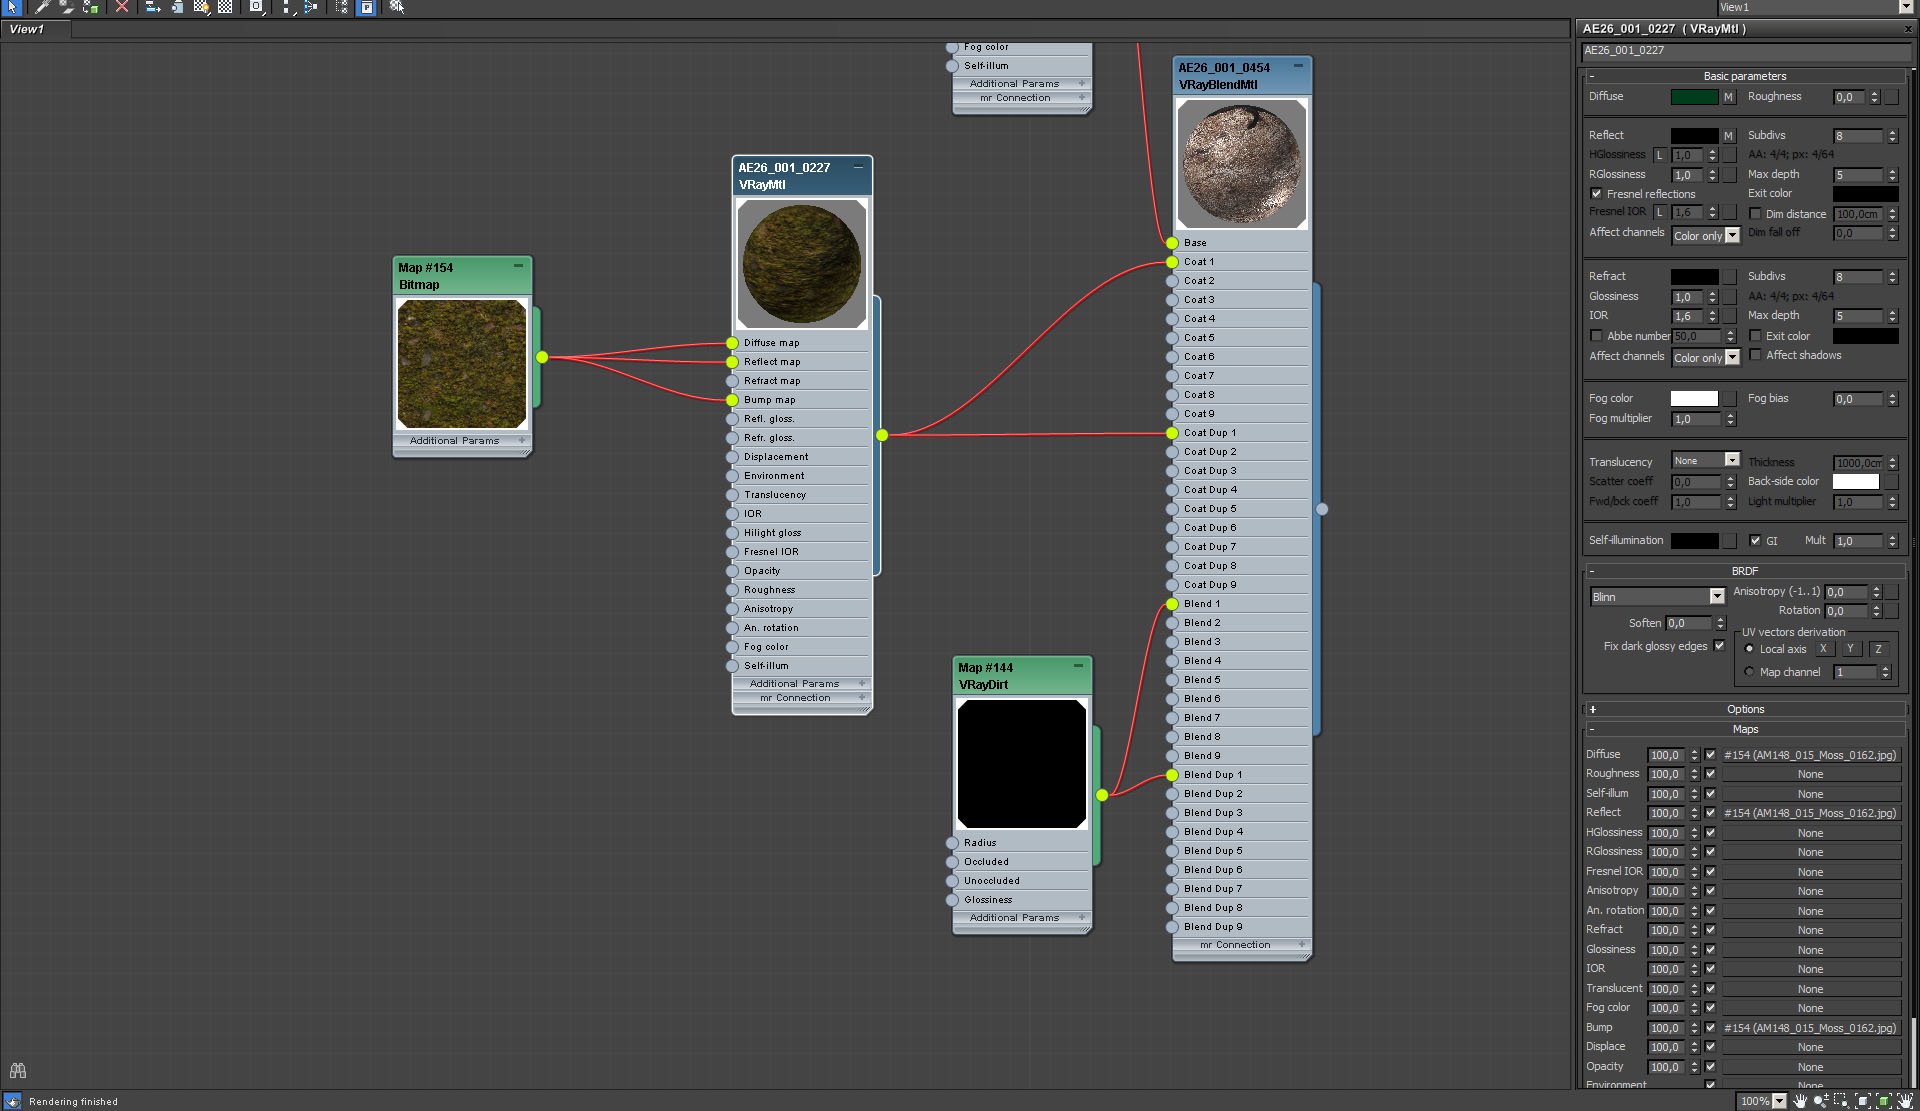
Stone material coat - mossy surface (VrayMaterial).


Click on image to enlarge nr_ai26_s01__0025_Layer_21_801.jpg
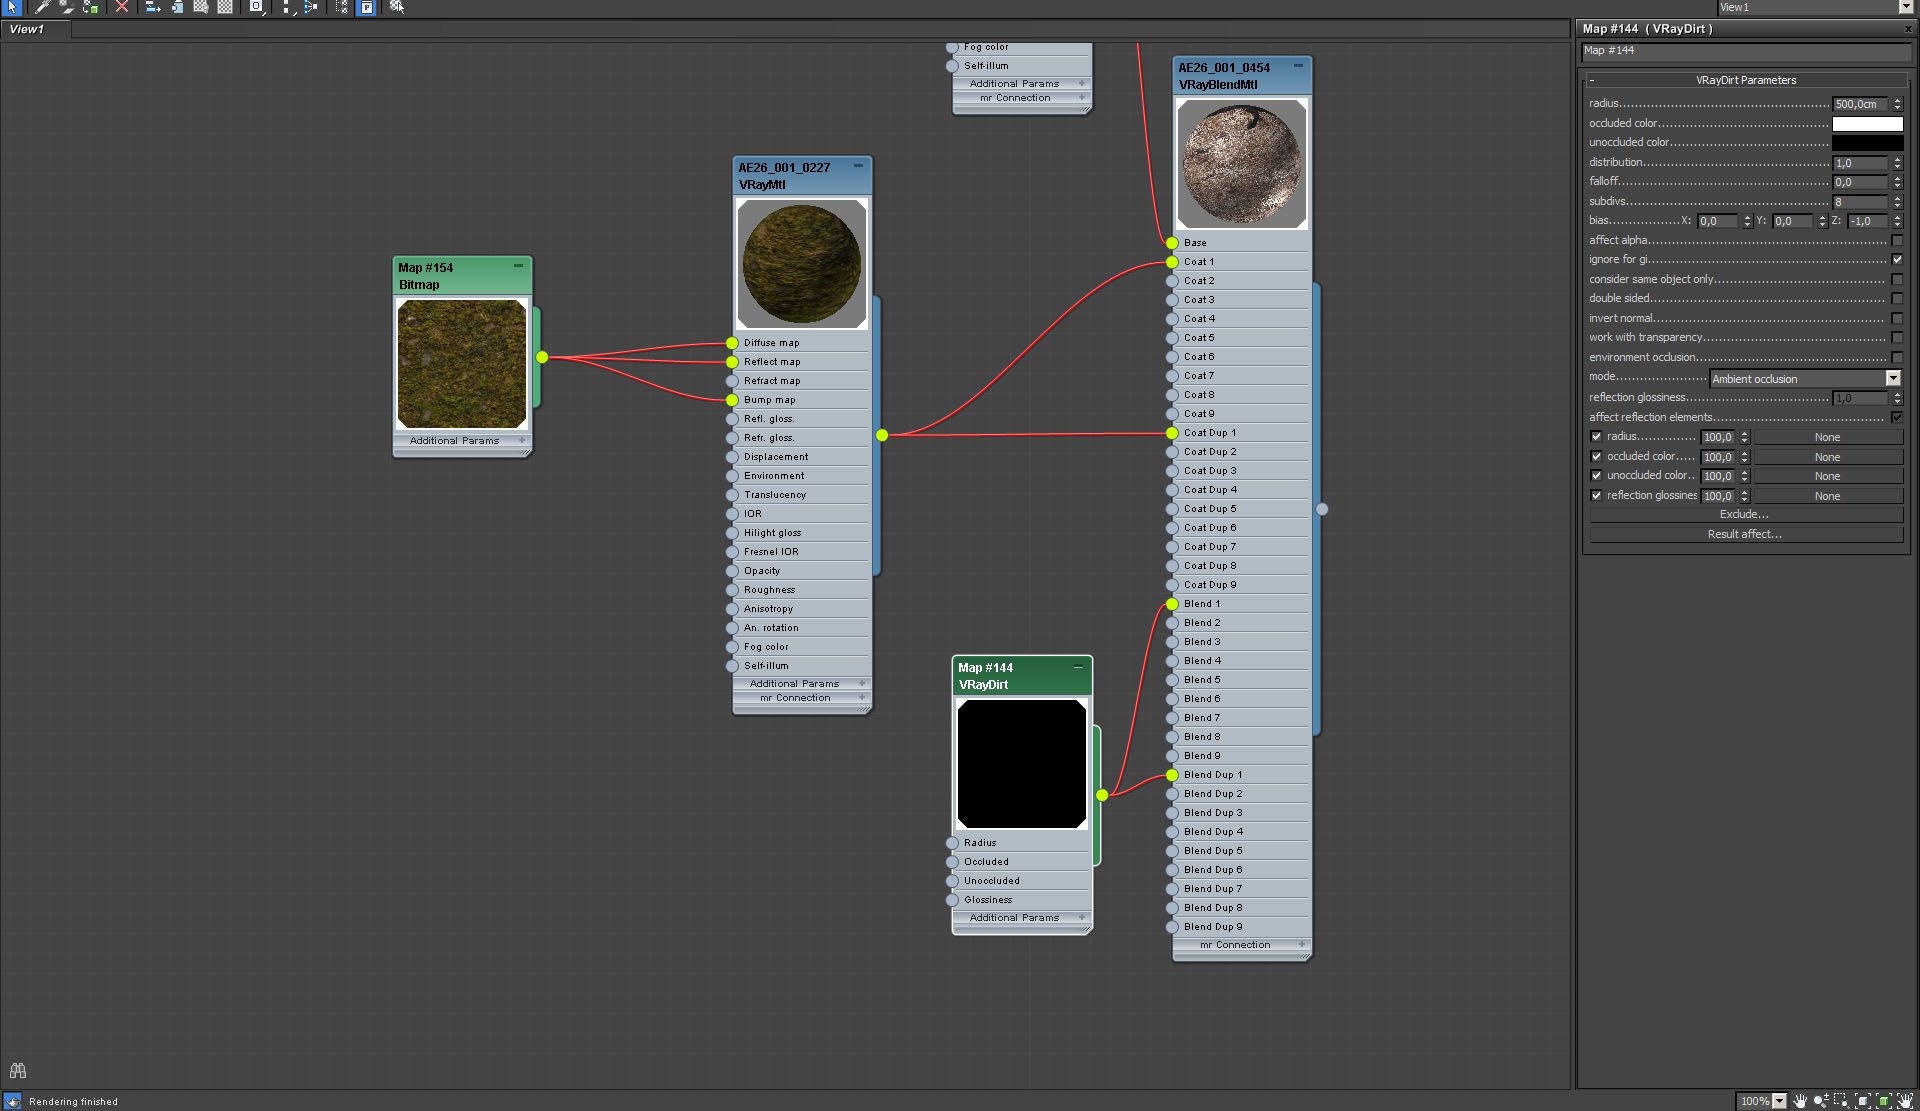
Stone material - VrayDirt settings.


Click on image to enlarge nr_ai26_s01__0024_Layer_22_800.jpg
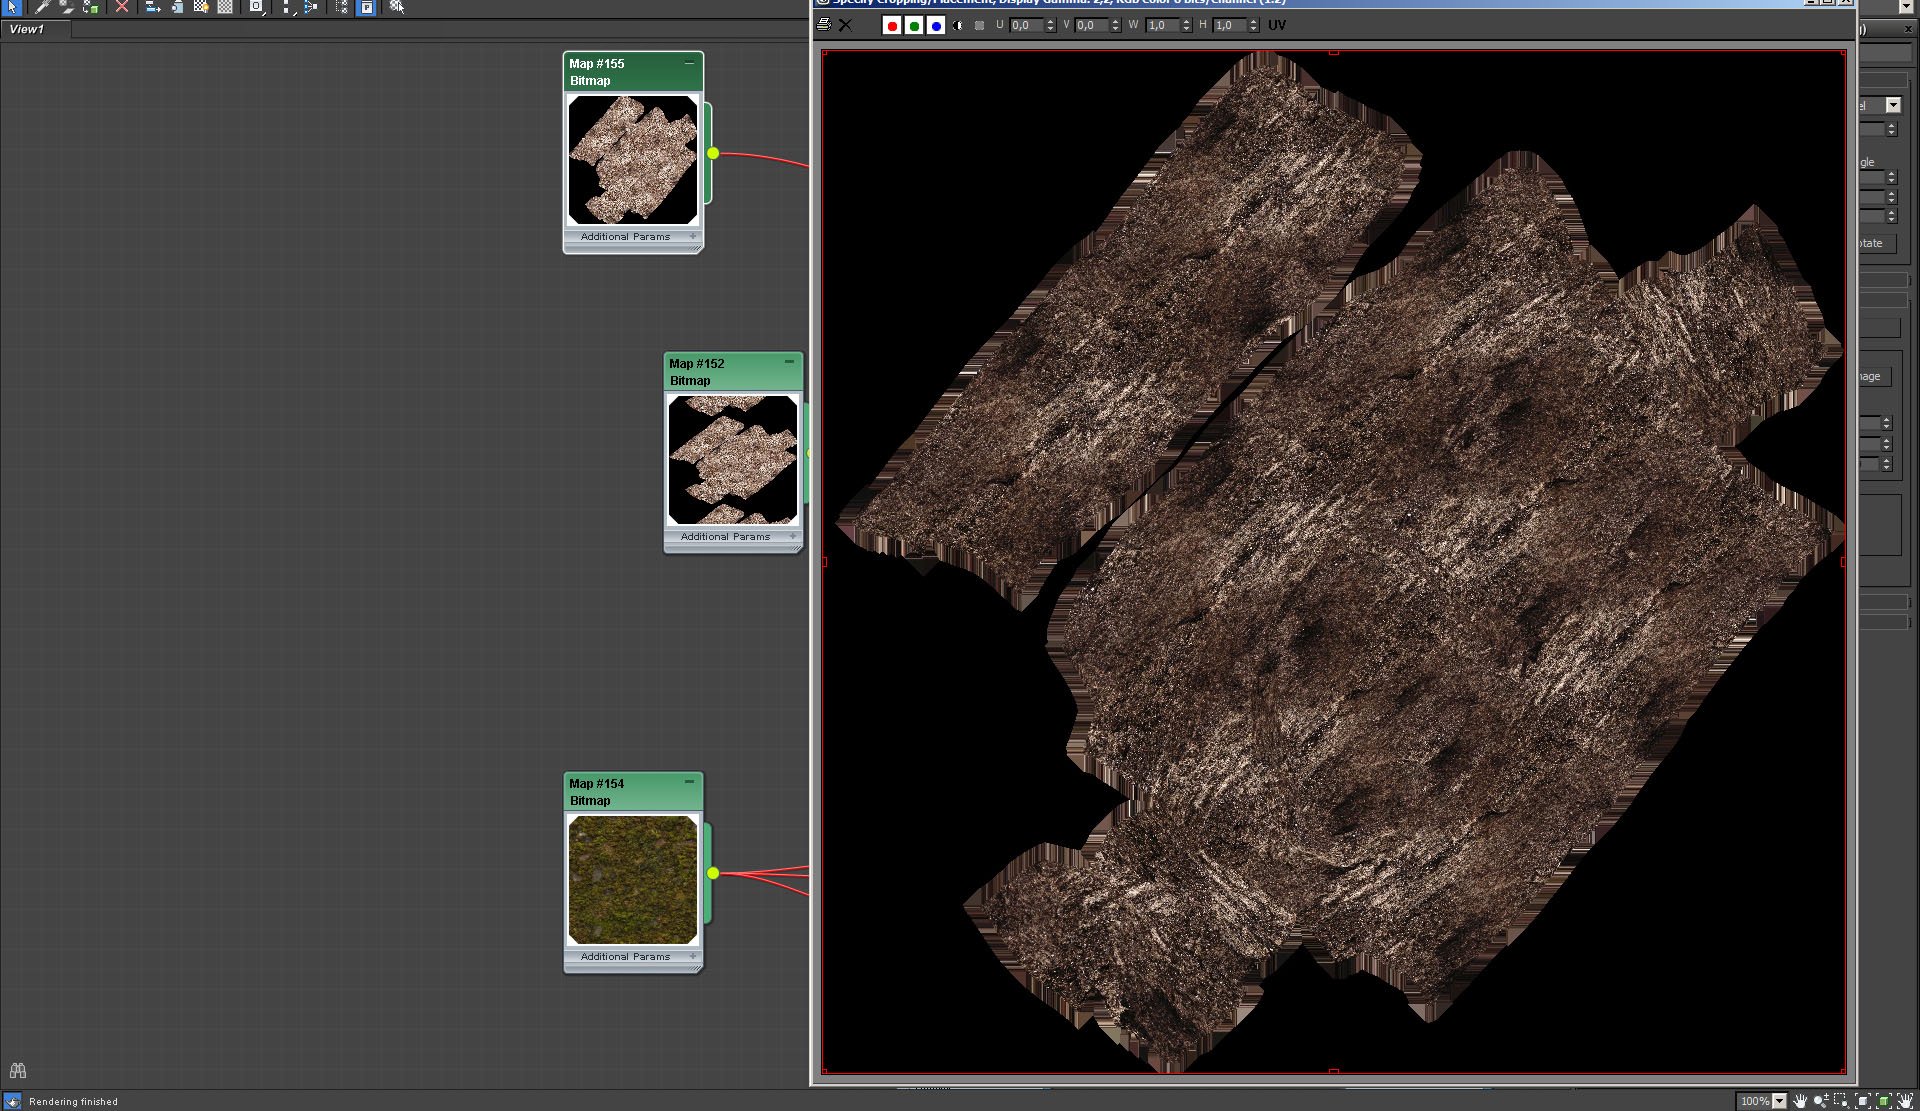
Stone material - rocky surface map.


Click on image to enlarge nr_ai26_s01__0023_Layer_23_799.jpg
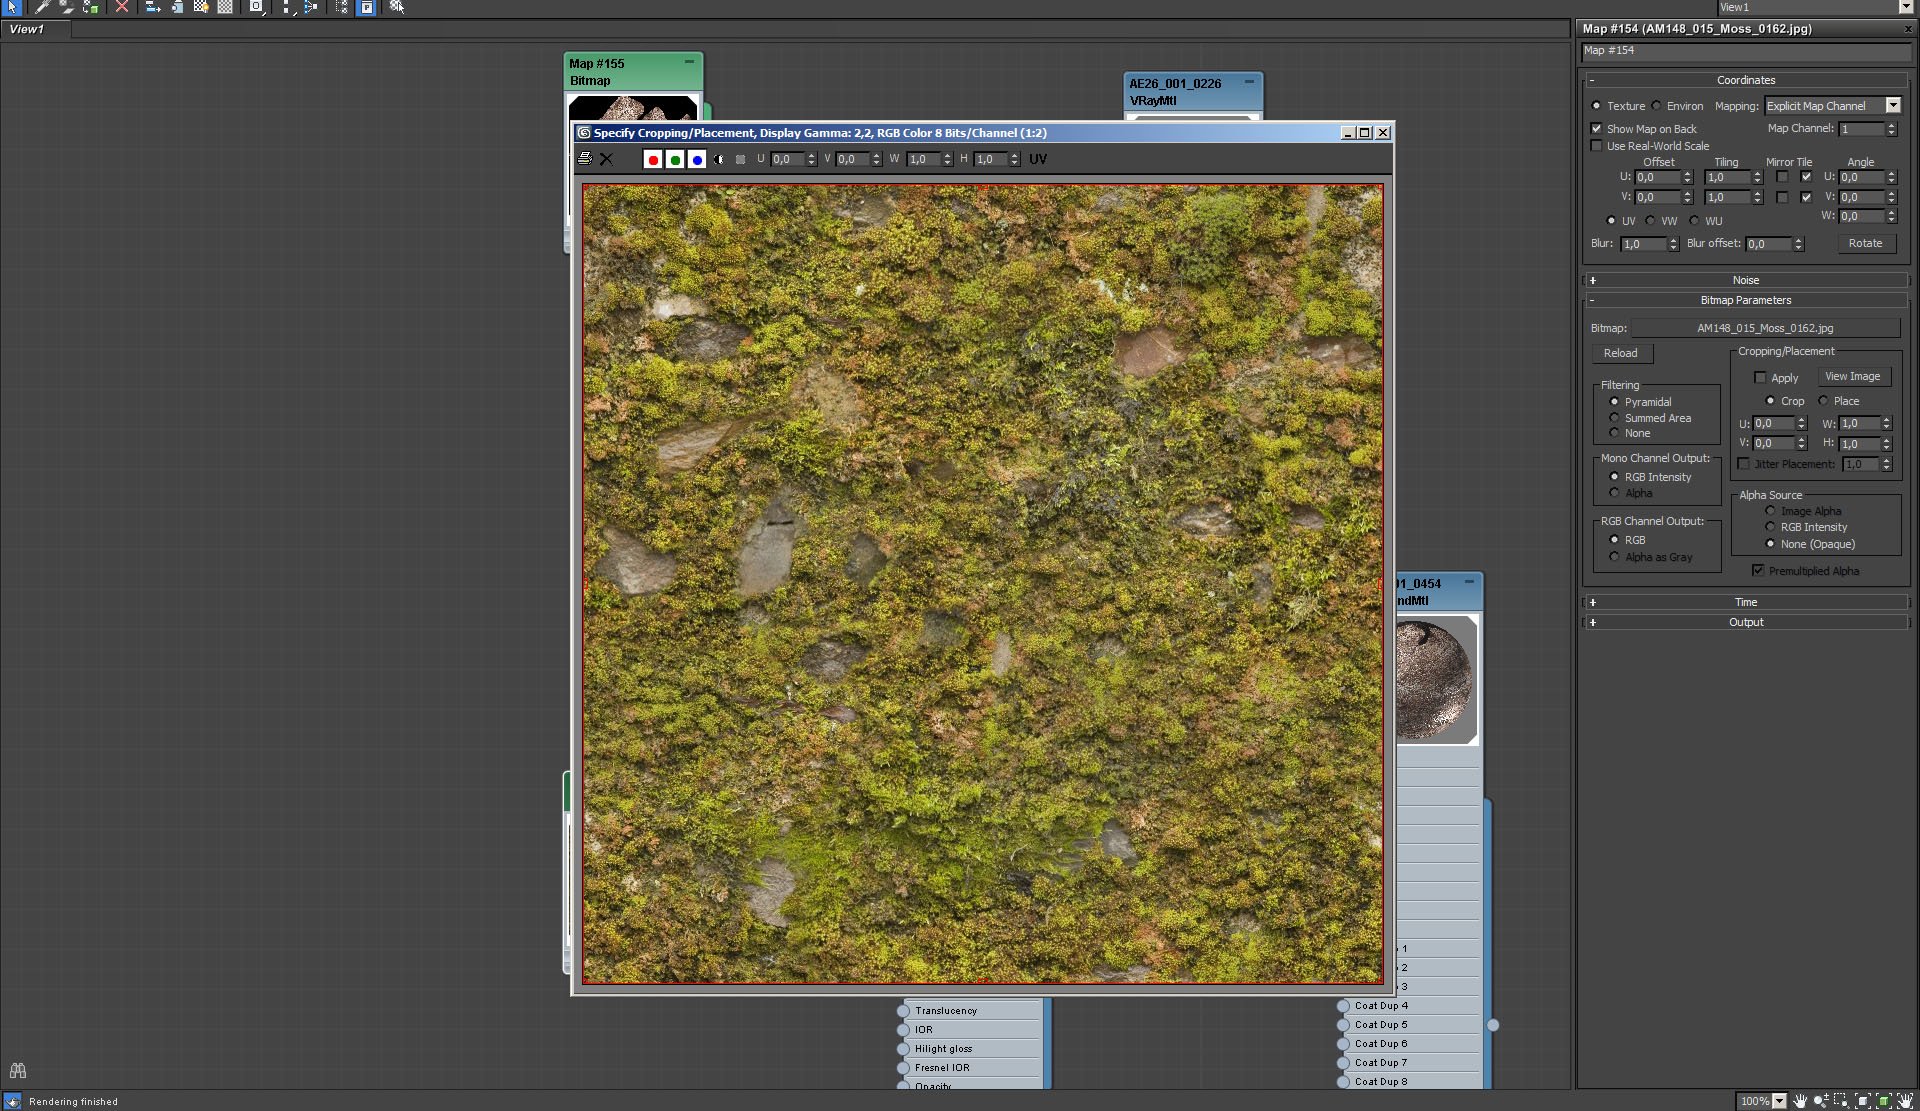
Stone material - moss bitmap.


Click on image to enlargenr_ai26_s01__0021_Layer_25_797.jpg
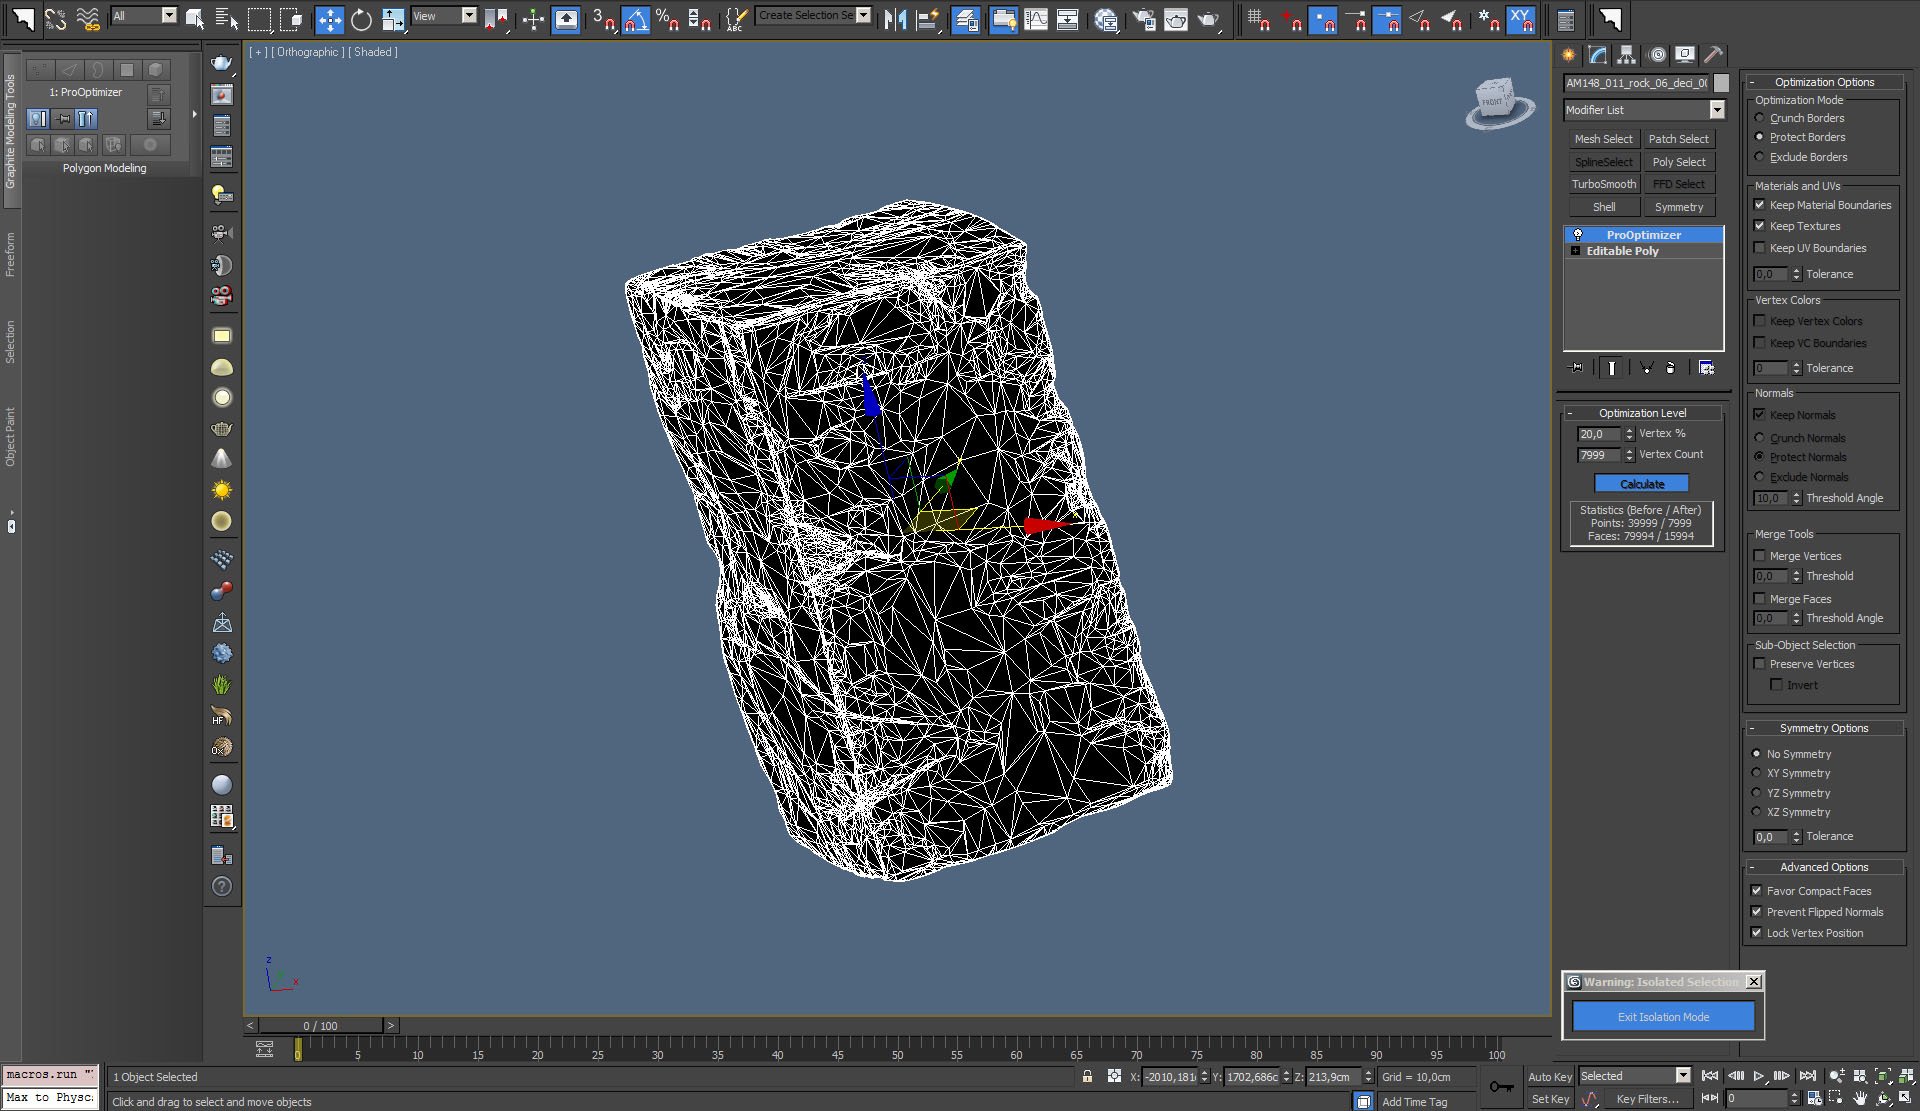
We used ProOptimizer to lower polycount of some rocks. Here you can see rock mesh with ProOptimizer on.


Click on image to enlargenr_ai26_s01__0020_Layer_26_796.jpg
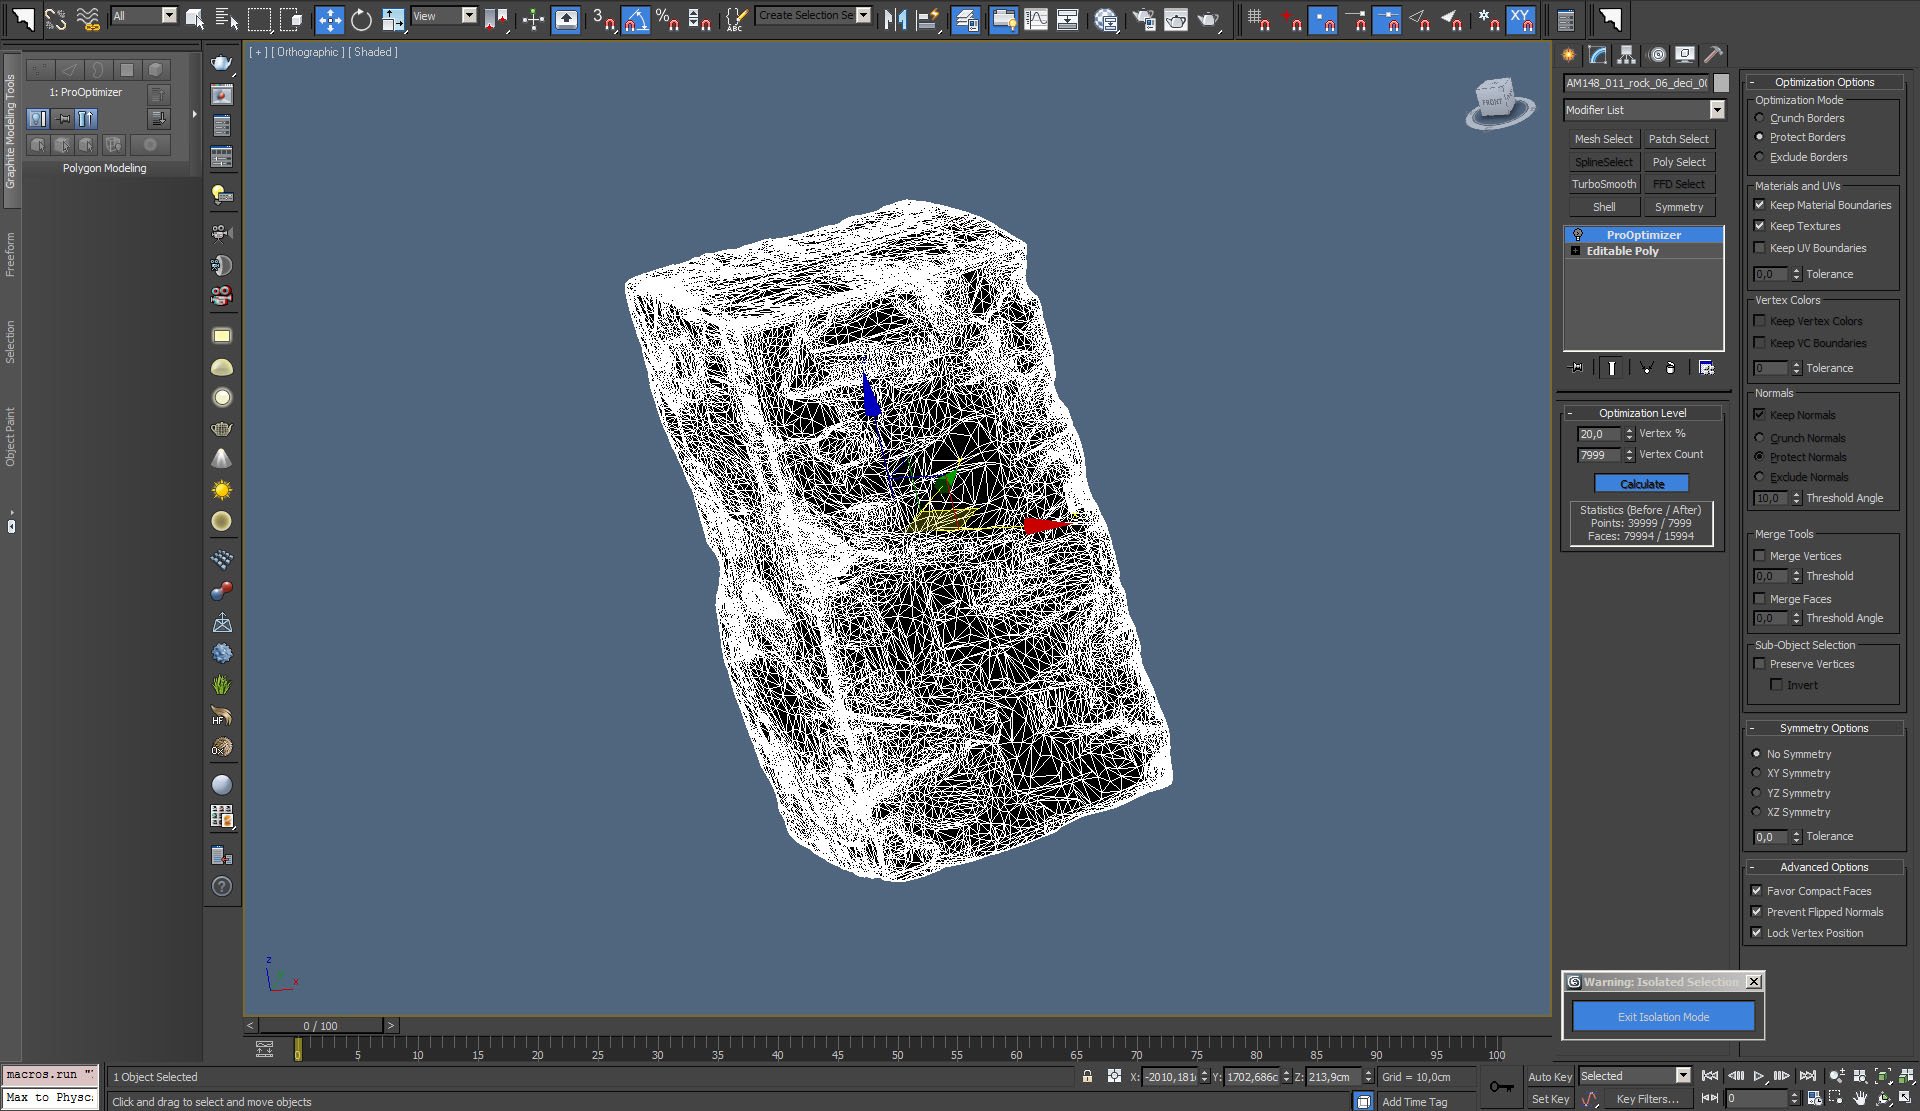
And here is the mesh without ProOptimizer. Five times more faces!


Click on image to enlarge
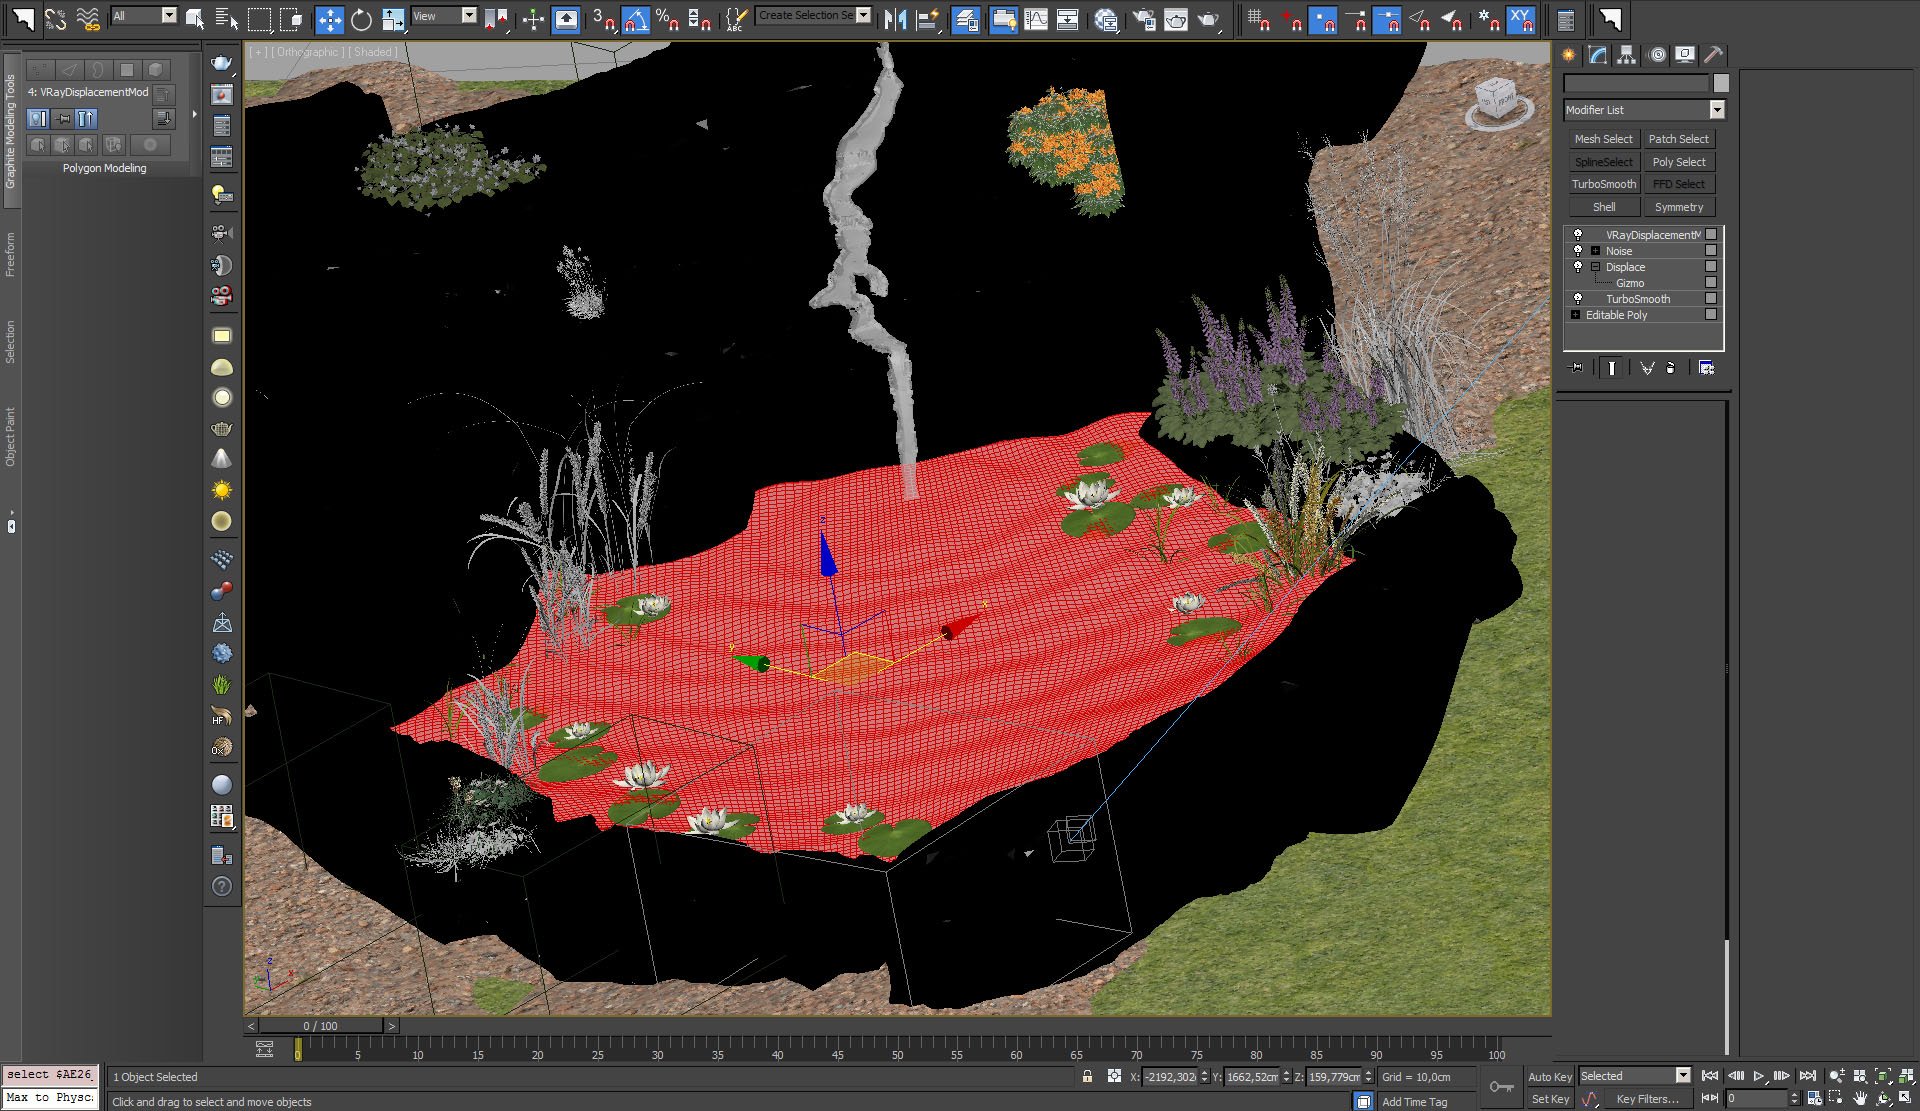
nr_ai26_s01__0018_Layer_28_794.jpg

Water surface was achieved with modifiers - turbosmooth, noise and displacement.


Click on image to enlargenr_ai26_s01__0016_Layer_30_792.jpg
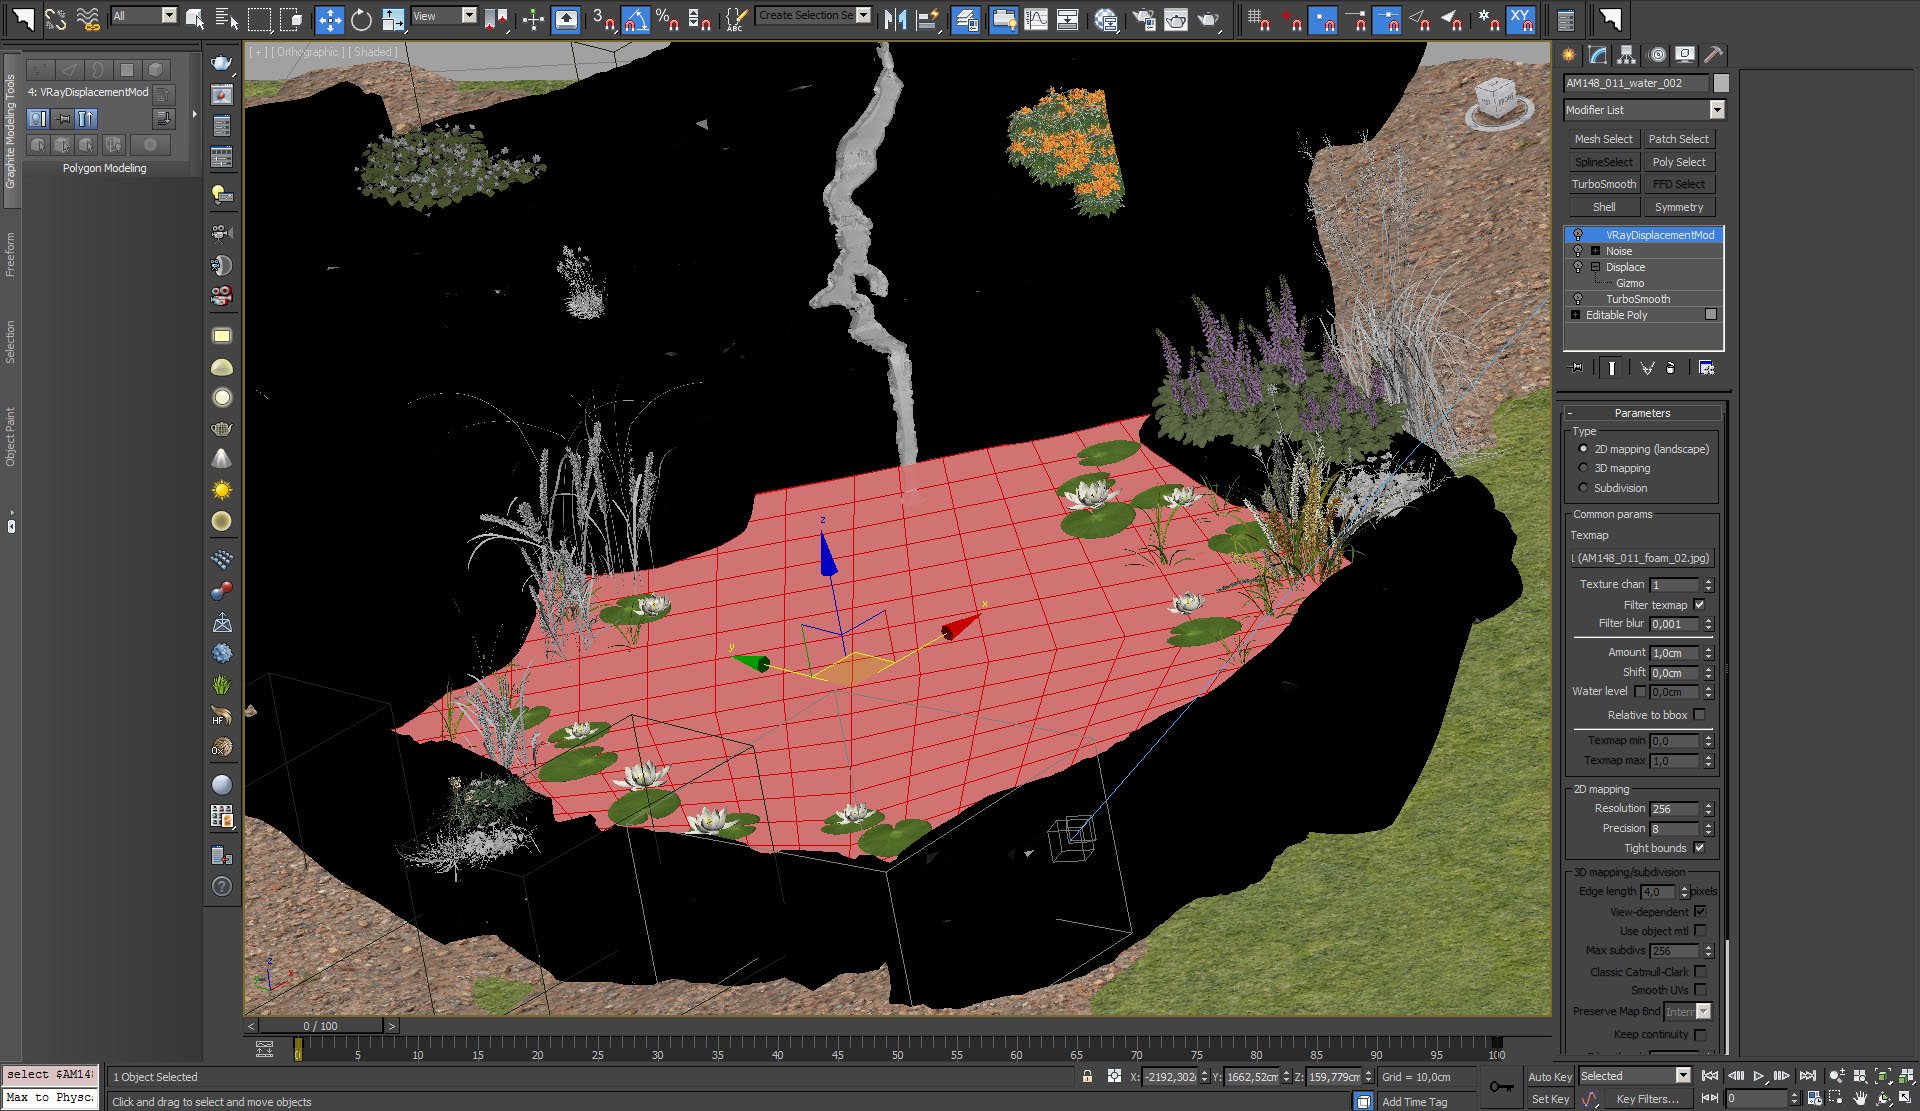
Basic mesh is very simple.


Click on image to enlargenr_ai26_s01__0015_Layer_31_791.jpg
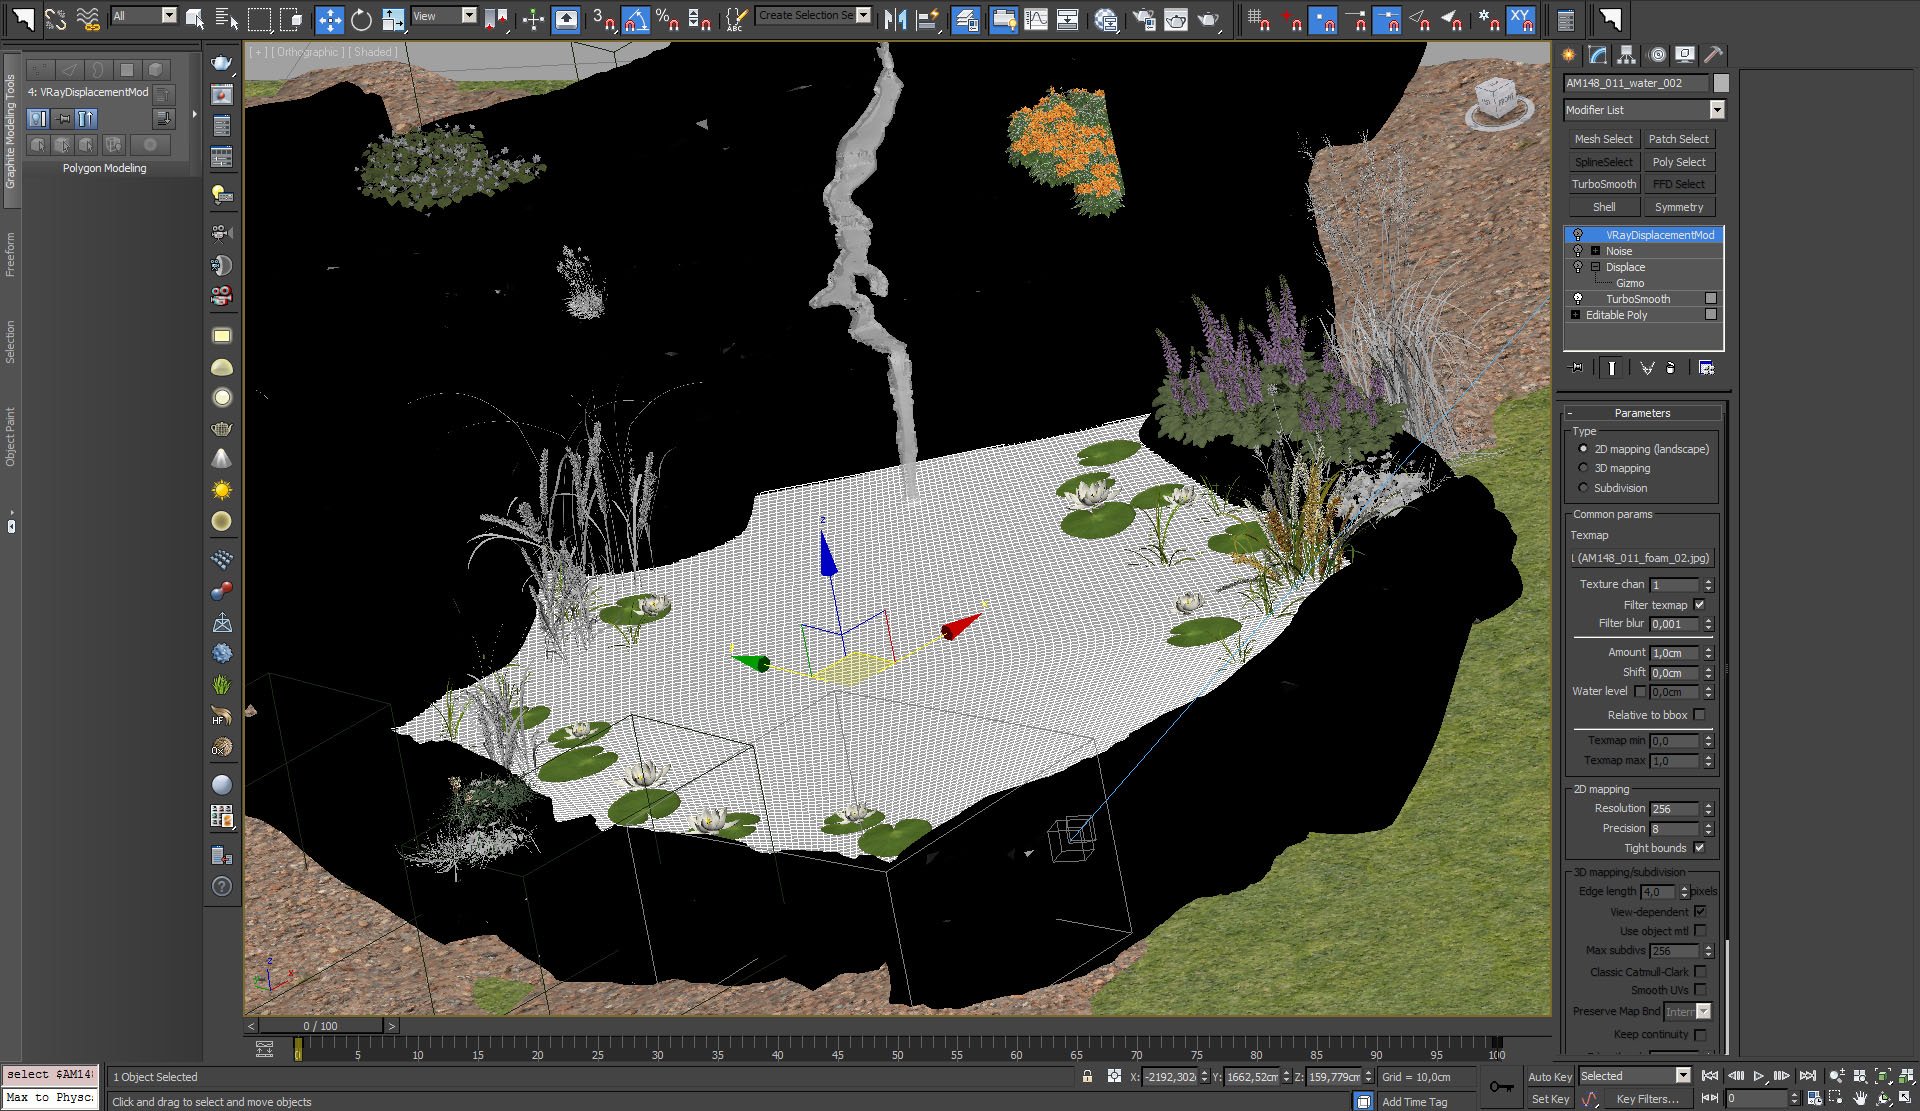
Then we added turbosmooth modifier.


Click on image to enlargenr_ai26_s01__0014_Layer_32_790.jpg
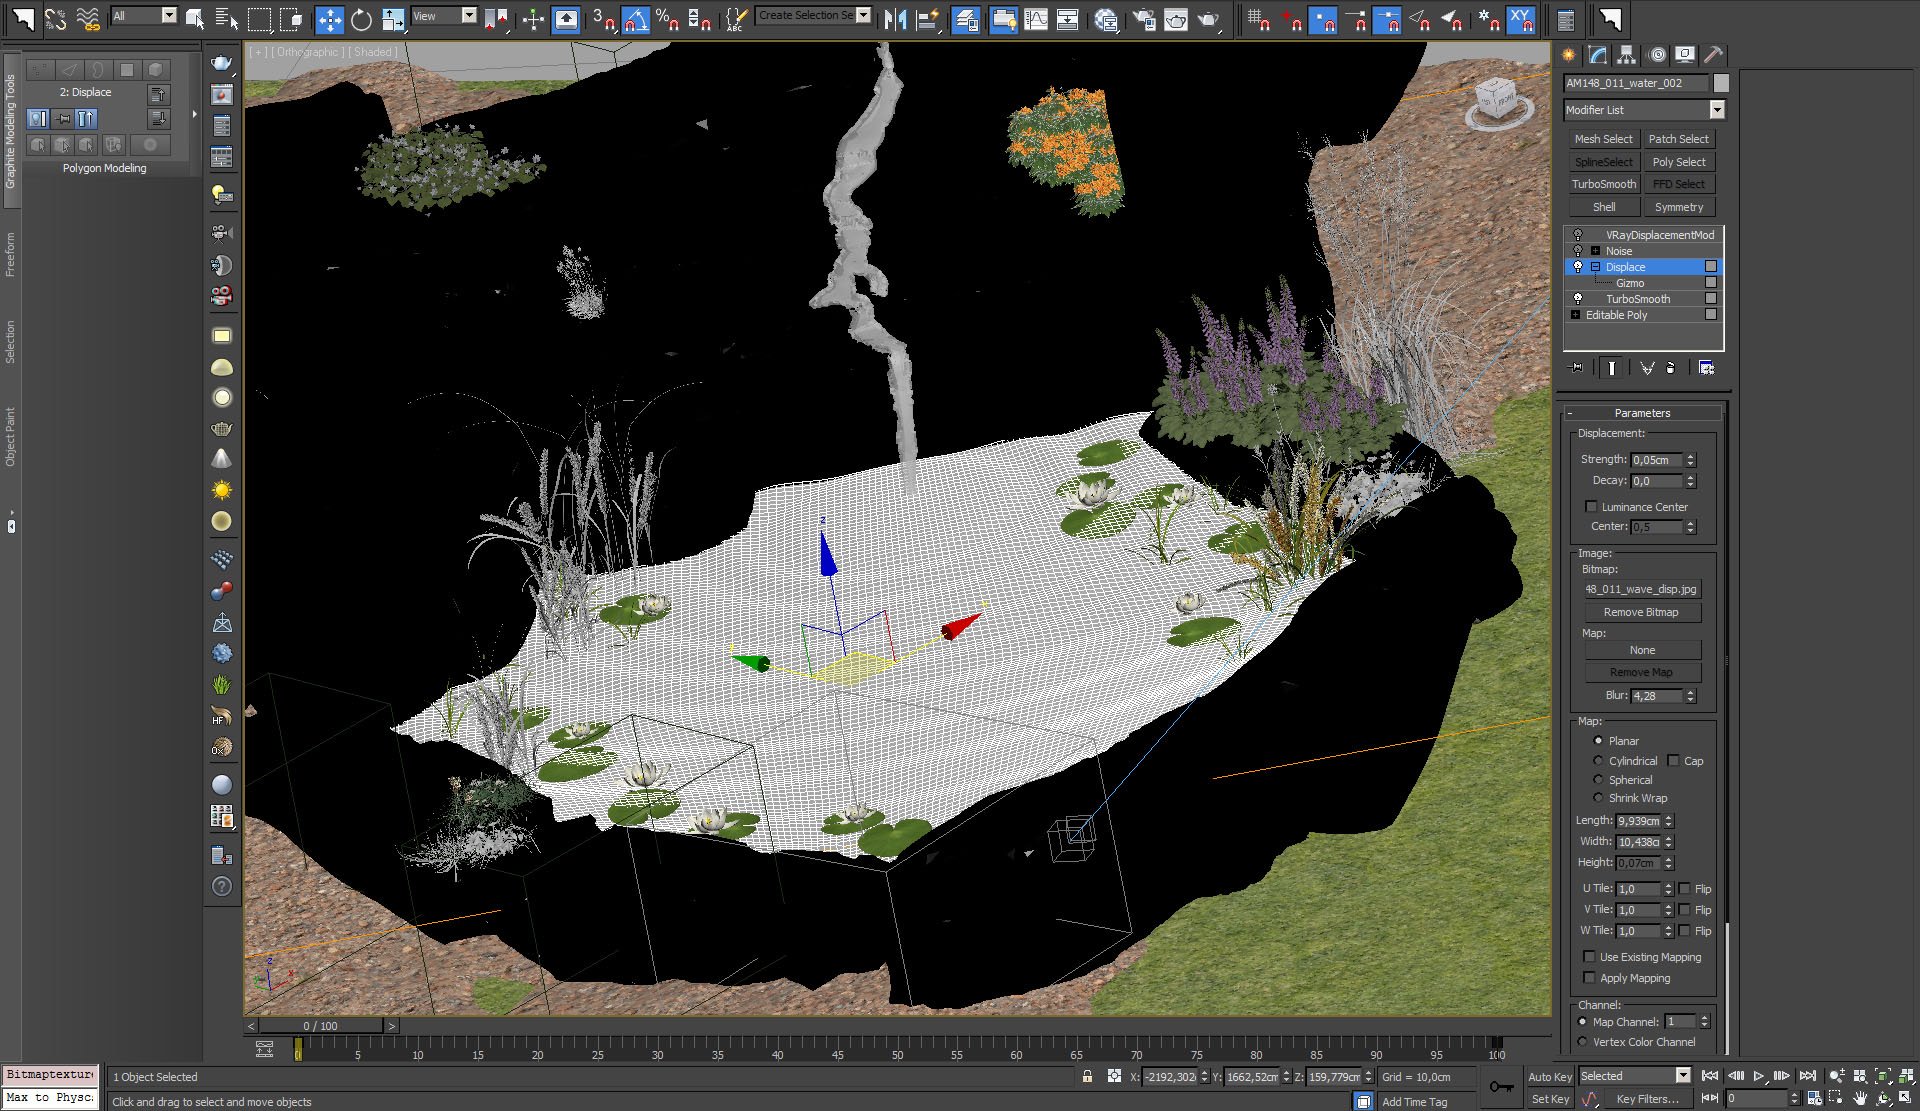
And we displaced surface with Displace modifier with waves bitmap.


Click on image to enlargenr_ai26_s01__0013_Layer_33_789.jpg
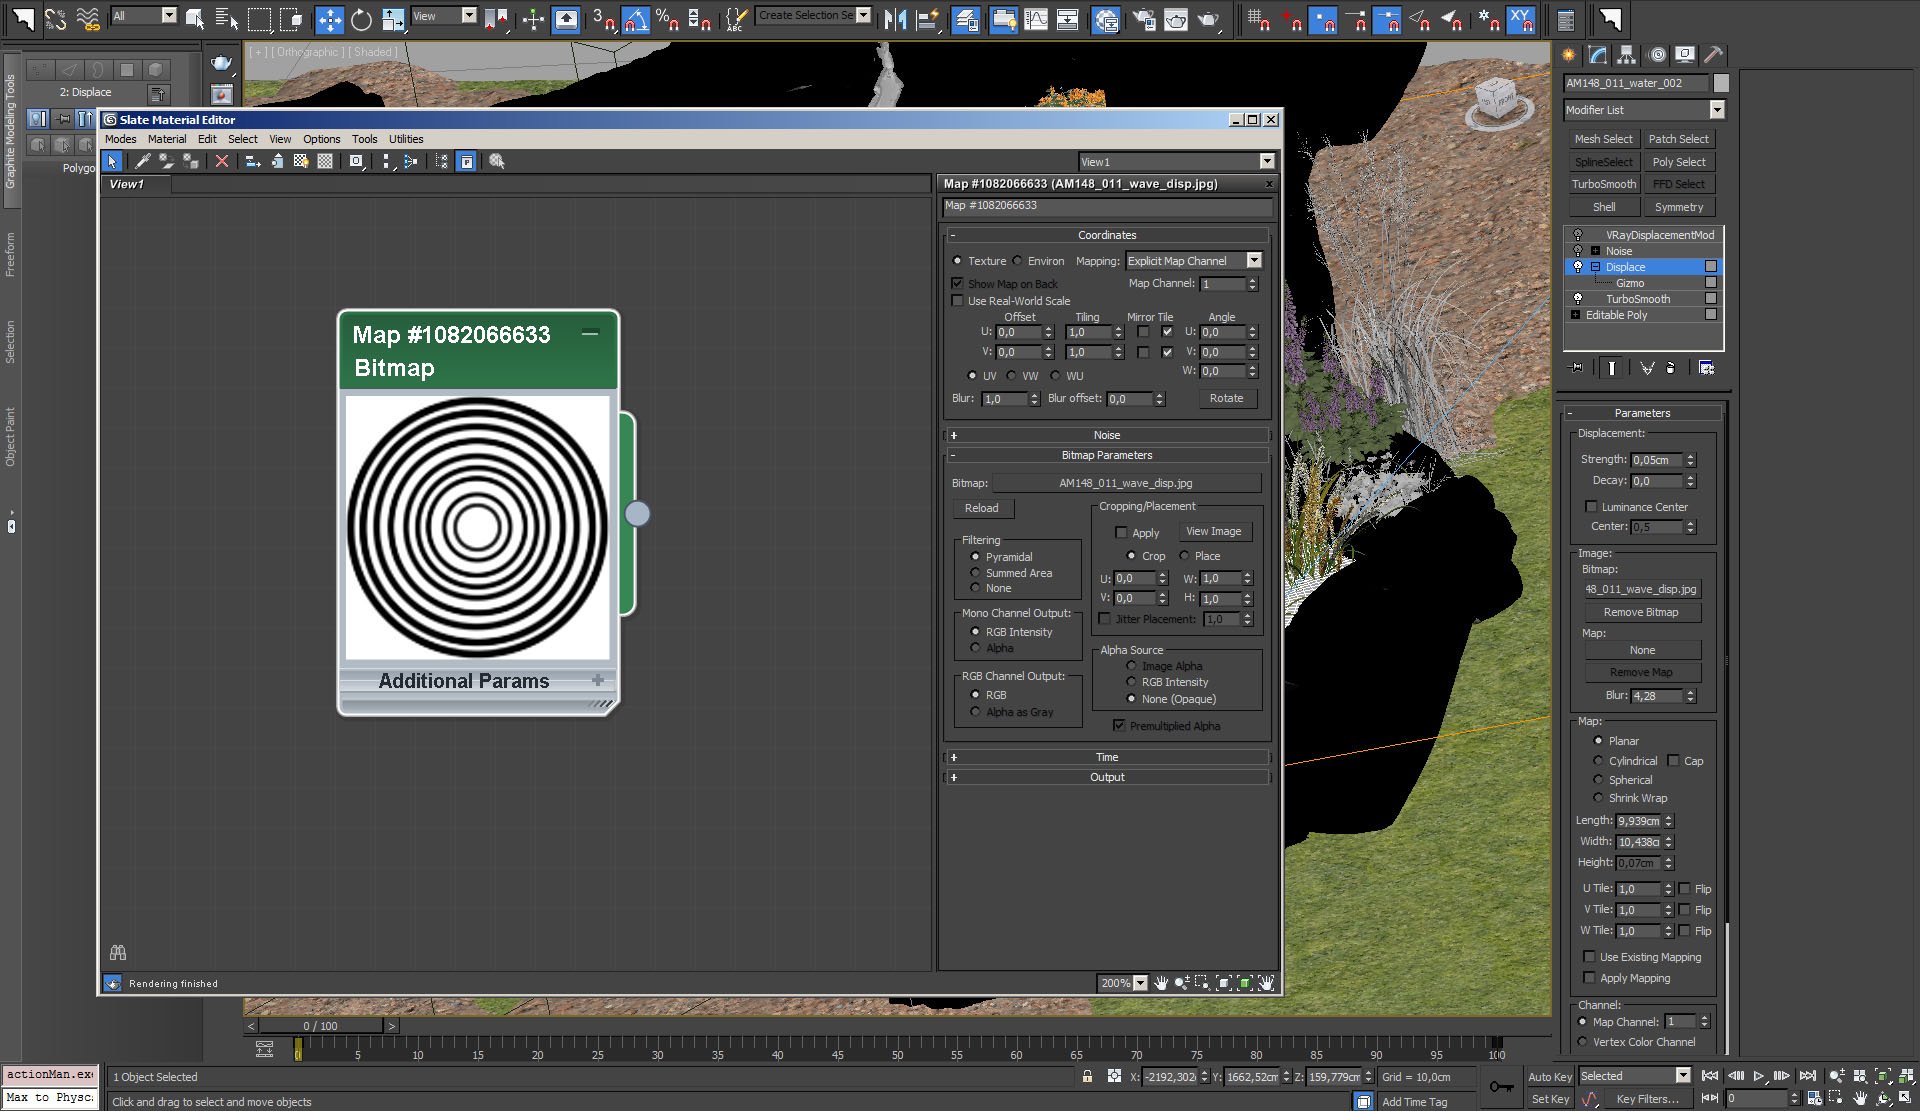
This is our waves bitmap for first displace modifier.


Click on image to enlargenr_ai26_s01__0012_Layer_34_788.jpg
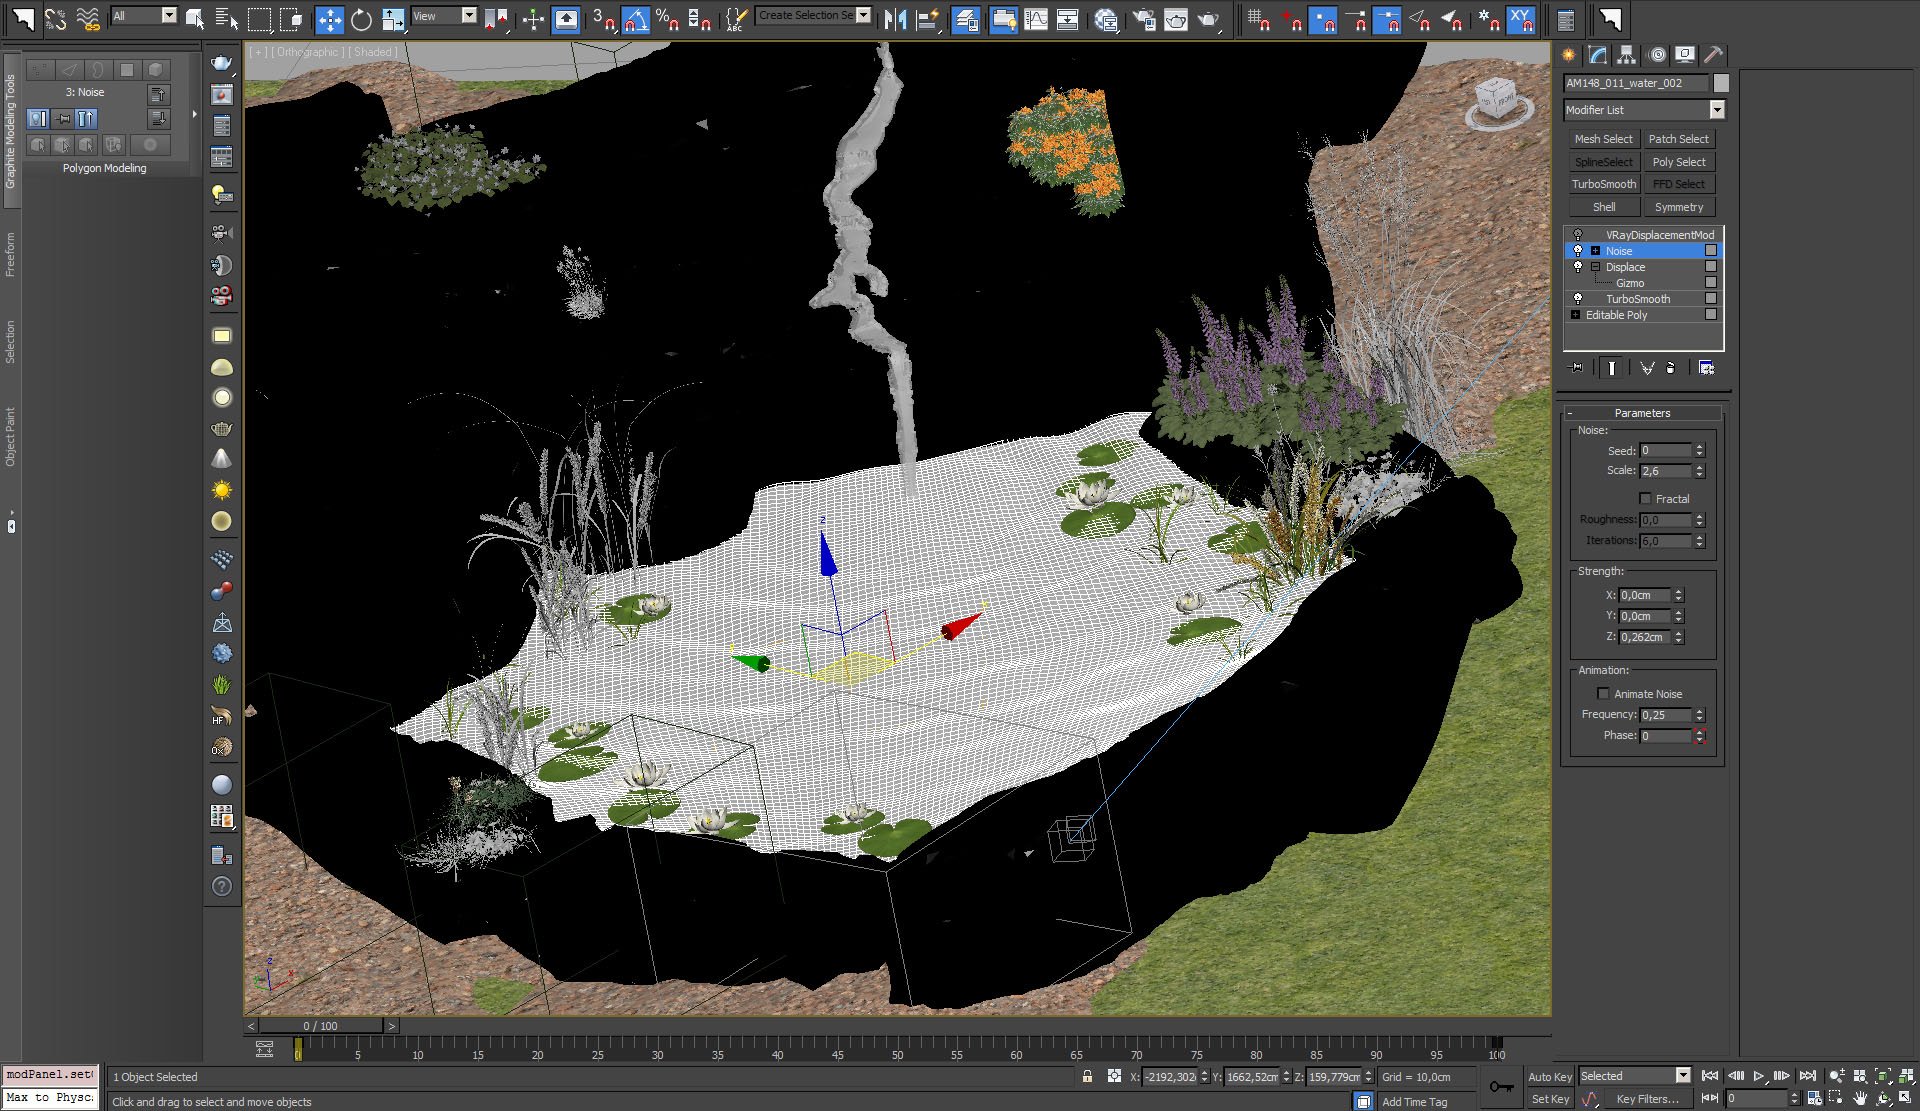
We added some noise on top.


Click on image to enlargenr_ai26_s01__0011_Layer_35_787.jpg
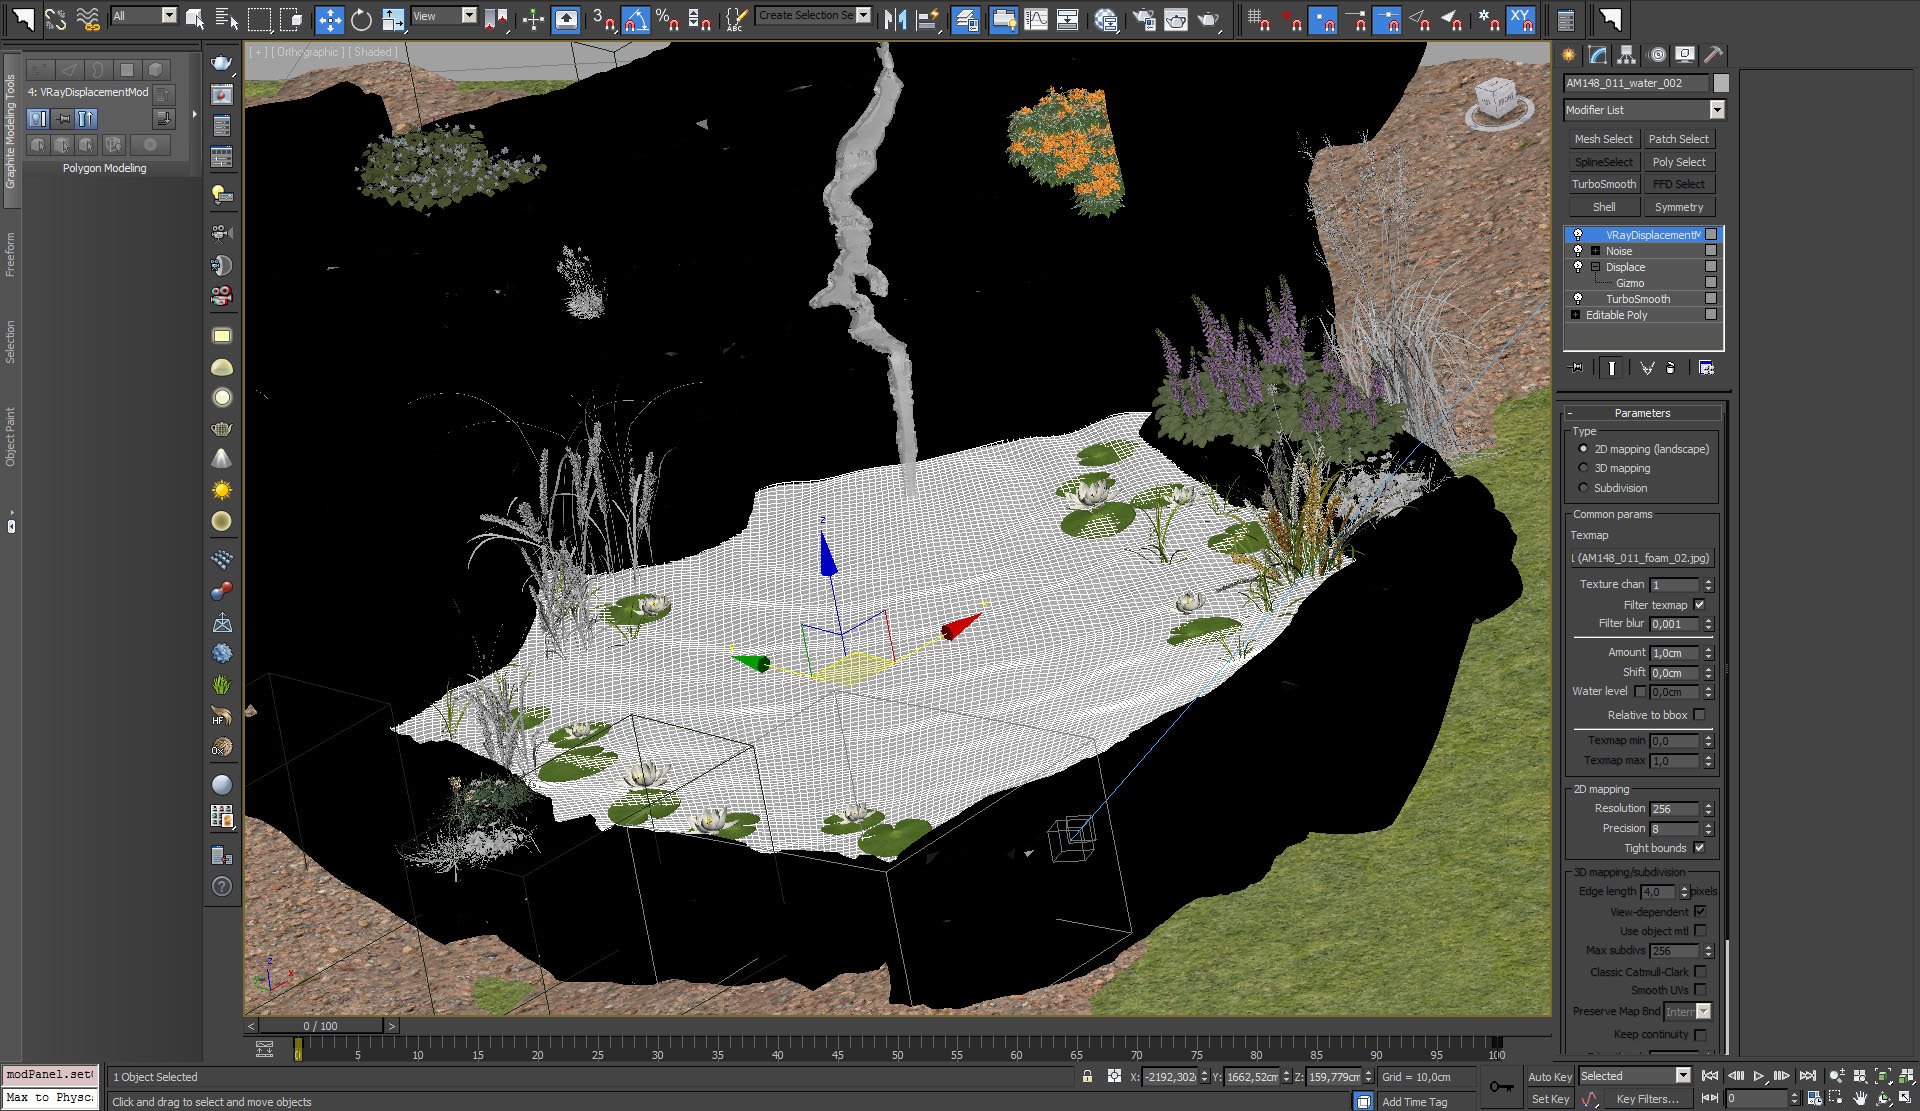
And finally, another displacement modifer for foam.


Click on image to enlargenr_ai26_s01__0010_Layer_36_786.jpg
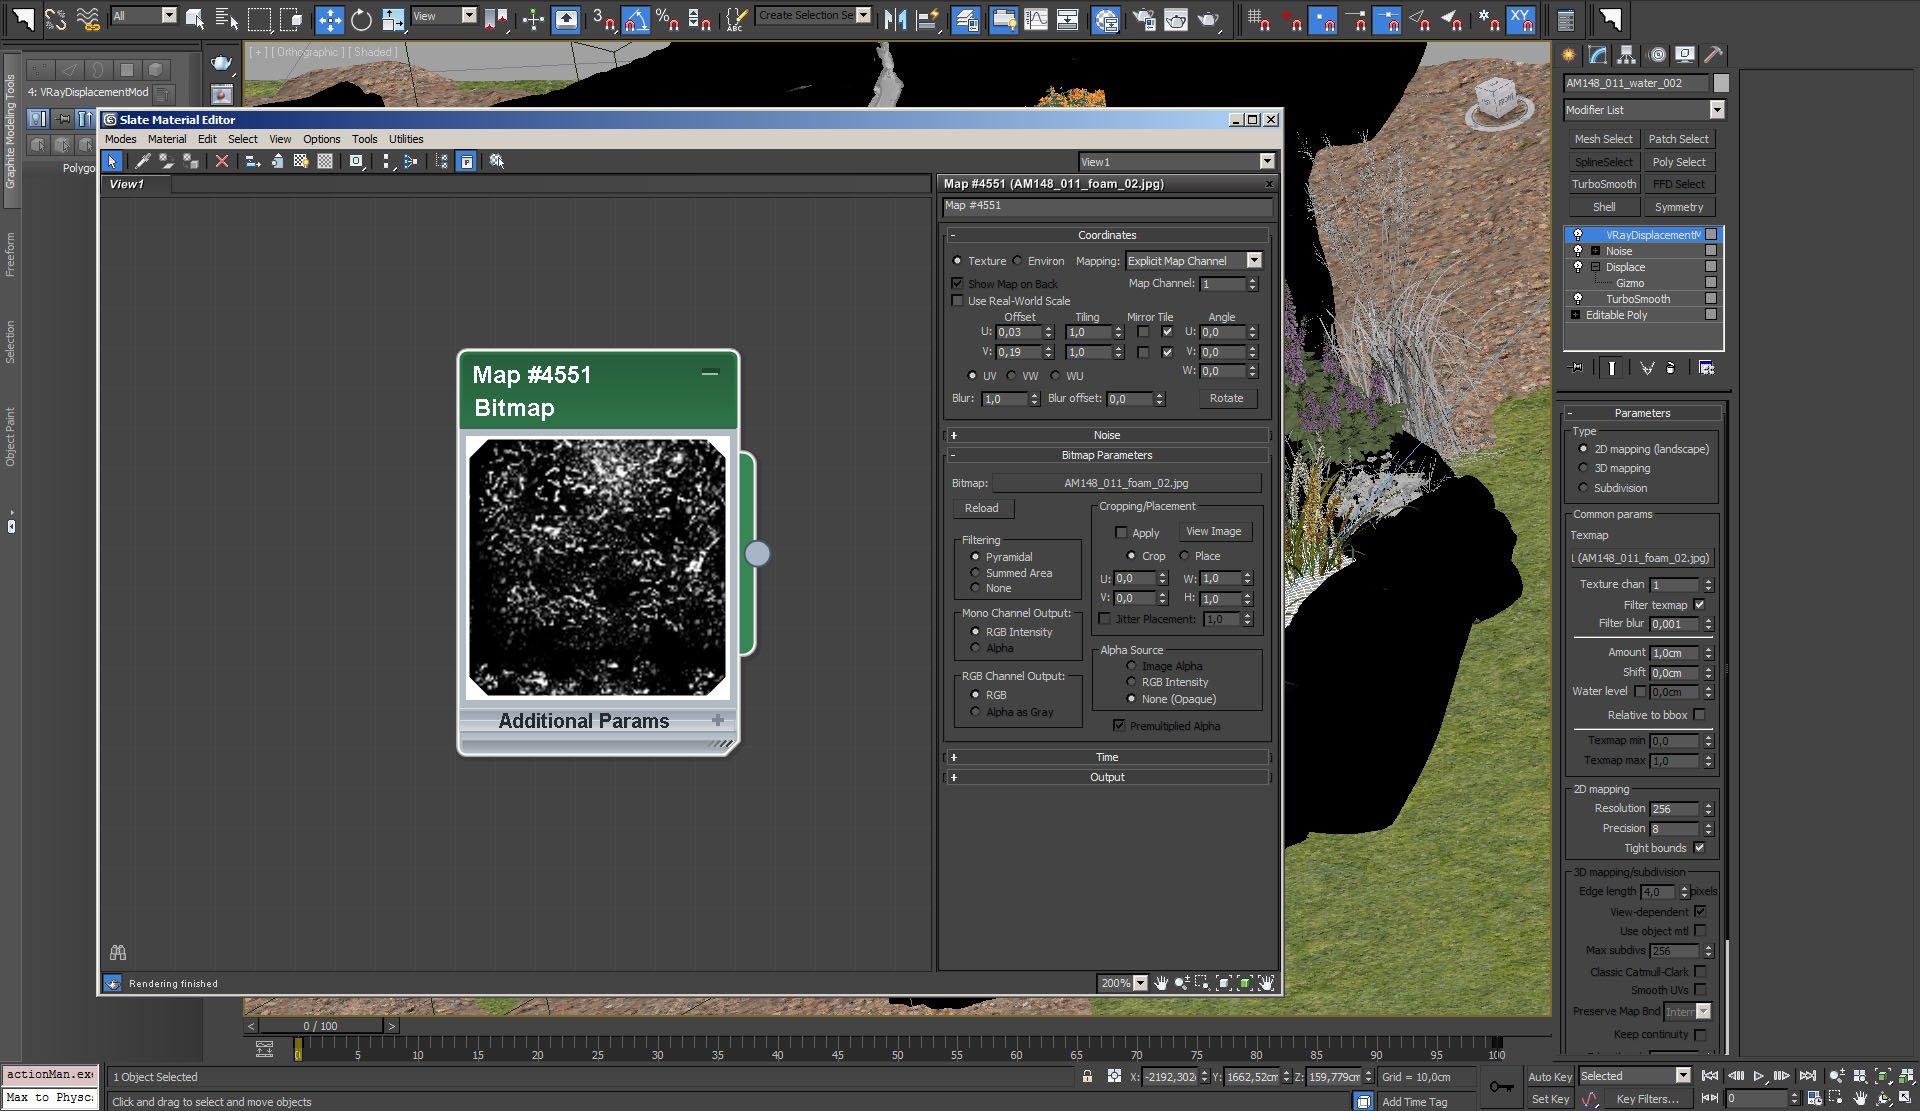
Foam displacement map.


Click on image to enlargenr_ai26_s01__0019_Layer_27_795.jpg
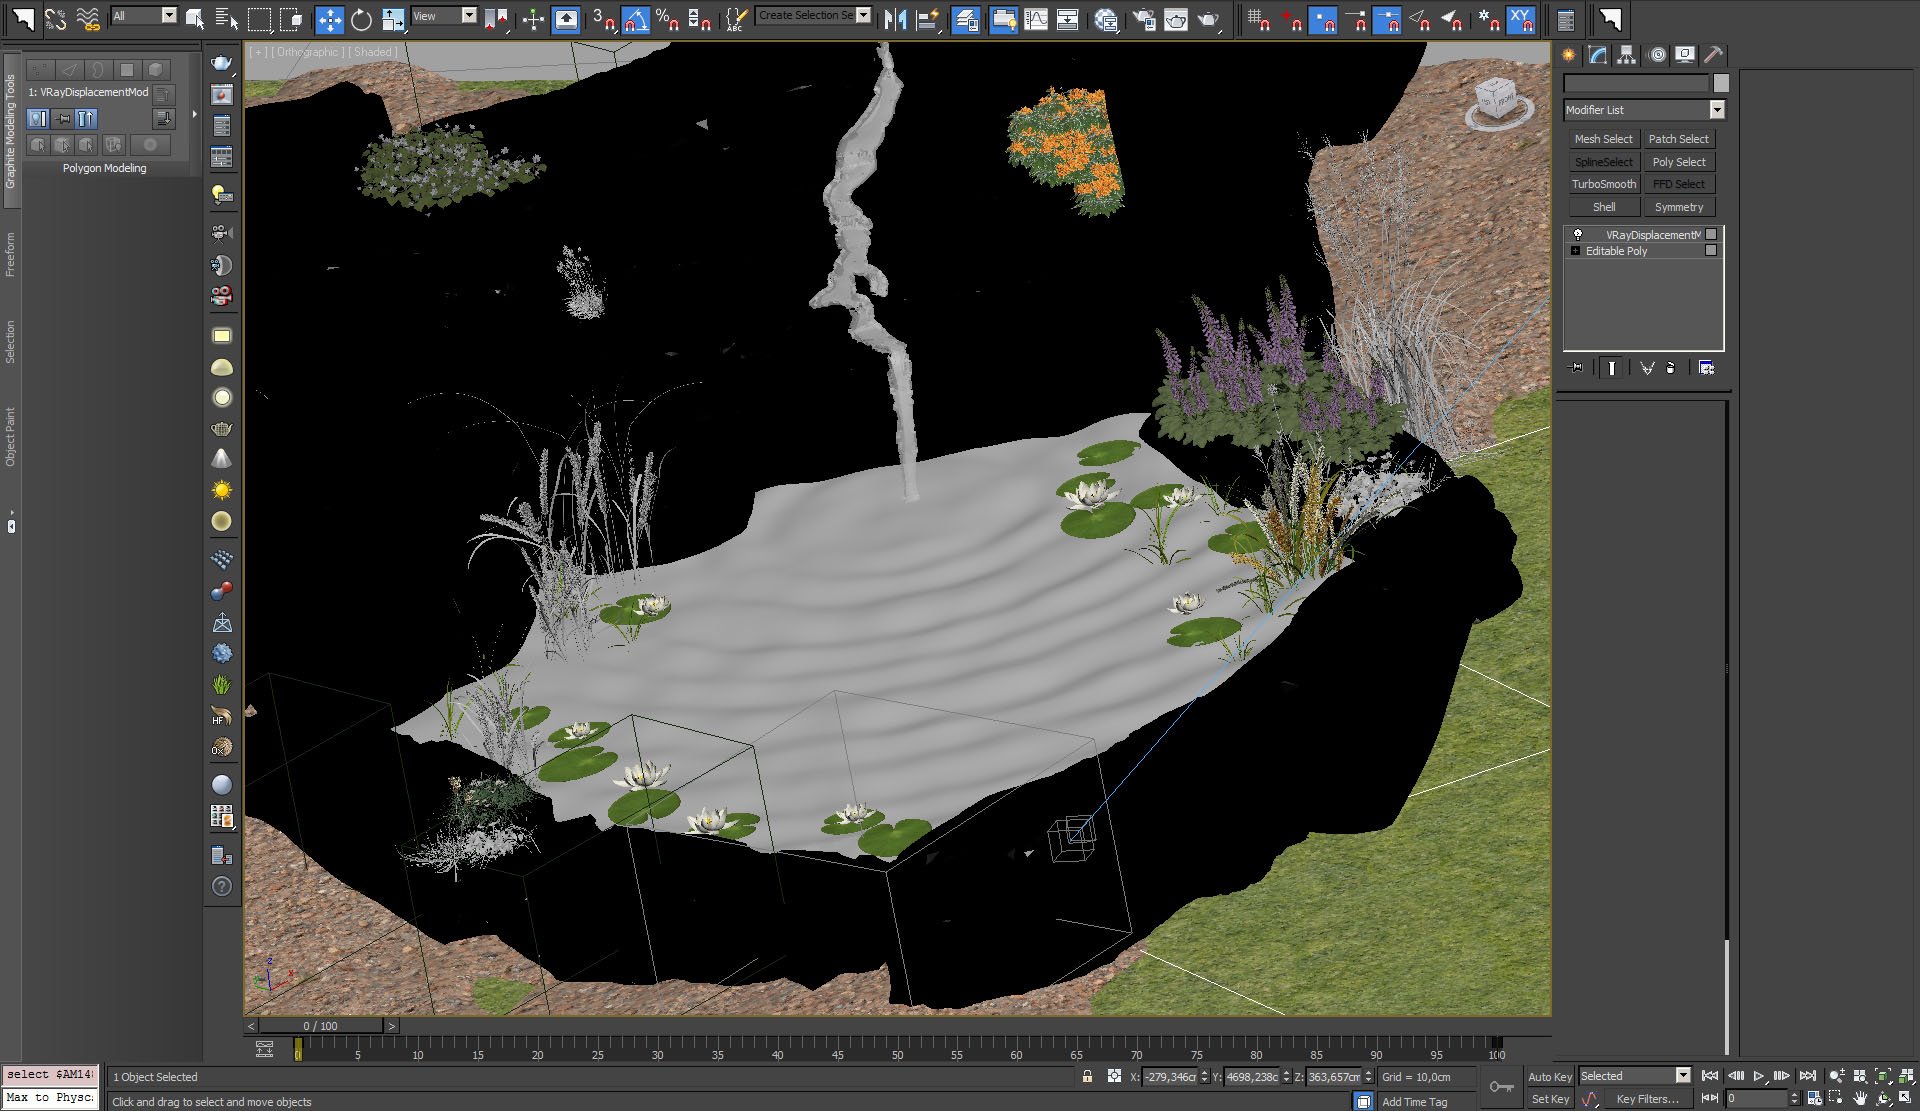
Final preview in viewport.


Click on image to enlargenr_ai26_s01__0009_Layer_37_785.jpg
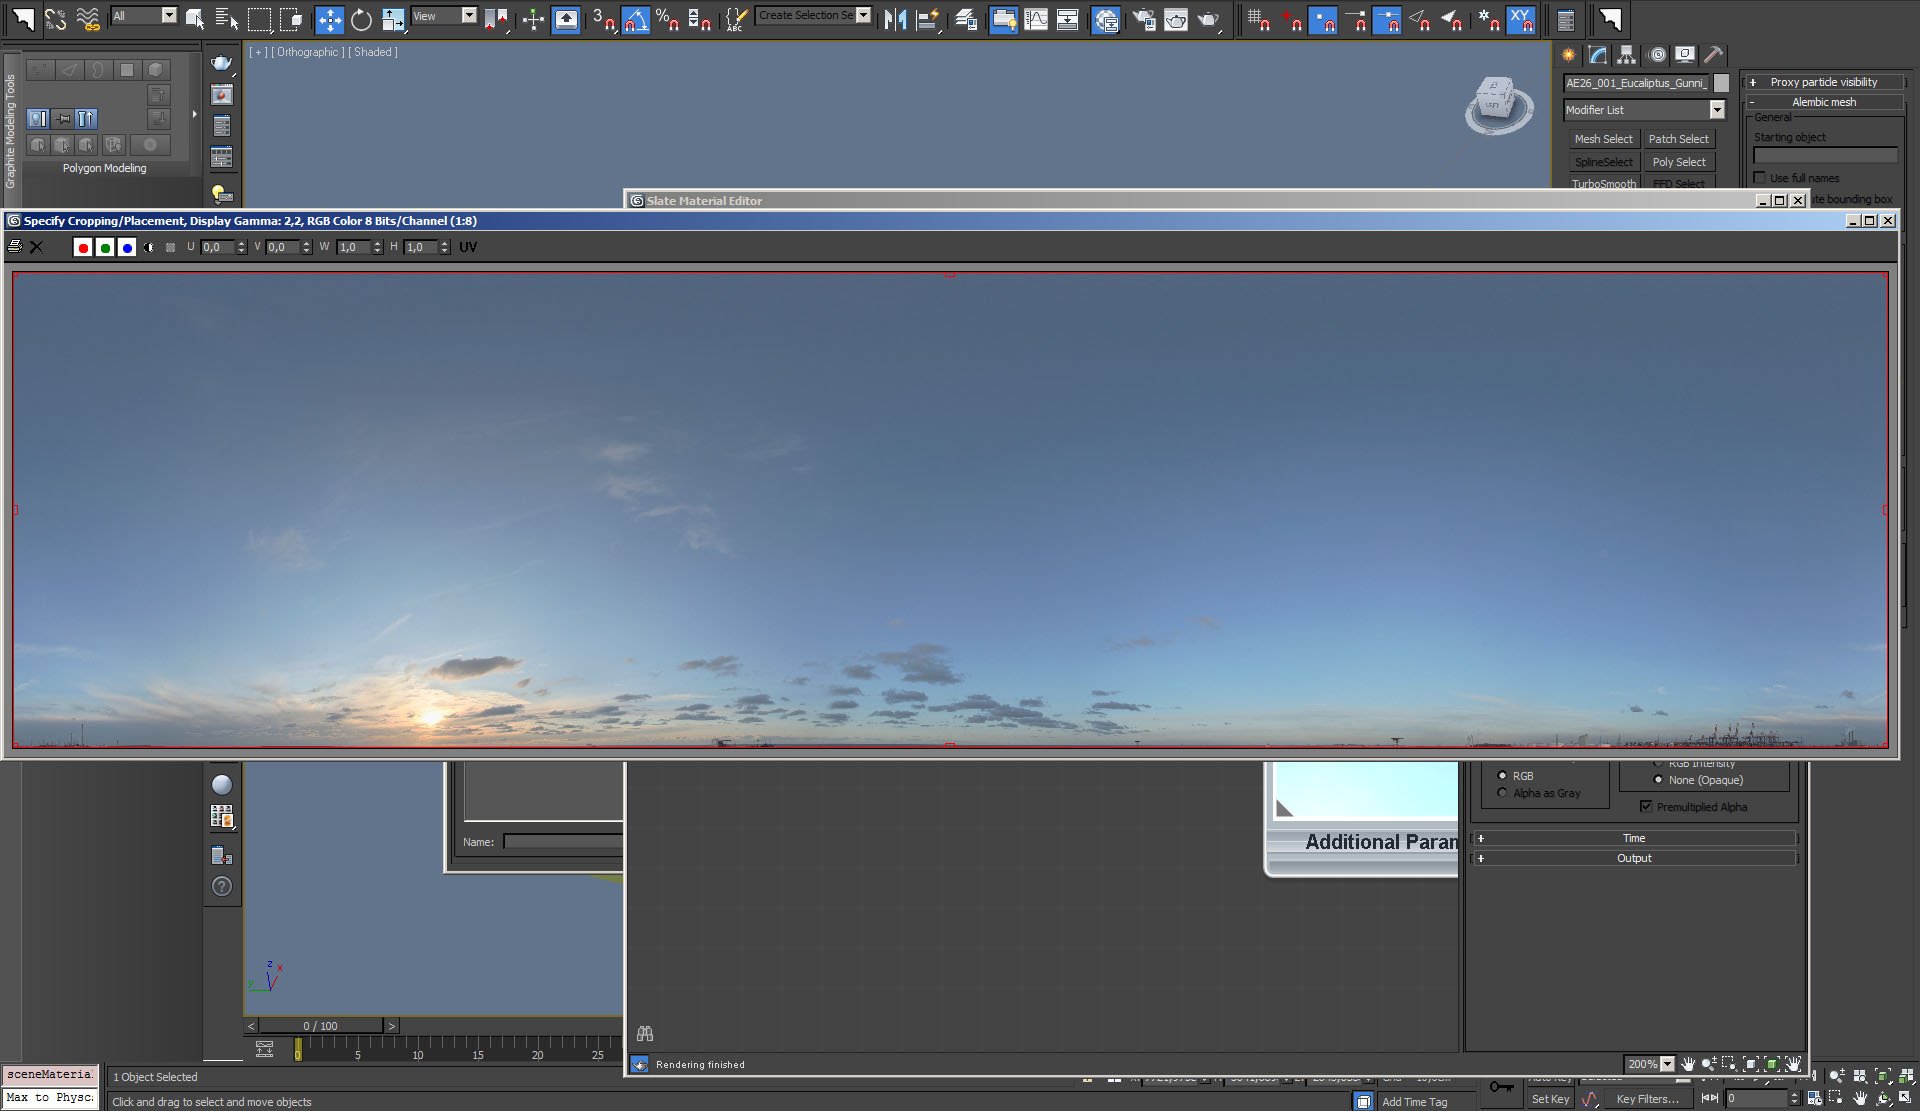
Our sky was simulated with this bitmap, placed as environment map in Enivornment and Effects panel.
 

Click on image to enlargenr_ai26_s01__0008_Layer_38_784.jpg

Environment and effects. Besides background sky, we also used fog.


Click on image to enlargenr_ai26_s01__0007_Layer_39_783.jpg
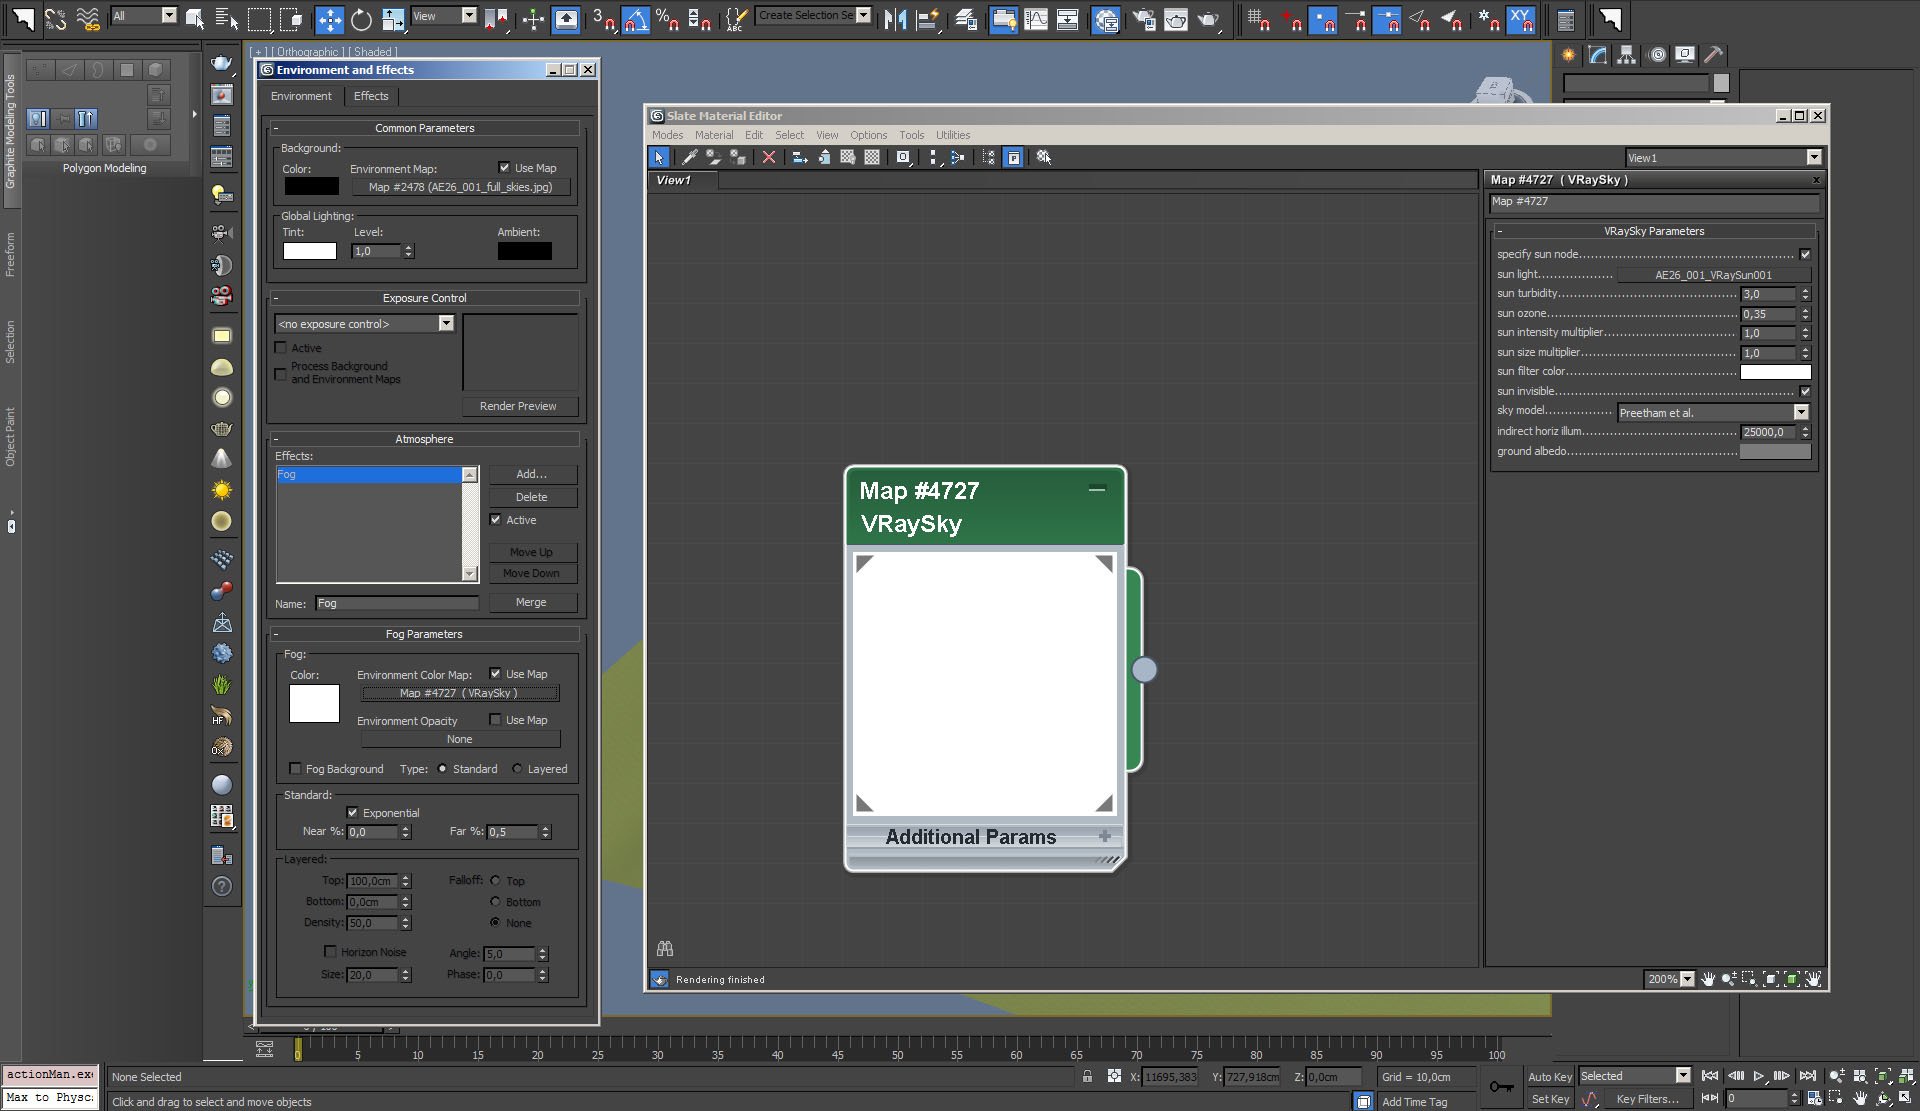
Another contribution to light in the scene - VraySky.


Click on image to enlargenr_render_settings_773.jpg
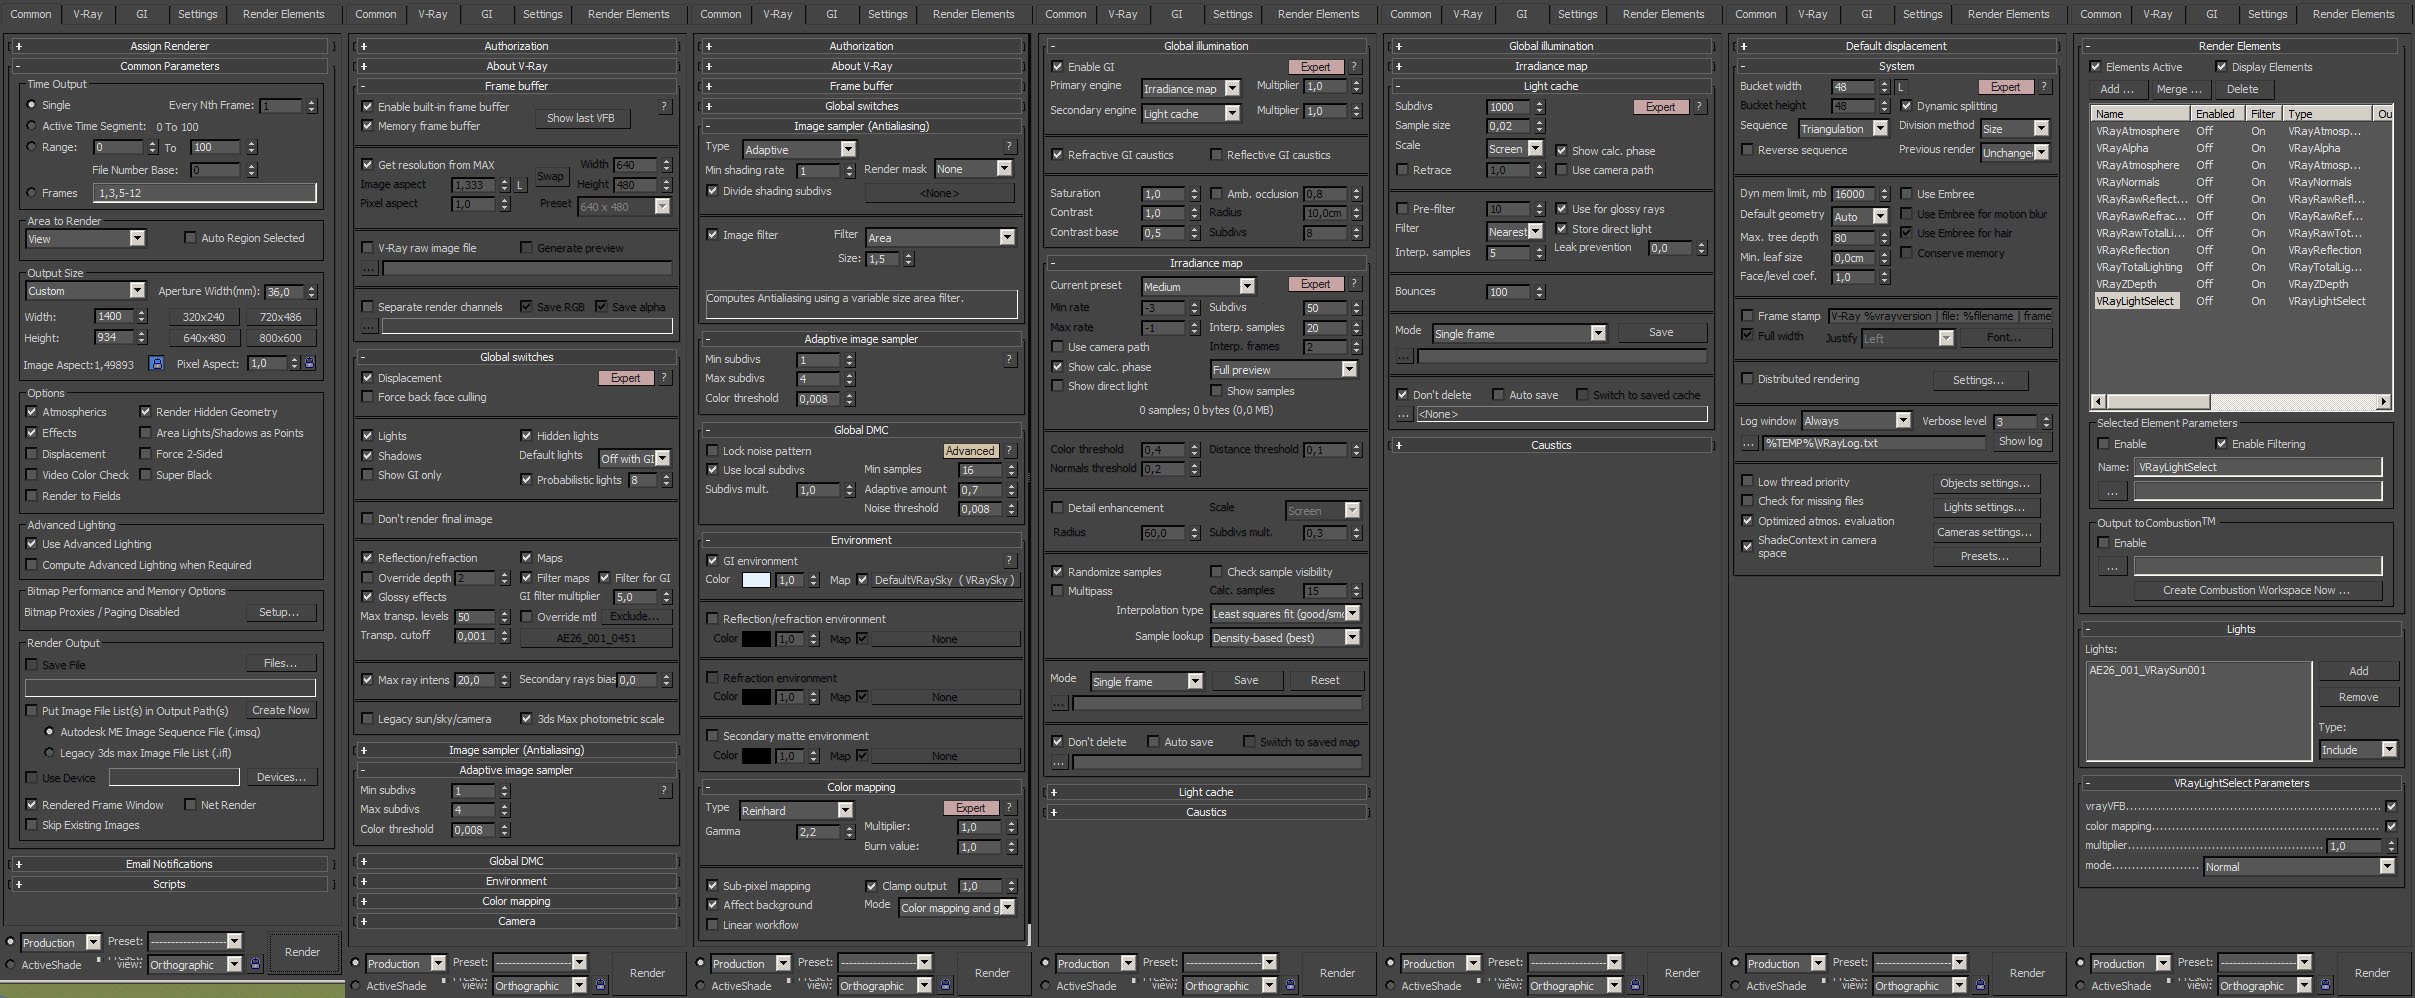
Render settings.


Click on image to enlarge
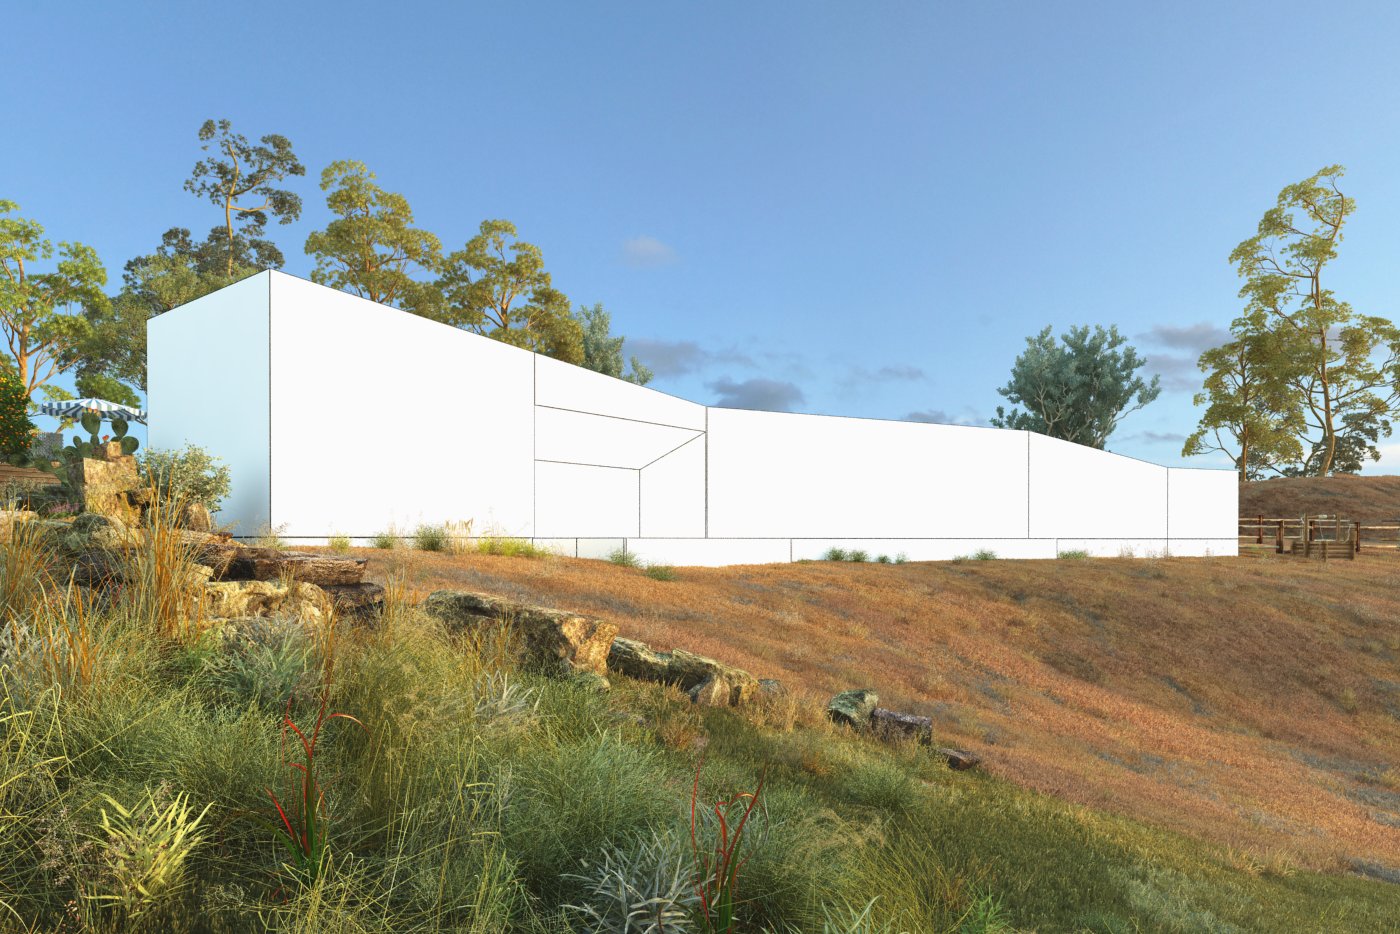
nr_AE26_001_cam01_.RGB_color_778.jpg

Raw render from camera 1


Click on image to enlargecam_1_ps.JPG
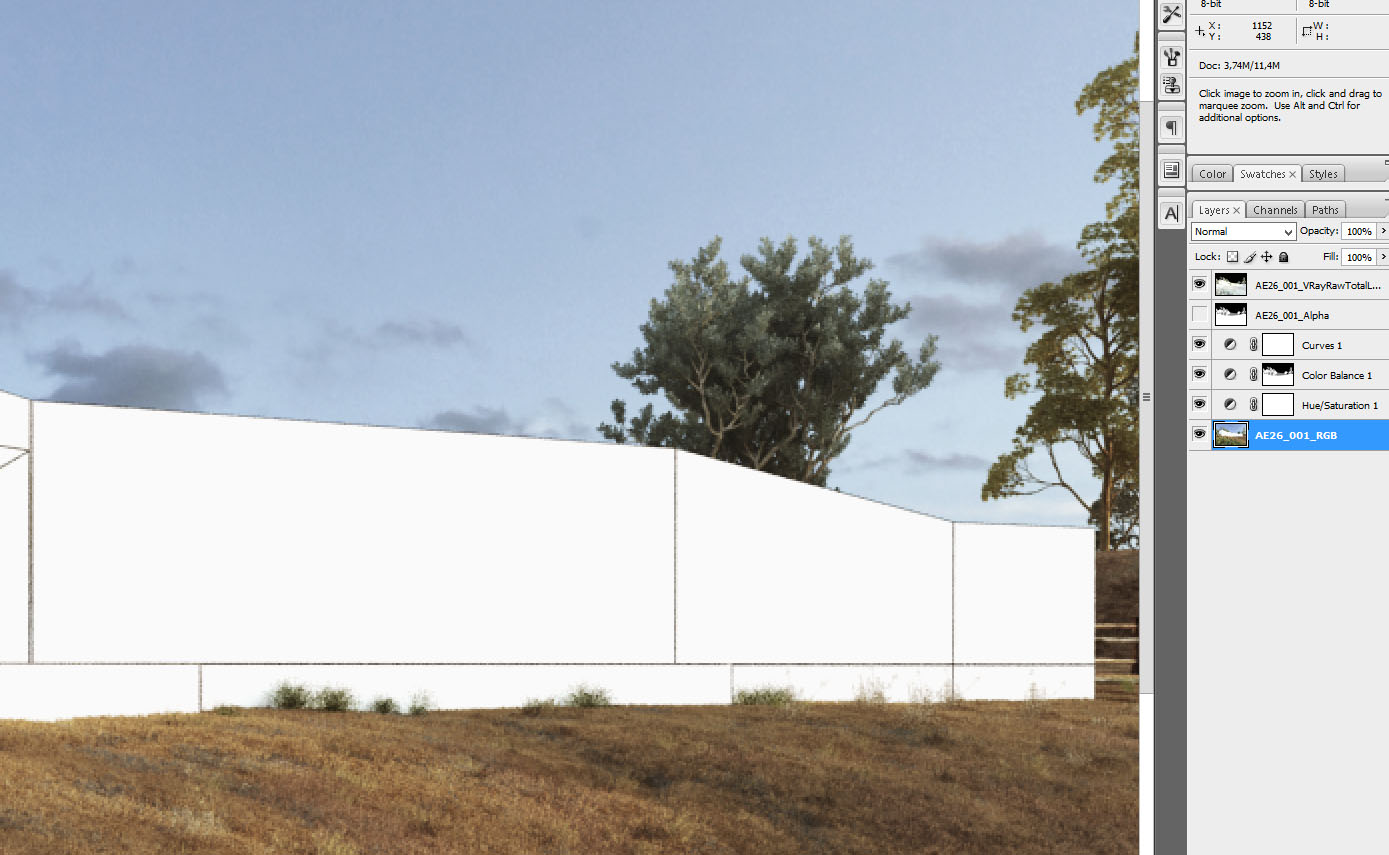
Photoshop stack of image from camera 1. It's not very complicated post-production. We used hue / saturation layer for desaturation (-40), then we increased reds with color balance layer, and used curves for more contrast and put Total Lighting layer on the top for more realistic lighting.


Click on image to enlargenr_AE26_001_cam001_PP_777.jpg

This if the final scene after post-production (camera 1).


Click on image to enlargenr_AE26_001_cam02_.RGB_color_780.jpg
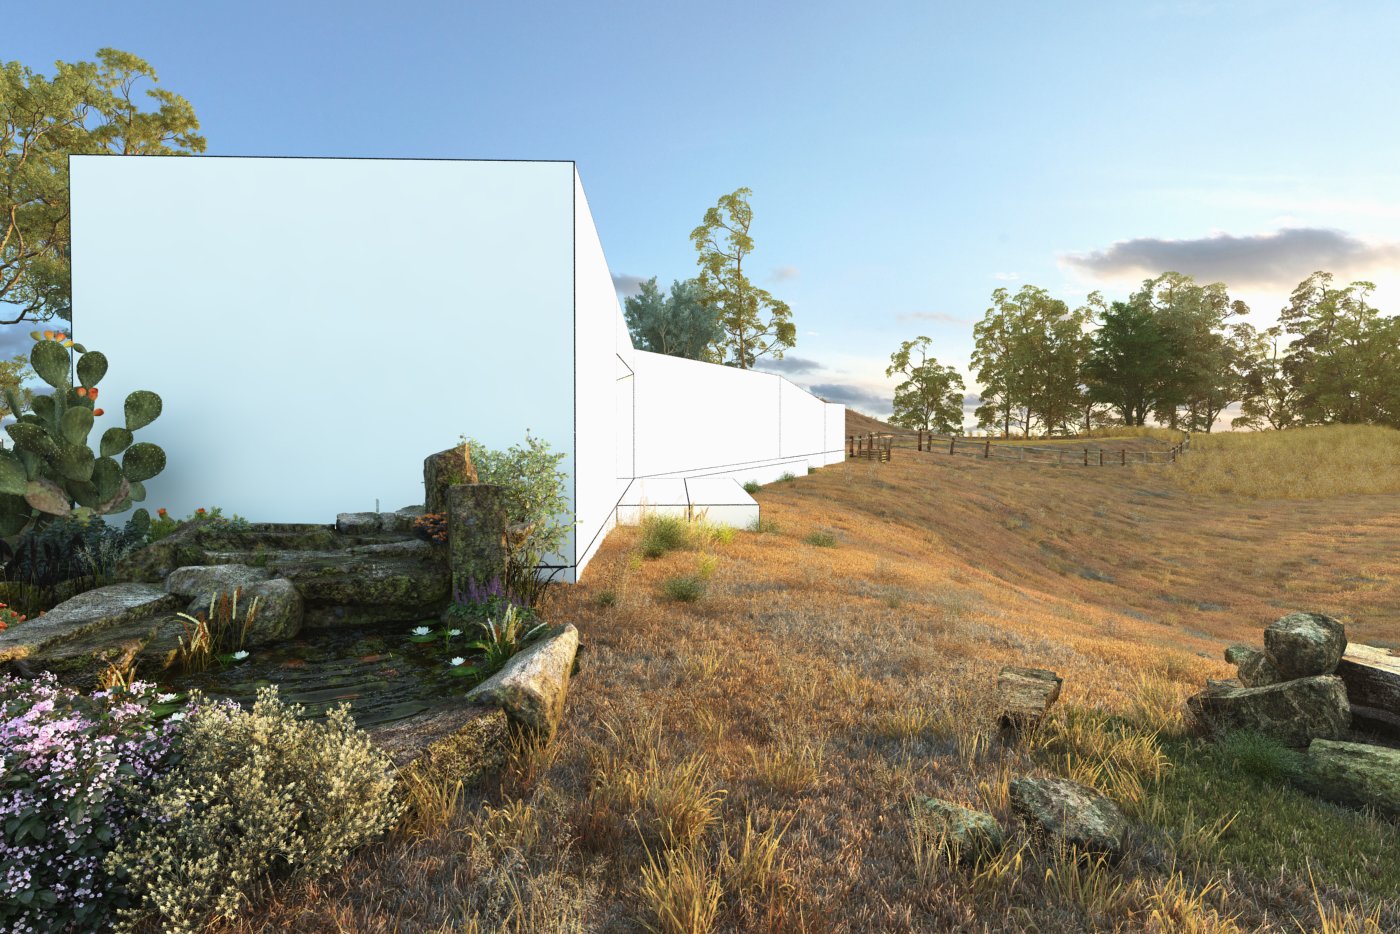
Raw render from camera 2


Click on image to enlargecam_2_ps.JPG
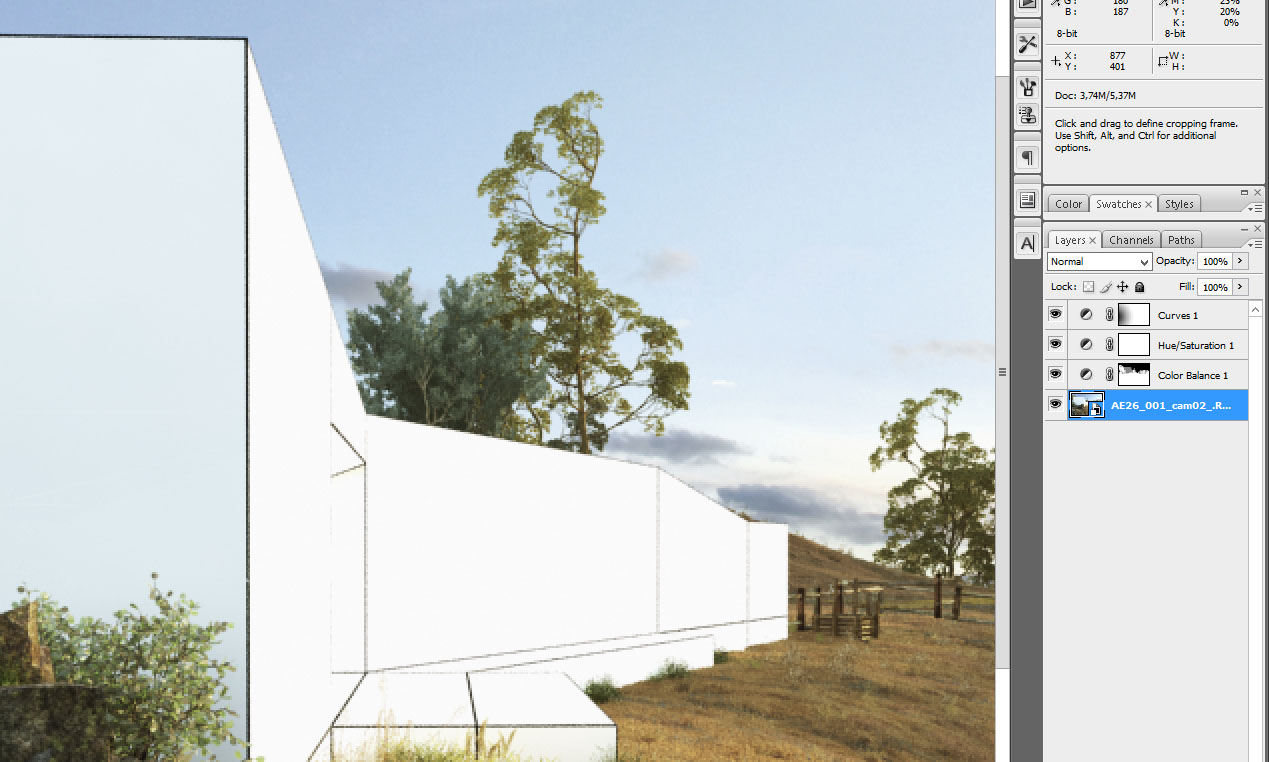
Photoshop stack - camera 2. Color balance - more yellow, more red; desaturation (-22), increased contrast with curves layer (with a mask - we increased mainly right side of the image).


Click on image to enlargenr_AE26_001_cam002_PP_779.jpg

This if the final scene after post-production (camera 2).


Click on image to enlargenr_AE26_001_cam03_.RGB_color_782.jpg
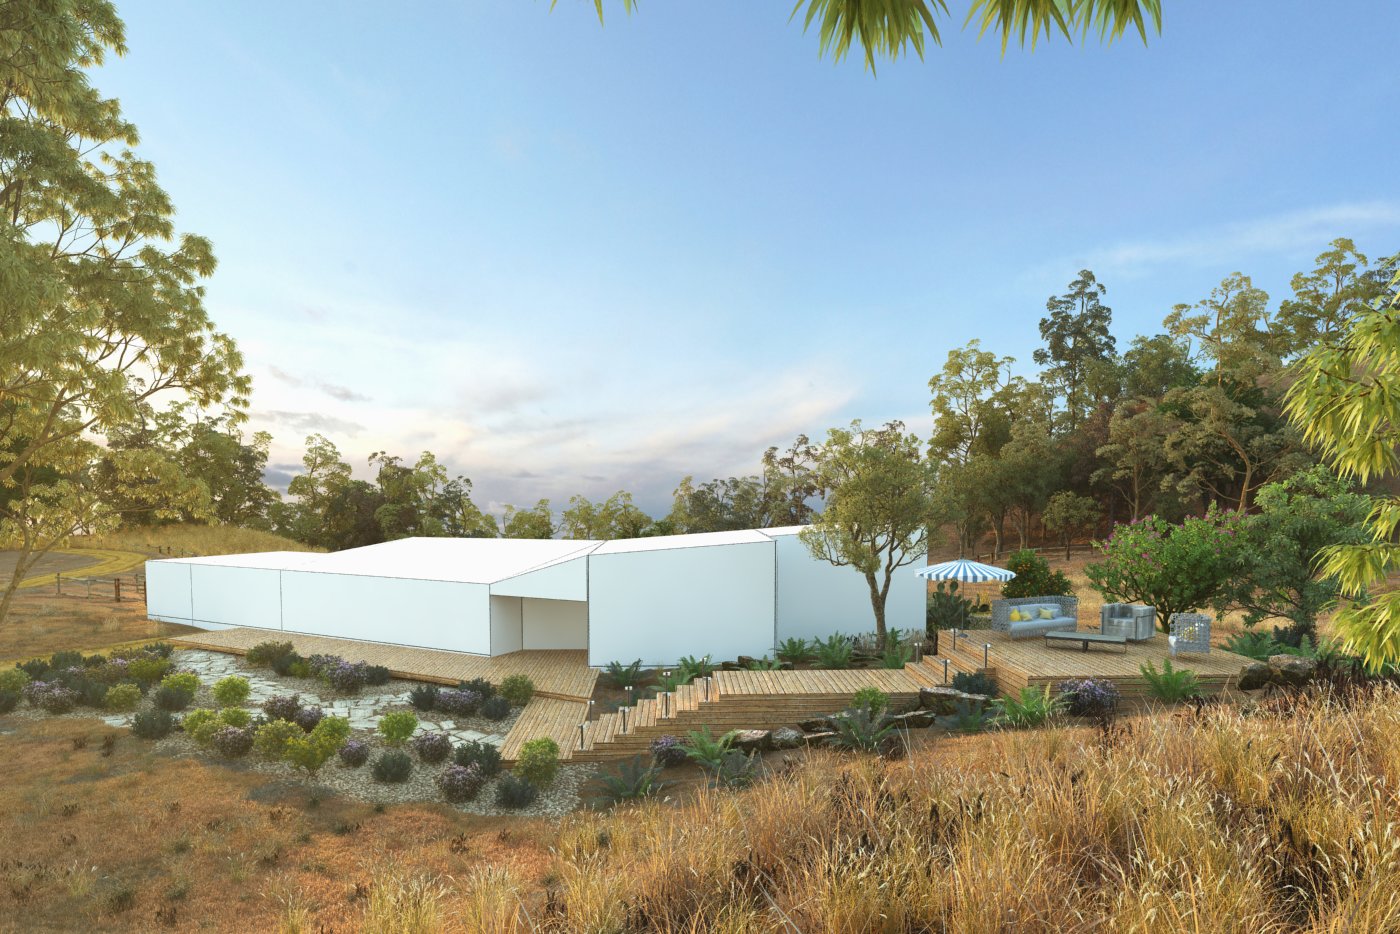
Raw render from camera 3


Click on image to enlargecam_3_ps_1.JPG
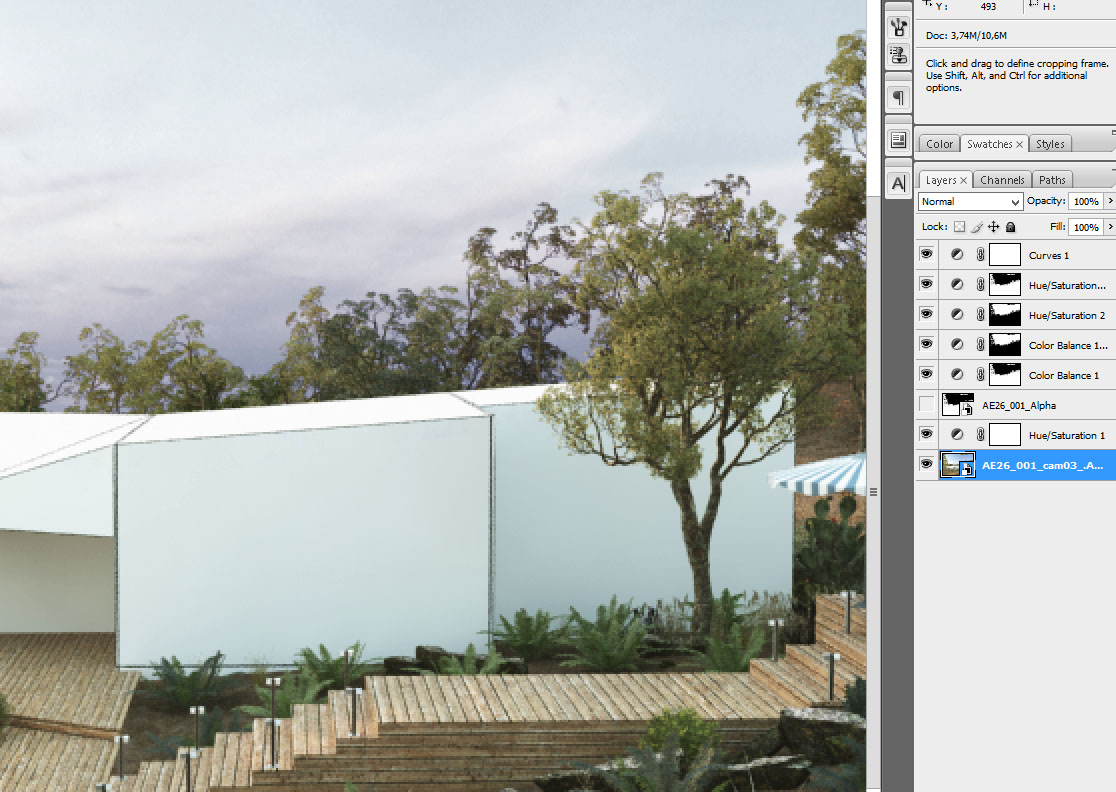
Photoshop stack - camera 3. Slightly increased saturation (+2), color balance - more greens, second color balance layer affects the sky (more blues), another hue / saturation layer desaturates sky, and the next desaturates ground.curves layer for more contrast.


Click on image to enlargenr_AE26_001_cam003_PP_781.jpg

This if the final scene after post-production (camera 3).


This exterior scene was made by Evermotion. It was set in 3ds Max and rendered in V-Ray. 

You can:


Author: Michał Franczak Editor: Michał Franczak
Tags: evermotion trees grass vol.26 archexterior dirt ae26 hill
You may also like...
Easy and fast download from customer zone

Easy and fast download from customer zone

This article will help You to manage downloads of multiple files from Customer Zone using DownThemAll and Free Download Manager.
×

LEAVE A COMMENT

You need to be logged in to leave a comment. Don't have account? Register now.

YAQUBBHAI 06:30:47  |  09-01-2016
Wow, amazing tutorial, superb. thanks for sharing. Bt i' av lil bit confusion, sRGB is ON or OFF ??? and what is the gamma value of file input and output and ovar all gamma ????