This interior scene was made in 3ds Max and V-Ray by Evermotion. It is scene 4 from Archinteriors vol. 37. You can purchase this single scene or entire Archinteriors vol. 37 collection in Evermotion Shop.
Click on image to enlarge 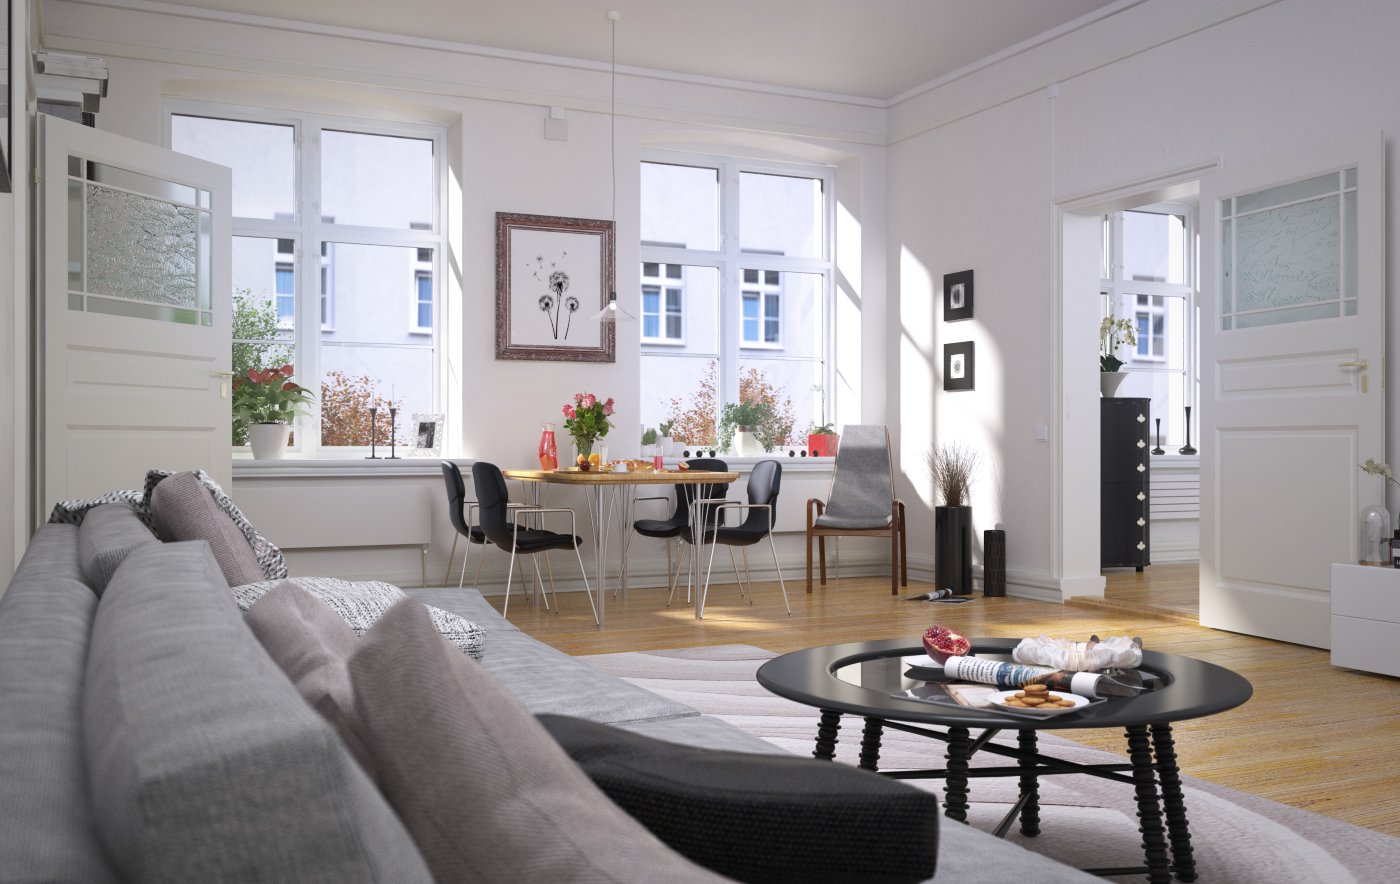
This is small living room arranged in minimalistic Scandinavian style. We have light colors, a lot of sunlight, cosy and warm look. As for furniture, we have a couch and two tables + chairs. There are also some props that come from Archmodels collections.
Click on image to enlarge 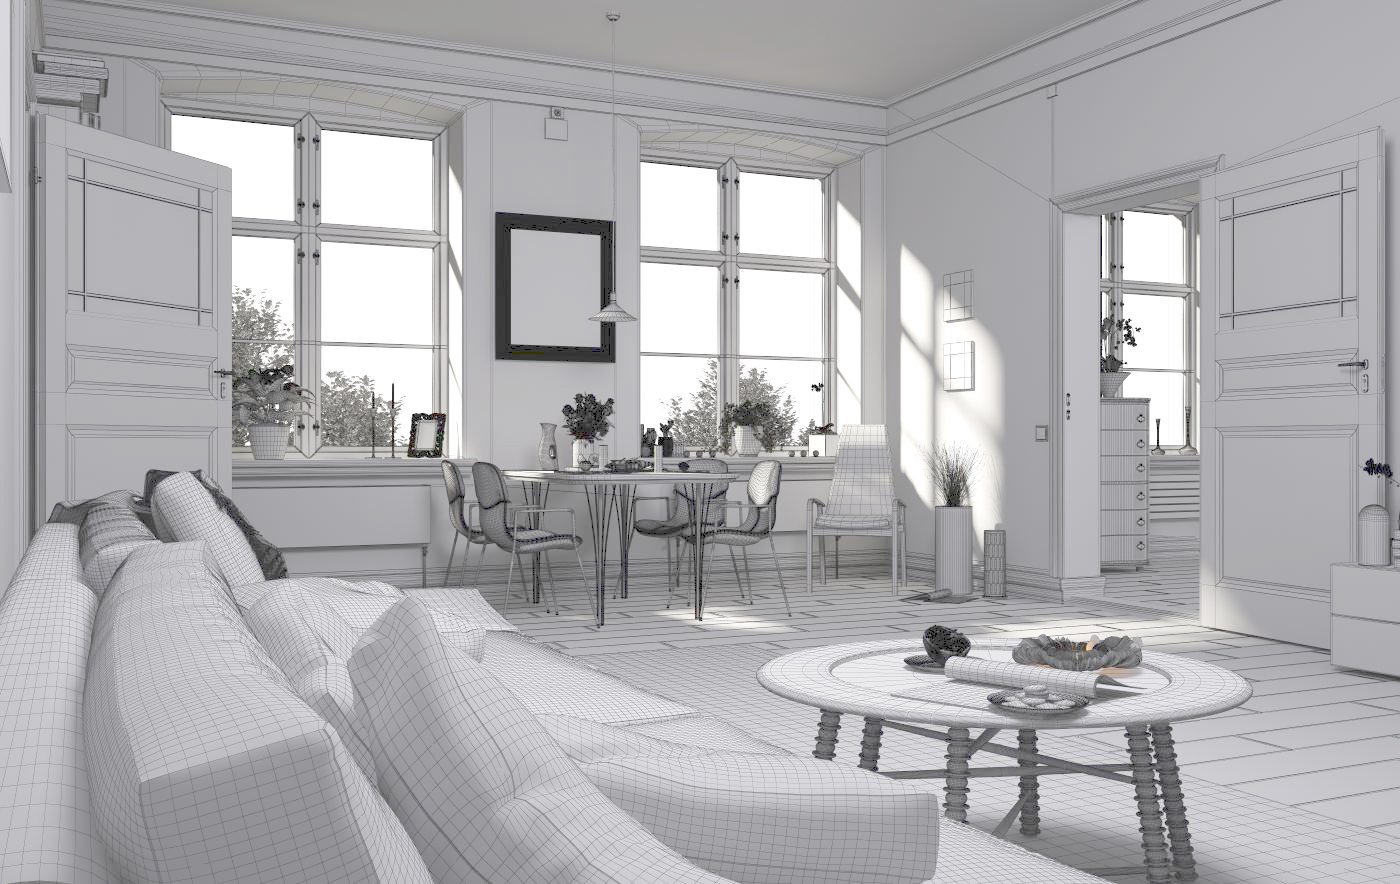
Wireframe view. building behind the window is not visible, because it is an image projected on a plane.
Click on image to enlarge 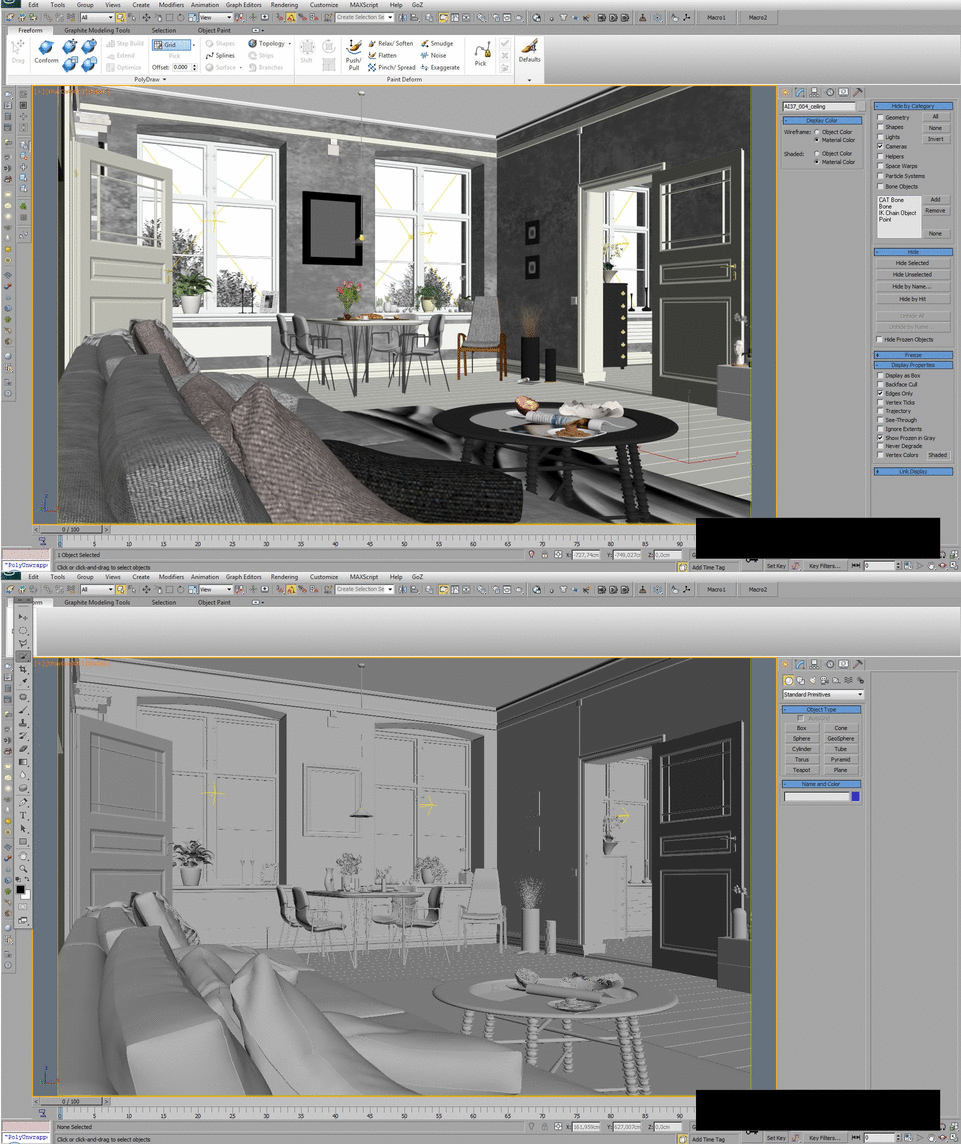
3ds Max viewport. View from camera (gif).
Click on image to enlarge 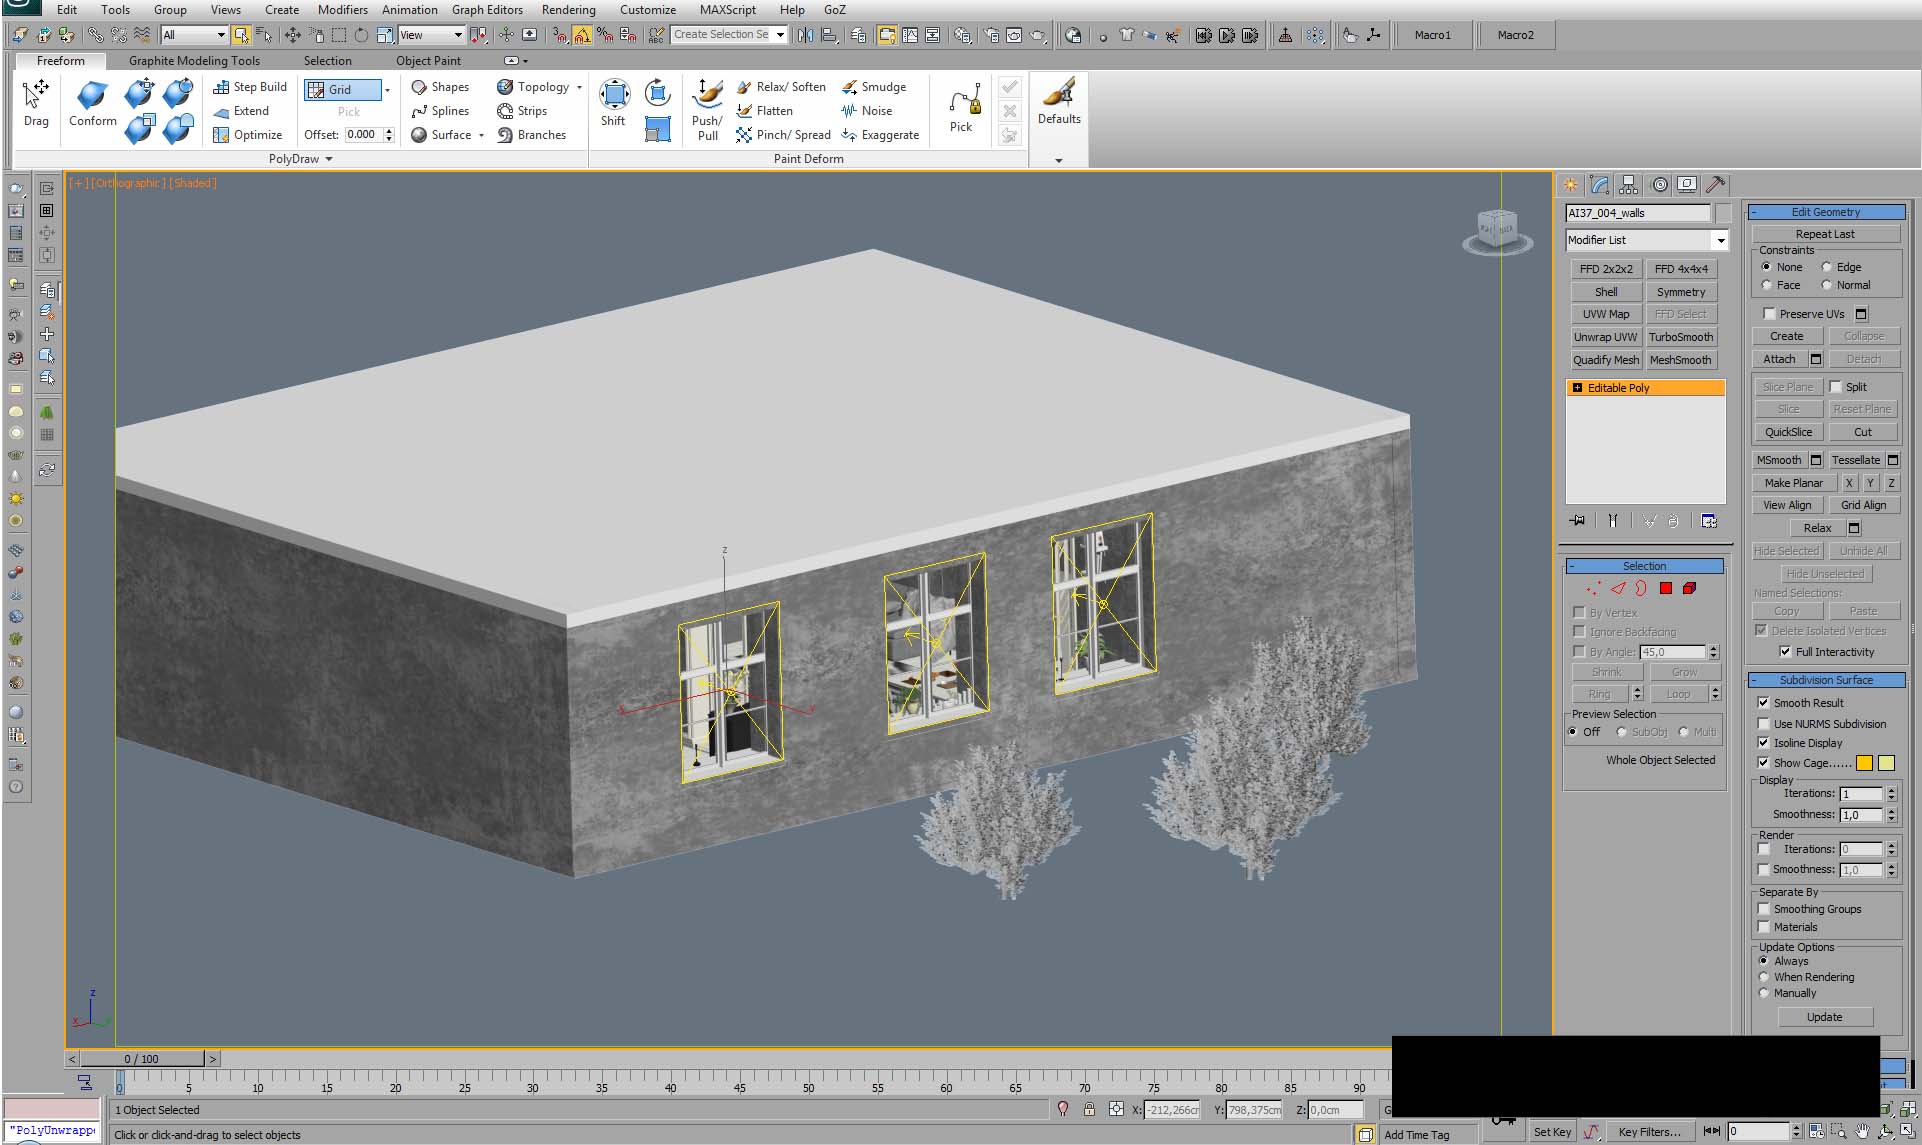
The building - view from the outside. We put some Vray lights in the windows as skylight portals. Quite a standard technique.
Click on image to enlarge 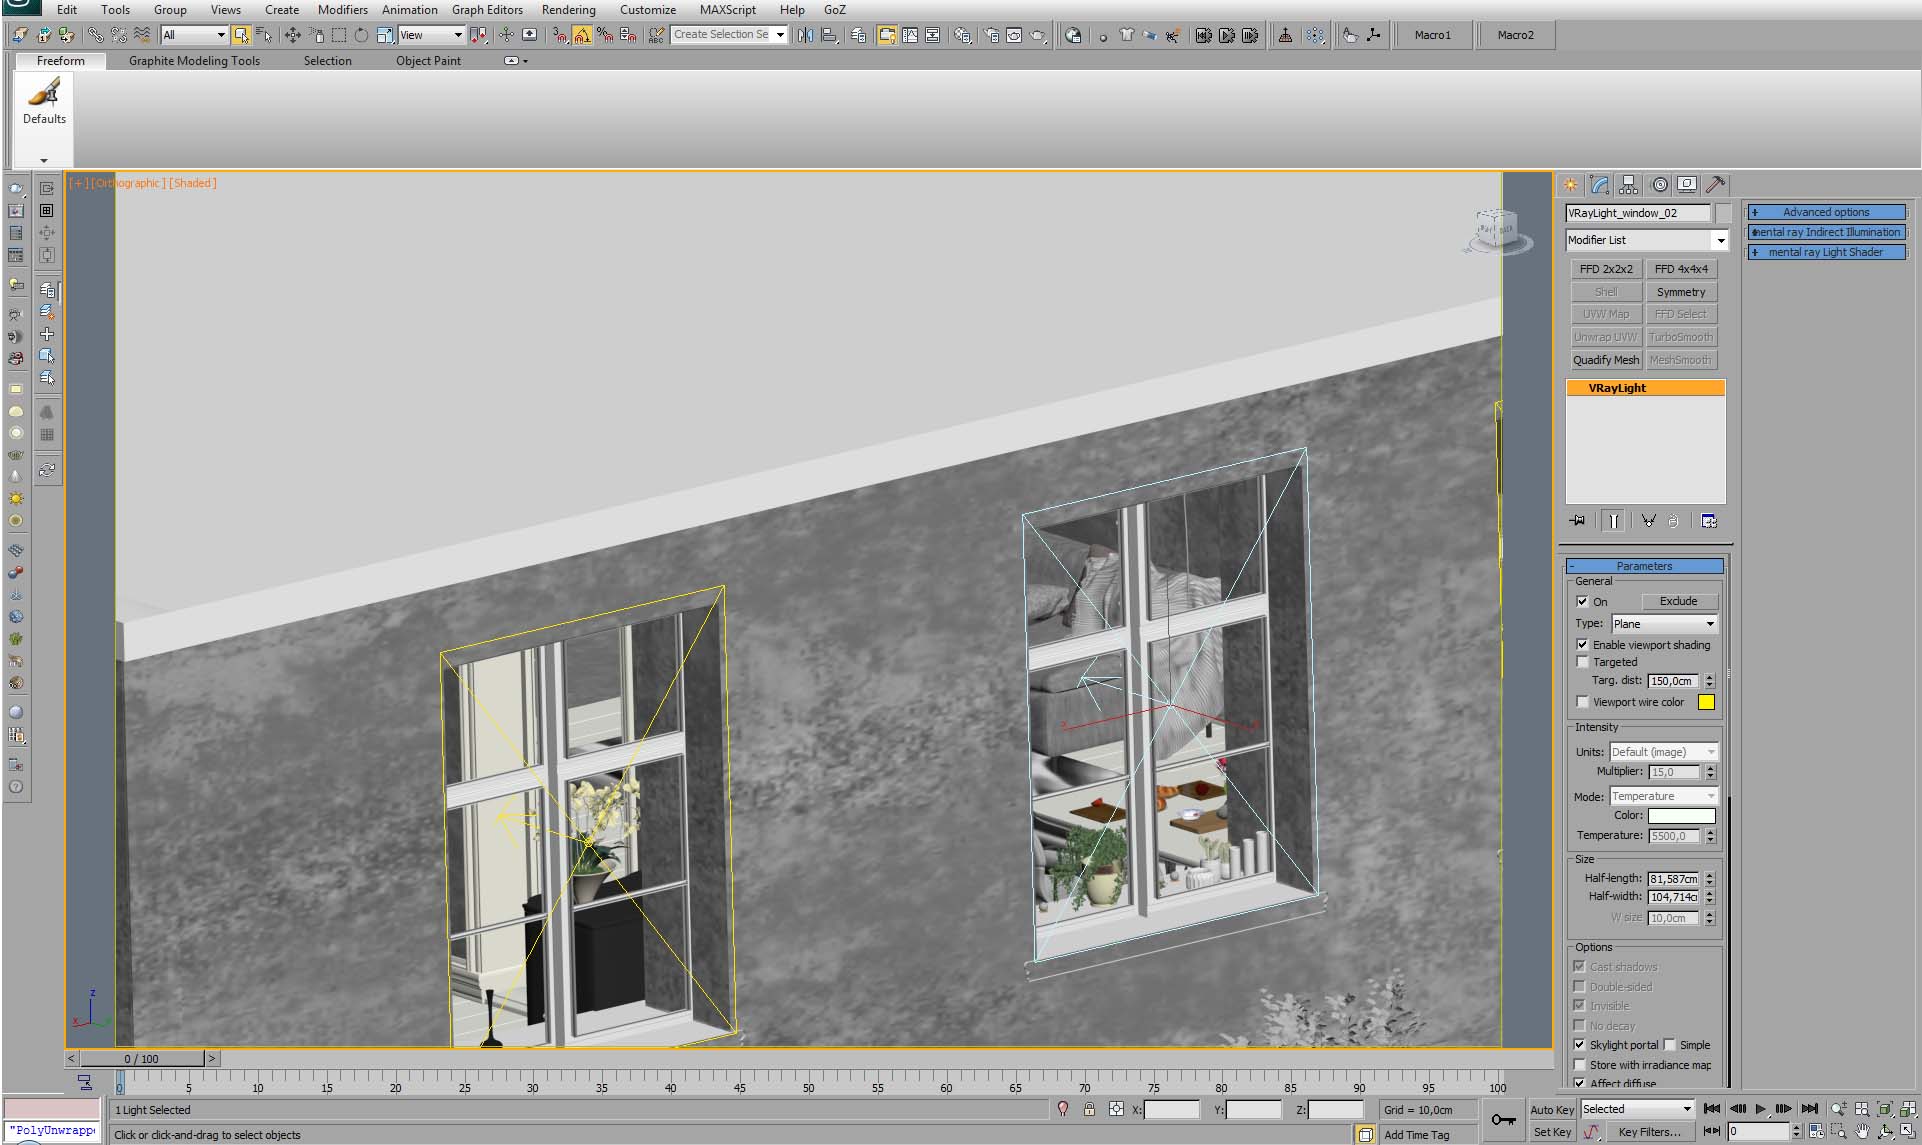
Vray light settings. It acts as skylight portal.
Click on image to enlarge 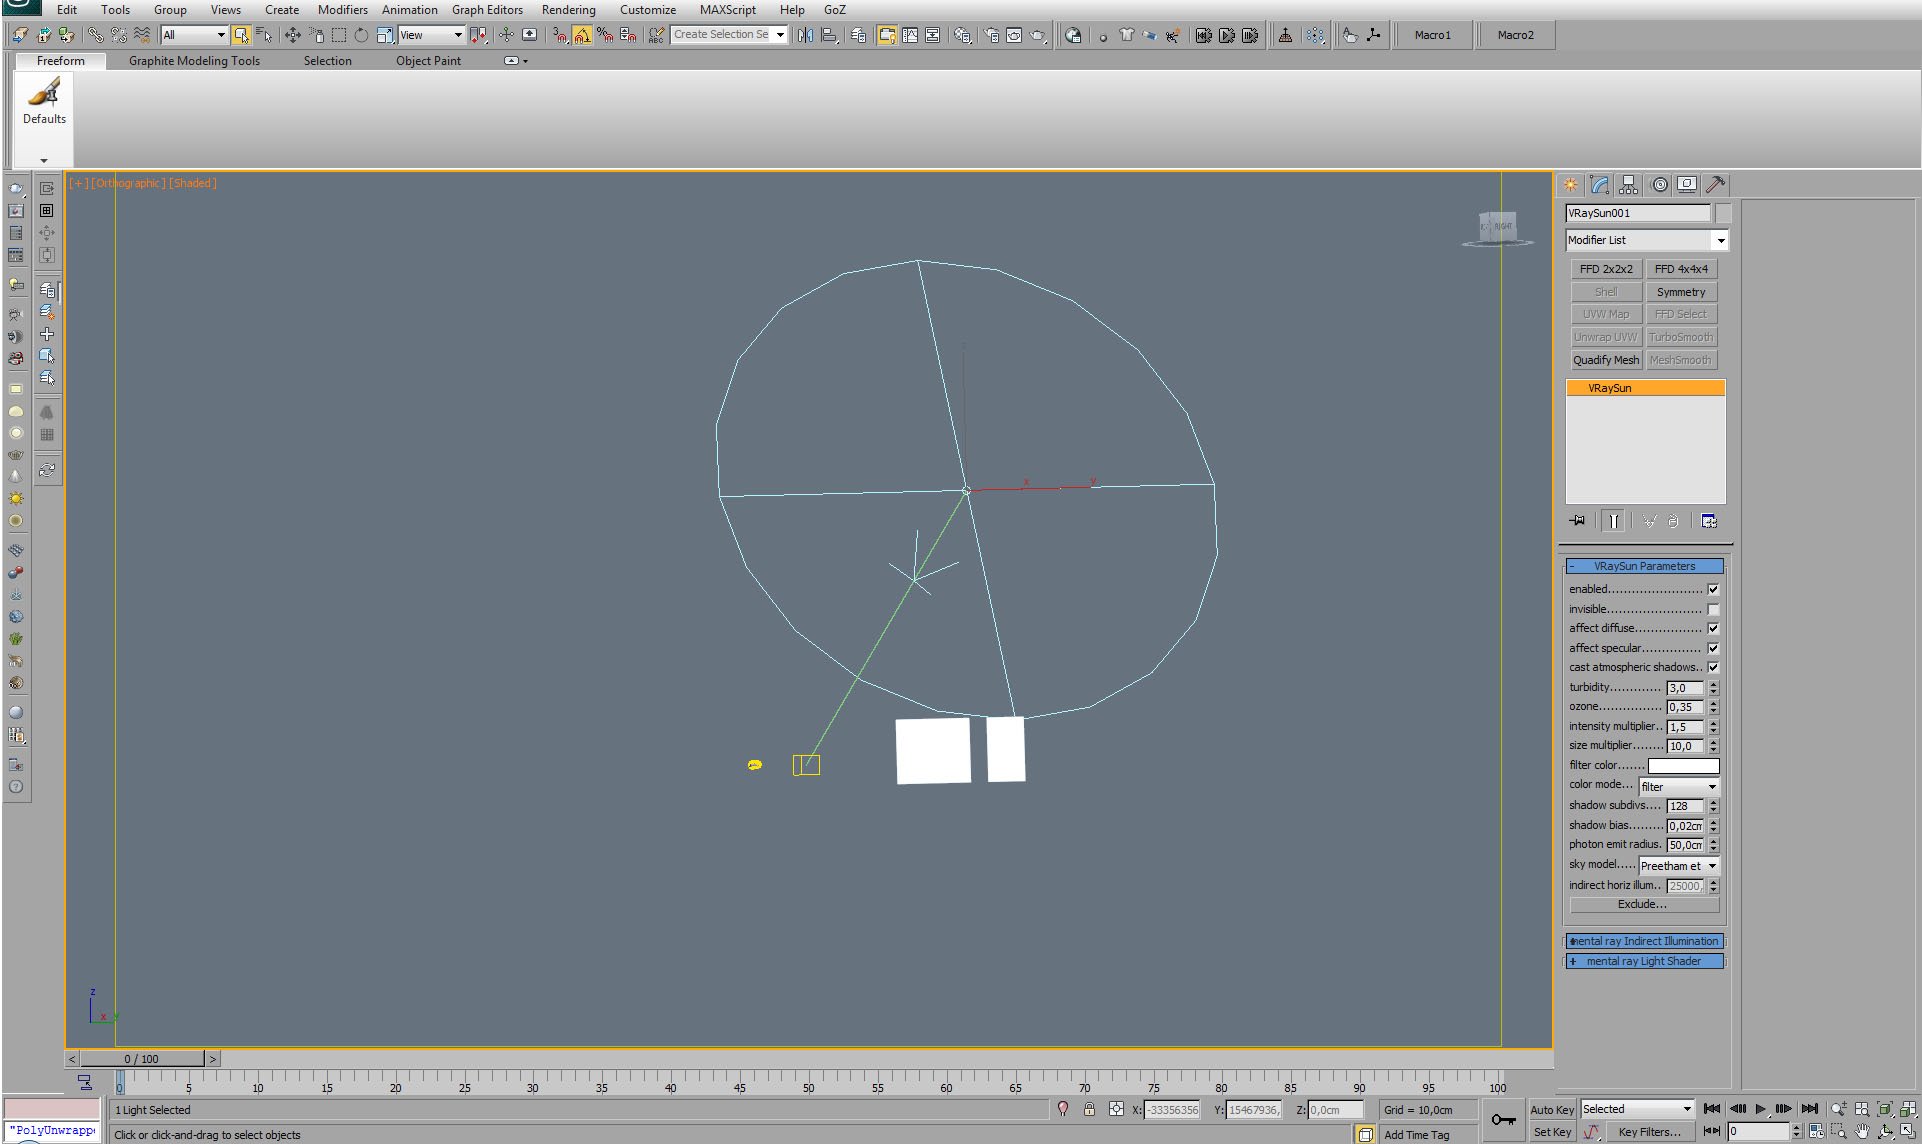
Our main light source - VraySun. Settings on the right.
Click on image to enlarge 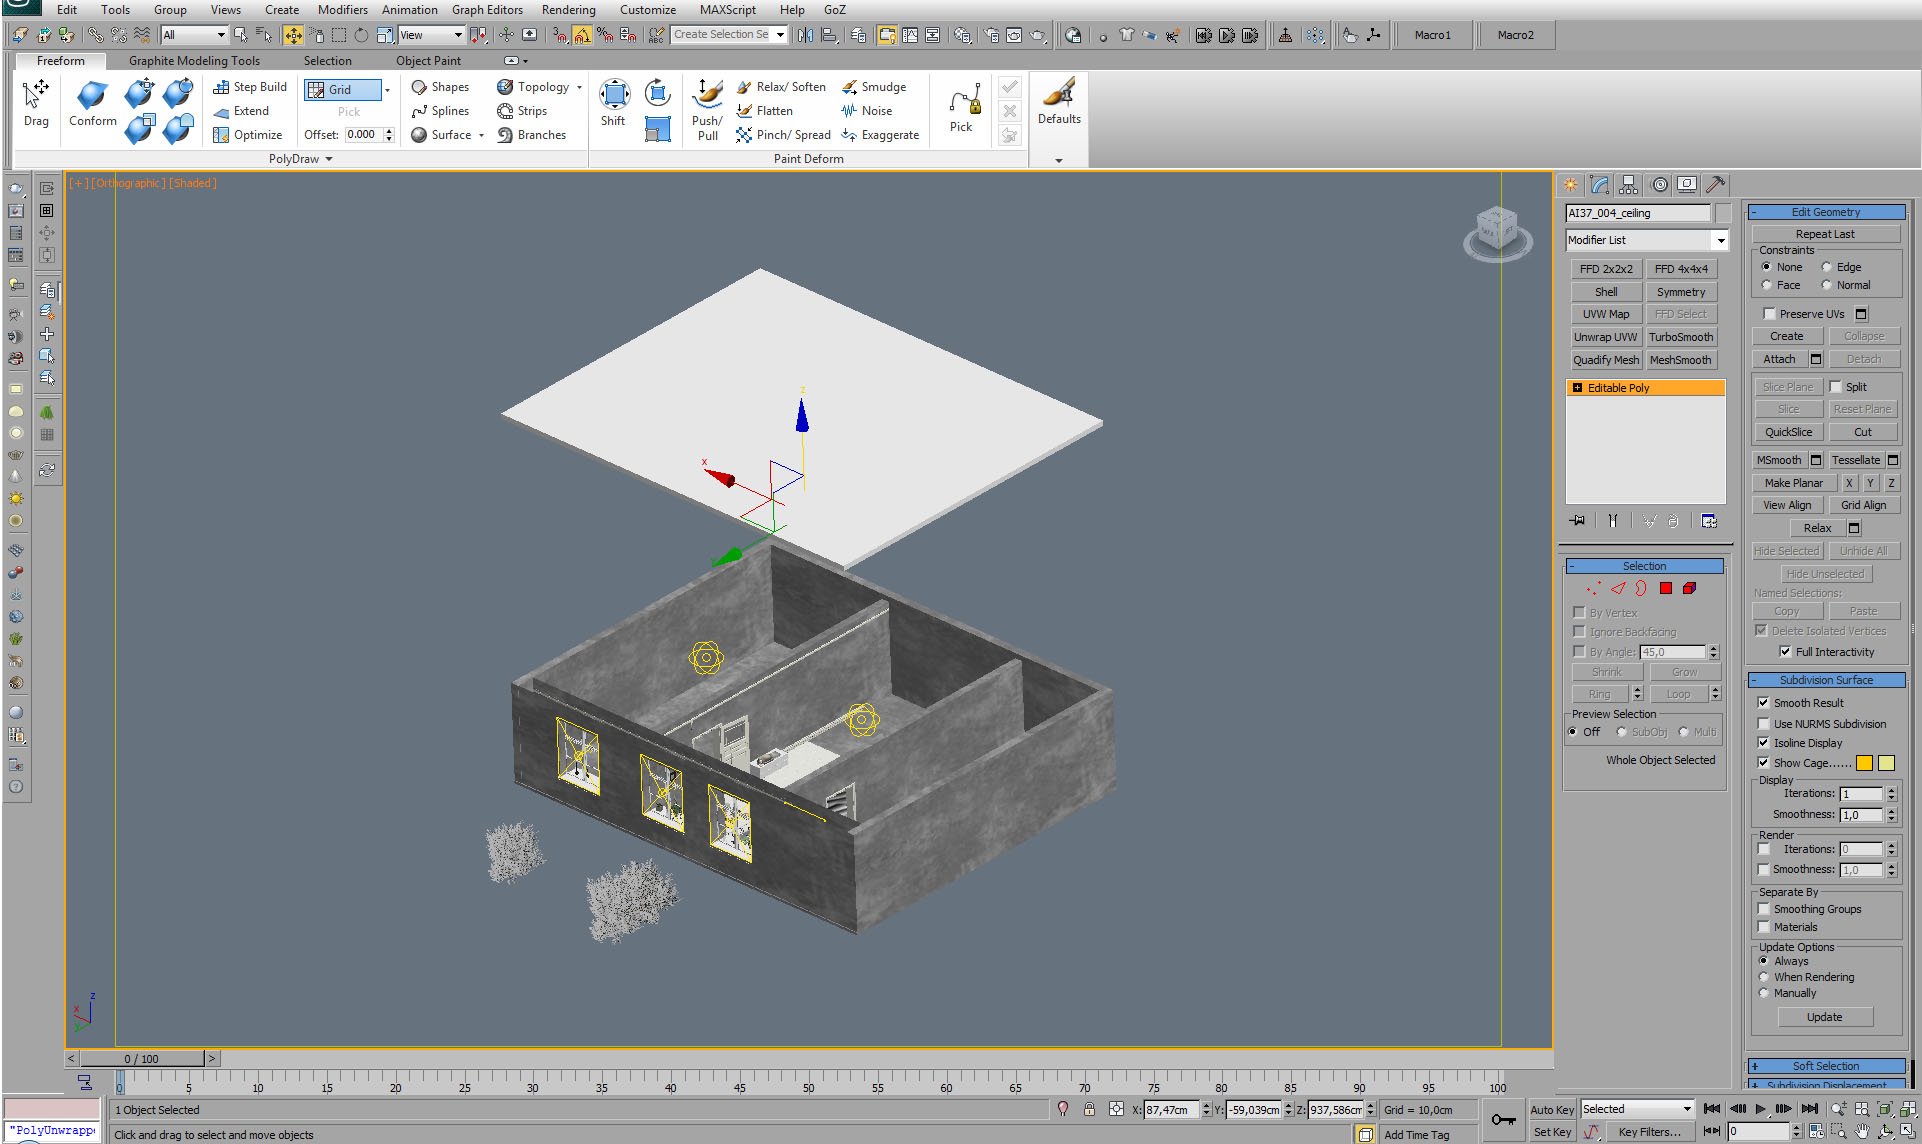
The building is a simple model. As often in arch-viz - the most photorealism comes from proper lighting and high quality shaders / textures.
Click on image to enlarge 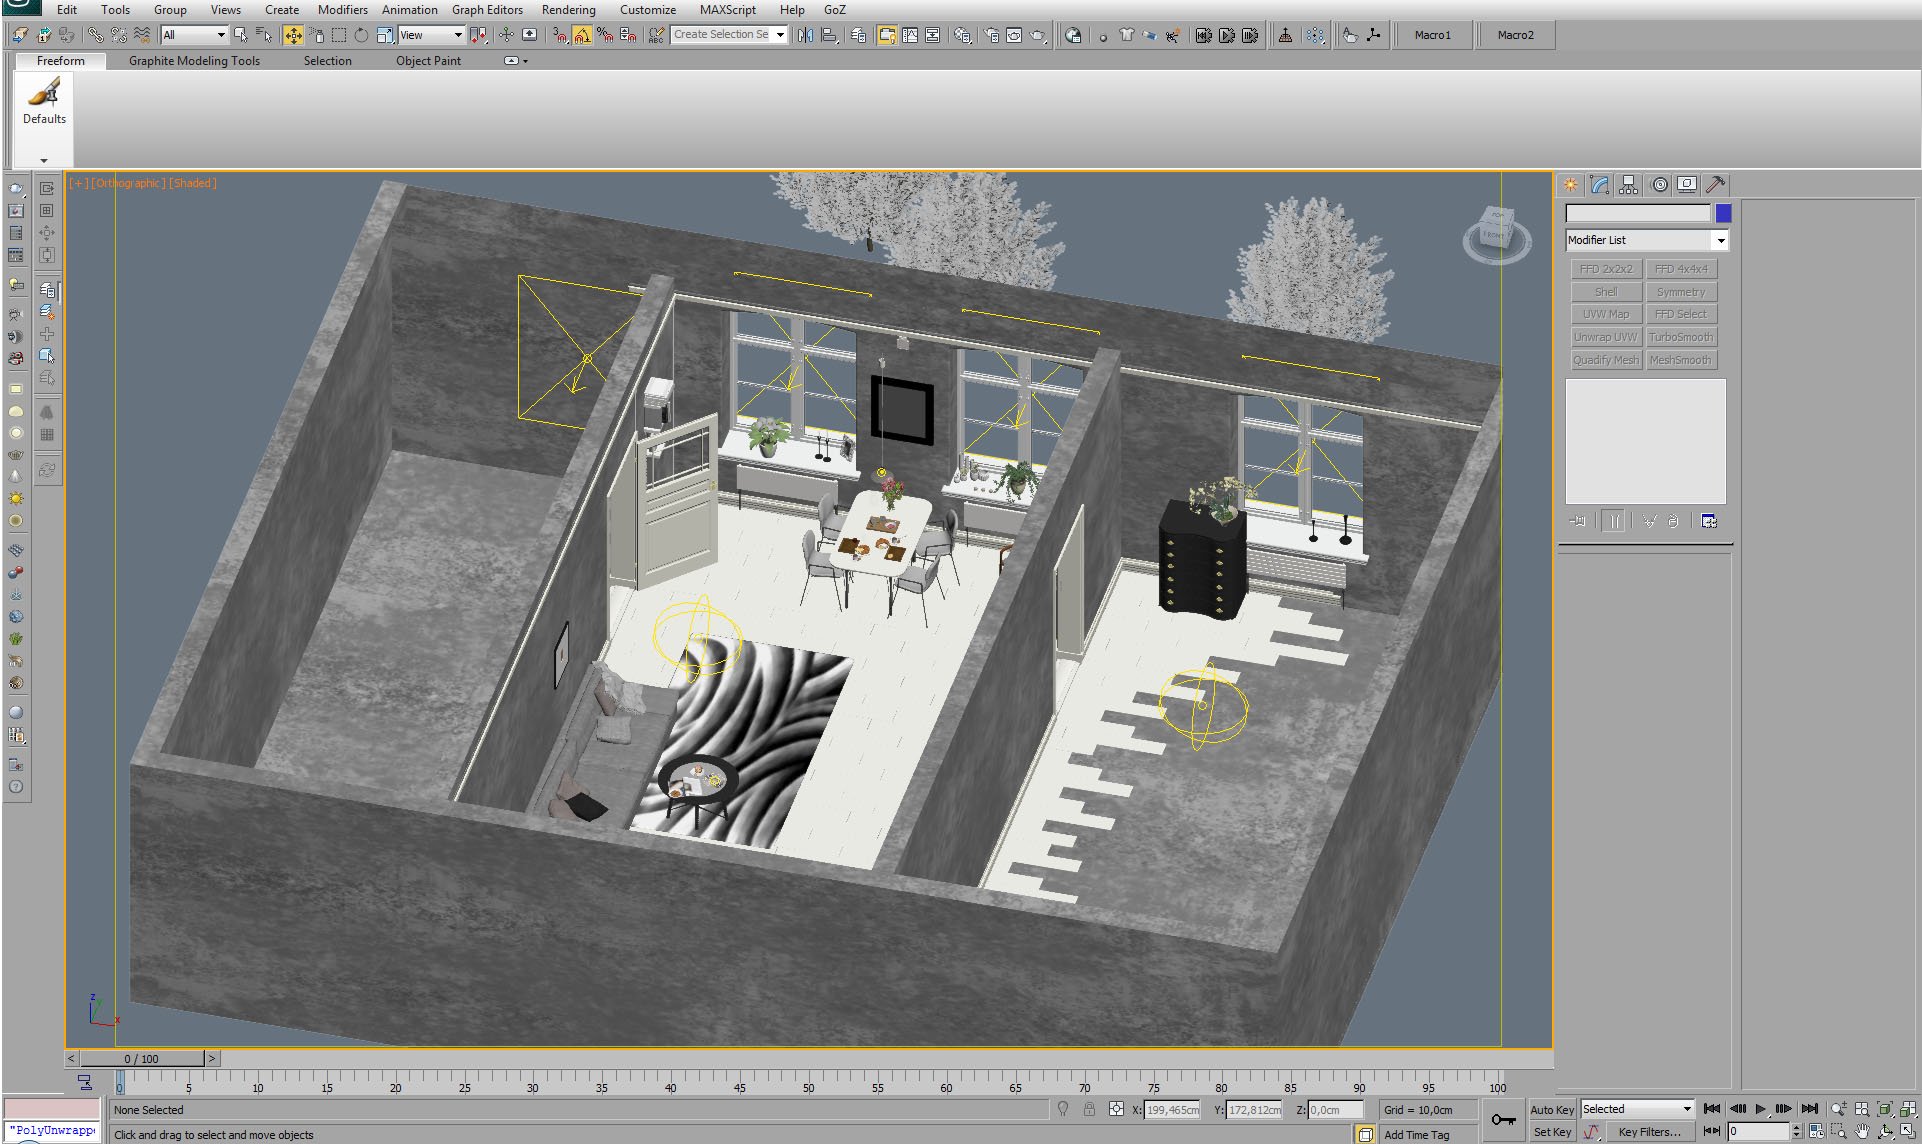
Isometric view of interior. It consists of three rooms, only two are direct visible by the camera. The left room was made to achieve proper light distribution in the interior (additional light from the left).
Click on image to enlarge 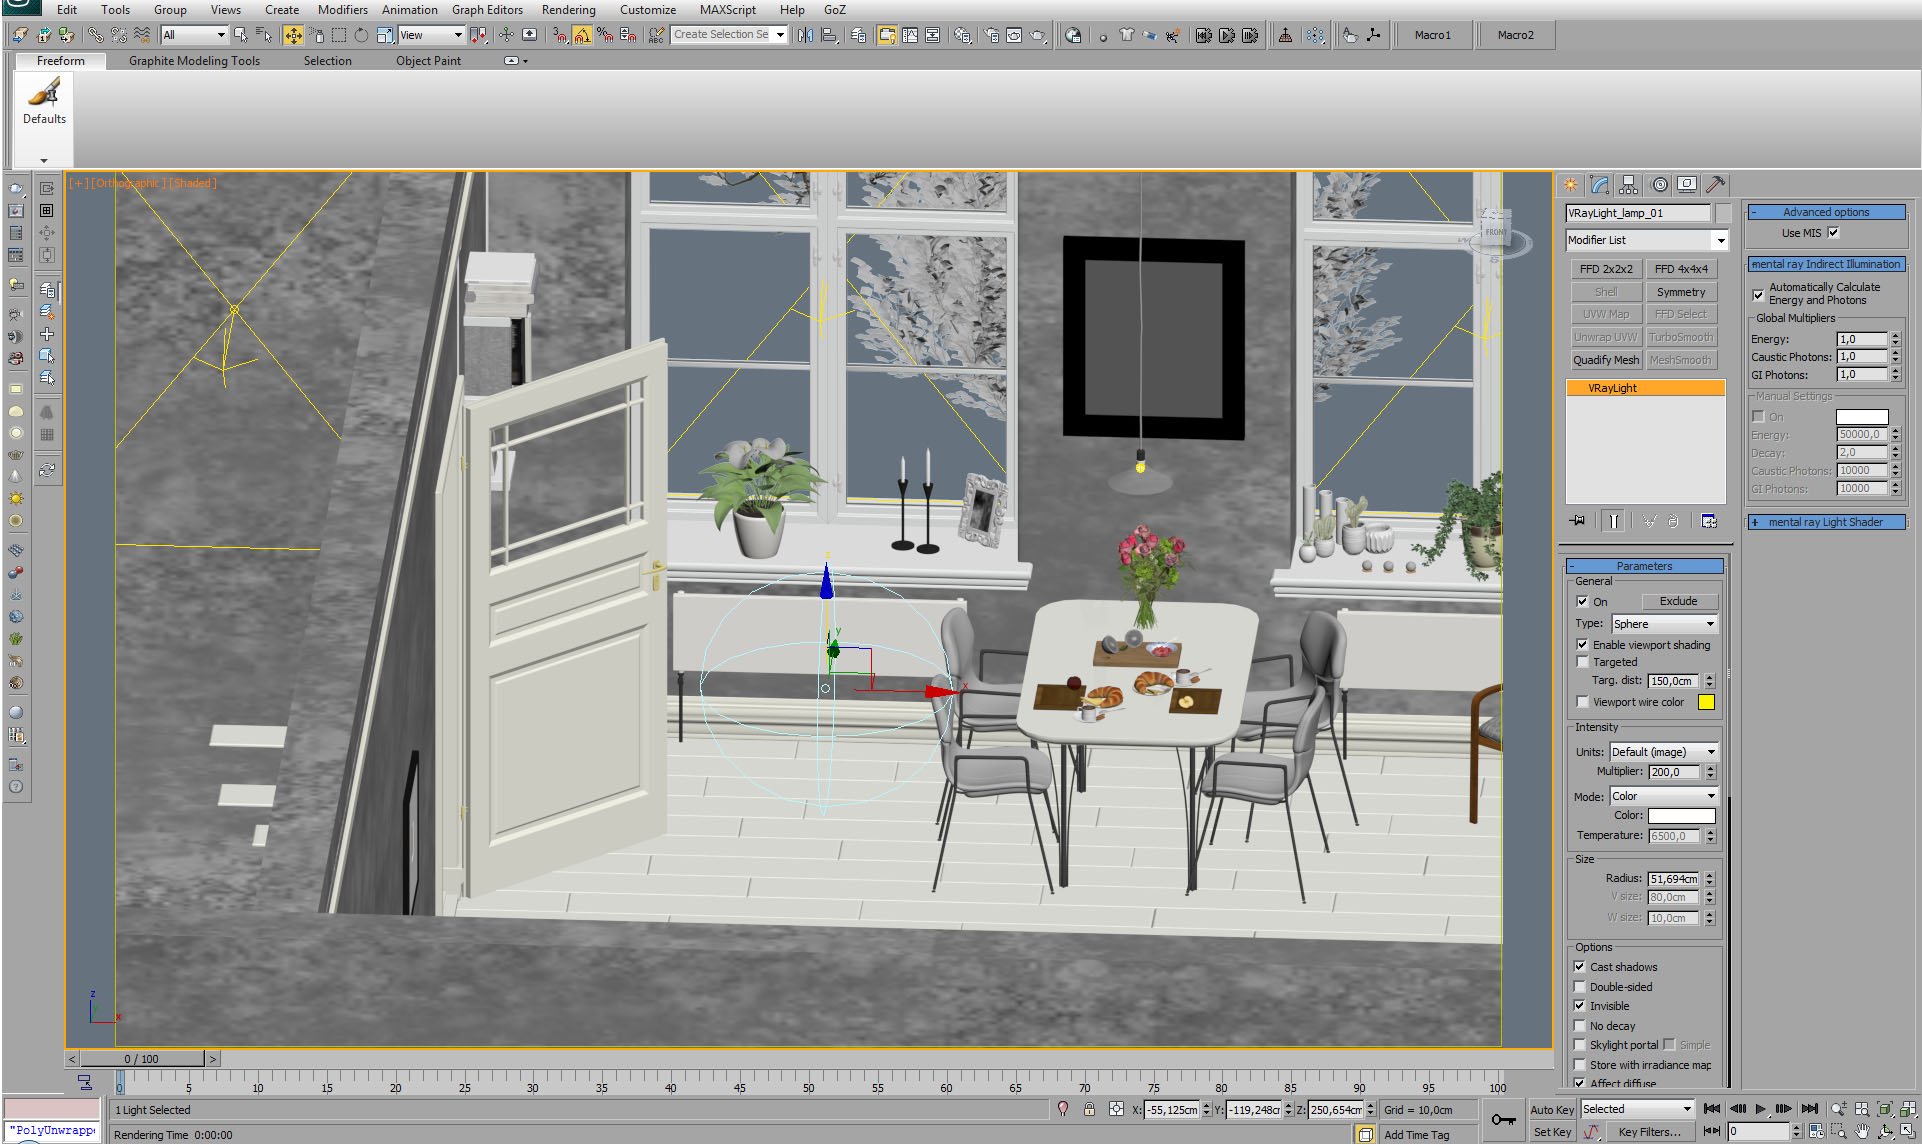
We also put Vray light inside main room. This invisible sphere casts warm light. Sunlight alone was not enough.
Click on image to enlarge 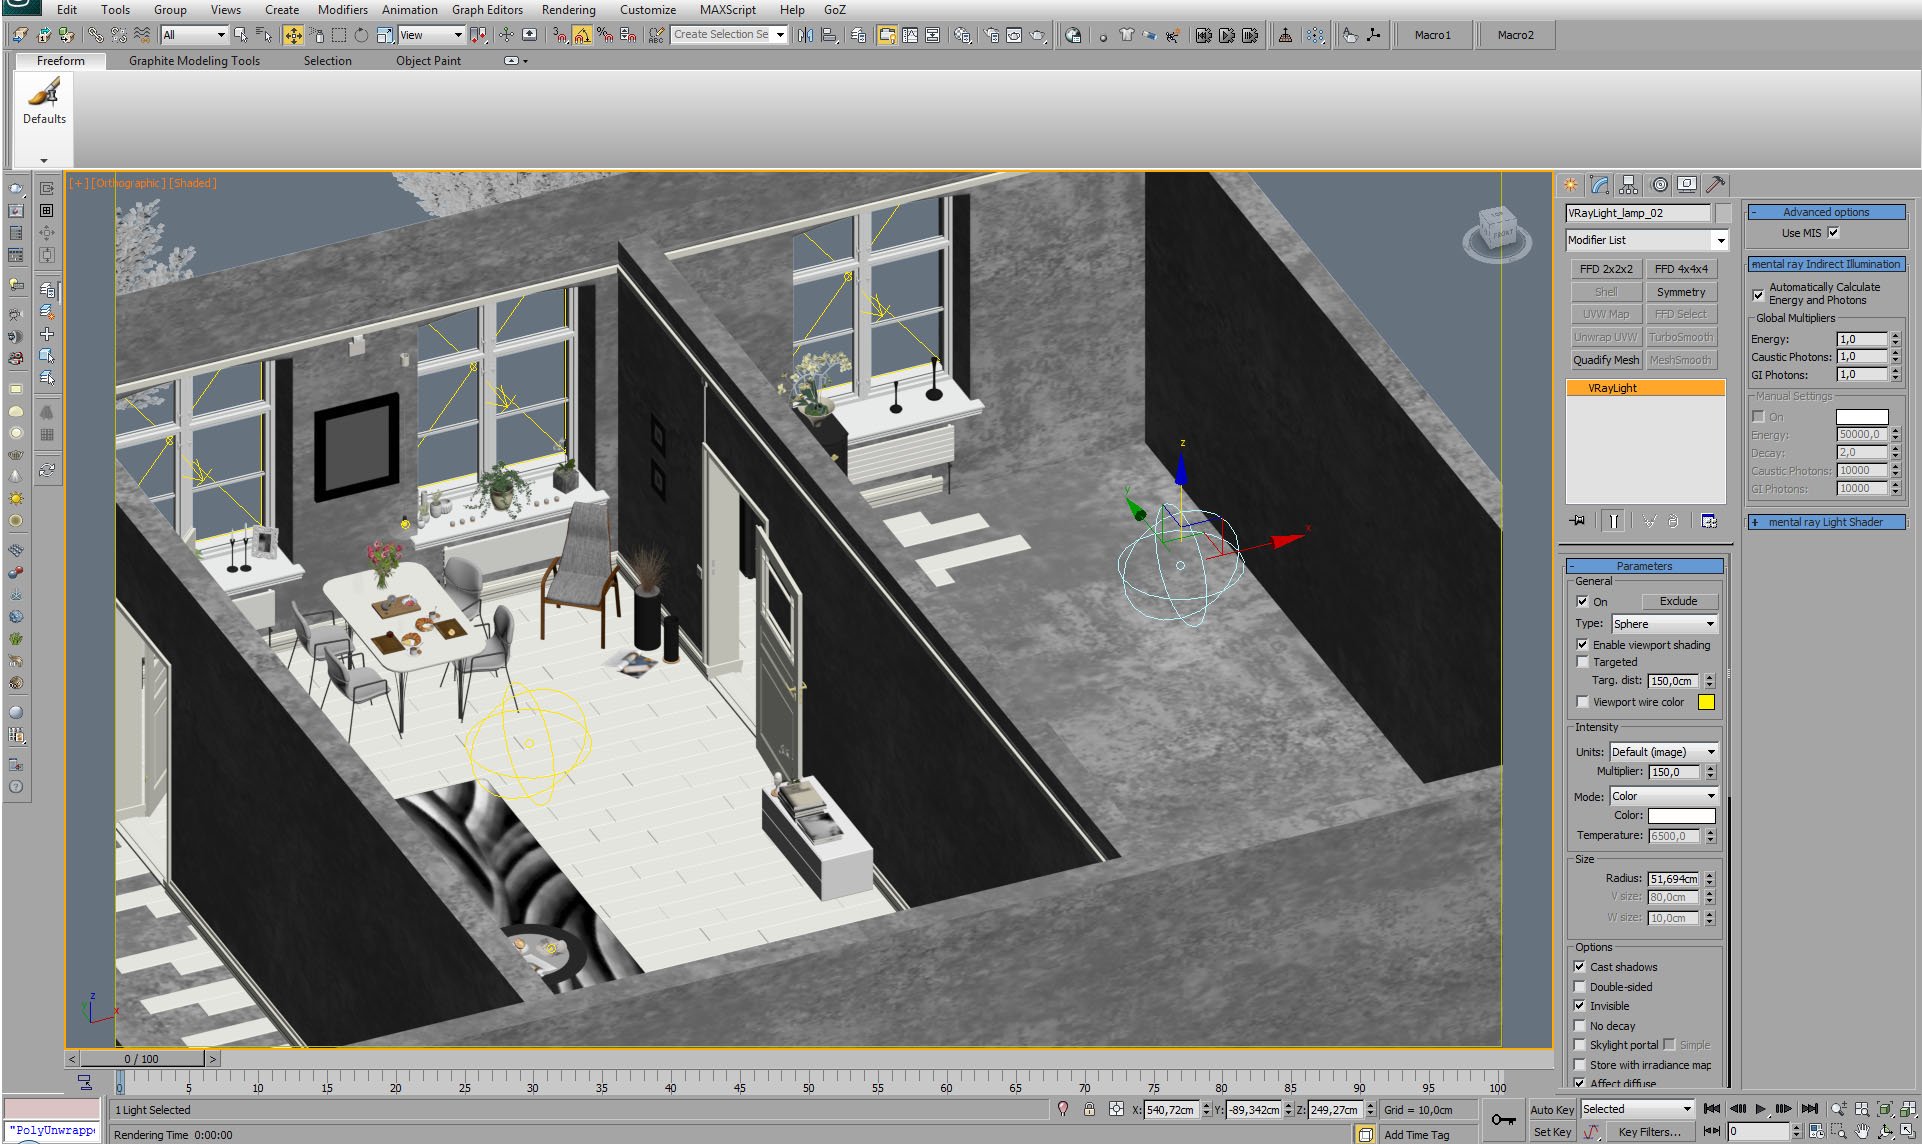
Another sphere light is placed in the room to the right of the camera.
Click on image to enlarge 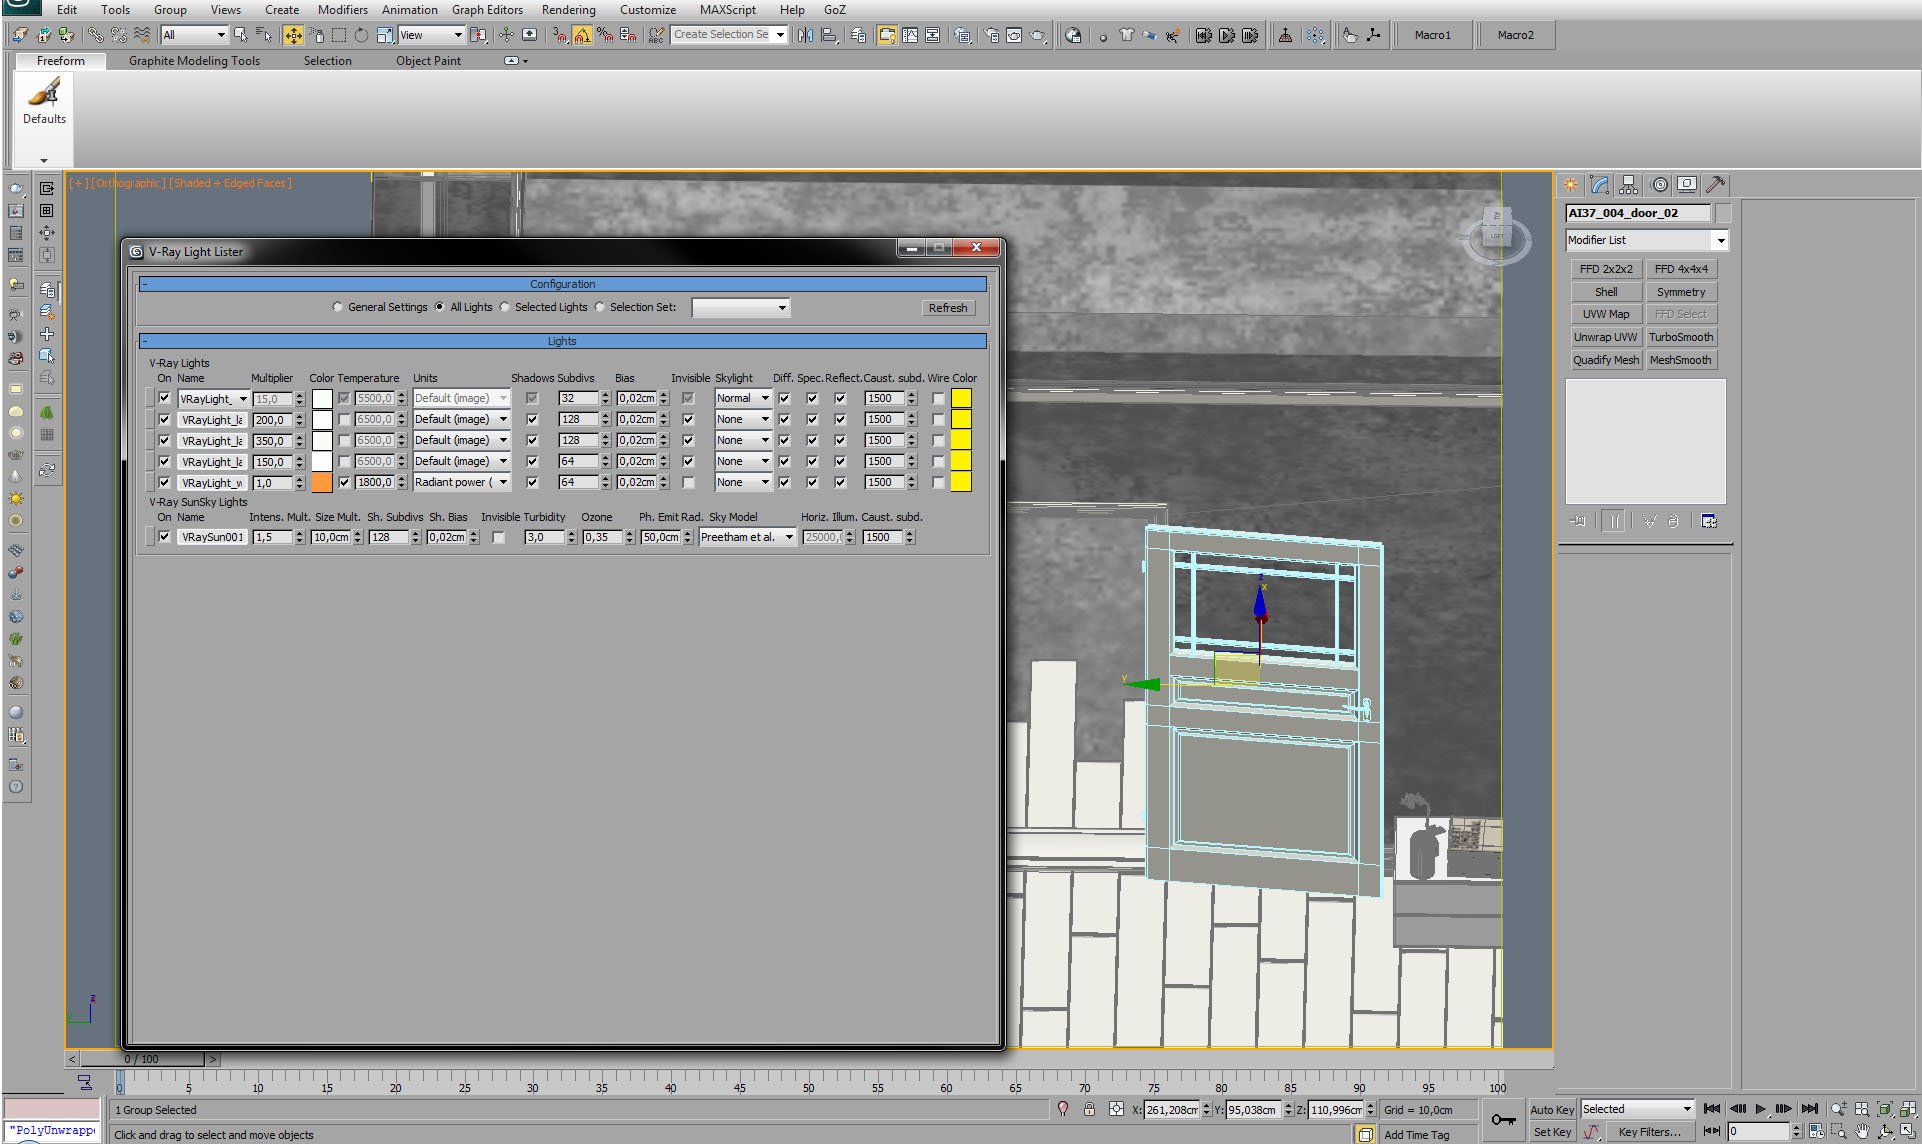
To sum up lighting of this scene - here is Vray Light Lister.
Click on image to enlarge 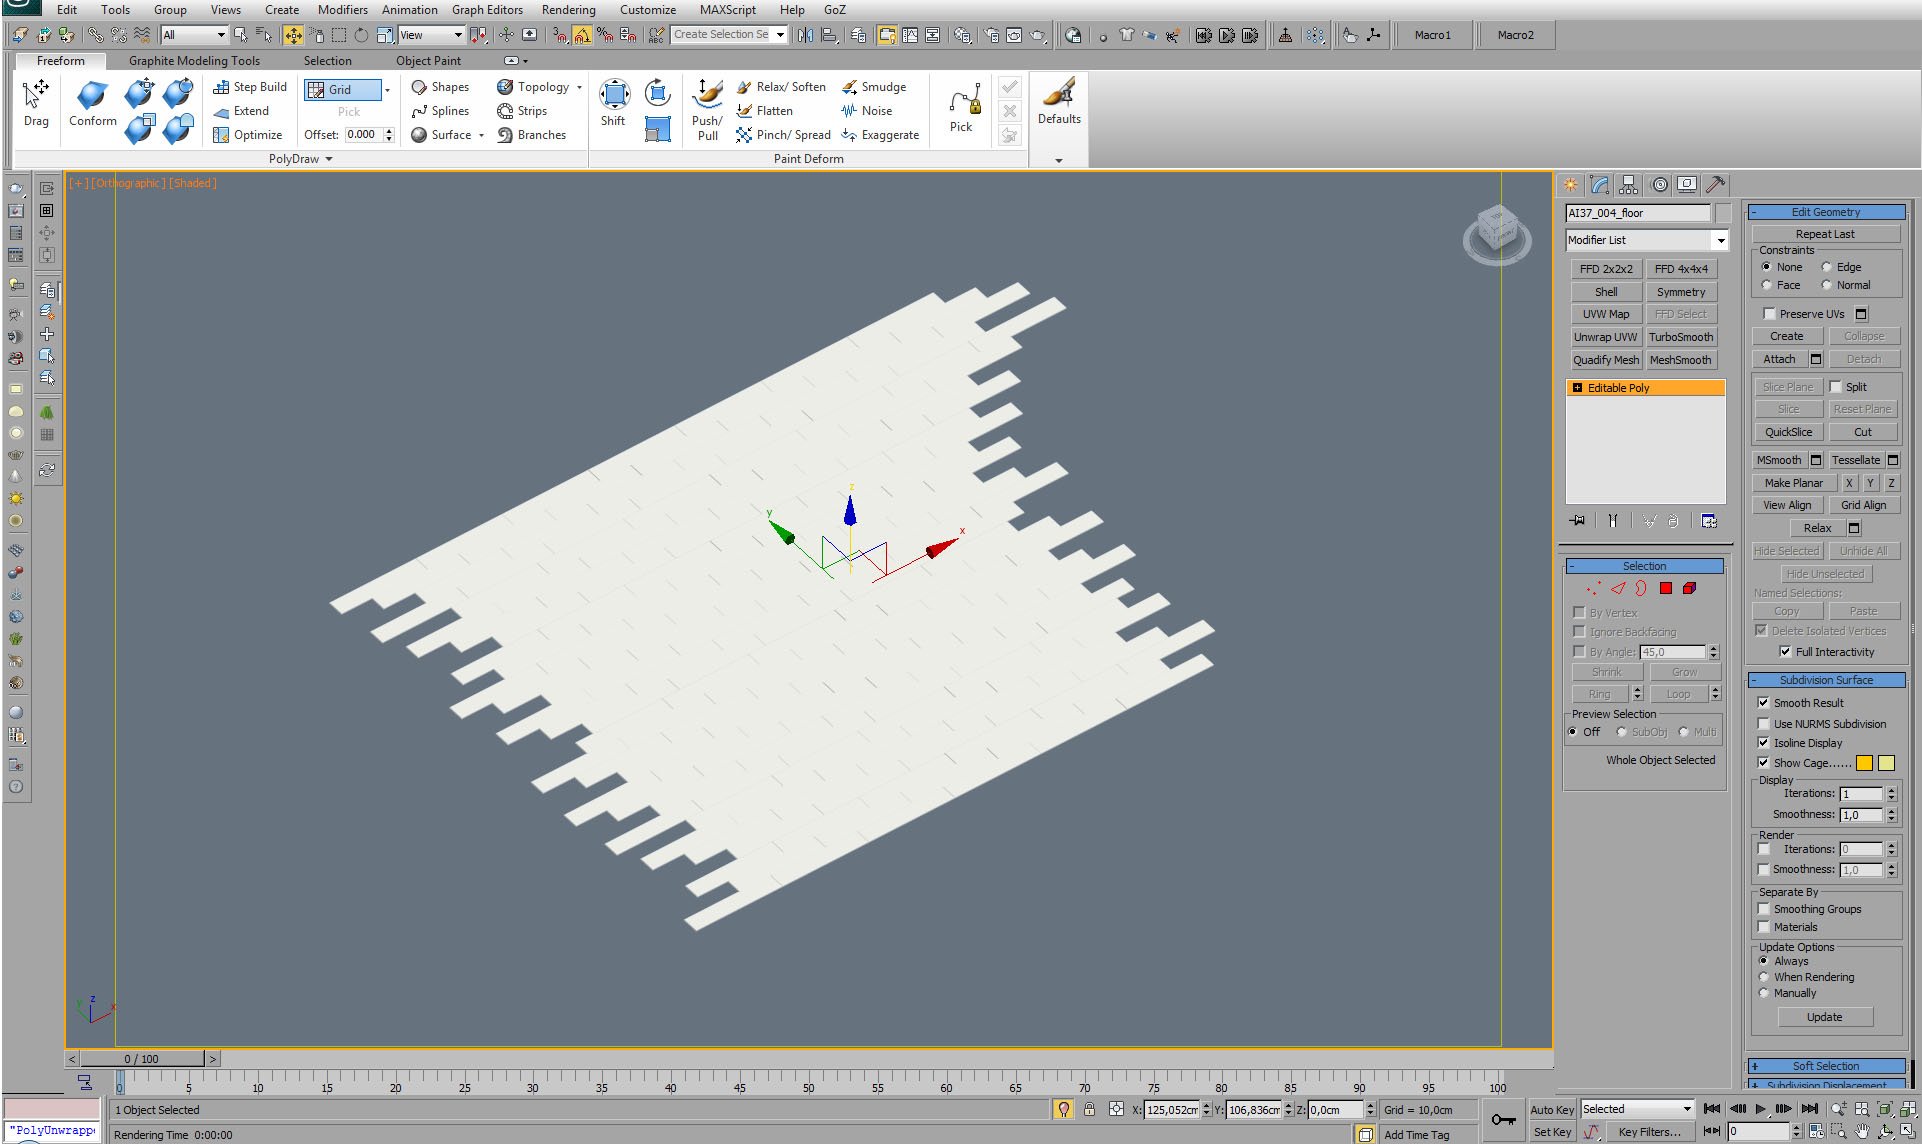
We modeled only a part of the floor that is visible in the camera. It speeds up rendering. We used floor Generator script to make floor boards.
Click on image to enlarge 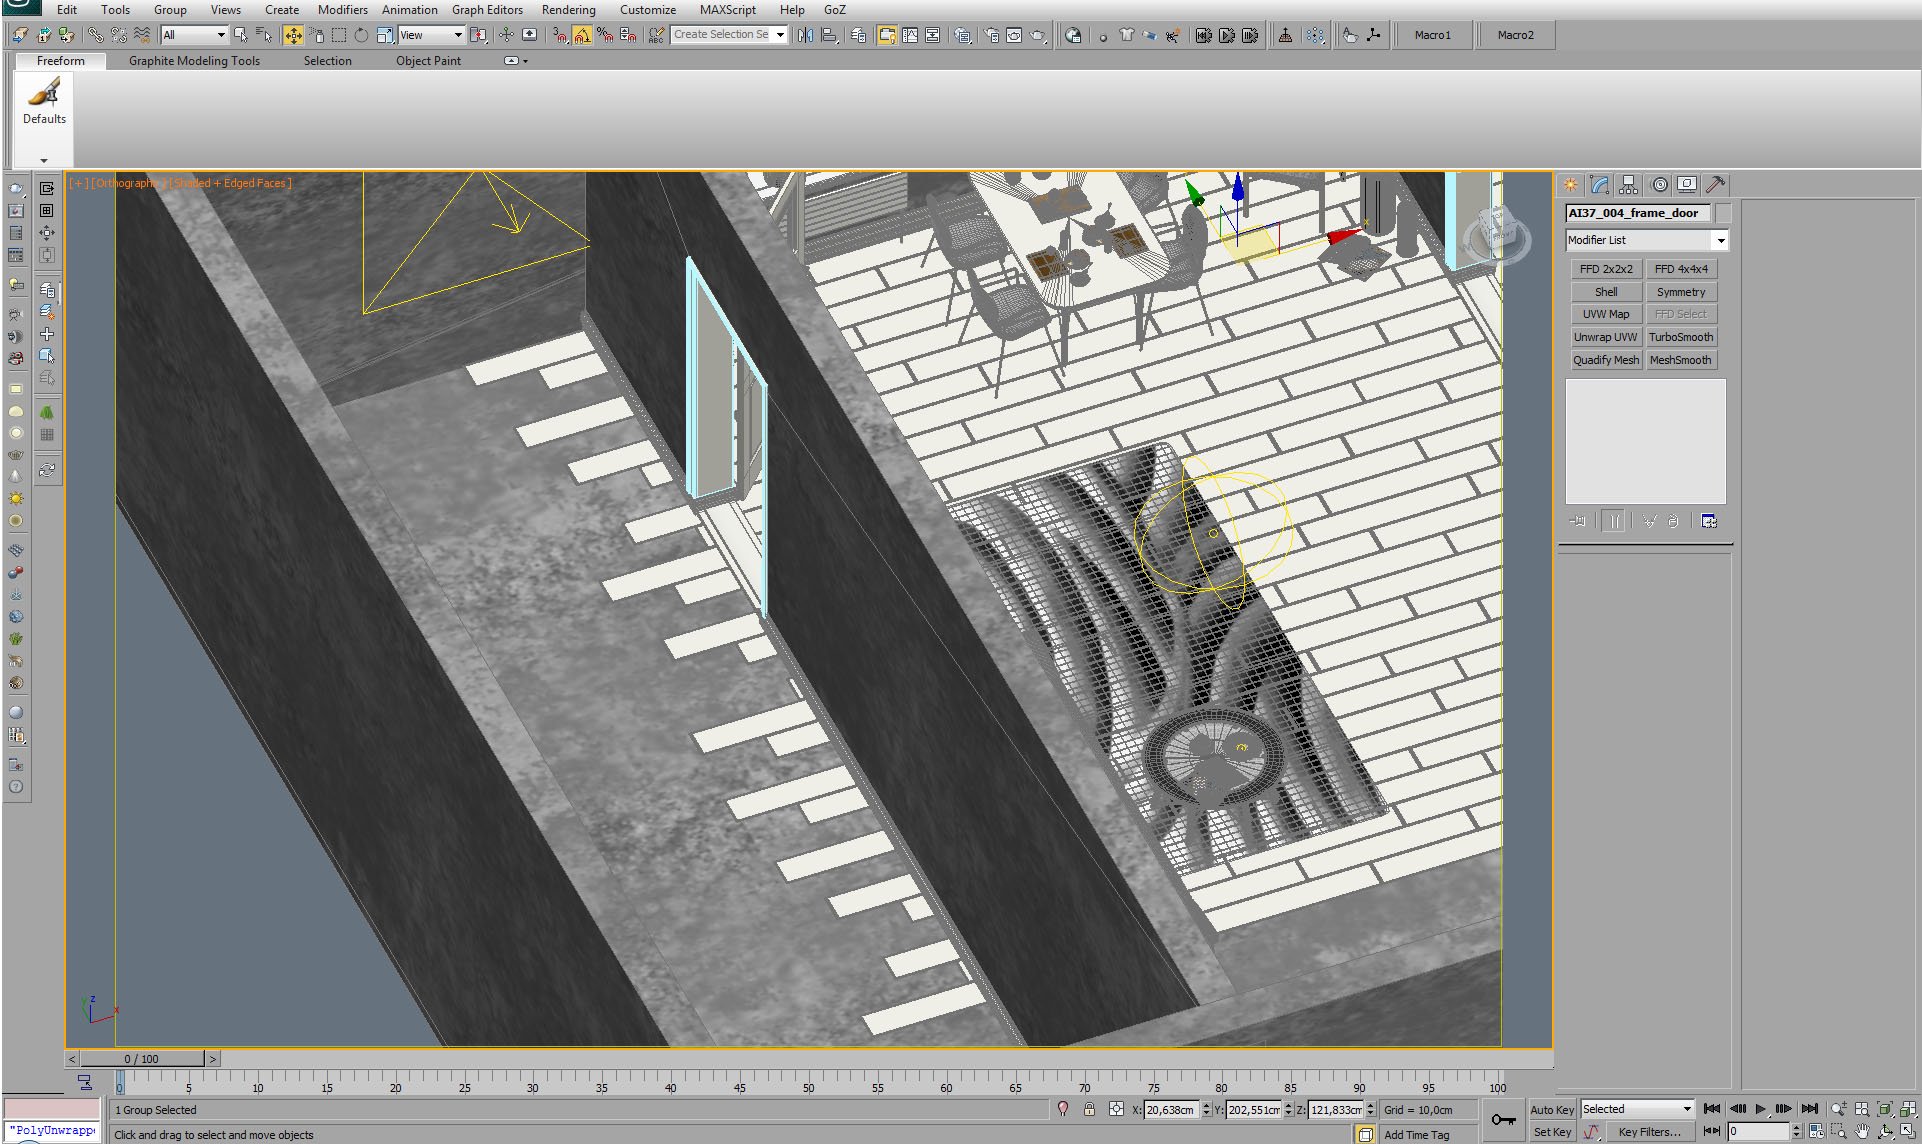
Floor boards extending to the left room. There is no need to cut them.
Click on image to enlarge 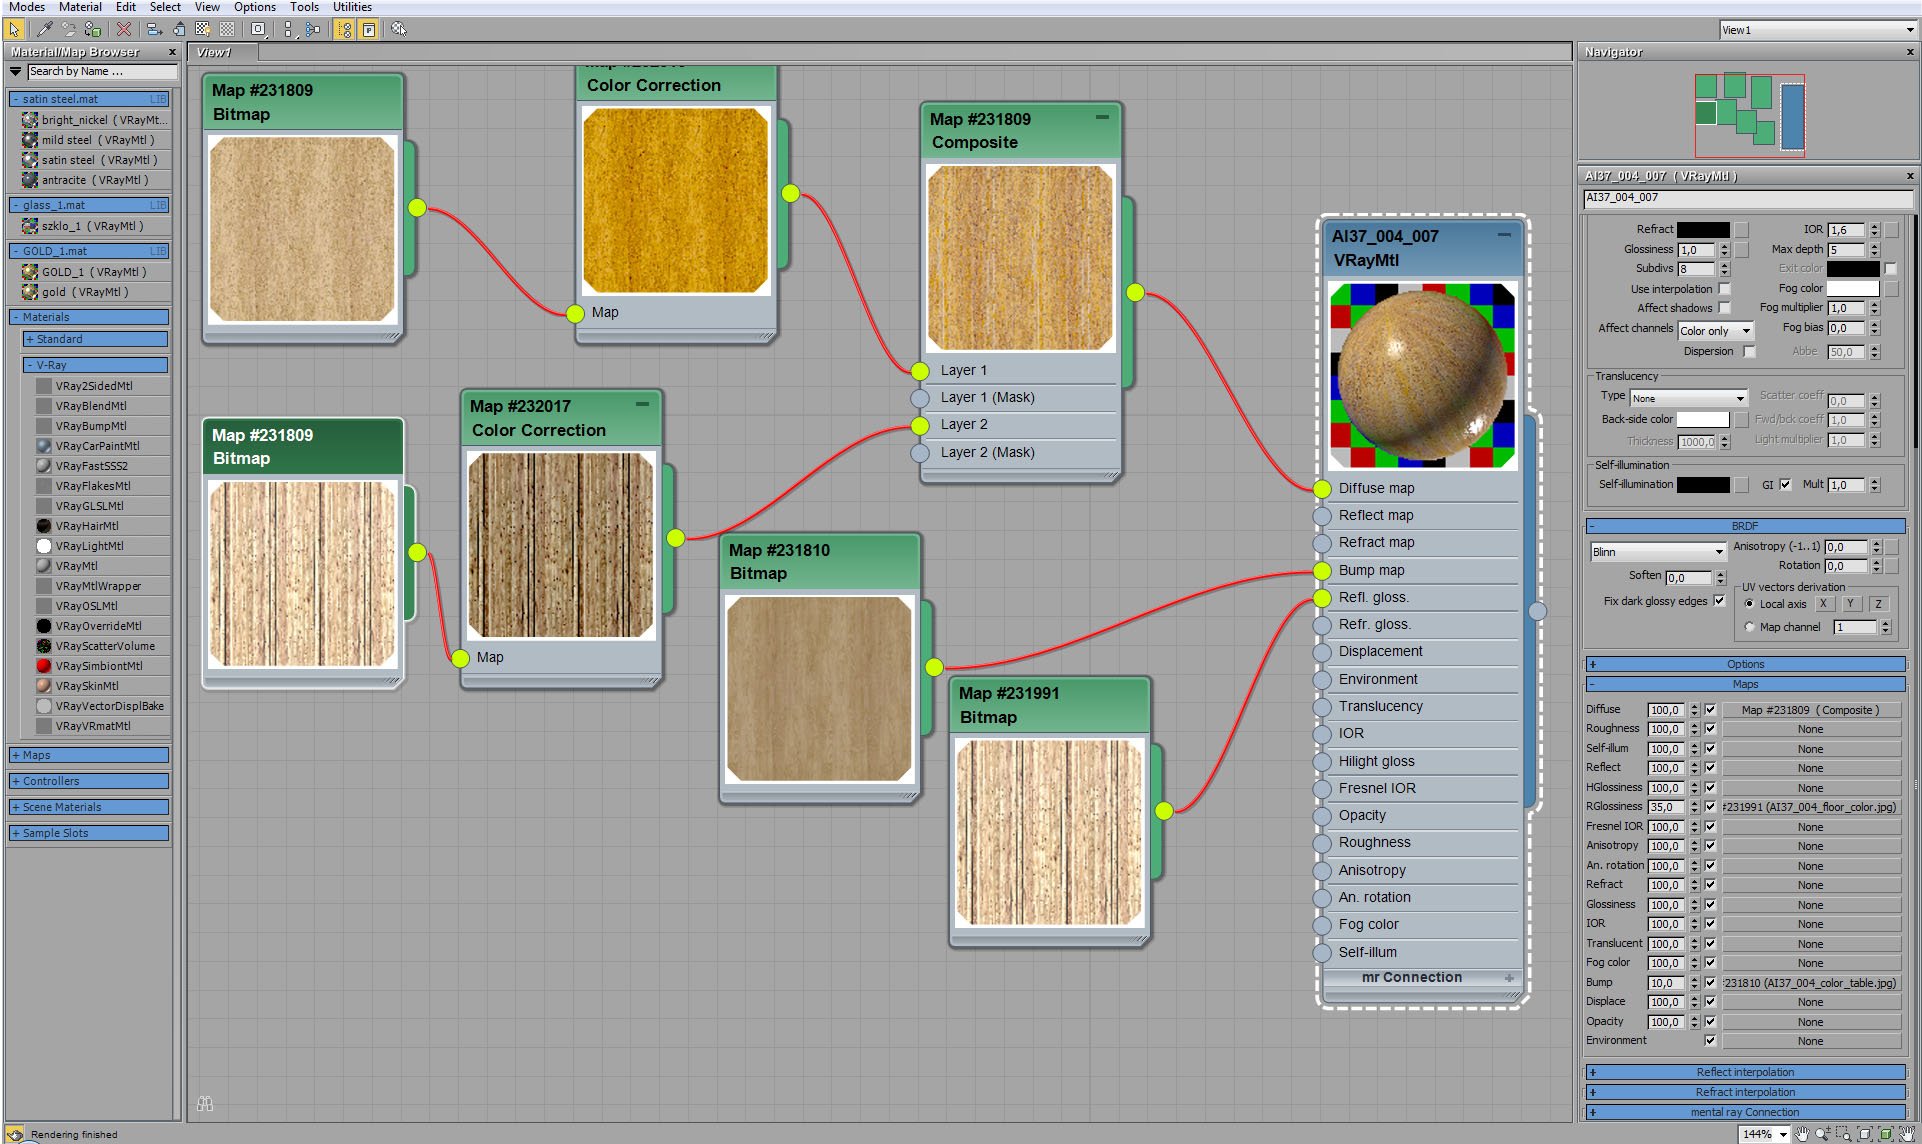
Click on image to enlarge 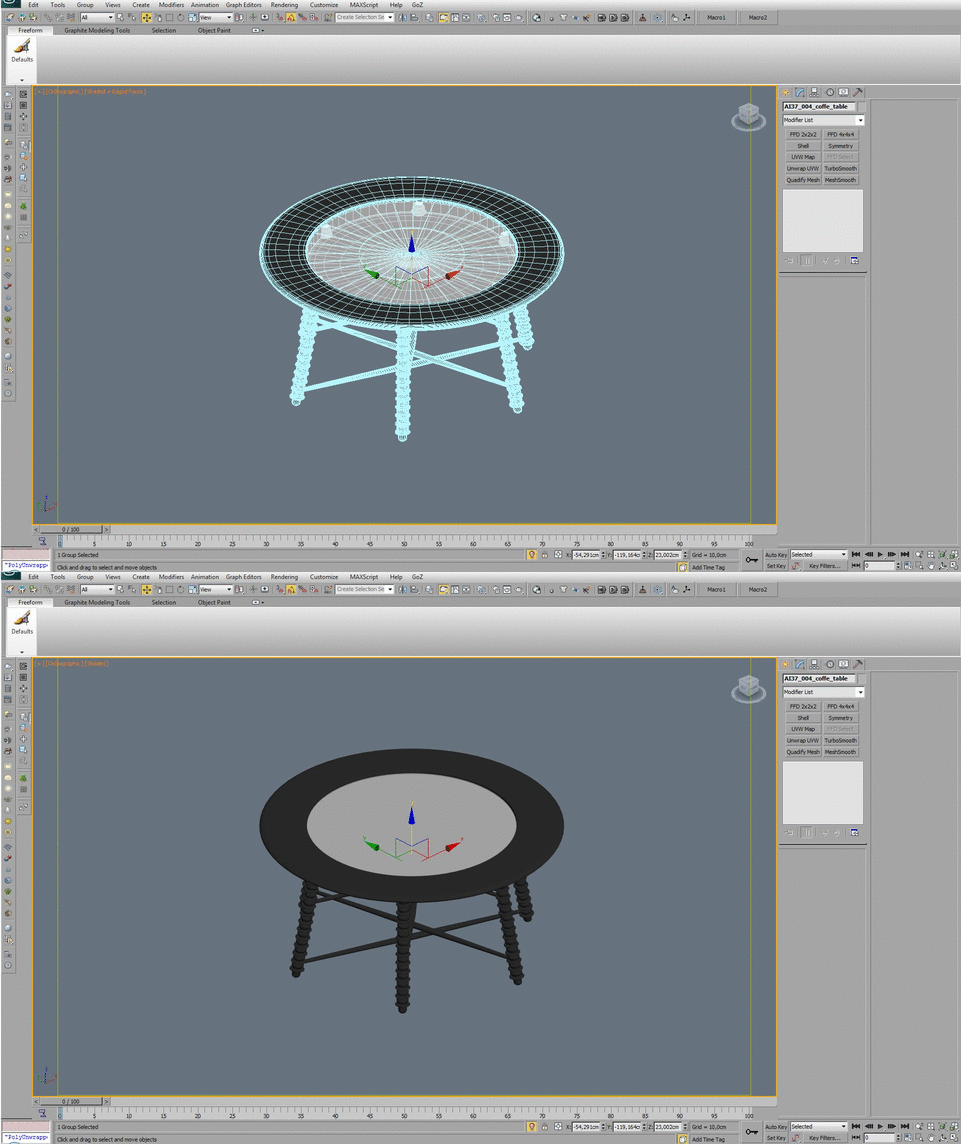
Click on image to enlarge 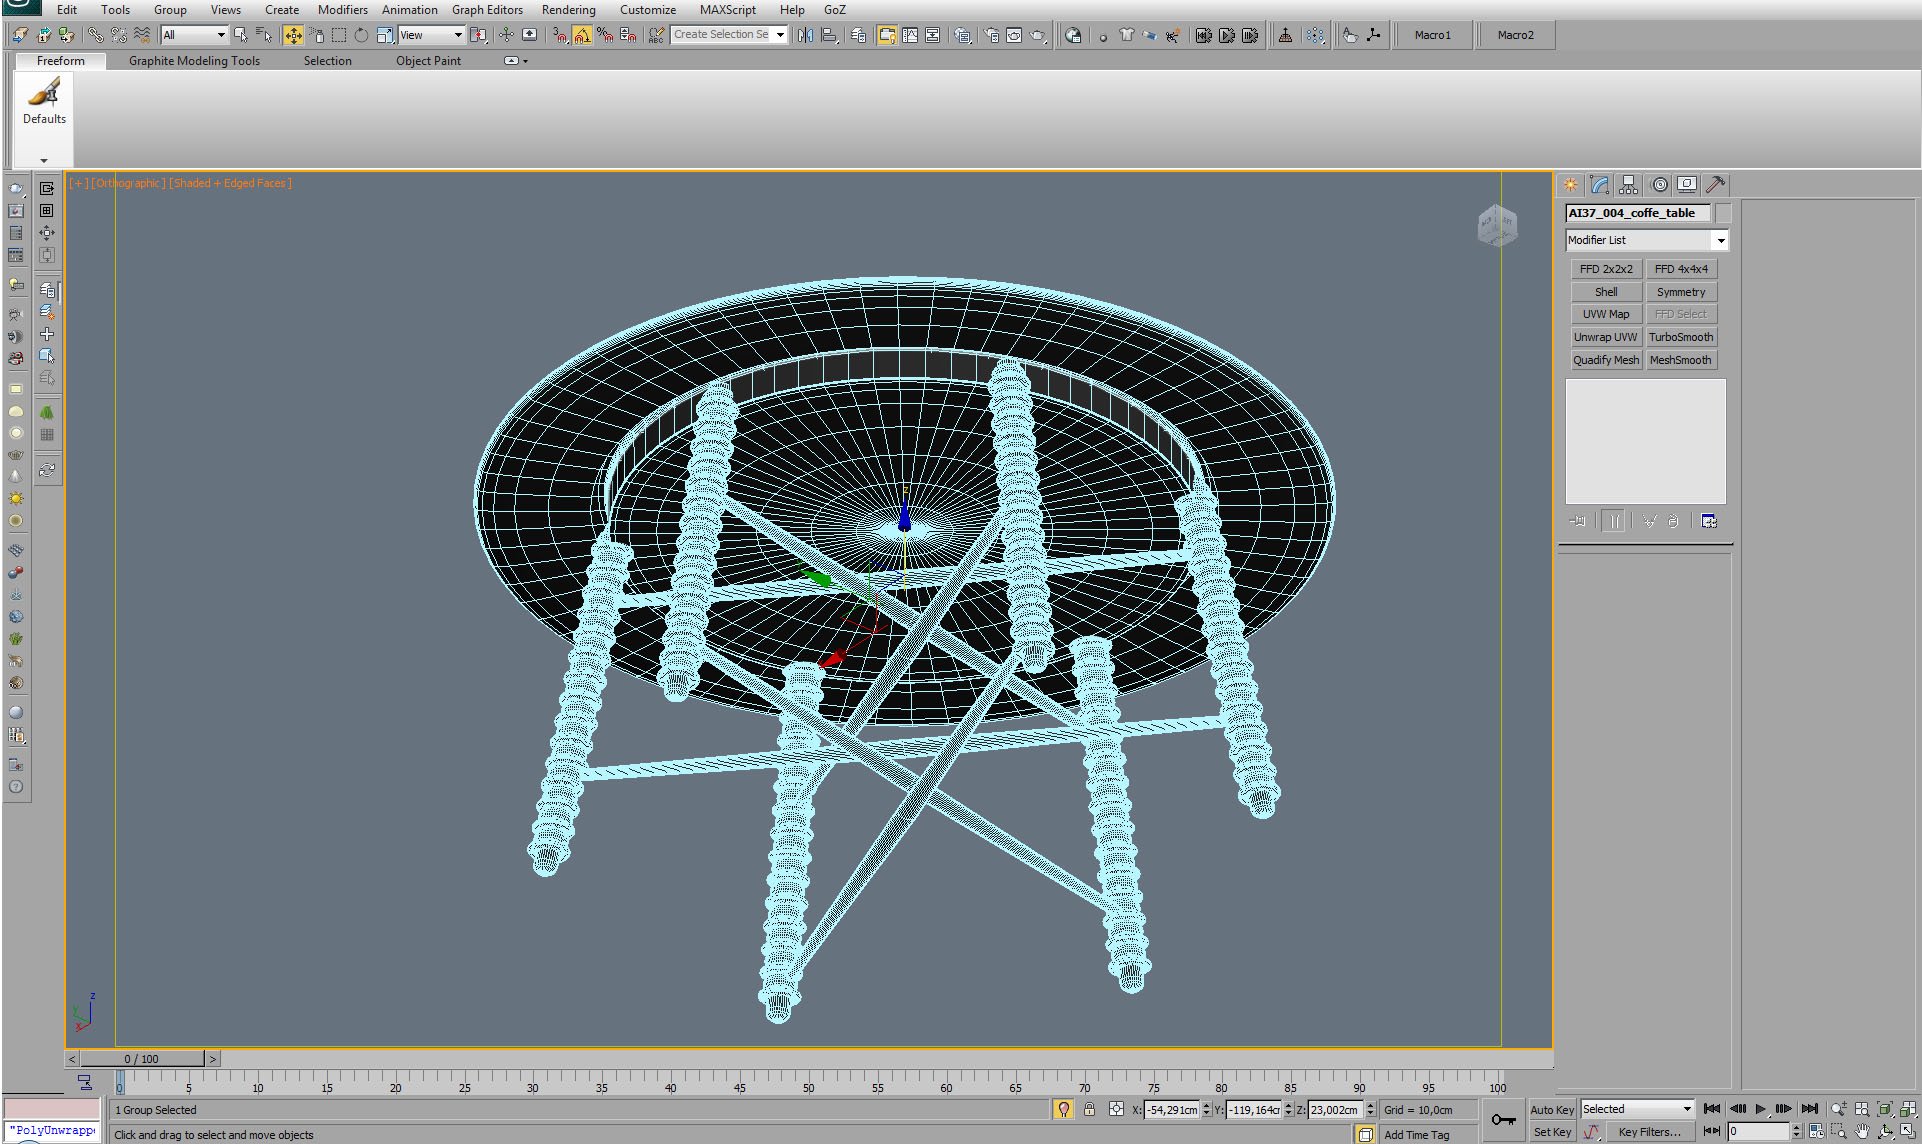
A table - view from the bottom.
Click on image to enlarge 
Click on image to enlarge 
Click on image to enlarge 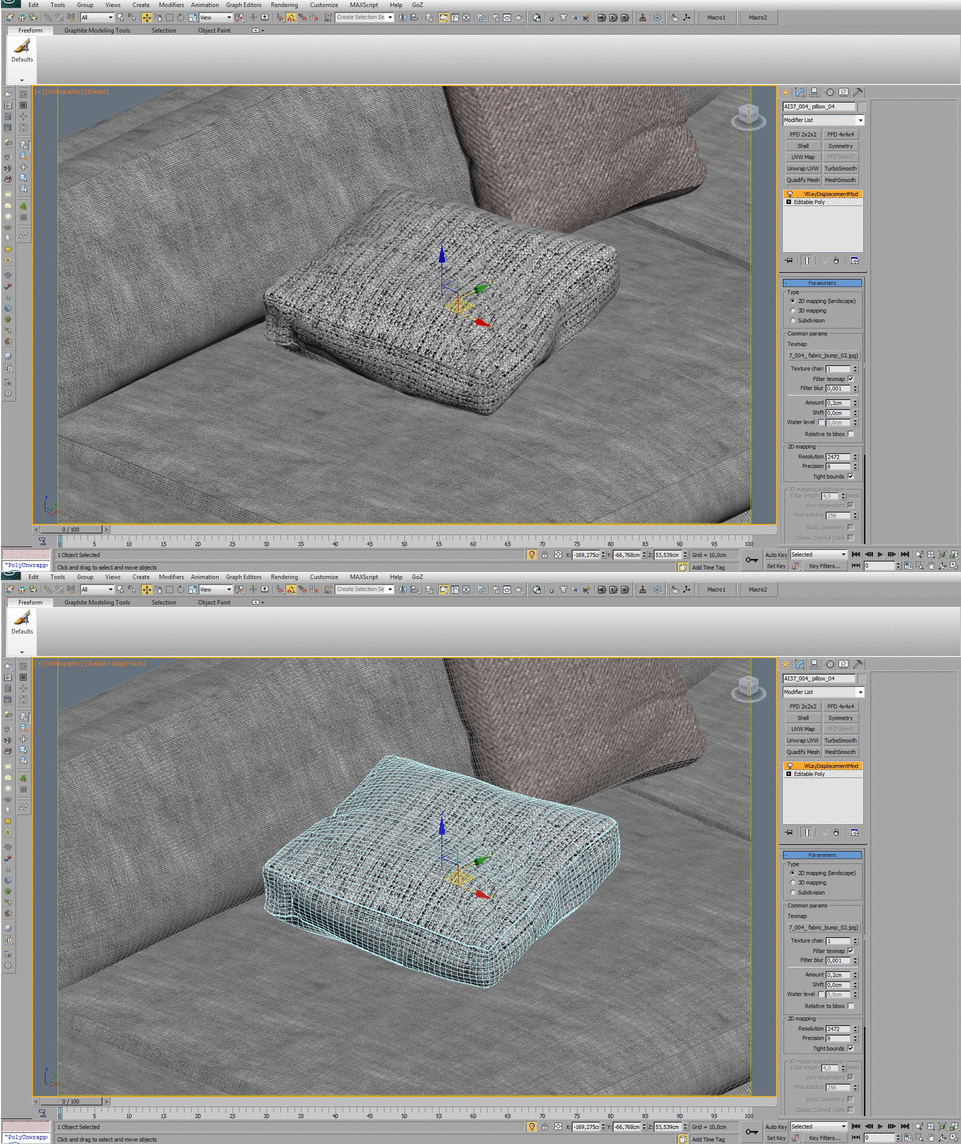
Click on image to enlarge 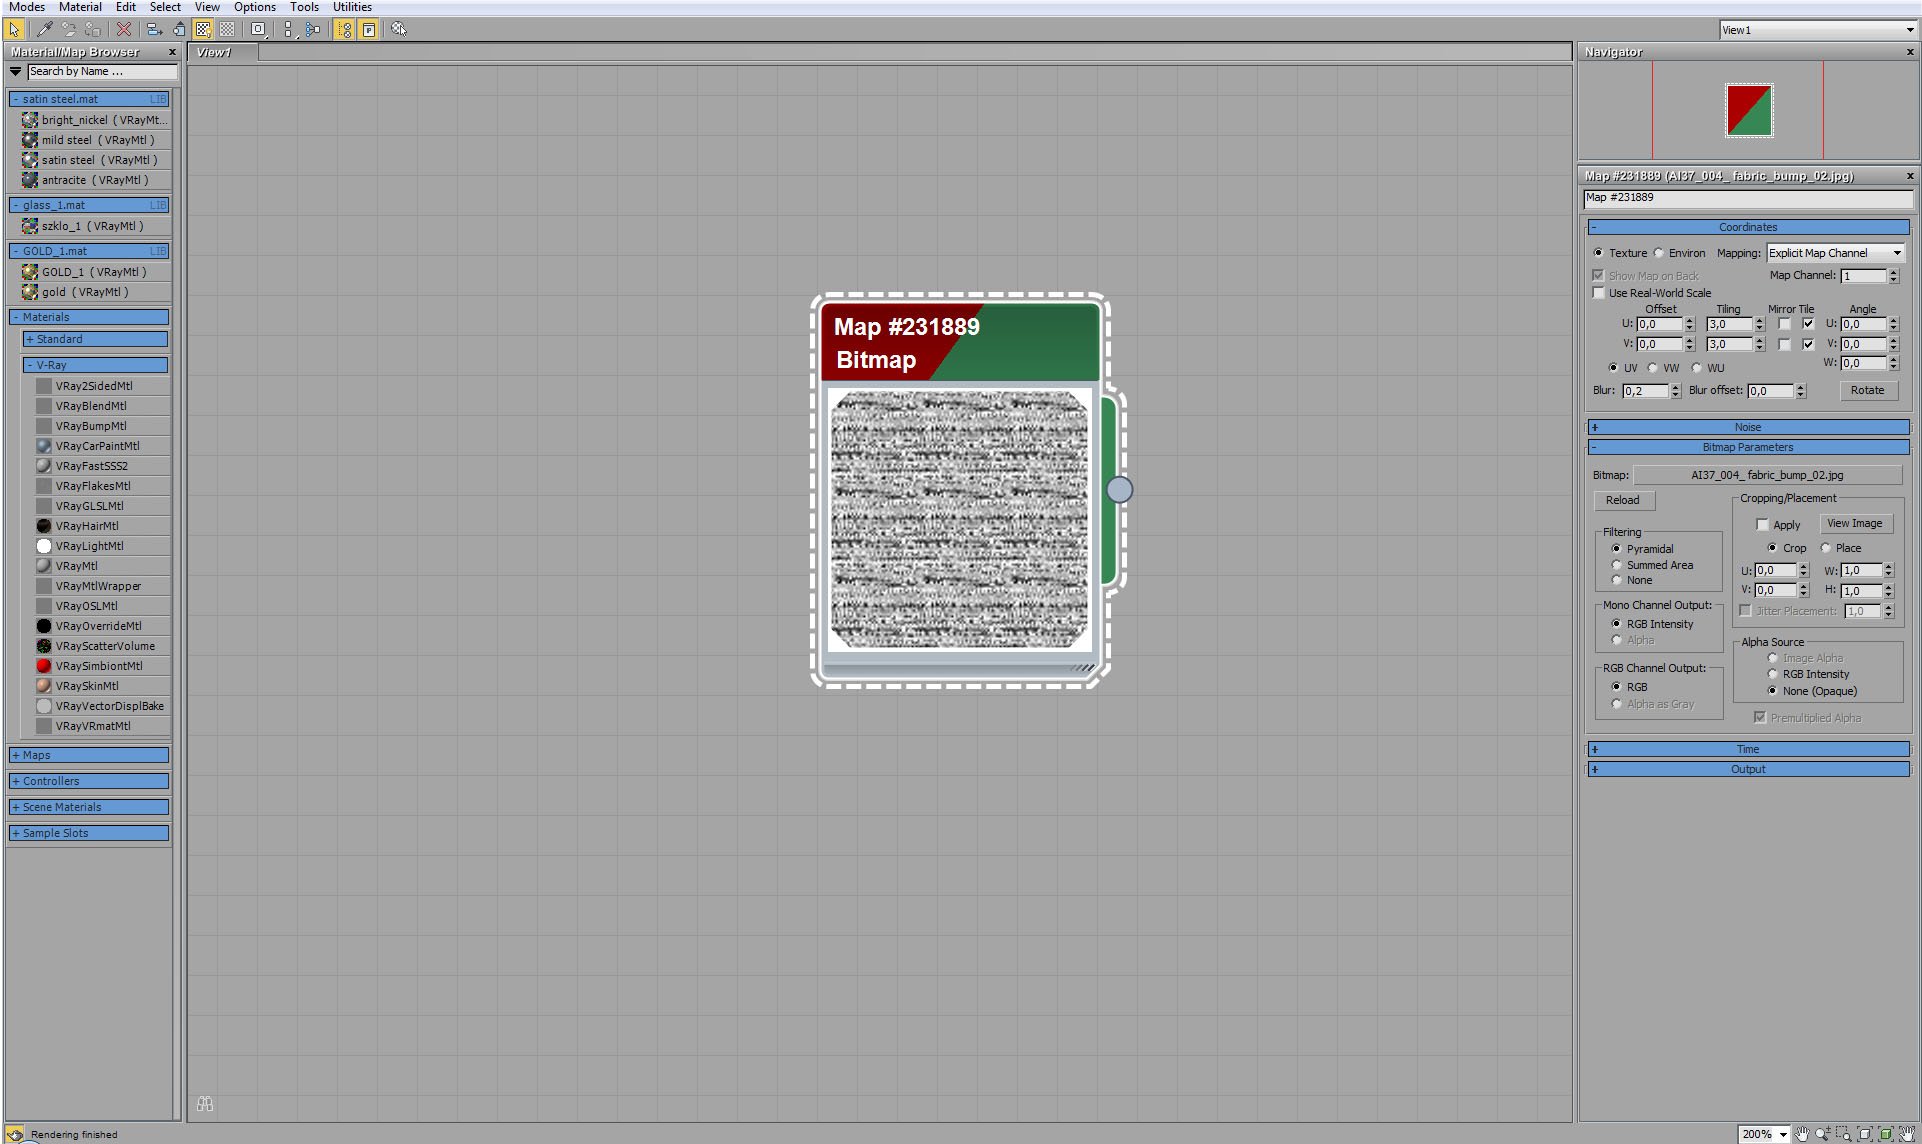
A pillow is an editable poly with VrayDisplacementMod. Above you can see displacement map.
Click on image to enlarge 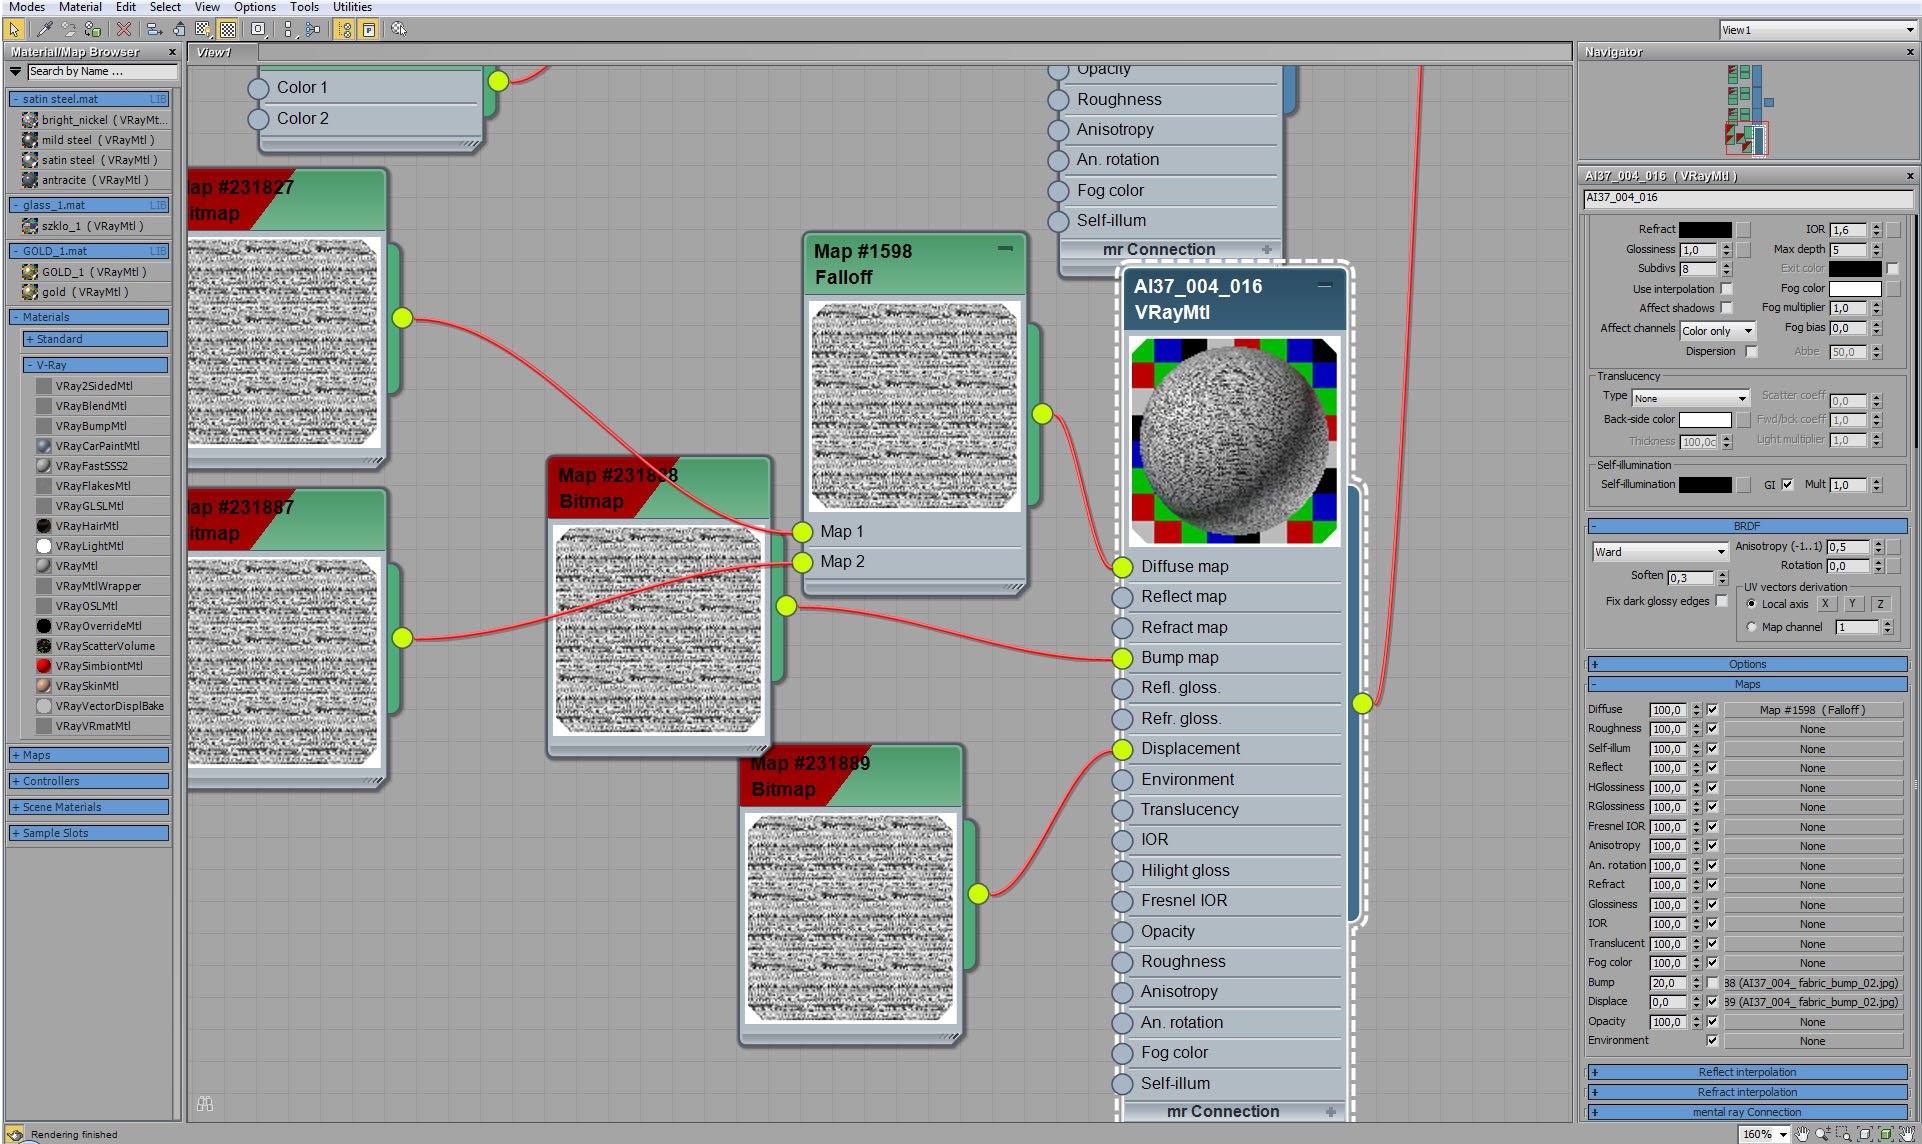
Click on image to enlarge 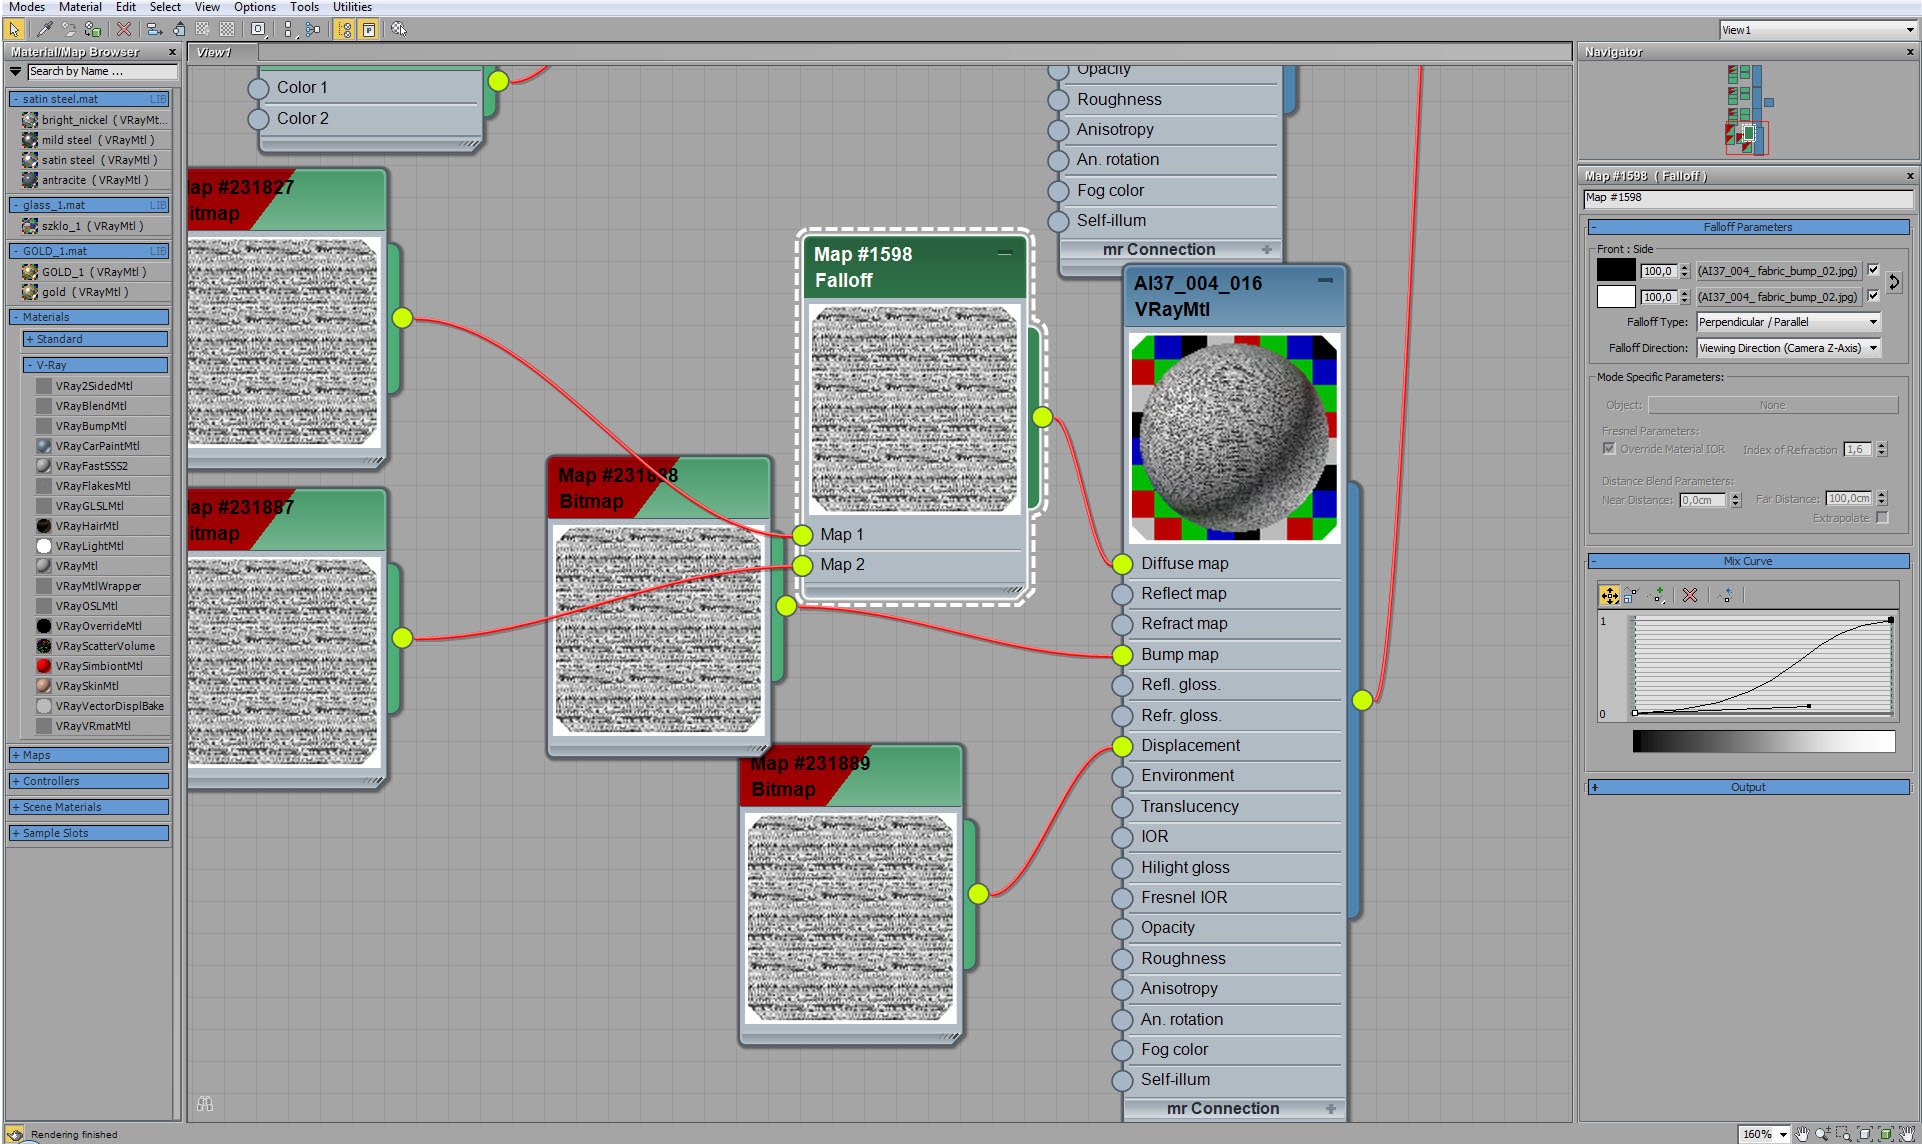
Pillow material - diffuse map settings.
Click on image to enlarge 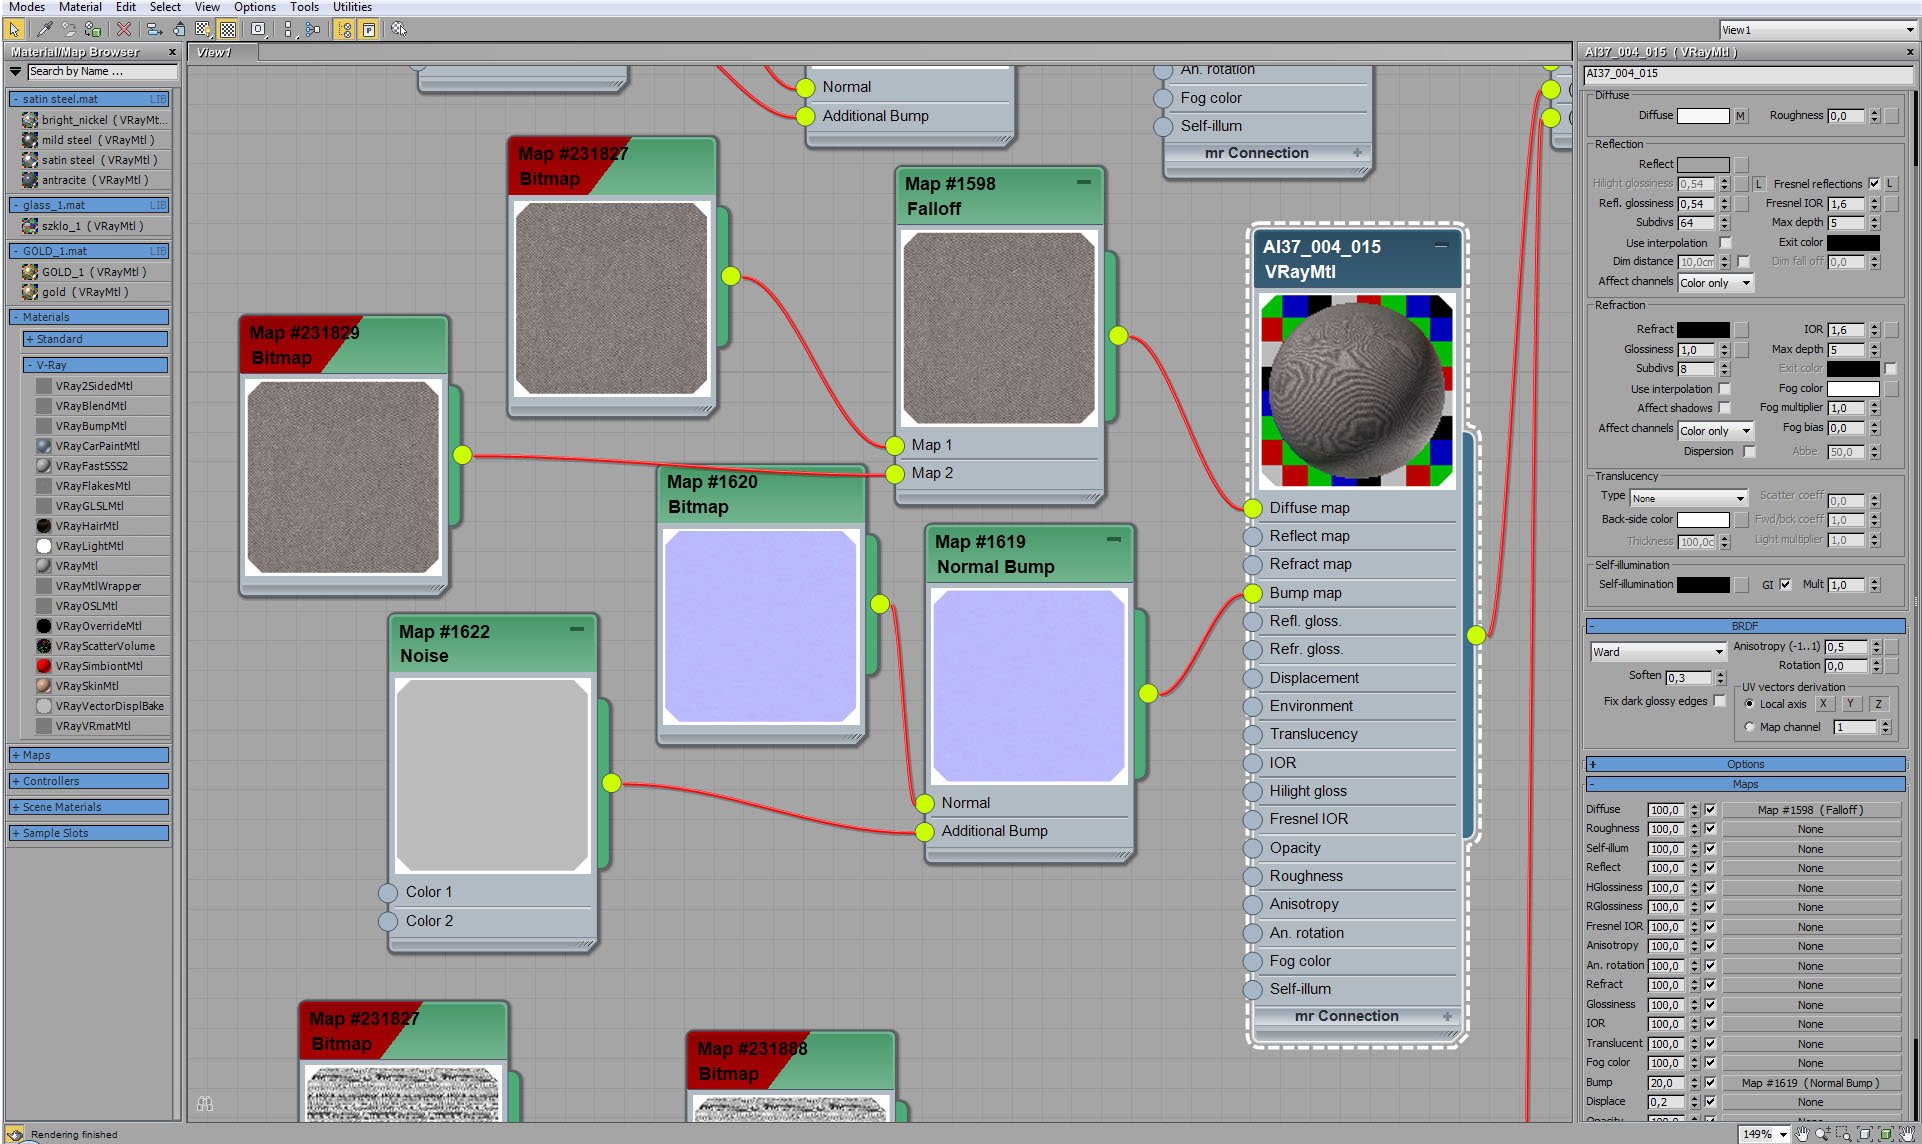
Click on image to enlarge 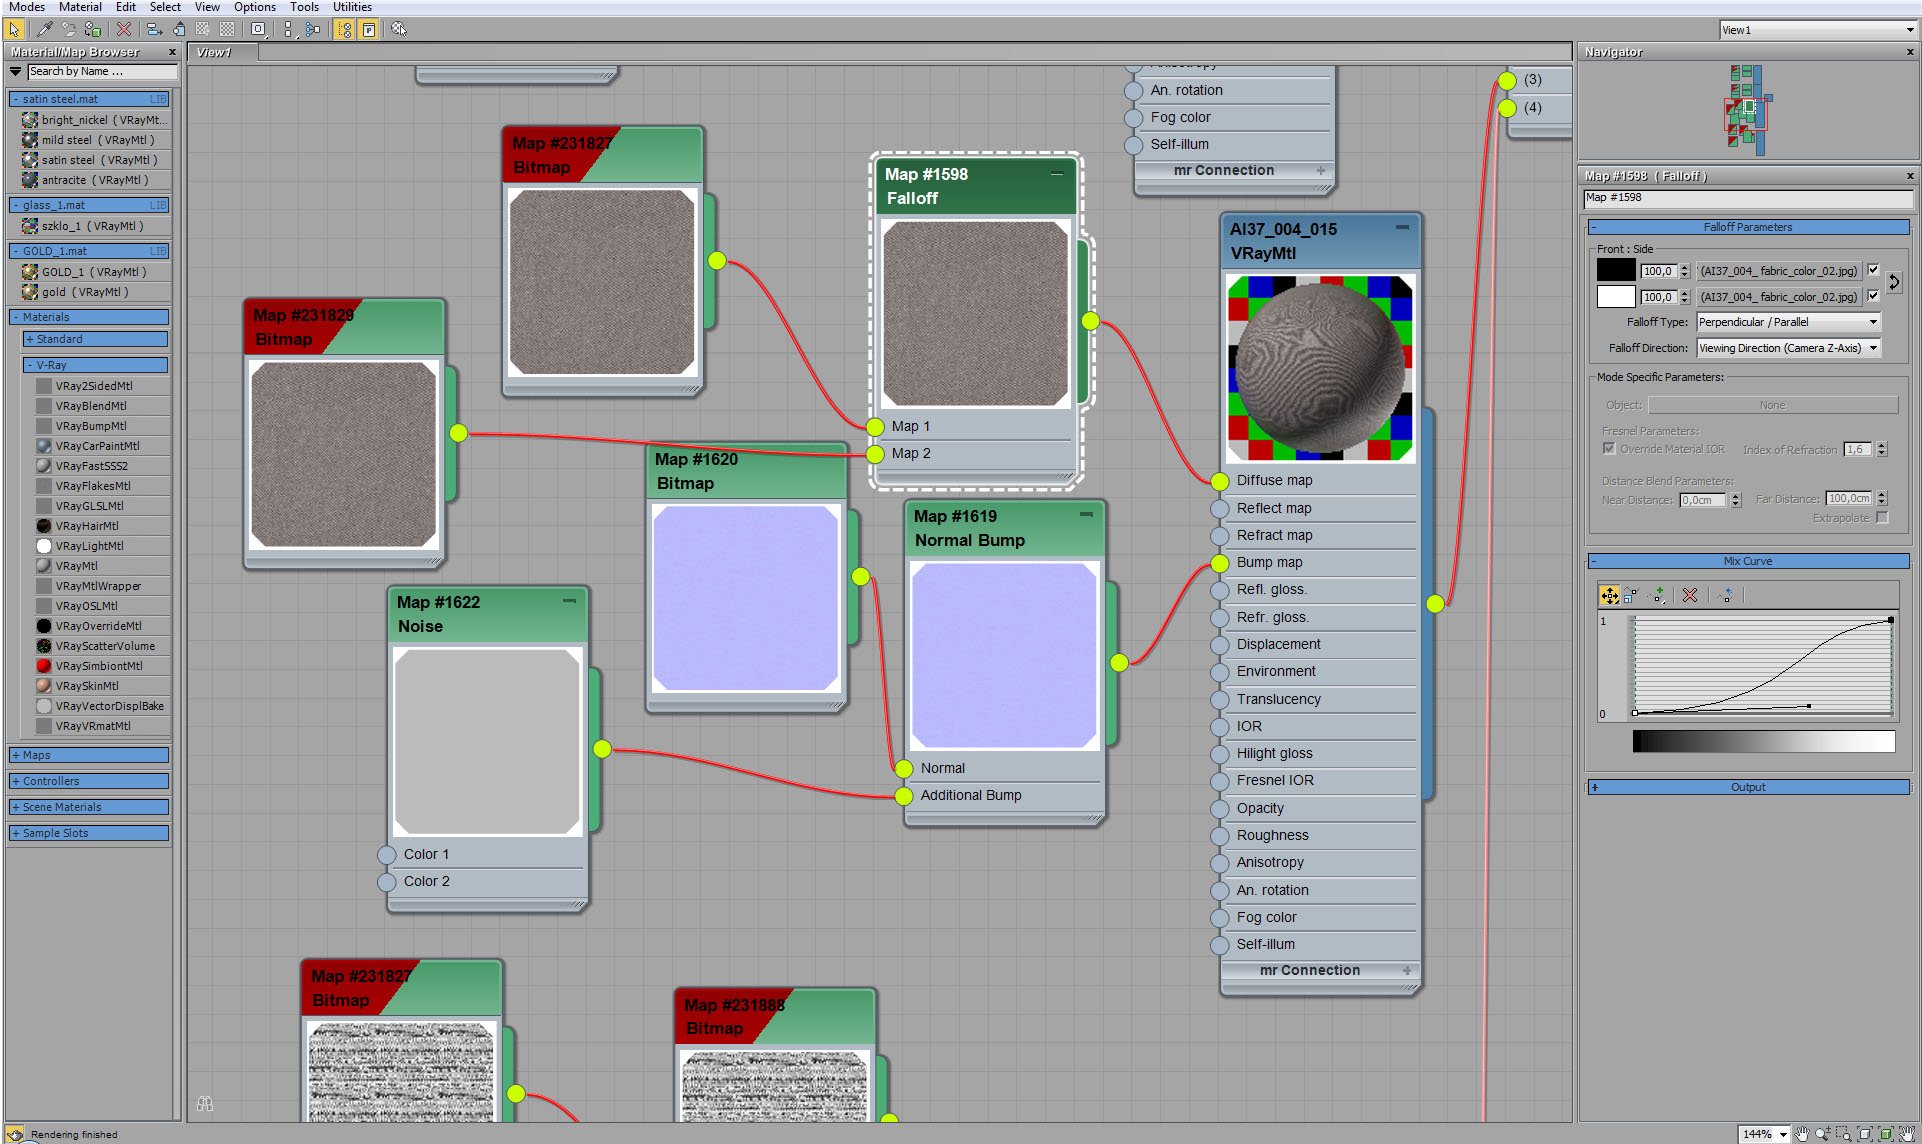
Couch material - diffuse map settings.
Click on image to enlarge 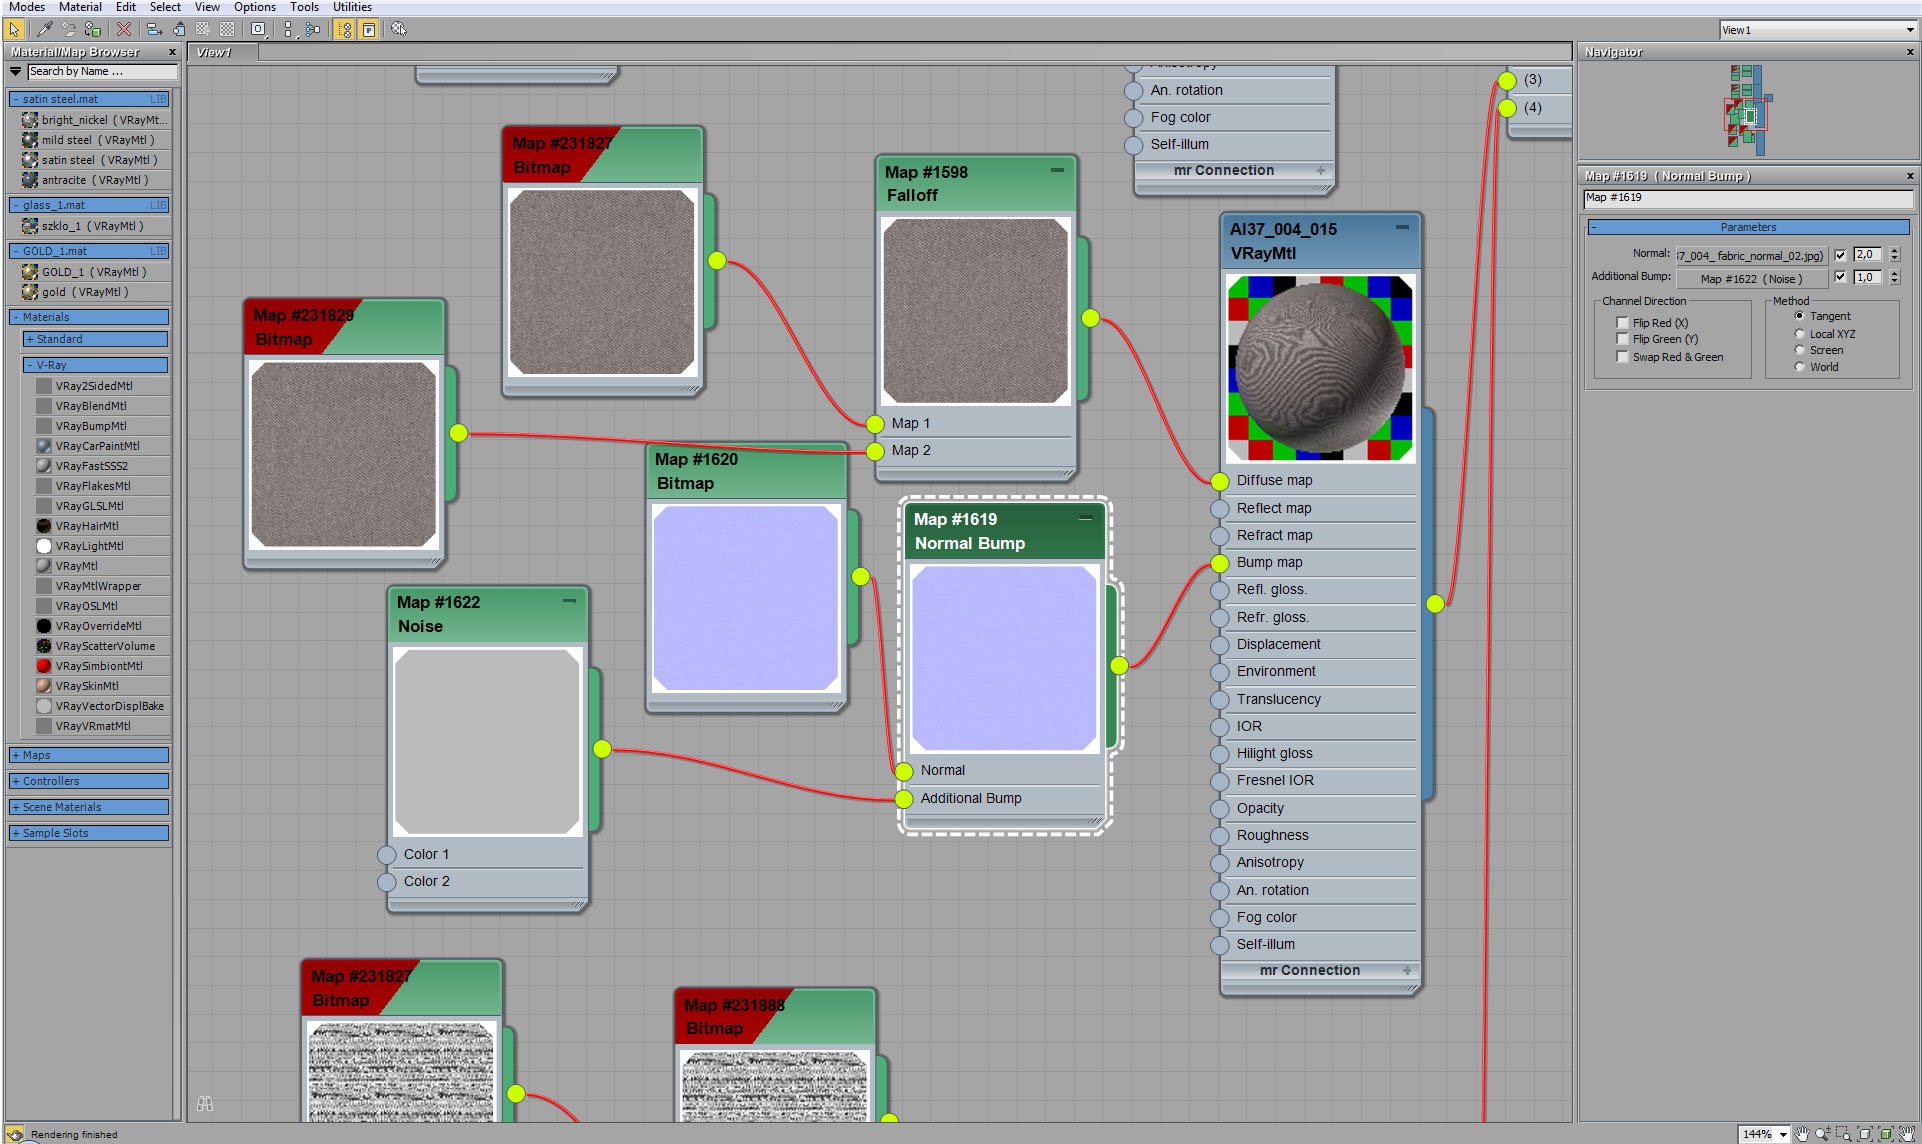
Couch material - normal map settings.
Click on image to enlarge 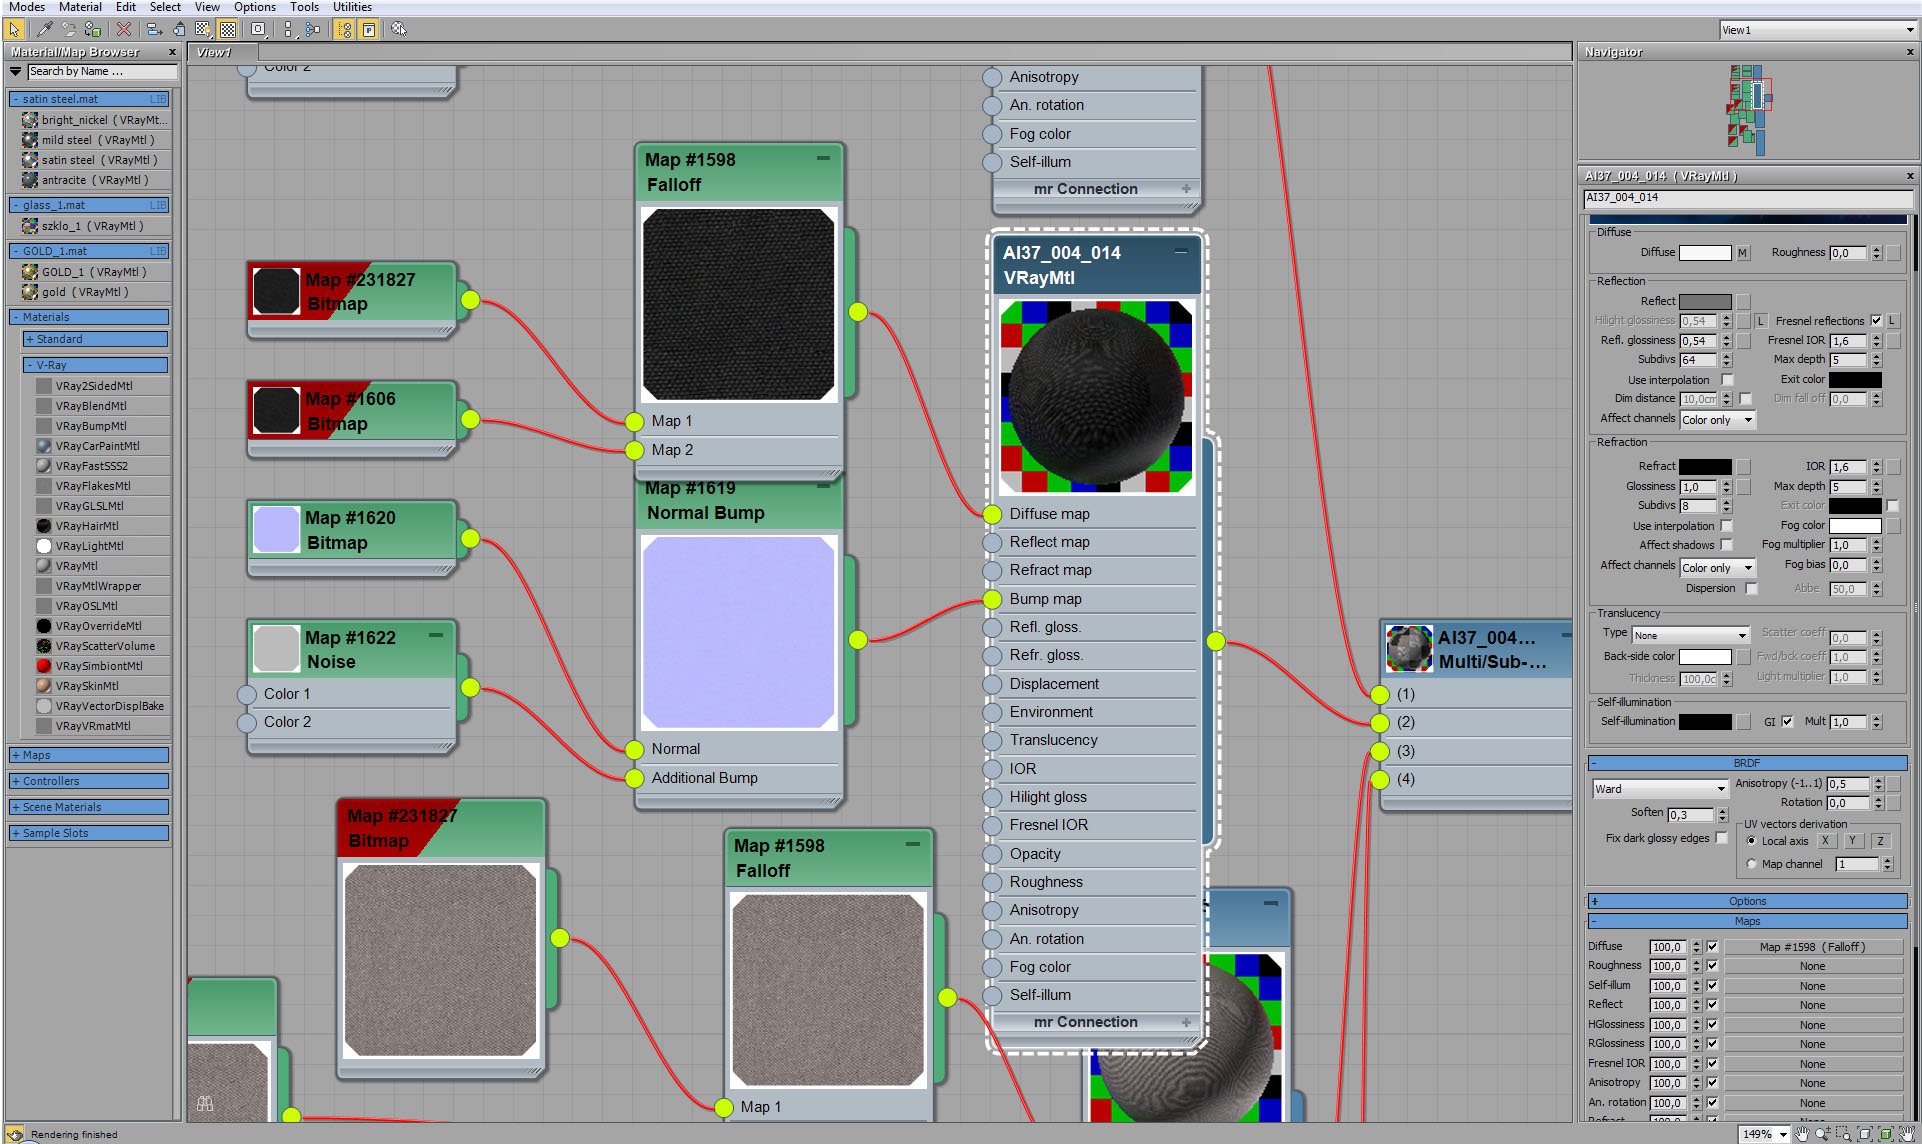
Click on image to enlarge 
Click on image to enlarge 
Click on image to enlarge 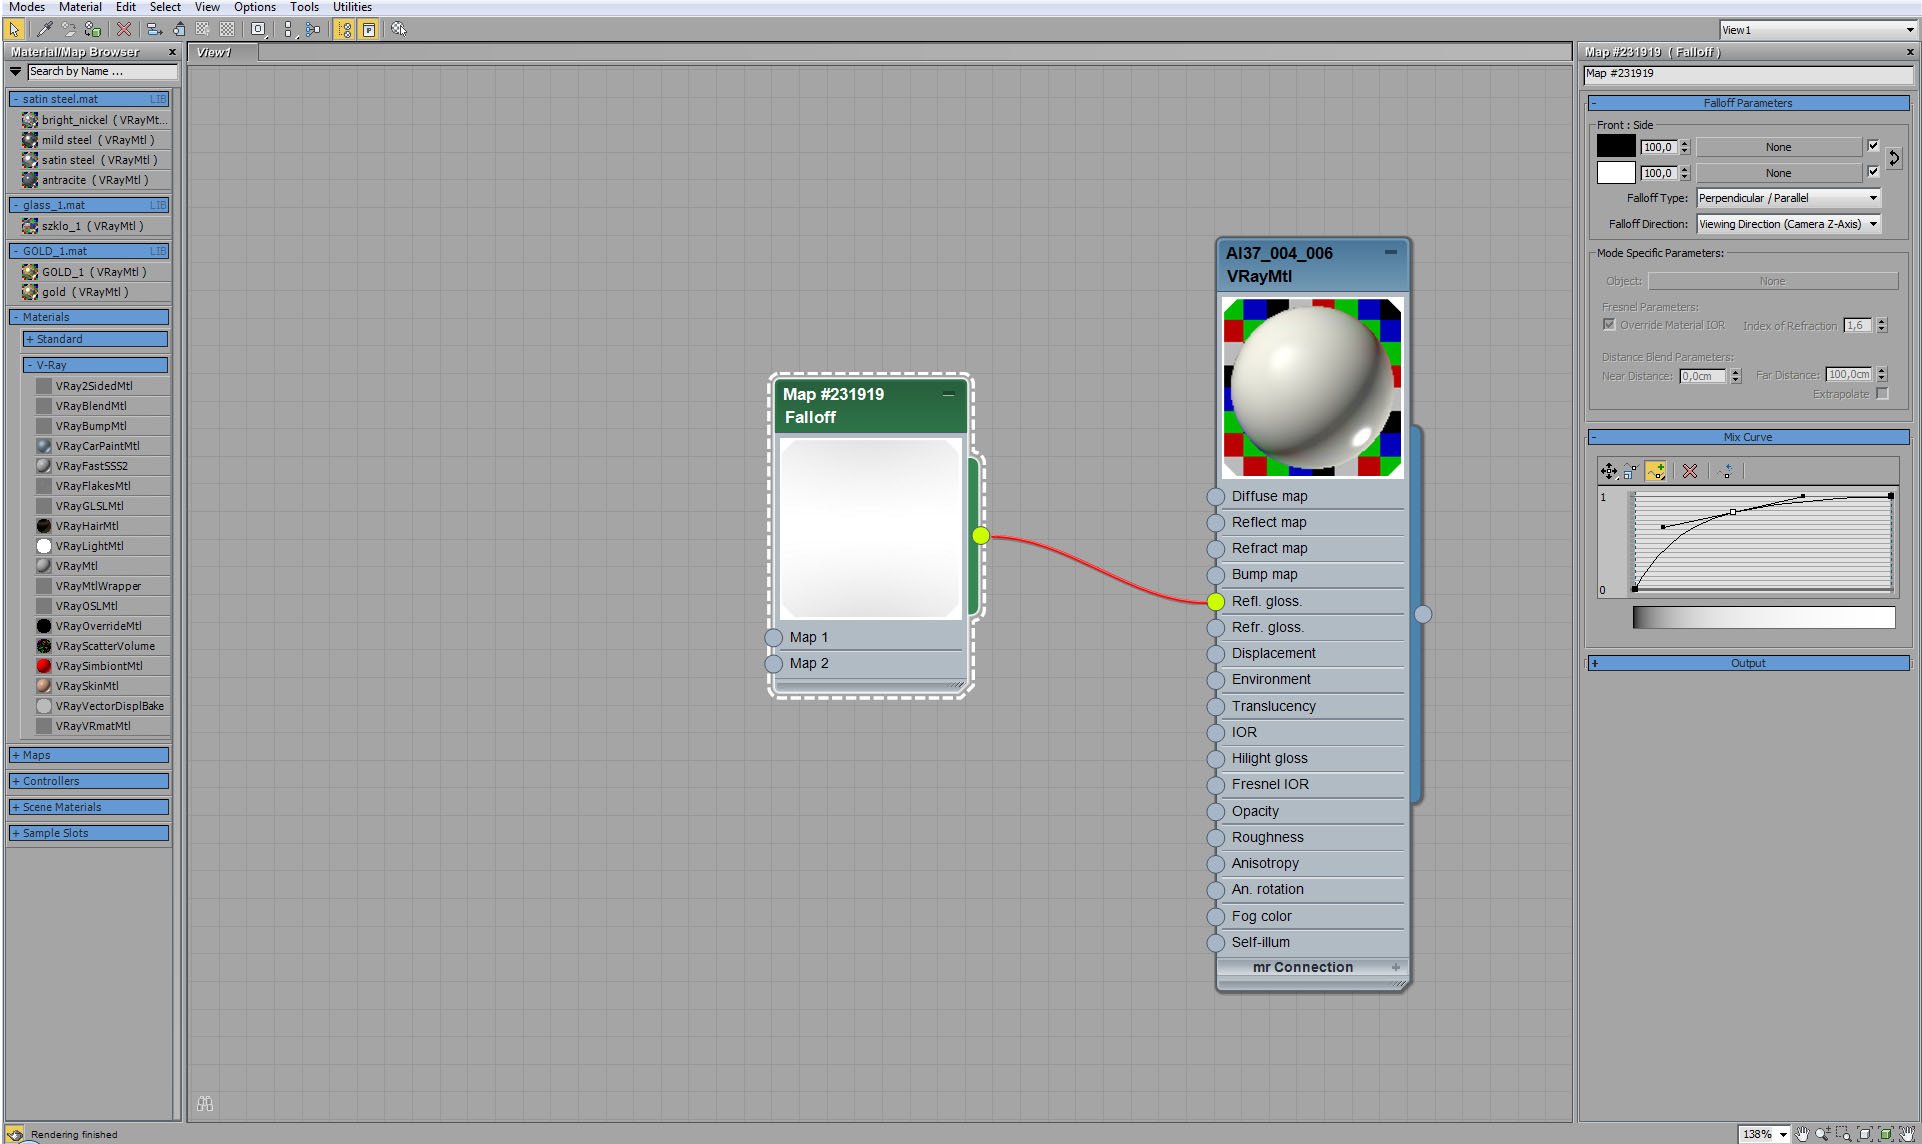
Click on image to enlarge 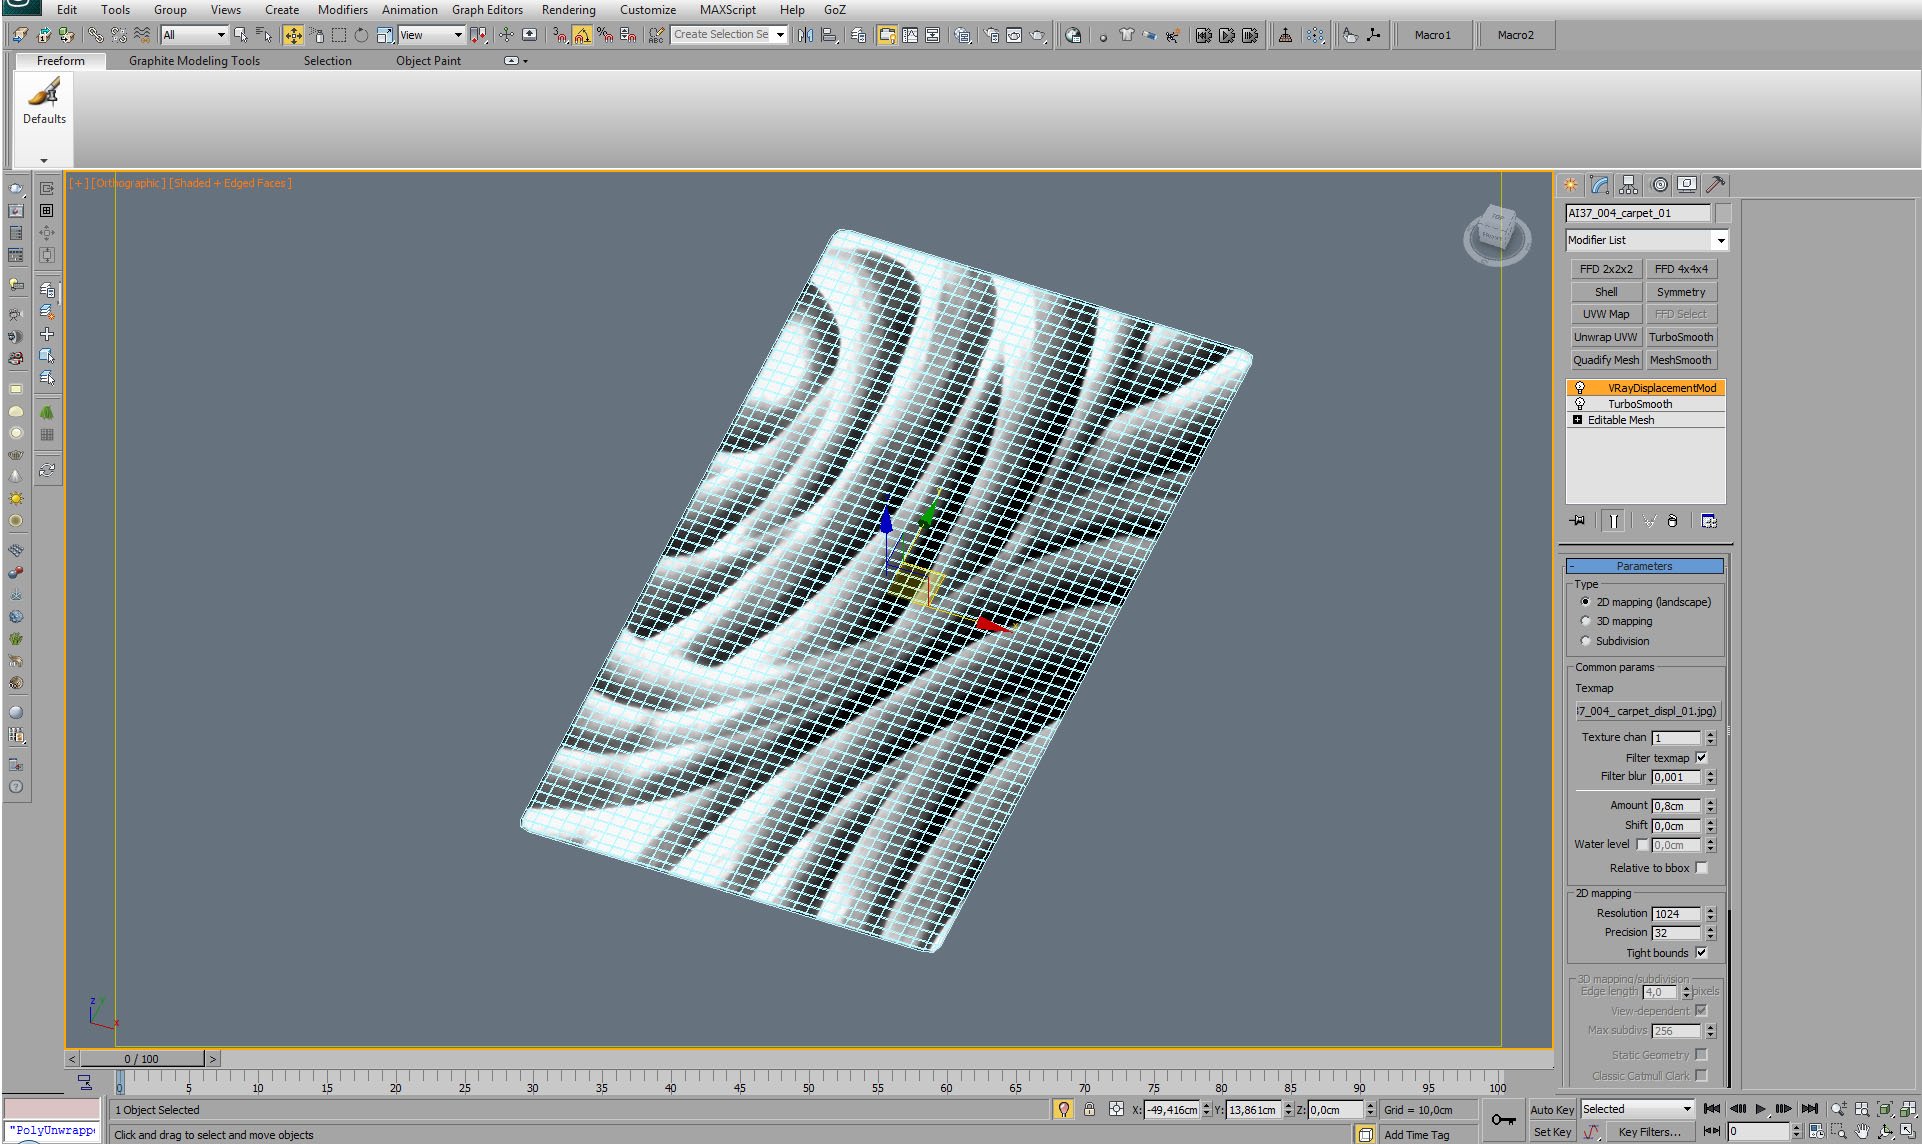
Carpet model - editable mesh with displacement.
Click on image to enlarge 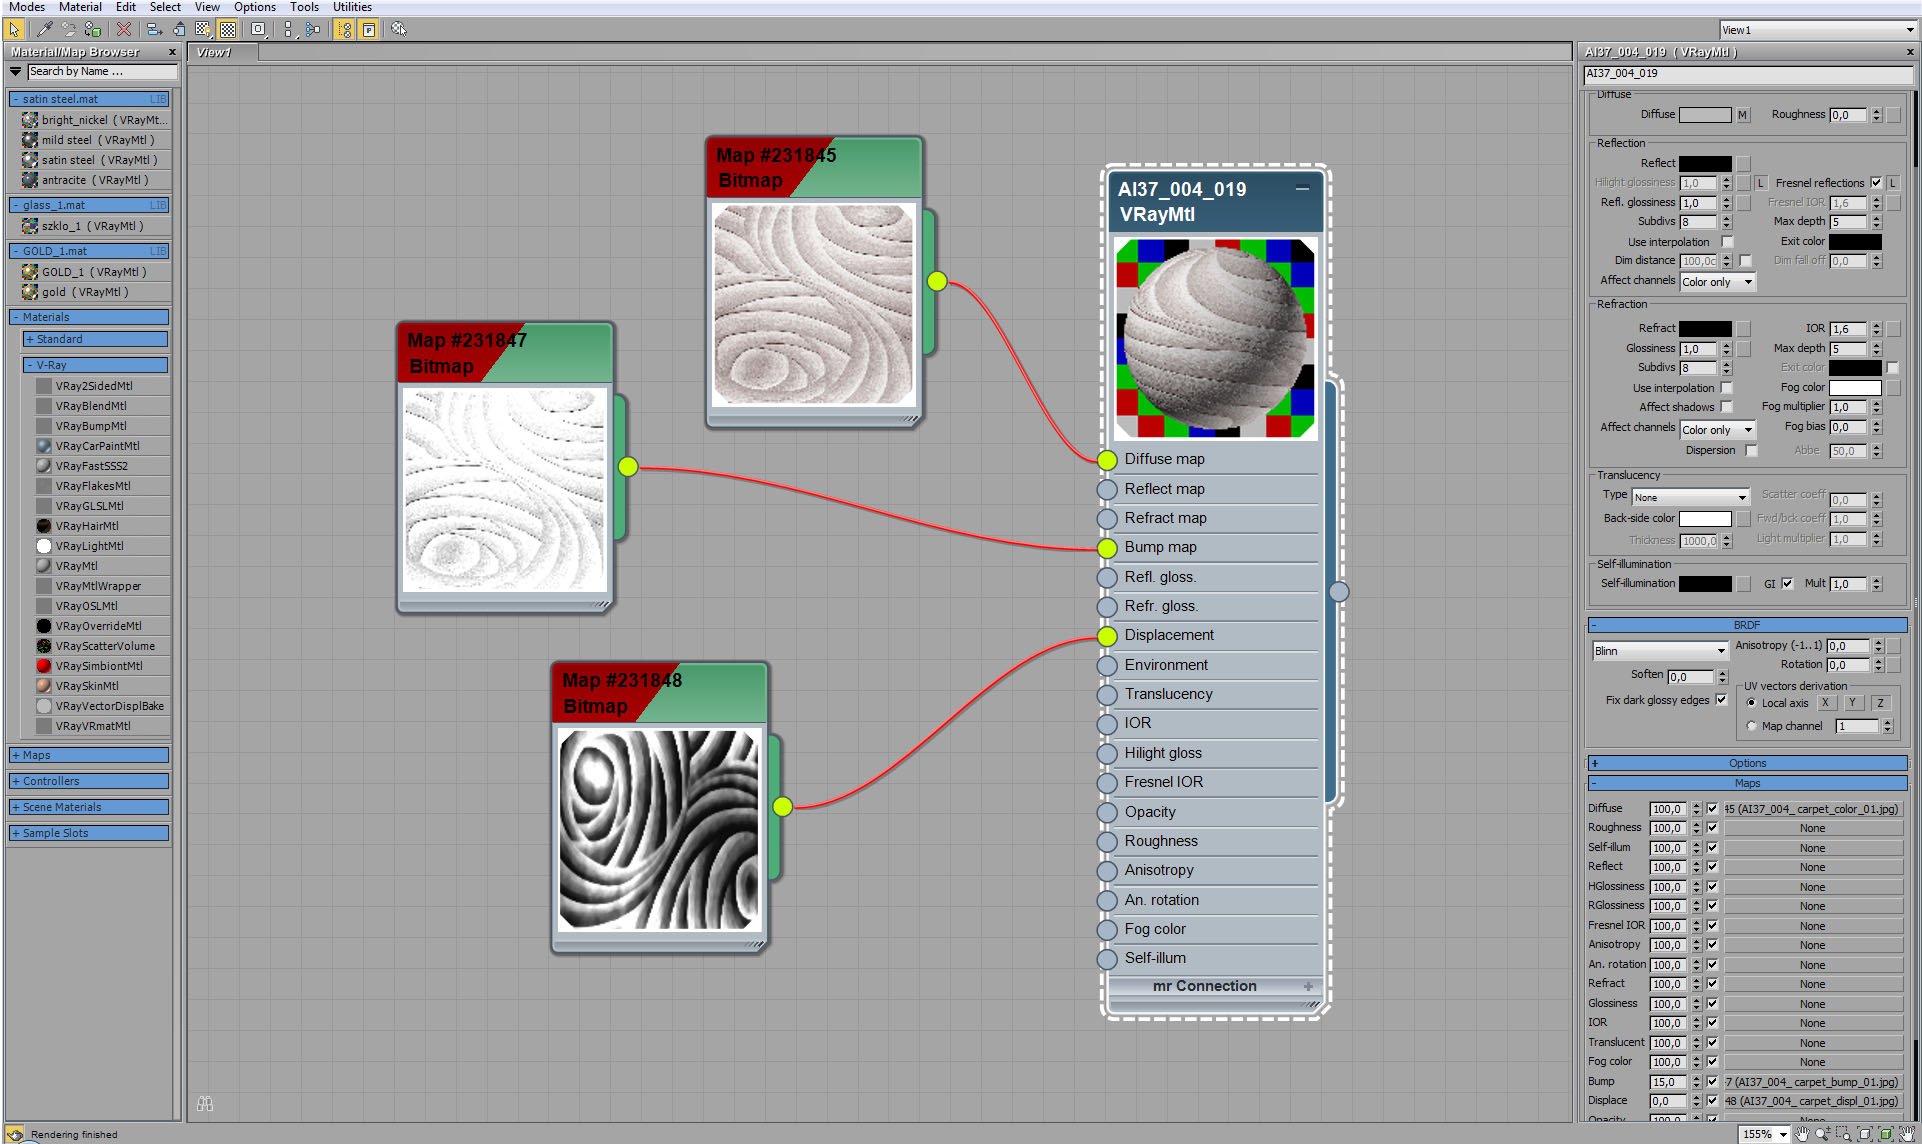
Click on image to enlarge 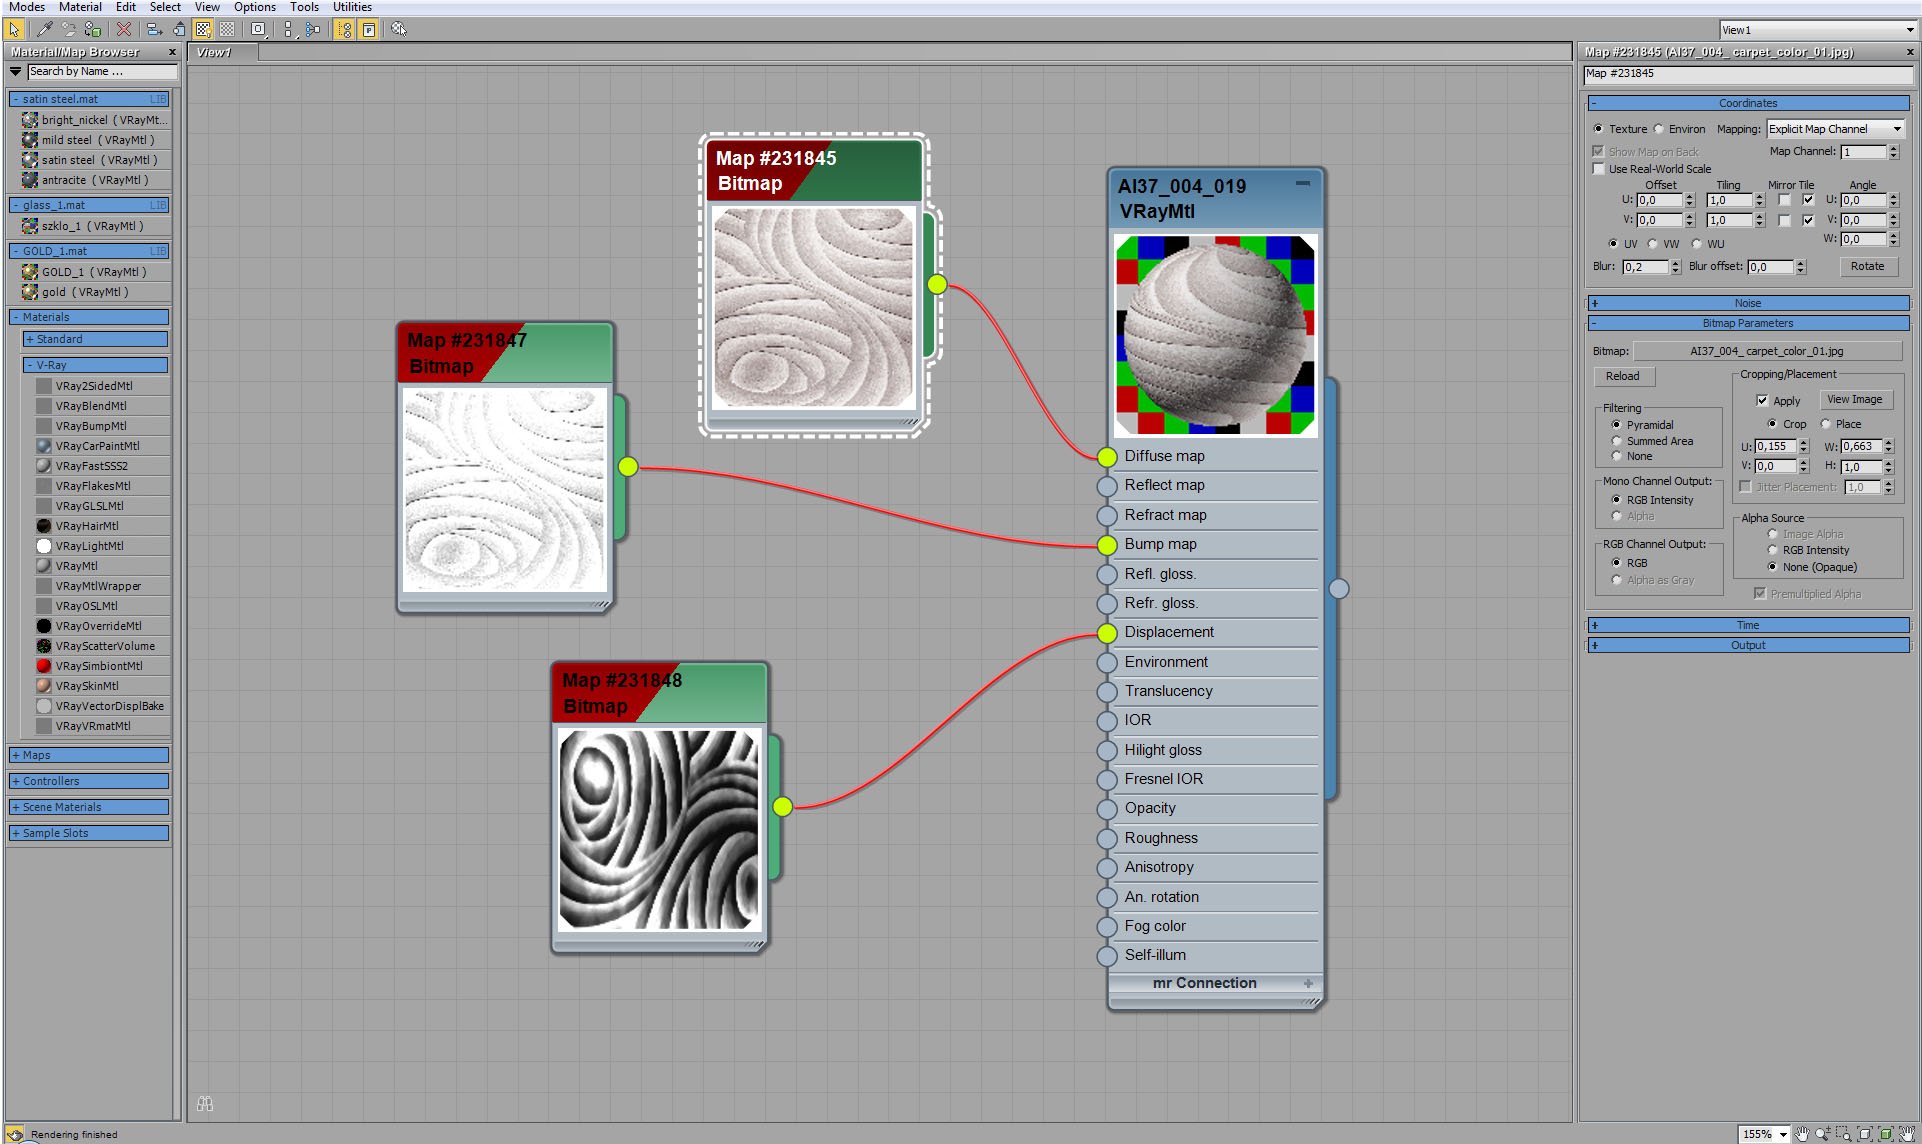
Carpet material - diffuse map settings.
Click on image to enlarge 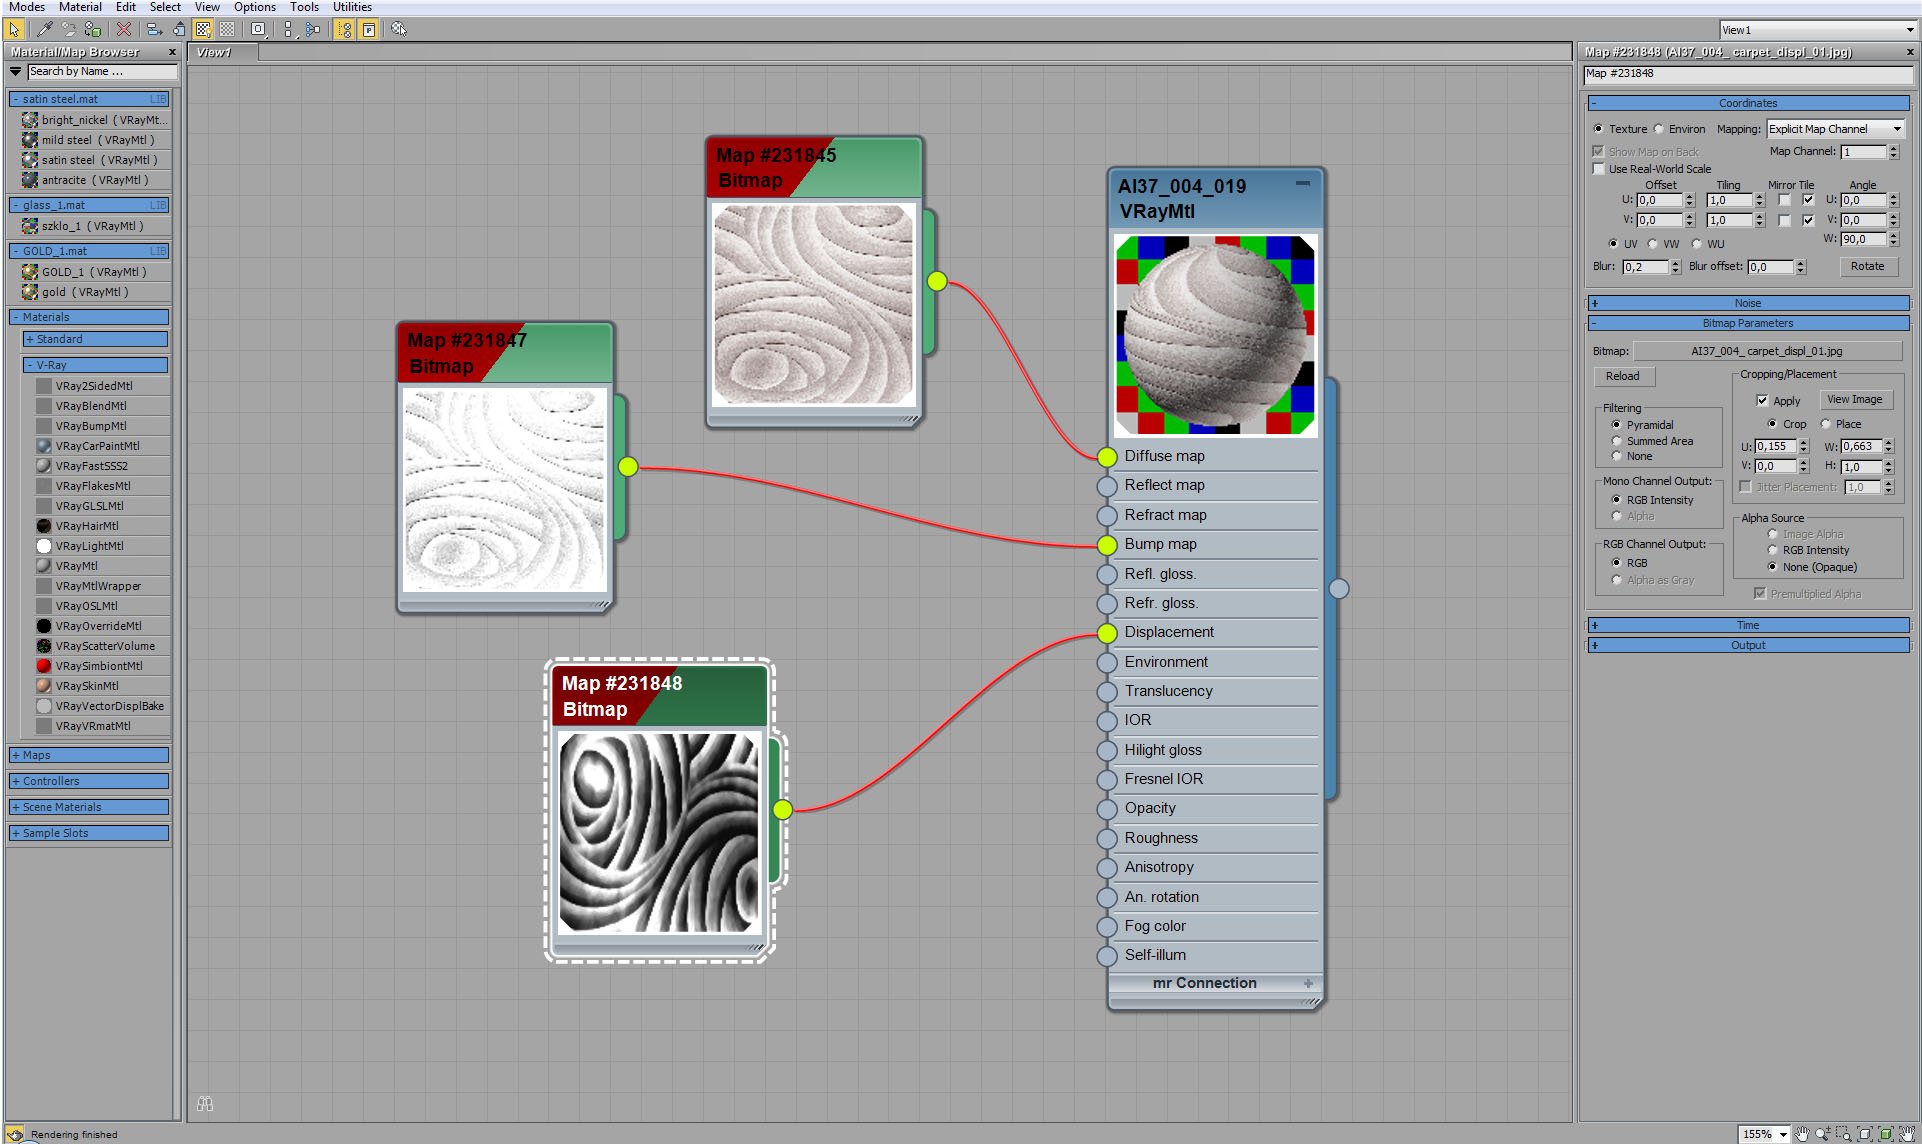
Carpet material - displacement map settings.
Click on image to enlarge 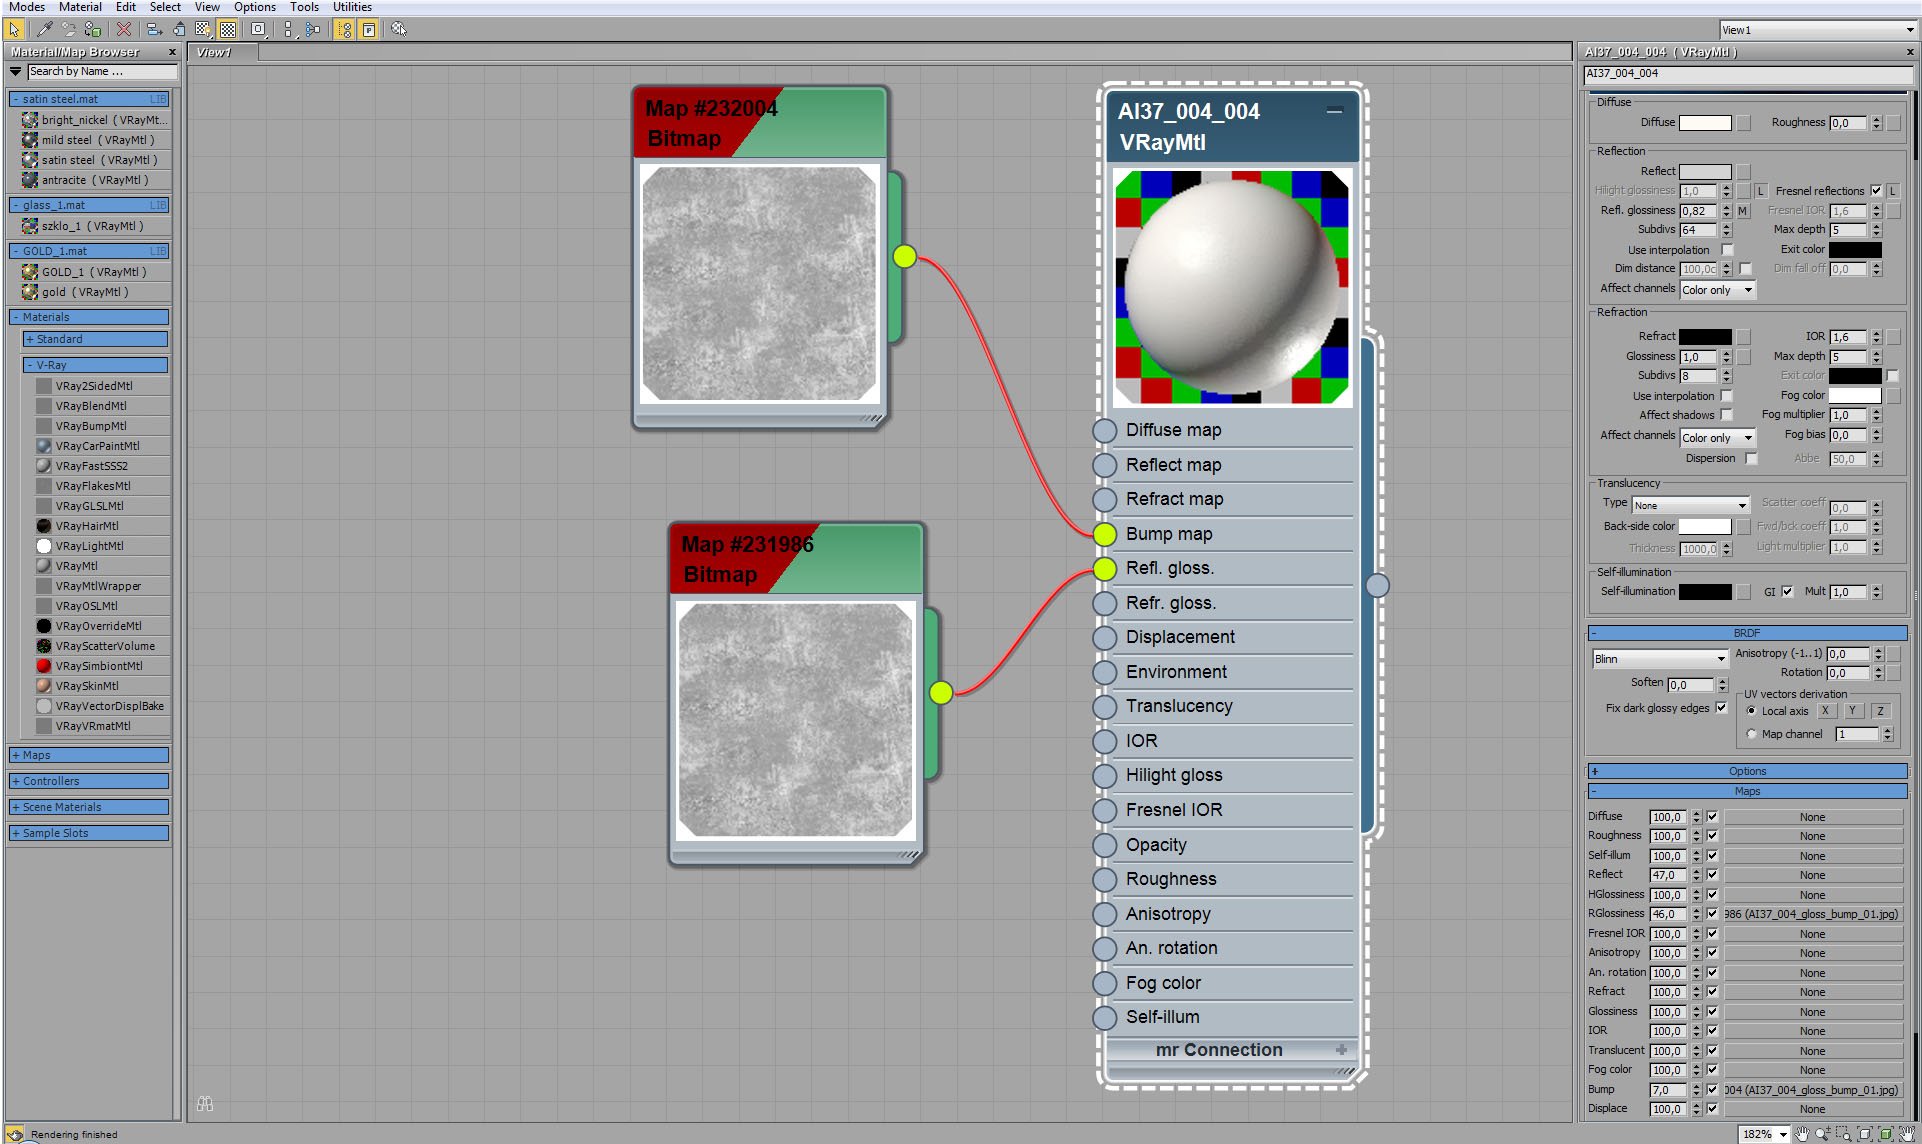
Walls material settings. Sometimes, even in the case of plain white walls, it's good to add subtle maps in bump and glossiness map slots to get more natural look.
Click on image to enlarge 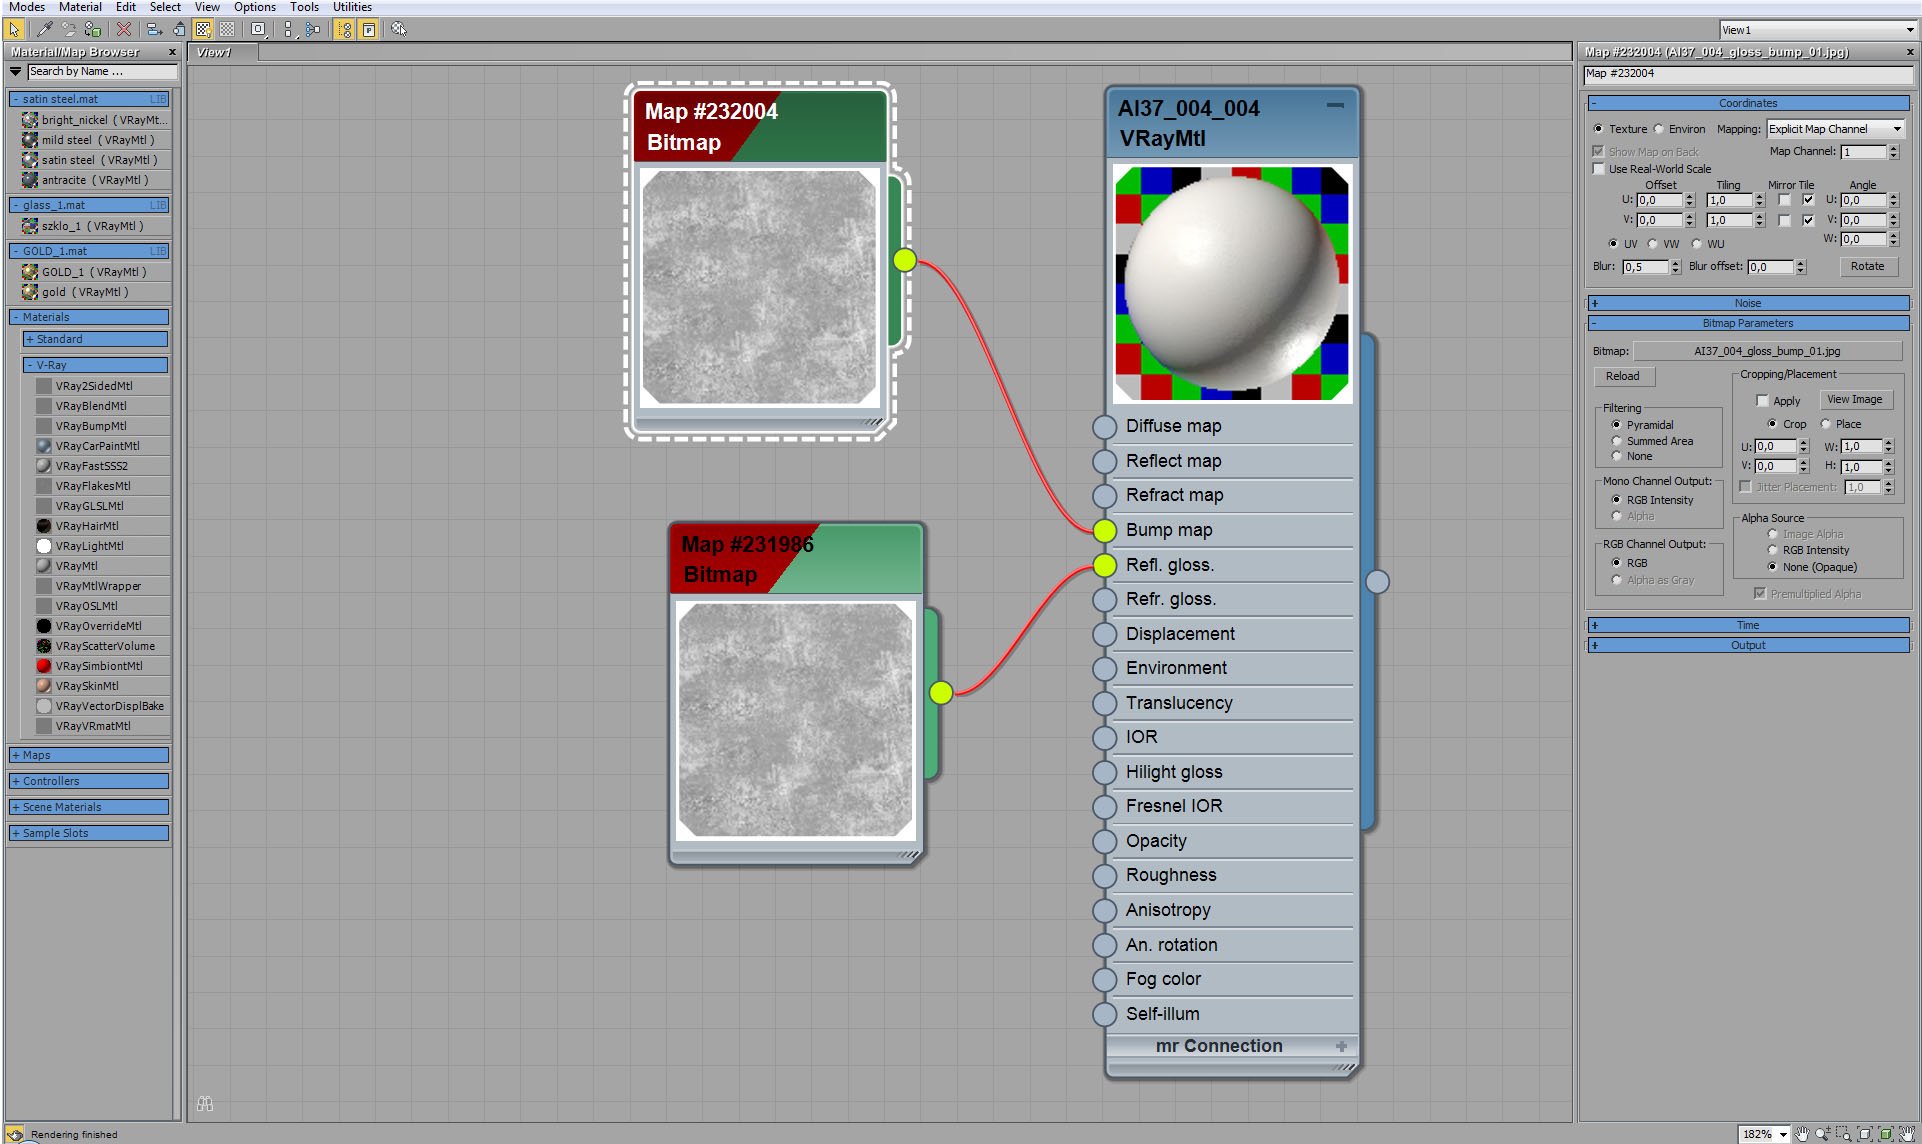
Walls material - diffuse map settings.
Click on image to enlarge 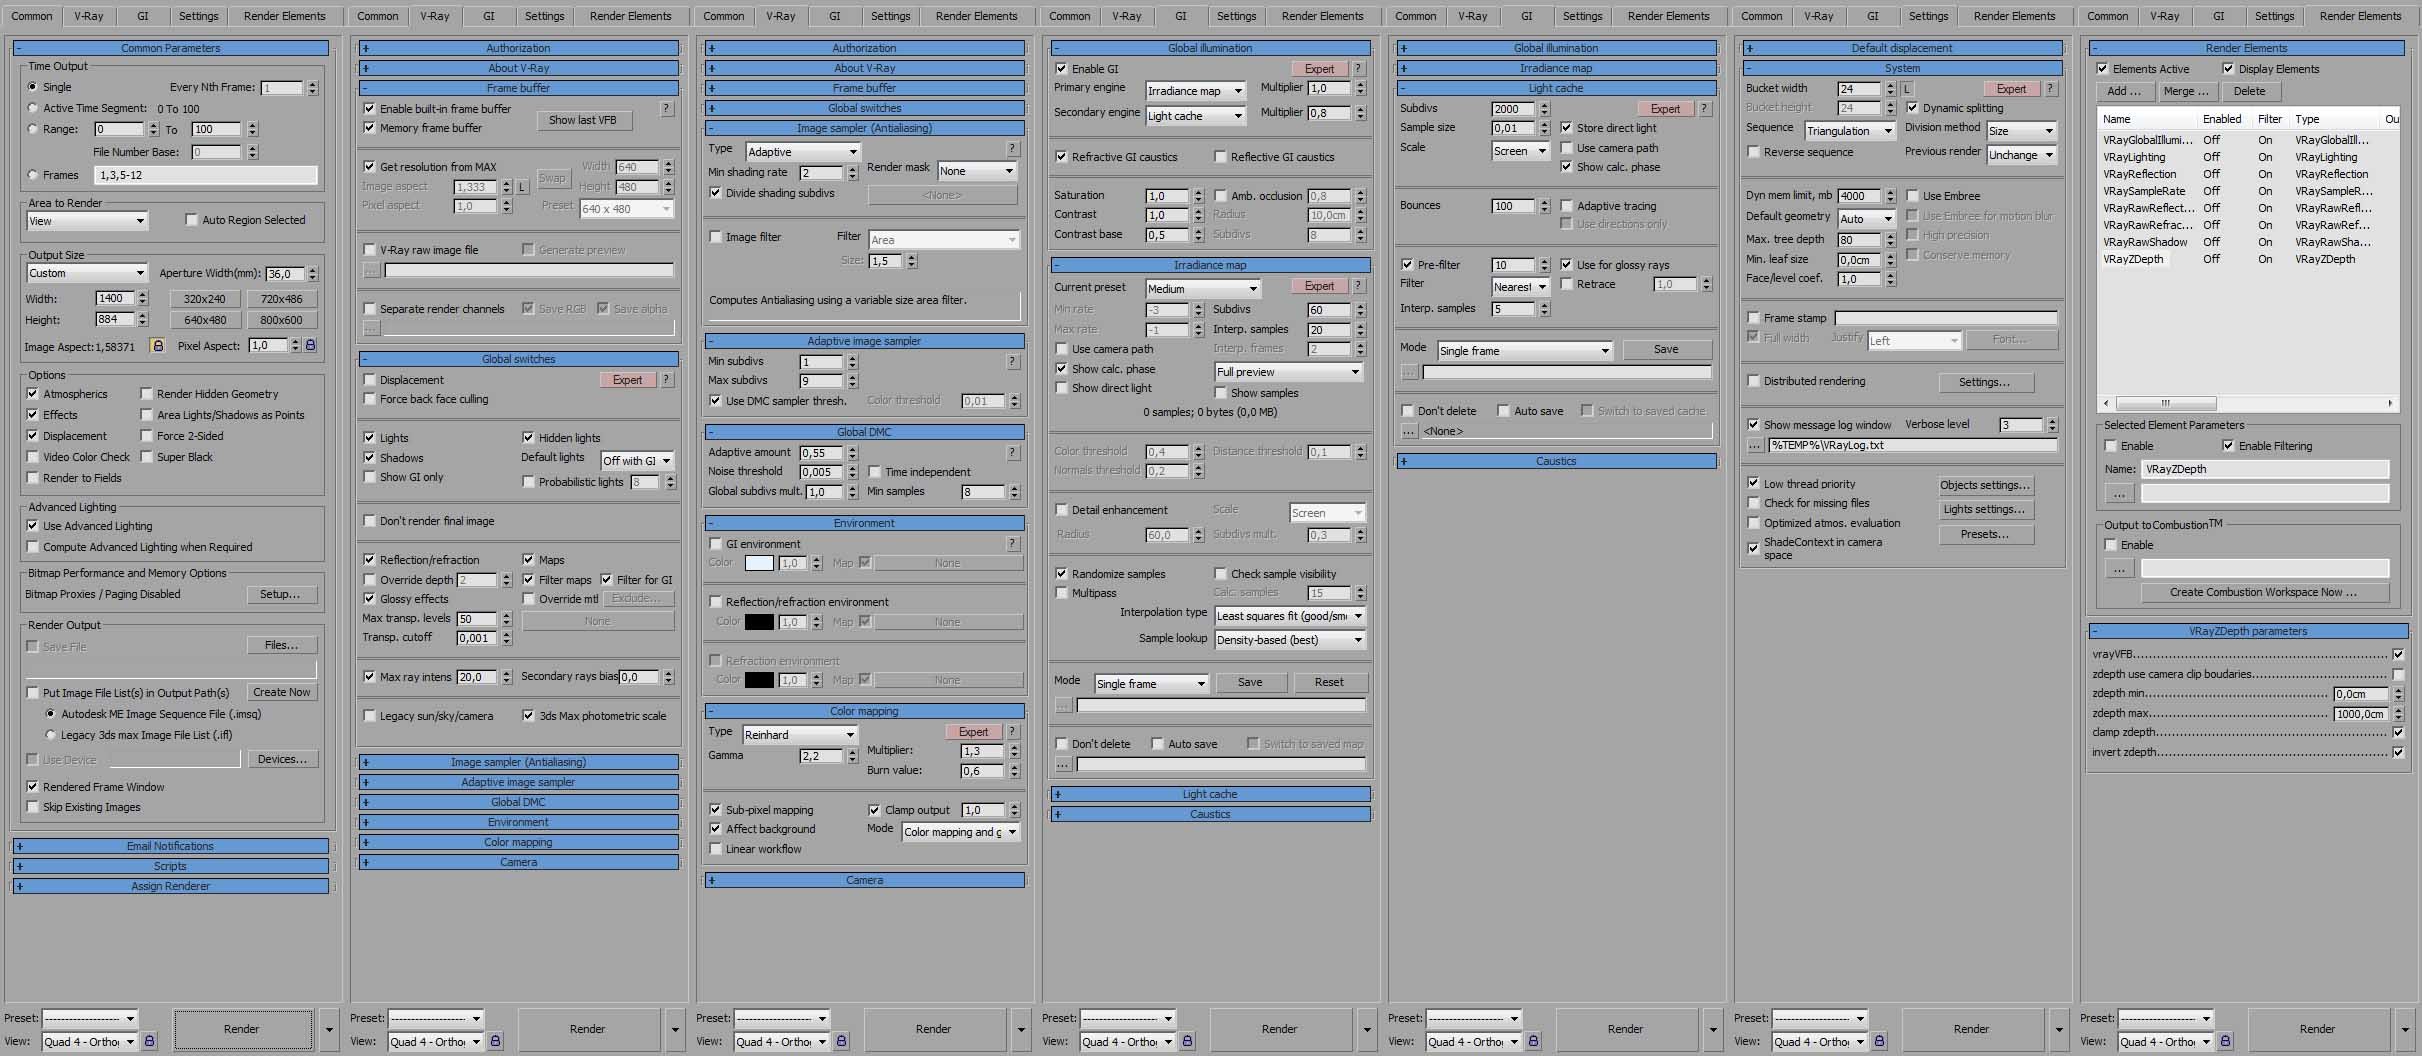
Click on image to enlarge 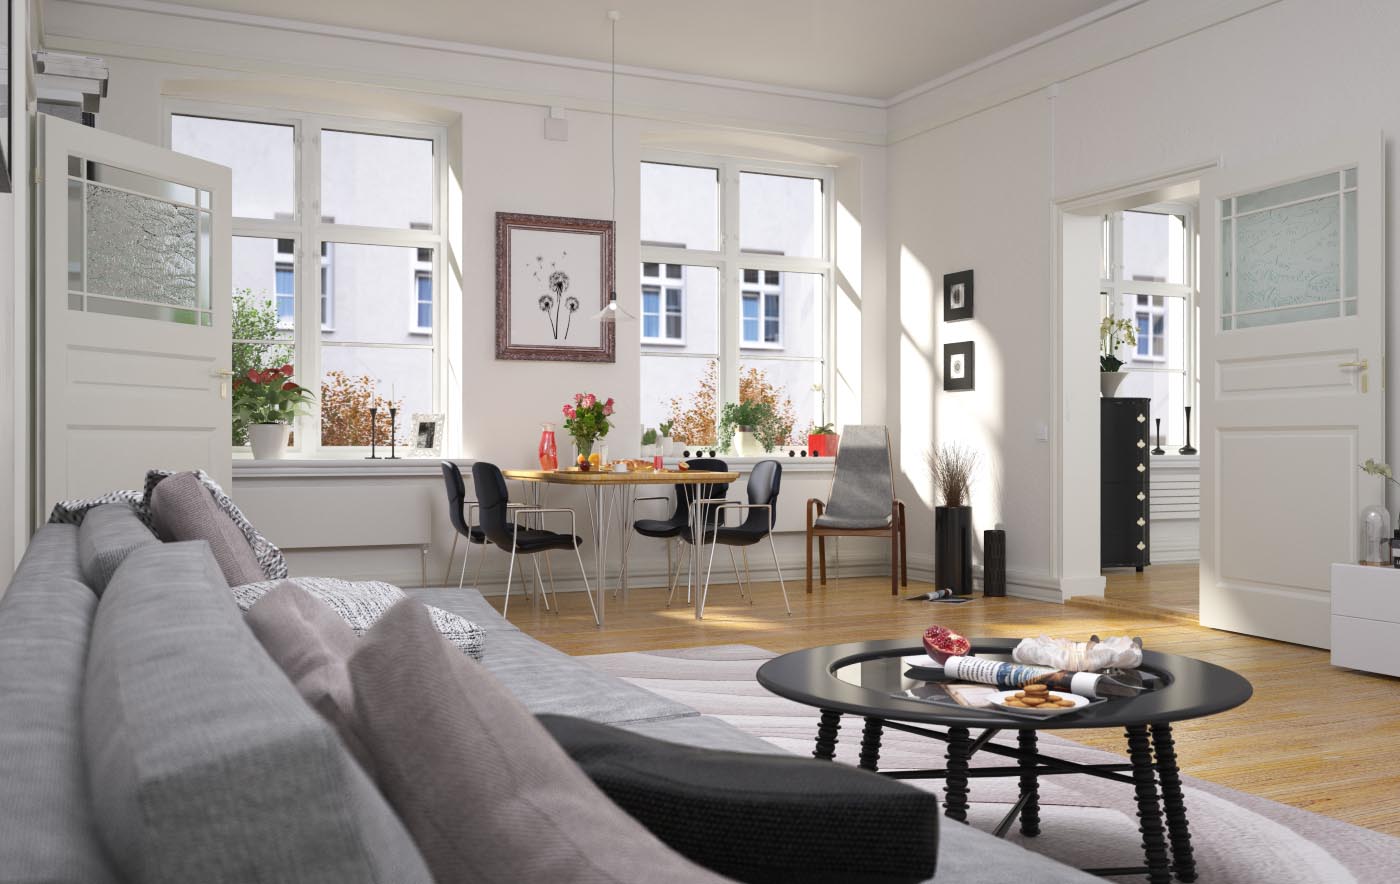
Raw render. It actually looks pretty good, even without any post-production. There will be no much work to do in Photoshop.
Click on image to enlarge 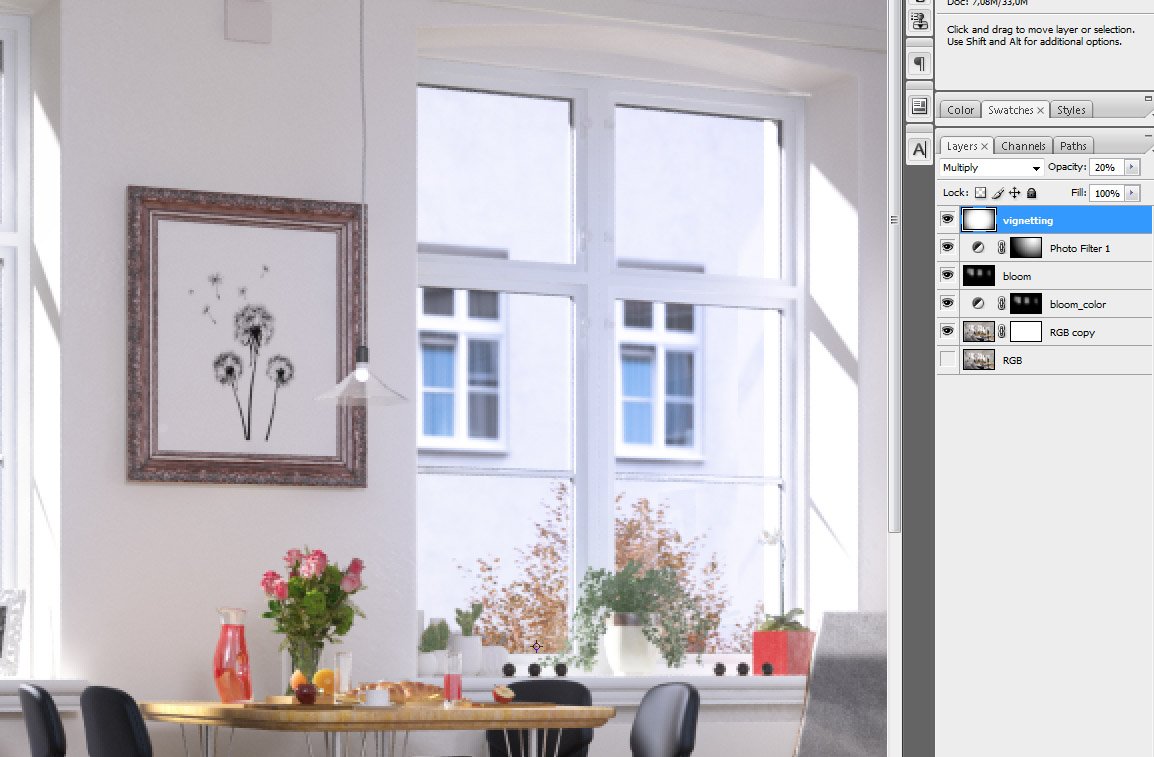
First, we added bloom color layer. It is a cooling photo filter with mask in the windows. It makes outside look more cold than the interior. Above it we placed bloom layer that adds some glow in the windows. Another blueish Photo Filter is placed above, to make interior a bit cooler. And the final touch is vignette on the top of Photoshop layers stack.
Click on image to enlarge 
Final image after post-production. Thanks for reading :)
Customer zone
Your special offers
Your orders
Edit account
Add project
Liked projects
View your artist profile


COMMENTS