Evermotion Pass 10% Off - Get Instant Access to Thousands of 3D Assets

Check Plans

Information Clause

In accordance with the art. 13 section 1 and 2 of the European Parliament and Council Regulation 2016/679 of the 27th April, 2016 on the protection of natural persons, with regard to the processing of personal data and on the free movement of such data, and repealing Directive 95/46/EC (General Data Protection Regulation), hereafter RODO, I hereby inform that:

1. EVERMOTION S.C., 8 Przędzalniana Str., 15-688 Białystok, Poland is the Administrator of your Personal Data (APD)

2. Data Protection Inspector can be reached through e-mail: iod@evermotion.org

3. Your personal data are to be processed on the basis of art. 6 section 1 letter a, b and f of RODO in order to:
a) prepare, conclude and execute the agreement and for other purposes approved by you,
b) to execute the legitimate interest like marketing of products and the agreement, claim assertion or defence against claims resulting from the law regulations.

4. Entities entitled to the reception of your personal data may be the authorised public bodies; mail providers; providers of the services covered by the agreement; responsible for debt recovery, keeping the archives, document utilization, legal consulting, technical services, IT services and accountancy.

5. Your personal data shall not be transferred to the third country, nor to the international bodies.

6. Your personal data shall be processed within the period of the agreement and upon your additional consent until you withdraw it. APD shall keep the data for the period of any civil law claim execution connected with the agreement.

7. You have the right to demand an access to your personal data, to correct or to delete the data if there is no other basis for the processing or any other purpose of such processing or to limit the processing of the data, to transfer the data to another administrator and to raise objections to the further data processing if there is no legal basis for further processing and to withdraw any previous consent.

8. You provide the personal data voluntarily, however they are necessary to conclude the agreement. The refusal of providing such data may result in the refusal of the agreement conclusion.

9. You have the right to lodge a complaint to the Personal Data Protection Office when in your opinion the data processing violates the regulations of General Data Protection Regulation of the 27 April, 2016 (RODO).

10. Your data will be automatically processed, including the form of profiling.
11. You are obligated to forward above mentioned information to your representative, especially if you appointed this person in the agreement as the contact person or as the representative for the agreement execution.

OK

Making of Modern Bathroom

Michał Franczak 2015-04-17 13:36 tutorial  > 3ds MAX  > rendering

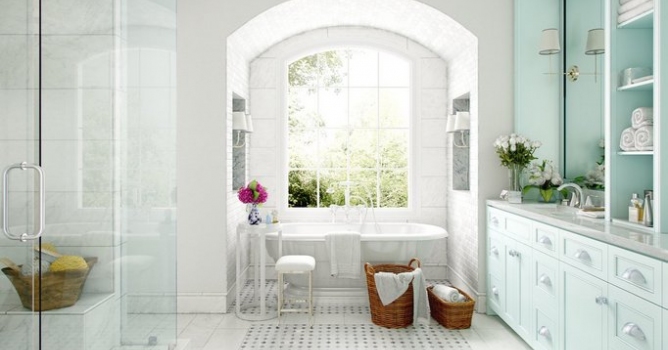
This white bathroom scene comes from Archinteriors vol. 39.

This white master bathroom joins old and modern style in great fashion. This interor, located in Atlanta was redesigned by Mark Williams / Mark Williams Design Associates. Original photo was taken by Chelsey Bowen. Interior scene was made from scratch by Kuba Dąbrowski from Evermotion. It is scene 05 from Archinteriors vol. 39. You can buy Archinteriors vol. 39 collection in  Evermotion Shop.

Click on image to enlarge nr_AI39_005_PP_629.jpg
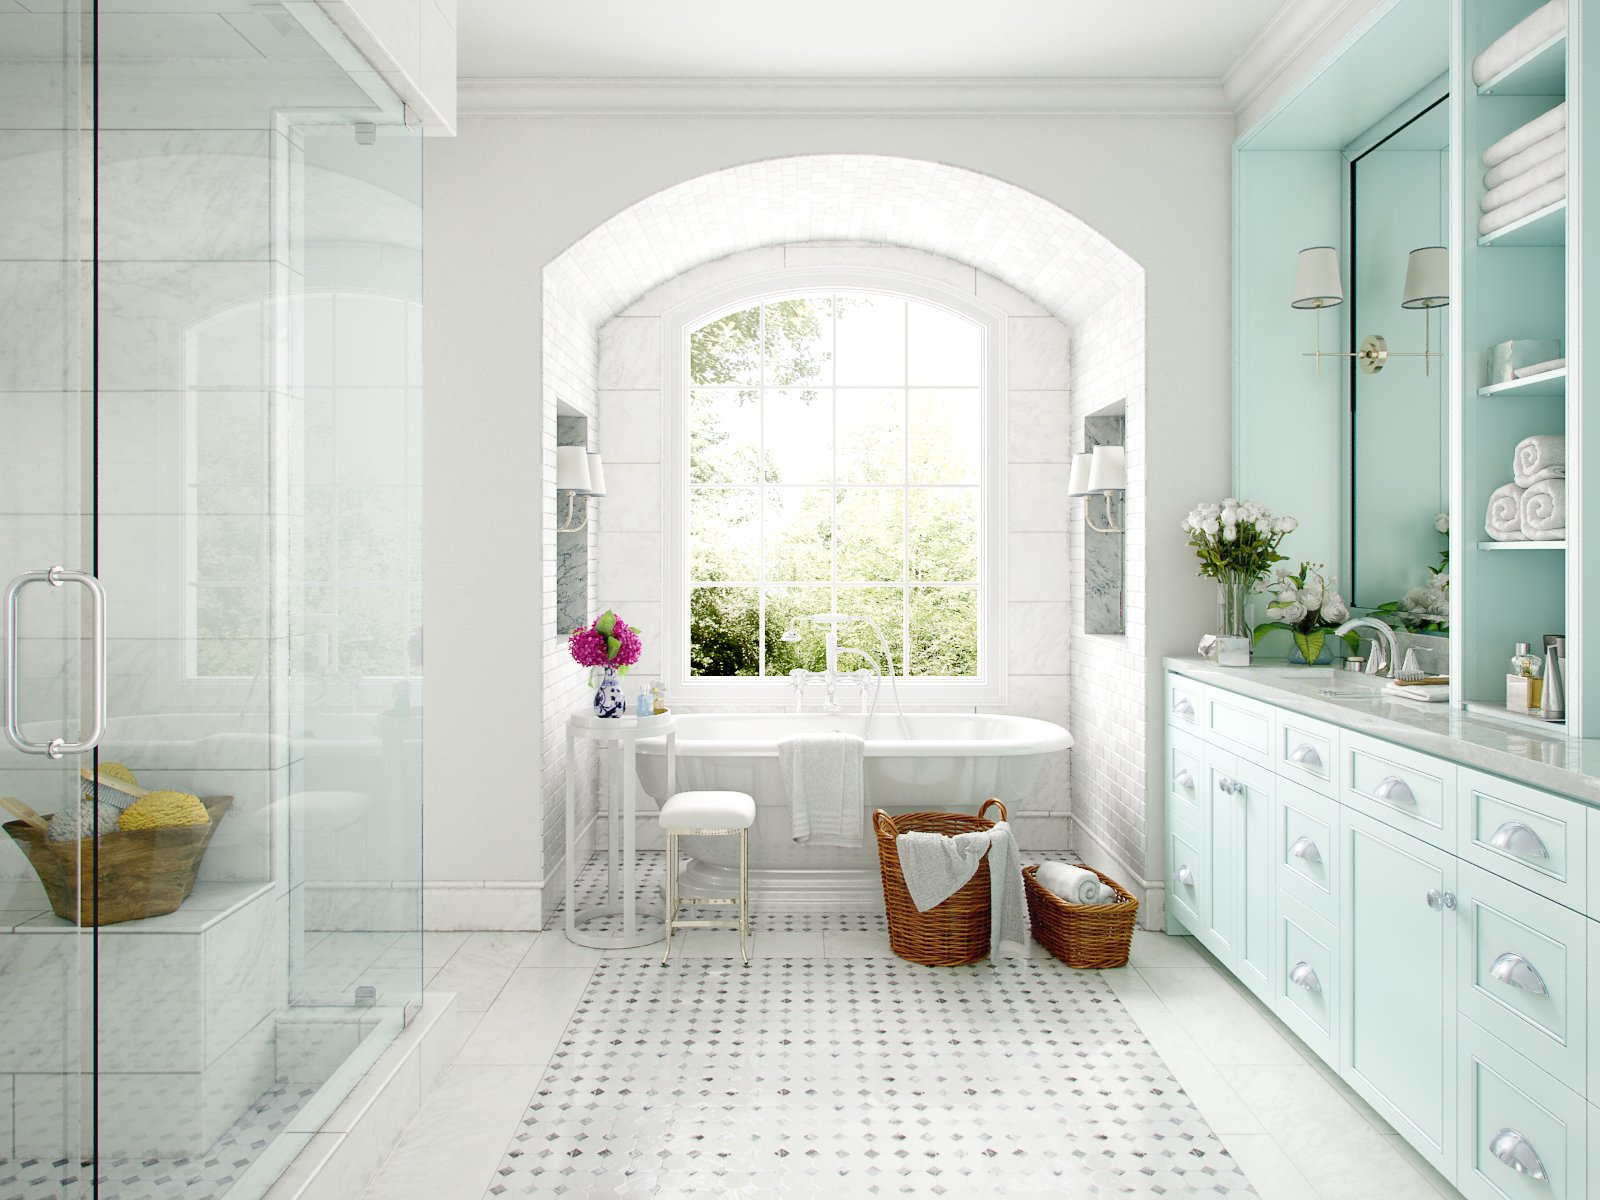
Final image after post-production. Interior is small, but very bright. We achieved it thanks to many Vray lights, lighting interior from almost every direction. With bright shaders and big window we achieved clean and pleasant design, very close to original interior in Atlanta.


Click on image to enlarge reference.jpg

Reference - real bathroom photo. Photo courtesy of Chelsey Bowen, Design by Mark Williams. You can read about this project here.


Click on image to enlarge nr_AI39_005_wire_635.jpg
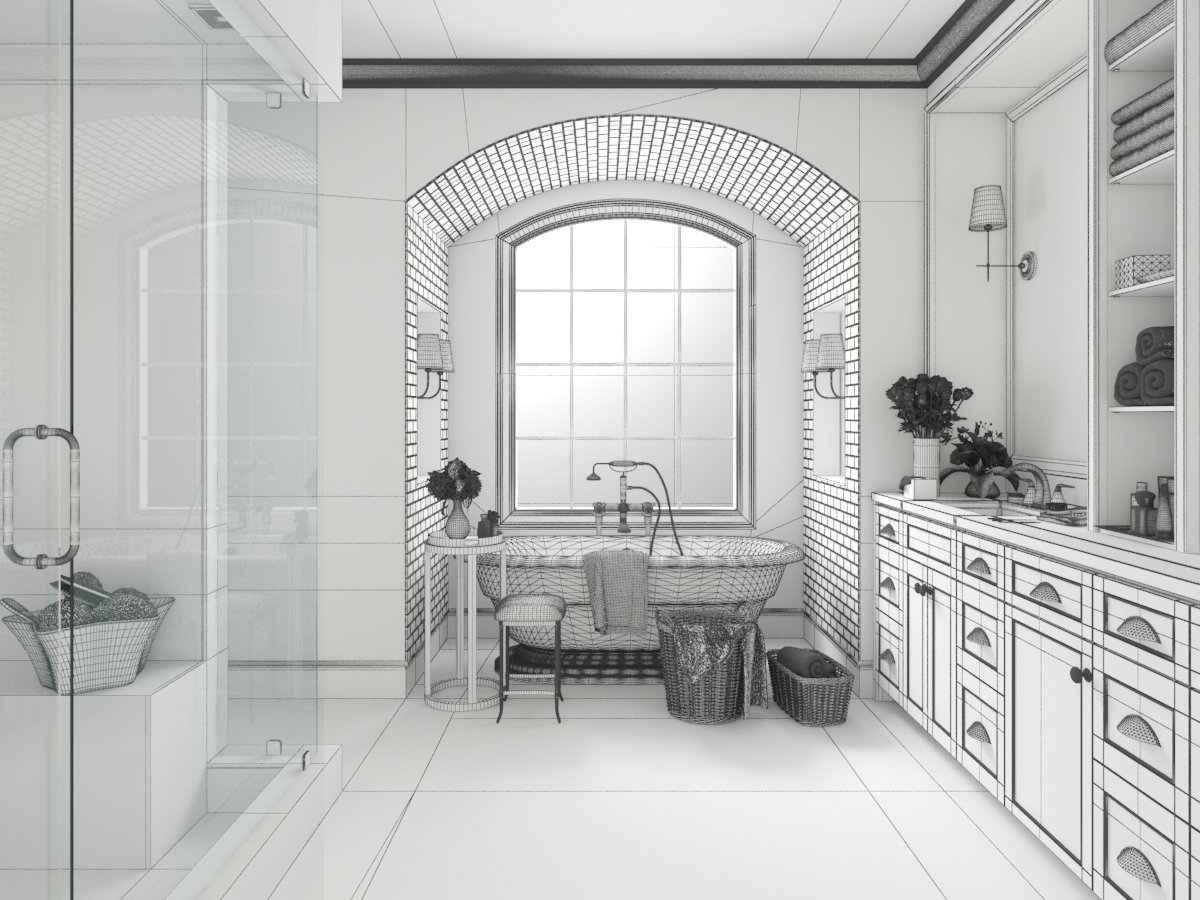
Wireframe of the scene.


Click on image to enlarge nr_AI39S05_0046_Layer_1_628.jpg

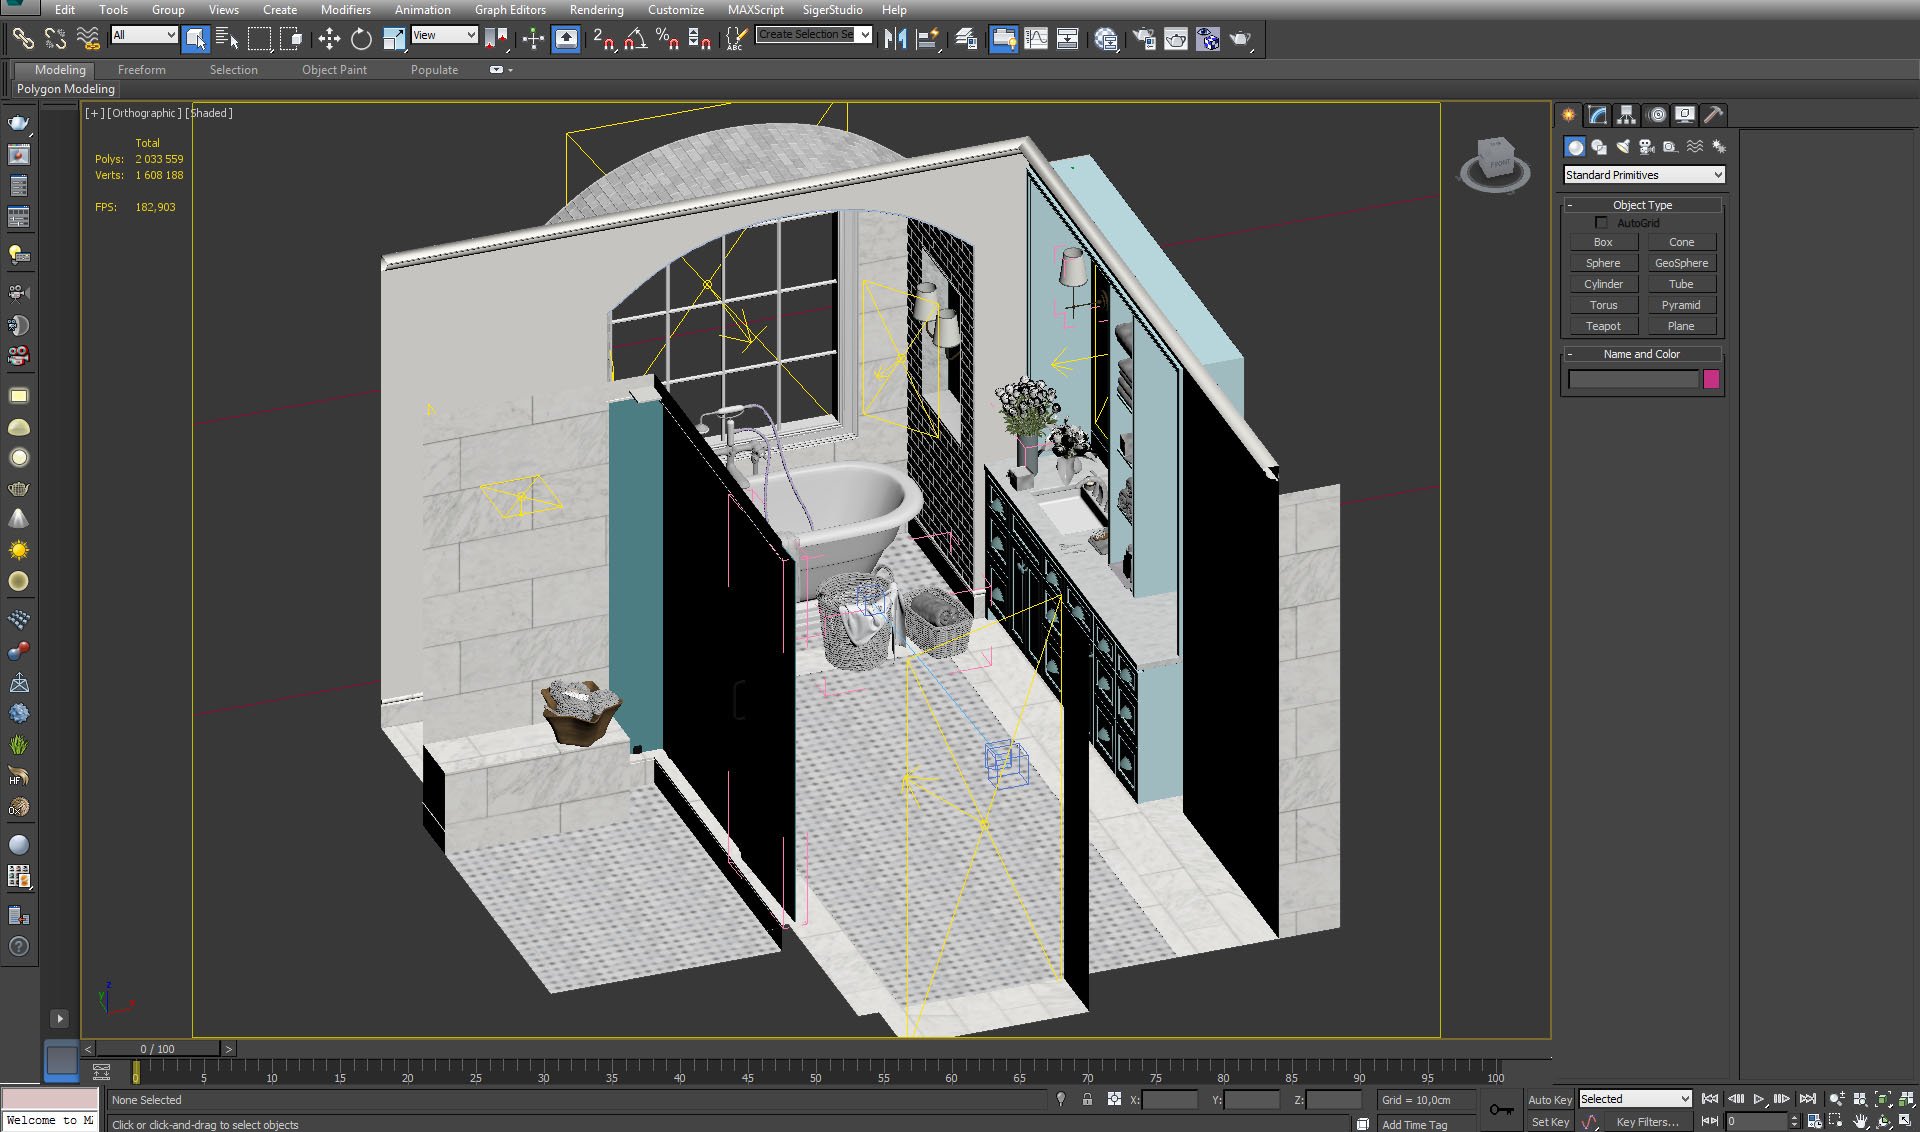
View from Vray Physical camera. The scene has ab. 2 million polys, and it weights 420 MB with maps.


Click on image to enlarge nr_AI39S05_0045_Layer_2_627.jpg

Front view.


Click on image to enlarge nr_AI39S05_0044_Layer_3_626.jpg

Isometric view. As you can see, it is simple, small interior.


Click on image to enlarge nr_AI39S05_0026_Layer_21_608.jpg

Camera settings. Camera is placed near the wall, it has quite small FOV (24 mm), quite slow shutter speed (80) and not too high ISO (100).


Click on image to enlarge nr_AI39S05_0043_Layer_4_625.jpg

Behind the window we put long box with map of the trees. The box is not visible to GI and it is not casting shadows.


Click on image to enlarge nr_AI39S05_0042_Layer_5_624.jpg

Trees are just a texture of box material. Shader settings on the right.


Click on image to enlarge nr_AI39S05_0041_Layer_6_623.jpg
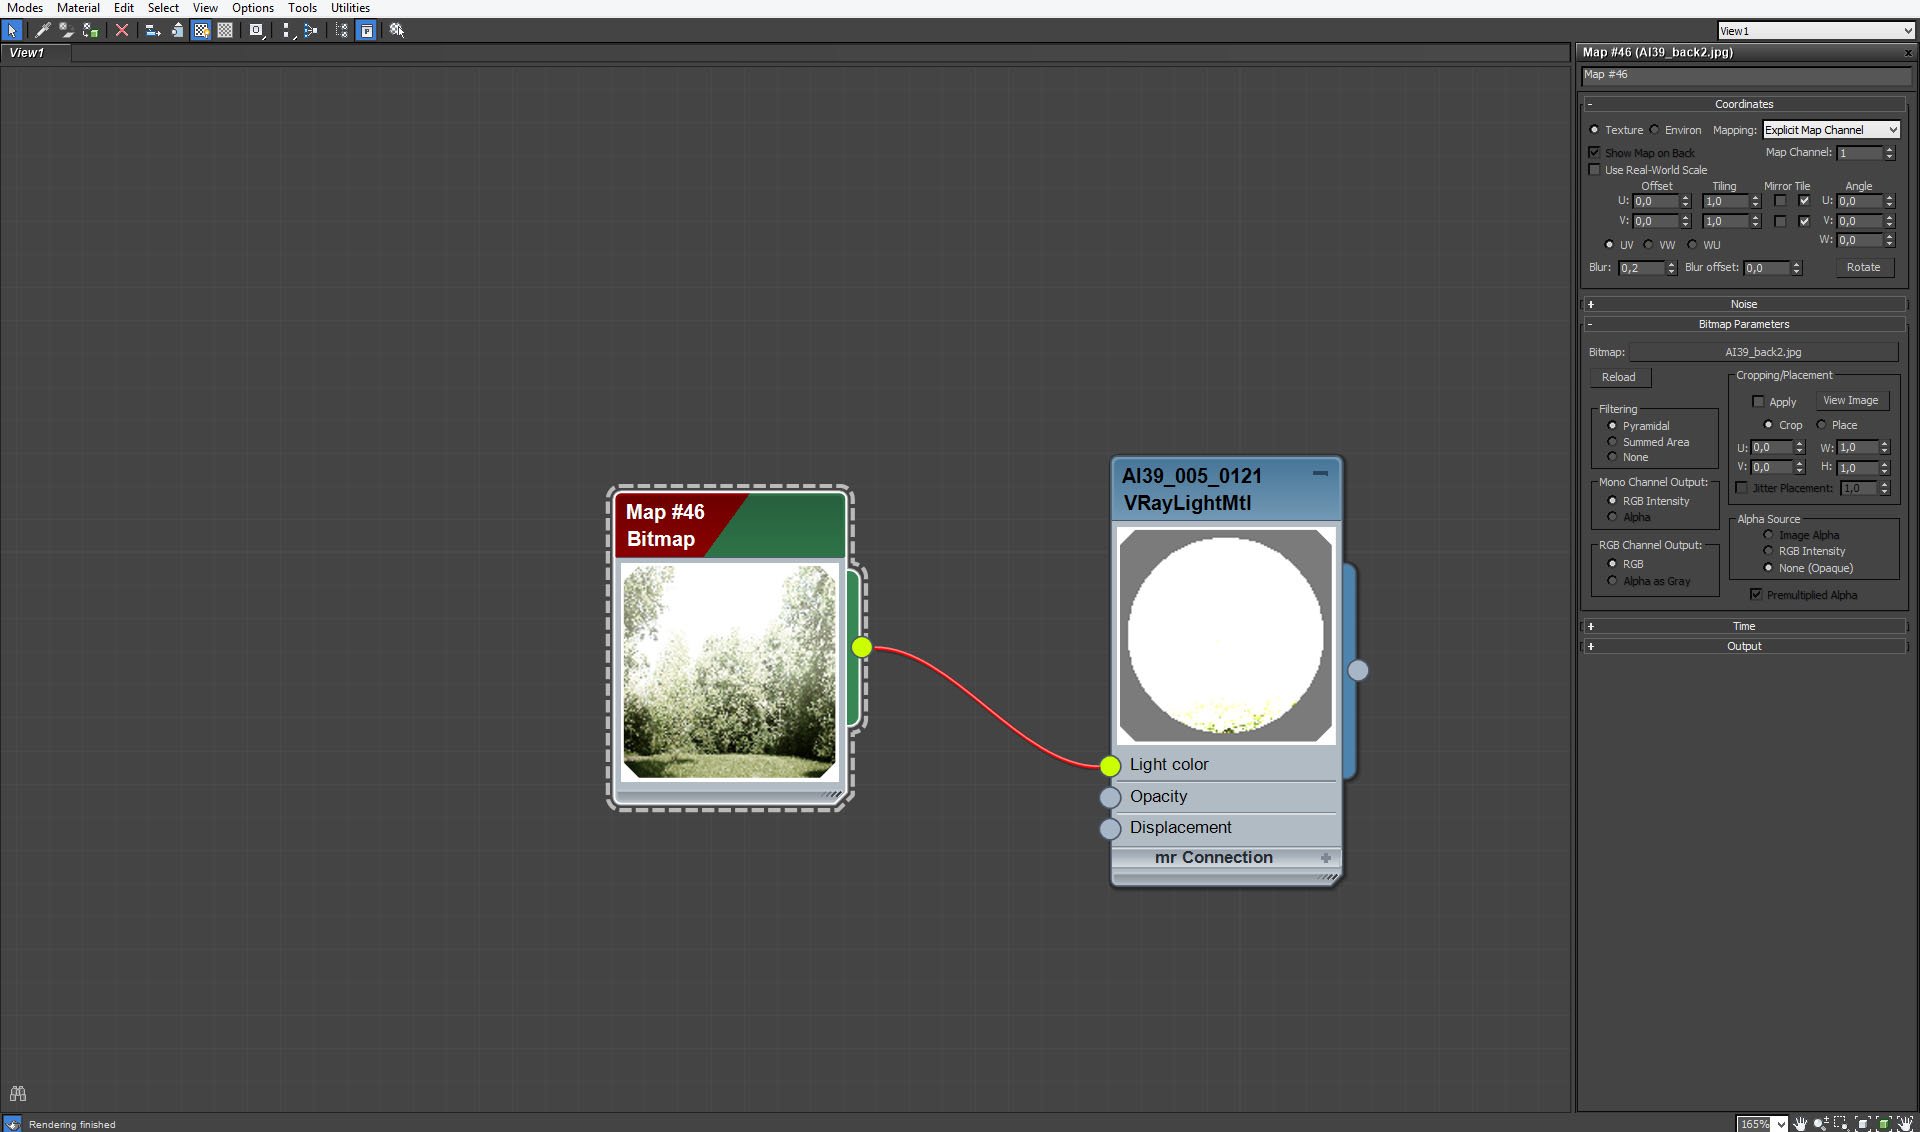
Trees behind the window - map settings.


Click on image to enlarge nr_AI39S05_0040_Layer_7_622.jpg
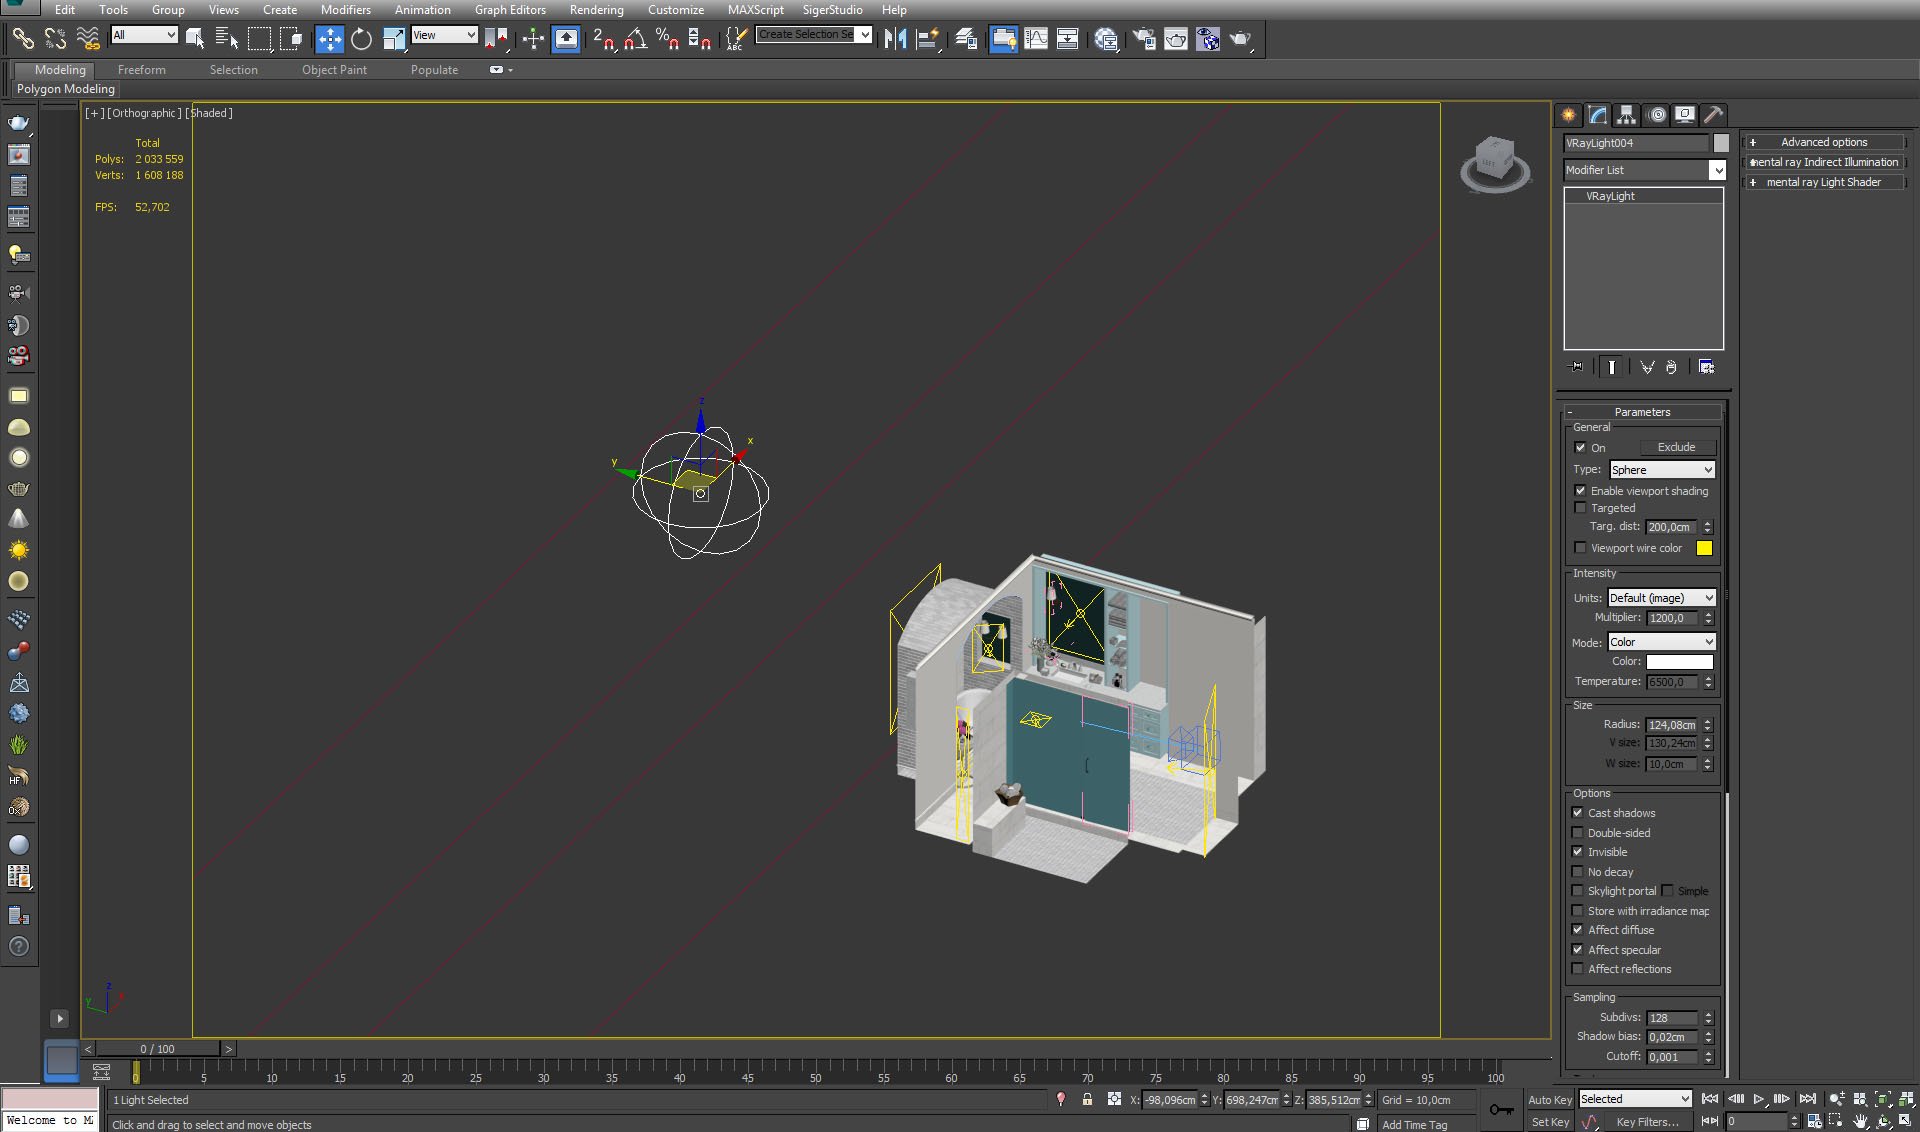
We placed Vray Light outside to simulate sunlight.


Click on image to enlarge nr_AI39S05_0039_Layer_8_621.jpg
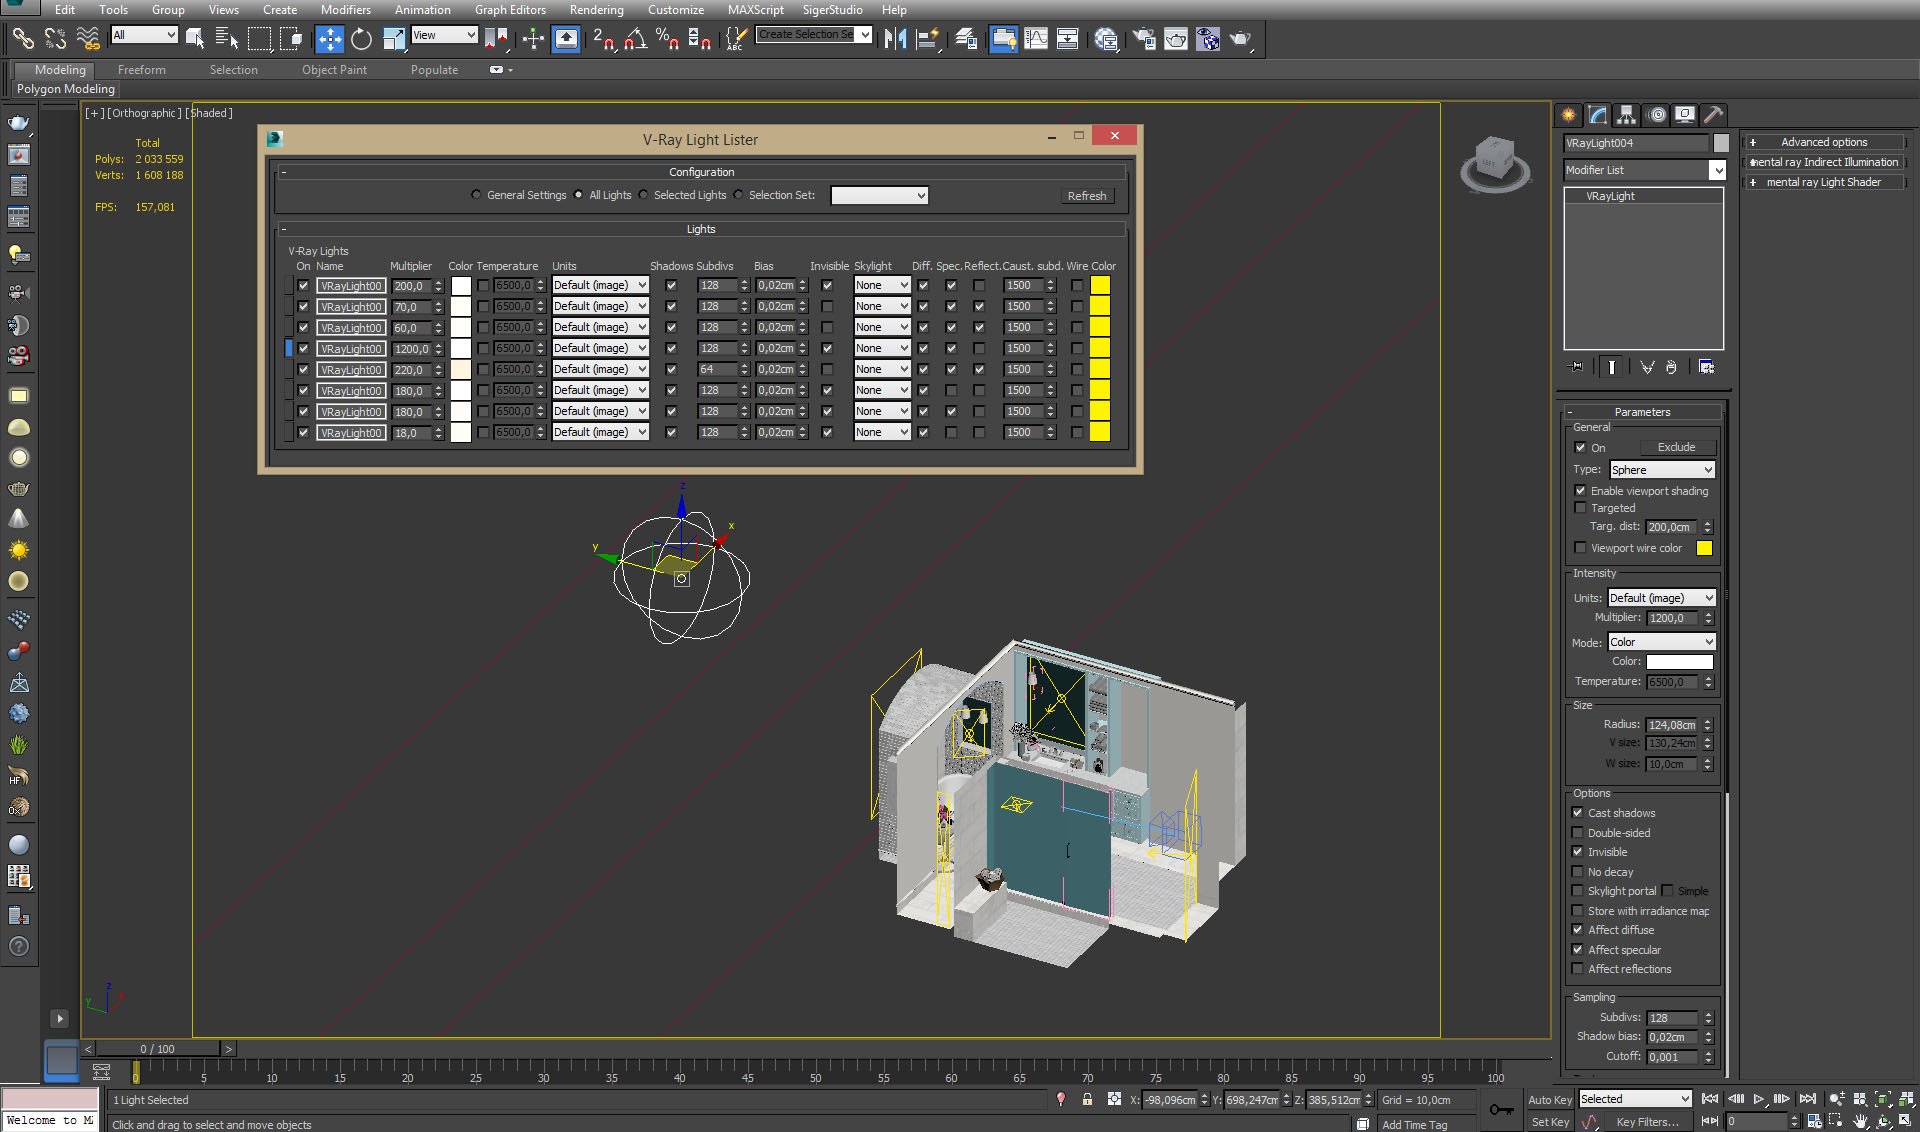
Vray lights listed.


Click on image to enlarge nr_AI39S05_0037_Layer_10_619.jpg

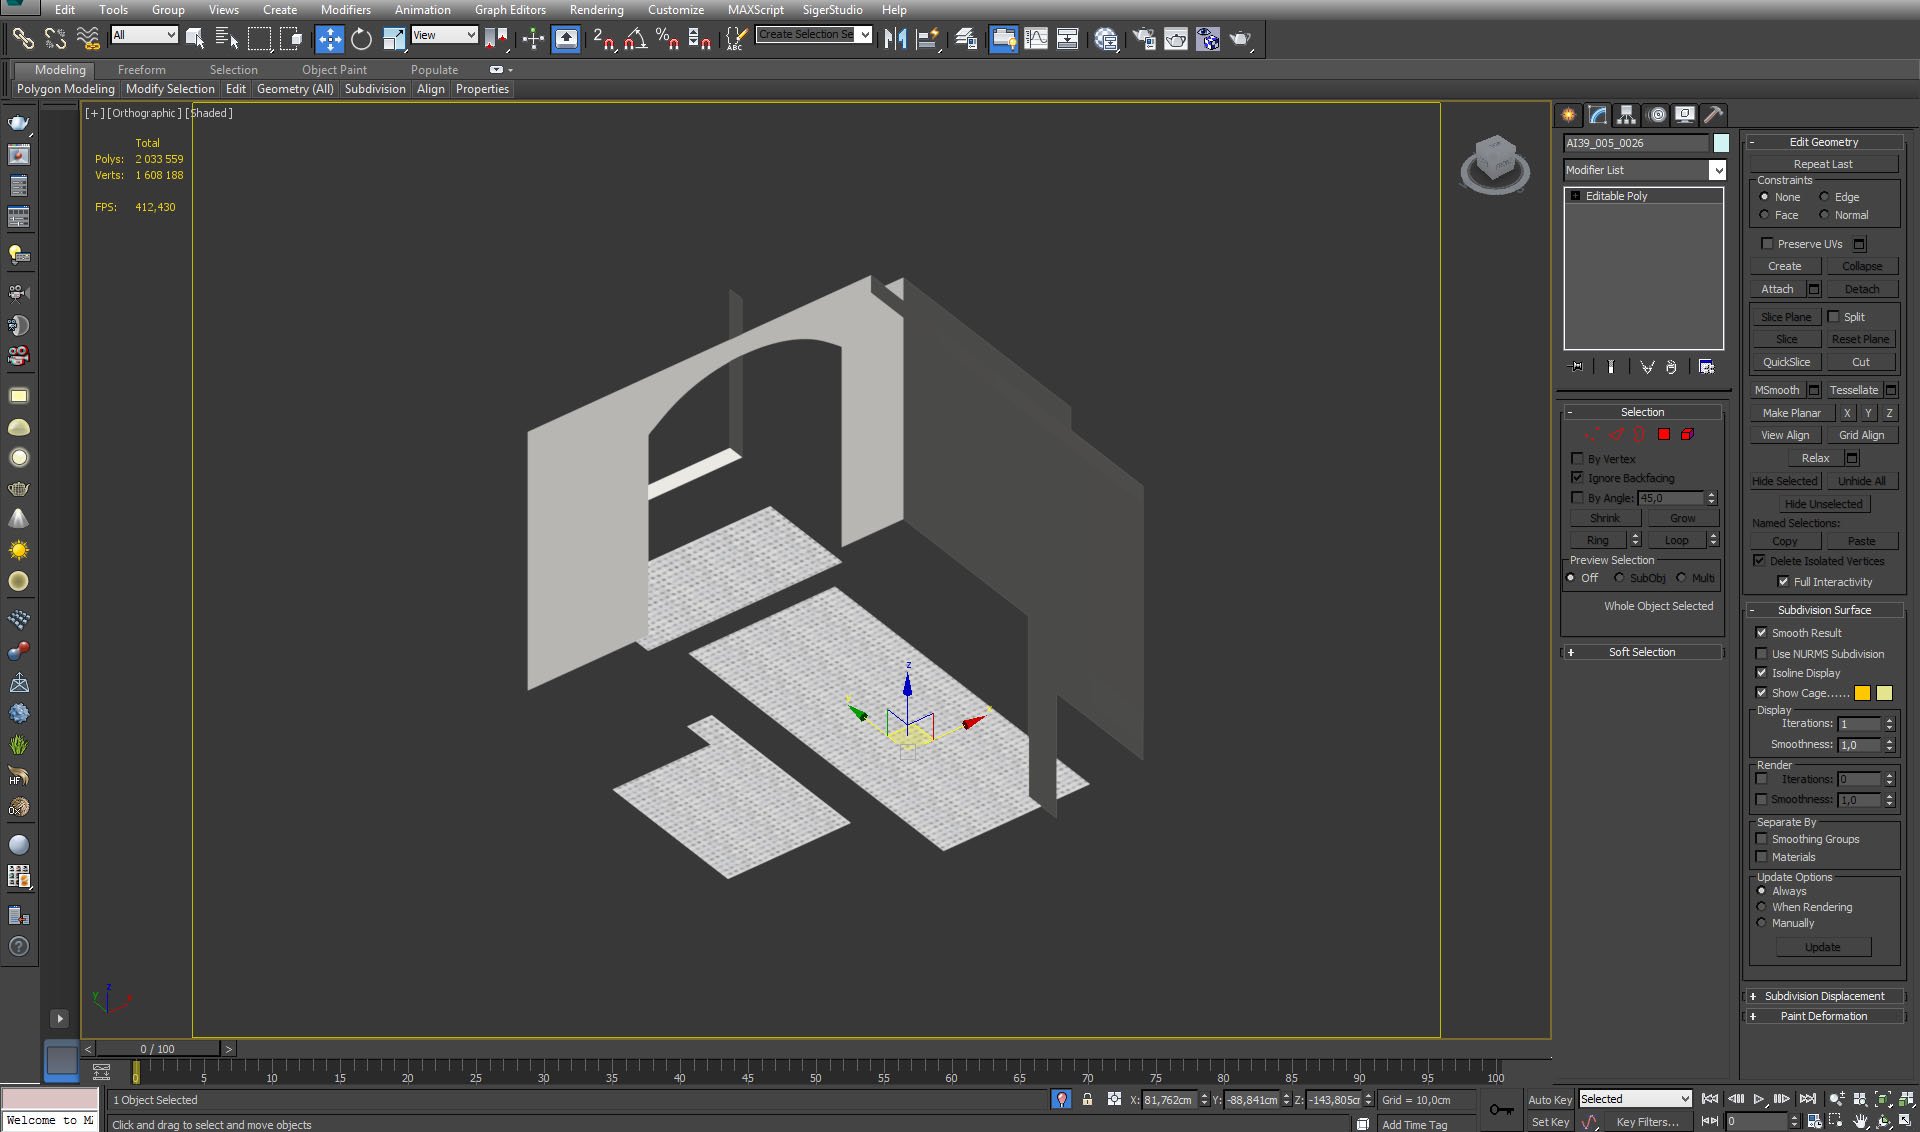
The floor and walls - simple planes with an arch over tube.


Click on image to enlarge nr_AI39S05_0038_Layer_9_620.jpg
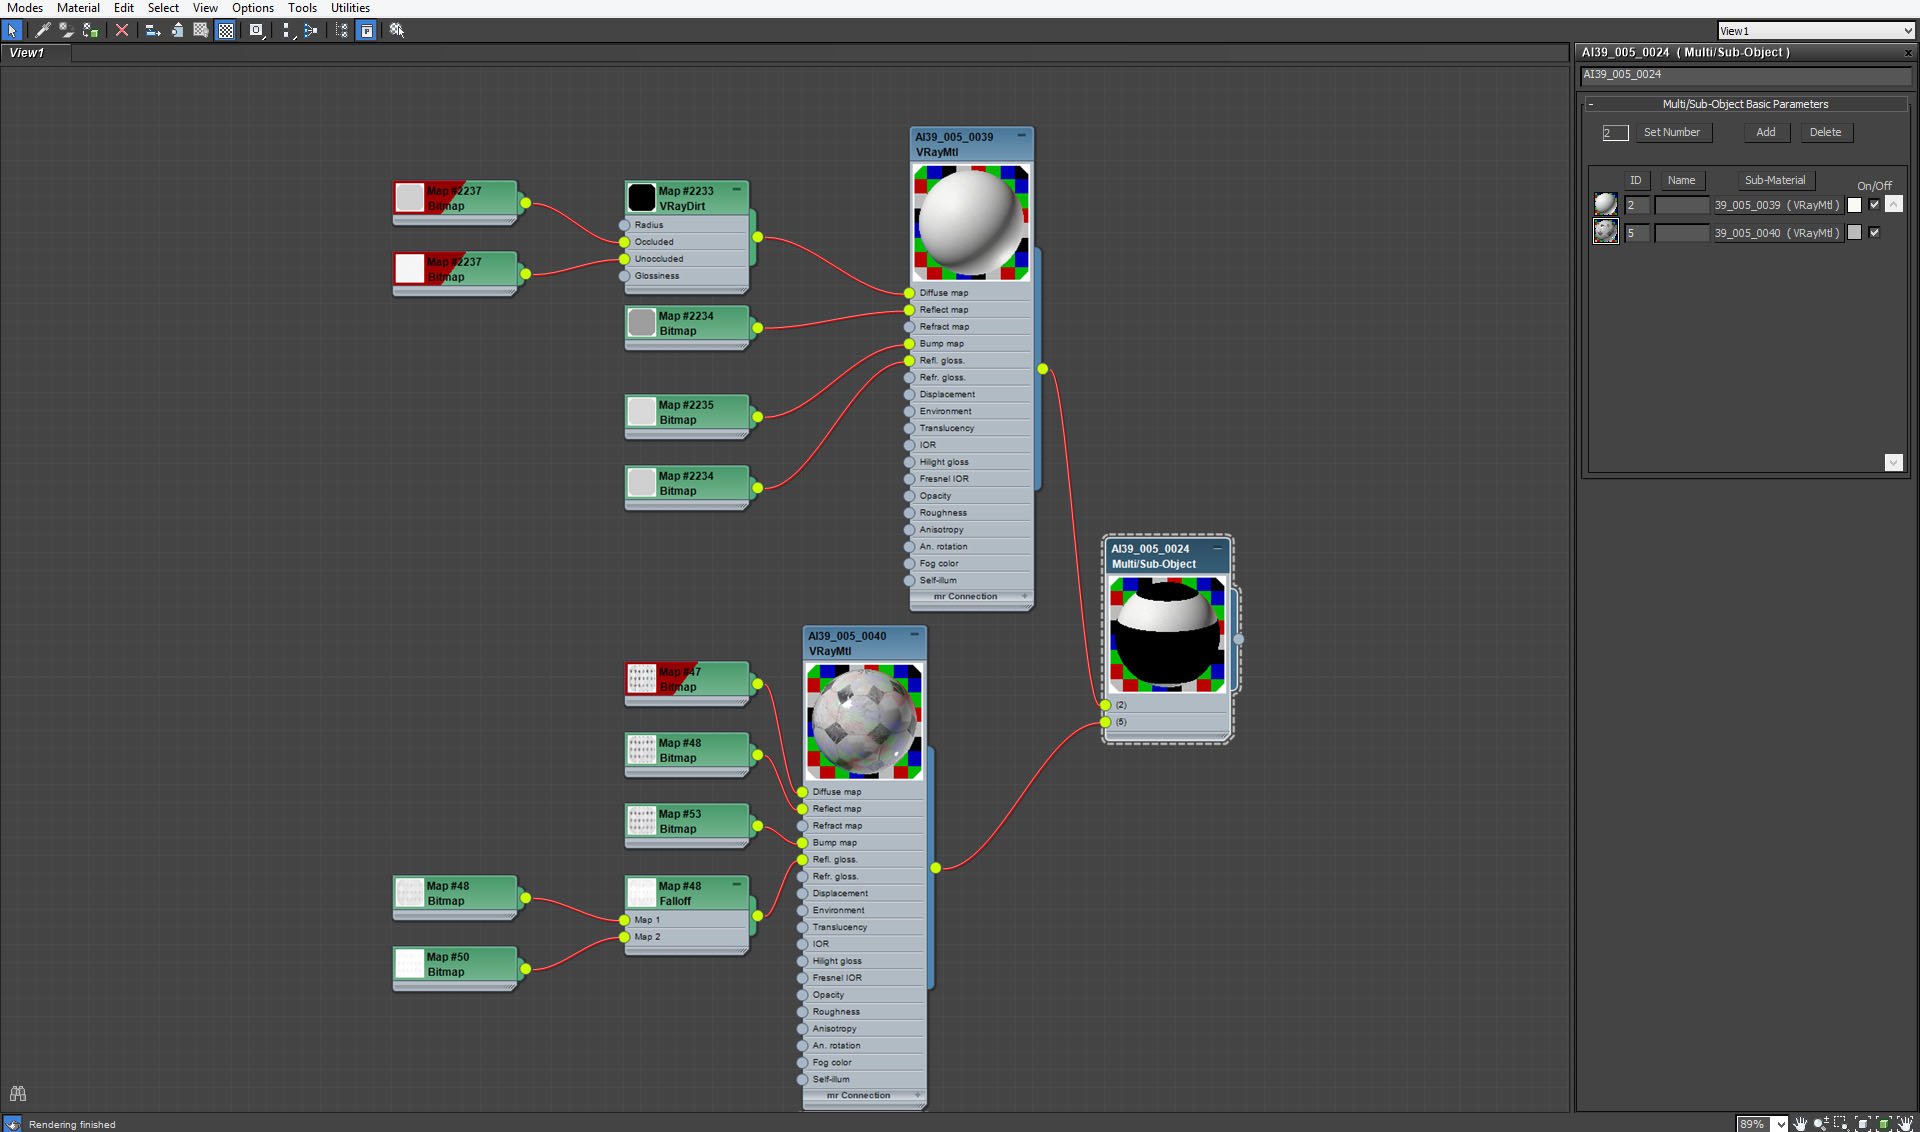
Floor and walls are single object, so they share one Multi/sub Object material. floor material is textured Carrara marble with black granite diamond pattern, wall material does not have pattern.


Click on image to enlarge nr_AI39S05_0035_Layer_12_617.jpg
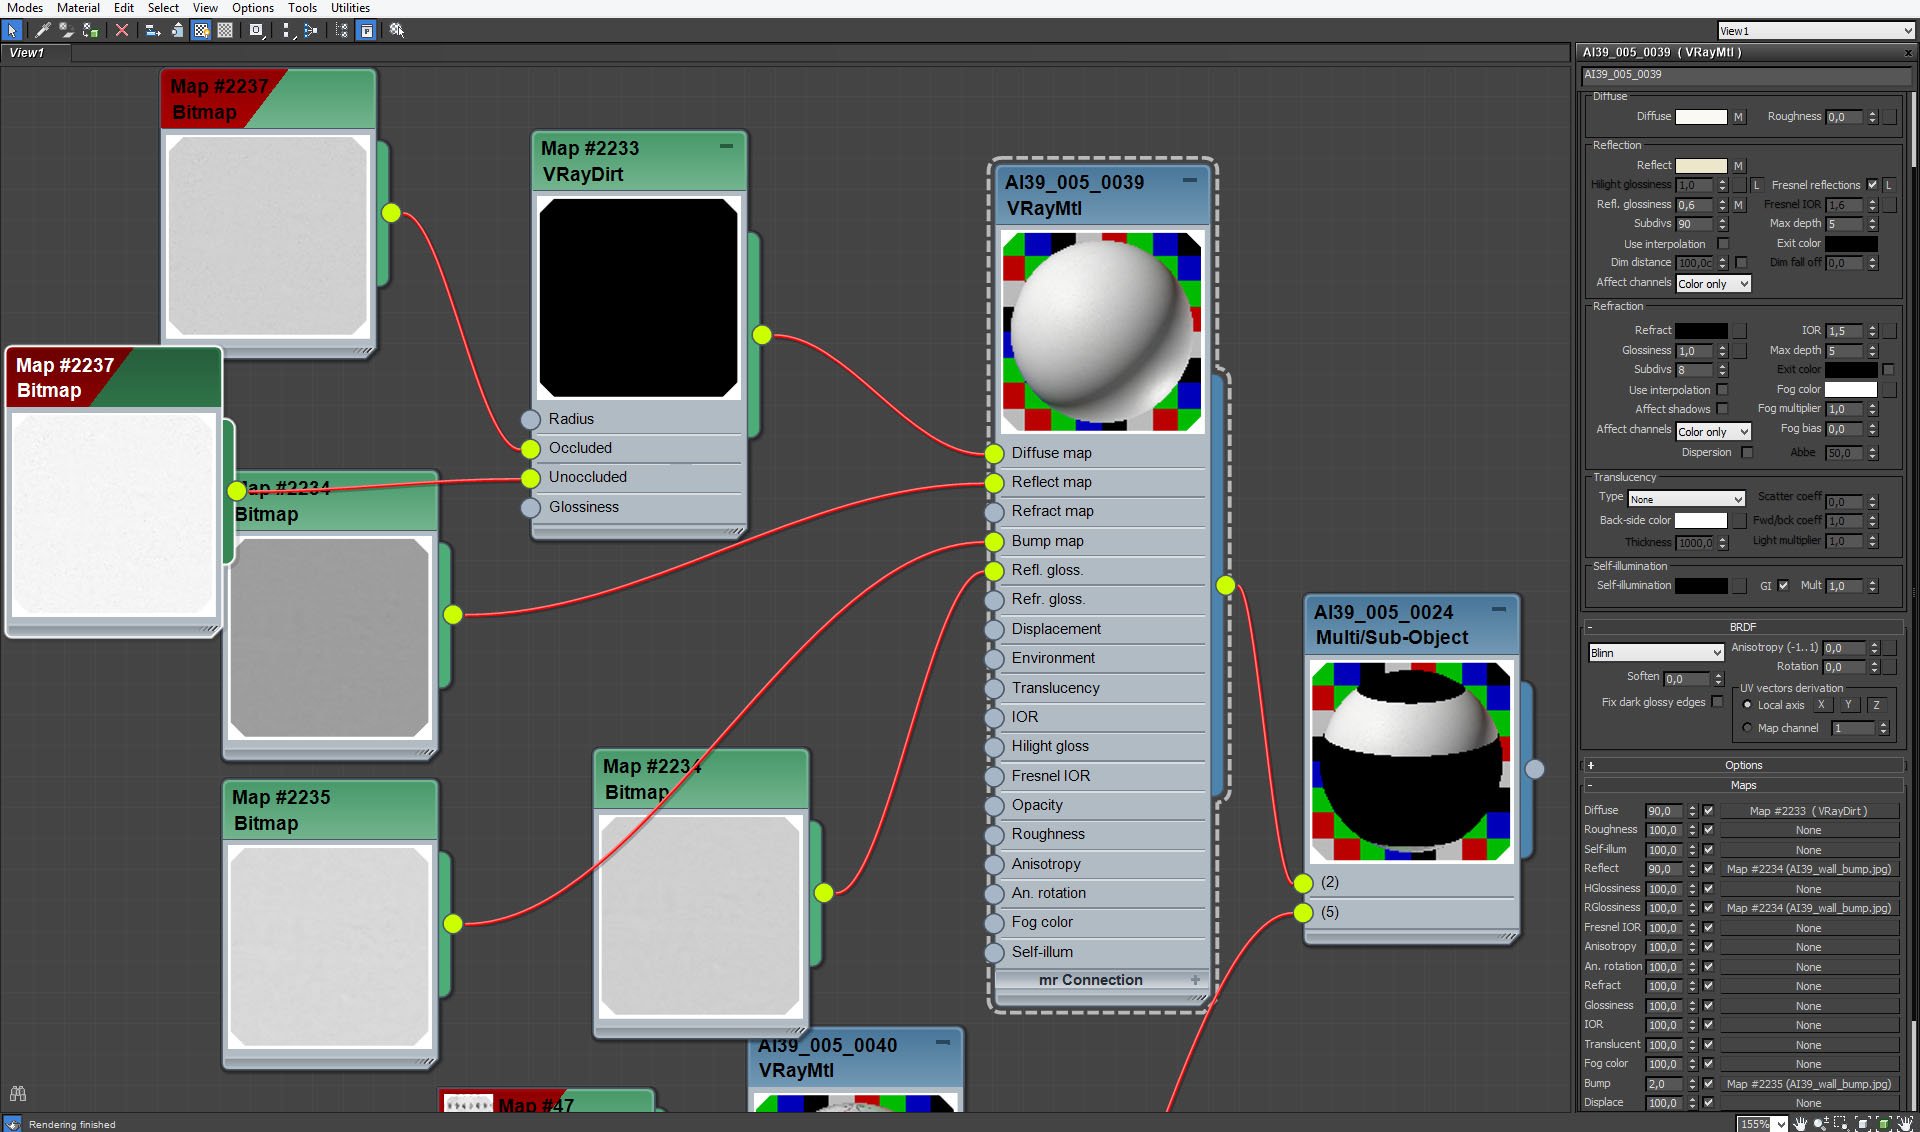
Wall material.


Click on image to enlarge nr_AI39S05_0034_Layer_13_616.jpg

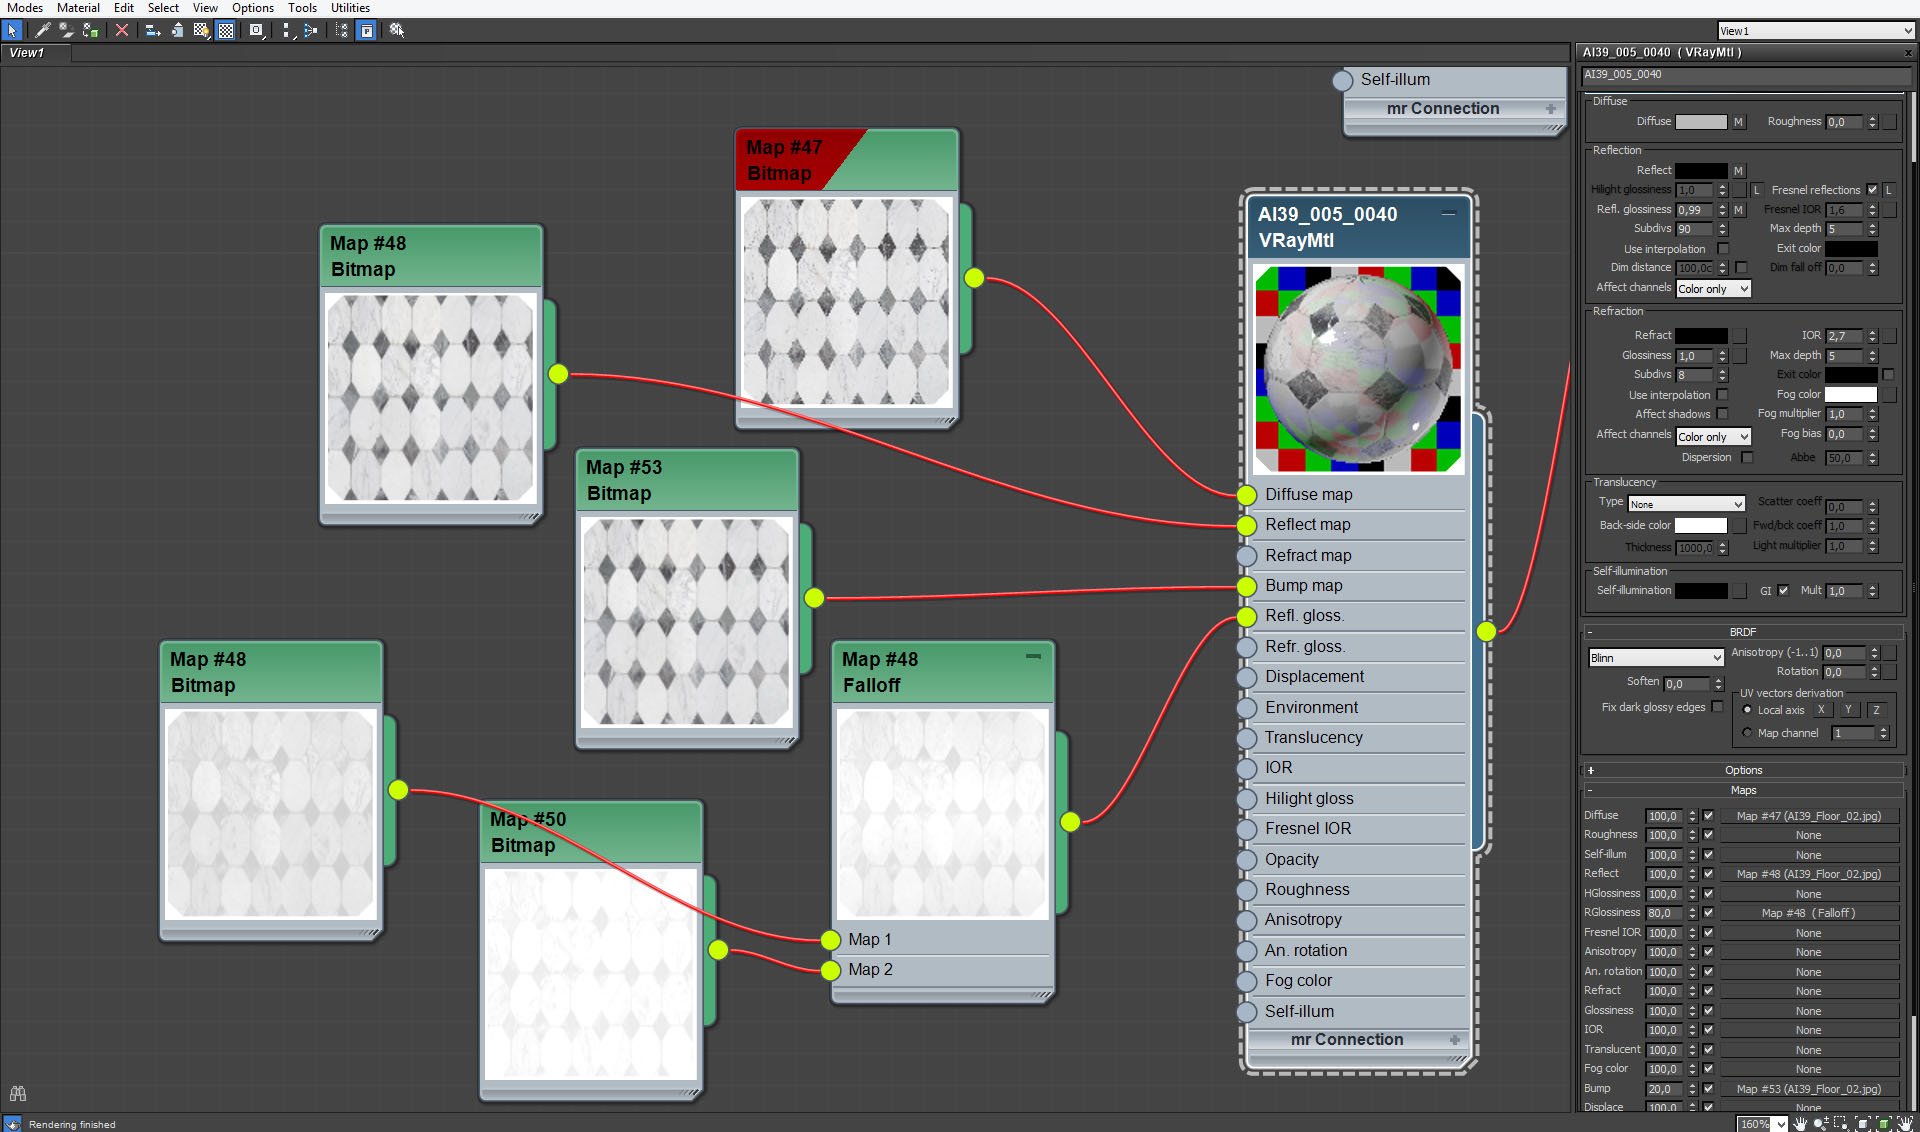
Floor material - marble with black diamond pattern.


Click on image to enlarge nr_AI39S05_0033_Layer_14_615.jpg
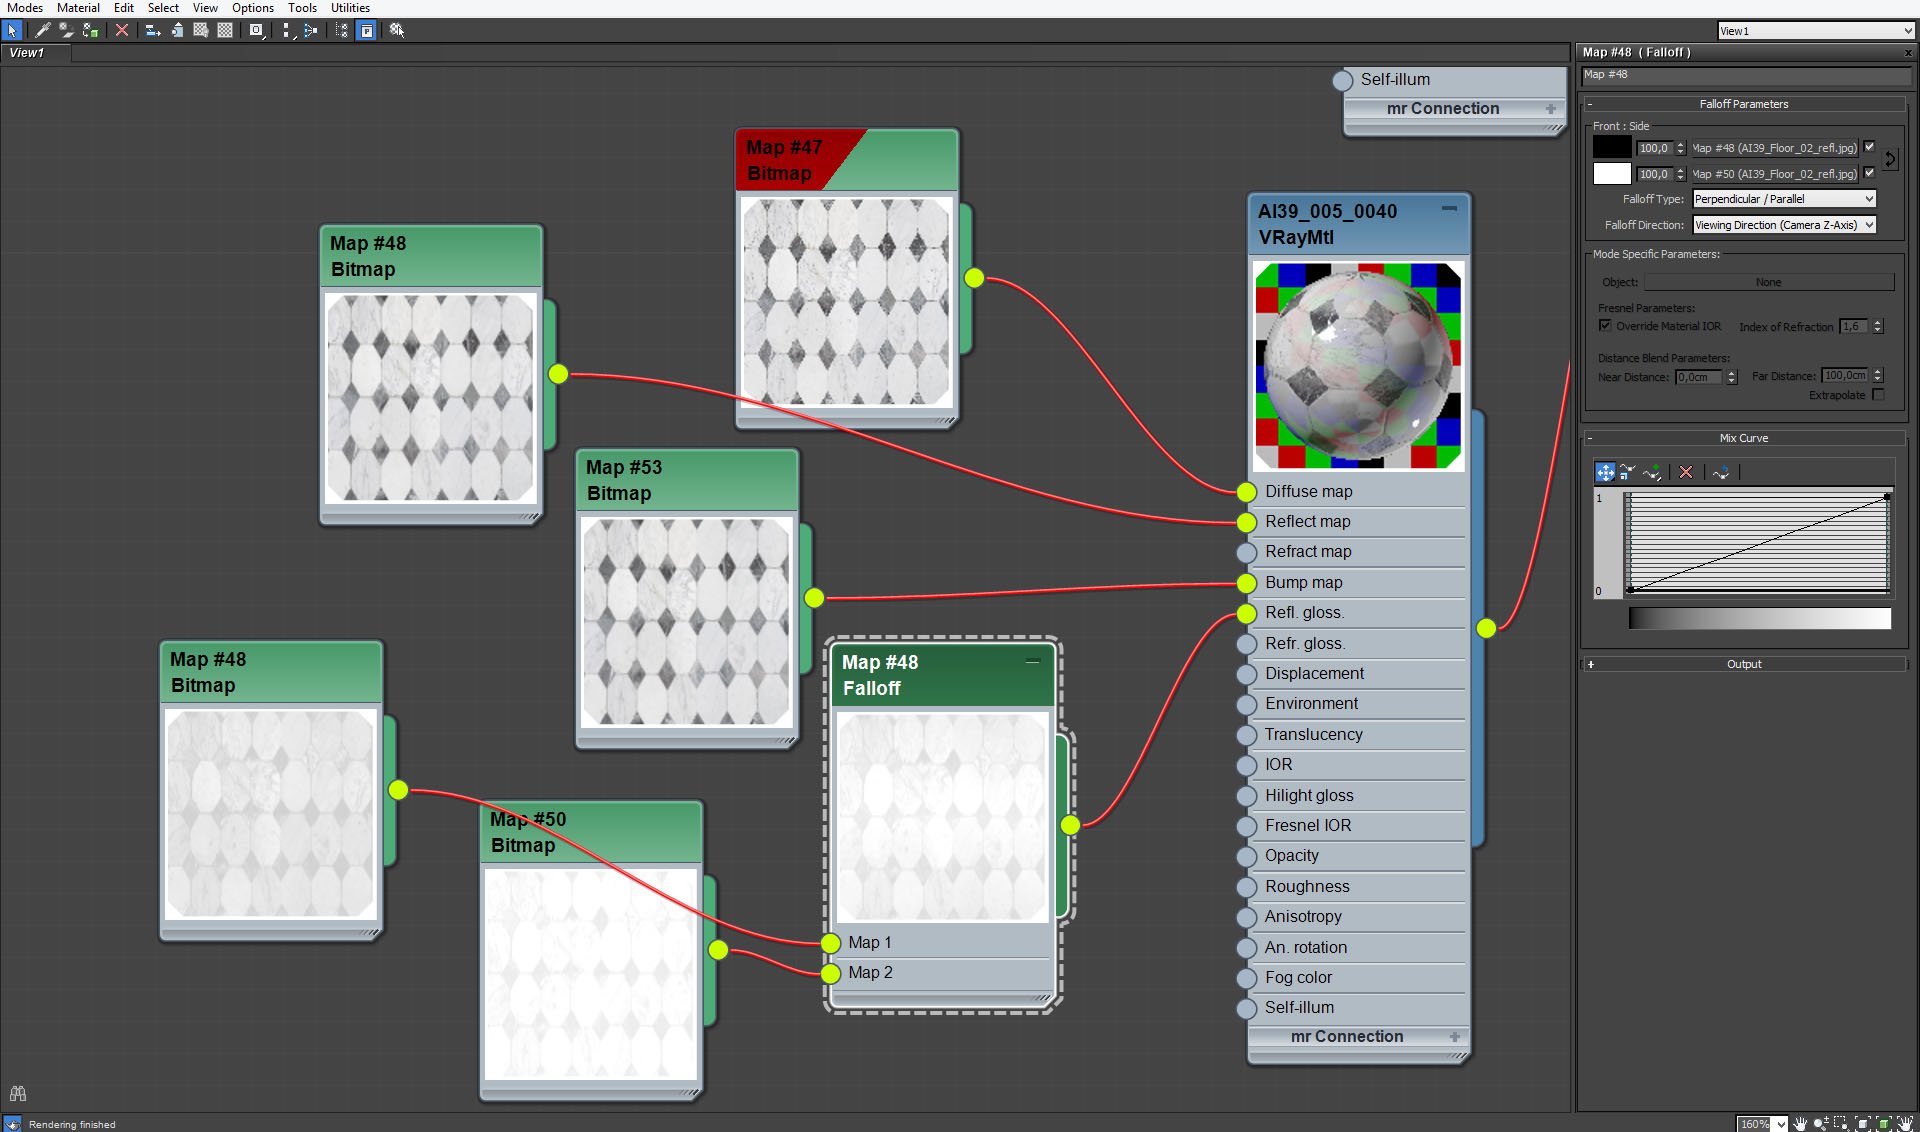
Floor material with black diamond pattern, continued.


Click on image to enlarge nr_AI39S05_0032_Layer_15_614.jpg
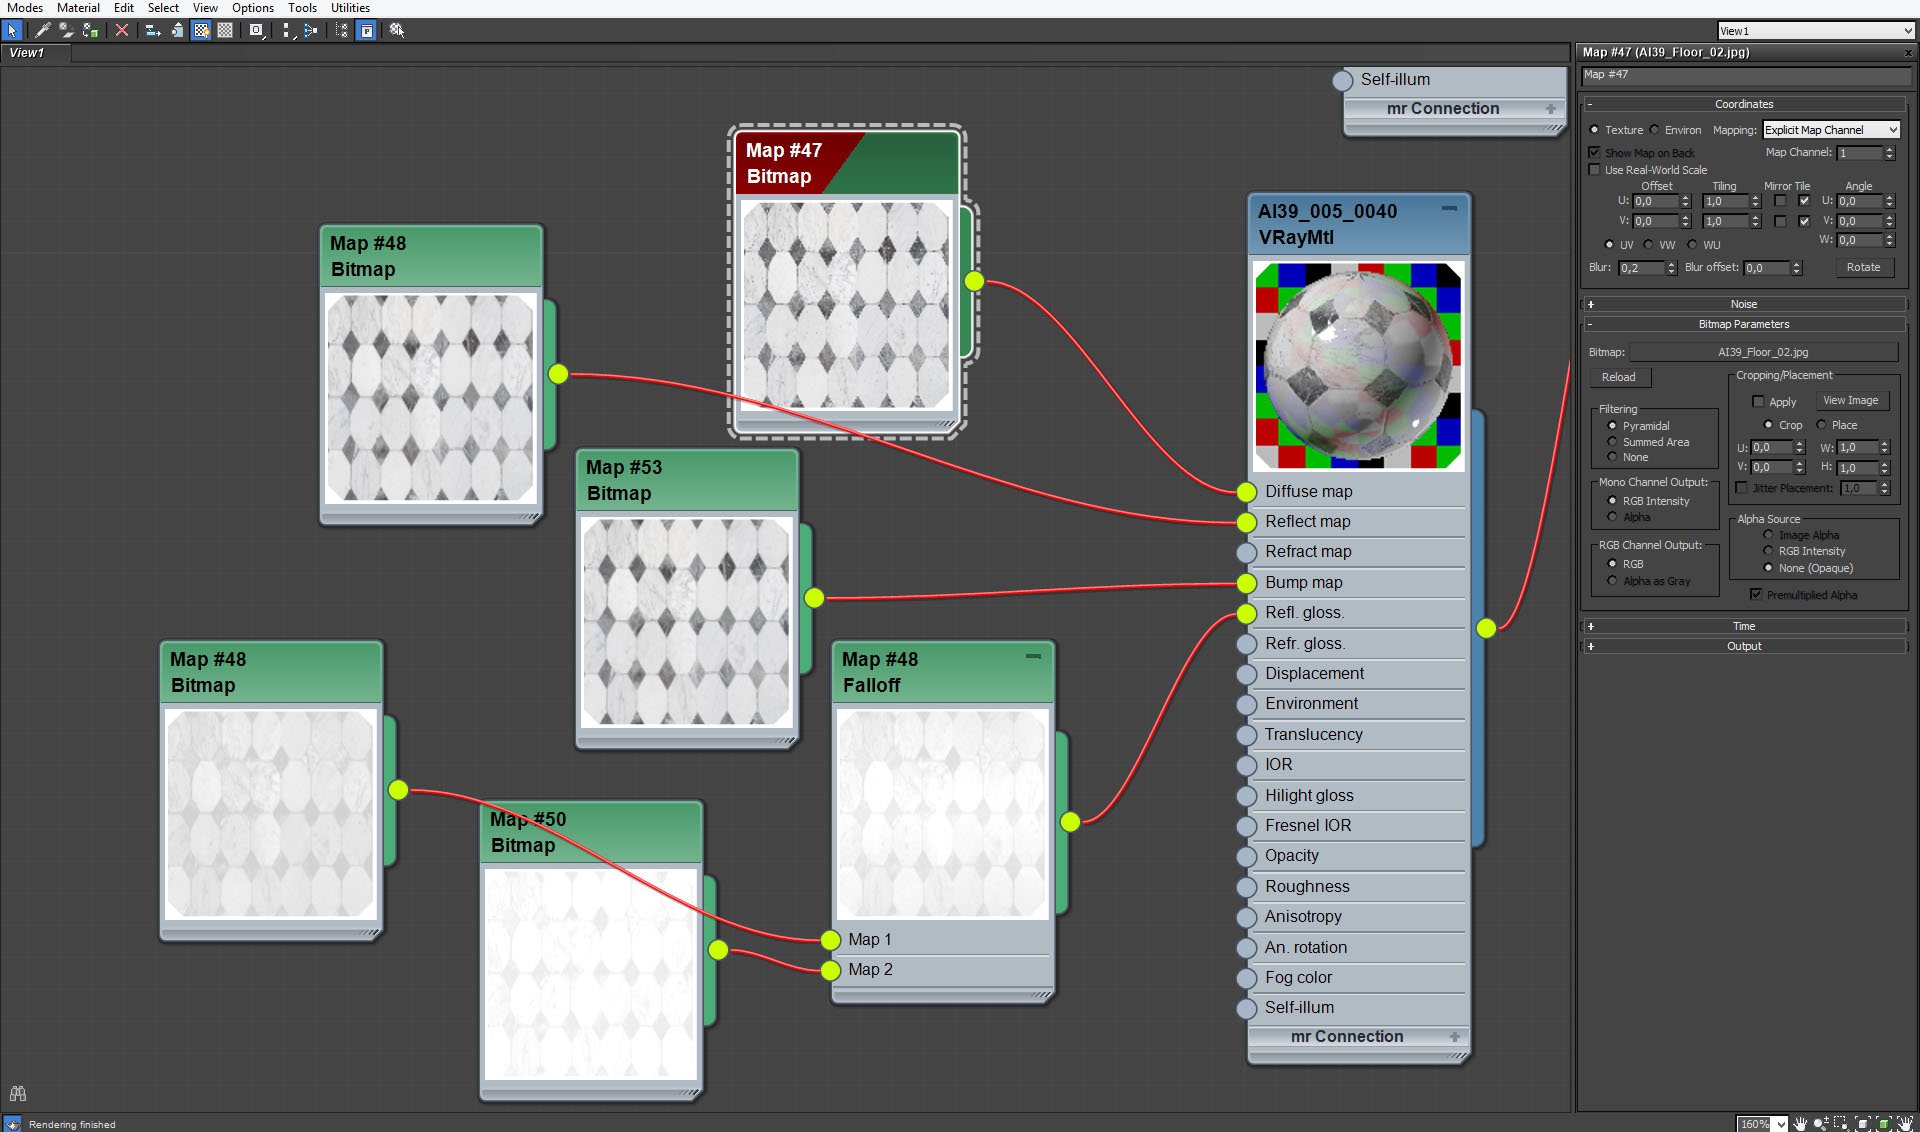
Floor material with black diamond pattern, continued


Click on image to enlarge nr_AI39S05_0031_Layer_16_613.jpg
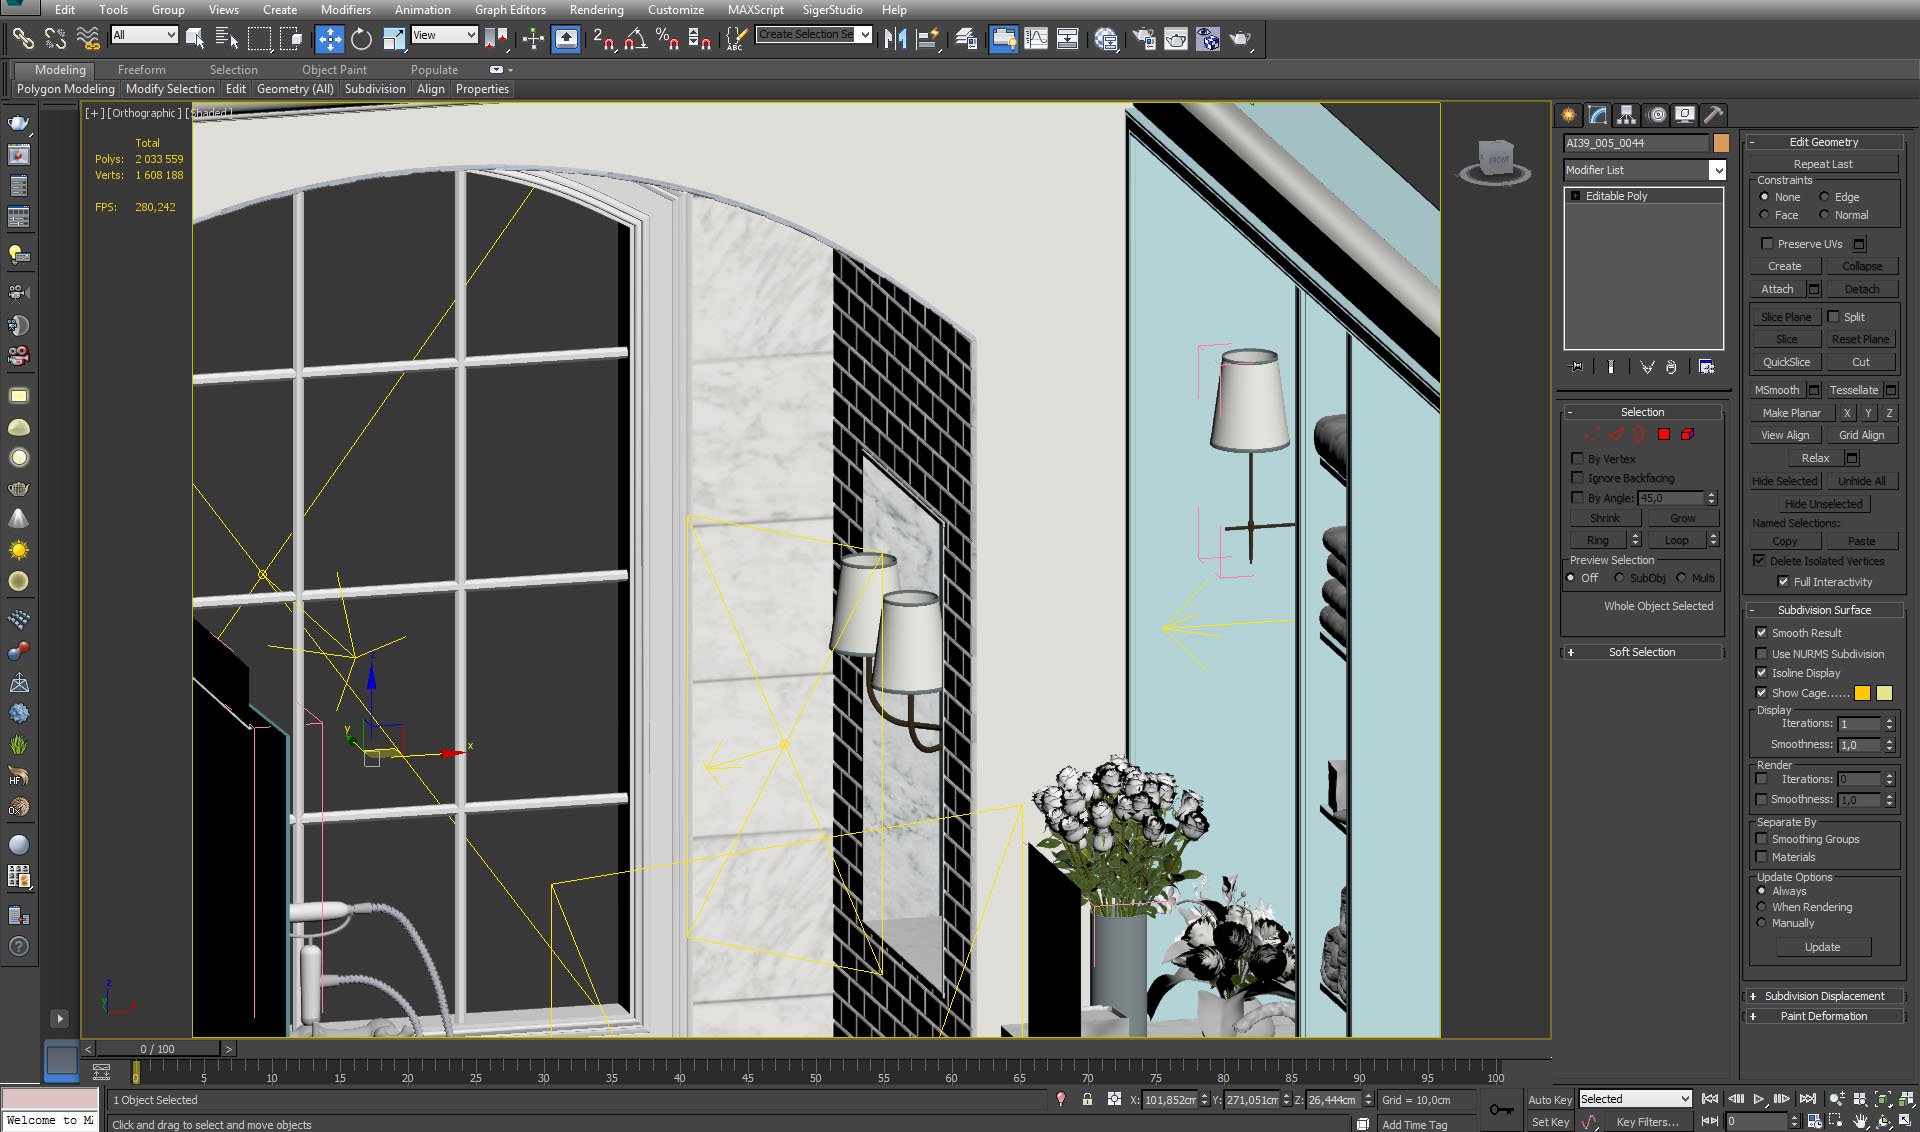
A tiled vaulted arch that defines the tub alcove. We also made mirrored niches with sconces.


Click on image to enlarge nr_AI39S05_0030_Layer_17_612.jpg
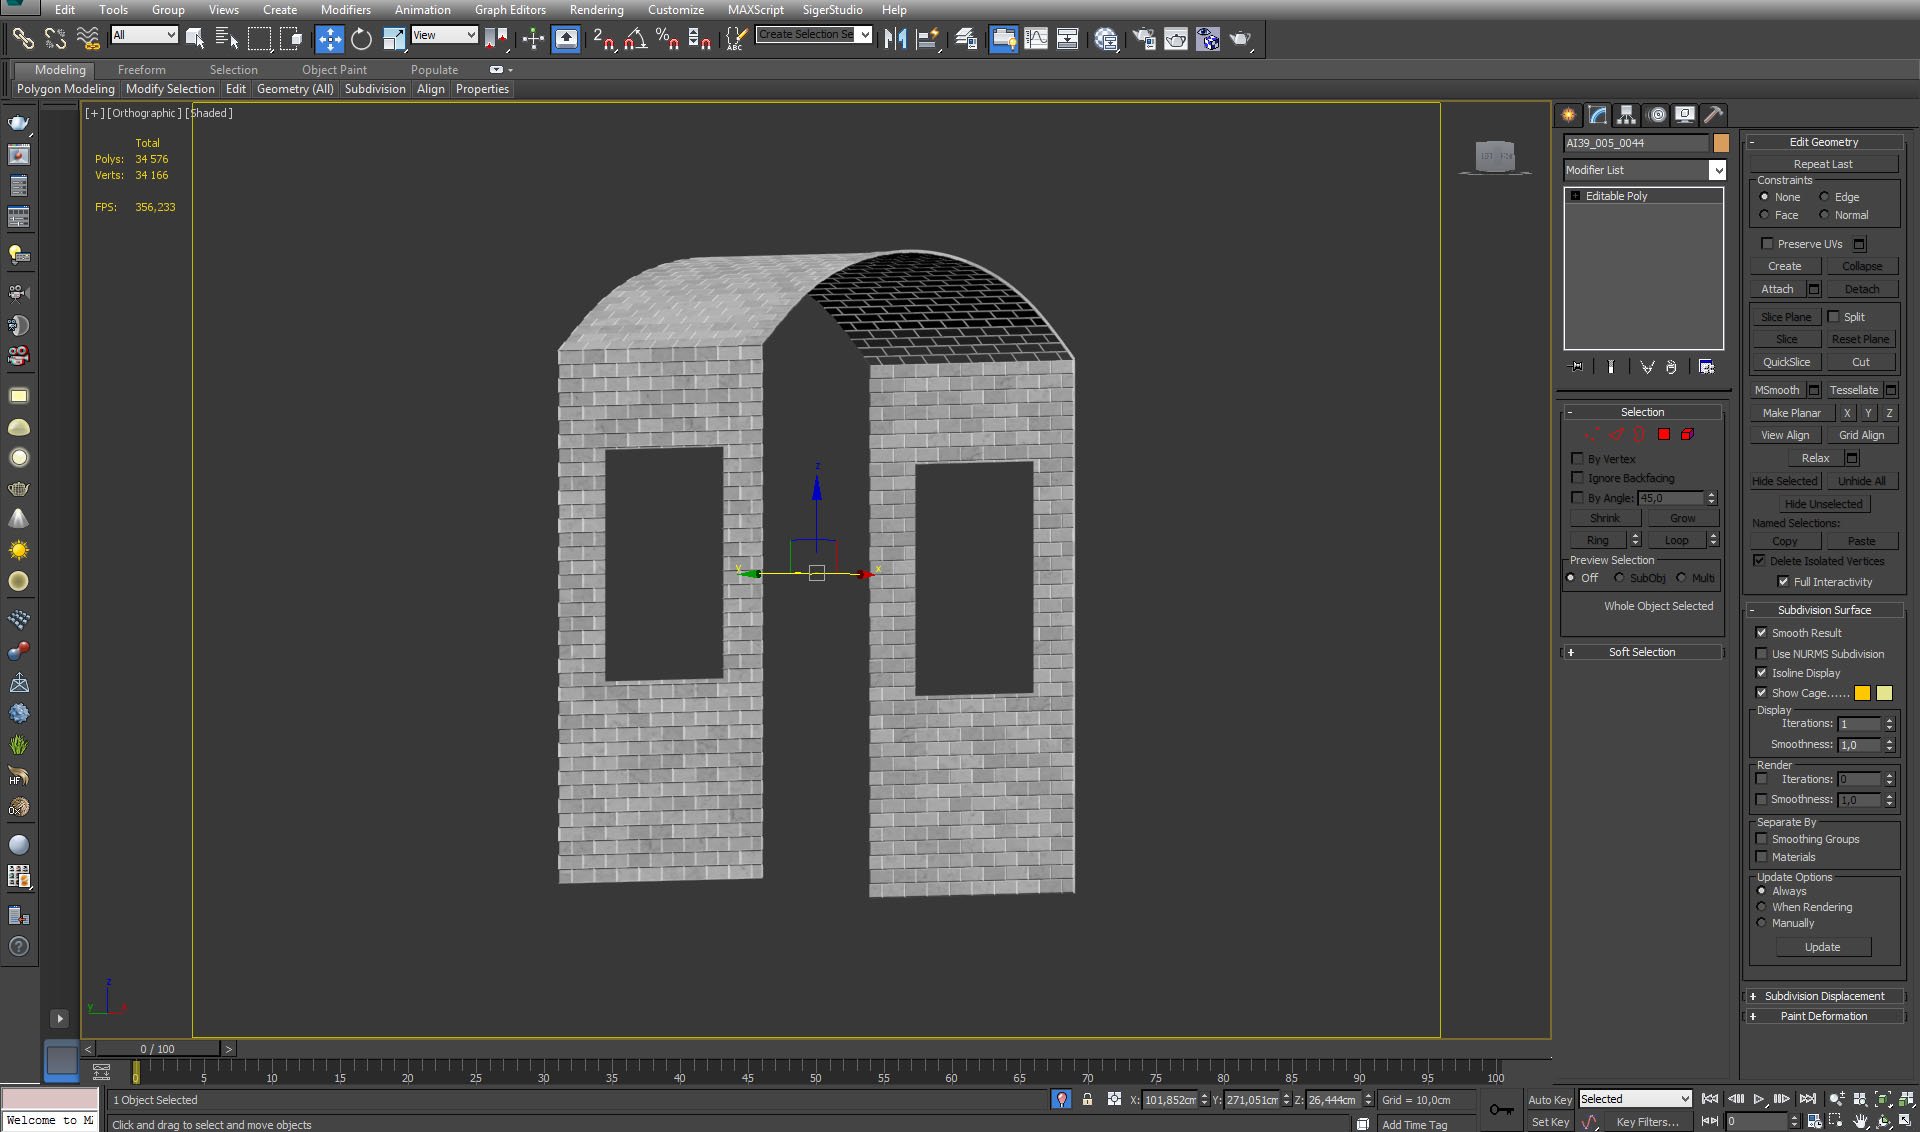
Tiled arch. it was made by hand. as Kuba says: "I could use displacement map, but it would made rendering time longer. In this case I prefered to create tiles with mesh - this way I have better control and the scene has acceptable rendering time".


Click on image to enlarge nr_AI39S05_0029_Layer_18_611.jpg

Tile details.


Click on image to enlarge nr_AI39S05_0027_Layer_20_609.jpg

Bath tub. It is modified model from Archmodels vol. 6.


Click on image to enlarge nr_AI39S05_0025_Layer_22_607.jpg

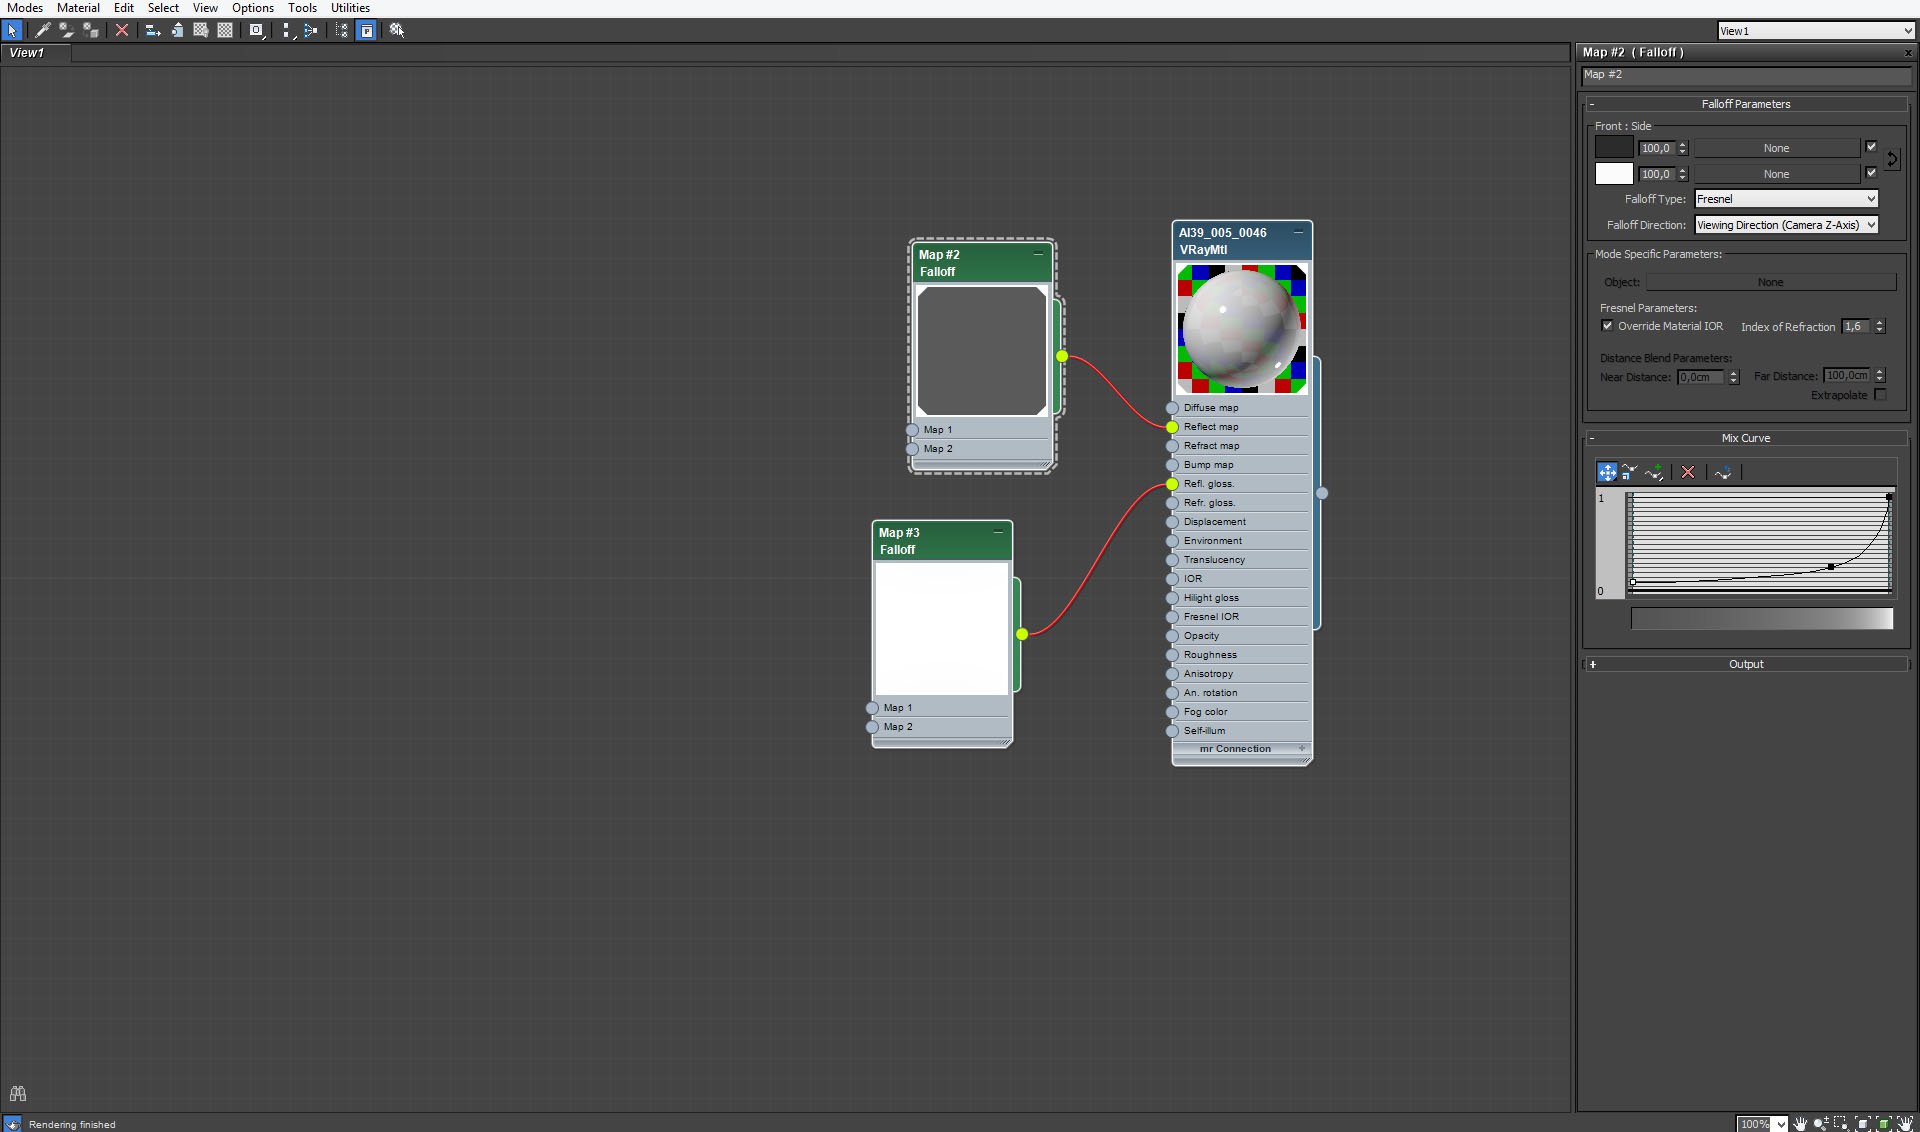
Bath tub material. kuba used fallof map to control glossines of the material. Fallof maps are especially usable when it comes to faithful recreation of real-world scene reflections - sometimes it is easier to achieve proper result than with fresnel.


Click on image to enlarge nr_AI39S05_0024_Layer_23_606.jpg
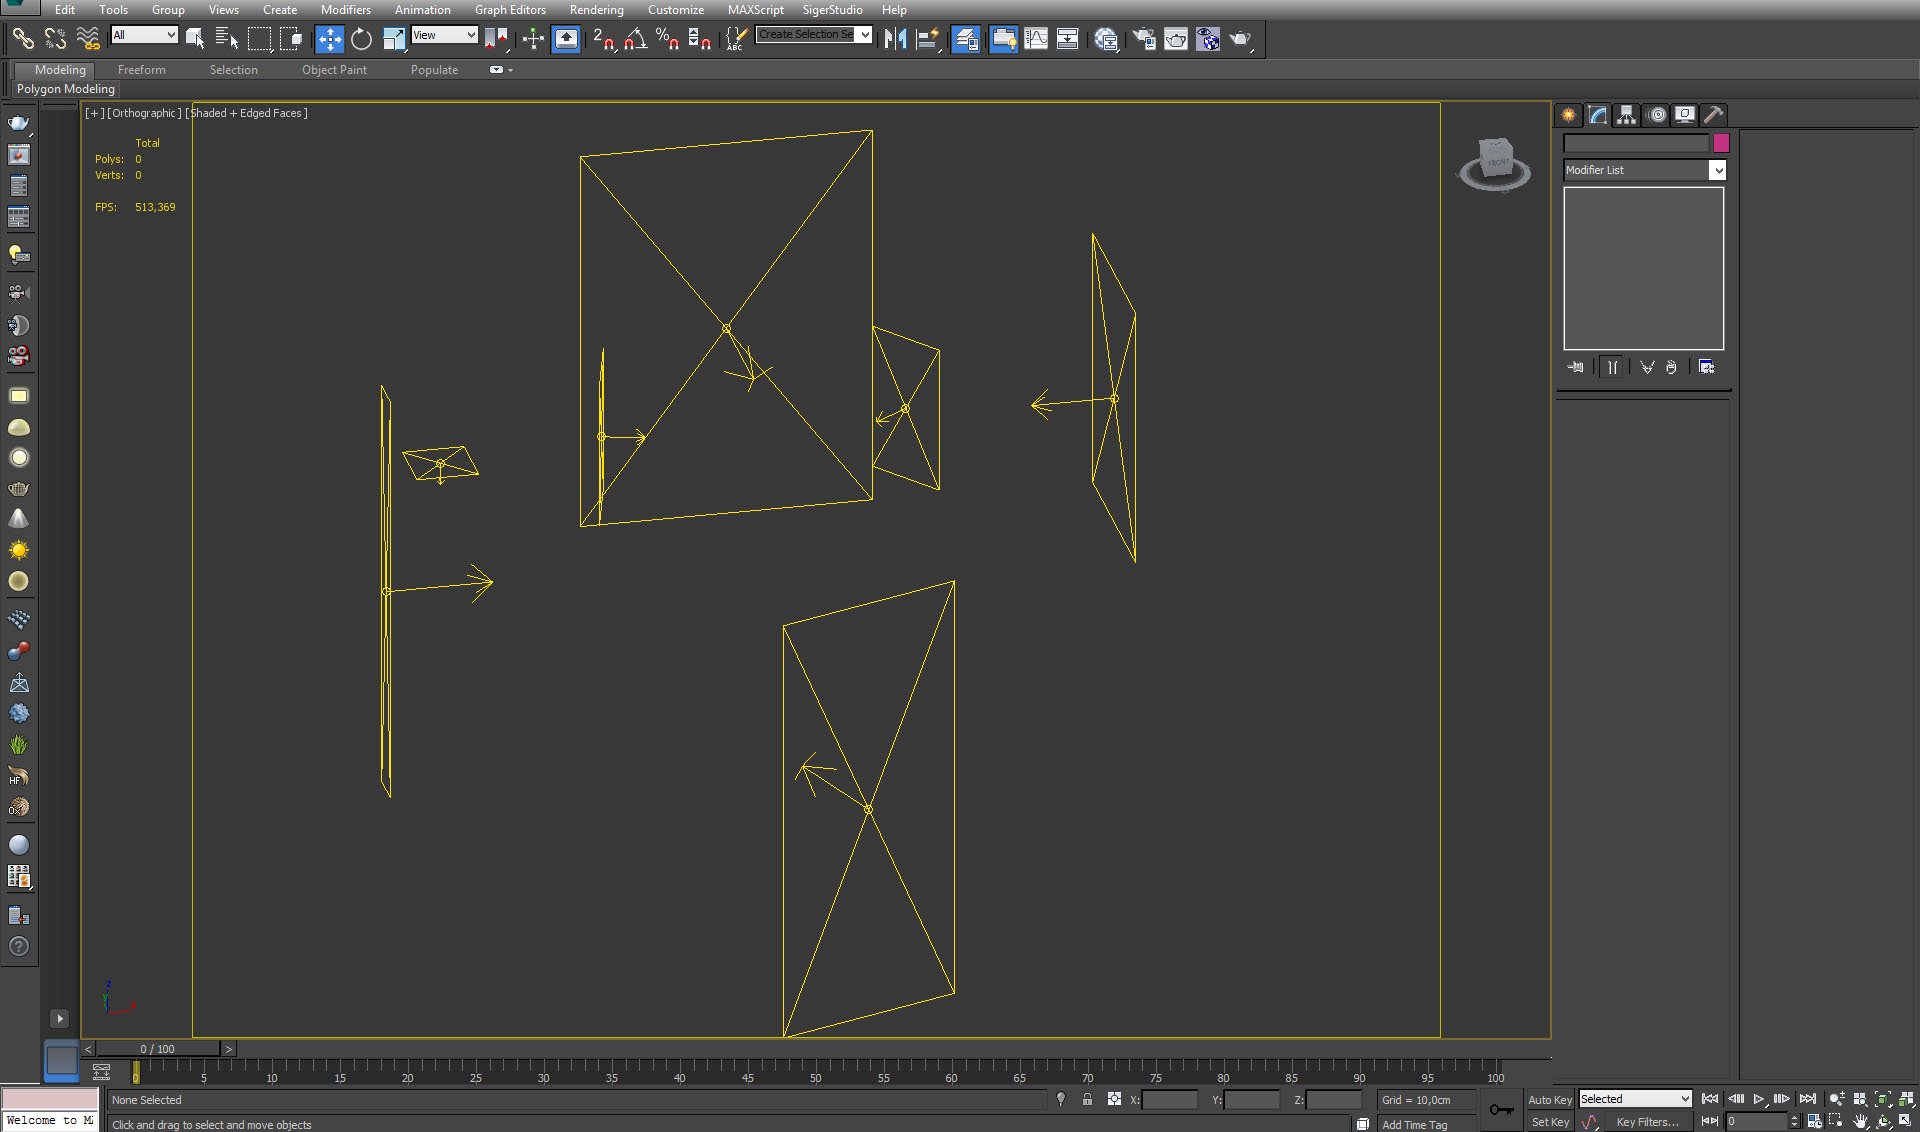
Vray lights in the scene.


Click on image to enlarge nr_AI39S05_0021_Layer_26_603.jpg
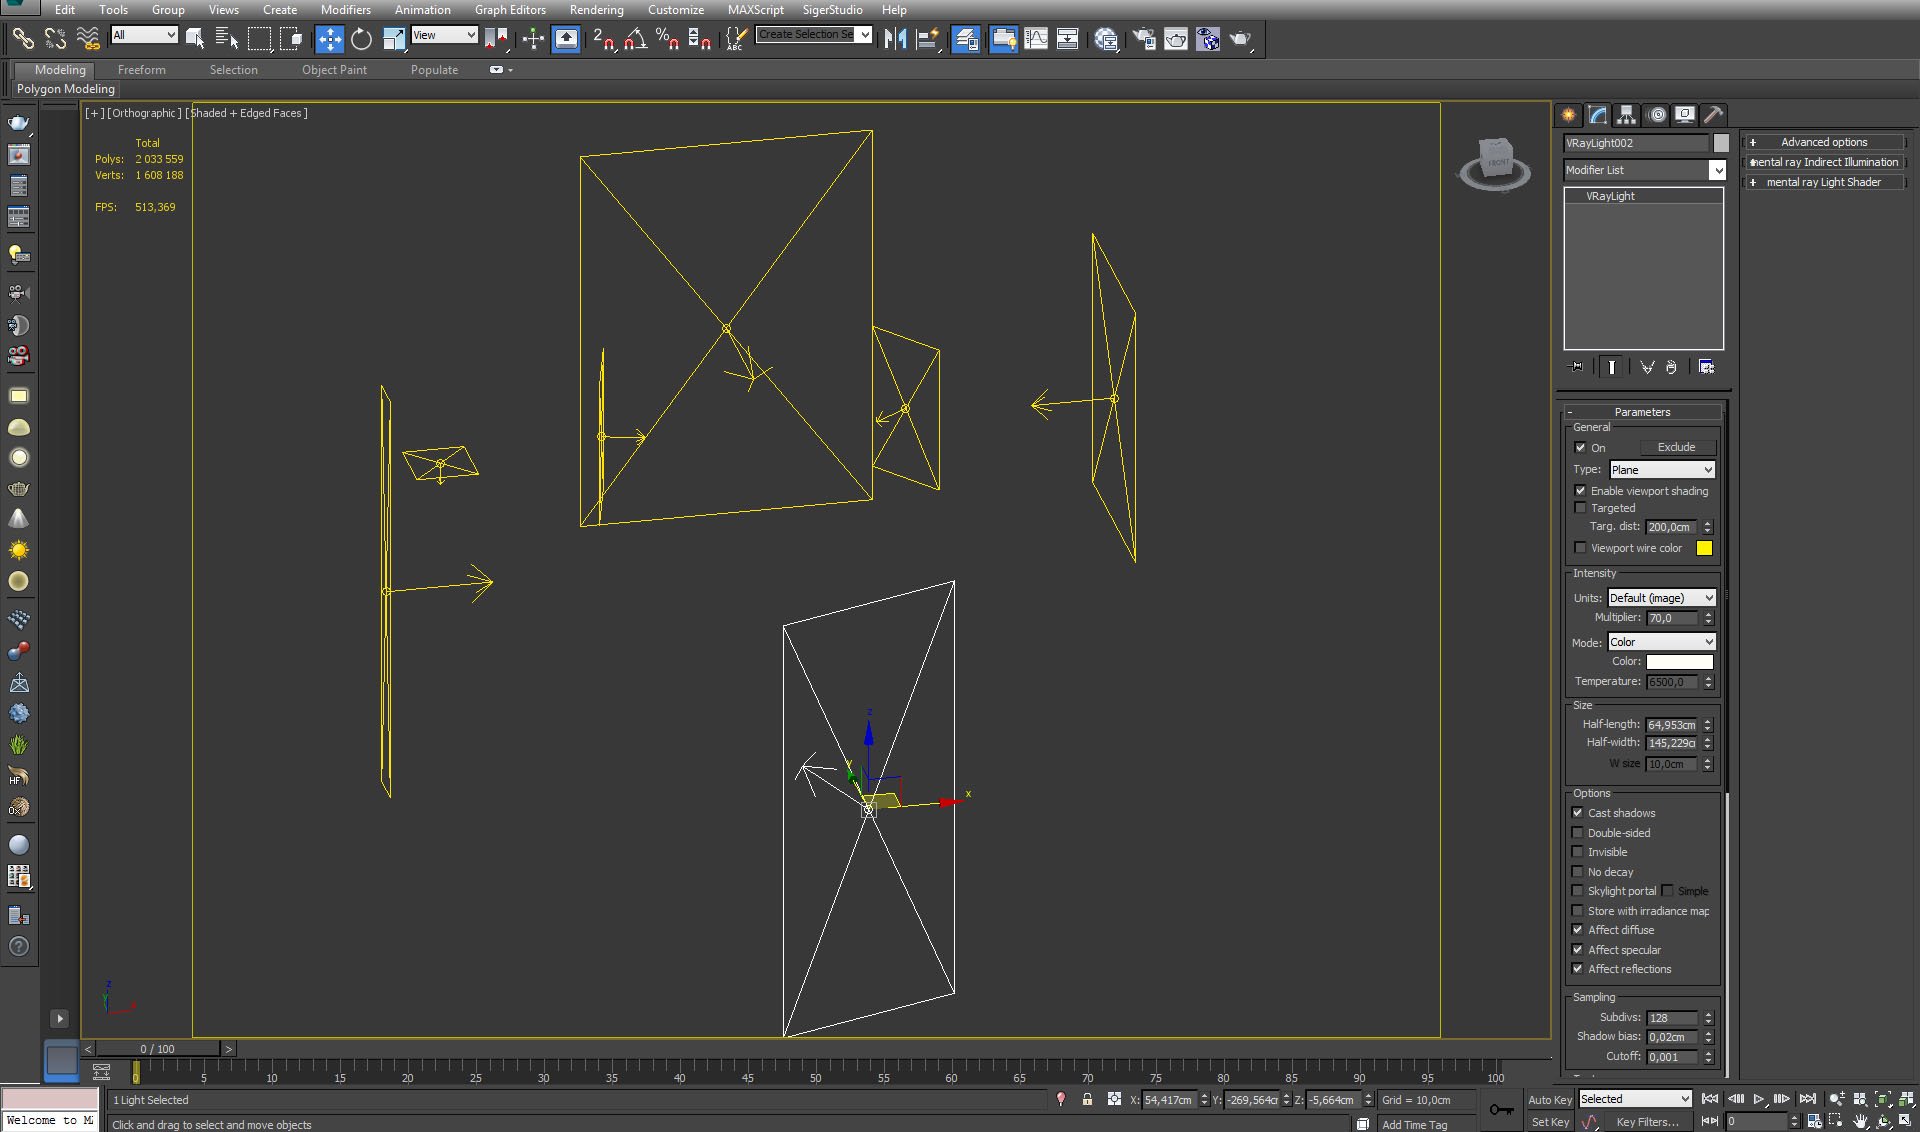
Vray Lights, settings of the light behind the camera.


Click on image to enlarge nr_AI39S05_0020_Layer_27_602.jpg
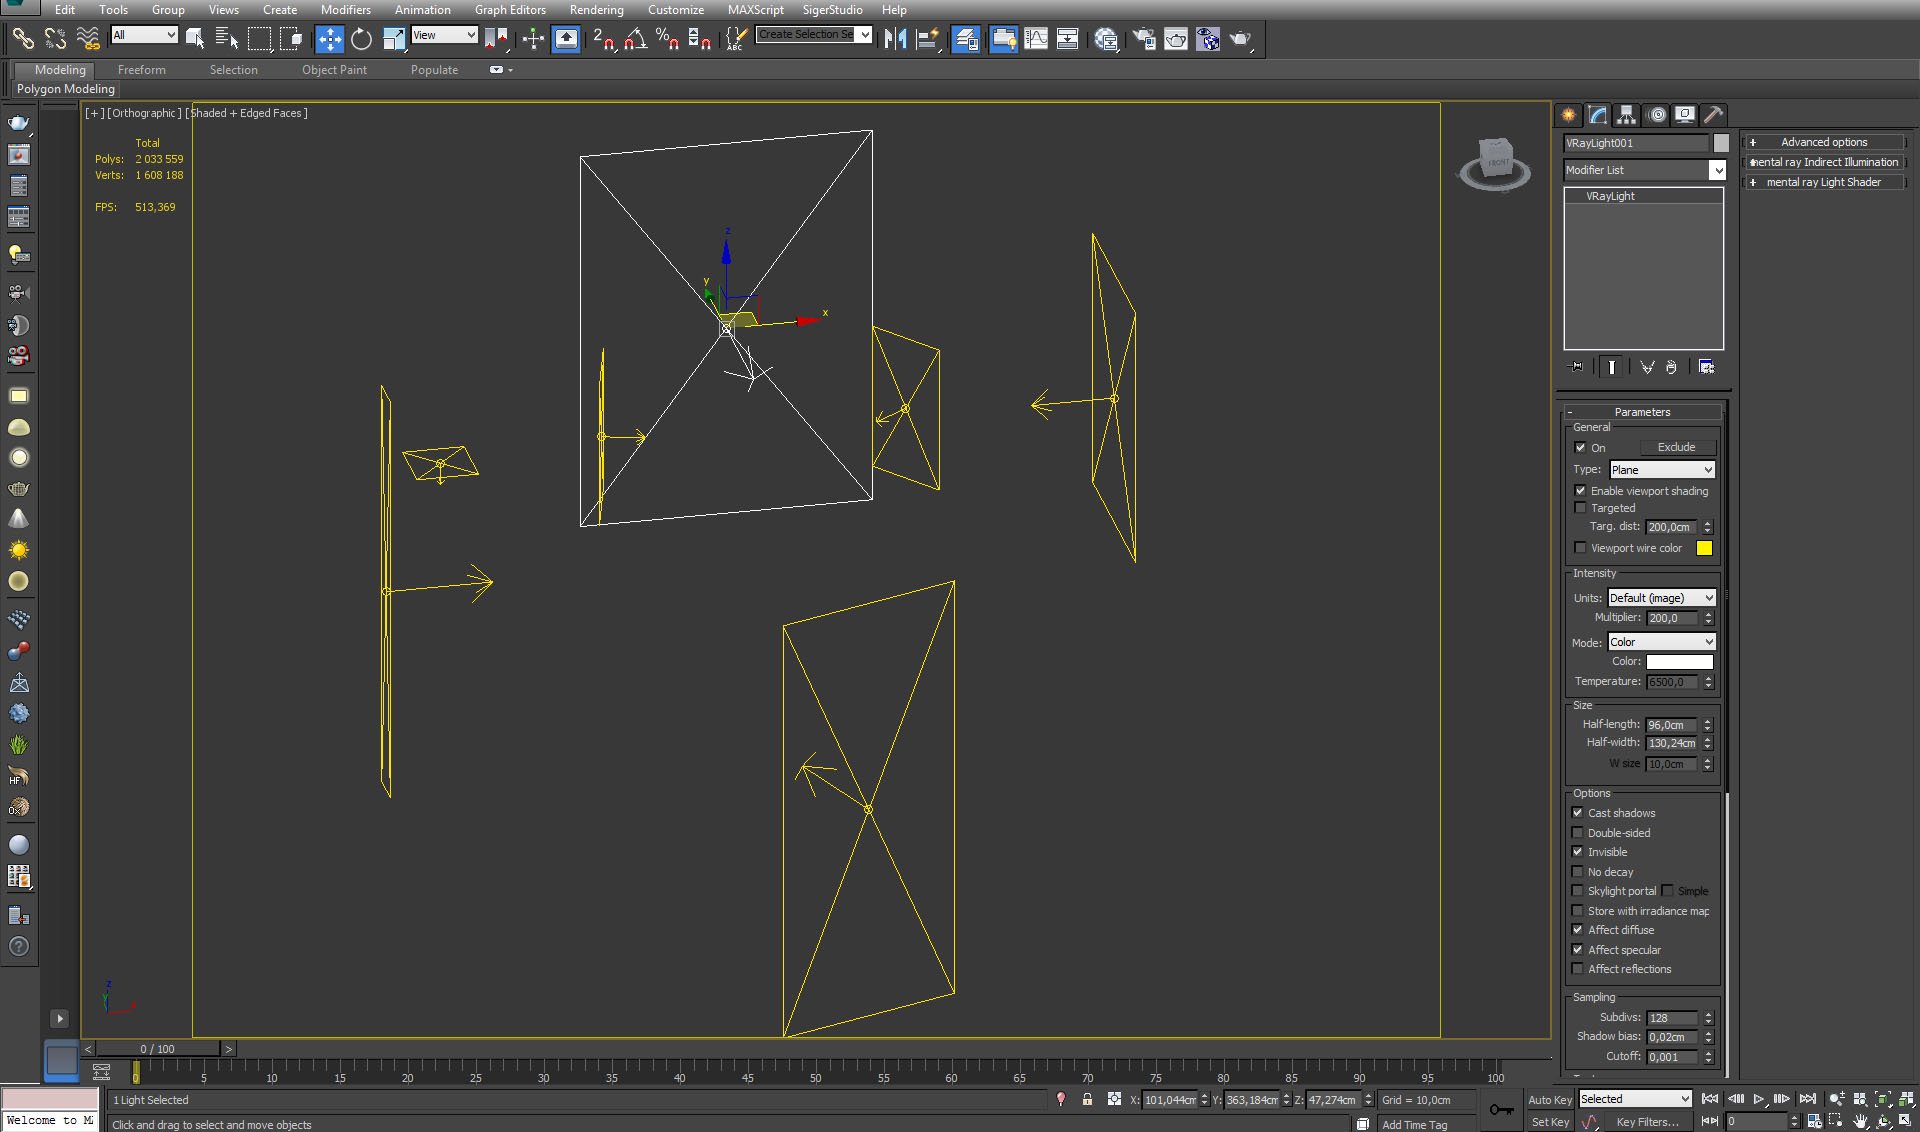
Vray Lights, settings of the light in the window.


Click on image to enlarge nr_AI39S05_0019_Layer_28_601.jpg
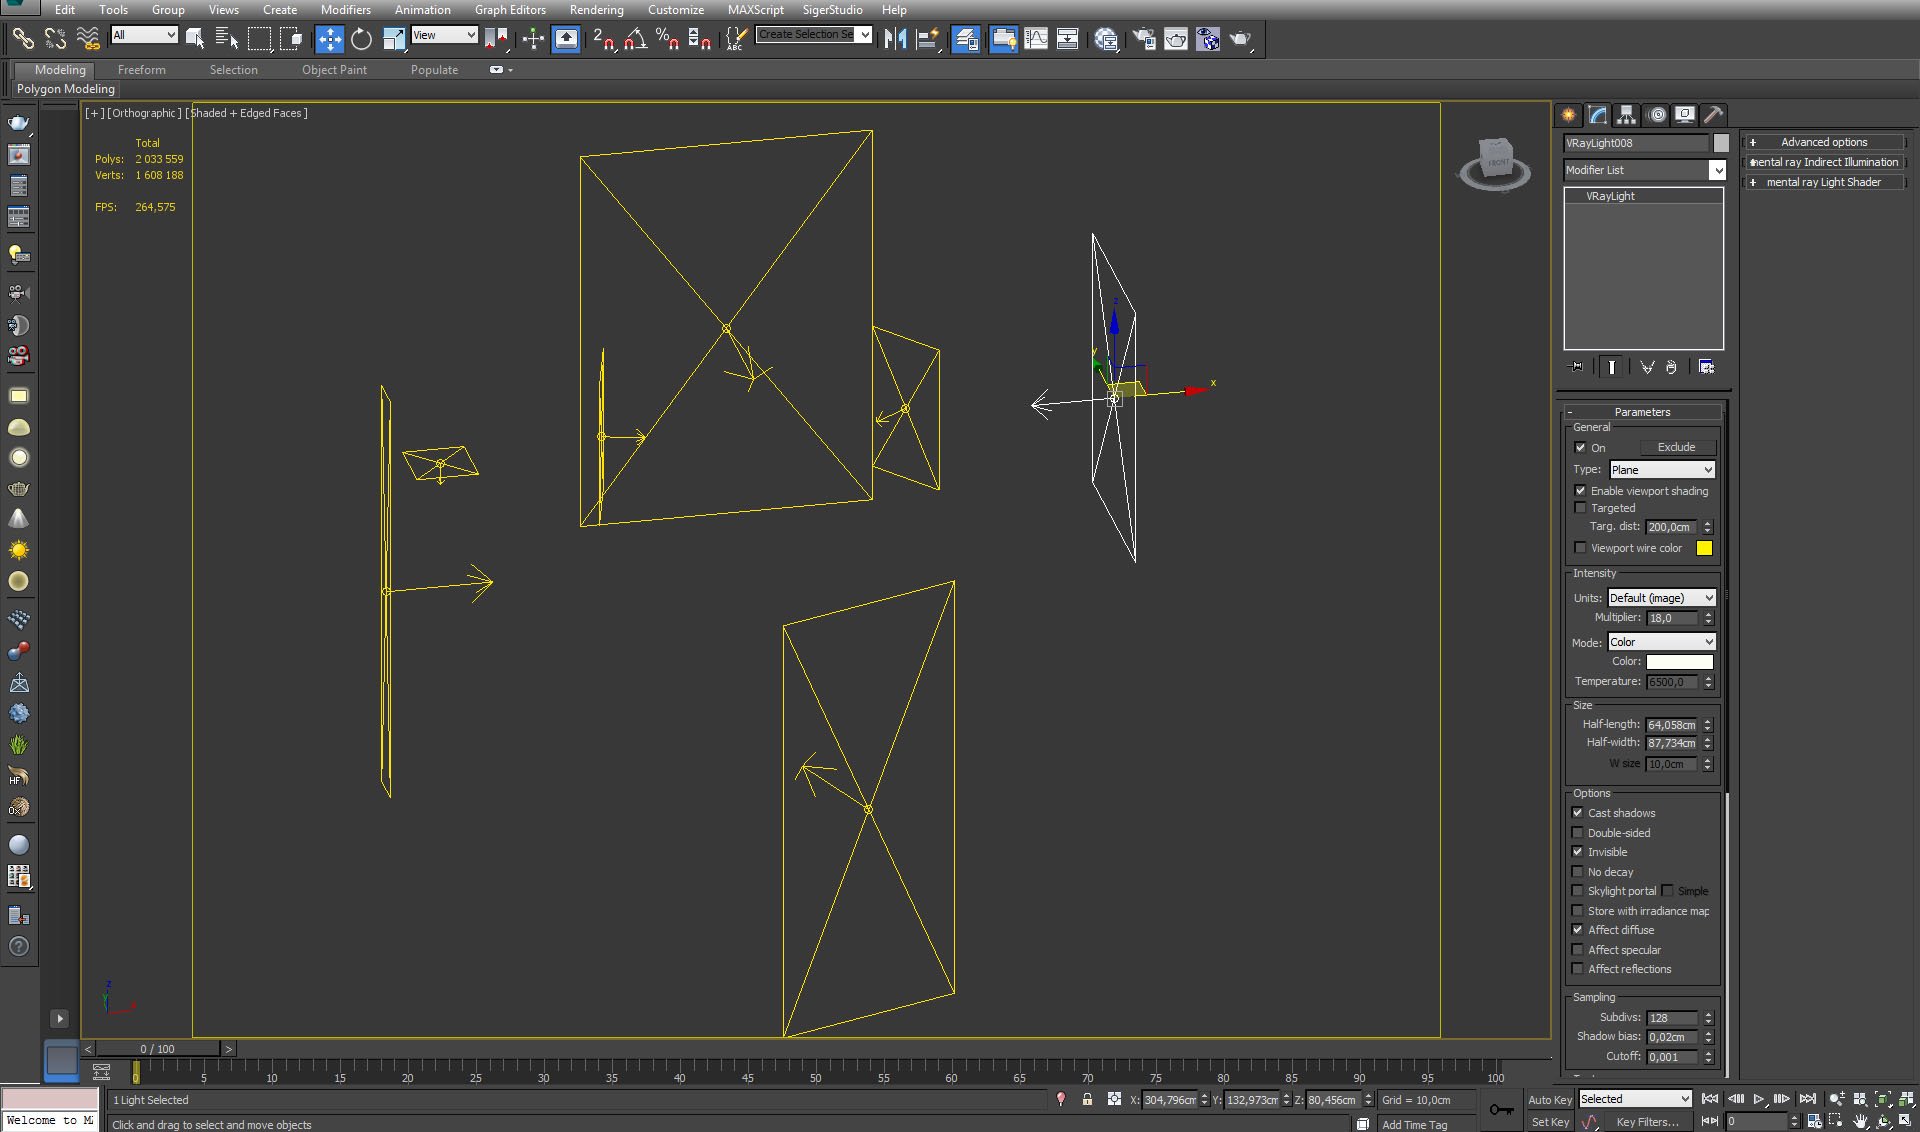
Vray Lights, settings of the side light. It was put in the mirror. Kuba Dabrowski explains: "In real world, mirror reflects light and lightens the environment. It can also do that in v-Ray scene, but you need to enable caustics. It makes rendering time significantly longer, so I wanted to avoid it. Instead of using caustics I put Vray Light that simulates light rays that are reflected by the mirror. This way I had my scene lit in even way without adding hours to rendering time".


Click on image to enlarge nr_AI39S05_0018_Layer_29_600.jpg
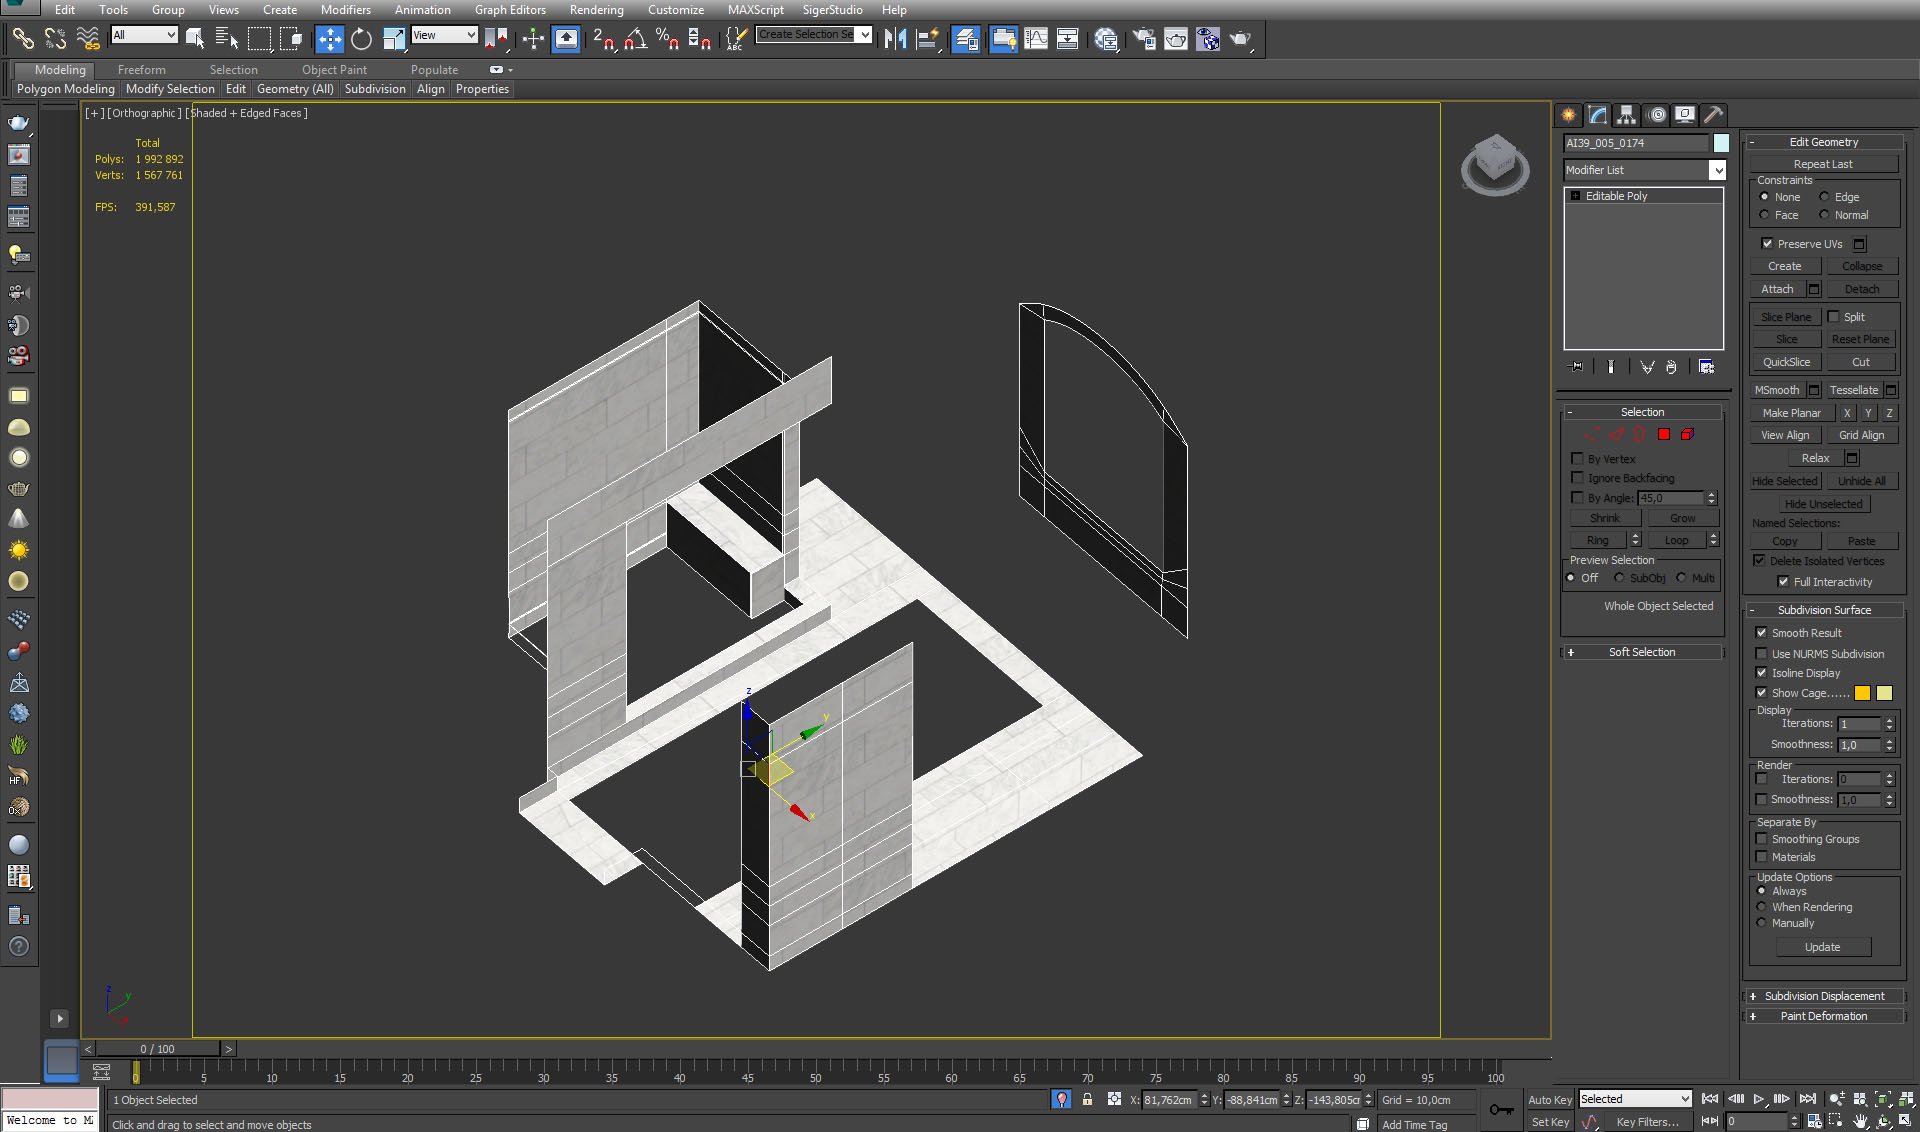
Walls of the shower cabin.


Click on image to enlarge nr_AI39S05_0017_Layer_30_599.jpg
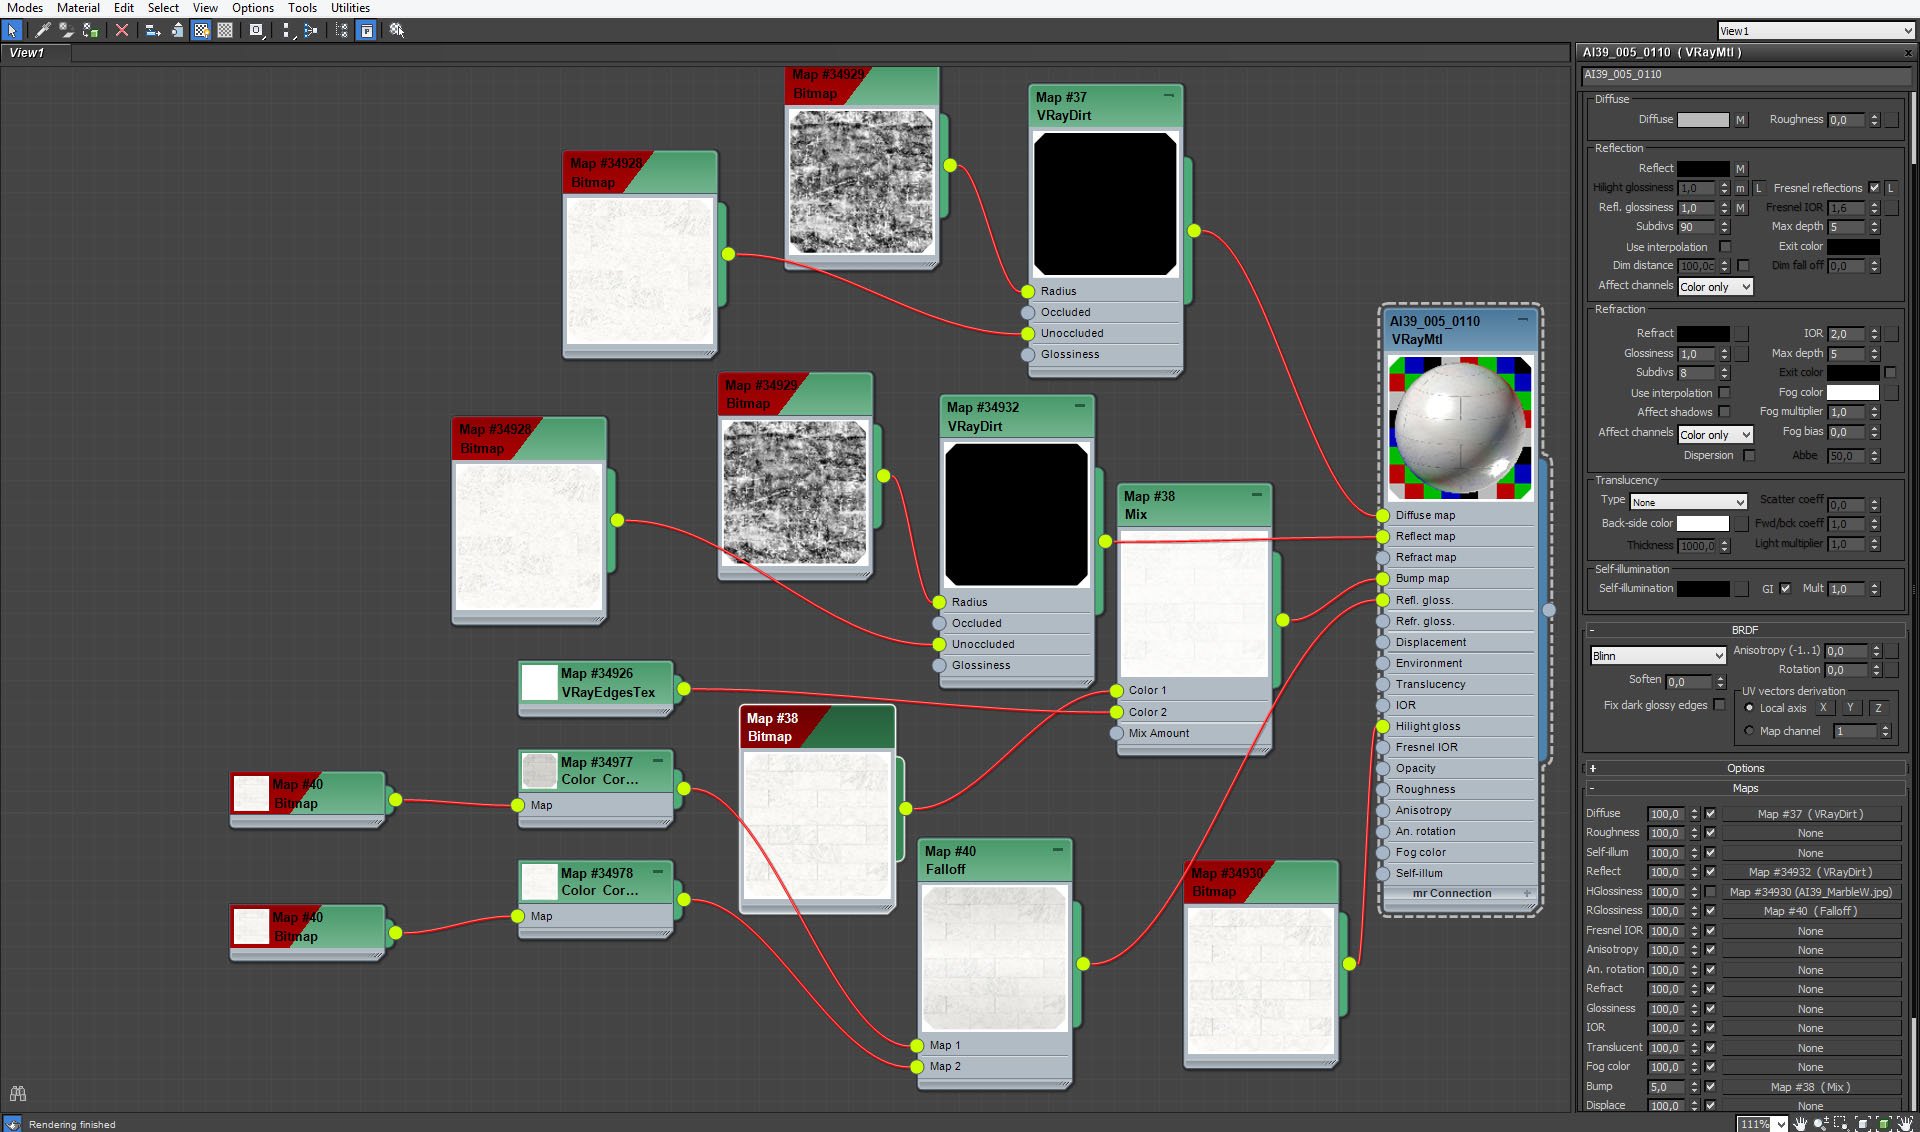
Shower cabin material.


Click on image to enlarge nr_AI39S05_0016_Layer_38_598.jpg

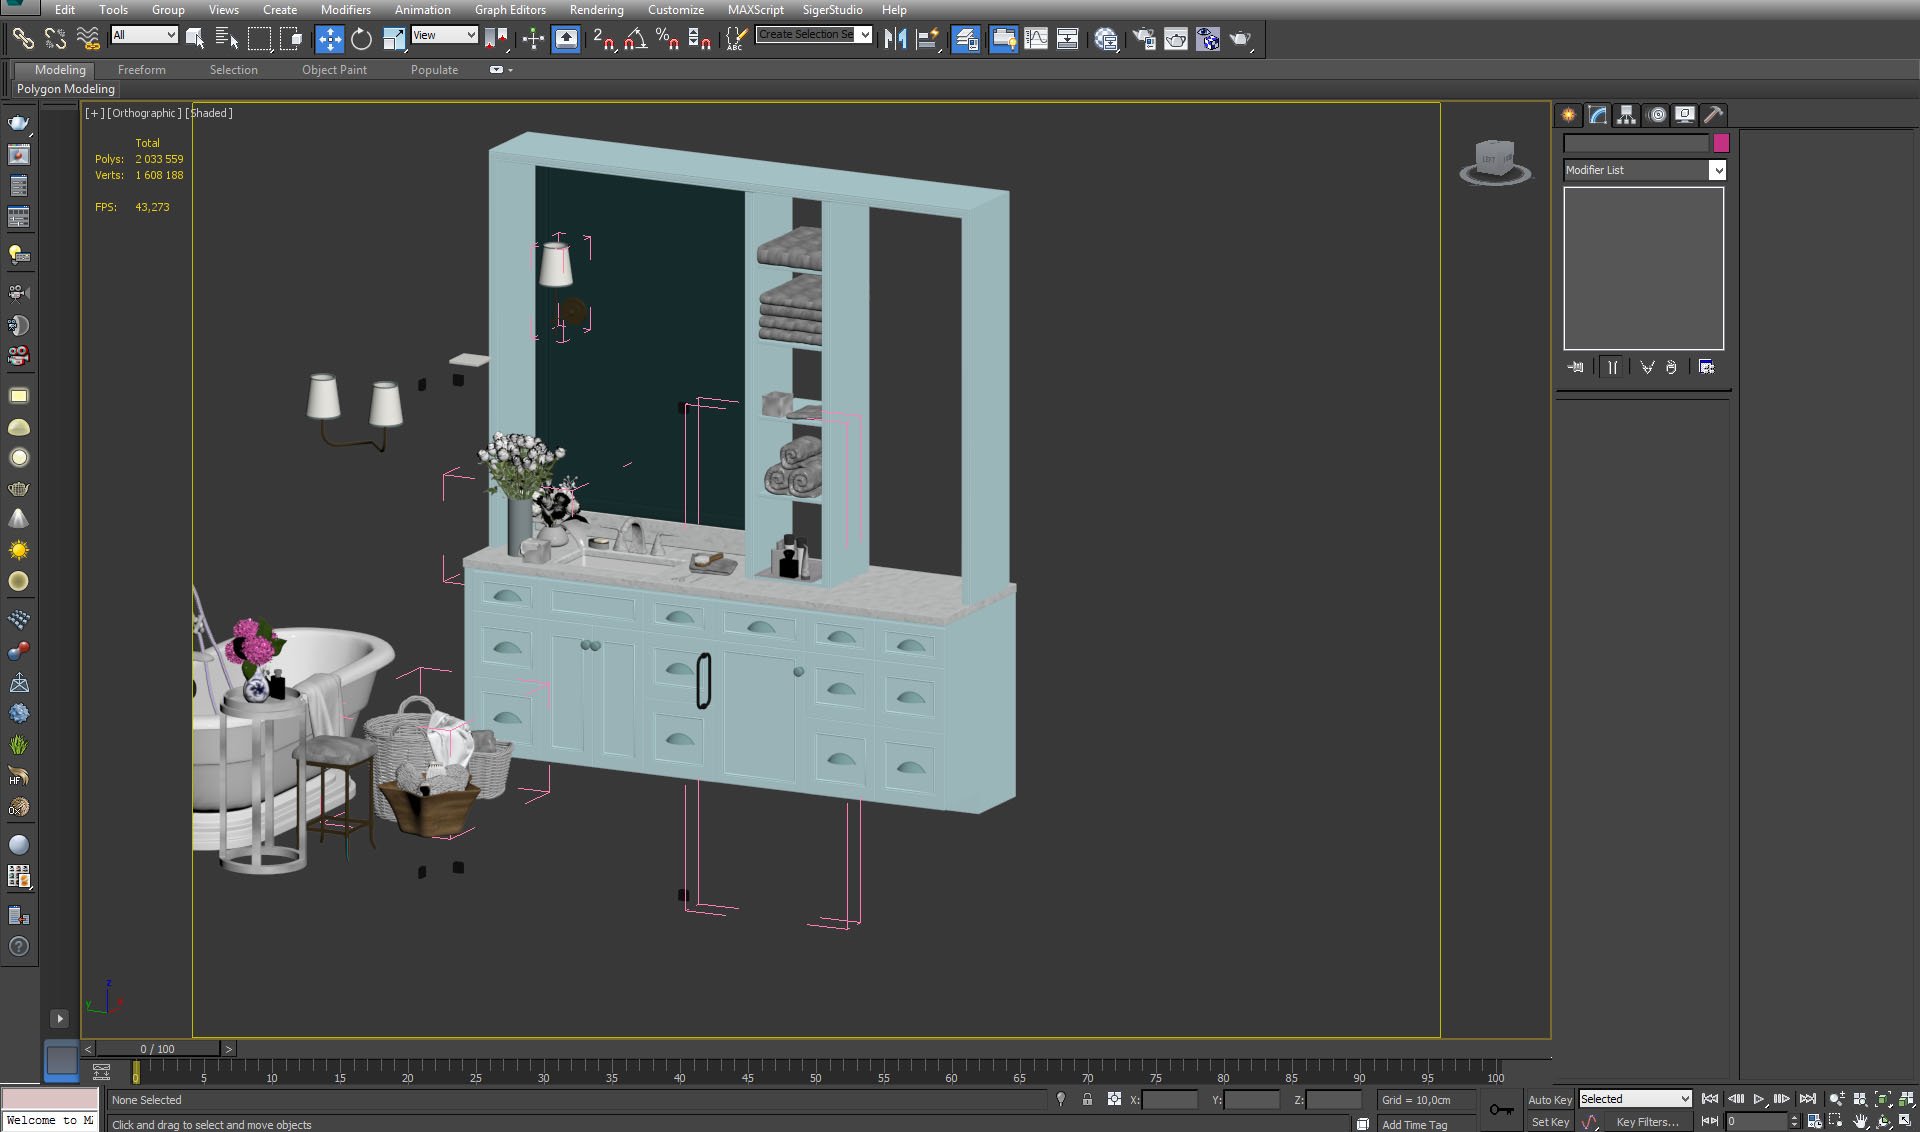
Furniture and props.


Click on image to enlarge nr_AI39S05_0015_Layer_39_597.jpg

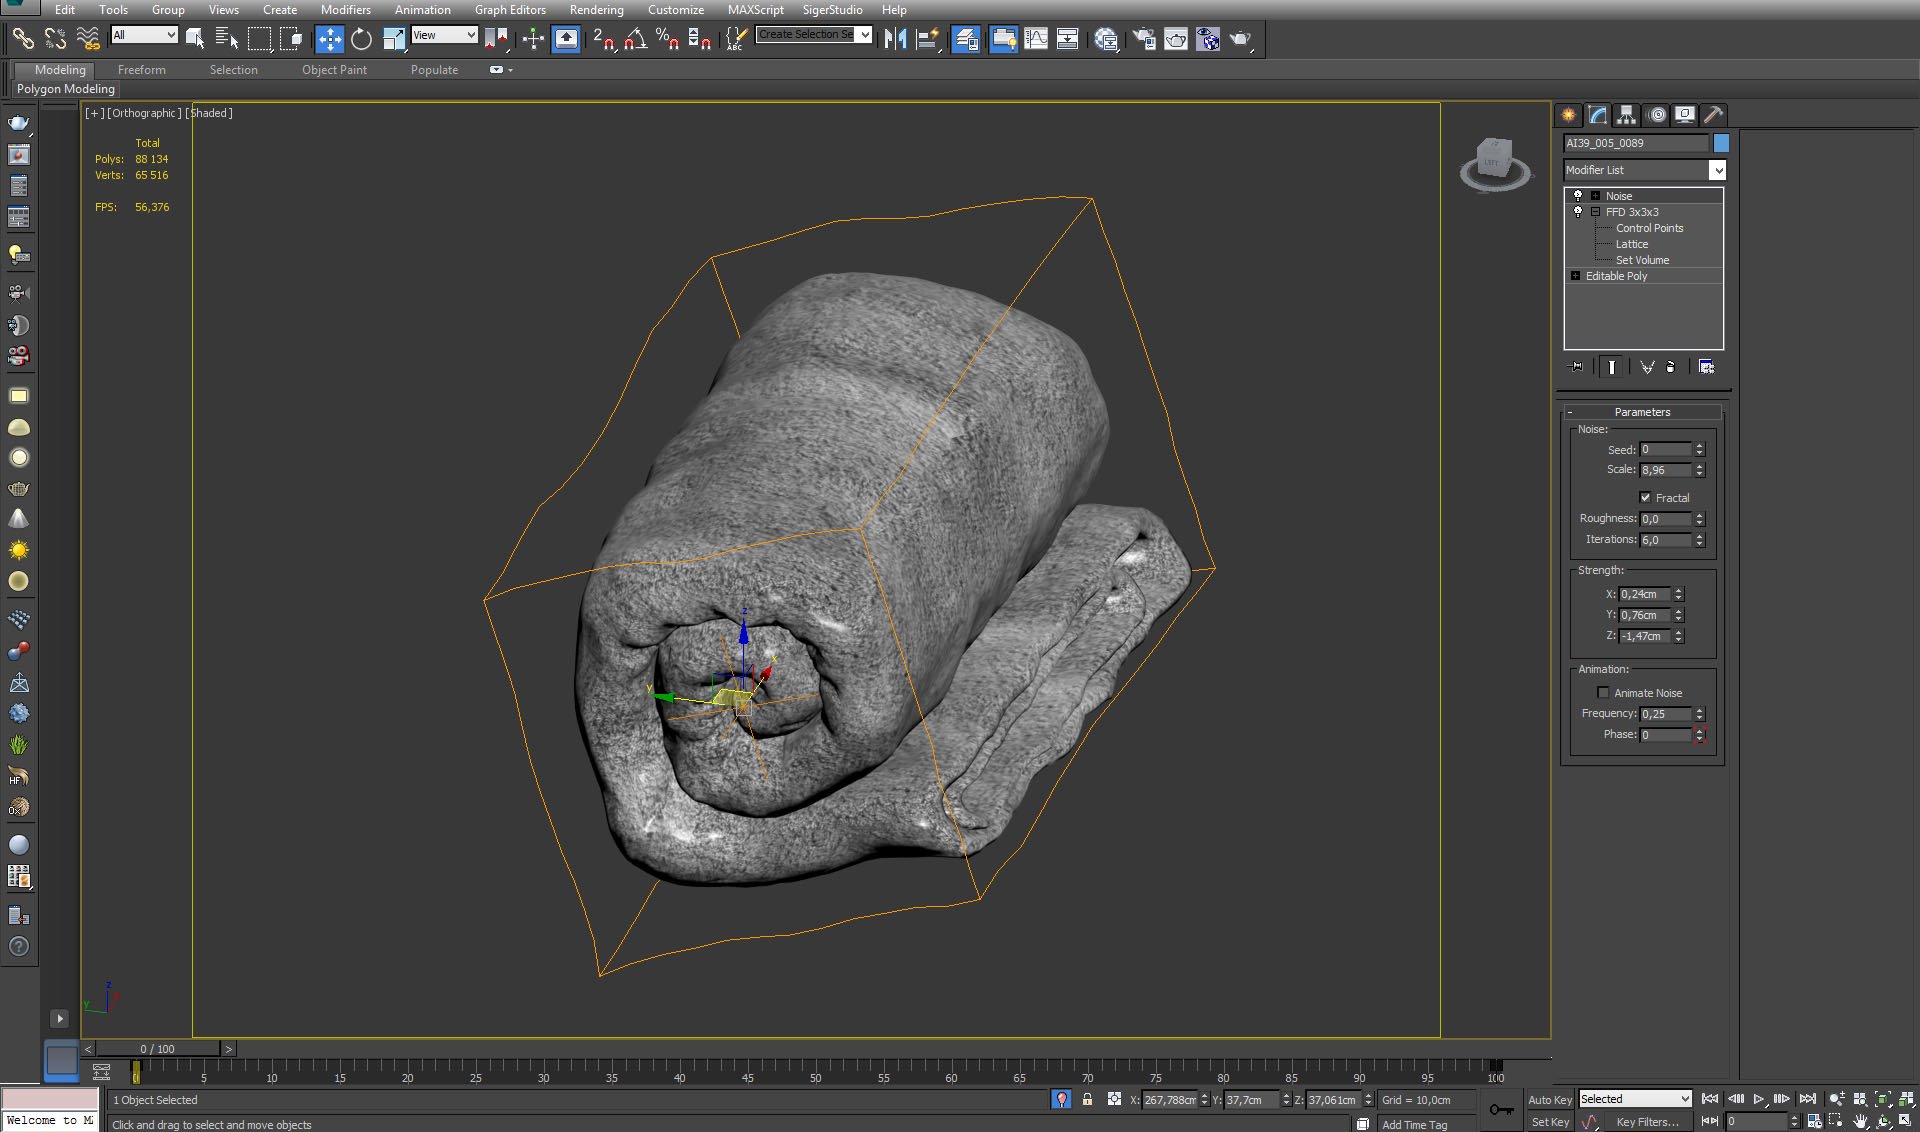
Towel. It was modeled by hand in 3ds Max, in a simple way. spline > extrude spline > shell > noise, add bump map in the shader.


Click on image to enlarge nr_AI39S05_0014_Layer_40_596.jpg
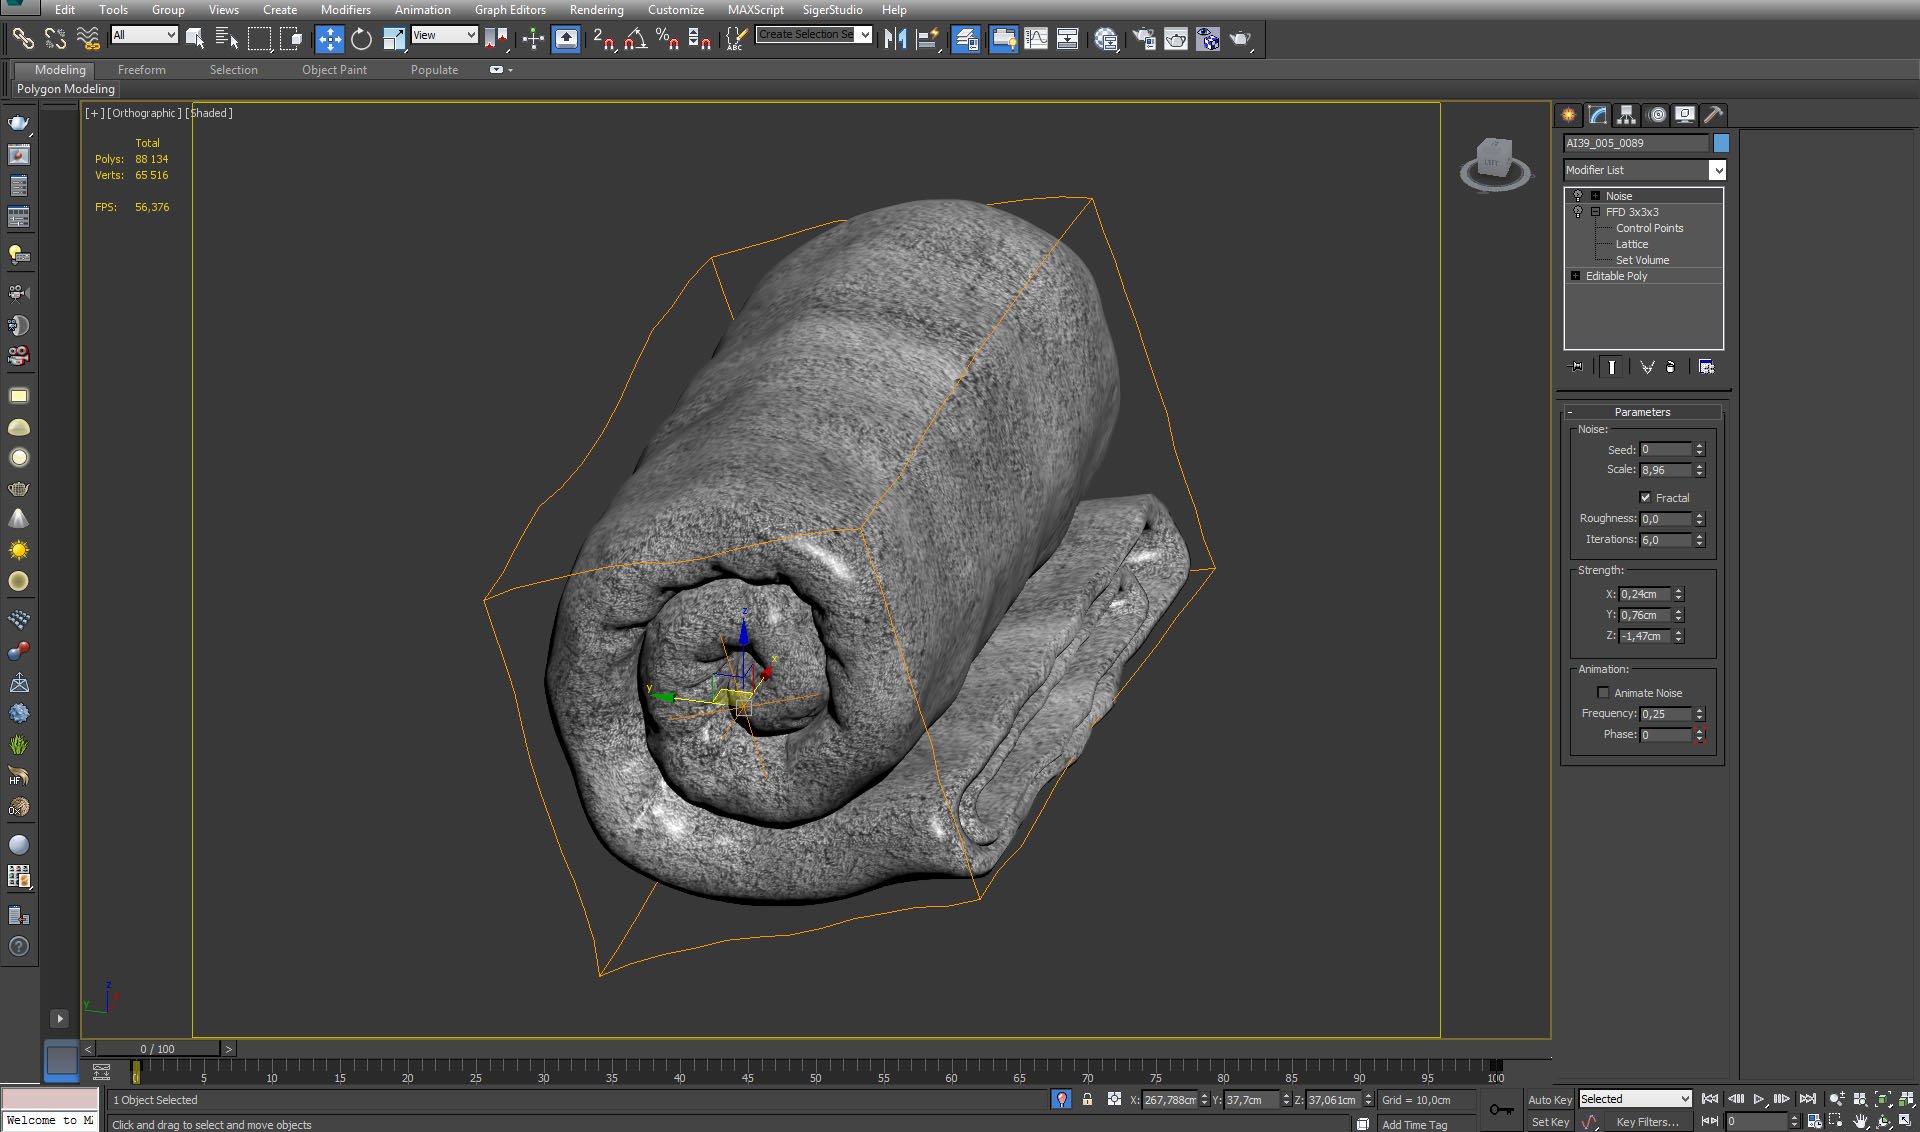
Towel - model without noise modifier.


Click on image to enlarge nr_AI39S05_0013_Layer_41_595.jpg
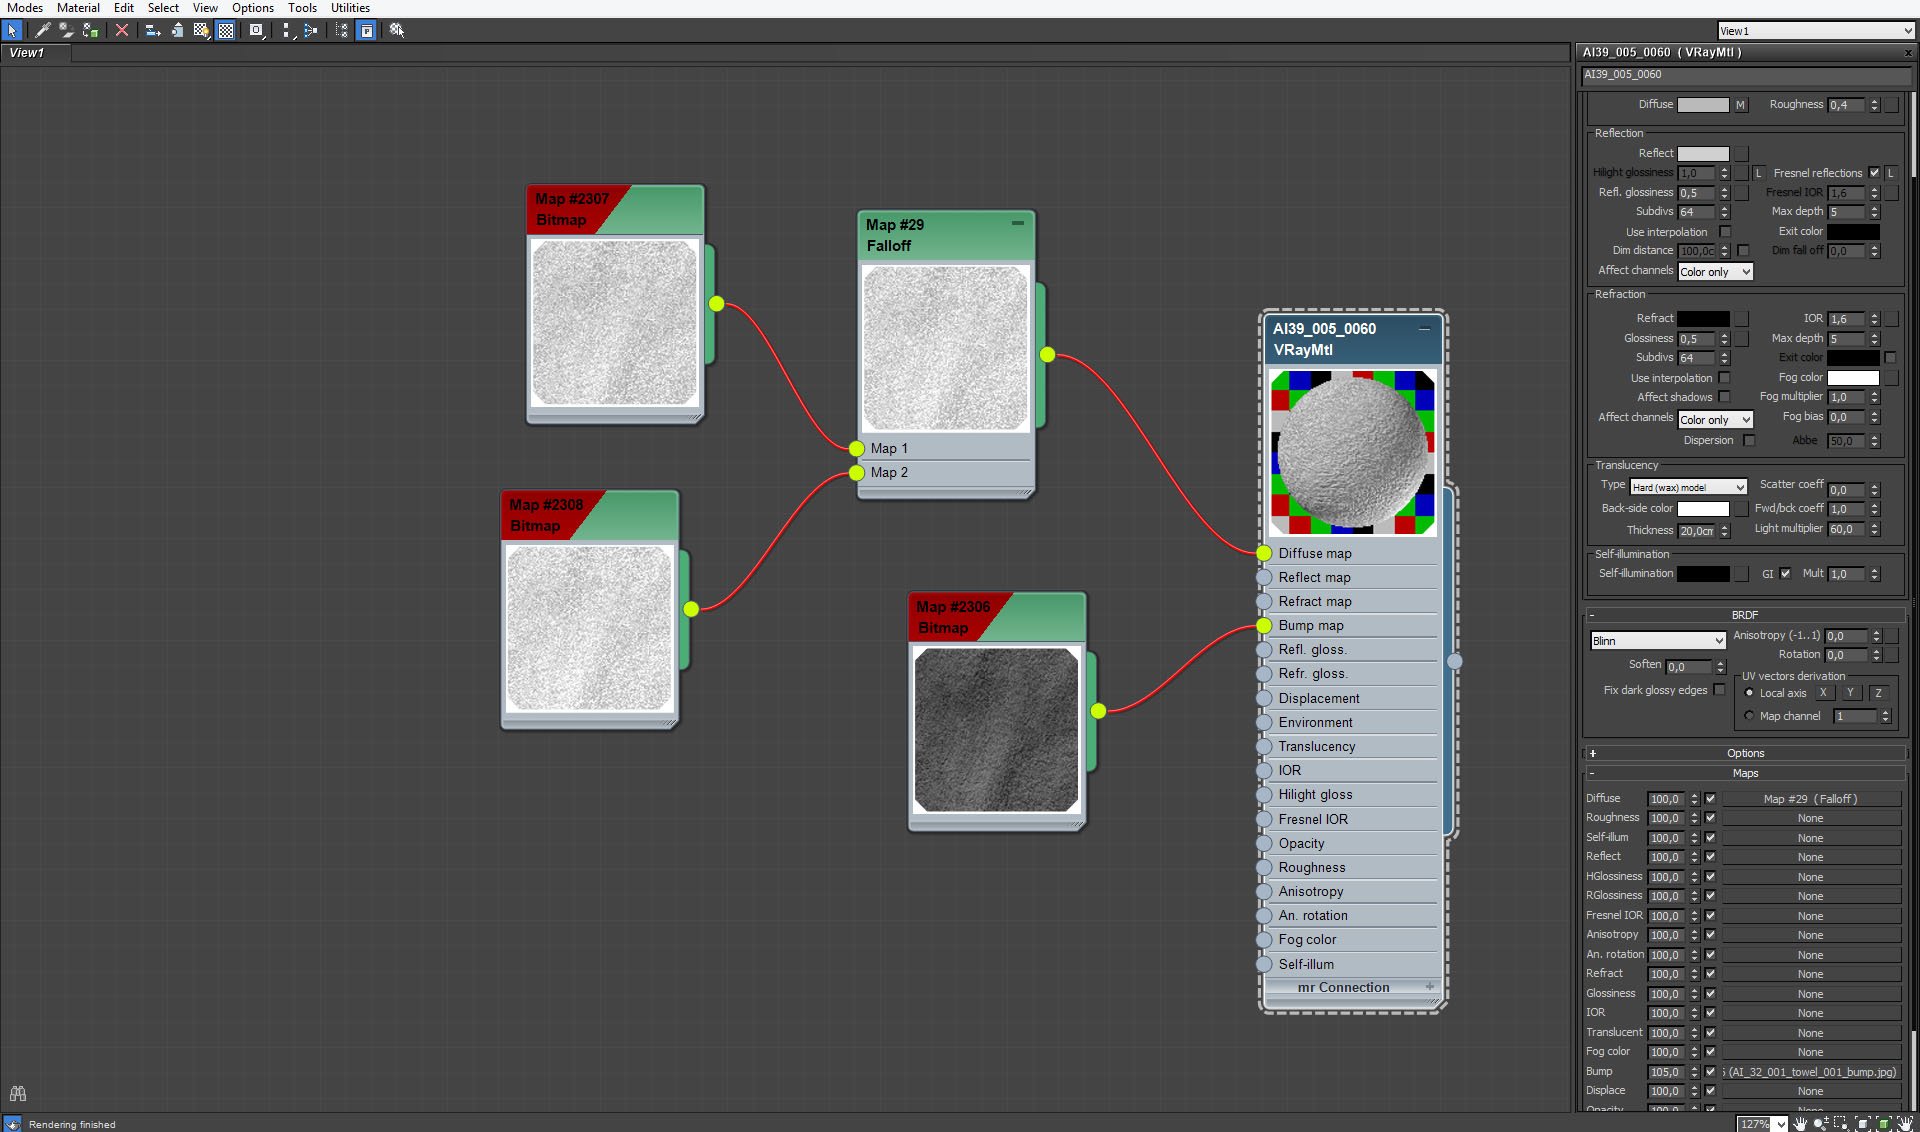
Towel material. Kuba used a shader with Hard (wax) translucency to scatter the light and a bump map for faking geometry.


Click on image to enlarge nr_AI39S05_0012_Layer_42_594.jpg

Flower petals.


Click on image to enlarge nr_AI39S05_0011_Layer_43_593.jpg

Flower petals material, Vray2sided material.


Click on image to enlarge nr_AI39S05_0010_Layer_44_592.jpg
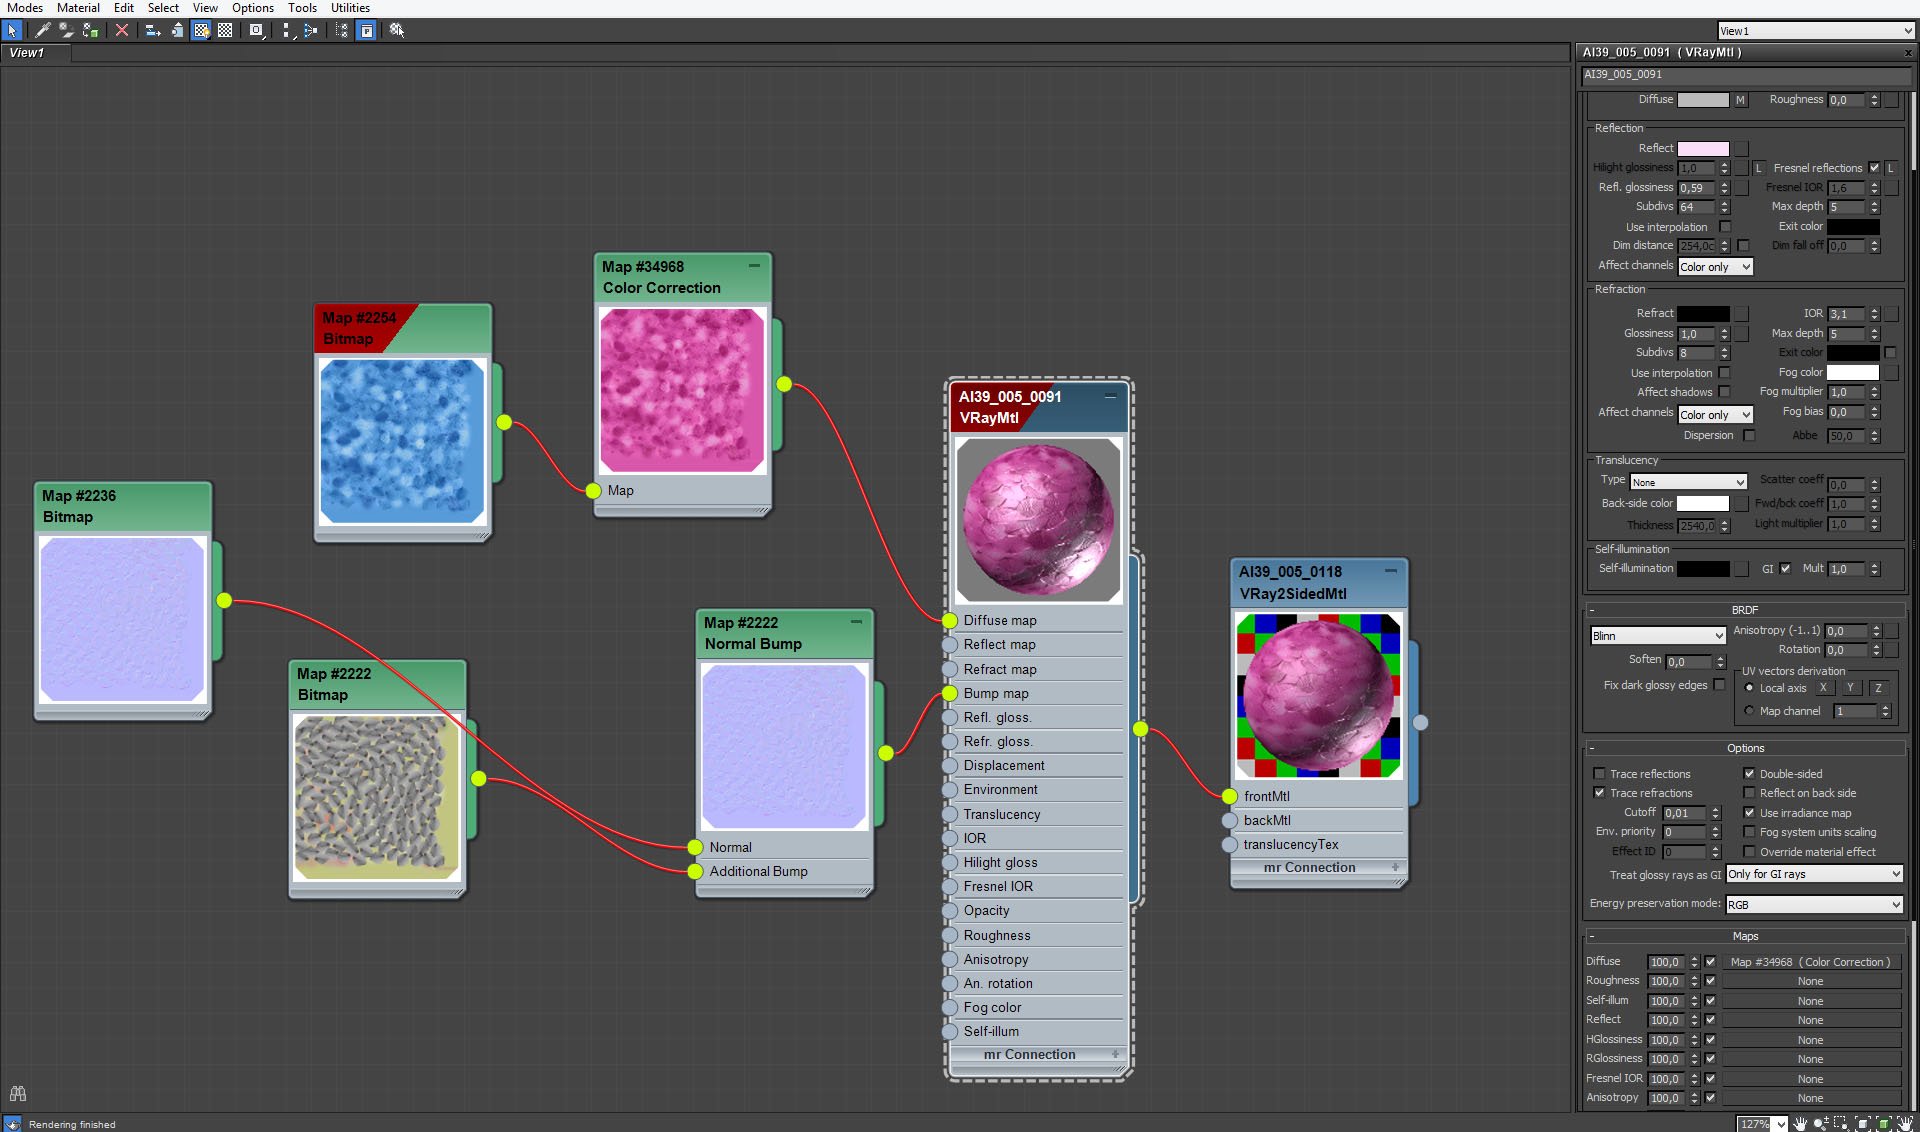
We put texture only on side one of the material. Petals have a subtle pink relfection.


Click on image to enlarge nr_AI39S05_0009_Layer_45_591.jpg

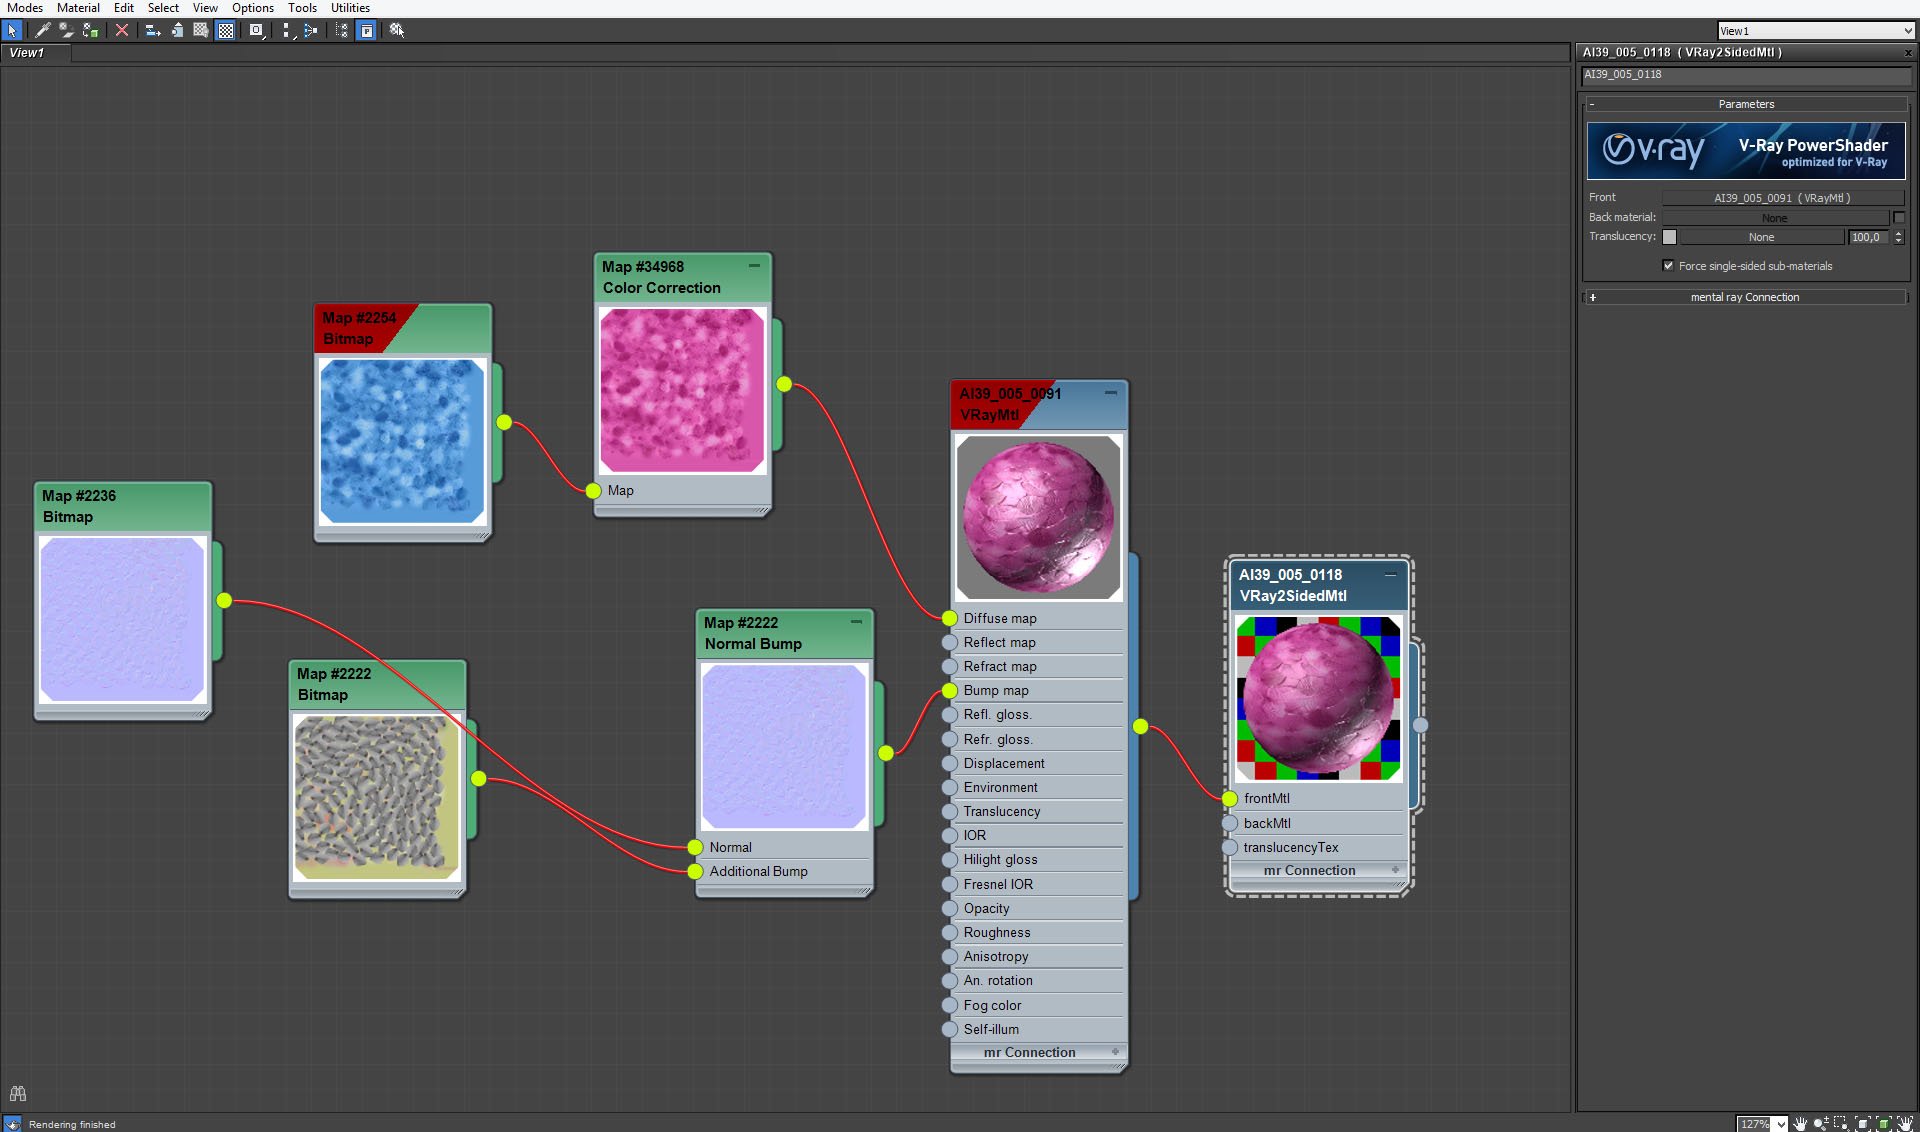
We used blue petals map as a base and then we corrected hue with Color correction node.


Click on image to enlarge nr_AI39S05_0008_Layer_46_590.jpg
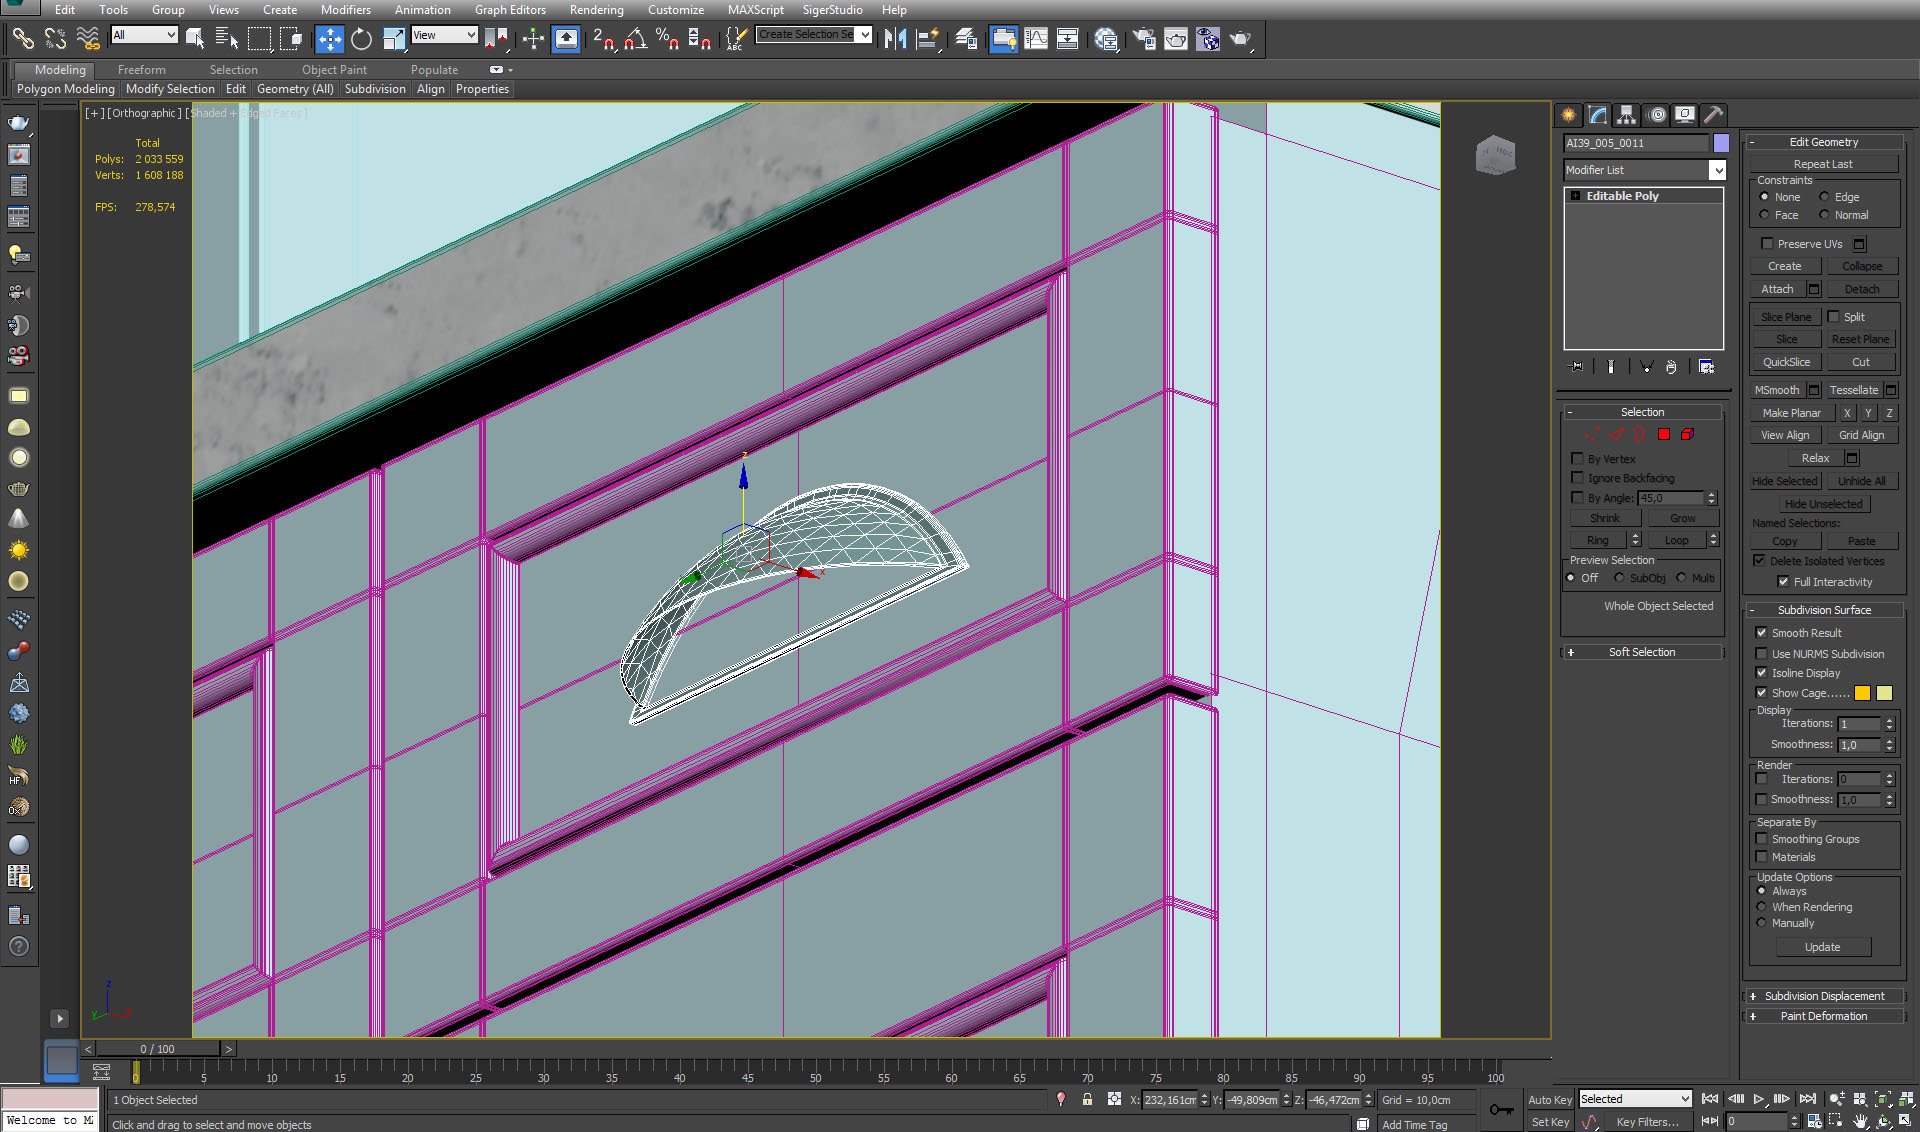
Furniture detail.


Click on image to enlarge nr_render_stack_632.jpg

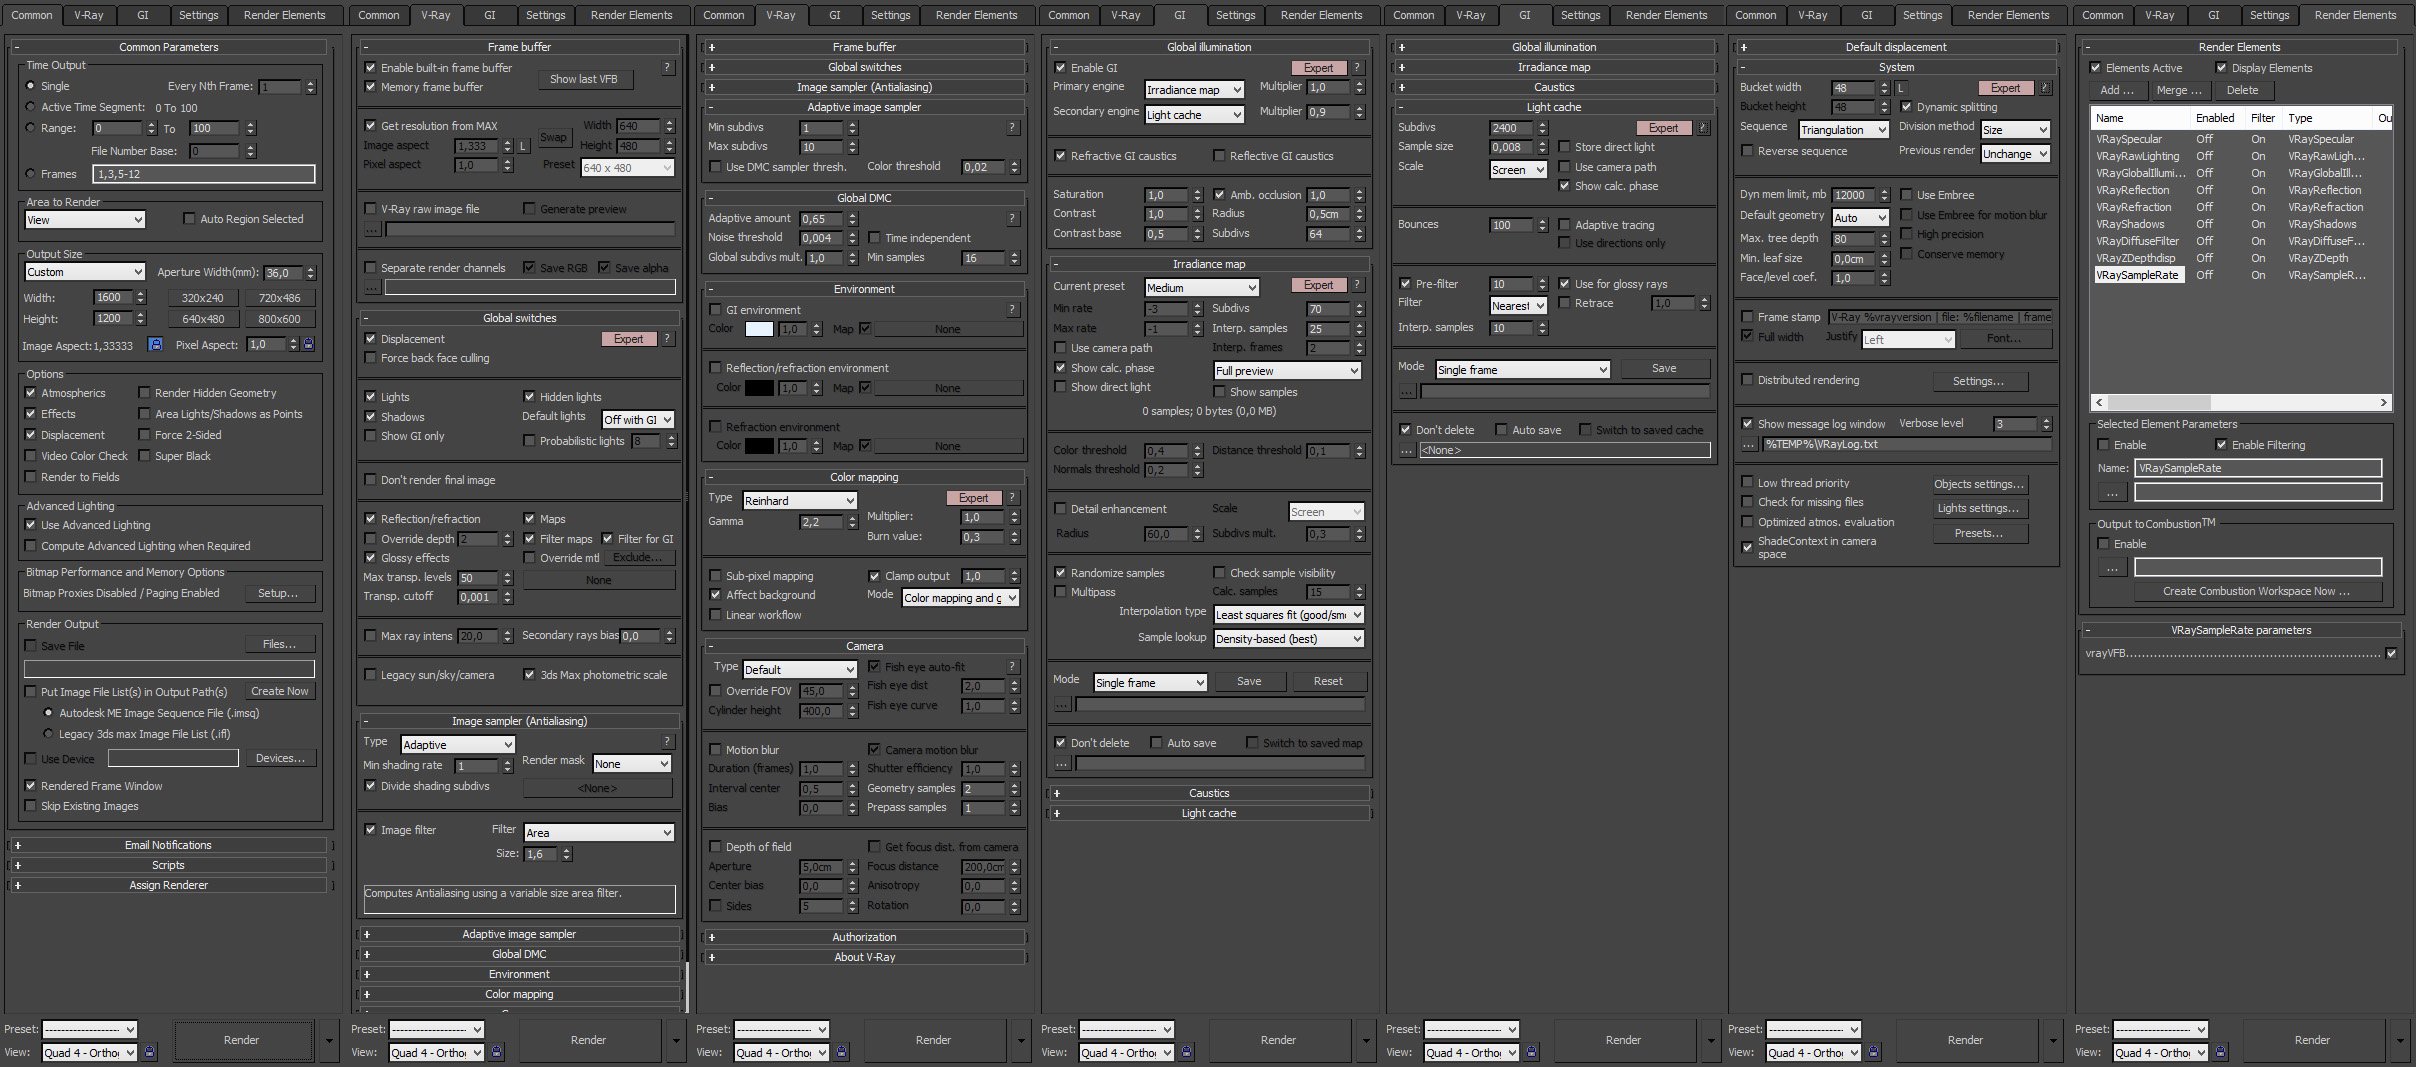
Render settings. Notice special color mapping settings. Kuba changed linear mode to Reinhard and lower Burn value to 0,3. It allowed him to achieve bright render without overexposuring window area.


Click on image to enlarge nr_AI39_005_RAW_630.jpg
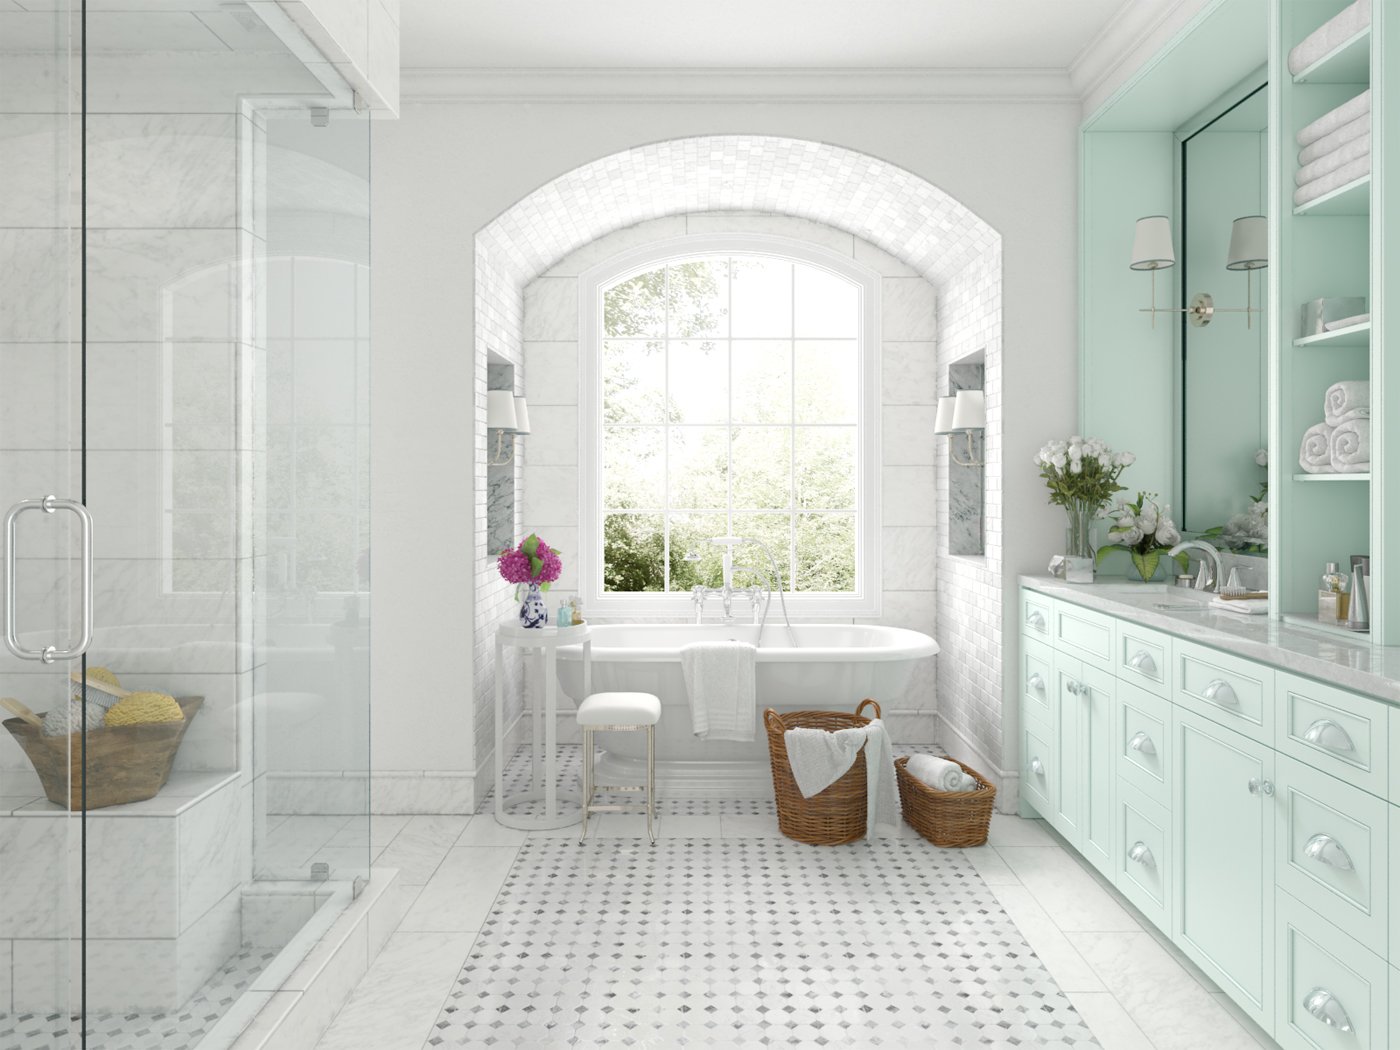
Raw render.


Click on image to enlarge nr_ai39_s05_ps_stack_631.jpg

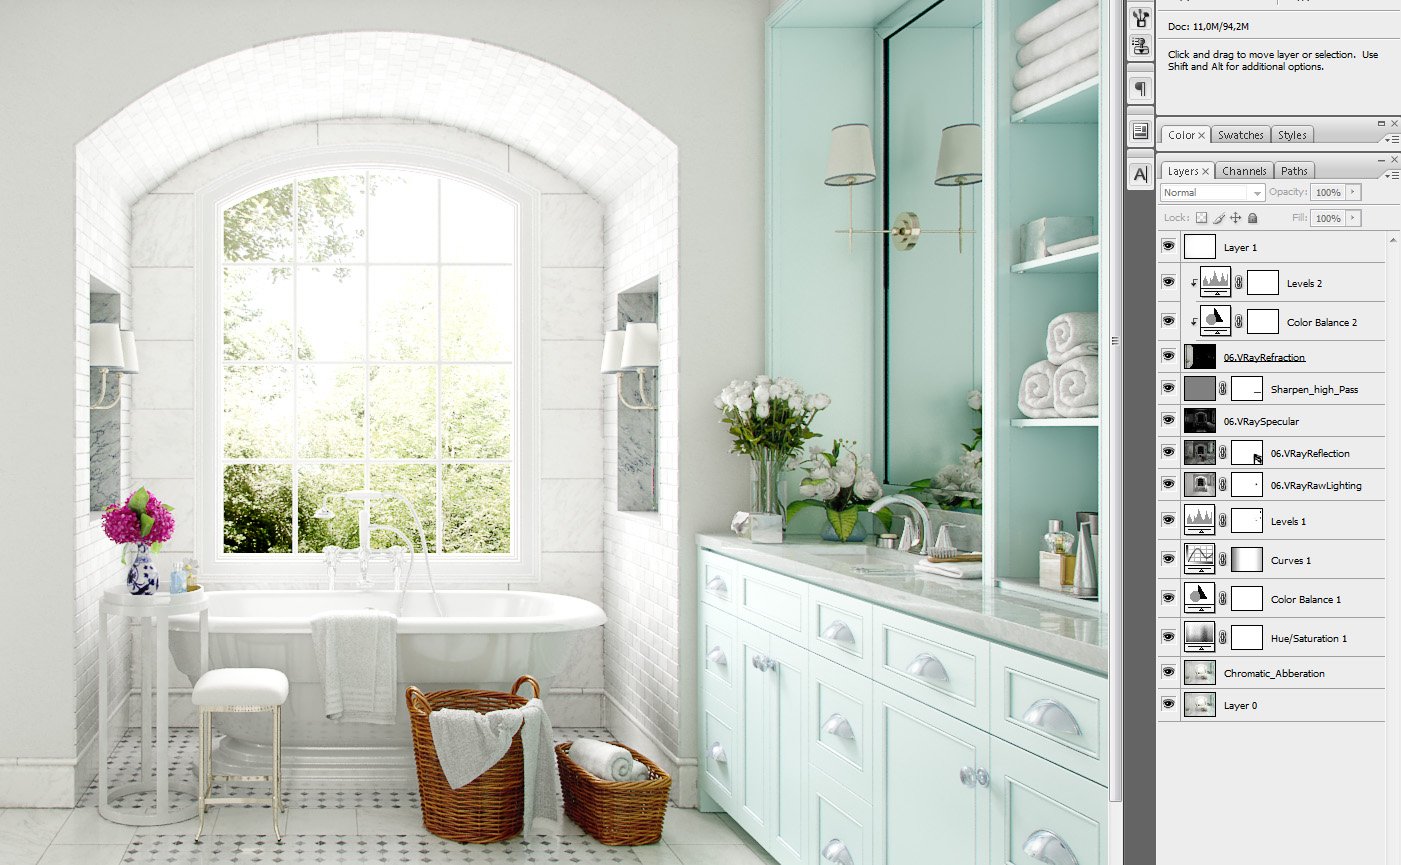
Photoshop stack.


Click on image to enlarge nr_AI39_005_PP_629.jpg

Final render after post-production. Thanks for reading! :)


Author: Michał Franczak Editor: Michał Franczak
Tags: vol archinteriors bathroom modern 39
You may also like...
Creating a bathroom in 3ds max - 4 of 8

Creating a bathroom in 3ds max - 4 of 8

In this tutorial we are going to create a bathroom in 3ds max and render it with Vray. The main goal of this tutorial is to show different techniques for modeling and rendering. So the objects and materials have been chosen according to this goal.
×

LEAVE A COMMENT

You need to be logged in to leave a comment. Don't have account? Register now.

Tugpsx 22:01:39  |  25-04-2015
Awesome tutorial, nice tips that should com in handy. Thanks for sharing.
william wu 04:51:58  |  10-05-2015
thank you for sharing,now ,I know more about the light .cool.
chrisc0le 10:40:36  |  13-05-2015
Nice 'Making of' and nice image too! Can you please break down the shower cabin material some more? it looks like the VrayDirt is appearing in the bump crevices. Am i right? I cant manage to get that to work.or is that AO? Thanks Chris