We add new 3D SCANS every week

Shop Now
Search
Cart
Sign in
  • offerCustomer zone
  • offerYour special offers
  • offerYour orders
  • offerEdit account

  • offerAdd project
  • offerLiked projects
  • offerView your artist profile

  • Dark mode

Information Clause

In accordance with the art. 13 section 1 and 2 of the European Parliament and Council Regulation 2016/679 of the 27th April, 2016 on the protection of natural persons, with regard to the processing of personal data and on the free movement of such data, and repealing Directive 95/46/EC (General Data Protection Regulation), hereafter RODO, I hereby inform that:

1. EVERMOTION S.C., 8 Przędzalniana Str., 15-688 Białystok, Poland is the Administrator of your Personal Data (APD)

2. Data Protection Inspector can be reached through e-mail: iod@evermotion.org

3. Your personal data are to be processed on the basis of art. 6 section 1 letter a, b and f of RODO in order to:
a) prepare, conclude and execute the agreement and for other purposes approved by you,
b) to execute the legitimate interest like marketing of products and the agreement, claim assertion or defence against claims resulting from the law regulations.
4. Entities entitled to the reception of your personal data may be the authorised public bodies; mail providers; providers of the services covered by the agreement; responsible for debt recovery, keeping the archives, document utilization, legal consulting, technical services, IT services and accountancy.

5. Your personal data shall not be transferred to the third country, nor to the international bodies.

6. Your personal data shall be processed within the period of the agreement and upon your additional consent until you withdraw it. APD shall keep the data for the period of any civil law claim execution connected with the agreement.

7. You have the right to demand an access to your personal data, to correct or to delete the data if there is no other basis for the processing or any other purpose of such processing or to limit the processing of the data, to transfer the data to another administrator and to raise objections to the further data processing if there is no legal basis for further processing and to withdraw any previous consent.

8. You provide the personal data voluntarily, however they are necessary to conclude the agreement. The refusal of providing such data may result in the refusal of the agreement conclusion.

9. You have the right to lodge a complaint to the Personal Data Protection Office when in your opinion the data processing violates the regulations of General Data Protection Regulation of the 27 April, 2016 (RODO).

10. Your data will be automatically processed, including the form of profiling.
11. You are obligated to forward above mentioned information to your representative, especially if you appointed this person in the agreement as the contact person or as the representative for the agreement execution.

OK

Making of Fall travel

Yones Bana 2014-03-17 10:14 tutorial  > 3ds MAX  > modeling

Tutorial by Yones Bana.

Hi, I am Yones Bana from cgrecord team, and this is a making of from my last personal work, Fall travel. In this tutorial I am using 3dsMax and V-ray, also Photoshop for postproduction steps.

02_noresize_1.jpg

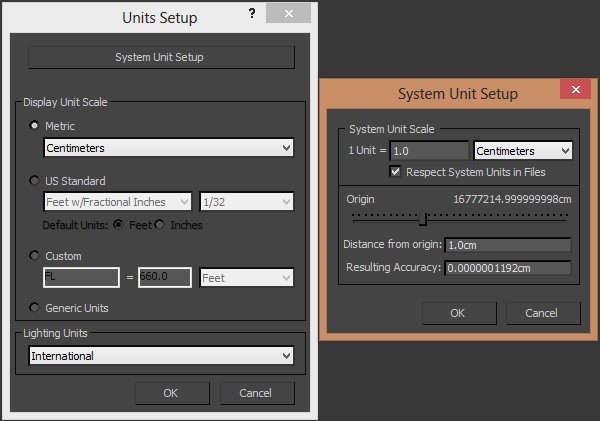
First of all adjust the unit setup. I use centimeters in this scene.


Click on image to enlarge 03_noresize_1.jpg

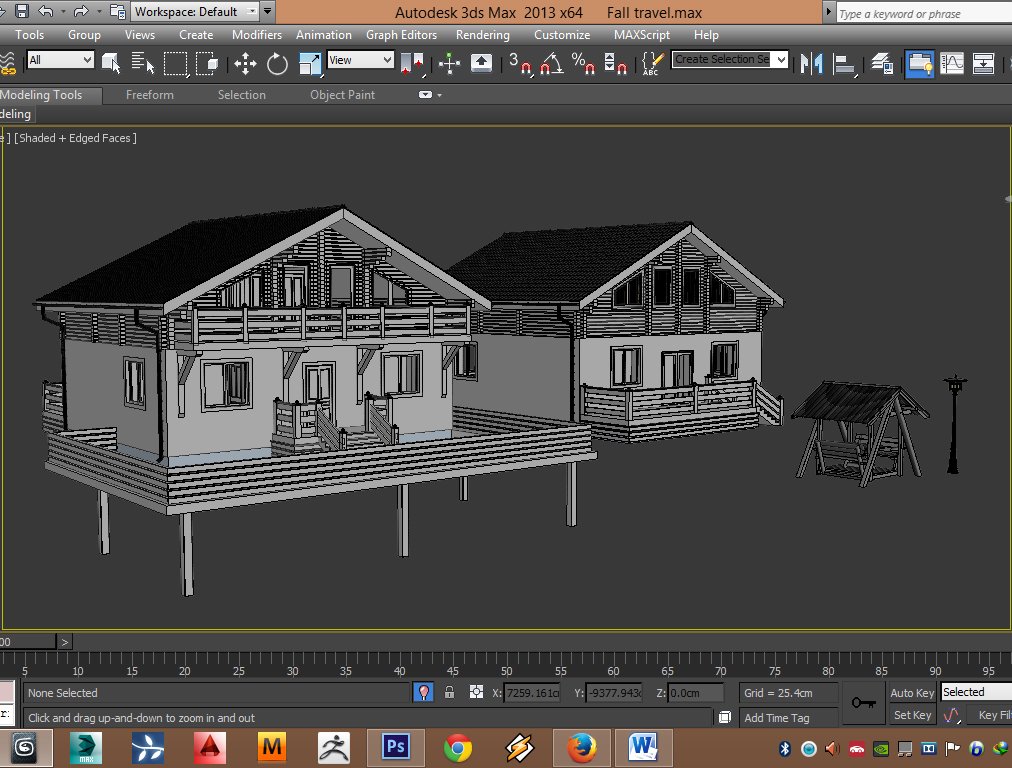
Models that I used in this scene


Click on image to enlarge 04_noresize_1.jpg

Models that I used in this scene


Click on image to enlarge05_noresize_1.jpg

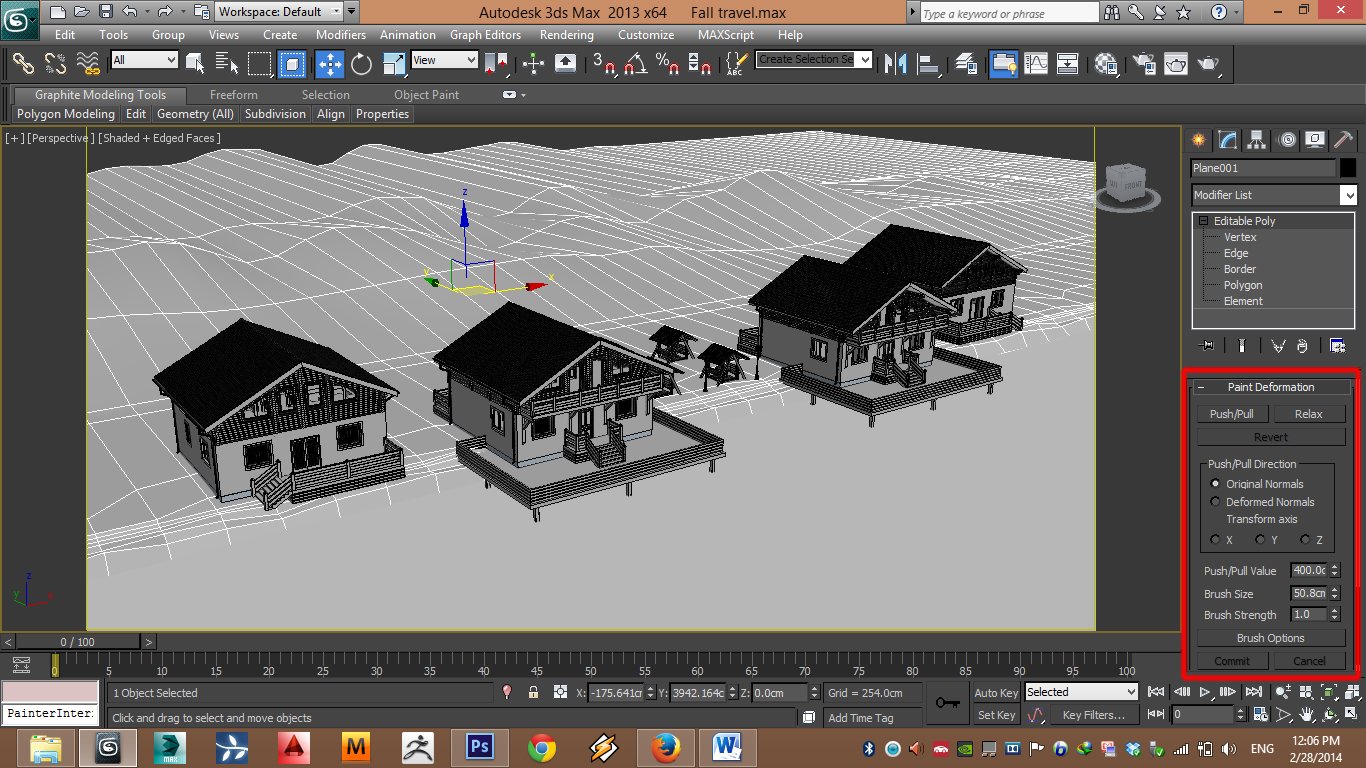
For environment ground I used Paint Deformation tools in edit poly.


Click on image to enlarge06_noresize_1.jpg

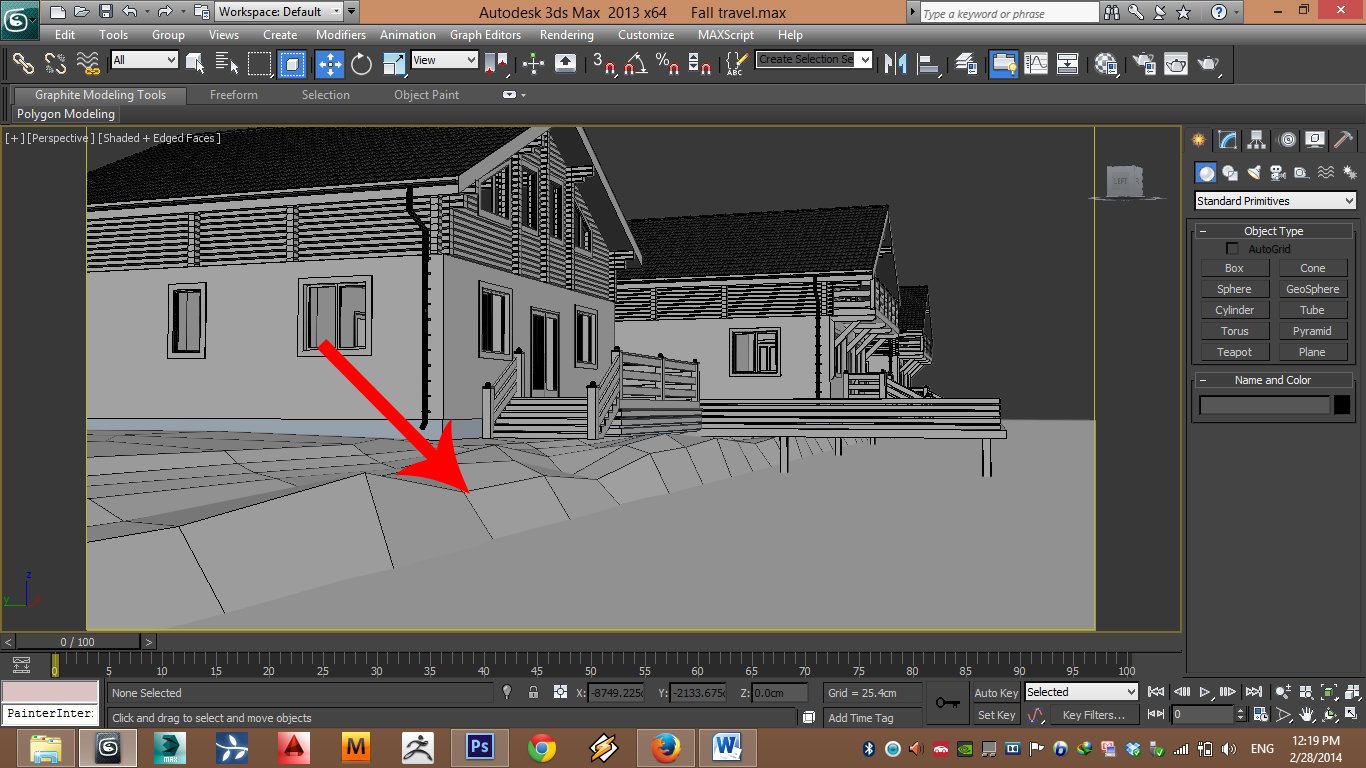
Note that we need a step in front of the beach.


Click on image to enlarge07_noresize_1.jpg

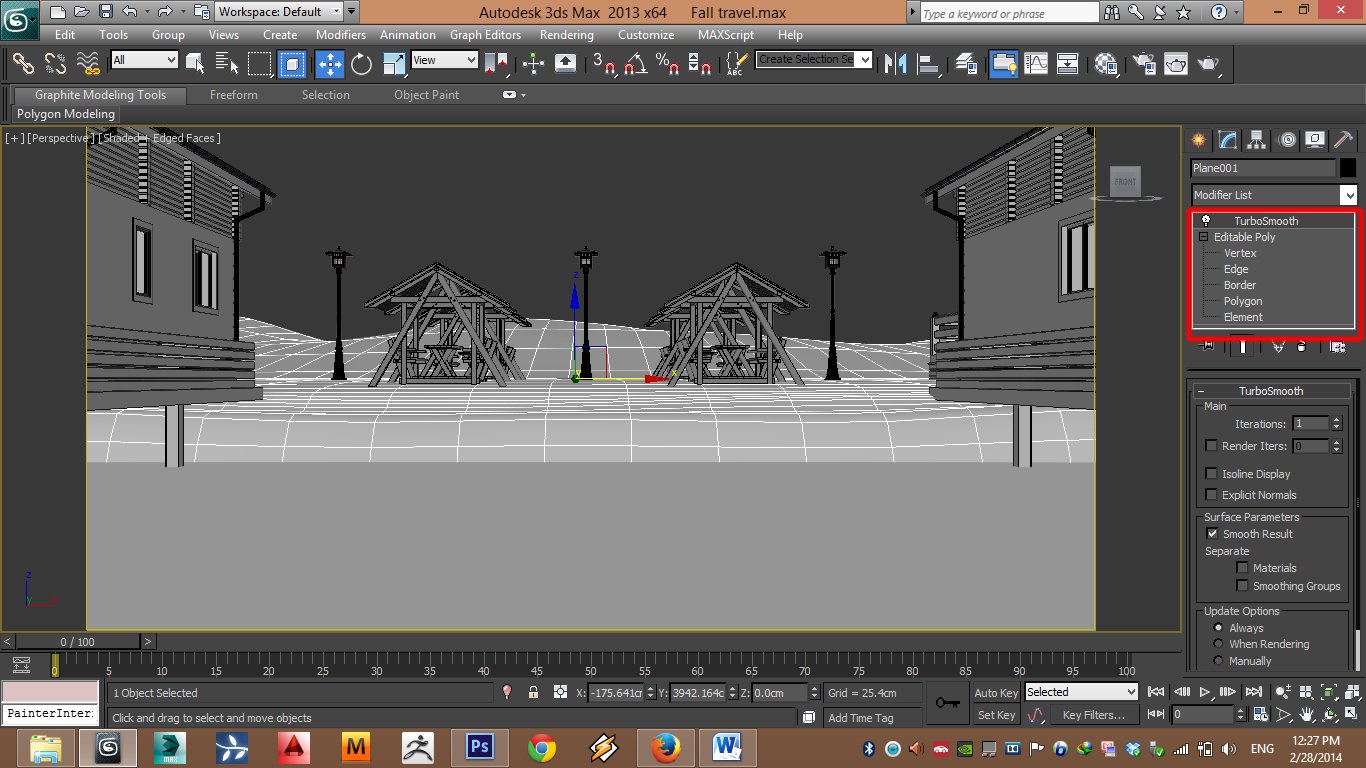
Add a turbosmooth modifier to achieve smooth result.


Click on image to enlarge08_noresize_1.jpg

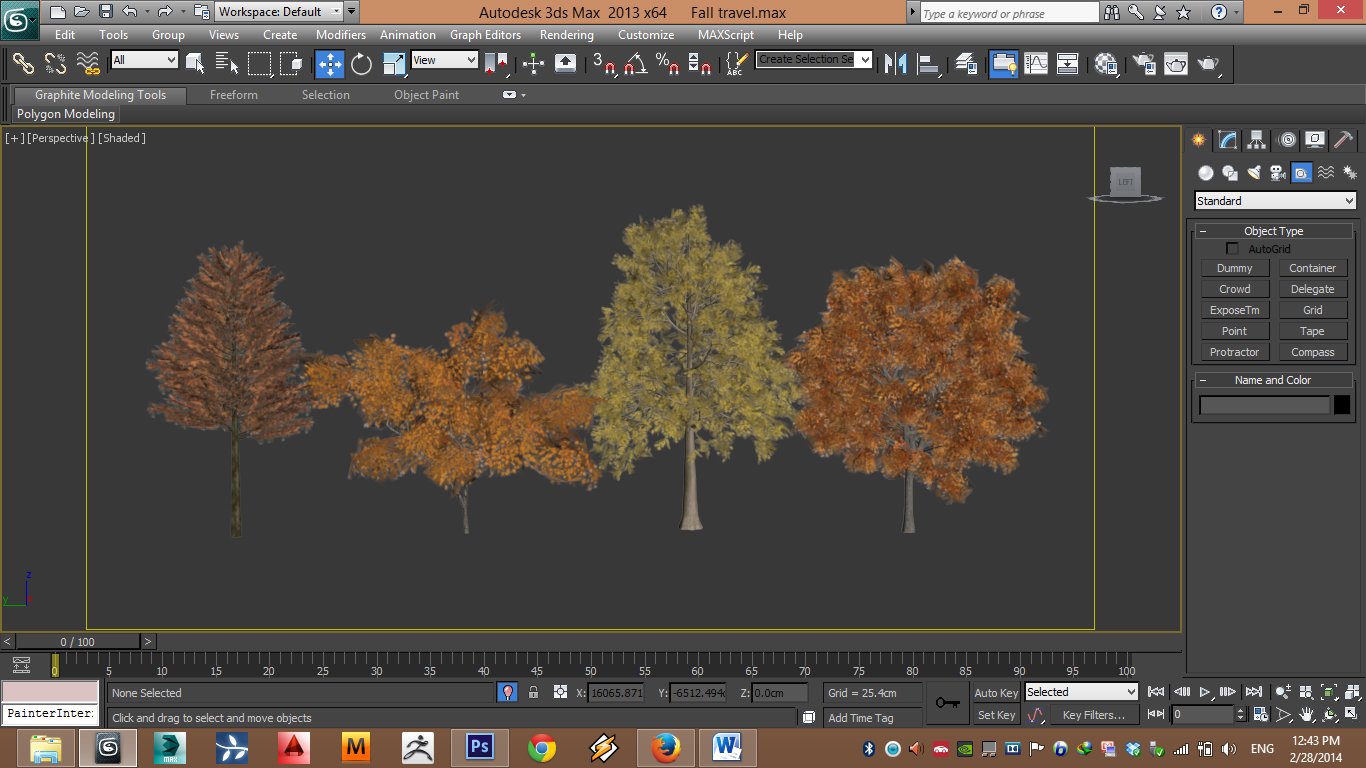
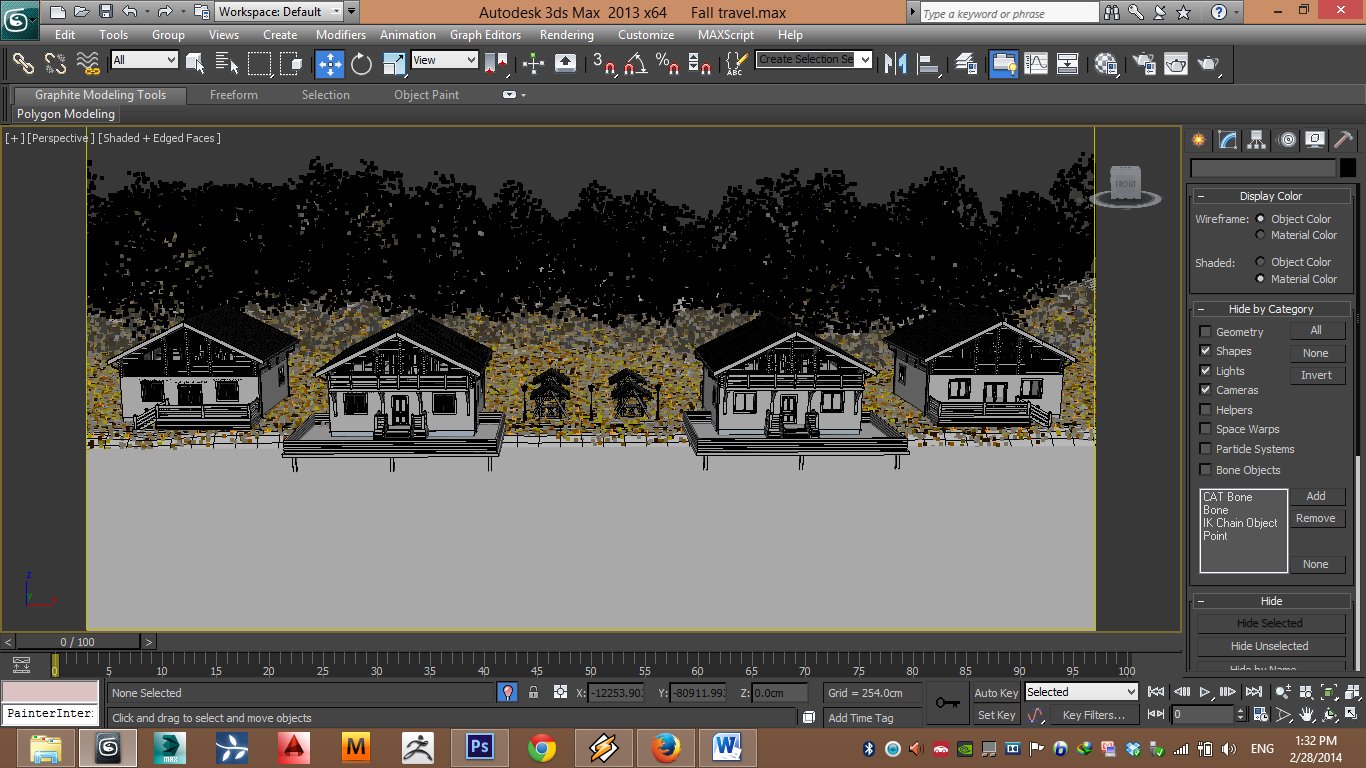
Vegetation is created by Forest plugin. Because I wanted to show the feeling of autumn I used some orange trees models from Evermotion.


Click on image to enlarge09_noresize_1.jpg

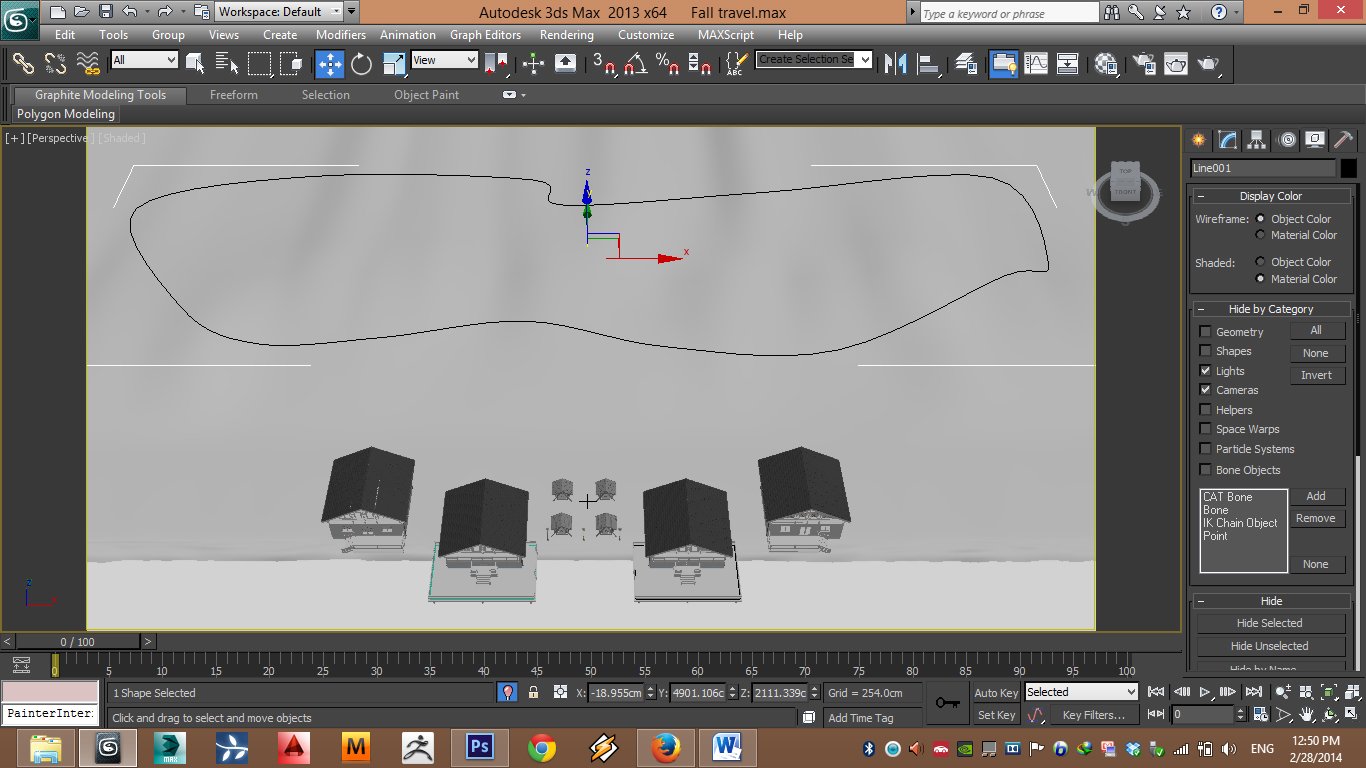
Create a spline to limit the trees area in top viewport.


Click on image to enlarge10_noresize_1.jpg

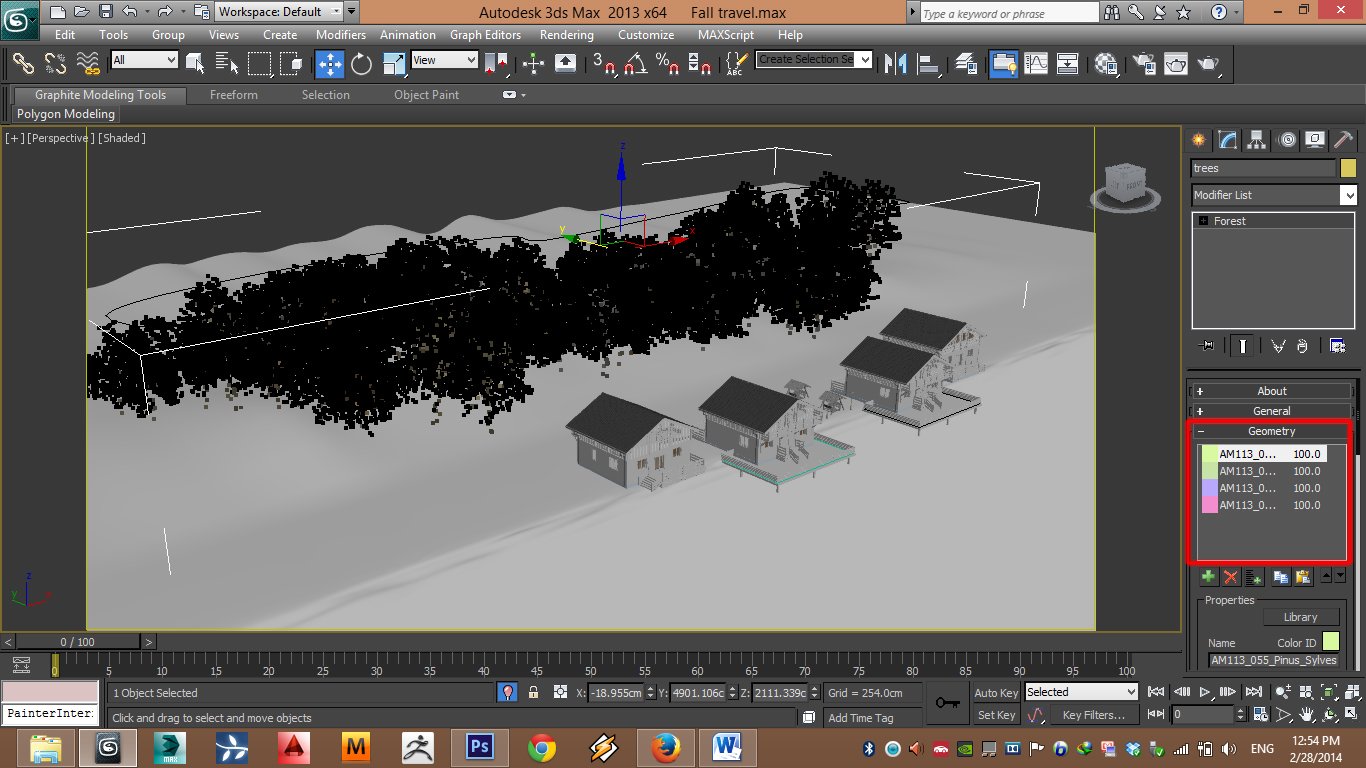
I used Forest for scattering the trees, I added the trees in Geometry rollout.


Click on image to enlarge11_noresize_1.jpg

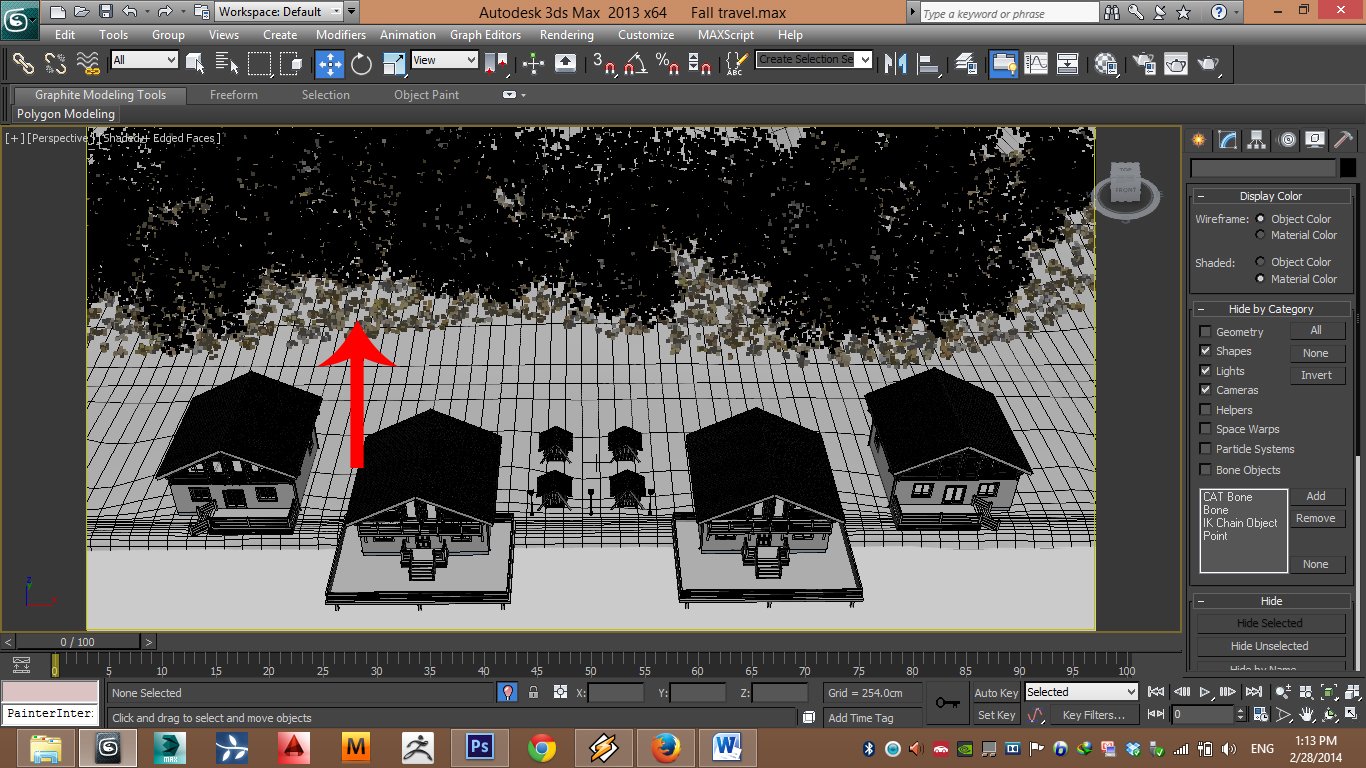
To add variety to the trees I used transform rollout in forest parameters.


Click on image to enlarge12_noresize.jpg

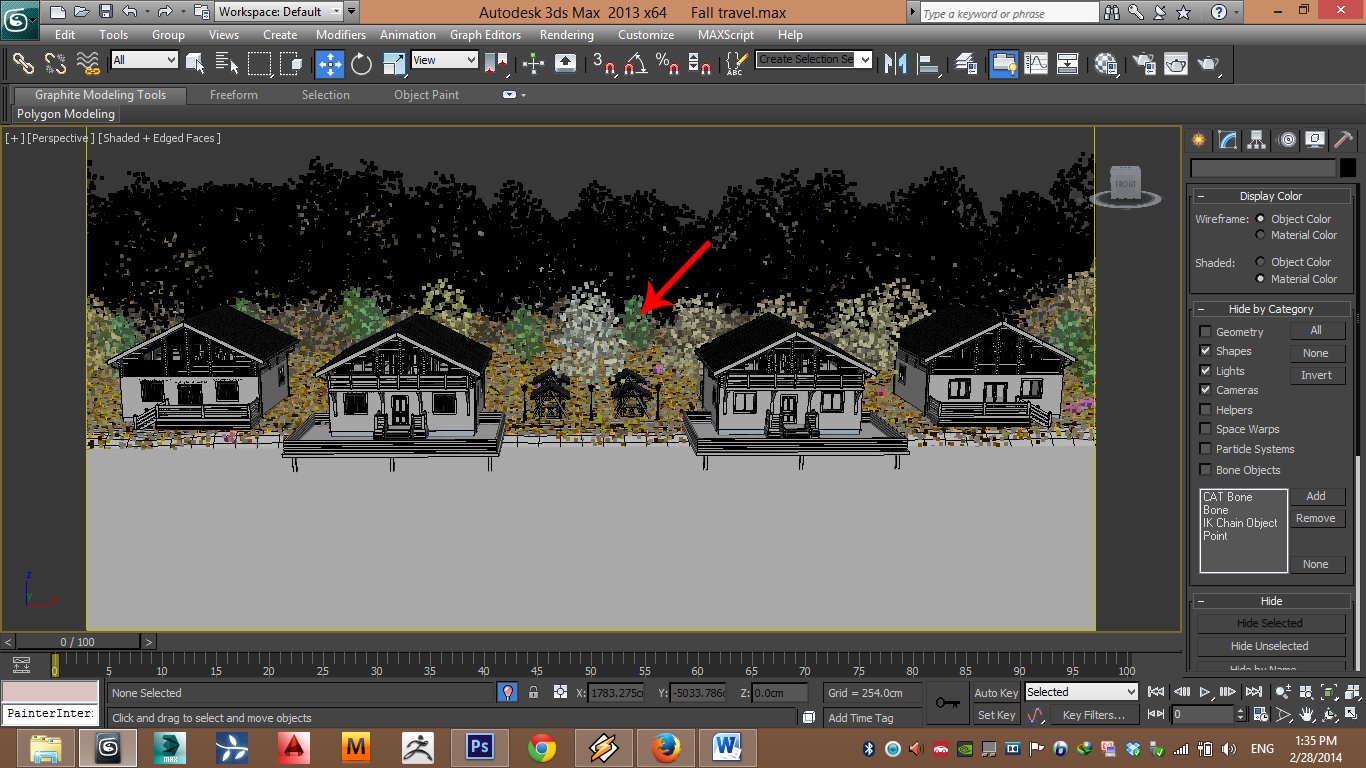
I scattered some bushes under the trees.


Click on image to enlarge13_noresize_1.jpg

Scattering bushes.


Click on image to enlarge14_noresize_1.jpg

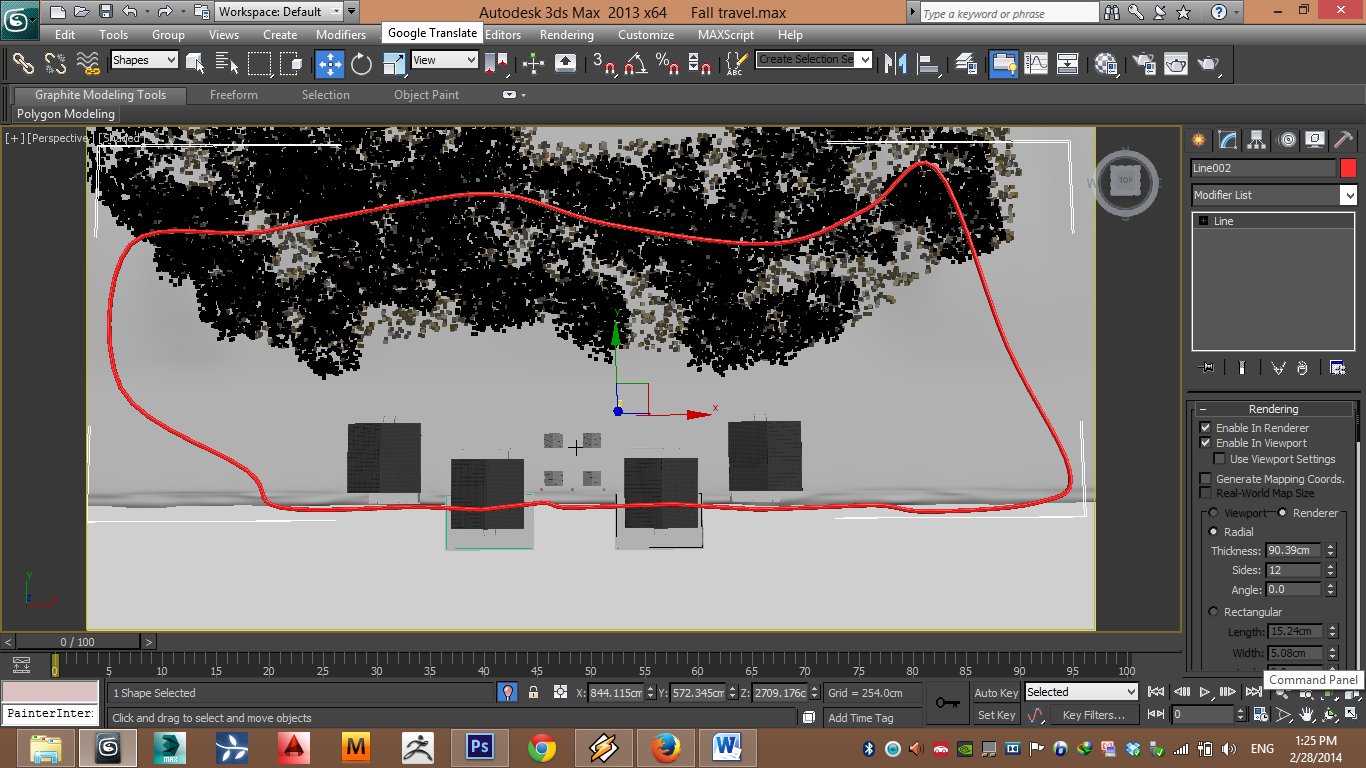
For the rest of the scene I created a new spline.


Click on image to enlarge15_noresize.jpg

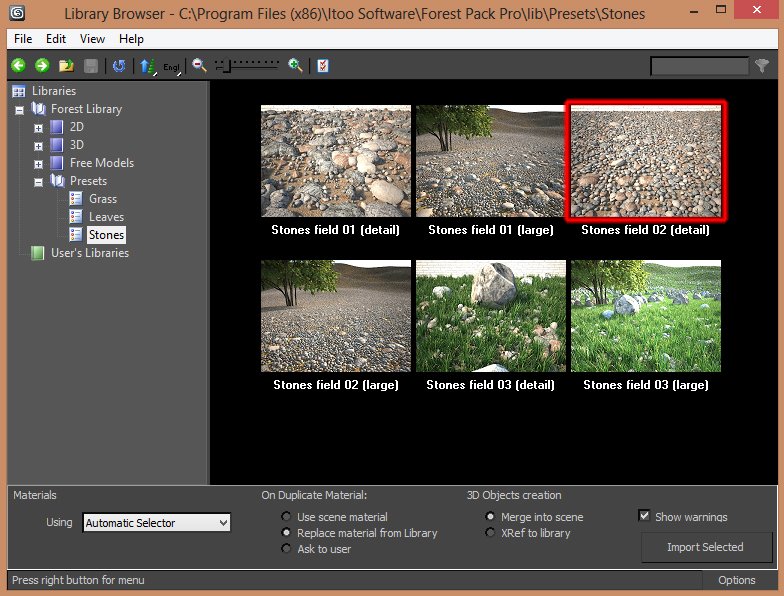
I used Forest Pack Pro stones library


Click on image to enlarge16_noresize.jpg

Scattering stones.


Click on image to enlarge17_noresize.jpg

Finally I added some trees in stone areas.


Click on image to enlarge18_noresize.jpg

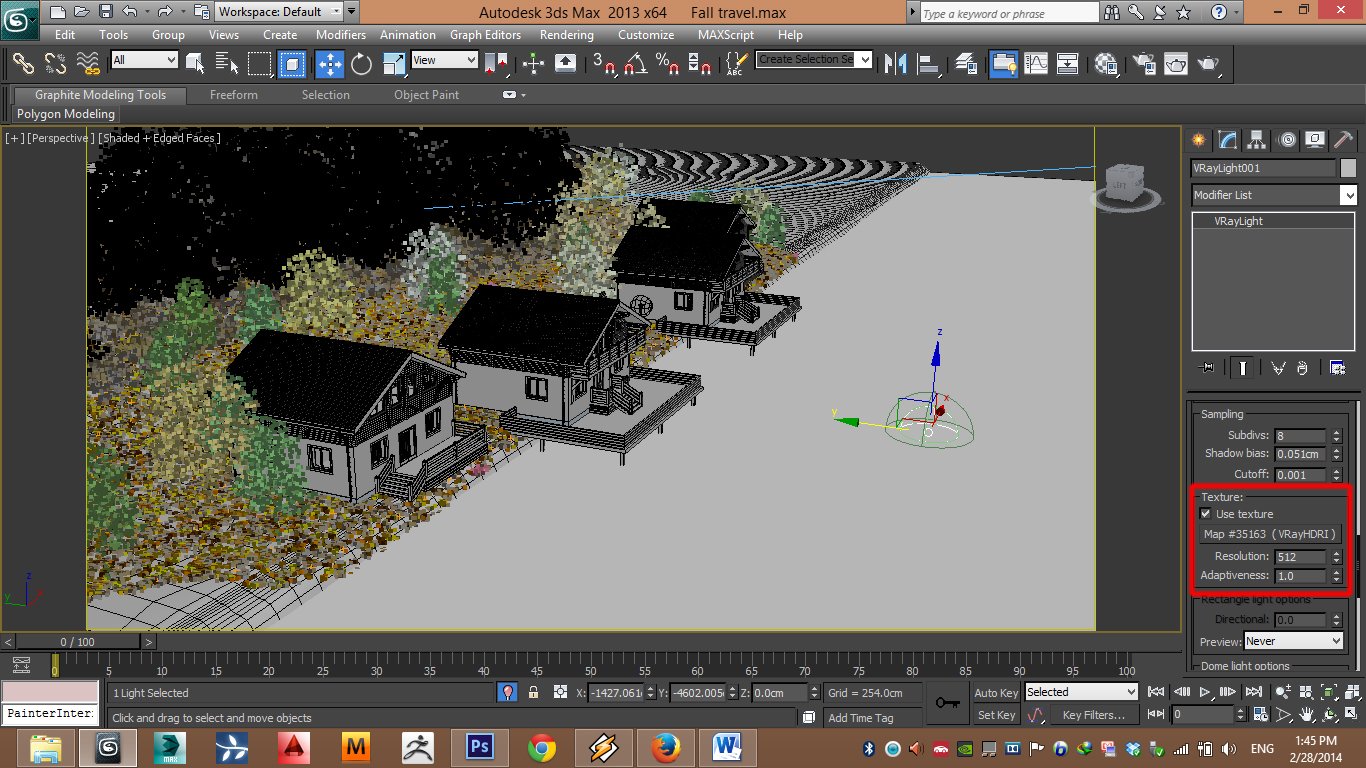
For the main GI lighting i used DOME and put VrayHDRI map on it.


Click on image to enlarge19_noresize.jpg

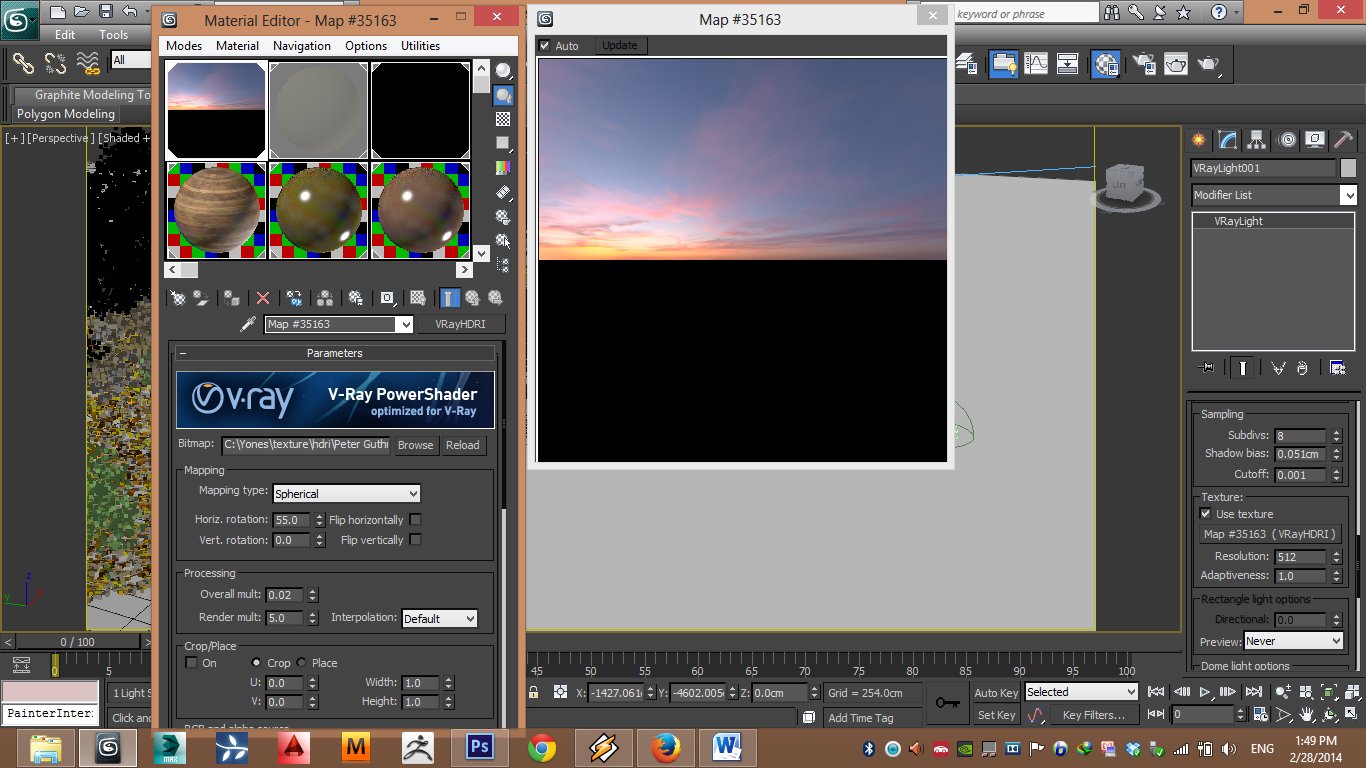
I used a nice HDRI from Peter Guthrie.


Click on image to enlarge20_noresize.jpg

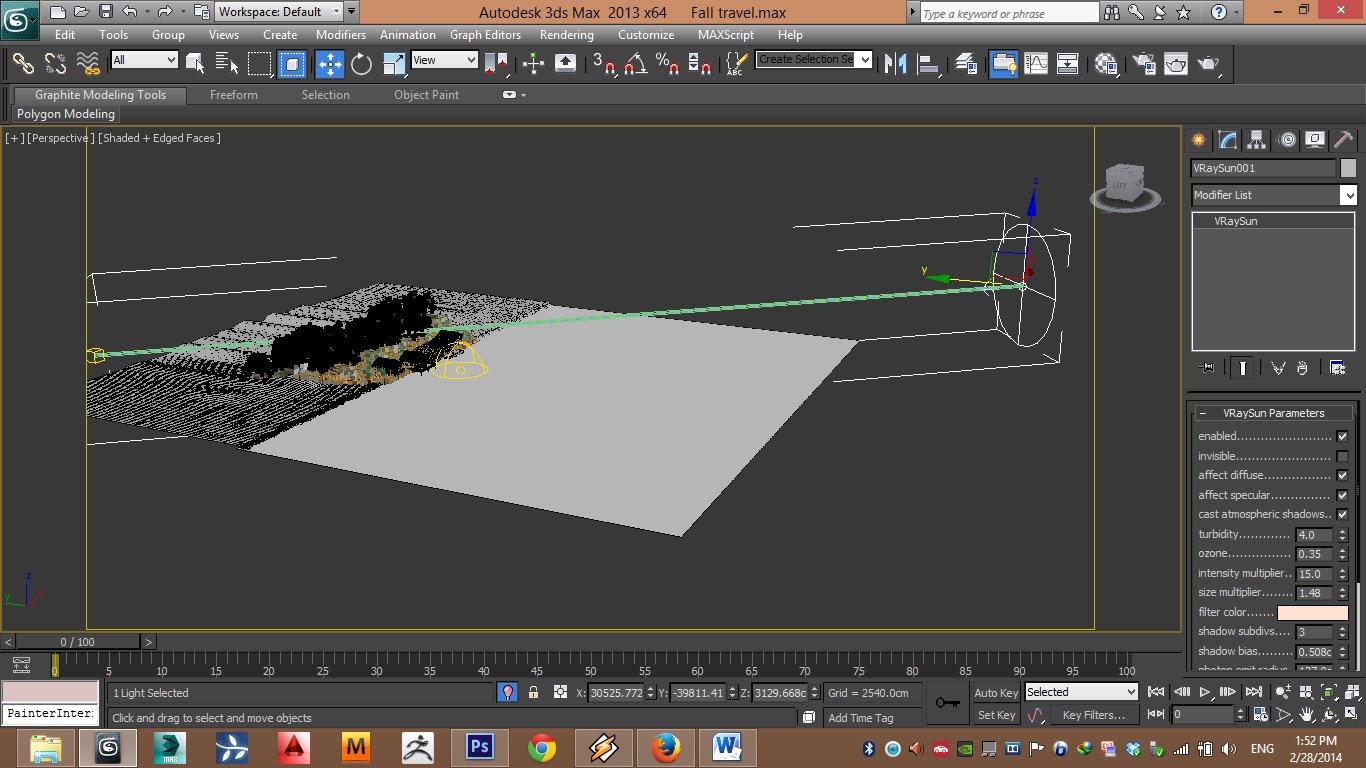
To strengthen the intensity of sunlight I used a vraysun exactly in position of sun in HDRI.


Click on image to enlarge21_noresize.jpg

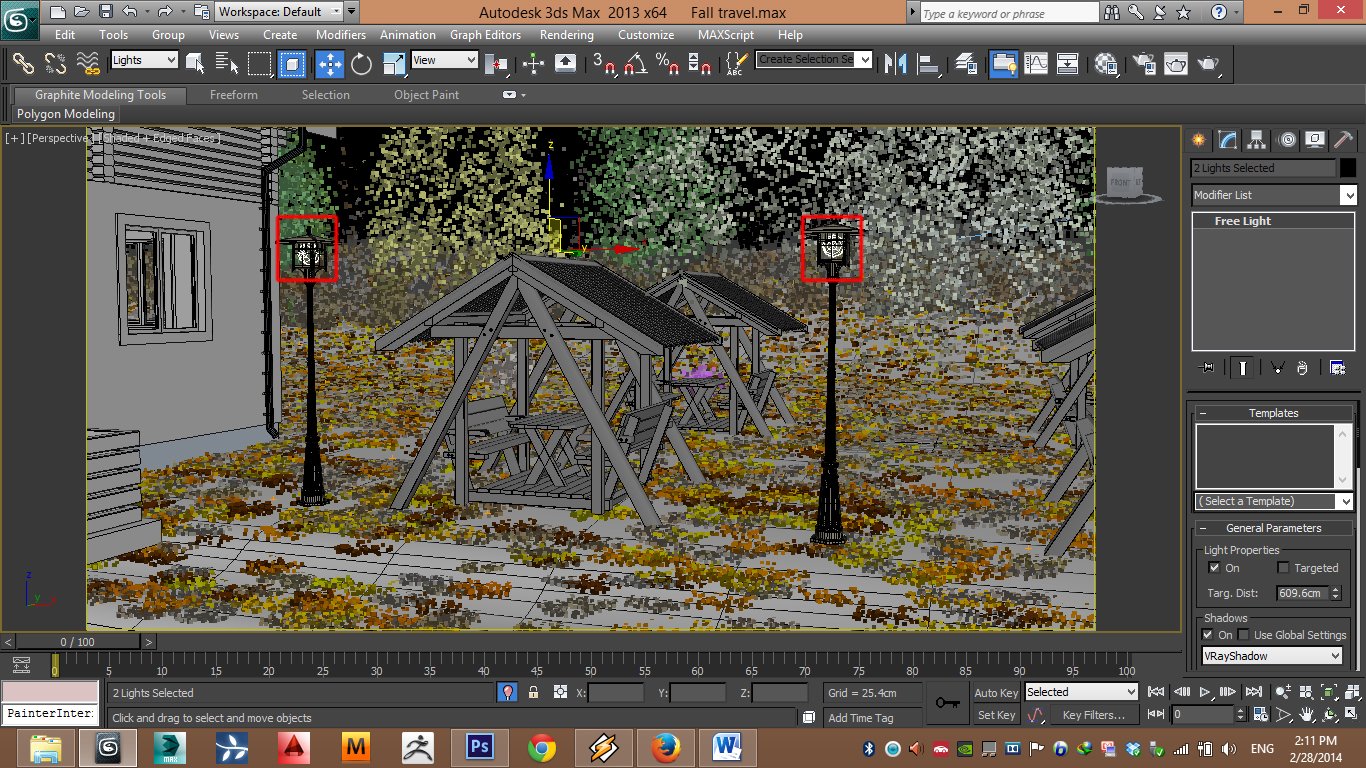
For landscape lights I used photometric lights.


Click on image to enlarge22_noresize.jpg

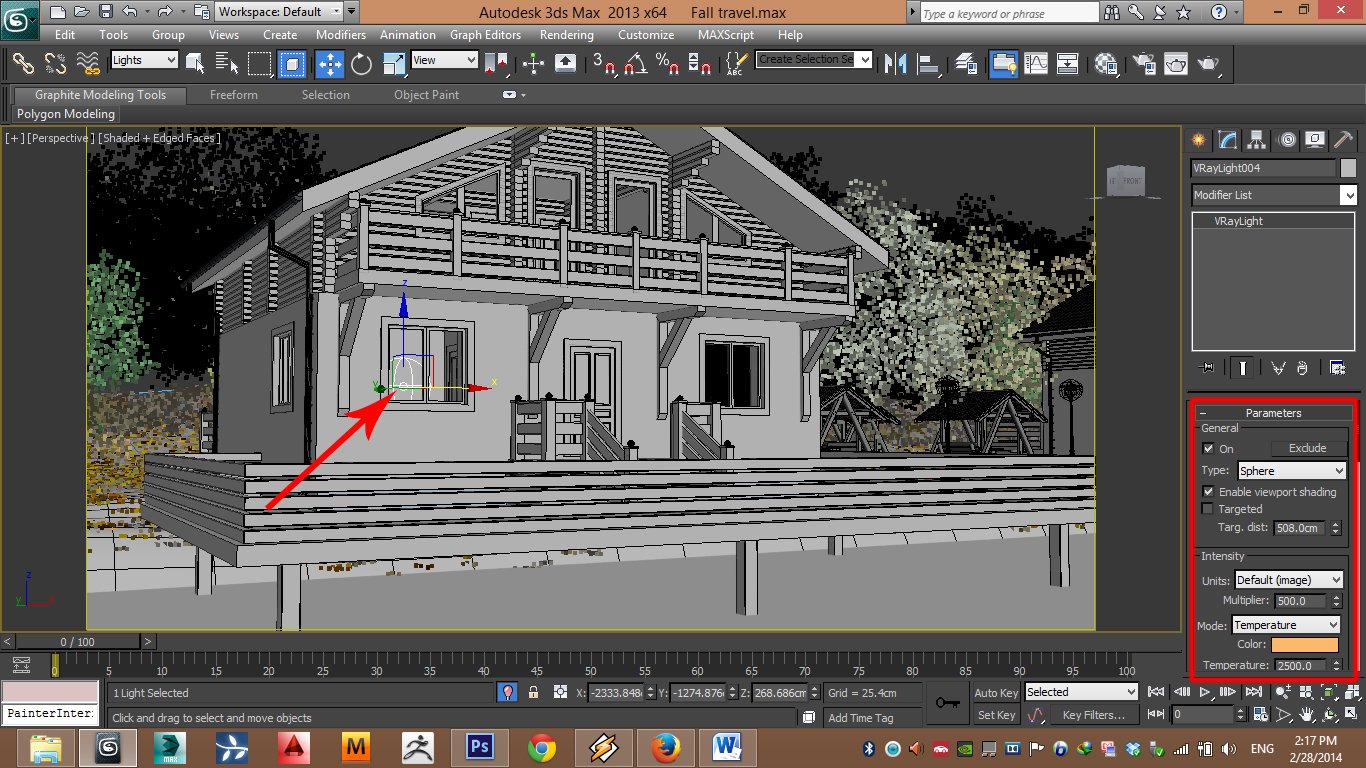
For interior lights I used vraylight sphere.


Click on image to enlarge23_noresize.jpg

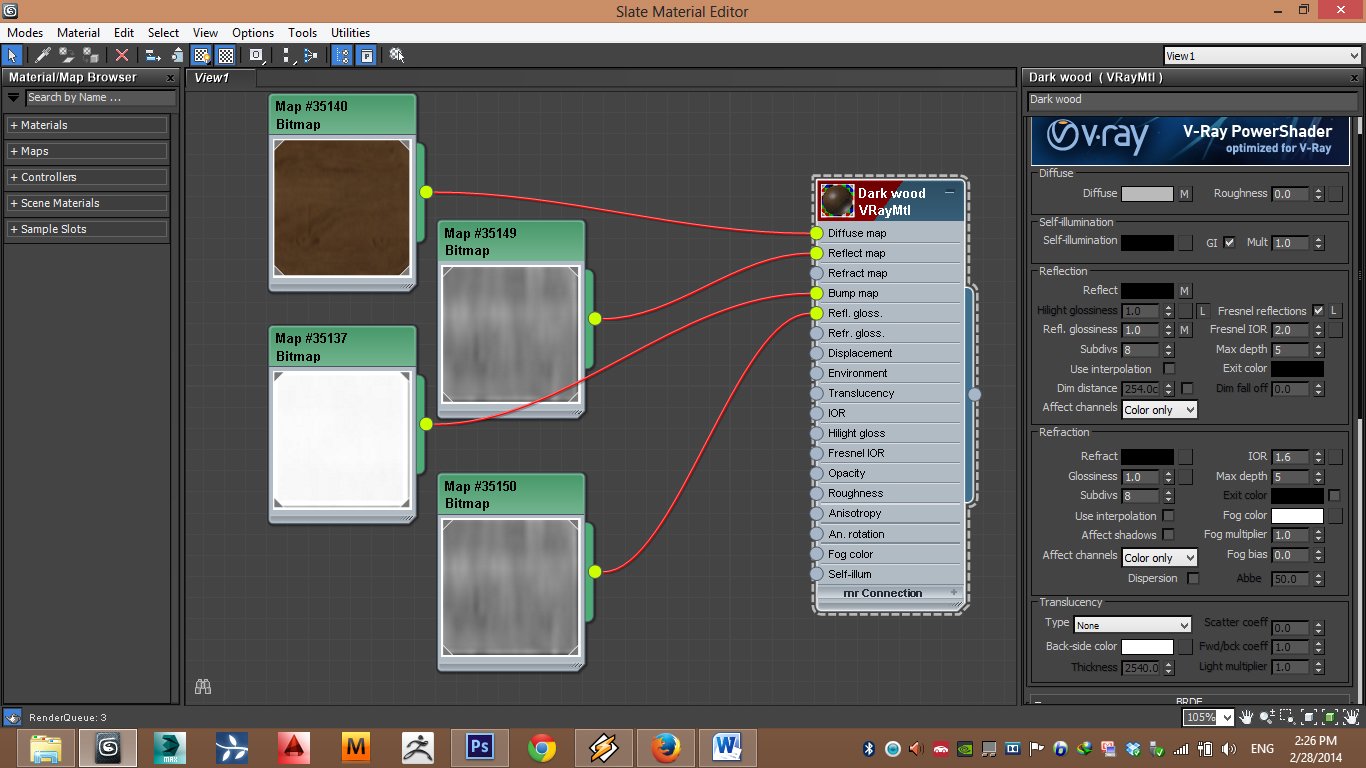
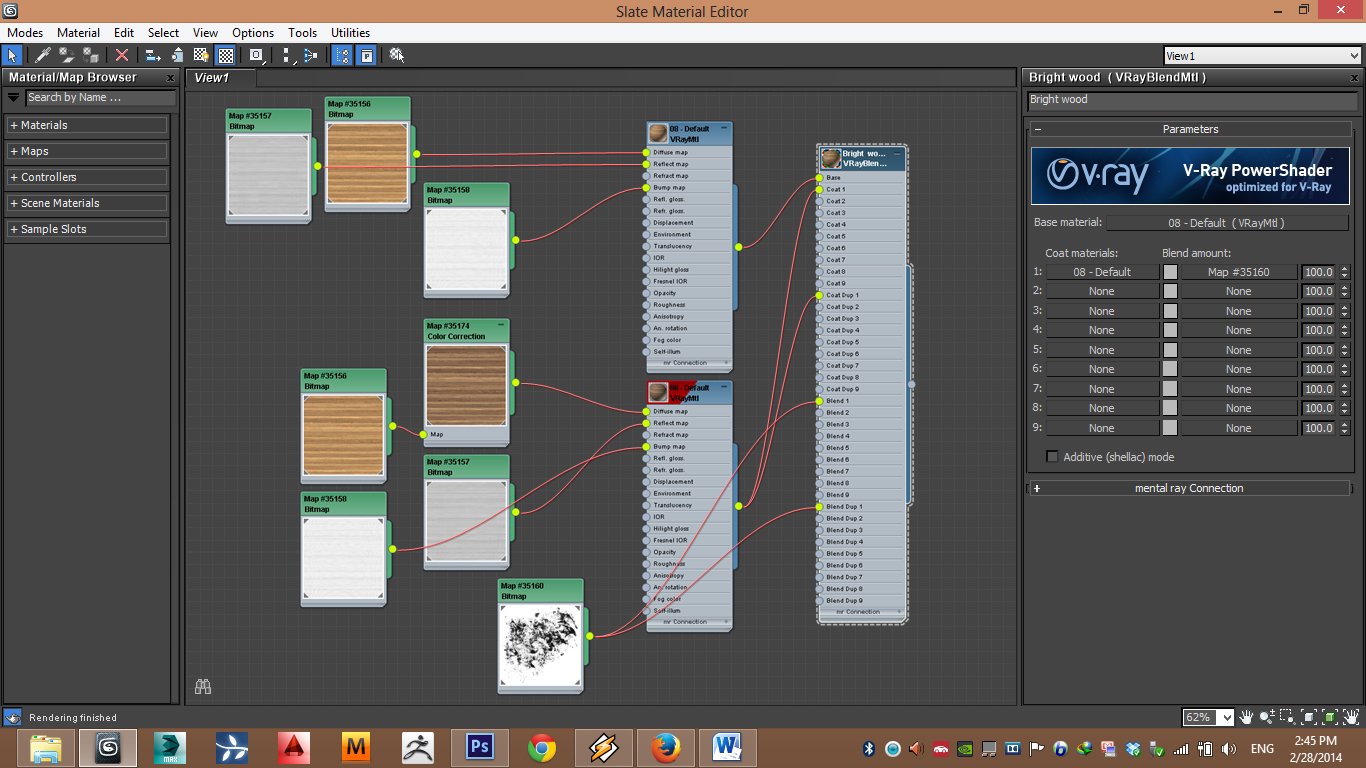
For the wooden houses I used two different materials. First - Dark wood


Click on image to enlarge24_noresize.jpg

For bright wood I blended the dark one and bright one with a mask.


Click on image to enlarge25_noresize.jpg

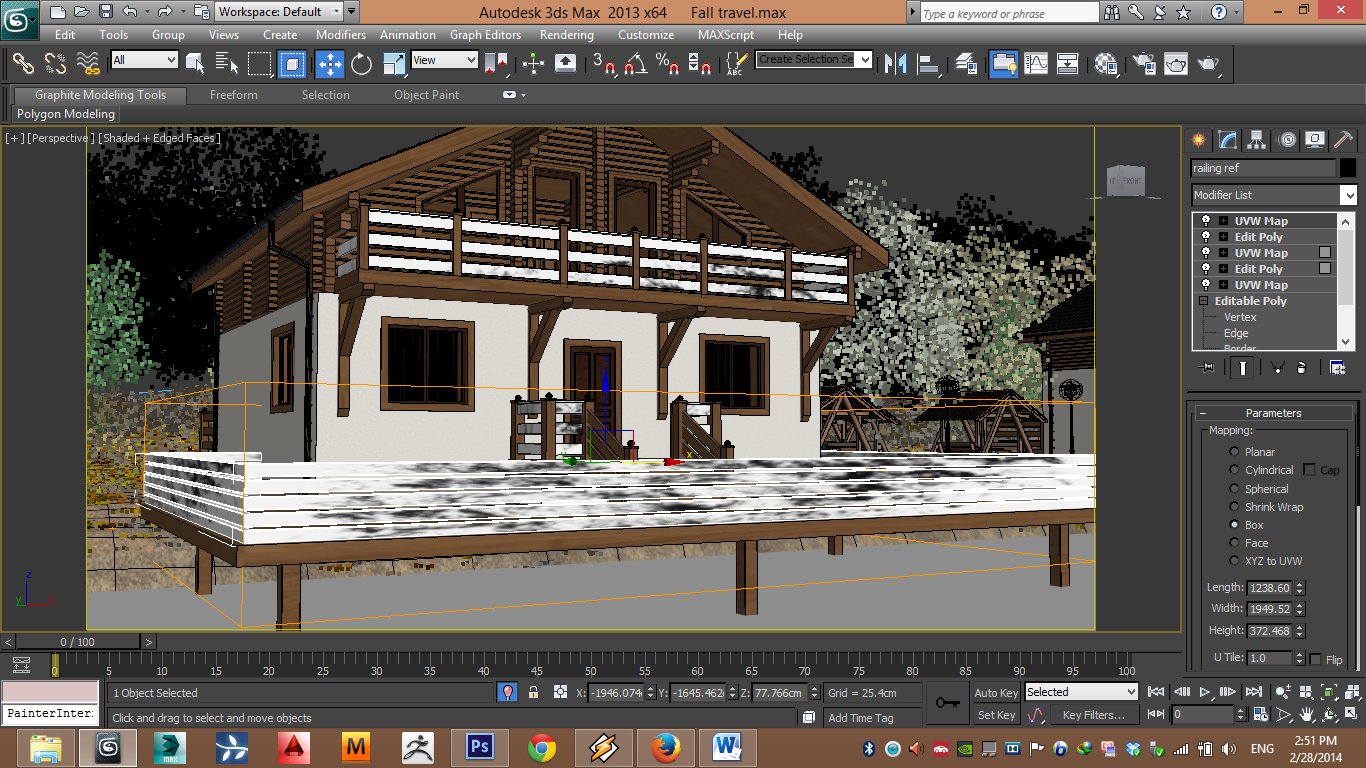
I corrected the mask map on my model with the uvwmap modifier.


Click on image to enlarge26_noresize.jpg

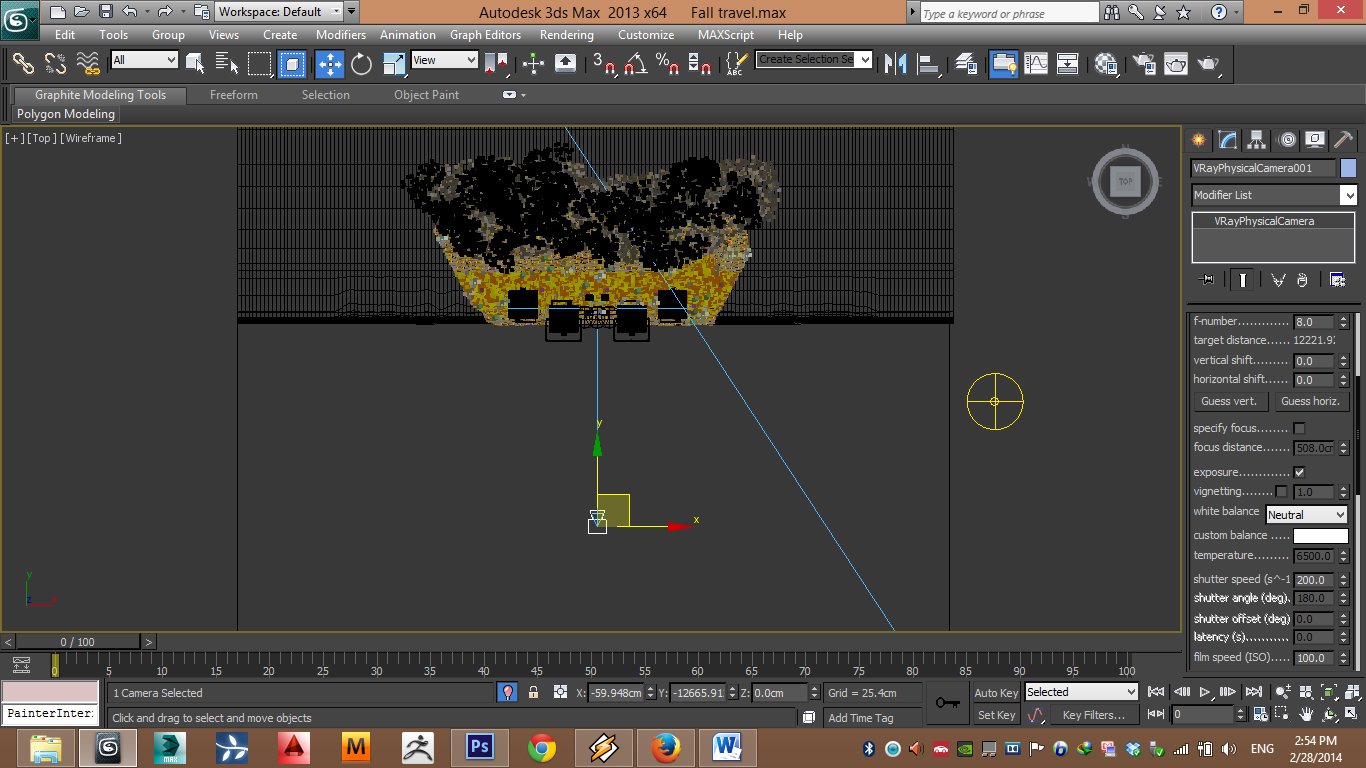
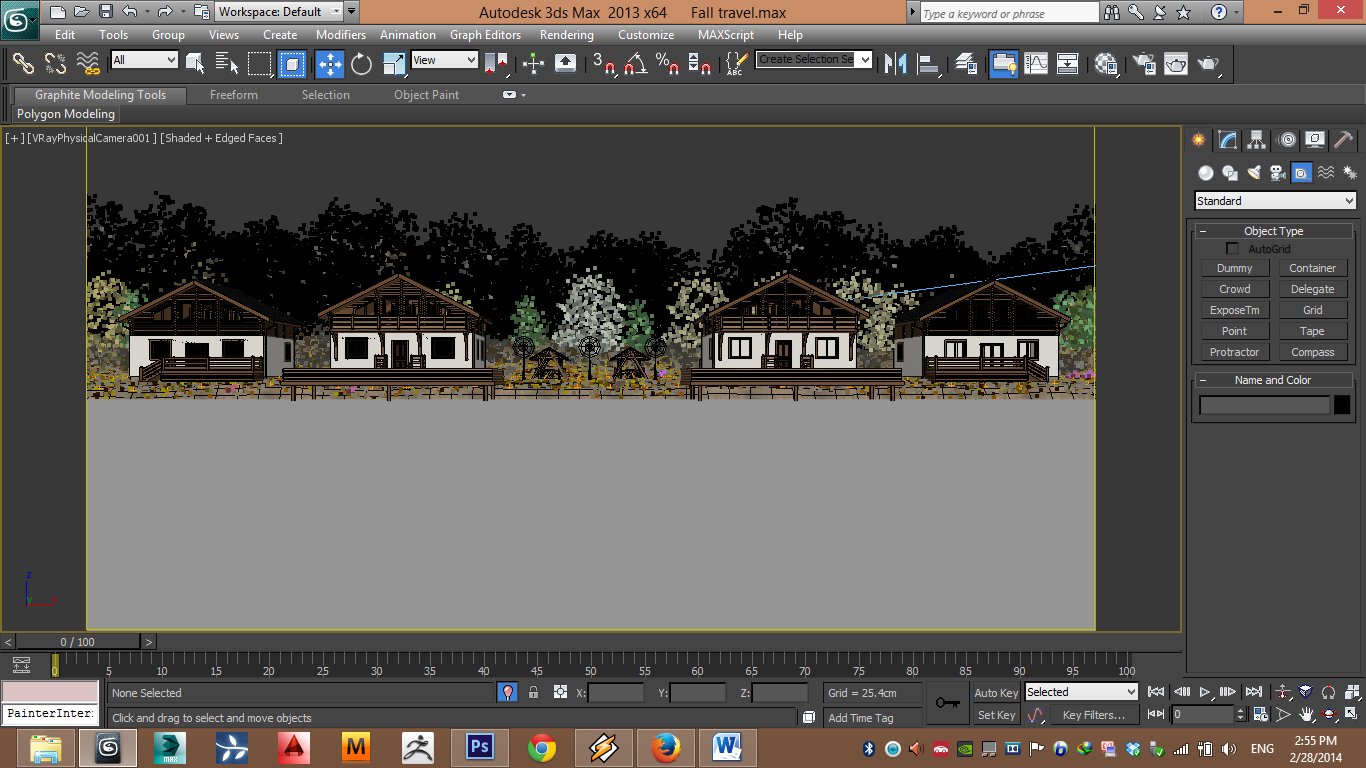
VRayPhysicalCamera settings.


Click on image to enlarge27_noresize.jpg

VRayPhysicalCamera settings.


Click on image to enlarge28_noresize.jpg

And finally this is my Render setup.


Click on image to enlarge29_noresize.jpg

This is a Raw render.


Click on image to enlarge30_sm.jpg

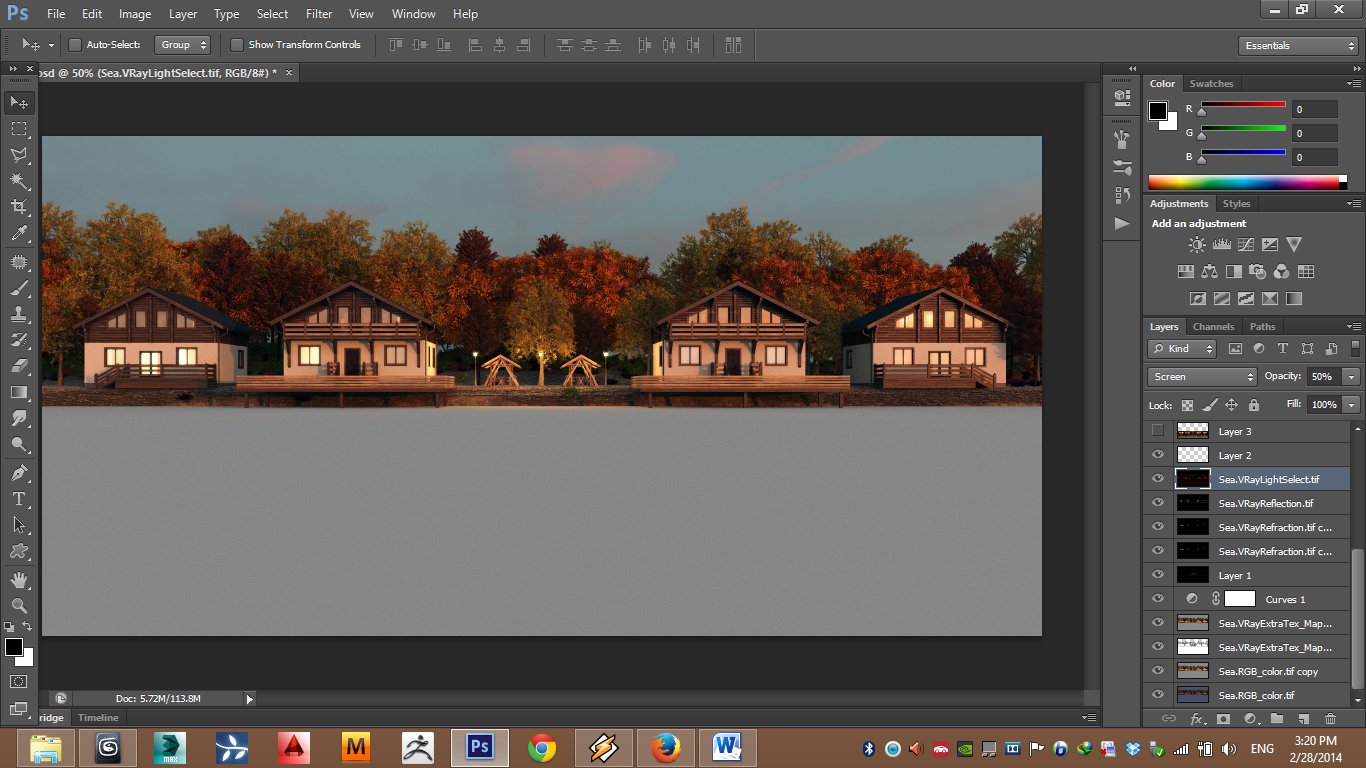
Render elements.


31_noresize.jpg

Now its time to finalize the image in Photoshop! With some adjustment like levels, curves, color balance, … and use elements with correct blending mode achive to better result.


Click on image to enlarge32_noresize.jpg

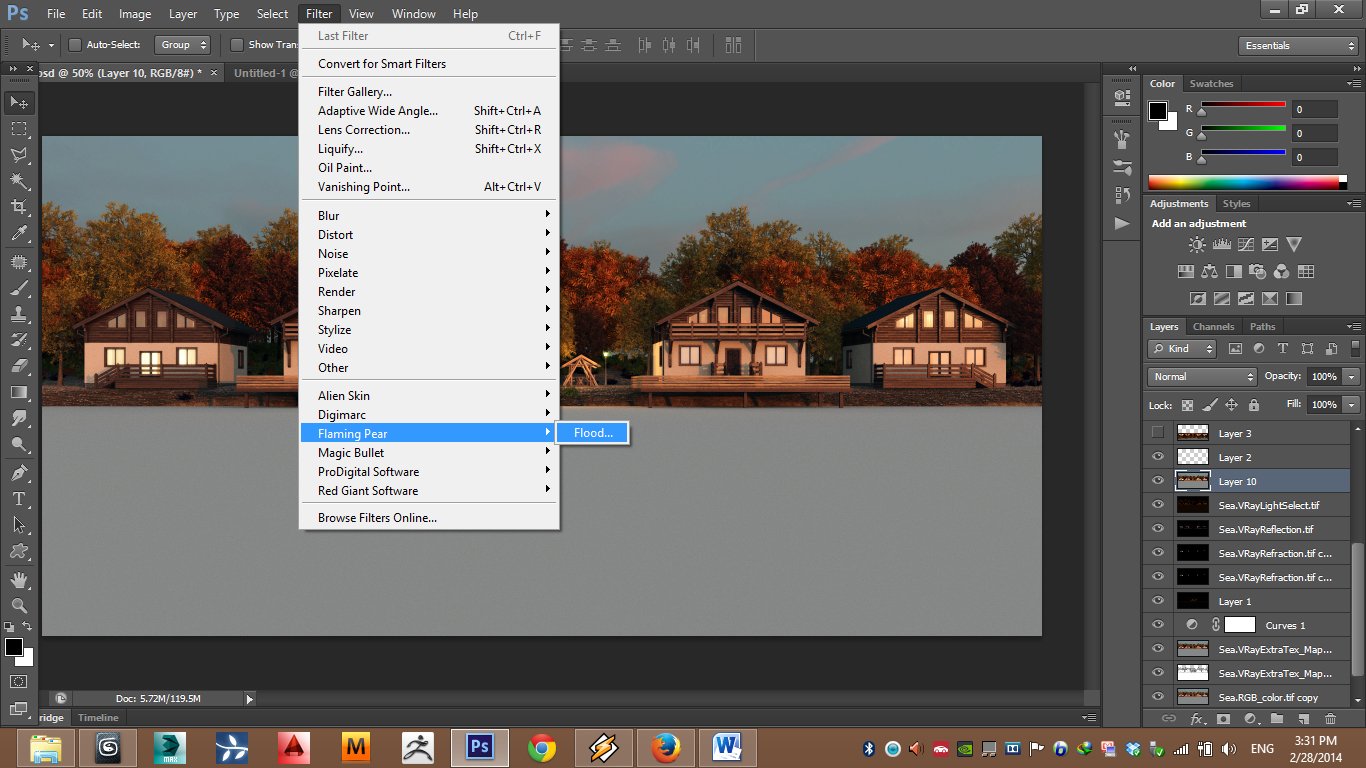
For water surface I used Flood plugin. You can download free demo here. After install the plugin, from filter menue select Flaming pear and Flood.


Click on image to enlarge33_noresize.jpg

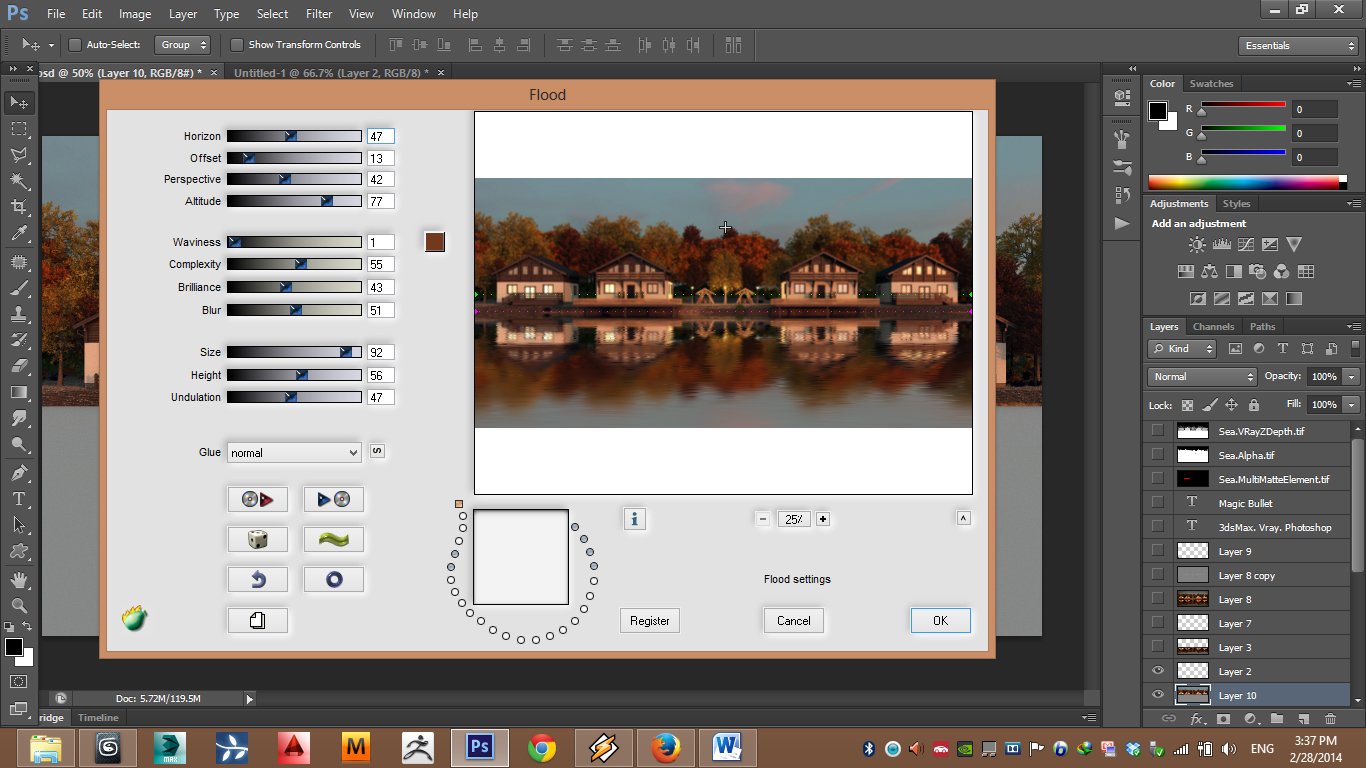
In this plugin you can control characteristic of water such as horizon, waviness, blur and etc.


Click on image to enlarge34_noresize.jpg

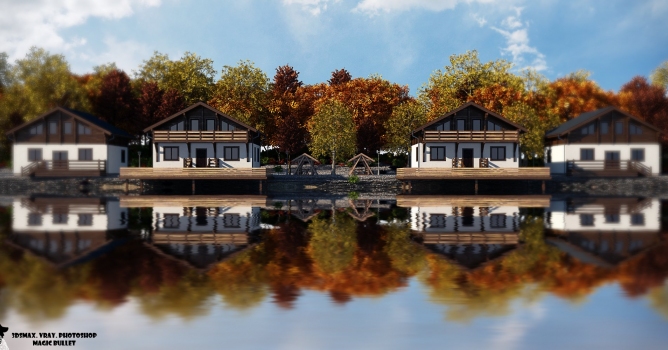
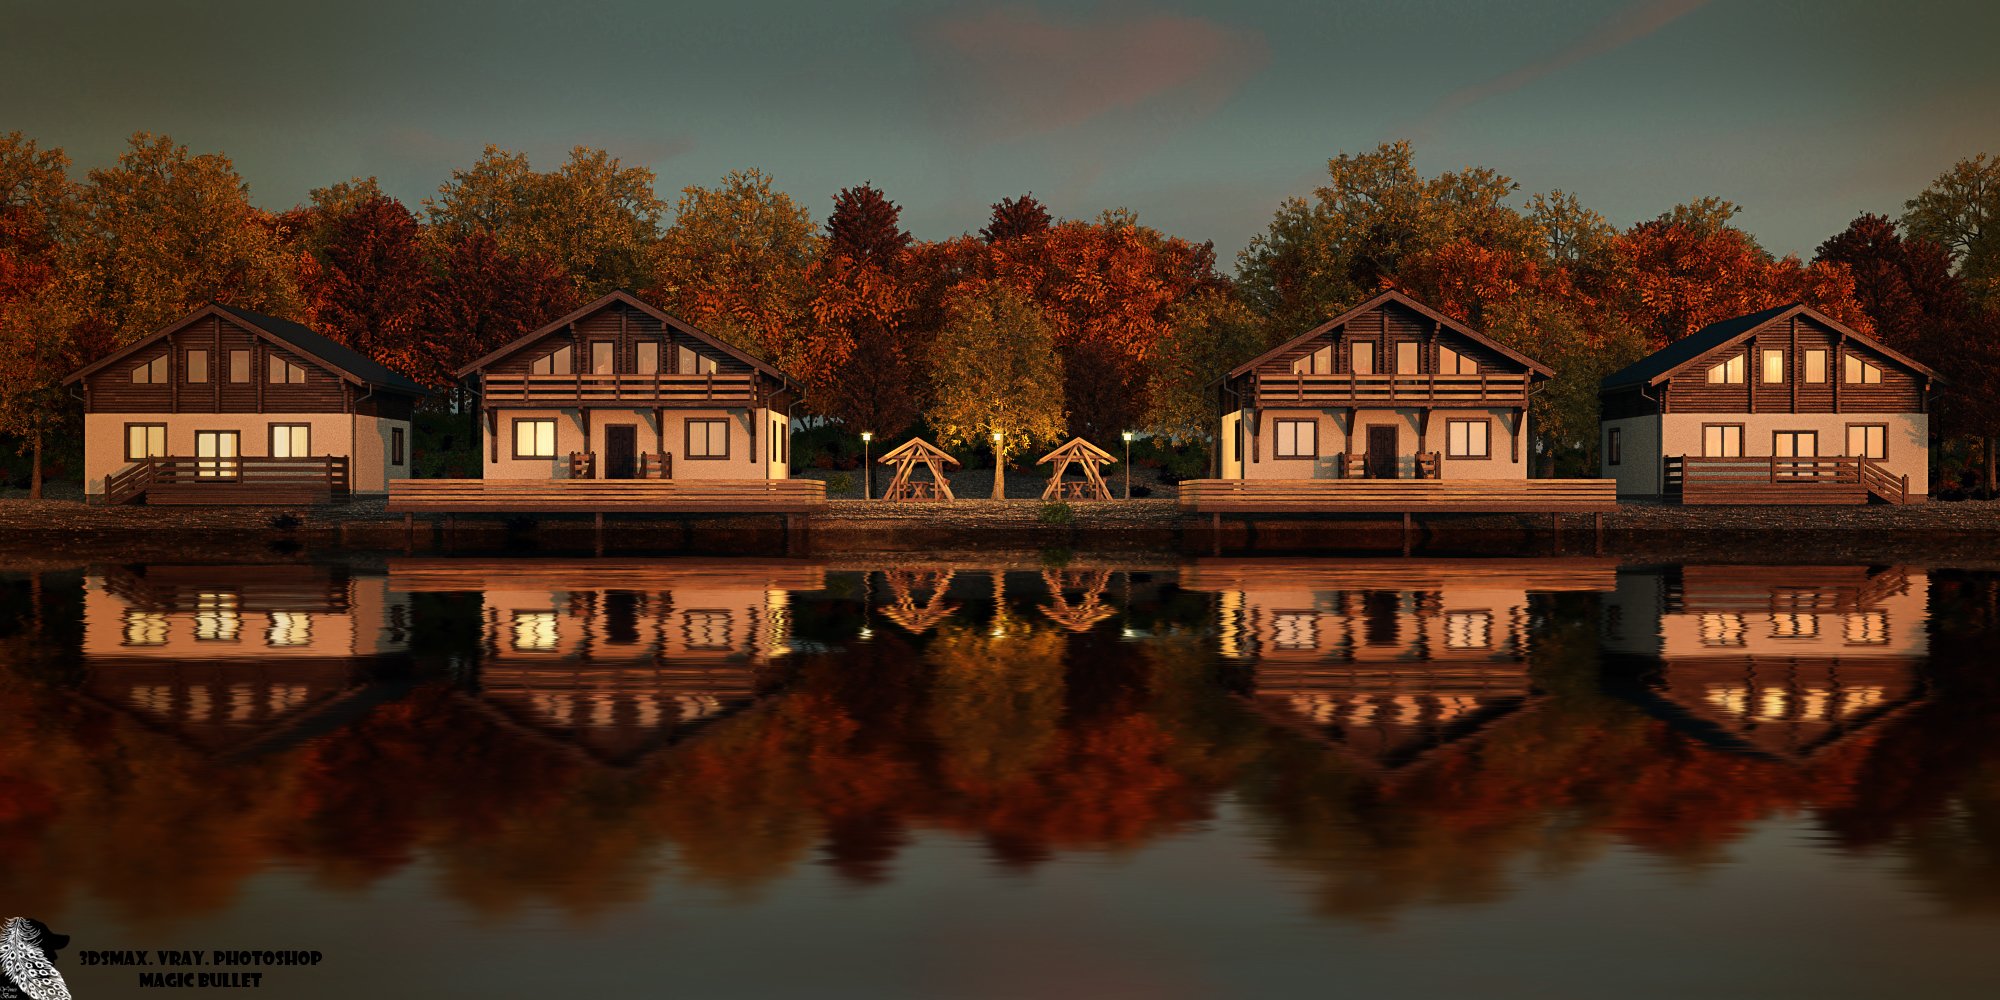
This is the final image.


Click on image to enlarge35_noresize.jpg

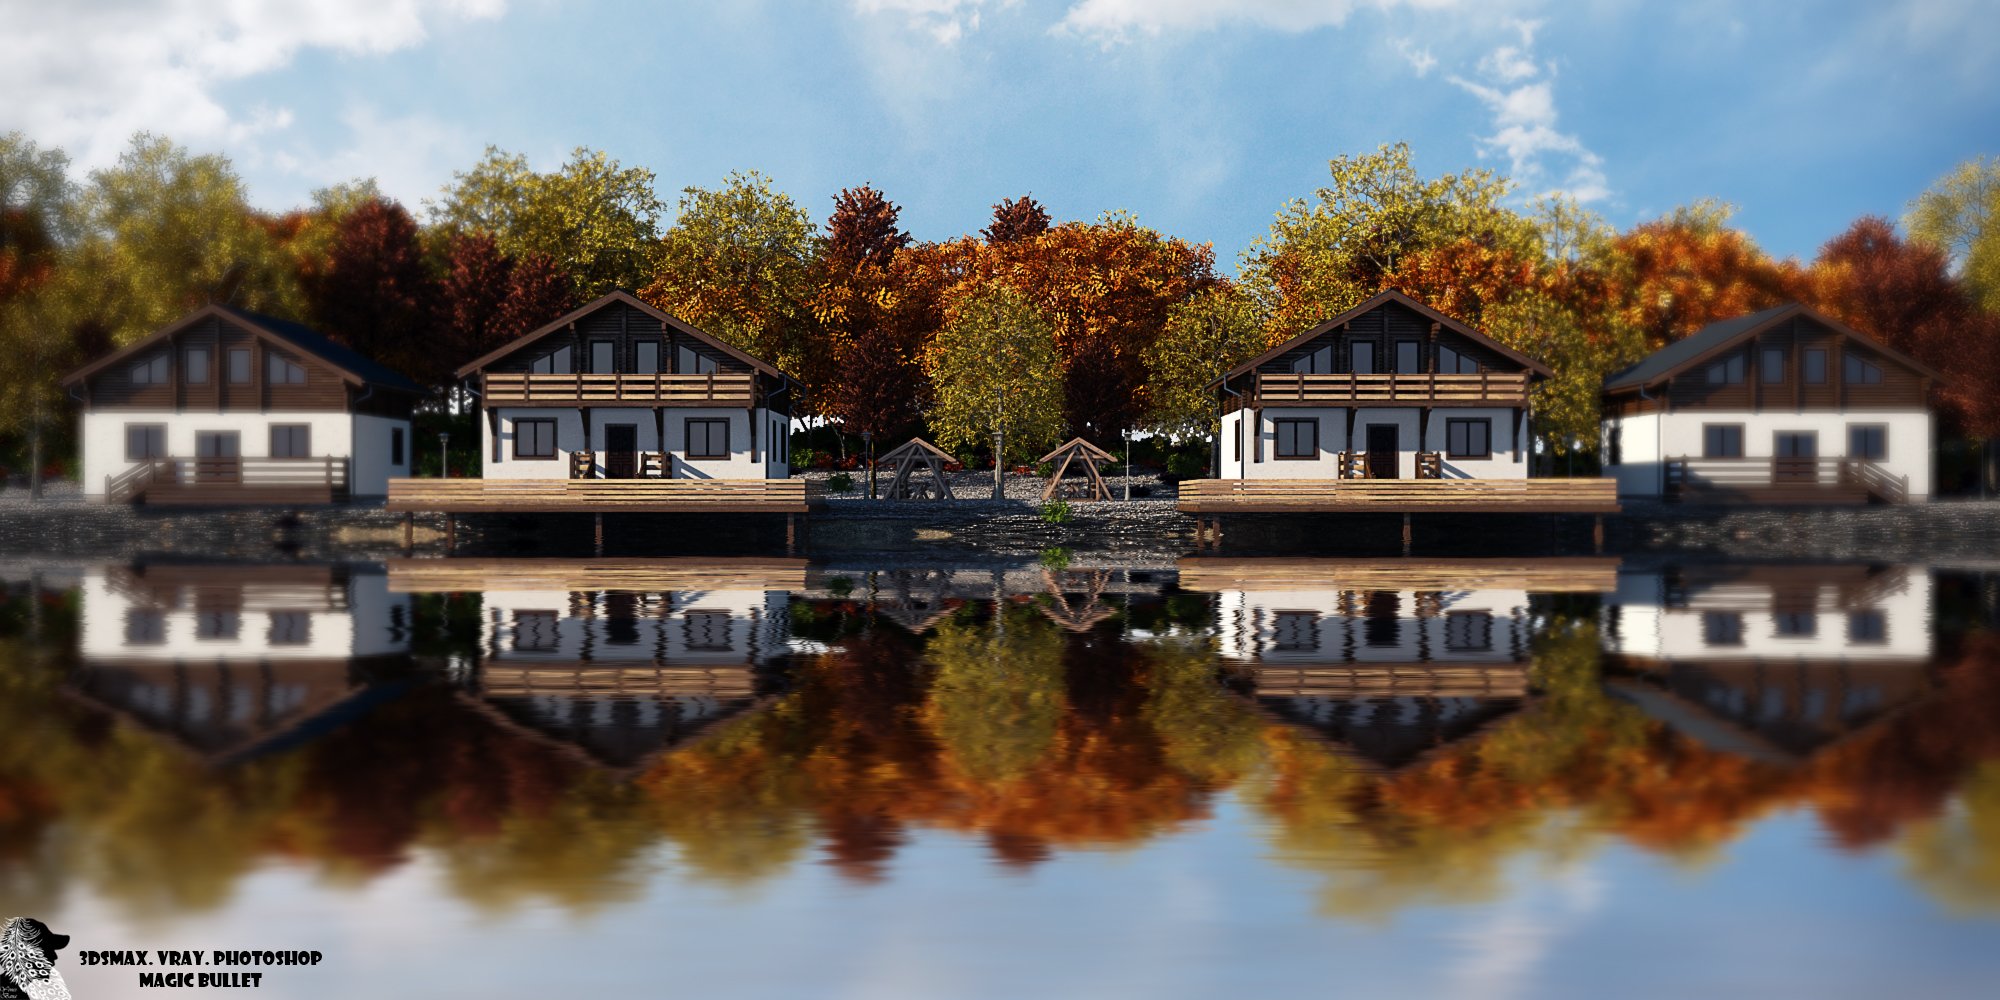
Another version.

I hope you like this tutorial :)

 
Author: Yones Bana Editor: Michal Franczak
Tags: yones
You may also like...
Best free and paid 3d animal models: which to choose for your project?

Best free and paid 3d animal models: which to choose for your project?

When embarking on a new 3D modeling project, selecting the right animal models is more than just a technical decision; it’s about bringing your vision to life while staying within your project's scope and budget.
×

LEAVE A COMMENT

You need to be logged in to leave a comment. Don't have account? Register now.