How To Make Your CGI Walls More Realistic
Realistic walls with noise modifier.
Total: € 0
Continue Shopping
In accordance with the art. 13 section 1 and 2 of the European Parliament and Council Regulation 2016/679 of the 27th April, 2016 on the protection of natural persons, with regard to the processing of personal data and on the free movement of such data, and repealing Directive 95/46/EC (General Data Protection Regulation), hereafter RODO, I hereby inform that:
1. EVERMOTION S.C., 8 Przędzalniana Str., 15-688 Białystok, Poland is the Administrator of your Personal Data (APD)
2. Data Protection Inspector can be reached through e-mail: iod@evermotion.org
3. Your personal data are to be processed on the basis of art. 6 section 1 letter a, b and f of RODO in order to:
a) prepare, conclude and execute the agreement and for other purposes approved by you,
b) to execute the legitimate interest like marketing of products and the agreement, claim assertion or defence against claims resulting from the law regulations.
4. Entities entitled to the reception of your personal data may be the authorised public bodies; mail providers; providers of the services covered by the agreement; responsible for debt recovery, keeping the archives, document utilization, legal consulting, technical services, IT services and accountancy.
5. Your personal data shall not be transferred to the third country, nor to the international bodies.
6. Your personal data shall be processed within the period of the agreement and upon your additional consent until you withdraw it. APD shall keep the data for the period of any civil law claim execution connected with the agreement.
7. You have the right to demand an access to your personal data, to correct or to delete the data if there is no other basis for the processing or any other purpose of such processing or to limit the processing of the data, to transfer the data to another administrator and to raise objections to the further data processing if there is no legal basis for further processing and to withdraw any previous consent.
8. You provide the personal data voluntarily, however they are necessary to conclude the agreement. The refusal of providing such data may result in the refusal of the agreement conclusion.
9. You have the right to lodge a complaint to the Personal Data Protection Office when in your opinion the data processing violates the regulations of General Data Protection Regulation of the 27 April, 2016 (RODO).
10. Your data will be automatically processed, including the form of profiling.
11. You are obligated to forward above mentioned information to your representative, especially if you appointed this person in the agreement as the contact person or as the representative for the agreement execution.


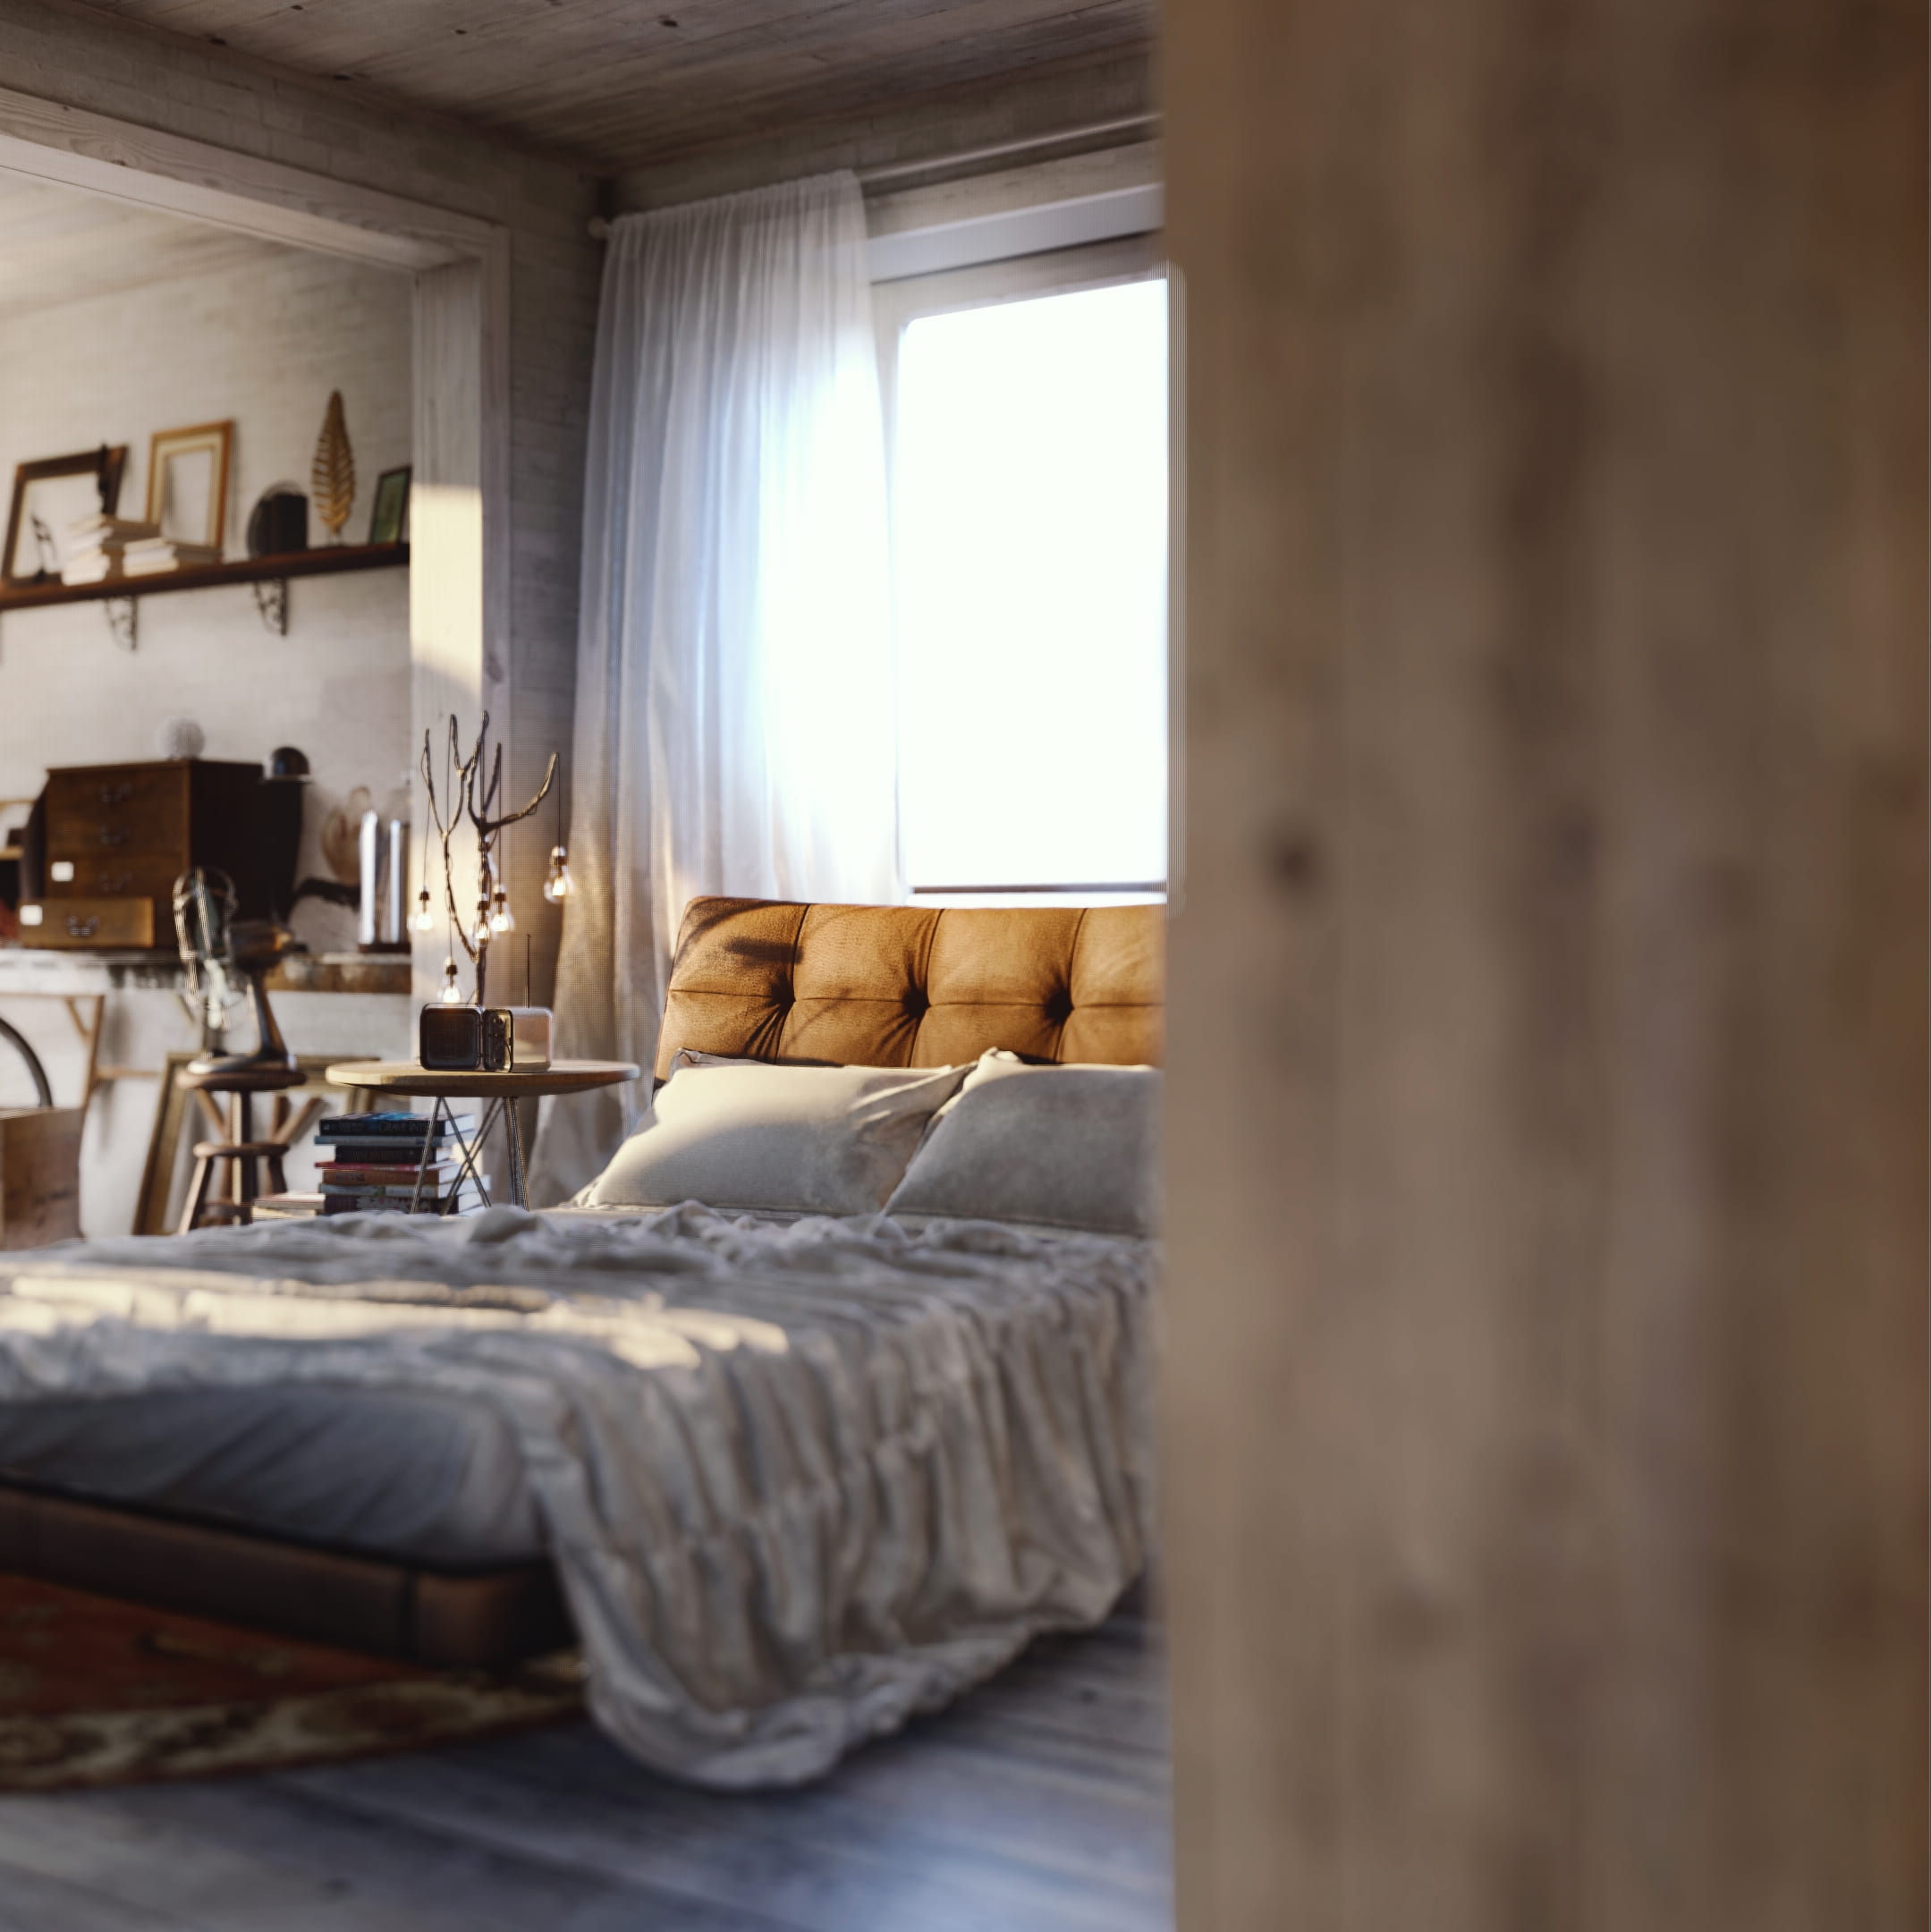
Hi. I am Yones Bana, I am working as an Arch-Viz tutor and co-Founder of Vivid Visual Studio. In this tutorial, I want to show the speed and quality of Lumion 10. For this reason, I used one of the old scenes of Ramon Zancaro to remember him. yes, this is a bedroom, which mix wood and light, rustic walls in the best Scandinavian style.
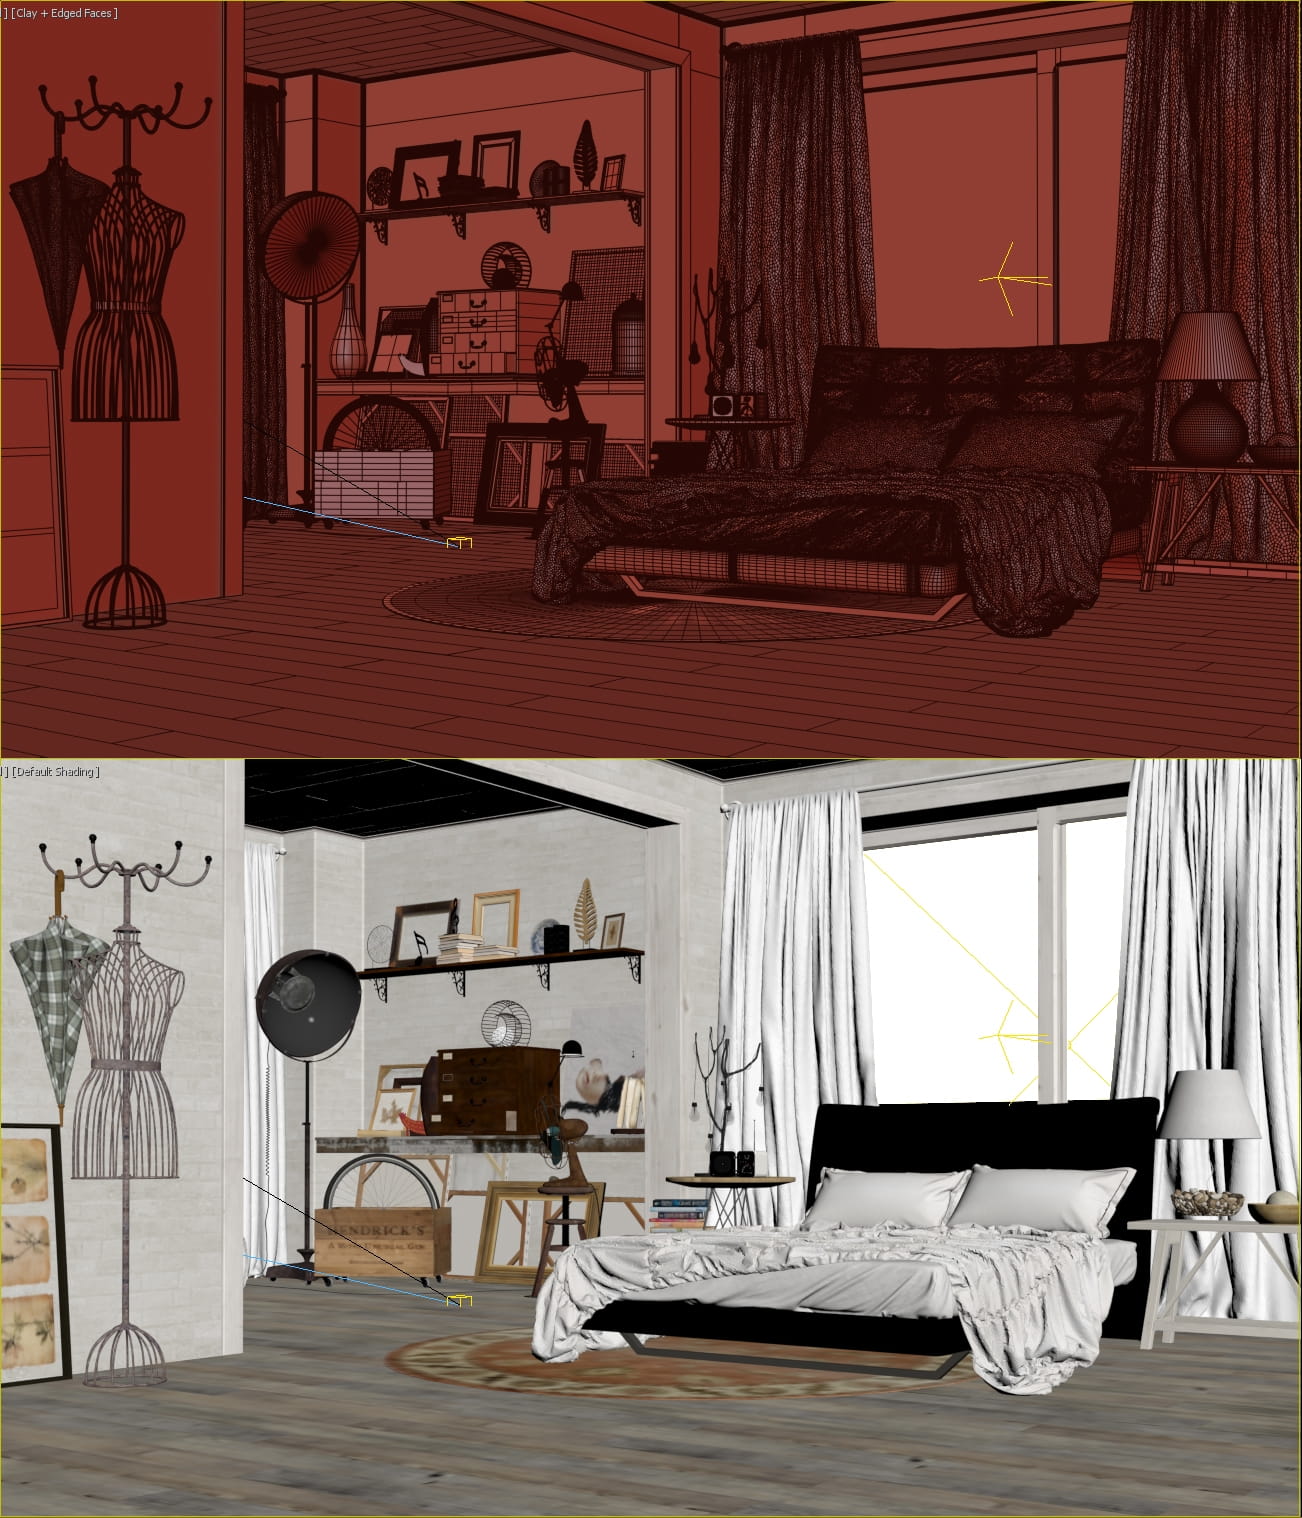
This scene has been prepared in 3ds Max and rendered with V-Ray.
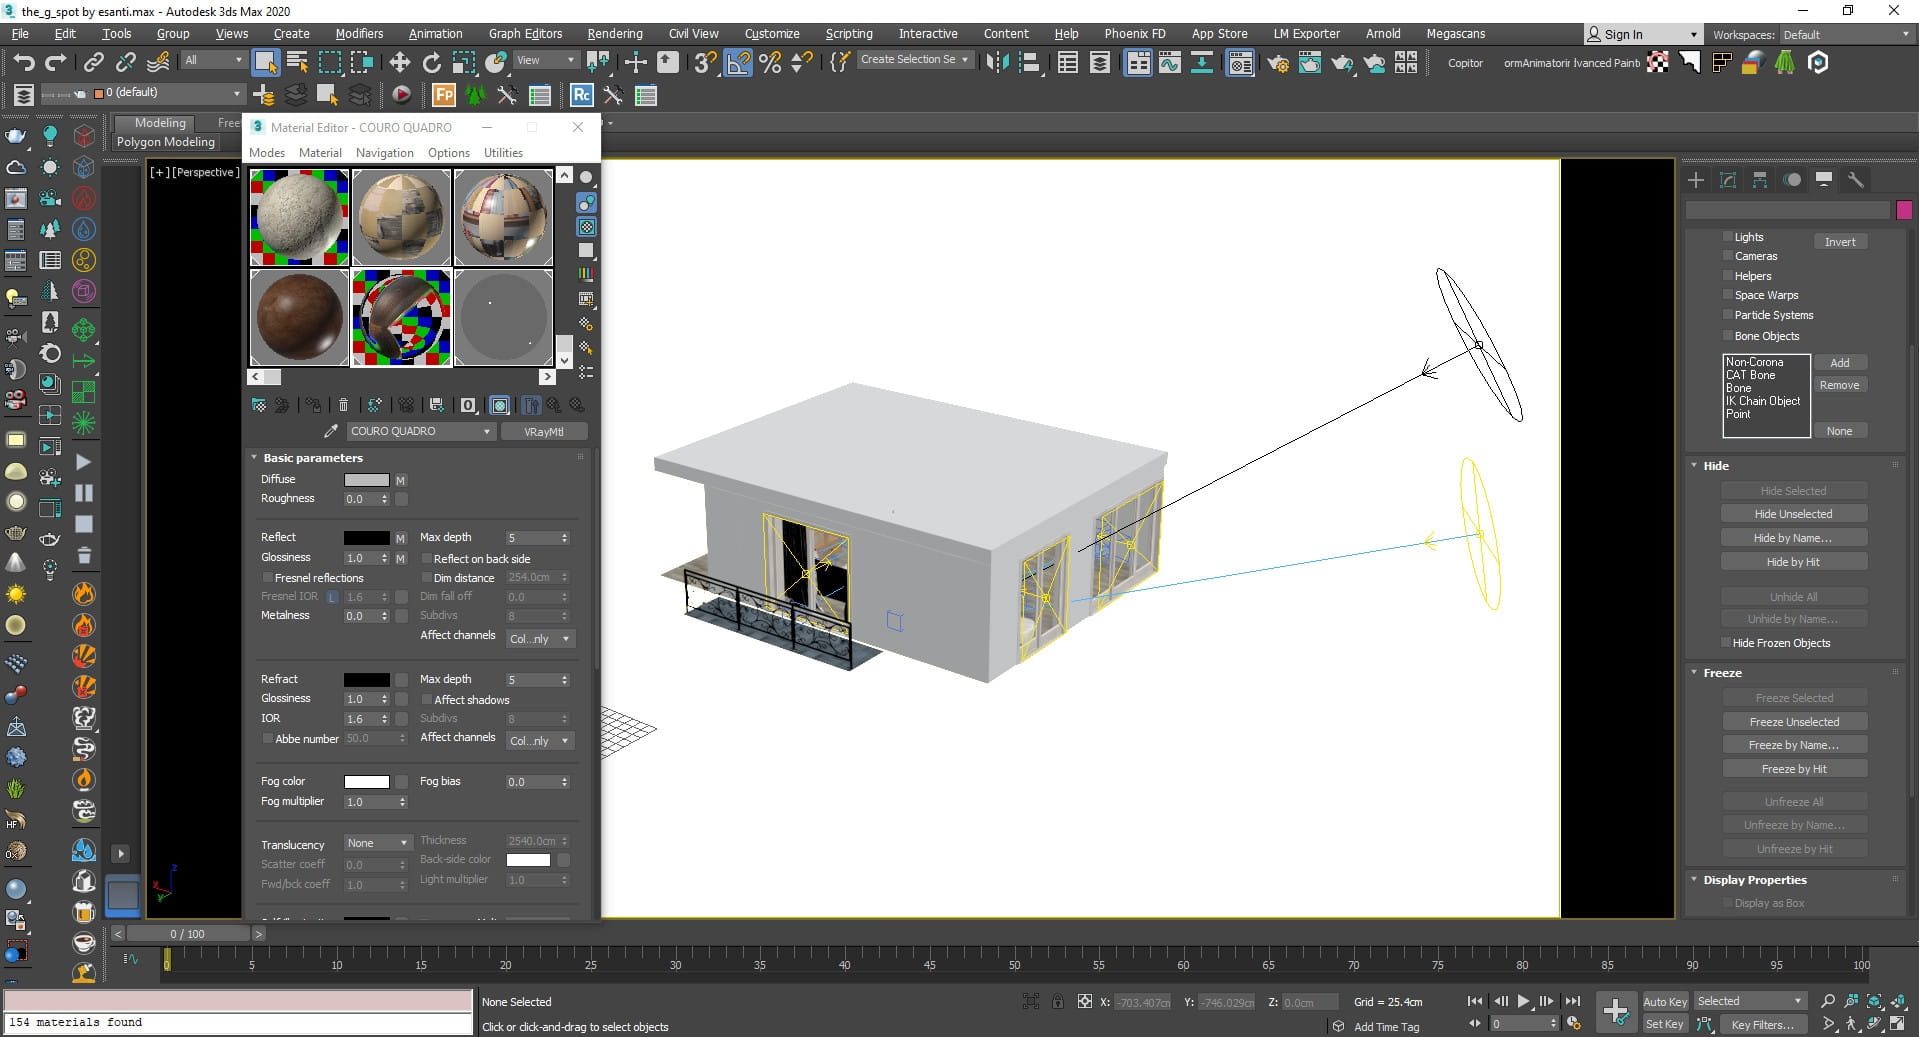
In the first step, we have to prepare the scene for the transfer to Lumion. All models need to have specific material, UVs and other properties, so I suggest to use Lime Exporter tool.
Lime Exporter is a tool that allows users to transfer 3ds max scene to Lumion. It works with Fstorm Render, Corona Render and Vray renderer. You don't need Vray, Corona or Fstorm permanent licenses, it works also with trial versions. It tries to keep the best settings of materials and it also transfers animations from 3ds max to Lumion. A new folder with all maps included in your project will be created and automatically re-linked. As LimeExporter modifies all meshes and all materials in your project, remember to save your work as a new file before using it! After installing this script in Max, you can access it from the LM Exporter menu.

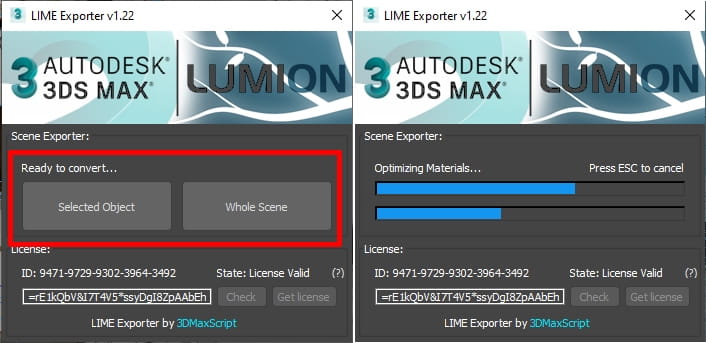
Click on the Selected Object or Whole Scene button for this script.
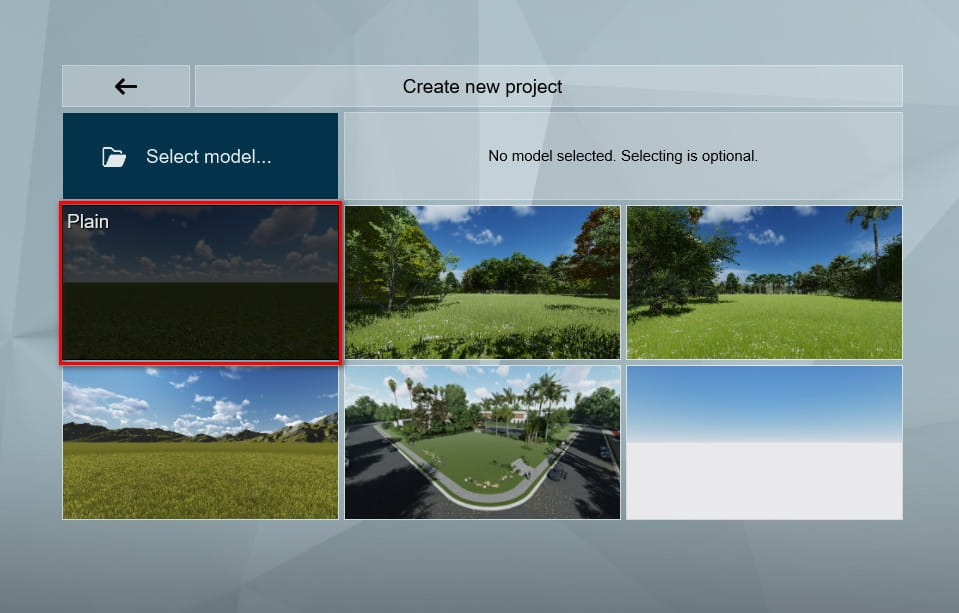
Now it's Lumion time! Just open an Plain scene in Lumion.
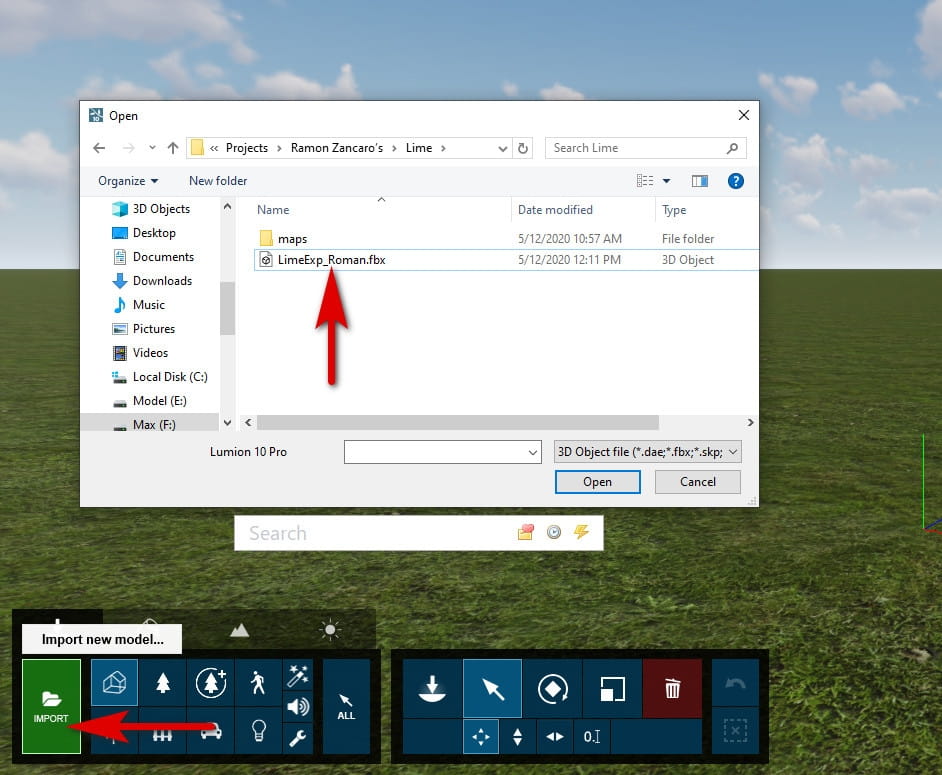
Click on Import new model button and select the FBX file generated by LIM Exporter.
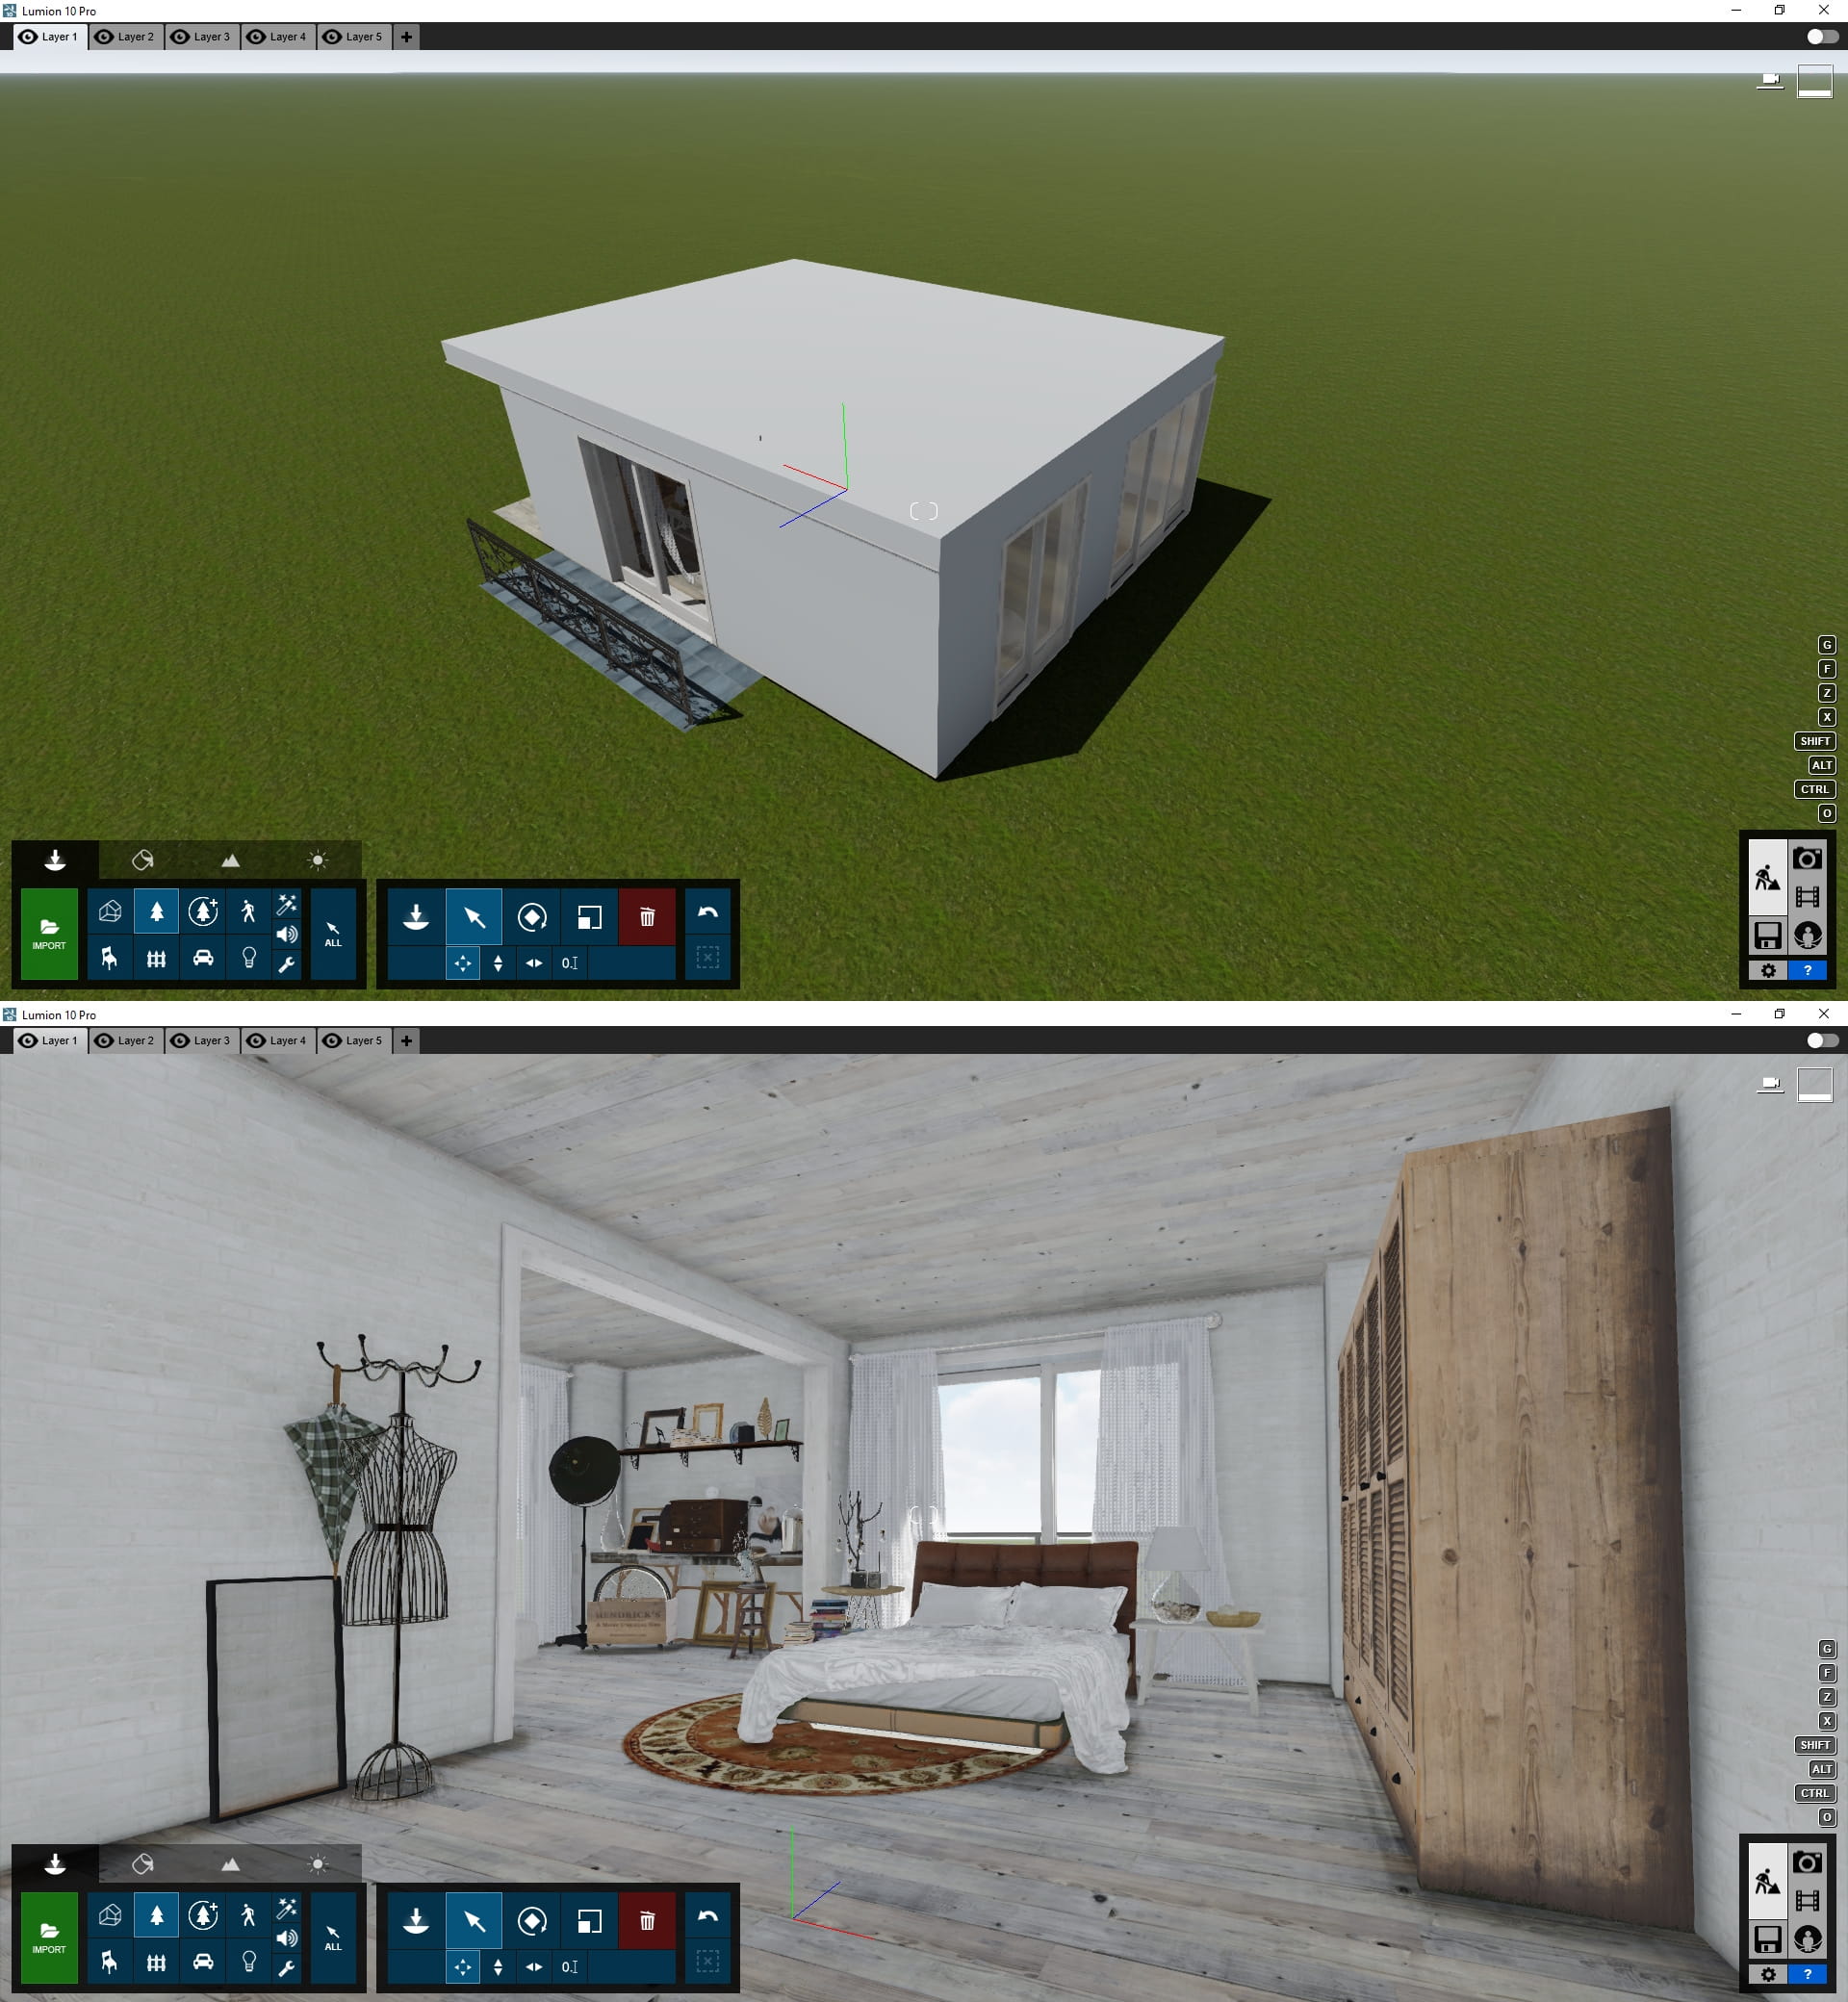
As you can see, the scene with all models and textures was transferred to Lumion.

One of the most important things to keep in mind when importing a model to Lumion is a proper control of materials. Be aware that after exporting you will have all textures set, but you will still to manually set Reflectivity, Glossiness, Bump, Weathering and Transparency.

Finally, in the photo section, you can record the angles you want and use desired effects to achieve the desired result.
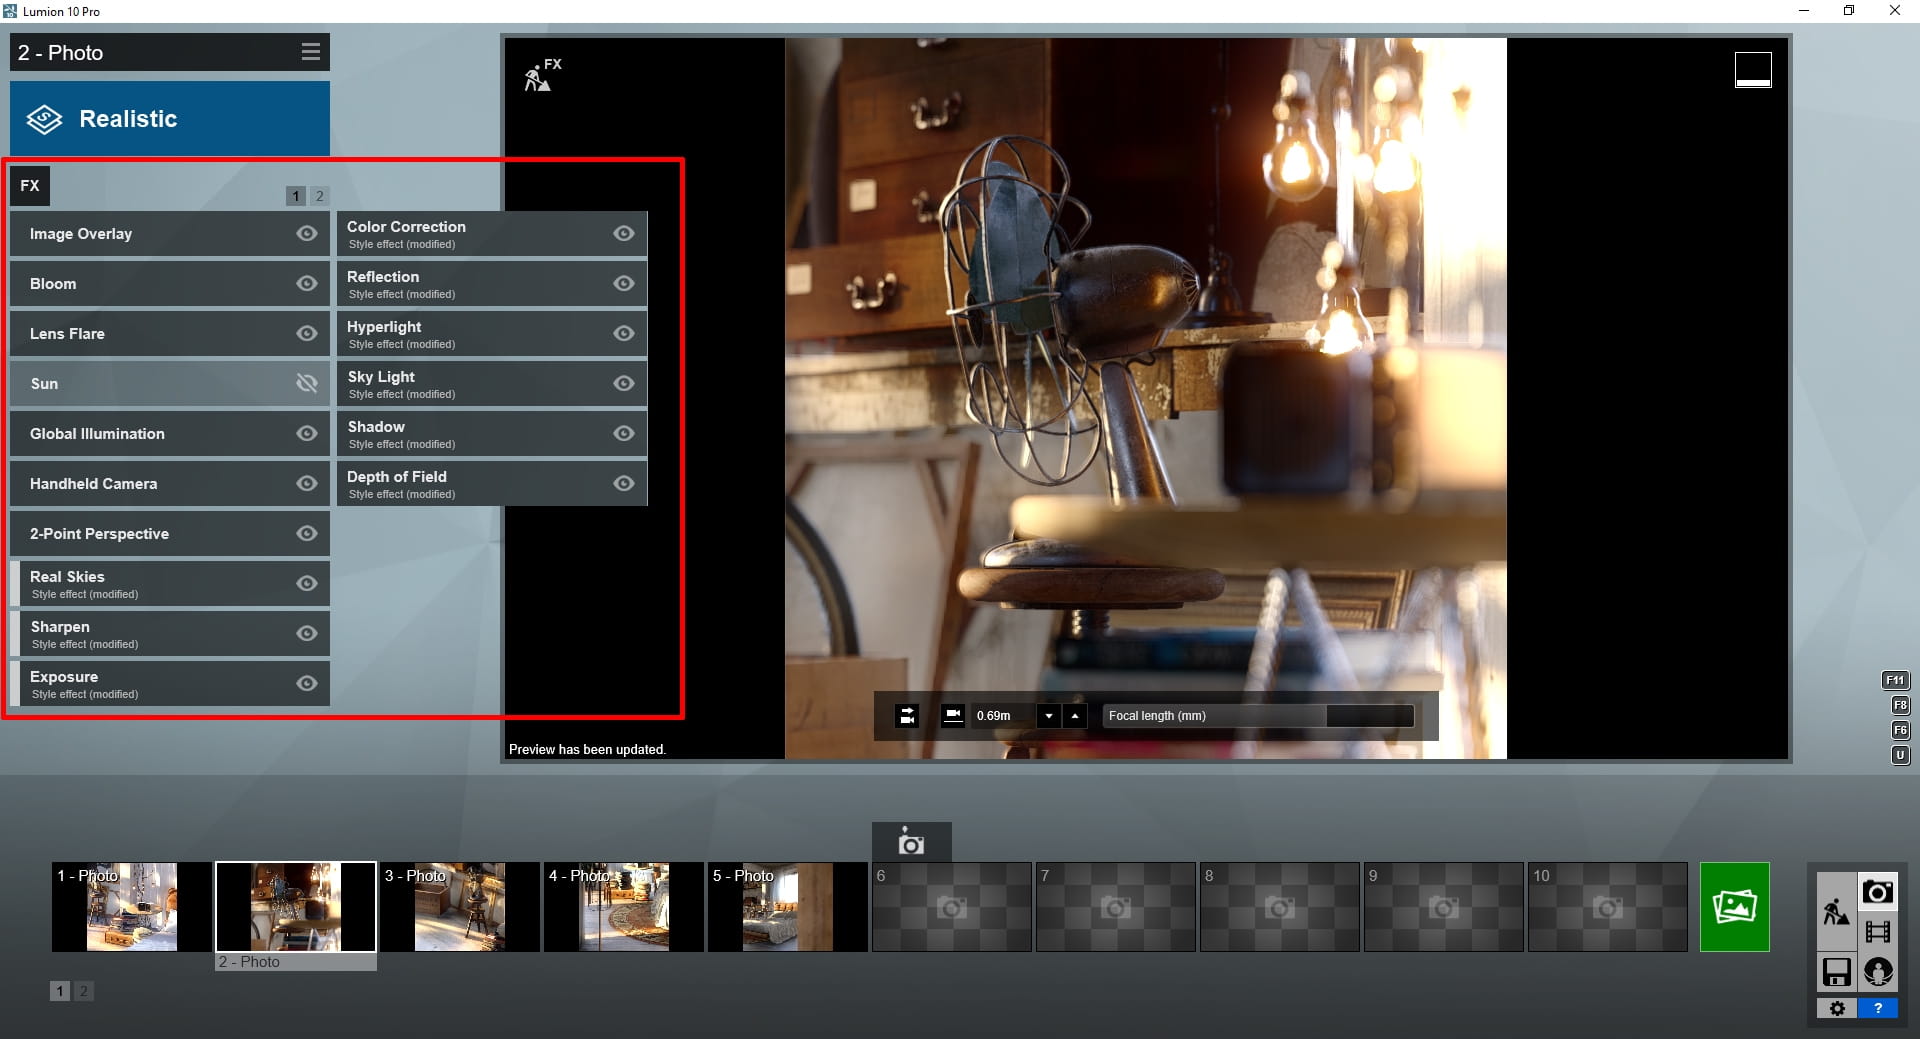
For example, in the image above, you can see all the effects used in this shot.
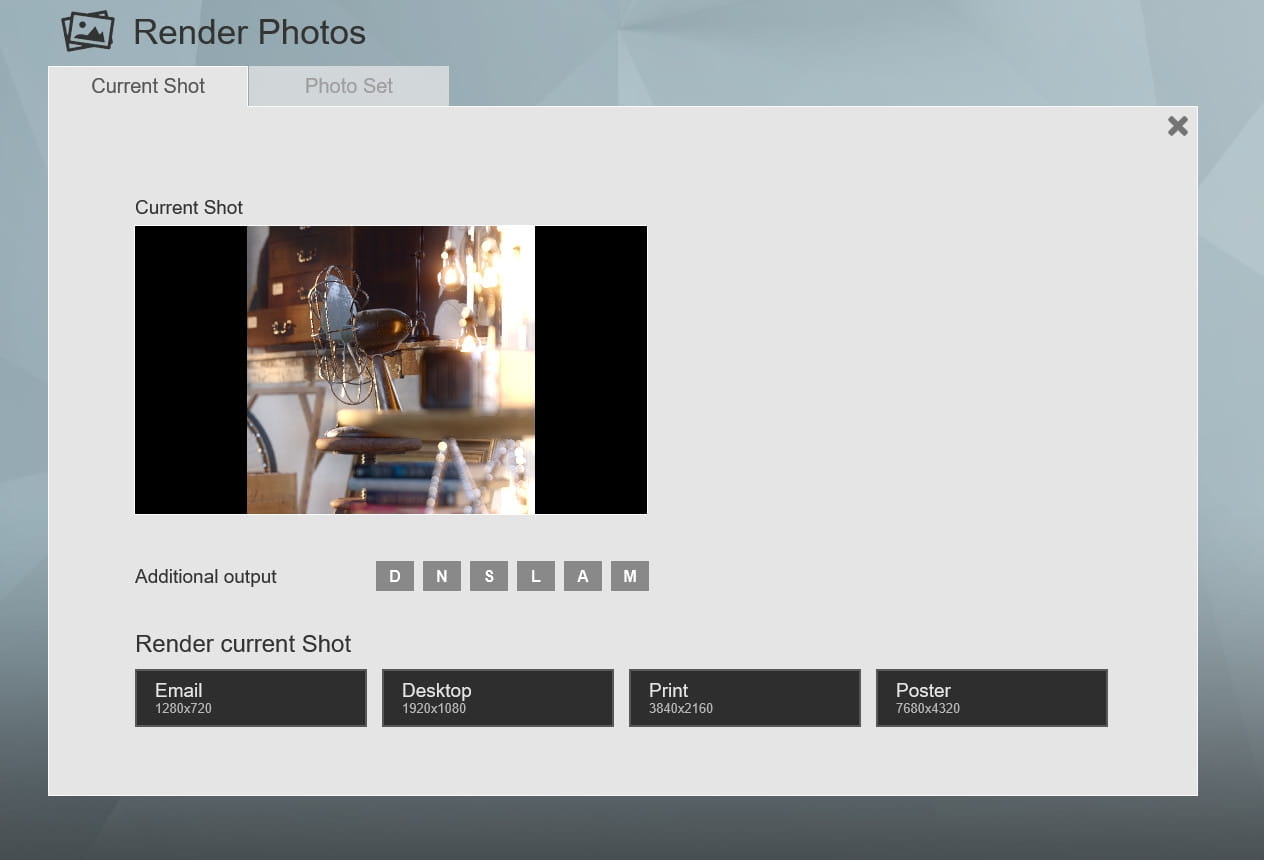
All these steps are very easy and fast and can be performed like a game in Lumion. Just click on render button and select your render size.
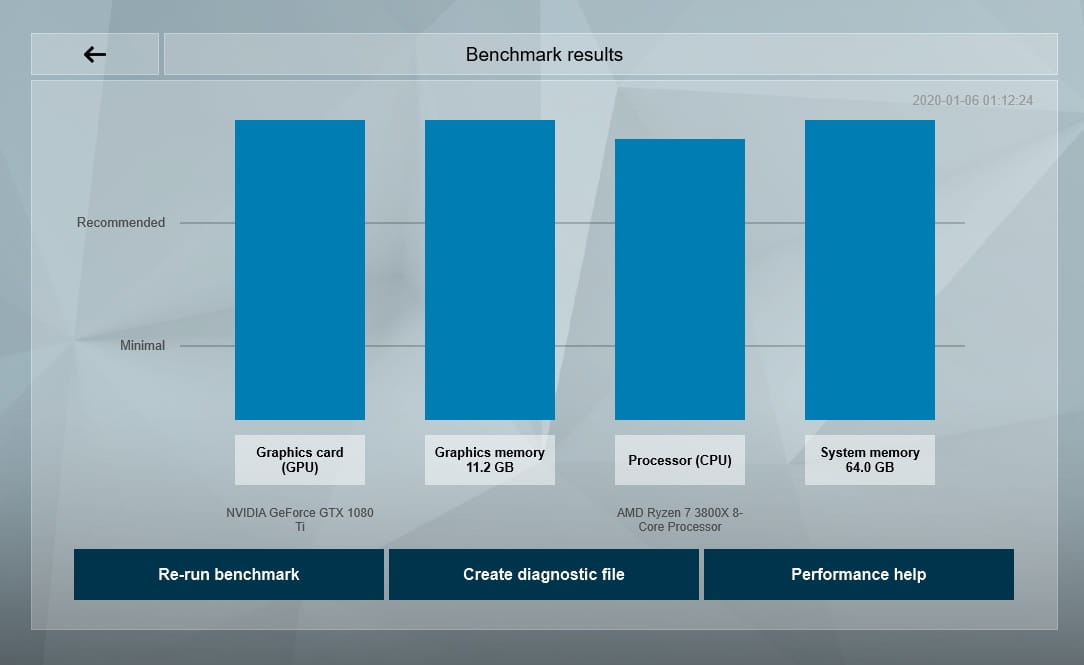
If you want to know the specifications of my computer, you can see it in the image above, which is the result of Lumion's own benchmark.
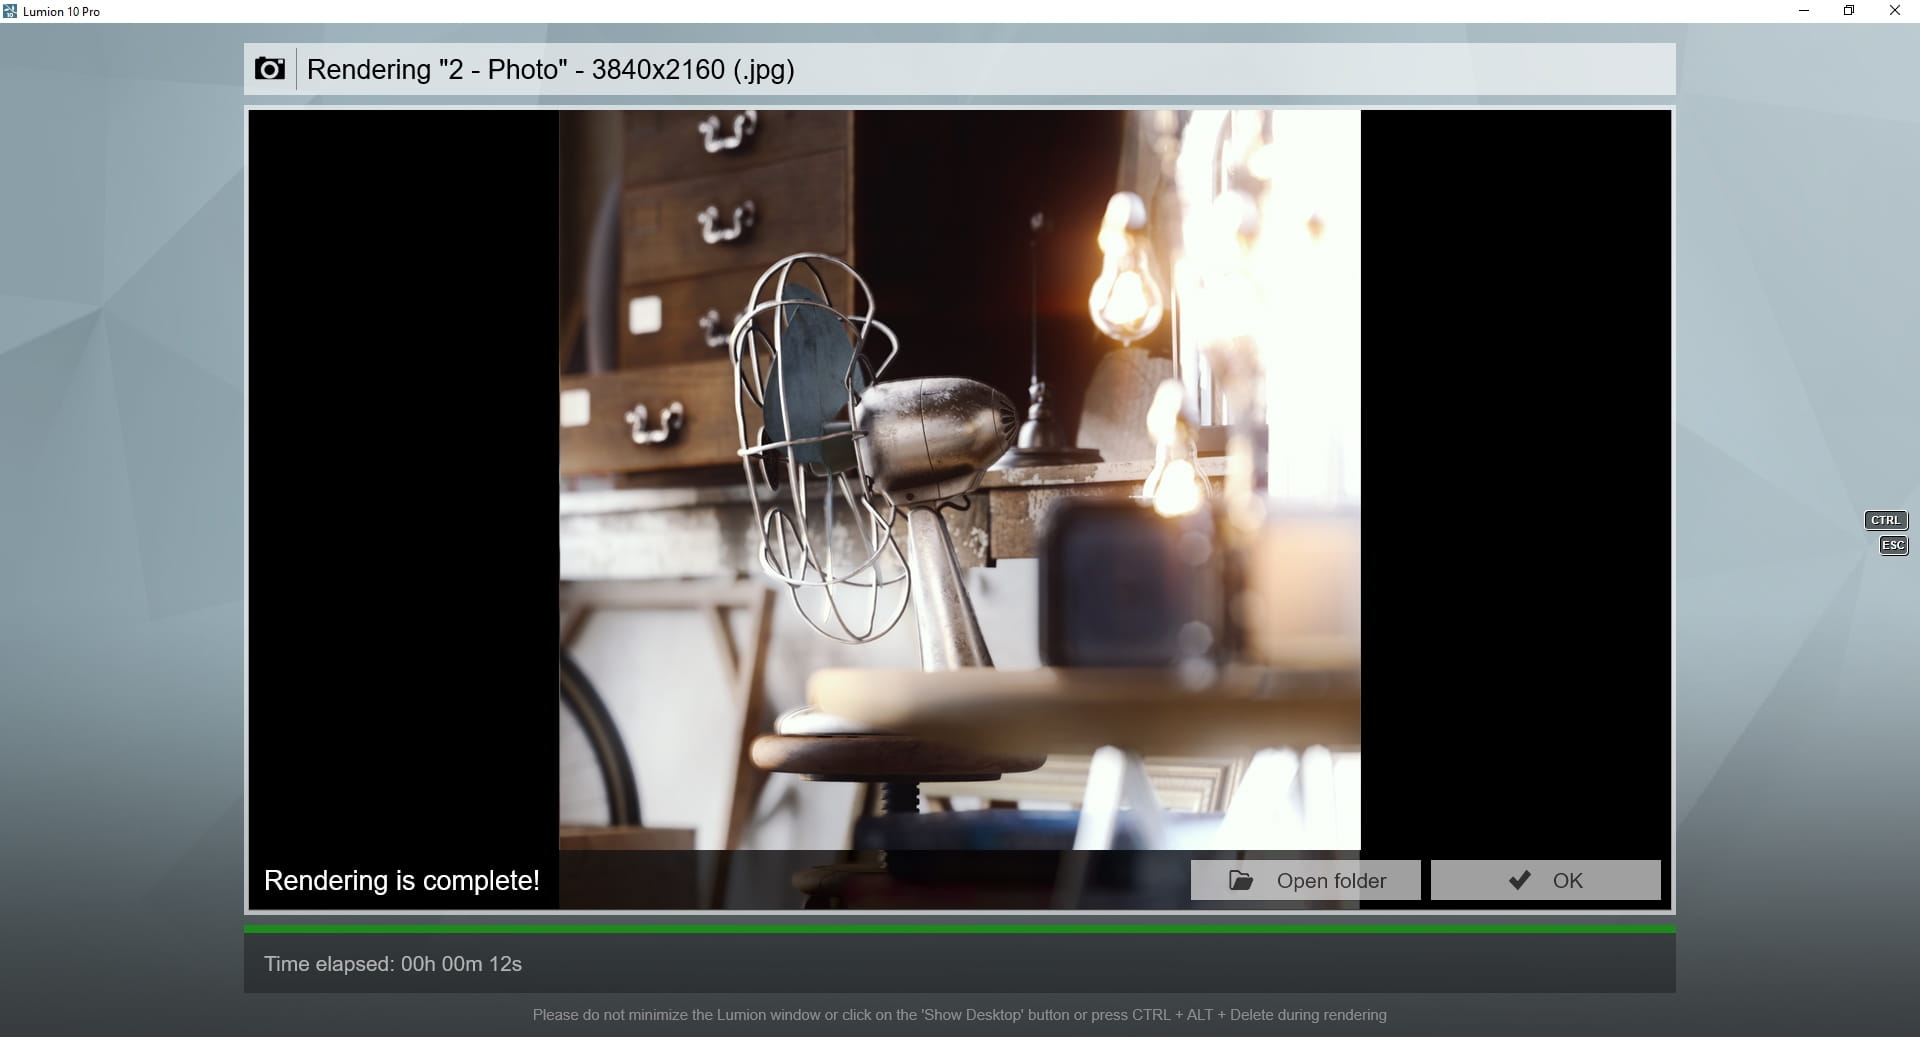
A rendering with dimensions of 3840 x 2160 is made in 12 seconds!
And finally, let me tell you that you don't even need to post production your images in other software, almost everything you need can be done in Lumion itself.
Final renders:


Thank you for reading this article. I suggest if you work in Archviz and have no experience working with Lumion, be sure to include it in your plan.


LEAVE A COMMENT


|

|

|

|

|
 Customer zone
 Your special offers
 Your orders
 Edit account
 Add project
 Liked projects
 View your artist profile
COMMENTS