Removing LUTs from Textures for better results
Remove the LUT from a specific texture in order to get perfect looking textures in your render.
Total: € 0
Continue Shopping
In accordance with the art. 13 section 1 and 2 of the European Parliament and Council Regulation 2016/679 of the 27th April, 2016 on the protection of natural persons, with regard to the processing of personal data and on the free movement of such data, and repealing Directive 95/46/EC (General Data Protection Regulation), hereafter RODO, I hereby inform that:
1. EVERMOTION S.C., 8 Przędzalniana Str., 15-688 Białystok, Poland is the Administrator of your Personal Data (APD)
2. Data Protection Inspector can be reached through e-mail: iod@evermotion.org
3. Your personal data are to be processed on the basis of art. 6 section 1 letter a, b and f of RODO in order to:
a) prepare, conclude and execute the agreement and for other purposes approved by you,
b) to execute the legitimate interest like marketing of products and the agreement, claim assertion or defence against claims resulting from the law regulations.
4. Entities entitled to the reception of your personal data may be the authorised public bodies; mail providers; providers of the services covered by the agreement; responsible for debt recovery, keeping the archives, document utilization, legal consulting, technical services, IT services and accountancy.
5. Your personal data shall not be transferred to the third country, nor to the international bodies.
6. Your personal data shall be processed within the period of the agreement and upon your additional consent until you withdraw it. APD shall keep the data for the period of any civil law claim execution connected with the agreement.
7. You have the right to demand an access to your personal data, to correct or to delete the data if there is no other basis for the processing or any other purpose of such processing or to limit the processing of the data, to transfer the data to another administrator and to raise objections to the further data processing if there is no legal basis for further processing and to withdraw any previous consent.
8. You provide the personal data voluntarily, however they are necessary to conclude the agreement. The refusal of providing such data may result in the refusal of the agreement conclusion.
9. You have the right to lodge a complaint to the Personal Data Protection Office when in your opinion the data processing violates the regulations of General Data Protection Regulation of the 27 April, 2016 (RODO).
10. Your data will be automatically processed, including the form of profiling.
11. You are obligated to forward above mentioned information to your representative, especially if you appointed this person in the agreement as the contact person or as the representative for the agreement execution.


At first I'd like to thank the VRay Workshop team and Evermotion for their recognition of my work. It's a great opportunity and honor as a young visualization artist to be recognized among other talented individuals in the Image of the Week selection.
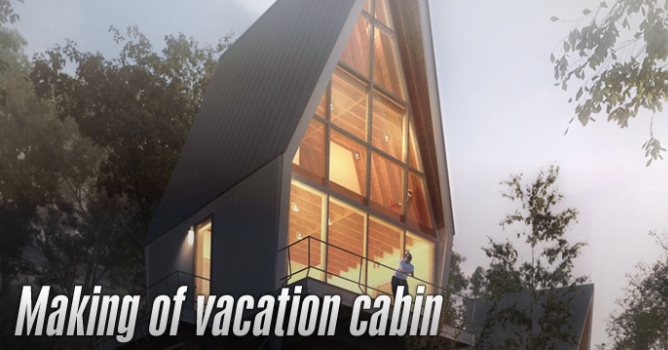
The image I will be sharing some information about was a quick commission done for Jacob Brillhart Architect over the course of a long weekend. The project was a part of a proposal for a series of vacation cabins located in the mountains of North Carolina. As an artist with an architectural background, I feel inclined to mention that good design will tend to yield a good image, and I think it is no different in this case.
The modeling, texturing and lighting schemes for this image are rather straightforward processes, whereas the post-production is where I feel I can get an image to really shine.
Final work:


The modeling process was rather straightforward - I received a cleanly built and fairly detailed Sketchup model of the cabin, which only required some detailing in areas such as the standing seam roof, tweaks to the design of the stilts.

The environment was the biggest obstacle in creating a convincing base plate. I used a large plane and push/pull and relax deformation tools to create the general mountainside landscaping.

Once modelled, I divided the mesh into two areas: a closeup patch for Multipainter, and the landscape where I could implement some non-specific vegetation scatters.

I didn't model vegetaion, I used ready vegetation models. After researching references of mountainside locations, it seemed only really necessary to scatter taller models, and leave the ground plane to be more or less textured with a convincing leaf texture. This kept the model and rendering relatively light and manageable with rendertimes.
 Settings used for scattering. In general, the more unique shaped trees were used at lower probabilities. 6 different Multiscatters were set up for this scene (3 sets of 2 per model type):
Large rocks were brought in from a project I completed earlier and were created using techniques outlined by an excellent tutorial by Sascha Henrichs. They were hand placed in the scene to get the desired look.


Ground plane


Mapped using a box map, and randomly shifted/rotated per beam to give variation to the structure.


Lighting - Interior lights were a compination of simple Vray Plane Lights with Vray Mesh Lights at the light fixtures hanging from the ceilings.


A few camera positions were explored before settling on the final composition. During this exploration, each cabin unit was also oriented in slightly different directions to create a bit more visual interest to the image. A couple of back and forth discussions with the client resulted in the final shot. Here are some initial camera views, along with the final composition.


There are some simple compositional guidelines that are used in this image. I tried to create visual movement through the repetition of units within the composition denoted by the red marks. As the eye is guided from the upper left to the bottom right from unit to unit, foreground to background, the visual movement in the image is capped along the right-hand side by a (somewhat flimsy) repoussoir element. The subjects of the image (the cabin, and arguably the boy) are horizontally placed roughly using the rule of thirds, denoted in the cyan.

Gamma settings. I do not use a 2.2 gamma correction through the 3DS Max Preferences menu, as it is a superficial gamma adjustment. Rather, I apply the gamma correction through the Vray Color Mapping menu. When done this way, the resulting rendering is more accurately calculated by Vray, particularly in low-light situations.

The Post-production process typically takes place in three stages for me: 32-bit – where I adjust specific lighting elements. I then apply a a slight Magic Bullet filter. In this case I brought the image into After Effects so I could comp in the zdepth and maintain a 32-bit format for the Magic Bullet filter. The image is then collapsed into an 8-bit format so I can composite 2d elements and color correct. Here is a video showing some of this process:
I hope this tutorial was helpful, and shed some light onto a bit of the process.
Seiji Anderson.


LEAVE A COMMENT


|

|

|

|

|
 Customer zone
 Your special offers
 Your orders
 Edit account
 Add project
 Liked projects
 View your artist profile
COMMENTS