How To Make Your CGI Walls More Realistic
Realistic walls with noise modifier.


Total: € 0
Continue Shopping
In accordance with the art. 13 section 1 and 2 of the European Parliament and Council Regulation 2016/679 of the 27th April, 2016 on the protection of natural persons, with regard to the processing of personal data and on the free movement of such data, and repealing Directive 95/46/EC (General Data Protection Regulation), hereafter RODO, I hereby inform that:
1. EVERMOTION S.C., 8 Przędzalniana Str., 15-688 Białystok, Poland is the Administrator of your Personal Data (APD)
2. Data Protection Inspector can be reached through e-mail: iod@evermotion.org
3. Your personal data are to be processed on the basis of art. 6 section 1 letter a, b and f of RODO in order to:
a) prepare, conclude and execute the agreement and for other purposes approved by you,
b) to execute the legitimate interest like marketing of products and the agreement, claim assertion or defence against claims resulting from the law regulations.
4. Entities entitled to the reception of your personal data may be the authorised public bodies; mail providers; providers of the services covered by the agreement; responsible for debt recovery, keeping the archives, document utilization, legal consulting, technical services, IT services and accountancy.
5. Your personal data shall not be transferred to the third country, nor to the international bodies.
6. Your personal data shall be processed within the period of the agreement and upon your additional consent until you withdraw it. APD shall keep the data for the period of any civil law claim execution connected with the agreement.
7. You have the right to demand an access to your personal data, to correct or to delete the data if there is no other basis for the processing or any other purpose of such processing or to limit the processing of the data, to transfer the data to another administrator and to raise objections to the further data processing if there is no legal basis for further processing and to withdraw any previous consent.
8. You provide the personal data voluntarily, however they are necessary to conclude the agreement. The refusal of providing such data may result in the refusal of the agreement conclusion.
9. You have the right to lodge a complaint to the Personal Data Protection Office when in your opinion the data processing violates the regulations of General Data Protection Regulation of the 27 April, 2016 (RODO).
10. Your data will be automatically processed, including the form of profiling.
11. You are obligated to forward above mentioned information to your representative, especially if you appointed this person in the agreement as the contact person or as the representative for the agreement execution.

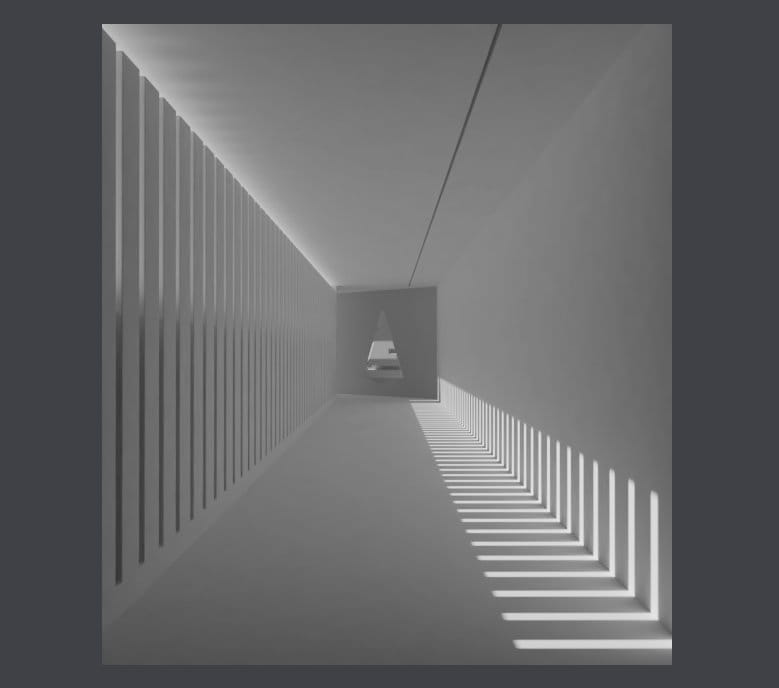
Today I am gonna show you how I created the animation BRUTALISM 101. It's industrial / minimal / ambient / psychodelic look at Akira Sakamoto Architect & Associates corridor. It is a simple proof-of-concept visualization that was made with my music band in mind (shameless self-promo: check Red Emprez on Spotify if you like synthwave). I play live occasionally so it was a nice idea to have some visualizations during the concert.
But why use Unreal Engine and not some path-tracing offline renderer?
The first reason: the speed. This animation contains almost 2000 frames and it rendered about 3-4 minutes in Unreal Engine. It would render for many hours in Cycles or any other offline renderer. As I am doing it as a hobbyst and I don't have hundreds of processing cores, it was obvious that if I want to make many animations and learn from them, I need a game engine.
The second reason: game engines have many tricks that could be very hard to implement traditional way. I am talking about interesting volumetrics, particle systems working in realtime, animated materials, game logic that can be used in animations, etc.
The third reason: game engine rendering quality is becoming higher at a very fast pace. Game engines have a bright future in movie industry, look at the works of Oats Studios: check out "The Book of the Dead" or "Adam" series for Unity or latest "Star Wars" elevator cutscene made in Unreal. They look great!
And last but not least: I could use Unreal or Unity, I choosed Unreal because I had access to GPU lightbaking, which means that it renders pretty fast.
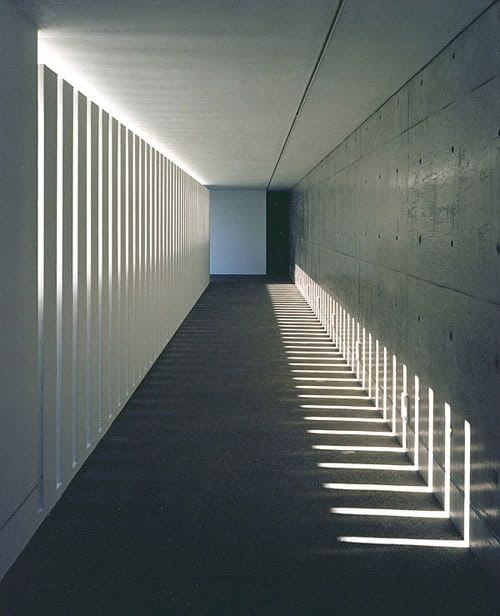
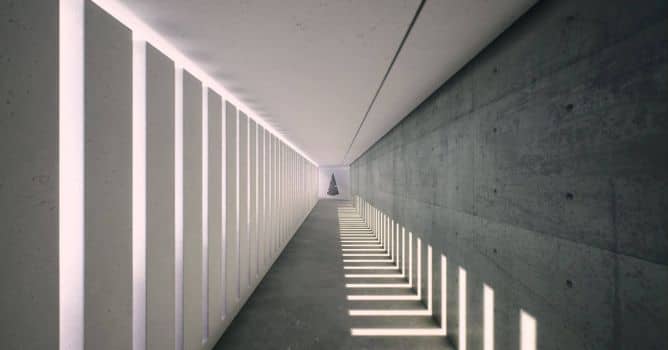
That is my reference. I like the raw, yet elegant look of this corridor and the way it is lit. Interior was modeled and unwrapped in Blender, but it consists of very simple meshes that could be created in any 3d application.
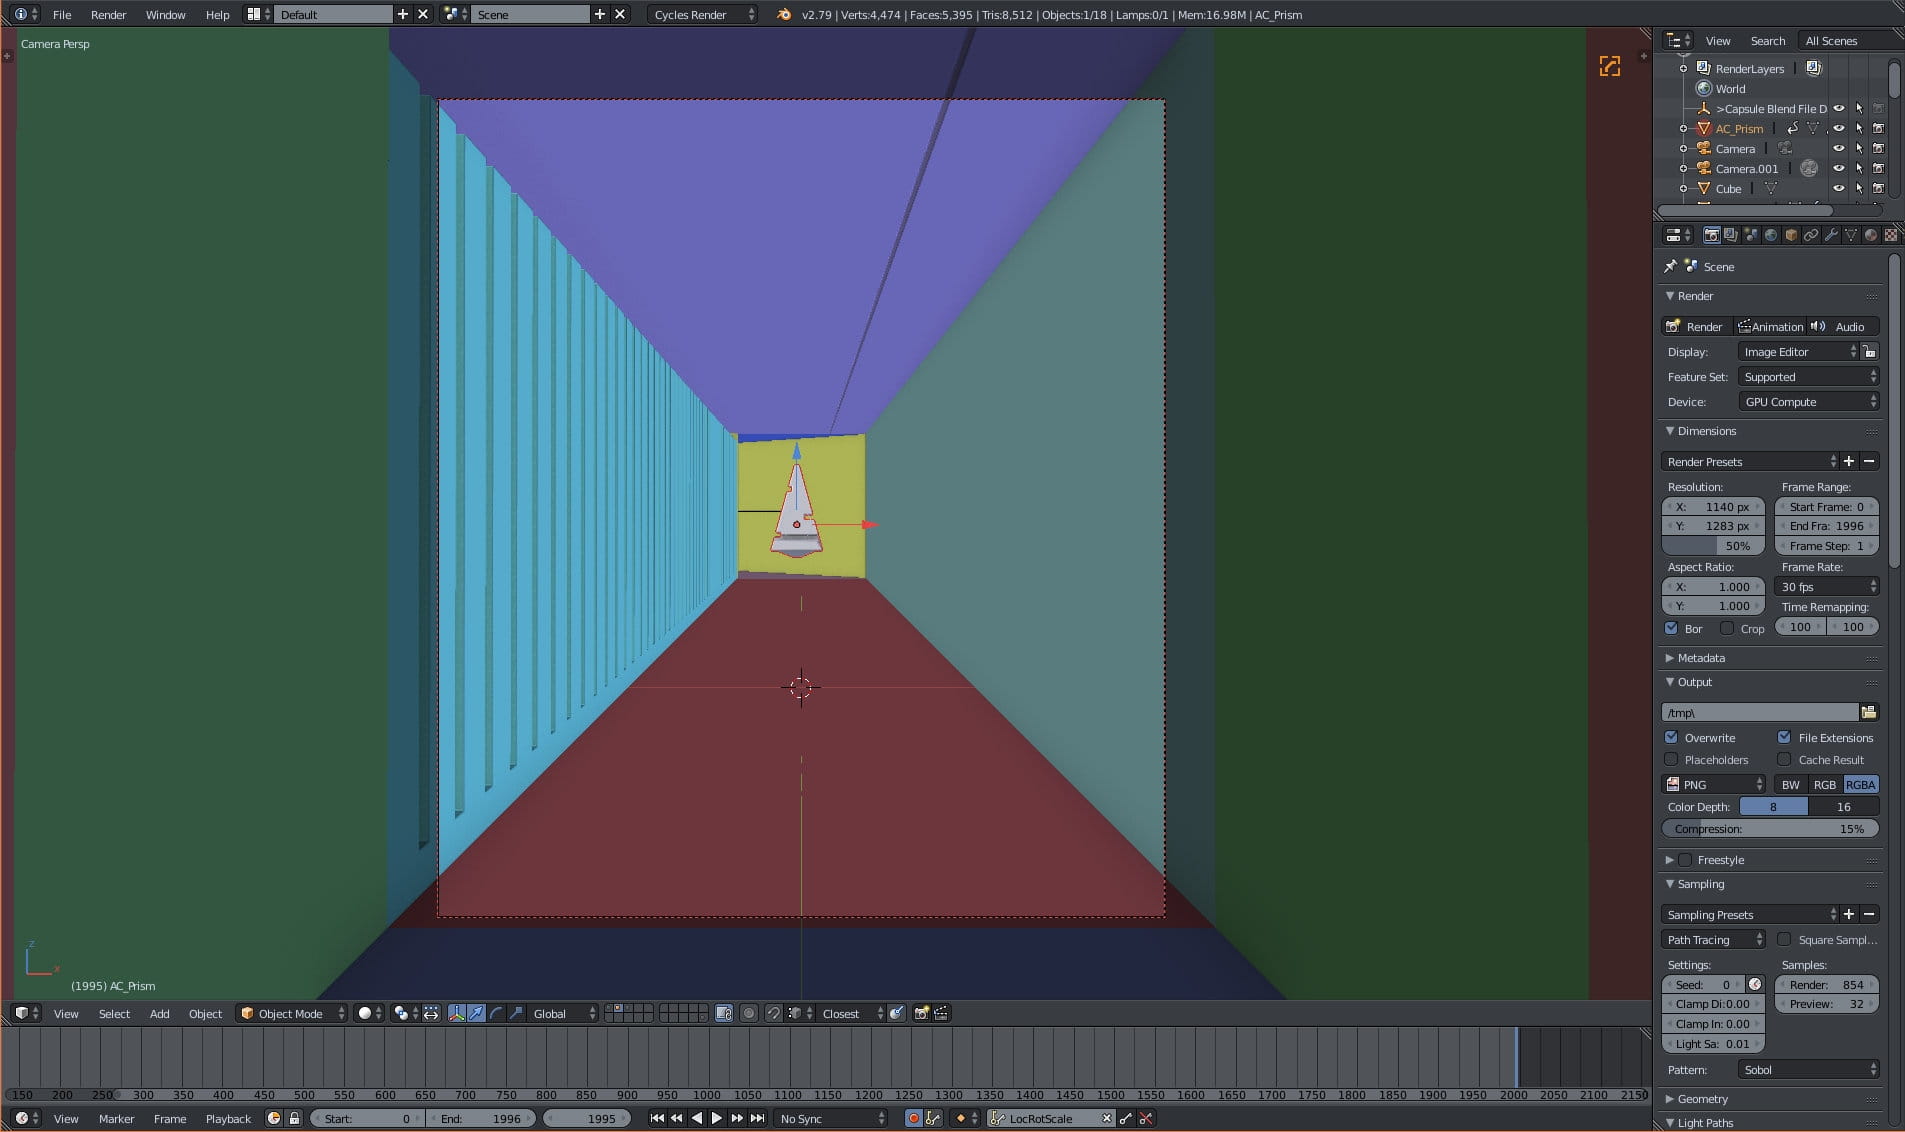
This is a view from camera in Blender. Meshes have distinct colors - these are material colors. When I prepare my meshes for exporting, I like to see if I have assigned all materials correctly. This view gives me instant feedback.
So, what is my process of creating a mesh for Unreal Engine?
First, I quickly create my corridor from a single cube, then I add details (in this case it was only the wall on the left that had to be removed and replaced with white pillars. Then I add thickness to my meshes (with Solidify modifier) and separate them. The rest of the process for each mesh:

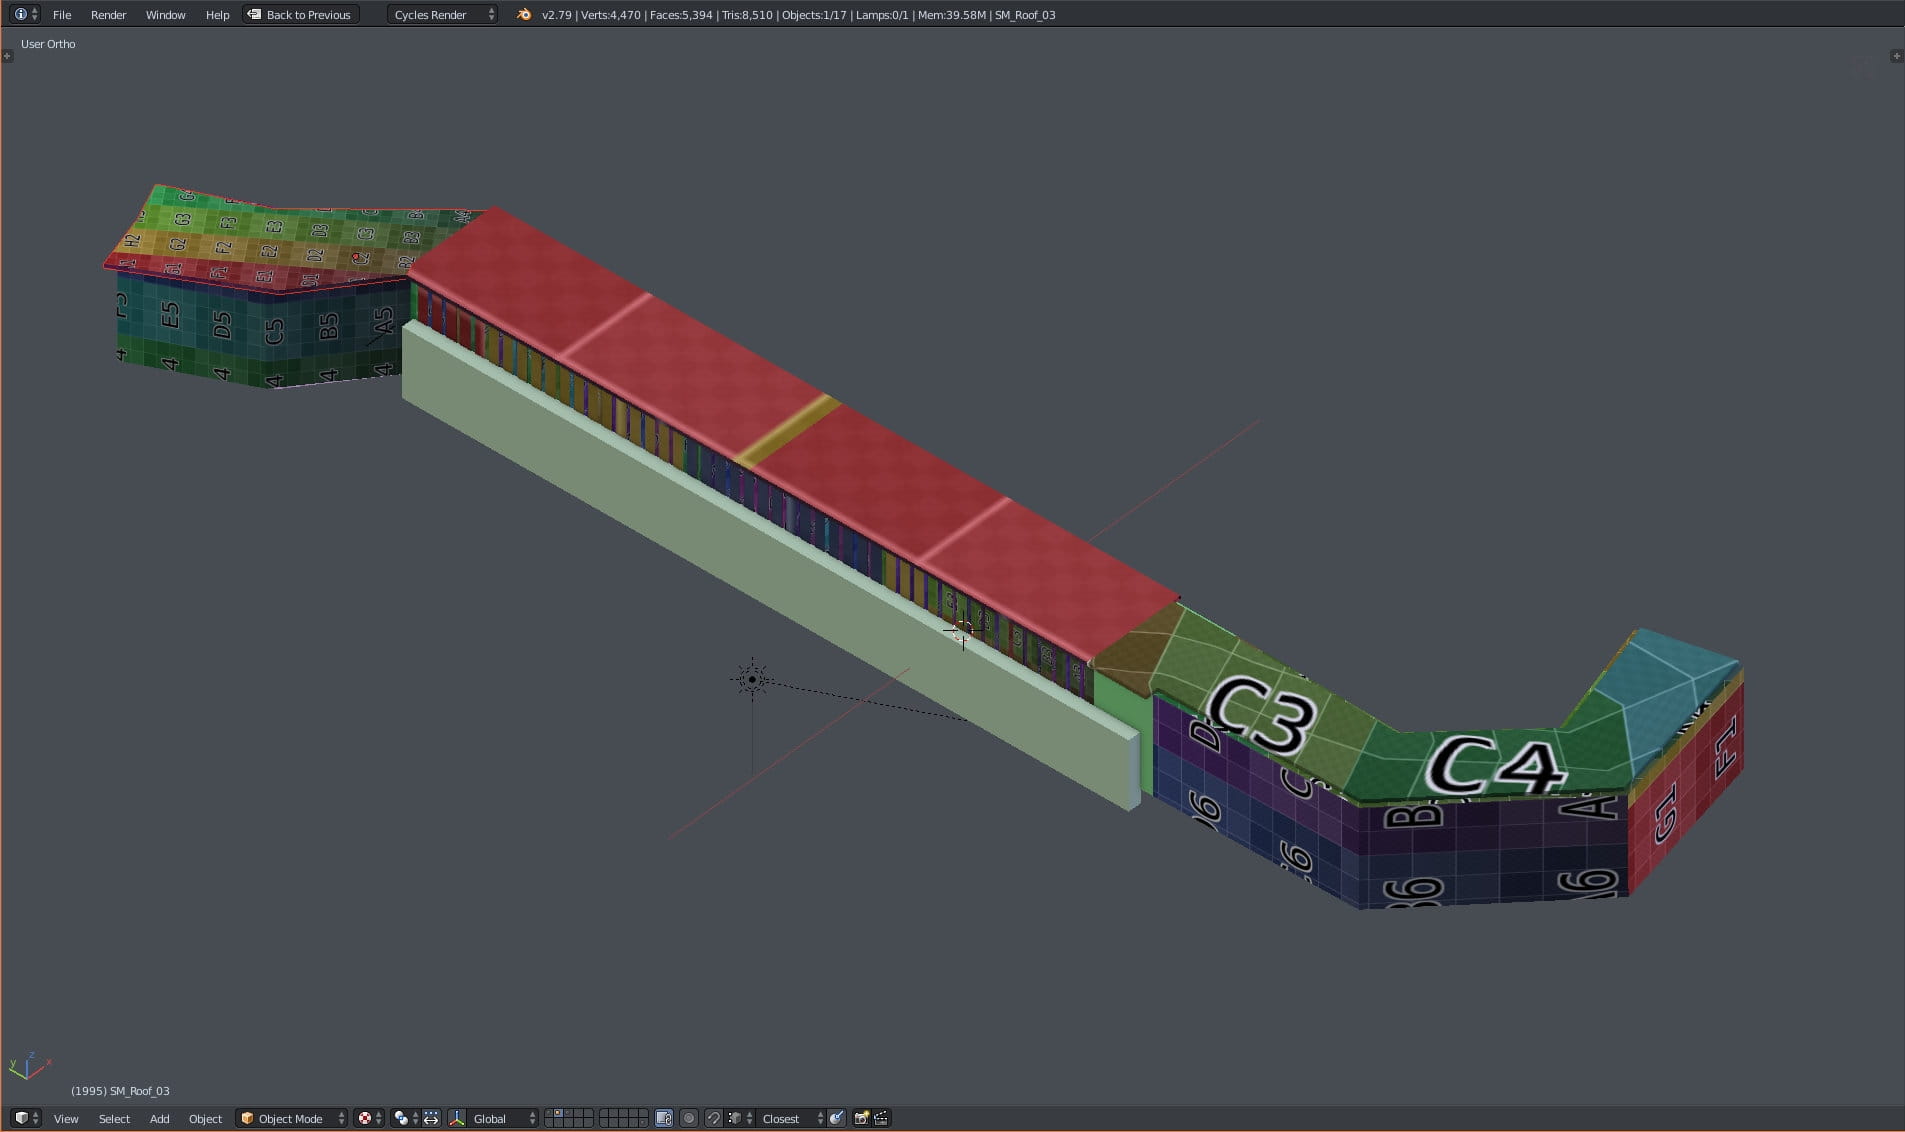
These are all meshes after all these steps(unwrapped and with unique materials). As you can see I added two curved endings to corridor - one behind camera and one at the other end of the corridor. they are used wanted to block light from the front and back.
Unreal rendering bases on baking global illumination into special textures called lightmaps. The quality of this bake depends not only from the ray count that we choose (we can change it at any time in Unreal) but also on the size of the texture (also possible to change in Unreal) and the quality of our unwrapping - which we need to take care in Blender.
To achieve the best texel density we need to be sure that we separate meshes and give them thickness. When rendering in 3ds Max or Blender, it is common to have all walls of building as one mesh. When working with Unreal, it's the best to separate each wall, floor, ceiling, etc. Without thickness we will have artifacts in baked lighting in Unreal and separation assures us that we keep maximum texel density of our lightmaps.
Here you can see meshes with UV Grid texture applied. Notice how it is stretched on the main ceiling mesh? I did it for a reason...
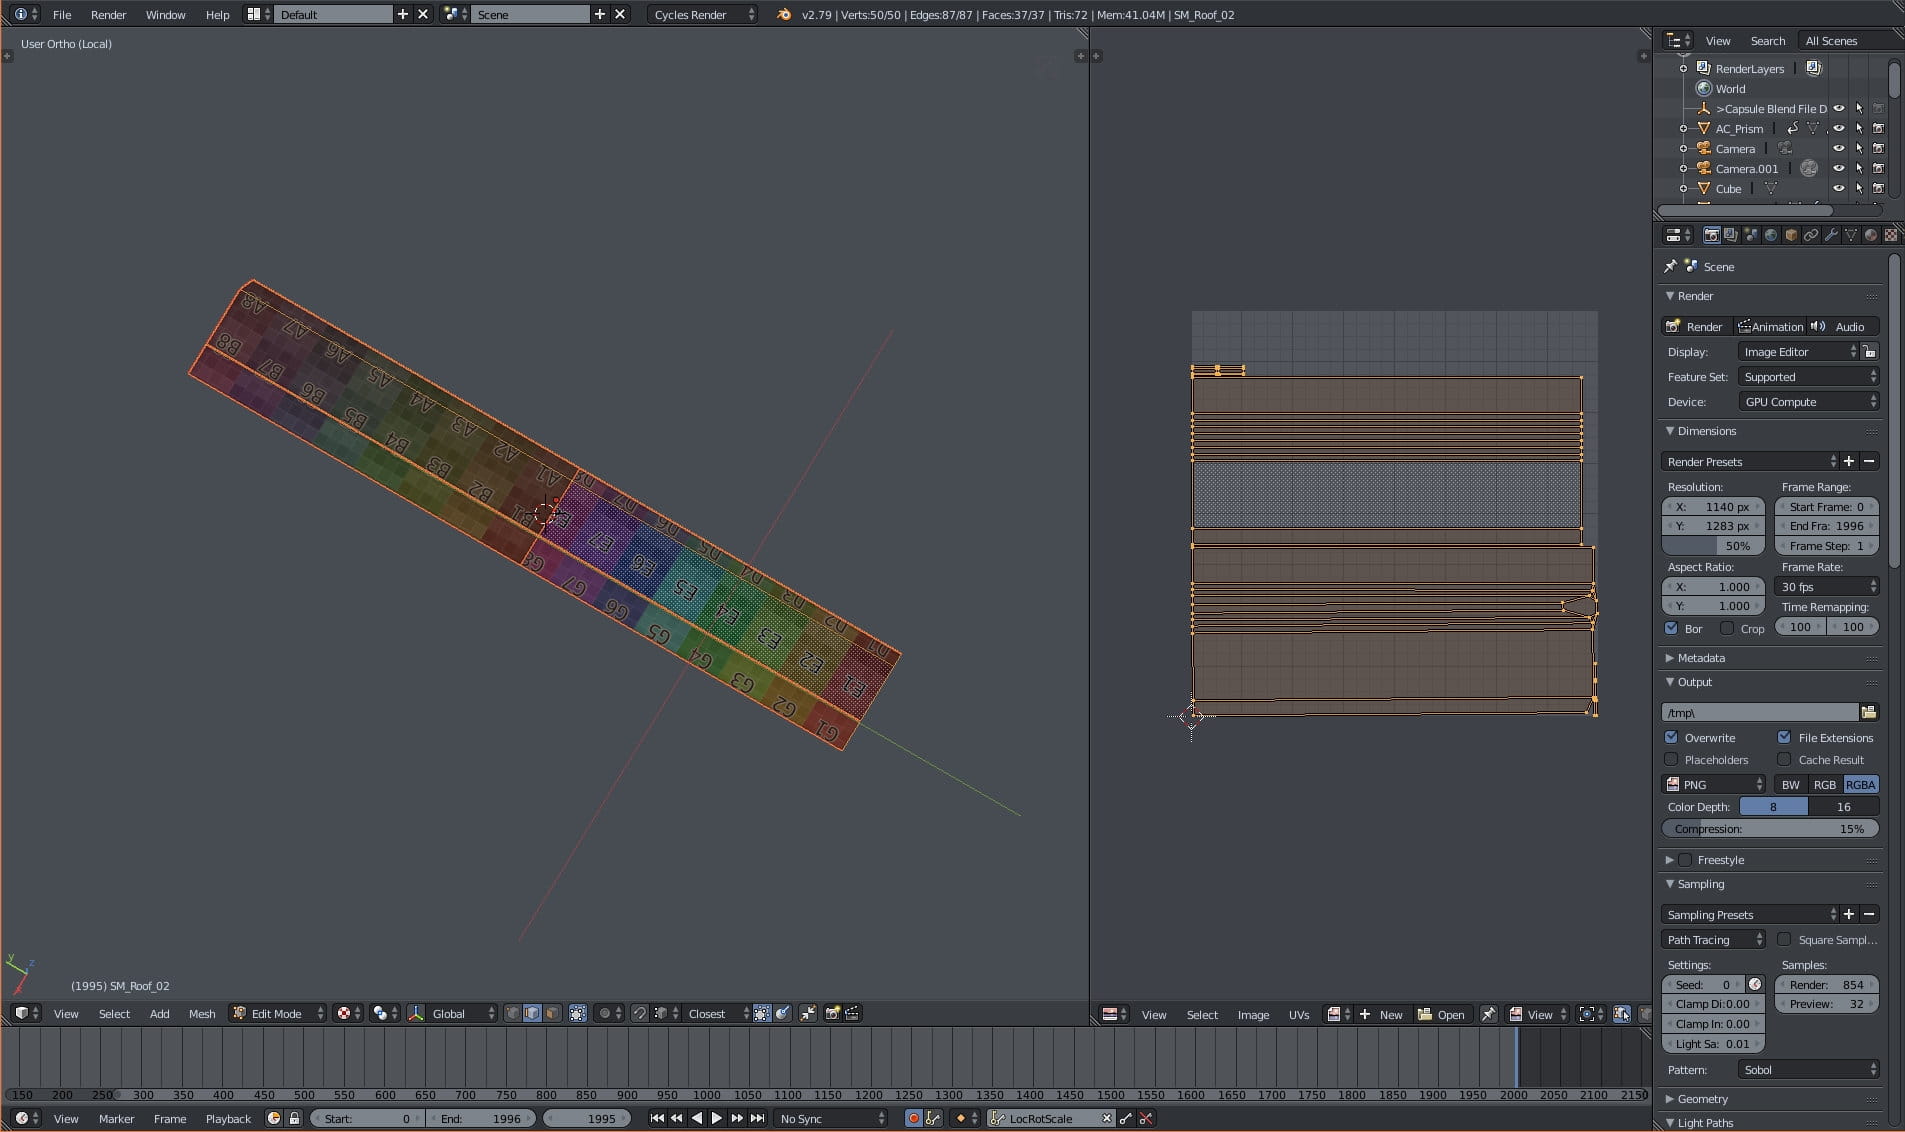
This is how ceiling was unwrapped. Knowing that only the bottom part of it will be visible to camera, I focused on giving the most of texture area to bottom faces. The rest was scaled down. So, the texture will look very badly on the top of the ceiling, but since we will never see the top of the ceiling, we don't have to worry - the bottom part of the ceiling will look good and crisp!

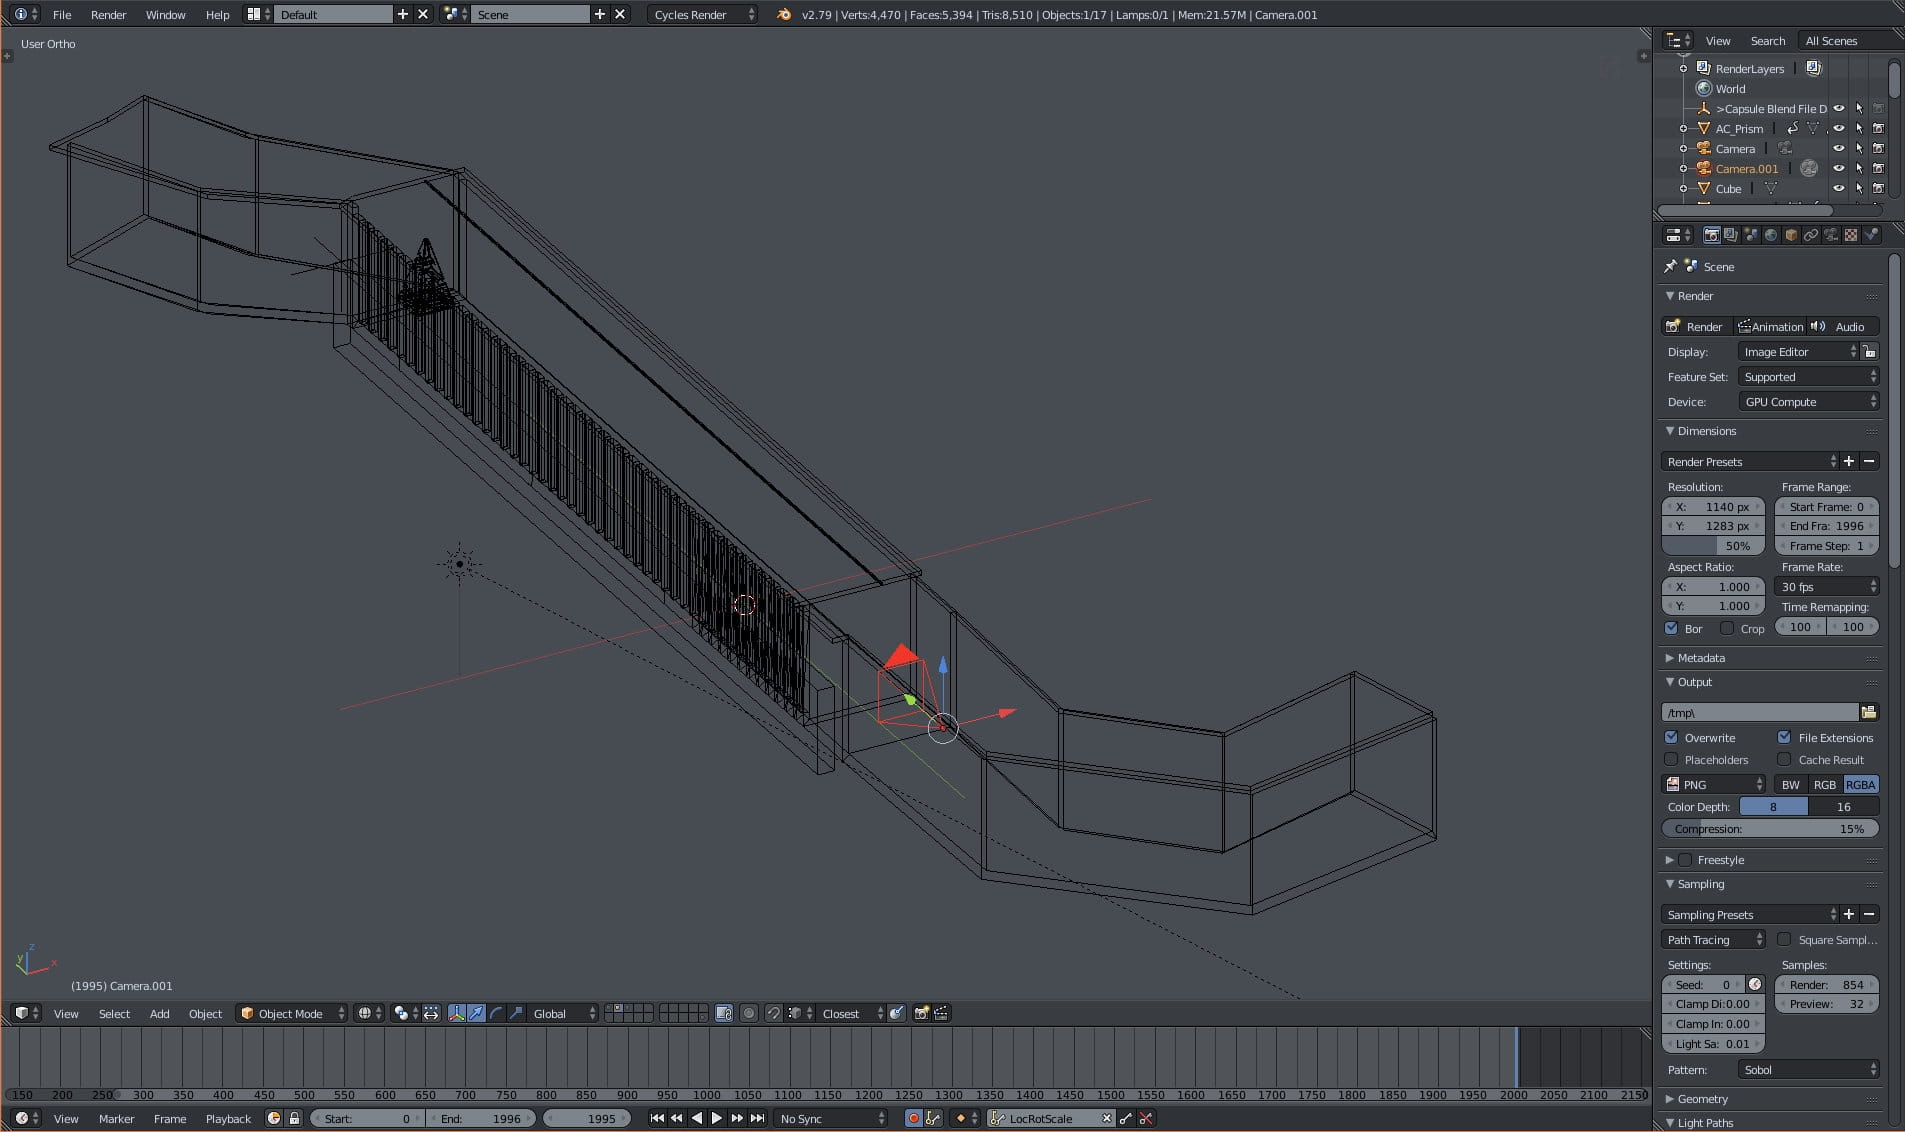
The pillars are very close to camera, so I used bevel on the mesh to get better edges.

This is a 3-segment bevel. We can achieve it by adding "Bevel" modifier.
In my case I automated this process by using "HardOps" add-on for Blender, which adds bevels, assignes sharp edges and smoothes mesh in one step.

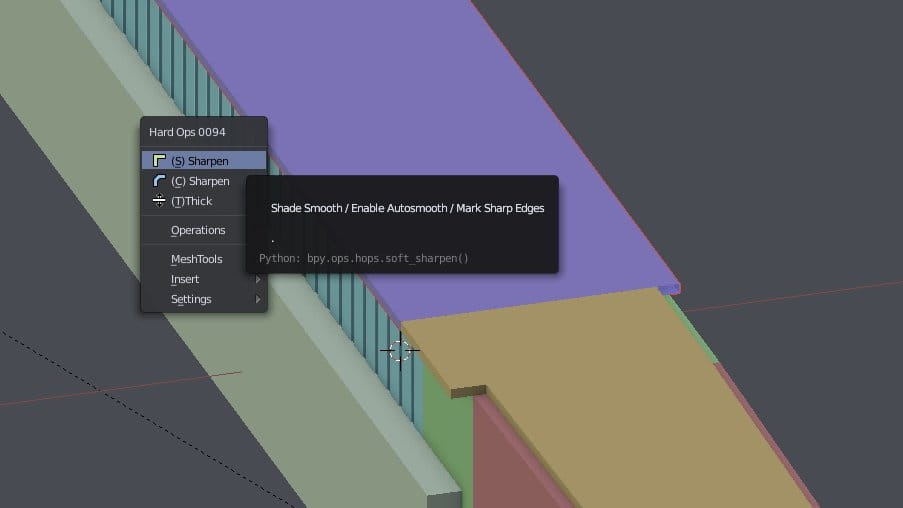
Pillars unwrapped. I aligned view to the camera and used "project from view method" to get undistorted uv map. Then I manually unwrapped the rest.
Final UV map of pillars mesh. It's worth to notice that I separated my pillars mesh - you can see that there are only 12 pillars here. The rest was put in a separate mesh that is further from a camera. All for the sake of maximizing texel density.
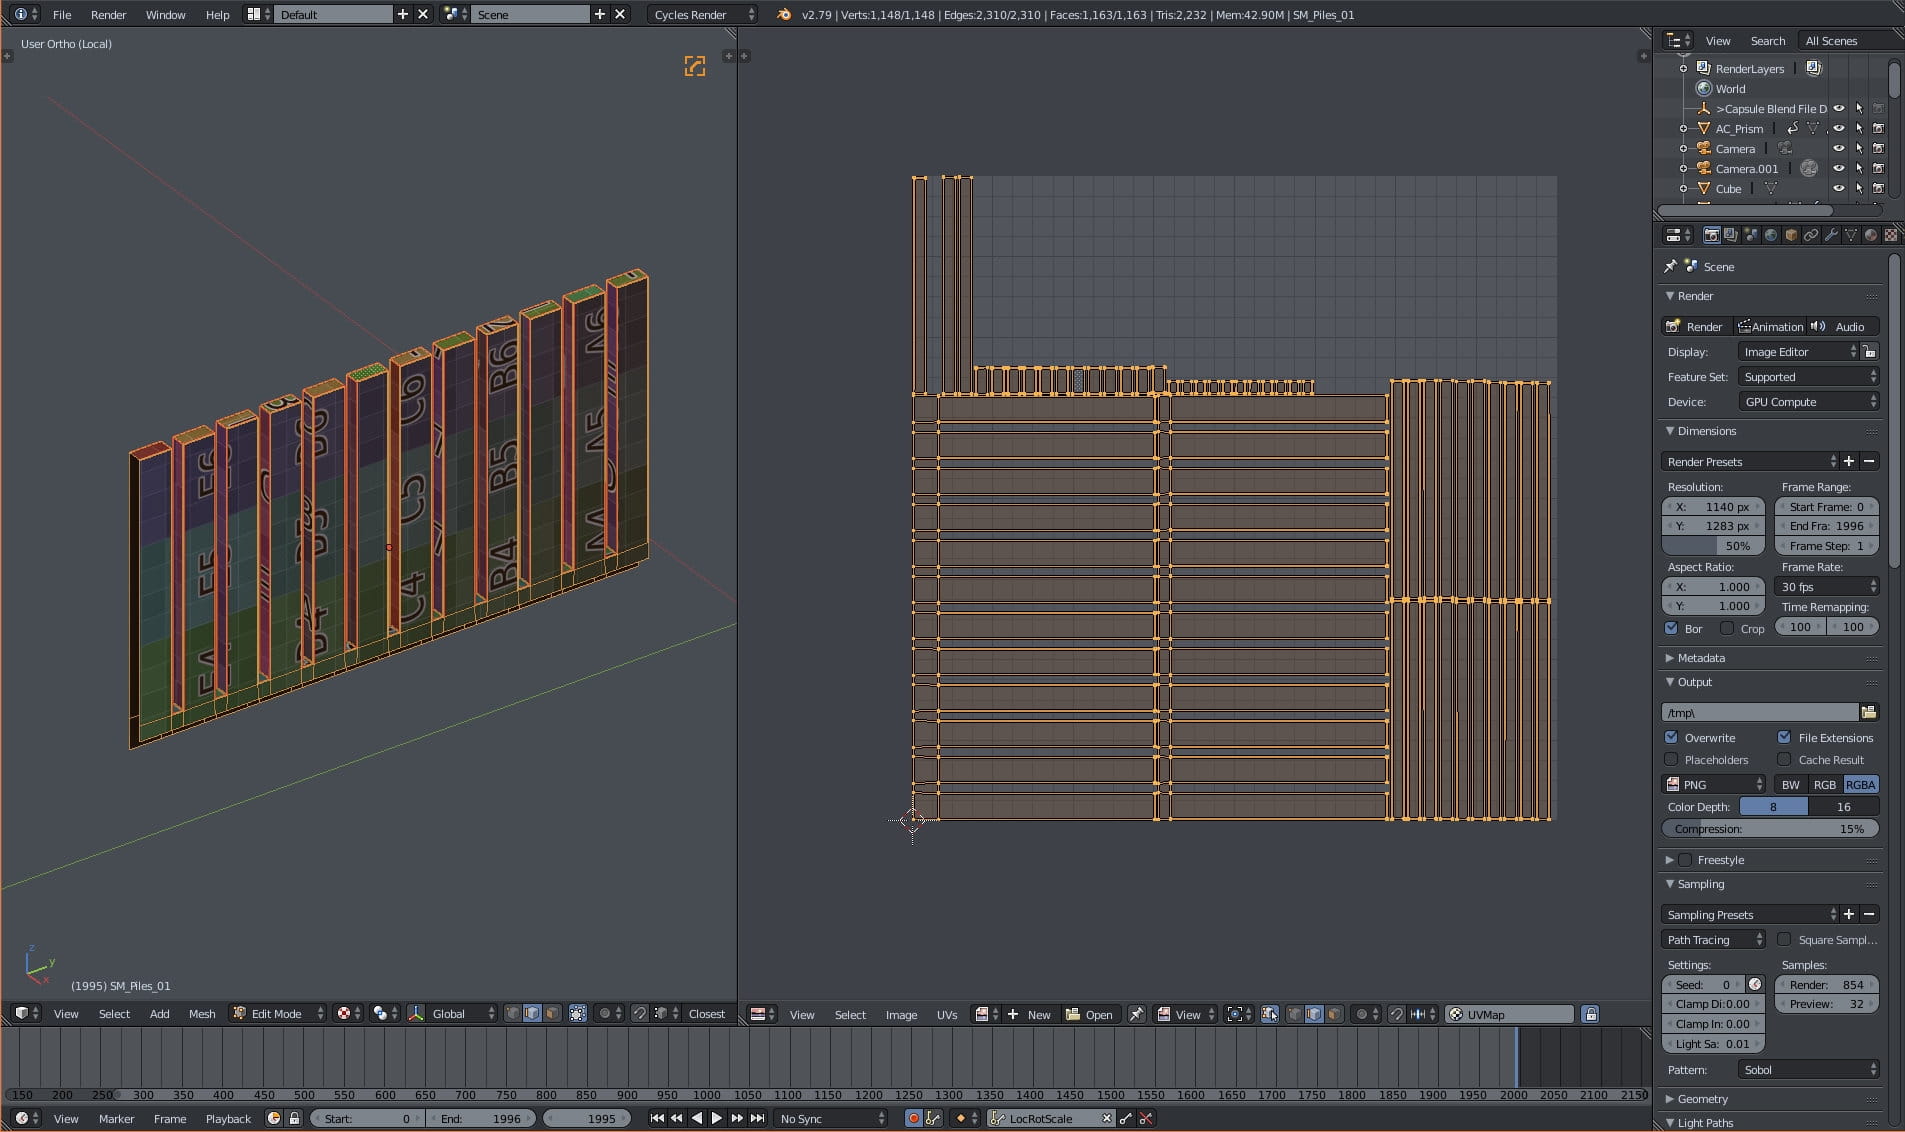
In the wireframe view we can see that I placed a camera inside my corridor. I also placed a prism shape (just to have something that can be animated).

Prism mesh unwrapped.
Test render in Blender / Cycles. Does not look to fancy, but after tweaking the settings in Unreal Engine it will be ok.

"Name Panel" add-on for Blender is great for mass-renaming assets. It has "Transfer names" function which copies the name of mesh to other attributes (in this case: to name of the material and data block).
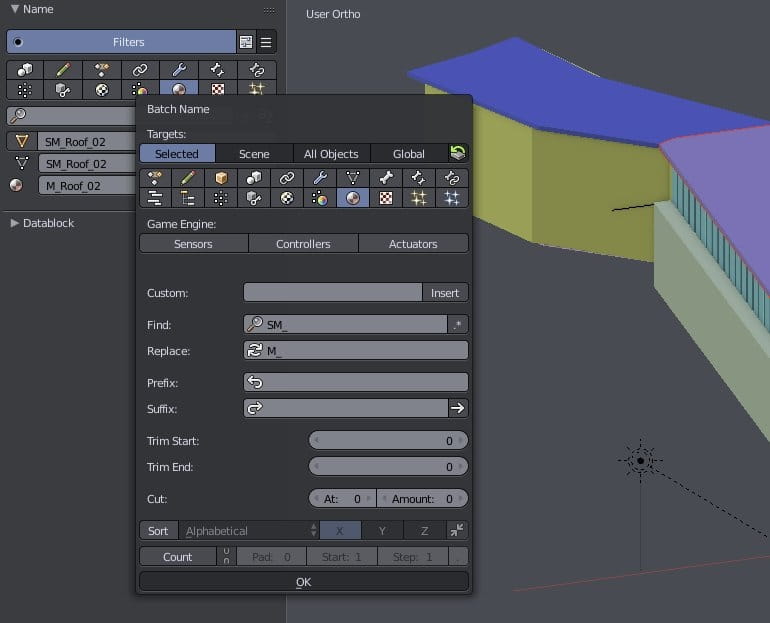
And after transfering names we can change prefix of material from "SM_" to "M_" with "Batch name" function.

I used "Capsule" add-on for exporting meshes to Unreal Engine. It let's you to automatically export selected meshes to chosen location as FBX files. I use scene origin for each mesh. This will be helpful during the import.

My exported FBX files are ready to import into Unreal Engine 4!

I import meshes to separate folder in Unreal Engine. And then I select them all and drag and drop to viewport. The last step is to reset location to 0,0,0 (with all meshes selected). Since I used scene origin during export, each mesh will be placed correctly in the same place as it was in Blender.
You can see that I have all materials assigned and ready here. I prepared materials in Substance Painter. I will not describe the whole process, because it would make this tutorial much longer, but here is the screenshot from the substance Painter - right wall material:
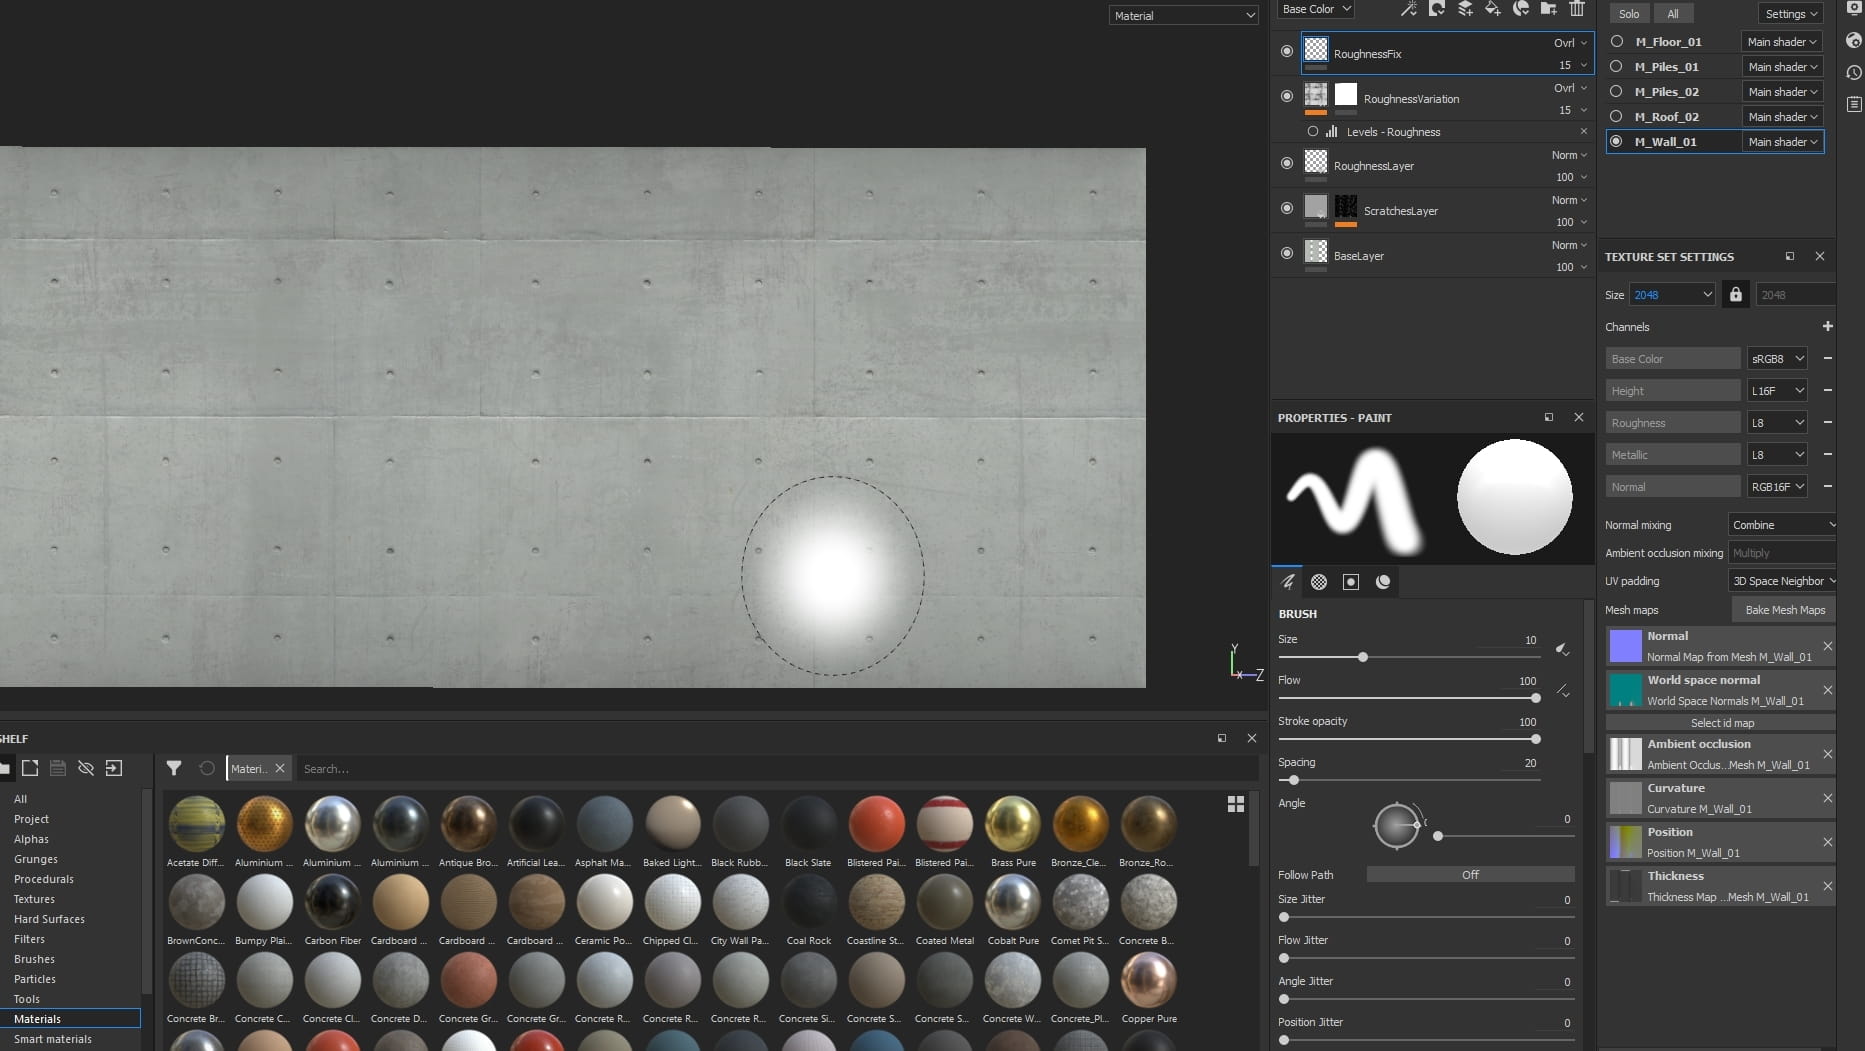
You can see that I used BaseLayer for my concrete (texture was downloaded from textures.com) and then tweaked roughness with some overlayed scratches layers.
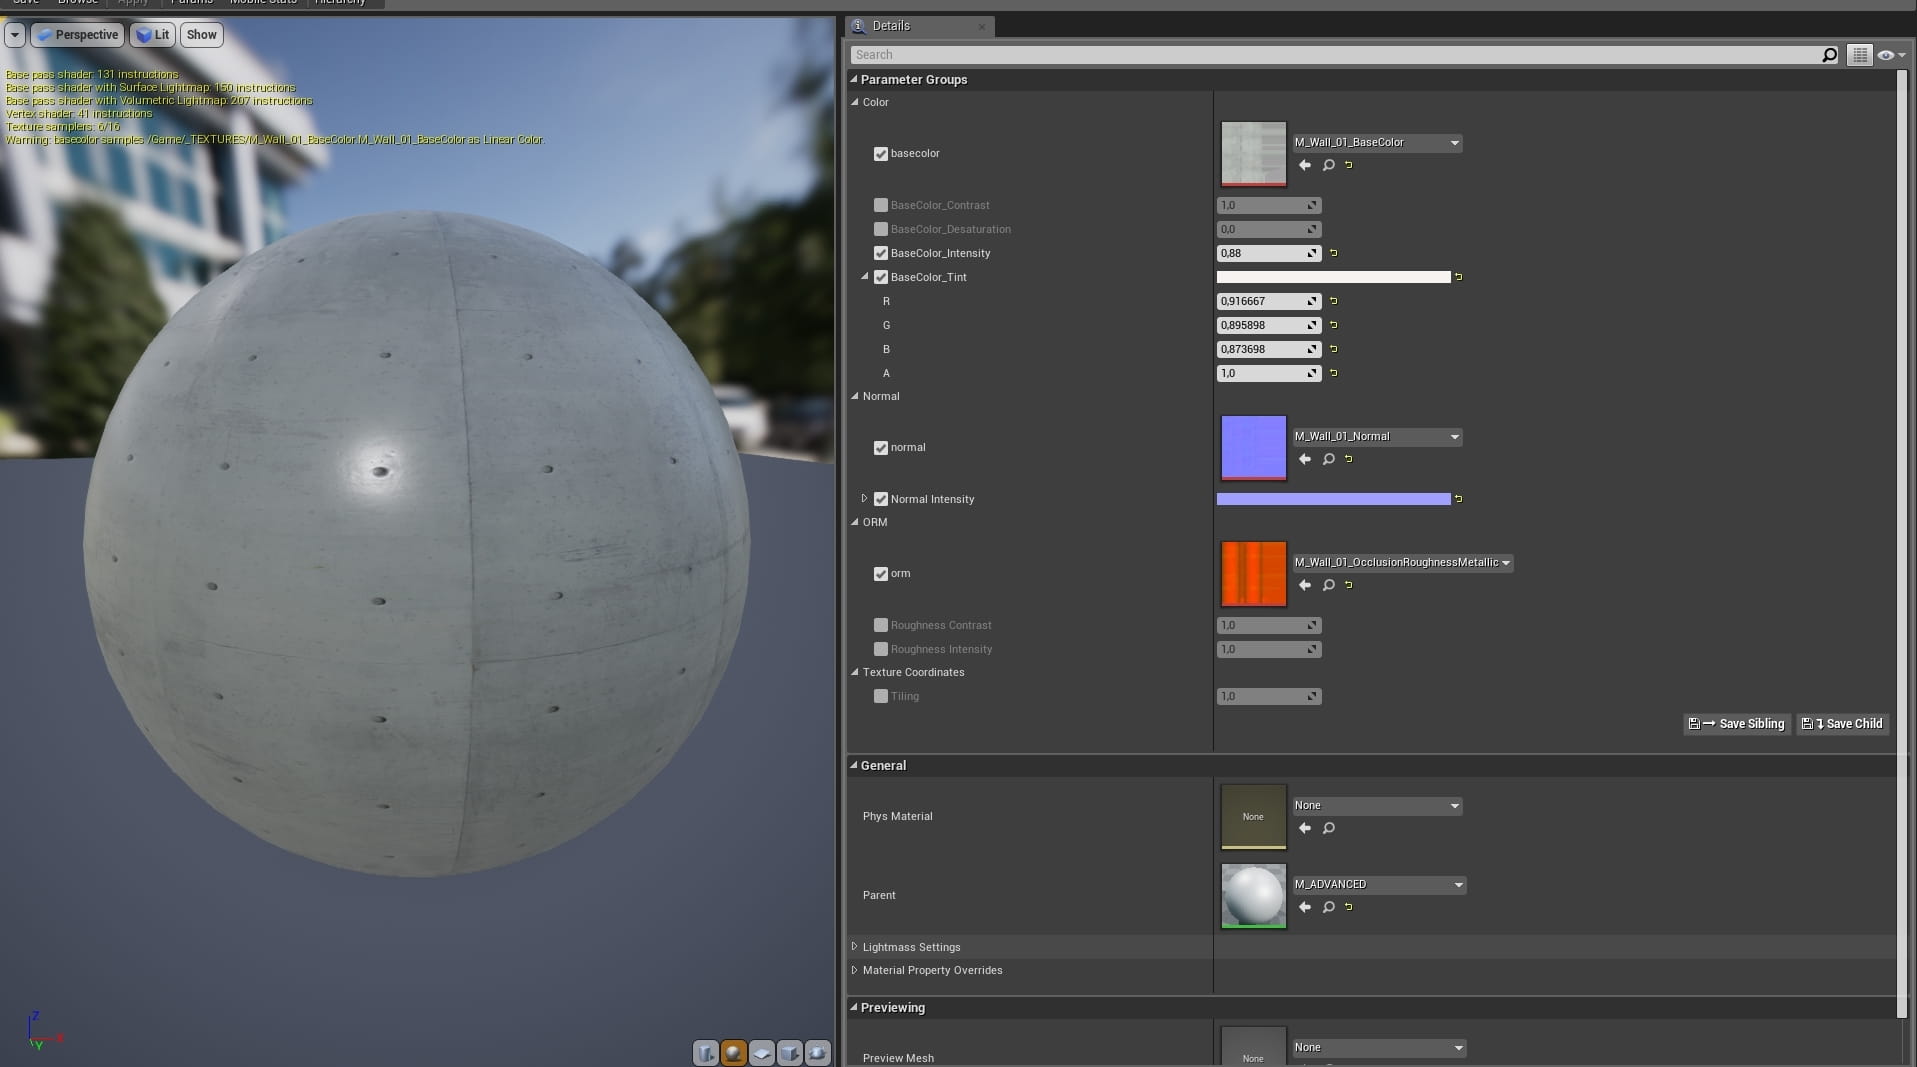
I exported textures to Unreal Engine 4 and assigned them to the instance of my base material. With this instance it is possible to tweak some texture settings - very handy if you want to get similar look to the reference photo quickly!

If you look closely, you will see that I overridden lightmap resolution of the right wall (currently selected with the yellow outline). I set it to 2k (2048) to achieve good global illumination. This wall is very close to camera, so we need to crank up the values. The cinematic was made in Unreal engine 4.19.2 and it was for a reason - it's the one of two UE4 versions that works with unofficial GPU baking by Luoshuang. It means that we can render global illumination in minutes instead of hours (if we have decent GPU. In my case I could render with GTX 1080 and it took 4 minutes on max settings, sweet!).
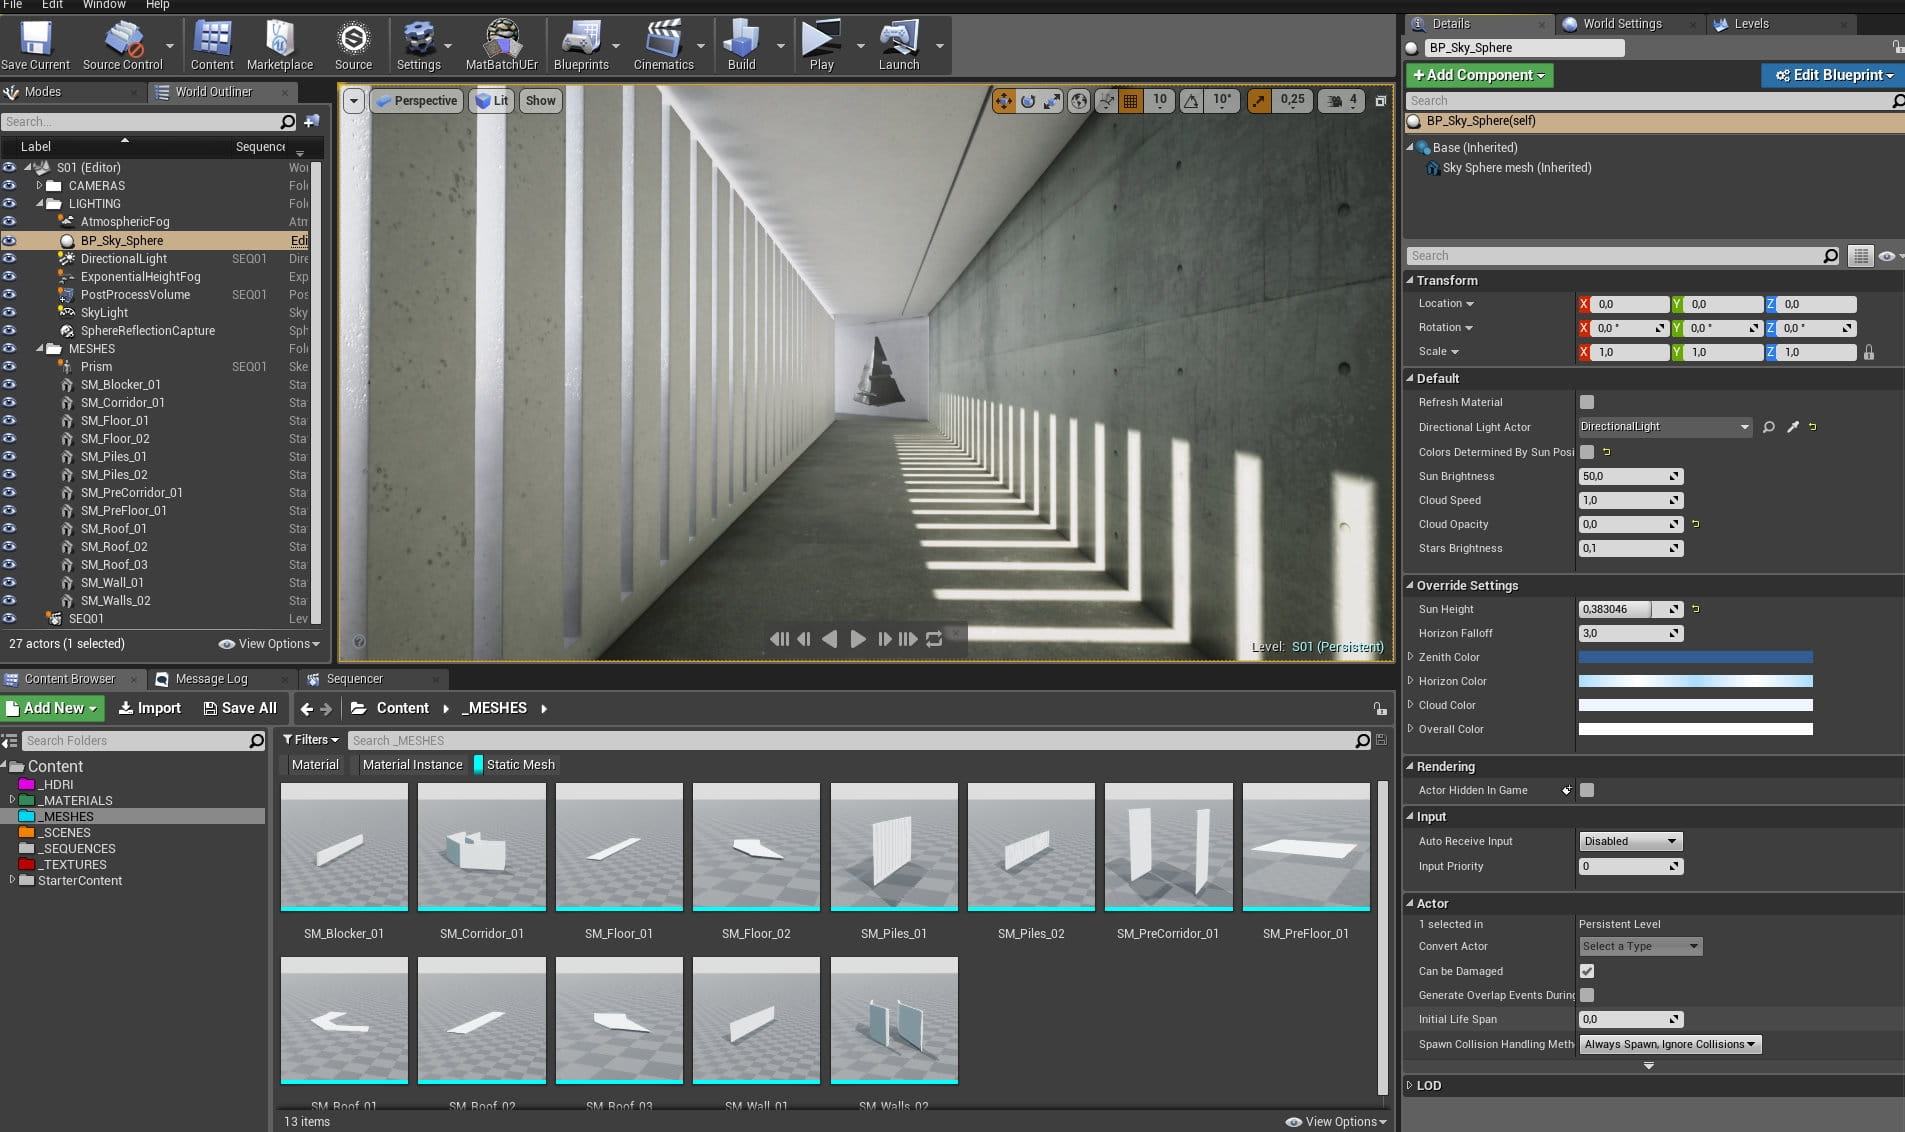
One of the light / environment components is BP_skysphere component available in Unreal. Settings are slightly changed, you can see them on the right panel.
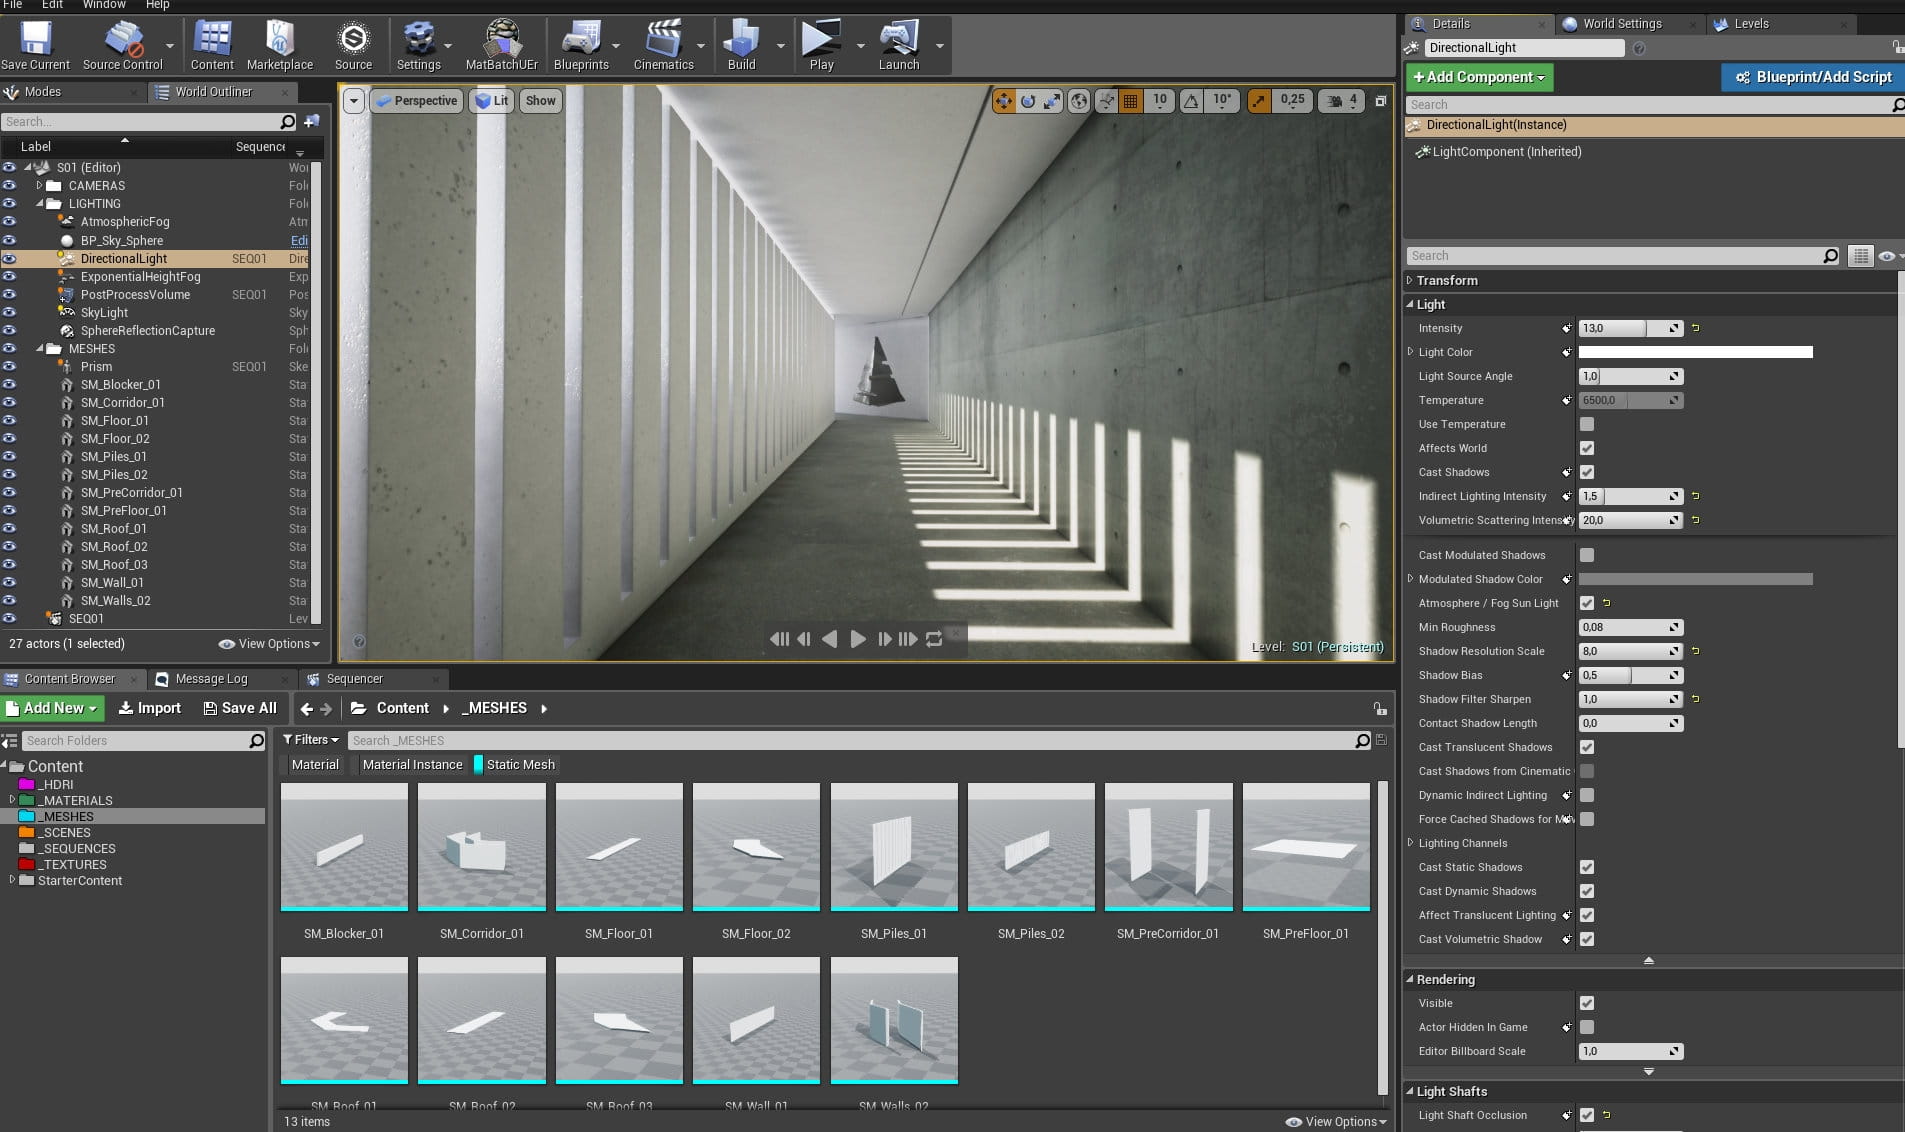
Directional light settings. Notice cranked up intensity (to 13) and indirect intensity (1,5).

More directional light settings. Although I enabled volumetric fog for this light, I barely used it in final shots.
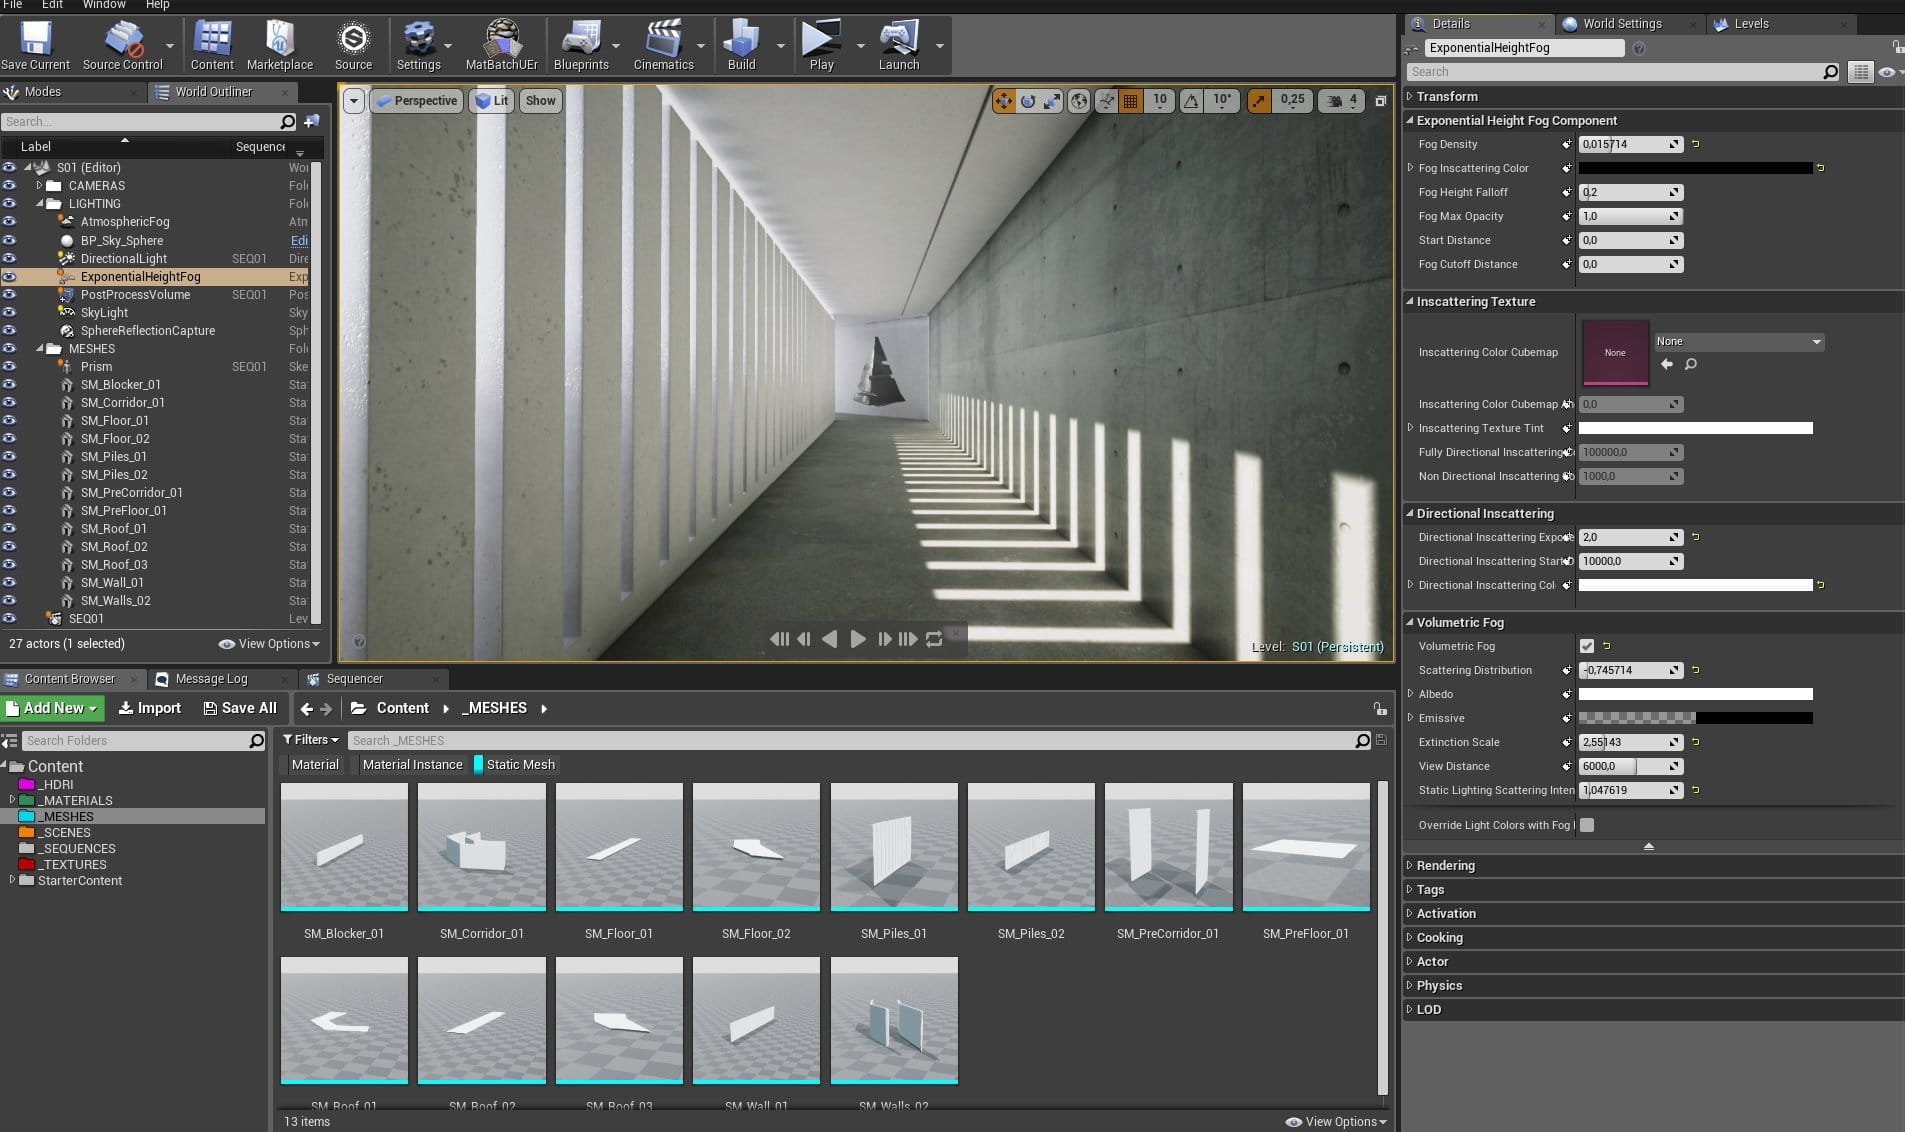
Exponential Fog settings. It slightly brightens the interior.
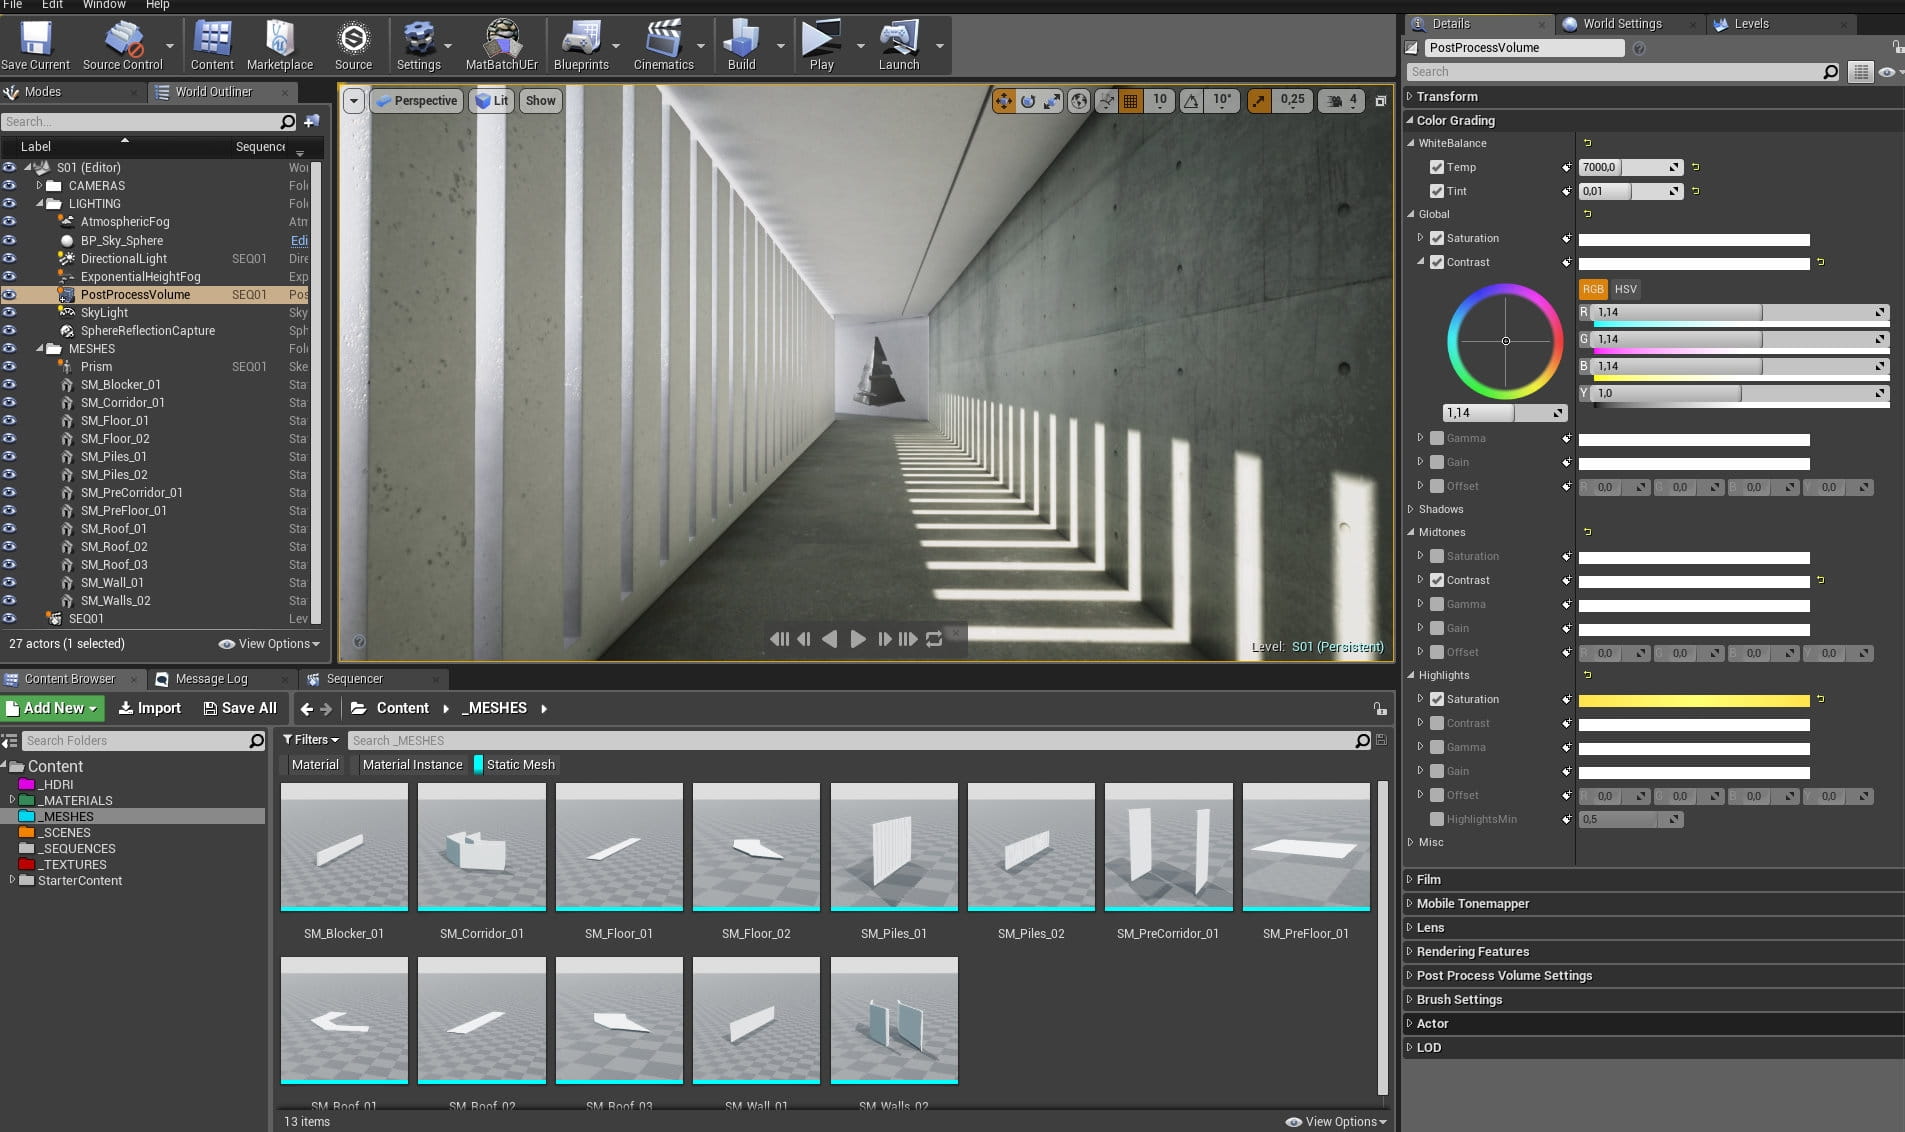
Post-process Volume settings. I used color correction for my scene.
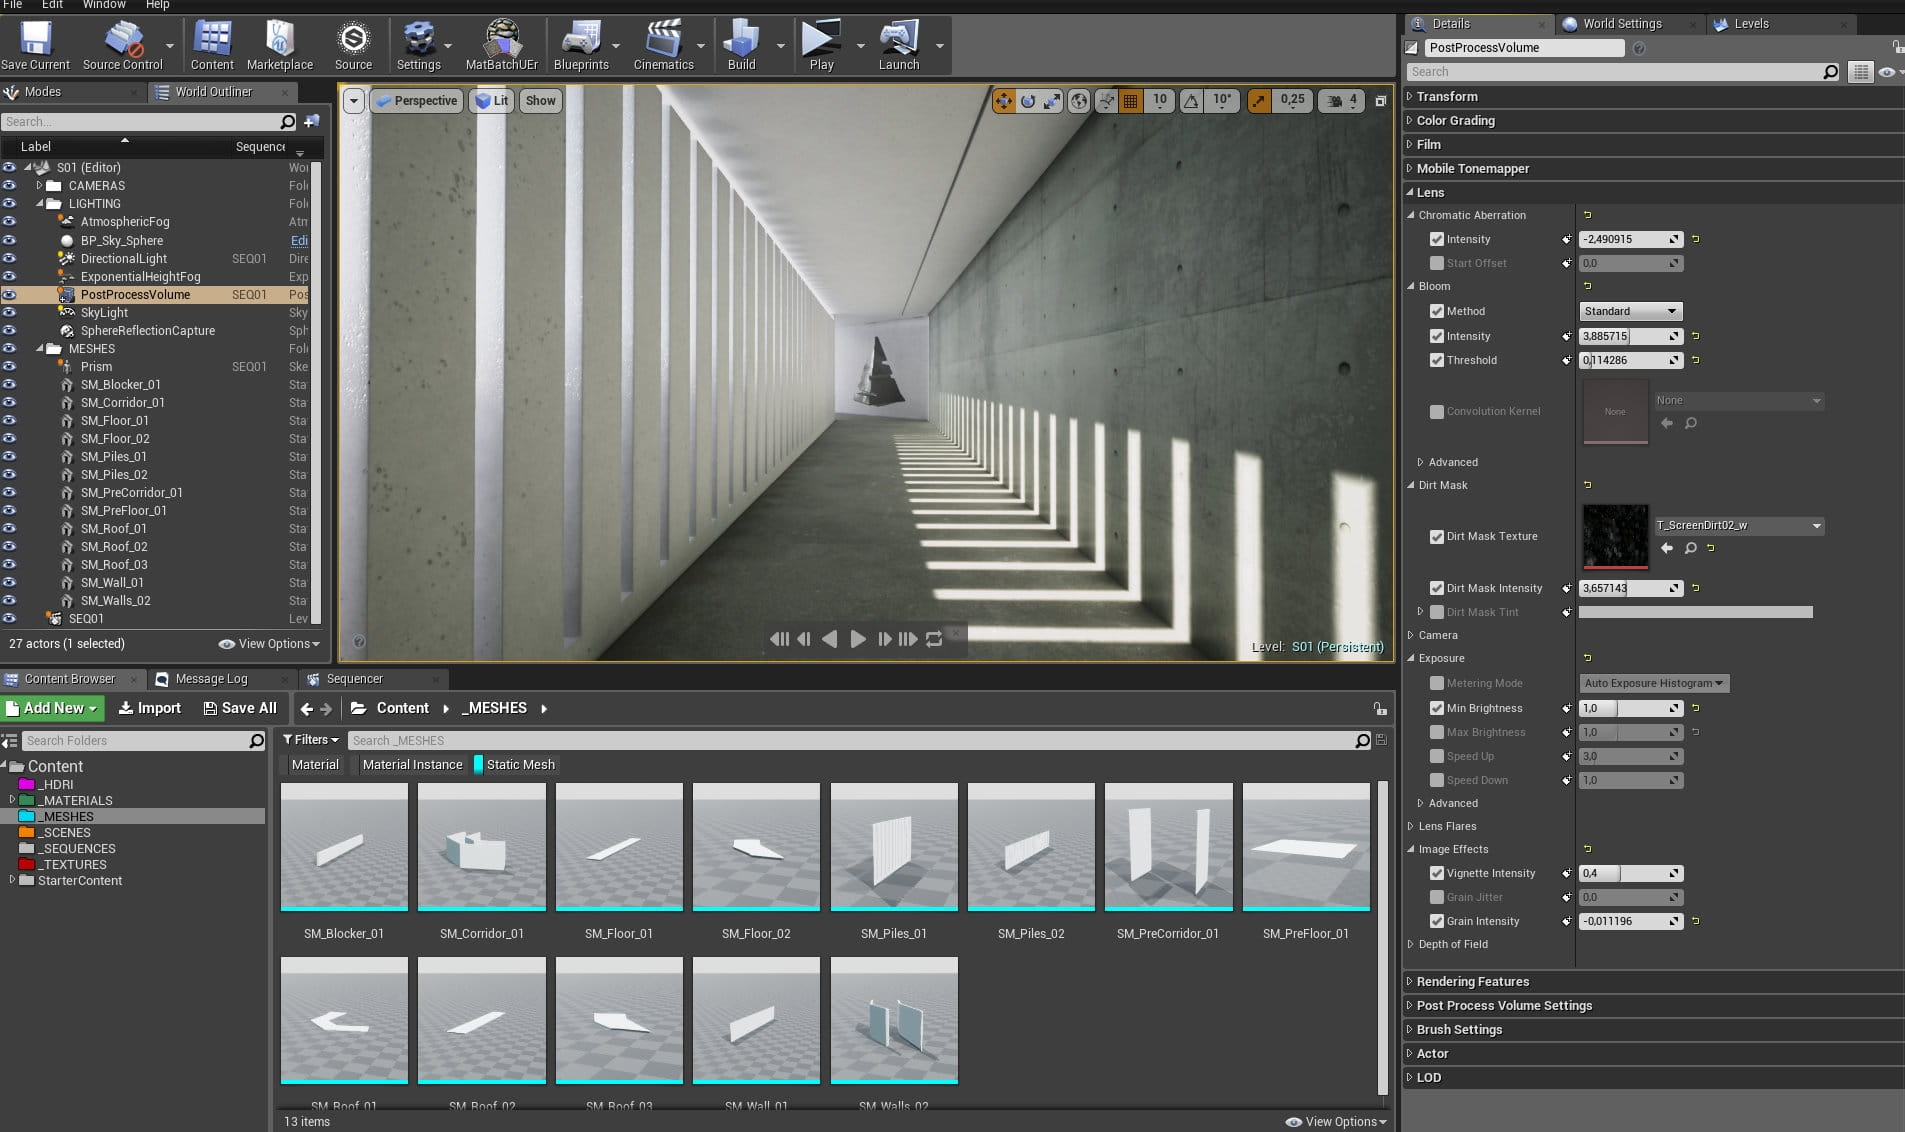
I also added some image efffects, all settings visible on the right. Worth noting is that some of these settings are animated, which you will see on later screenshot, so don't rise the brow seeing such high chromatic abberation settings :) It was used as FX in sequencer.
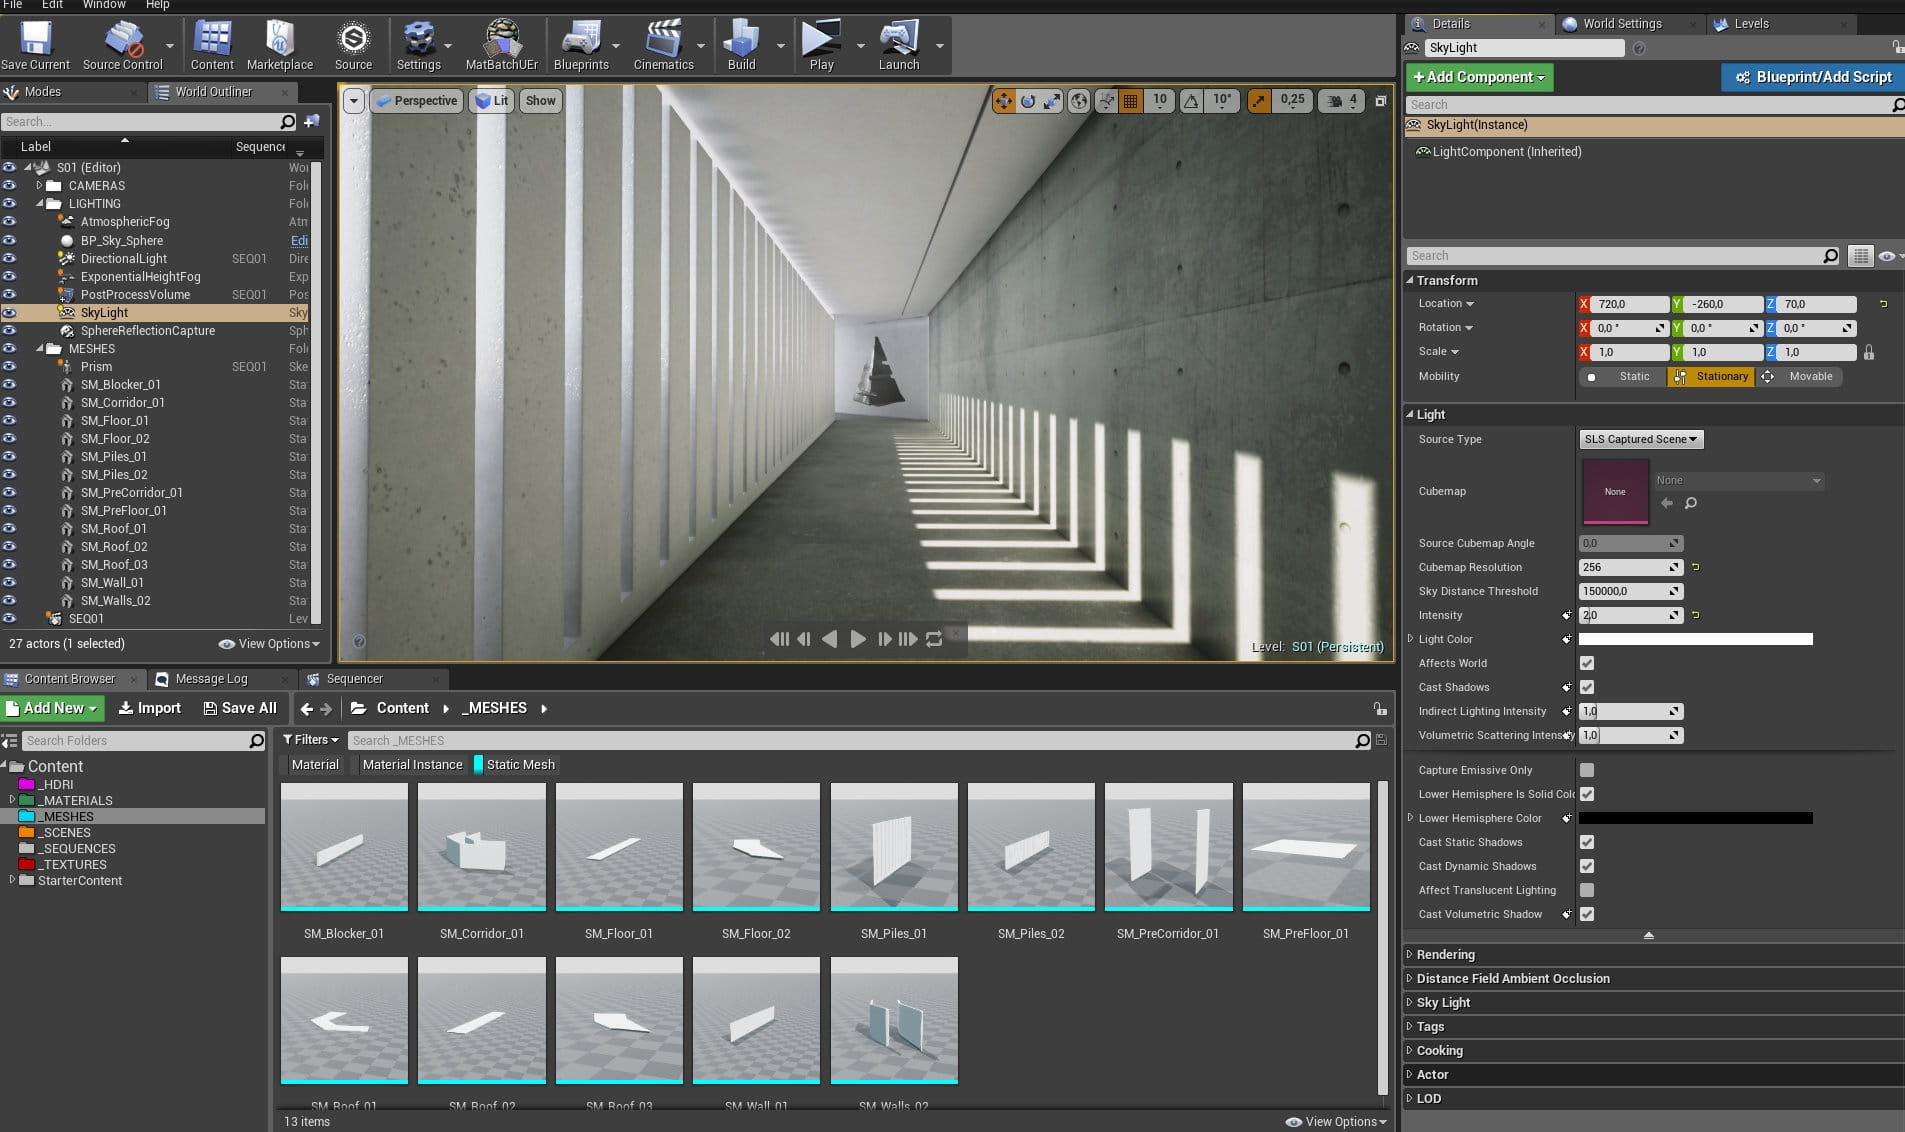
Skylight settings
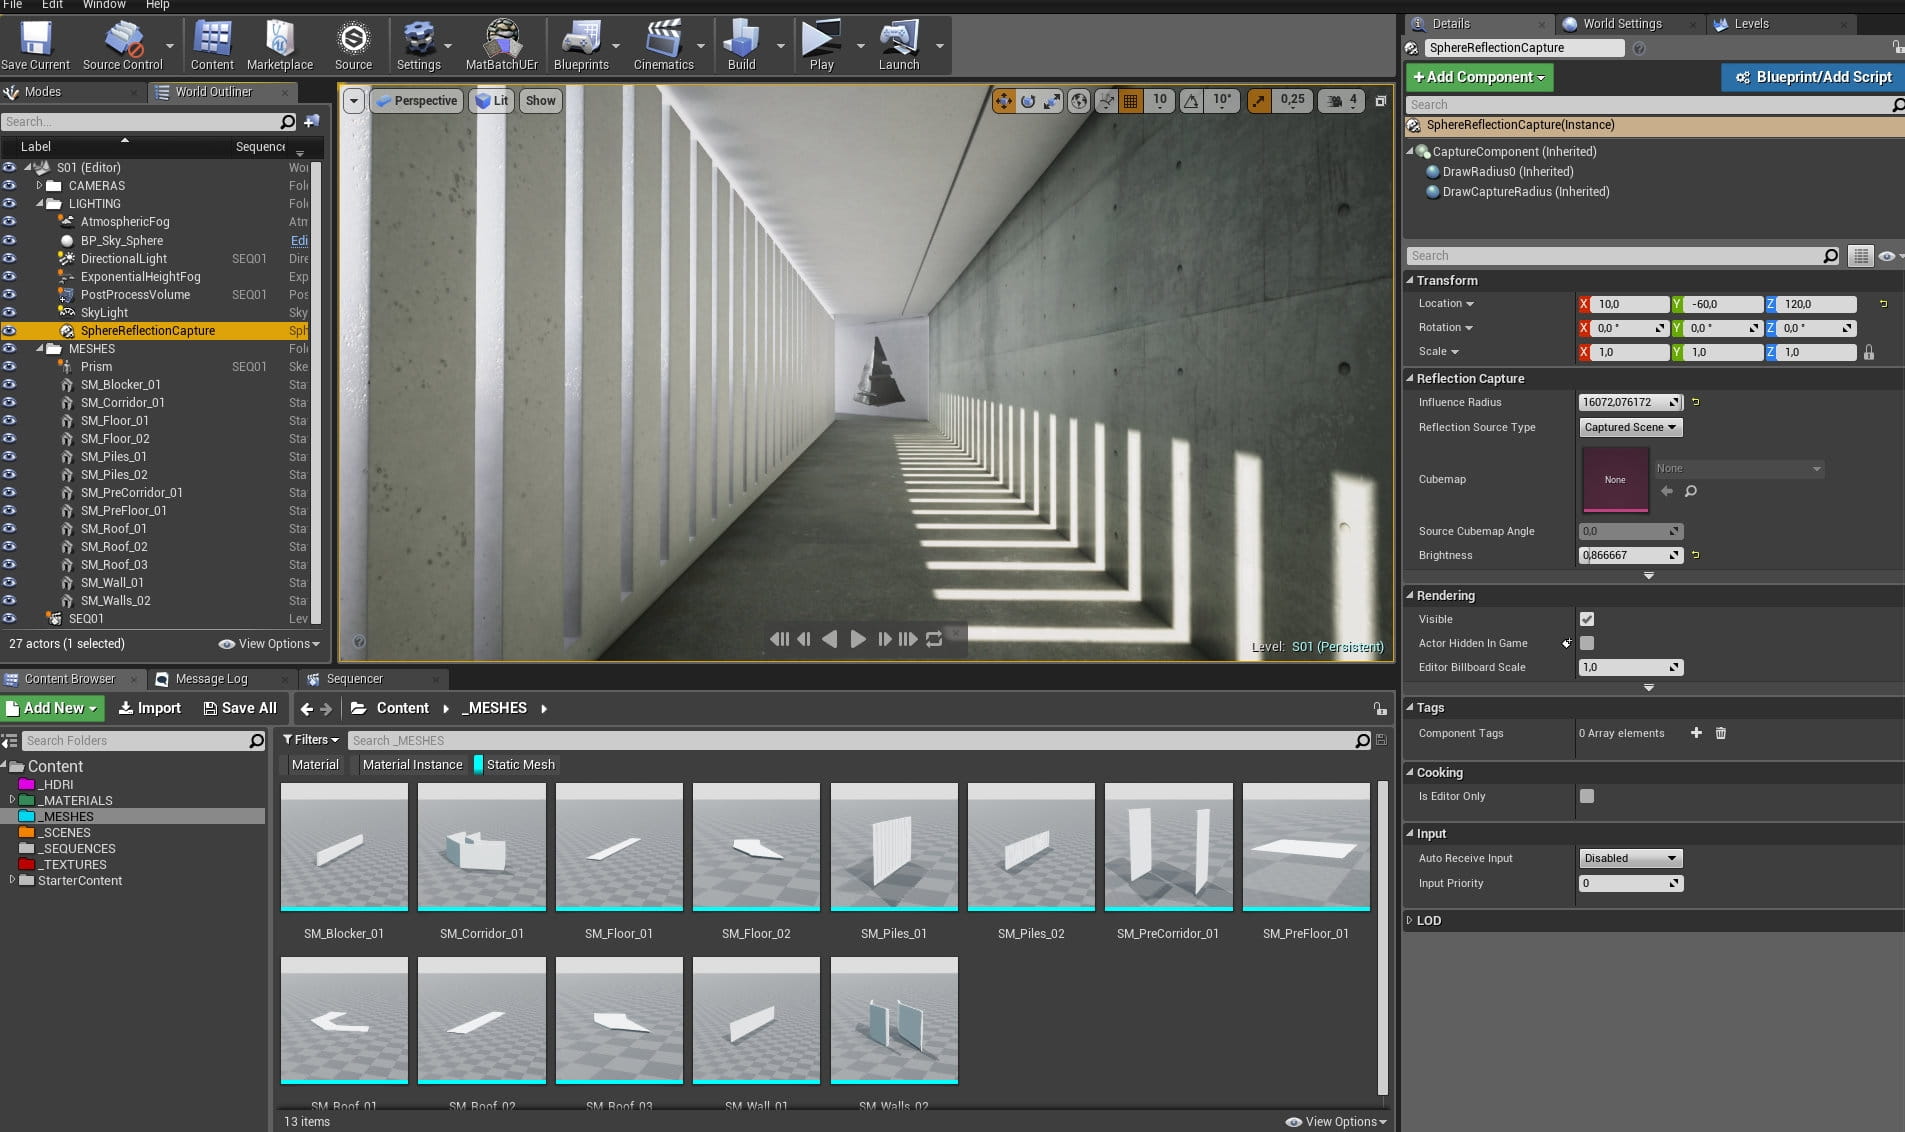
It's a small scene so I used one single reflection capture sphere. Settings on the right.
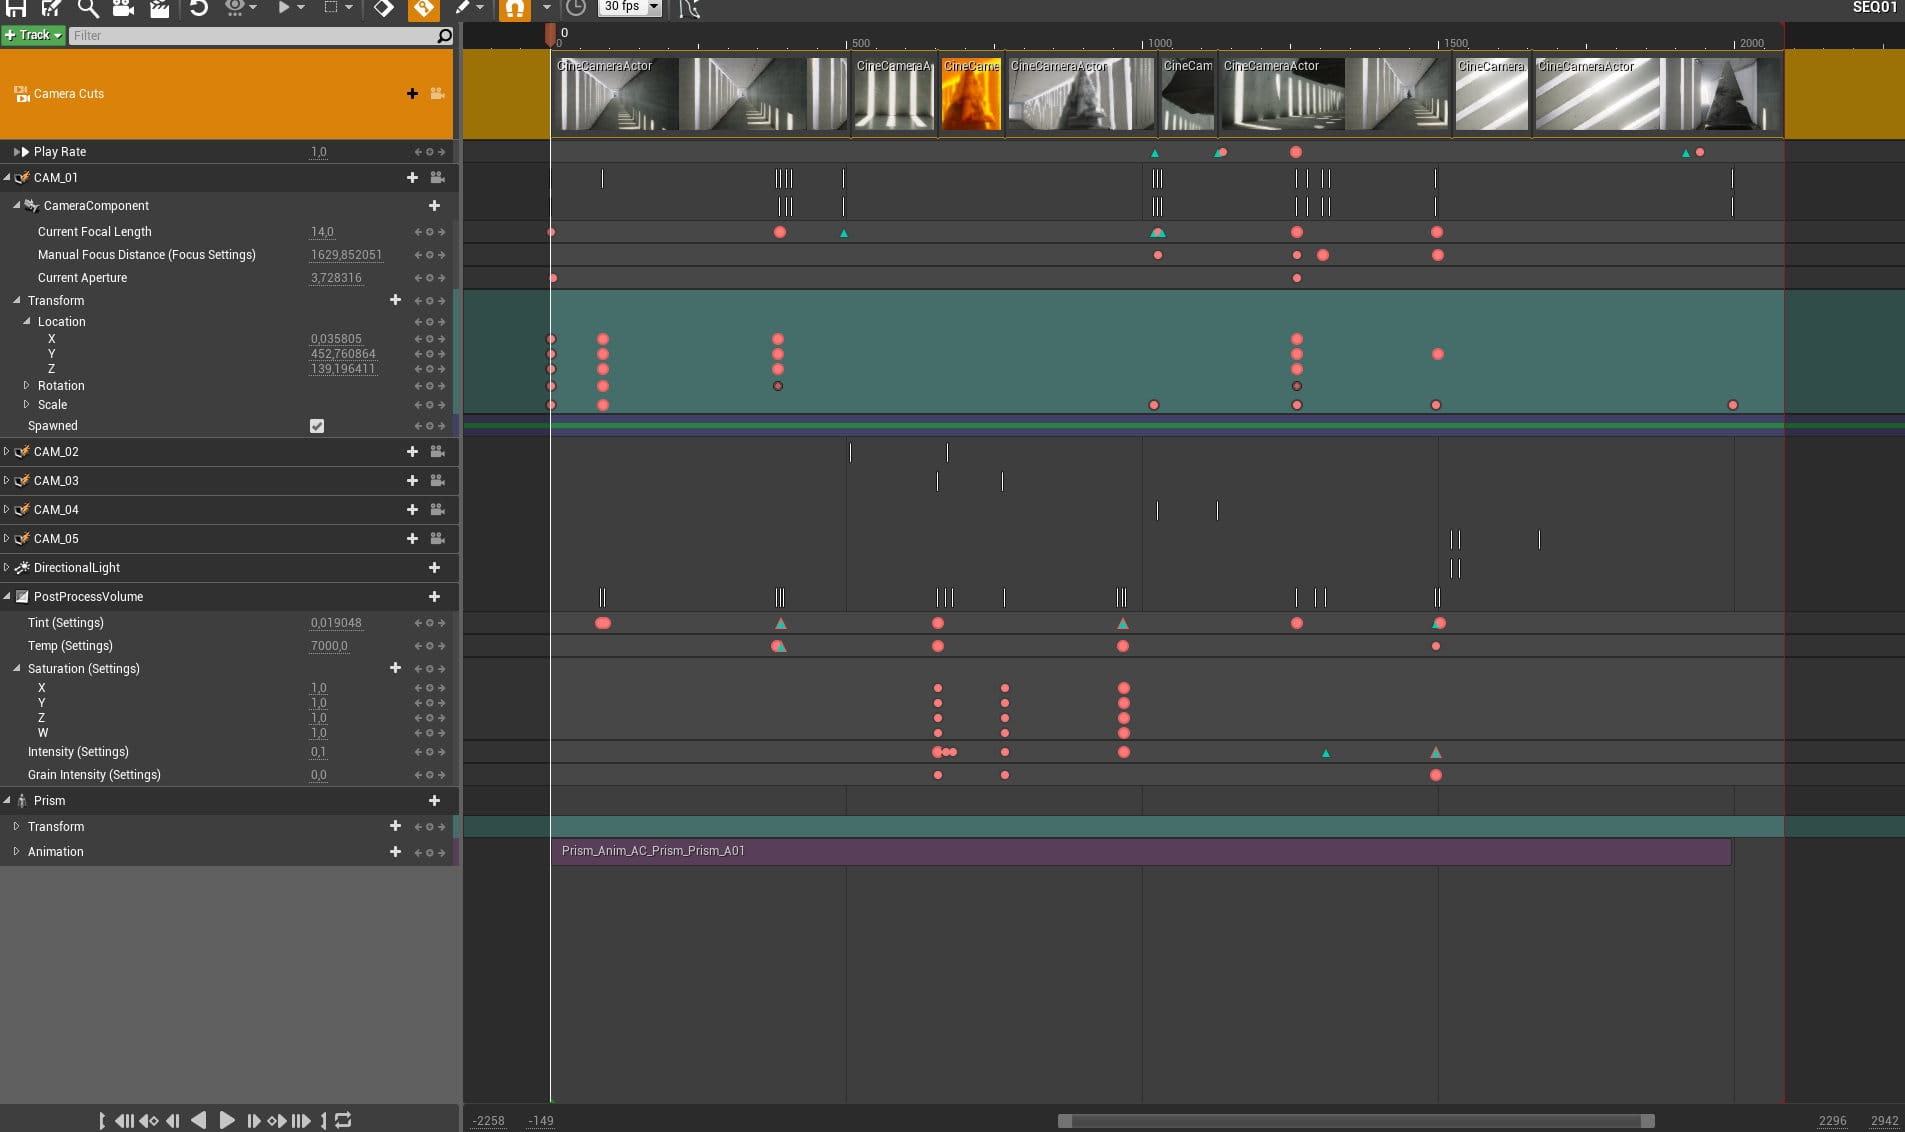
Then the real fun began - I animated cameras in sequencer. I also animated some Post-Process settings, like temperature and tint of the scene, chromatic abberation, etc. On the bottom you can see that I also added my prism to sequencer and attached animation to it.
The next step was to export frames to disk and then edit the whole video in Davinci Resolve (which was also used for mirror effects and final grading). After that I imported video file to Reaper and composed sfx and music then exported audio file to Resolve and re-exported video with audio.
Thanks for reading, hope you liked it!


LEAVE A COMMENT


|

|

|

|

|
 Customer zone
 Your special offers
 Your orders
 Edit account
 Add project
 Liked projects
 View your artist profile
COMMENTS