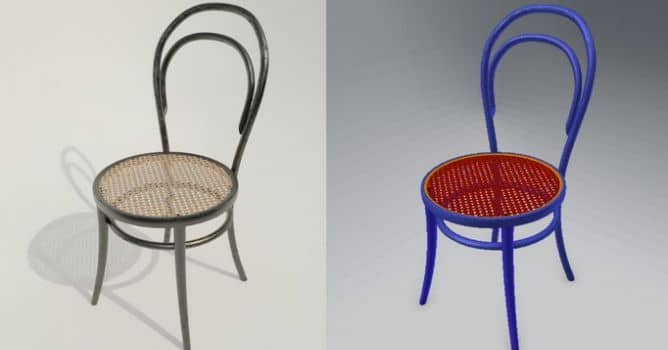
What is an ID map? It's just a simple texture that covers different elements of your mesh with different colors. Like this one made for a chair below.
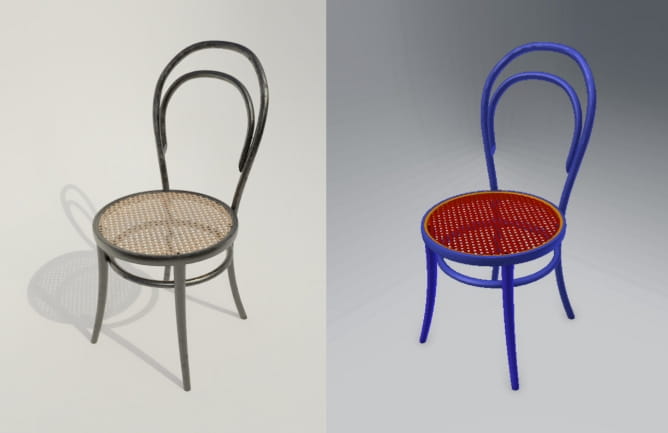
Many materials, many textures...
As you can see, we have two materials on this mesh. It's perfectly fine to assign two materials and fine tune them in Blender, correcting colors of textures, etc. It will let us tweak them individually to the last step and is normal approach when it comes to offline rendering.
But what if we only want one texture set for several materials?
Sometimes we want to optimize our memory usage and reduce texture count - it is especially important when we are rendering with GPU or using game engines like Unreal or Unity. What we aim for is to get one mesh, that has many different materials on different elements, but all of them are one one texture set that we will create in Substance Painter. So we need ID map for our model, that will let us easily select different elements of our mesh in Substance Painter and let us assign different materials for wood, screws or seat. We could do it without ID map, but selecting many elements by hand would be tedious and would slow down our texturing process. With ID maps masking different elements is as easy as a press of a button.
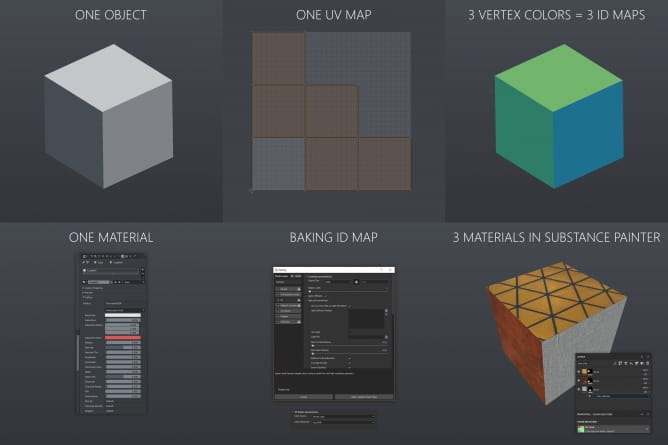
Are there any drawbacks of "multi-material in one texture set" approach? Yes, there is. This texture set, containing many materials, will not be easily tweaked in Unreal engine or in Blender Cycles - be prepared that you will do 100% of texturing work and all tweaks in Substance Painter.
There are two approaches for creating ID maps. We can create our own ID maps in Blender or we can prepare our model so Substance Painter will be able to bake them from data we will provide.
Baking ID map in Blender
It's quite straightforward process:
Switch to Blender Render and create separate materials for each elements of your mesh. In this case we created two materials - one for seat and one for wood. There are also some screws here, but we will leave them for now in the same id color as wood.
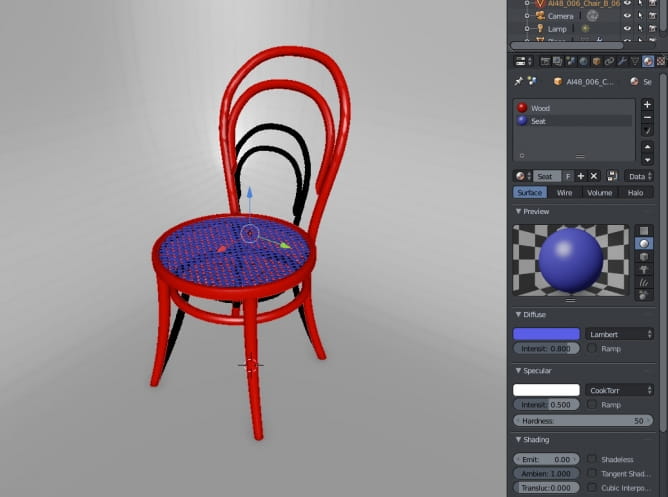
Create new texture in Image Editor (ID_TEX)
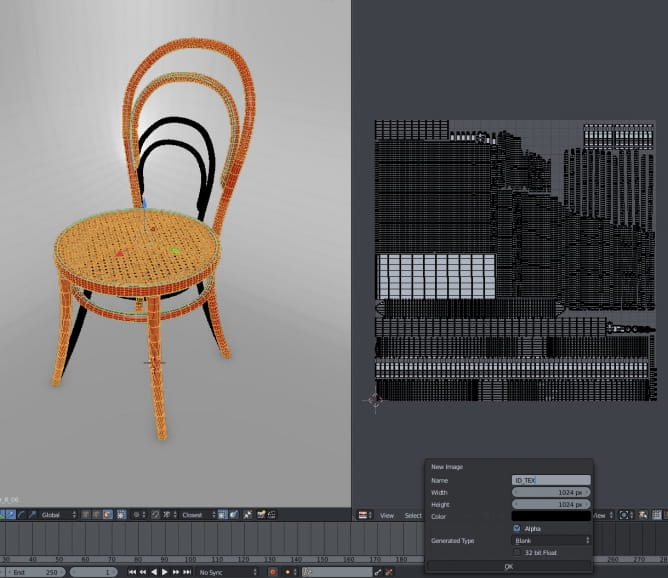
Go to render panel, choose "Textures" from Bake Mode menu and, with all faces of object selected, press "Bake". Your materials will be applied to texture. Now you can export your texture to PNG file (with F3 shortcut or by choosing Image > Save as Image menu entry).
Drawbacks of this method:
- You need to create different materials which you need to delete before exporting your mesh.
- If you will need to alter your selections later (and you should assume that you will), you must copy your mesh and save it somewhere just in case, which will clutter your 3d project file.
- You need to deal with additional baked texture file - importing it to Substance Painter and re-importing after each change.
These extra steps are not pure fun, but we can avoid them. How? By letting Substance Painter to create ID mapping. we just need to tell the software how to do it.
Baking from one mesh to another
Substance Painter can bake all kind of textures that can be used for texturing - from curvature, position, thickness to id maps. It can recognize ID maps by material colors, mesh IDs or Vertex Colors.
So, one approach would be: create one high-poly mesh, assign different material to each element that should have unique material, then create a copy of this mesh with only one material assigned to the whole mesh.
Note: If you want to create game asset, one of your meshes would be high-poly, and the second low-poly, so you could bake also maps with details, as normal map, but it is beyond the scope of this tip, so we will skip it and use just two identical meshes with different materials.
Then export two meshes from Blender as FBX files. You can choose your multi-material mesh as a source and Substance Painter will generate ID color map for the second mesh. This process is widely used by game assets creators and it works ok. But what if you do not need so much hassle and you only want to create one mesh with one material, you just need fast solution? You should use Vertex Colors option.
Assigning Vertex Colors in Blender
Substance Painter can create ID maps from Vertex Colors. Luckily, they are stored in FBX file, so you don't need any extra mesh or texture. Just one file. How to create Vertex Colors in Blender? There are a few methods. One of them:
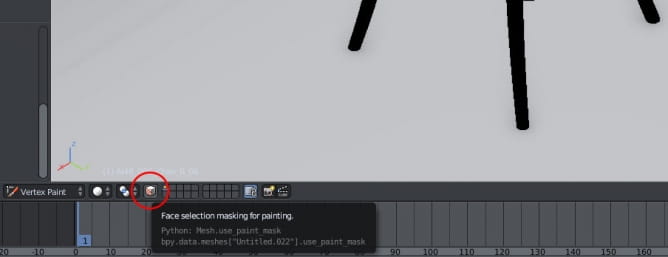
Select the faces you want, go into Vertex Paint, enable "Face selection masking for painting"
Pick the color and choose Paint > Set Vertex Colors.
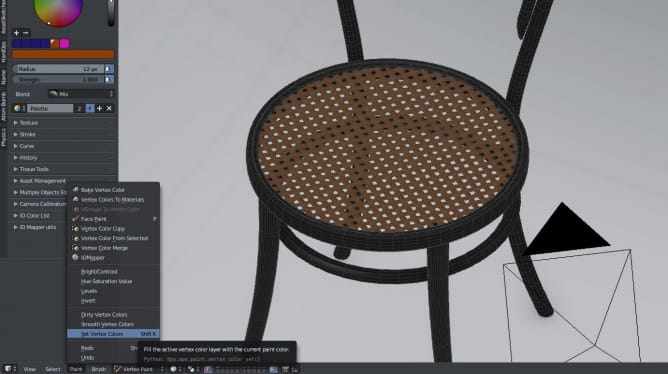
Repeat for different selections and you will have your Id map ready.
- Advantages: we don't need different materials and two meshes, we just set Vertex Colors and export our mesh as FBX. Substance Painter will bake ID map without problems and we don't need any additional texture. We can always go back to blender, paint different selection, quickly re-bake ID map and we're done.
- Disadvantages: if you have many elements, it can be a bit cumbersome to make all selections individually.
Can we do it faster? Yes, we can!
But we will need a paid tool - IDMapper add-on for Blender. It currently is available on BlenderMarket for $22.95 and it is the most sophisticated, yet very simple to use solution for creating ID map from almost each data that Blender can provide. IDMapper can automatically assign ID maps basing on face selection. It can convert Vertex Groups to Vertex Colors.

It can assign ID maps basing on seams or sharp edges of the mesh. It can automatically merge colors of similar elements and merge different vertex color groups.
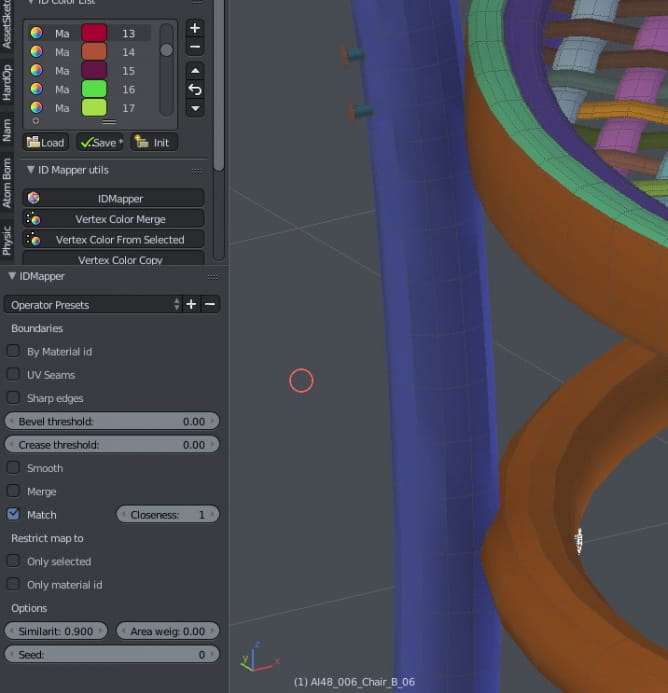
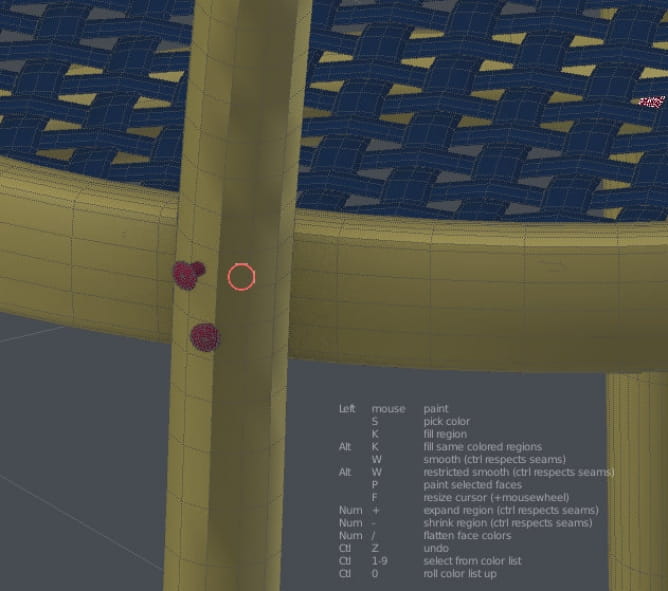
If you need to tweak the result, you can also use paint mode and easily sample any vertex color and paint on faces, assign it to selected polygons or turn the whole area of one color to another. It's very versatile tool that let's you be in full control of your vertex colors.
When you will have your final vertex colors, you need to export your mesh as FBX to Substance Painter. then you press "Bake meshes" button and bake maps using the same mesh you exported. Substance Painter by default uses Vertex Colors for baking ID maps. Another advantage of ID mapping: you only need to bake one Texture Set which makes things quickier!
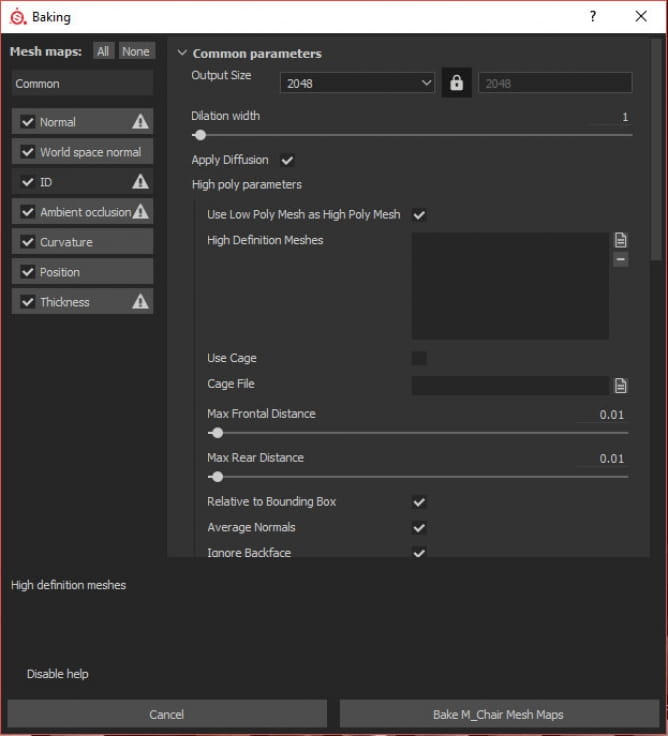
Use low poly mesh as high poly mesh
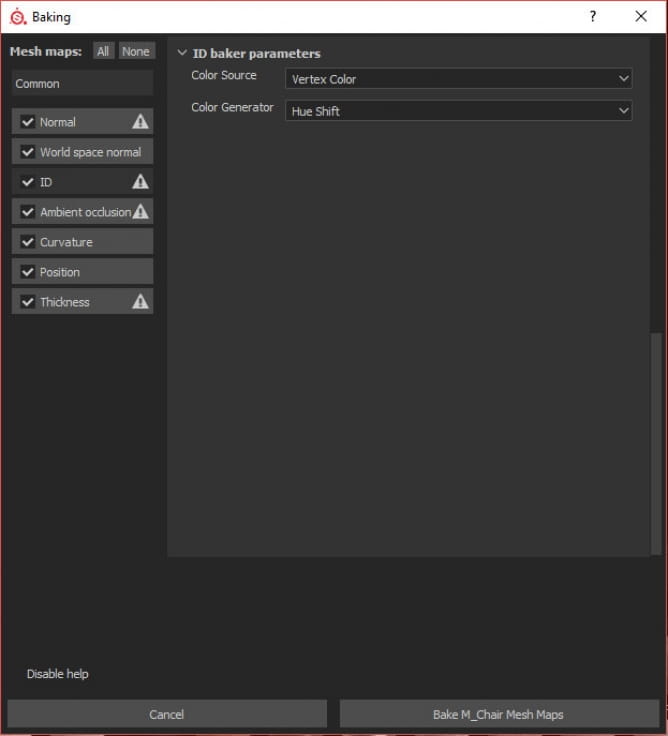
Bake from Vertex Color
Now, create a folder, add a black mask and from FX section (magic want above layers stack) choose "Color selection". Press "Pick color" button and now every layer that you will put in that folder will be restricted to specified ID color selection. You can pick as many colors as you want to.
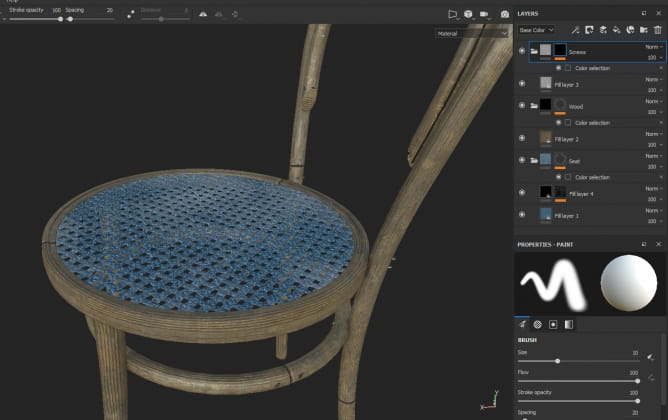
So now you have your model, your ID maps, different materials on different elements and all in one fbx file and one texture set! hope that it was useful to you, thanks for reading!
 How To Make Your CGI Walls More RealisticRealistic walls with noise modifier.
 Removing LUTs from Textures for better resultsRemove the LUT from a specific texture in order to get perfect looking textures in your render.
 Chaos Corona 12 ReleasedWhat new features landed in Corona 12?
 OCIO Color Management in 3ds Max 2024Color management is crucial for full control over your renders.
 A look at 3dsMax Video SequencerDo you know that you can edit your videos directly in 3ds Max? Renderram is showing some functionalities of 3ds Max's built in sequencer.
 FStorm Denoiser is here - First ImpressionsFirst look at new denoising tool in FStorm that will clean-up your renders.
Customer zone
Your orders
Edit account
Add project
Liked projects
View your artist profile


COMMENTS