How To Make Your CGI Walls More Realistic
Realistic walls with noise modifier.
Total: € 0
Continue Shopping
In accordance with the art. 13 section 1 and 2 of the European Parliament and Council Regulation 2016/679 of the 27th April, 2016 on the protection of natural persons, with regard to the processing of personal data and on the free movement of such data, and repealing Directive 95/46/EC (General Data Protection Regulation), hereafter RODO, I hereby inform that:
1. EVERMOTION S.C., 8 Przędzalniana Str., 15-688 Białystok, Poland is the Administrator of your Personal Data (APD)
2. Data Protection Inspector can be reached through e-mail: iod@evermotion.org
3. Your personal data are to be processed on the basis of art. 6 section 1 letter a, b and f of RODO in order to:
a) prepare, conclude and execute the agreement and for other purposes approved by you,
b) to execute the legitimate interest like marketing of products and the agreement, claim assertion or defence against claims resulting from the law regulations.
4. Entities entitled to the reception of your personal data may be the authorised public bodies; mail providers; providers of the services covered by the agreement; responsible for debt recovery, keeping the archives, document utilization, legal consulting, technical services, IT services and accountancy.
5. Your personal data shall not be transferred to the third country, nor to the international bodies.
6. Your personal data shall be processed within the period of the agreement and upon your additional consent until you withdraw it. APD shall keep the data for the period of any civil law claim execution connected with the agreement.
7. You have the right to demand an access to your personal data, to correct or to delete the data if there is no other basis for the processing or any other purpose of such processing or to limit the processing of the data, to transfer the data to another administrator and to raise objections to the further data processing if there is no legal basis for further processing and to withdraw any previous consent.
8. You provide the personal data voluntarily, however they are necessary to conclude the agreement. The refusal of providing such data may result in the refusal of the agreement conclusion.
9. You have the right to lodge a complaint to the Personal Data Protection Office when in your opinion the data processing violates the regulations of General Data Protection Regulation of the 27 April, 2016 (RODO).
10. Your data will be automatically processed, including the form of profiling.
11. You are obligated to forward above mentioned information to your representative, especially if you appointed this person in the agreement as the contact person or as the representative for the agreement execution.


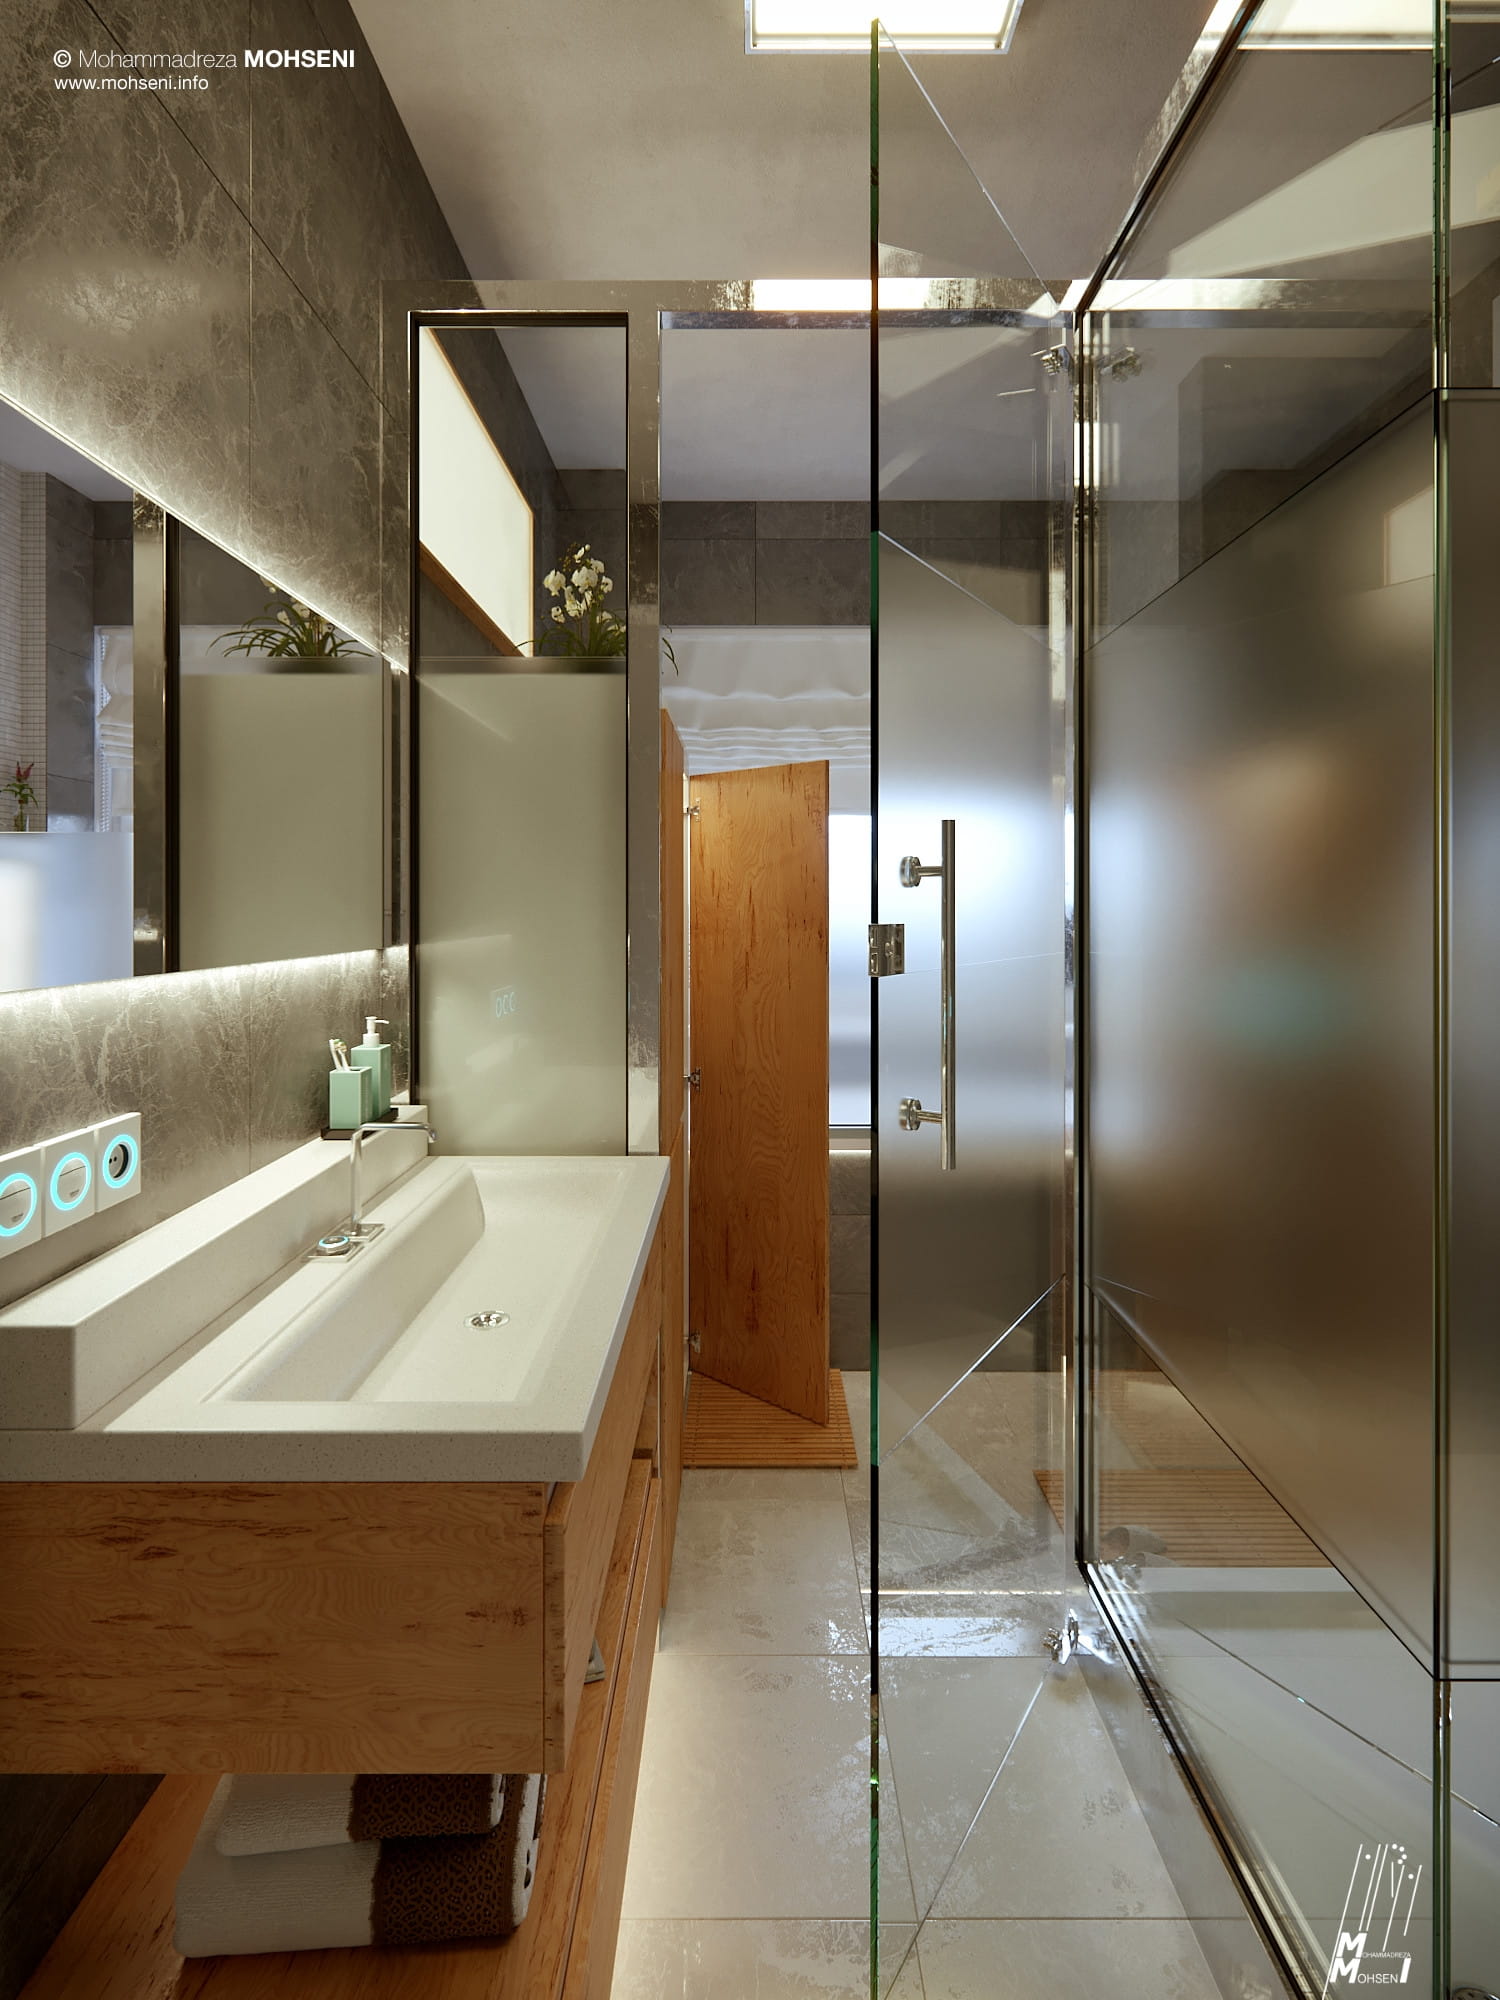
Hello to you all! I am Mohammadreza Mohseni, co-founder of newly founded Vivid Visual Studio in Iran and I am a certified architect with a Masters in Architecture. Additionally, I have over 10 years experience in architectural visualization and architectural photography, and I hope you enjoy reading this making-of article.
For this commercial project, I used Corona Renderer (which I have followed and used since Alpha 3) to learn about the changes and features in the latest version of Corona Renderer.
It was an absolute pleasure to write this article because I really enjoyed doing this project. Clients’ behavior and their interaction with artists is the axiom that can make the job pleasant, and can lead an artist to create extraordinary artwork (besides the technical and artistic capability of the artist). In this project, the client did not limit me and she was open to my recommendations about the design, colors, harmony, materials selection and lighting design in the process.
Modus Operandi (method of procedure)
In order to get some believable renders of a small space, there is no choice except to focus on richness in the details. As you may have heard, there is a famous quote that says “the devil is in the detail.” It is a hard and time-consuming process to create plenty of details in every aspect of the project, such as lighting, materials, and modeling. So, before we begin the walk-through, please keep in mind that adding lots of detail was my first priority.
Here we go, on to the workflow!
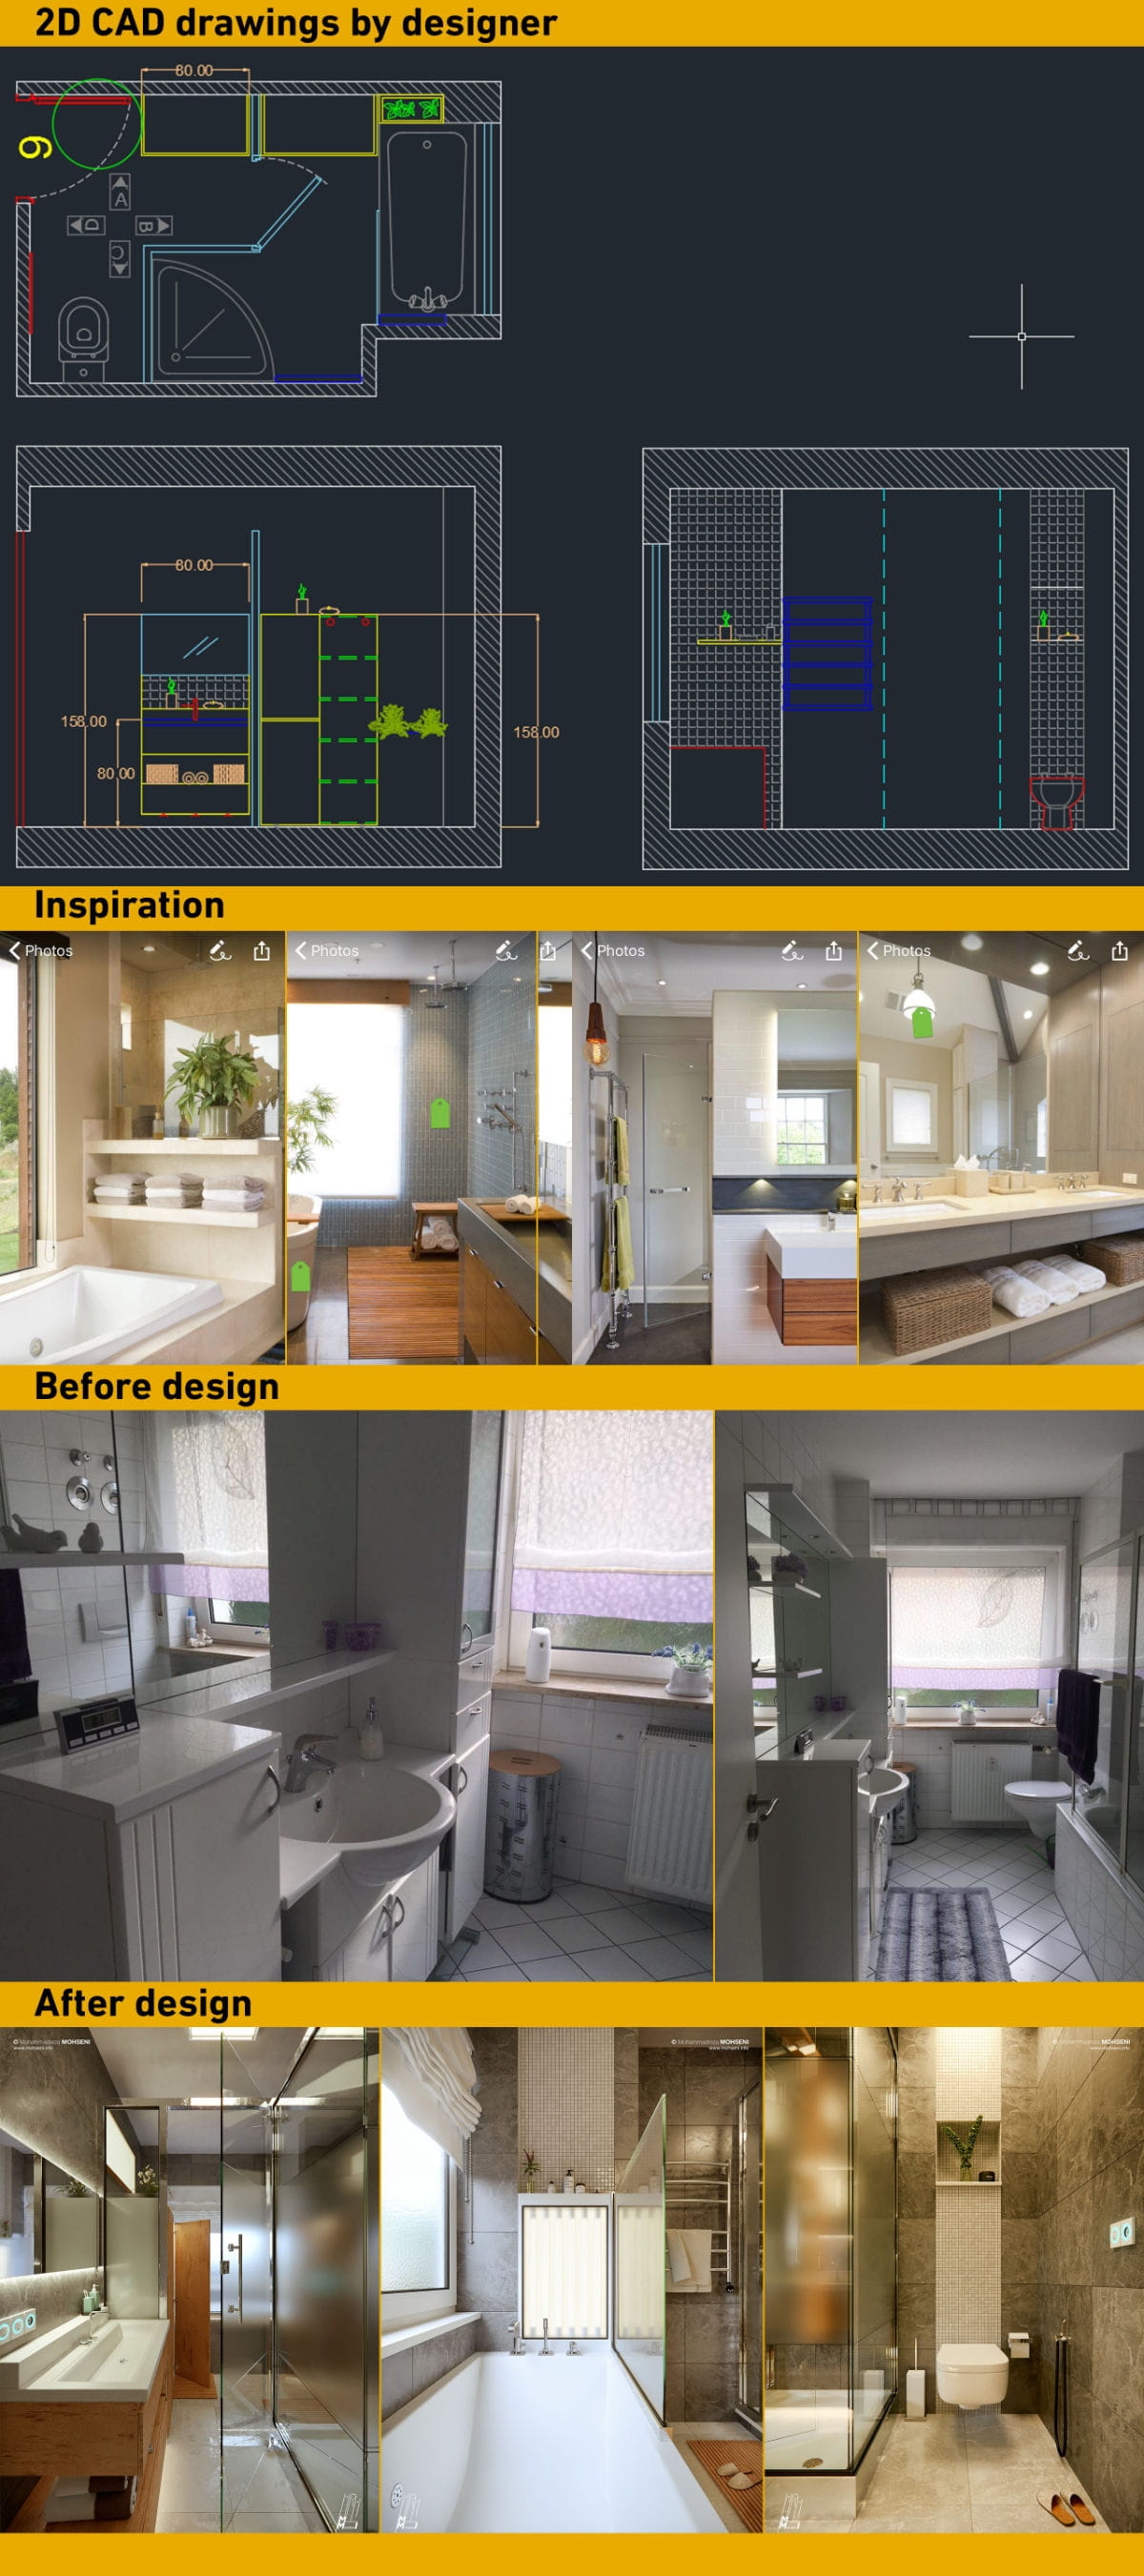
Inspiration
For this project, the client sent me a 2D-CAD file, plus some reference photos to act as inspiration. You can see the references below (the inspiration photos are from the houzz.com mobile app):
Modeling
I used Subdivision Surface Modeling for the hard surfaces objects – that is, almost everything in this scene! A few models are from 3dsky.org and Evermotion.
To control the resolution of the models in each camera shot, based on how much detail I needed for that particular shot, I changed the OpenSubdiv Render Iterations parameter using values between 2 (for objects that were further away) and 4 (for objects that were seen in close up). You can see below how the Render Iterations affects the smoothness of the model:
In order to control the Render Iterations efficiently, I wrote a simple script to quickly change this setting for all objects in the scene, or for the objects which were currently selected. You can find this script below for you to use:
Control OpenSubdiv Render Iterations Script
Run the MAXScript Listener (F11) and then copy and paste the script that I wrote, replacing X at the end of the script with the number you want for the Render Iterations parameter.
Note: be aware changing the resolution of a model will affect render times.
To run on all objects in the scene:
for i in objects where ((finditem (for m in i.modifiers collect classOf m) OpenSubdiv) != 0) do (for m in i.modifiers where (classOf m == OpenSubdiv) do (m.useRenderIterations = true; m.renderIterations = X))
And to run on only currently selected objects:
for i in getcurrentselection() where ((finditem (for m in i.modifiers collect classOf m) OpenSubdiv) != 0) do (for m in i.modifiers where (classOf m == OpenSubdiv) do (m.useRenderIterations = true; m.renderIterations = X ))
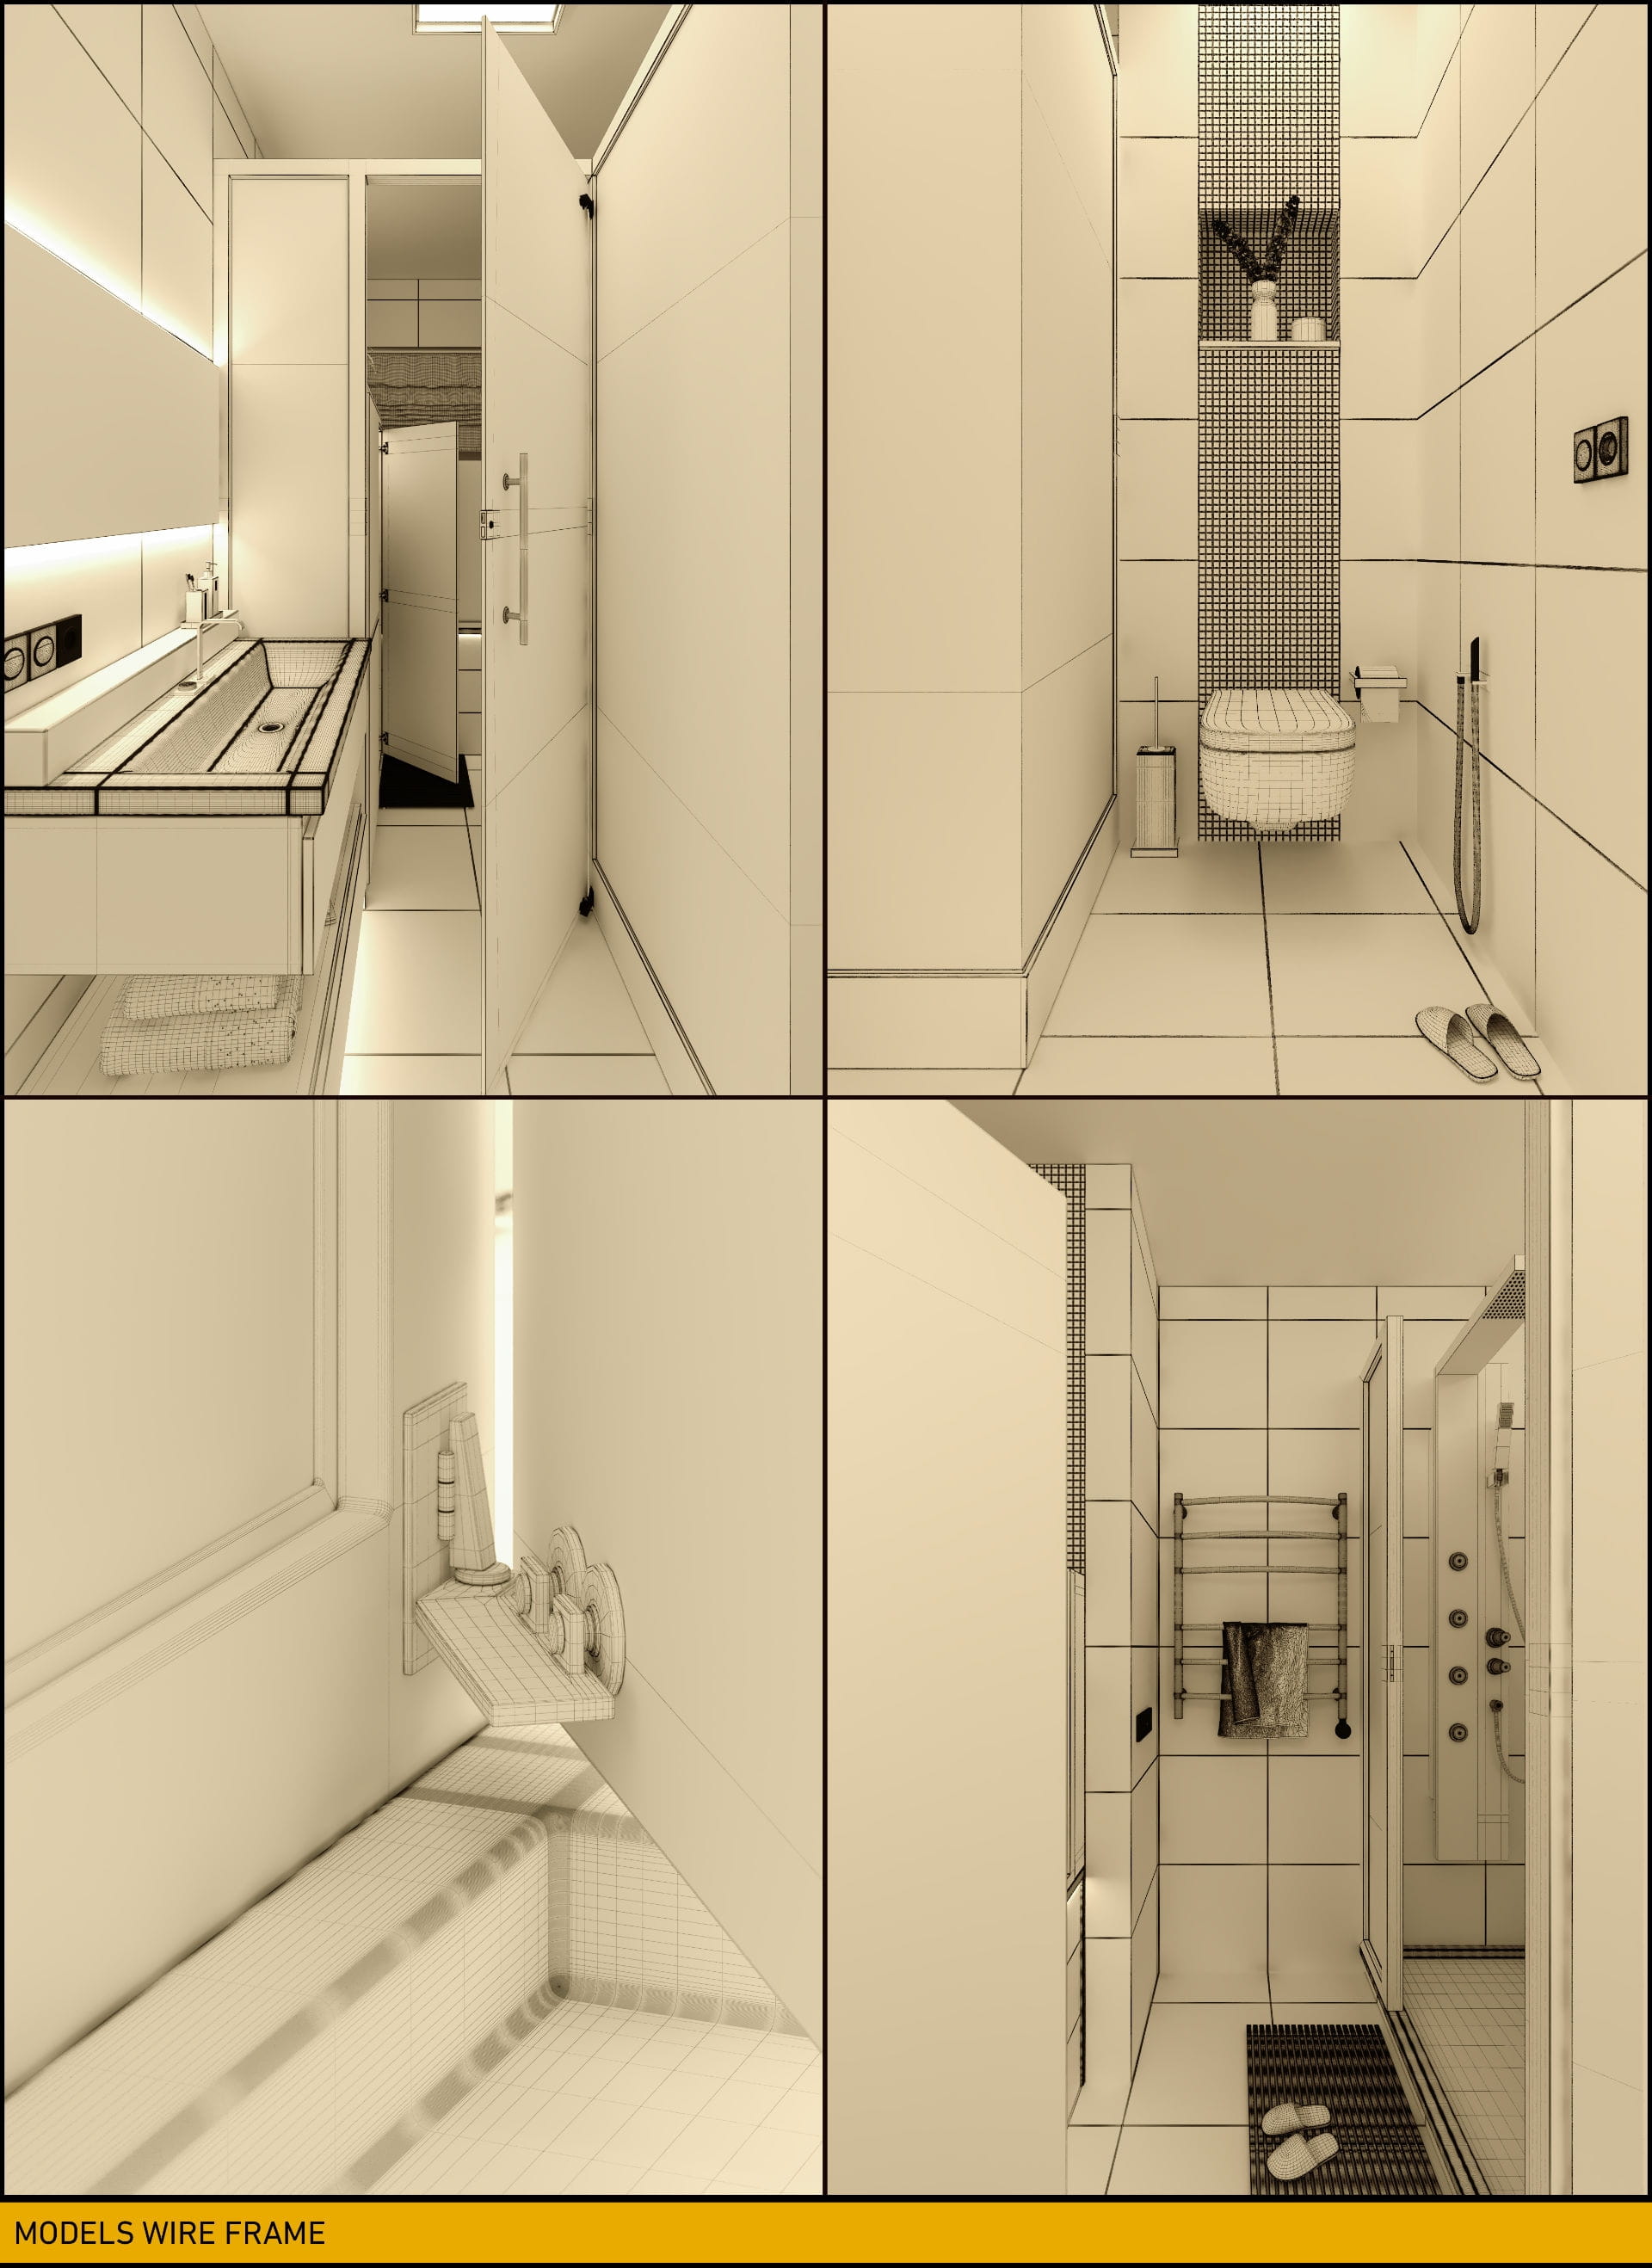
Below, you can see wireframes of several of the camera angles. I adjusted the amount of subdivision based on how much detail I needed in any given shot:
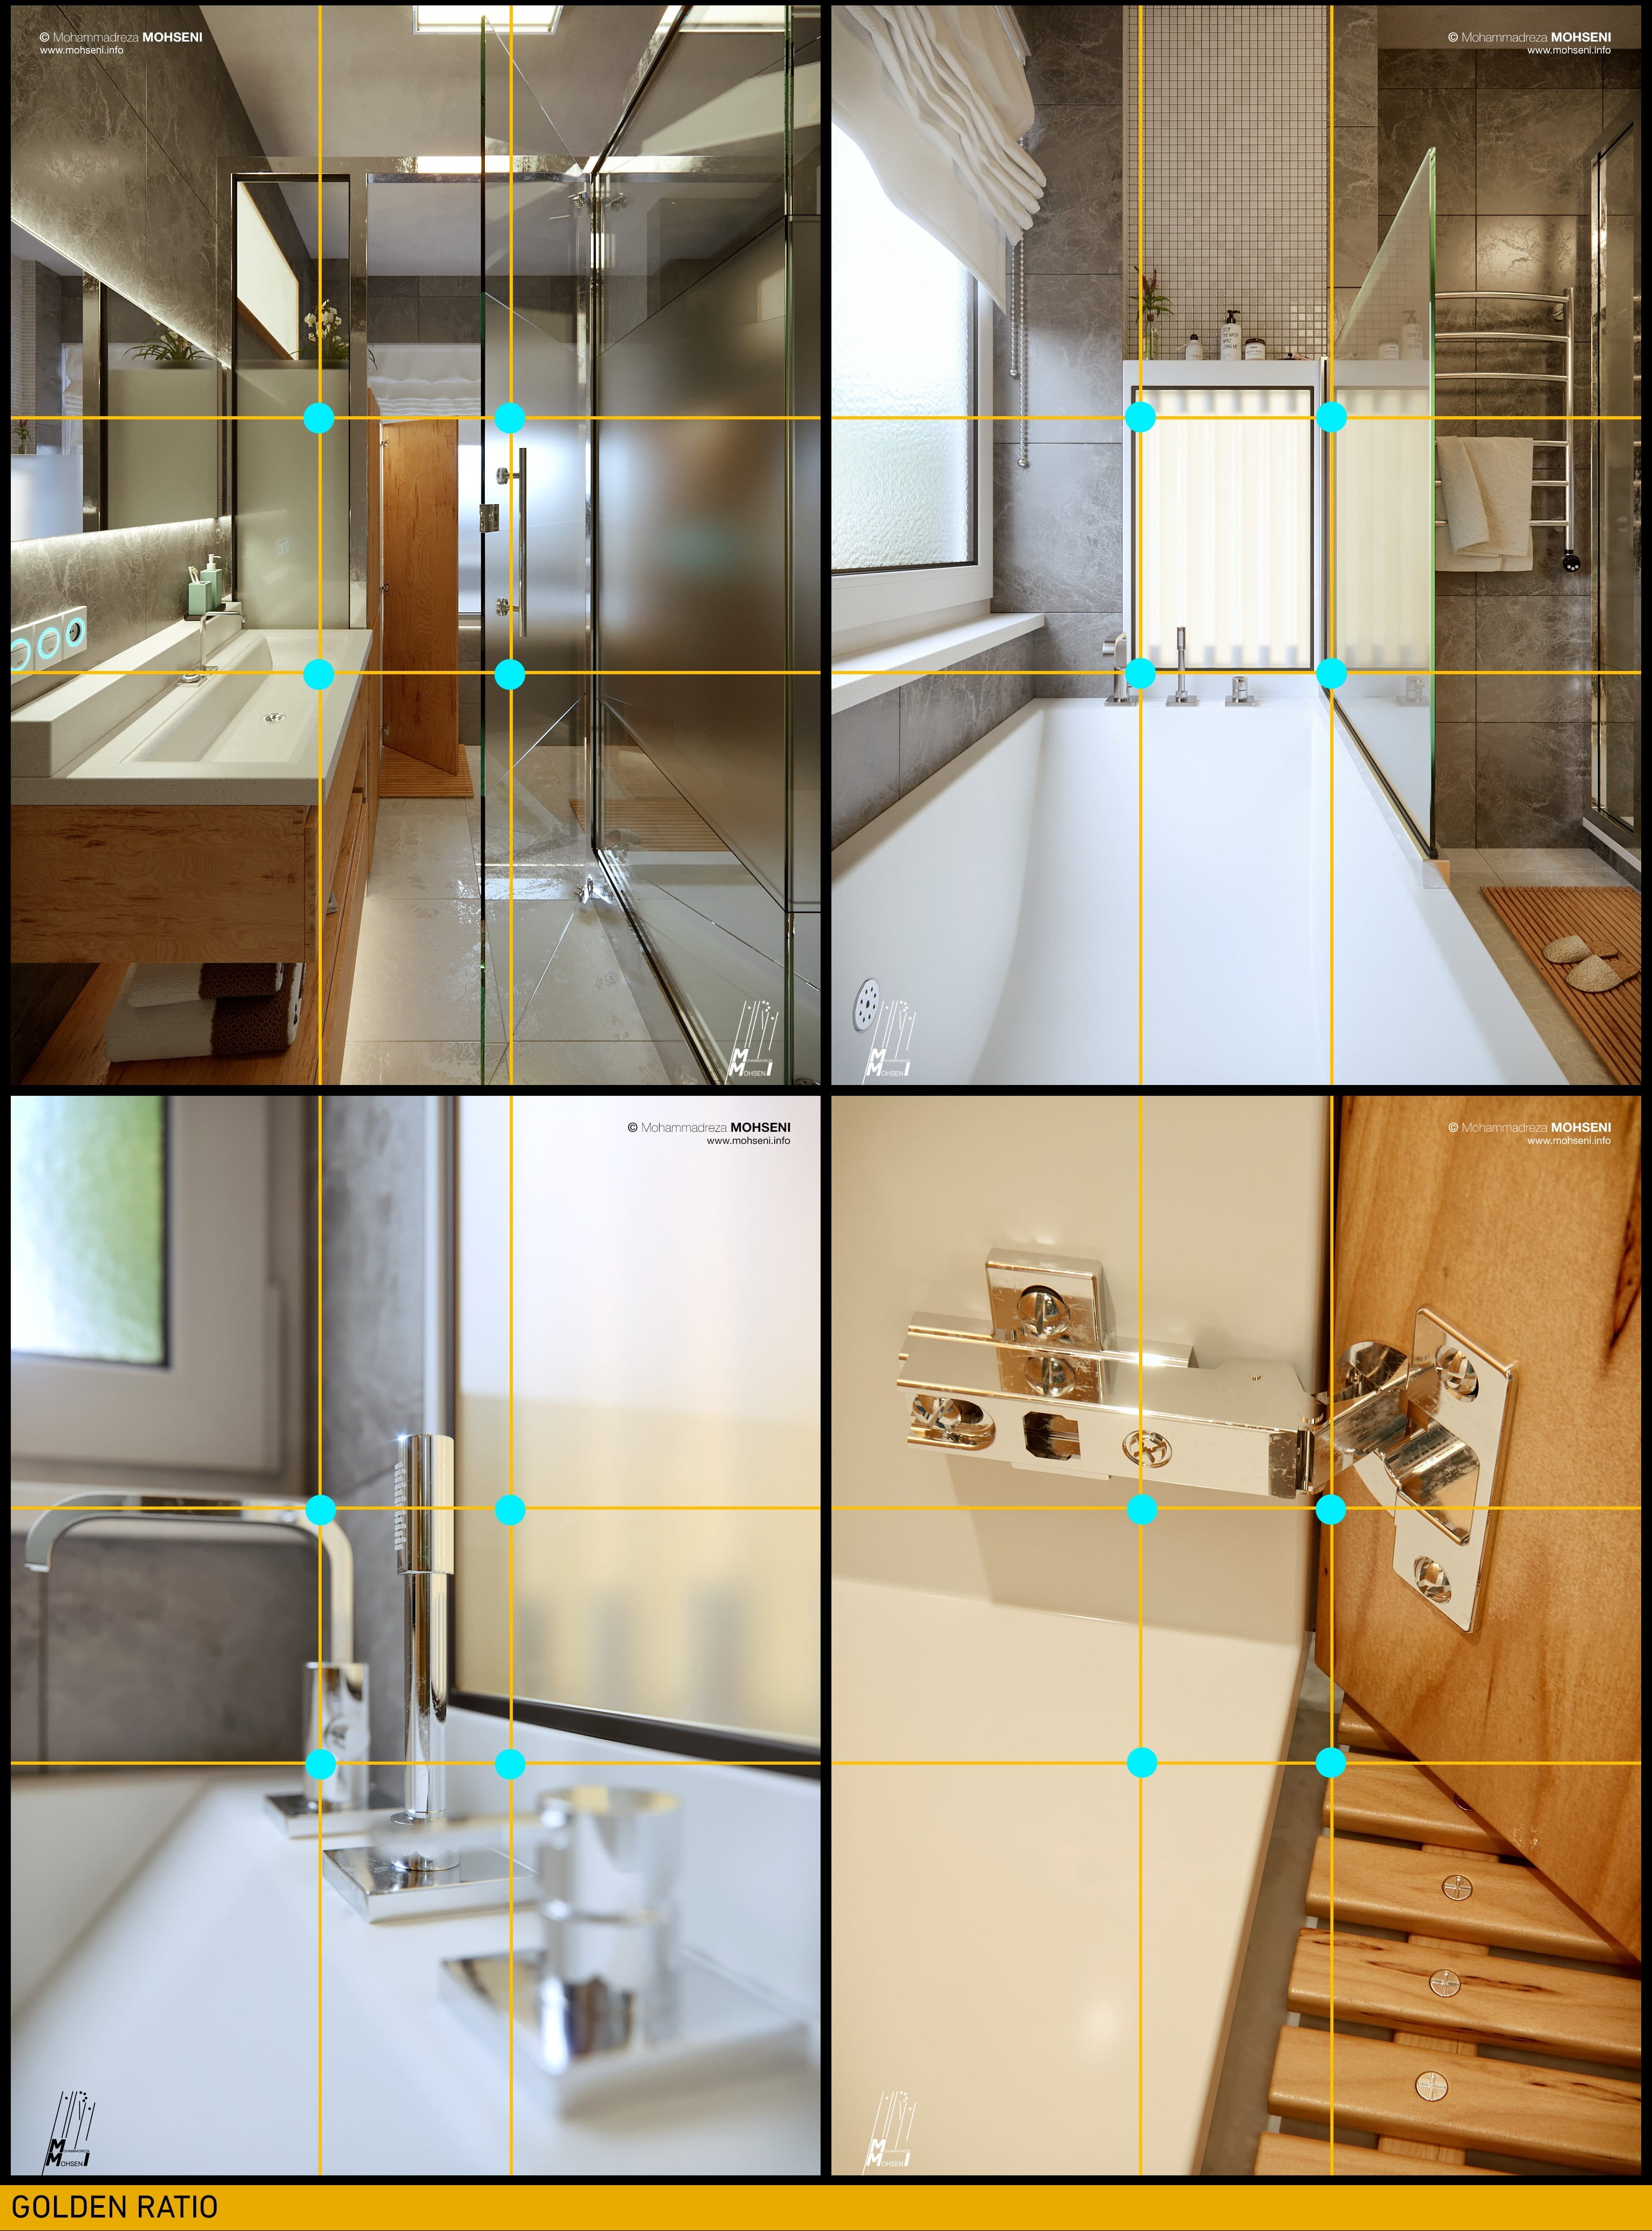
Camera & Compositions
I used the golden ratio as a guideline to compose my camera shots. You can see it below, overlaid on the renders:
Finding the right camera settings is really easy if you have a background in photography (like me), and it will take a less than minute to set your camera exposure triangle for your lighting scenario.
Even if you don’t have experience with photography, it is not a big hassle – you can use one of my scripts called “DSLR Exposure (EV-LV Method)” to help you set your camera. The script supports the Corona Camera Modifier, as well as other camera types, and you can download it here.
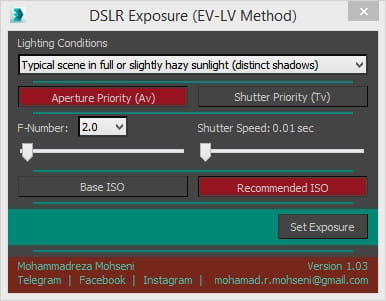
Note: if your priority is DOF, use AV mode; if your priority is Motion Blur, use TV mode.
Lighting
Remember the “Modus Operandi” part of this making of? Well, now we will begin focusing on the details, aiming to keep it simple but realistic. One of the ways to make your lighting realistic is by using a high resolution HDRI – it will help you create realistic, natural lighting, with detailed variation, with ease.
You can of course use other methods, such as using a Corona Sky (which is awesome) and get a pretty damn good result, but I usually go for the HDRI approach. In this project, I used the Peter Guthrie 0902 HDRI loaded into a Corona Bitmap, in conjunction with a Color Correction map to change the colors a little bit. You can see the settings below:
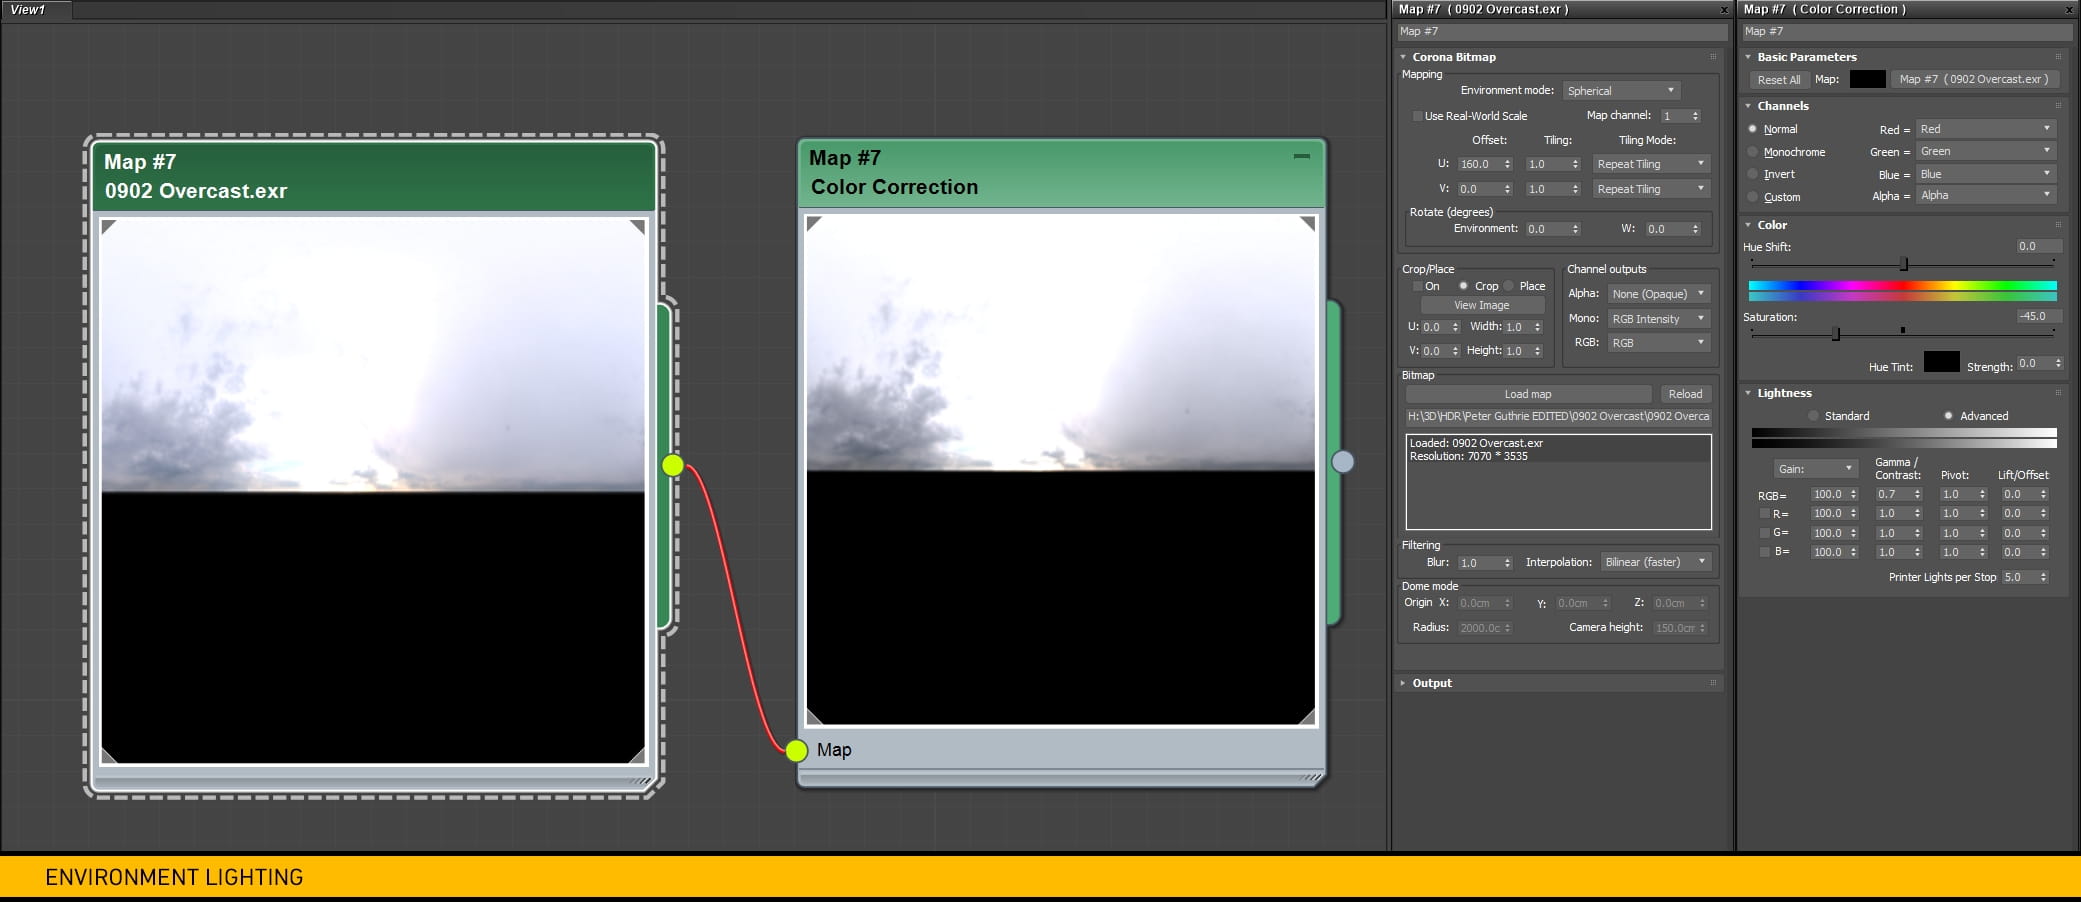
Note: be aware that using a Color Correction map will increase the render time.
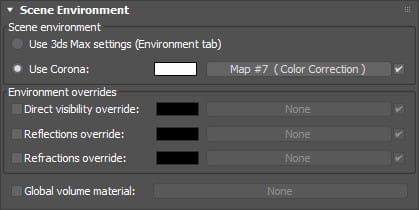
Then just drop that Color Correction node into the Corona Scene Environment:
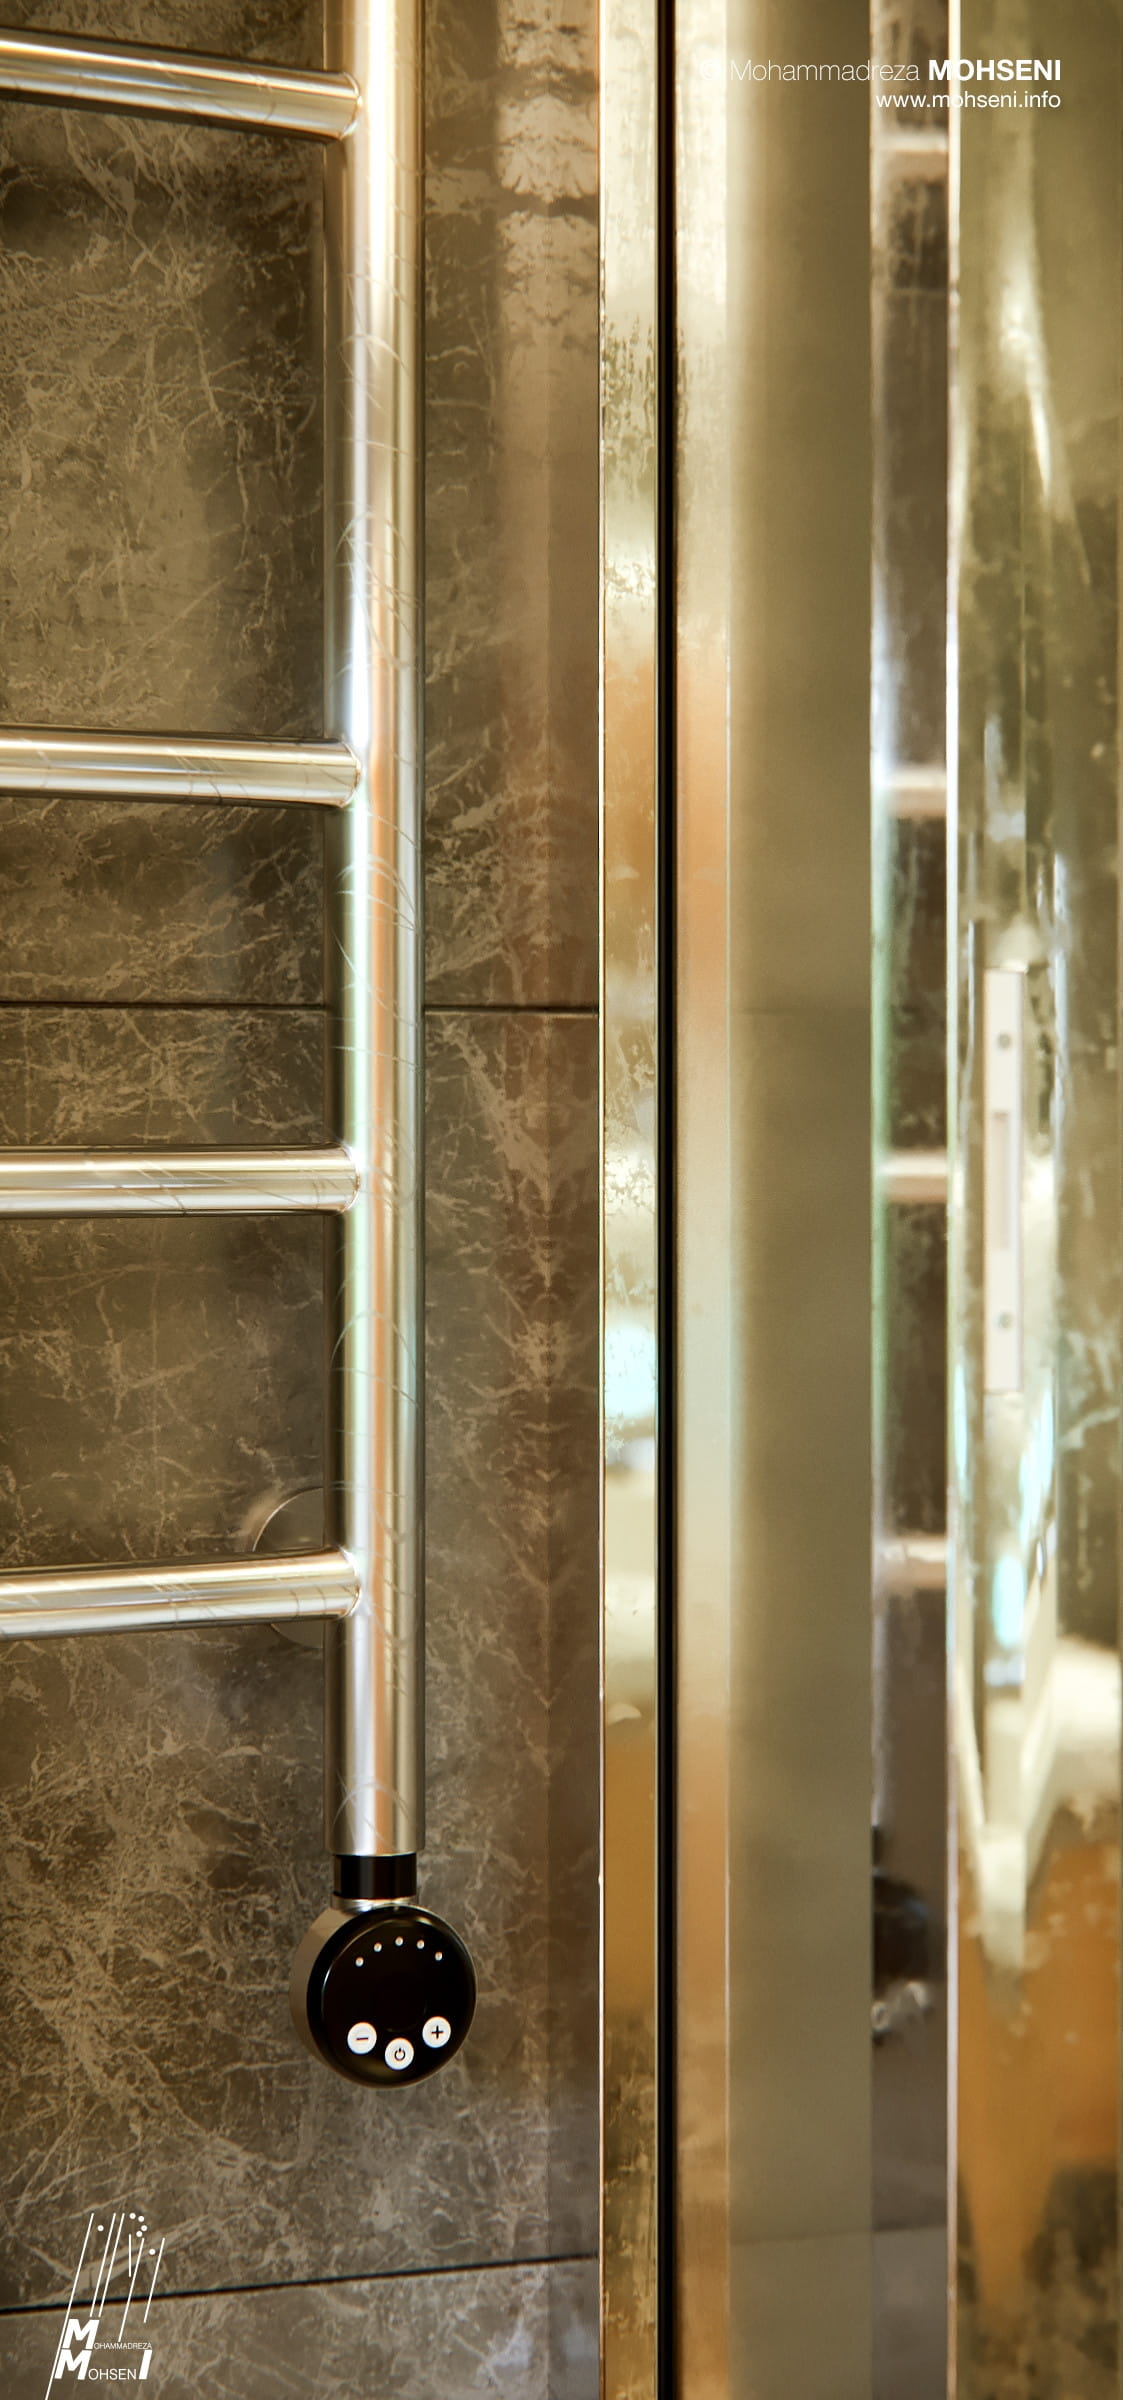
After setting up the environmental lighting, it’s time to set up the artificial lighting. Because I went for a desaturated atmosphere but I did not want my materials to look pale (especially because the colors of the materials have a kind of gray tone in general), I decided to create a chromatic contrast in my lighting by using the complementary color of the environmental lighting, and to saturate it quite a lot to make it more attractive to my client’s eyes.

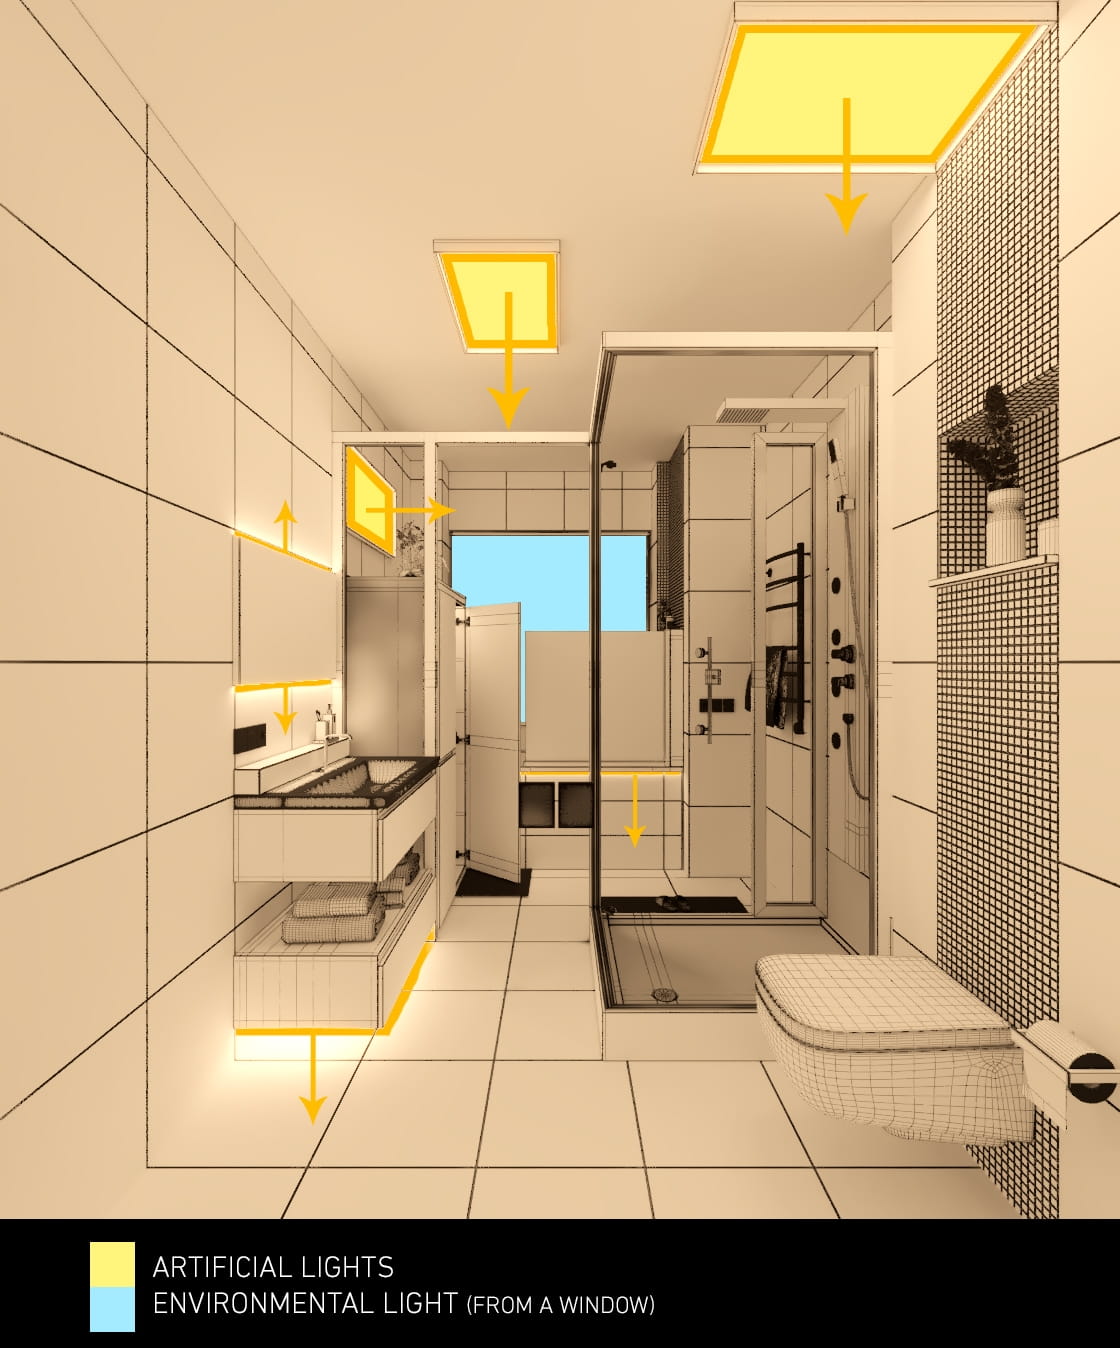
All the artificial lights have the same setup, just with variations in intensity. You can see their positions in the pictures above, and below you can see the light settings I used:
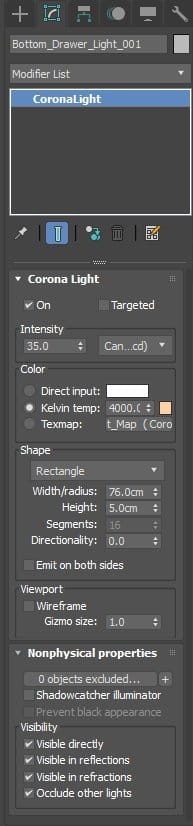
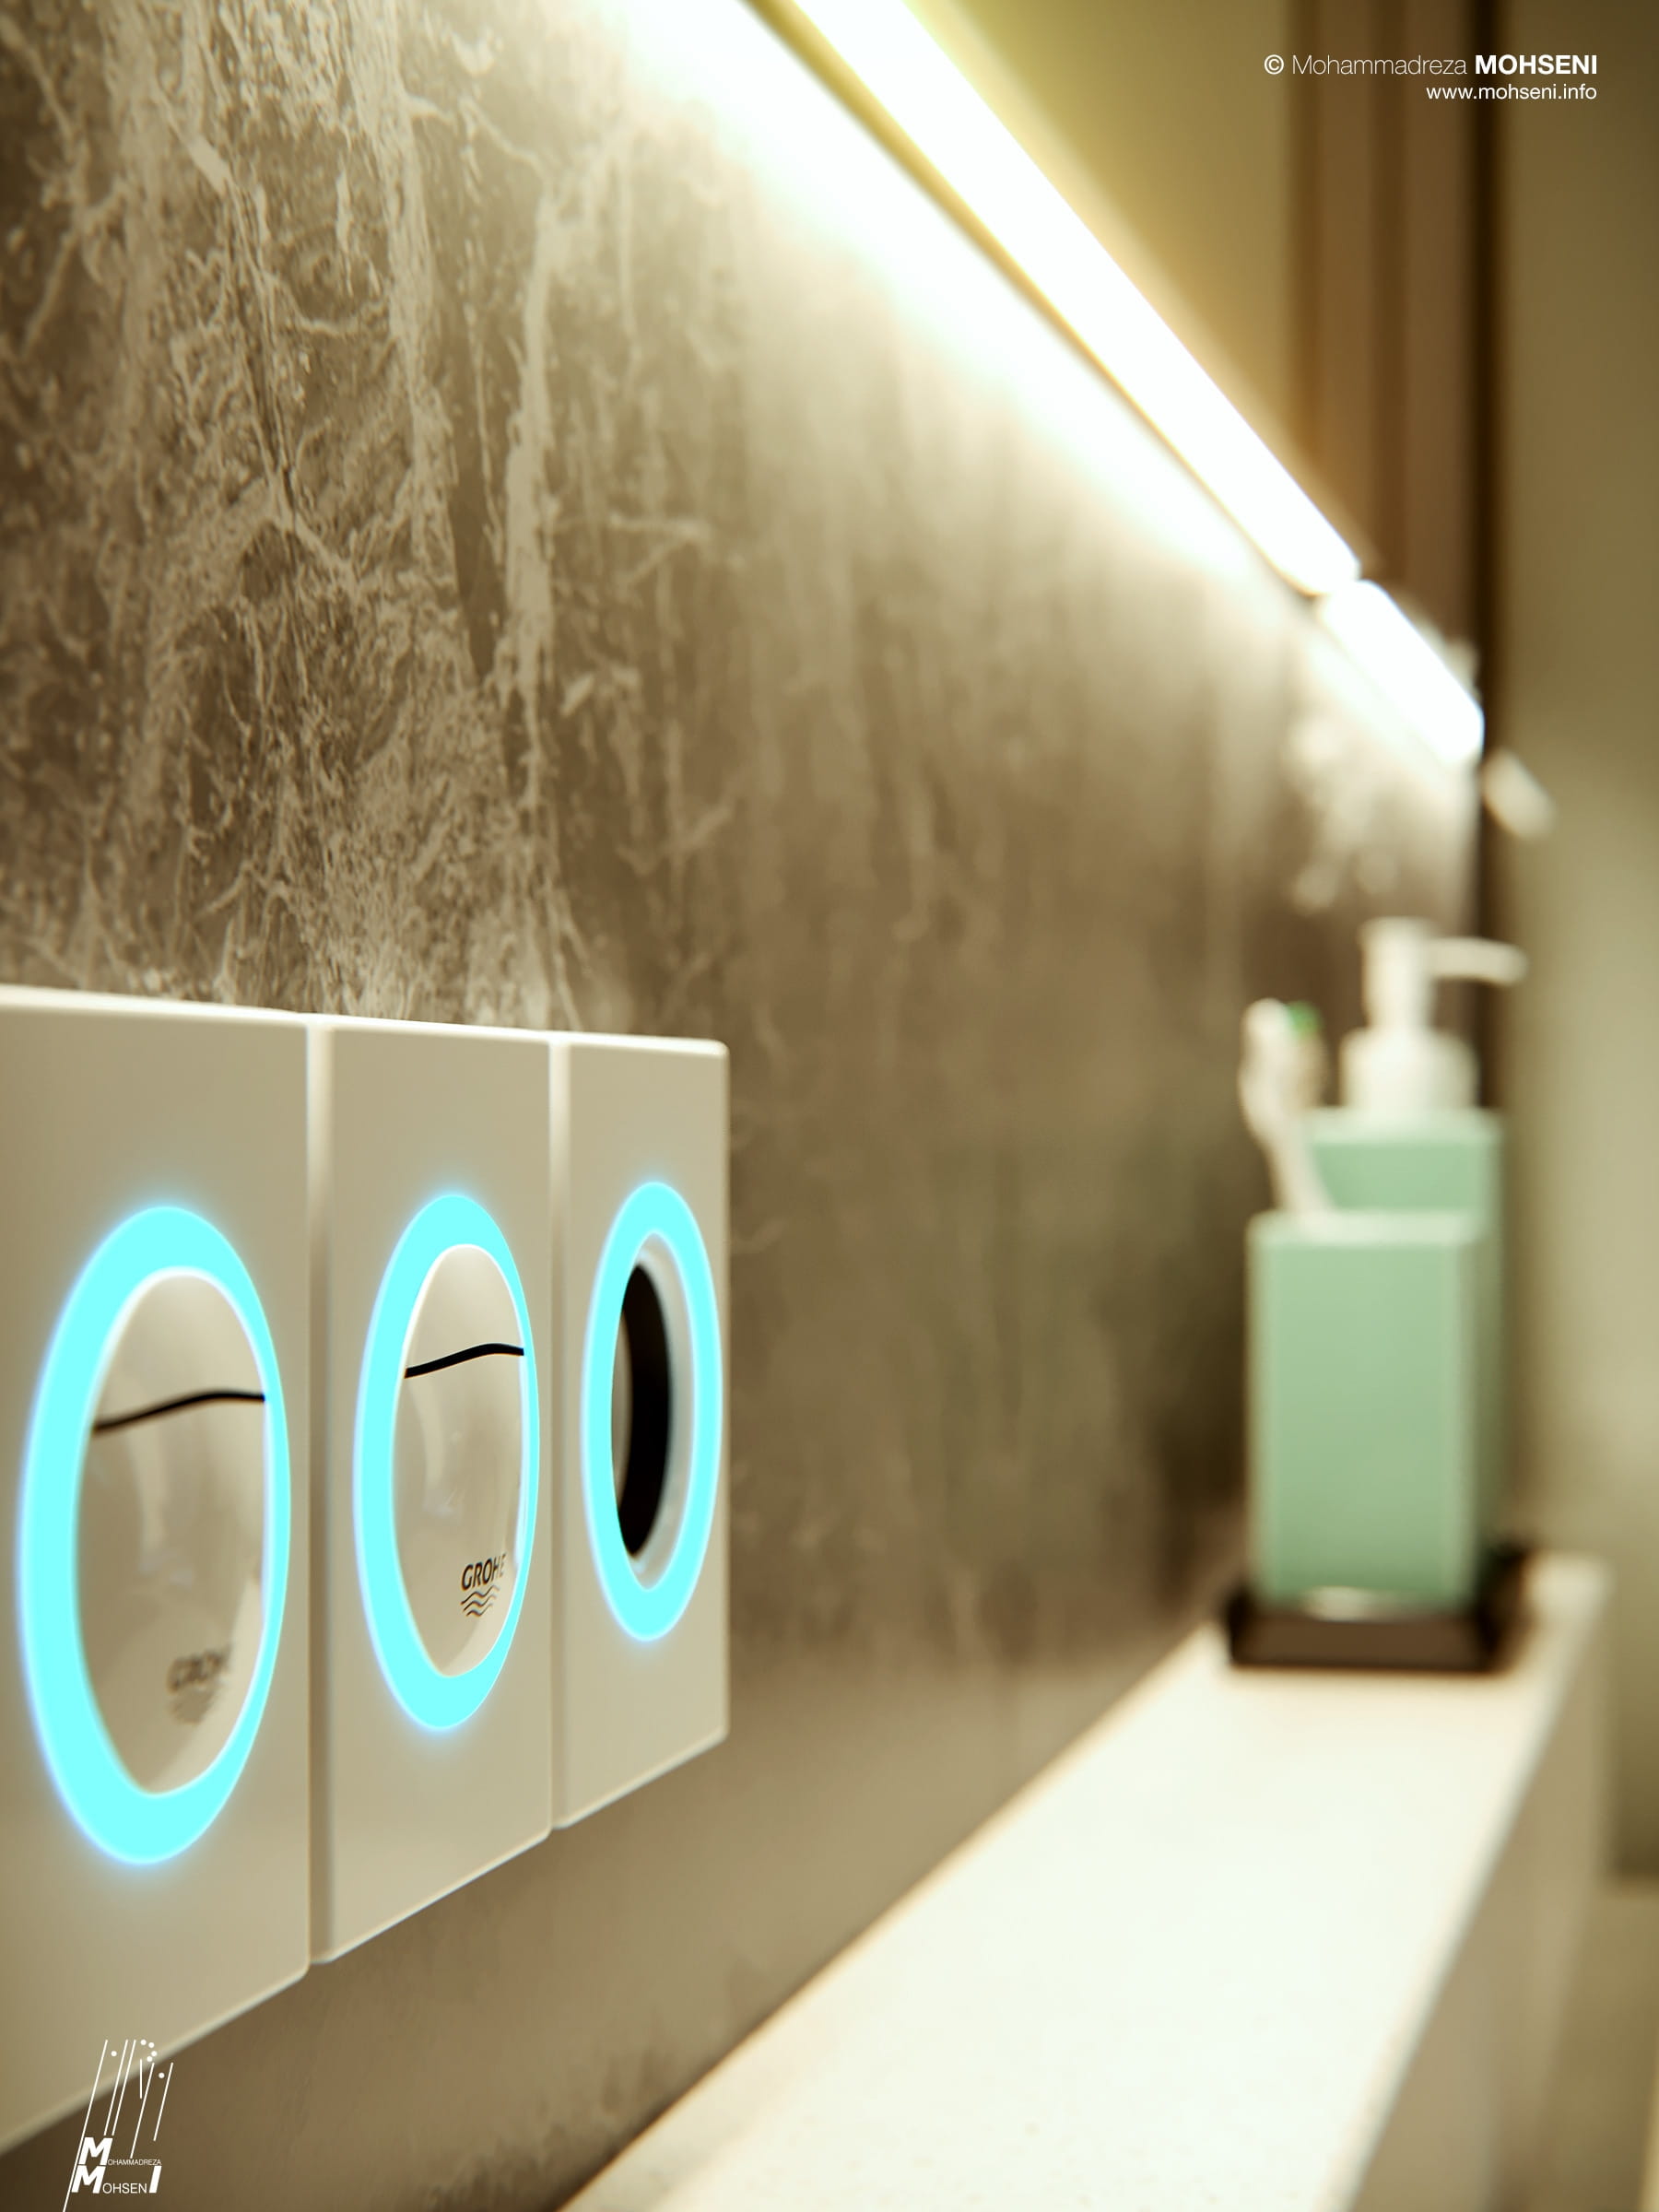
Note: The diffuse light boxes have a frosted glass in front of them (even those below the console, or those below the edge of the tub) to help make the lights look more realistic. For the switches and sockets lights I have used a Corona Light Material with a very basic setup:

Materials
After setting up our lighting, it is time to begin the real fun part – material creation!
Note: Do not ever use any pre-created materials or a converted material right out of the box; modify it if you want to create something awesome!
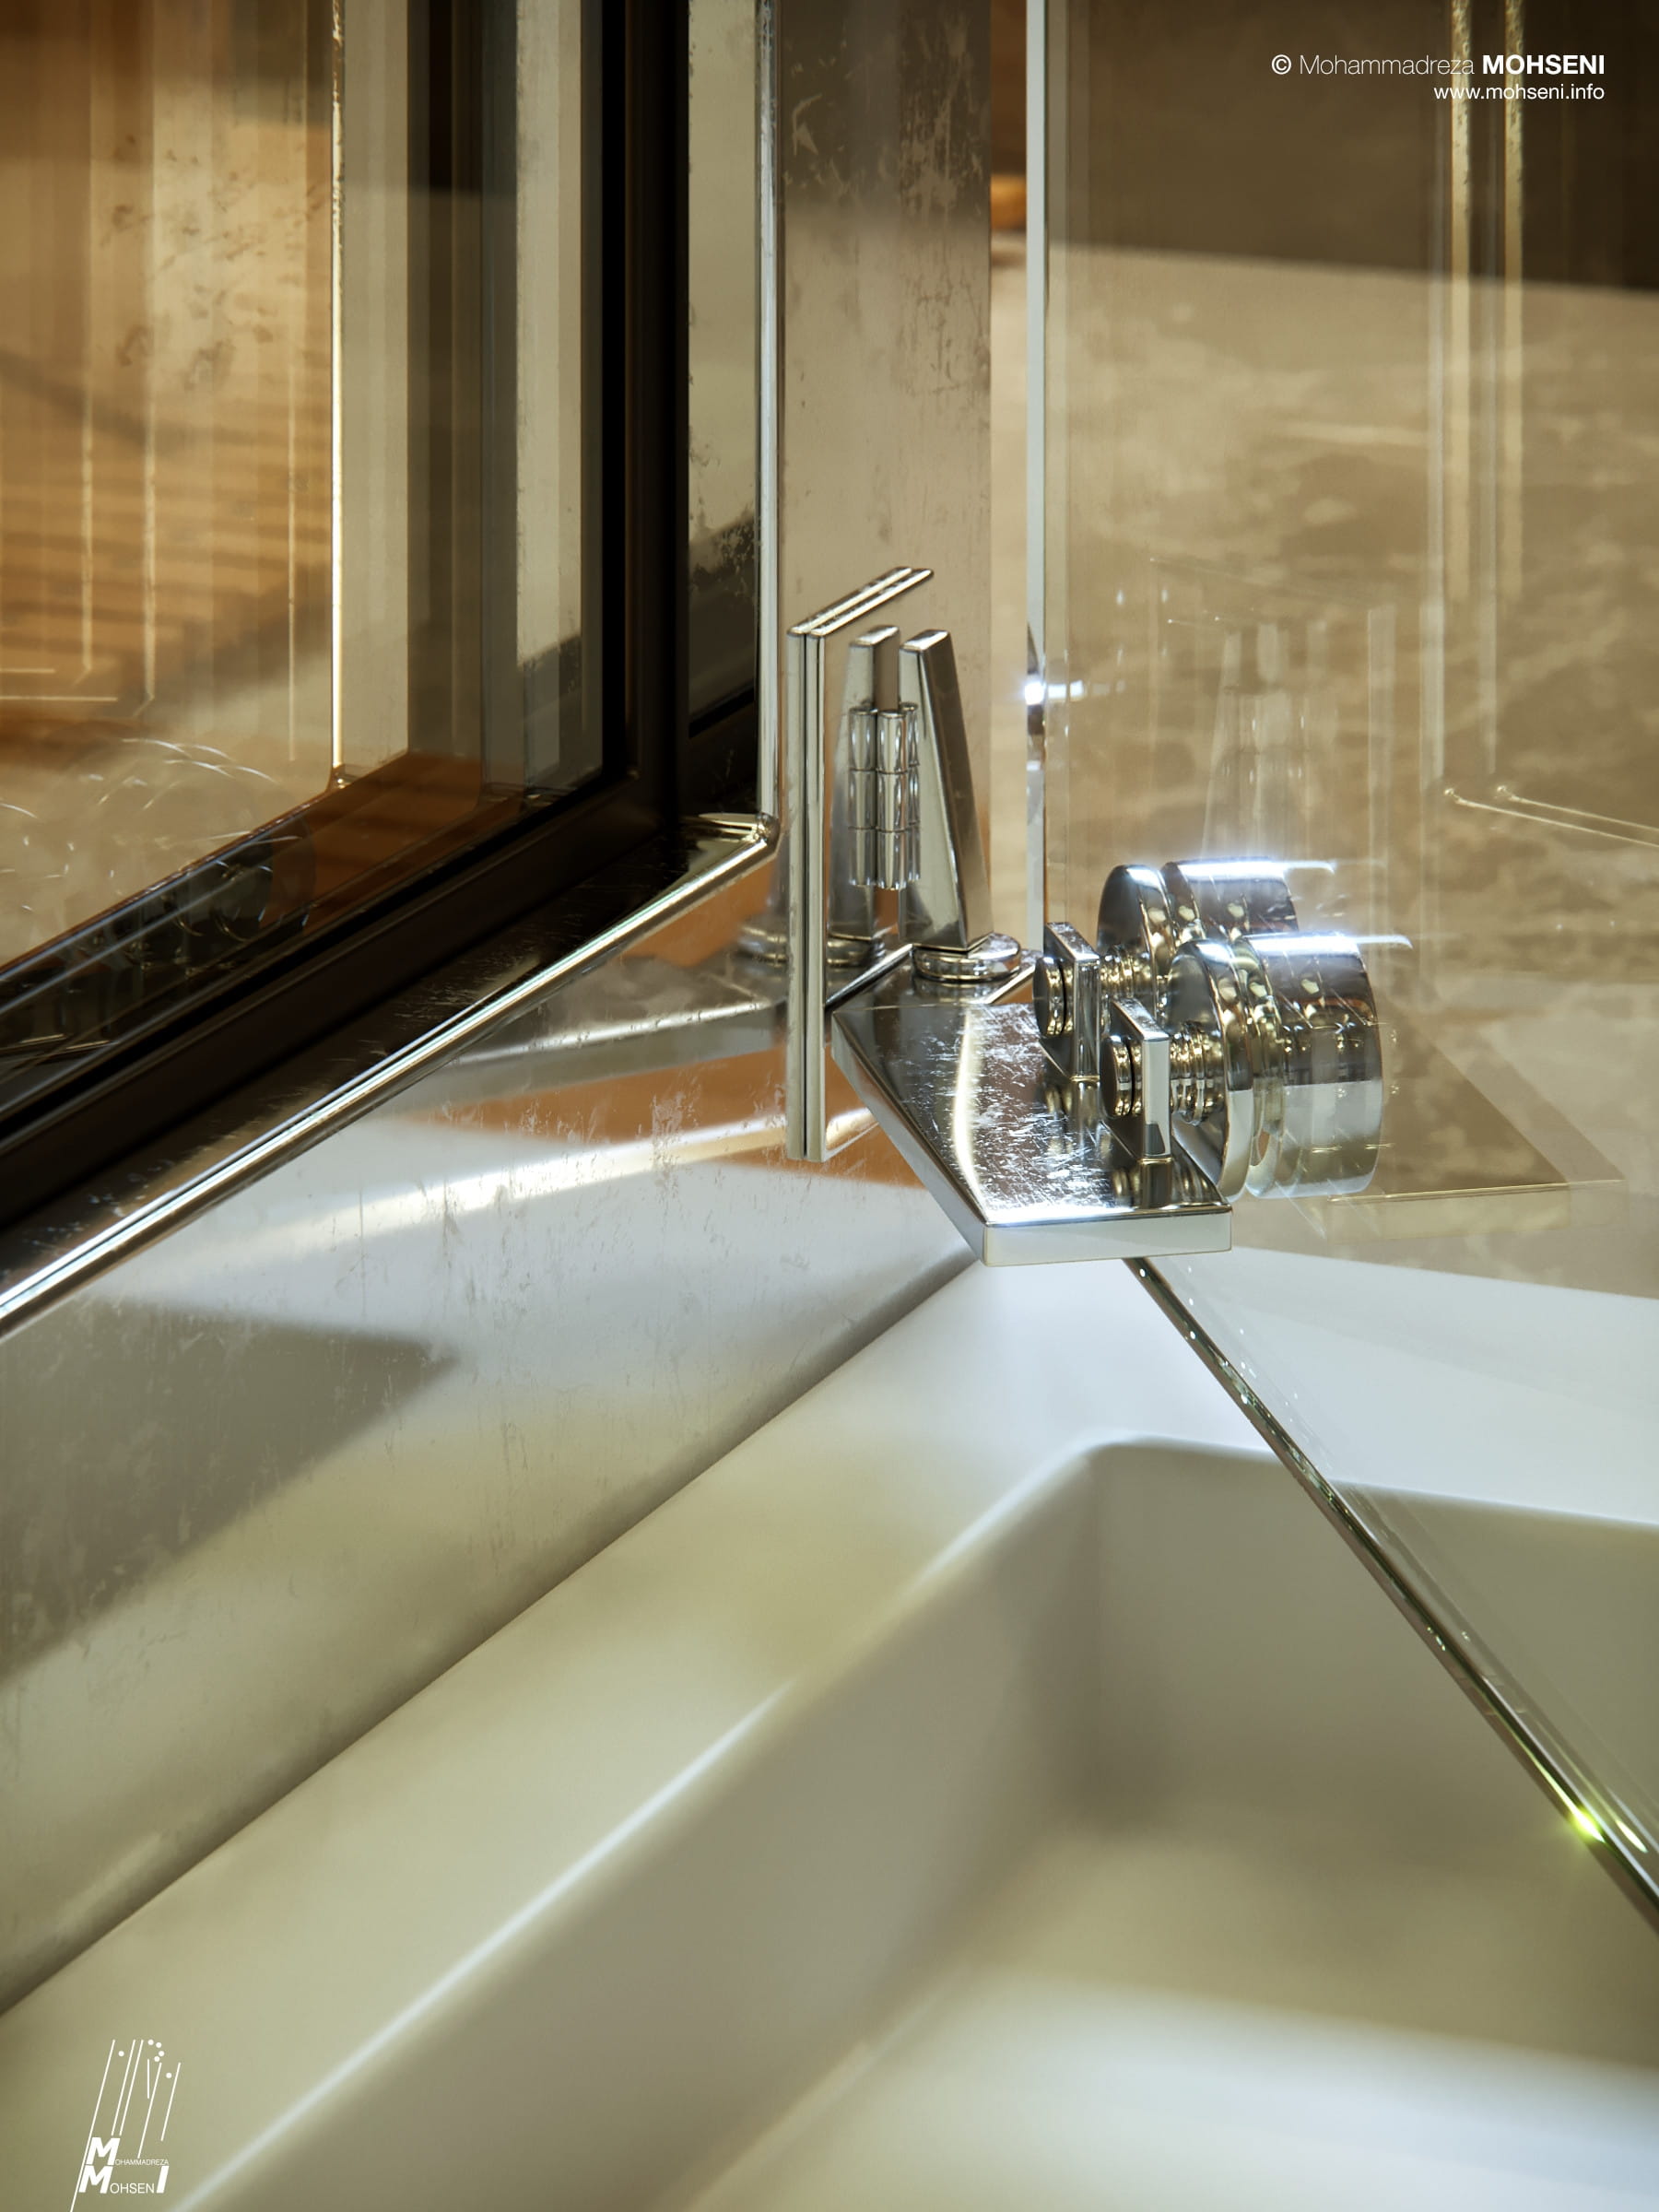
Chrome:
I have used the Complex Fresnel plugin (by Siger Studio – it’s free) to create a more realistic shader. To use the Complex Fresnel shader, disable the Corona Fresnel by setting the Fresnel IOR to 999 in the Corona Material.
For the Glossiness I have used a composite of several maps. You can see the set up in the picture below. If you do not want heavy scratches, it is really easy to modify it, just play with the opacity of the scratch map layers in the properties of the Composite map node, and you will be able to get the result you are looking for.

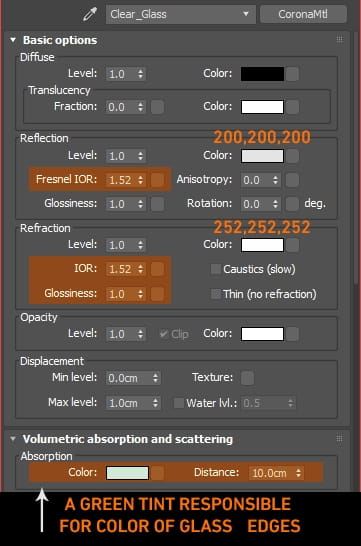
Clear Glass:
This was really easy and simple! See the material setting in picture below:
Frosted Glass:
This was also really easy and simple. See the material setting in picture below:

Using this setup will give you a realistic result, but it does come with a price – it will be slower during rendering, especially because I have used this kind of glass in front of my diffuse lights to get a more realistic result. Be aware of what you are looking for, whether it is detail, or render time – if you want detail it may sometimes have a price.
Note: if you want a tint of color on glass edges, you need to model the glass correctly and with full detail. You won’t get a nice result using a simple plane and a glass material!
Post Production
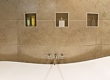
There was not much needed in this stage, you can see the raw renders in image below:

I did a little bit of tone mapping, and adjusted the exposure by +1, or in some images by as much as +2 stops, if needed. Then I added glare and bloom using ArionFX – Corona has its own lens effects and they are awesome, but after some testing I liked the result of ArionFX for this particular set of images.
Then I introduced more contrast to the images, and added sharpness using the Unsharp Mask filter – and the final images are ready! A pretty straightforward and simple procedure. You can see the layers in Photoshop below:
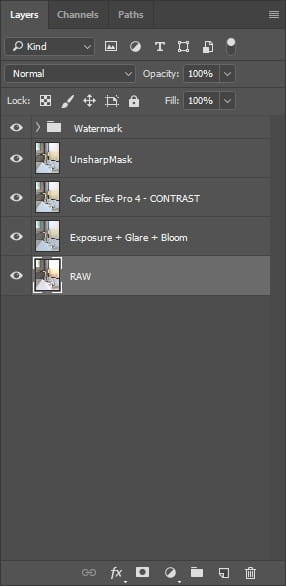
And you can see the post production steps in the image below:

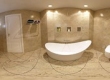
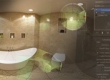
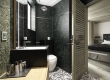
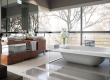
And that completes the project! Here are some of the final renders:

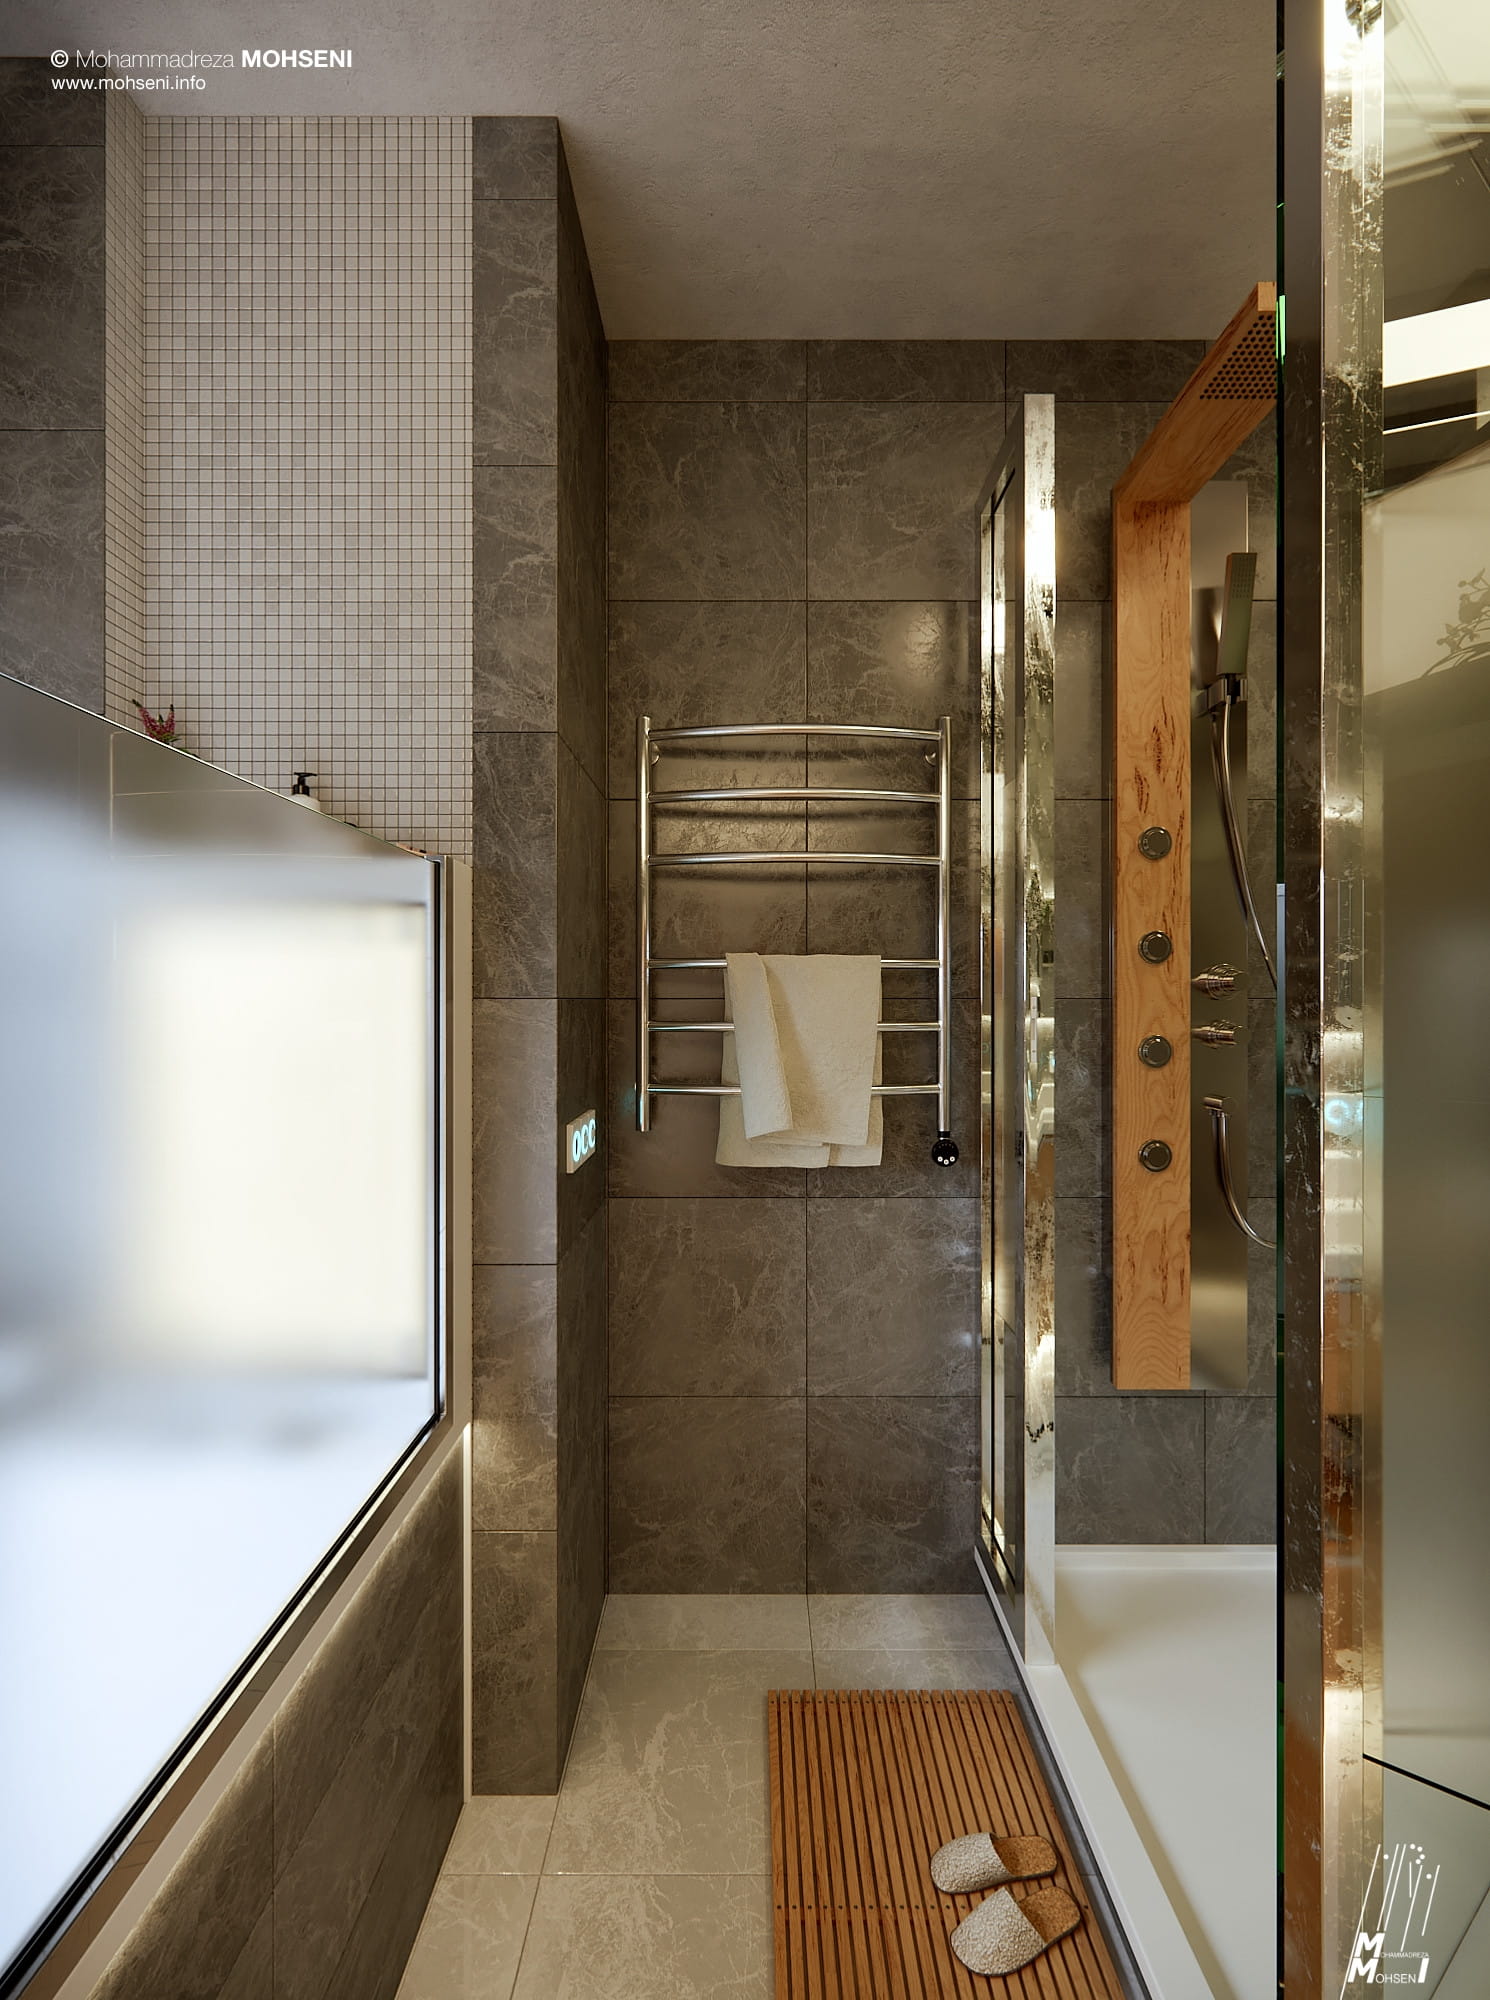


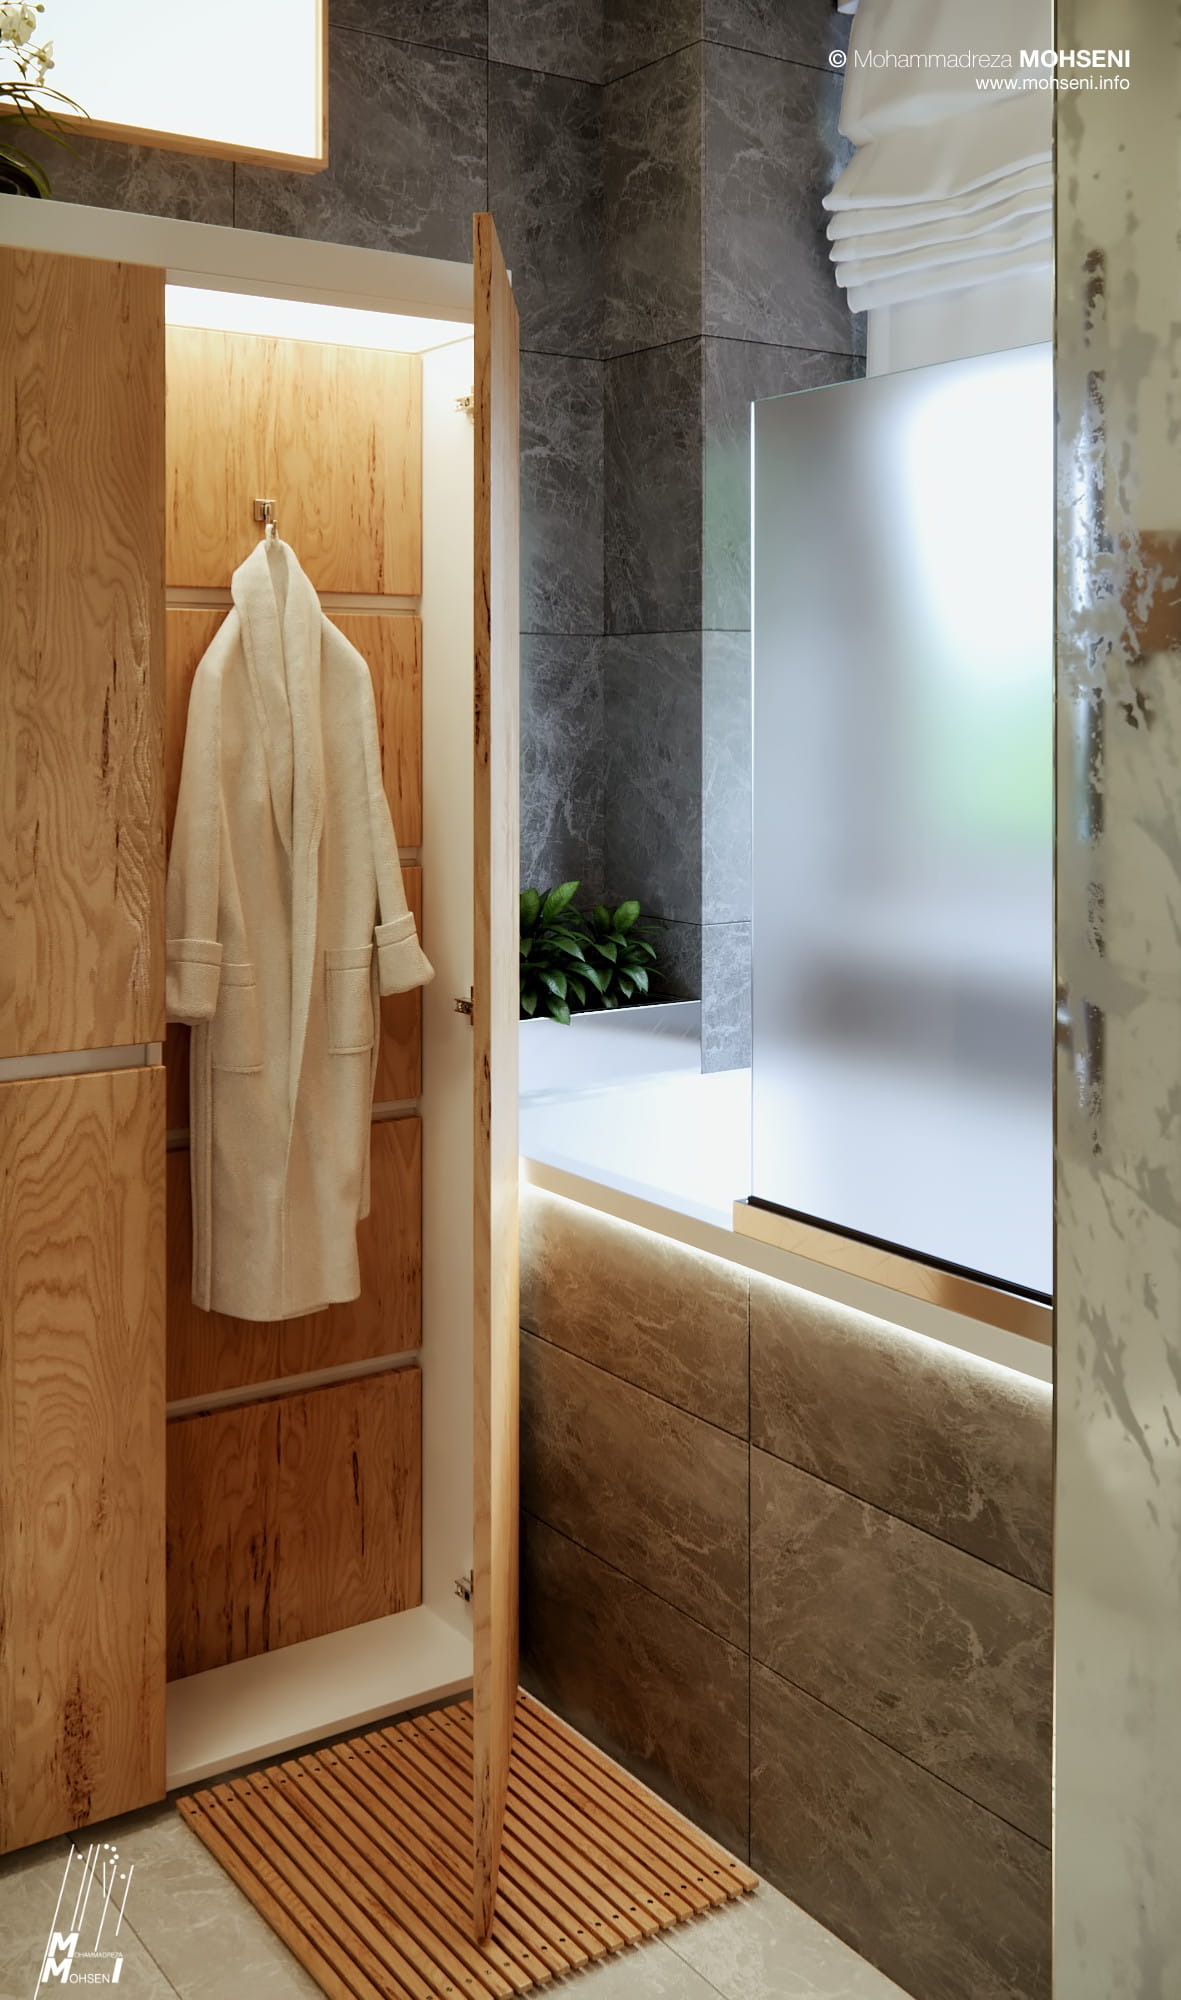
You can see the complete set of images over at Behance.
Thank you for reading, and I hope you found some good tips here, and that you find the scripts useful!
Mohammadreza Mohseni, Co-founder of Vivid Visual Studio
LINKS
Instagram: https://www.instagram.com/mohseni.mr/
Email: mohamad.r.mohseni@gmail.com
Vivid Visual Studio: https://vividvisual.studio


LEAVE A COMMENT


|

|

|

|

|
 Customer zone
 Your special offers
 Your orders
 Edit account
 Add project
 Liked projects
 View your artist profile
COMMENTS