Evermotion: More Than an Asset Library
How Evermotion became a full-scale production partner for archviz, automotive and synthetic data.


Total: € 0

Hi all, this is my first “Making of” tutorial and I hope you enjoy it. Feel free to ask me any questions in the comments section. I really appreciate the Evermotion forum as it helped me a lot to improve with all the free tutorials that you can find here. I was very excited when I received the invitation to produce this “Making of” so now it’s my turn to share some knowledge. I structured this tutorial in 8 main steps that I used to create my final image and they are all detailed below.
For this project I used 3Ds Max 2016, V-Ray 3.6 and Photoshop CS 6.
Step 1 - Mood board
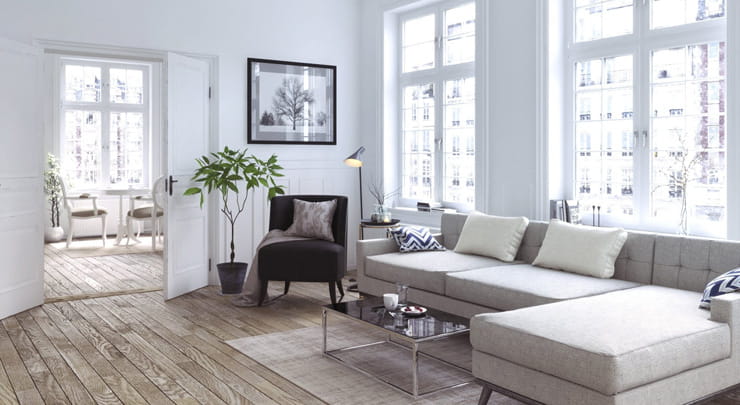
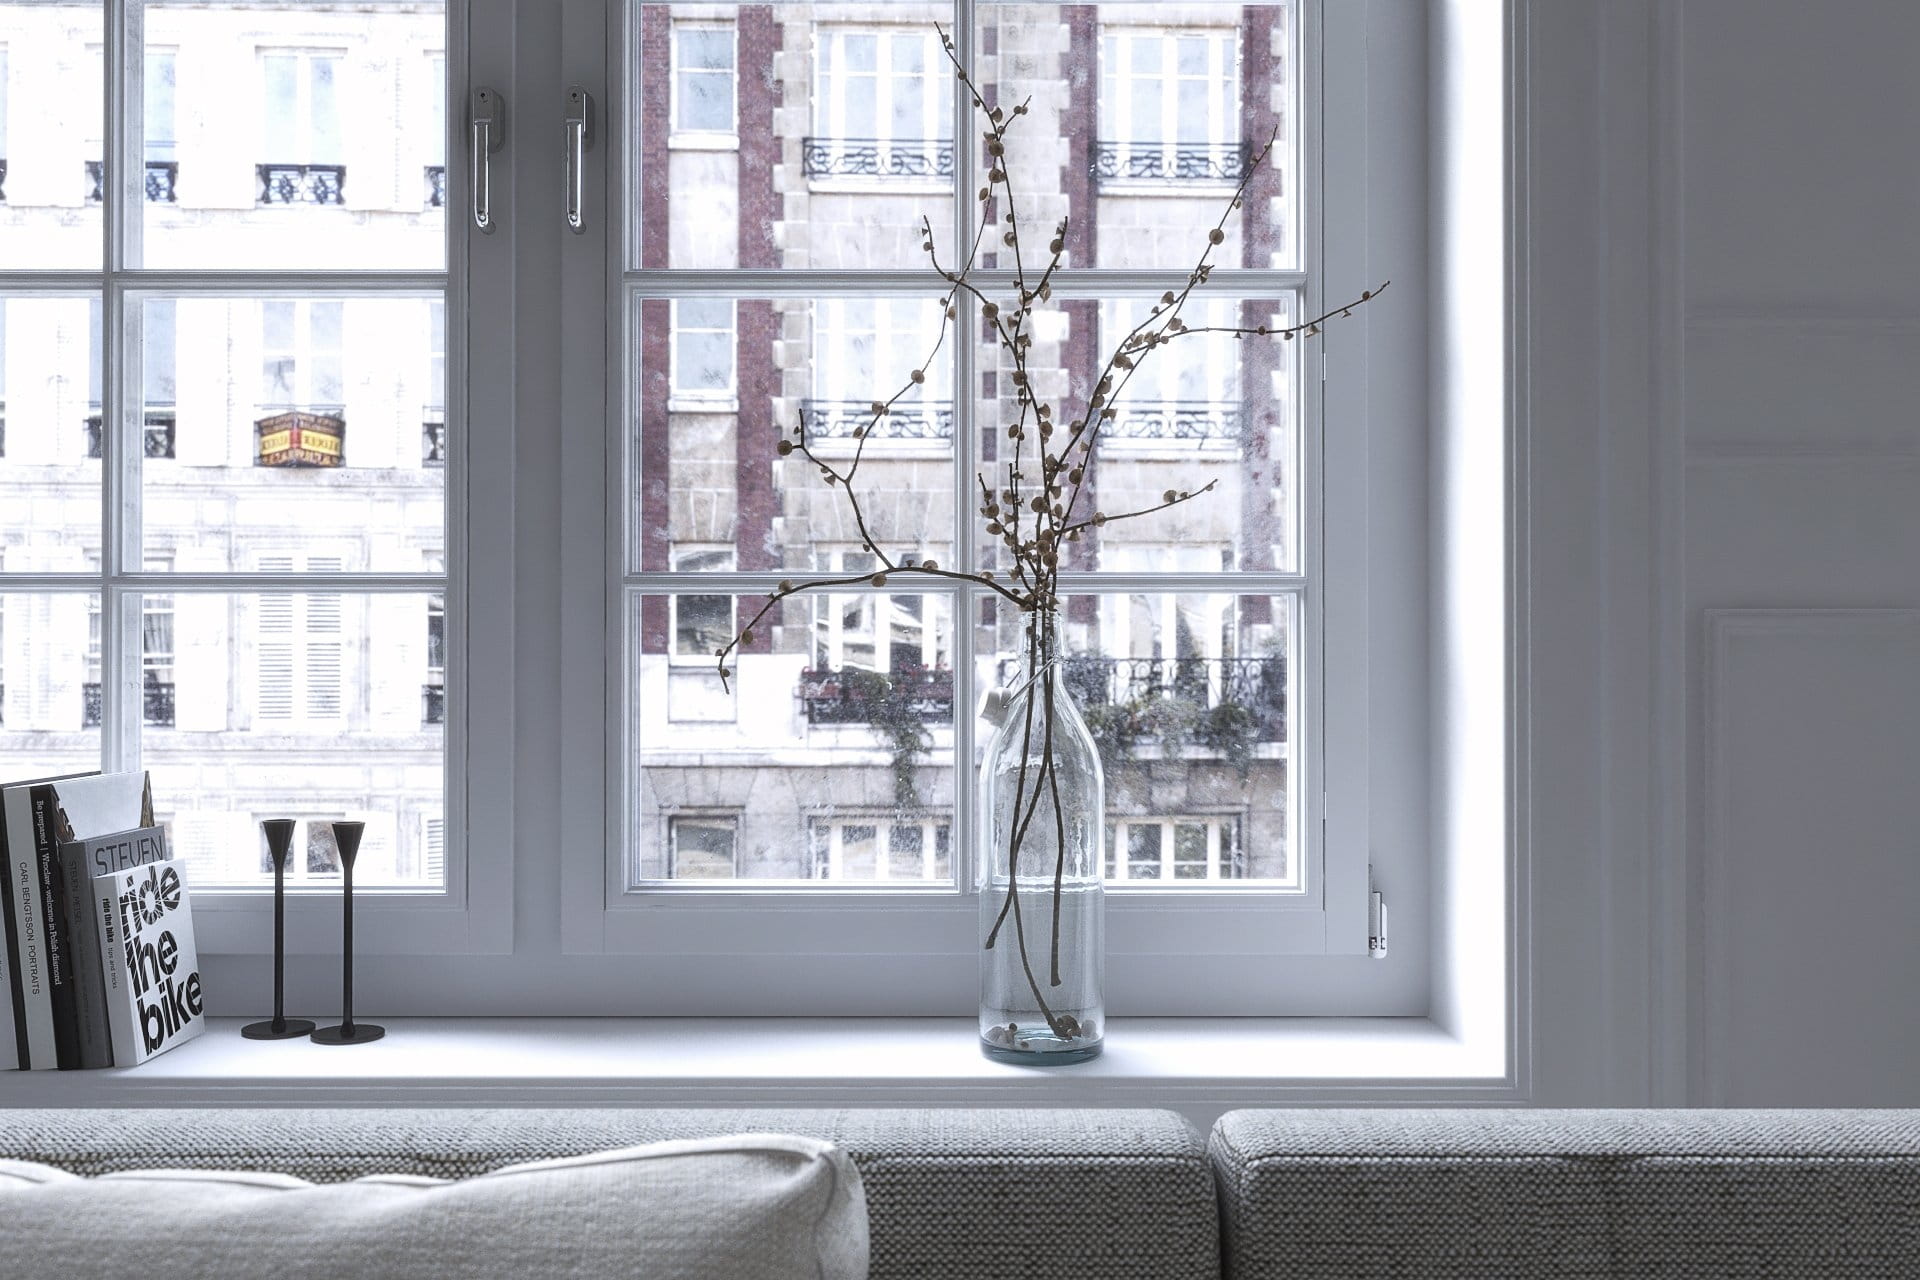
As with every visualisation project, the first step is looking for inspiration, creating a mood board with reference images. I use Pinterest, Google, Flickr and a few design and visualisation studios websites for reference images. Below are the reference images I used for this project:
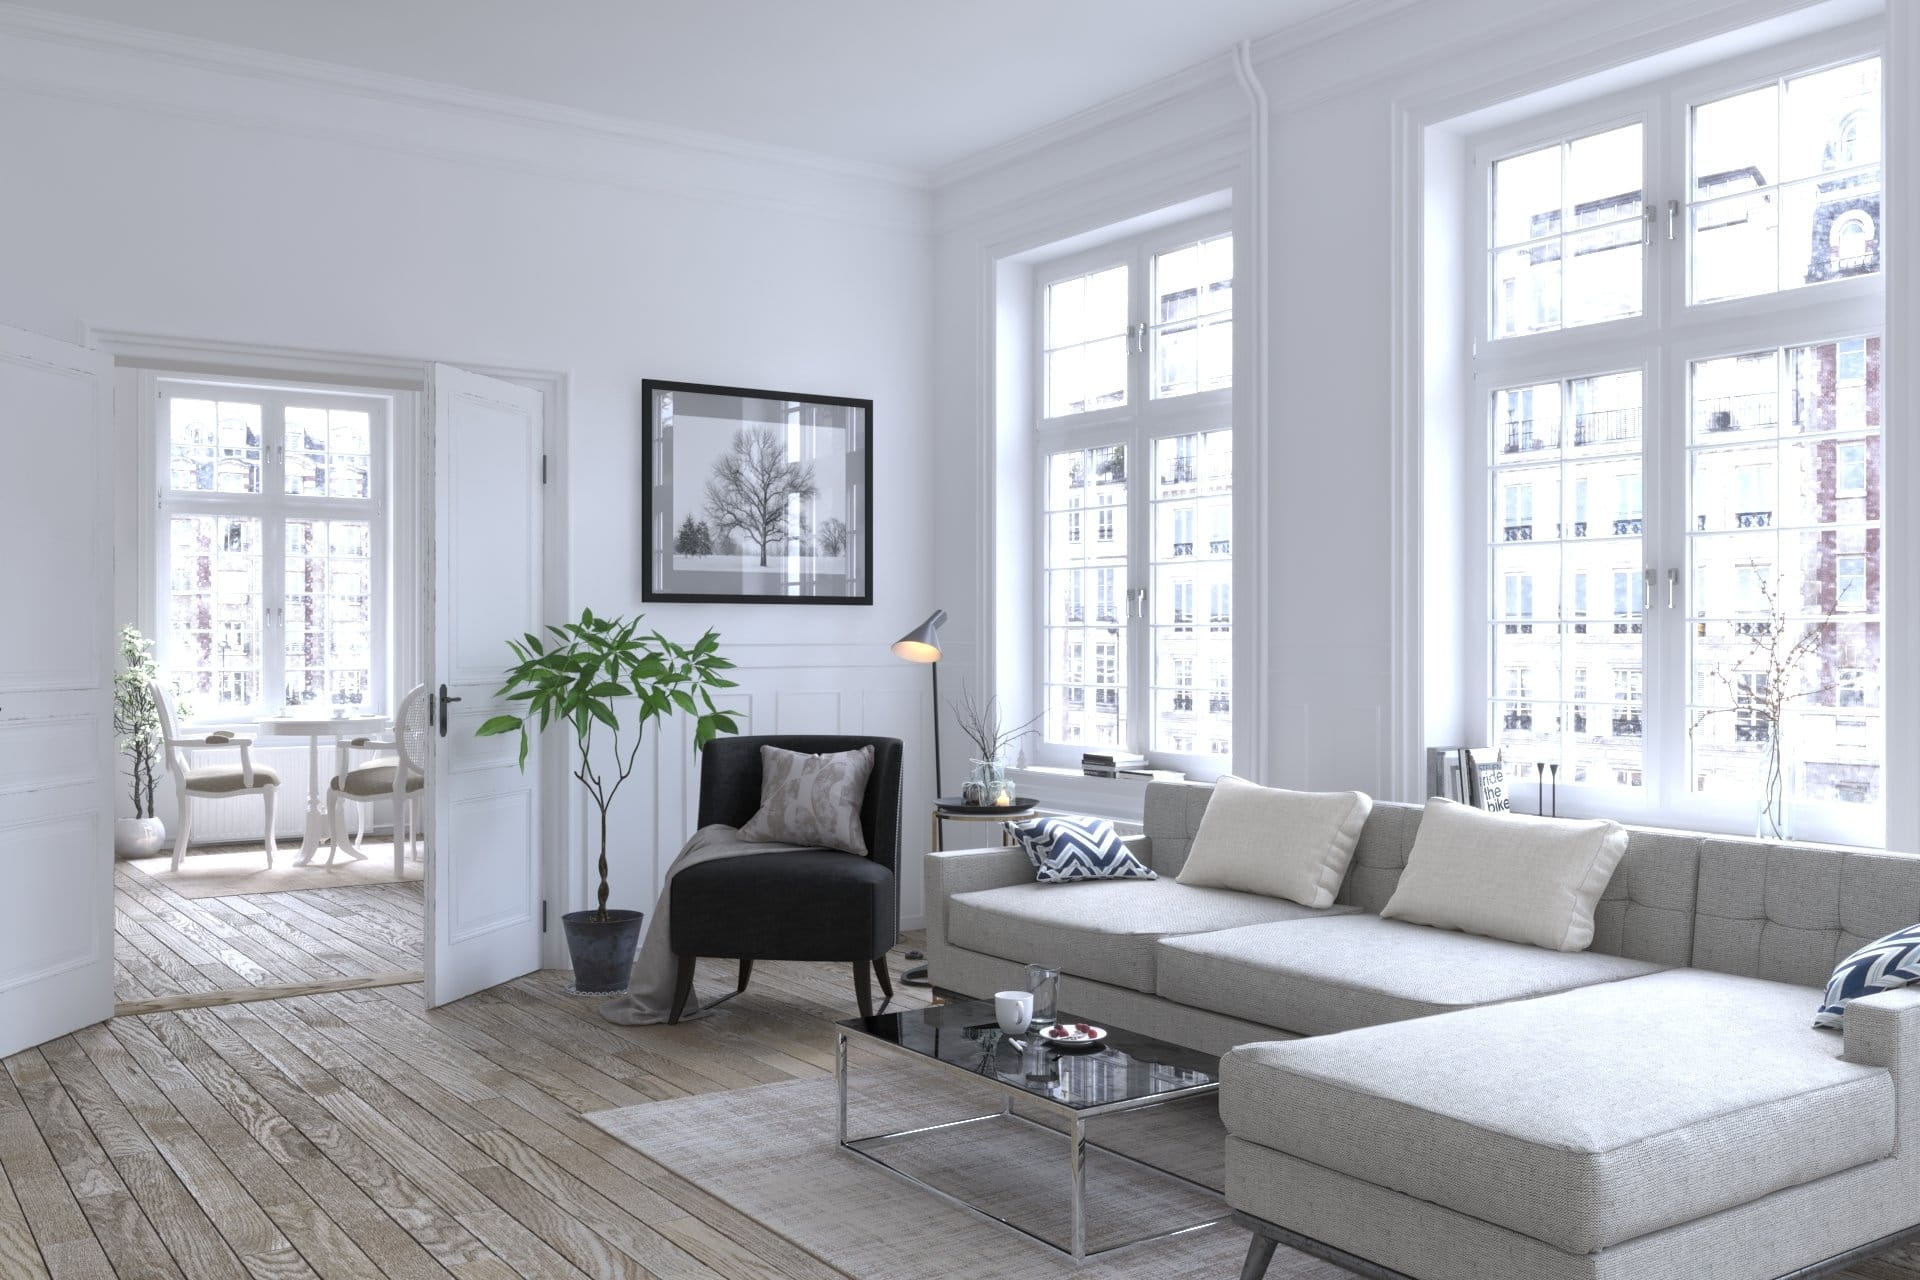
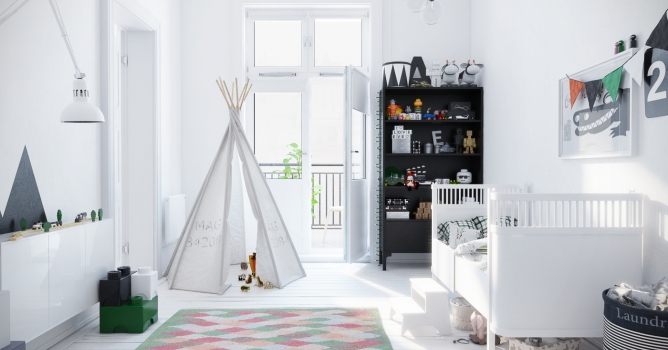
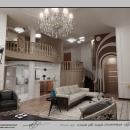
Right from the start I was inspired by the image above which shows a space full of personality and uses two focus points that help direct the viewer’s attention and I wanted to reproduce that.
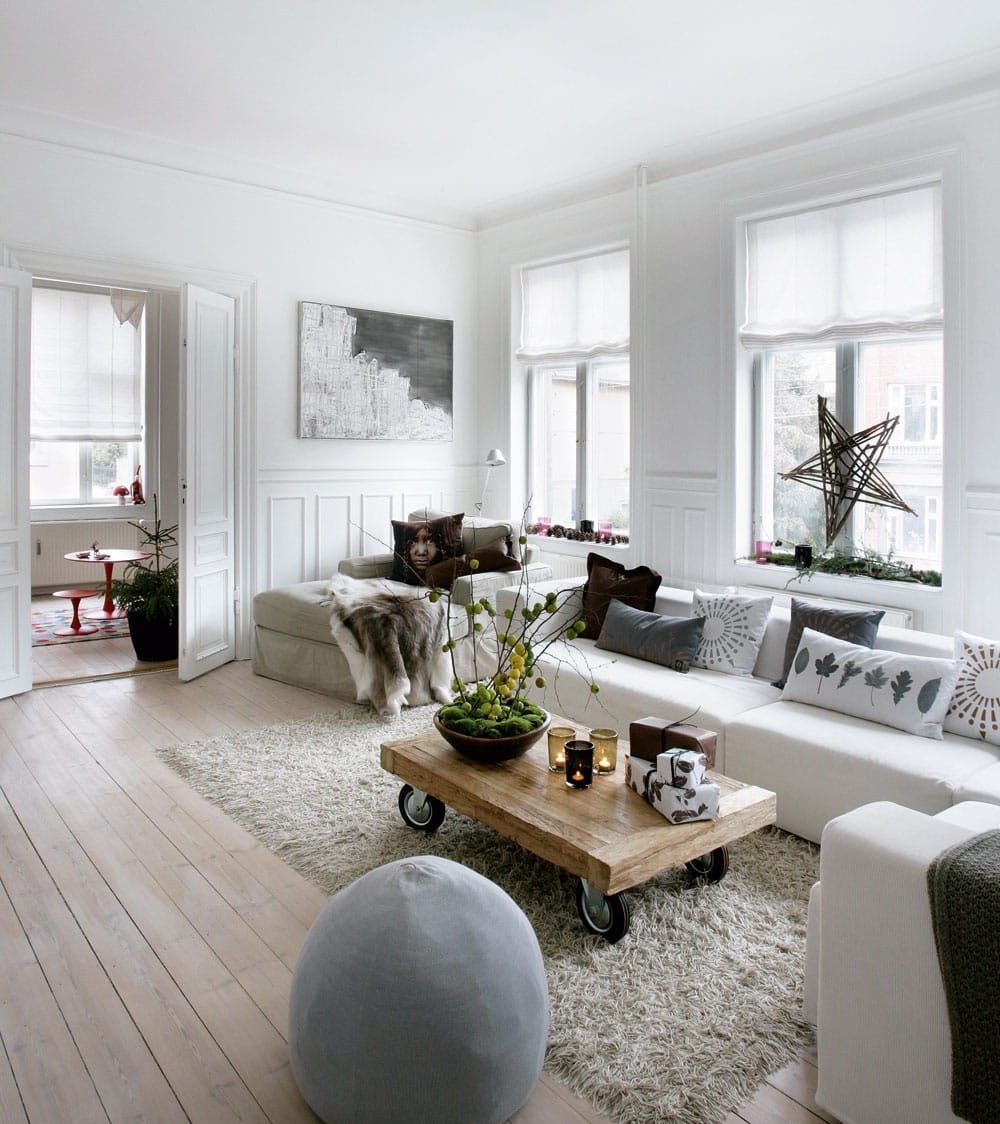

Image source: https://archzine.fr/deco/deco-cocooning-conseils-exemples/
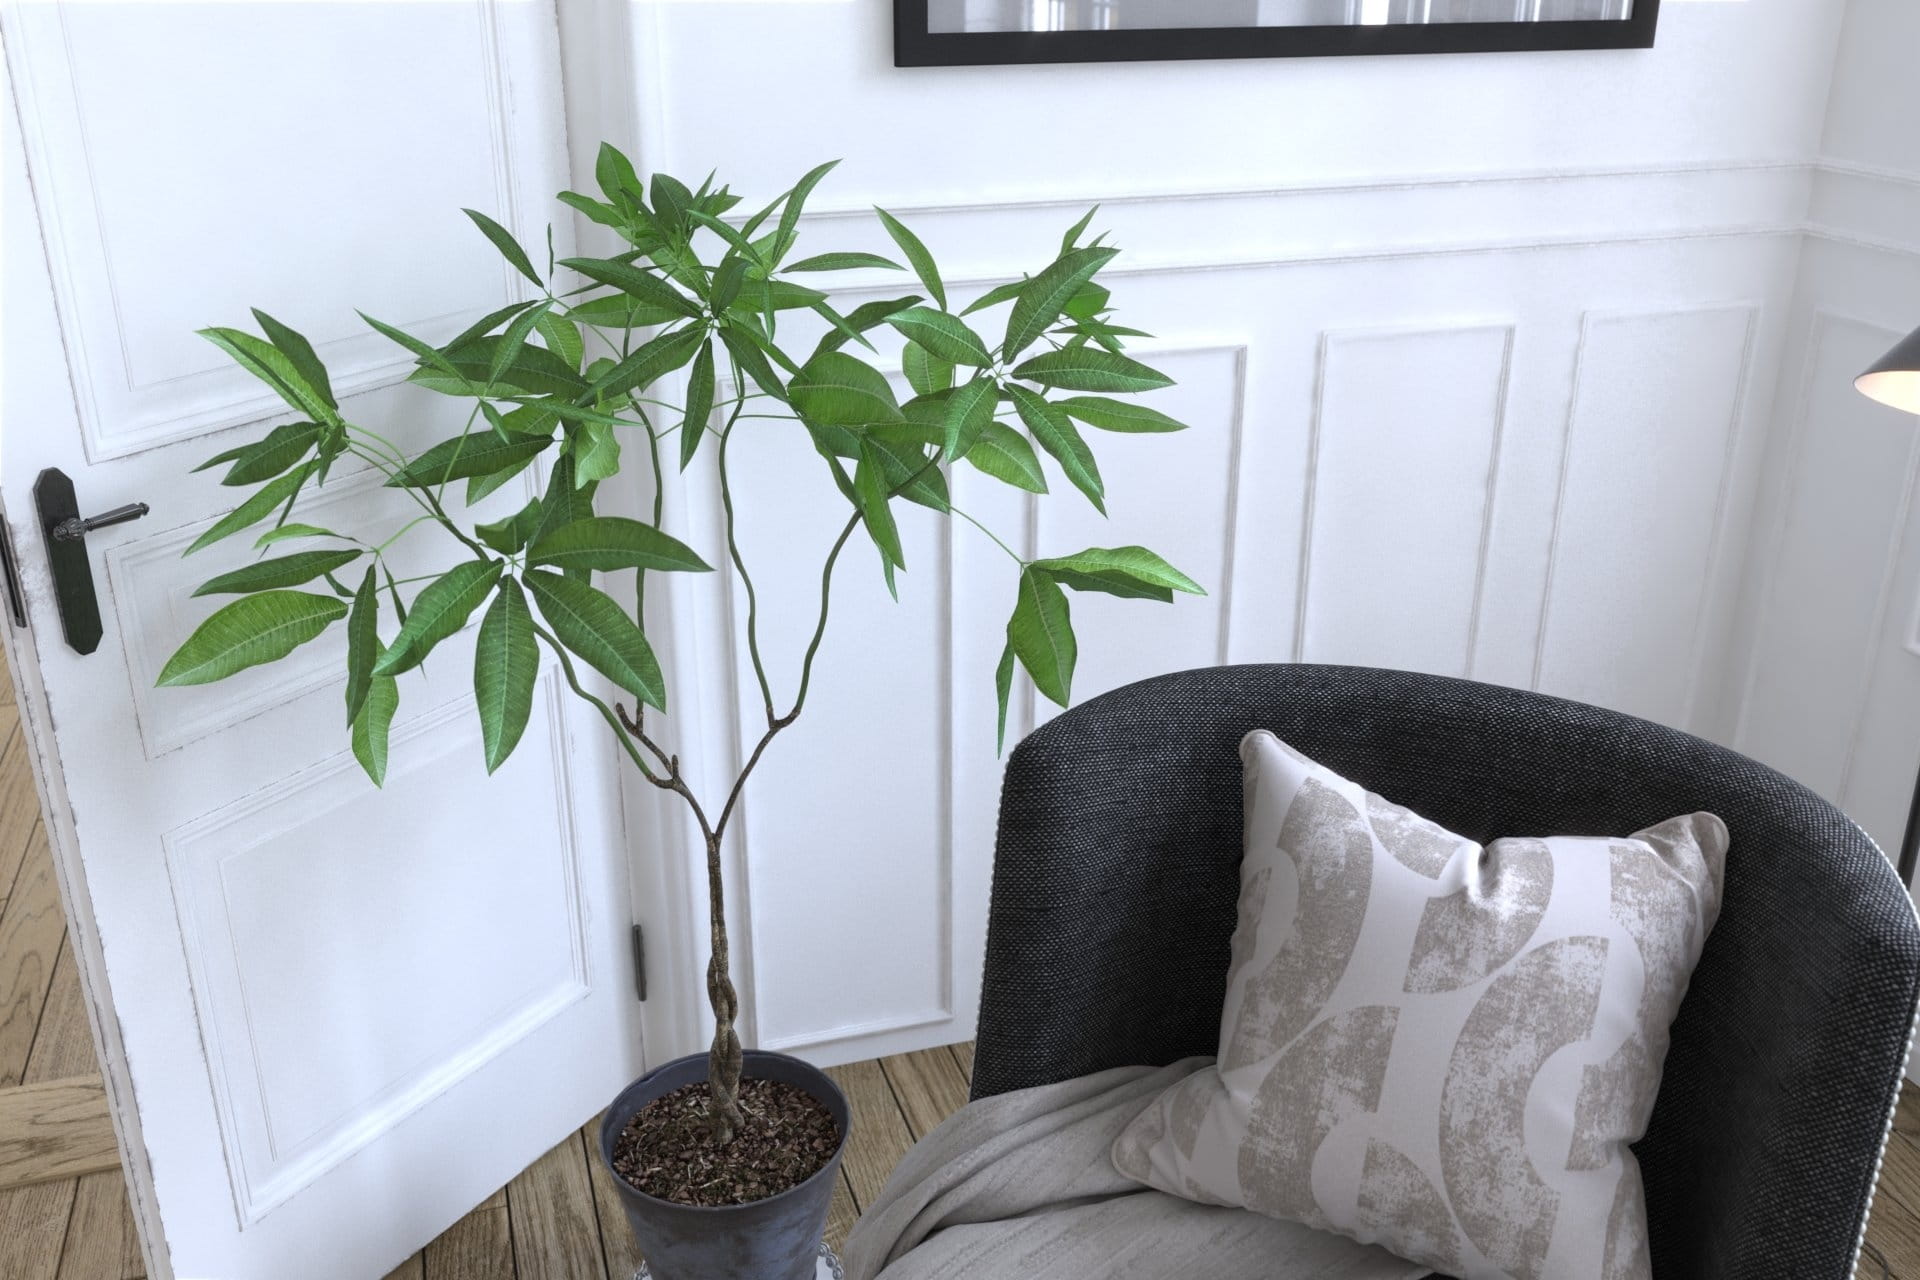
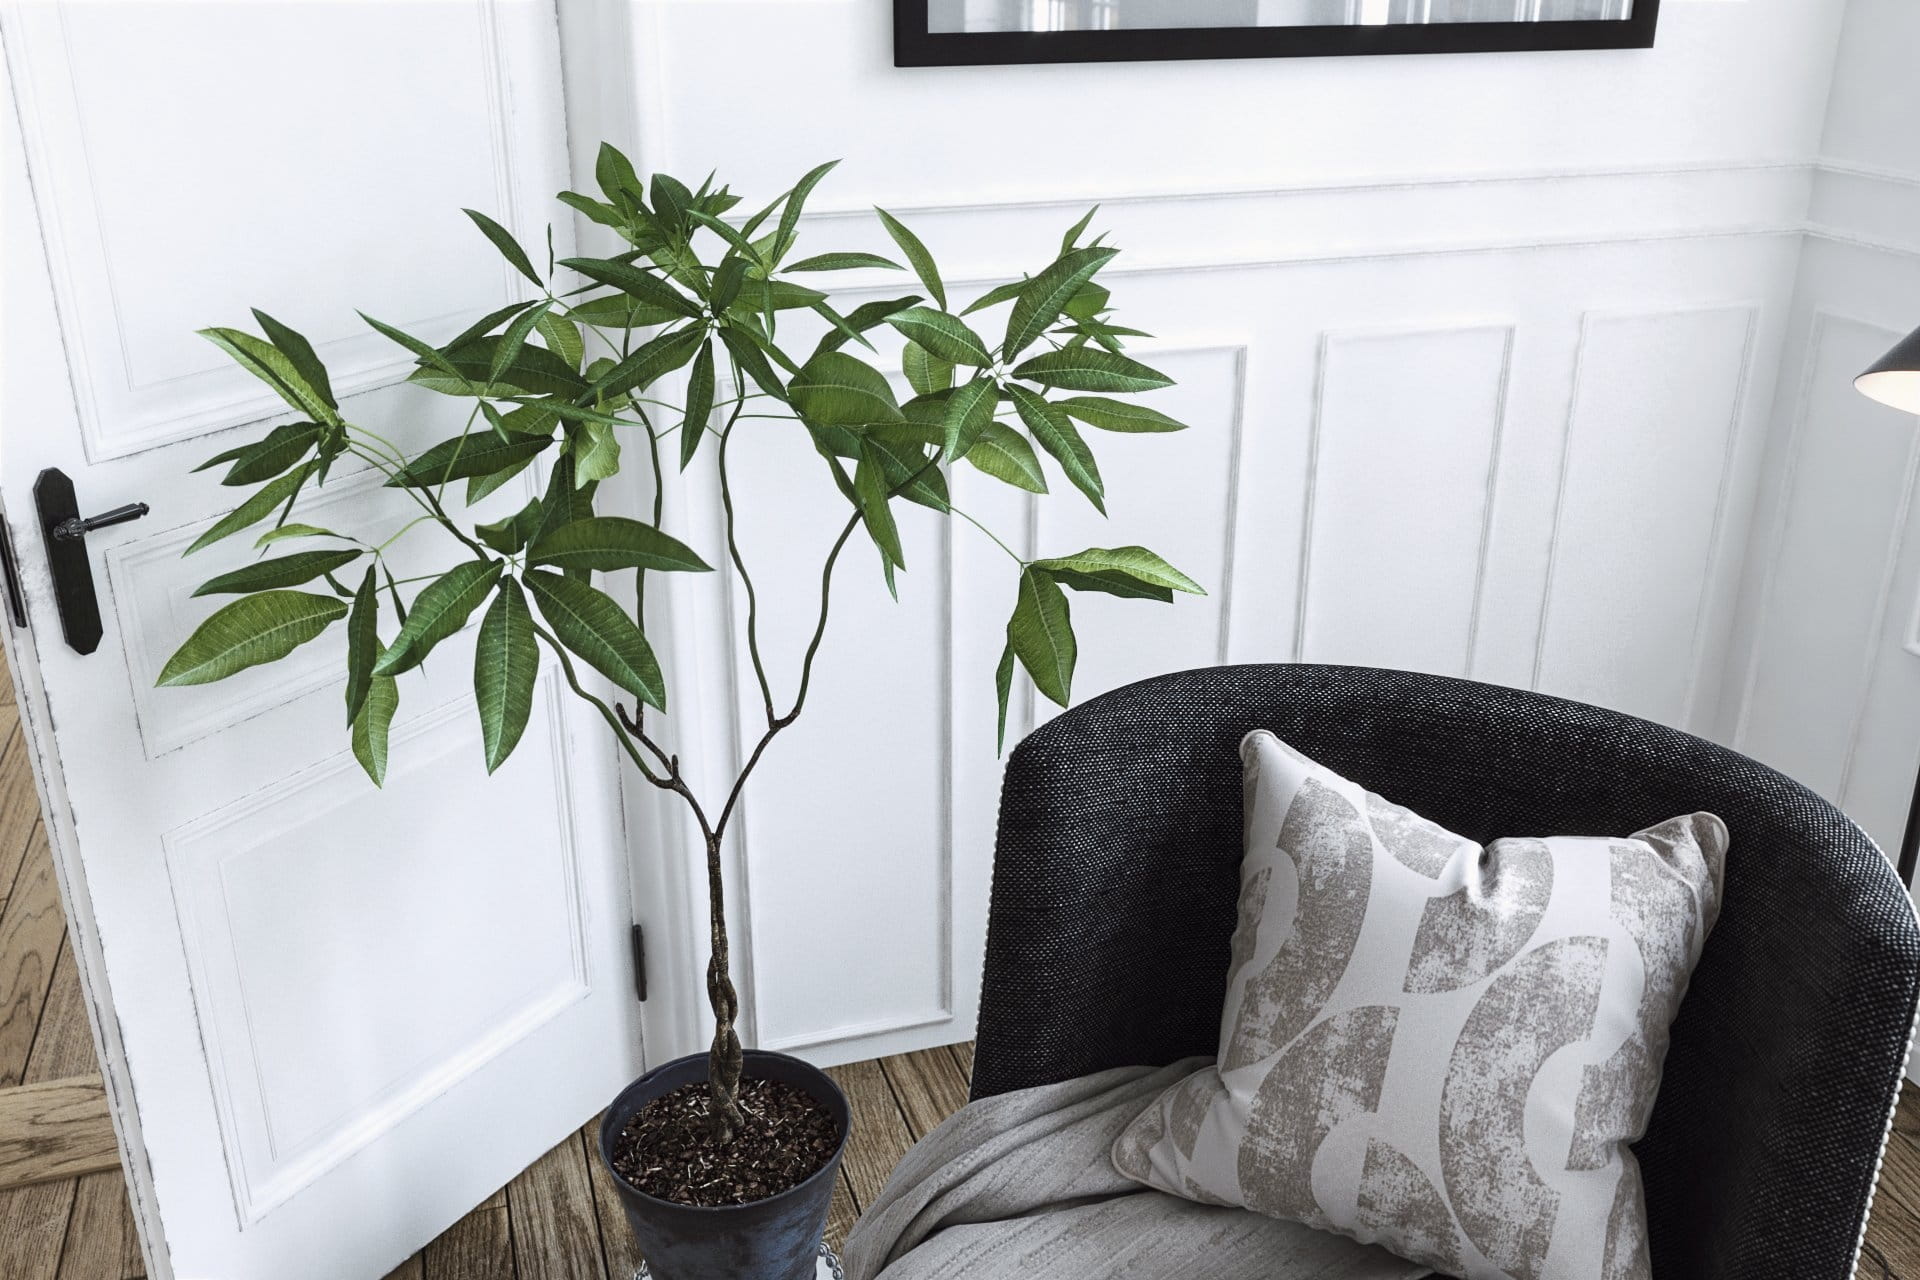
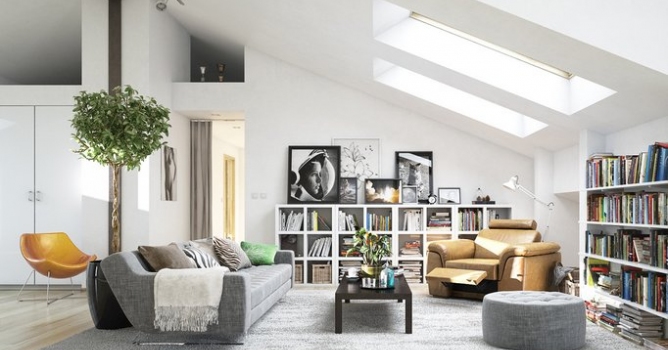
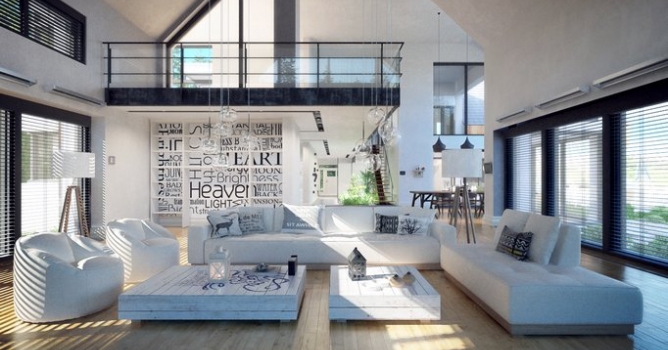
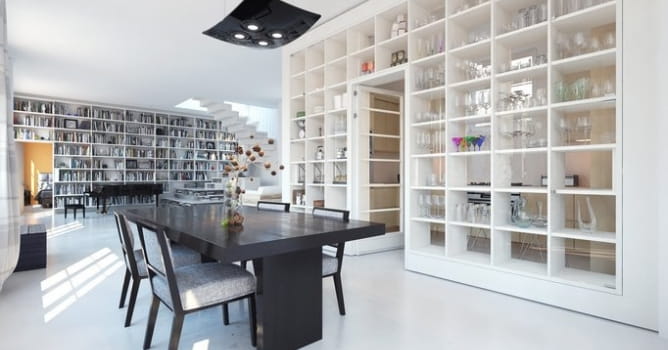
Some other references:
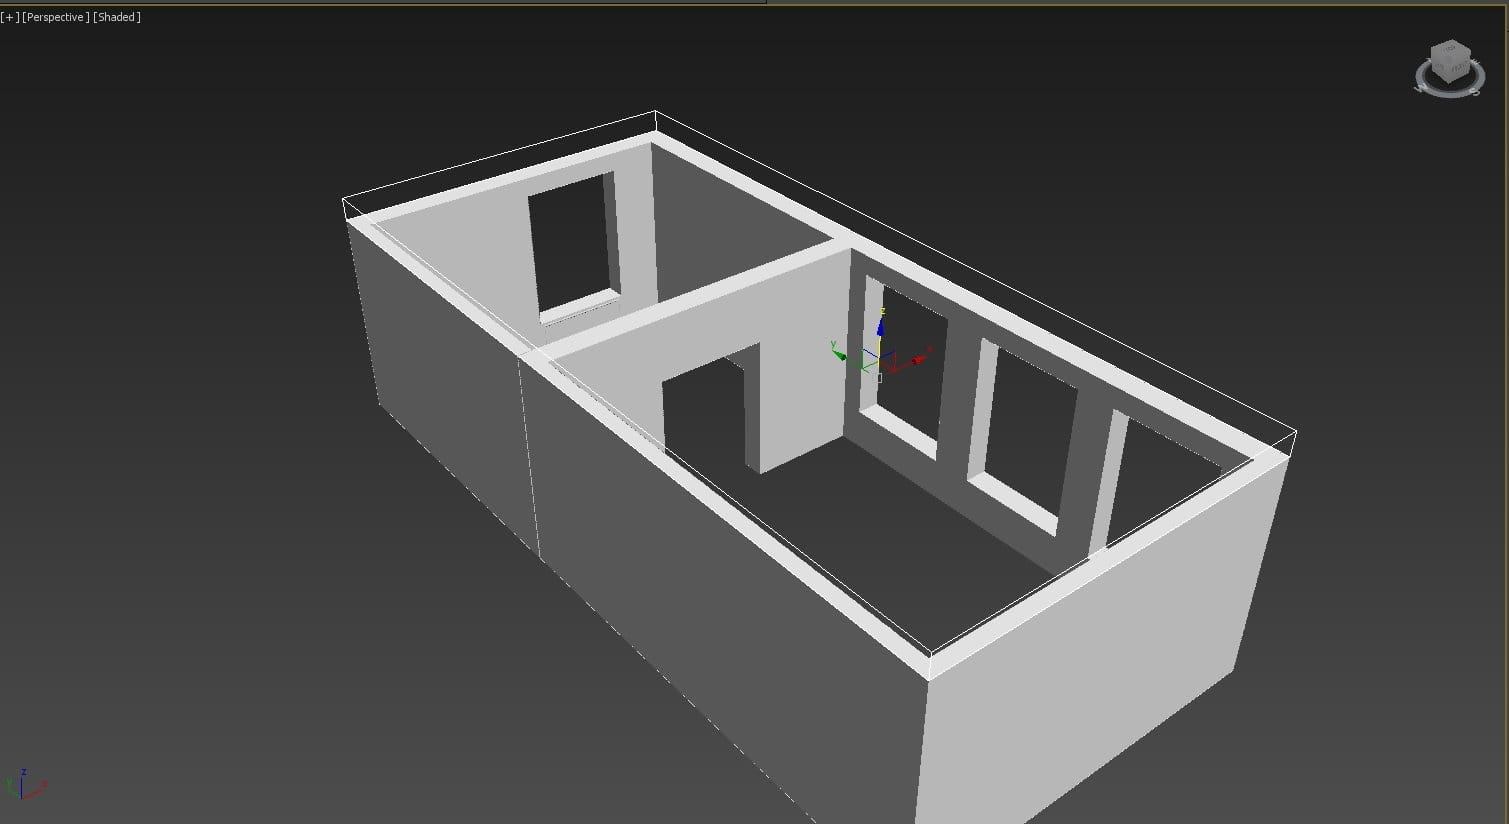
Step 2 - Modeling
In this part I completed the walls, wood floor, windows and details for walls and ceiling.
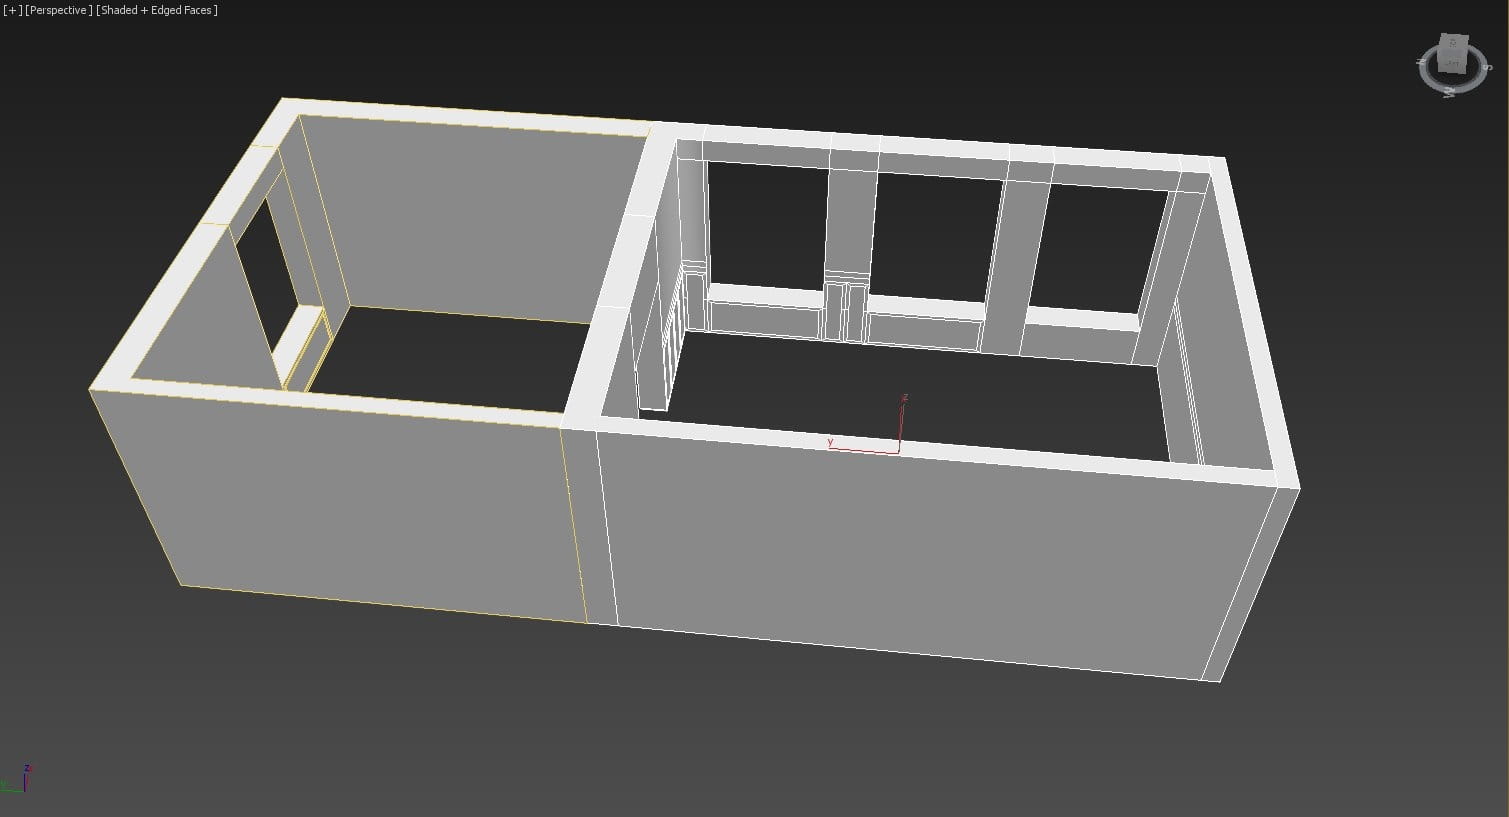
Walls
I start with a simple polyline and use offset, extrude, convert to editable poly and then I use sub-object modeling tools like connect and offset to create wall details and bridge for doors and windows openings.
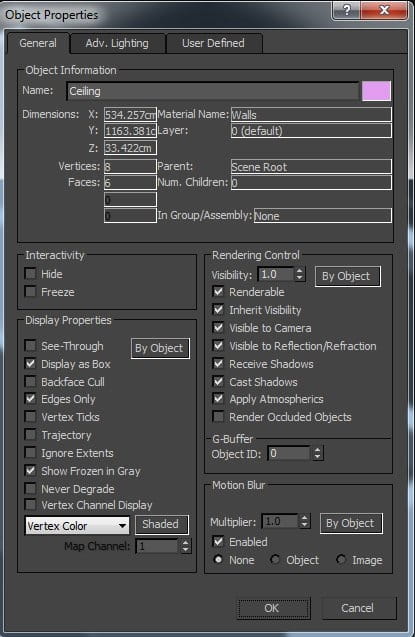
Ceiling
Ceiling is a basic box with display as box enabled in object properties so I can better visualize the scene from above.
Floor
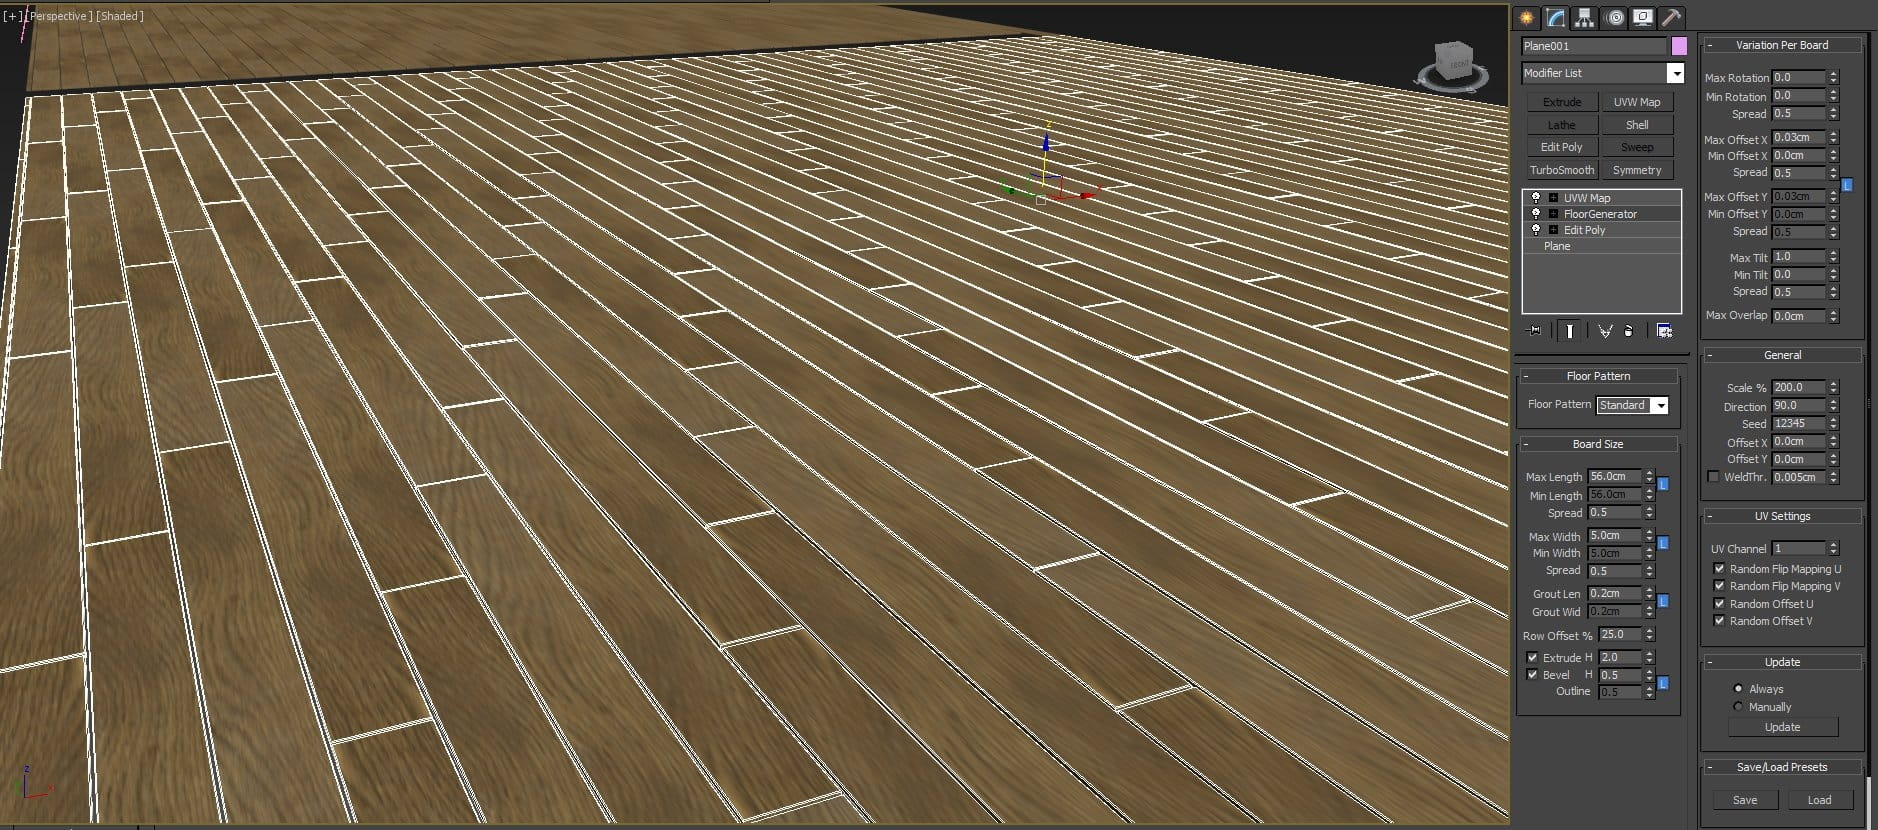
I used Floor Generator and MultiTexture Map from CG-Source for the wood floor and a simple box with chamfered edges to create the door threshold.
Floor material is a VRayMtl:
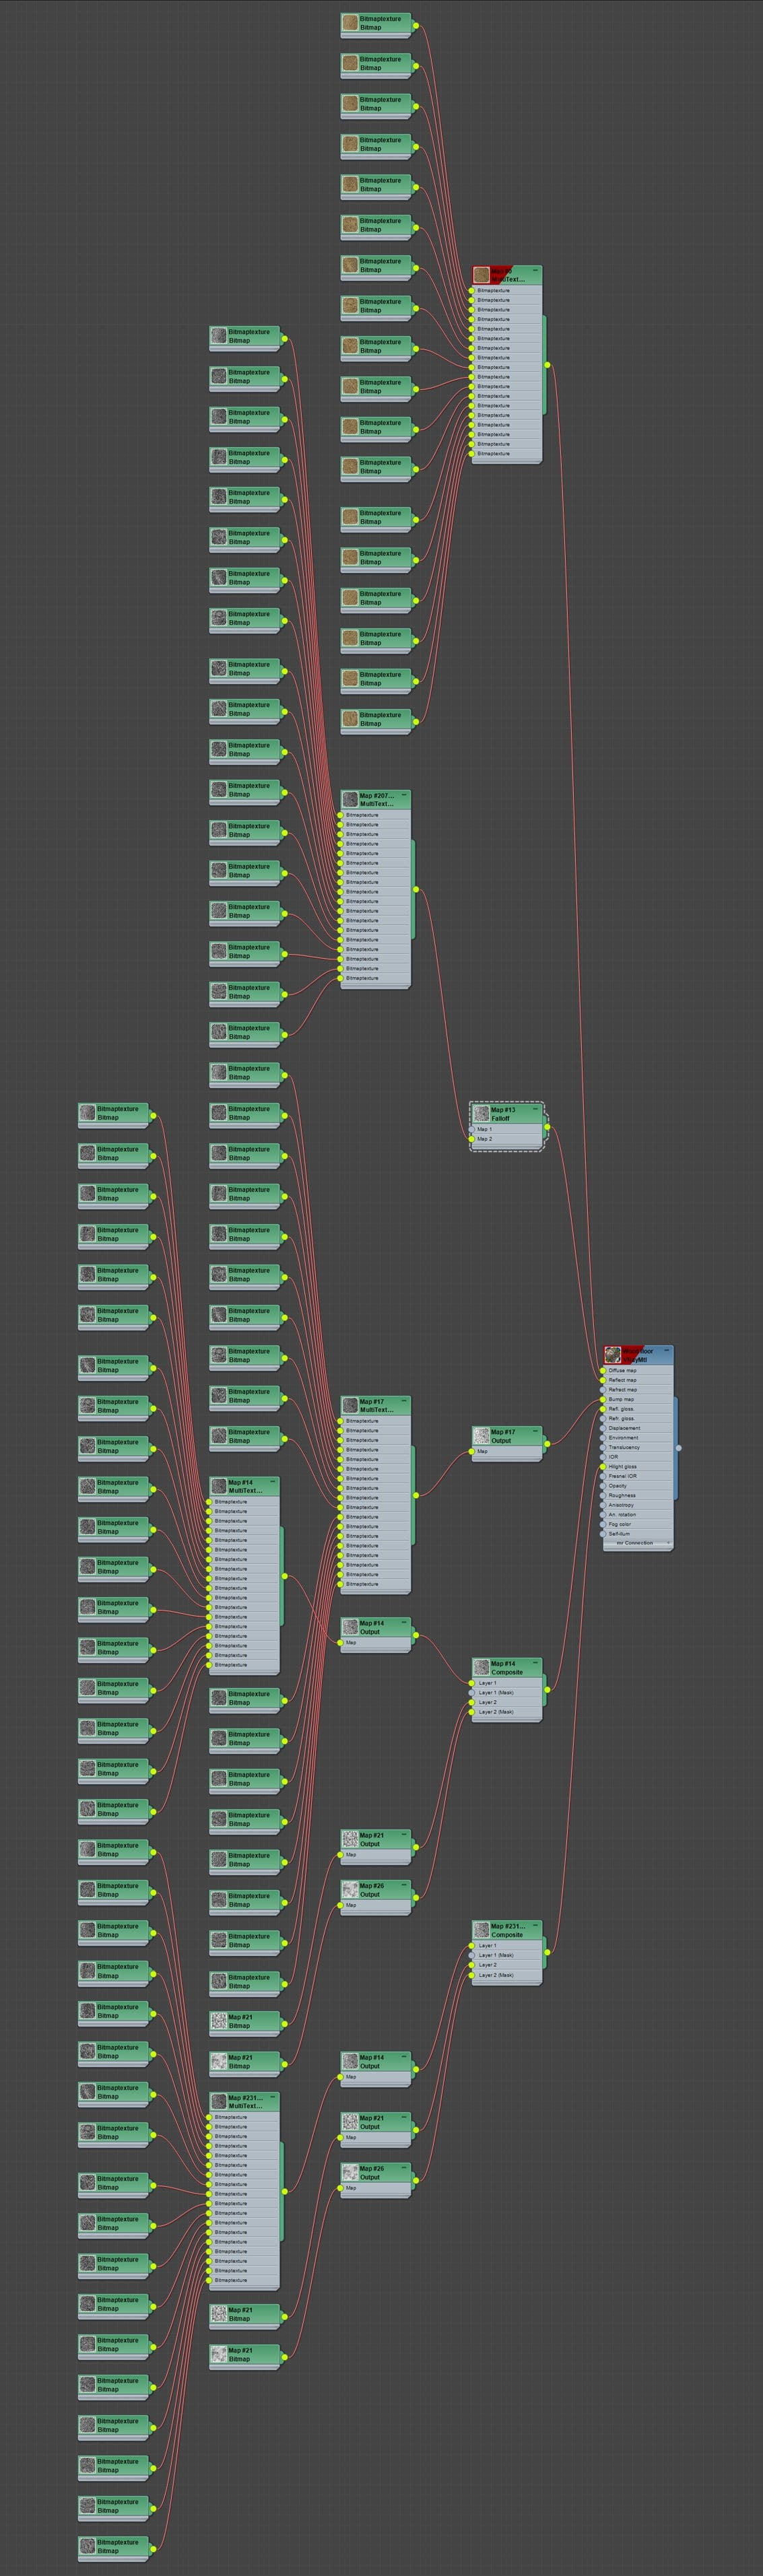
For the diffuse slot I used 18 wood textures from CG-Source combined inside a MultiTexture Map.
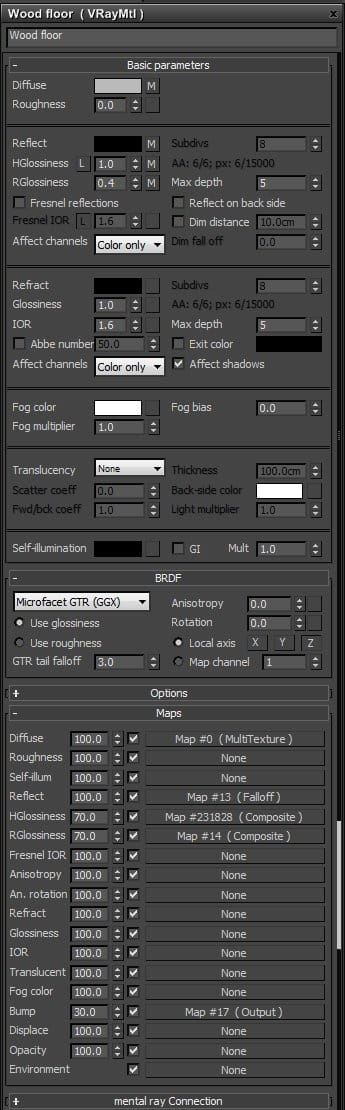
Wood floor VRayMtl settings.
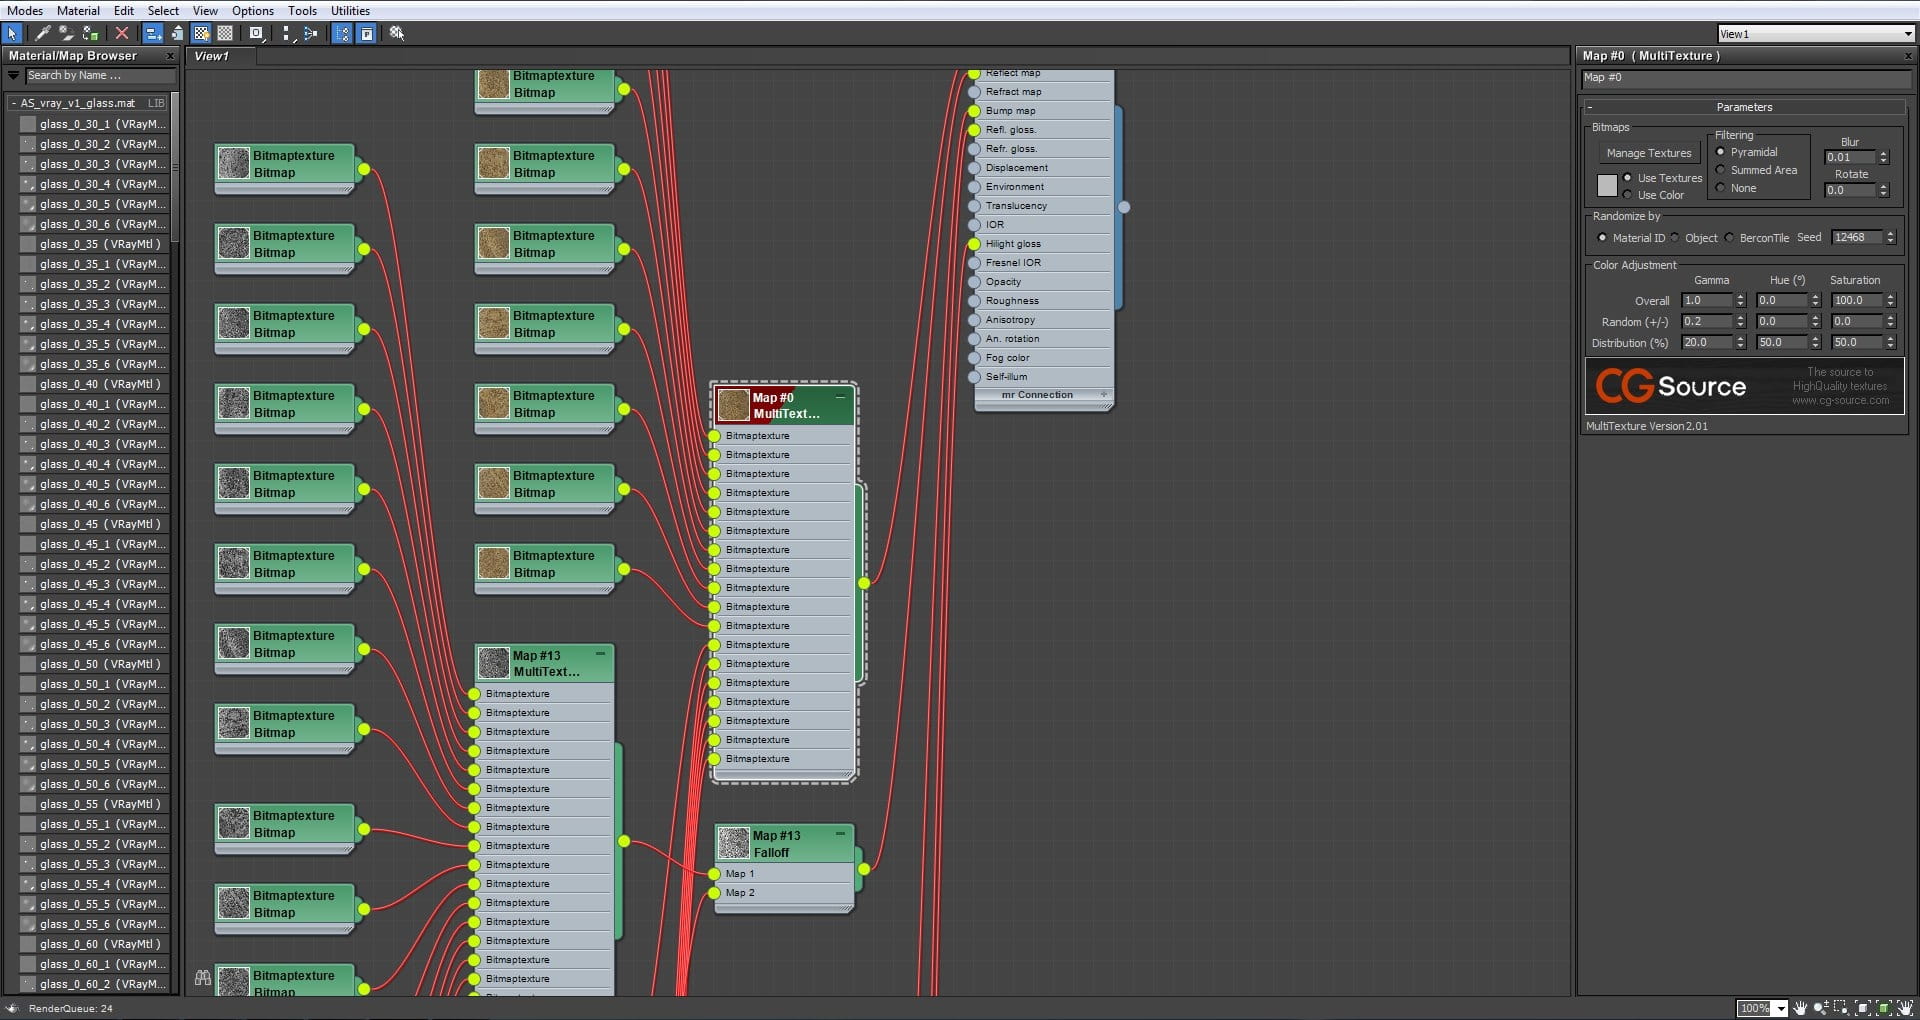
MultiTexture map settings.
For the reflection slot I used a Falloff map and inside it I used a similar MultiTexture map. I desaturated and made some curves adjustments to each wood texture to use them in reflection, glossiness and bump slots.

Falloff map settings.
In the RGlossiness and HGlosiness slots I used the same Composite map (although not instanced).
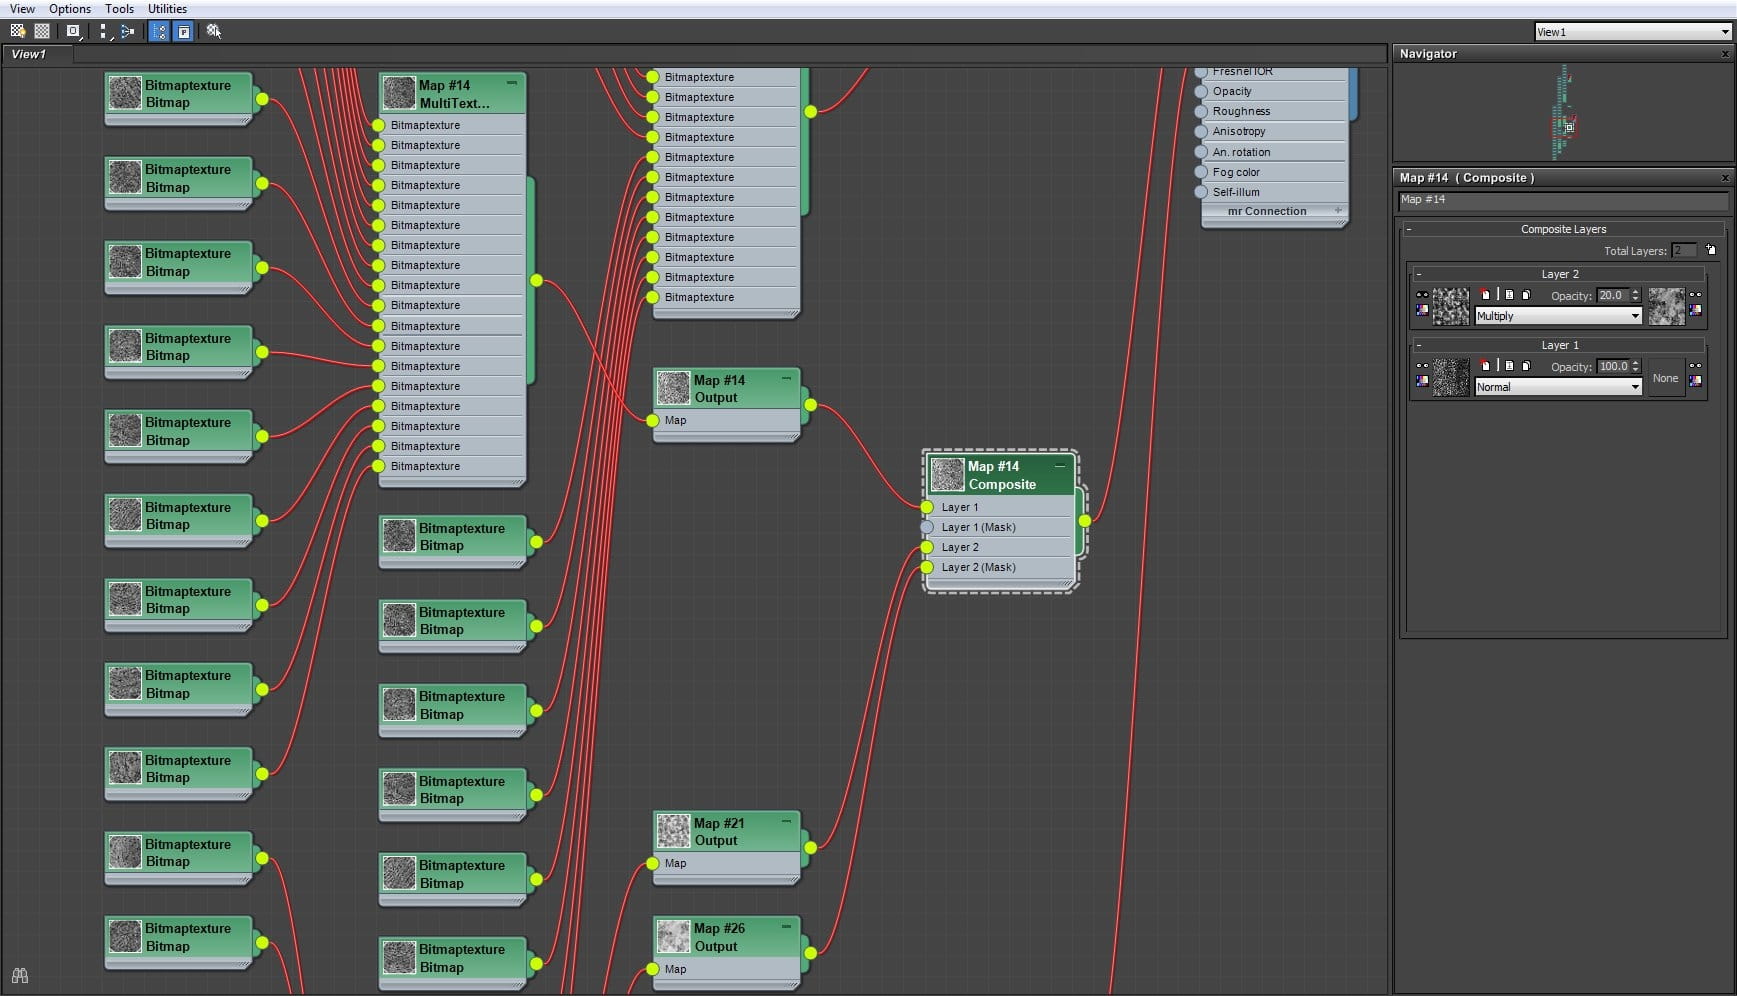
In Layer 1 I used the same MultiTexture map as in the reflection slot and place it inside an output map to add a curves adjustment and increase contrast.
Composite map settings.
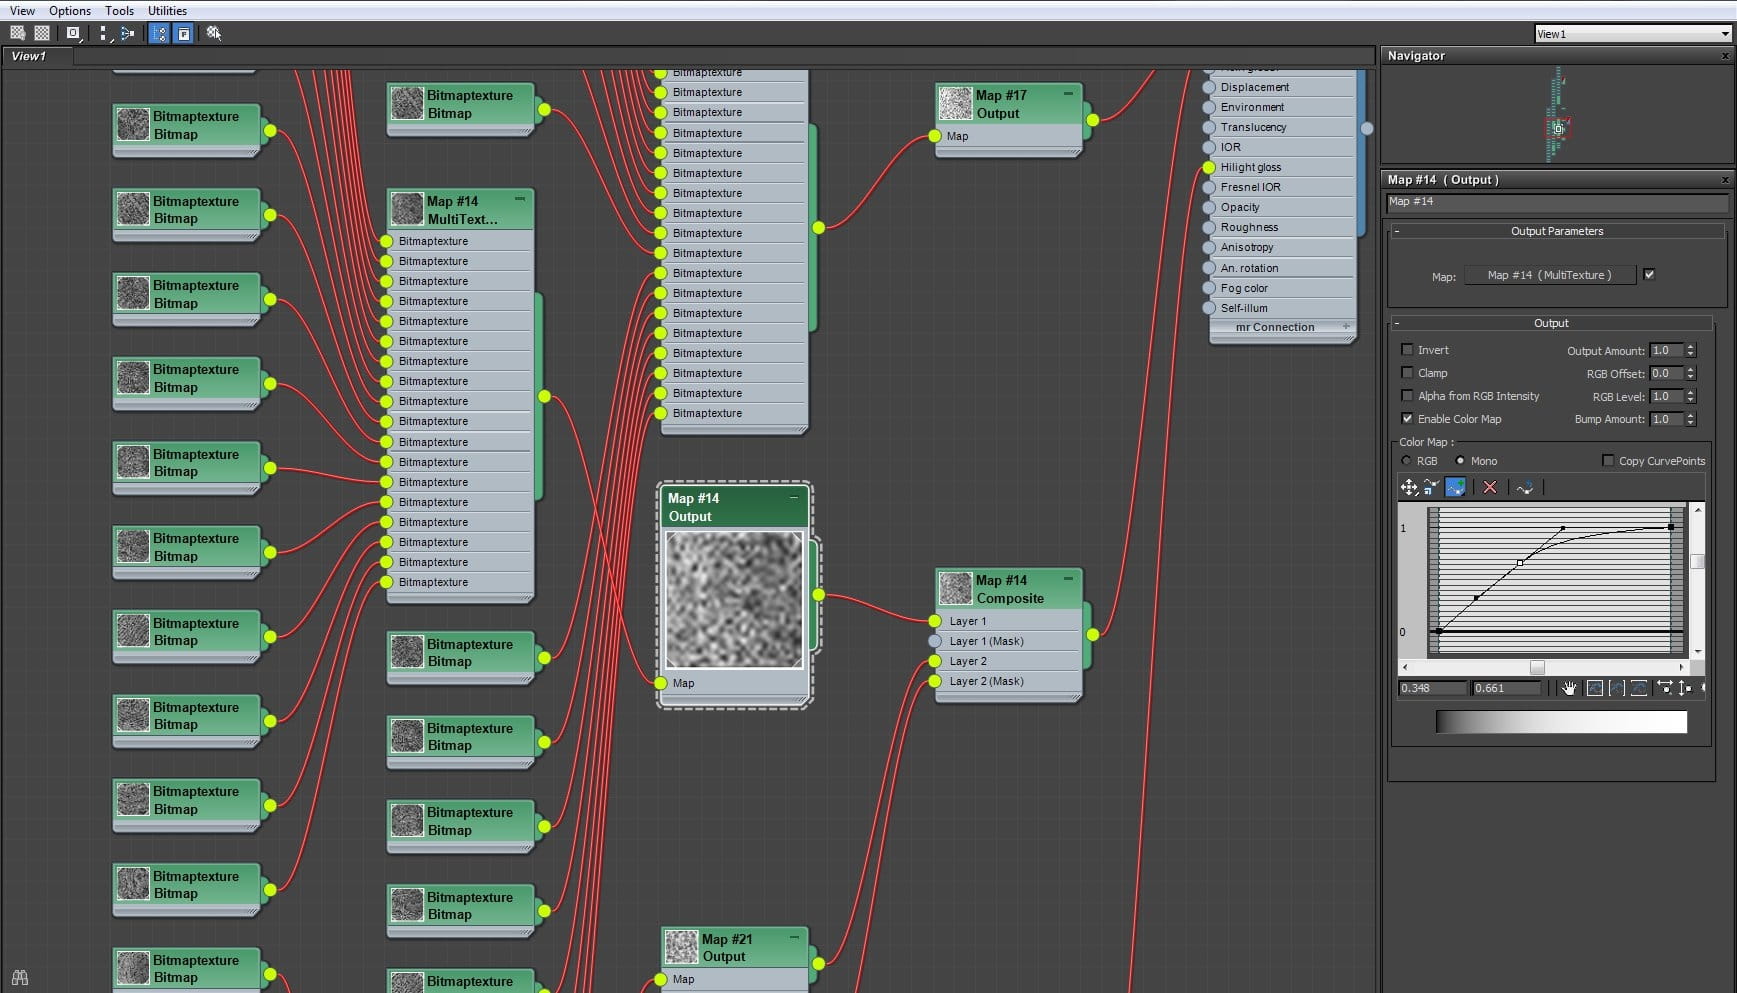
Output map settings.
I wanted to add some dirt detail in the floor material so inside Layer 2 of the composite map I used a texture from 3D Collective and masked it with a different dirt texture and set the blending mode to multiply.
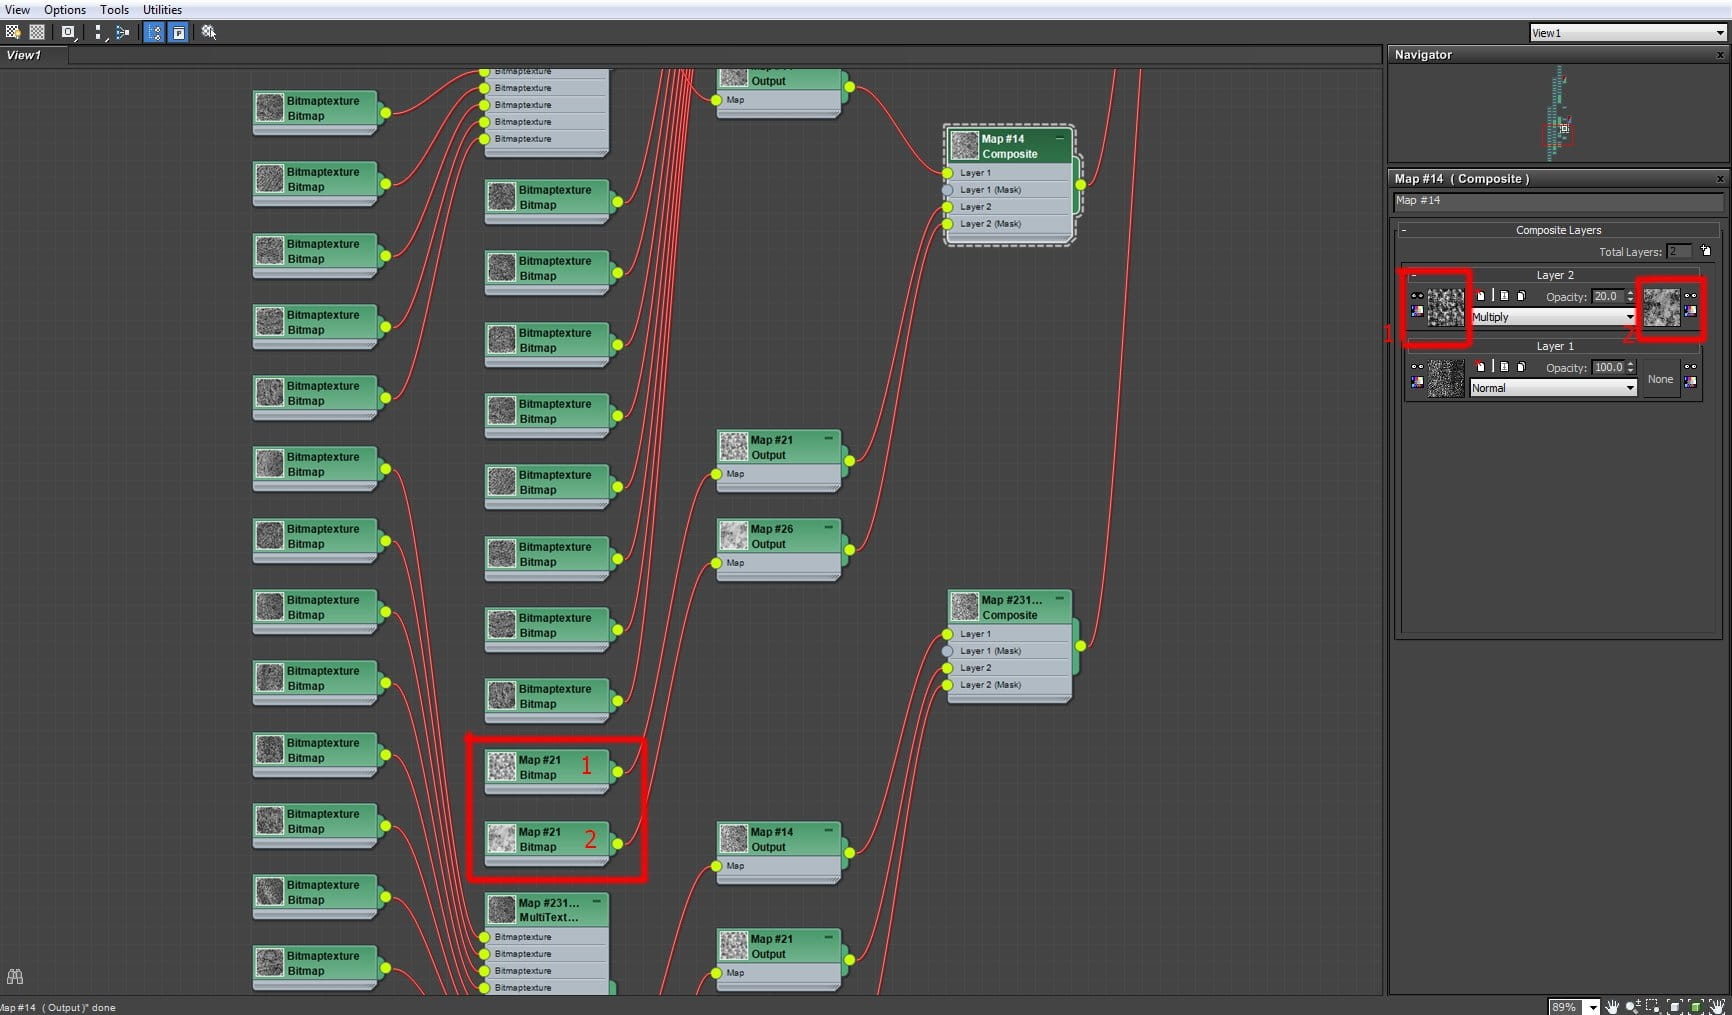

Dirt maps inside composite map.
In the bump slot I used the same MultiTexture map from Reflection, RGLossiness and HGlossiness (as copy not instance) and placed it inside an output map to adjust curves.

Output map in Bump slot.
Door threshold is a basic box with some edit poly adjustments like connect and chamfer.

Door threshold.
Doors and windows
Doors and windows are from 3Dsky. The models were a bit high poly so I used ProOptimizer modifier to reduce number of polys and Edit poly modifier to customize design and sizes.
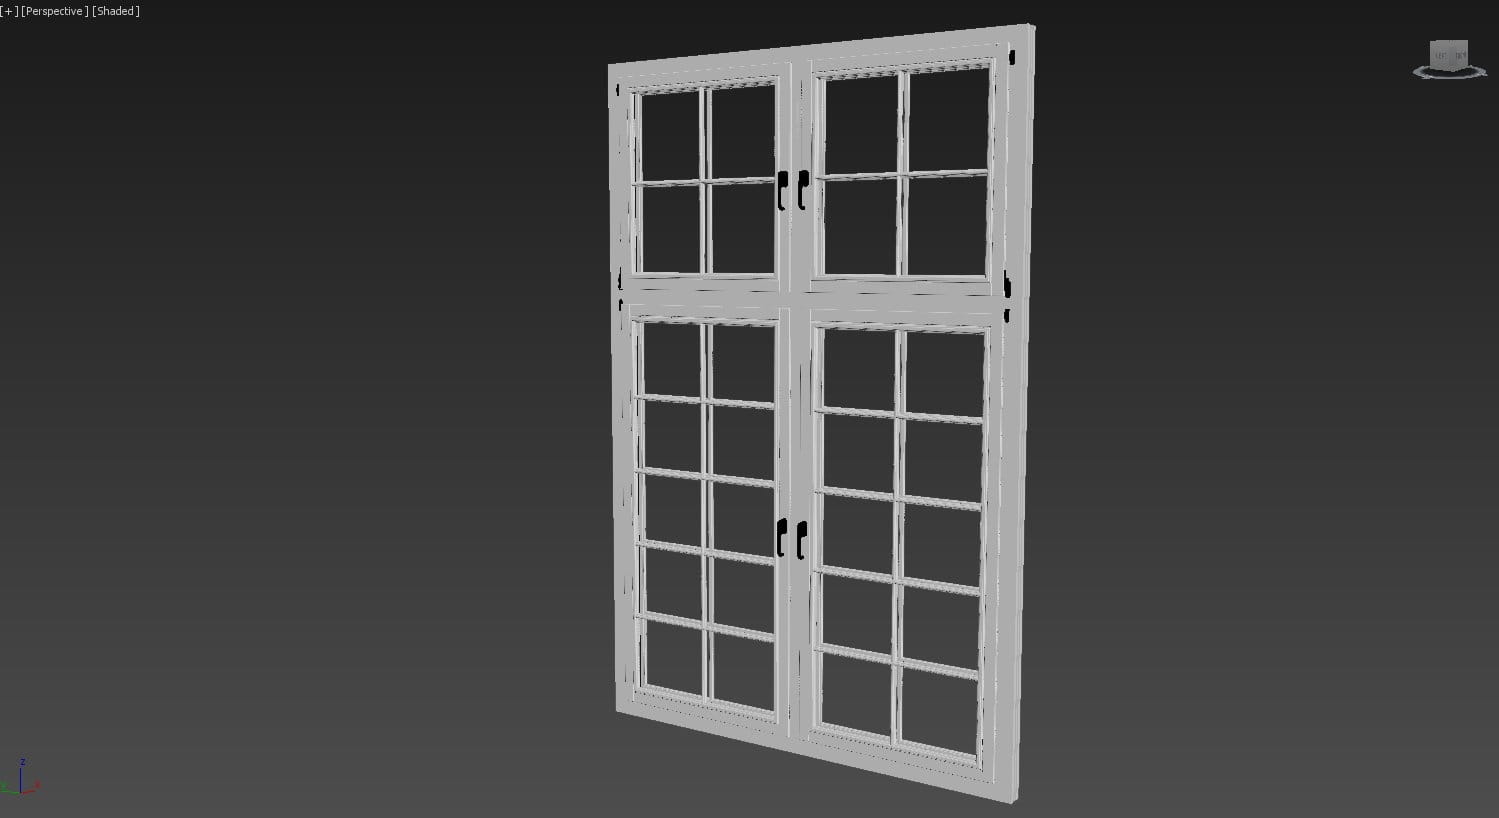
Window
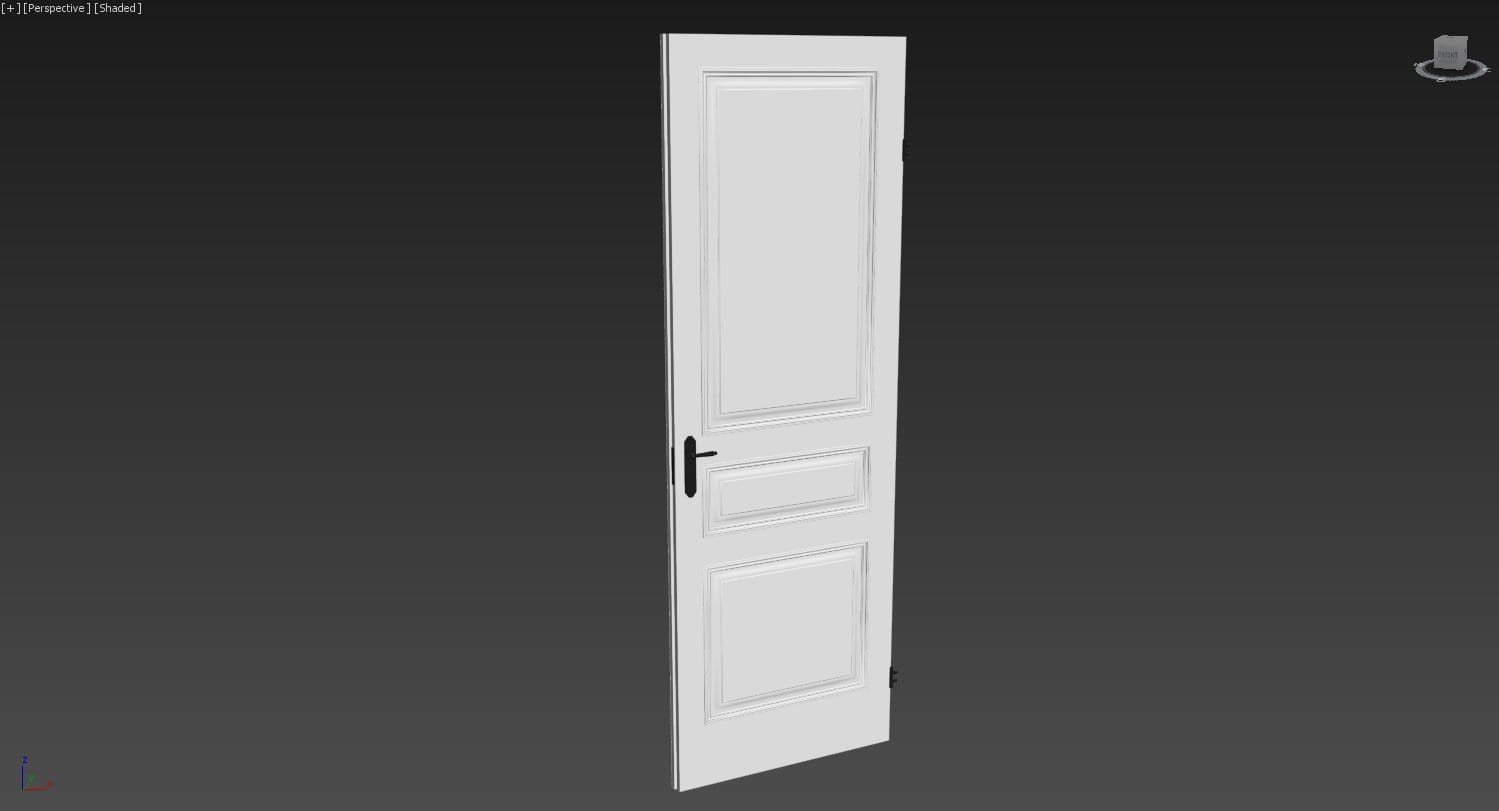
Door panel
Frames
I used sweep modifier for the door and window frames with a custom section spline. On top of the sweep modifier sometimes is necessary to use a smooth modifier because the mesh has some unwanted dark spots.
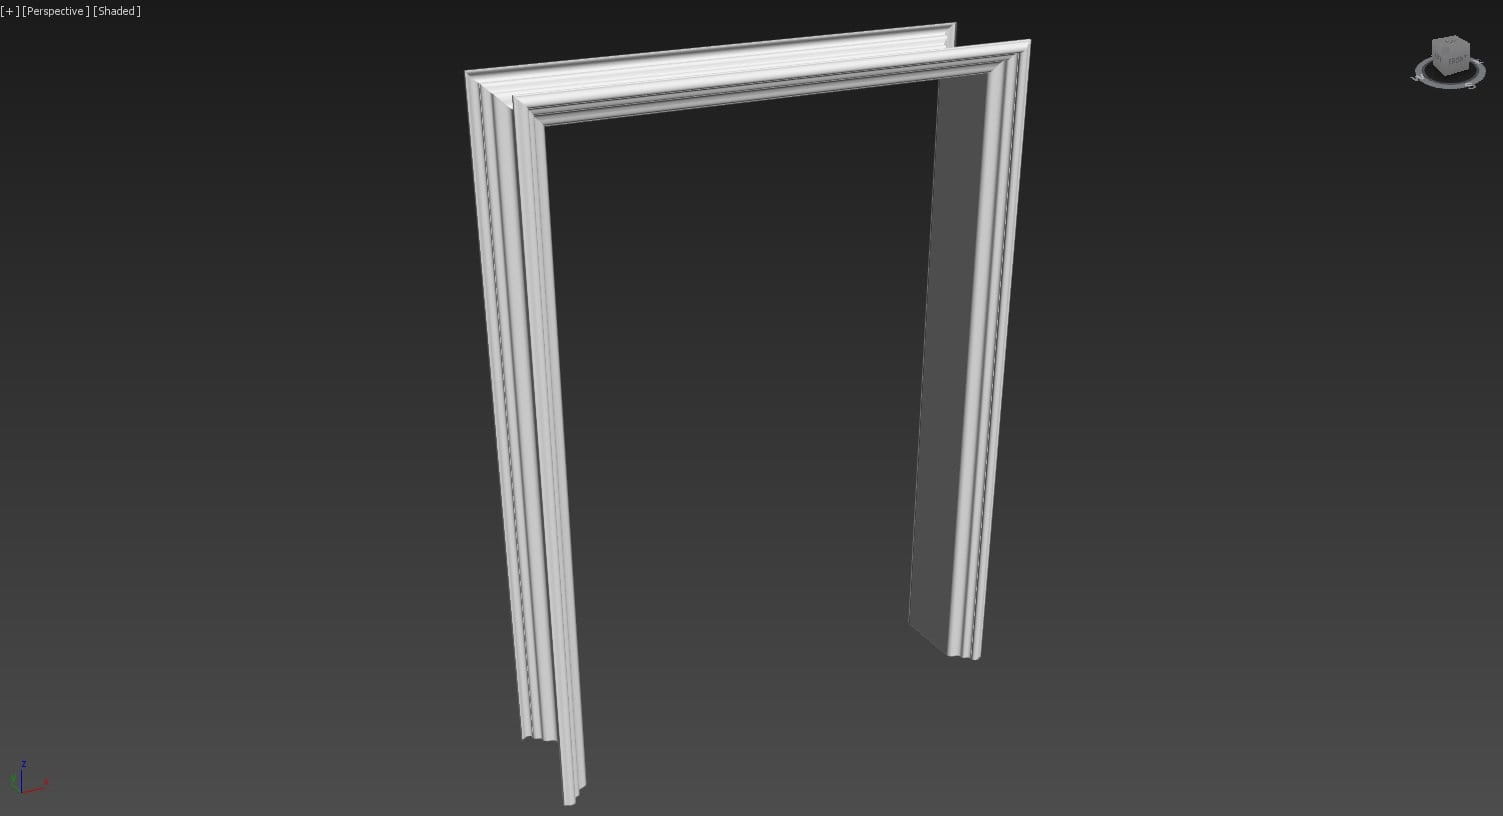
Door frame
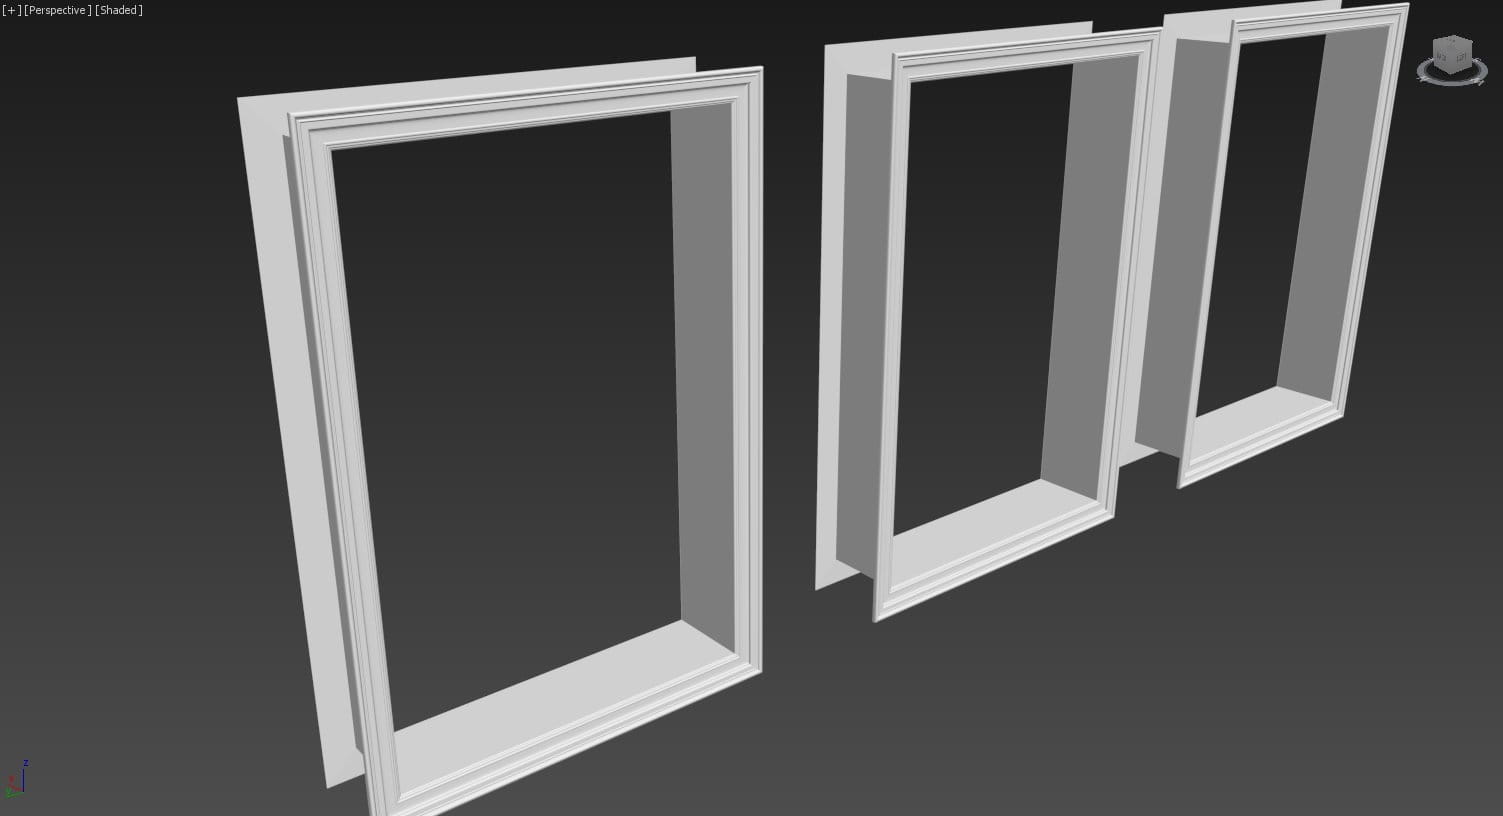
Window frame
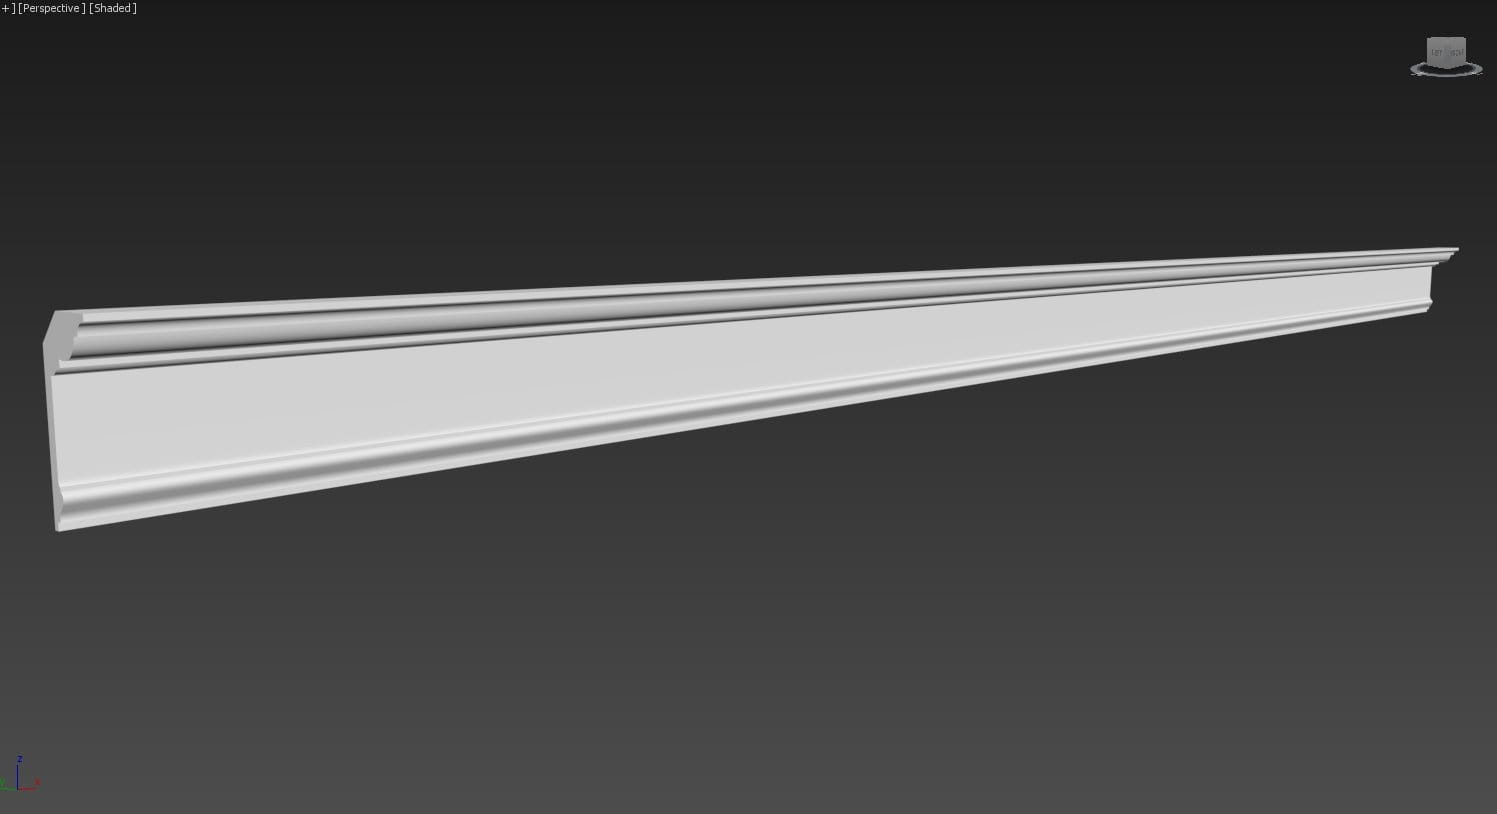
Ceiling cornice sweep
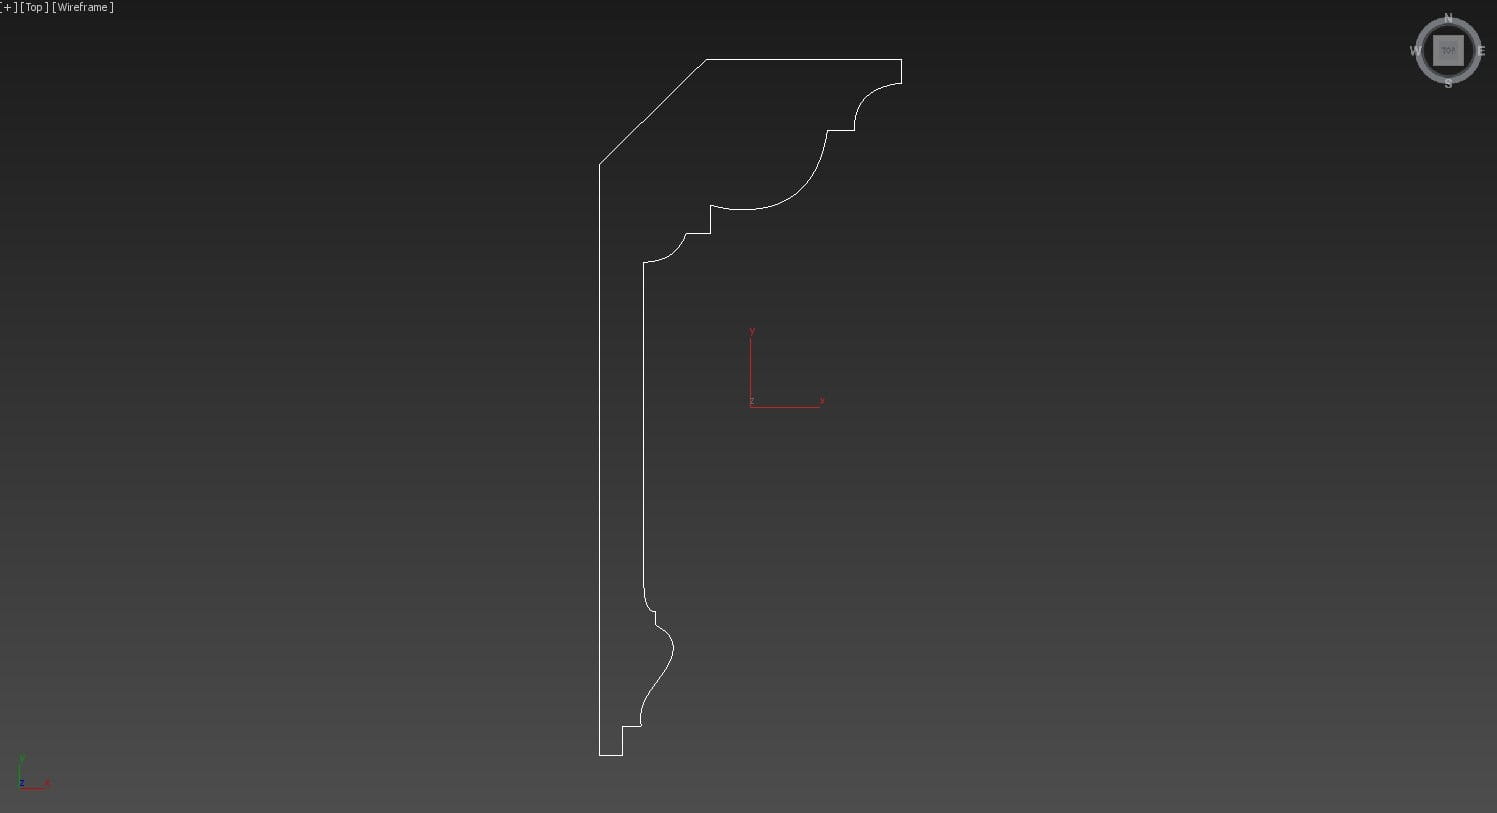
Section spline for cornice.

Wall details sweep
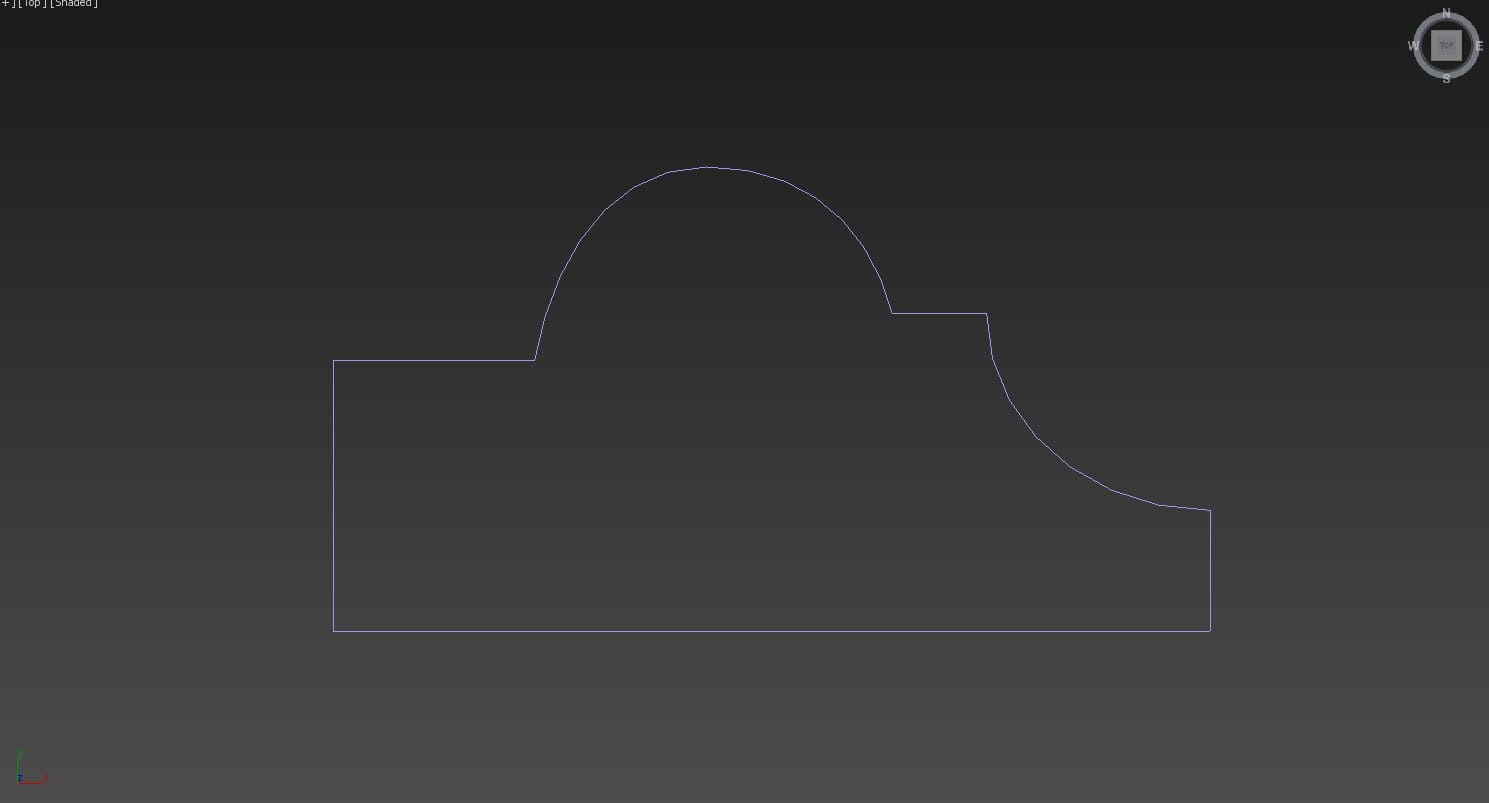
Section spline for wall details.
Step 3 - Lighting
Before I place furniture and props I set the scene lighting to create the overall mood and test the floor material. The scene was lit using only HDRI lighting inside V-Ray dome light.
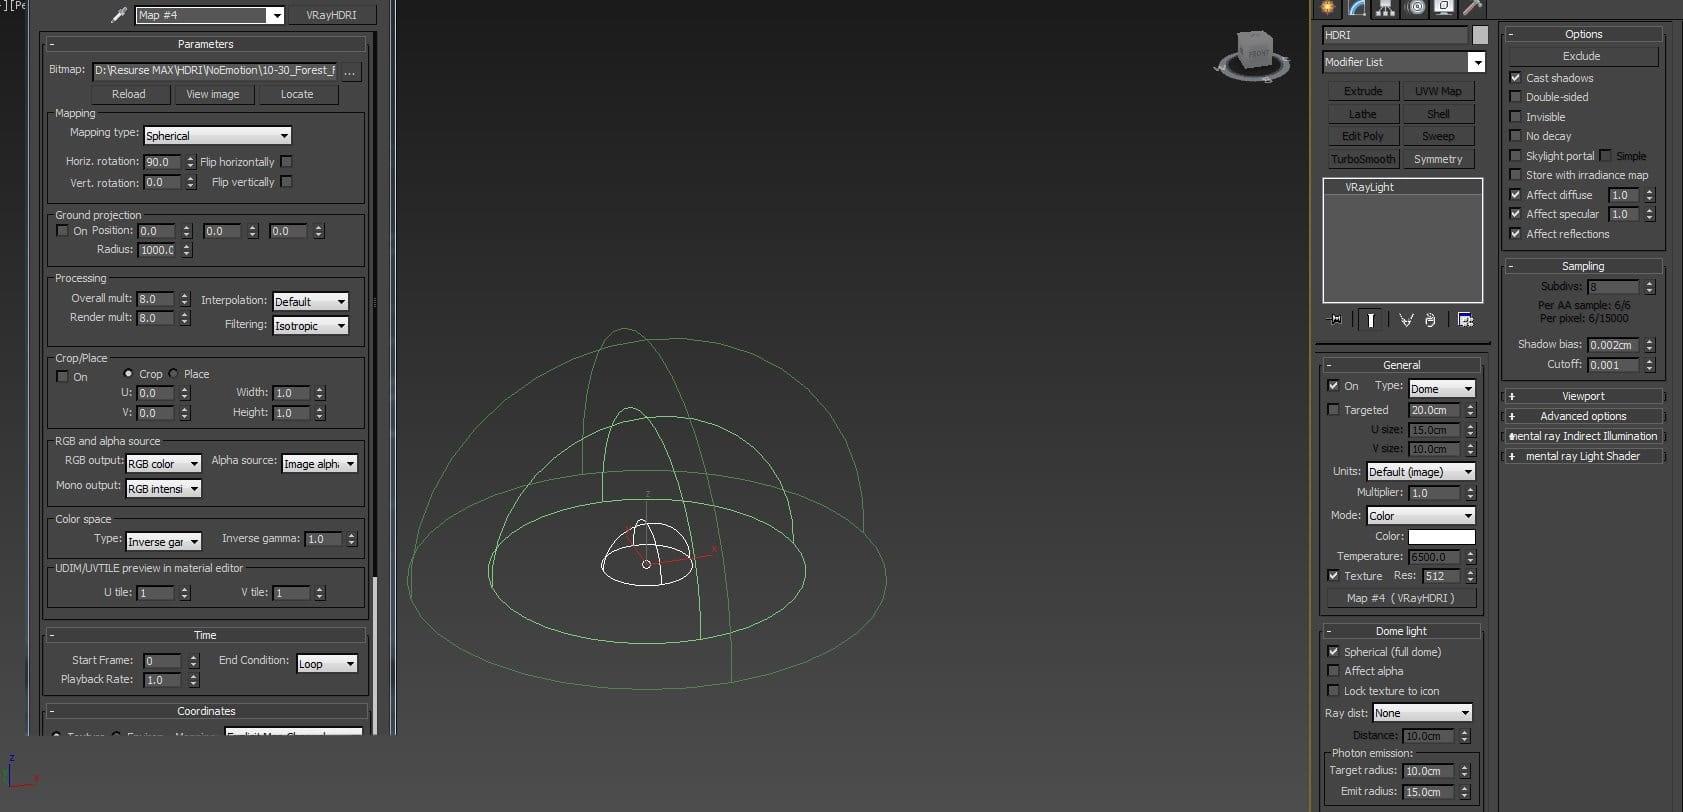
HDRI and VRay dome light settings
HDRI file is from http://noemotionhdrs.net
Two planes were used to create background behind windows and VRay Lightmtl was assigned to both planes.
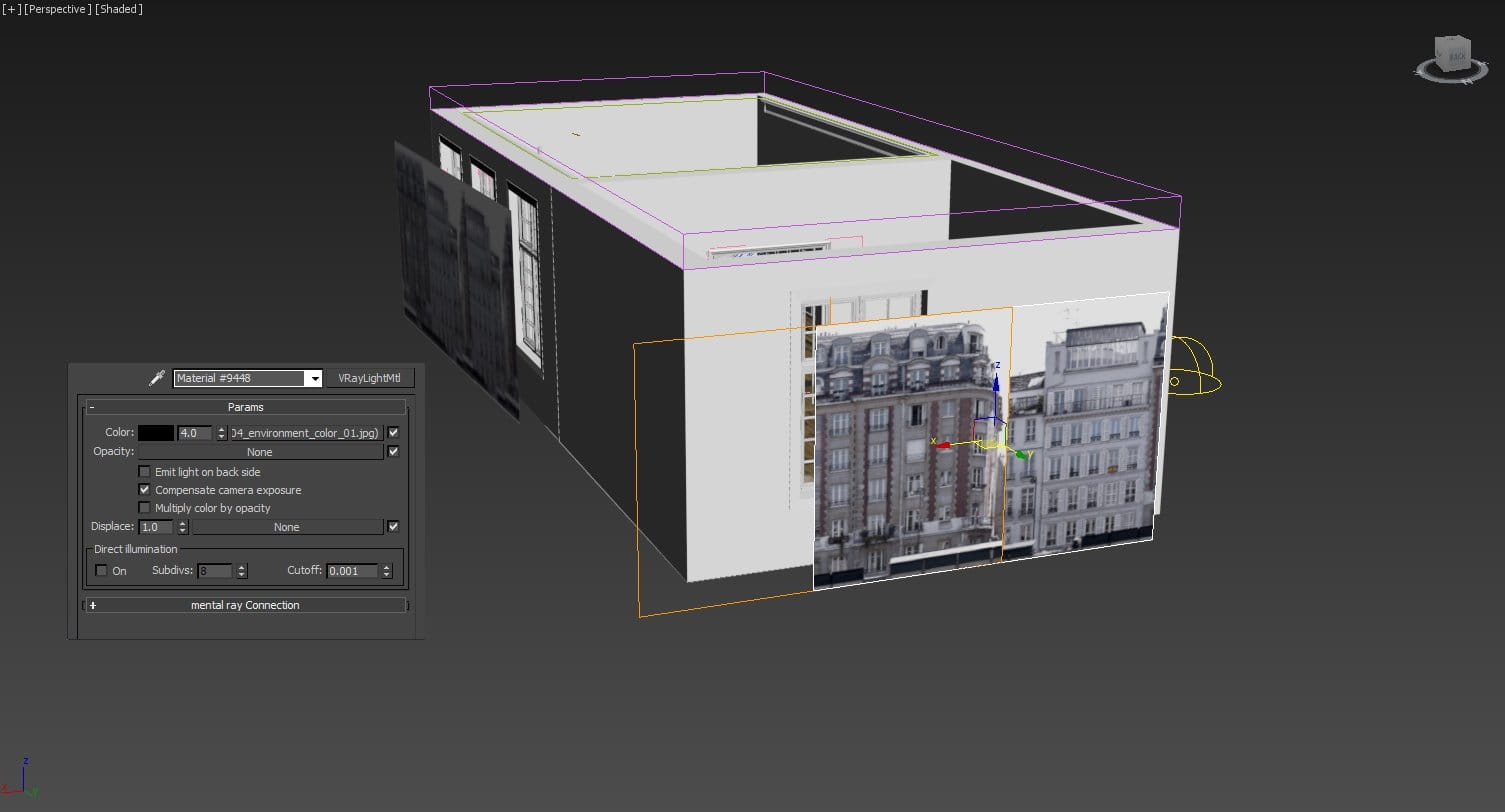
VRayLightMtl settings.
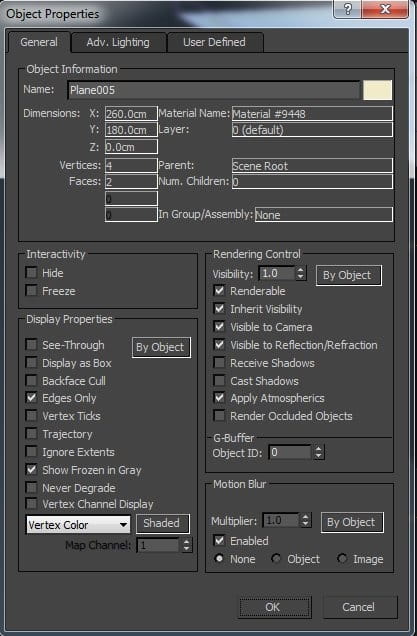
Both planes are set to not cast or receive shadows in the object properties.
For the lamp light I set the light multiplier to 0.5 because I didn’t want a glare coming from this light.

Lamp light settings
Step 4 - Furniture and props
A few pieces of furniture and props from 3DSky:
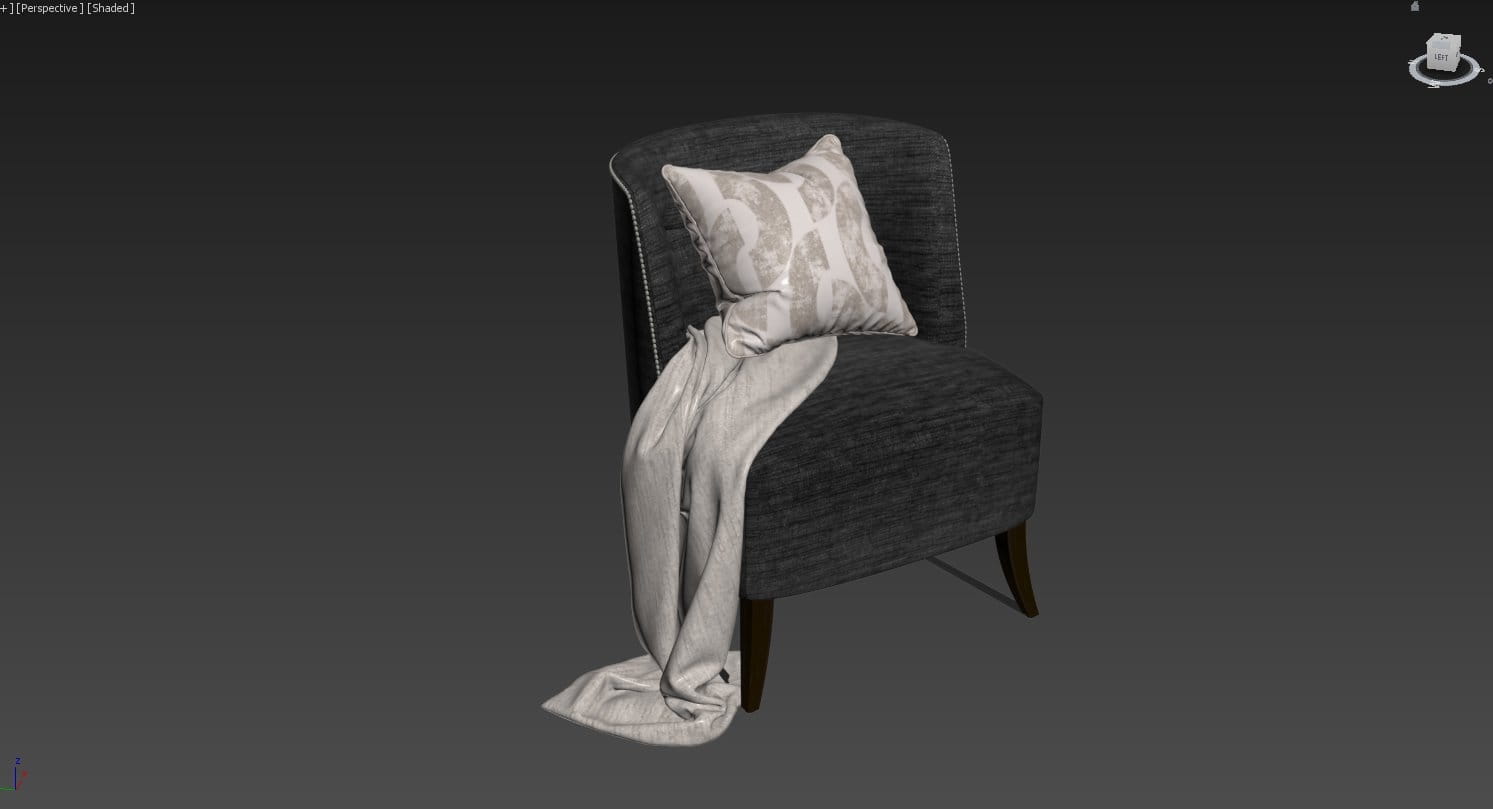
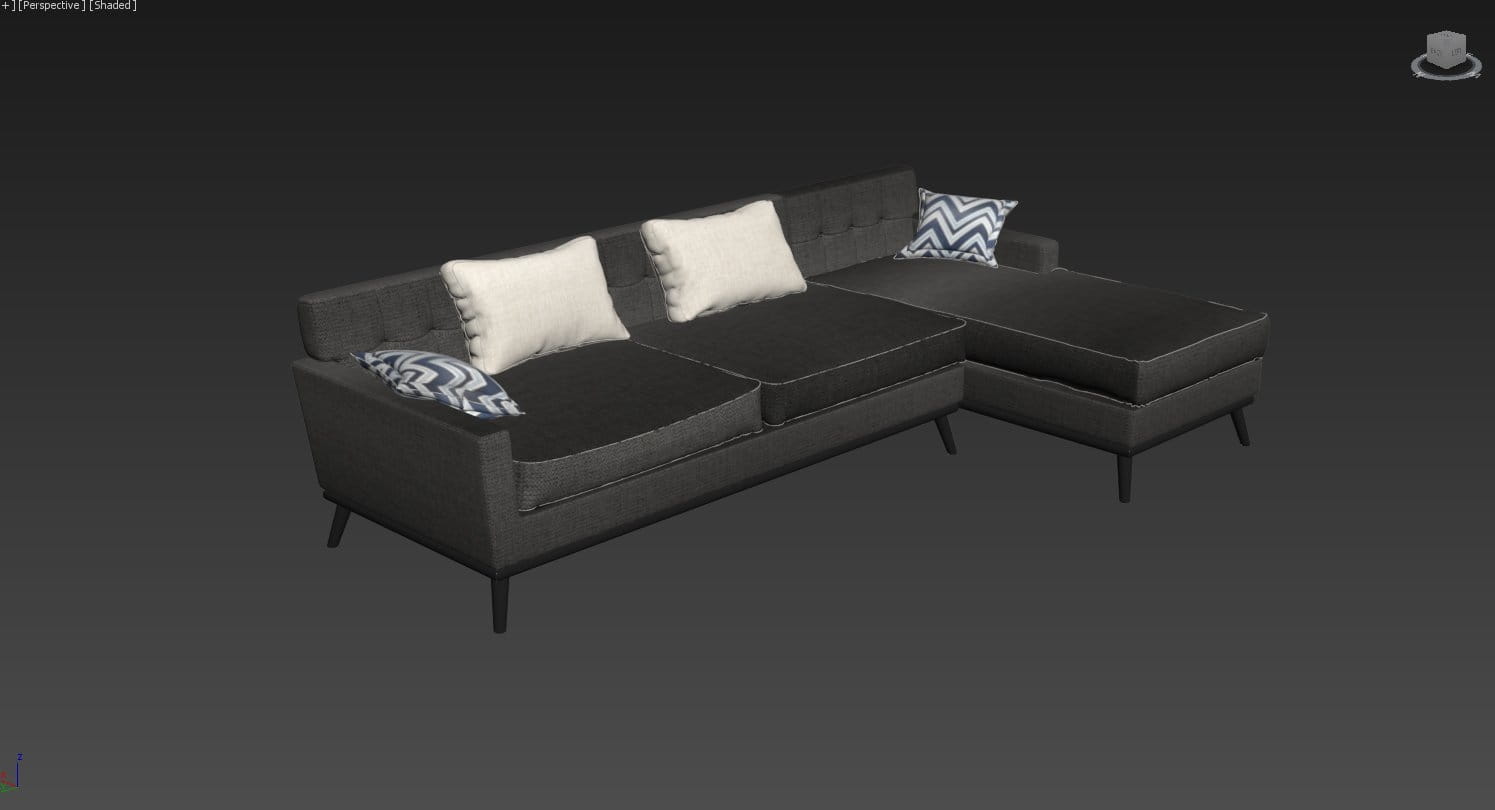


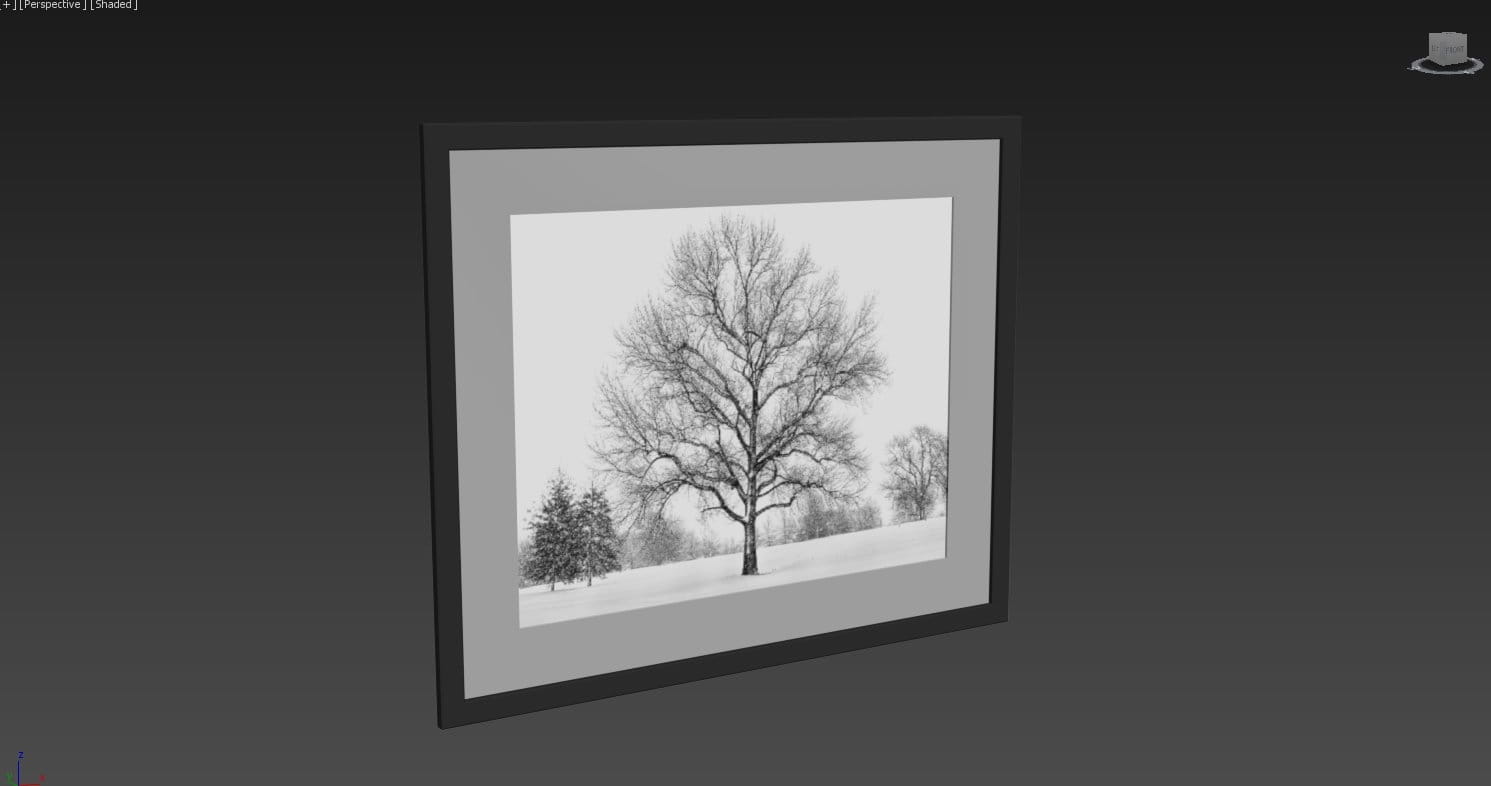
Some furniture and props from Evermotion
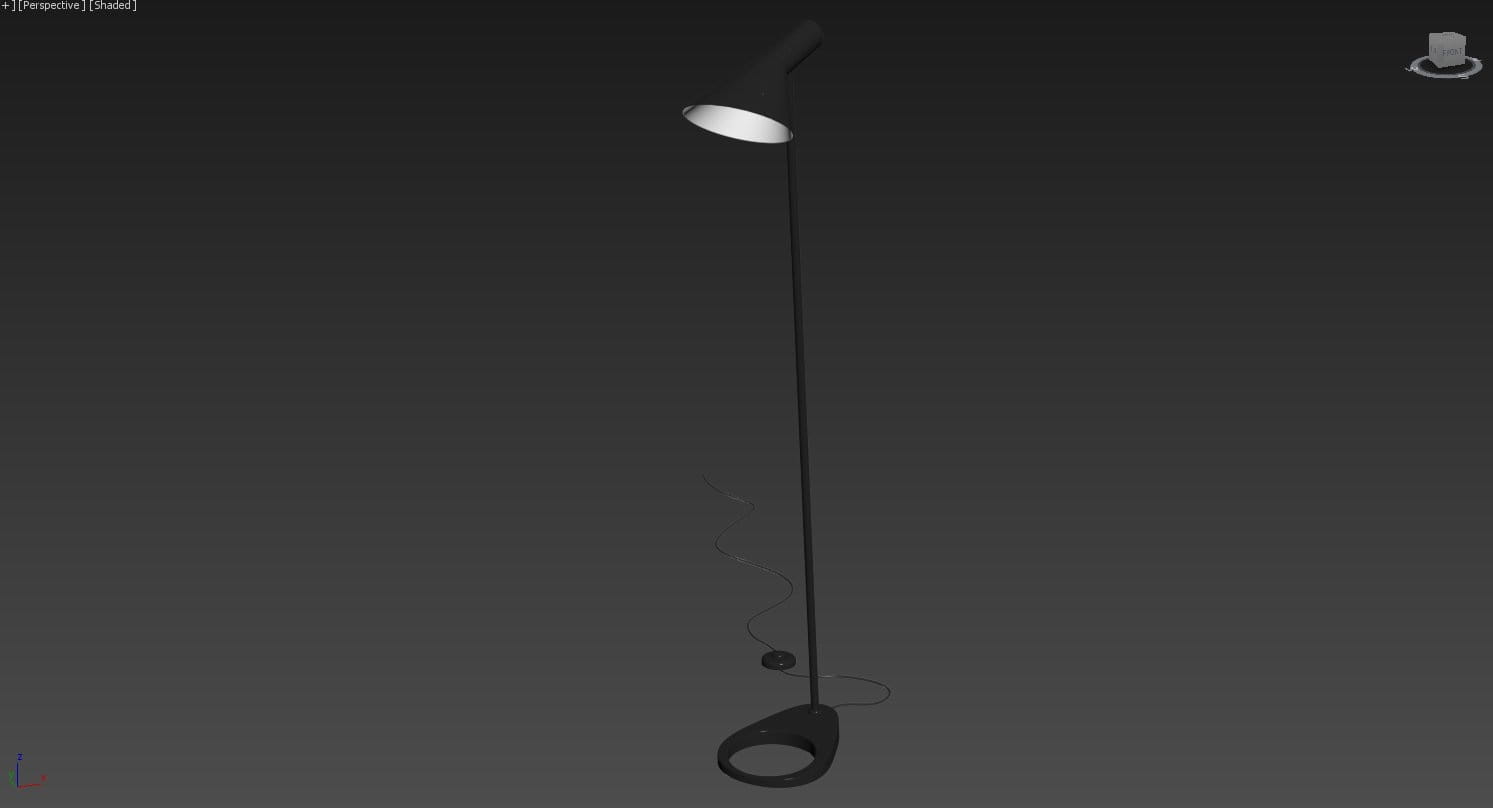
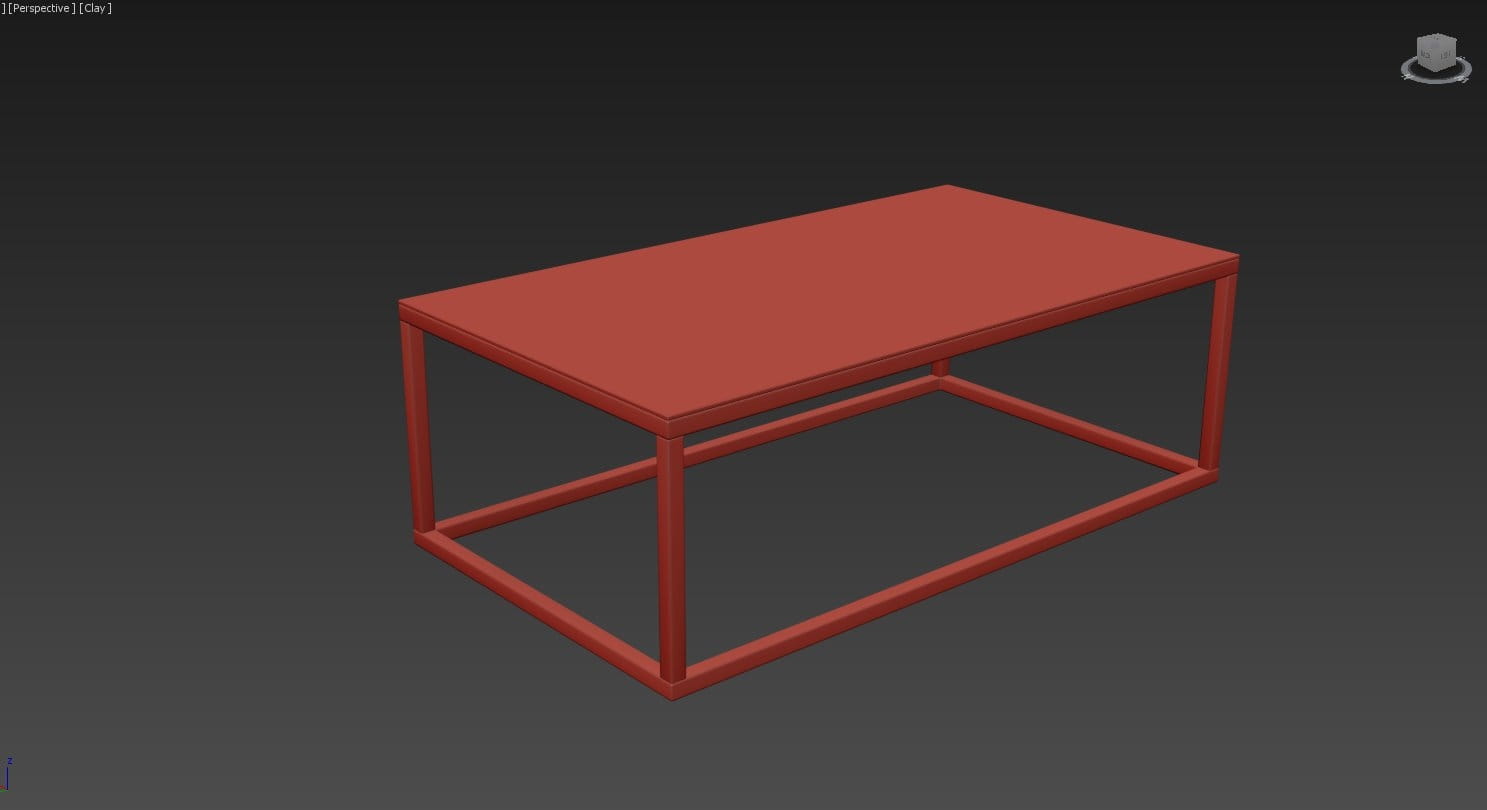
Lamp from Archmodels vol. 138
Table and chairs from Archinteriors vol. 12

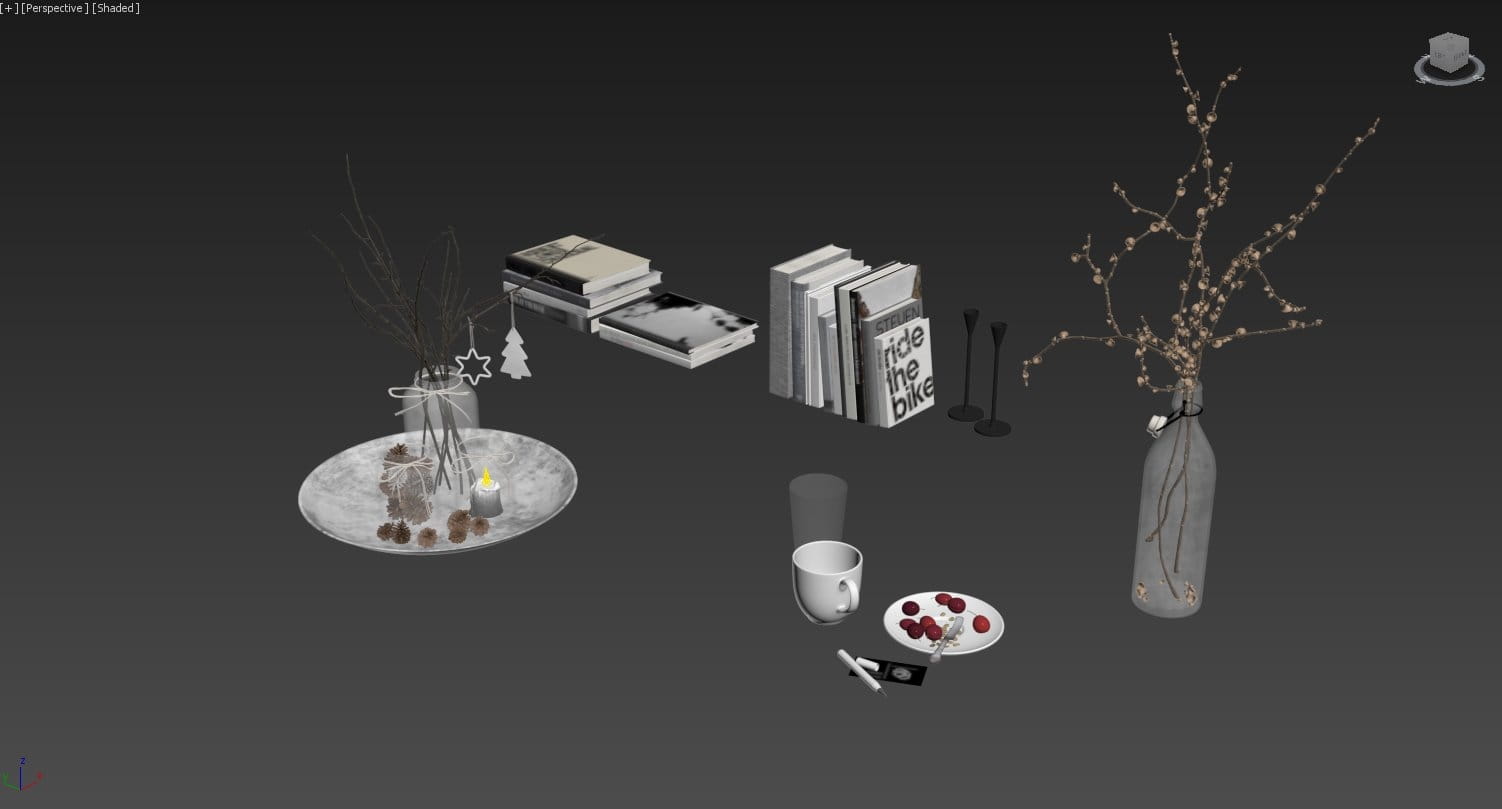
Plants from Arhchmodels vol. 173.

Props from Archmodels vol. 134 & 160
Step 5 - Camera, composition
I used Physical cameras for all images in the project. First camera is used to create the main image of the project and I tried to add some narrative by creating two focus points ( sofa on the right which is my key object and table with chairs on the left in the background). This way the viewer attention is directed from right to left by separating the two spaces and by focusing the light on them with different intensity.
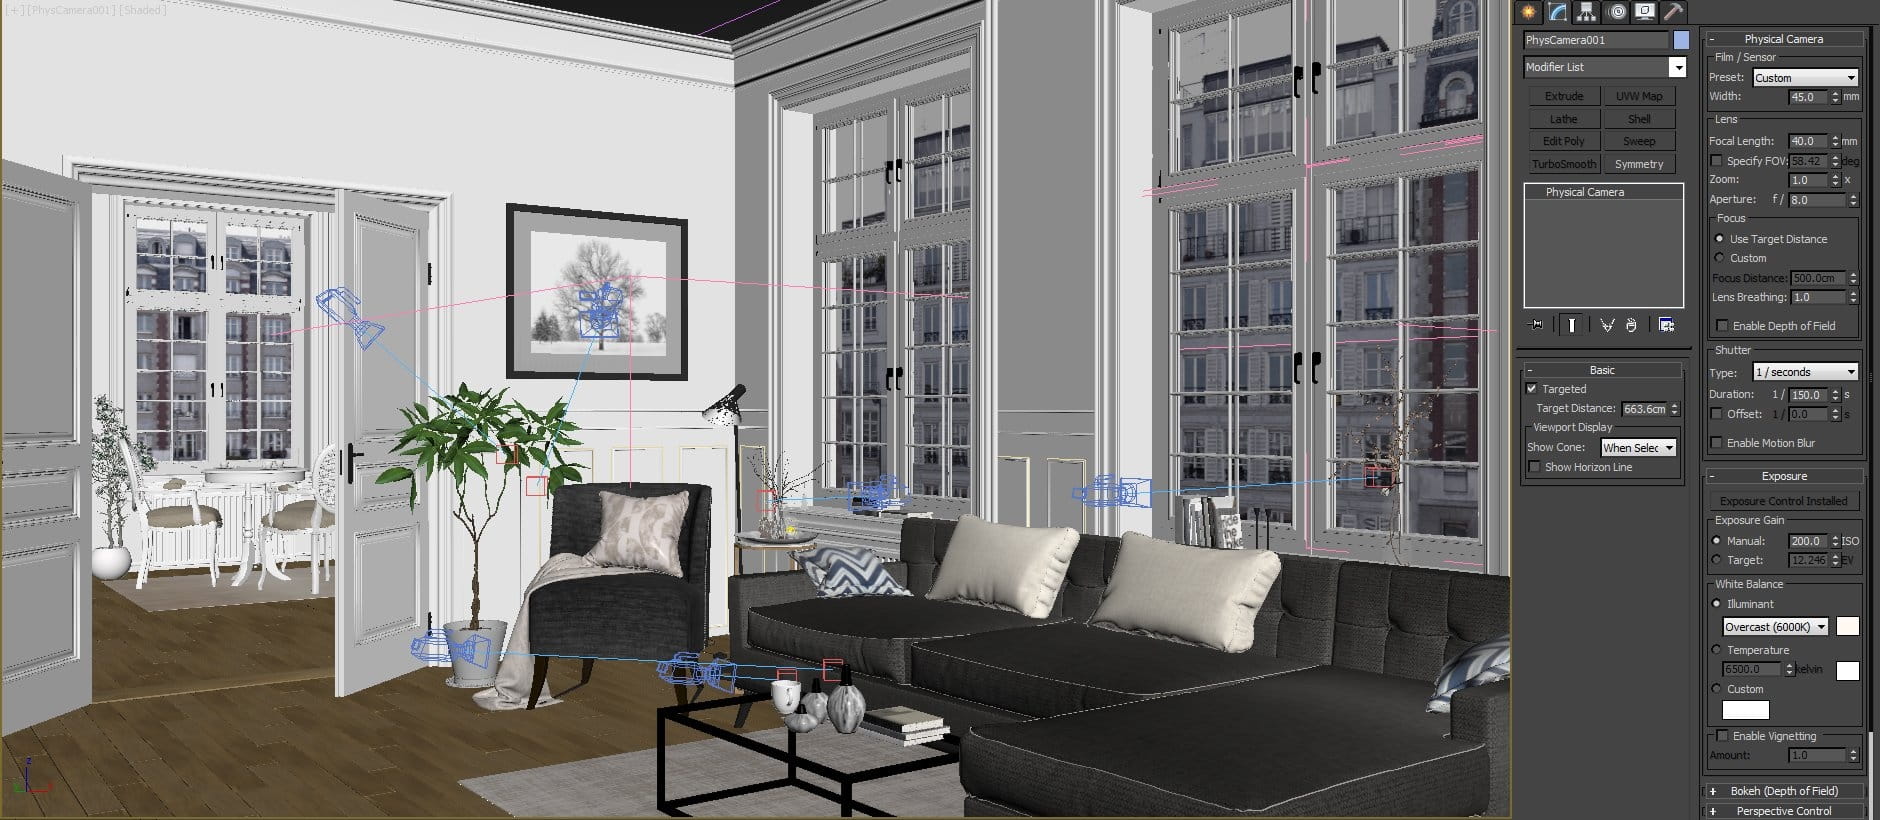
Main camera settings.
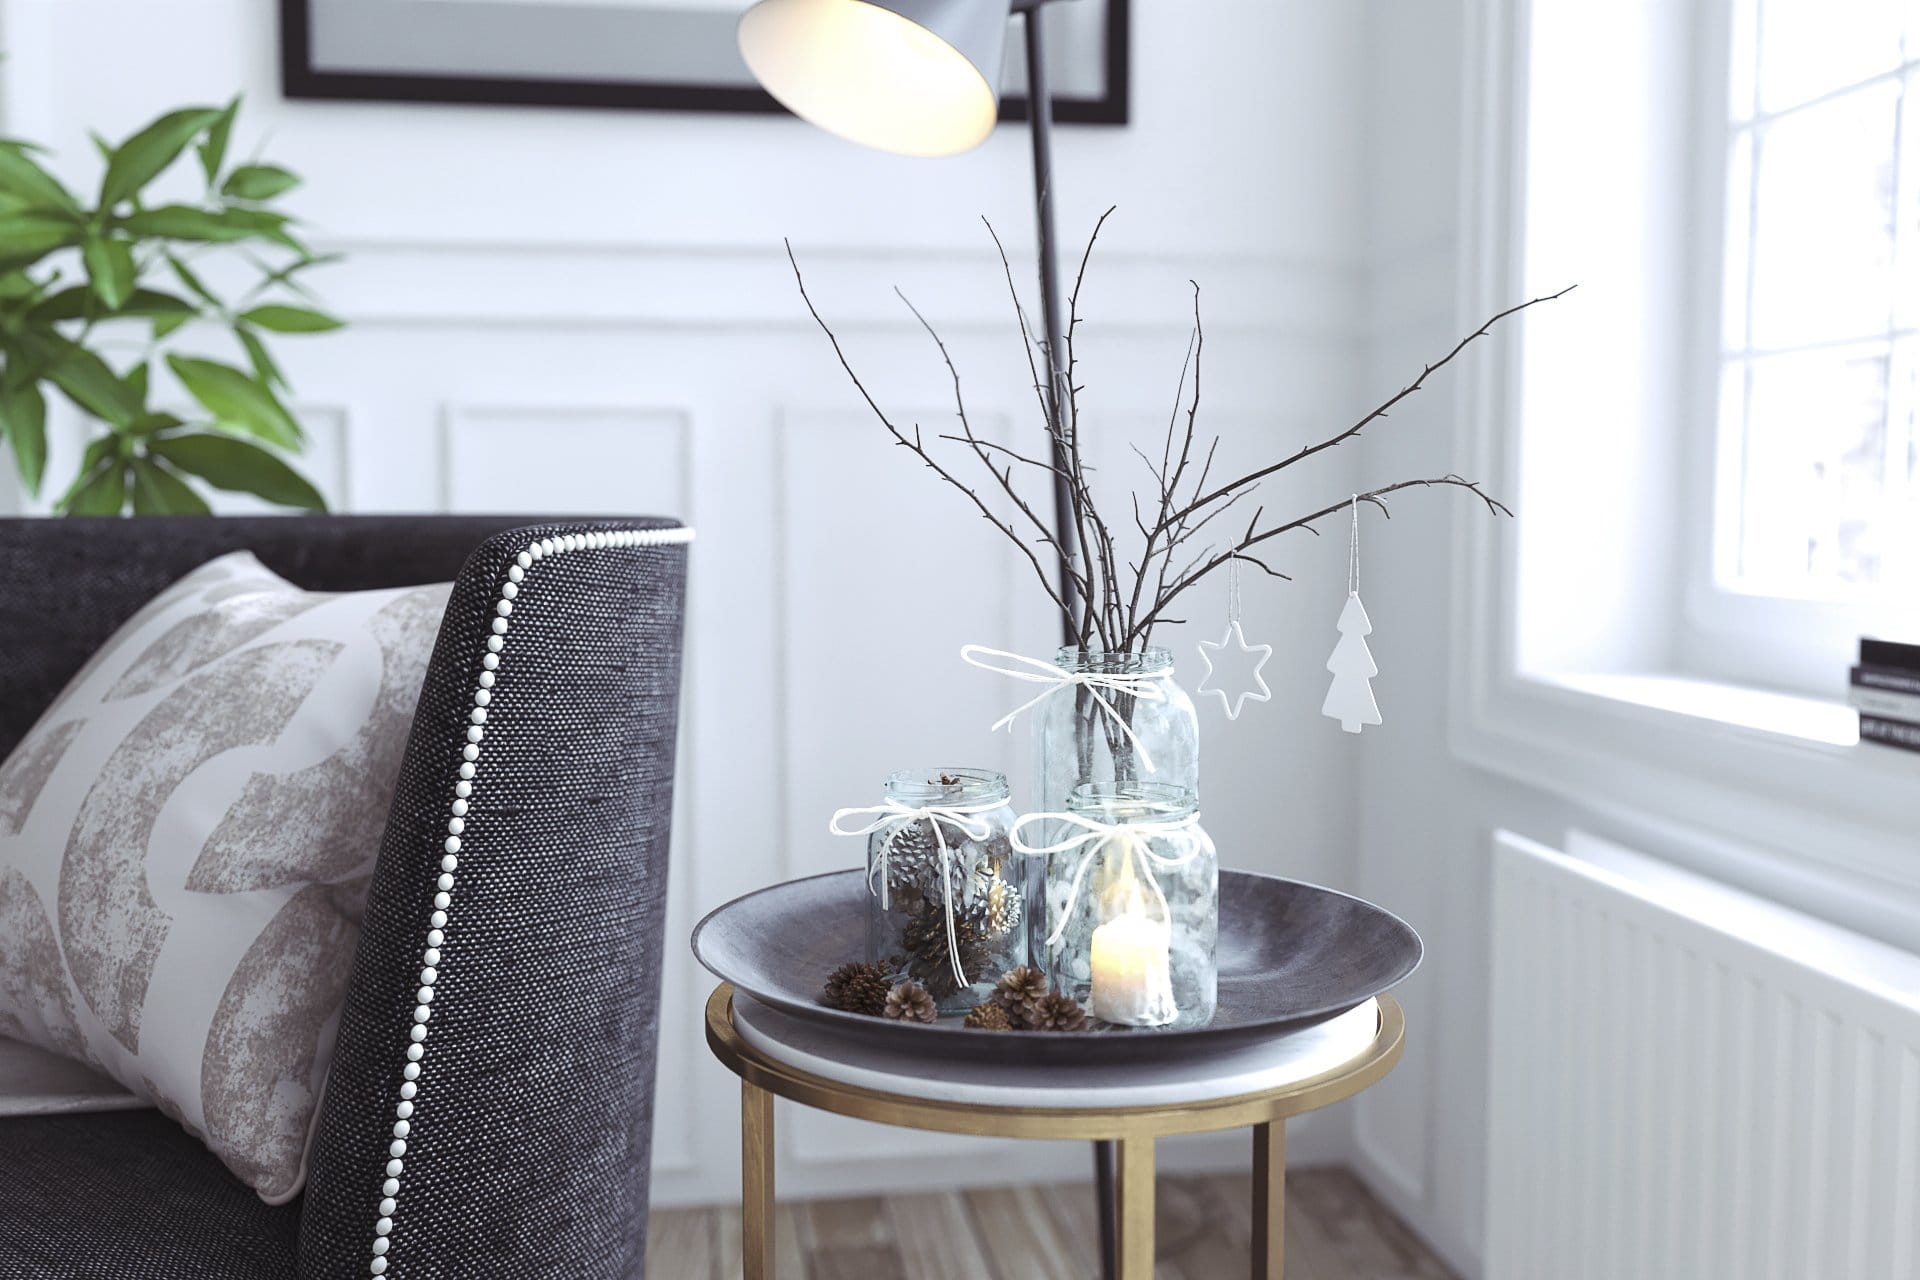
Secondary cameras are for close-ups and have depth of field enabled with wide aperture (low F-number) for shallow depth of field and low ISO to reduce brightness.
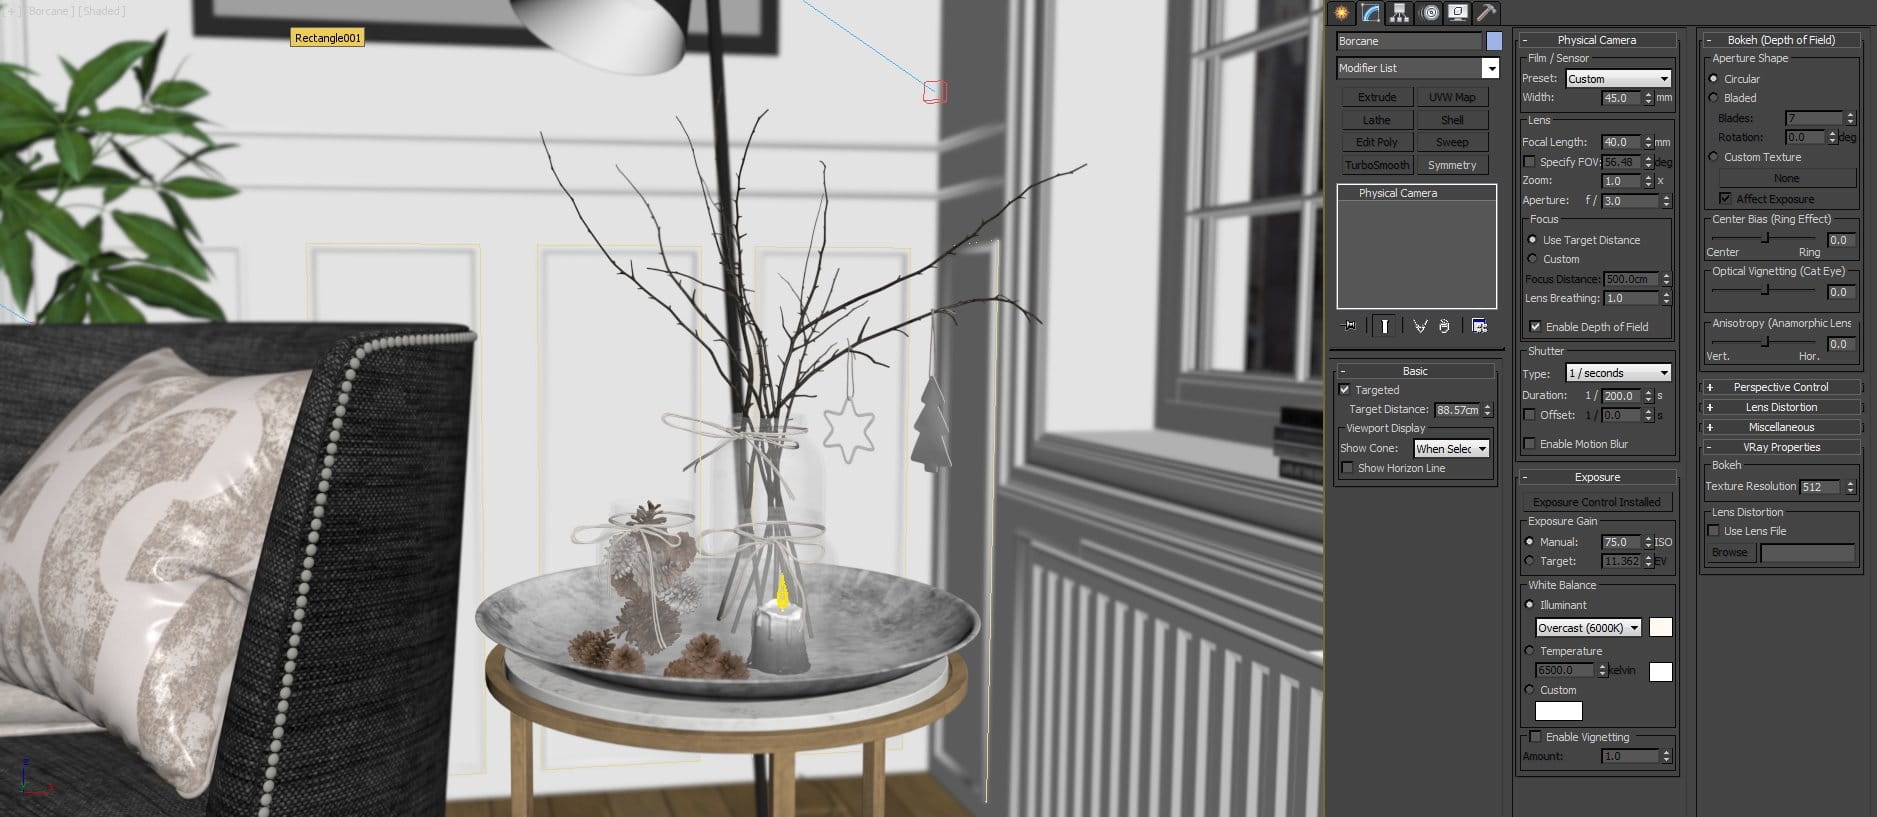
Close-up camera settings with DOF.
Step 6 - Materials final tests
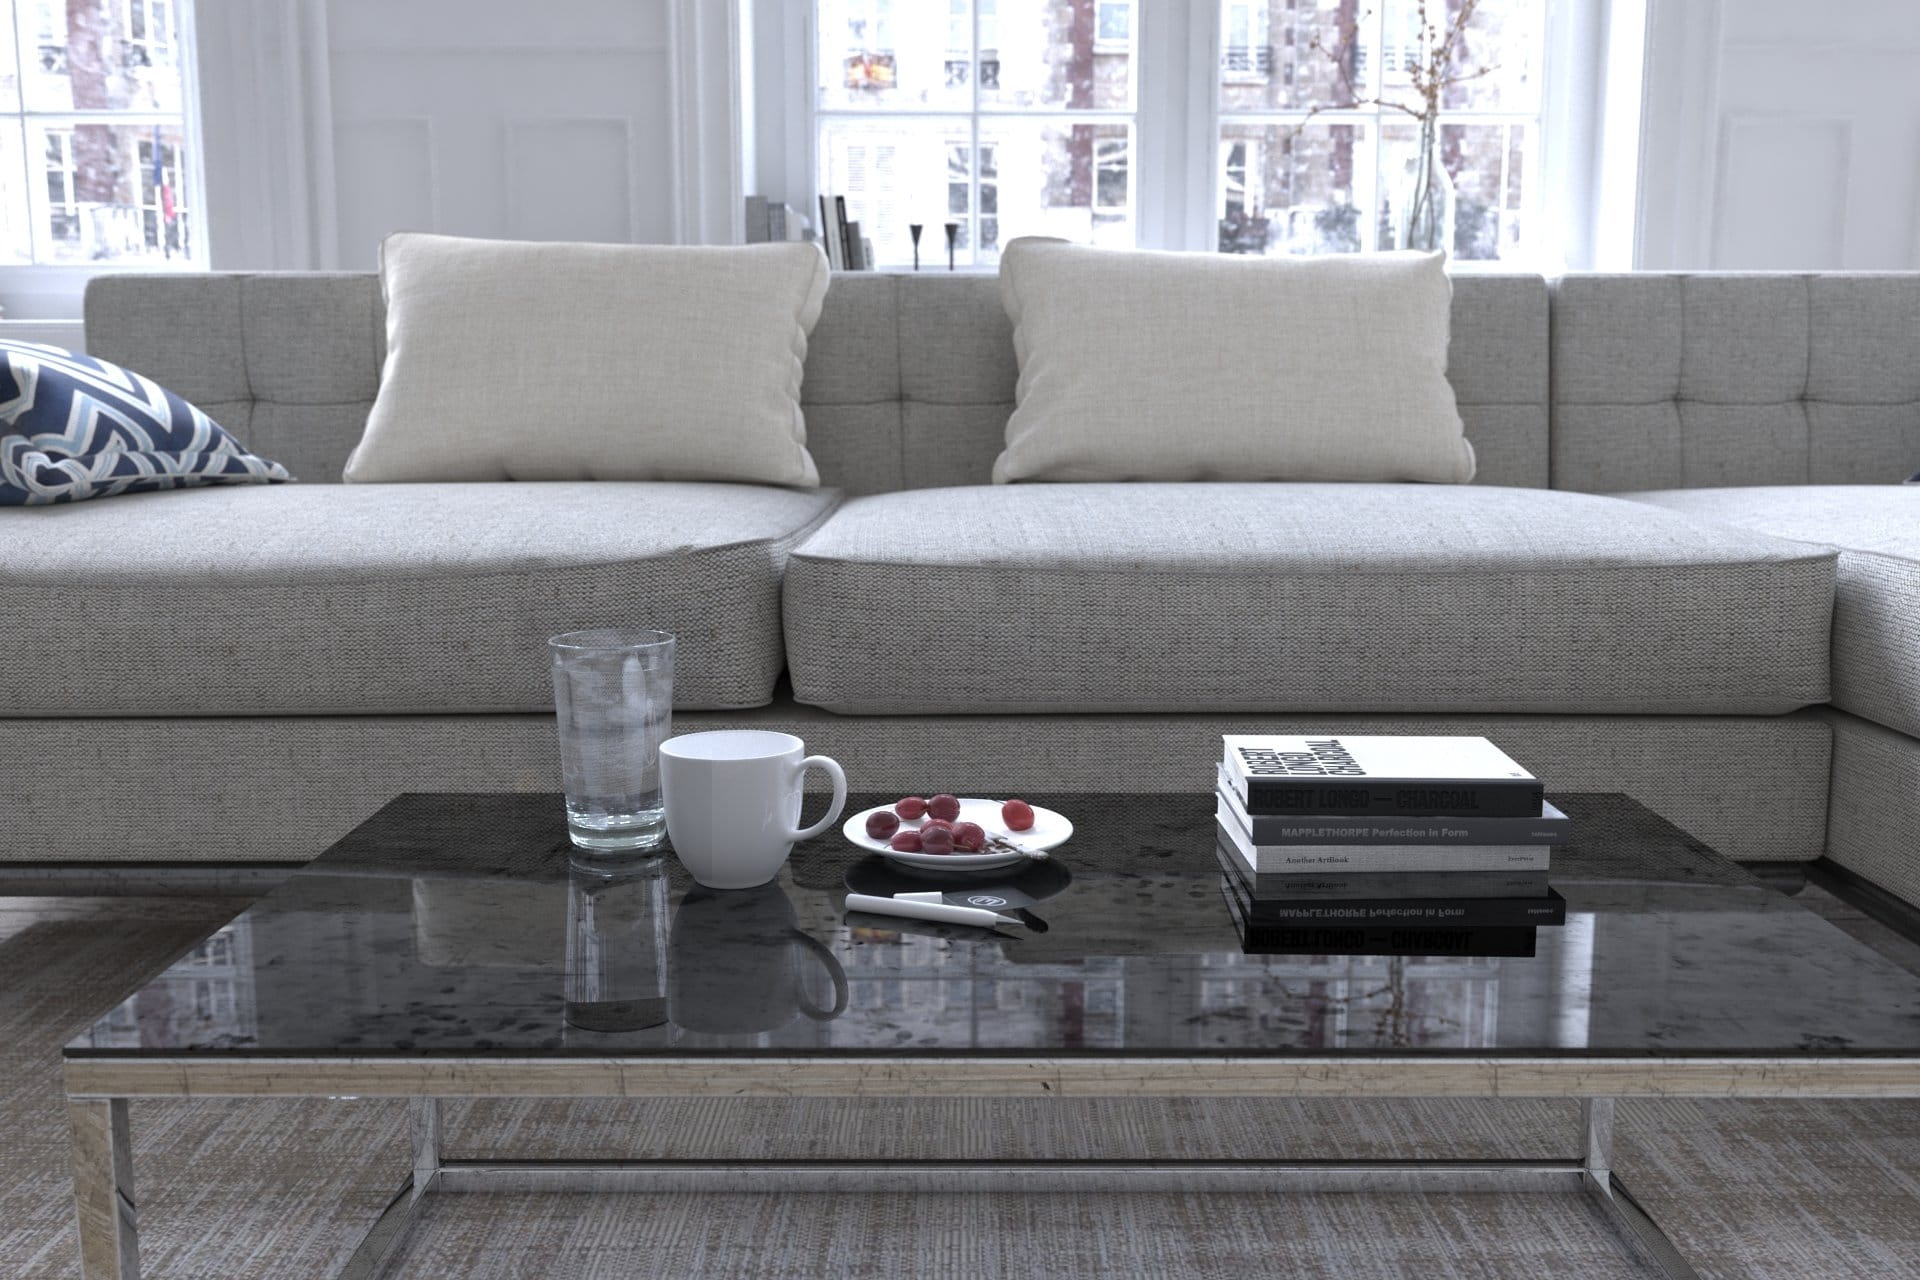
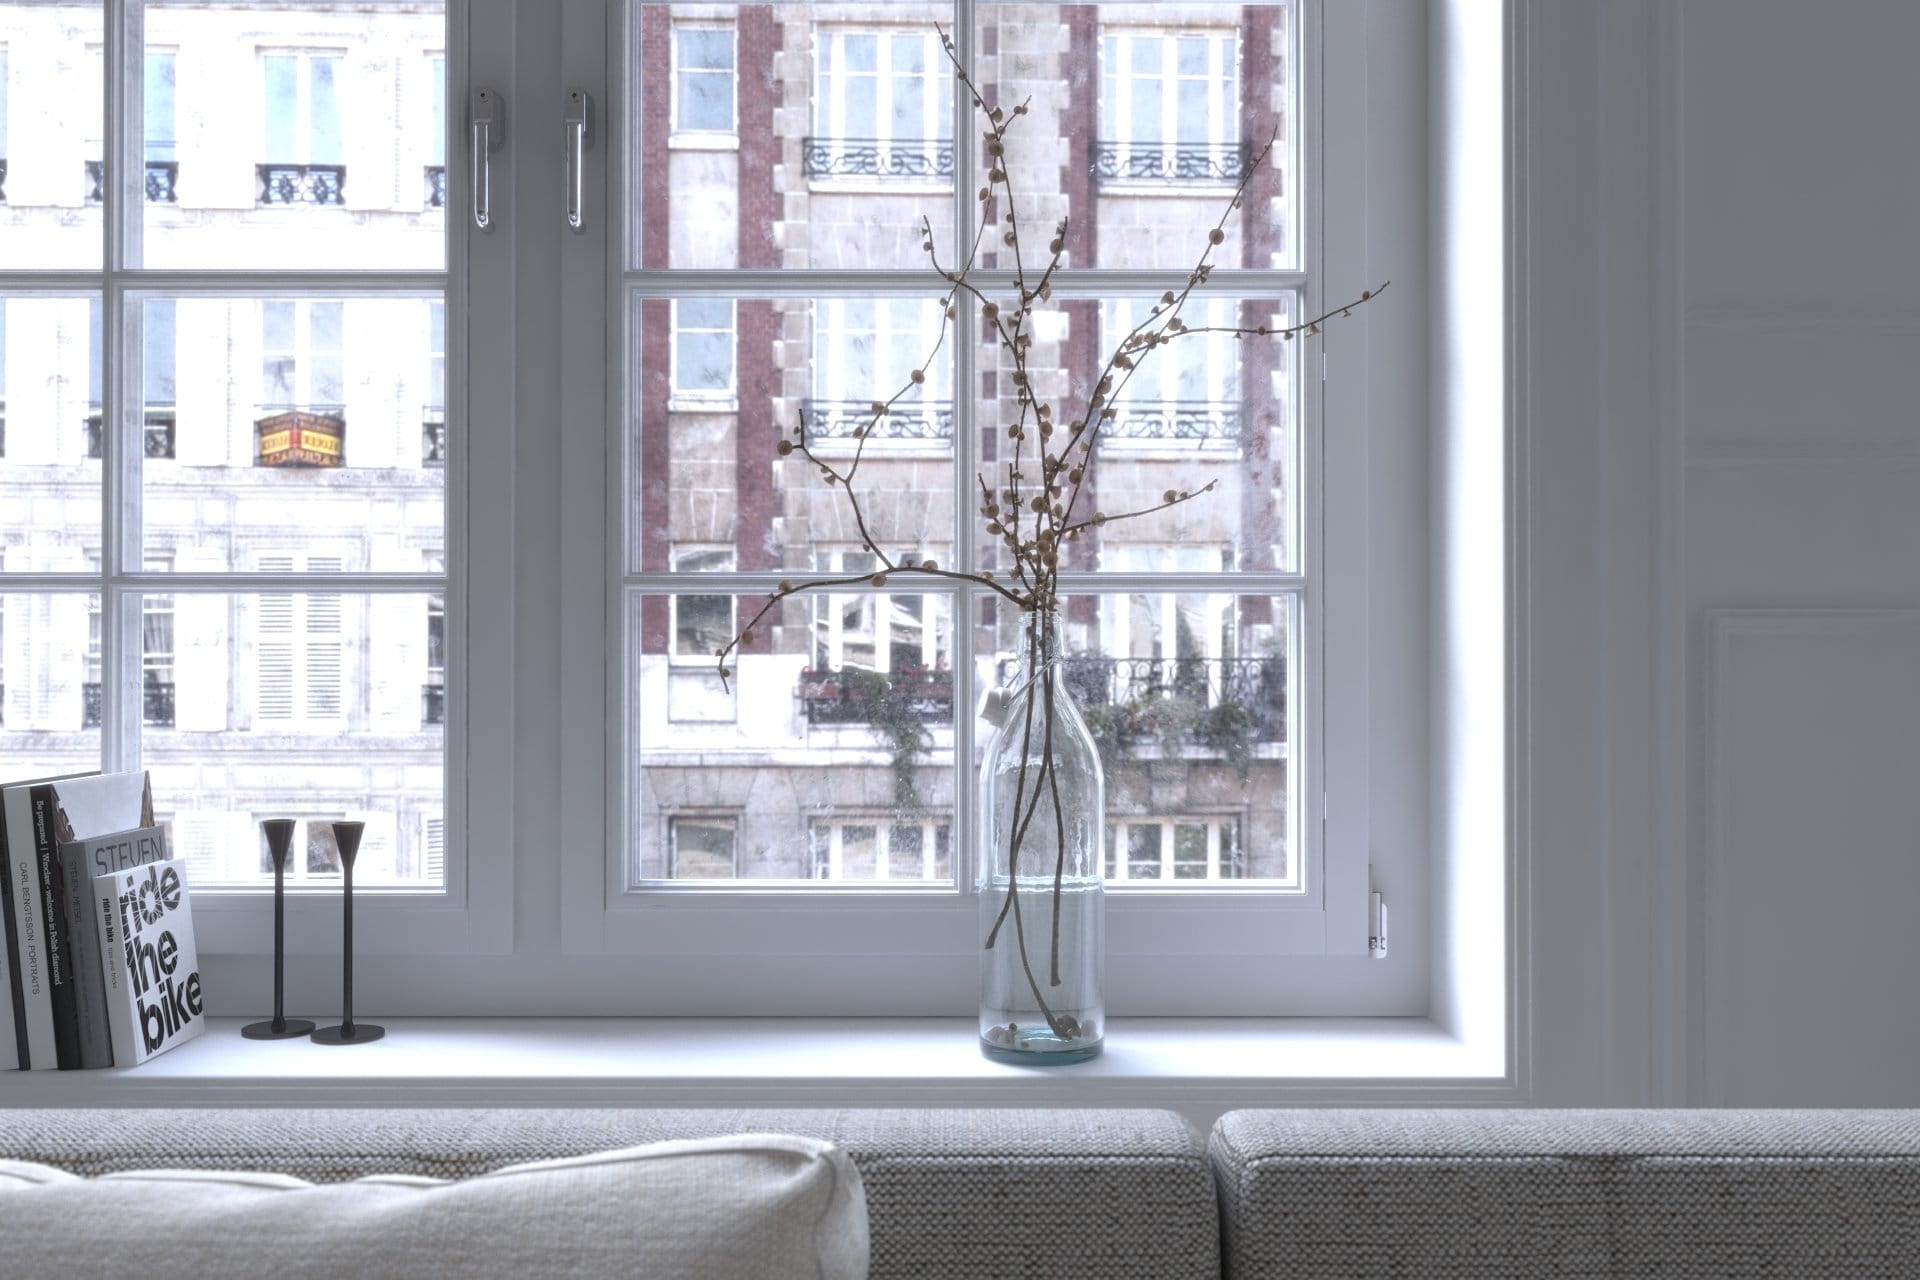
To add realism to the scene I applied some wear and tear effects on the door edges and some smudges and fingerprints on window panels and water glass.
Door material
Door material is a VRayBlendMtl with a white base material and a red wood coat blended together using a VRayDirt map. The blending amount is set to 20 so the effect is subtle.
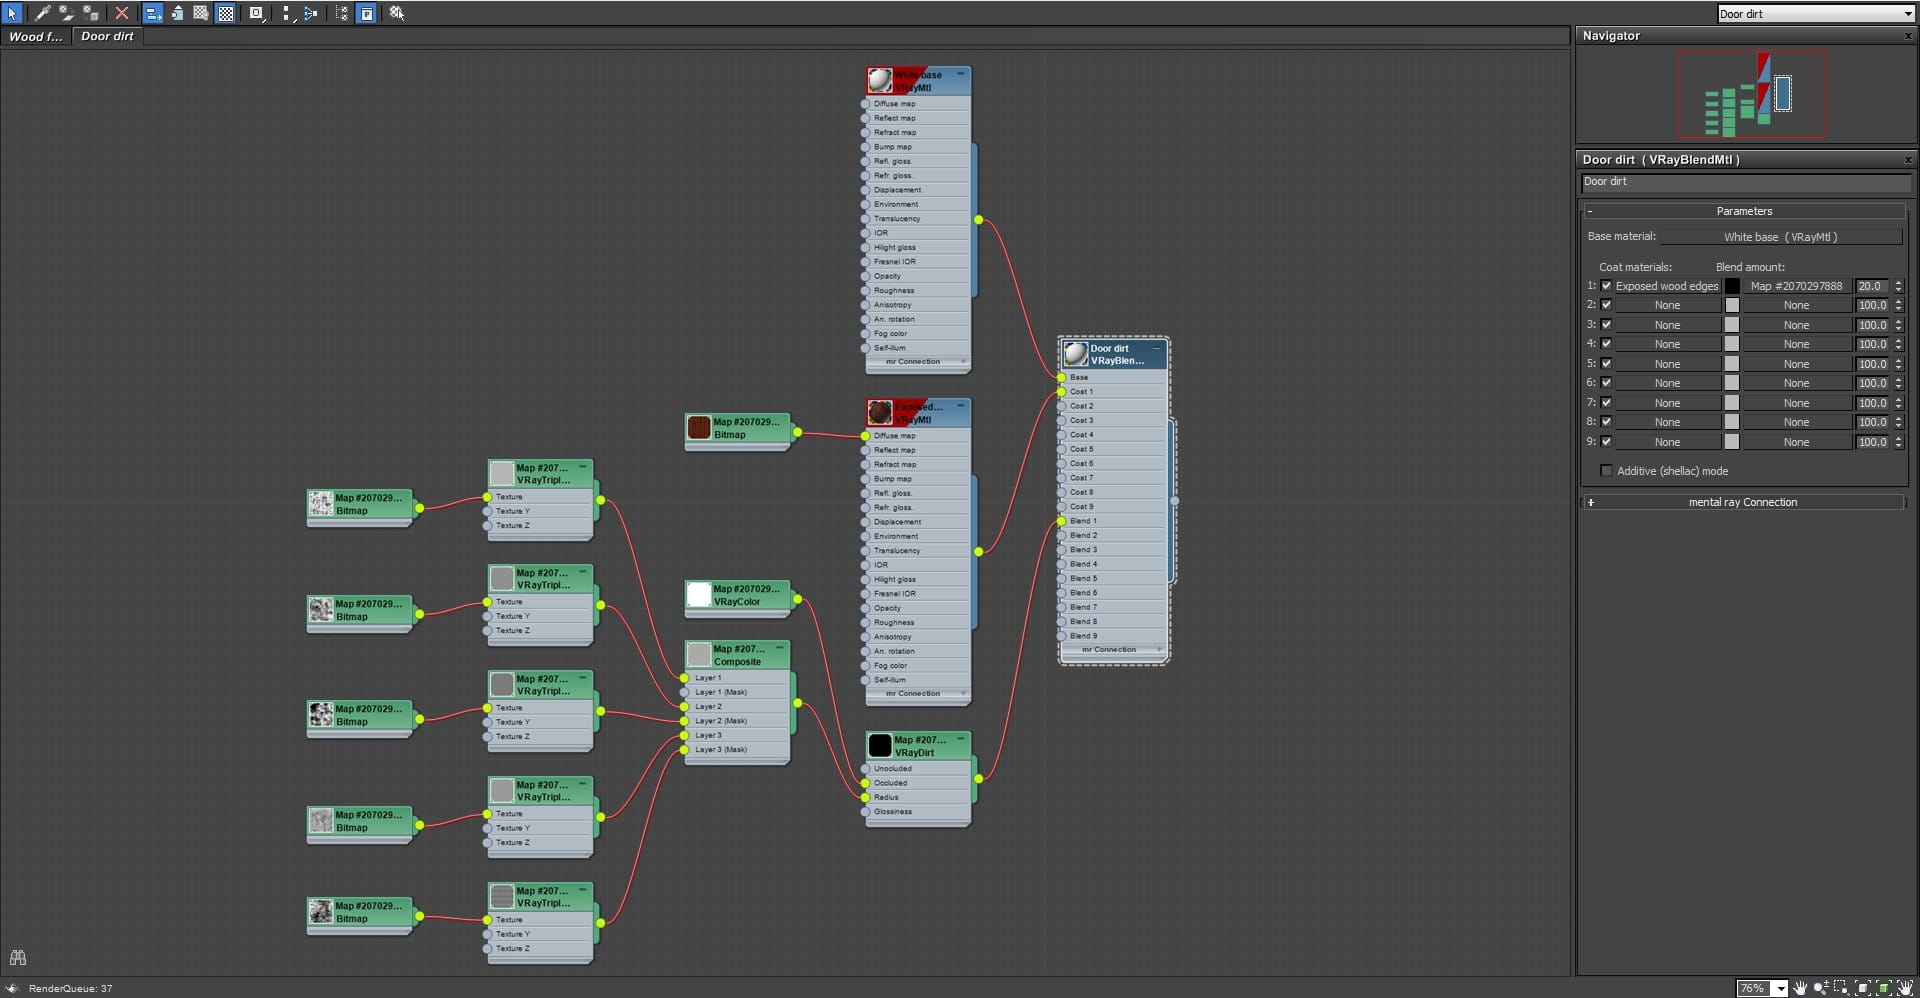
VRayBlendMtl settings.
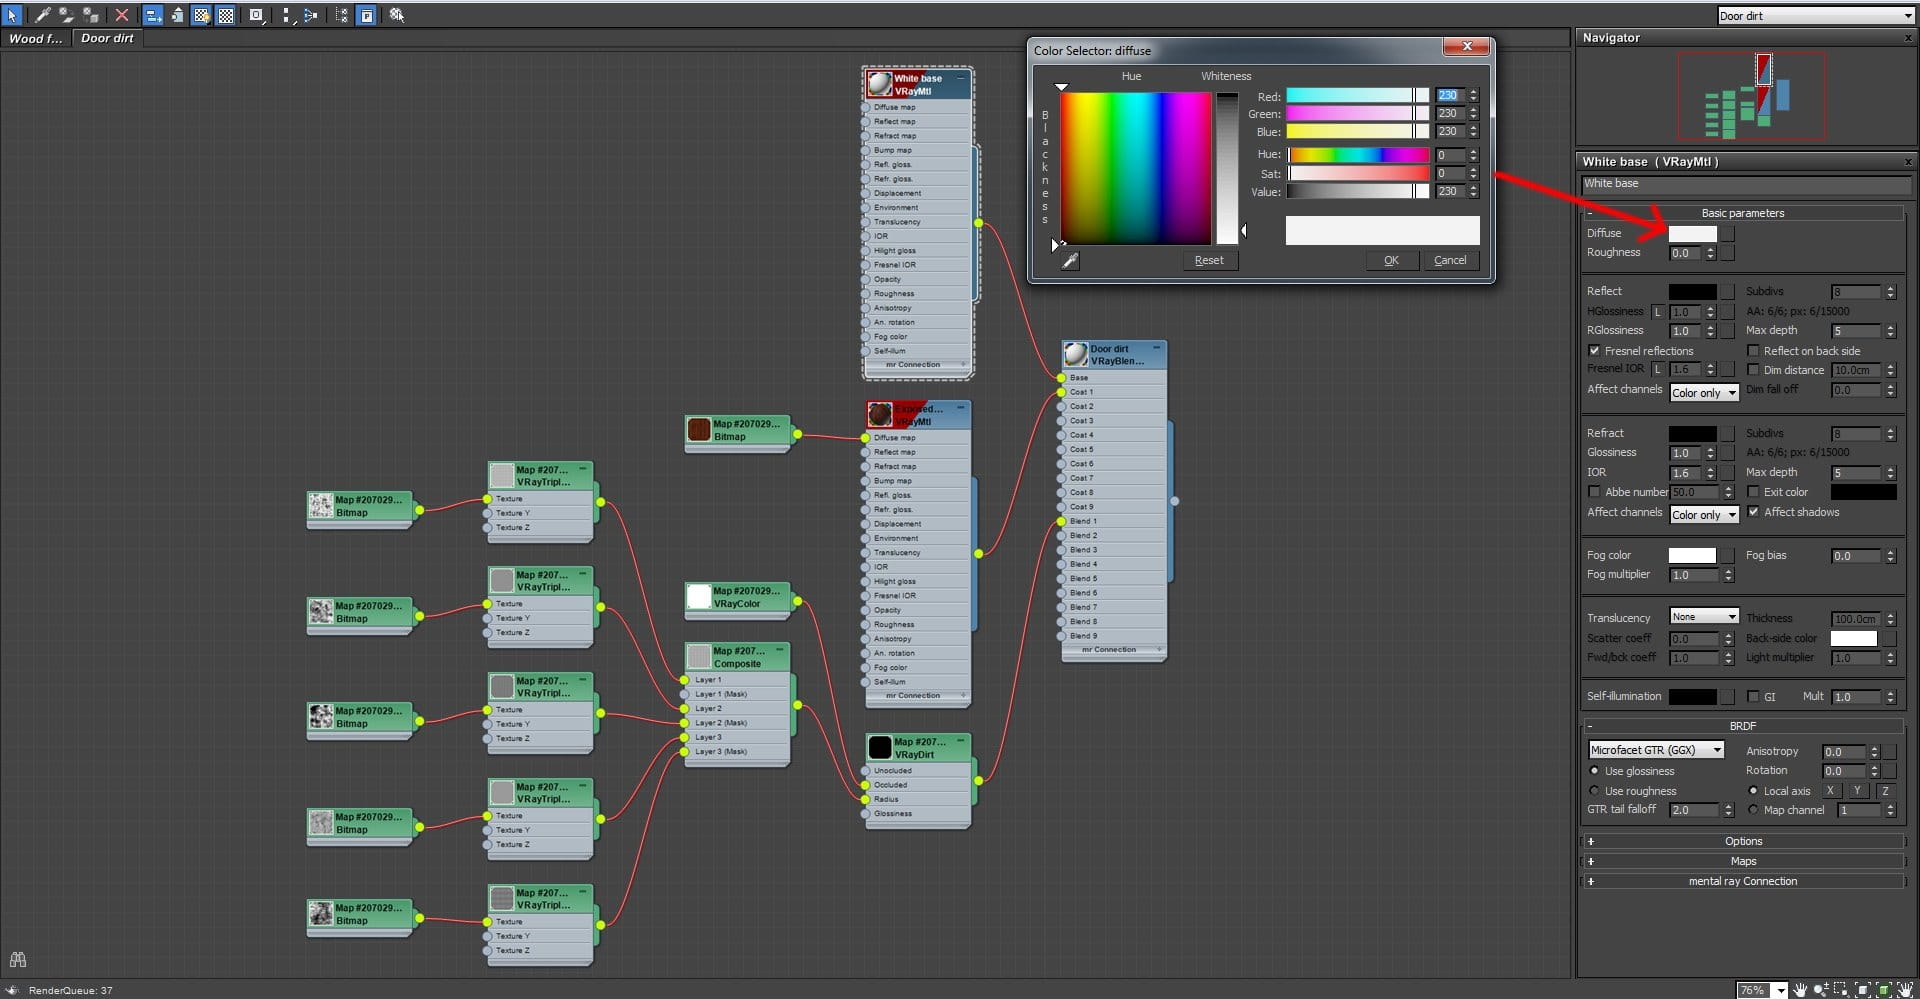
Base material settings.

Coat material settings
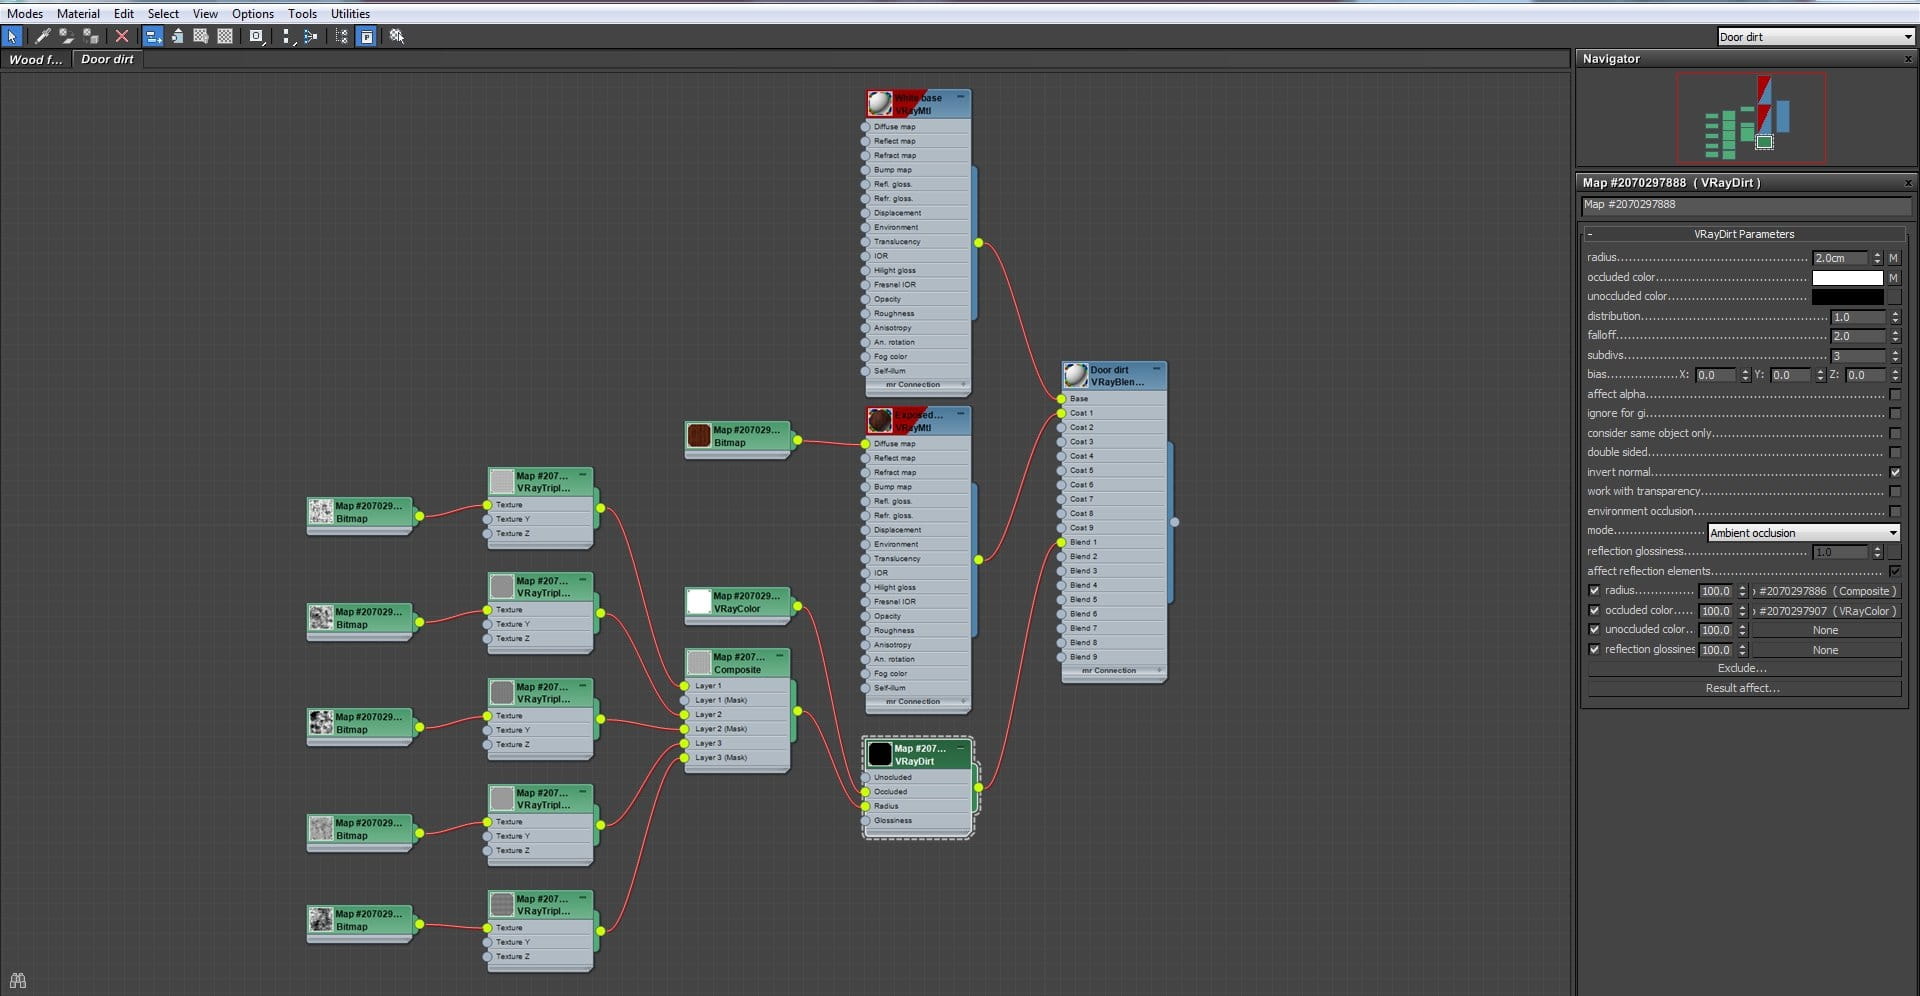
Blend (VRayDirt) settings.
In the VRay Dirt I enabled invert normal so the effect is visible on the edges and not in the occluded areas.
In the occluded color slot I placed a VRayColor map with white color and RGB multiplier set to a floating value of 10 so the VRayDirt effect has more contrast.

VRayColor map settings.
In the radius slot I used a composite map with textures from 3DCollective inside VRayTriplanar maps at different scales. The reason for the triplanar maps is to avoid the use of UVW mapping for each texture. Each layer is masked with a similar triplanar maps set at different scales. This way the tiling effect of the textures on the edges is avoided.
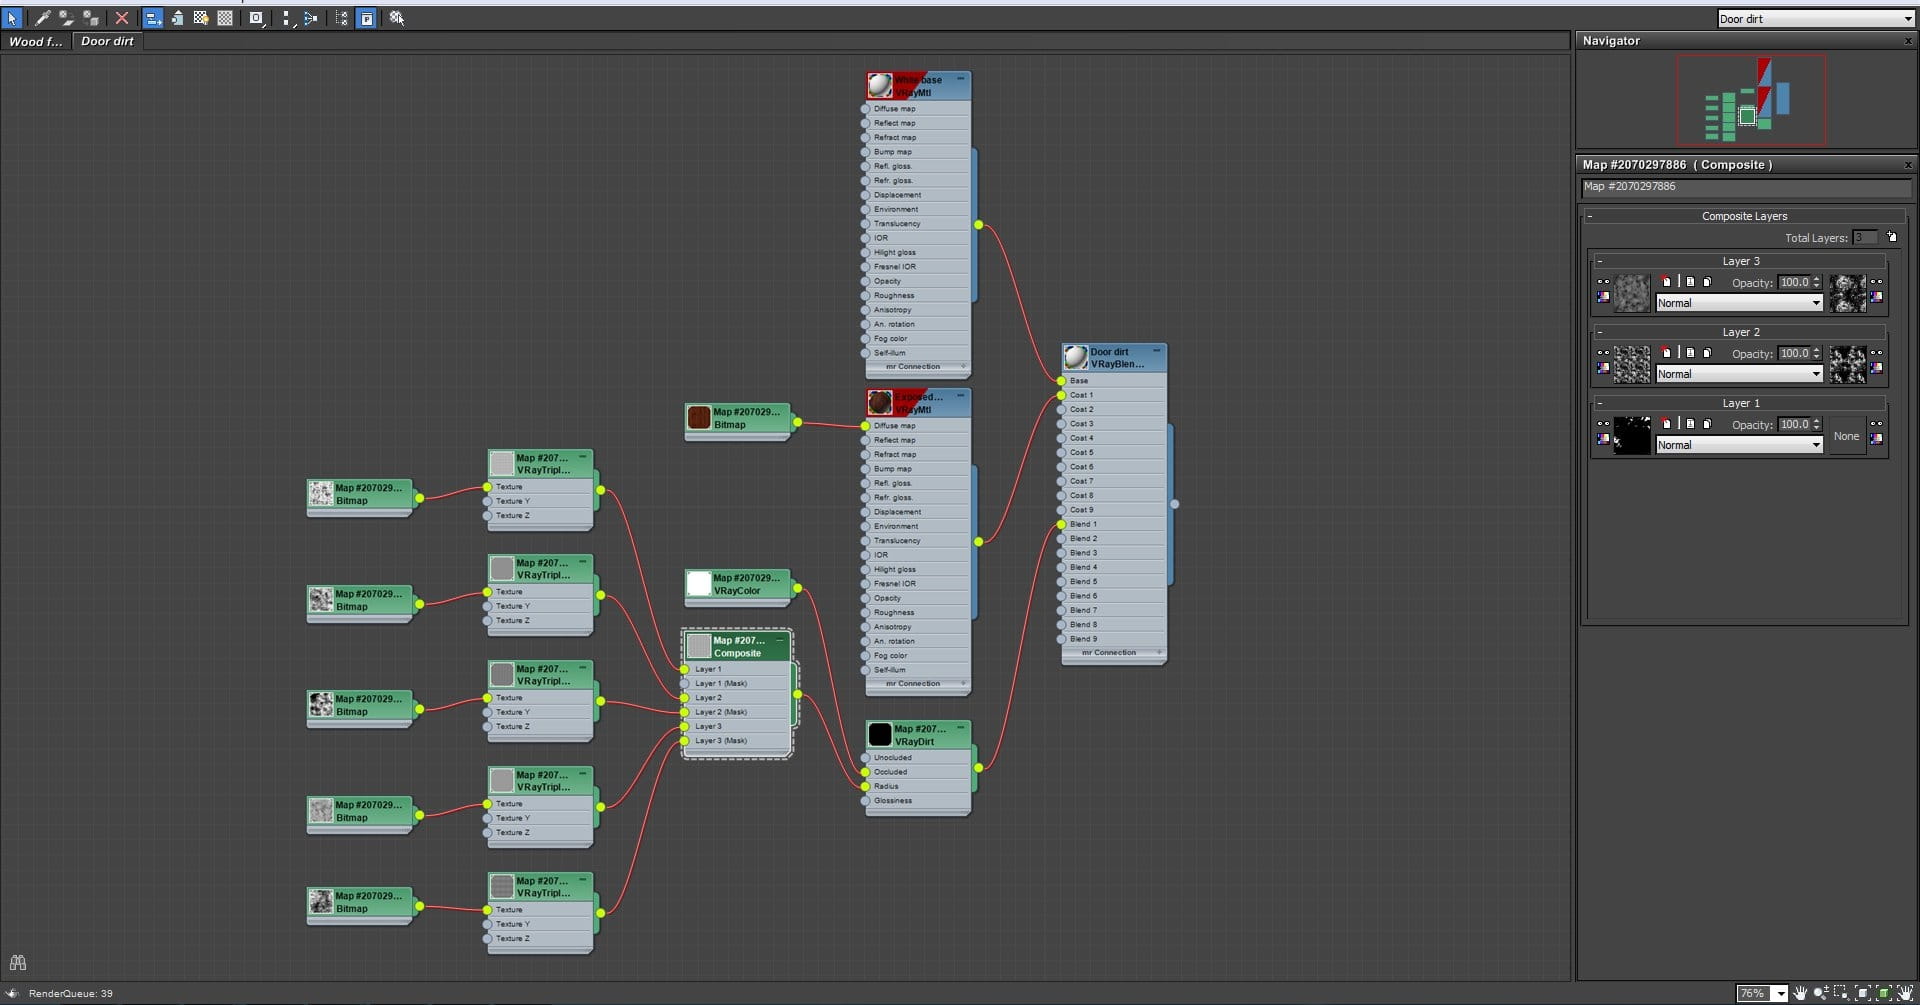
Composite map settings.
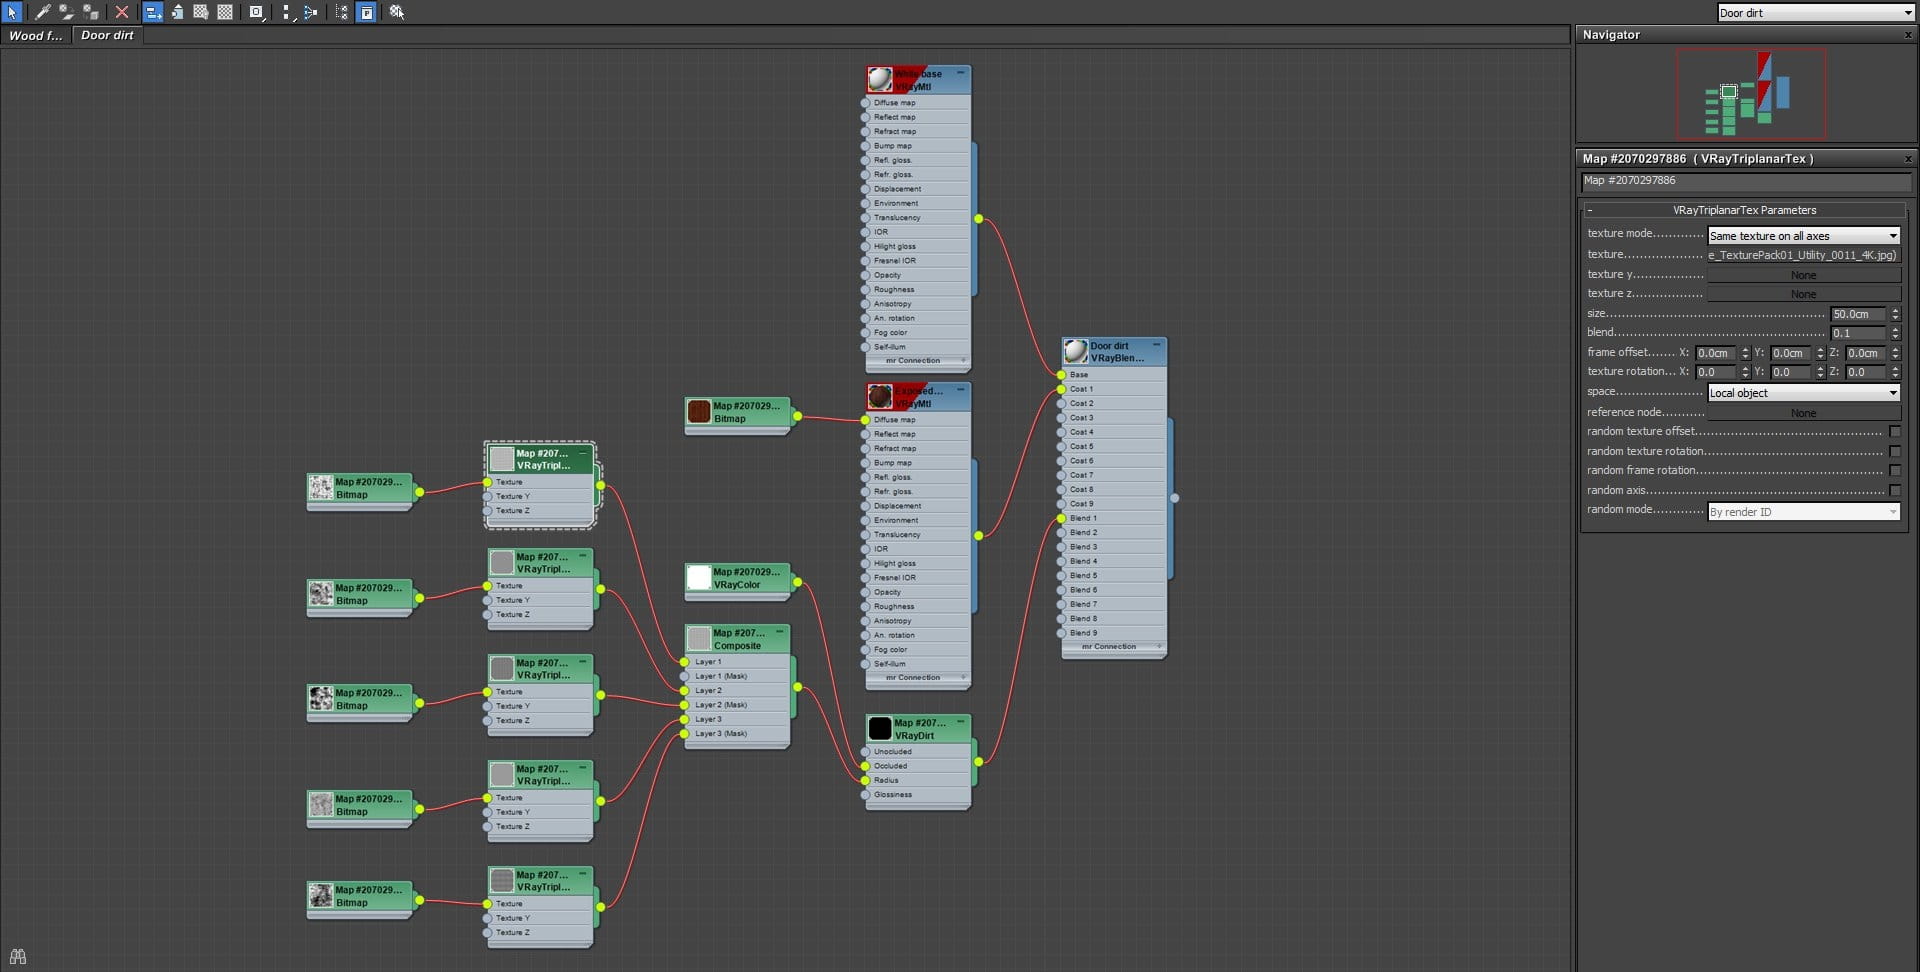
VRayTriplanarTex settings.
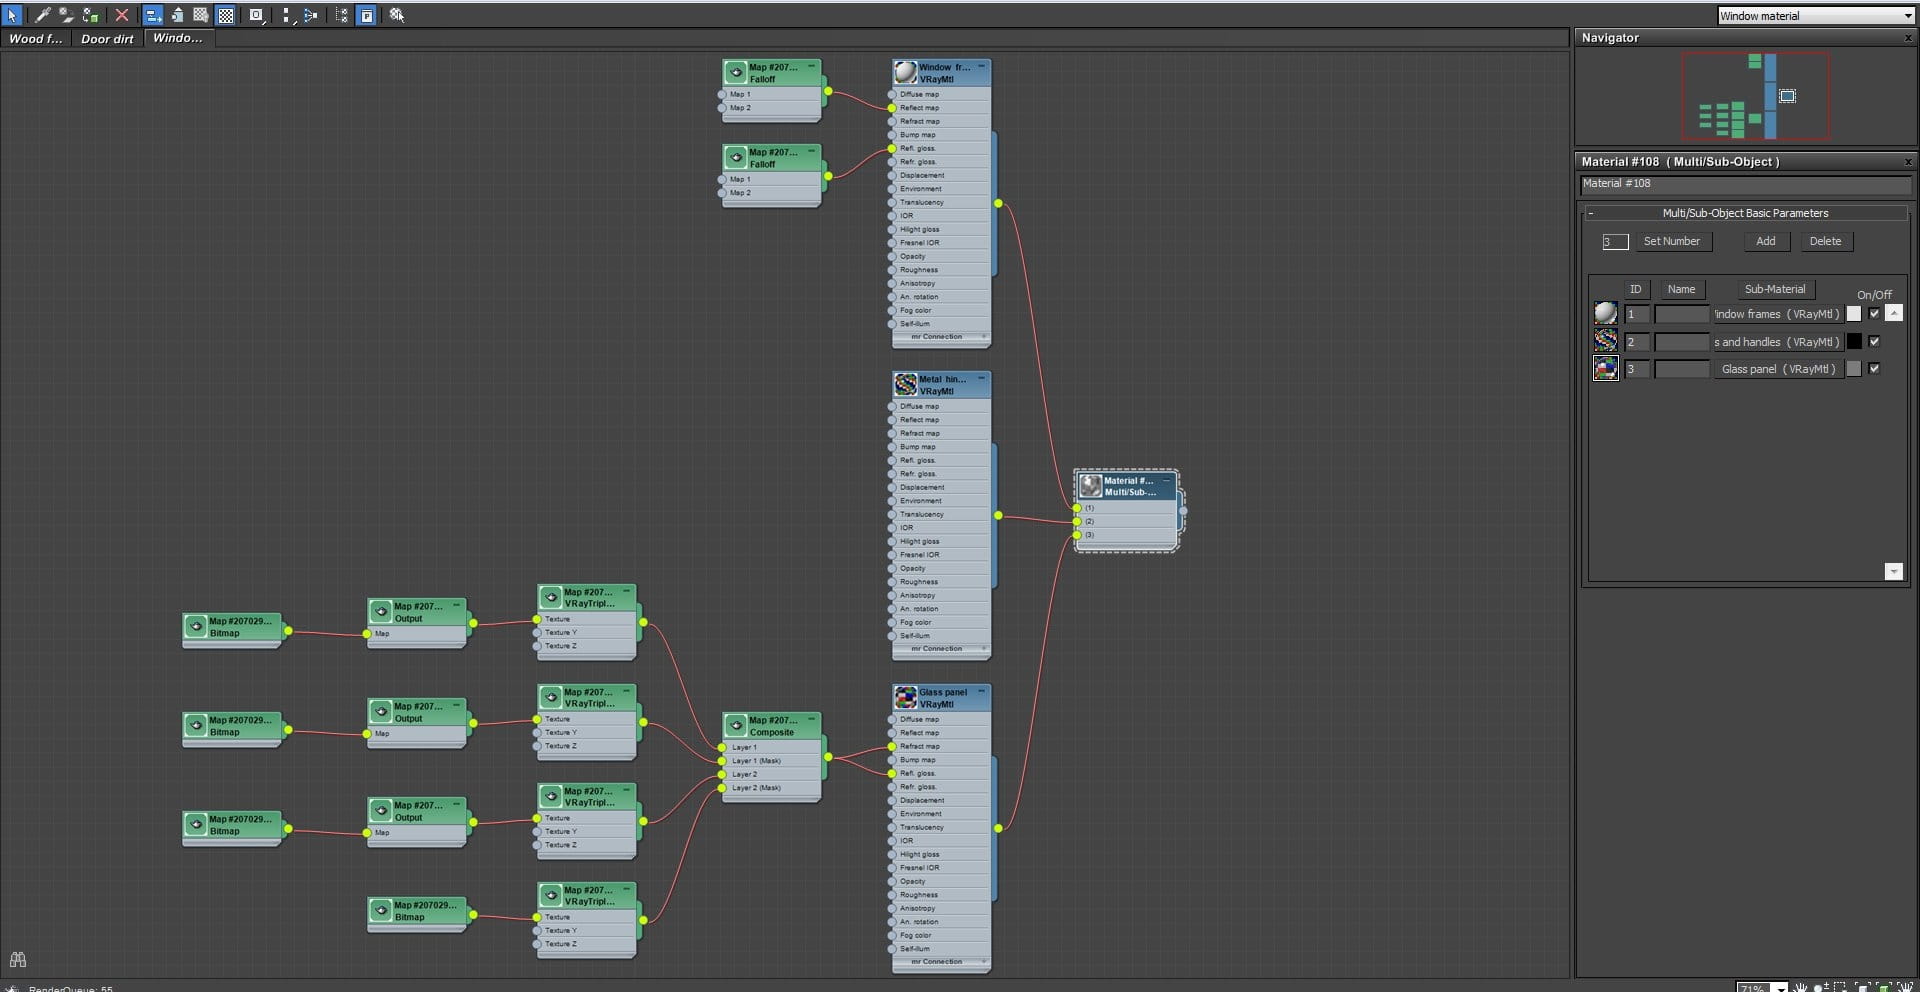
Window material
Window material is a Multi/Sub-object material based on the object’s ID’s with three Sub-materials (frame, glass panel and metal pieces).
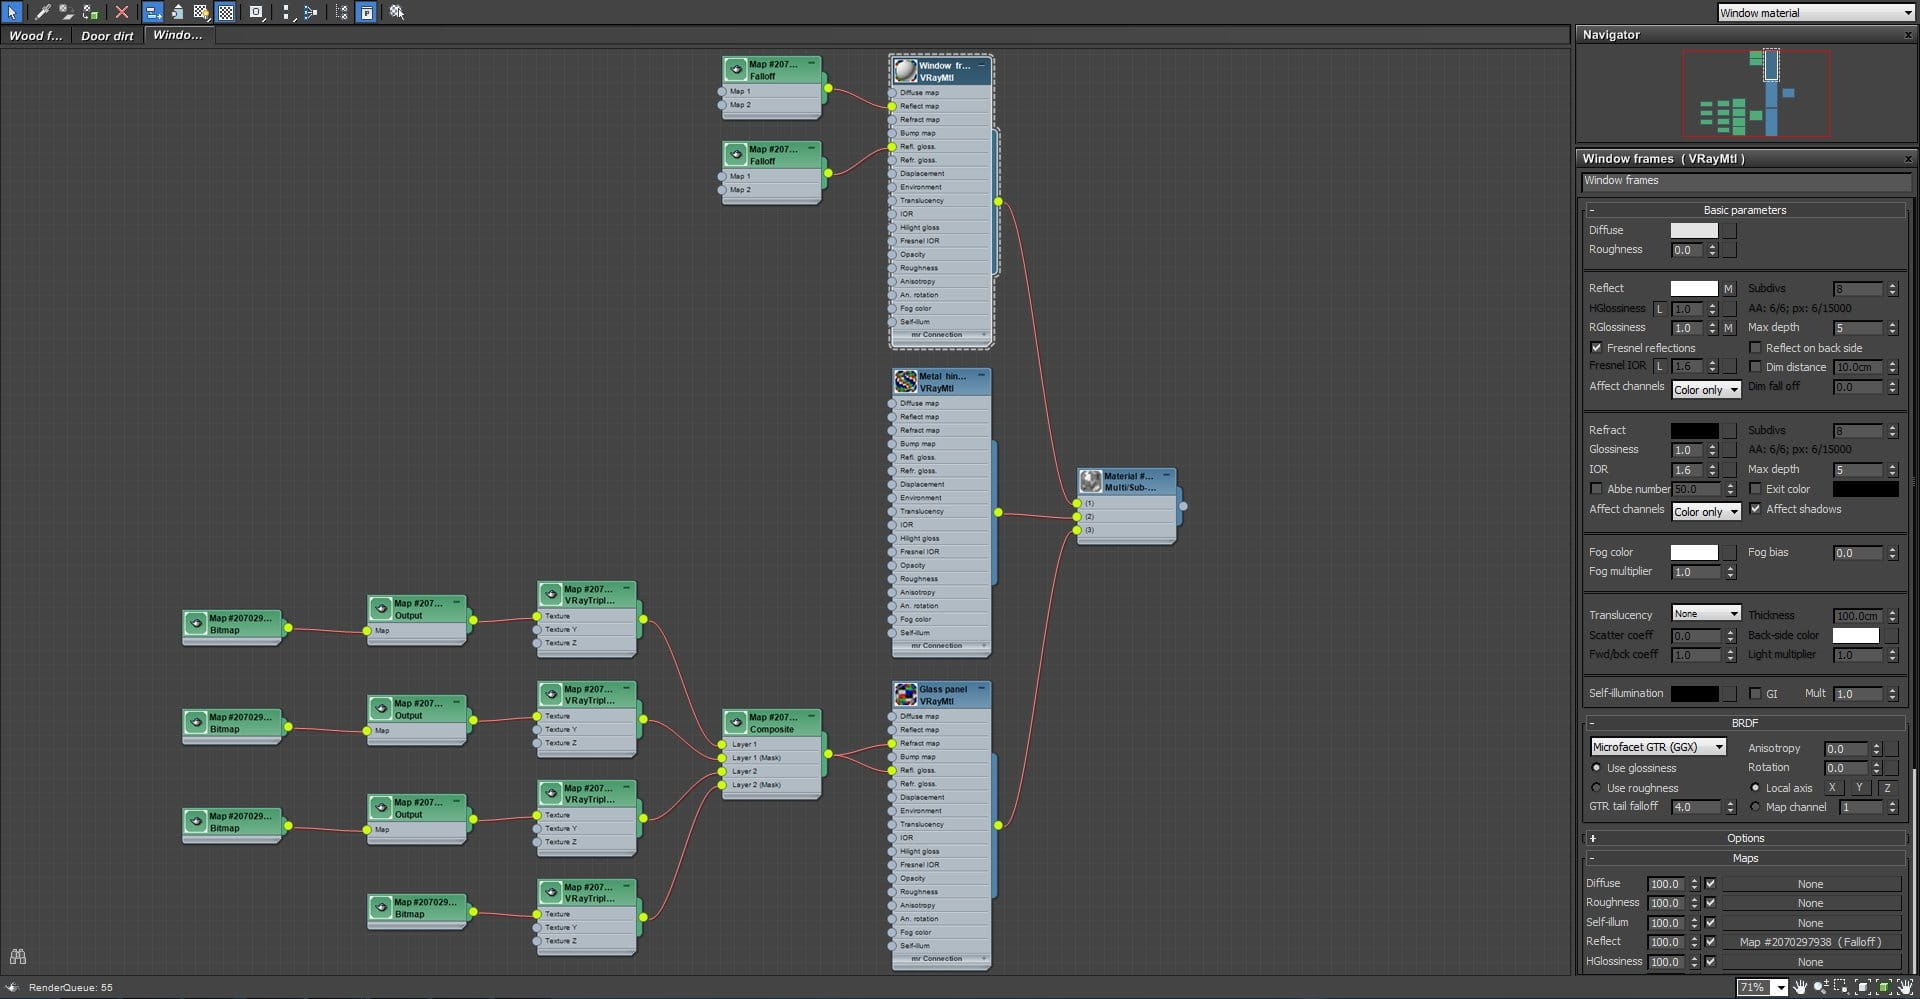
Frame material settings.

Reflection Falloff map settings.
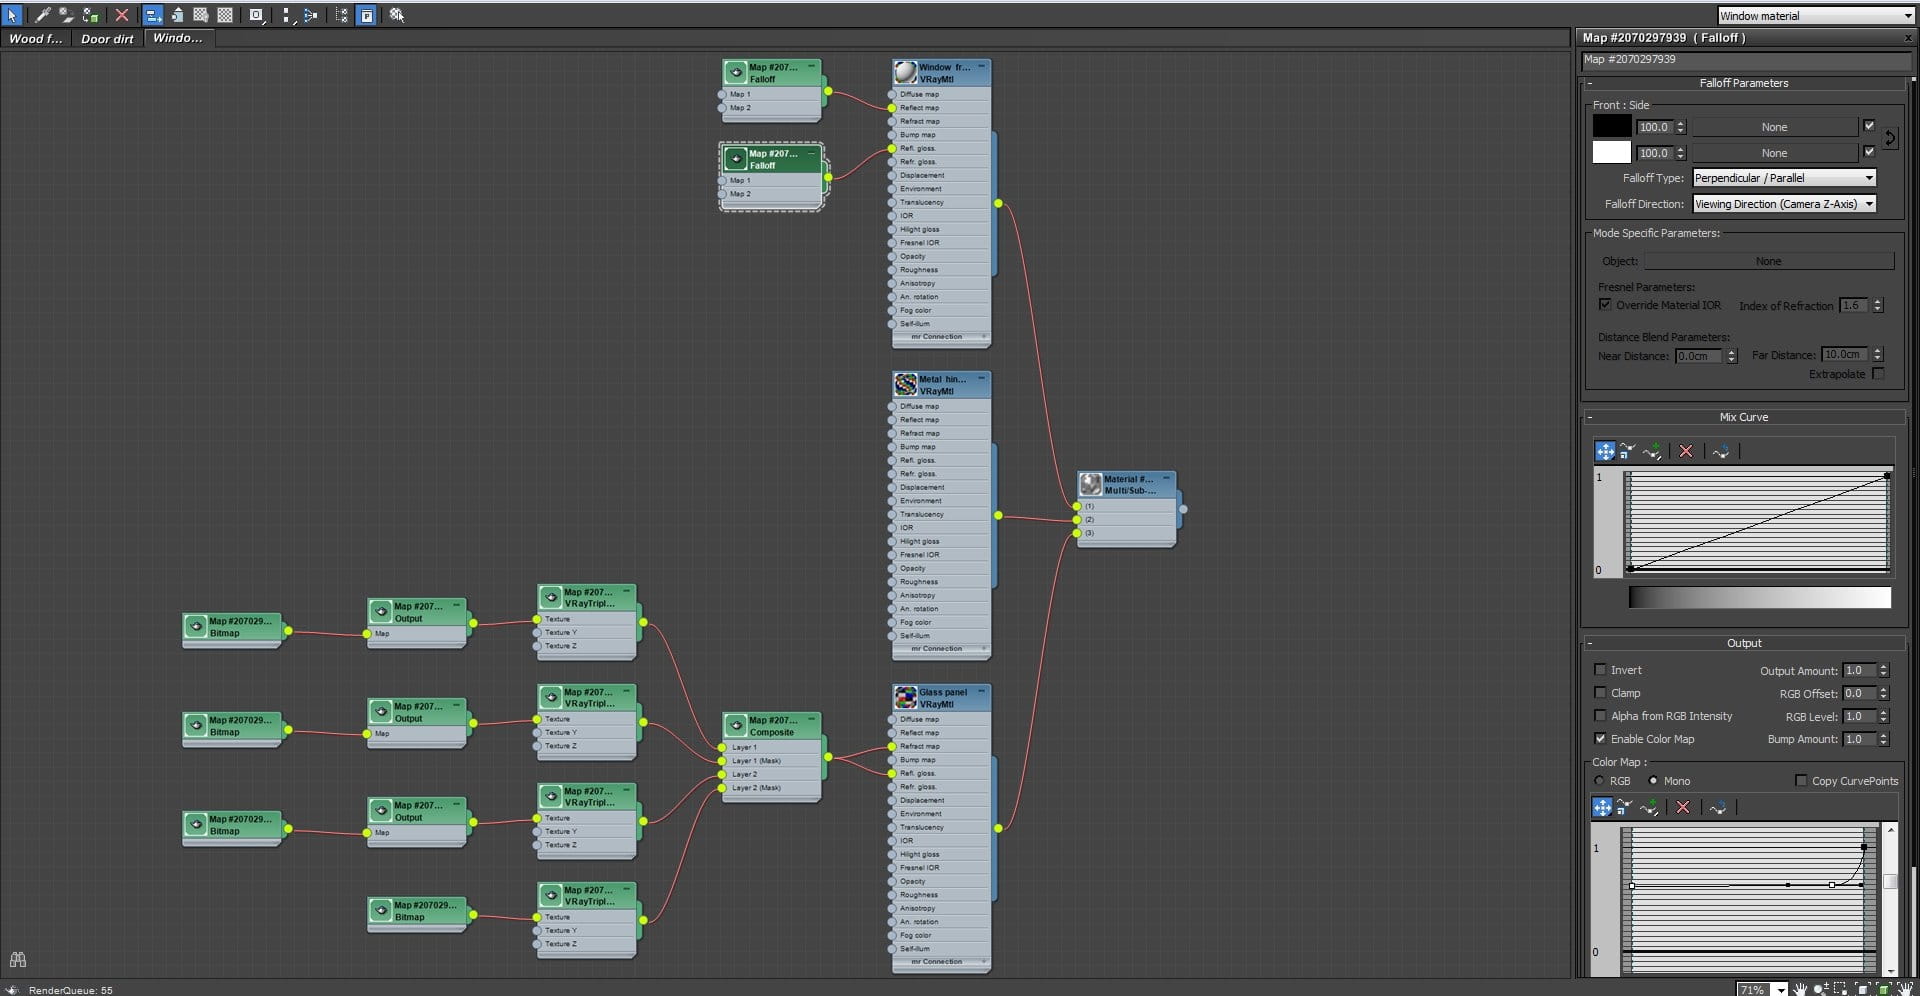
RGlossiness Falloff map settings.
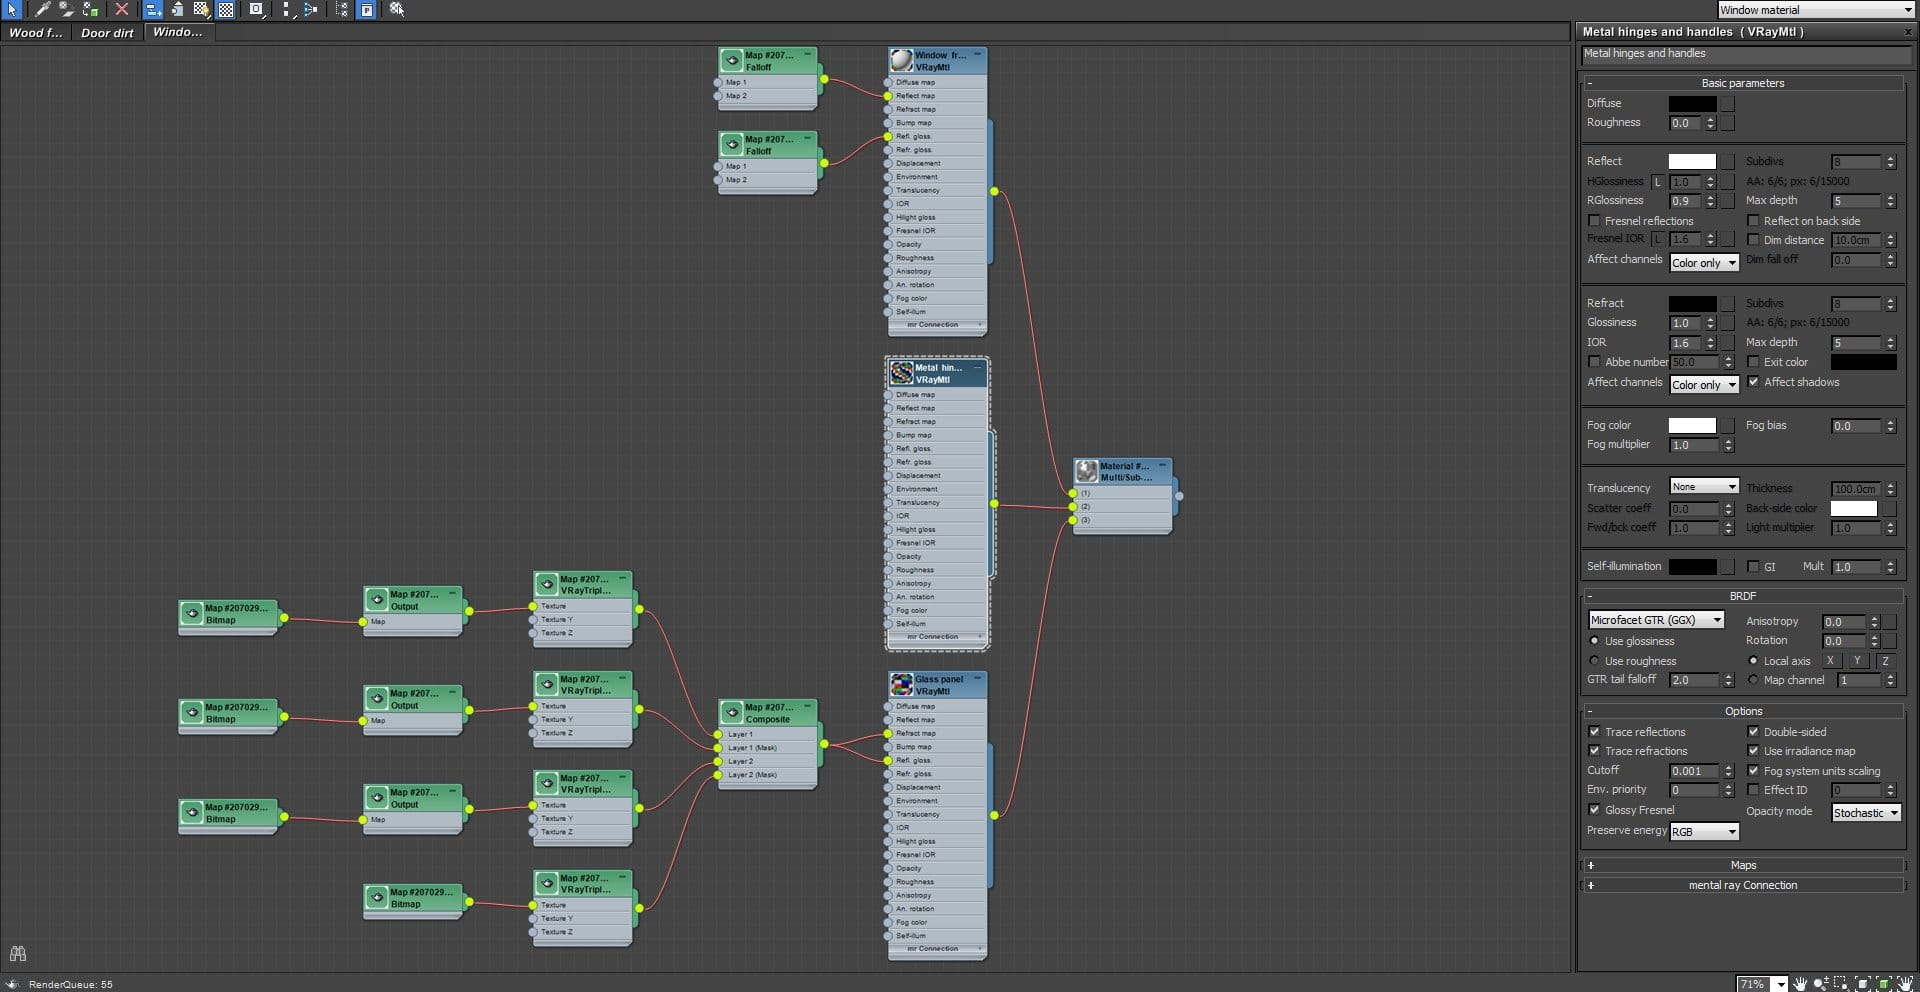
Metal material settings for handles and hinges.
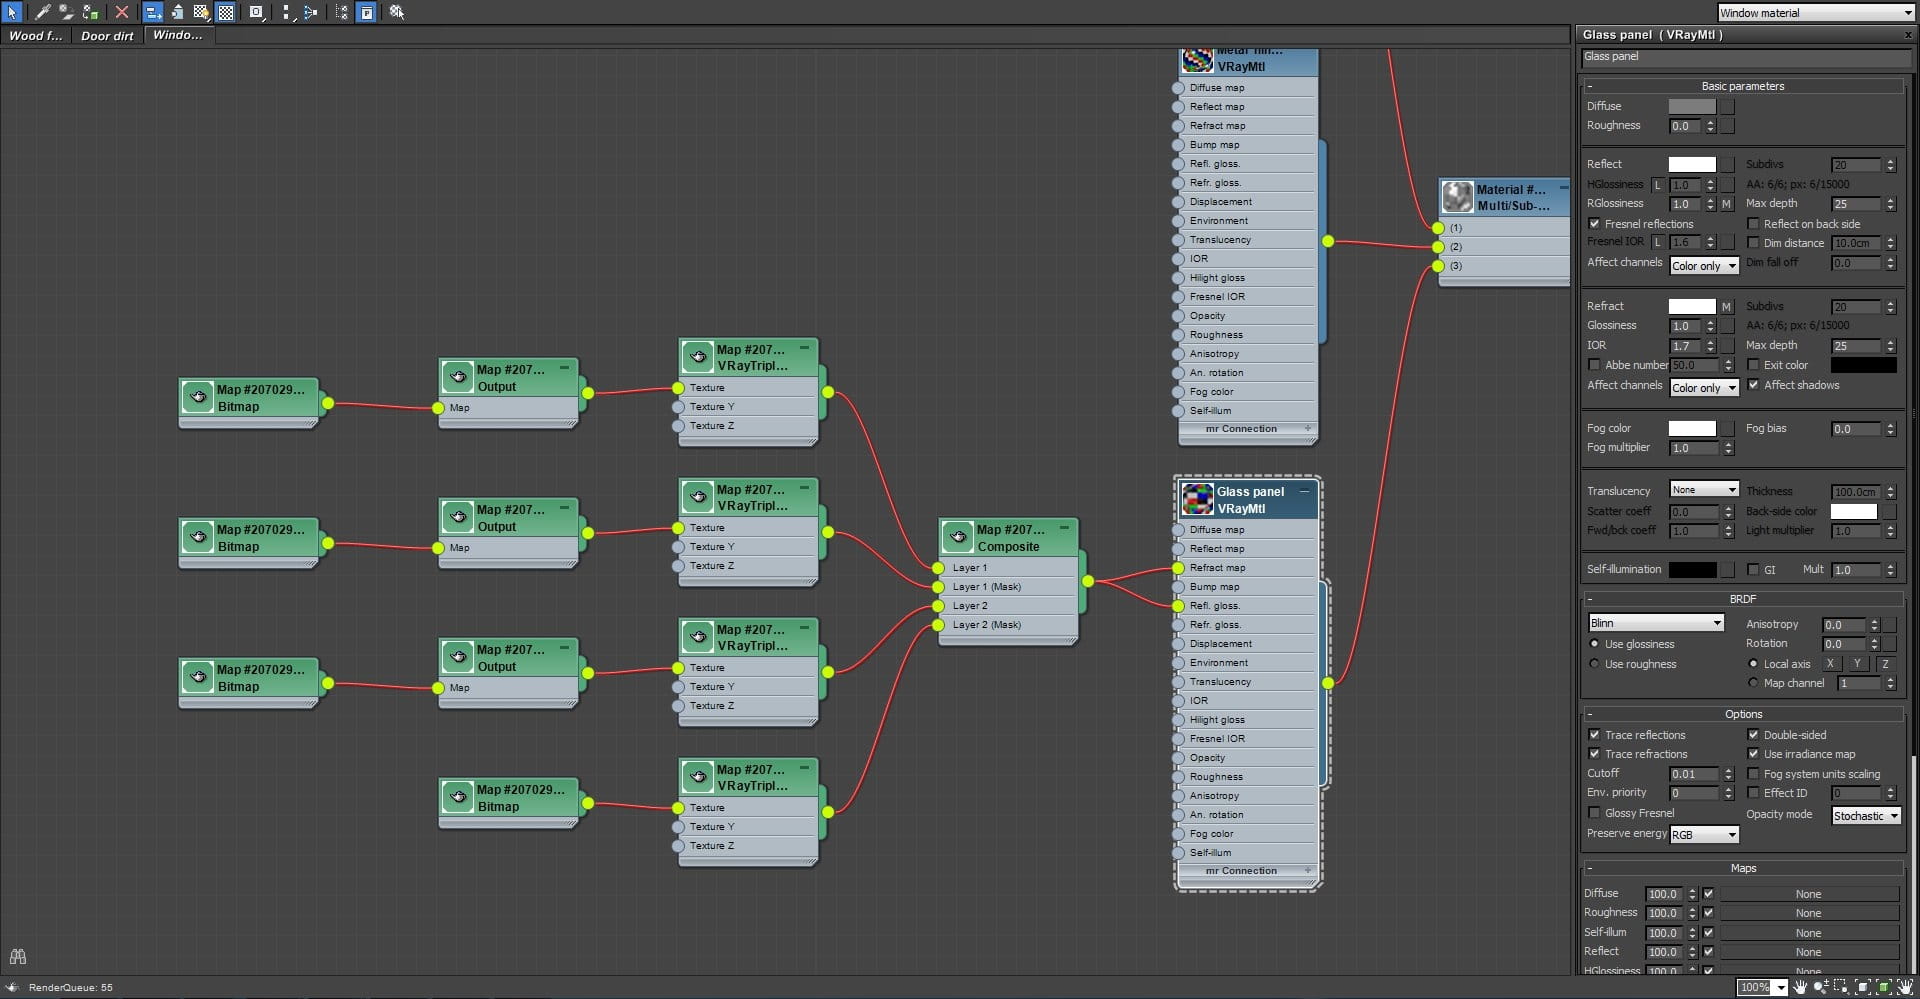
Glass panel material settings.
To show smudges and fingerprints on the glass panels I used a Composite map inside RGlossiness and Refraction slots.
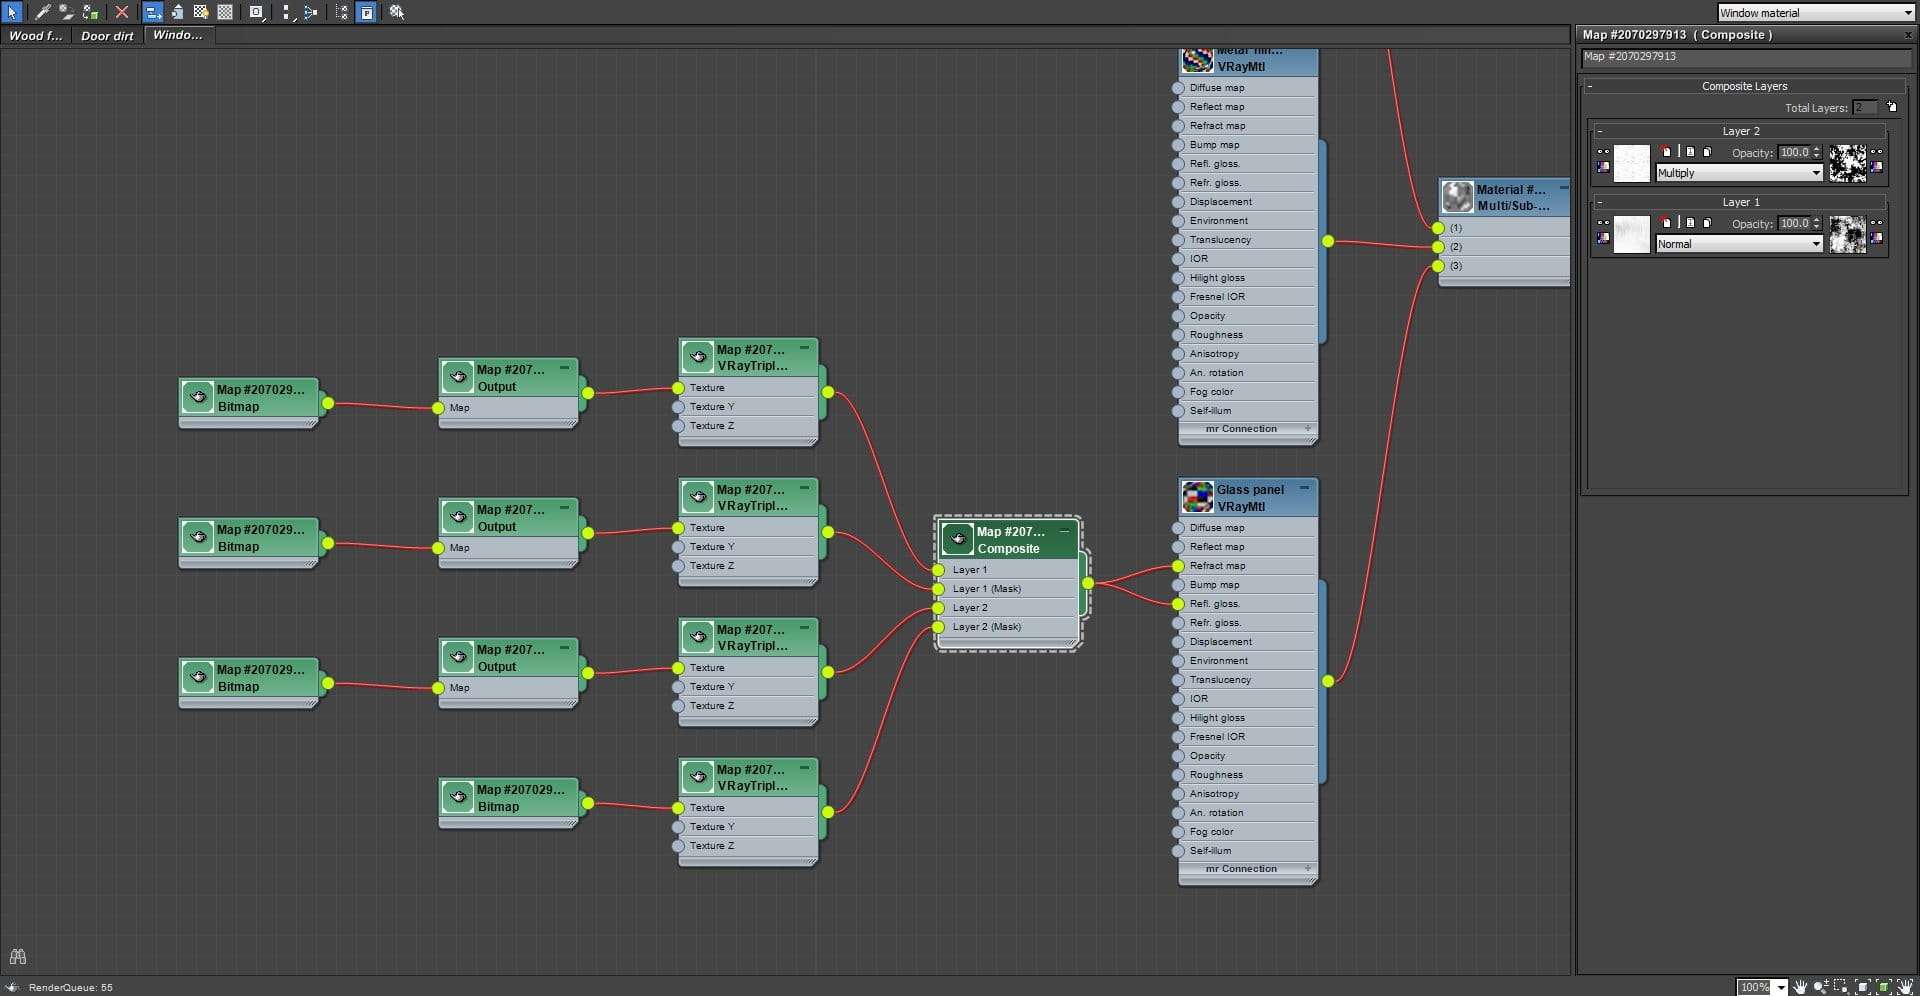
Composite map settings.
Inside the composite map I used two layers with textures from 3DCollective. First layer is a smudge texture placed inside a VRayTriplanar map which is then placed inside an Output map. The same structure is applied to the layer mask. Second layer is with a fingerprints texture set to multiply and masked using a utility mask. All textures are placed inside VRayTriplanar maps and inside Output maps for a better control of contrast and scale.
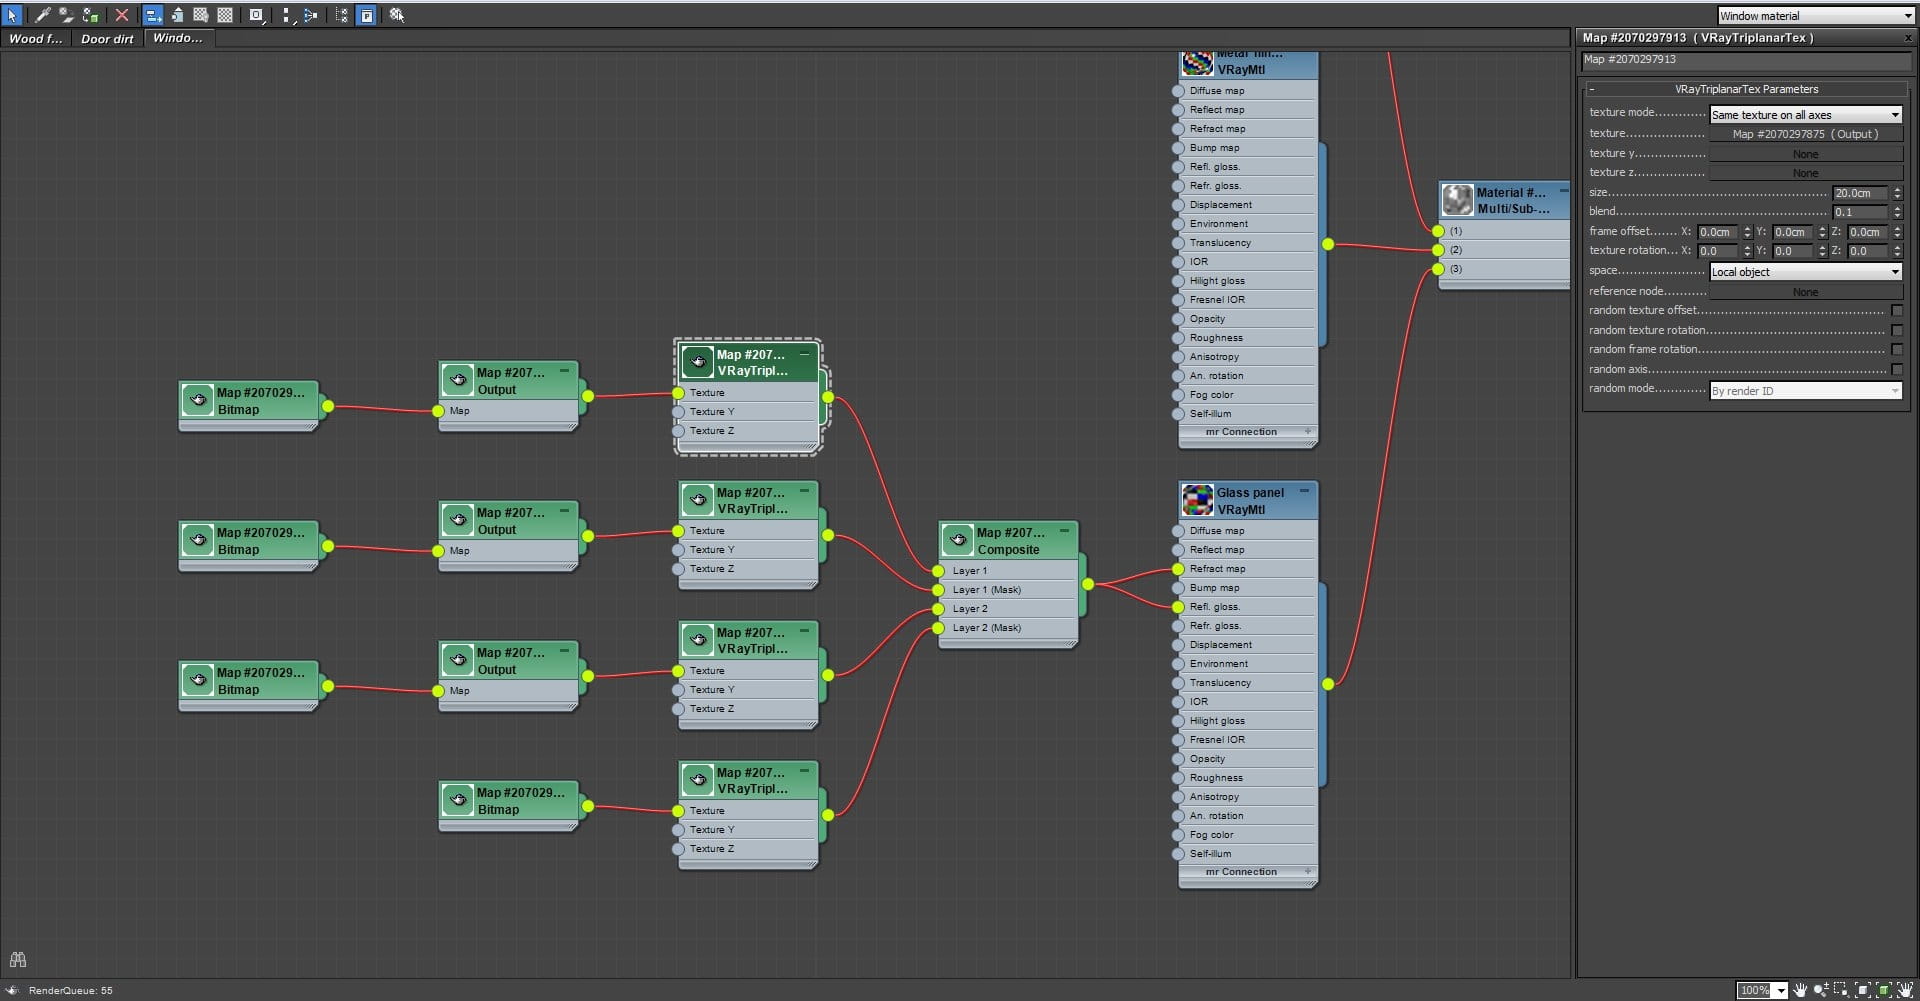
VRayTriplanar map settings.
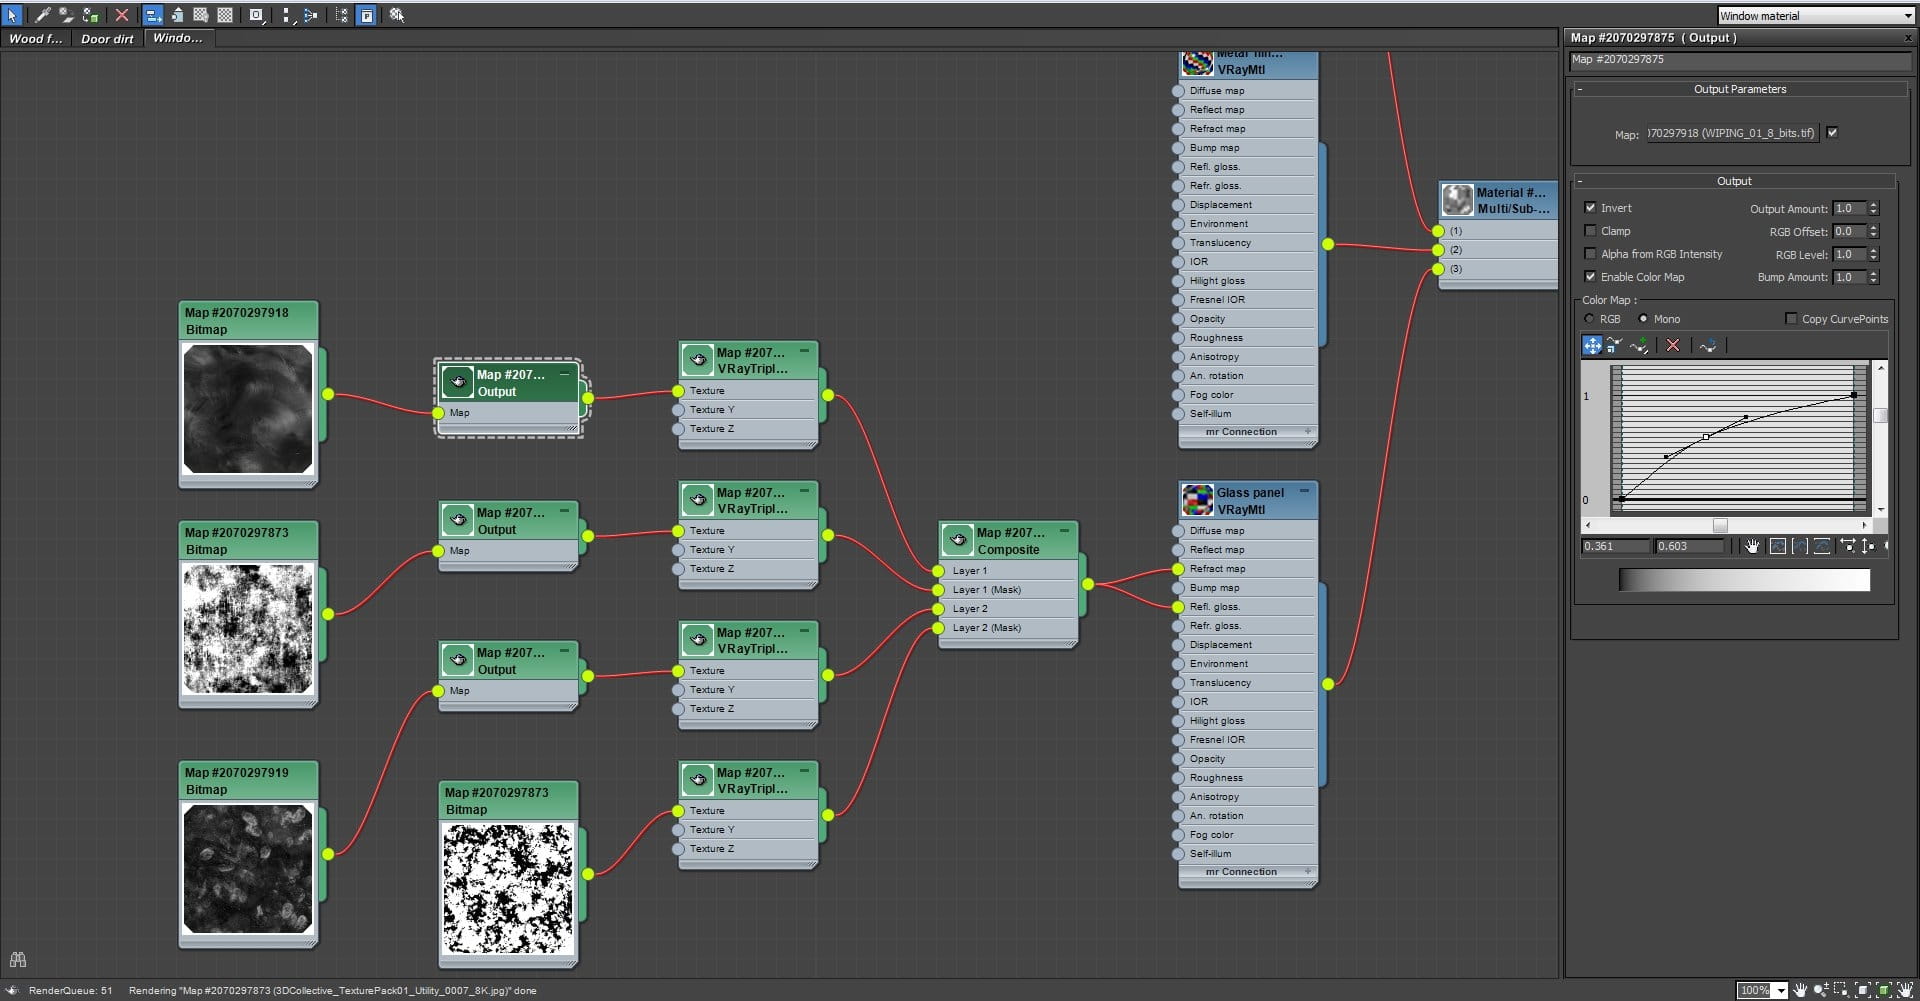
Output map settings.
Step 7 - VRay settings optimization for rendering
In this step I used mainly the VRay sample rate pass to optimize scene samples with the help of AA. The goal here is to achieve a blue-green sample rate so the image is noise free without increasing render time too much.
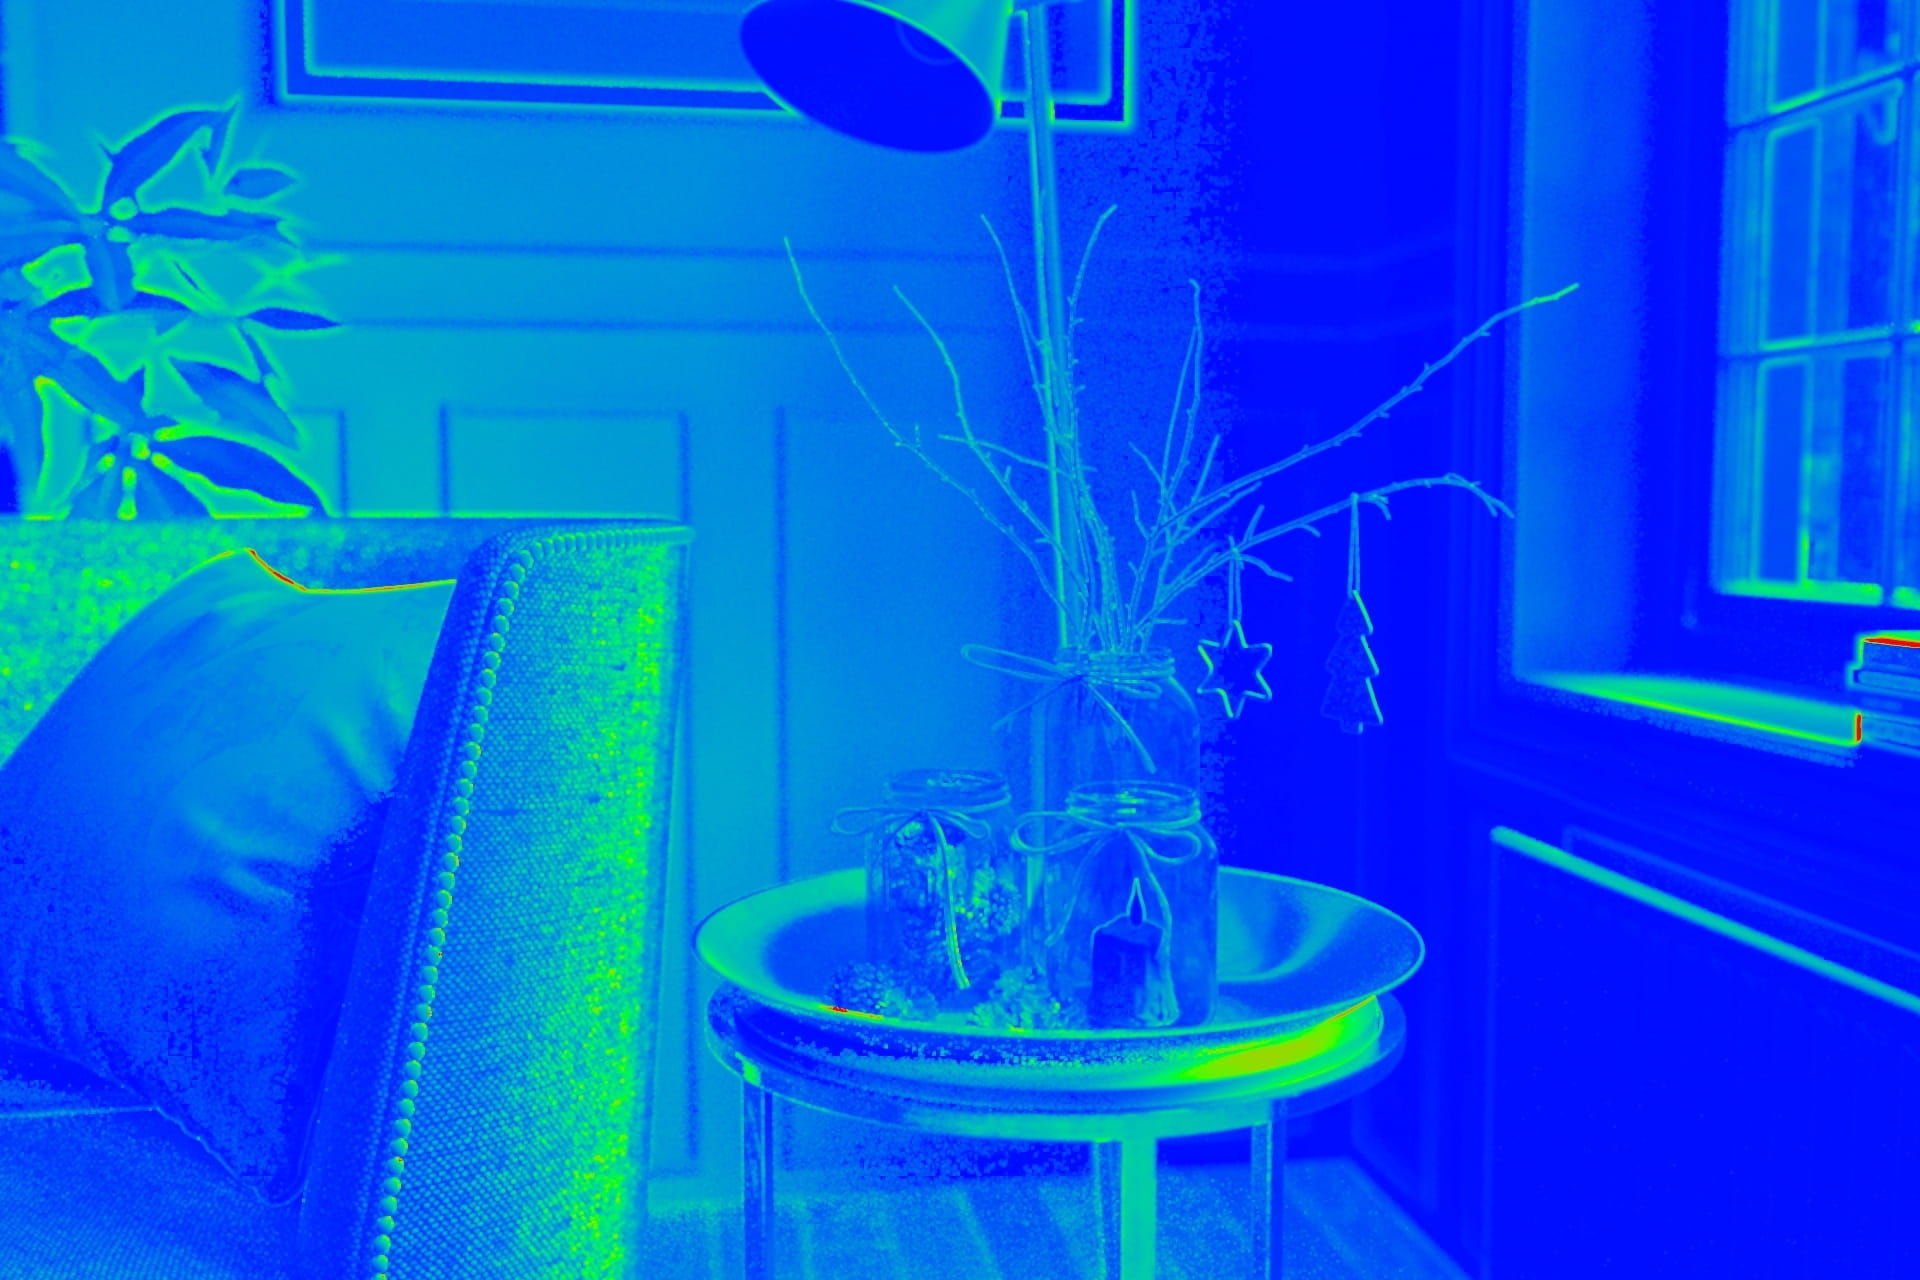
Sample rate pass.
Things really improved in V-Ray since version 3.3 when the option to not use local subdivs was introduced. Now you have the possibility to control the noise threshold by adjusting samples in AA and GI without worrying about samples for lights and reflection glossiness.
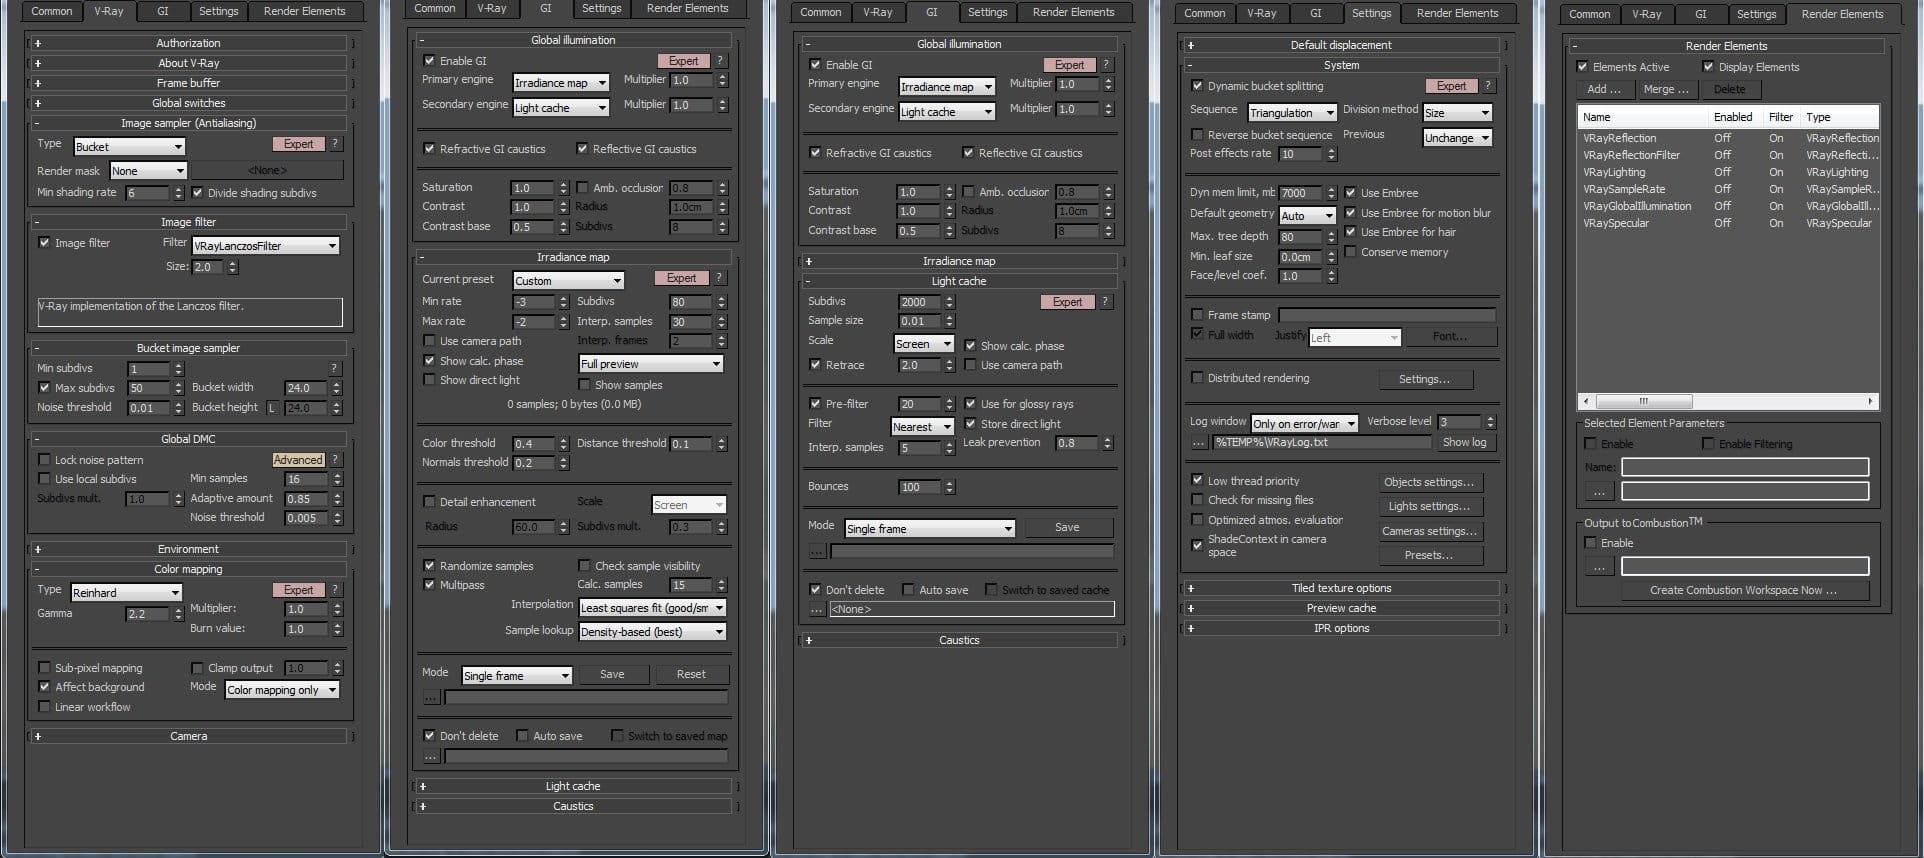
VRay final settings.
Step 8 - Post Processing
After the render process is completed I open the raw images in Photoshop. First adjustment is to sharpen the image by duplicating the base layer and aply High Pass.

High Pass settings.
I set the blending mode to Overlay and 62% Opacity.

High Pass settings.
Next I adusted the curves and play with the opacity until it looks OK.
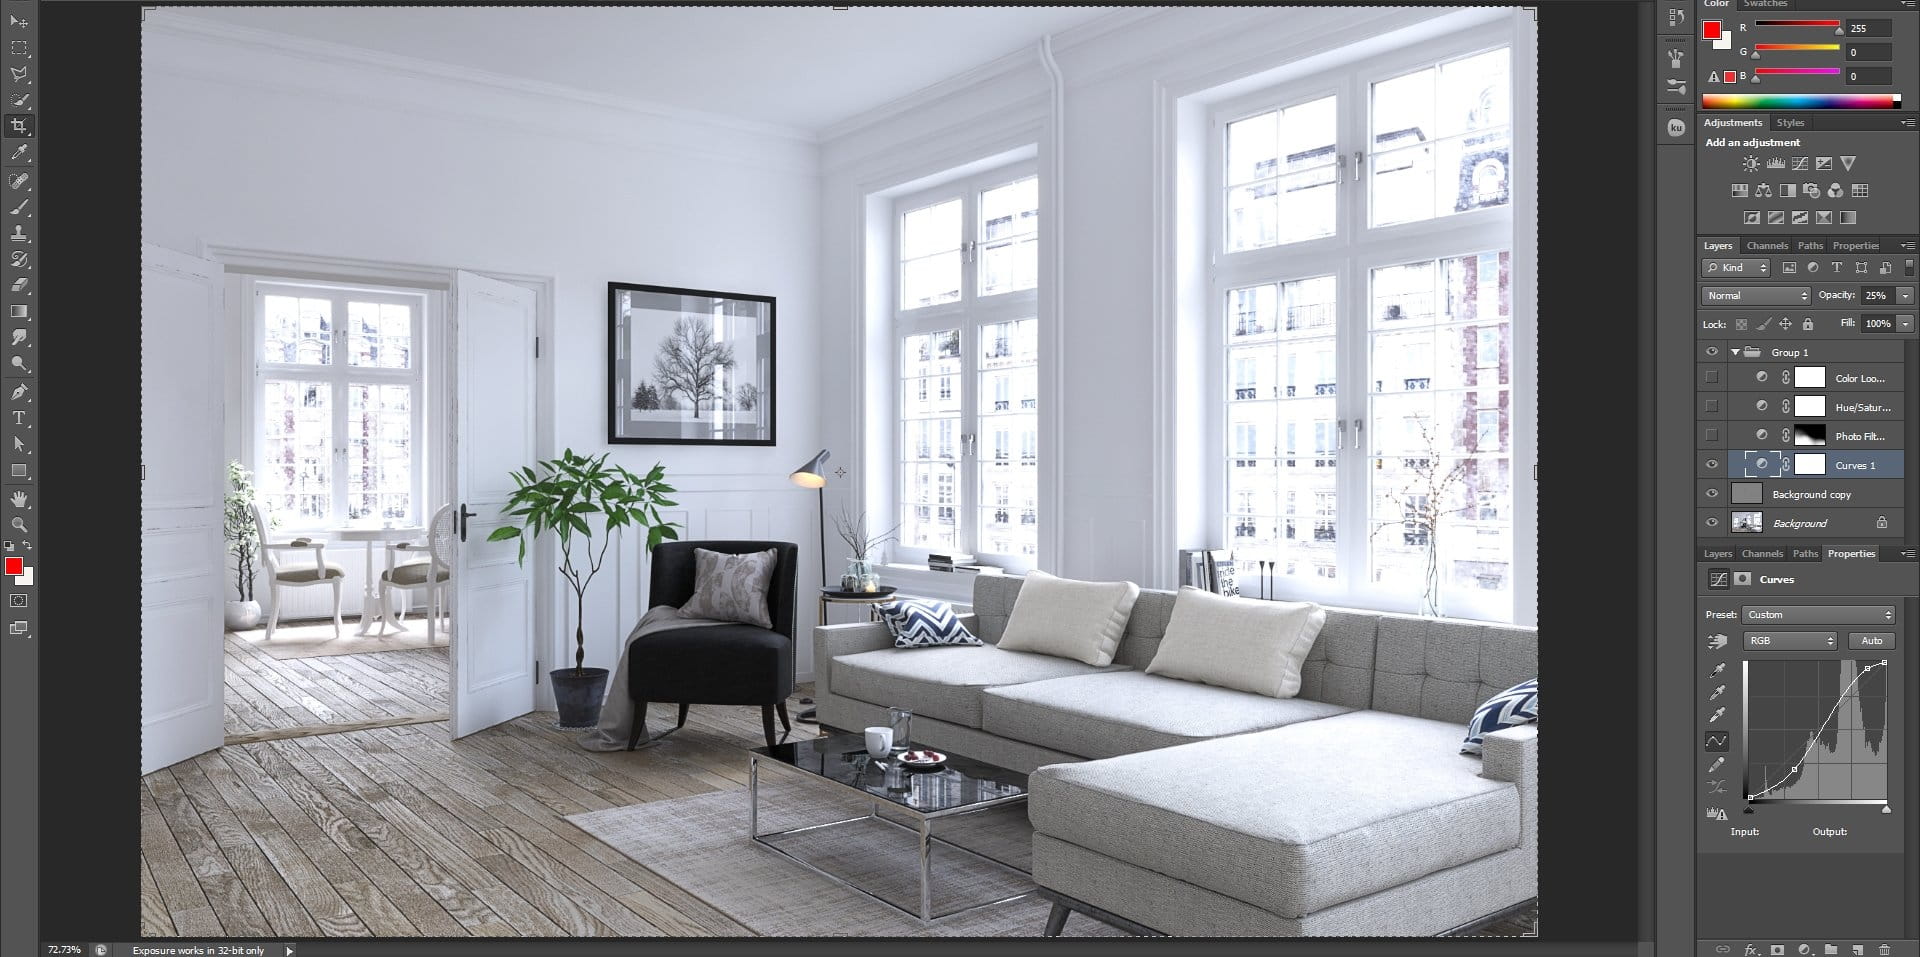
Curves adjustment.
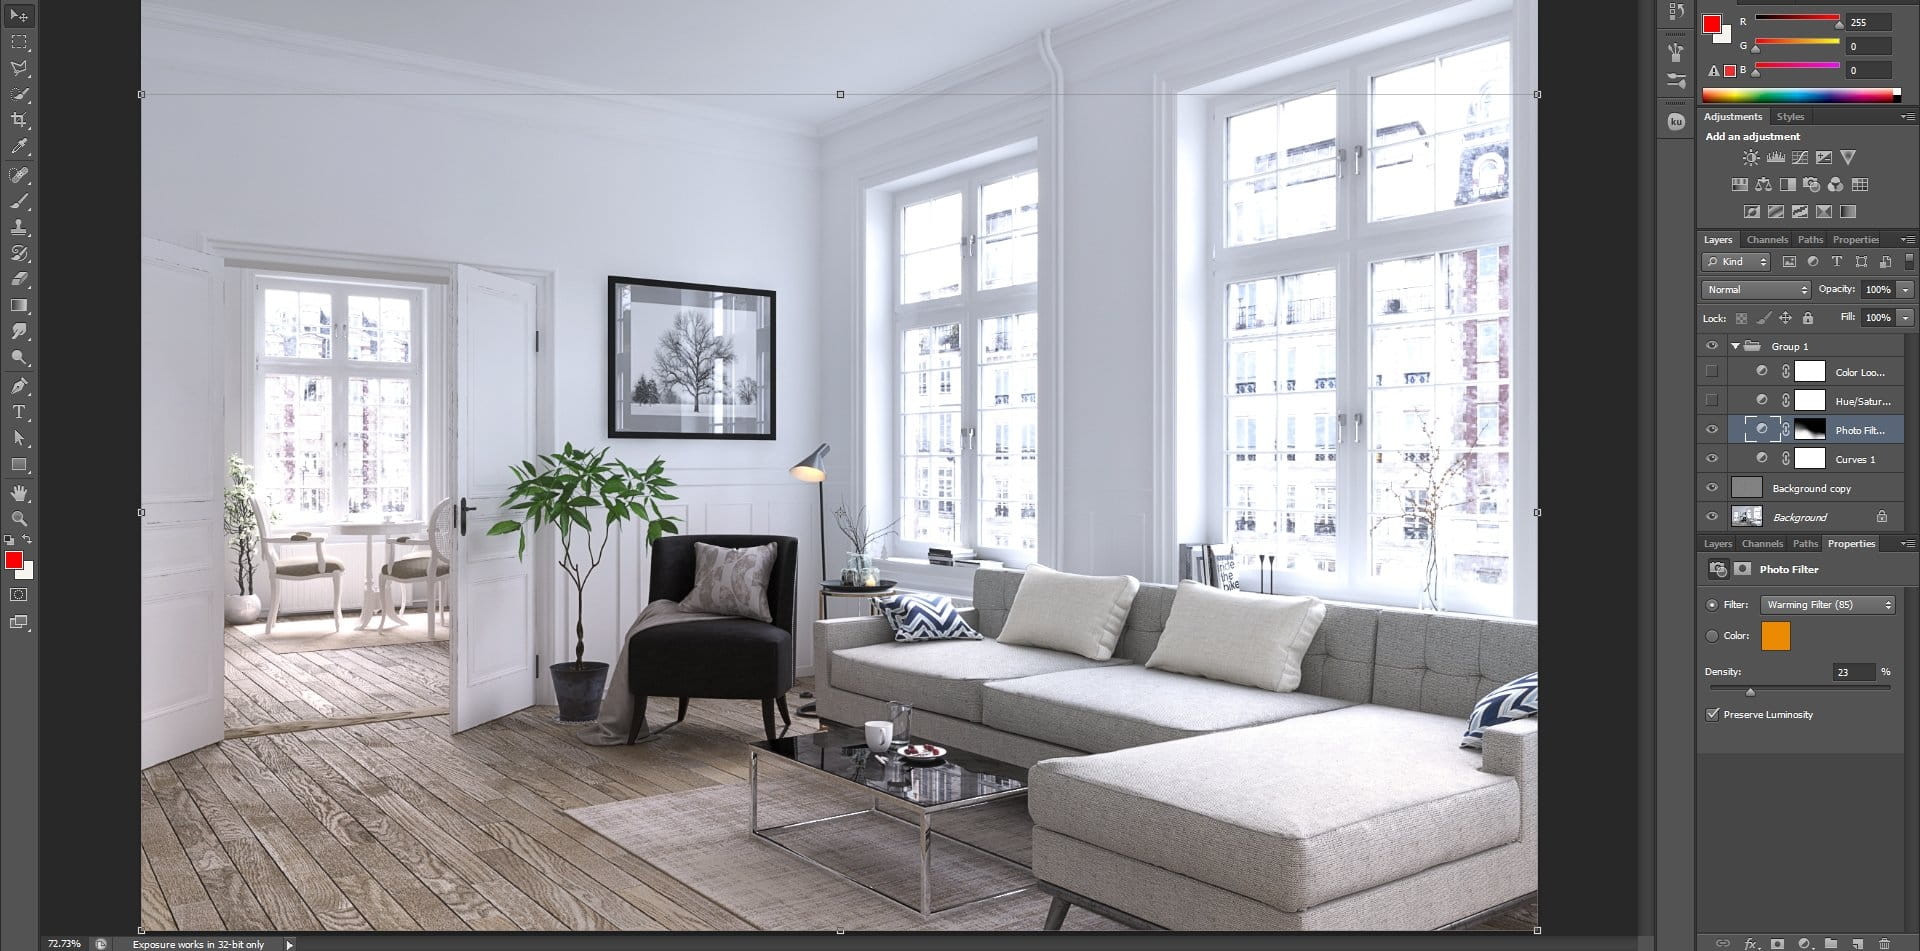
Next, I applied a photo filter, in this case to add some warmth to the image from the left side by using a mask:
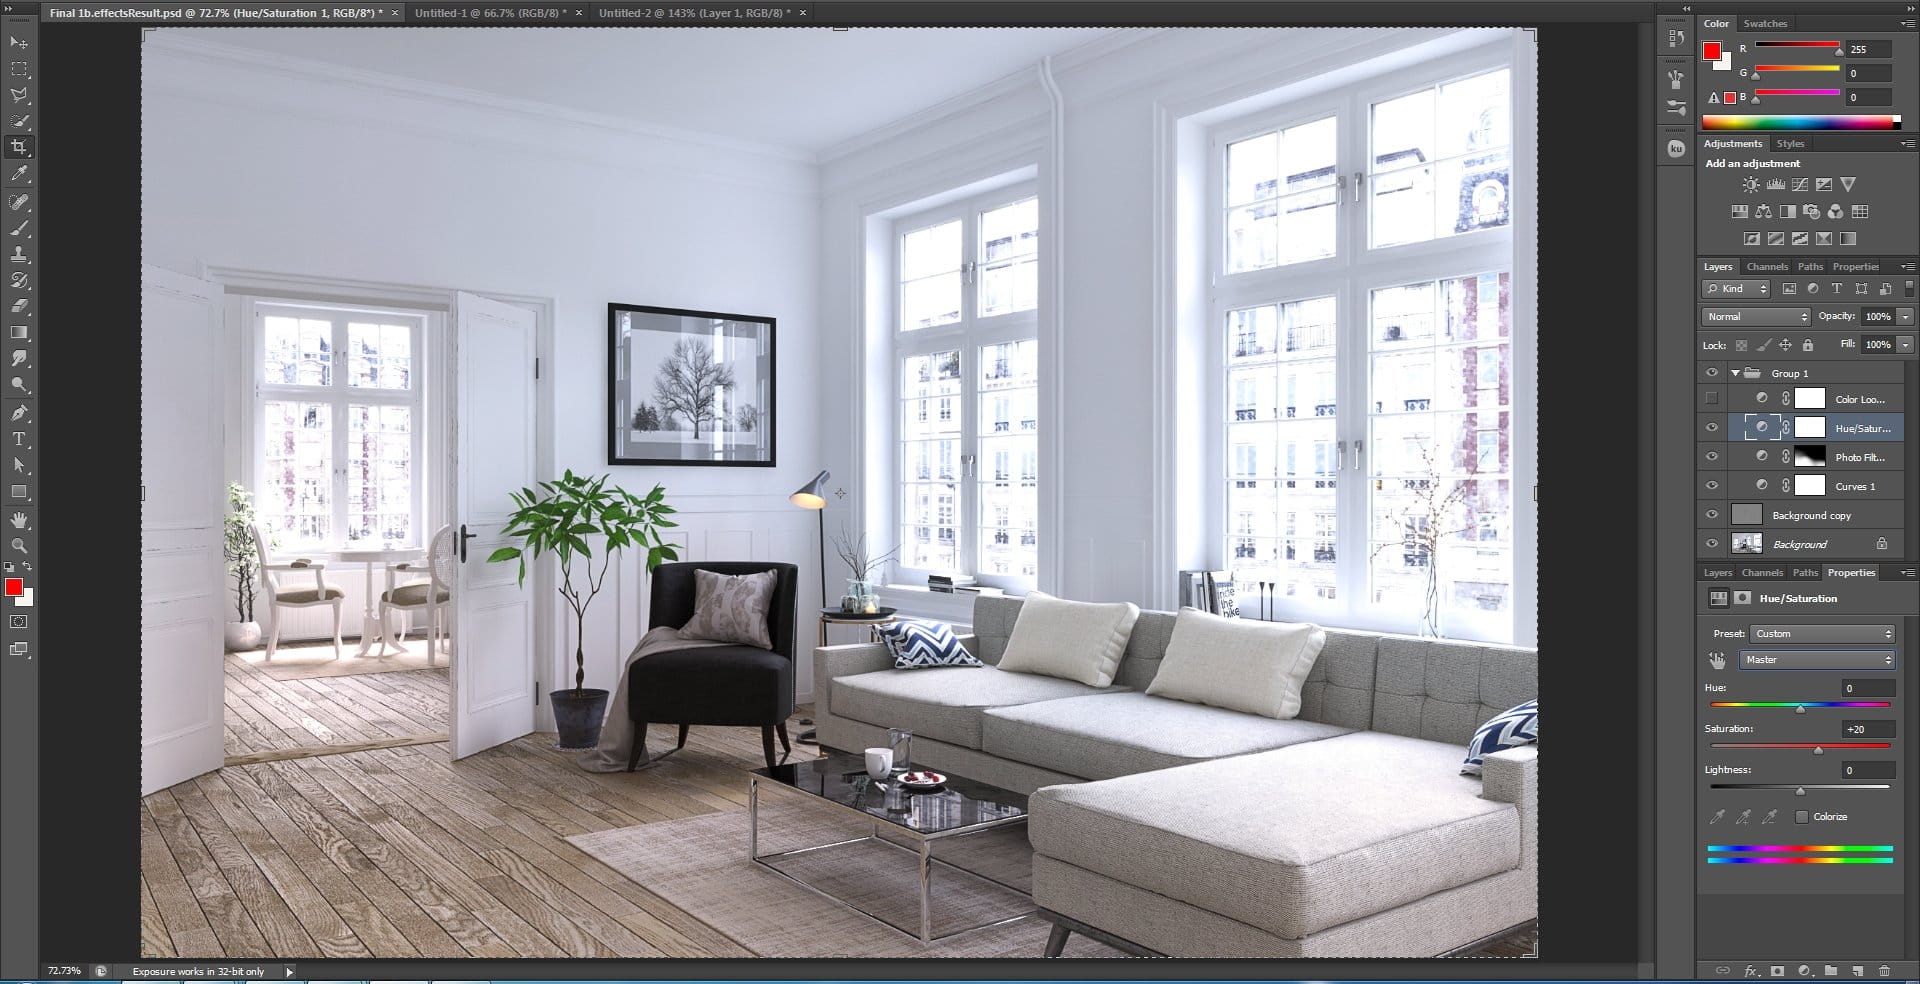
Subtle saturation adjustment
As a final adjustment I add a Color Lookup Table (LUT) to make the colors pop out a bit and add a cool mood to the image. I test several LUT’s before I decide on a final one and in the end I play with the opacity until I’m satisfied with the result.

I finish by grouping all the adjustment layers and play with the group’s opacity until I have a good result.
End result - Image 1
Raw render:
Final image:

End result - Image 2
Raw render:

Final image:
End result - Image 3
Raw render:
Final image:

End result - Image 4
Raw render:
Final image:
End result - Image 5
Raw render:
Final image:
LEAVE A COMMENT


|

|

|

|

|
 Customer zone
 Your orders
 Edit account
 Add project
 Liked projects
 View your artist profile
COMMENTS