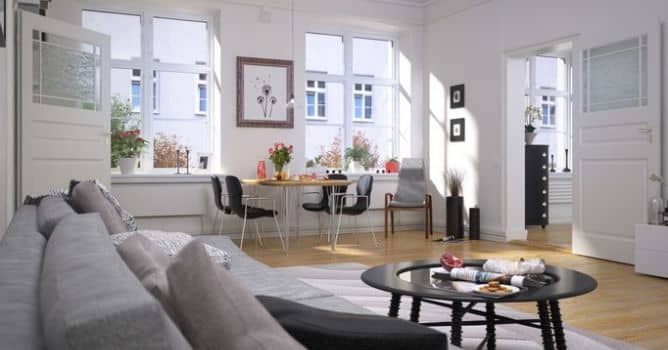
Most of the following tips refer to Substance Painter and Unreal Engine, but the descibed techniques can be easily adapted for 3ds Max / Photoshop. Top image comes from Archinteriors vol. 37.
If you use Substance Painter, you may be tempted to use UV scaling of Substances or textures. But be aware that with each tile you are losing the detail of your texture! Let's take for example 4k texture. If you tile it four times, you basically are projecting 4K texture four times onto surface and bake final 4k texture.... which means that your source texture now occupies only 1024 x 1024 surface and it has four time less details.
It's very obvious, if you think about it - this way it always worked in Photoshop, so why should it work differently in Substance Painter (which is like Photoshop in three dimensions)? But let's see exactly what we are losing / gaining during tiling textures.

I choosed this fabric material with geometry to act as wallpaper on my interior wall. The reason I have chosen this material is that it has distinct geometry pattern, we will see better if it loses it's quality in the process.
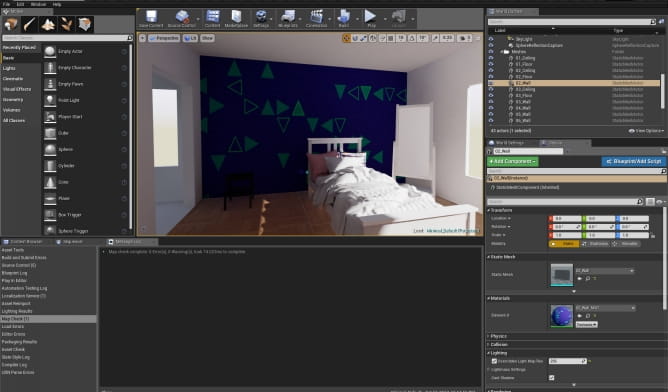
This is how it looks in Unreal Engine. Let's take a closer look.

Ok, not bad, but I don't like the overal scale of this triangles, I want more of them on wall. Let's return to Painter.
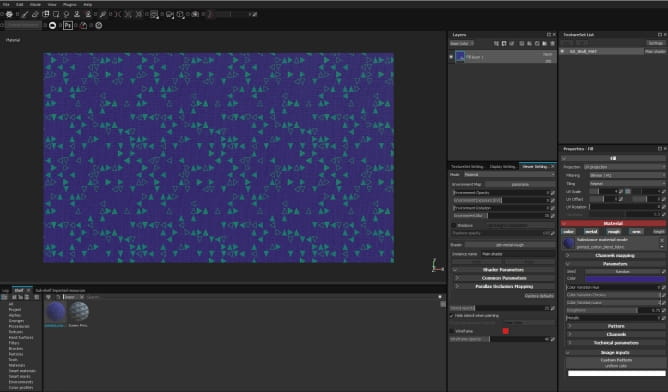
I use "UV Scale" and tile my texture 5 times in Painter. Now I have right density! Let's check how it looks in Unreal.
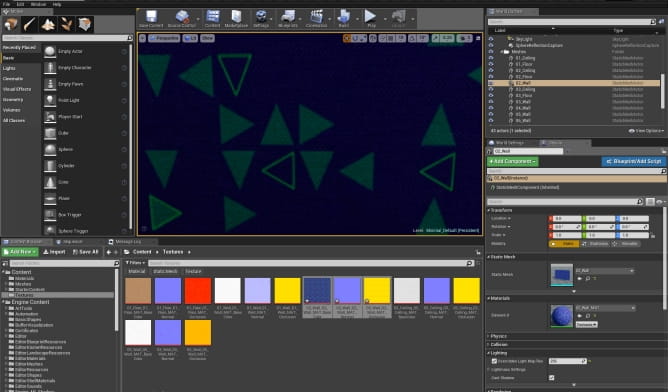
Well, we have more triangles, but they are blurry! Why?
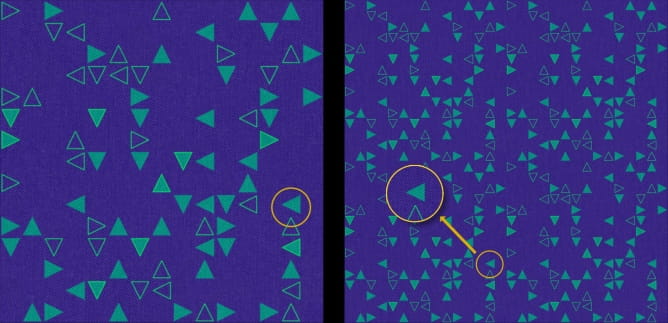
The reason is simple: our original texture in substance Painter has 2k. If we change the slider UV Scale to two, it becomes densier, but the final image is still 2k. So The detail you get now occupies lesser space. Texel density is more sparse.
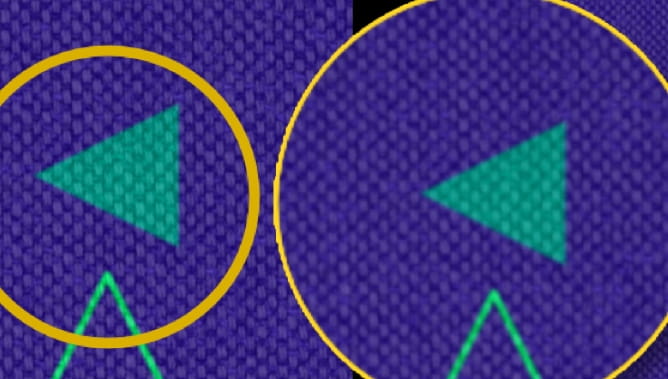
In effect you will get blurry textures in the end. On the left - original texture. On the right - the same detail is blurred when taken from texture UVScaled in Painter (in each raster graphic software it will look similar - Photoshop, Affinity Photo - the result will be comparable).
Ok! So we better not tile in our texturing software. But sometimes you NEED to tile your base material, because you want your wall tiles to be smaller or you want more planks on the floor. How to achieve that? You need to tile them in your 3d software, not in texturing software!

If your base texture comes from Substance Source it couldn't be simpler, because those Source materials are already tiling perfectly: just make a new project in Substance Painter and import an unwrapped square plane. Add your fill layer, apply your substance (no tiling) and export textures - now you can add it to your mesh and tile it in the material (using for example tiling options in 3ds Max or texture Coordinate node in Unreal Engine). (It's even easier for Unreal Engine and Unity users: You can use Substance Source Plugin and drag and drop your material directly to the mesh).
If you want some custom base material, you need to mix it in Substance Painter and then make sure that it is tileable. There are many tiling tutorials on the net, so I will not describe how to make tilable texture. You can use Photoshop for that or Bitmap 2 Material, which does it automatically. You can also fix the tiling in Substance Painter (we will make a short tutorial about it in the future). No matteri, which technique you use, at the end you should have a couple of perfectly tiling textures. Let's wire them up in Unreal Engine.
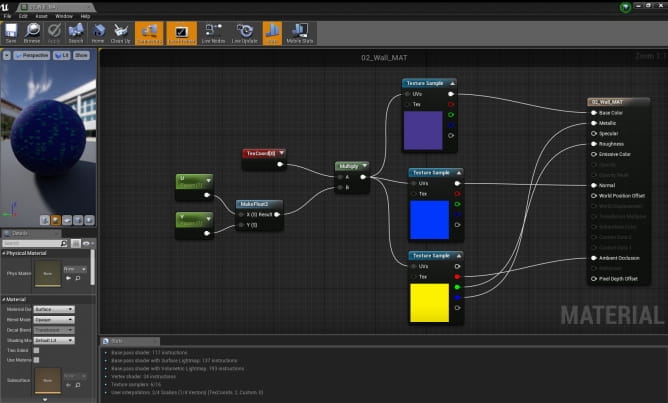
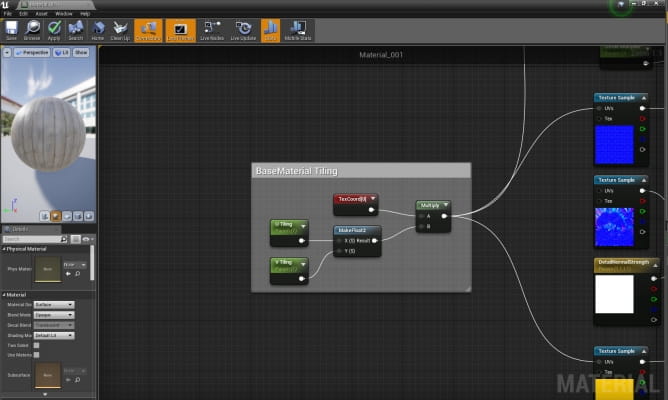
I imported textures to Unreal and added Texture Coordinate node, two scalar nodes, one MakeFloat2 node and Multiply node. This small system is very handy for controlling tiles in your texture - U and V coordinates can be controlled individually this way. I tiled these textures 5 times.
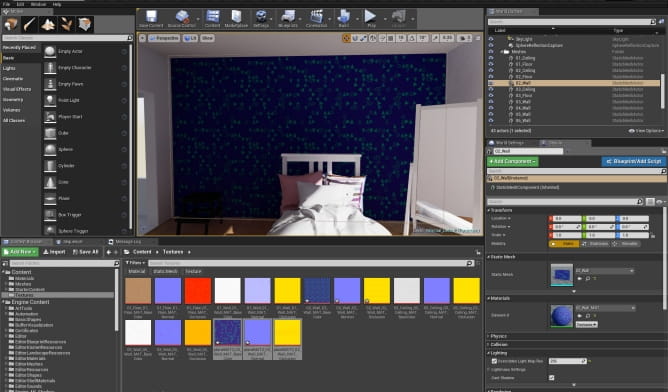
We have nice number of triangles now! But how do they look from a close up?
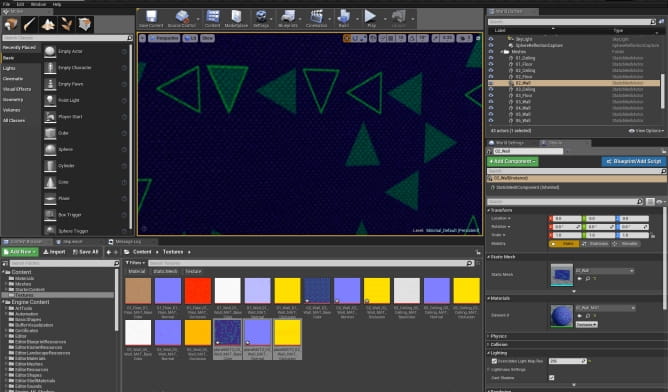
Still sharp and crisp! Great!
Monkey Bussiness
But what if you want to get some painted detail? Substance Painter can gve you such detailed dirt maps, decals, stencils, some really customized look for your models. You need them at maximum resolution too. So you need to export them separately. Make your layer details as needed. Add a fill layer on the botom of your layer stack in Substance Painter. Add opacity channel to TextureSet. change viewr settings to "PBR with alpha blending". Make this layer 100% transparent (opacity slider all the way to black). Now you can disable your base layer and export only your detail layers (select preset with alpha channel).

Details can be exported separately. Now it is the time to recreate material. I will use Unreal Engine for this.
Import your base textures and set up your texture Coordinate node. You can tile them freely. Import your detail textures as well, but don't connect them with TextureCoordinate tiling.
LERP your detail textures with your base textures using alpha channel of detail textures. In 3ds Max / V-ray you would just mix two bitmap nodes with a mask.
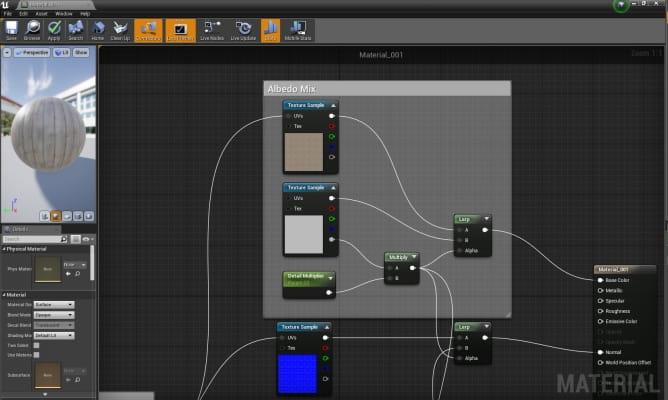
I added an additional node - a scalar parameter to control the strength of the alpha channel. It's optional.

I mixed two normal maps and (optional) added a parameter to control Normal channel strength.
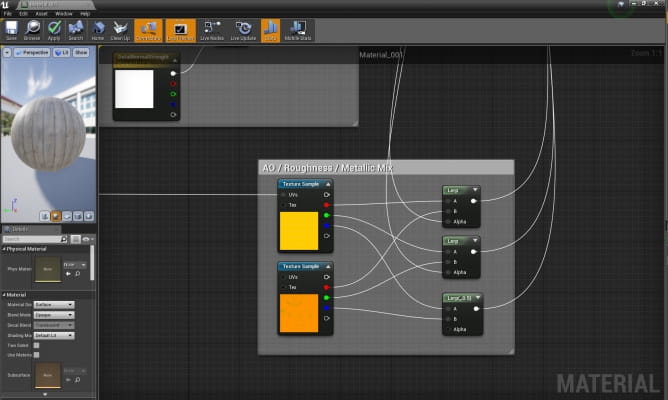
In the case of the last two textures, we have packed images. That means that each channel (red, green, blue) uses one texture with information. These packed textures have ambient occlusion on red channel, roughness on green channel and metallic on blue channel. They were made automatically in Substance Painter. We need three LERP nodes to mix these channels.
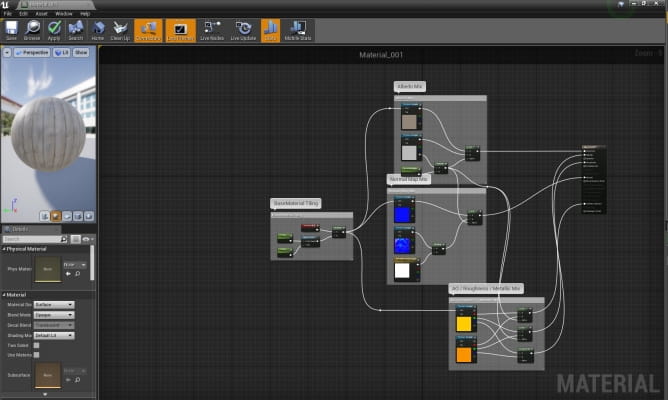
Overal look of the material.

Unreal Engine lets us creat an instance of the material in one click. In instanced material we can only change these parameters that we exposed in base material.
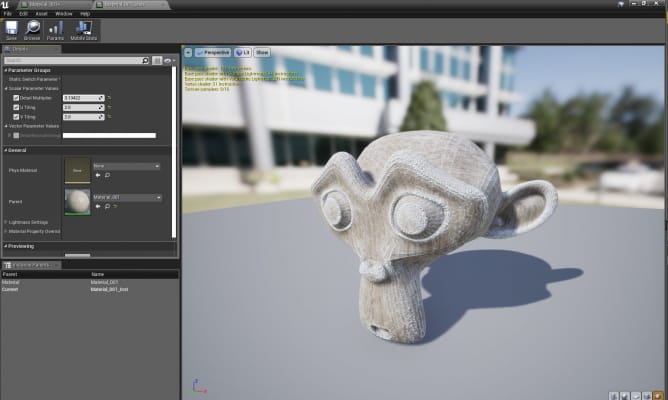
By dragging a slider, I can control how much of details will be revealed. Nice!
Your material is ready: you have base that can be tiled as many times you want, without losing detail and you have your decals too. You could obviously make this process simpler if you would use deffered decal in Unreal Engine (you could add some graphitti on the wall this way). But with our approach you have all material channels in your details (decals in Unreal don't support metallic channel). And you can still tweak them in Substance Painter.
Customer zone
Your special offers
Your orders
Edit account
Add project
Liked projects
View your artist profile


COMMENTS