Hello dear CG community, I am Olivié Charbonneau at Cedreo Studio. Since I validated my 5SRW certification with LearnVRay.com I thought it would be the opportunity to share my 5SRW certification project “The cabin on the lake” as a tutorial in 5 steps. Here is the complete Photoshop file, 1920 pixels wide: 161 Mo on Google Drive.
Click on image to enlarge 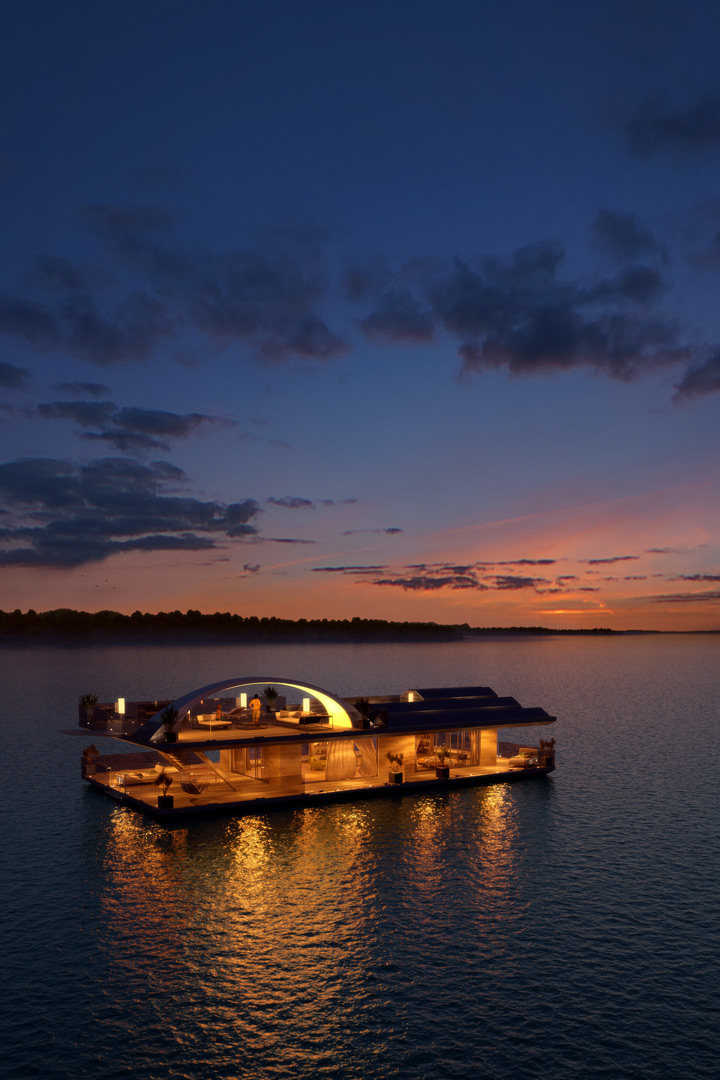
Final image after post-production
Step 1 – Framing
The cabin on the lake is an image about the serenity of a floating house at dusk, suspended between day and night, and between the sky and the water. My intention was that the whole image would be a “blur” so to speak, like a gradient between areas and tones, rather than individual and separated elements.
Click on image to enlarge 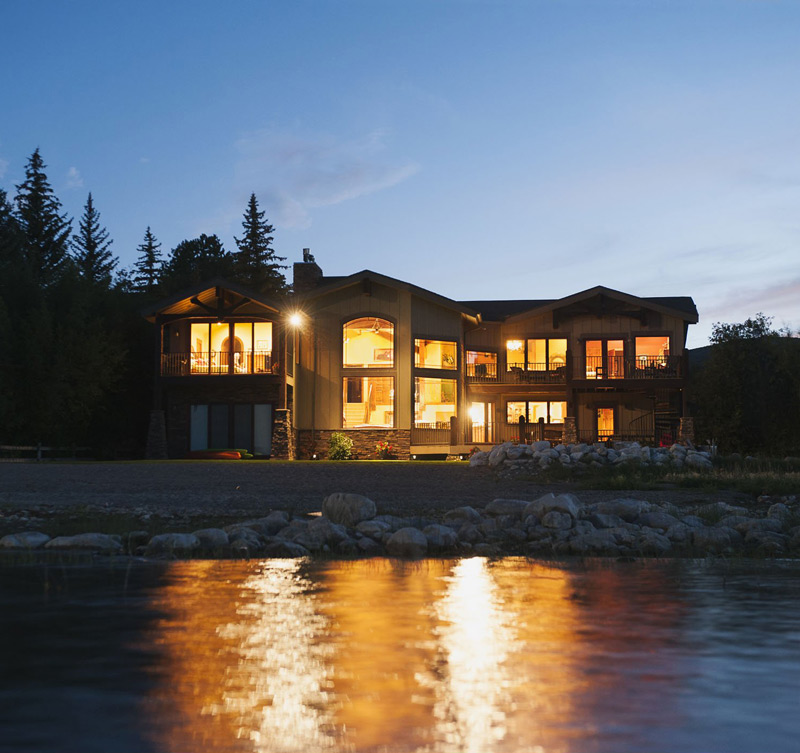
A reference photo of a lake house lit during twilight with interesting chromatic contrast (warm/cold complementarity).
Click on image to enlarge 
Designing the floating house.
I choose to frame the image vertically to give a sense of scale and of depth to the sky-horizon-lake superposition. The house is the focal point.
Click on image to enlarge 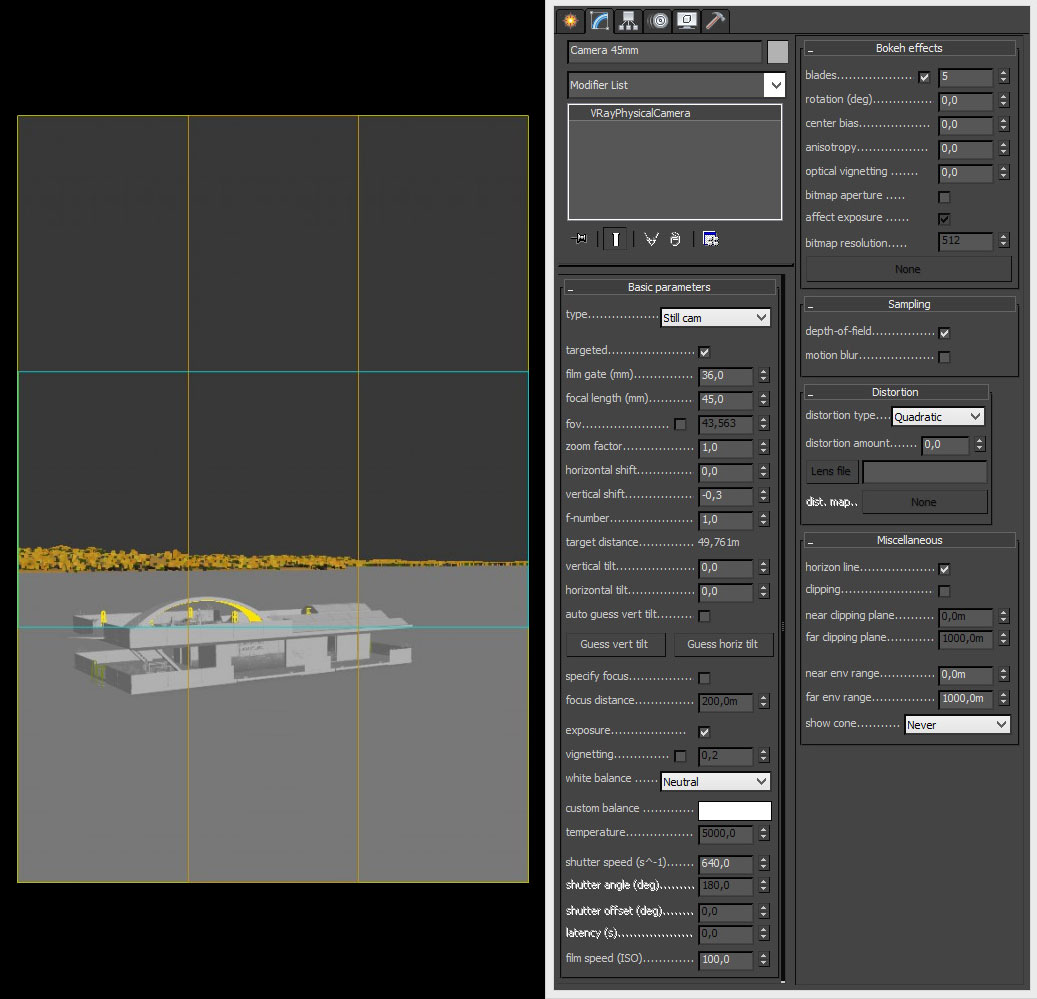
Height of the camera and position behind the house in order the see the whole house and its terrace upstairs, and give a bit of perspective and shift.
The composition is driven by chromatic contrast, between the warm tones of the lighting of the house, the lighting reflection in the water, and the twilight clouds on the horizon; and the cold tones of the blue parts of the sky (most of the sky), the blue sky reflection on the lake, and the overall blue tint cast on the scene by the sky.
Photographic considerations:
- 45 mm lens to have normal “human vision” without particular deformation of the perspective. 40 mm lens was a bit too deformed and 50 mm was a bit too flat.
- Vertical shift (not vertical tilt) : in order to easily define the desired vertical position of the house in the composition I used this very useful tool (“offsets the field of view of the camera”) and established a value of -0,3 (the house is shifted downwards without perspective deformation). I didn’t use vertical tilt because I didn’t need the vertical lines to be perfectly parallel.
The time of day is dusk for a weak and soft blue light without direct sun (twilight) that sets a calm mood. I chose to use an HDRi sky for the subtle, soft ambient light it provides and the interesting reflections it brings (mostly on the water).
Click on image to enlarge 
Photographic considerations:
- Shutter speed: 1/10 of a second because the situation is a low light exterior, typical of dusk.
- White balance: because I chose to use IBL lighting the WB is set to Neutral to keep the tones of the HDRi. The blue tones of the HDRi make the render very blue/cold but with the artificial warm lights it balances out. Because of the HDRi strong blue tint I don’t need to set the WB to 4500K to “cool the image at dusk or at night” to increase the chromatic contrast with the artificial warm lights.
- For the artificial lighting I used VRayLight “mesh” and VRayIES for realistic illumination through space. The IES I chose has a very wide angle of illumination (illuminates vertically and also very horizontally) that is suitable for the shape of the house and the space to be lit. I designed the light objects (meshes) of this scene: the box lights are very simple and the “light bridge” is an original idea.
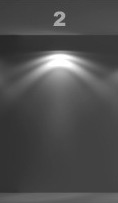 I used the photometric file “02.ies” from this classic collection of 30 free IES files.
Click on image to enlarge 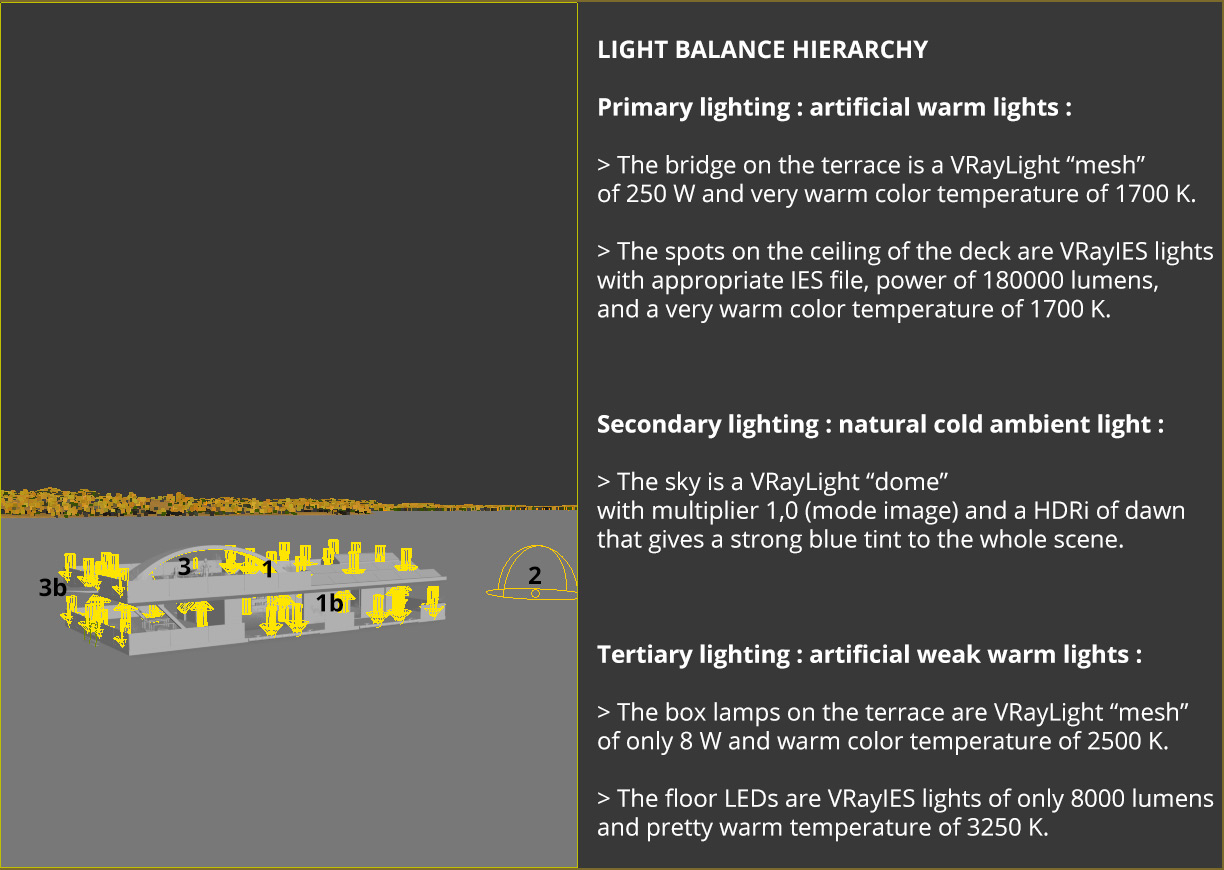
Click on image to enlarge 
The IES provide a pretty sharp lighting (point lights), while the light bridge provides a pretty soft lighting (area light). The “Cutoff” option of these primary IES lights is set to 0 in order to avoid their reflection in the lake water to be cut at a certain distance towards the camera.
Lights temperature: because the blue tint of the HDRi sky is so strong, and this blue ambient light envelopes everything in the scene, it cools the warm lighting a lot, and to get visibly warm lights I needed to exaggerate their low temperatures. In this scene, in order to have enough chromatic contrast, I had to set very low temperatures below 2000K, and even then enhance that warmth in post-production.
Light emitters of the LED spots on the floors and ceiling spots: the emitter part of the fixtures were converted into a Light “mesh” so they would appear visibly emissive and reflect in the water surrounding the house. I set the “Cutoff” to 20 to avoid any lighting of the scene (only the very close faces are a little bit lit).
Click on image to enlarge 
More info about the camera.
Lake water: while searching for water techniques I discovered Peter Guthrie’s beautifull seascapes, and decided to follow his approach using Phoenix FD and specifically its impressive and easy to use Ocean Texture: here is the official Chaos Group tutorial on YouTube on how to use it. There is only one this they don’t tell you here: this tool uses a lot of computer memory so make sure you have at least 16 Go of RAM or get ready to wait a long time.
The Phoenix FD Ocean Texture for the VRayDisplacementMod modifier of the water object (a plane):
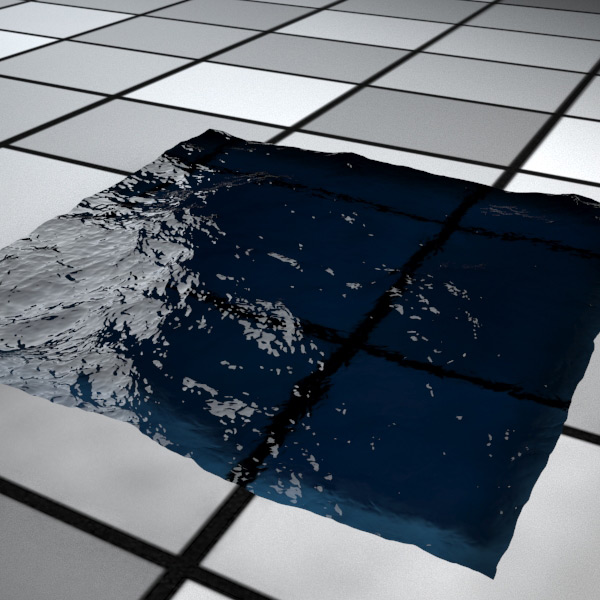
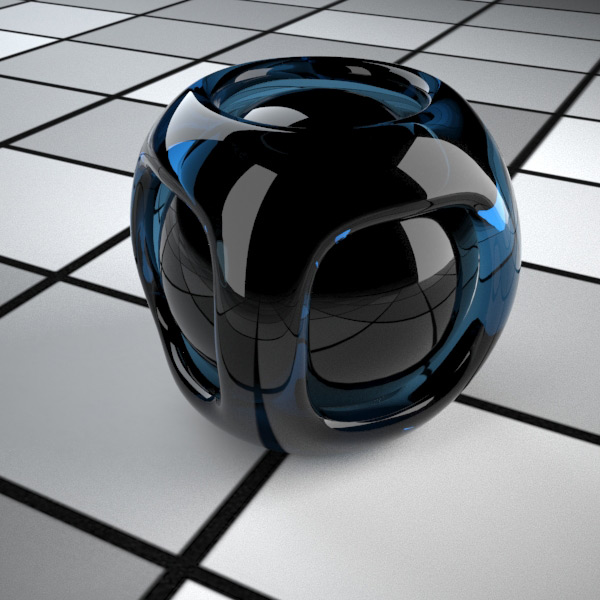
So to create realistic water we need 3 things : a realistic shape (here waves generated with Phoenix FD), a realistic material/shader (here a mix of ideas found online and personnal tests), and a realistic lighting to generate nice reflections (in this case the HDRi and the artificial lighting shown above).
Important note about the specular highlights on the water: in order to avoid very small and pixelated dots, and in order to have large and smooth areas of specular, we need to unlock the Highlight Glossiness (untick “L”) and set it to a lower value like 0,9 in this case.
The lake water in the render is pretty much all reflections: its diffuse and refraction fog color are almost invisible under the strong reflection.
Render glitches: I had black shapes in the glass blades and I fixed it by increasing the “Max depth” of the reflection of the Lake water from 5 to 10. Since the water was behind the glass and the water reached 5 reflections, it appeared black in some areas through the glass panels.
Click on image to enlarge 
2 different woods: a clean wood for the walls and the ceiling, and a weathered wood for the used floors and exposed sides. I used “Real-World map size” for the mapping.
Click on image to enlarge 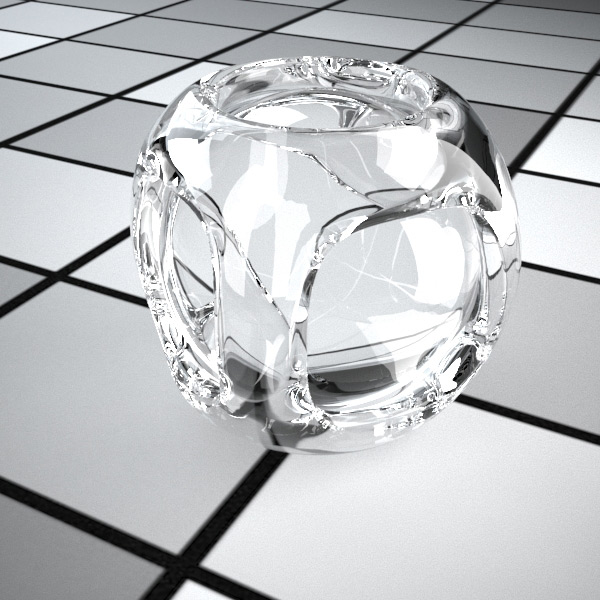
Clear glass for the windows - sample
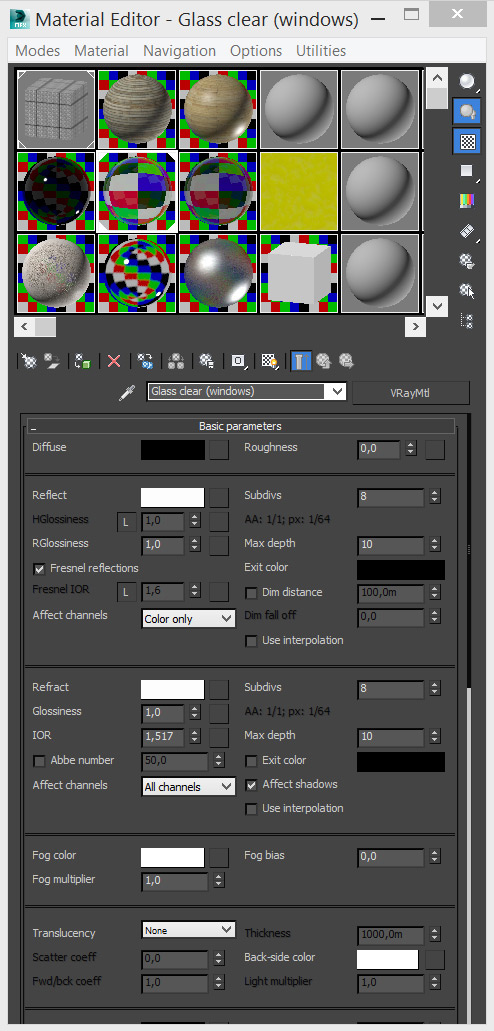
Clear glass - material settings
Click on image to enlarge 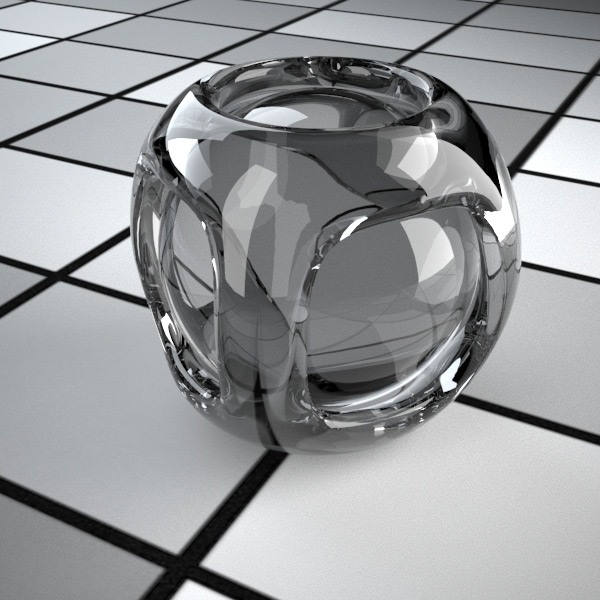
Tinted railing glass - sample render
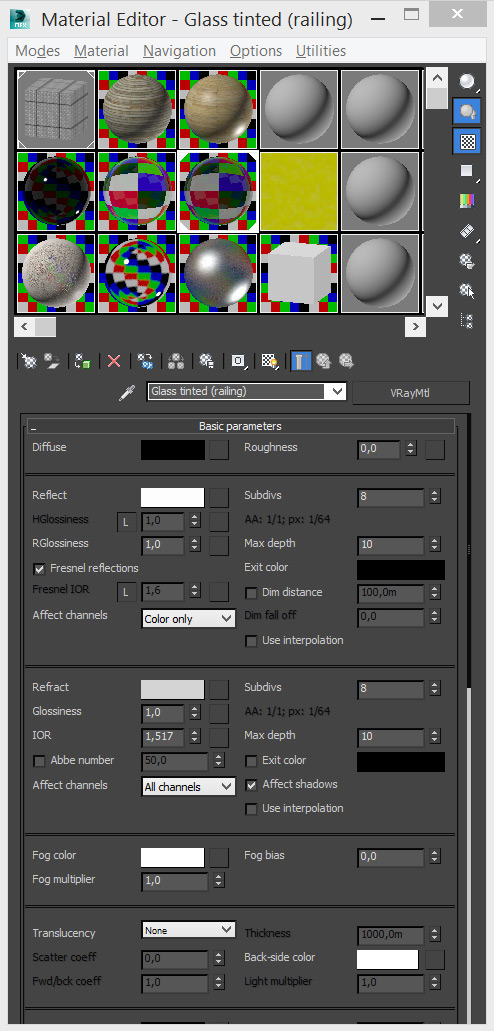
Tinted railing glass - material editor
Click on image to enlarge 
Metal (chrome) sample render

Metal (chrome) material settings
Click on image to enlarge 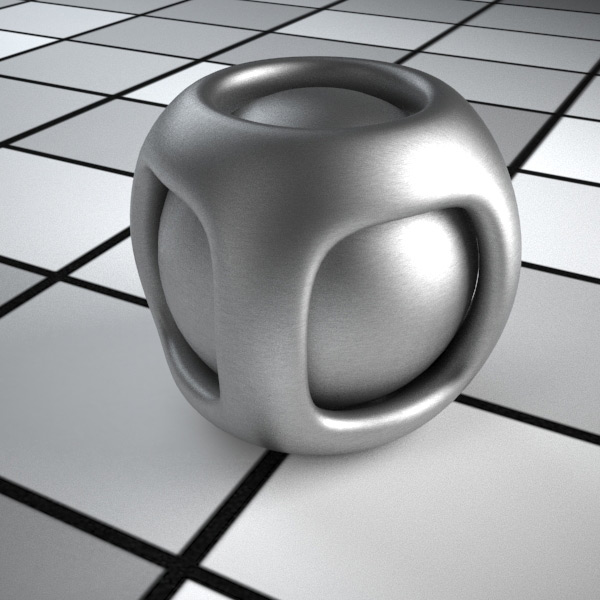
Metal (steel) - sample render
Click on image to enlarge 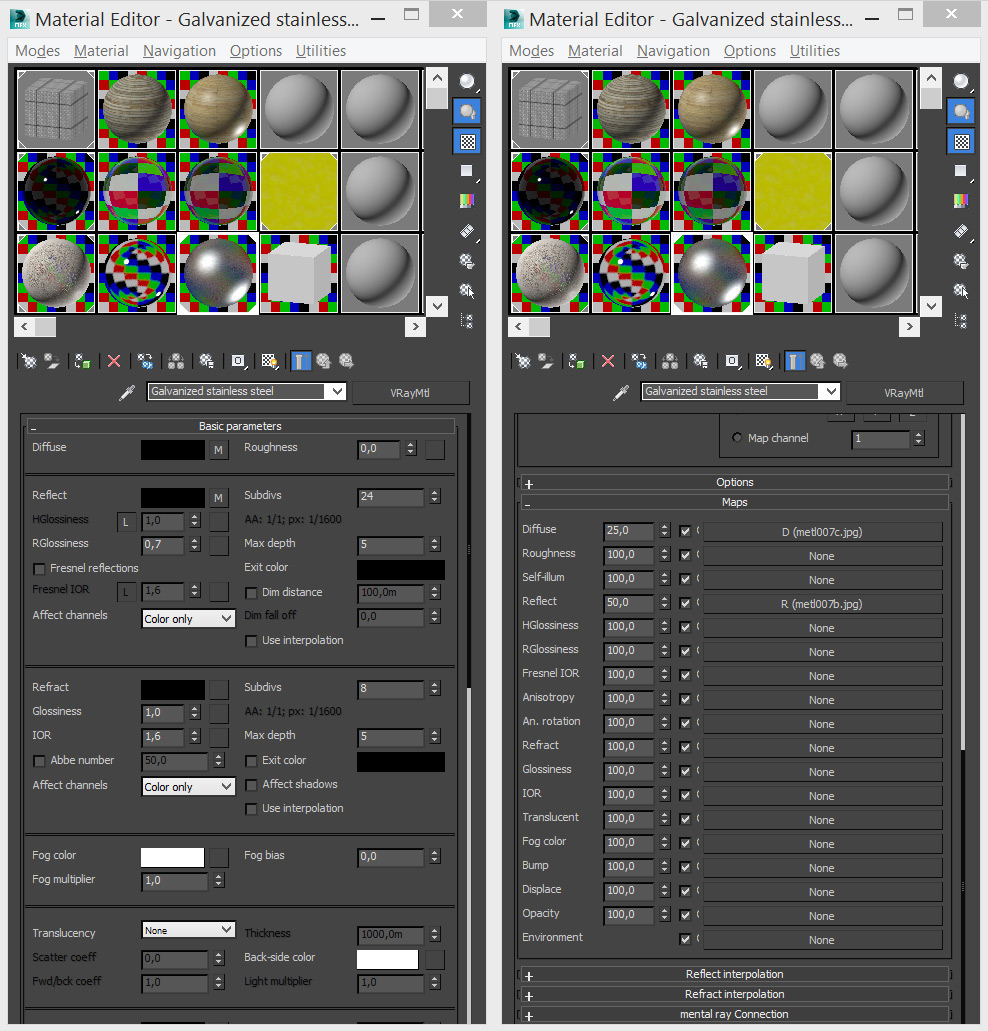
Metal (steel) - material settings
Click on image to enlarge 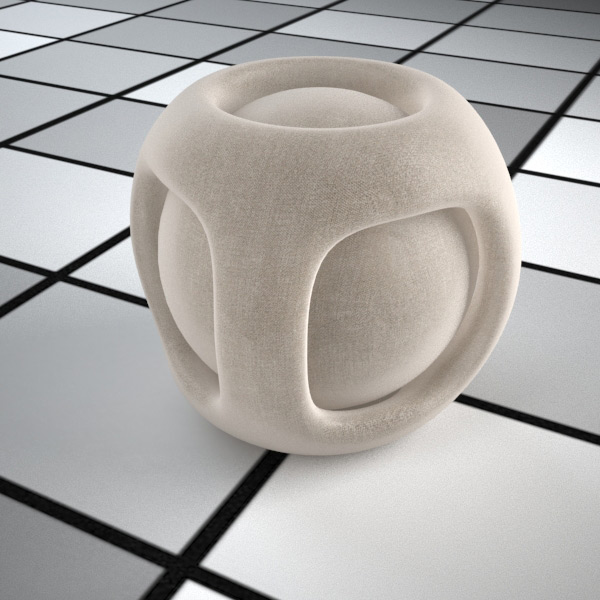
Click on image to enlarge 
Curtains - material settings
Step 4 – Final render (High quality settings)
- Image sampler (antialiasing): “Adaptive” subdivs Min 1 Max 50
- Irradiance map: Preset “High”
- Light cache: Subdivs 2000 with “Retrace threshold”
- DMC Sampler: Noise threshold 0,005.
As recommended by Grant Warwick I looked at the “SampleRate” Render Elements (and also looked at the noise of the “Reflection” Render Element) and where necessary I increased the corresponding lights and materials Subdivs.
Color mapping “Exponential” is recommended by 5SRW if overexposure or burnt areas appear on objects: in this case there is not any overexposure or burnt areas so Color mapping is left on “Linear multiply”. I tried Exponential to make sure and it was pointless (Exponential made saturation decrease if anything else at all) and also “View clamped colors” in the VFB confirmed the absence of overexposure.
Photographic considerations:
- Depth-of-field: I wanted a visible out of focus effect on the background to add to the blurred aspect of the sky, the fog, and the general intended atmosphere. The pretty long distance between the camera and the target / focus point (50 meters) and the normal 45mm focal length forced me to use a very open aperture (very low f-number) of f/1 and compensate the Shutter speed from 10 to 640 to keep the same exposure (exposure f/8 ss10 = exposure f/1 ss640).
- Bokeh: activated to try to catch more interesting “out of focus highlights” on the lake water in the foreground, with 5 blades.
My objective for this image was to create as much atmosphere as possible so I used VRayEnvironmentFog at the egde of the lake to blend the land and the water, creating a lake at night ambiance. I modeled a custom mesh as a gizmo that would contain the fog and be easy to edit in a more natural way than simple boxes gizmos. In order to have some variation in the fog I used a Noise “Turbulence” texture.
Click on image to enlarge 
The VRayEnvironmentFog is blended into the rendered image and also available as a render element for post-production
Click on image to enlarge 
I also used a VRay ZDepth render element to generate a more uniform fog through the distance towards the horizon in post-production.
I also rendered a few Render Elements for the post-production.
Click on image to enlarge 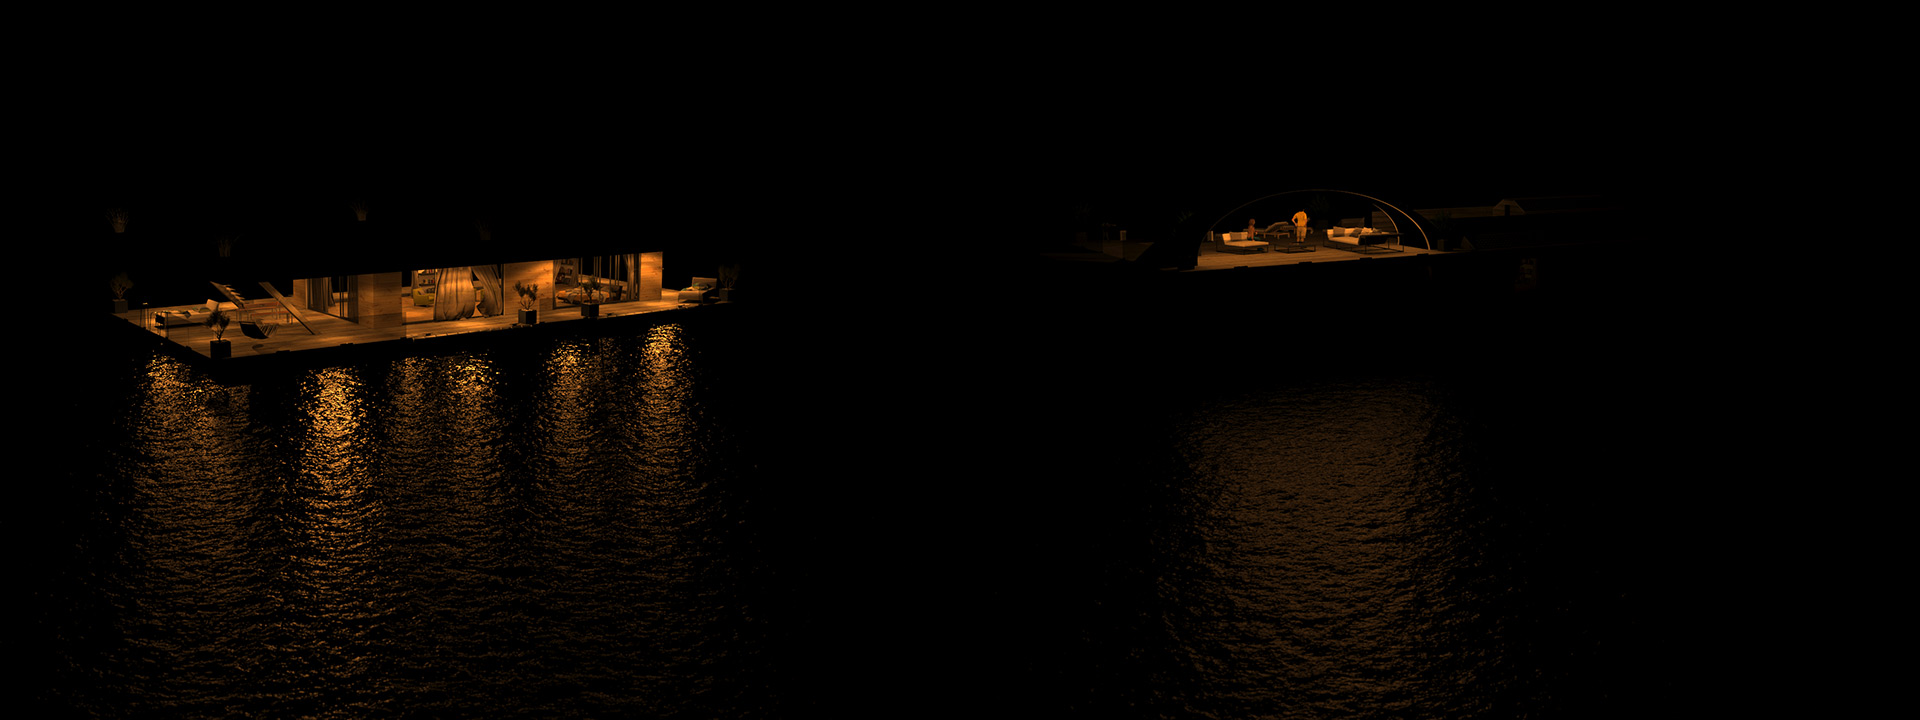
VRayLightSelect for each light or group of lights, so I will be able to edit the lights intensity in post: shown below are the roof spots of the deck and the bridge light on the terrace
Click on image to enlarge 
VRayReflection and VRaySpecular, so I will be able to edit the reflection intensity in post.
I didn’t use any ambient occlusion in the final image because it didn’t bring much (and I don’t like this fake effect so much), but this can be added as a Render Element VRayExtraTex with a VRayDirt map.
Click on image to enlarge 
In another scene modified only for mattes rendering, with MultiMatte render elements I created a series of mattes for the post-production, for example here the matte for the house.
Step 5 – Post-production:
You can download the PSD file with all the render elements, mattes, corrections, effects, etc.
The idea here is to make sure we have the chromatic contrast intended at the beginning of the project, between the cold blues and the warm oranges. I didn’t want to make the effect too strong and have colors too saturated, in order to keep a certain degree of subtlety in the tones. Another aspect is to not necessarily have a perfectly contrasted, saturated, sharp image because this is a very low light situation, and because of the mist over the lake. In order to have all the control in Photoshop I decided to not apply any Color correction in the VFB.
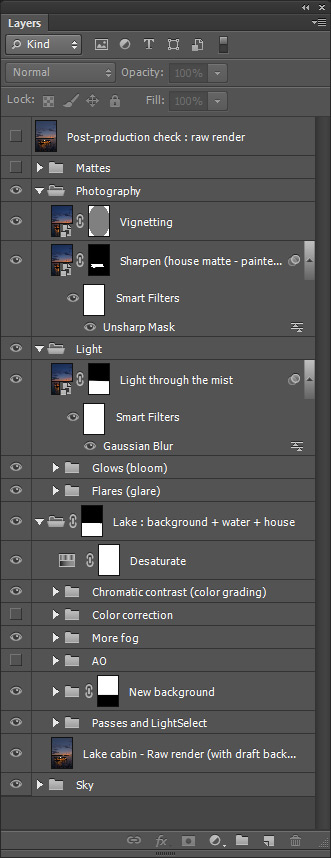
Click on image to enlarge 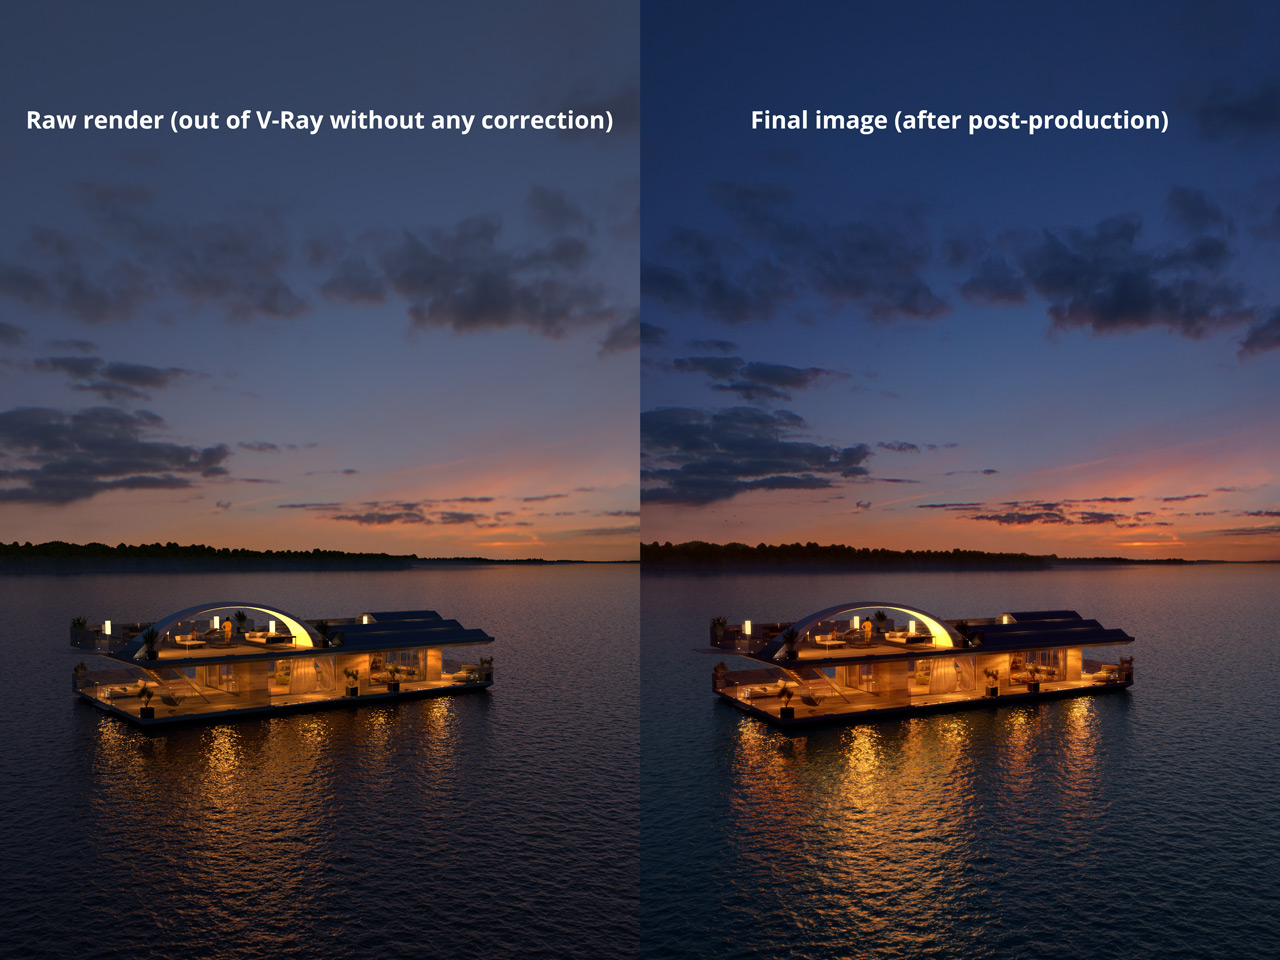
Raw render vs post-production.
Color grading and retouching in Photoshop
- The main purpose here is to emphasis the chromatic contrast, because the render couldn’t provide a result strong enough: the sky has its own warm/cold Color Balances and the lake (background + water + house) also has its own warm/cold Color Balances so both can be set independently. Each warm/ cold Color Balance has a mask in order to only influence the desired areas of the image. In general I increased the warm tones of the house (orange with a touch of red) and the clouds (orange with a touch of purple at the separation with the blue), and increased the cold tones of the sky and the water. All the process has been achieved with Color balances “Shadows/Midtones/Highlights”.
- Fog / mist / atmosphere was an important part of the original idea and was achieved with various adjustments of VRayAtmospheric and ZDepth render elements.
Finishing effects in Photoshop
- Smart filter « Unsharp mask »: it was not my intention to make a perfectly sharp image because I want to create a soft and atmospheric feeling, so I only applied the sharpening to the house.
- Pro glow (bloom): I used this technique on the lamps and the light bridge on the terrace (with a specific rendered matte) and on the highlights on the water (with the Specular render elements and adjustment “Threshold”).
- Lens flares (glare): to make the LEDs on the floor more realistic and get rid of their aliased edges I used the flares provided by 5SRW “Lens Flares Pack.psd” and choose “basic spot”, applied in Screen mode.
- Vignetting to focus the image on the warm tones in the middle of the image, and make the blue corners of the image fade darker into the coming night: very subtle/transparent and created with an editable vector mask with editable feather.
Thank you for reading and feel free to leave comments below. I hope you learnt something here and have fun with your images!
Olivié Charbonneau at Cedreo Studio
Click on image to enlarge 
Final image after post-production
Customer zone
Your special offers
Your orders
Edit account
Add project
Liked projects
View your artist profile


 I used the photometric file “02.ies” from




COMMENTS