Creating stone wall may seem a difficult and time consuming task. It feels as if it requires sophisticated sculpting skills that some of 3D artists do not possess. Naturally you can go for displacement and other texturing hacks but if some close-up renders are required you need a different approach. The solution I'm just about to share with you is based on shattering simple object to pieces and then transforming them using bunch of modifiers. My setup in Blender is fast, clean and produces geometry that is fairly simple to texture using Cycles and its powerful nodes system.
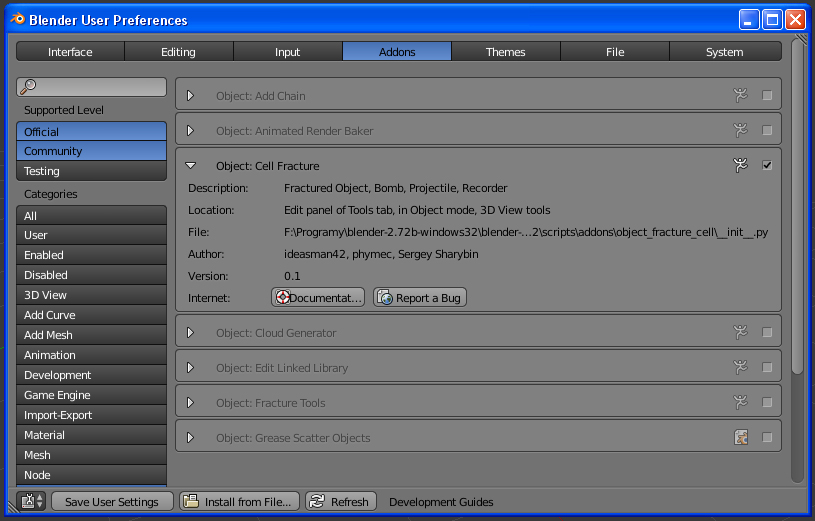
Lets start by enabling Cell Fracture Addon from Blender User Preferences. You can either search for it by typing its name or directly inside Object Category. When set to active, you'll be provided with one extra option in Toolshelf called Cell Fracture.
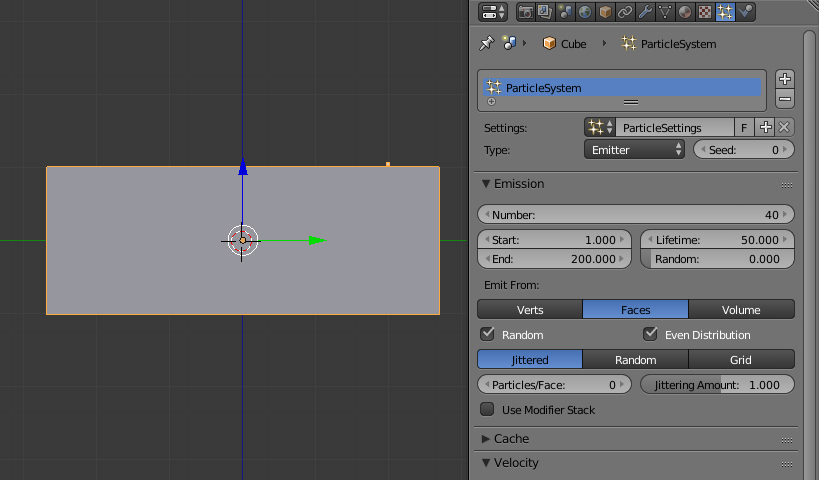
Mind out that you'll need a simple base for your wall before launching the addon. Add a Cube, scale it along desired axis and apply its size with a help of Ctrl+A shortcut. Give your model default Particle System and lower the number of emited object, in my case 40 is more than enough. This value will determine the number of rocks that will together form the wall we need.
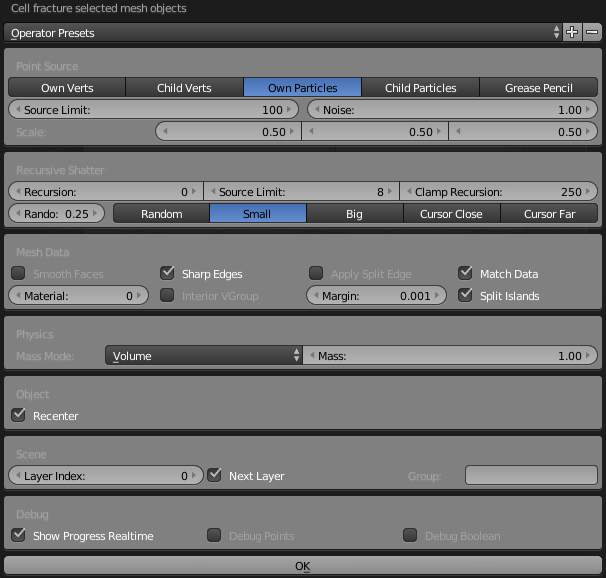
Select Cube and hit Cell Frature button that will give you access to dozens of new settings. I won't discuss them all, instead lets focus on those that are really needed to complete our task. Firts of all set Point Source to Own Particles so that the particle system we created will become the root of every single piece of shattered Cube. Increase the Noise value and lower Scale for all the axis as we need our Cube to be cut in small and randomly shaped pieces. Don't forget to disable Apply Split Edge option or else newly generated objects will be useless for further editing using modifiers stack. I tend to leave Next Layer option ticked as I prefer to keep shattered elements on the other layer than the base one. Having it done push OK button and shred your object to bits.
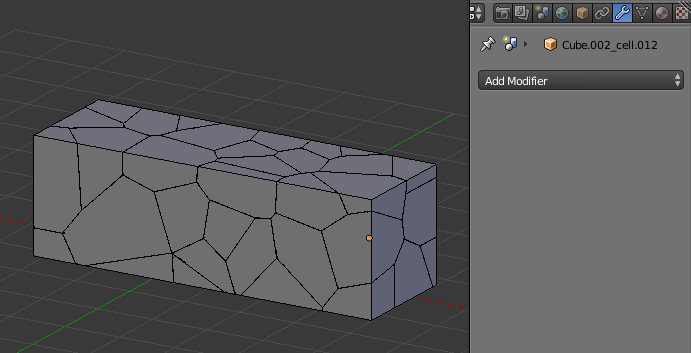
First of all select all of your objects (excluding the base) and join them into one model. Make sure you don't have any loose geometry (disconnected vertices, edges or faces) or a really small pieces that may produce annoying bugs in the future. In case of their presence delete them ASAP.
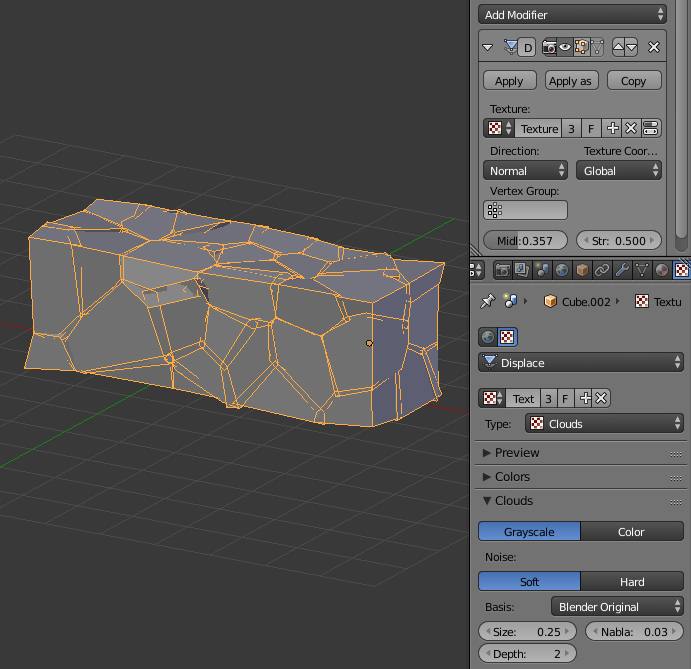
Add Displace modifier and decrease its Midlevel and Strength options. Ideally you want to slightly deform your mesh and push its fragments away from its center. Use Cloud texture as a source of generated noise, if needed tweak its size until desired result.
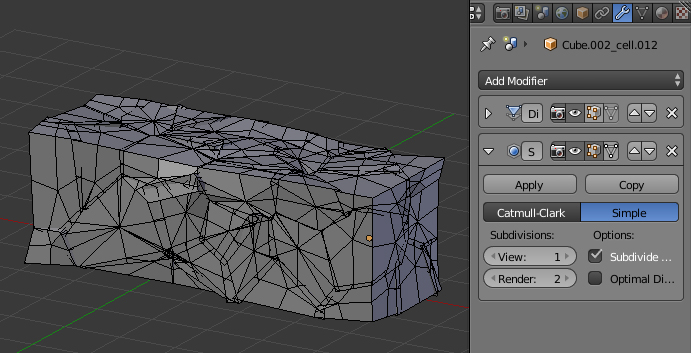
In order to change the shape of every piece a little bit more we need to add Subdivision Surface modifier that uses Simple aligorithm. This way we'll make sure that future Catmull-Clark subdivisions will work fairly well and won't spherify rocks too much. Optionally you can follow this step by Triangulate modifier with Fixed Quad Method.
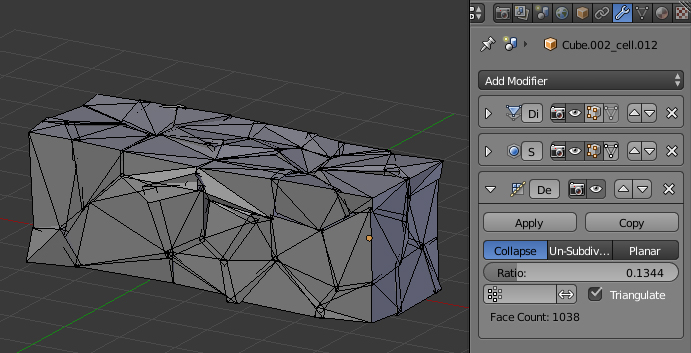
Further deformation of our stones (and probably teh most important one) will be caused by Decimate modifier. Keep Ratio at a reasnable low level in order to control the final density of the stone wall. Consider activating Triangulate option that may keep your model bug-free.
Add another Subdivision Surface modifier and leave its default settings intact. As you can see rocks got smoother yet they touch each other as if they were placed to form a wall. That's exactly what we wished for!

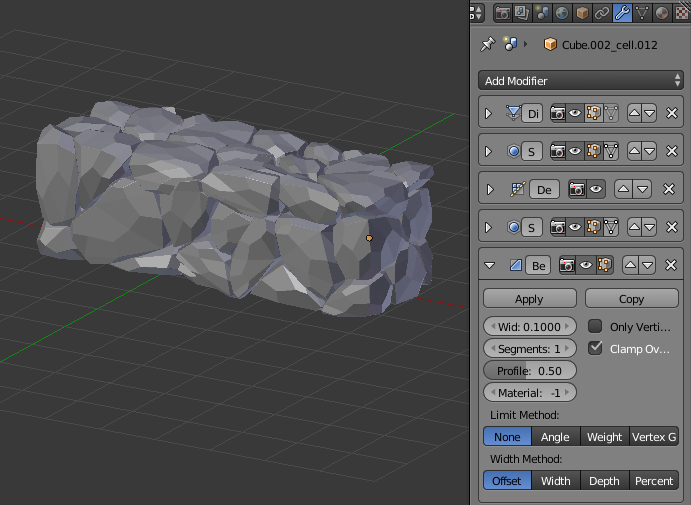
You can easily stop right here and complete stack with Edge Split modifier... but sometimes it's not the case. For any render closeups I suggest adding Bevel modifier that will determine the style of your stone wall. Keeping Limit Method as None will make your stones hard-edged whilst choosing Angle will smooth them a bit. As I prefer cartoonish and imagine-evoking solutions I gave the first option a try.
Finally add the third Subdivision Surface modifier with Catmull-Clark aligorithm. As you can see the shape of our wall stone is now clearly visible. Setting up shaders is now the only thing that's left to do.
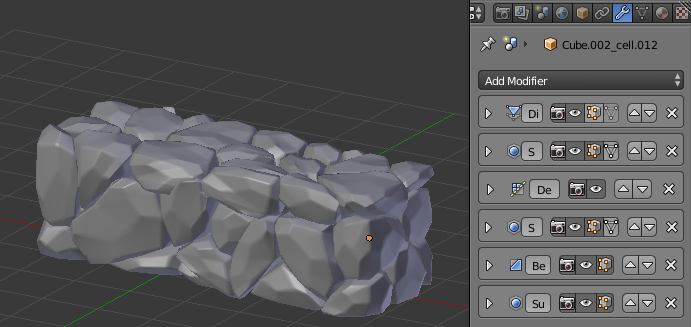
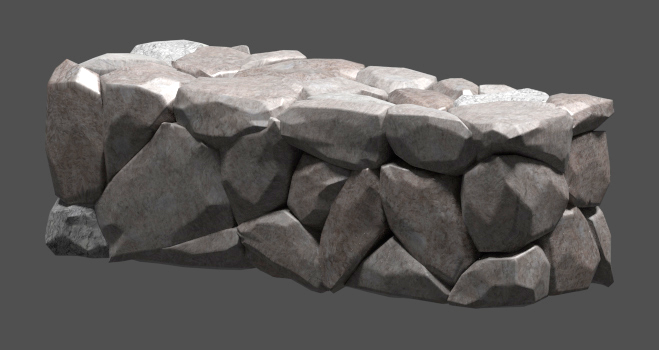
Switch your rendering engine to Cycles and add a new default material to your wall. Select your model and unwrap it using Smart UV Project (shortcut U). Because we are going to work on every single rock we need to separate all loose parts of our mesh (shortcut P in Edit Mode). Unfortunatelly this step requires applying all the modfiers so make sure everything looks like intended. When ready, hit Alt+C and choose Convert to Mesh option. Prepare a few tiled textures of stones and open material node editor. This is the place when magic starts.

Instead of discussing every single node I decided to divide them in sections. These are the most important chains of my setup that determine the final look of our model.
Click on image to enlarge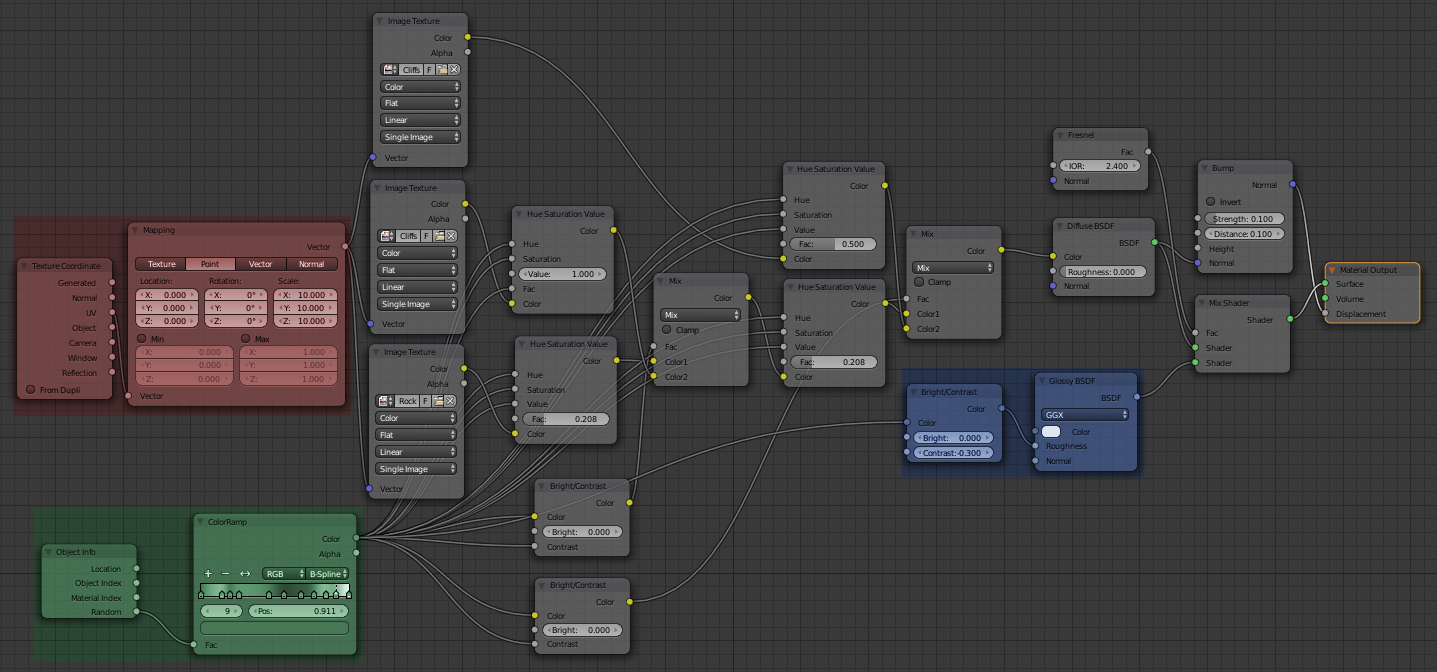
As you can see I scaled all of my textures ten times so they would fit the general size of the wall (section red). Every time I mixed or even attached them to other nodes I used a simple randomizing technique (green section). It invlolves Object Info and Color Ramp node with a bunch of extra points from the greyscale. Remember that they are read differently for every object on the scene that carries the very same material. Therefore I plugged it to Hue Saturation Value inputs as long as other nodes dicreasing blend points contrast when needed. This way I made sure that every piece of my wall will look slightly different from another. Finally, when all the images were combined and changed a bit, I added Glossy shader and mixed it with default diffuse using Fresnel node (blue section). Once you activate rendered viewport shading you can admire your stone wall directly in 3D space!
 Removing LUTs from Textures for better resultsRemove the LUT from a specific texture in order to get perfect looking textures in your render.
 Chaos Corona 12 ReleasedWhat new features landed in Corona 12?
 OCIO Color Management in 3ds Max 2024Color management is crucial for full control over your renders.
 A look at 3dsMax Video SequencerDo you know that you can edit your videos directly in 3ds Max? Renderram is showing some functionalities of 3ds Max's built in sequencer.
 FStorm Denoiser is here - First ImpressionsFirst look at new denoising tool in FStorm that will clean-up your renders.
 Unreal Engine 5.4: Nanite Tessellation in 10 MinutesThis tutorial takes you through creating a stunning desert scene, complete with realistic tire tracks, using Nanite for landscapes, Gaea for terrain sculpting, and an awesome slope masking auto material.
Customer zone
Your special offers
Your orders
Edit account
Add project
Liked projects
View your artist profile






COMMENTS