Removing LUTs from Textures for better results
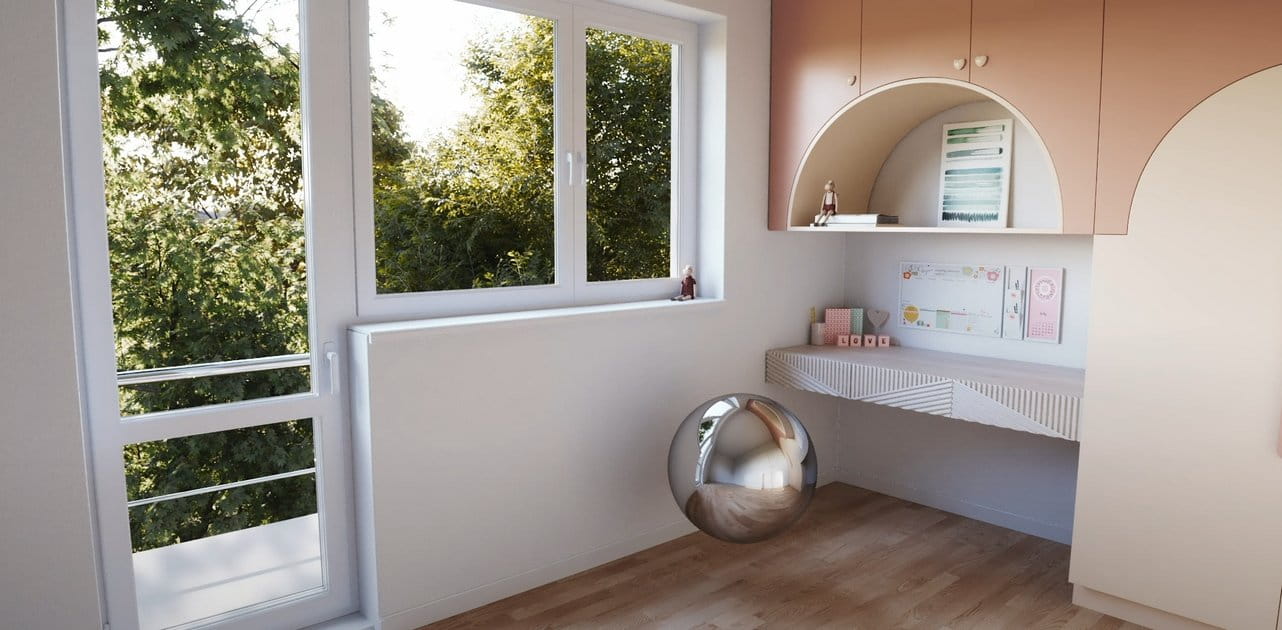
Remove the LUT from a specific texture in order to get perfect looking textures in your render.

Total: € 0
Continue Shopping
In accordance with the art. 13 section 1 and 2 of the European Parliament and Council Regulation 2016/679 of the 27th April, 2016 on the protection of natural persons, with regard to the processing of personal data and on the free movement of such data, and repealing Directive 95/46/EC (General Data Protection Regulation), hereafter RODO, I hereby inform that:
1. EVERMOTION S.C., 8 Przędzalniana Str., 15-688 Białystok, Poland is the Administrator of your Personal Data (APD)
2. Data Protection Inspector can be reached through e-mail: iod@evermotion.org
3. Your personal data are to be processed on the basis of art. 6 section 1 letter a, b and f of RODO in order to:
a) prepare, conclude and execute the agreement and for other purposes approved by you,
b) to execute the legitimate interest like marketing of products and the agreement, claim assertion or defence against claims resulting from the law regulations.
4. Entities entitled to the reception of your personal data may be the authorised public bodies; mail providers; providers of the services covered by the agreement; responsible for debt recovery, keeping the archives, document utilization, legal consulting, technical services, IT services and accountancy.
5. Your personal data shall not be transferred to the third country, nor to the international bodies.
6. Your personal data shall be processed within the period of the agreement and upon your additional consent until you withdraw it. APD shall keep the data for the period of any civil law claim execution connected with the agreement.
7. You have the right to demand an access to your personal data, to correct or to delete the data if there is no other basis for the processing or any other purpose of such processing or to limit the processing of the data, to transfer the data to another administrator and to raise objections to the further data processing if there is no legal basis for further processing and to withdraw any previous consent.
8. You provide the personal data voluntarily, however they are necessary to conclude the agreement. The refusal of providing such data may result in the refusal of the agreement conclusion.
9. You have the right to lodge a complaint to the Personal Data Protection Office when in your opinion the data processing violates the regulations of General Data Protection Regulation of the 27 April, 2016 (RODO).
10. Your data will be automatically processed, including the form of profiling.
11. You are obligated to forward above mentioned information to your representative, especially if you appointed this person in the agreement as the contact person or as the representative for the agreement execution.
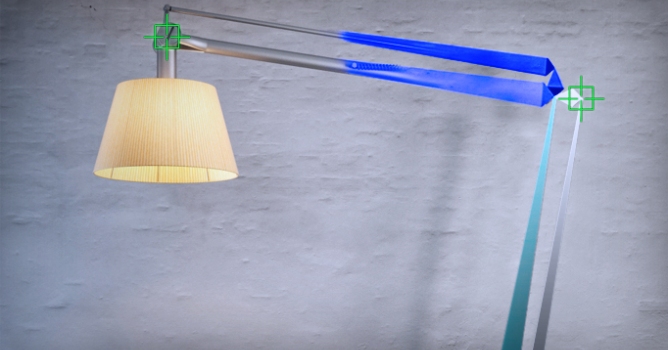

In order to help you follow all the steps I marked parts of the lamp with different colors. The bones I'm just about to create will carry the very same tints so that you'll know which objects should be linked together (for instance white rod will have to be linked to white bone etc; black ones are used only as helpers). 
Lamp model comes from Archmodels vol. 138 available in Evermotion shop.
Let me start from adding a few Points and numbering them. I'll locate them at every spot that will become rotation pivot of lamp's moving elements. Remember that these are just helpers that won't affect functionality of the final rig.
Select Bone Tools from the Animation menu, hit Bone Edit Mode and create three bones (A,B,C). Use Align option to place them where the 1st,5th and 8th Points are. Mind out that with a help of Bone Edit Mode bones automatically change their length according to their location.
Select the first, light blue bone and choose HI Solver from IK Solvers menu. Drag the line up to the last, black bone and hit left mouse button. Newly created IK Chain Point will now control all the bones. This way we will use it as the main controller of our whole lamp.
In the next step we will add two red bones and place them where the 8th Point is. They need to face the ground just like the Shade does. Select the first red bone, go to Constraints menu, select Position Constraint and pick the black bone. This way red bones will follow location of IK Chain but never its rotation. 
Time for the rod that's connected to the horizontal arm. Create three blue bones and place their pivots at 5th,6th and 9th Point centers. Once again add HI Solver to the first bone and select the last one as the End Joint.

Use Position Constraint to link first bone with B bone and newly created IK Chain point with the main controller of the lamp. This way the rod should follow the arm and rotate slightly if needed.
Time for the rod that's connected to the vertical arm. Lets follow the previous procedure but this time create four white bones. Place their origins at the location of Points number 1,2,4 and 5. Select the second bone and add HI Solver using the last one as End Joint. With a Position constraint make the first bone follow location of the A bone. Repeat this operation for a newly created IK Chain Point and the B Bone. 
We need to check how our lamp behaves at this point. Link its elements with bones that carry the same color and move controller to see our rig in action. As you can see springs are still motionless but the other parts of the lamp work like expected. Be aware that controller should be dragged only on two axis (viewer's Y and X) or else the lamp will not work correctly. To do so visit Link Info from Hierarchy panel and lock the movement on chosen axis.
Springs are the last thing that need to be taken care of. I'll focus my attention at the upper one and continue my work by creating two other chains of bones - black and the purple one. We need to align their first bones to Points number 5 and 6. Bones that end both chains should be located exactly where the 7th Point is. 
The next step involves more complex setup as the spring has to stretch from one ending to the other. In order to do so Link the first black bone to the B Bone so that it'll follow horizontal arm of the lamp. Now choose the first purple bone and use Position Constraint picking the nerby blue one as the Target. Having that done, select the last purple bone and use Position Constraint again but this time make it copy location of the last black bone. Finally get back to the first purple bone and use Look At constraint picking the last black bone as a Target. This way we ensured that the first purple bone responsible for the spring will always stay between Points 6th and 7th however it'll not stretch between them. To fix this small glitch make sure the bone's selected, enter Bone Tools and find Object Properties options. Disable Freeze Length and voila, the bone no longer keeps its primary length but changes it according to the lamp's position.
Last but not least - add Skin modifier to the spring choosing the first purple bone as the envelope. For the lower spring simply follow the same procedure as described above. Remember to always disable Bone Edit Mode before testing your rig as it may lead to unexpected and faulty results.
Described technique may also come in handy when it comes to rig all kind of non-organic, mechanical objects, like robots, cars or planes. Used with lamps it pushes your work into a new level of interior design. No more static, stiff models that only appear to bend and fold. Changing the angle of all the moving parts of your lamp may be crucial while looking for the right light and composition of your scene. That's why we believe you'll appreciate this tutorial along with the whole content of the Archmodels vol. 138 collection.
Have fun and in case of any questions feel free to contact us!


LEAVE A COMMENT


|

|

|

|

|
 Customer zone
 Your special offers
 Your orders
 Edit account
 Add project
 Liked projects
 View your artist profile
COMMENTS