Evermotion Pass 10% Off - Get Instant Access to Thousands of 3D Assets

Check Plans

Information Clause

In accordance with the art. 13 section 1 and 2 of the European Parliament and Council Regulation 2016/679 of the 27th April, 2016 on the protection of natural persons, with regard to the processing of personal data and on the free movement of such data, and repealing Directive 95/46/EC (General Data Protection Regulation), hereafter RODO, I hereby inform that:

1. EVERMOTION S.C., 8 Przędzalniana Str., 15-688 Białystok, Poland is the Administrator of your Personal Data (APD)

2. Data Protection Inspector can be reached through e-mail: iod@evermotion.org

3. Your personal data are to be processed on the basis of art. 6 section 1 letter a, b and f of RODO in order to:
a) prepare, conclude and execute the agreement and for other purposes approved by you,
b) to execute the legitimate interest like marketing of products and the agreement, claim assertion or defence against claims resulting from the law regulations.

4. Entities entitled to the reception of your personal data may be the authorised public bodies; mail providers; providers of the services covered by the agreement; responsible for debt recovery, keeping the archives, document utilization, legal consulting, technical services, IT services and accountancy.

5. Your personal data shall not be transferred to the third country, nor to the international bodies.

6. Your personal data shall be processed within the period of the agreement and upon your additional consent until you withdraw it. APD shall keep the data for the period of any civil law claim execution connected with the agreement.

7. You have the right to demand an access to your personal data, to correct or to delete the data if there is no other basis for the processing or any other purpose of such processing or to limit the processing of the data, to transfer the data to another administrator and to raise objections to the further data processing if there is no legal basis for further processing and to withdraw any previous consent.

8. You provide the personal data voluntarily, however they are necessary to conclude the agreement. The refusal of providing such data may result in the refusal of the agreement conclusion.

9. You have the right to lodge a complaint to the Personal Data Protection Office when in your opinion the data processing violates the regulations of General Data Protection Regulation of the 27 April, 2016 (RODO).

10. Your data will be automatically processed, including the form of profiling.
11. You are obligated to forward above mentioned information to your representative, especially if you appointed this person in the agreement as the contact person or as the representative for the agreement execution.

OK

Red Vertex Foliage Tutorial

Red Vertex 2009-01-25 00:00 tutorial  > 3ds MAX  > rendering

SCENE OVERVIEW

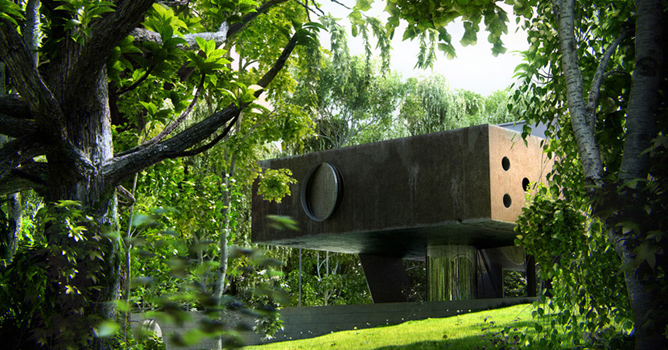
The scene consists of a round patch of grass, the house in the center and trees surrounding it. They had to be close to each other so you couldn't see through them, creating the impression of a forest. For every camera view, I added, removed or moved trees and foliage to shape the composition.


The whole scene


GRASS
 

Grass cut in patches

The grass is actually very simple and similar to the grass most people produce with displacement. The key is having a lot of displacement subdivisions and a good noise map. I used VrayDisplacement modifier, set to 2D mapping. The amount, controlling the length of the blades was different for every camera - shorter for close-ups and longer for broader views. The very detailed look is mainly provided by the resolution set to 3500. This also varied thru the different scenes, but generally I kept it to a very high level of above 2000.


Grass displacement settings

Of course, as you would imagine, this generates a huge amount of polygons which had to be rendered and I shortly ran out of memory even on a 6GB RAM machine. The problem was solved by cutting the whole grass field in patches. Then I would turn on the displacement only for those seen in the view. I also added some bumps to the surface which was displaced to make it more random. I did this by subdividing the grass surface and then applying a standard displacement modifier, with a smoke map in it. Just next to the building or the trees I added some extra, untrimmed grass blades. Each one is a VrayProxy, because I had to save every polygon I could.

The map for the displacement is a plain noise map. You just have to set it up properly, so there aren't any bright white dots which make the grass look like a carpet. You need just the right balance between the high and low settings and the right size, which in my case was the smallest possible.


Grass bumps


Displacement noise map


TREES
 
Most of the trees were modeled in Onyx Tree and two were made with the Bionatics plugin, because it provides very detailed leaves. Making trees in Onyx Tree is quite simple, furthermore simplified by the pre-saved parameters that come with it. The hard part part involved the leaves. Since I used SSS material (More on that topic in the Materials section), I couldn't use opacity maps, so I had to have leaves made by geometry only. Onyx Tree does not support complex leaves, which is OK in most cases, but not in this one. I needed the leaves to be well shaped and to have volume.


Tree bark displacement

This meant I couldn't use the original leaves, imported from Onyx. In the scene I had trees for background and some better detailed for foreground and close-ups. The leaves on the background trees I left almost as they came from Onyx Tree. The only thing I did was to add a shell modifier to add volume instead of having just a surface (Why, you'll find out in the Materials section). Sounds easy, but it isn't. With the thousands of leaves these trees had, that operation turned out to be quite heavy and it had to be done in pieces. All the leaves were in a single object, which I split to several parts. This let 3dsmax apply a shell modifier to each part without freezing. Then I attached them back together. Things got even harder with making the detailed trees. They had a replacement of leaves. I imported those models with square leaves from Onyx and then scattered a highpoly leaf model over the entire low-poly square leaves object, deleting the distribution object.


High poly leaves


Low poly leaves

Onyx tree and Bionatics produce pretty good trunks and branches. As far as geometry goes they give you all the subdivisions you could need. There was, however, some tweaking and model enhancement I did to one of the trees, mostly because I needed it to be thicker and more detailed since it was taking a central part in the composition.


Tree bark

The fine detail of the bark was added with VrayDisplacement. I tried to have displacement on all of the trees, but it didn't turn out to be a good idea, because the amount of memory this took was too much. I had to restrict it to the closest trees to the camera, or even to some of the boughs and branches. The thinnest branches didn't need any displacement and disabling it freed a lot of memory. You should always be very careful with VrayDisplacement. It's best if you make sure that only objects or parts of objects, that are in the render frame have displacement applied to them.

One of the best thing with these parametric tree generators is that they give you UV coordinates both for the leaves and the trunk/boughs/branches. You can then easily map your selected texture by adjusting its size and position.

After I've modeled the trees I had to convert them to proxies, so I can copy every type multiple times and shape a forest. What I did was, instead of making a single proxy, I made a group of two proxies for every type of tree. One proxy for the leaves and one for the trunk and branches. The purpose of this was to let me replace the trunk proxy with its mesh equivalent, so I could apply a VrayDispl modifier to it when needed. This way I could choose the close trees and add displacement only to them. You can't use VrayDispl with proxies.


Tree proxies

Every large tree had over a 1,000,000 polygons and there were a total of around 5 large trees and 5 more smaller trees or bushes. I don't have an accurate number for the total polycount of the scene, with almost everything being a proxy, but as the scene is the counter shows 13.6 million polygons. It isn't much at all, but the most of the final polygons come from the displacement of the grass and the tree bark.

 
MATERIALS
 
For grass material, I used a Vray2SidedMtl. As Front material, in the 2Sided, a simple VrayMtl was used, and the translucency color is a 140 140 140 gray. In the VrayMtl I had only a diffuse texture and some opacity added with VrayColor with a grey at 140 140 140. The use of 2 sided material and the lowered opacity gave the grass a bit softer look. To the grass patches that had no displacement, I gave the same material, but darker and opaque because they get reflected and take part in the GI calculations. Displaced grass gets darker than just textured, so I had to even them.

Since the main material is see-through I had to put an opaque plane under the displaced grass. It had the darker, opaque material.


The grass texture I used

Nothing special here. Bark texture for diffuse and the same but greyscale for Reflect and Reflect Glossiness. The Fresnel IOR is 2.0. Also, interpolation was used on some trees with reflections to speed things up. For every tree the scheme is similar but with different textures.


Bark material

Leaves

This was the biggest challenge. After several days of testing I decided that I should use VrayMtl with translucency enabled to achieve that special look of the greenery. The other option was to use Vray2SidedMtl, but my tests with it didn't give the results I could achieve with SSS. The main problem that came up was that in order to use SSS, I had to use fog, and fog works with geometry only. This means you can't use opacity maps to shape your leaves. You can't make an object transparent with a texture if it has fog enabled. You also have to have a solid object to use fog with it, that's why the leaves can't be flat. I applied a shell modifier to give them width and thus was able to enable fog (Be careful with the amount of the shell. Don't make it too thin, or the fog won't work. If you get black leaves, check whether it's not because of this). I have the following way of setting up a SSS shader: First I set the refract level to 100%. Then depending on the thickness of the object I set a color and value for the fog to make it have the right density and color (note that the value here may very greatly, depending on the thickness). If I want to have some diffuse texture in the shader, I lower the refraction level, making a mix. Then I put a value lower than 1 in the Glossiness slot, 0.8 or 0.6 is great. This is very important, otherwise the translucency won't work properly. You should increase the subdivisions to at least 20 to get a smoother light distribution. The hybrid translucency model worked fine for me. With the light multiplier I control the brightness of the shader. To simulate the "skeleton" of the leave I put a black/white texture for translucent. The other settings are a matter of testing. Of course there's some reflectiveness and bump in the material as well, as you can see in the screenshot.


Leaf material


TEXTURING
 
My main source of textures was www.cgtextures.com. They have great textures there, and even sets of photos for a specific use. I took a set of several bark photos and mixed them to make a tall texture for the trunks. For leaves I used mainly photos, but also did some corrections by hand to make the translucency and bump maps. The texture on the building is a mix of many dirtmaps placed according to the positions of the openings and the edges of the volume. All of the UVW mappings are simple plane or box. Only on the trees I used the coordinates that came from OnyxTree or Bionatics.


LIGHTING
 
The light setup is pretty simple. Direct light for sun, VraySky for GI, and a VrayColor with a boosted RGB multiplier for an environment to be reflected. This makes the reflections brighter. The color mapping is Exponential. The sun light has area shadows turned on to smooth the shadow edges. On some frames I placed planes around the camera to stop the light coming from behind.


VraySky settings
 
 
RENDER SETTINGS
 
I rendered the scenes with irradiance map and brute force engines. Image sampler was DMC with catmull-rom for antialiasing filter. I used the 1-100 technique to get better blurred reflections. You may be unfamiliar with this method, but it's very simple actually. You have to set max subdivisions of the DMC sampler to 100 and uncheck "Use DMC sampler thresh". This way you can control quality and render time with the Clr. thresh setting. It does get slower, but you get much better reflections. The reflection subdivisions in the materials you can leave at 8, everything is controlled with the Clr. thresh setting.


Render settings


Render settings

In this scene it was very important to set properly the dynamic memory limit. Since most of the geometry was either displacement or proxies I had to increase the limit as much as possible. The system I was rendering on had 6GB RAM, so I set the dynamic memory limit to 4000MB, leaving some memory for the mesh geometry. After I optimized the displacement and the rendering settings I was able to render a frame in a single pass, however for one of the frames I had to render the grass in a separate pass, because there were too many displacement polygons to be handled.

To help the postprocessing I rendered multimatte elements for the different trees and materials. I also added a Zdepth channel for the depth of field effect to be applied later in PhotoShop.

 
POSTPRODUCTION
 
All of the postproduction for this project was done in Adobe Photoshop using various plug-ins: DFT-55mm, Nik Software Color Efex Pro 3.0,Digital Anarchy-Knoll Light Factory and Richard Rosenman DOF-pro 3.0.This is a step by step tutorial of making the post for one of the five frames but a similar method was used for the other four.

This is the pure render right from the render machine, there are no corrections.


There are two additional passes with the foreground trees and the grass that will be introduced later in the post production. First thing of all, here is to take all of the color channels from the multimatte elements and literally brake the render into layers for easier color correction. This is a method that we use in every project. There is a color channel for every material in the scene from the leaves of the trees to the various materials of the house. There are total of 84 layers of fine adjustments, color correction, curves, "re-paints" and blurs in the final frame.

The first thing that I did was to generally "light up" the picture a little bit because the original render was too dark. I work the same way every time. First I make a level correction for all the layers, then I start color correcting layer by layer. When I'm happy with the general result, I collapse all the layers and start up some plugins and play around.

The house on this picture has 3 layers on top of the original. I used levels and curves to give it more contrast, also there is a little bit of painting with the dodge and burn tool to enhance the light from the sun and the bounced light at the bottom. That is all, there is nothing more done to the house.


Now the really tricky part.


I put in and color correcte the pass with the displacement grass to match with the rest of the green in the picture, also there is a subtle gradient from dark to white with blending mode set to screen, this will give more depth to the grass. The two foreground trees on the left and right have layers with levels and curves to enhance the contrast. The light was then manually enhanced with the dodge tool. All of the leaves had the dodge treatment. In the original render the leaves are made with sub-surface scattering, so I wanted to enhance that and add an extra simulation of the light scattering effect. In the left upper corner are added some additional branches with leaves. The bark of the big tree on the right is "over-painted" and I placed somewhat cool photo filter in its layer. Some of the leafs in this stage are intentionally over exposed or burned, in the next stage I will reintroduce the original render with opacity set to 20 to dial down the burned area. There is also a warm filter applied to all of the leaves in the scene. The background trees have more pronounced dark areas and a little more light from the sky to simulate real world light reflection, they are also desaturated and cooled a little bit to get the effect of depth. A little bit of vignette effect and level adjustments finish this stage.

Leaves with bokeh effect are added in the foreground, to achieve a similar effect in PS you must find a good Depth Of Field generator, I use Richard Rosenman's DOF-pro it's a wonderful plug-in with a lot of capabilities. In one of the other final pictures there is a branch on focus and the house is fully blurred, there DOF-pro played a big part in achieving the final look. The blur in that frame is made with Z-Depth channel that is loaded as a depth map in DOF-pro, then in the aperture tab the aberration is altered to make the aperture shape. At this stage there is also a curves adjustment layer that affects everything in the scene, the sky is cooled down and a little glow is added to simulate light passing through the leaves. I regularly copy all the layers into a new one on top of them. I do this to preserve layers and previous corrections in case I need to undo. I used DFT 55mm and Nik Software Color Efex Pro for additional color correction.

Here additional layers are added using the plug-ins.


A foreground plant is added also, and blurred with motion blur. A little bit of chromatic aberration is added, the vignette is strengthened to frame the house better. And this is all, this is the final look and feel of this frame.

This is our way of working at RED-VERTEX. We make the post production for almost every static picture in the exact same steps. Everything is subjective when it comes to color correction and post-production because everyone perceives colors differently and sees things in his own way. The main thing is to be critical of your work, and of course learn from the best to become one of them.

 
Author: Red Vertex
Tags:
You may also like...
Outdoor Lighting in 3D. Is there a magic formula?

Outdoor Lighting in 3D. Is there a magic formula?

Ever struggle to light exterior scenes in 3D? In this video, we'll have a look at a cinematic lighting framework, inspired by filmmaking techniques, to elevate your 3D art.
×

LEAVE A COMMENT

You need to be logged in to leave a comment. Don't have account? Register now.

BLADERUNNER 09:02:47  |  16-06-2009
Thank you very much for sharing your workflow. A very interesting tutorial and of course a great work.
Olivoist 22:48:33  |  02-07-2009
Thank you for sharing such good techniques!
DAVID_ARCHITECTURE 10:45:10  |  04-07-2009
VERY VERY PERFECT !!! PLEAS SEND YOUR EMAIL TO MY EMAIL I can work with you
DAVID_ARCHITECTURE 10:45:58  |  04-07-2009
MY EMAIL DAVID_ARCHITECTURE@YAHOO.COM
tuankt14b6 11:21:50  |  29-07-2009
thanks very much , I'm Tuan ,I'm from Viet Nam
tuankt14b6 11:35:38  |  29-07-2009
Can you give me materials ????... my email: kute_kt14b6_1990@yahoo.com thanks very much
torvicz 08:01:12  |  30-07-2009
great renders, great tutorial! thanks for sharing dude! and for taking time to do this... "learn from the best to become one of them..."
amardeep 11:31:06  |  10-08-2009
nice render dude and thanks to share with us but i think grass needed more work
roses1989 14:43:18  |  12-08-2009
very nice
noor_arch 03:59:43  |  21-08-2009
good job thanx
istu0517 22:46:51  |  30-08-2009
great tutorial! i just have one problem. When i want to do the grass with vraydisplacementmod it doesn't work with a plain noise map. It works with a bitmap but it doesn't with any 3dsmax map (noise, speckle, smoke etc...). Can anybody tell me why is that? Thanks!
afshin_architecture 15:18:28  |  19-09-2009
thank
atrivm 12:48:49  |  05-10-2009
thanks a lot.......
thaivanminhkts 05:51:21  |  08-10-2009
very nice ! thank a lot !
lgt711s 08:20:37  |  01-11-2009
thank a lot ...
Sergey_Spa 15:55:30  |  03-12-2009
Good tutorial! Beautiful render!!! Was Not got material sheet,and herb! Unless it is difficult send to my email (mtl leaves and 3d sceane with herb)?sergey_spa@rambler.ru Thanks!
ebachka 16:03:07  |  03-04-2010
vneheer laitai shoo. Very very expert 3d man keke. Good luck. Double_1900@yahoo.com
Anuradhaslk 18:50:20  |  03-06-2010
very nice dude.... my mail address is anuradhaslk@gmail.com please send me your mail address. I like to talk with you.
Anuradhaslk 18:52:06  |  03-06-2010
very nice dude.... my mail address is anuradhaslk@gmail.com please send me your mail address. I like to talk with you. Thanks
AMOET 21:30:19  |  16-06-2010
very2 great....perfect rendering dude...
ghaith 17:57:17  |  30-06-2010
very nice man congratulation
PARIJATHAM 08:34:27  |  03-07-2010
great work
kutu 14:18:53  |  19-08-2010
Nice work. Can you give me rendering settings
sammi1020 04:14:34  |  09-10-2010
Geart work!
whole.3dlink 10:02:50  |  23-10-2010
really nice image
ktstrung_uce 04:16:58  |  28-12-2010
Can you give me materials ????... my email: ktstranmanhtrung@gmail.com or ktstrung_uce@yahoo.com.vn thanks very much
FYTUFTUTF 11:19:53  |  08-01-2011
NICE WORK what type of lighting i use in exterior
ruilv224 11:05:24  |  22-01-2011
very nice ! thank a lot !
Gabi Petri 02:08:21  |  26-01-2011
Perfect Tutorial, very good. Can you send to my e-mail (gabszuk@hotmail.com), please. Thanks in advantage...
rathod 13:37:19  |  14-03-2011
superb tutorial......hmm can u give me the render settings...with materials ( if possible ) @ kalpikrathod@gmail.com
battusani 16:51:24  |  31-03-2011
hai this is navanil nice work
grungedesign 14:51:11  |  09-05-2011
круть я вафиге!
sxxktt1 15:54:25  |  10-05-2011
very nice man congratulation
jaychoupham 10:36:40  |  12-06-2011
can you send me 3max file, please. yahoo: jaychoupham@yahoo.com thansk
mohsen.hatam 12:03:49  |  28-06-2011
hi my friend.please send this max file for me. my mail is mohsen.hatam.65@gmail.com... tank you so much...
xuanhai_0272007 11:36:32  |  29-06-2011
hi my friend.please send this max file for me. my mail is xuanhai0272007@gmail.com... tank you so much...
kalishbg 00:42:43  |  02-07-2011
Please can you send me scene too on vnristic@yahoo.com? Thanks!
suratgondal123 14:00:20  |  23-07-2011
interior.sagarpipaliya@gmail.com
junil 18:05:53  |  30-07-2011
hi.i like it.this is beautyful.please send this max file for me. my mail is mountain.pine88@gmail.com... thank you so much...
luizifer 14:49:51  |  06-08-2011
Hi! I have some problems making the tutorial, can you sent me the scene please? luizifer@gmail.com Thanks!
xphire 06:56:07  |  12-08-2011
wow....amazing....can you also send me the 3d model so i can study it clearly, if its alright with you sir...my add is..christopher_ladua@yahoo.com....thank you...
cutcuz 14:48:34  |  18-10-2011
can you send me also the 3D of this. i wanna study the work flow - thanx in advance Good job - cutcuz@yahoo.com
Jc-Boy'o 17:36:24  |  02-11-2011
hey man, this is great!! can you please email me the 3ds file? (happeningnowpost@gmail.com)
ryuuen 13:04:51  |  23-11-2011
can i have the file please>< ryu_uen@hotmail.com
everbrobetter 16:44:42  |  09-12-2011
great work ))). please send me this scene please ))) excellent09@mail.ru for this mail ))
pranavkm 11:35:41  |  14-01-2012
Amazing Work...Please send me the .max file:pranavmania2@gmail.com
czajnik 23:40:14  |  24-01-2012
I cant see anty images. Is it me only?
azeez 06:02:18  |  02-02-2012
wonderful work can you send me the max file please i realy want to study it abo-alzeez@hotmail.com
kaptanmarkos 12:45:39  |  07-02-2012
amazing work, could you pls send me the max file if prossible? enumaxx@hotmail.com
madmarx 13:33:41  |  11-02-2012
very impressive! can you send me the max file too? marin@archa.ro Thenks a lot!
barjas 04:02:45  |  07-03-2012
how can get to thes
happiest13 09:29:27  |  10-03-2012
Very nice! send me please MAX file, my email happiest13@mail.ru
Push404 17:02:19  |  19-03-2012
Awesome work. trees are unbelievable, Can You Please Send me the .max file. pushstudios@ymail.com
Push404 17:06:59  |  19-03-2012
at the First look, I thought it's your real apartment. The best 3d scene I've ever seen...
pqt865 10:49:27  |  11-04-2012
Hi my friend. can you send me 3max file, please. yahoo: pqt865@gmail.com thansk
Mona amini 18:20:52  |  25-04-2012
Hi can you send me this 3dmax file please.thanks mona_lso@yahoo.com
nati2 15:30:18  |  26-04-2012
Hi can you send me this 3dmax file please!!!!!!!!!. thanks kasia131@op.pl
weitiecheng8310 11:13:01  |  07-05-2012
朋友你好:很喜欢你的作品,如果方便可以传给我一份,感激不尽谢谢 weitiecheng.8310@163.com
sofy 18:54:14  |  21-05-2012
cool!!! can you send this 3dsmax file to me at yulitawh_16@yahoo.co.id thx a lot...
Kavenn 11:19:33  |  30-05-2012
hi, your render is ridiculously real and beautiful... im dying to be as pro as you are! im working on it hardly, keep learning the rendering skill from internet. and i see your's. can i....... can i have the max file of this from you? i'll be appreciate if you send me~ shinigami_kaven@hotmail.com thank you very VERY MUCH!
HeNey 17:18:57  |  01-06-2012
Hi! I have some problems making the tutorial, can you sent me the scene please? ney.villota@gmail.com gracias
khishgee 12:18:09  |  02-06-2012
Can you send me please Max file. My email dash_hishig@yahoo.de
VLADMIGUEL 08:10:49  |  05-06-2012
can you send me 3max file, please. miguel_desing_art@hotmail.com thanks
aset1106 08:03:14  |  19-06-2012
Astonishing work! Could you send the scene to aset1106@gmail.com?
collie21 11:55:30  |  22-06-2012
Amazing!!Could you send the scene to iw.designe83@gmail.com
vaken 15:48:16  |  24-06-2012
absolutely great work, wonderful. could you send the max file to: fler1000@gmail.com thanks!
srav 09:30:17  |  04-07-2012
pls send me the max file sravan.jogi@yahoo.com
srav 09:30:48  |  04-07-2012
great work...........
CVF25 15:05:52  |  11-07-2012
i would love the file aswell, great work! cvf225@gmail.com
Dave Jacobson 03:37:26  |  23-07-2012
Thanks so much for this tutorial! Would you mind sending me the 3DS file? dave@davejacobson.com
intertoni 13:00:12  |  20-09-2012
Big work men, if prossible, could you pls send me the max file? email: antonio.design.produtos@hotmail.com. Thank's!
zaed 17:21:43  |  19-10-2012
wonderful work can you send me the max file please zaed87@yahoo.com thx XD
nukaimalat 22:34:11  |  25-10-2012
May I have the file also kaan.kiska@gmail.com . Thanks great work...
lanciaga 12:51:15  |  30-10-2012
hey! amazing working, could you send me the file at ivangrassi@hotmail.fr if it is possible? xx
b_arch_5 12:52:28  |  29-11-2012
Hi.great. very very good.can you send me this 3dmax file please.thanks b_arch_5@yahoo.com
sweetmusic 21:18:55  |  15-12-2012
Hi, i love your work. is it possible to send me the file? slashroses@hotmail.co.uk
alireza sh 18:51:07  |  21-12-2012
Hi, i love your work. is it possible to send me the file? a.r.sh.itecture@gmail.com Tanx a lot
M the creator 18:28:41  |  12-01-2013
Hey, great work man! can you send me this 3dsMaxs file? matteos89@hotmail.it Thank's!
deenis 13:08:46  |  11-02-2013
good
Moneli 08:44:12  |  26-02-2013
woo thats great workers, the three is very good ...lights.. more
admyang 10:06:09  |  27-02-2013
nice a
cjxasj 10:14:27  |  19-03-2013
I am a lover can borrow your files.604765831@qq.com.Considerable shock,Grateful
cjxasj 10:16:21  |  19-03-2013
The resolution is how much?
hankl 14:37:50  |  11-06-2013
Amazing!!Could you send the scene to 527517423@qq.com? Thank you!
carteranderson 19:08:39  |  21-06-2013
wow!gr8 tutorial. can you send me the file please on cateranderson01@gmail.com
yong o 00:04:19  |  06-07-2013
wow!gr8 tutorial. can you send me the file please on ed5858@nate.com
yong o 00:04:20  |  06-07-2013
wow!gr8 tutorial. can you send me the file please on ed5858@nate.com
damianmusi 03:10:01  |  07-08-2013
Wow! Amazing job! Could you send the scene to damichelo@hotmail.com? Thank you!
sorry88cm 15:50:00  |  18-10-2013
hi.i like it.this is beautyful.please send this max file for me. my mail is sorry88cm@gmail.com... thank you so much...