Removing LUTs from Textures for better results
Remove the LUT from a specific texture in order to get perfect looking textures in your render.

Total: € 0
Continue Shopping
In accordance with the art. 13 section 1 and 2 of the European Parliament and Council Regulation 2016/679 of the 27th April, 2016 on the protection of natural persons, with regard to the processing of personal data and on the free movement of such data, and repealing Directive 95/46/EC (General Data Protection Regulation), hereafter RODO, I hereby inform that:
1. EVERMOTION S.C., 8 Przędzalniana Str., 15-688 Białystok, Poland is the Administrator of your Personal Data (APD)
2. Data Protection Inspector can be reached through e-mail: iod@evermotion.org
3. Your personal data are to be processed on the basis of art. 6 section 1 letter a, b and f of RODO in order to:
a) prepare, conclude and execute the agreement and for other purposes approved by you,
b) to execute the legitimate interest like marketing of products and the agreement, claim assertion or defence against claims resulting from the law regulations.
4. Entities entitled to the reception of your personal data may be the authorised public bodies; mail providers; providers of the services covered by the agreement; responsible for debt recovery, keeping the archives, document utilization, legal consulting, technical services, IT services and accountancy.
5. Your personal data shall not be transferred to the third country, nor to the international bodies.
6. Your personal data shall be processed within the period of the agreement and upon your additional consent until you withdraw it. APD shall keep the data for the period of any civil law claim execution connected with the agreement.
7. You have the right to demand an access to your personal data, to correct or to delete the data if there is no other basis for the processing or any other purpose of such processing or to limit the processing of the data, to transfer the data to another administrator and to raise objections to the further data processing if there is no legal basis for further processing and to withdraw any previous consent.
8. You provide the personal data voluntarily, however they are necessary to conclude the agreement. The refusal of providing such data may result in the refusal of the agreement conclusion.
9. You have the right to lodge a complaint to the Personal Data Protection Office when in your opinion the data processing violates the regulations of General Data Protection Regulation of the 27 April, 2016 (RODO).
10. Your data will be automatically processed, including the form of profiling.
11. You are obligated to forward above mentioned information to your representative, especially if you appointed this person in the agreement as the contact person or as the representative for the agreement execution.


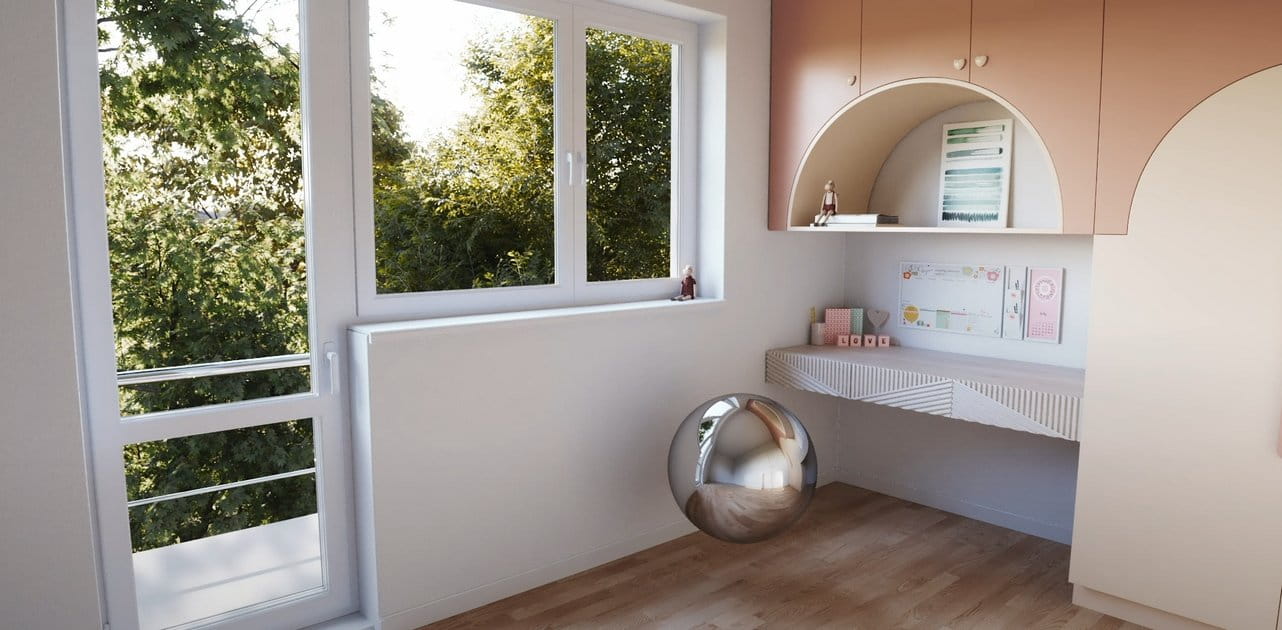
Thanks to Jamie Cardoso we can publish today an excerpt from his new book V-Ray 5 for 3ds Max 2020: 3D Rendering Workflows. Jamie Cardoso is a senior 3D artist and special effects designer. Currently he is working as a 3D Consultant for a variety of professional organizations worldwide.
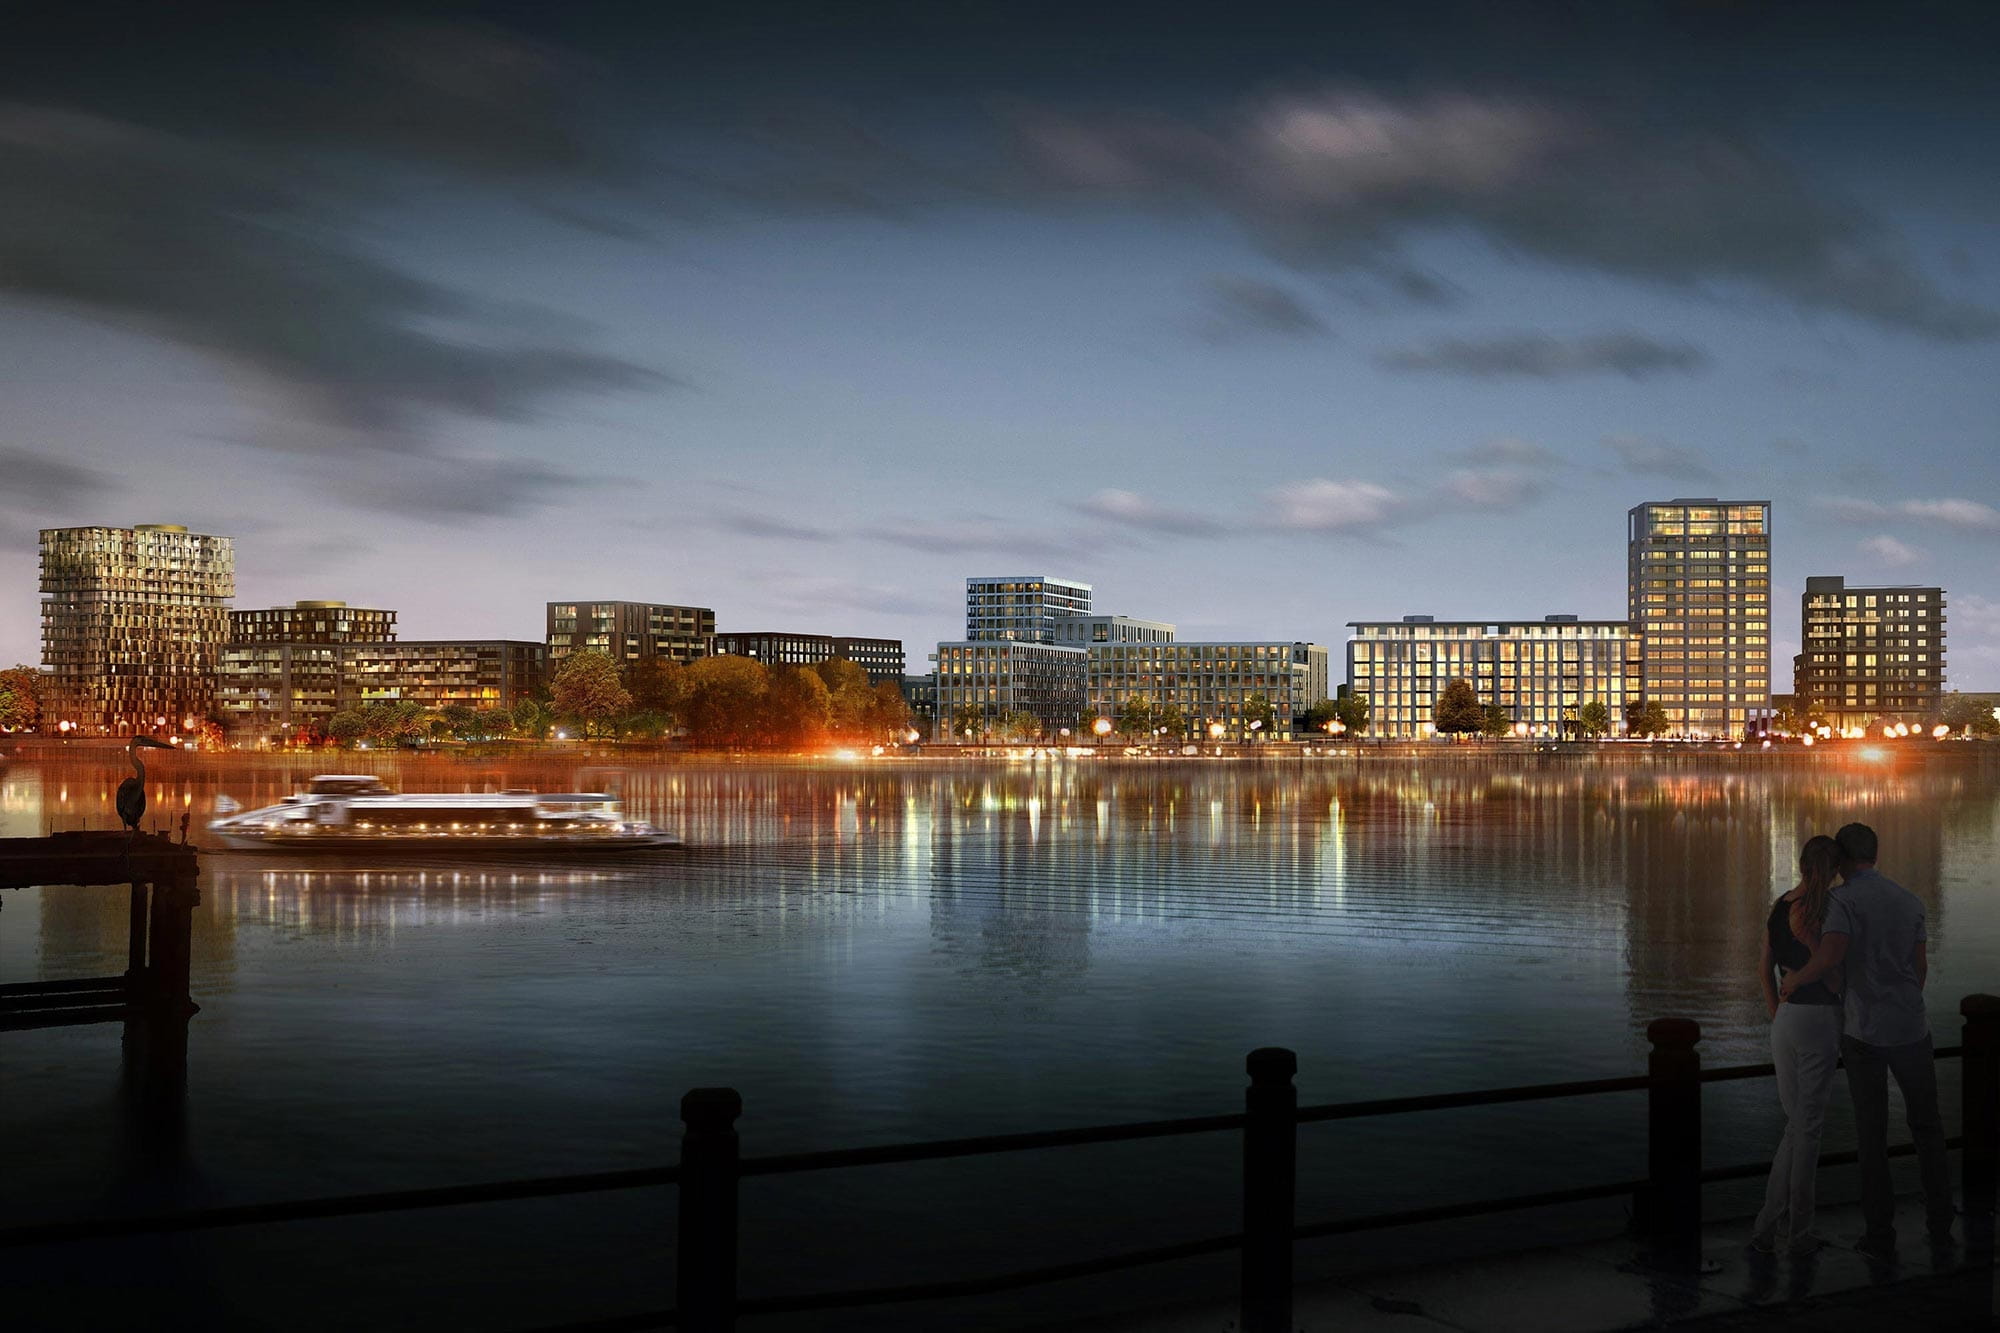
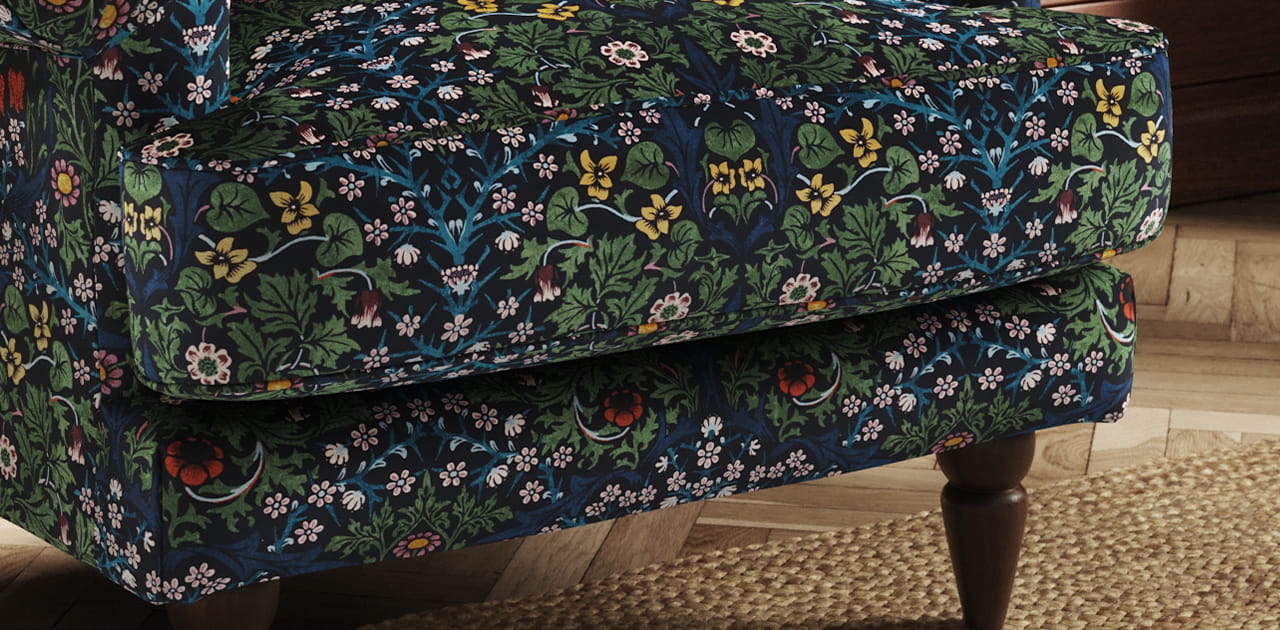
Image by Jamie Cardoso
Full book V-Ray 5 for 3ds Max 2020: 3D Rendering Workflows is available from Amazon.
Book is filled with tutorials and each tutorial includes a 3d project scene to guide users through the production and the post-production processes.
Image sampler (Antialiasing)
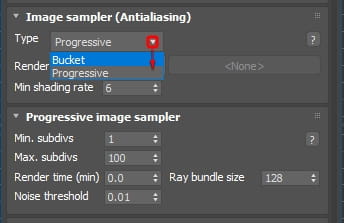
< Image sampler types>
This rollout controls the final quality of the renders
Type- This function allows users to choose Progressive (default) or Bucket type from its dropdown list.
Render mask- This function doesn't work well with region renders. It allows users to choose from a list of different types of areas/masks to render such as, Texture, Selected, Include/Exclude list and Layers.
This tool is quite useful for final renders that require one or two object surfaces to be changed. Instead of having to re-render the entire scene, users can select the object/s in question and re-render them.
Default, none.
Min shading rate- This amazing function allows users to increase the render quality without affecting the rendering times. The higher the value the better the shading quality.
Note: I often set it to 64 for final renders.
Default value, 6
Progressive image sampler
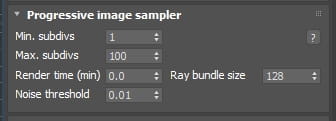
<Progressive image sampler options>
This image sampler type is often used for test renders while building the scene. It cannot be used for strip network renders, etc.
Min. subdivs- This function controls the minimum number of samples required to process the antialiasing. The higher the value the slower the rendering times.
Default value, 1
Note: For optimal results this value should always be kept at 1.
Max. subdivs- The function controls maximum number of samples required to process the antialiasing.
Default value, 100.
Note: For optimal results this value should always be kept at 100.
Render time (min)- The values entered here specify the total number of minutes a render should take, regardless of its final quality. The default value of 0.0 sets the rendering time to progressively unlimited, until the final quality is achieved.
If the renders are set to Interactive (IPR), users can continue making changes to the scene and materials while rendering interactively in the viewport or VFB simultaneously.
Ray bundle size- This function controls the number rays calculated on each machine(if many) when the render is set to distributed.
Default value, 128.
Noise threshold-This function is the main parameter to control the overall quality of renders. The smaller the value the better the quality.
However, rendering times will increase.
For draft renders, the value of 0.1 should be sufficient.
For high resolution progressive renders, values between 0.007 to 0.01 often work perfectly.
Default value, 0.01.
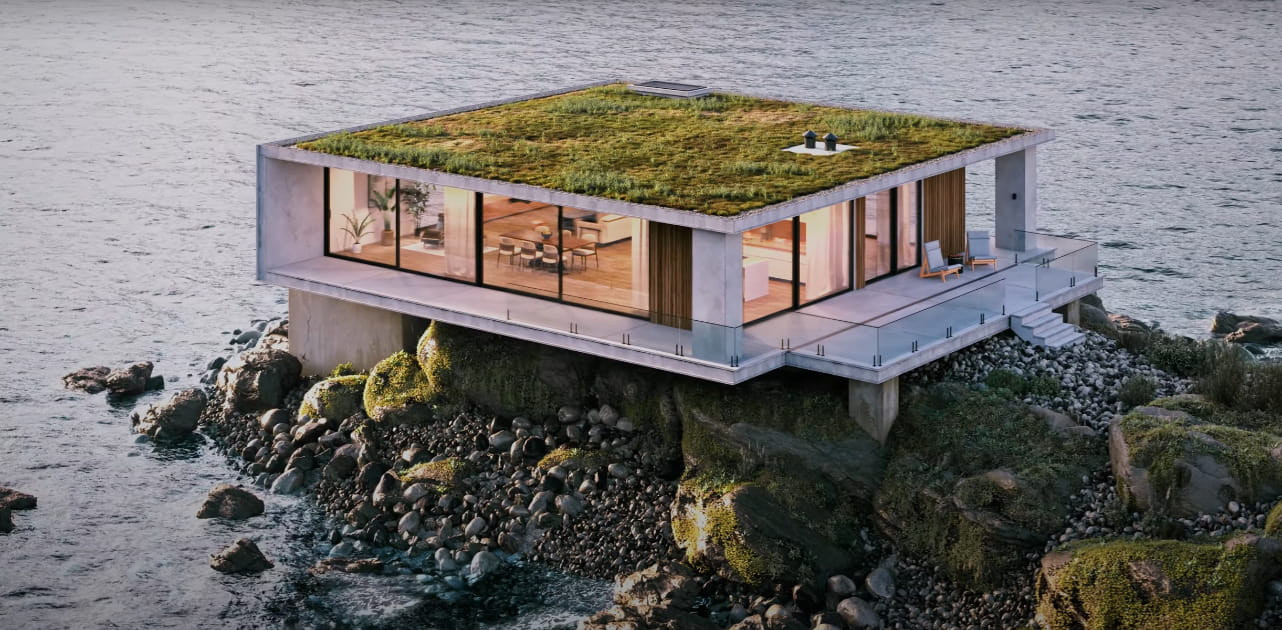
Image by Jamie Cardoso
<Progressive Noise threshold set to 0.01>
<Progressive Noise threshold set to 0.007>
Bucket image sampler
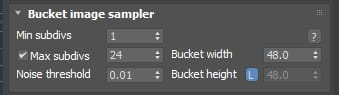
< Bucket image sampler options>
This image sampler type is often used for final renders and animations via network rendering using strips, etc.
Min subdivs- It controls the minimum number of samples necessary to compute each rendered pixel.
Default value, 1
Note: For optimal results this value should always be kept at 1.
Max subdivs- It controls the maximum number of samples necessary to compute each rendered pixel.
Default value, 24
Note: For optimal "universal workflow" settings , this value should be set to 100.
Noise threshold-This function is the main parameter that controls the overall quality of a render. The smaller the value the better the quality.
However, rendering times will increase.
For draft renders, the value of 0.1 should be sufficient.
For final high resolution renders, values between 0.007 to 0.01 often work perfectly.

< Bucket Noise threshold set to 0.1>

< Bucket Noise threshold set to 0.007>
Bucket width and height- The default value of 48 pixels sets the size of each bucket rendered on VFB.
Note: Uncloaking the padlock allows user to set the bucket's width and height sizes individually.
Image filter
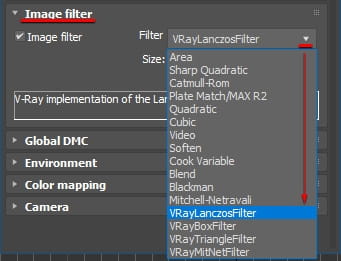
< Image filter options>
This section controls the filter applied to the renders.
Image filters such as Mitchell-Netravali, yield sharp results, and increase the rendering times slightly.
Default filter, VRayLanczosFilter.
I often use the Area filter.
Global DMC
This section controls how the noise is processed.
Lock noise pattern-When enabled, it forces similar noise patterns to be locked.
It's mainly used for animations.
Disabled, by default.
Blue noise sampling-When enabled, it optimizes the noise pattern uniformly across a render.
Enabled, by default.
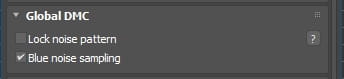
< Global DMC group>
Environment
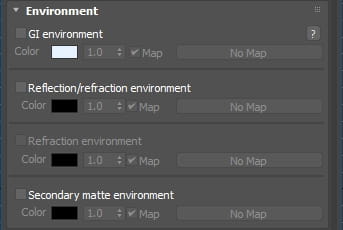
< Environment rollout parameters>
When used, the environment parameters will override the Environment map toggle
GI environment- If turned on, it controls the environment/background Global Illumination parameters .
Color- This function allows users to pick a color from its color swatch dialog and control the intensity with its values.
Map- Users often plug a VRayBitmap with an HDRI in this toggle to produce accurate environment lighting.
Reflection/refraction environment- If turned on, it controls the global reflection/refraction of the environment.
Map- VRayBitmap with an HDRI are often used in this toggle to produce the environment's reflection/refraction.

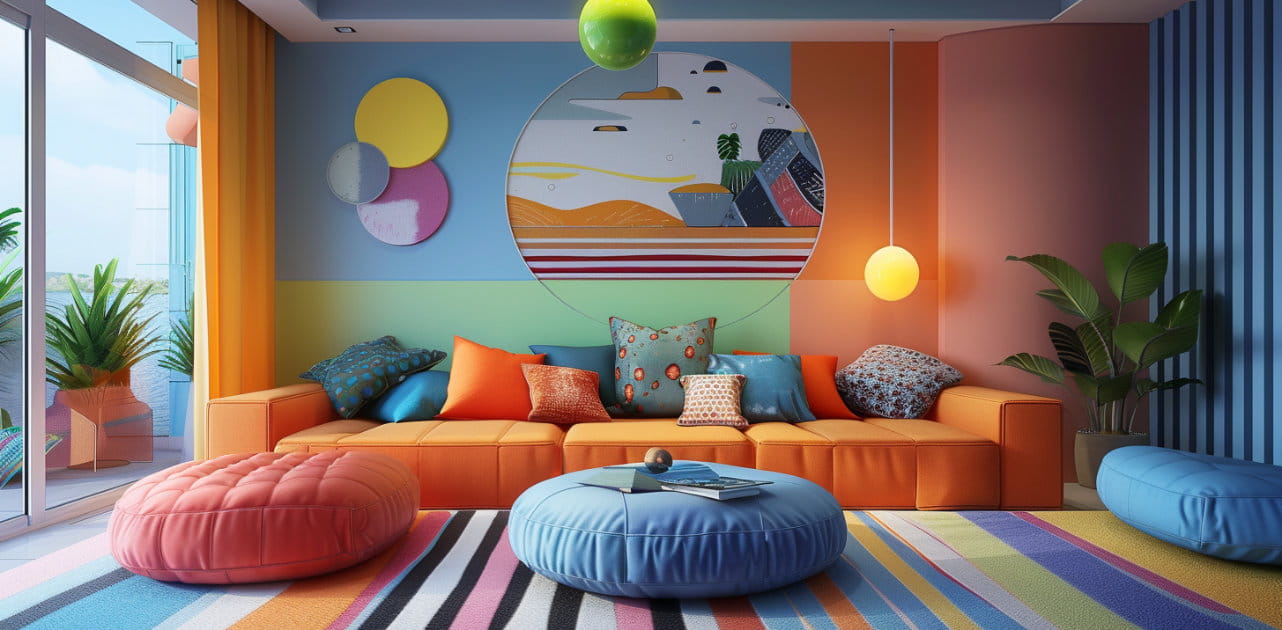
Image by Jamie Cardoso
Color mapping
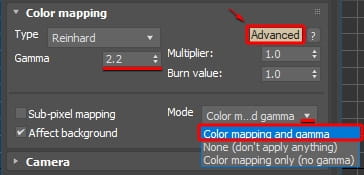
< Color mapping rollout parameters>
These parameters control how the overall render is processed and saved in your computer.
Note: Ensure to click on the Default button to bring up the Advanced parameters.
Type-This function allows users to choose the Color mapping type, from its dropdown list. One of the most popular ones in the Linear multiply.
I personally prefer the Exponential type, because of its overall photographic look and the ability to balance overexposed renders.
Default type, Reinhard
Gamma-This function controls the gamma value. The value of 2.2 is the most accurate one.
Users should also set the gamma from Preference Settings to 2.2 .

< Gamma Preference Settings to 2.2>
Multiplier-This function controls the intensity of the multiplier in the render. Default value, 1.0.
Burn value- This option controls the intensity of exposed/burnt areas in the render. Default value, 1.0.
This function is quite useful to help integrate Photomontages or Verified views. In addition, it can be used to help reduce overly bright areas.
Sub-pixel mapping-This function applies the color mapping to individual sub-pixel samples.
Also, it helps to remove artefacts such as bright pixel dots on a render. It often increases the rendering time slightly, when enabled.
Disabled, by default.
Affect background- When on, the color mapping is applied to the environment map.
For photomontages, users often disable this option to avoid doubling the gamma. Enabled, by default.
Mode- This option controls how the VFB renders are saved into your hard drive.
Note: Color mapping and gamma mode is the best, because it saves the renders exactly as seen in the VFB. Ensure to always setup your scene in this manner prior to beginning a project.
Scenes from earlier versions of 3ds max should be merged in a scene setup with Color mapping and gamma mode. Otherwise saved images/renders may differ from what is seen in the VFB.
Default mode, Color mapping only (no gamma).
Global Illumination
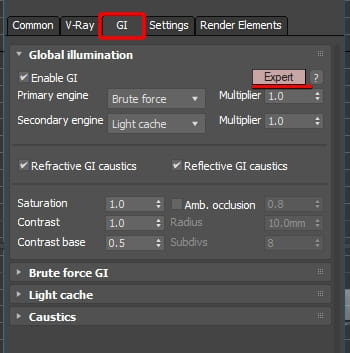
< Global Illumination parameters>
Note: Ensure to click on the Default button twice to bring up the Expert parameters.
Enable GI- This function activates the Global Illumination.
Enabled, by default.
Primary engine-This option computes the GI primary bounces. Its dropdown menu allows users to choose other prime engines such as Irradiance or Light cache.
Note: Brute force is the most accurate Primary engine. Its parameters are greyed out because it's physically accurate(unbiased).
Furthermore, in V-Ray 5, lights, render elements and most parameters only work with Brute force.
Default, Brute force.

<Brute force primary engine>
Secondary engine- This option computes the GI secondary bounces. Light cache is the default secondary engine.
Multiplier-For both, Primary and secondary engine, this function helps to reinvigorate or diminish their influence in the GI calculation.
Default value, 1.0.
Refractive/Reflective GI caustics- When enabled, these functions allow the GI caustics to be computed on refractive and/or reflective (transparent) surfaces.
Enabled, by default.
Note: They only work when the Caustics rollout parameters are enabled.
Caustics parameters are disabled, by default.
Saturation- This option controls the color saturation of the GI effect. Higher values cause the GI to produce more saturated colors.
Default value, 1.0.
Contrast- This function determines the overall contrast of the GI. Higher values increase the GI contrast.
Default value, 1.0.
Contrast base- This option controls the base contrast values. Default value, 0.5.
Amb. occlusion- When on, it adds connecting shadows on indirectly lit areas globally. Disabled, by default.
Note: Ambient occlusion works in a similar way to VRayDirt (previously covered).
Radius- This option controls the propagation of the connecting shadows from its starting point. Default value, 10mm.
Subdivs- This option controls the smoothness of the connecting shadows. Higher values yield smoother results.
Default value, 8
Light cache

< Light cache parameters>
This secondary GI engine is an approximation (biased). It's ideal for most high resolution still renders and animations,
Preset- This function allows users to choose between, Still and Animation presets.
The Still preset comes with the default Subdivs value set to 1000.
The Animation preset comes with the default Subdivs value set to 3000.
Subdivs- This function determines the accuracy of the light cache calculation. Extremely high values produce results closer to Brute force (unbiased).
Values between 1000 to 3000 work well for most scenes. Default value, 1000.
Sample size-This function controls the spatial detail of light cache. The default value of 0.01 works well for most scenes and animations.
Default value, 0.01
Show calc. phase-This function displays the pre calculation of the light cache in the VFB, prior to rendering .
Enabled, by default.
Store direct light- This function caches the direct light (if any) in the light cache calculation.
Enabled, by default.
Retrace-This function retraces the light in tight areas such as corners, etc. Having this option turned on prevents light leaks and flickering.
Default value, 2.0. Higher values increase the light cache pre-calculation time.
Note: The value of 8.0 is ideal for animations.
Mode- This option allows users to choose between, Single Frame or From file mode.
Default Mode, Single frame.
Save- This toggle allows users to name and save a Light cache file (*.vrlmap)
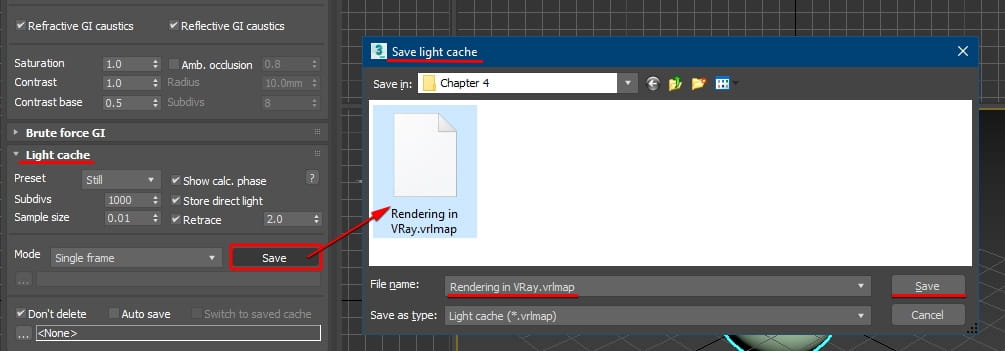
< Save Light cache dialog>
Don't delete-When turned on, it keeps the light cache in memory after rendering. It's faster for subsequent renders.
However, it uses up computer memory.
Enabled, by default.
Auto save-When enabled, it automatically saves the light cache file entered in the toggle below (<None>).
Disabled, by default.
Switch to saved cache- This function only becomes available if the Auto save option is enabled.
It automatically uploads the saved light cache file in the toggle below(<none>), after being saved previously.
Users tend to enable the Don't render final image option whilst saving the light cache file. Having this function enabled will allow users to save the light cache pre-calculation file without having to render the image.
Also, ensure to disable the Don't render final image option, prior to sending the final render
You can buy full book V-Ray 5 for 3ds Max 2020: 3D Rendering Workflows from Amazon.
Book is filled with tutorials and each tutorial includes a 3d project scene to guide users through the production and the post-production processes.
The book contains also an overview of the best techniques to approach clients via emails, calls, meetings, and via social media. There are also key insights into the best practices of handling projects, pricing, contracts, invoices, the pre-production, production, and the post-production, to name but a few.
Throughout the book, users are taken through VRayMtl functions such as Diffuse, Roughness, Reflect, Glossiness, Metalness, Refract, Index of Refraction (IOR), Abbe number, Fog color, Translucency, BRDF, Coat, Sheen, and Bump.

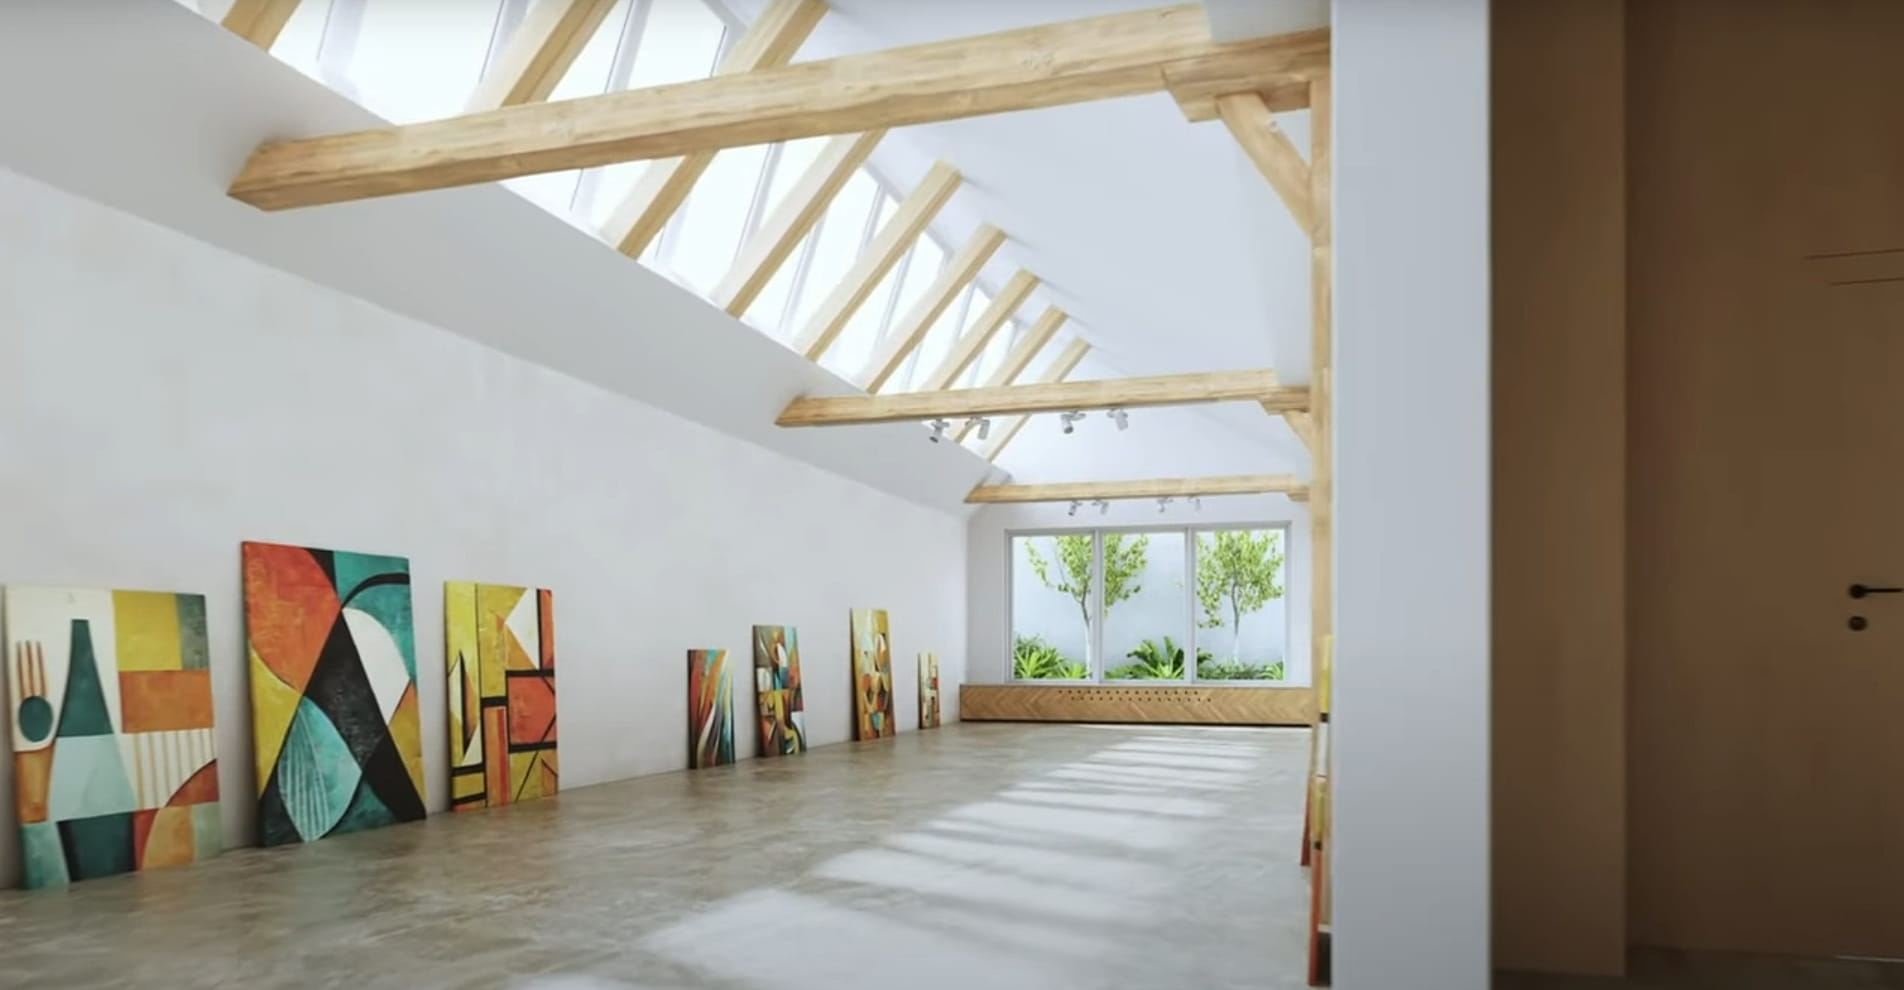
Image by Jamie Cardoso


LEAVE A COMMENT


|

|

|

|

|
 Customer zone
 Your special offers
 Your orders
 Edit account
 Add project
 Liked projects
 View your artist profile
COMMENTS