Evermotion: More Than an Asset Library
How Evermotion became a full-scale production partner for archviz, automotive and synthetic data.


Total: € 0
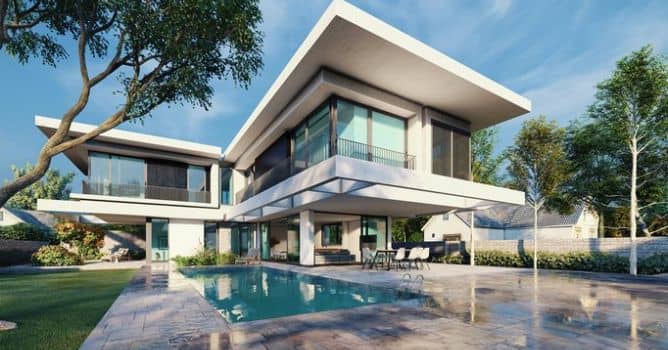

Hi. I am Yones Bana, I am working as an Arch-Viz artist and co-Founder of Vivid Visual Studio. After the launch of Lumion 10, I decided to prepare one of my educational projects in the form of articles for enthusiasts. For this purpose, I used one of the Metropole Architects projects at ISRAEL.
First, I analyzed the project and gathered building images and plans:
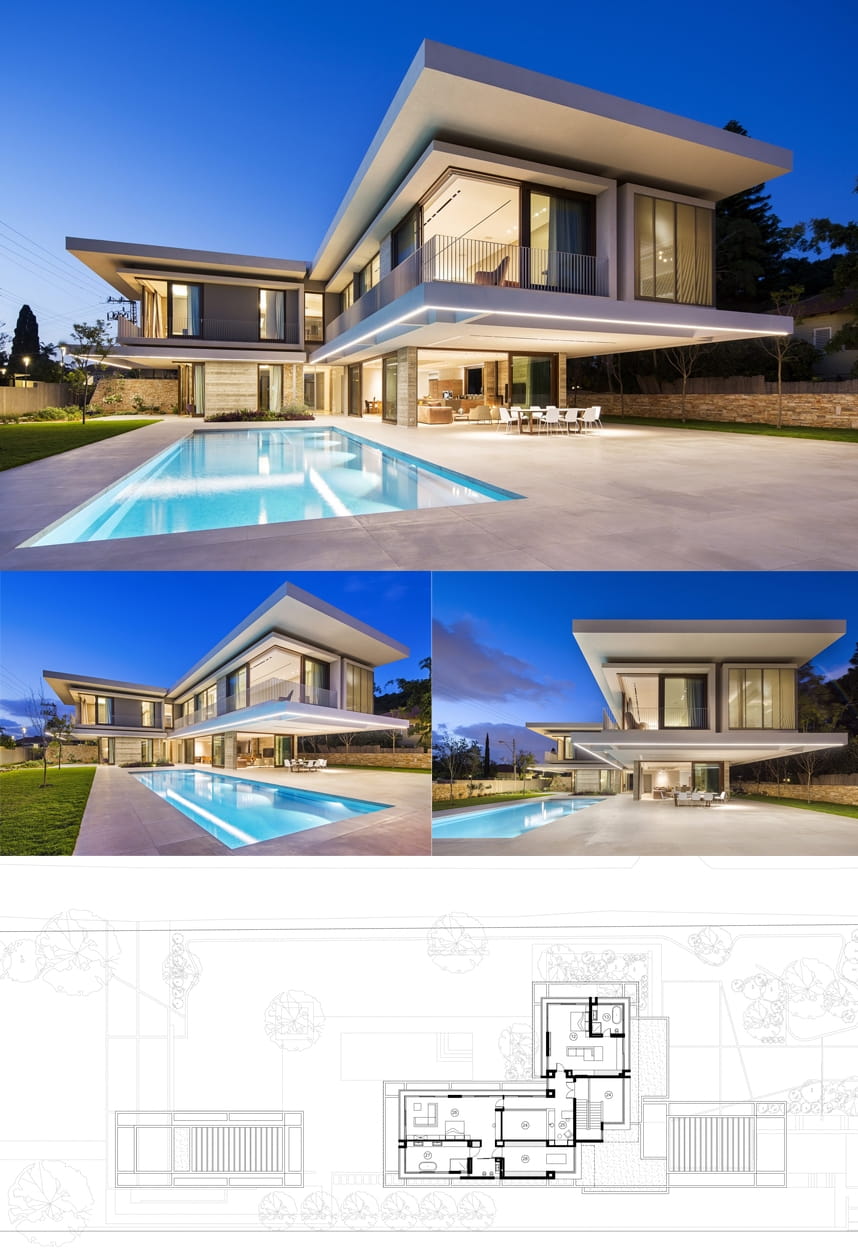
You can find the original project here.
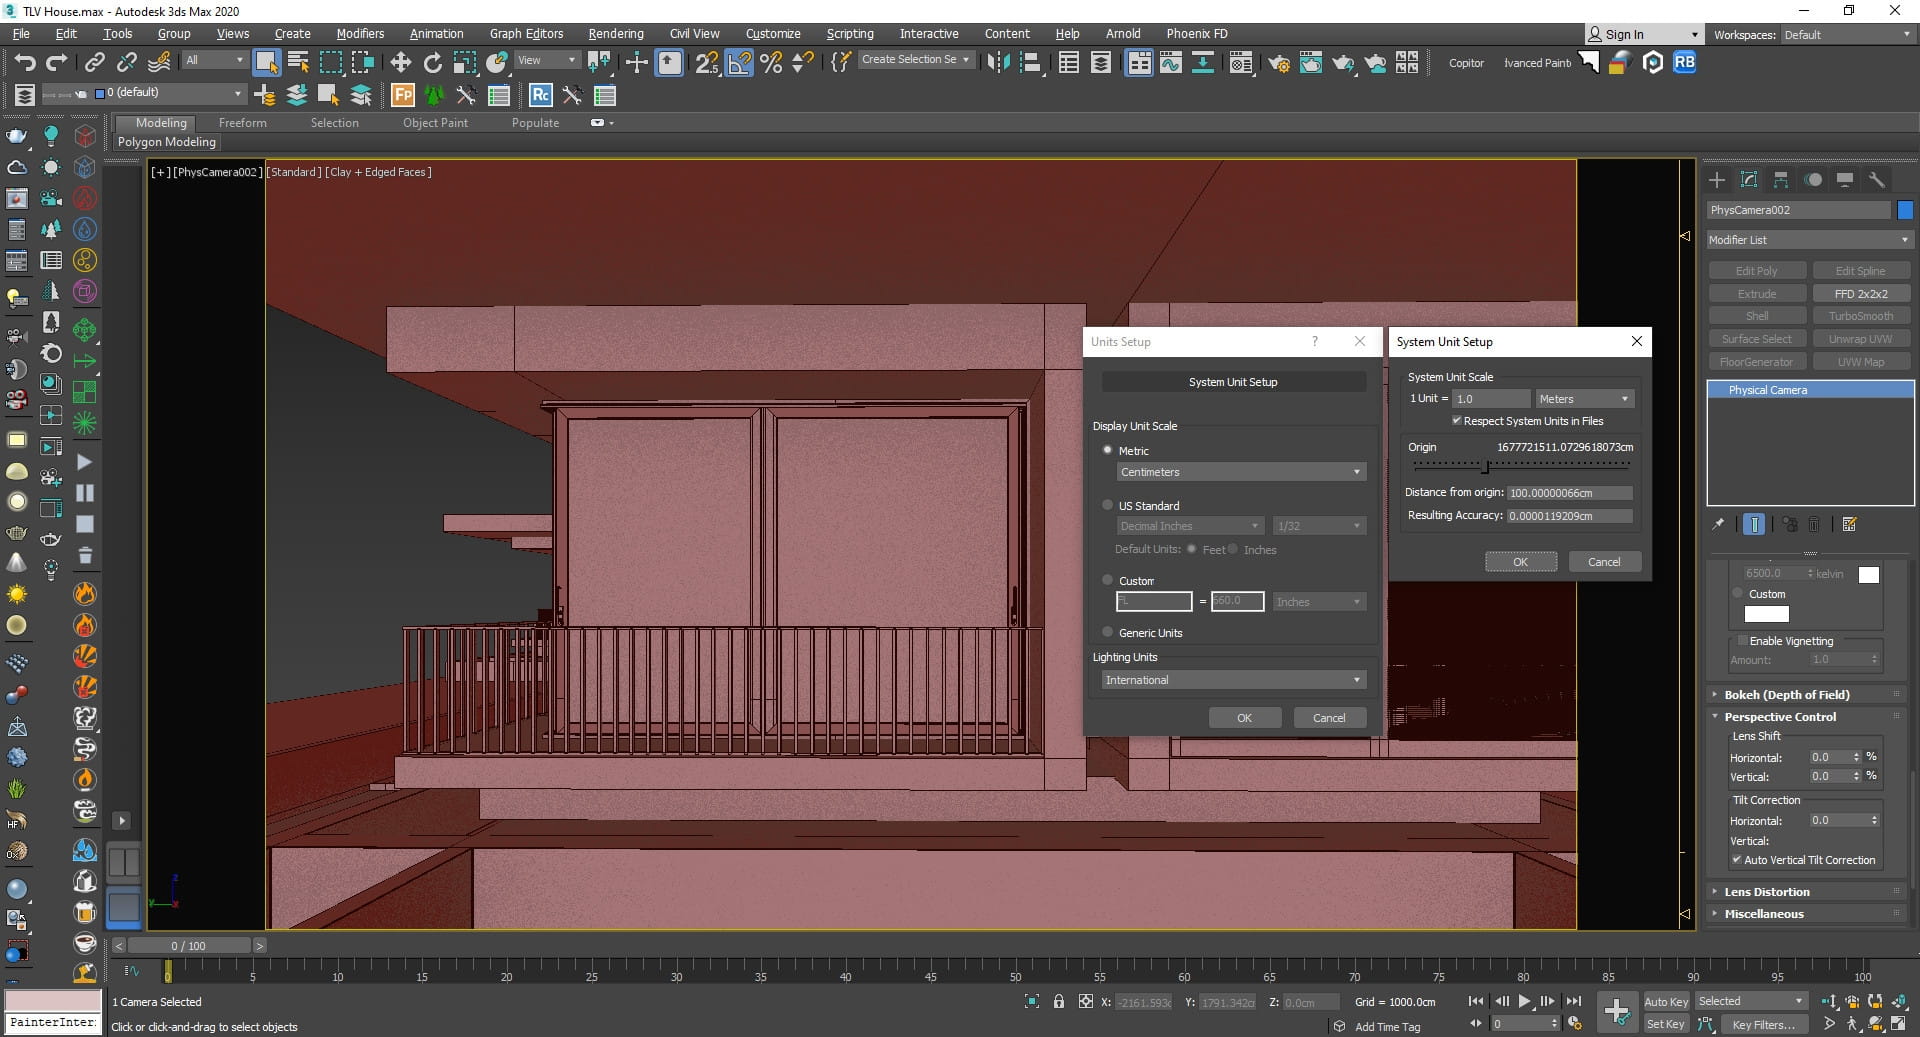
In the first step, we started modeling the project. All steps were performed in the 3ds Max.

In the modeling phase, remember three things:
Thanks to Sheida Sarafrazi for modeling this scene
Create standard material for each part of the model so that we can work as a separate model on the Lumion and their materials.

After complete modeling step, export it as FBX format.

Now its Lumion time!
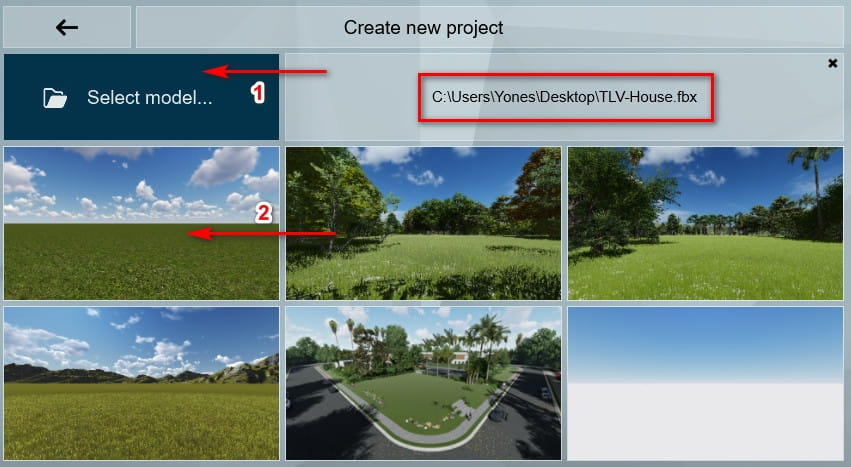
Click on the new section after running the Lumion.
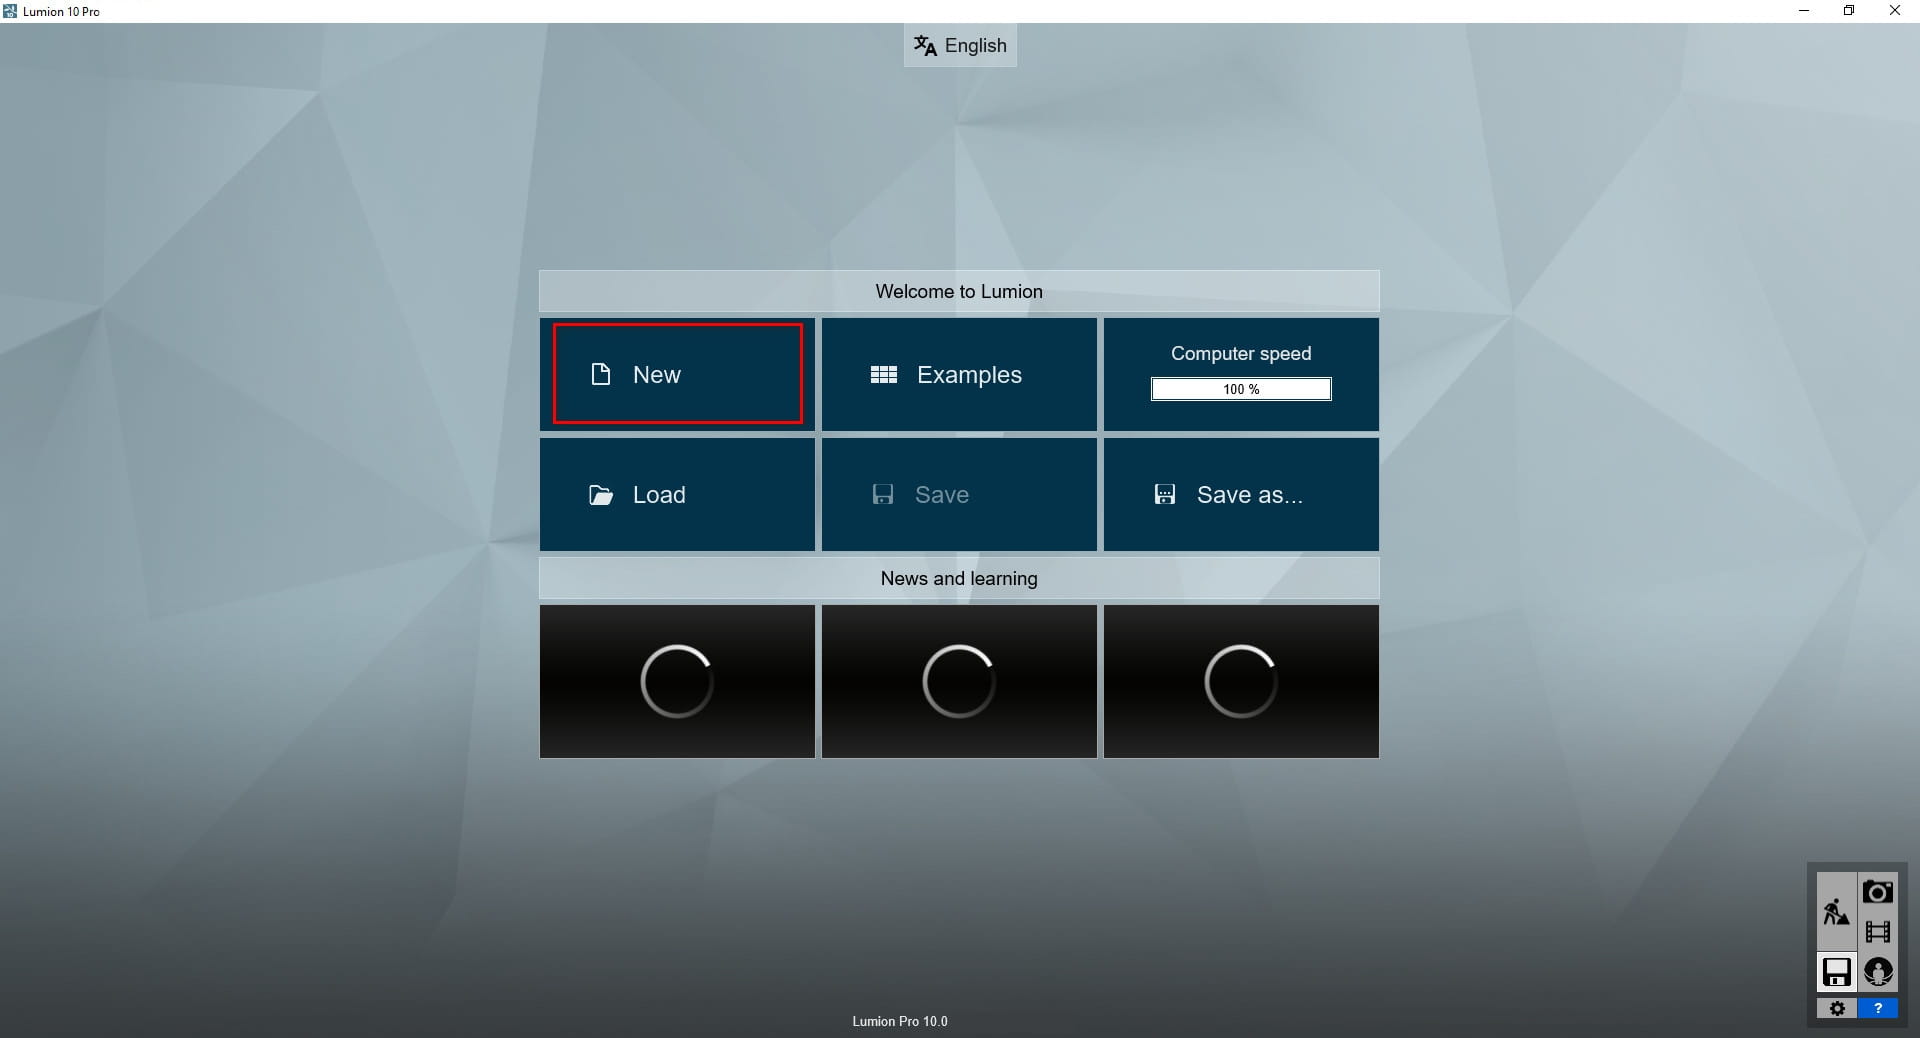
First, click on the Select model button and choose your FBX file, then select one of six built-in scenes to start the project.
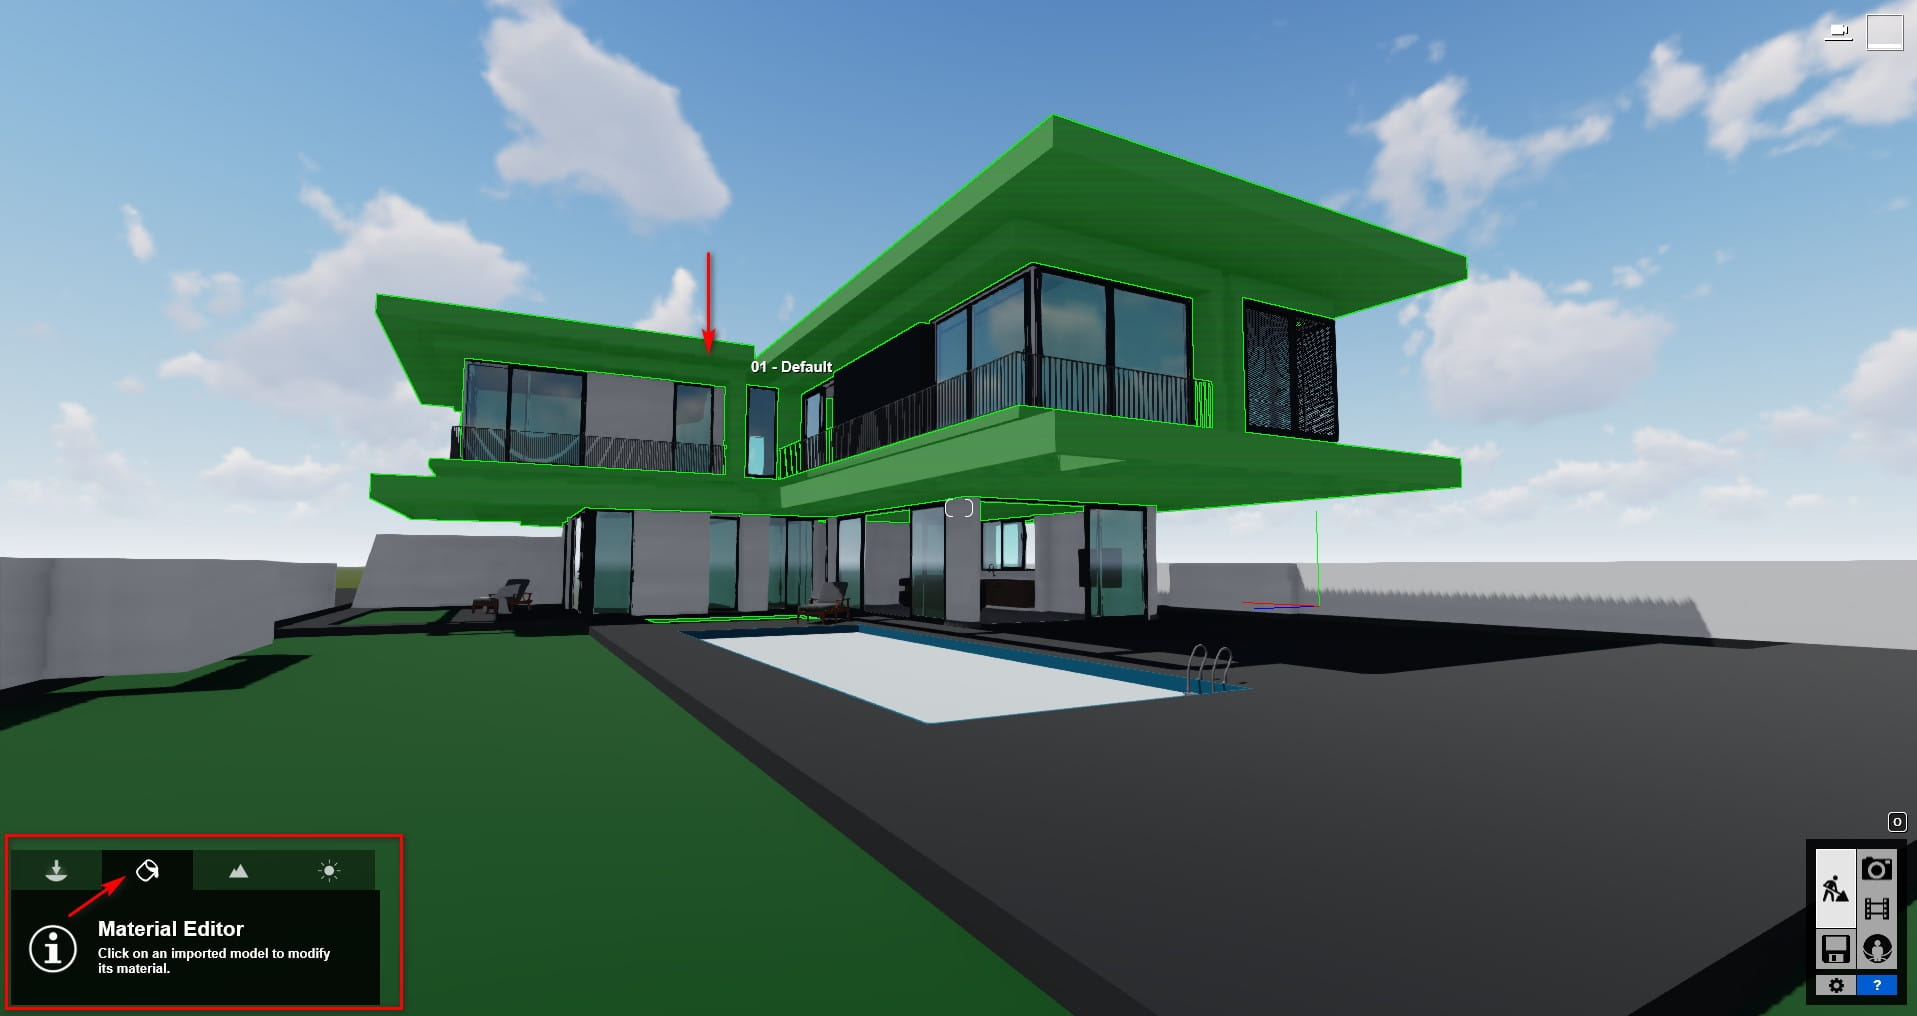
After this step, your model imported to lumion and its ready to go to another steps. Notice that we are in the Build state.

OK. Let's go about making materials. Activate the material section in the lower-left corner and then click on the model you want to create the material for.
At this point, you can access the full archive of built-in materials and access the material you want in different categories.
In addition you can use the WASD keys to walk around, and QE keys to move up and down. If you hold the right mouse button and drag, this will change your view direction. Holding Shift will speed up your movement. It is quite a fluid navigation system.
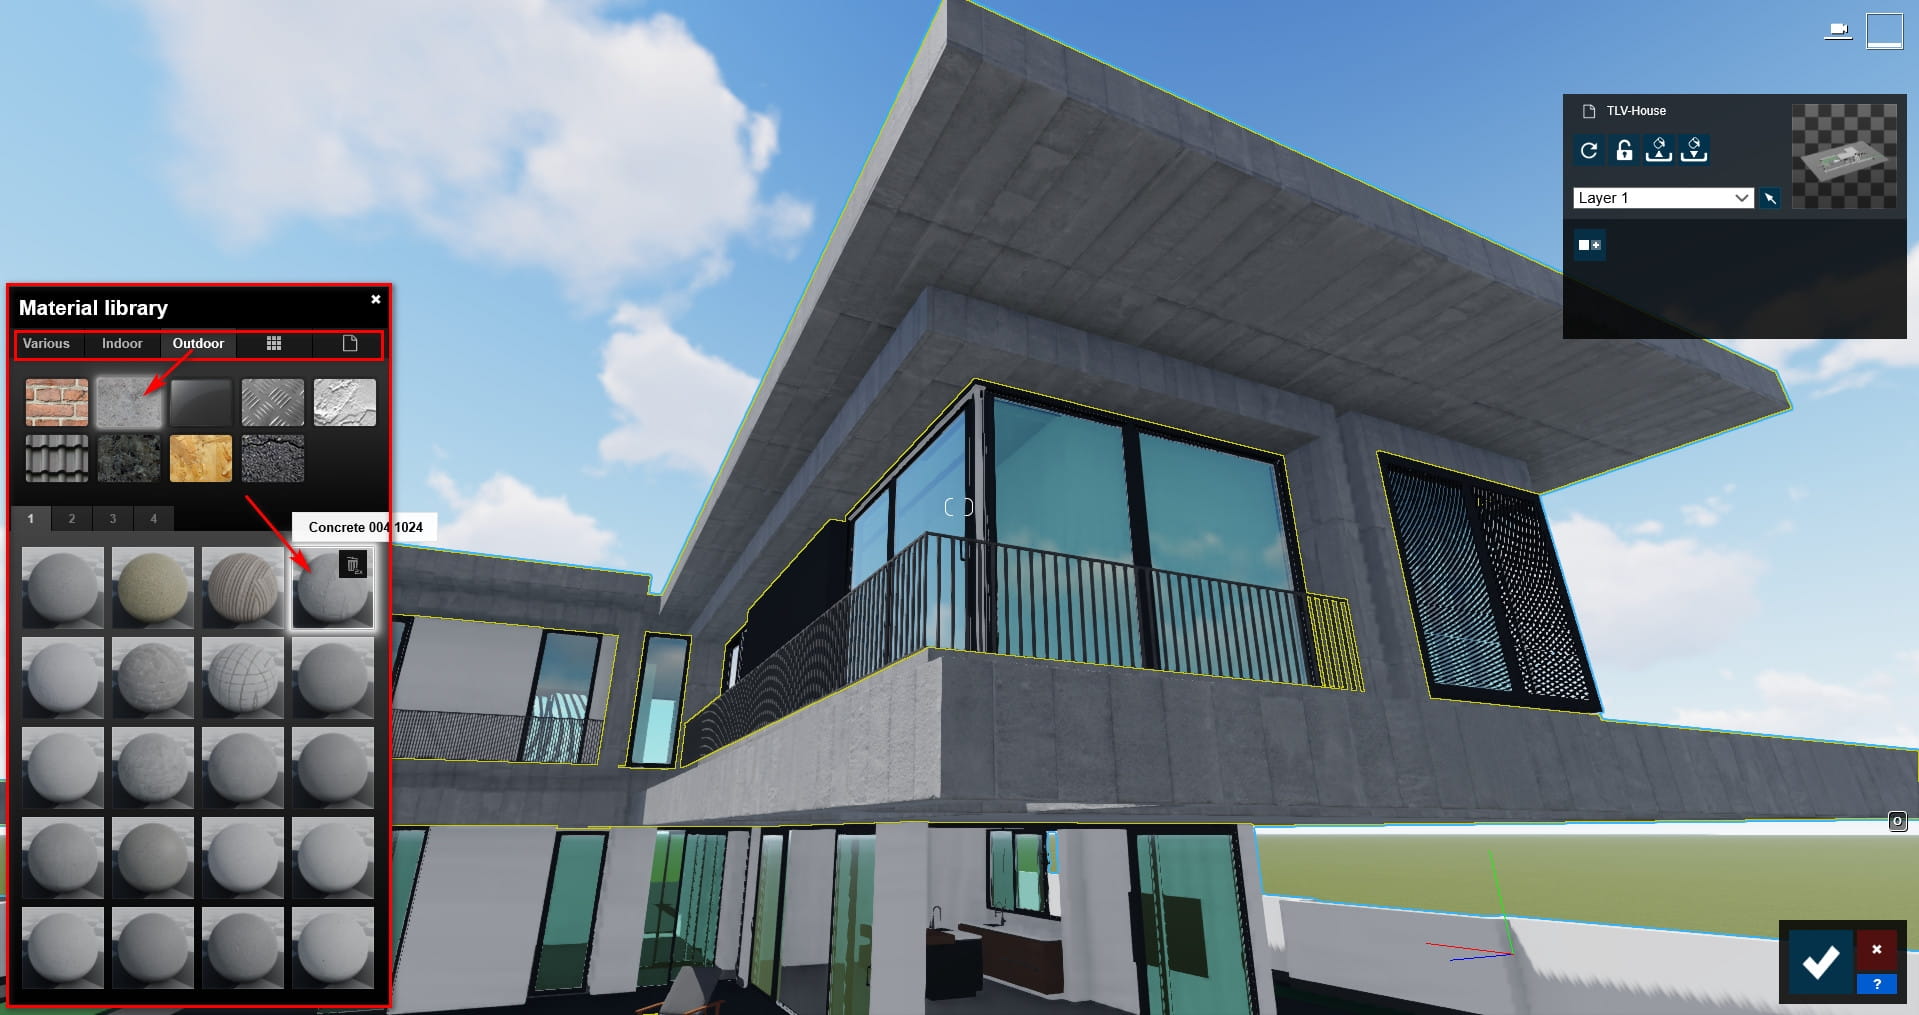
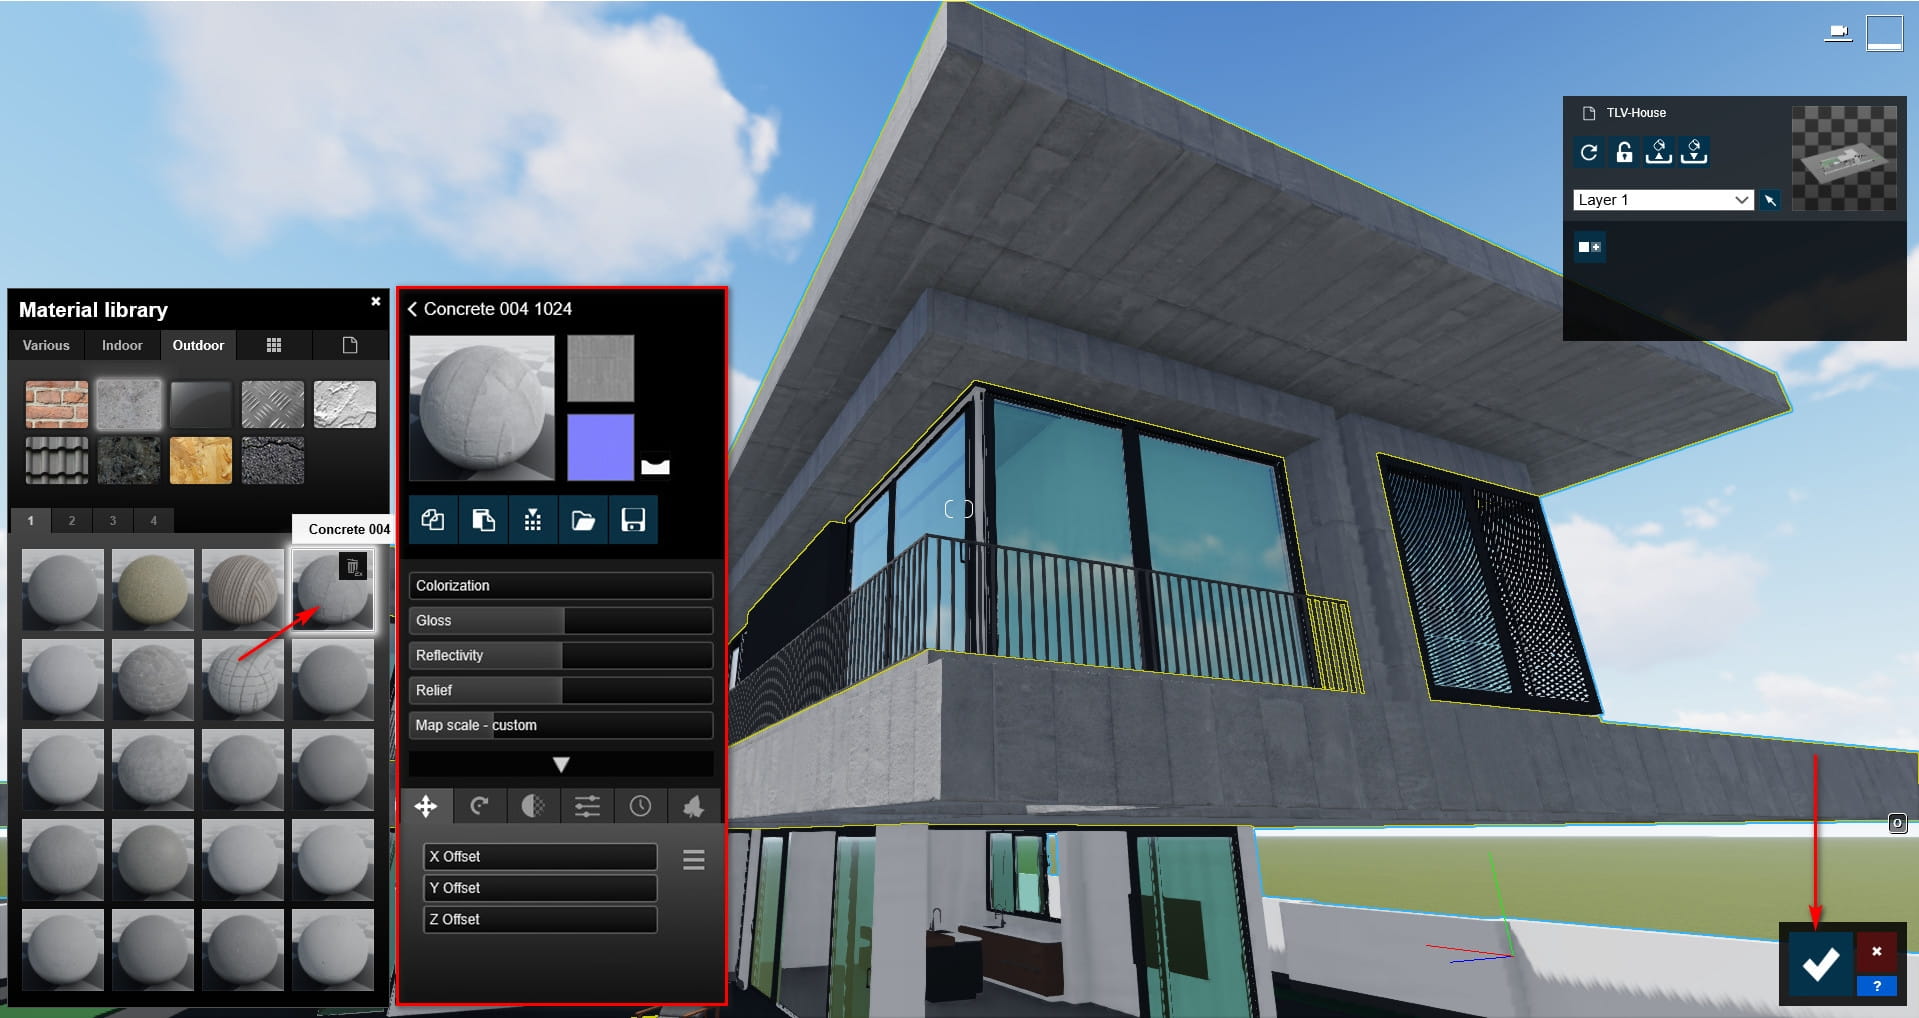
Double-click on the material you want to get more control over. There are many controls on the material, including texture, color, reflection and gloss, bumps, position, orientation, translucency, emissive, weathering and foliage. Click on the OK button after the material is made.
One of the great features in Lumion is to quickly add foliage to walls and other materials in your Lumion renderings.
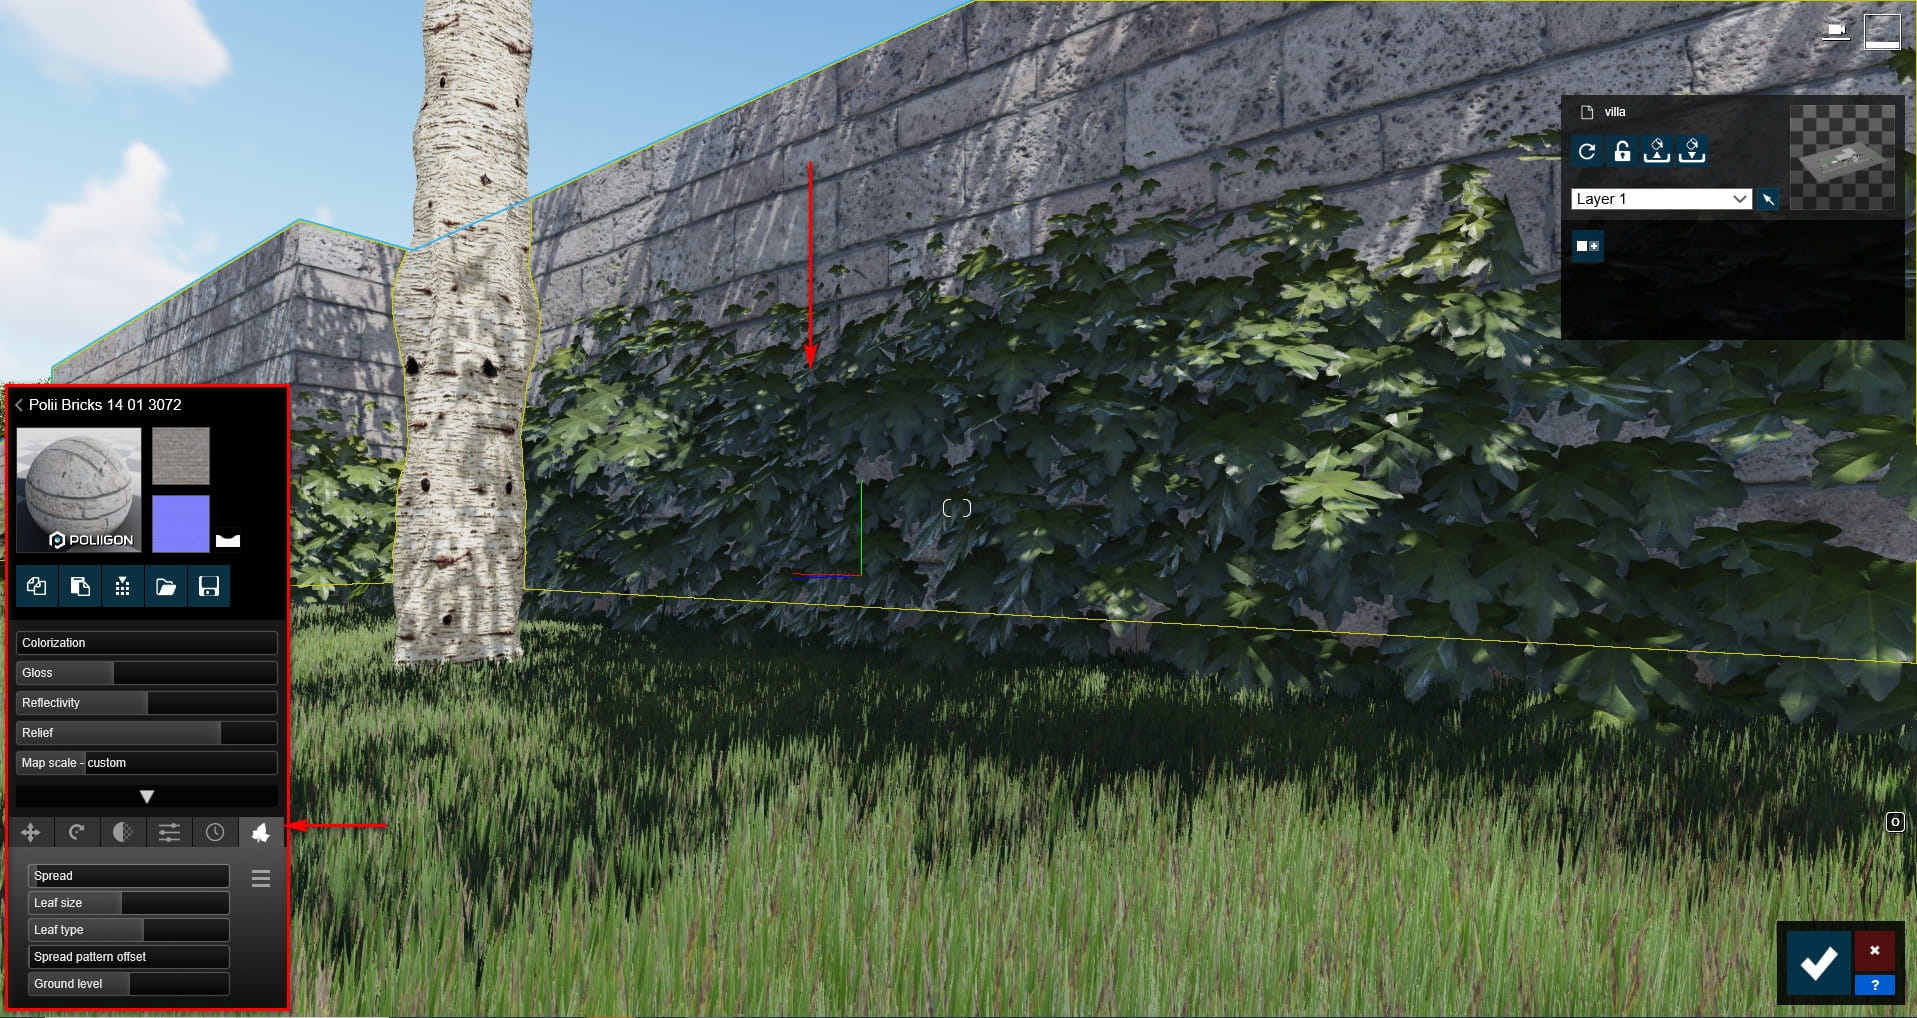
In this project, I use 3D Grass for the yard. This grass is fully editable, letting you set the length, curliness, thickness, size, and patterning, as well as giving you the option to have long or cut grass.

Lumion 10 includes a new tool called the Landscape Cutter. This tool lets you hide the Lumion Landscape below up to 2 rectangular Landscape Cutter objects.

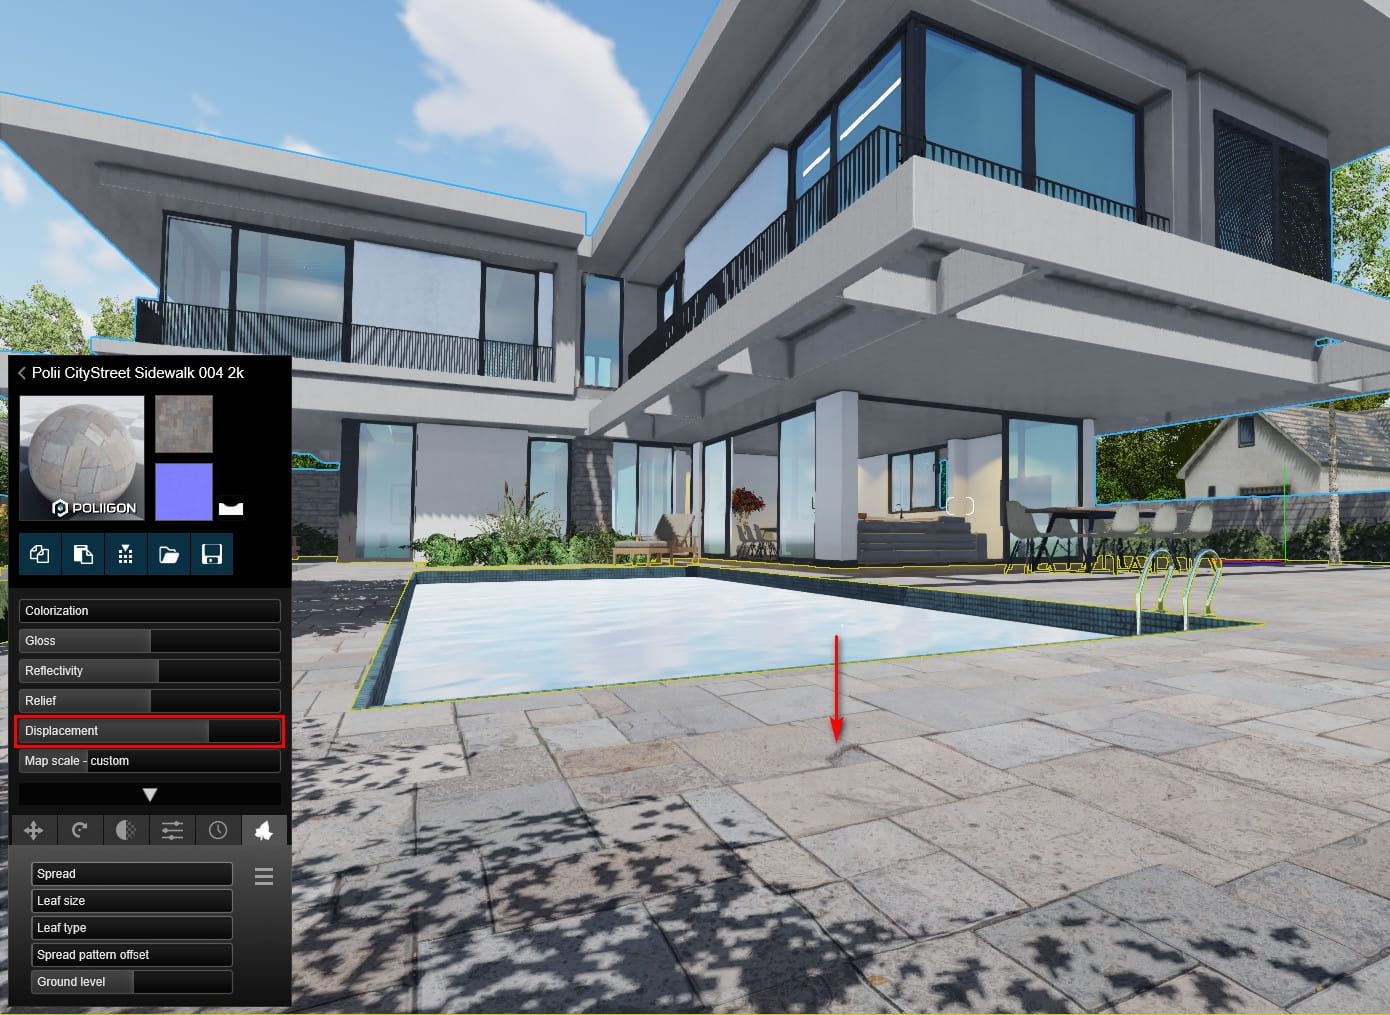
Another big feature in Lumion 10 is the addition of displacement mapping to some materials. With the movement of a slider, you can adjust the depth and geometry of the selected material, giving it a realistic, three-dimensional look and feel. I usually use this feature in subjects and models close to the camera.
It's time to fill the space with a huge archive of built-in models.
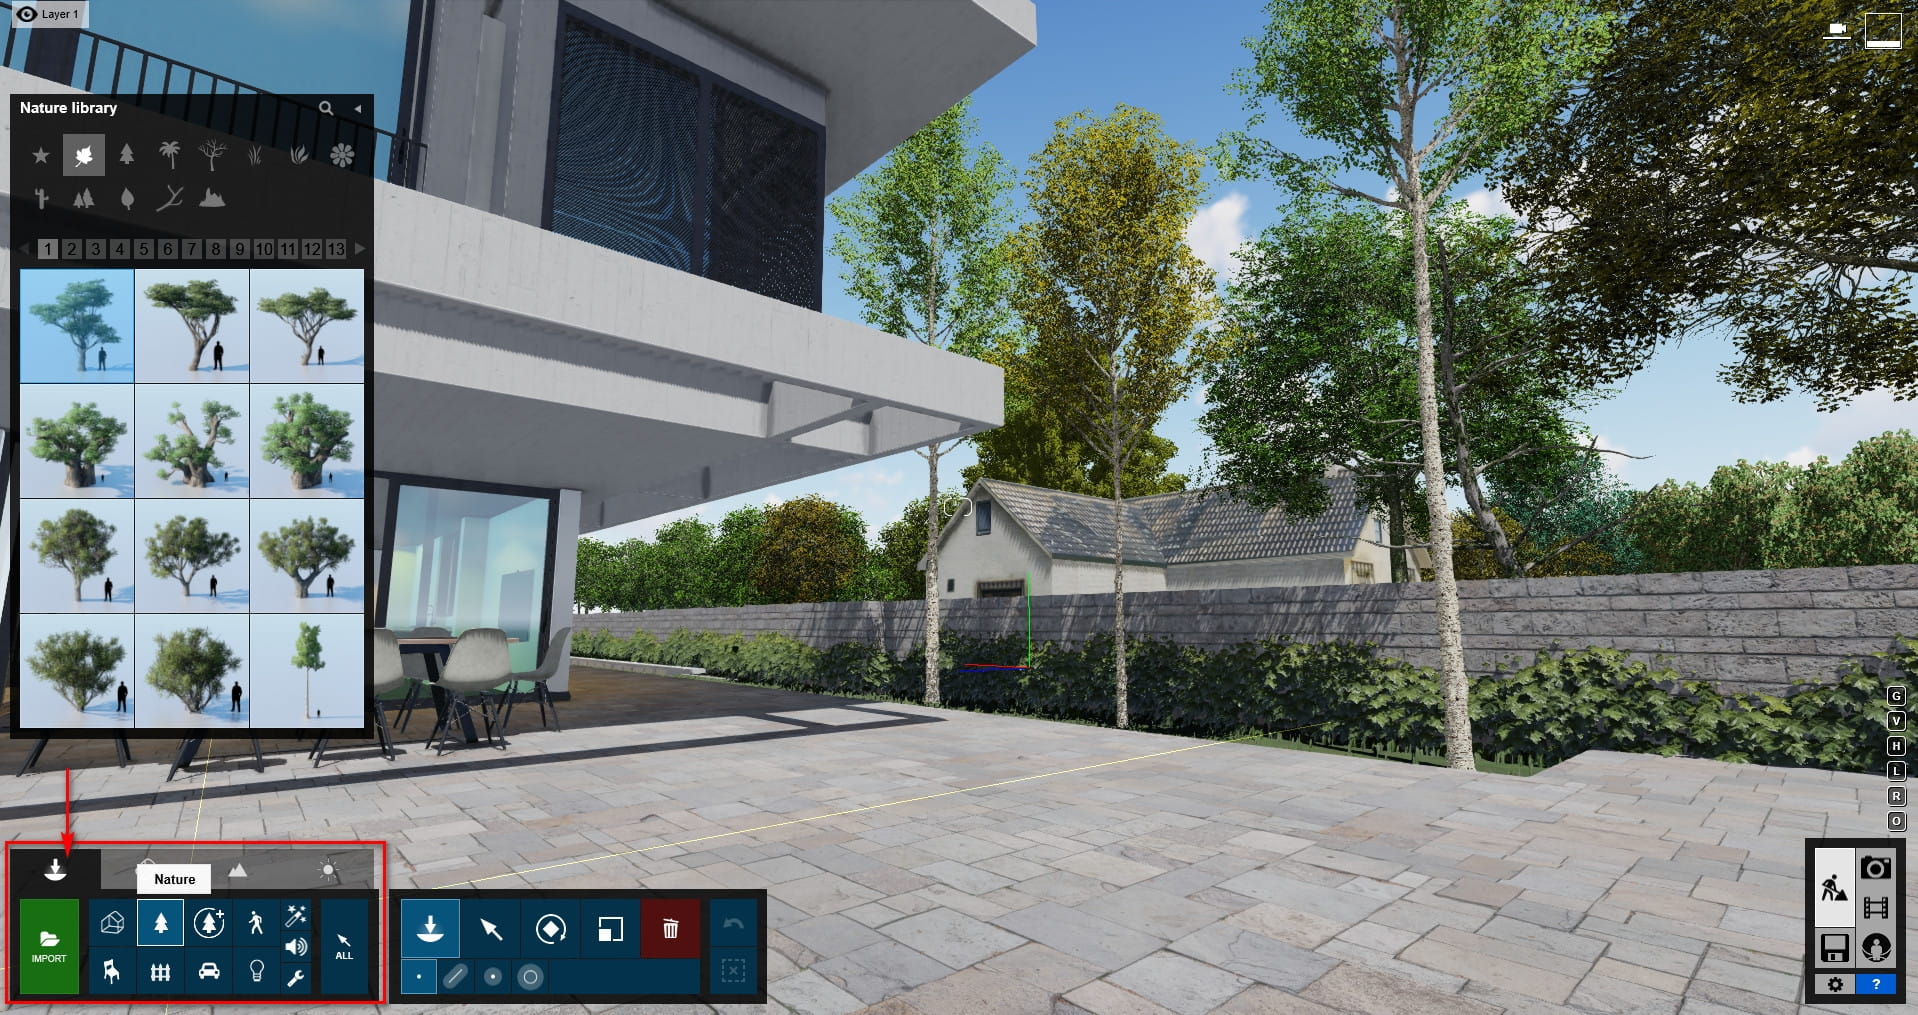
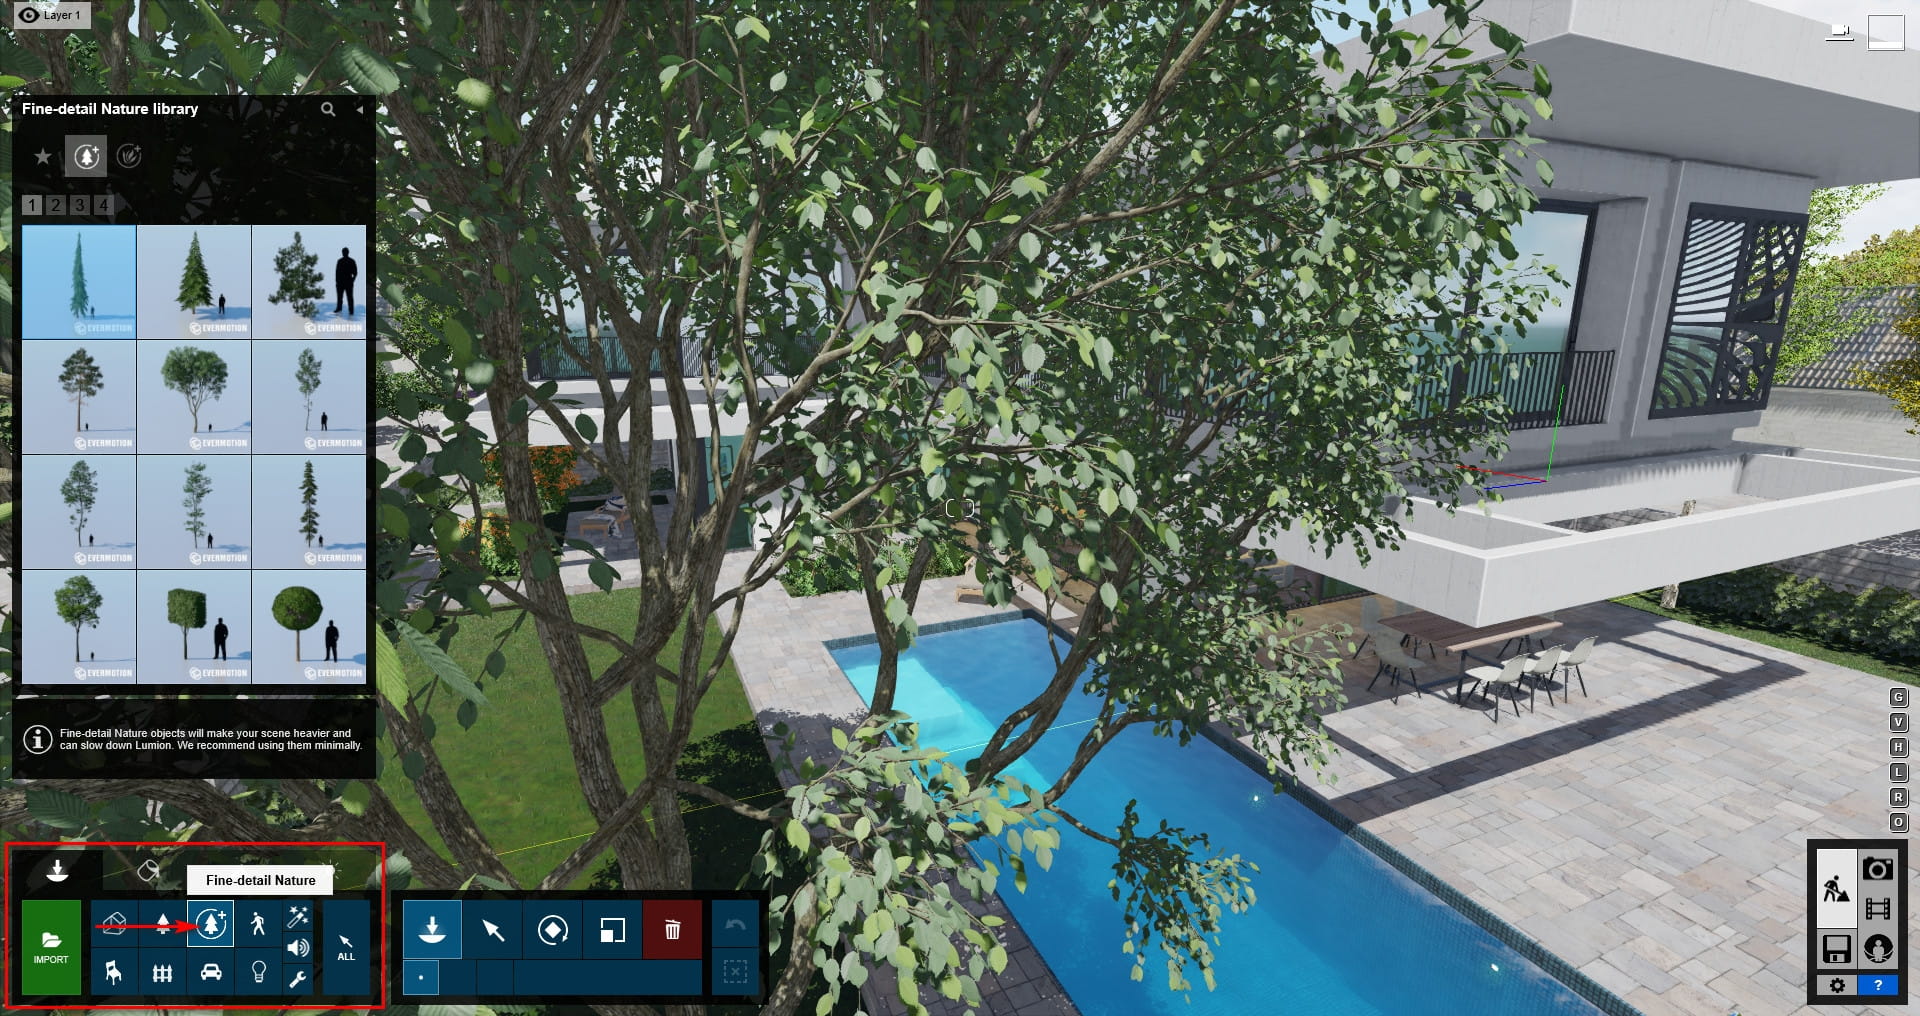
Use fine-Detail Nature for where is close to the camera to get a realistic result.
After finishing the material and filling the scene, go to the photo section and get ready for still rendering.
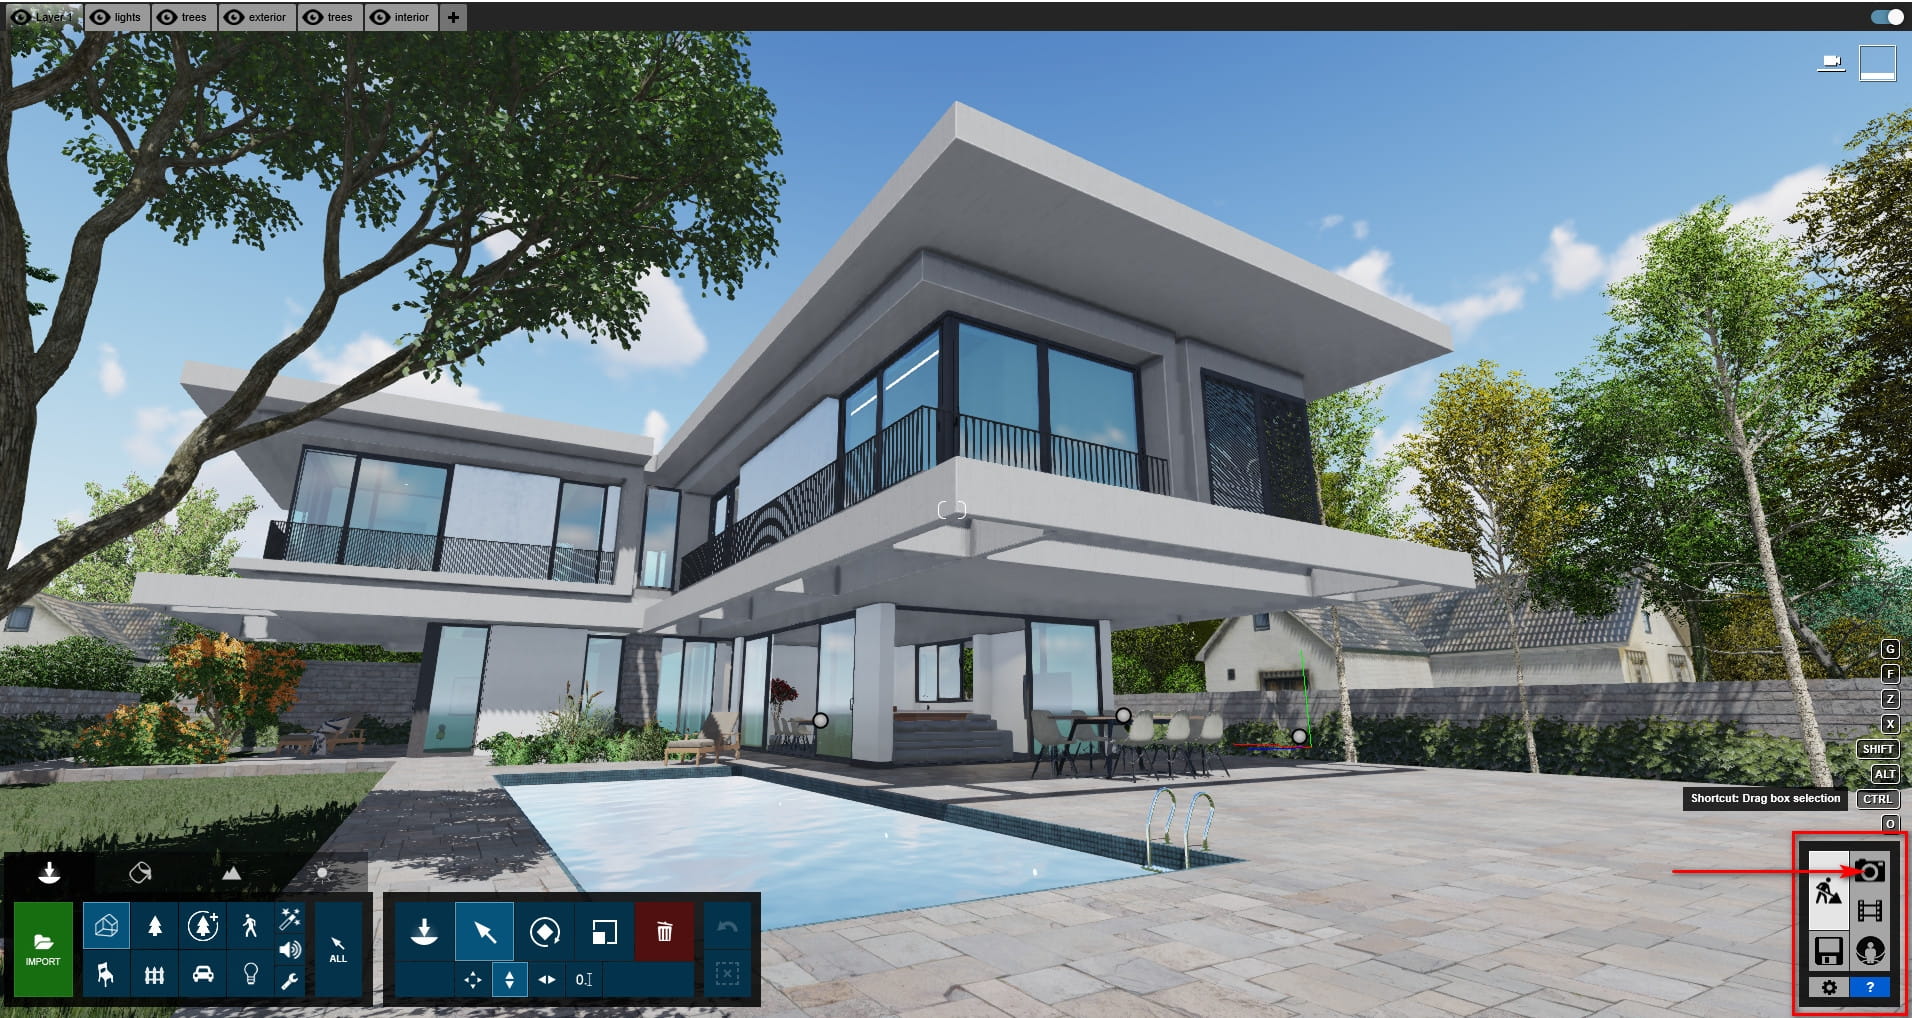
Record the angles you want and click the FX button to apply effects.

These are all effects I have used in this project. Finally click the Render Photos button to enter the render window.
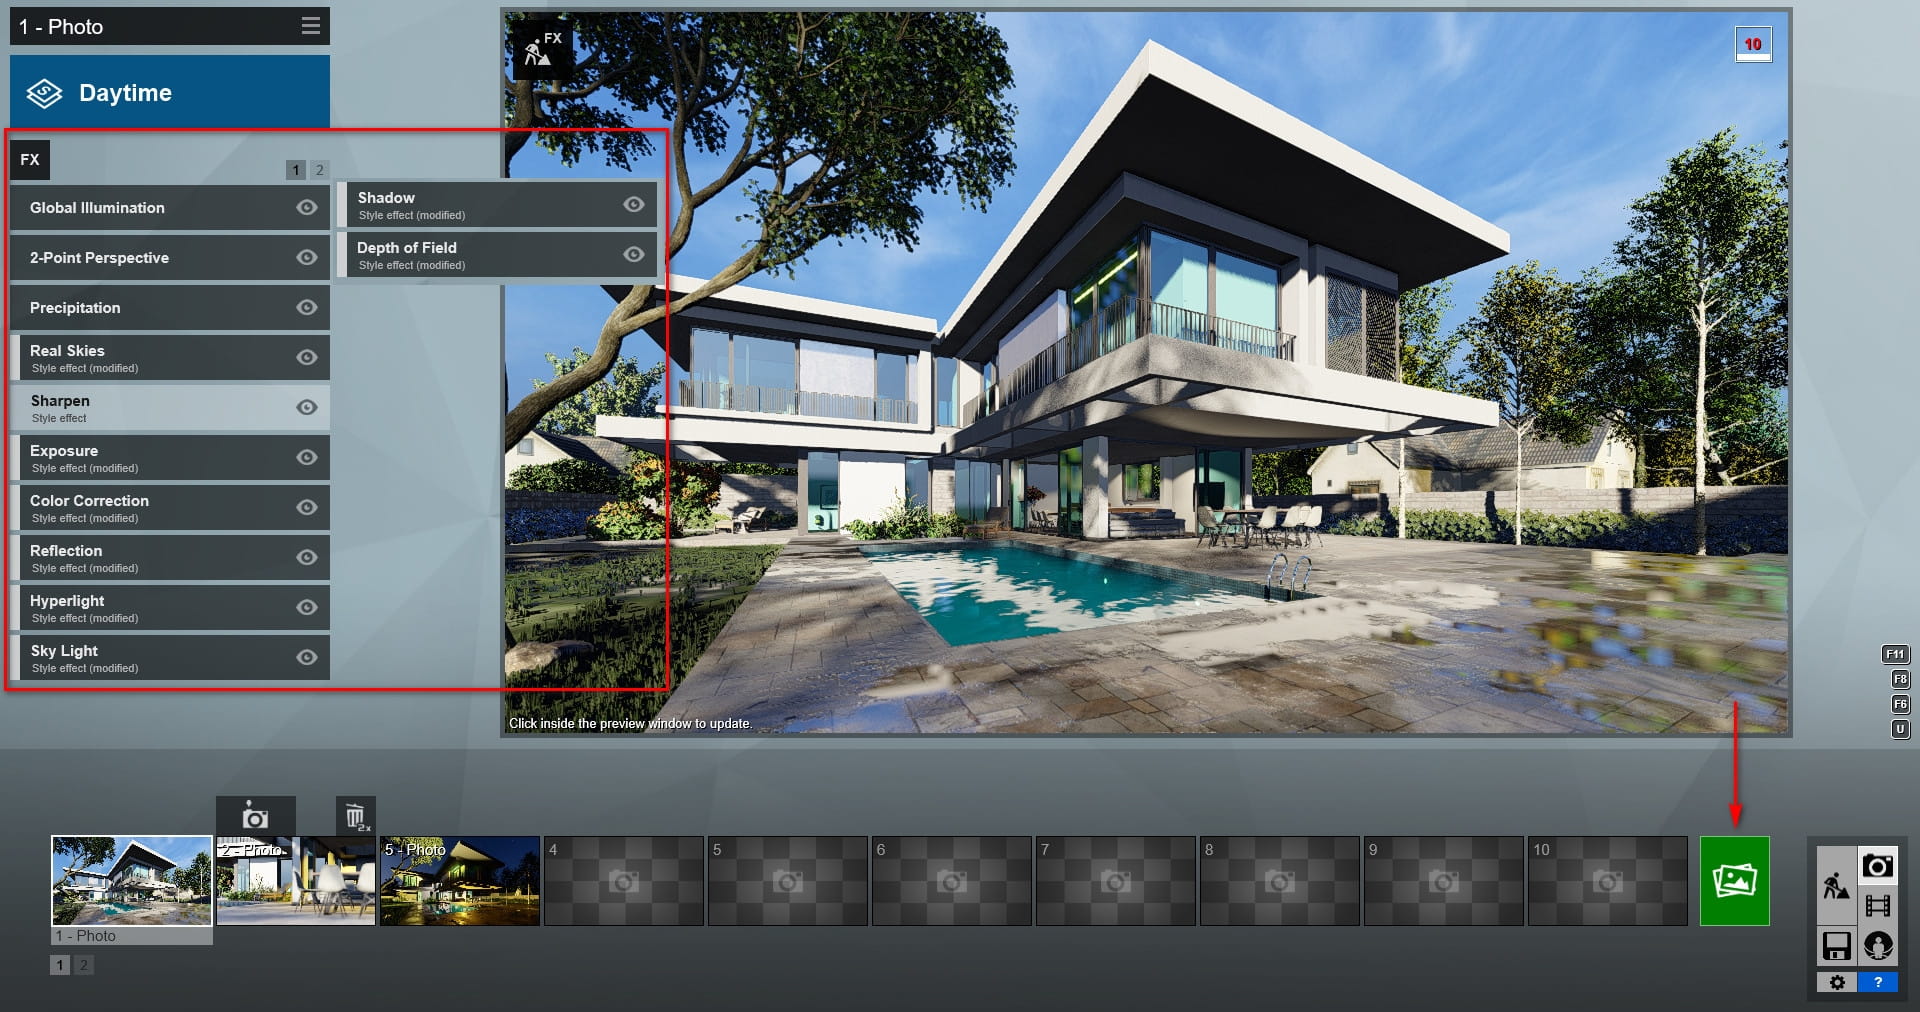
In this window, you can customize the render size as well as the required rendering elements.

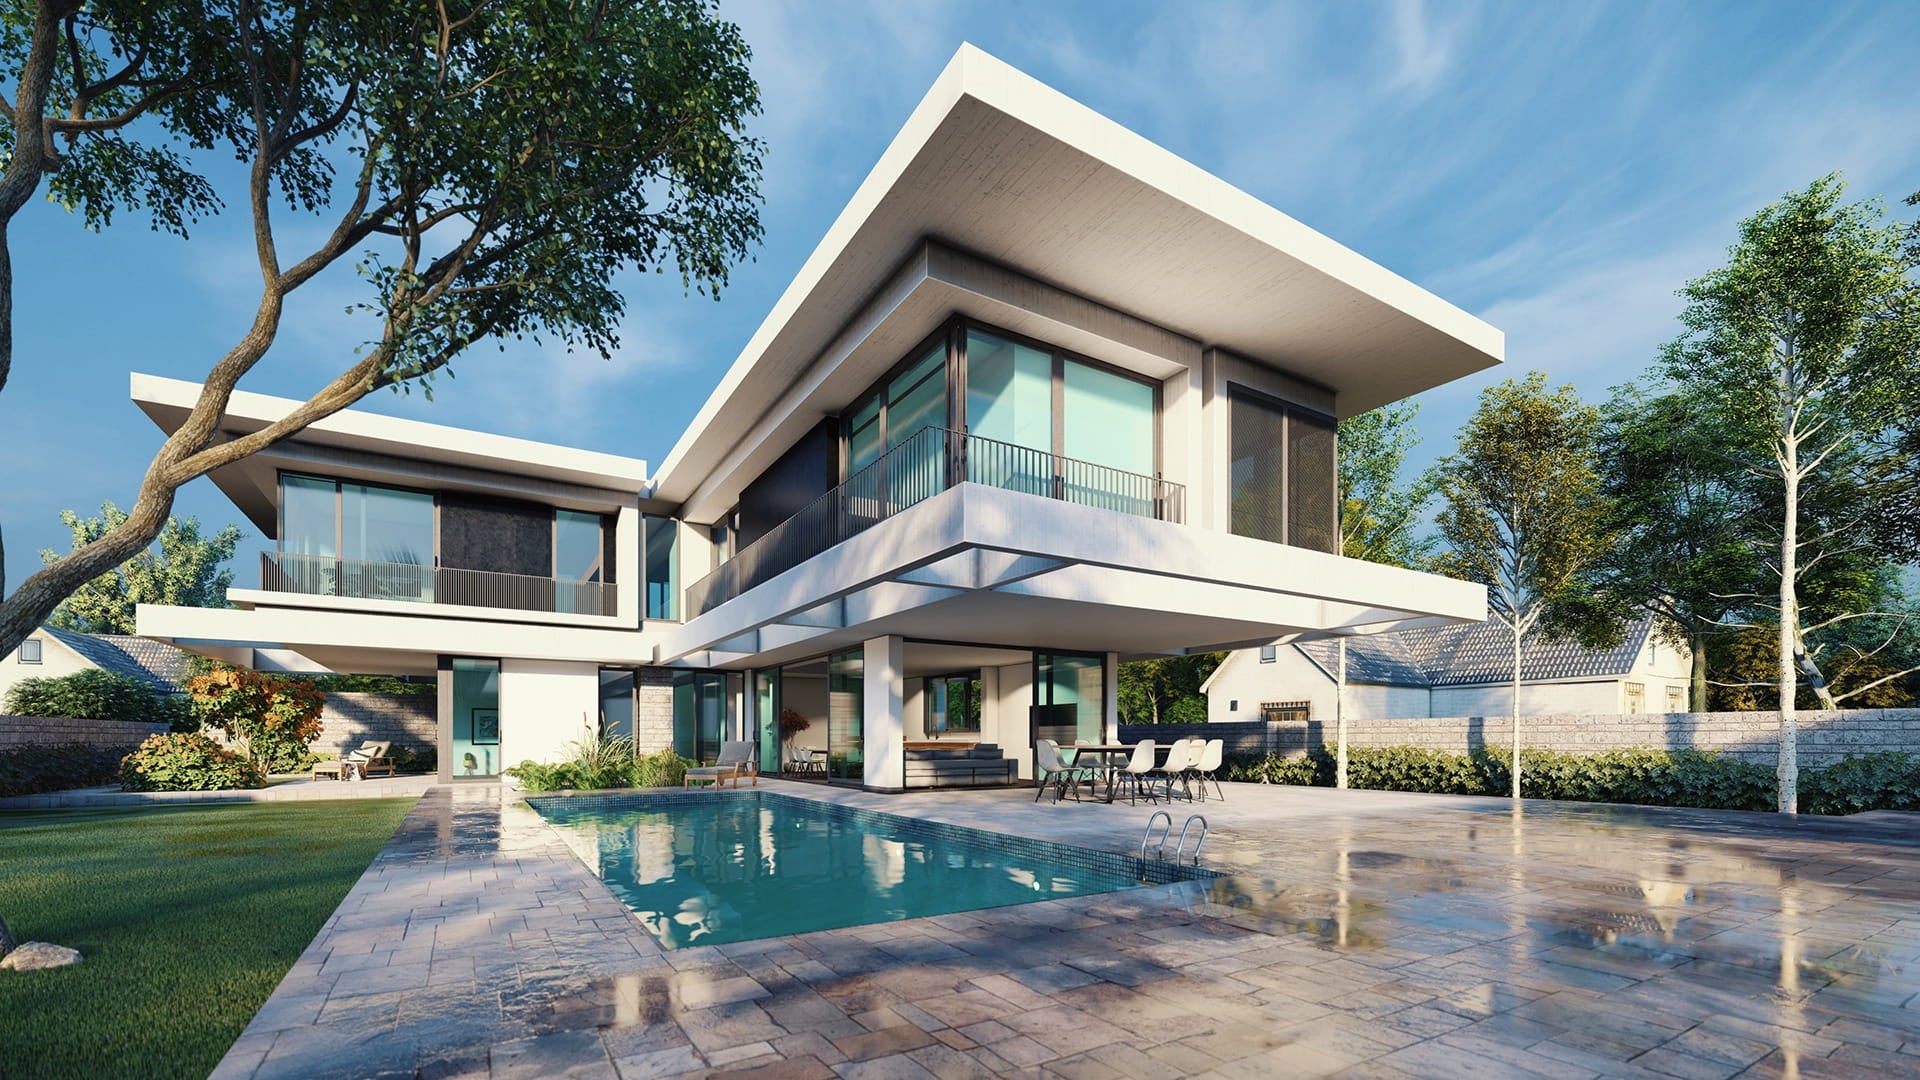
Before you hit the render button I have to tell you that you can expect a miracle. A miracle in speed and quality. The render was done in 1920*1080 size with an Nvidia GTX1080TI in 18 seconds!
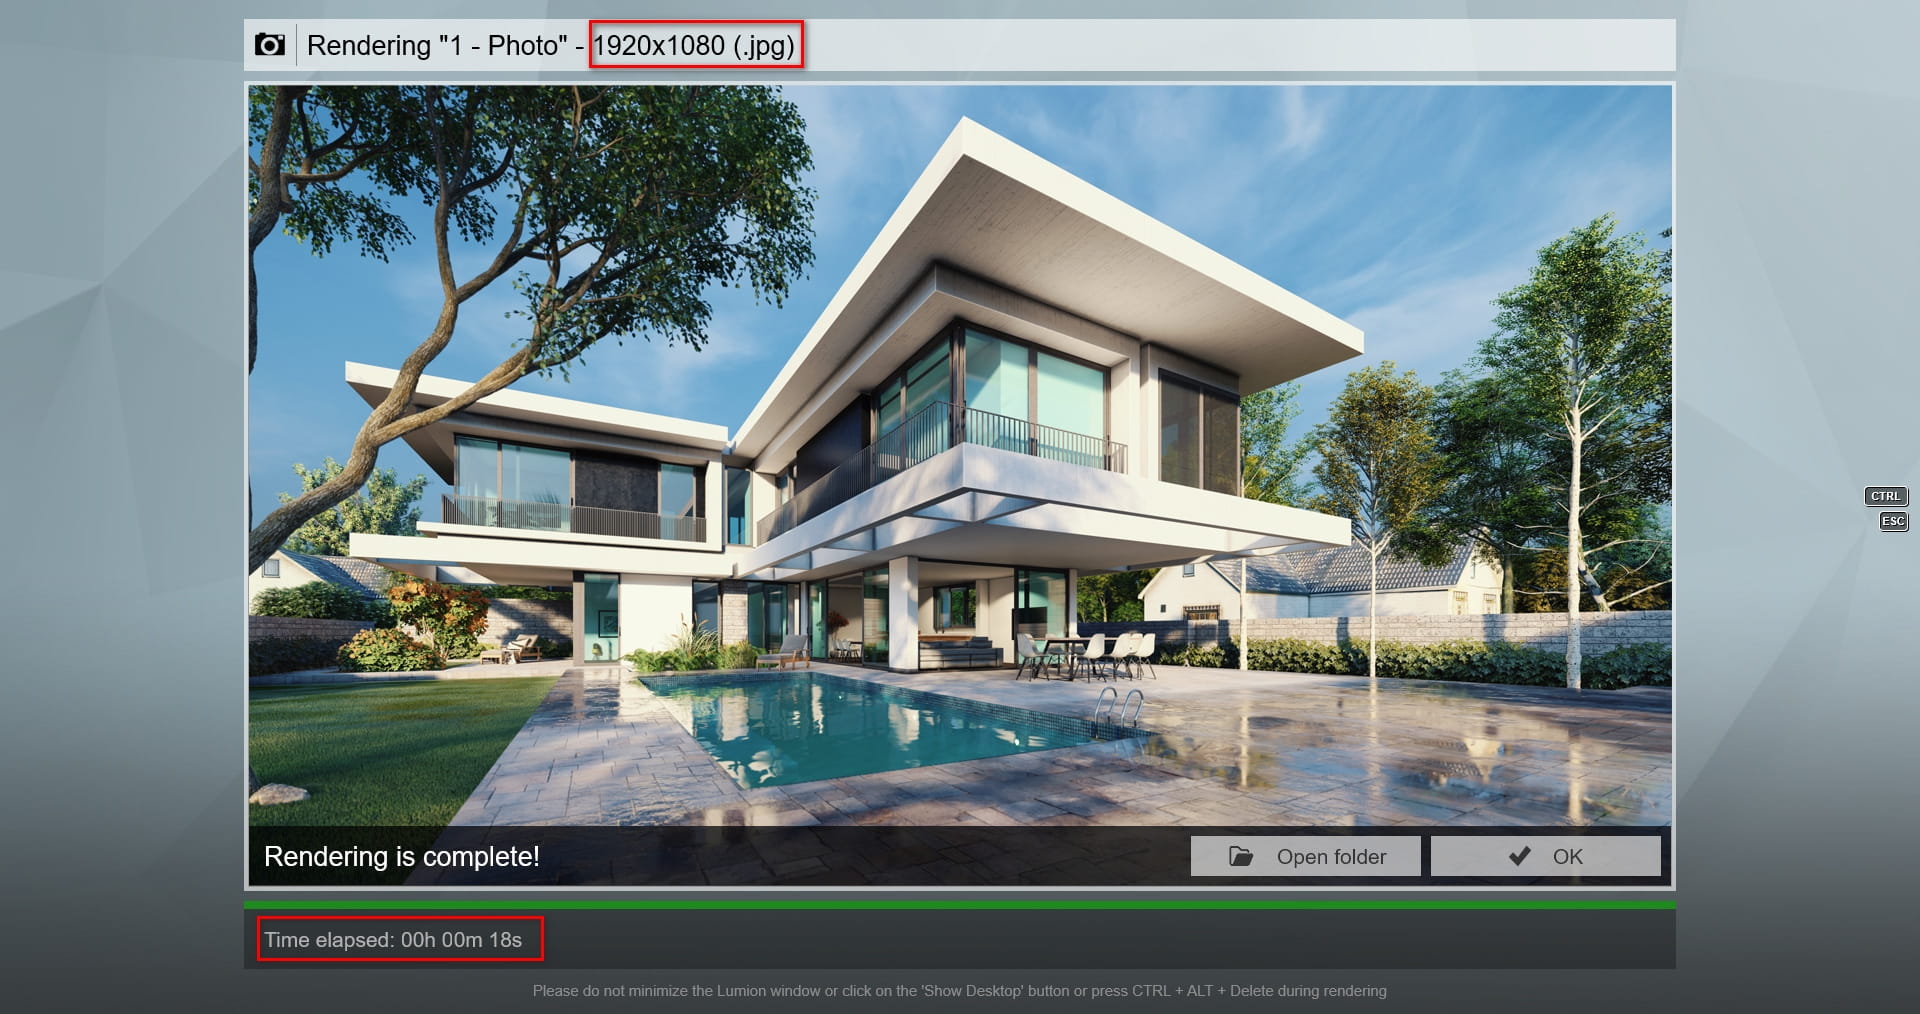
As you can see, there is no need for post-production, and at this point, we can do this inside of the lumion with effects like color correction.
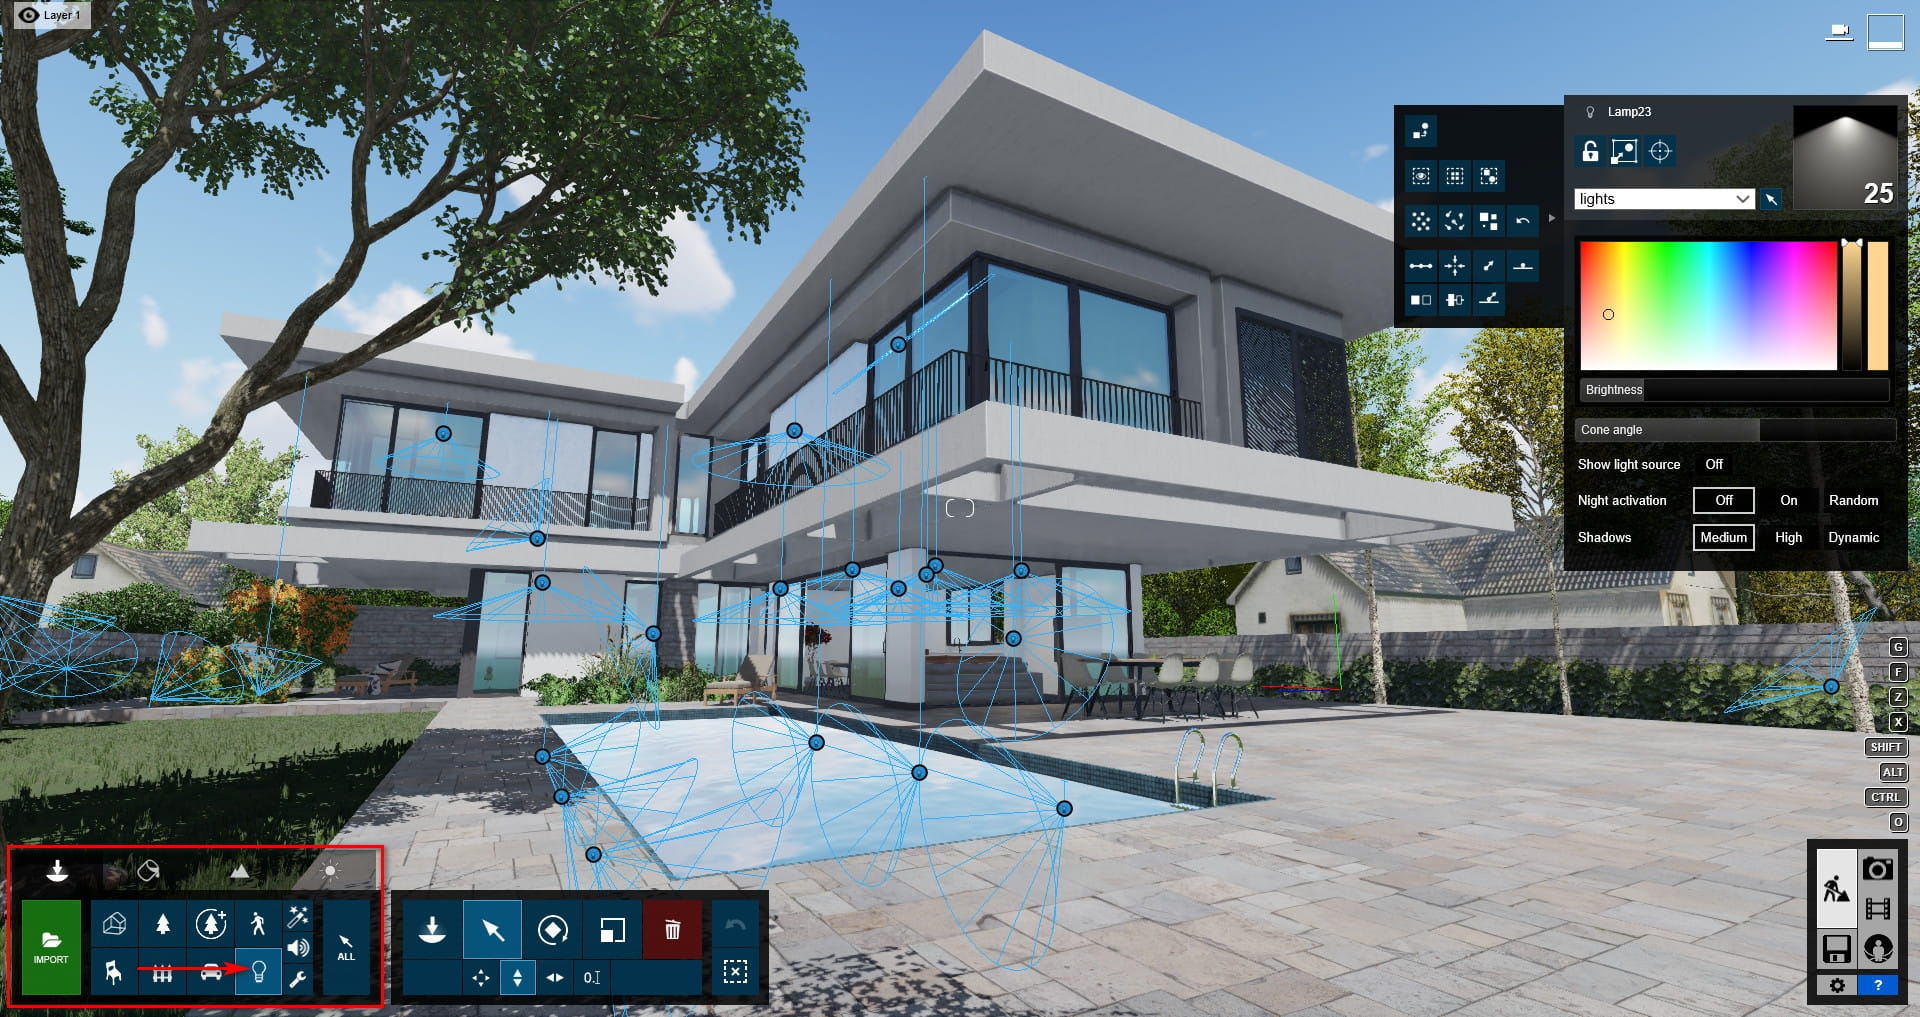
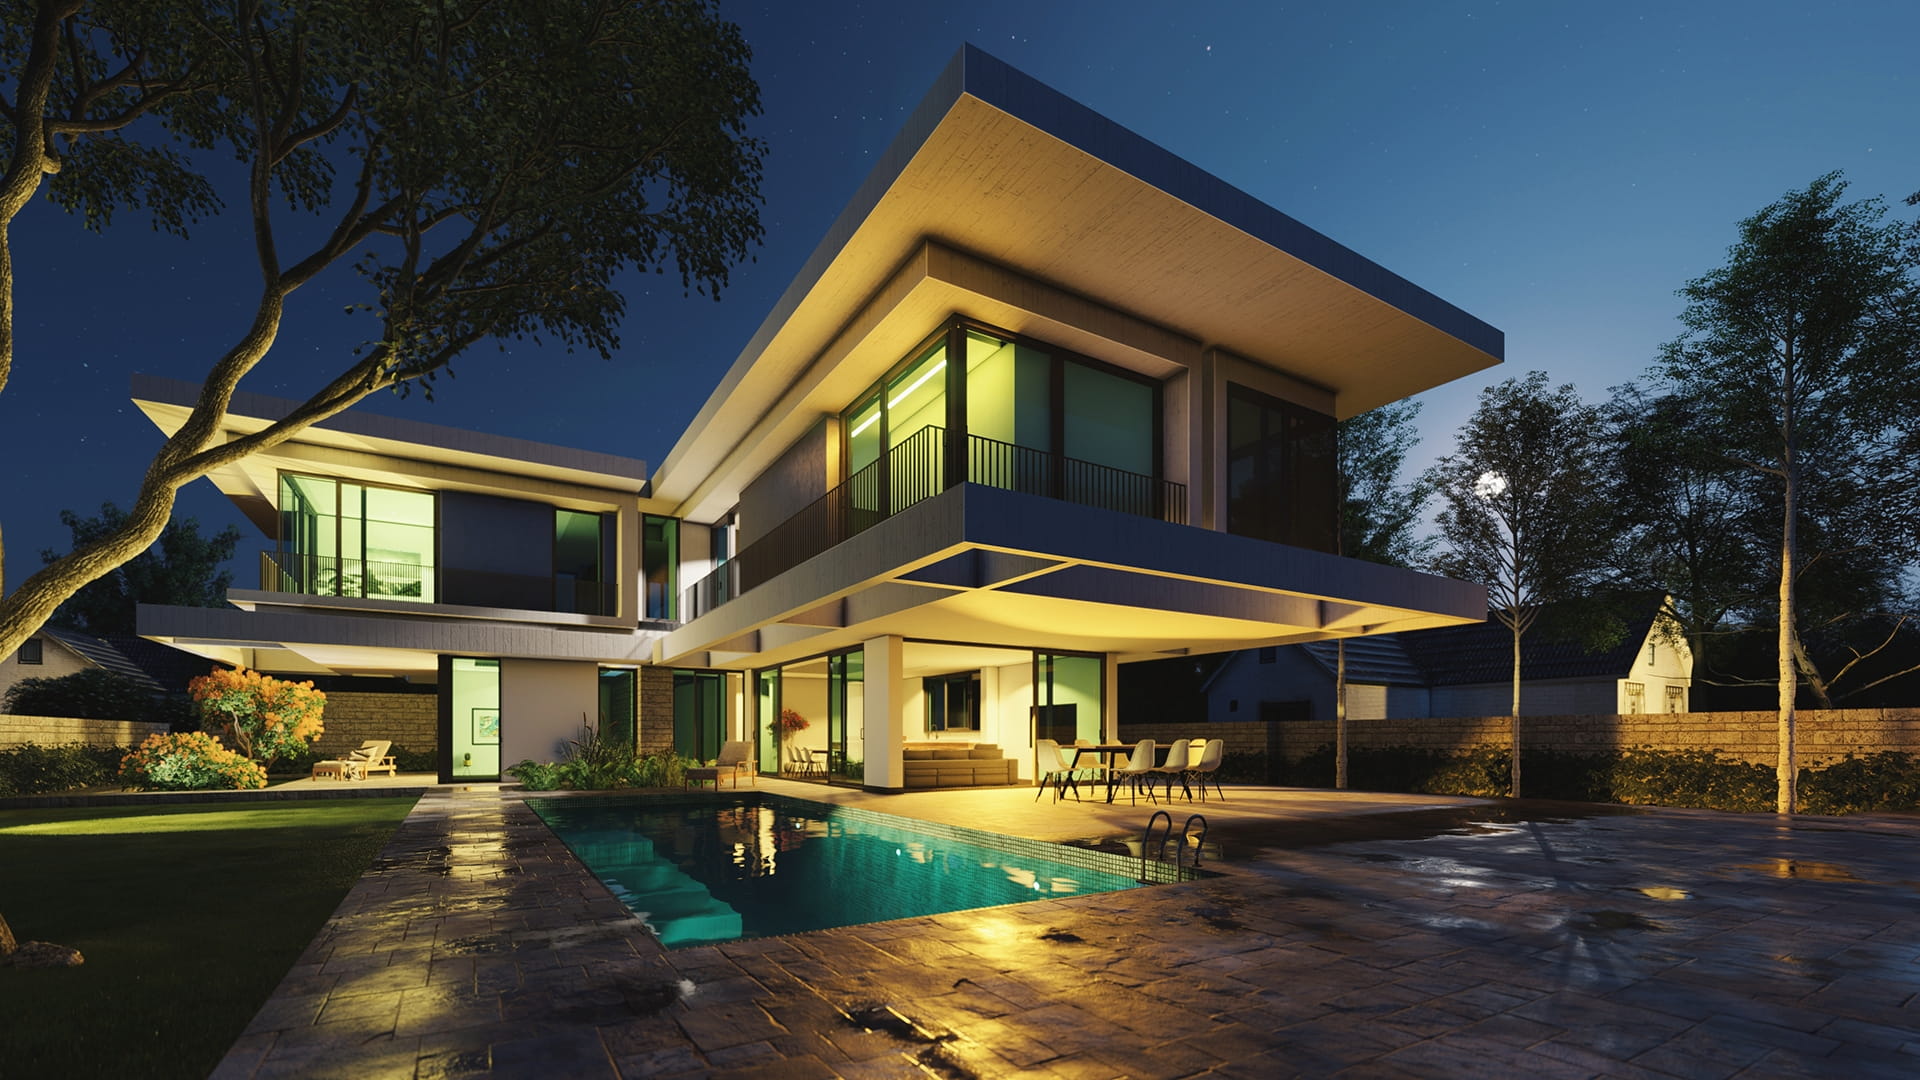
You can use the available light sources to prepare the scene for night rendering.
Thank you for reading this article. I suggest if you work in Archviz and have no experience working with Lumion, be sure to include it in your plan.
Editor's note: you want to share your tutorial with community? Send it to us or use article submission form!


LEAVE A COMMENT


|

|

|

|

|
 Customer zone
 Your orders
 Edit account
 Add project
 Liked projects
 View your artist profile
COMMENTS