Top image: Unreal Engine 4 screenshot from upcoming Evermotion collection.
Unreal Engine is a great tool for real-time architectural visualizations, although it is not the fastest one to work with. You need to deal with exporting and importing models and textures and all meshes should be correctly unwrapped. there are also some quirks that make work tedious. Let's look at some tips that will make our work faster.
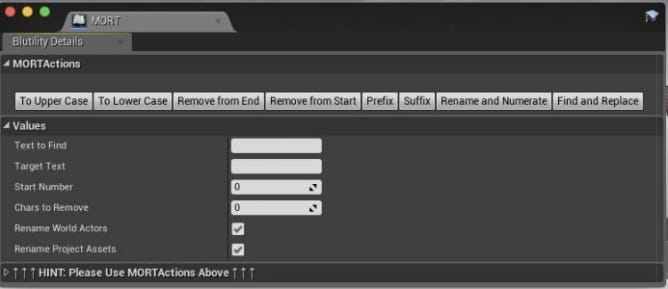
1. Multi-Object-Renaming Tool - MORT (paid add-on for Unreal Engine 4). Usable if you import FBX files with many meshes.
MORT is usable when you need to rename many objects at once after importing them to engine. You could ask: "Why do I need it? I can export my FBX files to UE4 with correct names, right?"
Well, yes, but only if you export them one-by-one. If you group many meshes in a single FBX file, Unreal Engine 4 will import them with name file as a prefix. So, if your Cabinet was named in your 3d application "SM_Cabinet" and your table was "SM_Table" and you exported them to "Furniture.fbx", after importing this file you will have "Furniture_SM_Cabinet" and "Furniture_SM_Table" meshes in Unreal Engine 4. Which means that your naming convention just went to hell and your meshes list is now messy. If there are only two meshes that are uncorrectly named, you can rename them manually, but if you have a hundred? Use MORT, it will rename your meshes automatically.

2. Use Naming convention - I always use Unreal Engine 4 naming convention for meshes. It takes a bit of time to take care of it, but it saves a lot of time when you are in UE4, you will be able to locate your assets quickier and that means faster work. Full list of Assets Naming convention can e found on Unreal Engine 4 wiki site.
- BP_ Blueprint
- SK_ Skeletal Mesh
- SM_ Static Mesh
- ST_ Speed Tree
- PS_ Particle System
- LF_ Lens Flare
- S_ Sound
- SC_ Sound Cue
- M_ Material
- MI_ Material Instance
- MF_ Material Function
- T_ Texture
- SP_ Sprite
- SS_ Sprite Sheet
- TC_ Texture Cube
- PM_ Physical Material
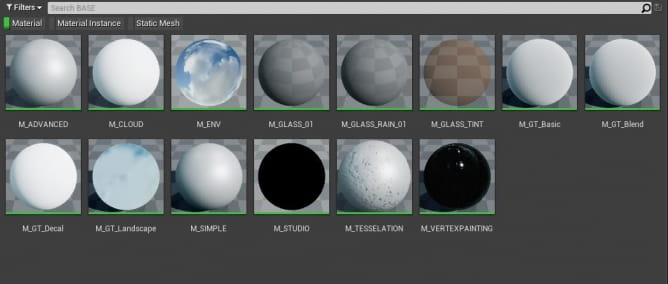
3. Use MatBatchUer (another paid plugin). This one can save you a lot of time, especially if you are importing meshes that have textures assigned and you do not use Datasmith (for example: because your 3d software does not support it). MatBatchuer assigns all textures from a given folder to material slots of a designated base material. Which means that you can create a hundred Unreal materials at once - especially handy if you have some nice custom master material that allows for changing tiling, tint, contrast of textures, parallax occlussion mapping, etc. and you need to use it as a base that will control your imported textures. Now you can do it with a few clicks with MatBatchUer.
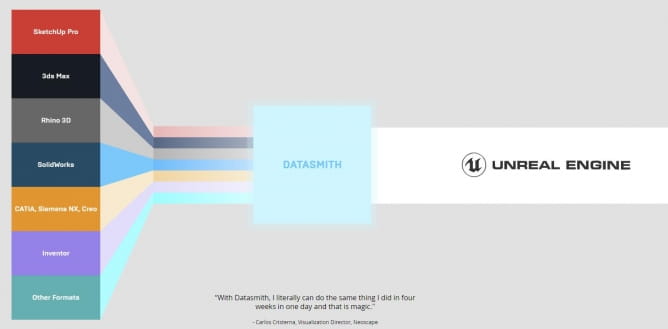
4. Use Datasmith / Unreal Studio - this one is trivial if you are working with 3ds Max. Datasmith is a great importer from many 3d applications to Unreal Engine. Datasmith includes a plugin for 3ds Max that directly translates a scene including lights, cameras, materials, and geometry while maintaining familiar scene hierarchy. It also converts popular V-Ray, Corona and Mental Ray elements into Unreal Engine assets.

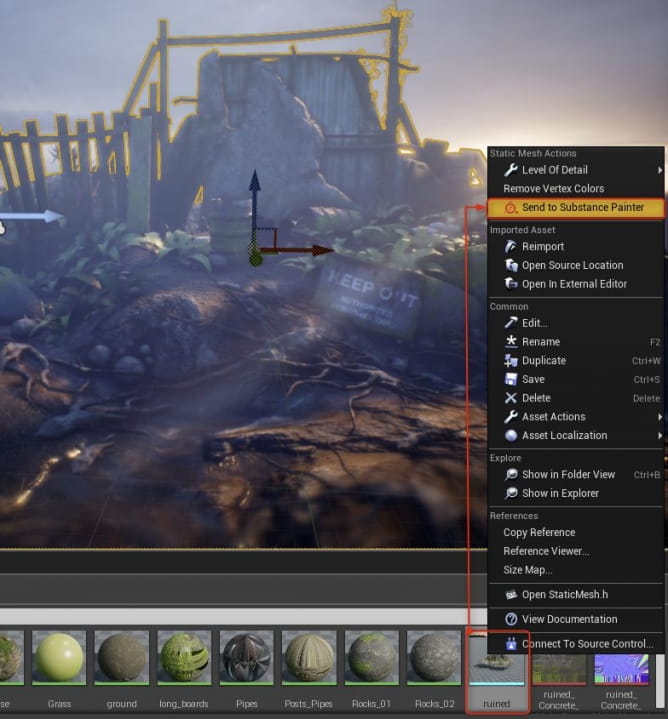
5. Use Substance LiveLink for Unreal Engine 4 - it will help you to quickly iterate between many materials for the given mesh. After you send a mesh to Substance from Unreal Engine 4 and make some changes, you will get almost immediate viewport update in Unreal engine 4, which makes the work with materials faster. Of course, LiveLink is not ideal to all situations - if you will need to update your mesh (for example, if you change unwrapping), you will also have to delete Substance File generated by LiveLink, delete exported FBX mesh and start over, so sometimes it is wise to use regular workflow, keeping Substance files unlinked to Unreal Engine meshes. You need to decide for each mesh what will be the best way to proceed.

6. Create base material library and import it to each new project. I personally have several base materials that are used for all meshes in the scene. I only create new ones for special purposes.

7. Create a project template - instead of changing your project settings with each new project, create a template with all render settings that you usually use, with some template scene, some look development scene and all assets that you usually use and just copy this template to new folder to work with it. Of course, you would probably need to change the name of the project. It's simple, you need to:
- change the name of file with .uproject extension
- change the name of folder
- go to Config folder inside Project folder, open DefaultEngine.ini and add GameName=YourProjectName in the [URL] section at the top.
8. Bake with GPU. It's still unofficial, but soon it will be - a real GPU lighmap baker for Unreal Engine 4 by Luoshang. It works with 4.19 and 4.20 versions and it is up to 10 x faster than baking your scenes with CPU. Try it out, results are stunning! The installation is simple - you just copy a few files into your "engine" folder of Unreal Engine 4 installation (don't forget to make a backup of overwritten files!). After you press "Build" in Unreal Engine, your GI will be generated with GPU instead of CPU, which means that it will finish a LOT faster!

Hope that you liked it! Happy rendering!
Customer zone
Your special offers
Your orders
Edit account
Add project
Liked projects
View your artist profile


COMMENTS