How To Make Your CGI Walls More Realistic
Realistic walls with noise modifier.
Total: € 0
Continue Shopping
In accordance with the art. 13 section 1 and 2 of the European Parliament and Council Regulation 2016/679 of the 27th April, 2016 on the protection of natural persons, with regard to the processing of personal data and on the free movement of such data, and repealing Directive 95/46/EC (General Data Protection Regulation), hereafter RODO, I hereby inform that:
1. EVERMOTION S.C., 8 Przędzalniana Str., 15-688 Białystok, Poland is the Administrator of your Personal Data (APD)
2. Data Protection Inspector can be reached through e-mail: iod@evermotion.org
3. Your personal data are to be processed on the basis of art. 6 section 1 letter a, b and f of RODO in order to:
a) prepare, conclude and execute the agreement and for other purposes approved by you,
b) to execute the legitimate interest like marketing of products and the agreement, claim assertion or defence against claims resulting from the law regulations.
4. Entities entitled to the reception of your personal data may be the authorised public bodies; mail providers; providers of the services covered by the agreement; responsible for debt recovery, keeping the archives, document utilization, legal consulting, technical services, IT services and accountancy.
5. Your personal data shall not be transferred to the third country, nor to the international bodies.
6. Your personal data shall be processed within the period of the agreement and upon your additional consent until you withdraw it. APD shall keep the data for the period of any civil law claim execution connected with the agreement.
7. You have the right to demand an access to your personal data, to correct or to delete the data if there is no other basis for the processing or any other purpose of such processing or to limit the processing of the data, to transfer the data to another administrator and to raise objections to the further data processing if there is no legal basis for further processing and to withdraw any previous consent.
8. You provide the personal data voluntarily, however they are necessary to conclude the agreement. The refusal of providing such data may result in the refusal of the agreement conclusion.
9. You have the right to lodge a complaint to the Personal Data Protection Office when in your opinion the data processing violates the regulations of General Data Protection Regulation of the 27 April, 2016 (RODO).
10. Your data will be automatically processed, including the form of profiling.
11. You are obligated to forward above mentioned information to your representative, especially if you appointed this person in the agreement as the contact person or as the representative for the agreement execution.
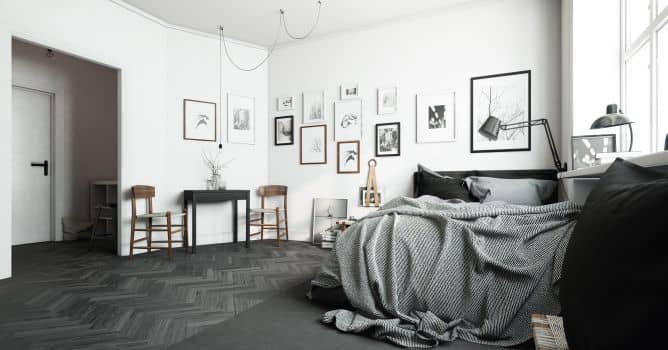

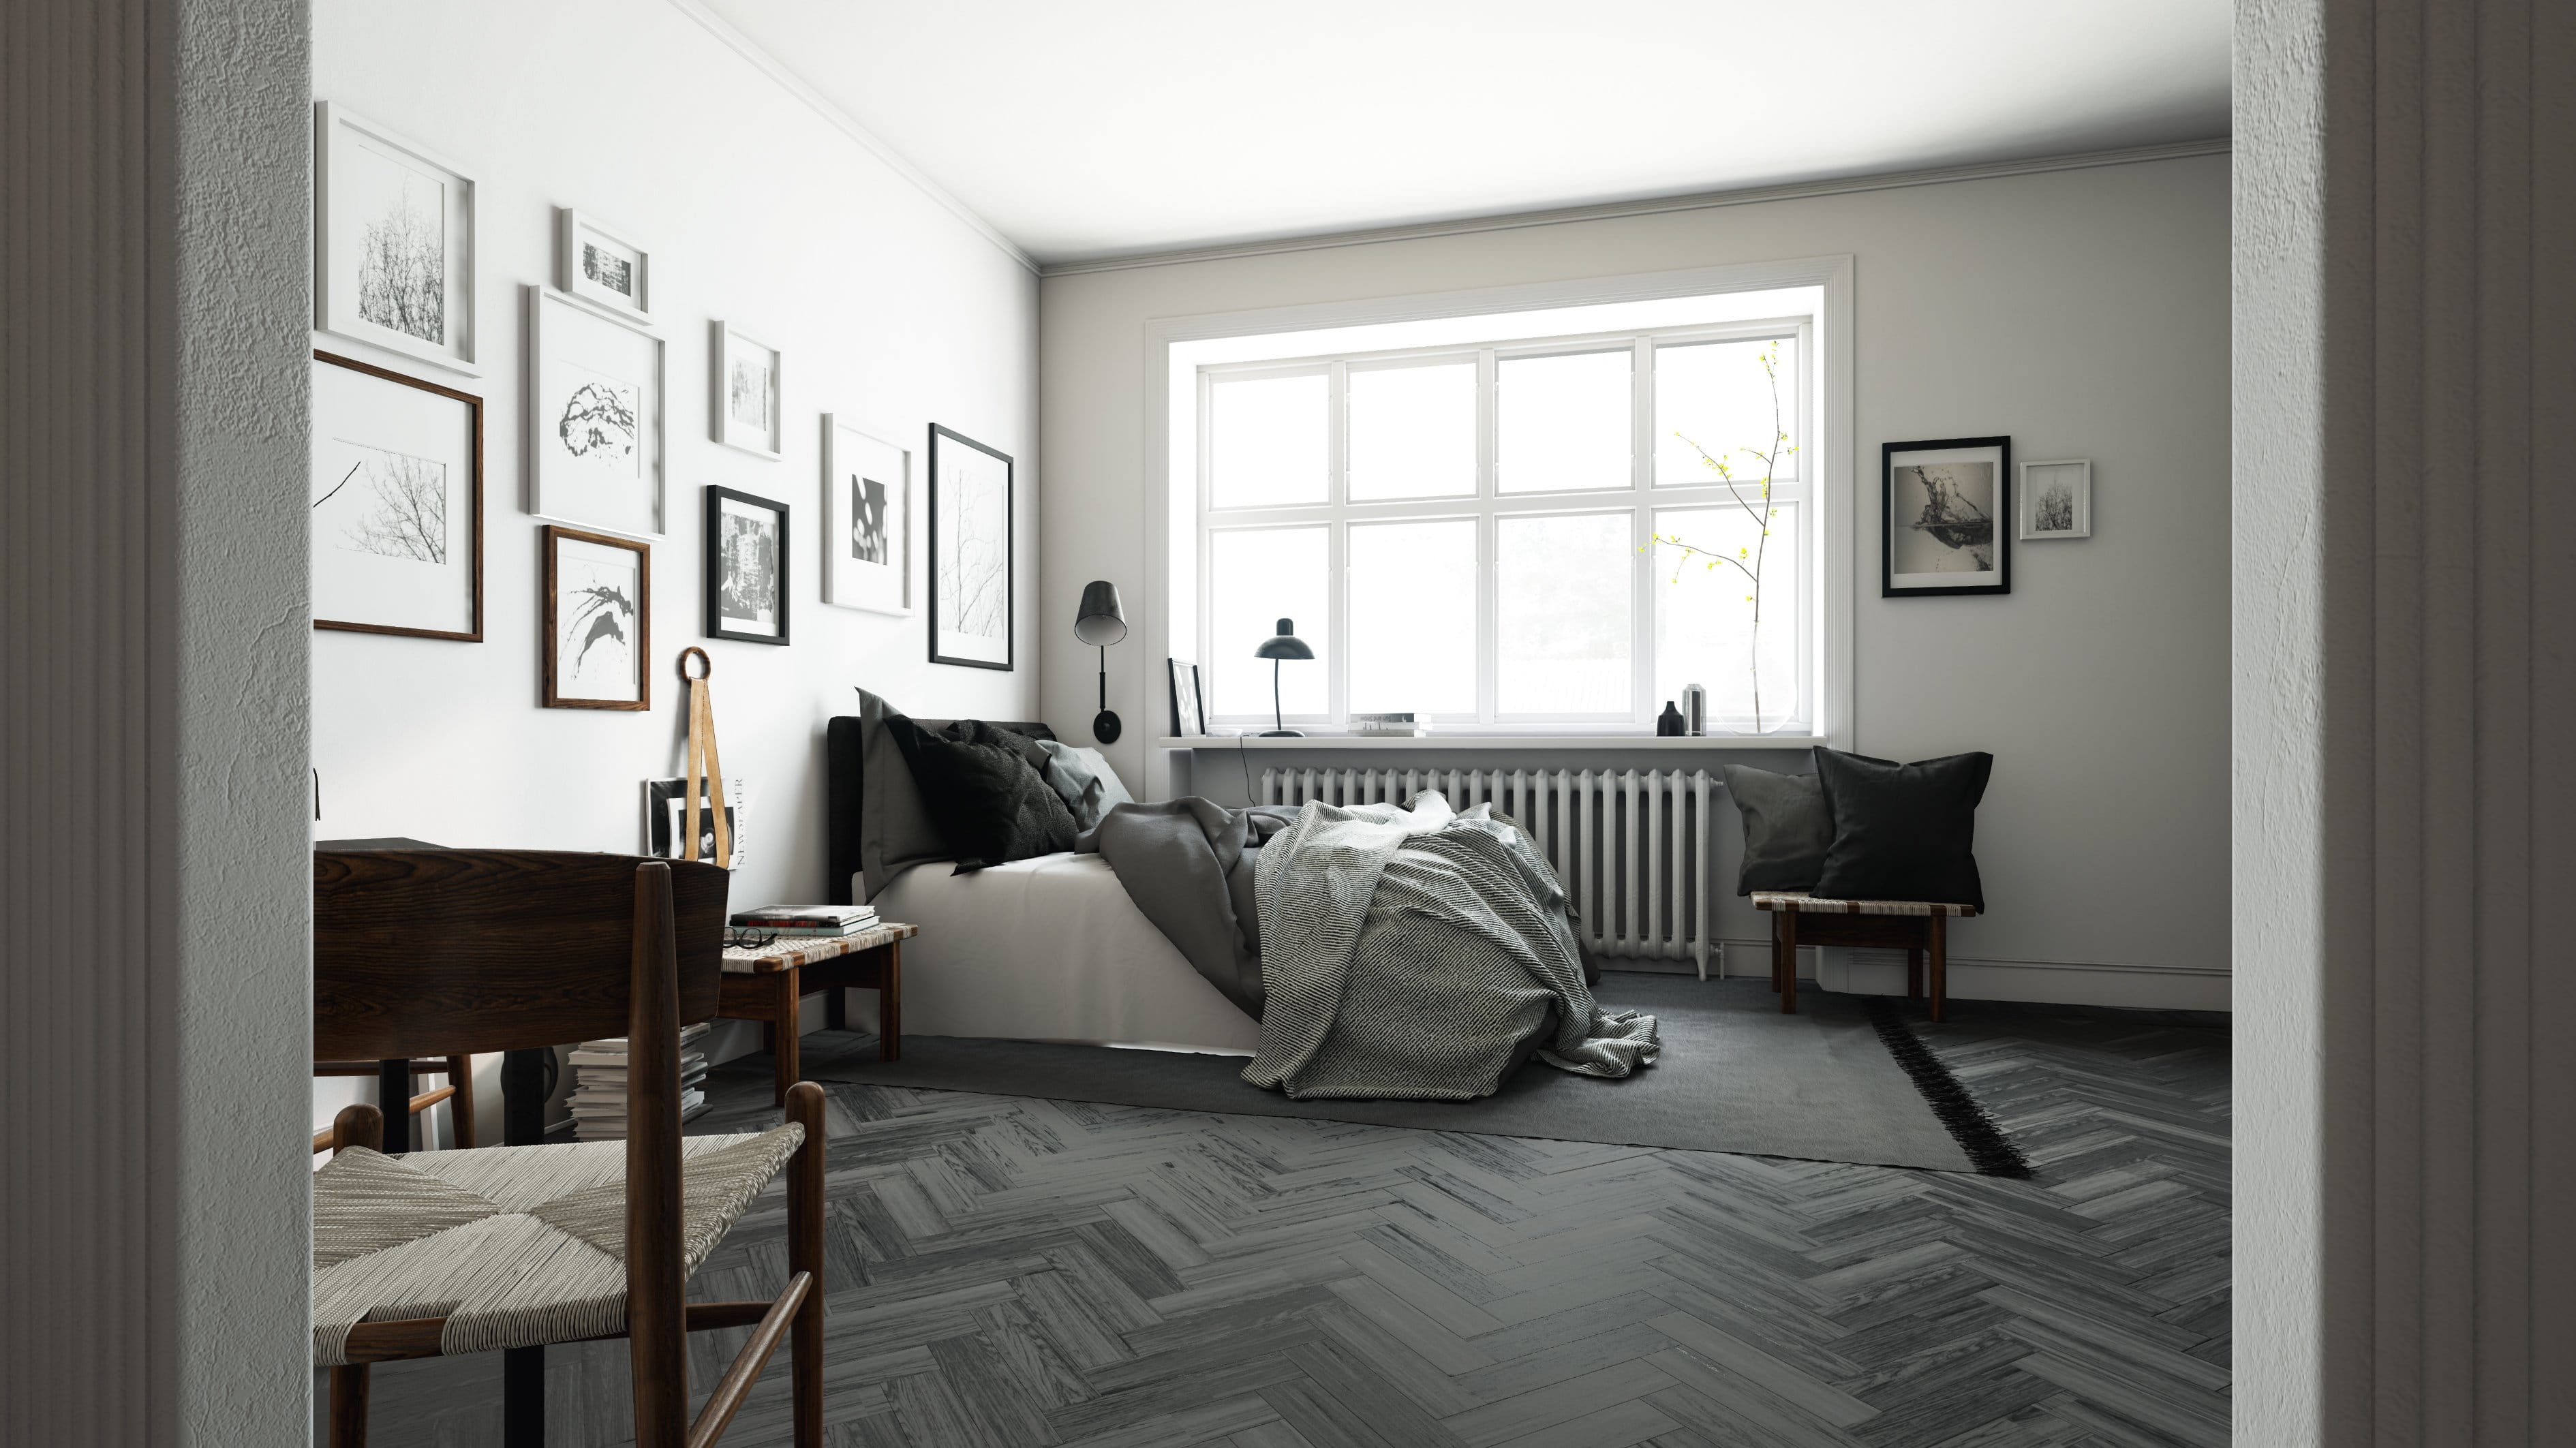
This scene was created in two versions. One was for 3ds Max, which appeared in Archinteriors vol 45. We also have a tutorial for that version: Making of Cosy Bedroom. After releasing this collection we came with the idea to create nice set of interiors for Unreal Engine users and push the limits to the top when it comes to realistic rendering in game engine. This way we created an entire new collection of scenes - Archinteriors for UE vol. 3. This is one of four scenes that is included in this collection.

First light source is directional Light.
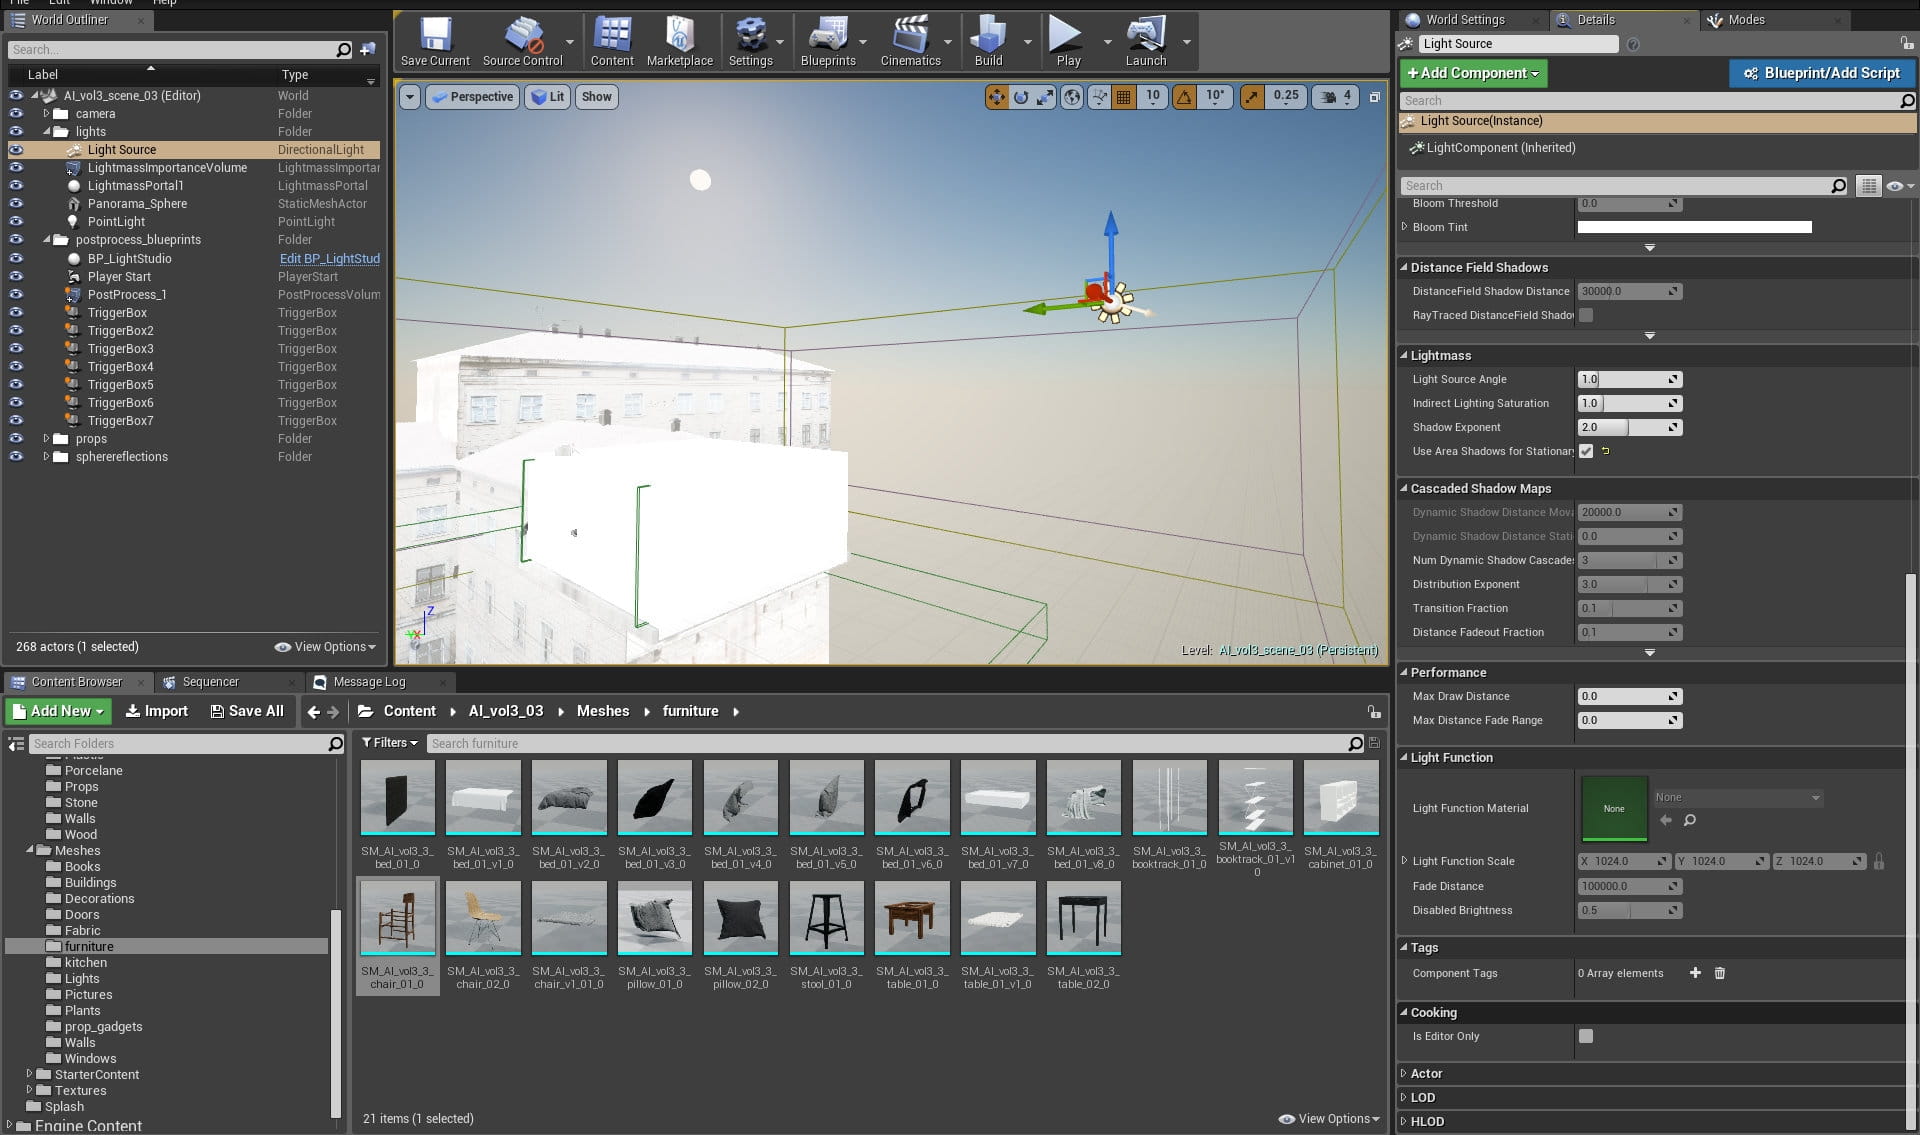
Directional light settings

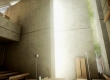
Our scene in Unreal Engine. One of characteristics of game engines are reflection probes that are used to generate believable (although fake) reflections for scene elements. Positioning and sizing of reflection probes is a process of trial and error and generally - the matter of taste.
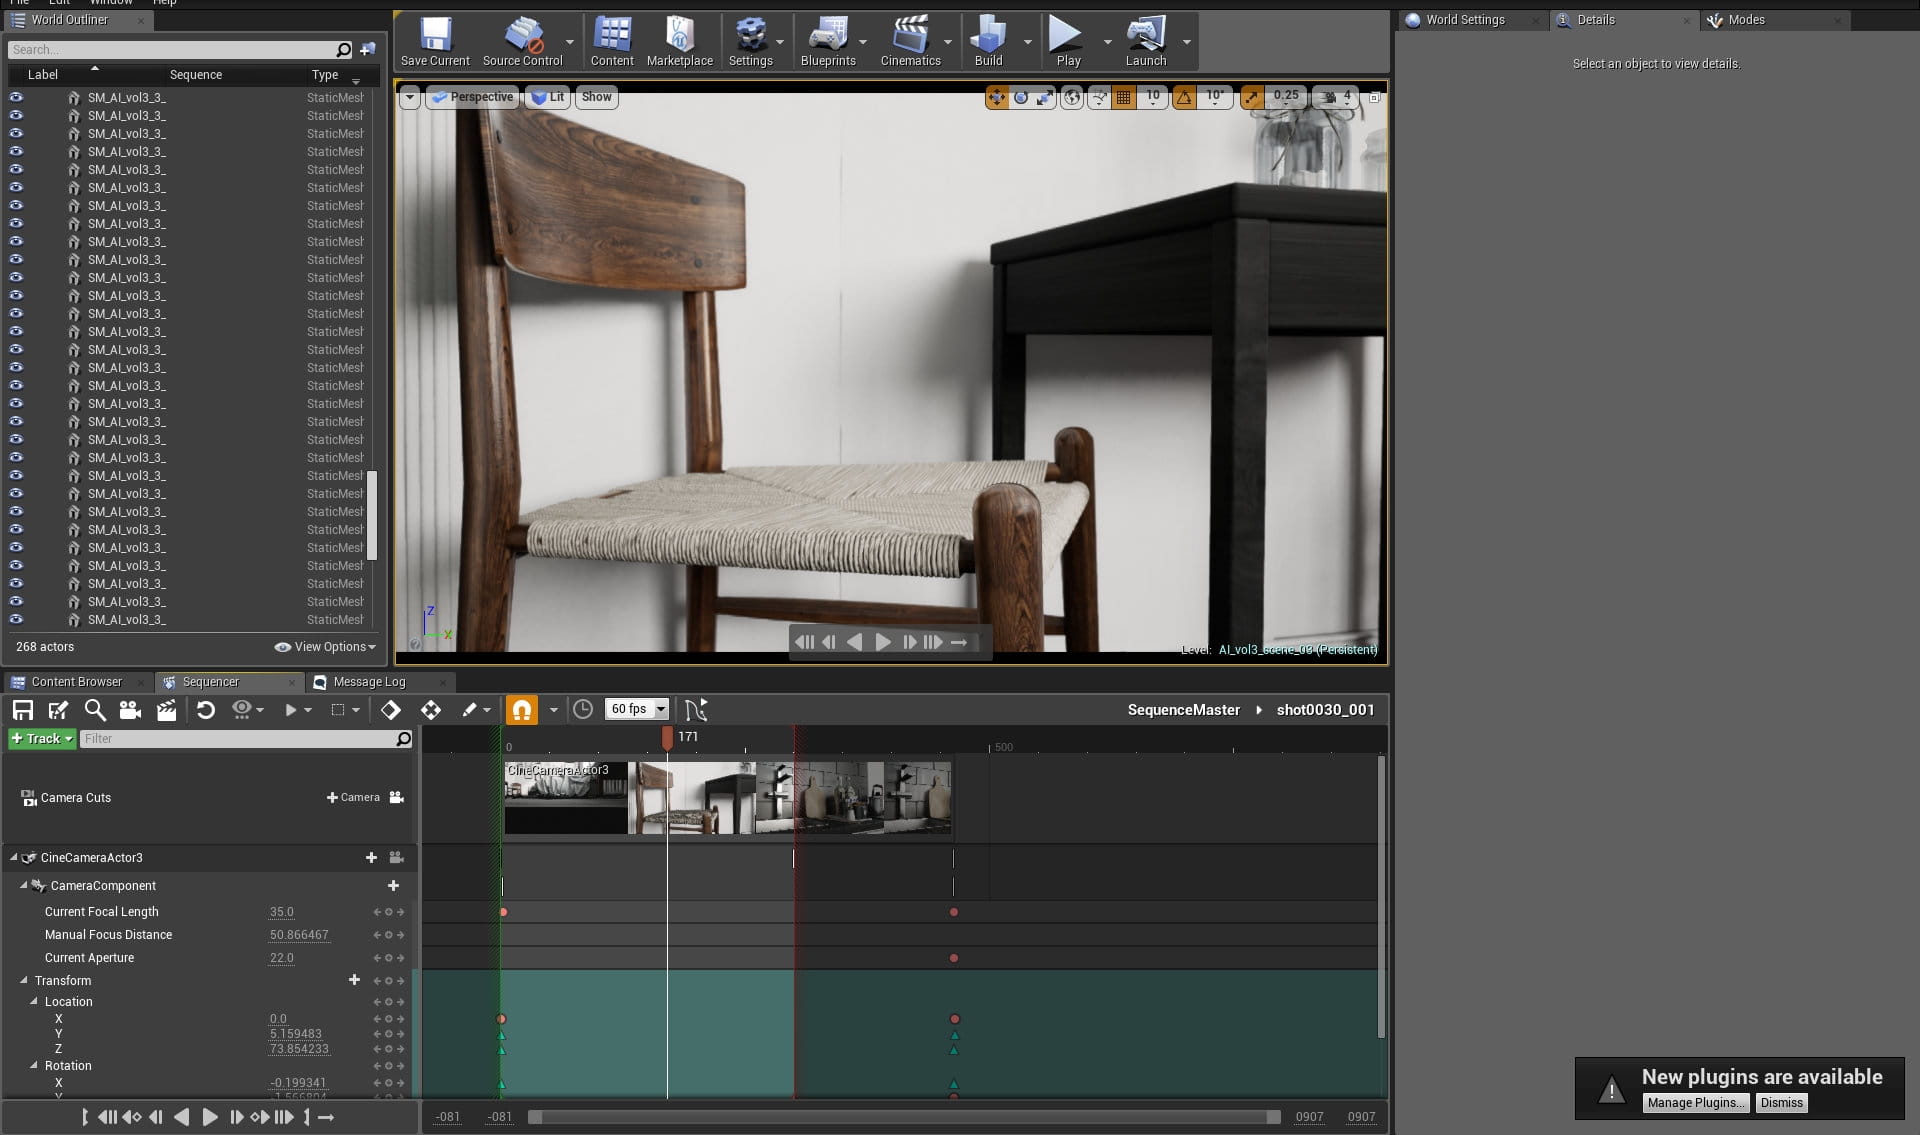
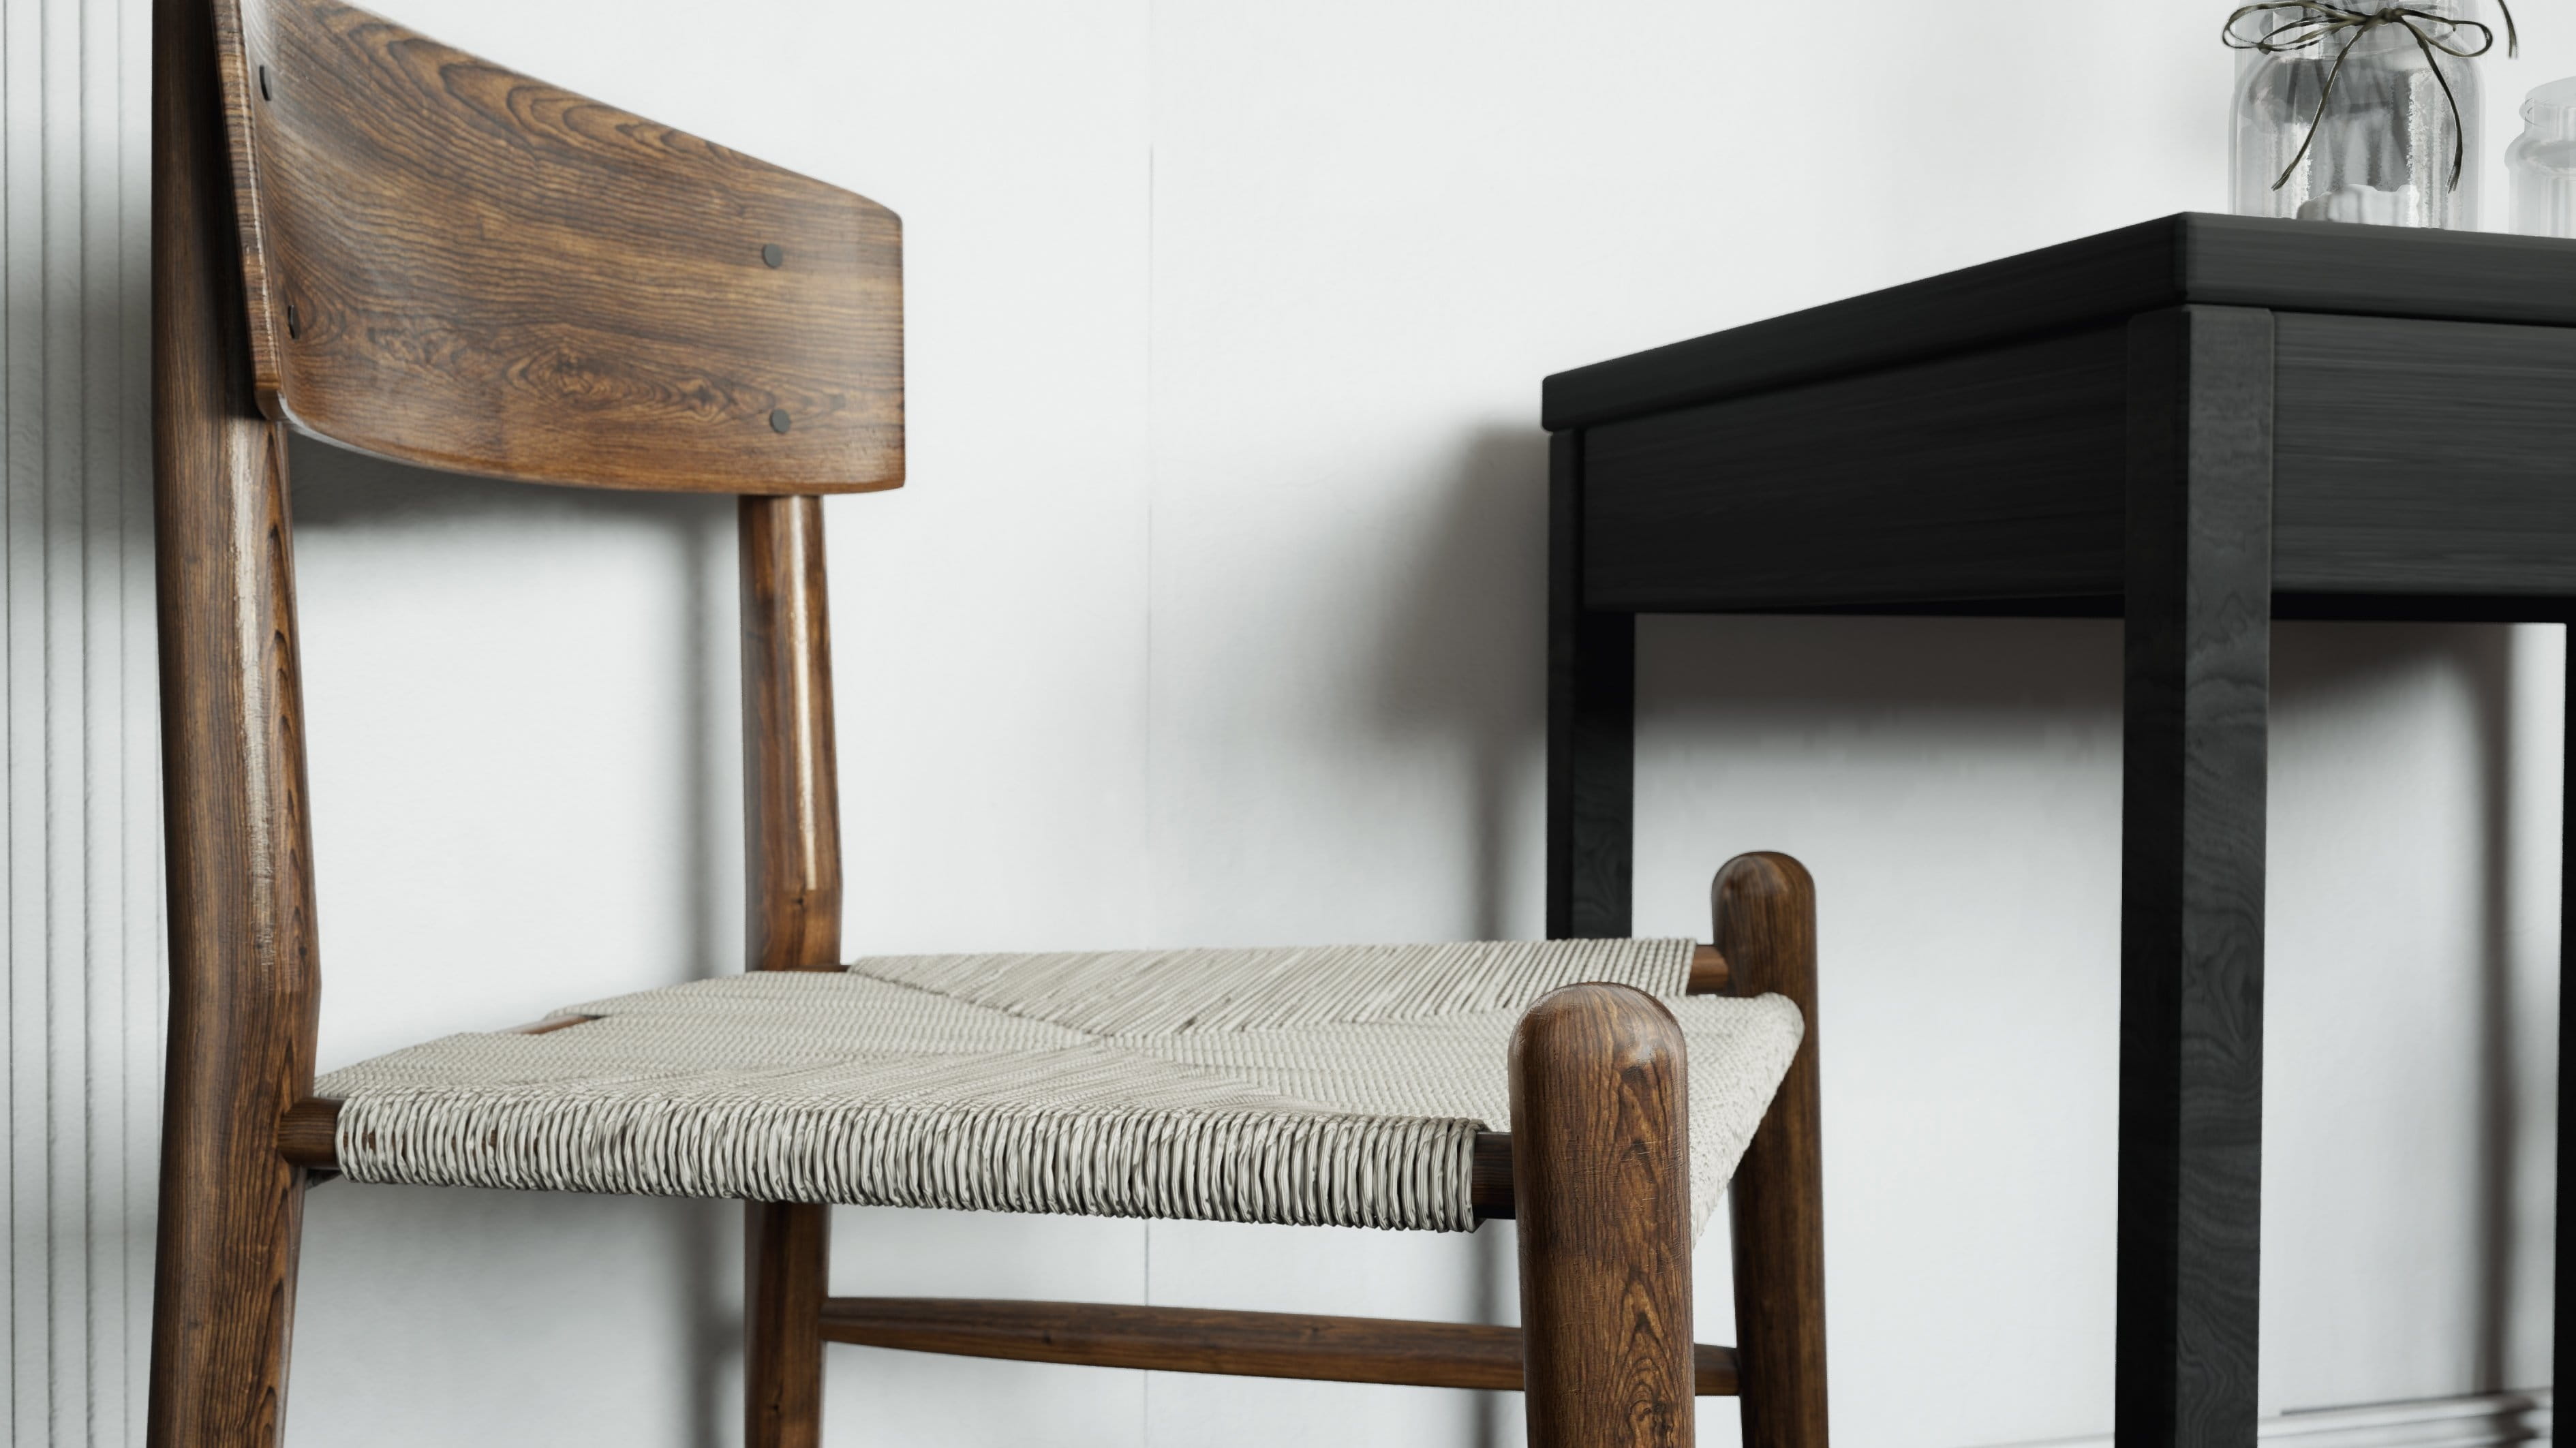
We made an animation of this scene for promotional purposes. All cameras were placed and moved within the engine and we decided to leave the final sequences and their elements in the scene, for educational purposes. Here you can see level sequence that was used for a short close-up shot of a chair. It's very simple - just a camera track with keyframes for position and rotation and Camera Cut track.
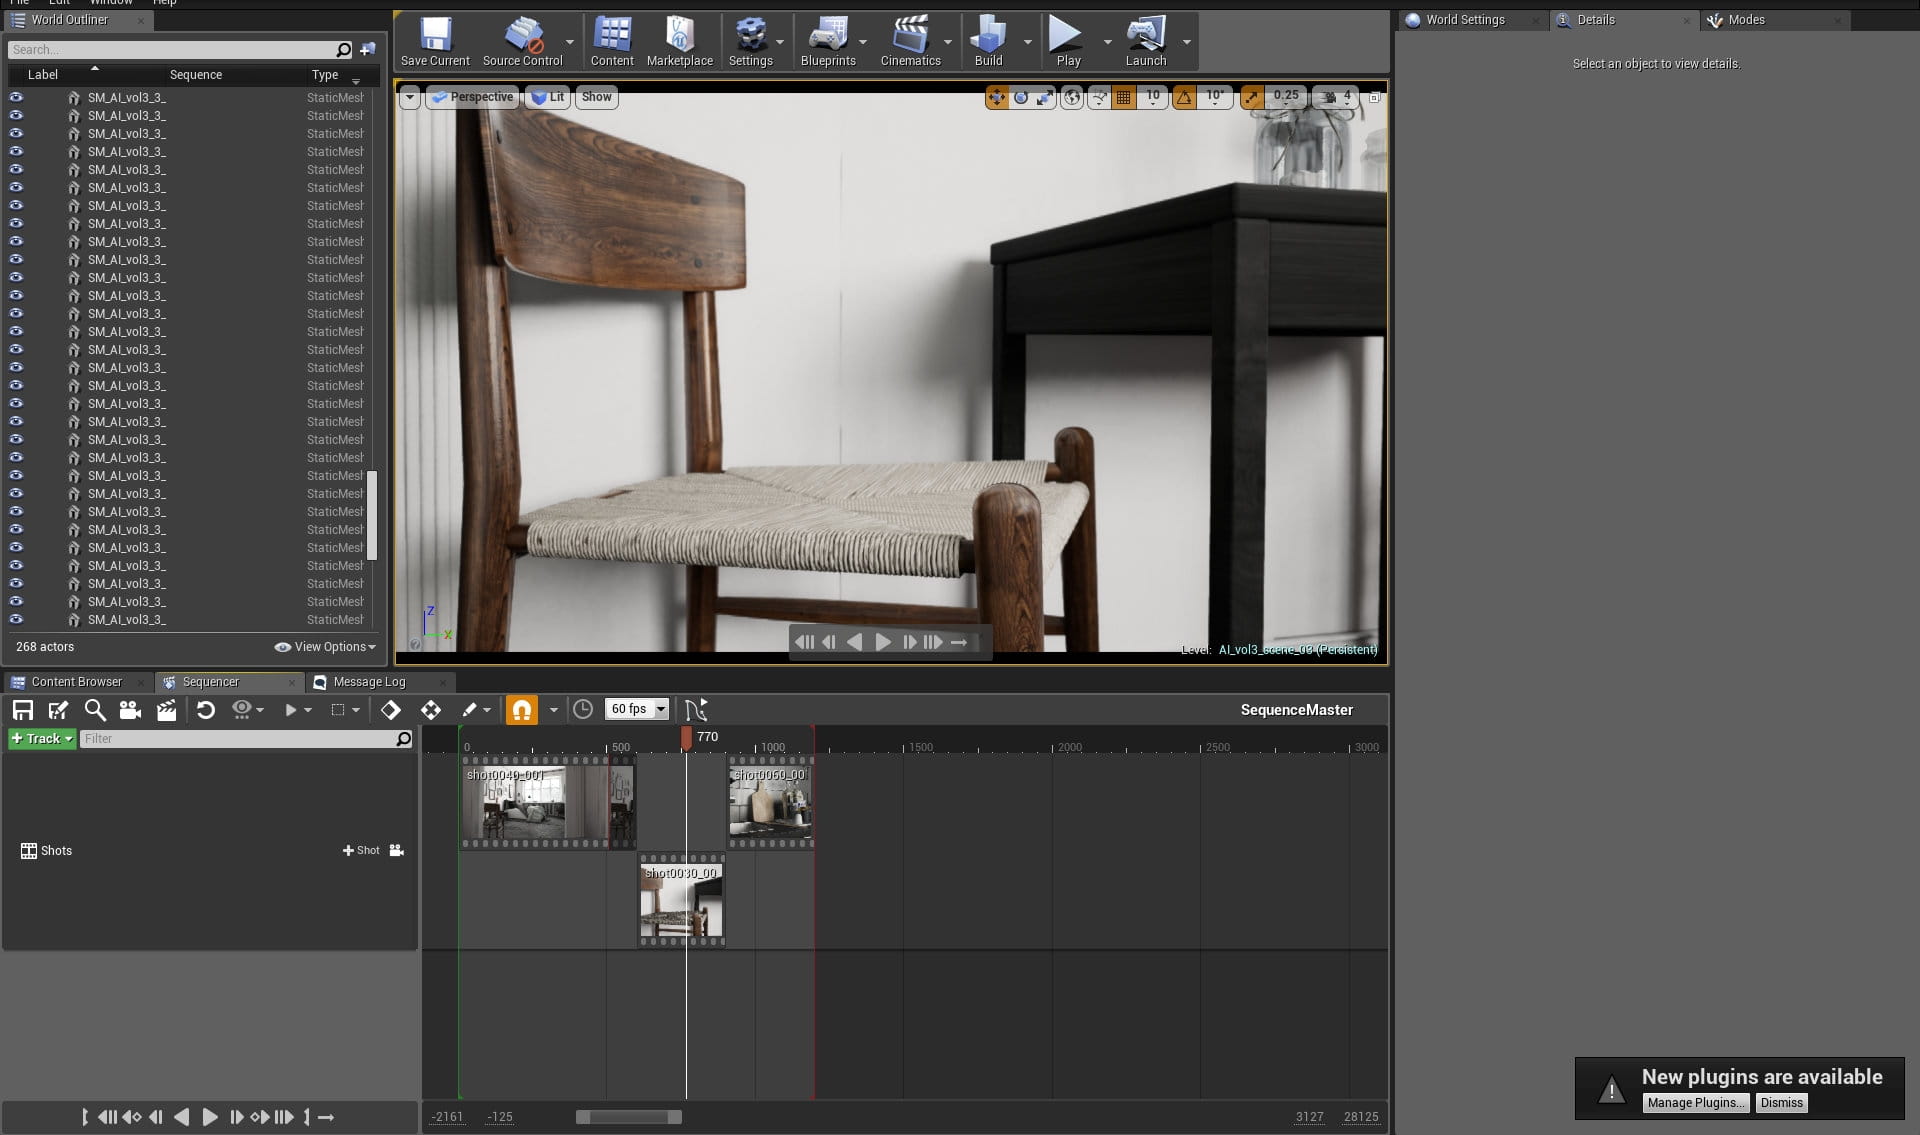
The sequence from previous image is a part of Master sequence, consisting of 3 sub-sequences.
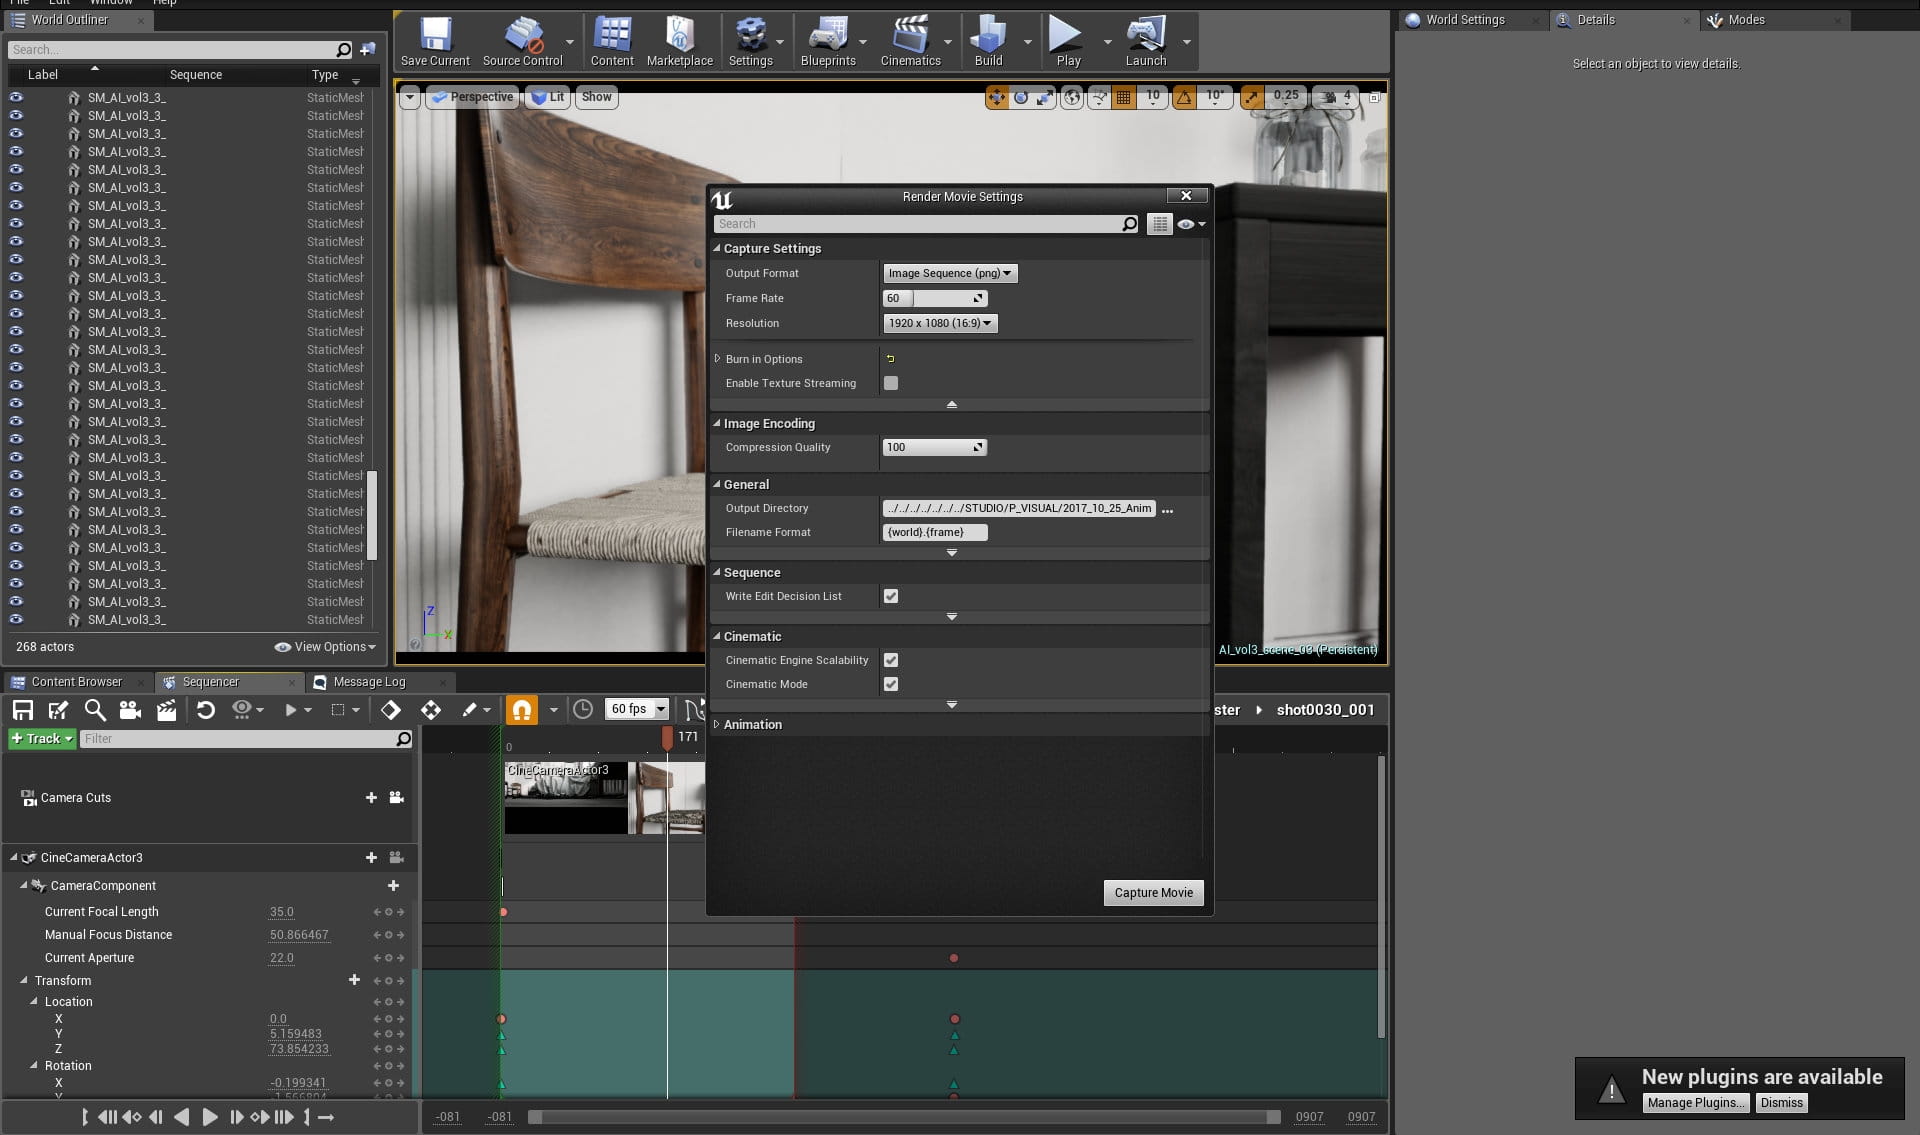
Sequence export settings: 60 frames per second in HD resolution, PNG files (loseless). These files will go into video editing software later.
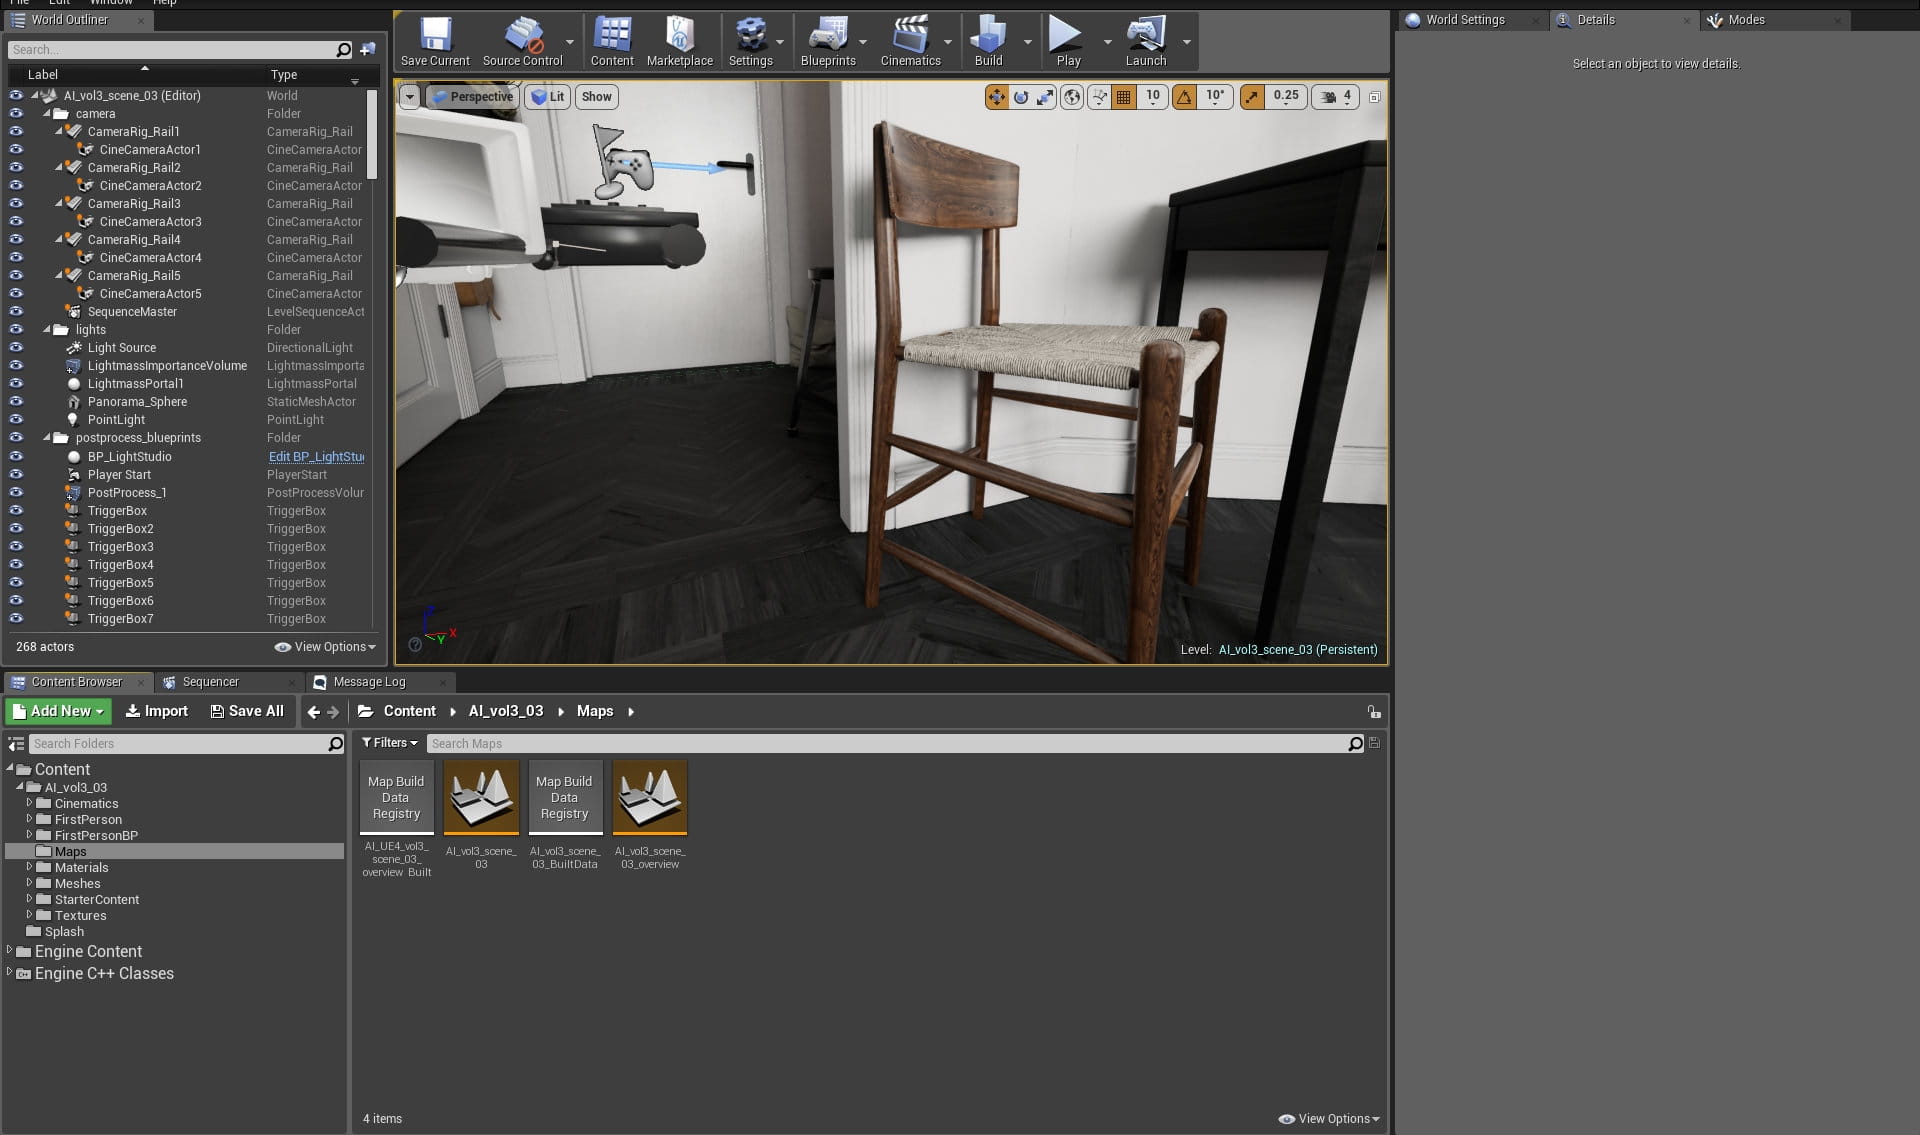
Our file has two levels (or maps). One is the room that is a final scene and the second is an overview scene that serves as a menu of items that were used in the project.

A screenshot of an overview scene
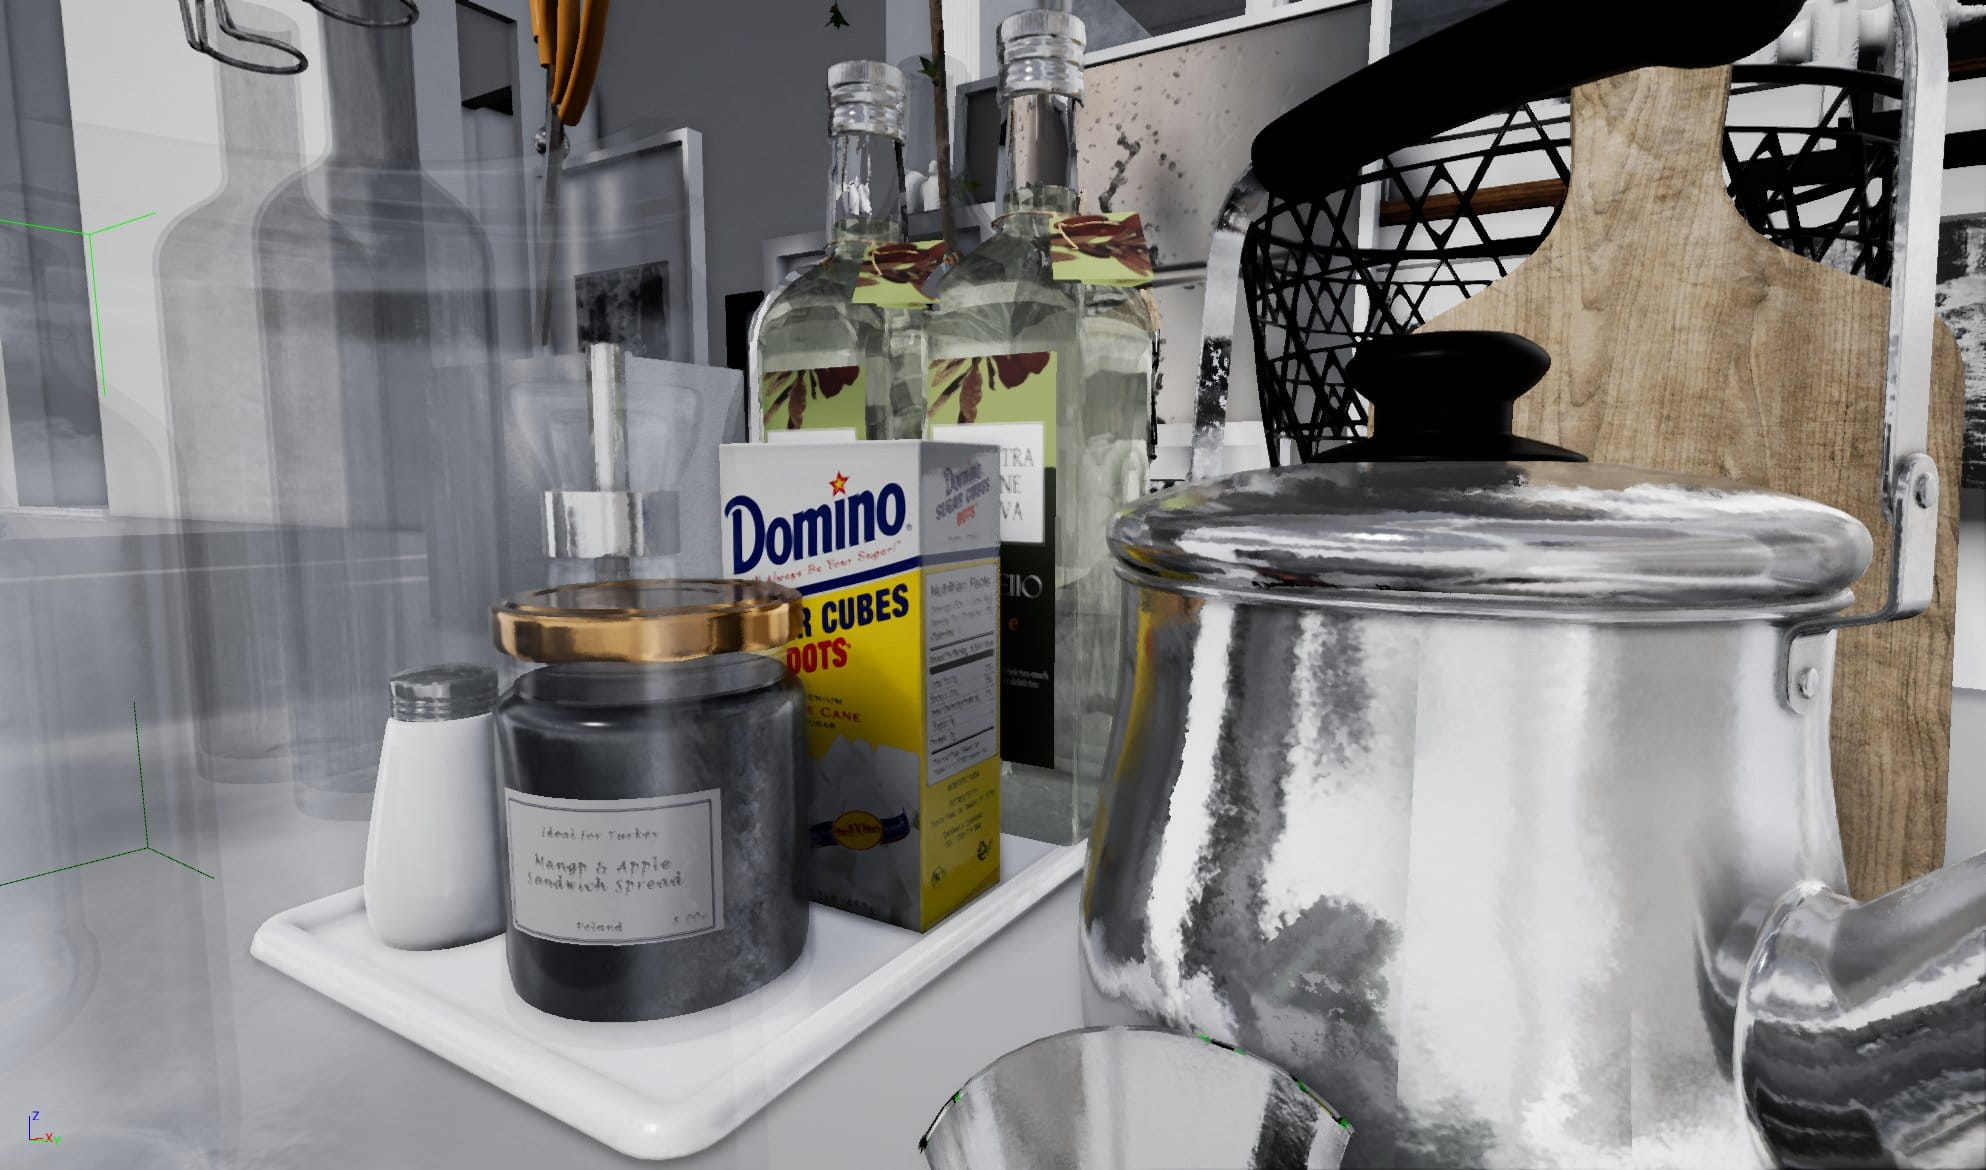
Overview scene - close up
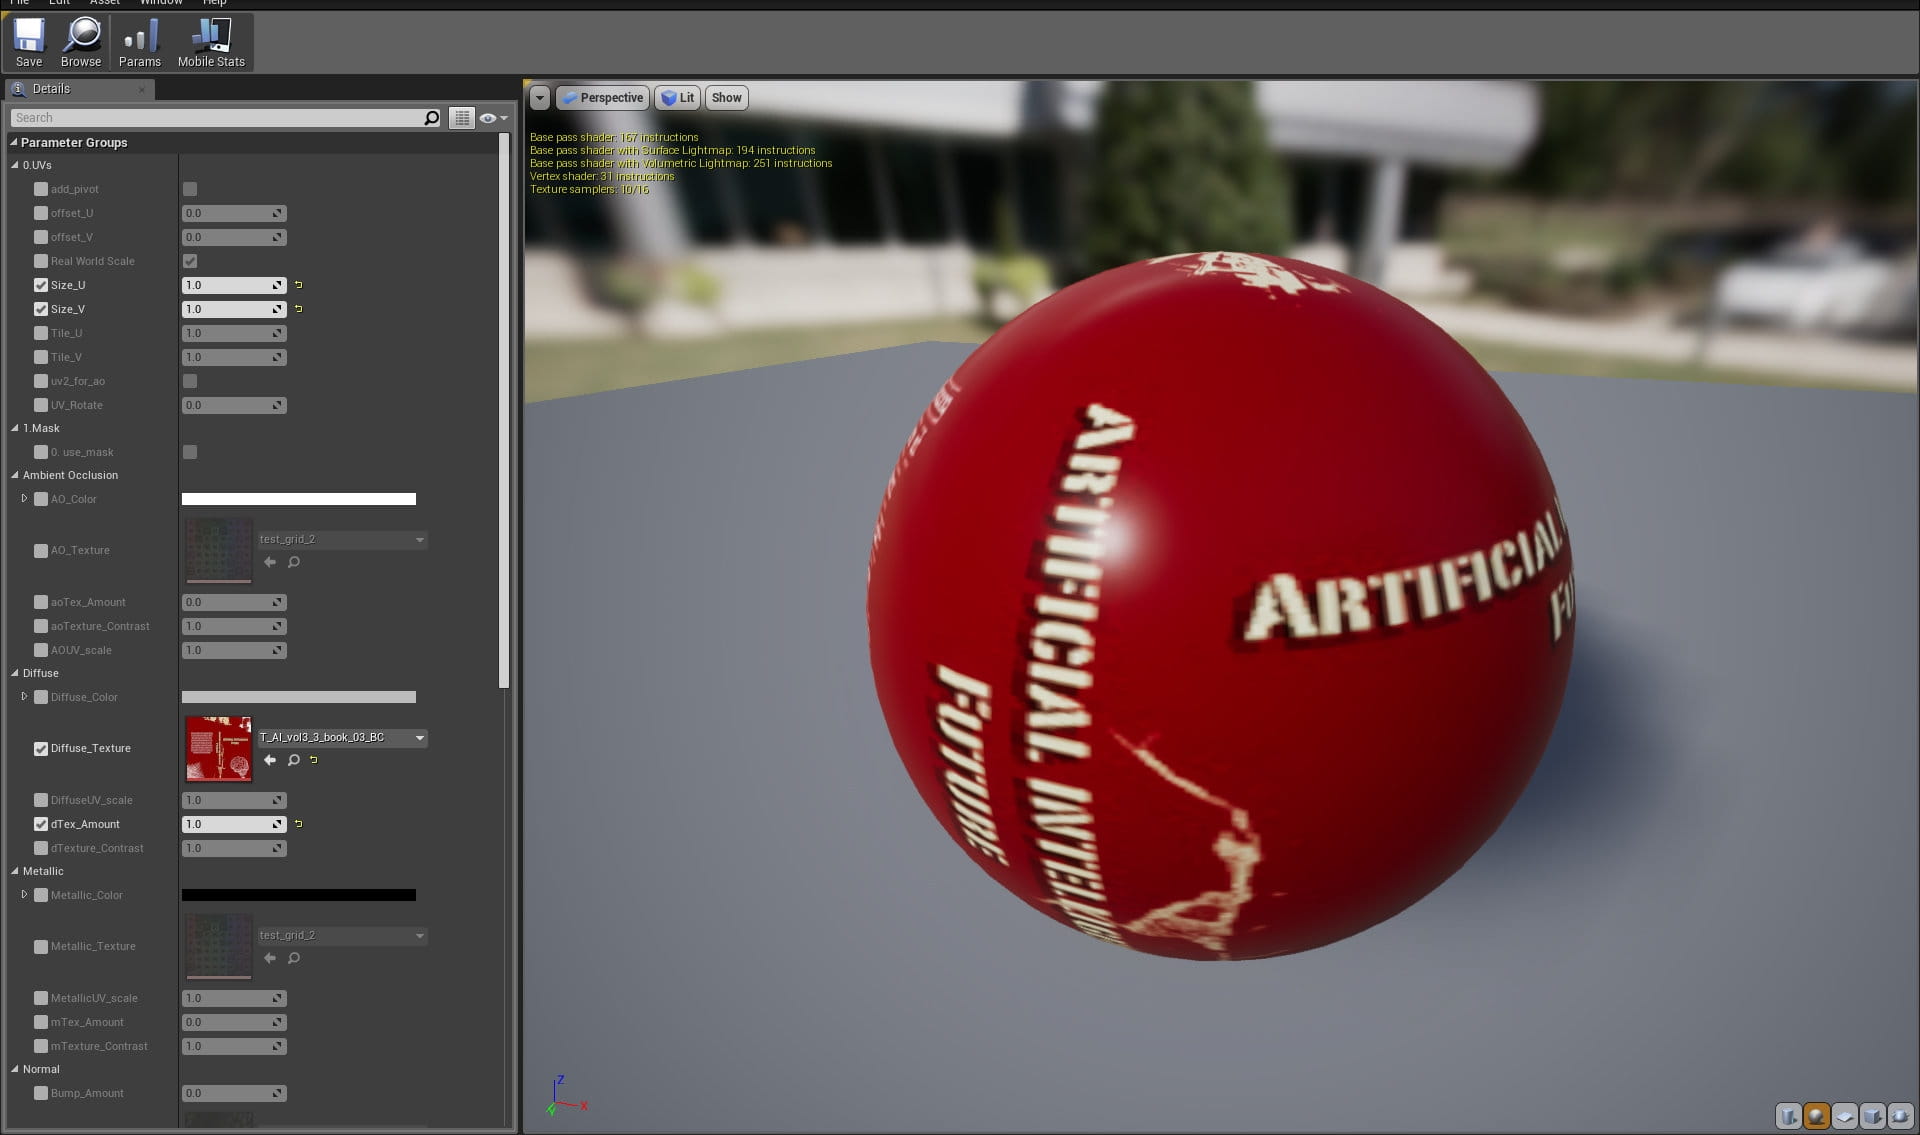
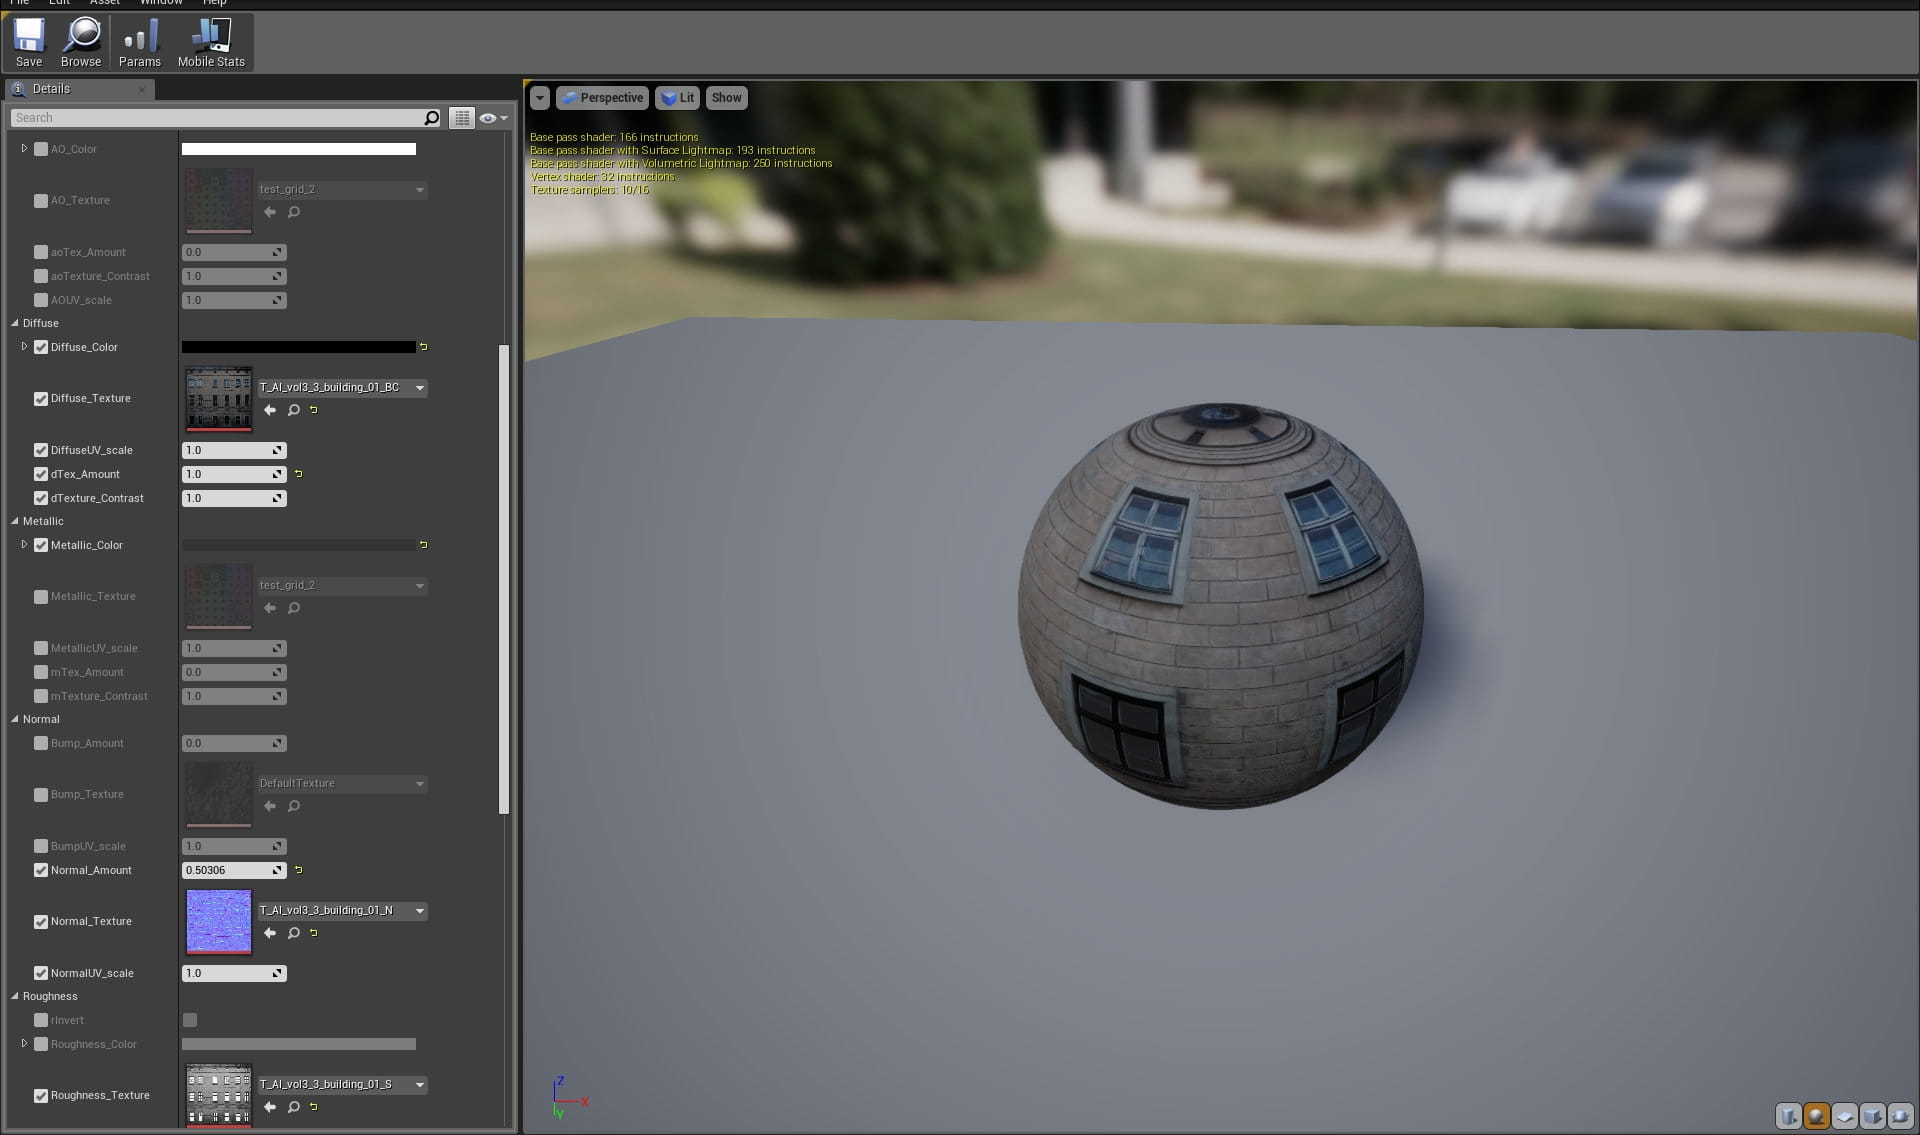
Book texture: The most of materials are based on "Base material", so we can work with instances (which is faster and easier to iterate with textures, if we want to change something, etc.)
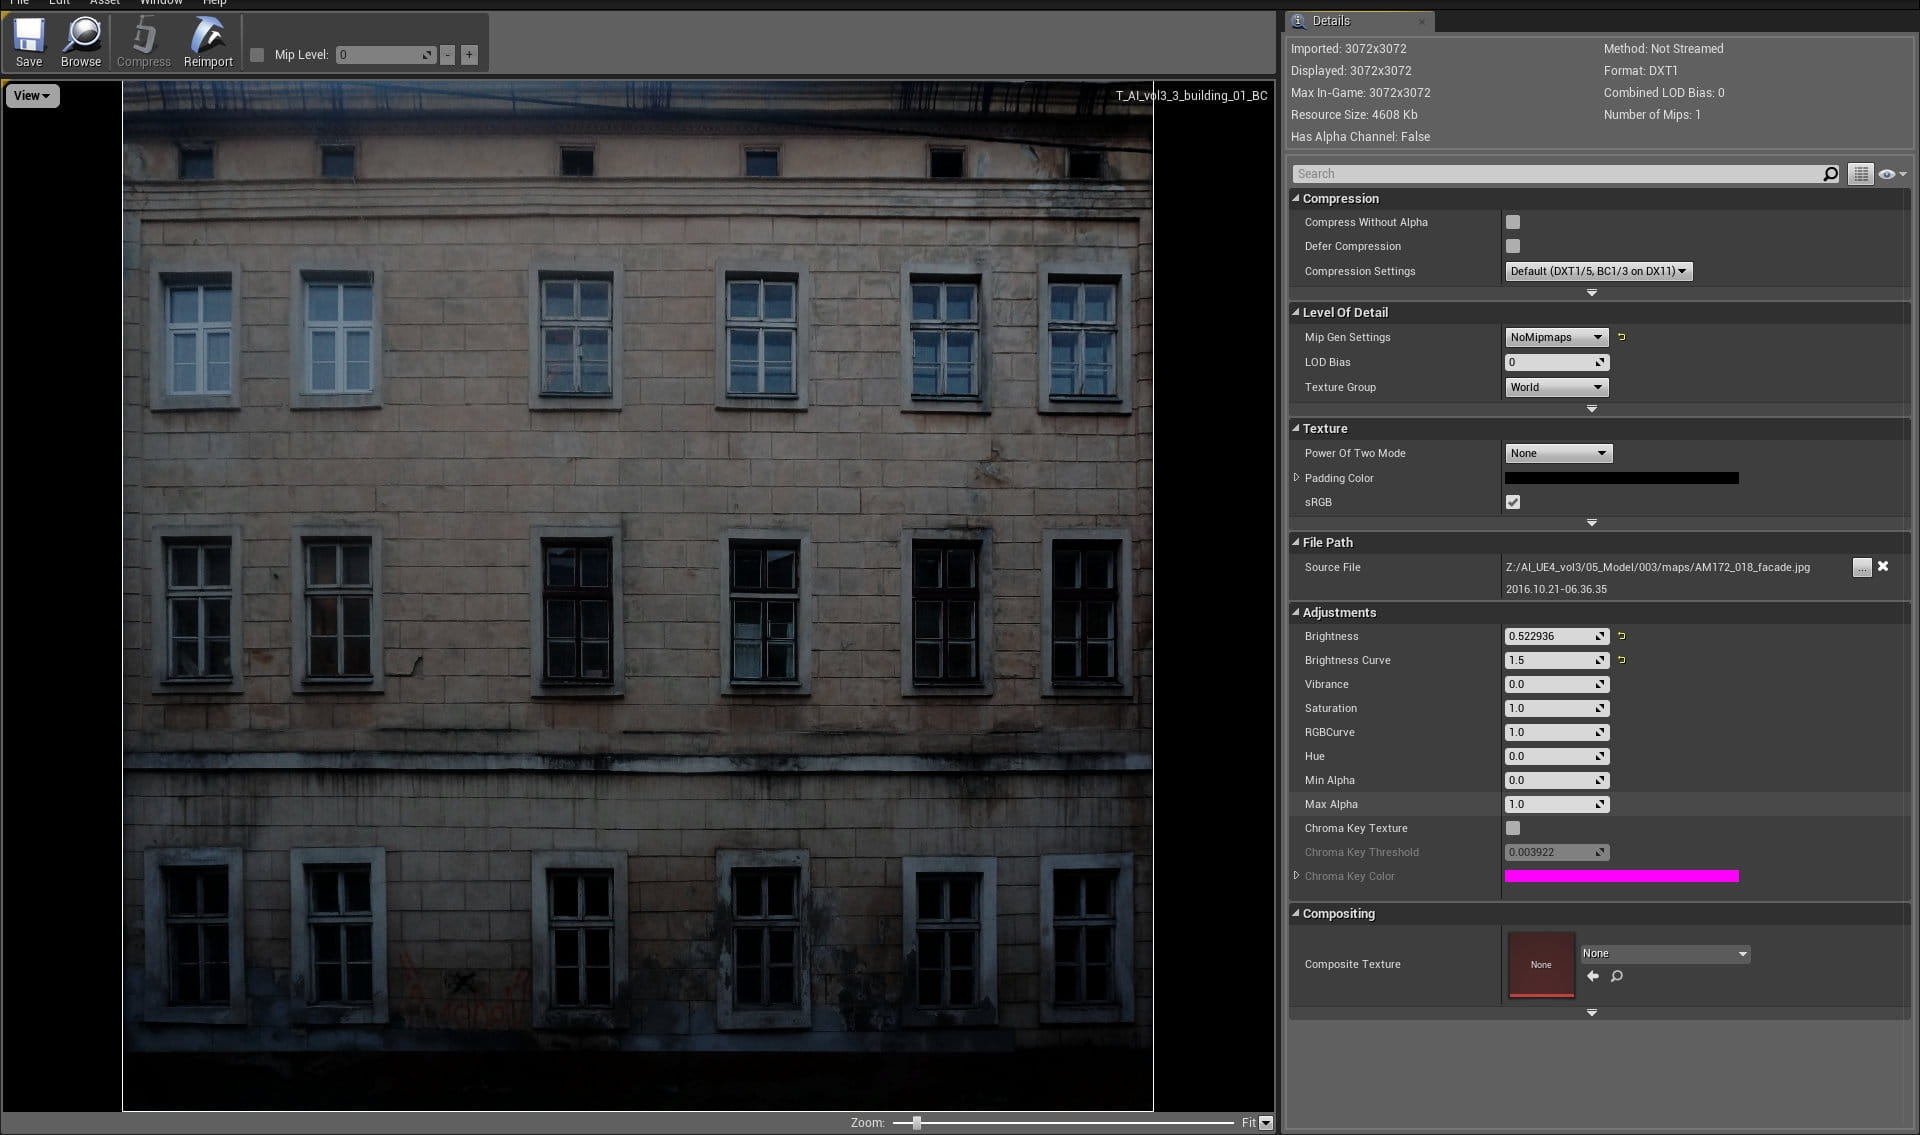
A texture of a plane that is mimicing building behind the window
Building facade material
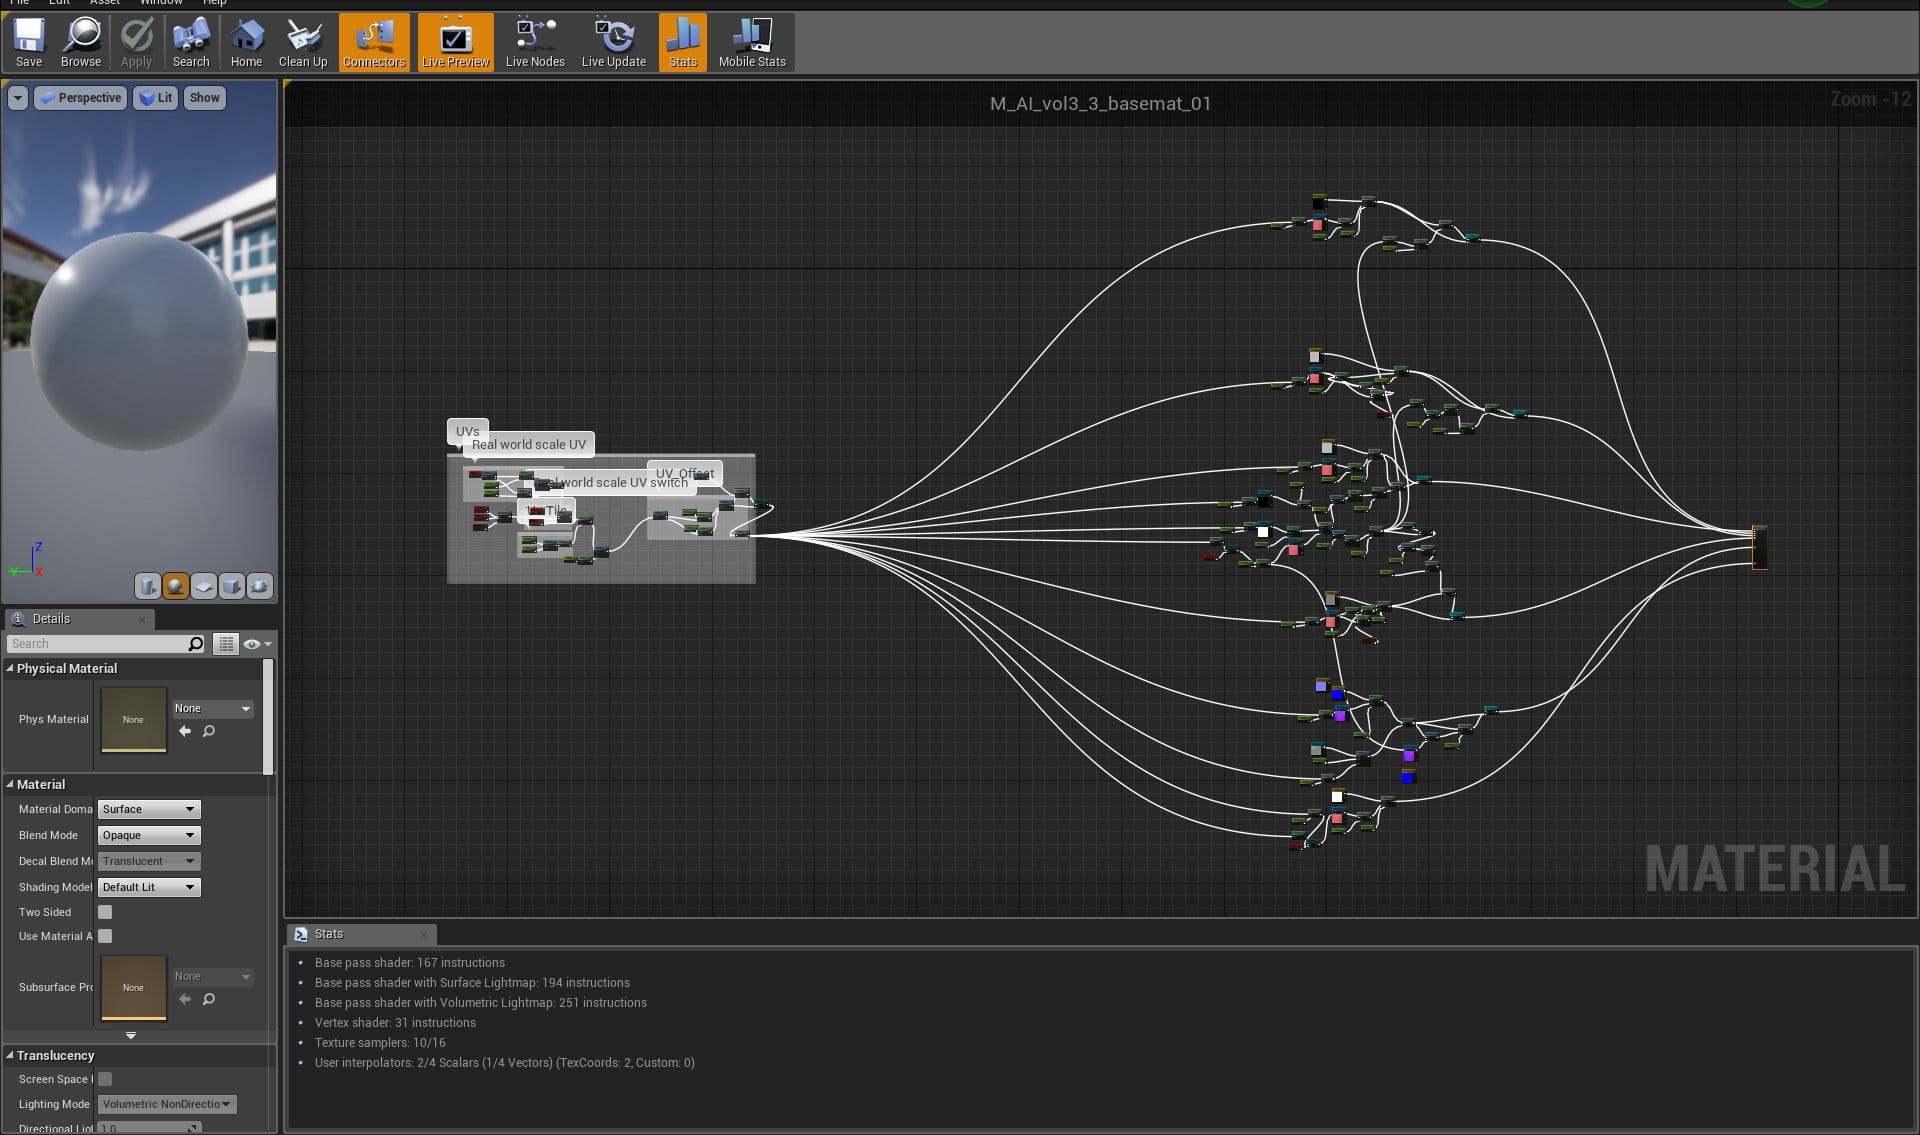
Base material overview. Looks like a big fish, but really it is not THAT complicated.
For example - metallicUV_scale node is controlling UV scale, we also have a node that is used to place texture in material instance, another node controls contrast of this texture and another one: amount of metallic texture.

A chair and its UVs
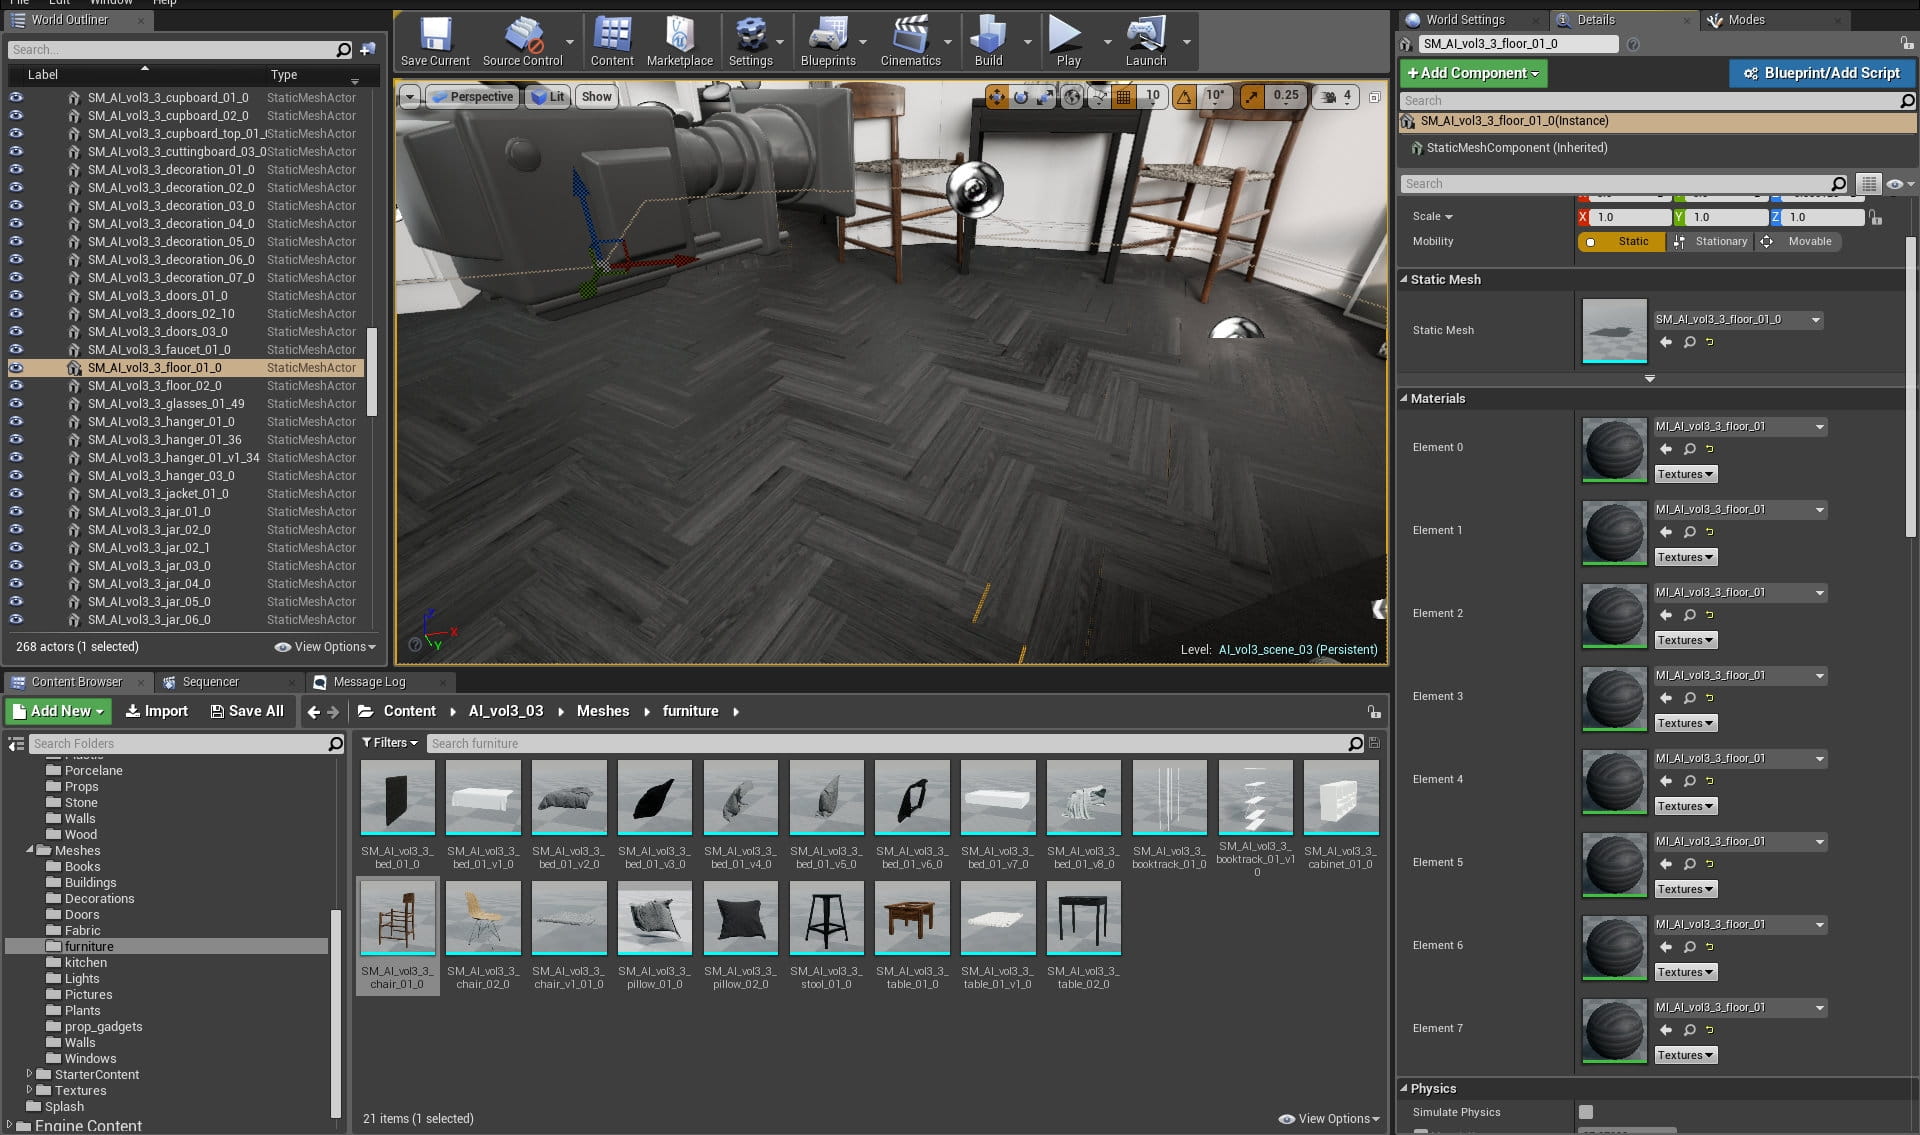
Floor has seven separate materials with color variations.
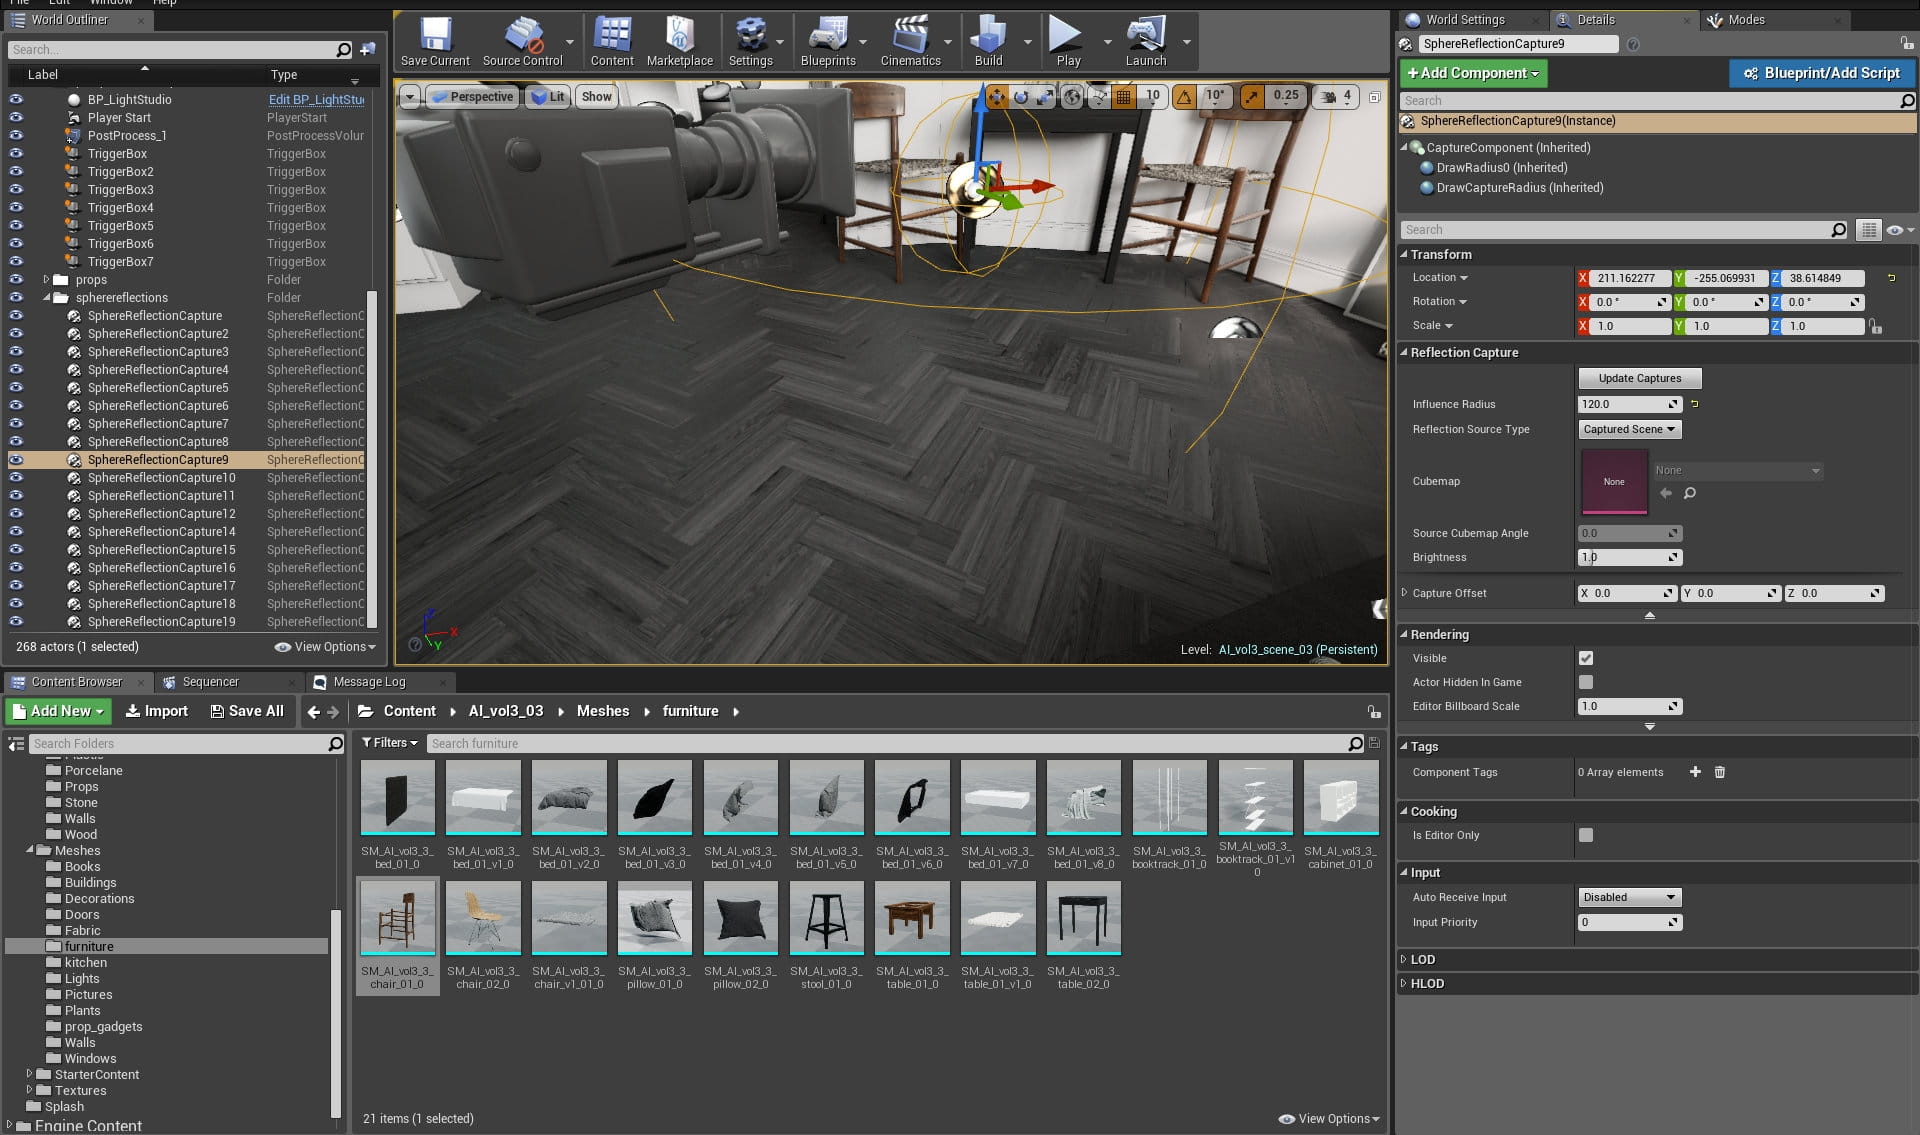
Sphere Reflection capture settings. Here you can control influence radius of the sphere and its overall contribution to the scene.
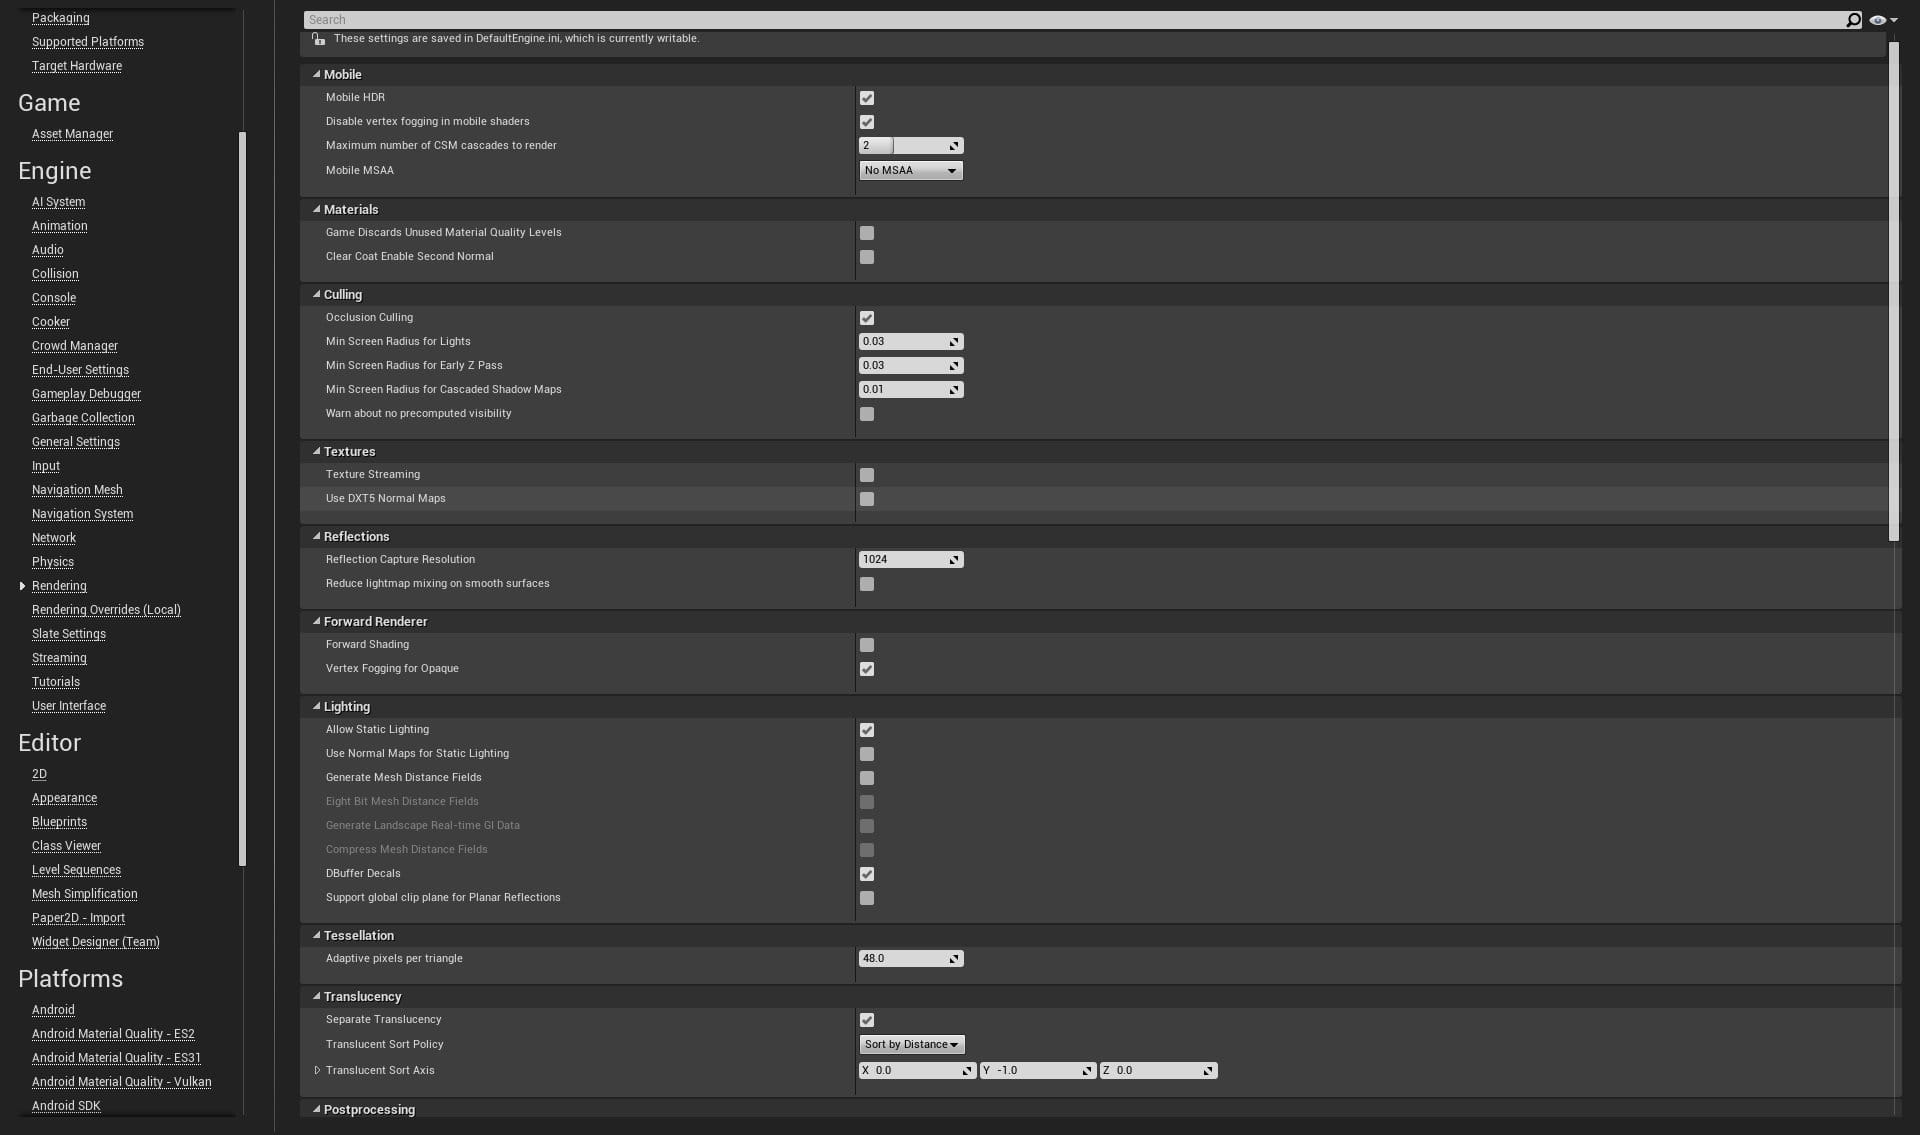
In Project settings > Rendering you tweak reflections quality - use Reflection Capture Resolution box for that.
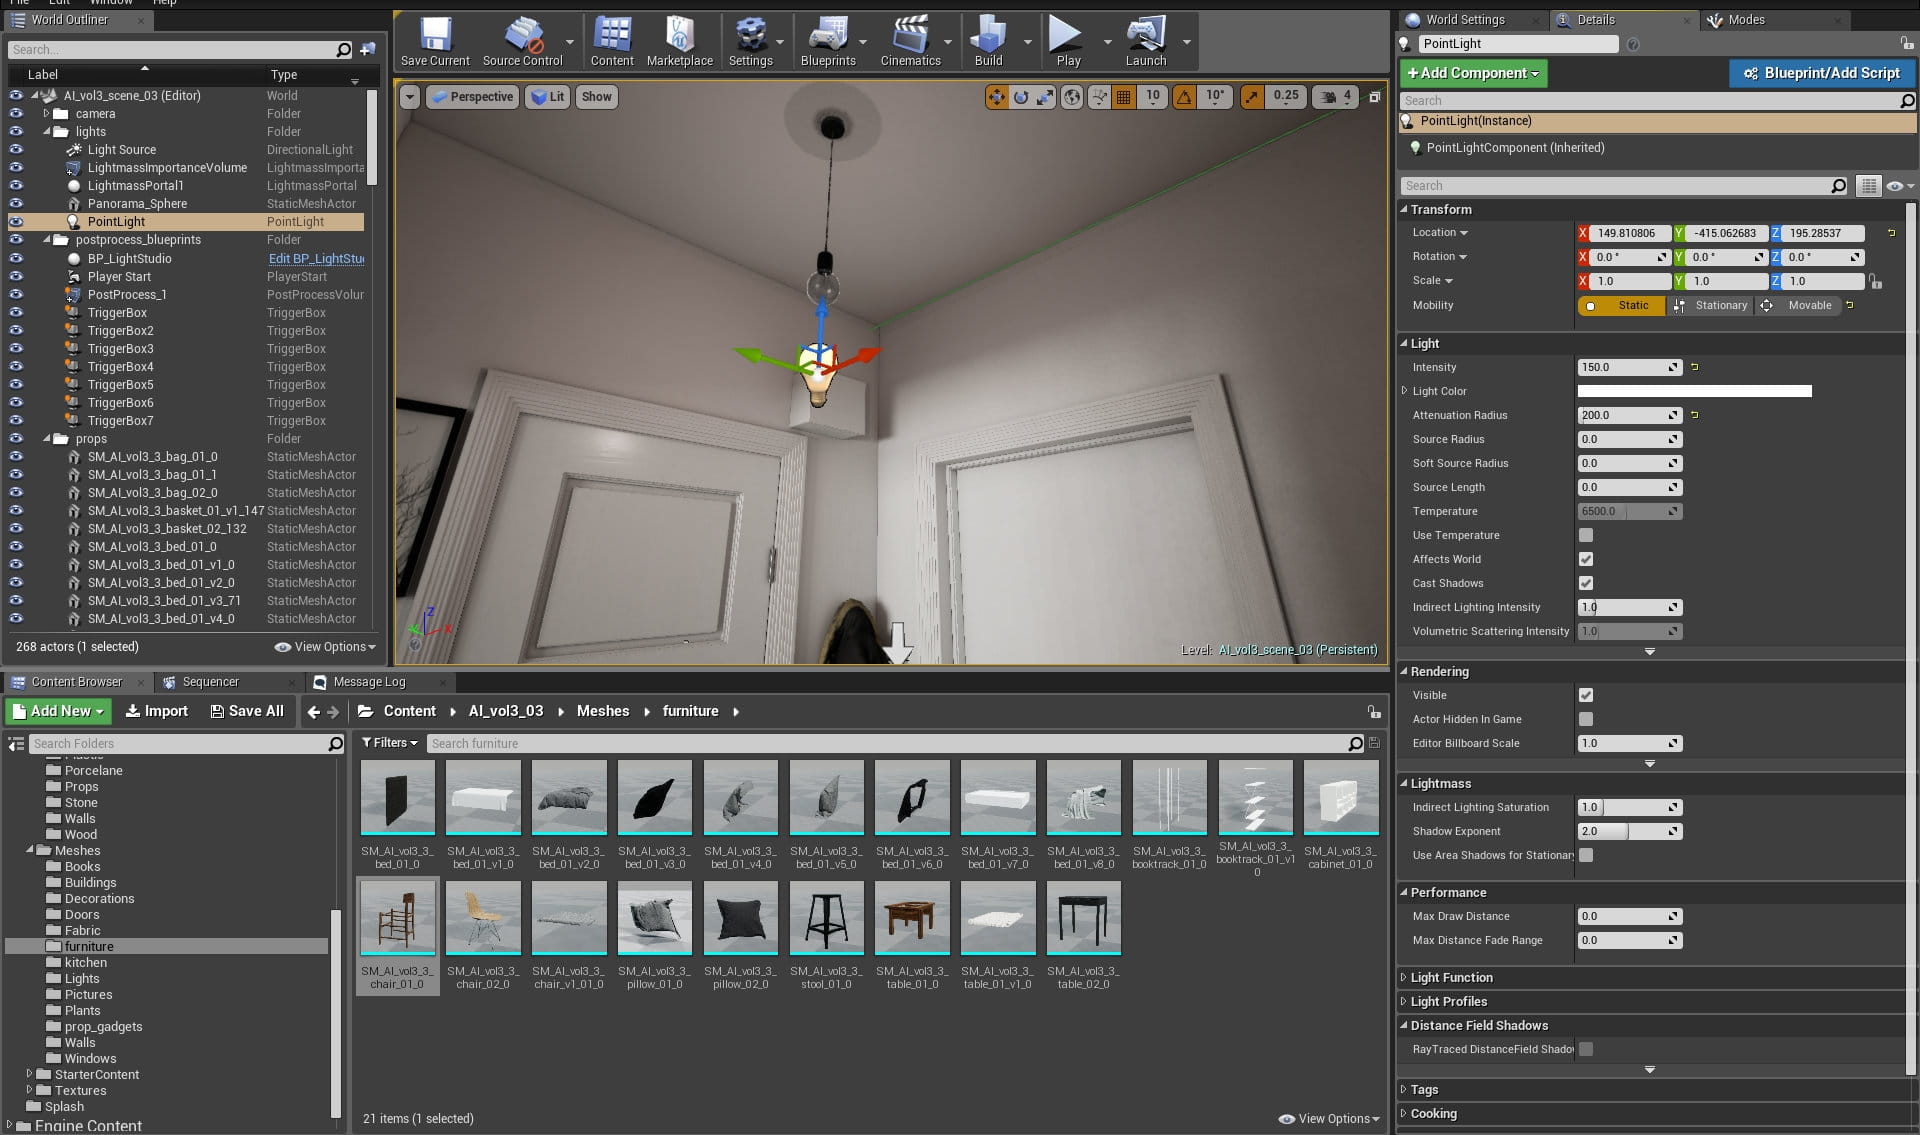
The only light except direct light is a small point light inside.
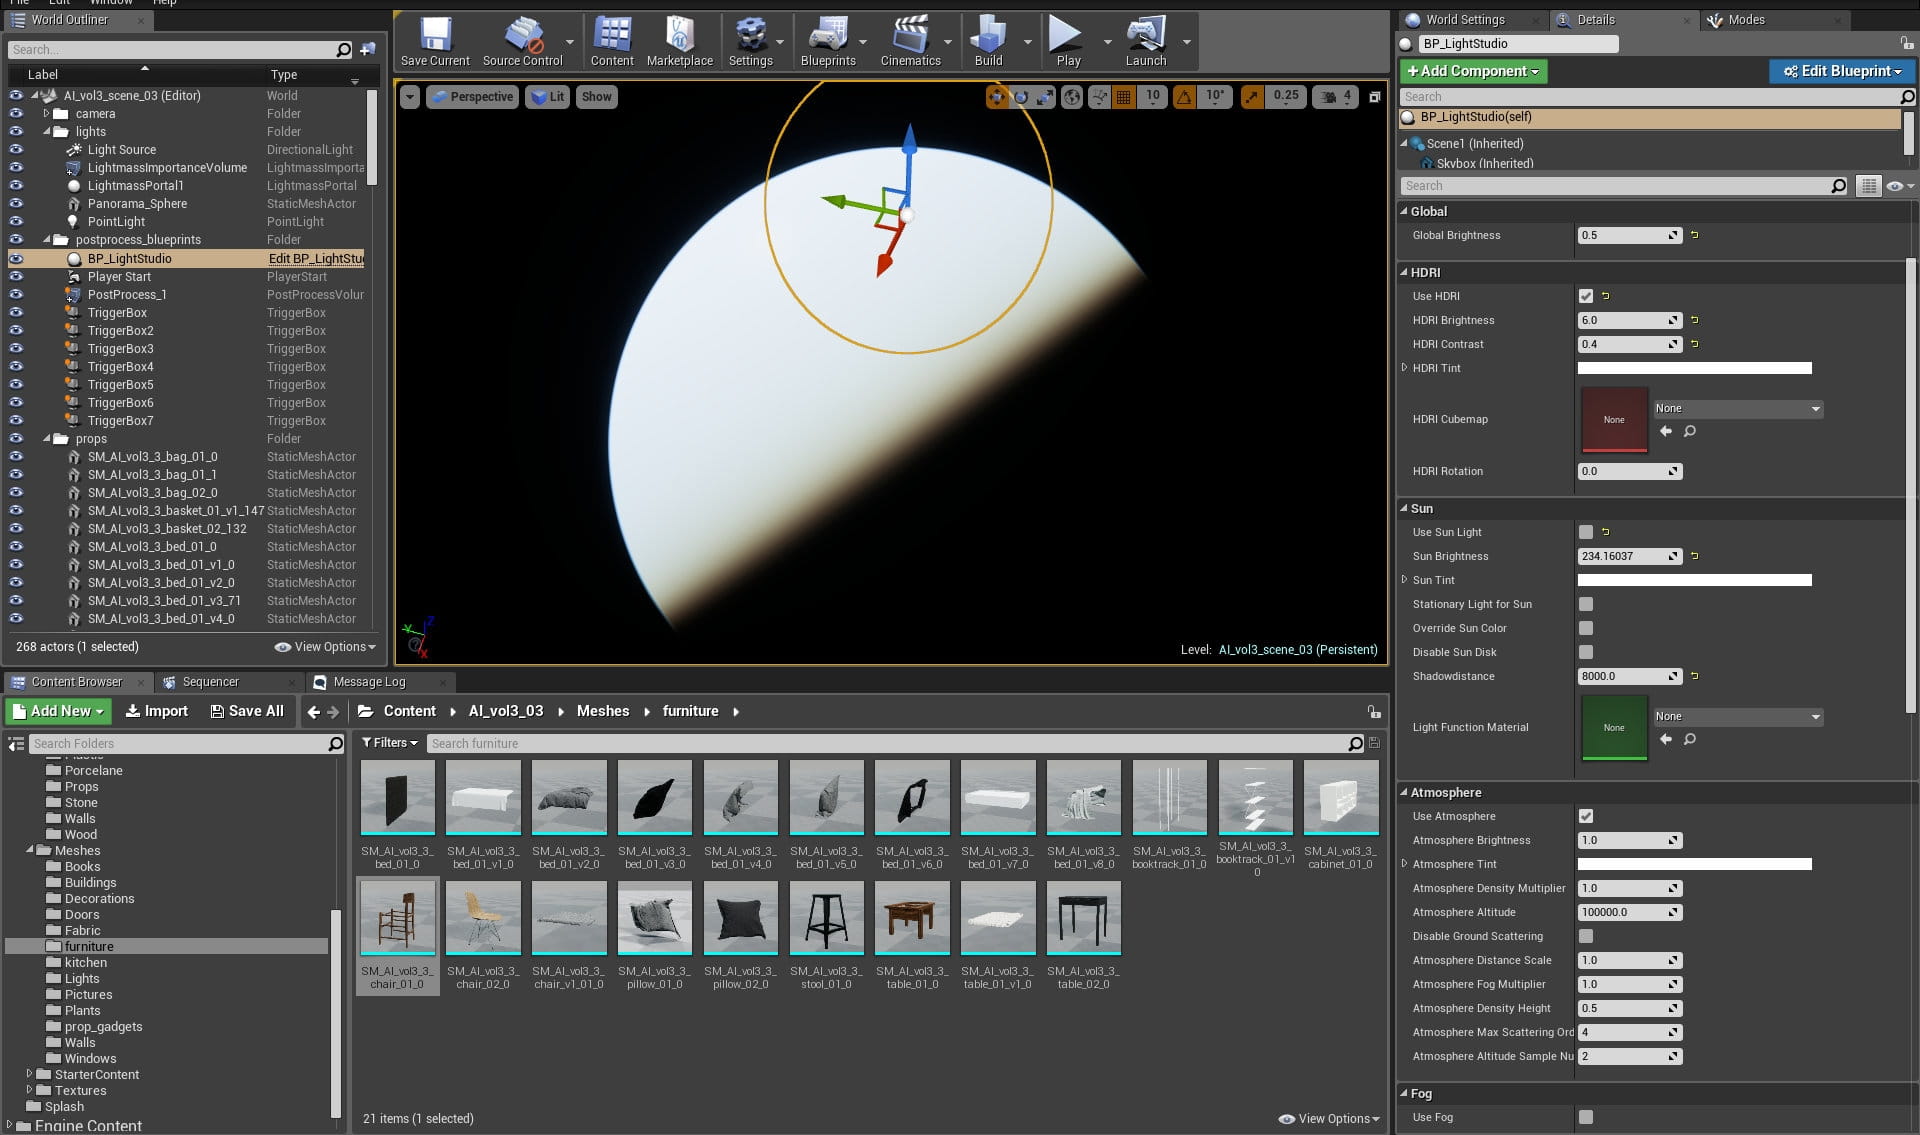
The whole scene is surrounded by LightStudio Sphere, settings on the right.
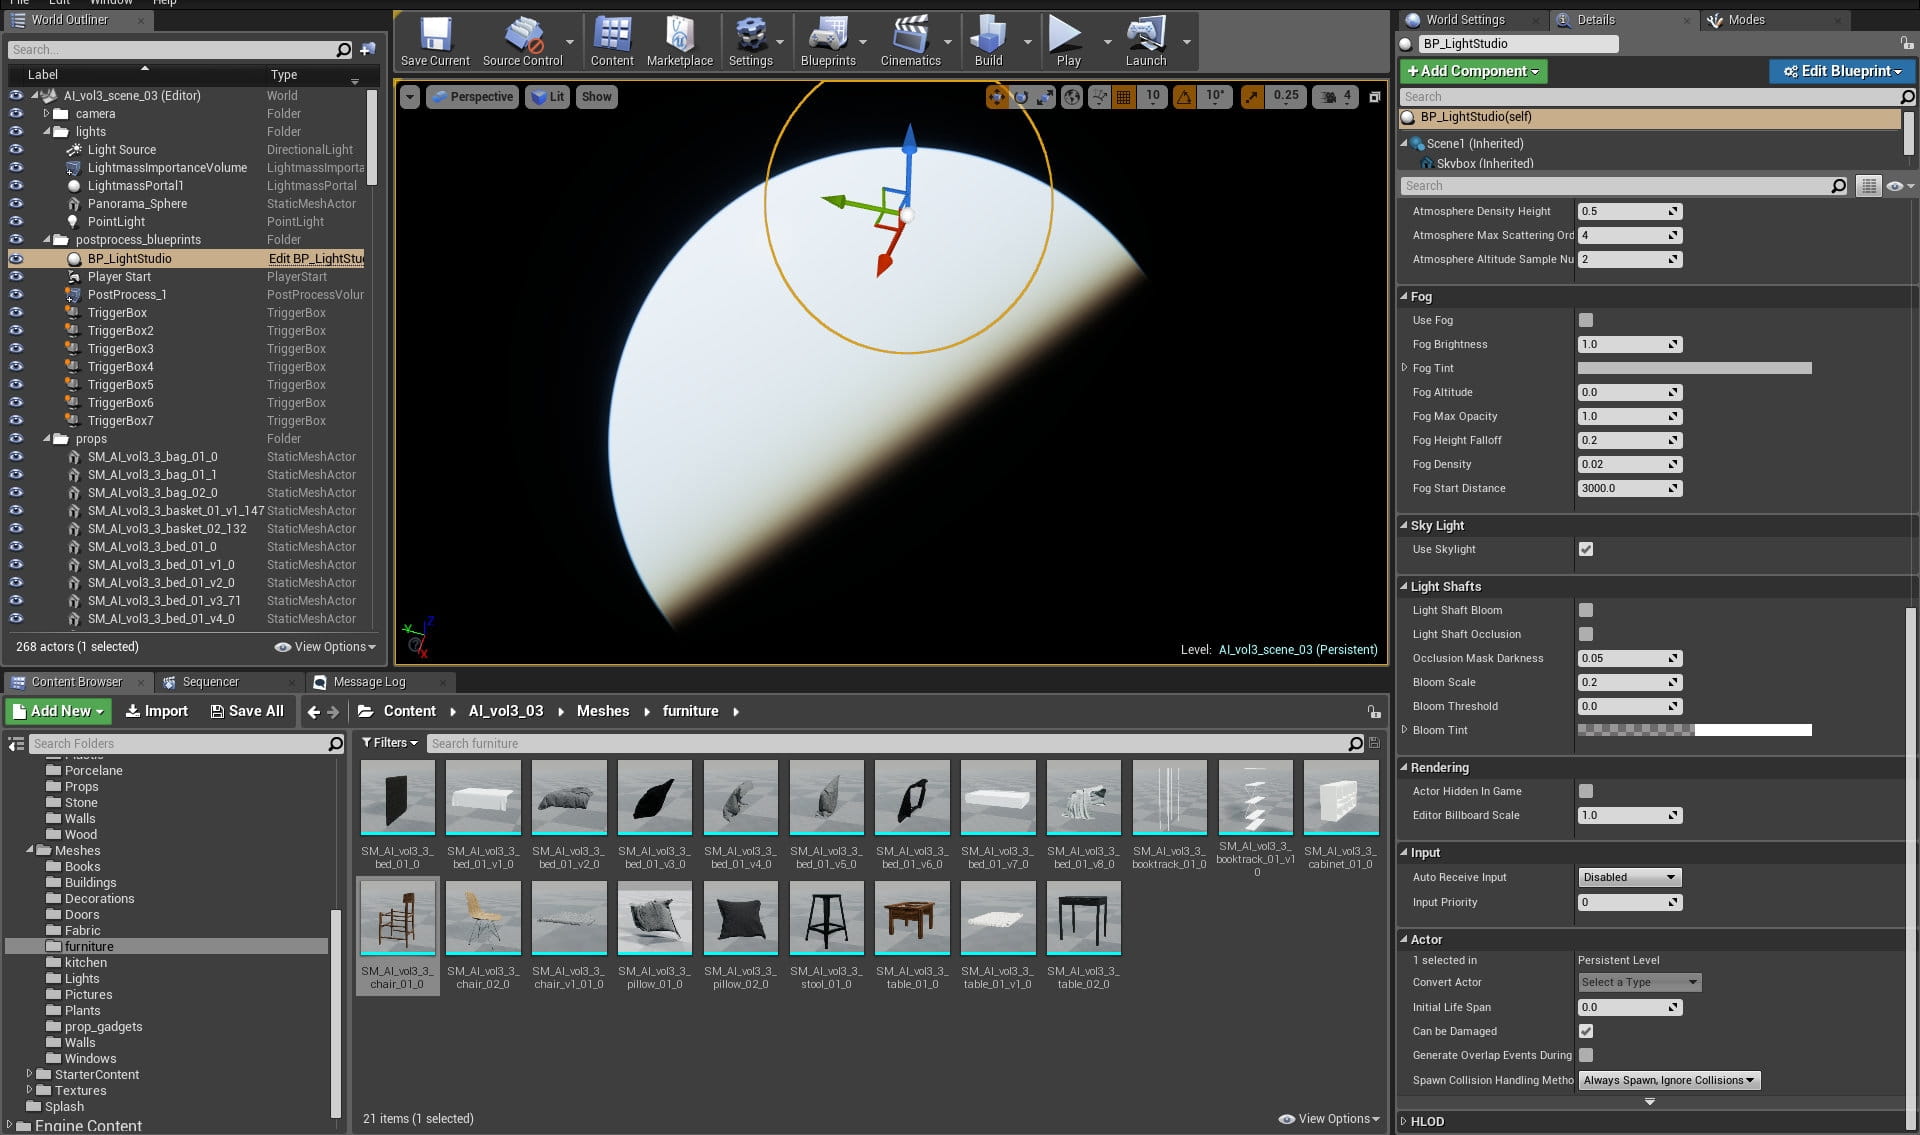
LightStudio sphere settings, continued.
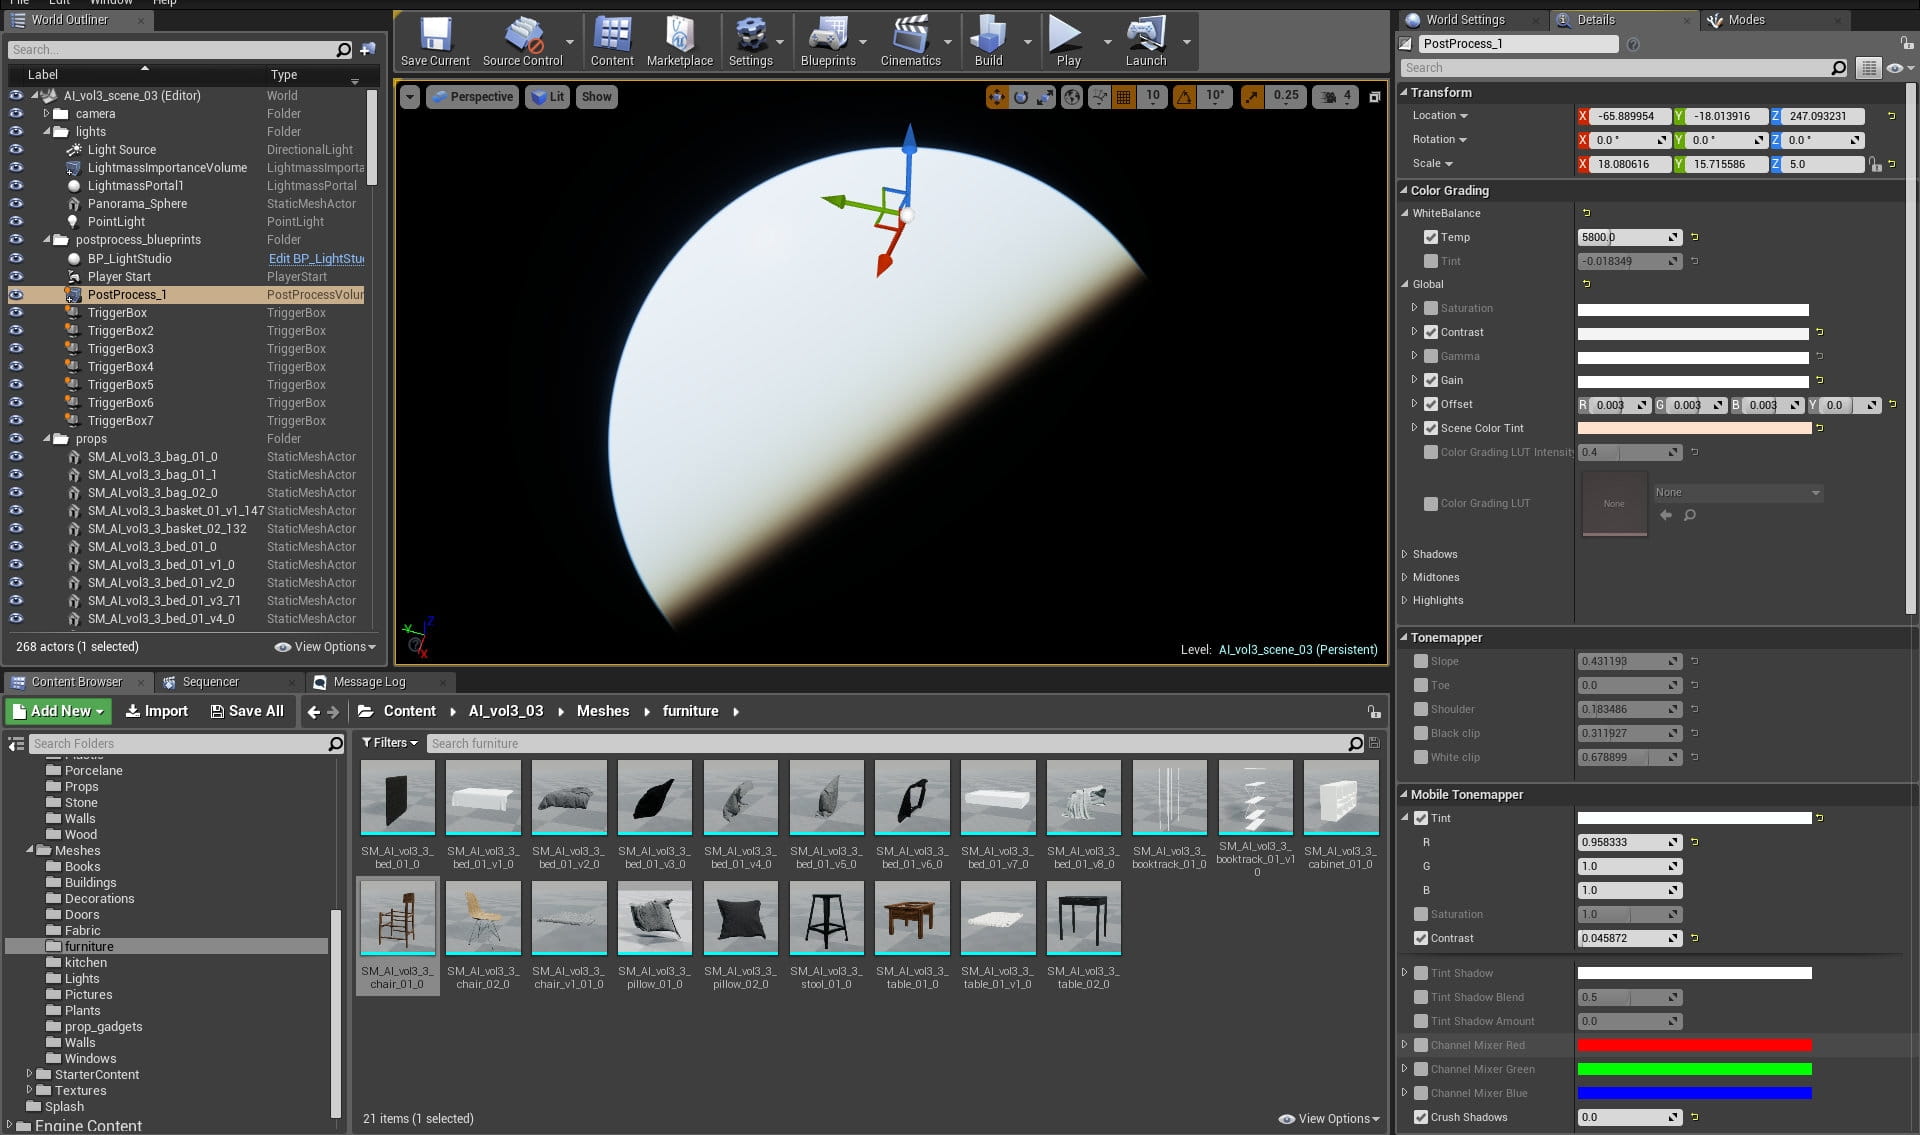
Post-processing volume settings
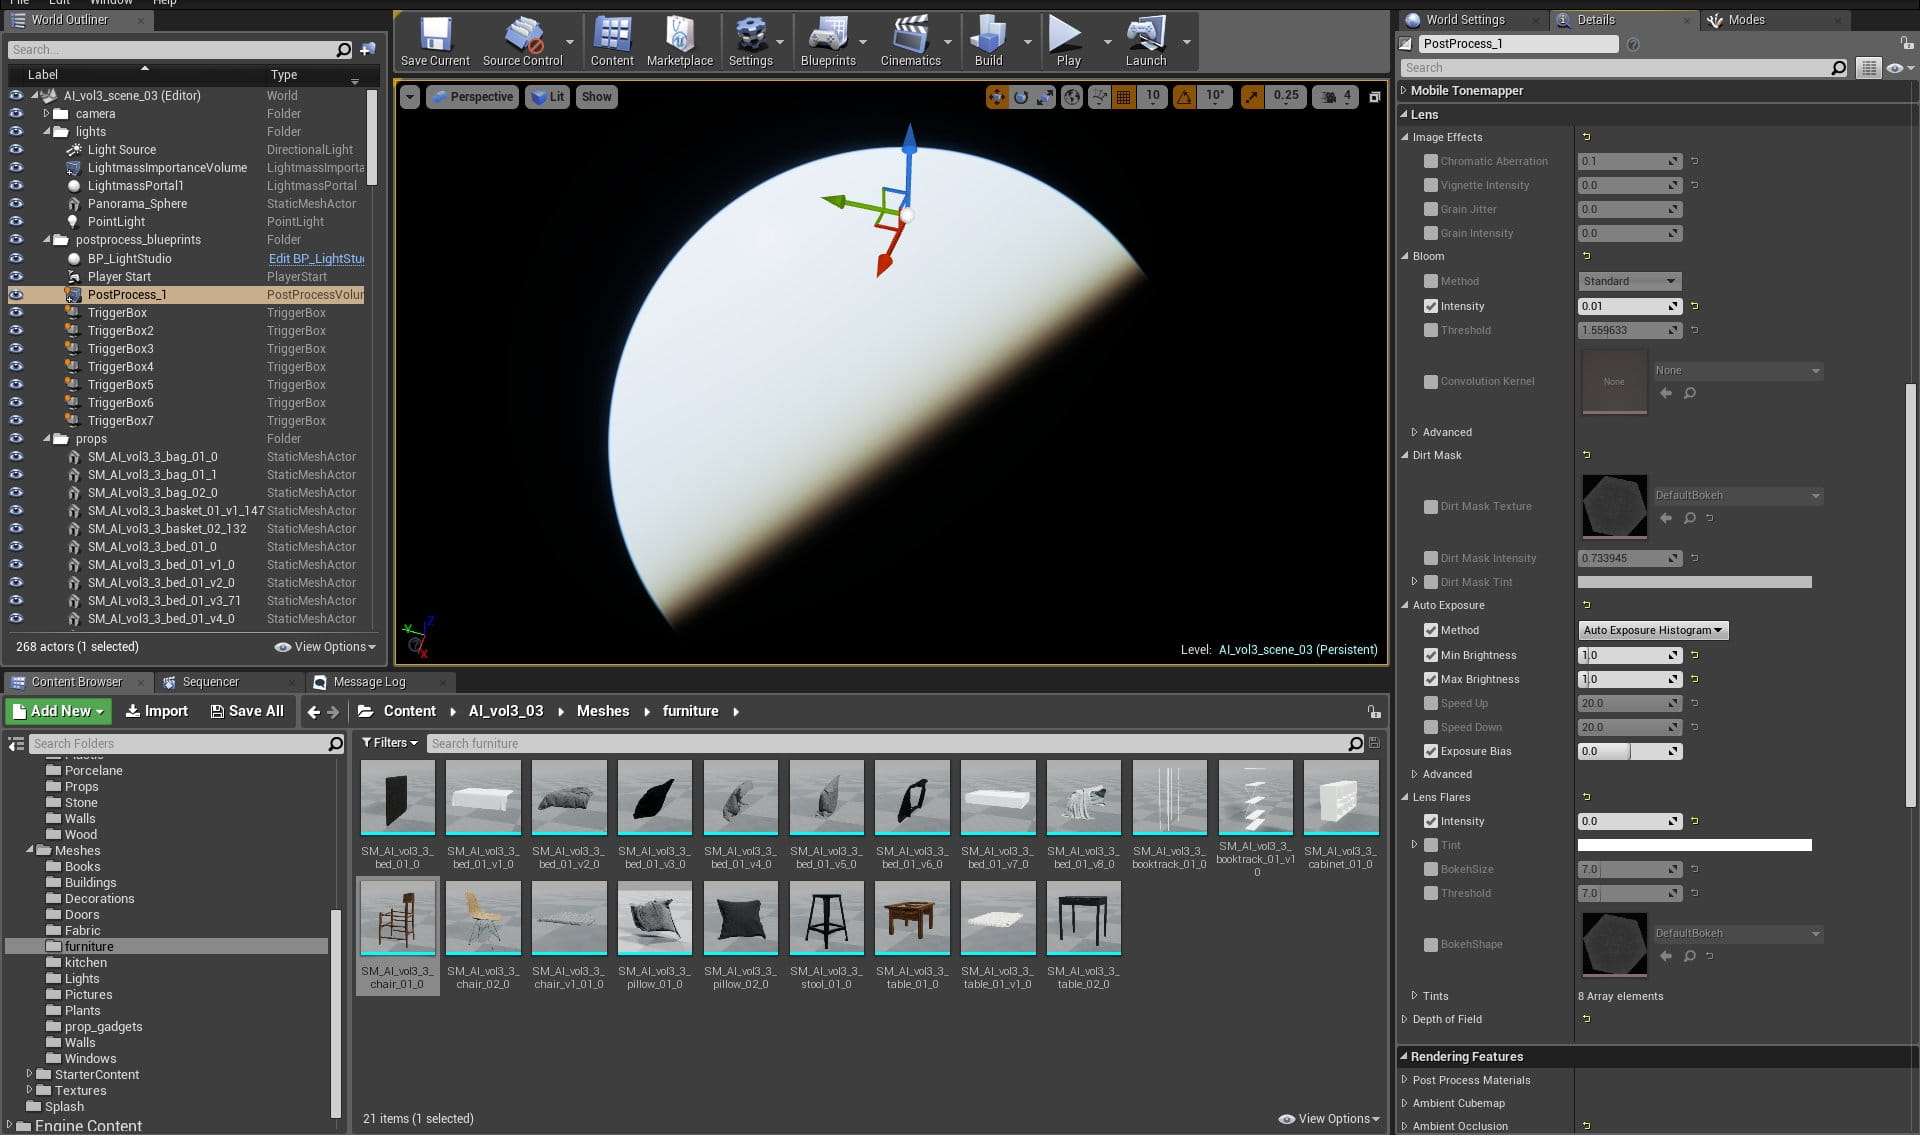
Post-processing, continued

Post-processing, continued

Post-processing, continued

Final scene - screenshot 1. Archinteriors for UE vol. 3
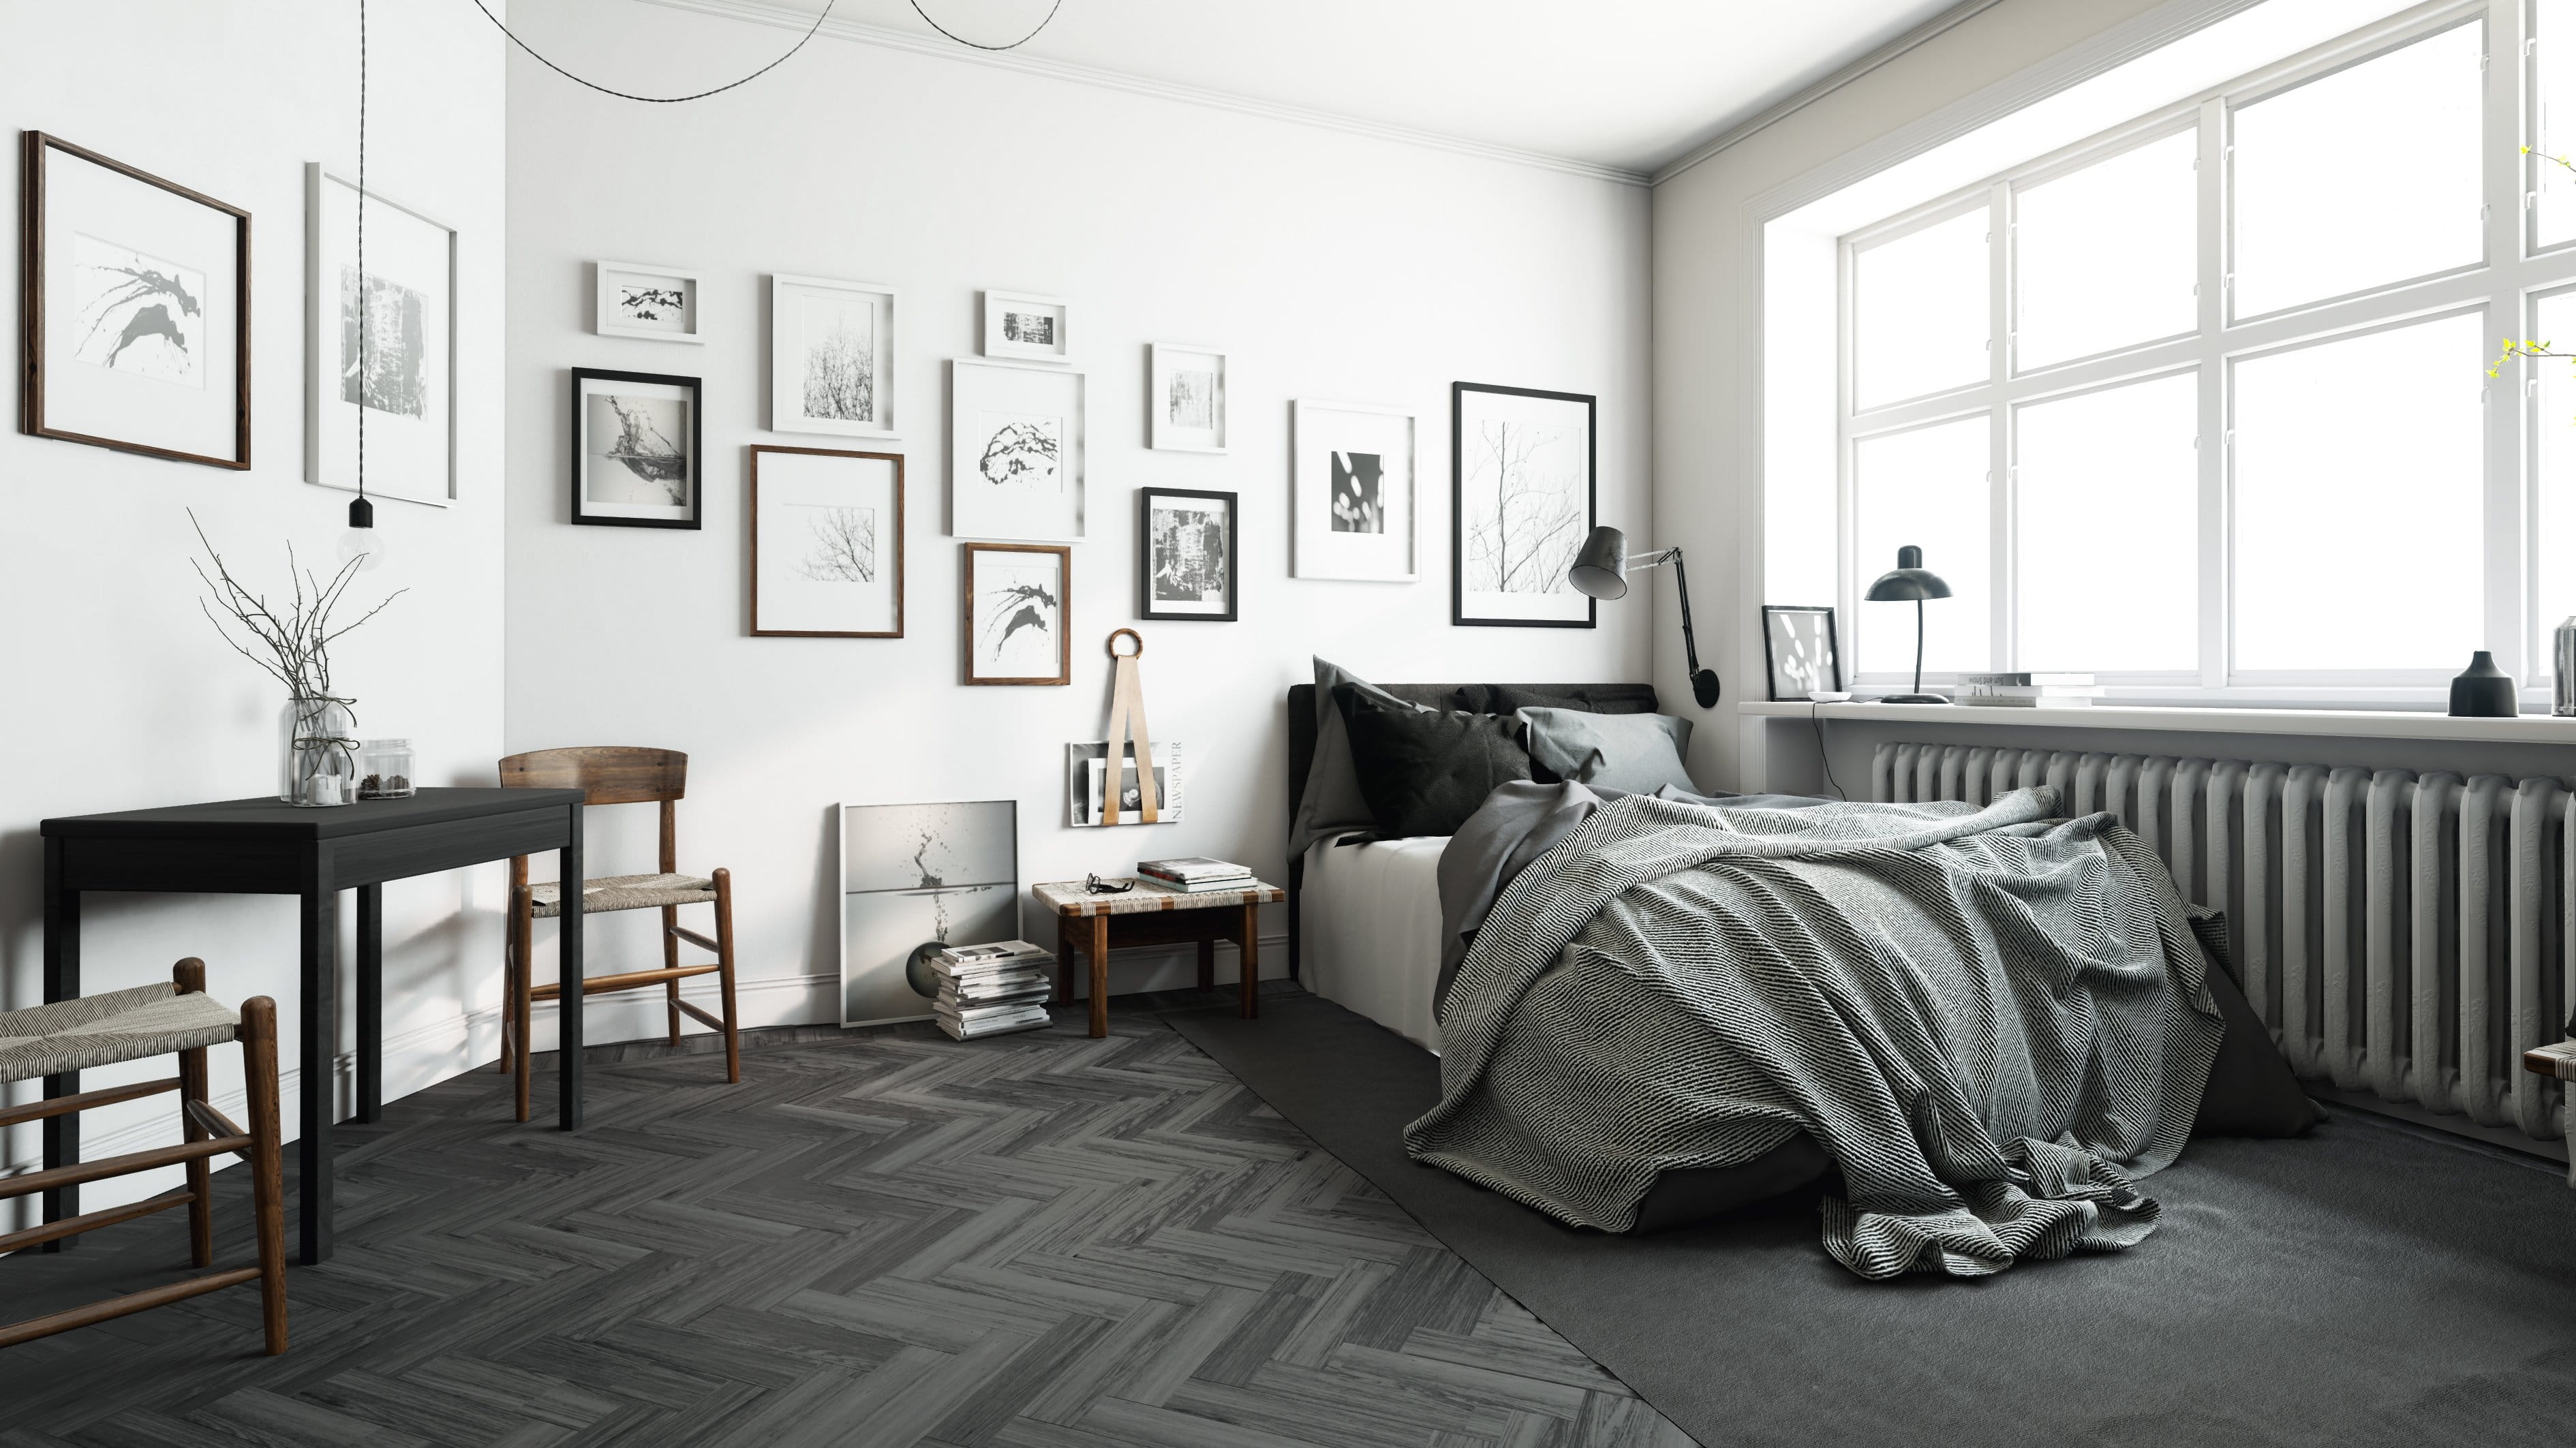
Final scene - screenshot 2. Archinteriors for UE vol. 3
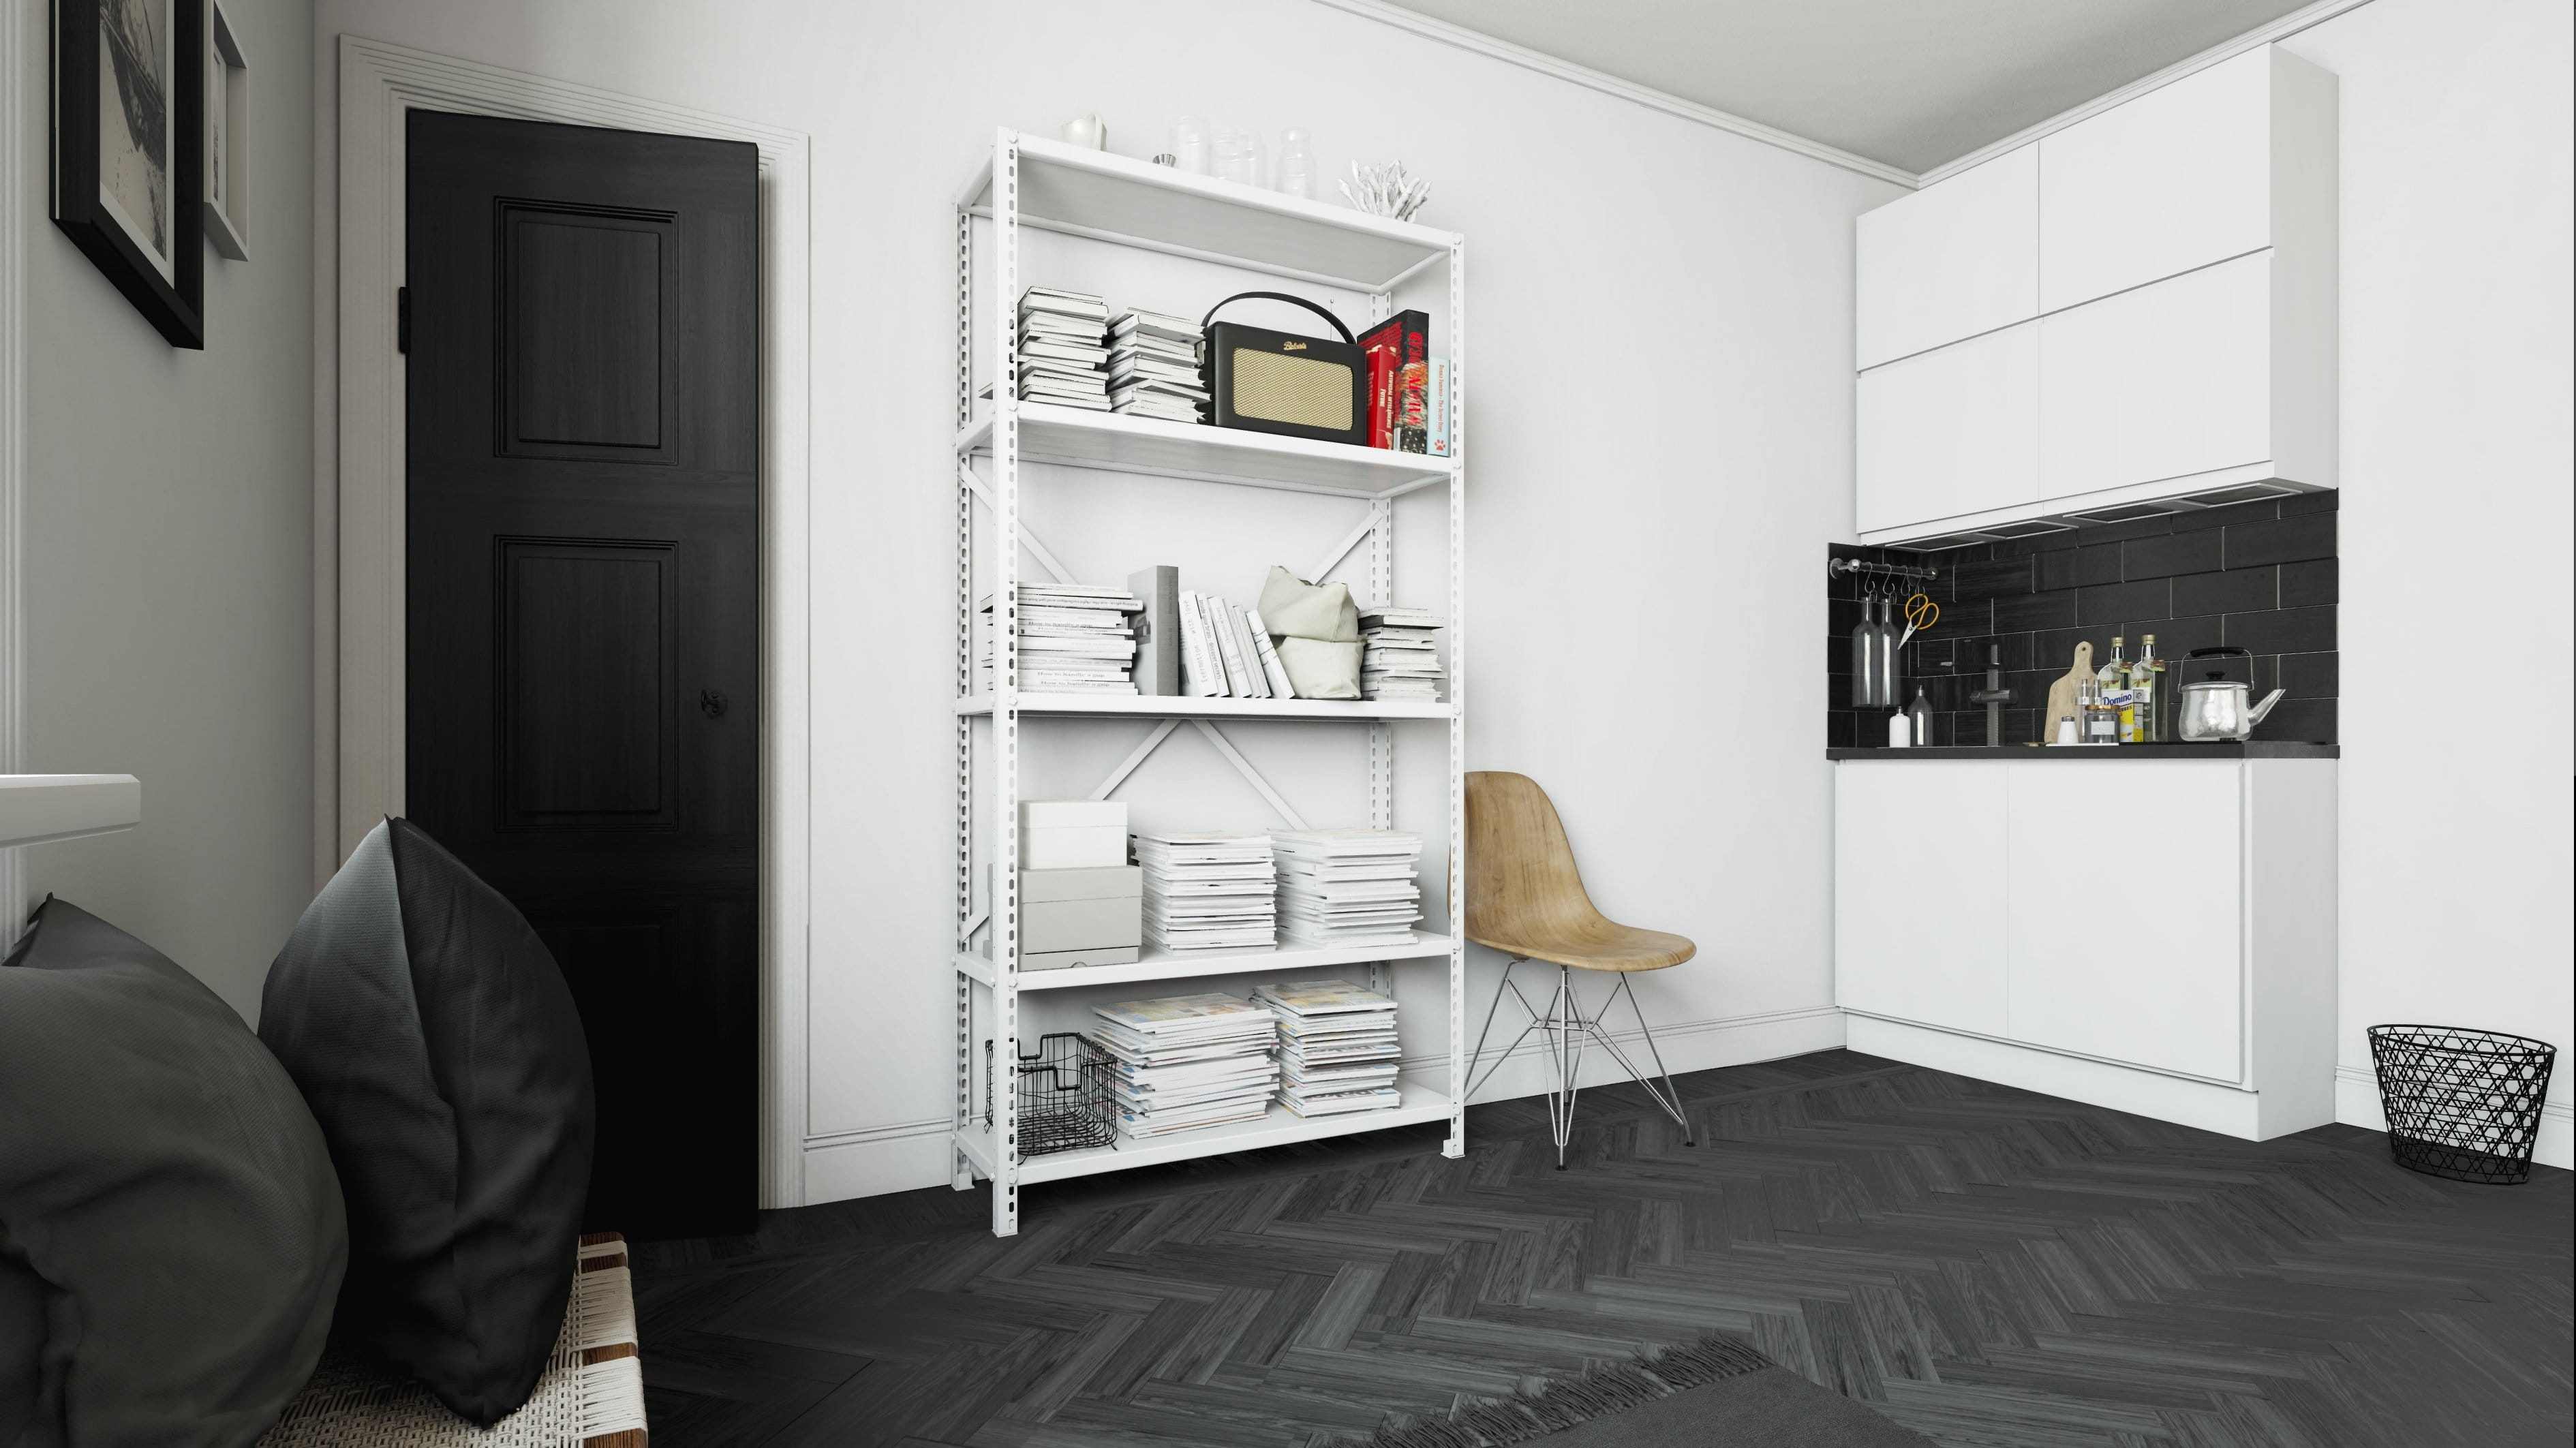
Final scene - screenshot 3. Archinteriors for UE vol. 3
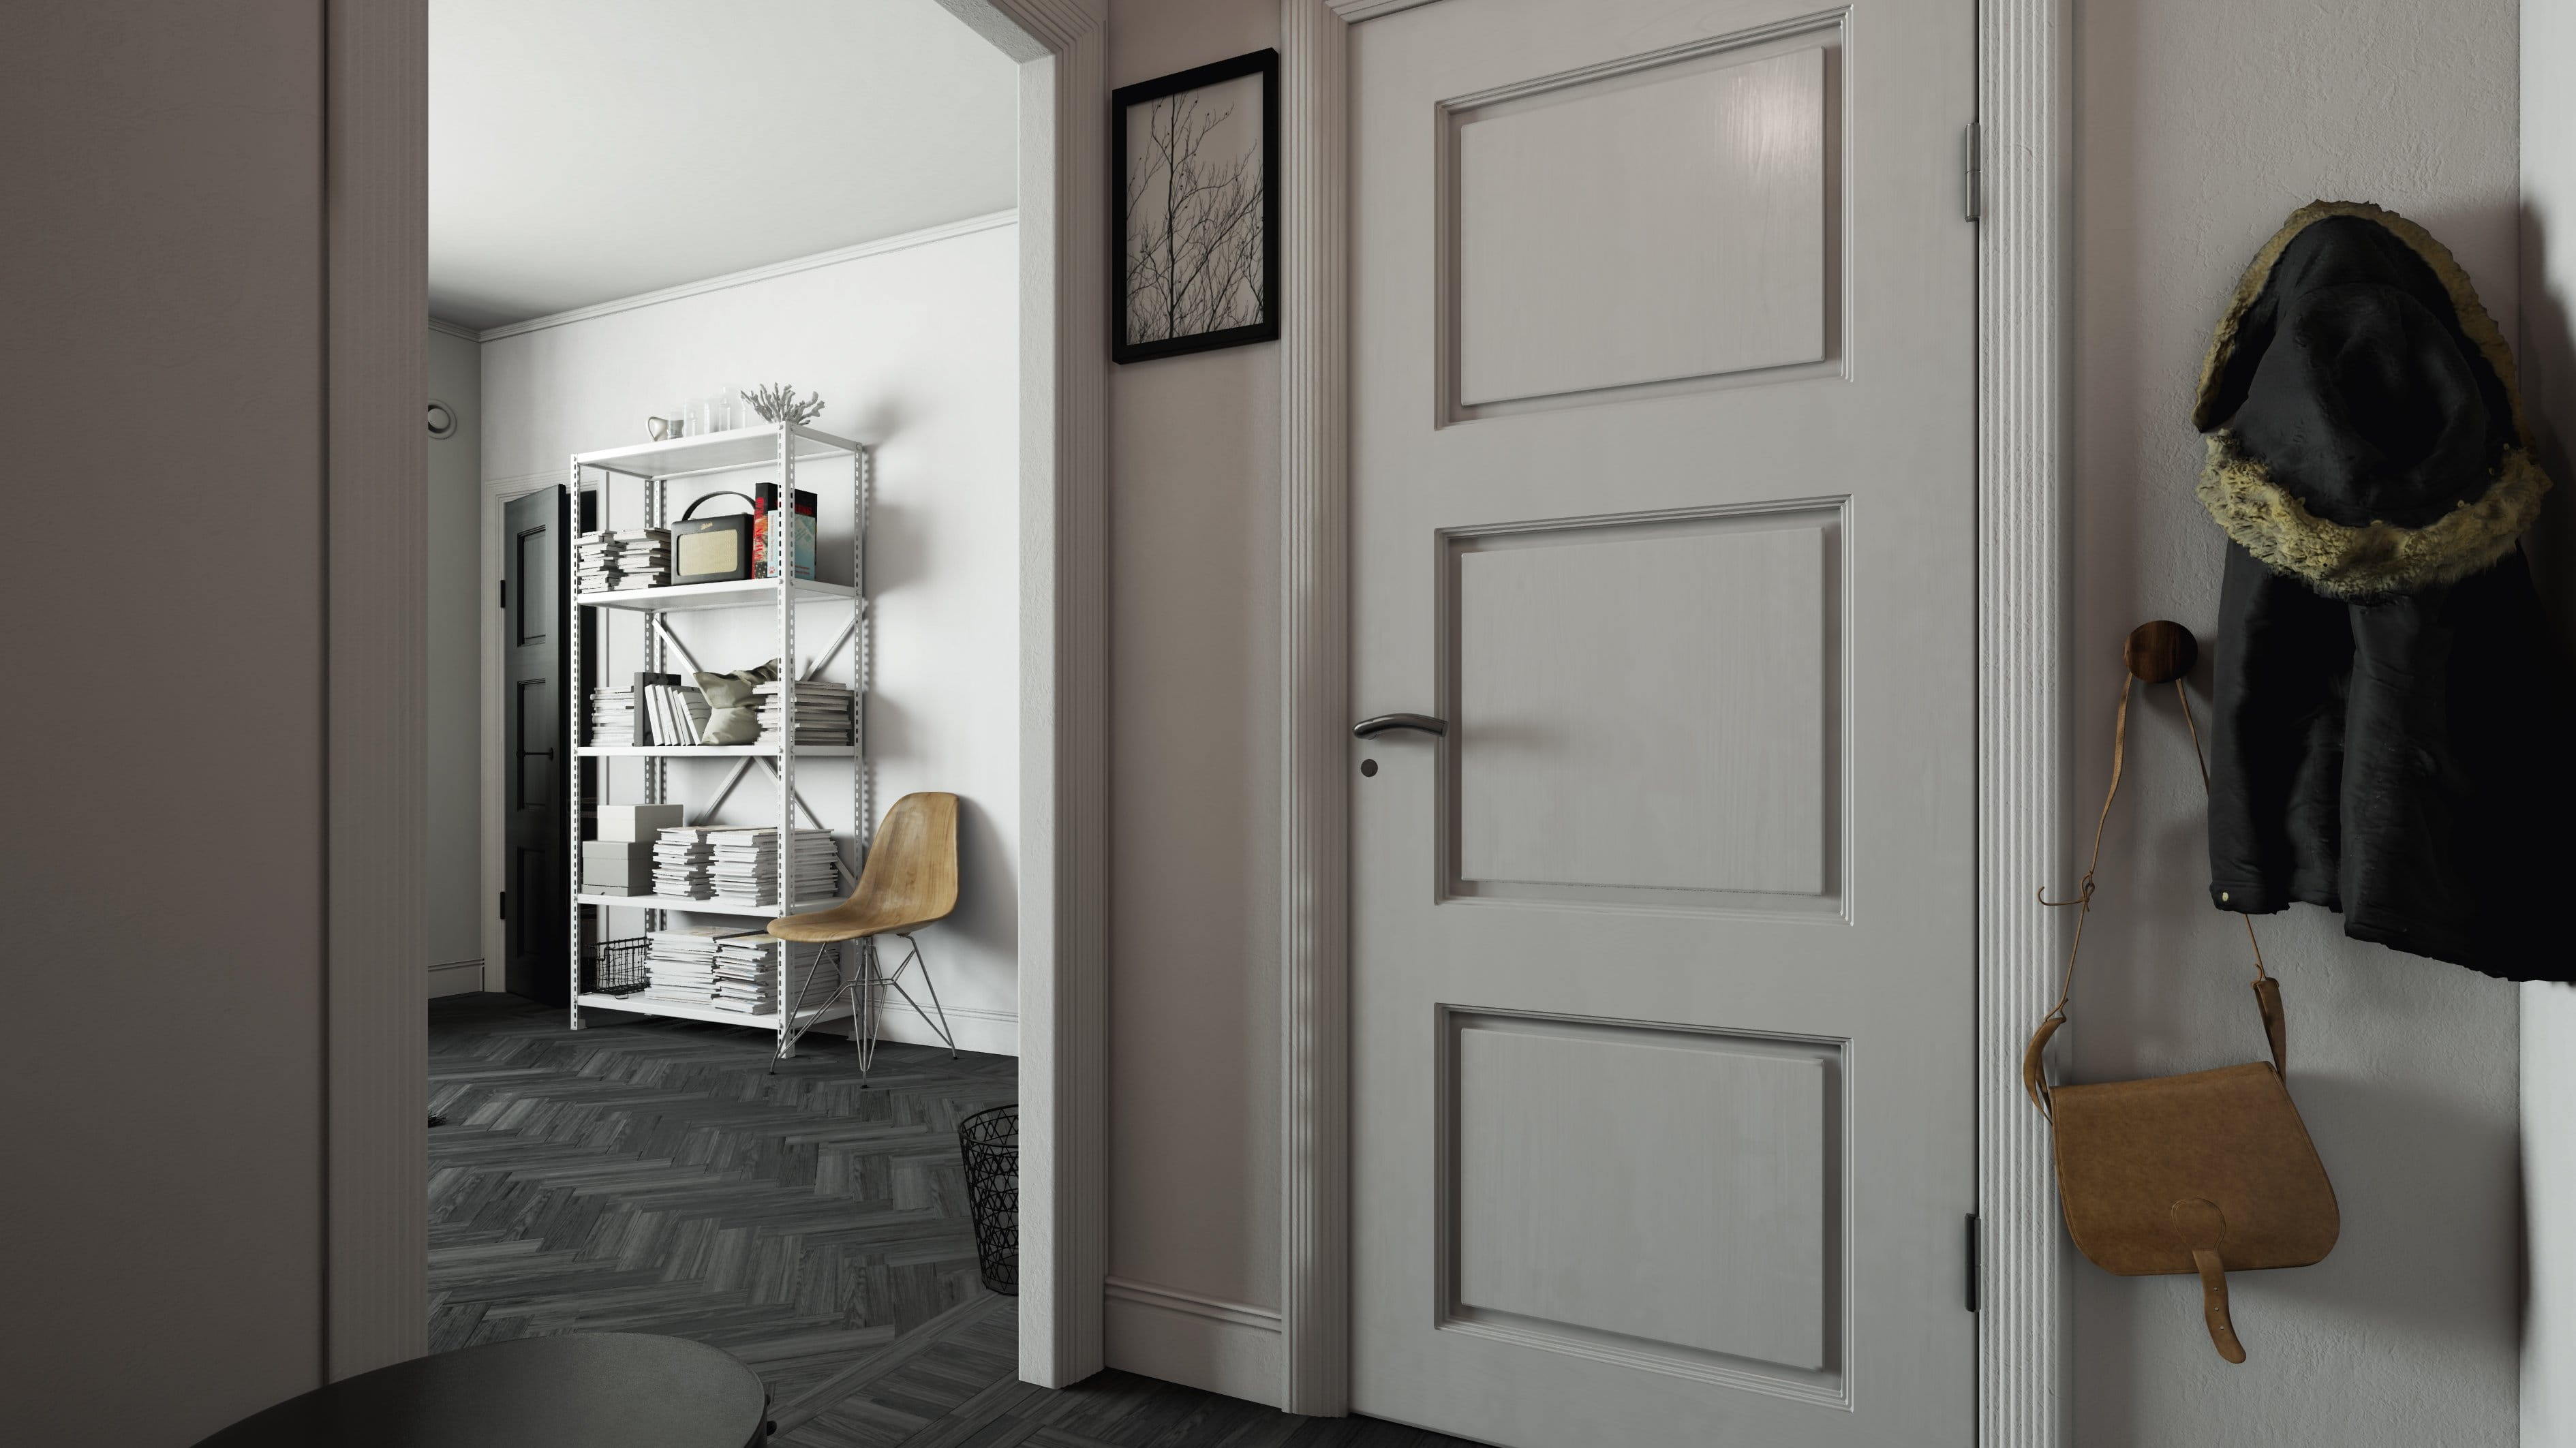
Final scene - screenshot 4. Archinteriors for UE vol. 3

Final scene - screenshot 5. Archinteriors for UE vol. 3

Final scene - screenshot 6. Archinteriors for UE vol. 3
Final scene - screenshot 7. Archinteriors for UE vol. 3
Final scene - screenshot 8. Archinteriors for UE vol. 3
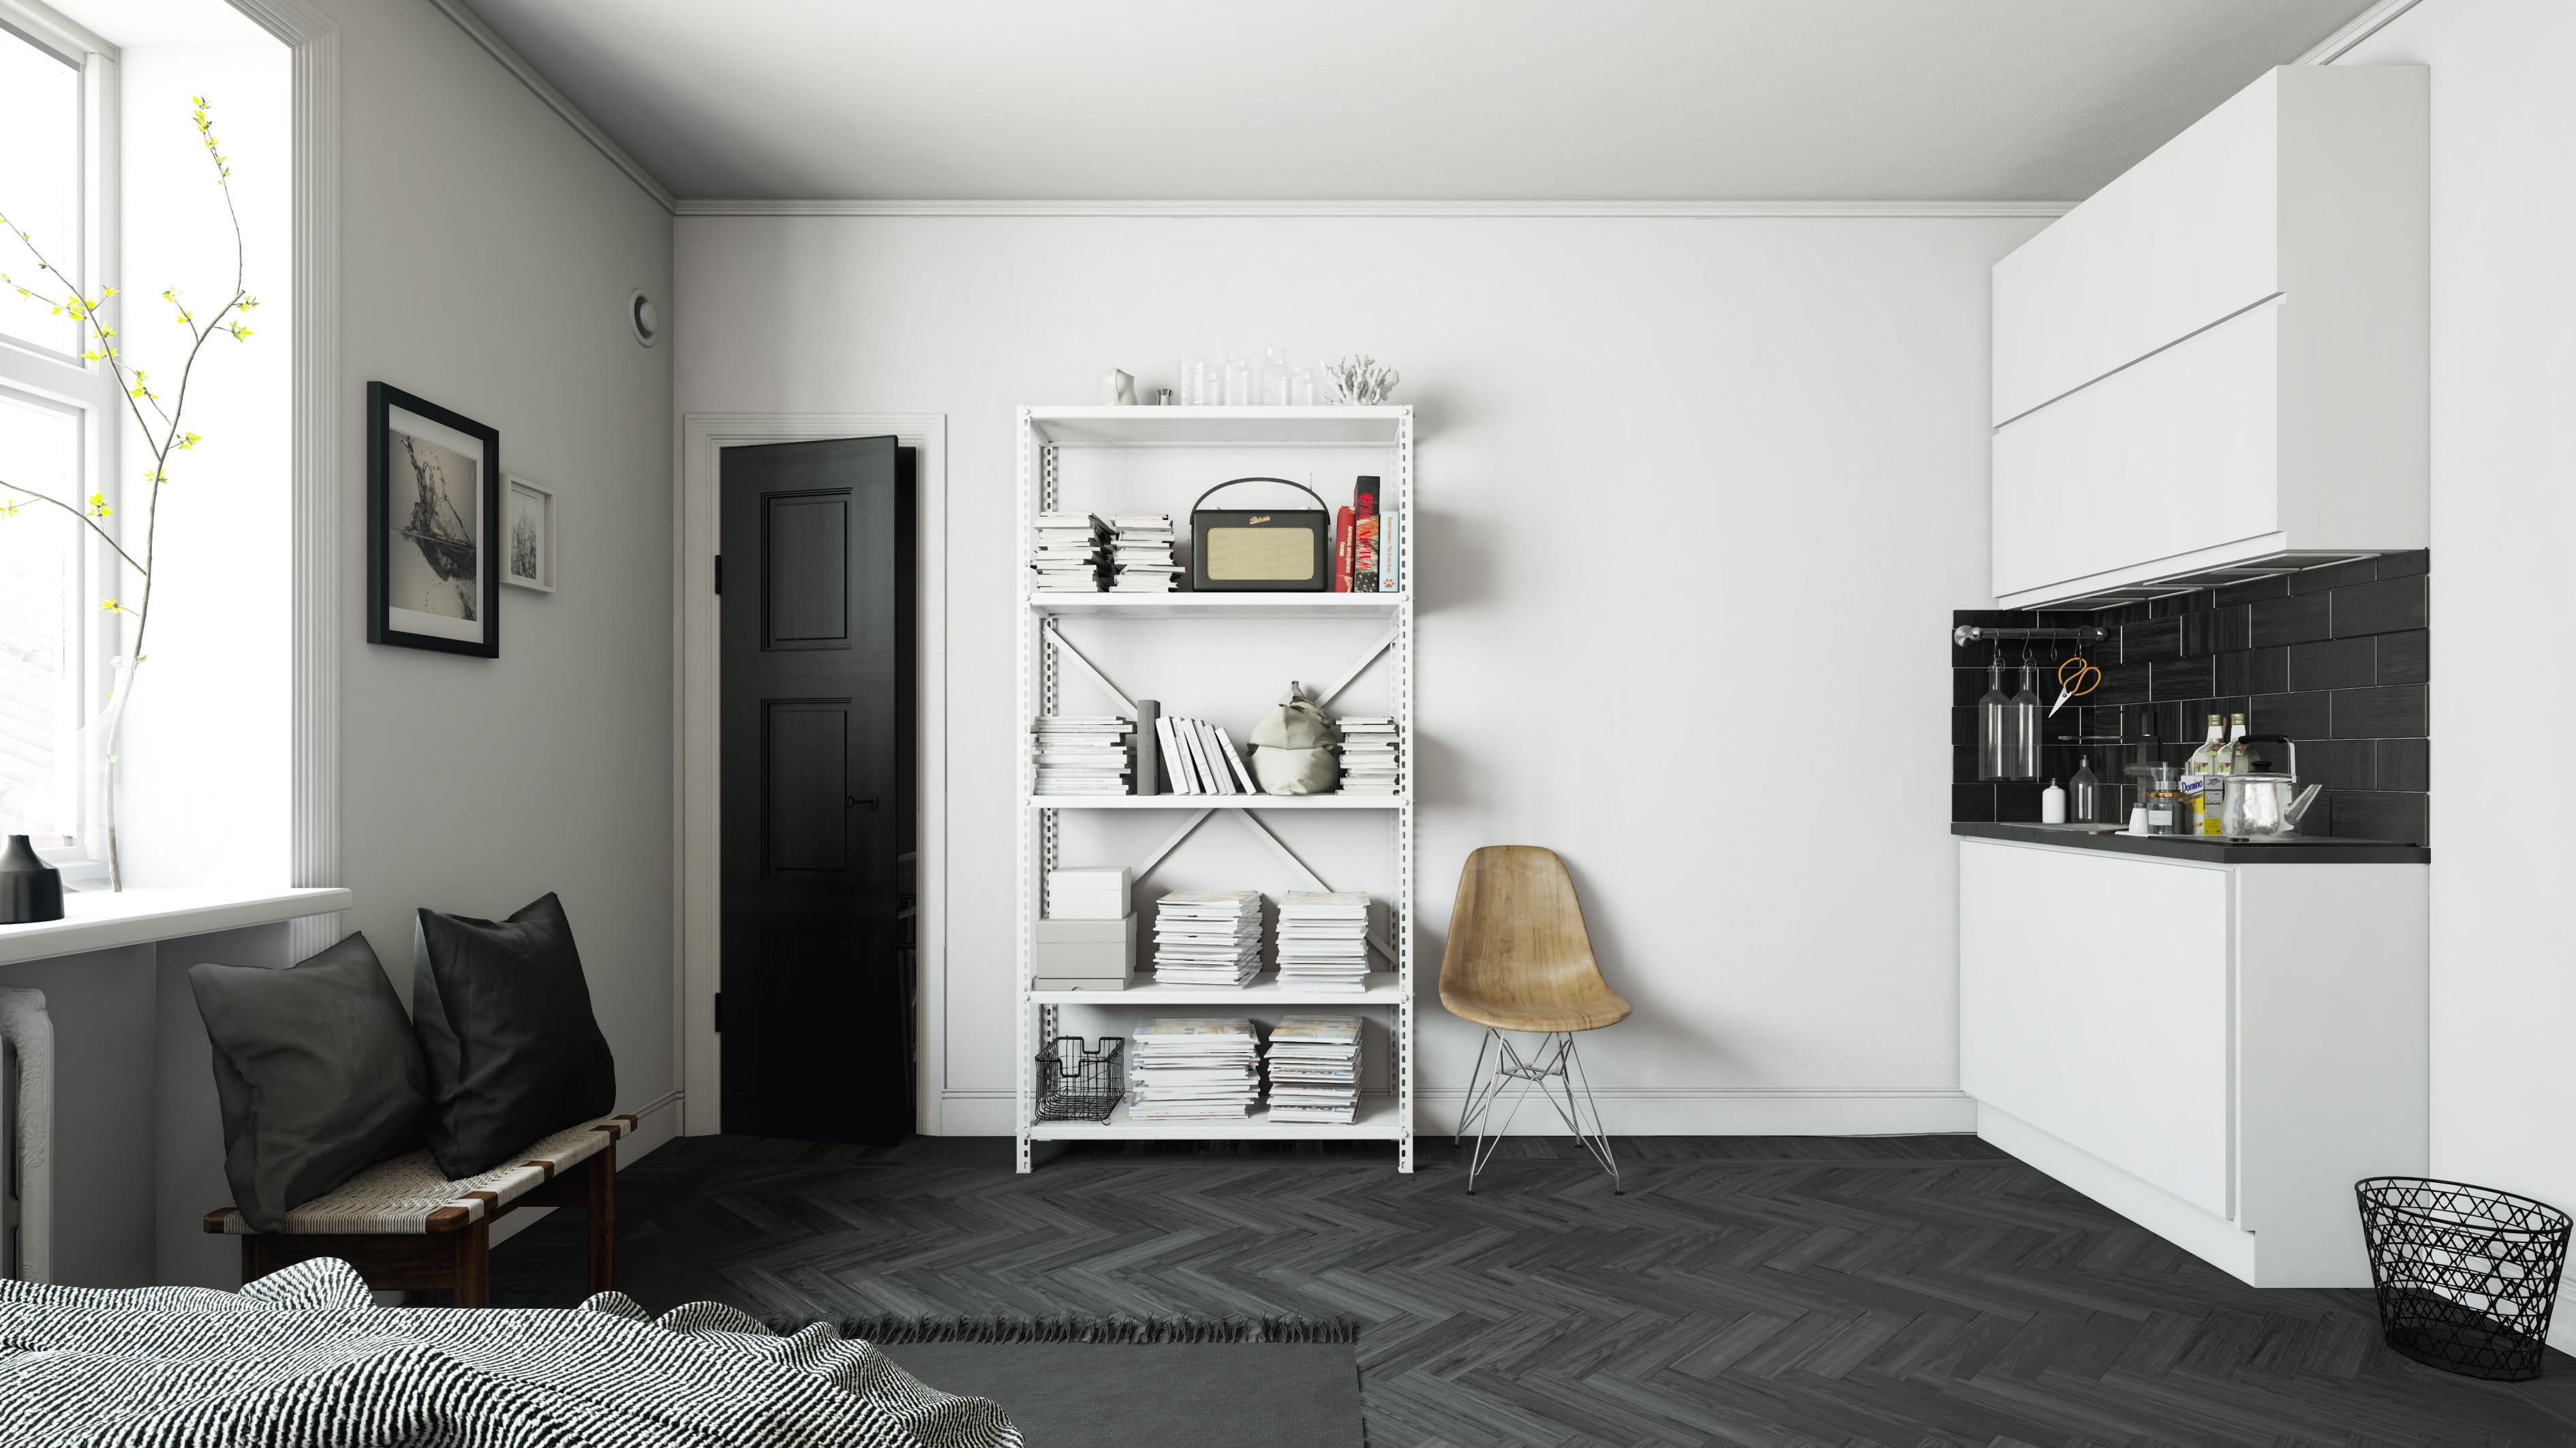
Final scene - screenshot 9. Archinteriors for UE vol. 3

Final scene - screenshot 10. Archinteriors for UE vol. 3
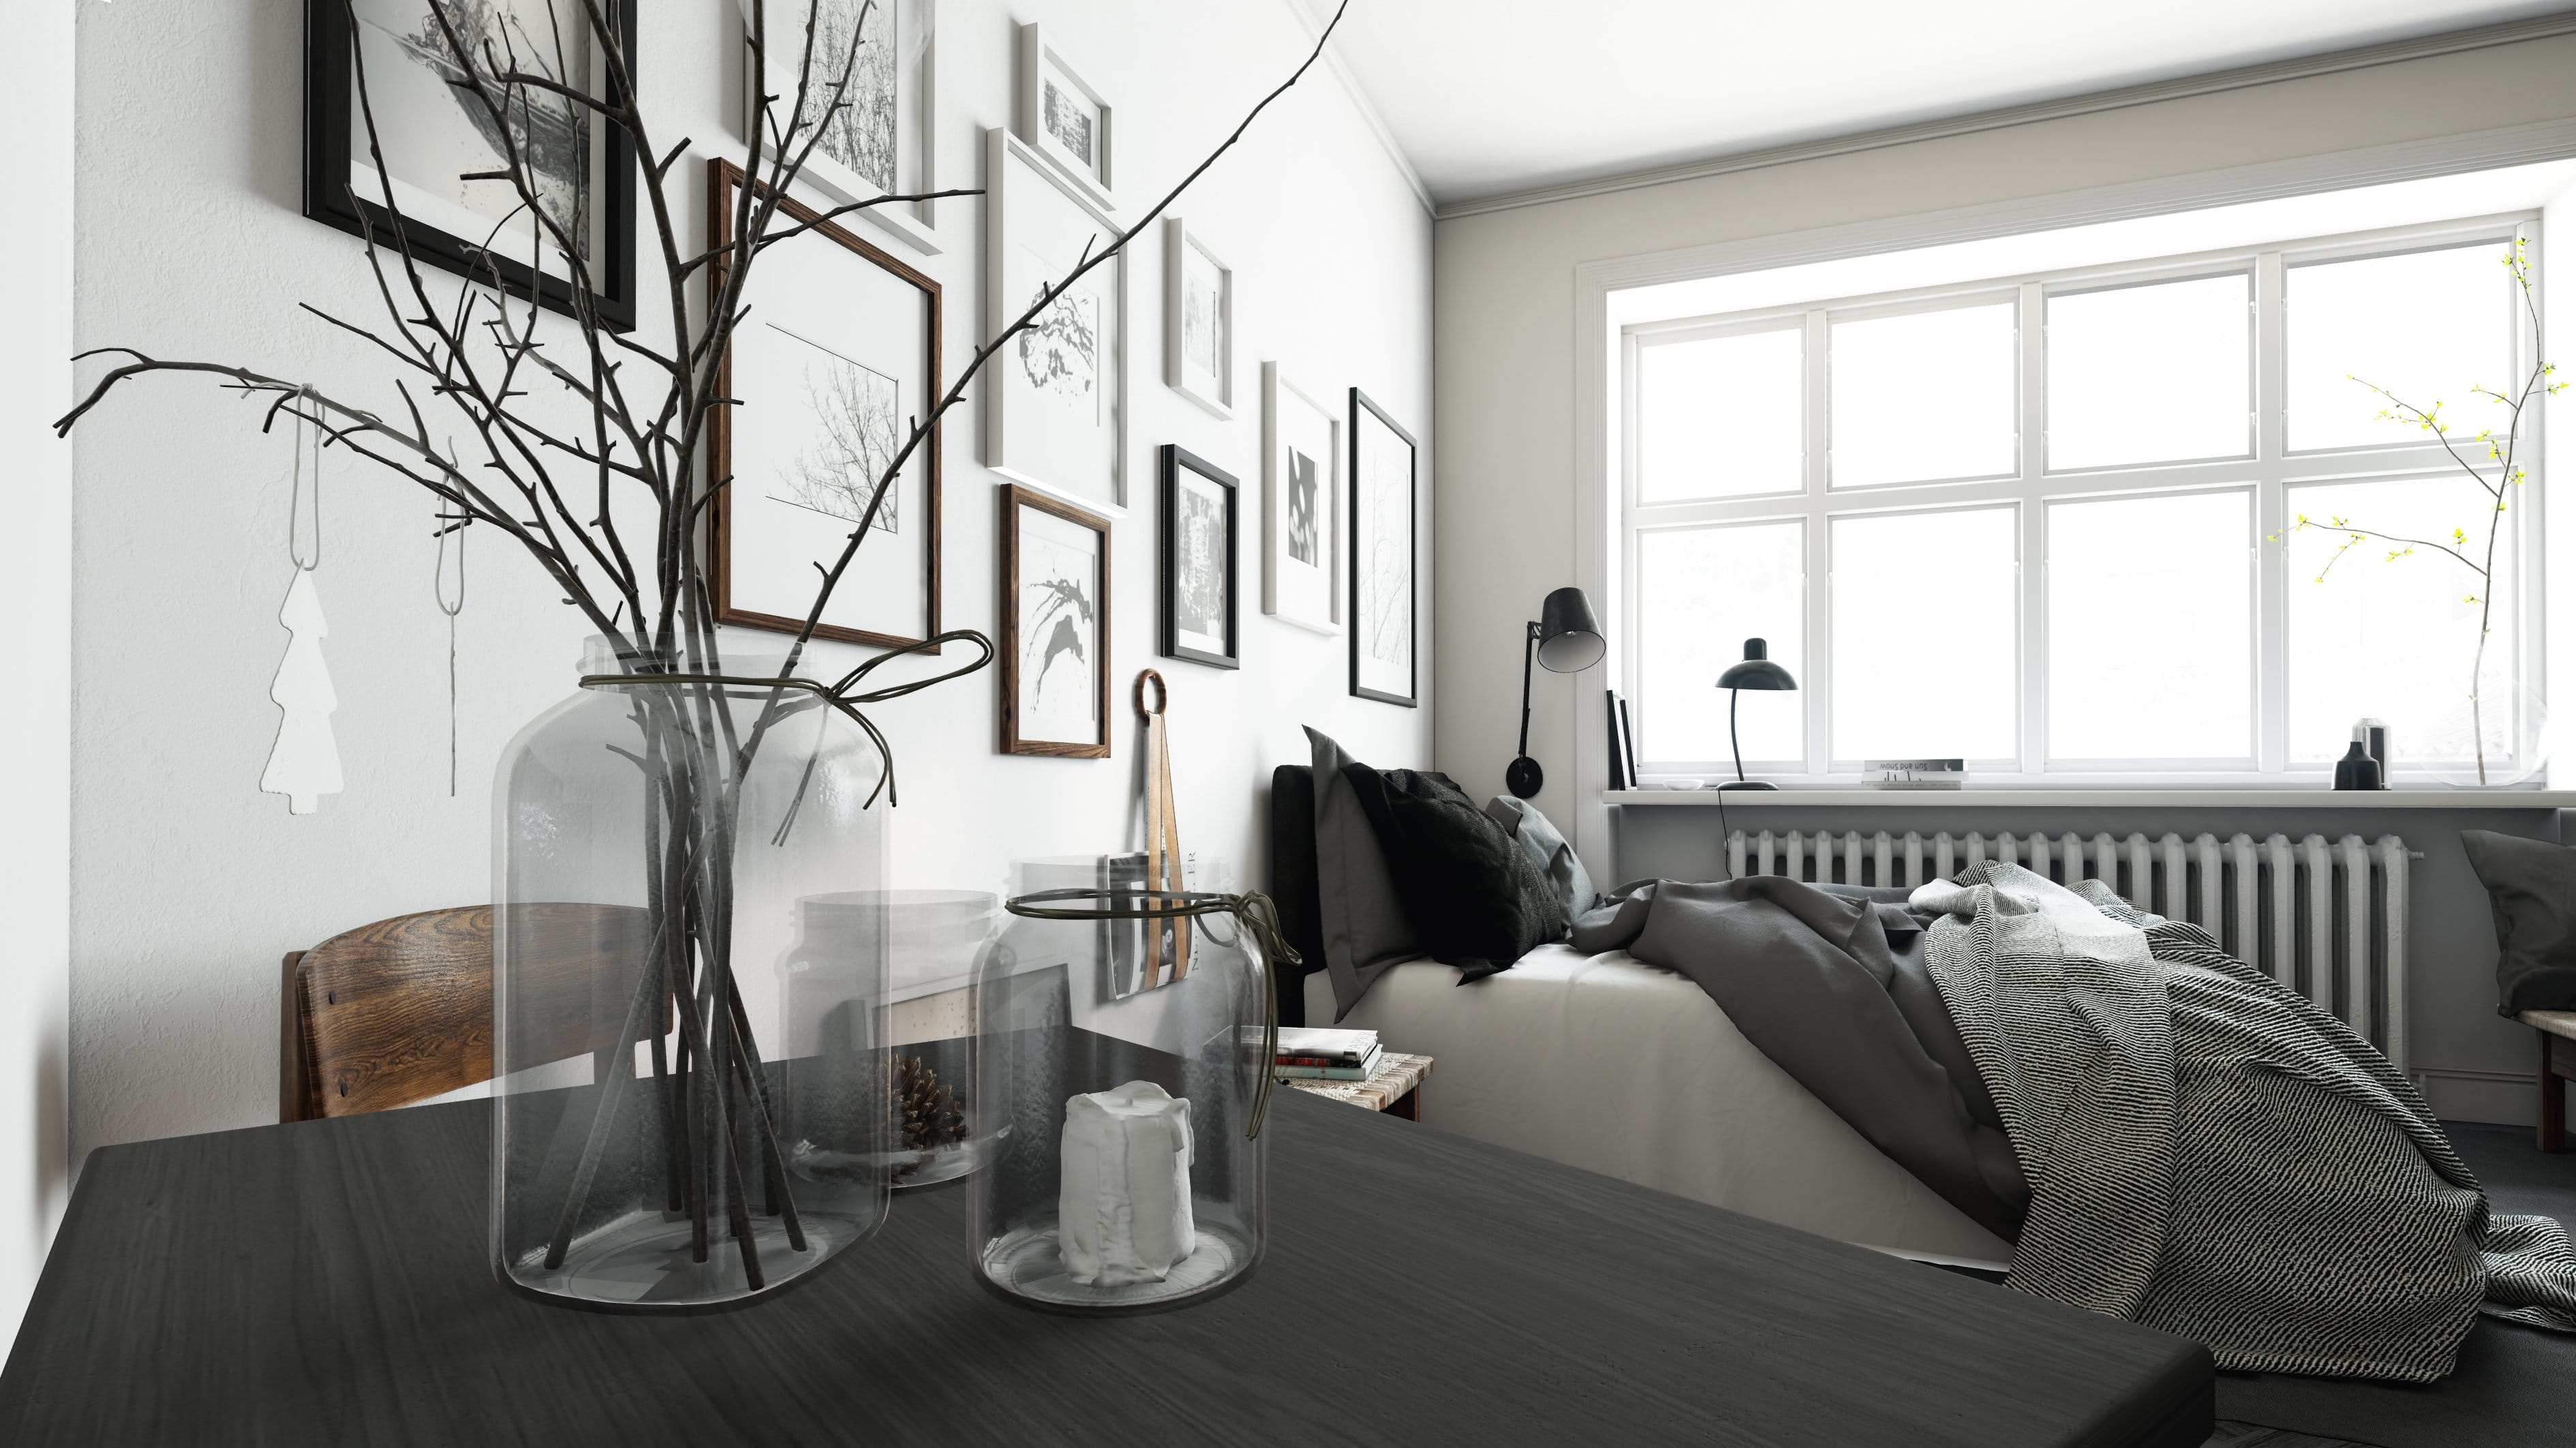
Final scene - screenshot 11. Archinteriors for UE vol. 3


LEAVE A COMMENT


|

|

|

|

|
 Customer zone
 Your special offers
 Your orders
 Edit account
 Add project
 Liked projects
 View your artist profile
 one node that is used to ind
COMMENTS