How To Make Your CGI Walls More Realistic
Realistic walls with noise modifier.
Total: € 0
Continue Shopping
In accordance with the art. 13 section 1 and 2 of the European Parliament and Council Regulation 2016/679 of the 27th April, 2016 on the protection of natural persons, with regard to the processing of personal data and on the free movement of such data, and repealing Directive 95/46/EC (General Data Protection Regulation), hereafter RODO, I hereby inform that:
1. EVERMOTION S.C., 8 Przędzalniana Str., 15-688 Białystok, Poland is the Administrator of your Personal Data (APD)
2. Data Protection Inspector can be reached through e-mail: iod@evermotion.org
3. Your personal data are to be processed on the basis of art. 6 section 1 letter a, b and f of RODO in order to:
a) prepare, conclude and execute the agreement and for other purposes approved by you,
b) to execute the legitimate interest like marketing of products and the agreement, claim assertion or defence against claims resulting from the law regulations.
4. Entities entitled to the reception of your personal data may be the authorised public bodies; mail providers; providers of the services covered by the agreement; responsible for debt recovery, keeping the archives, document utilization, legal consulting, technical services, IT services and accountancy.
5. Your personal data shall not be transferred to the third country, nor to the international bodies.
6. Your personal data shall be processed within the period of the agreement and upon your additional consent until you withdraw it. APD shall keep the data for the period of any civil law claim execution connected with the agreement.
7. You have the right to demand an access to your personal data, to correct or to delete the data if there is no other basis for the processing or any other purpose of such processing or to limit the processing of the data, to transfer the data to another administrator and to raise objections to the further data processing if there is no legal basis for further processing and to withdraw any previous consent.
8. You provide the personal data voluntarily, however they are necessary to conclude the agreement. The refusal of providing such data may result in the refusal of the agreement conclusion.
9. You have the right to lodge a complaint to the Personal Data Protection Office when in your opinion the data processing violates the regulations of General Data Protection Regulation of the 27 April, 2016 (RODO).
10. Your data will be automatically processed, including the form of profiling.
11. You are obligated to forward above mentioned information to your representative, especially if you appointed this person in the agreement as the contact person or as the representative for the agreement execution.
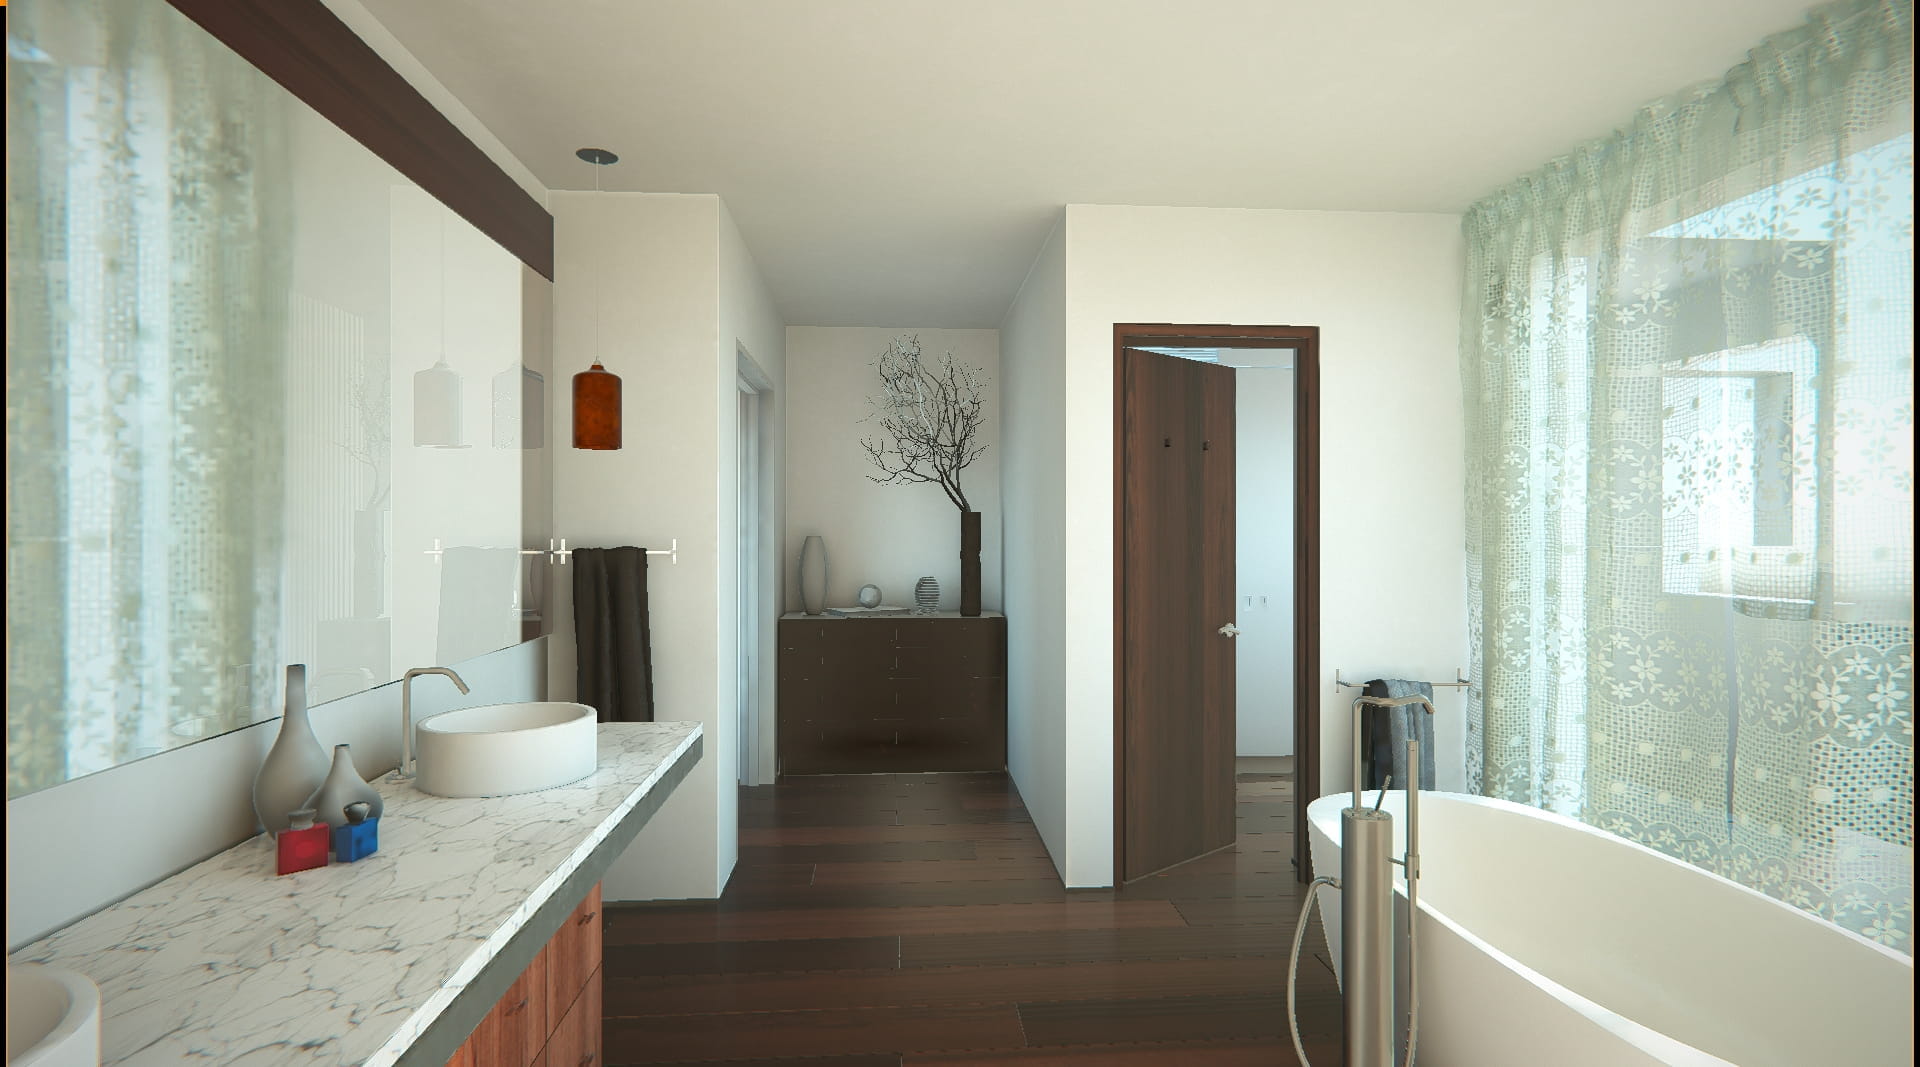

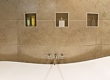
This nice bathroom is a simple test of moving 3ds Max scene to Unity. In fact it is just more than "moving" - most of the meshes are taken from original scene, but I re-unwrapped them for Unity and created materials from scratch in Substance Painter. This was just a test of Unity engine for arch-viz purposes. Result is pretty good, but, of course, each engine has got its limitations and Unity is no exception, we will talk about it later.
First, a little disclaimer - it's not totally finished scene, it has some lacks (bottle materials are just placeholders, we also could make better mirror material, etc.), but it was just a proof of concept of what is possible and it was my learning base of this engine.
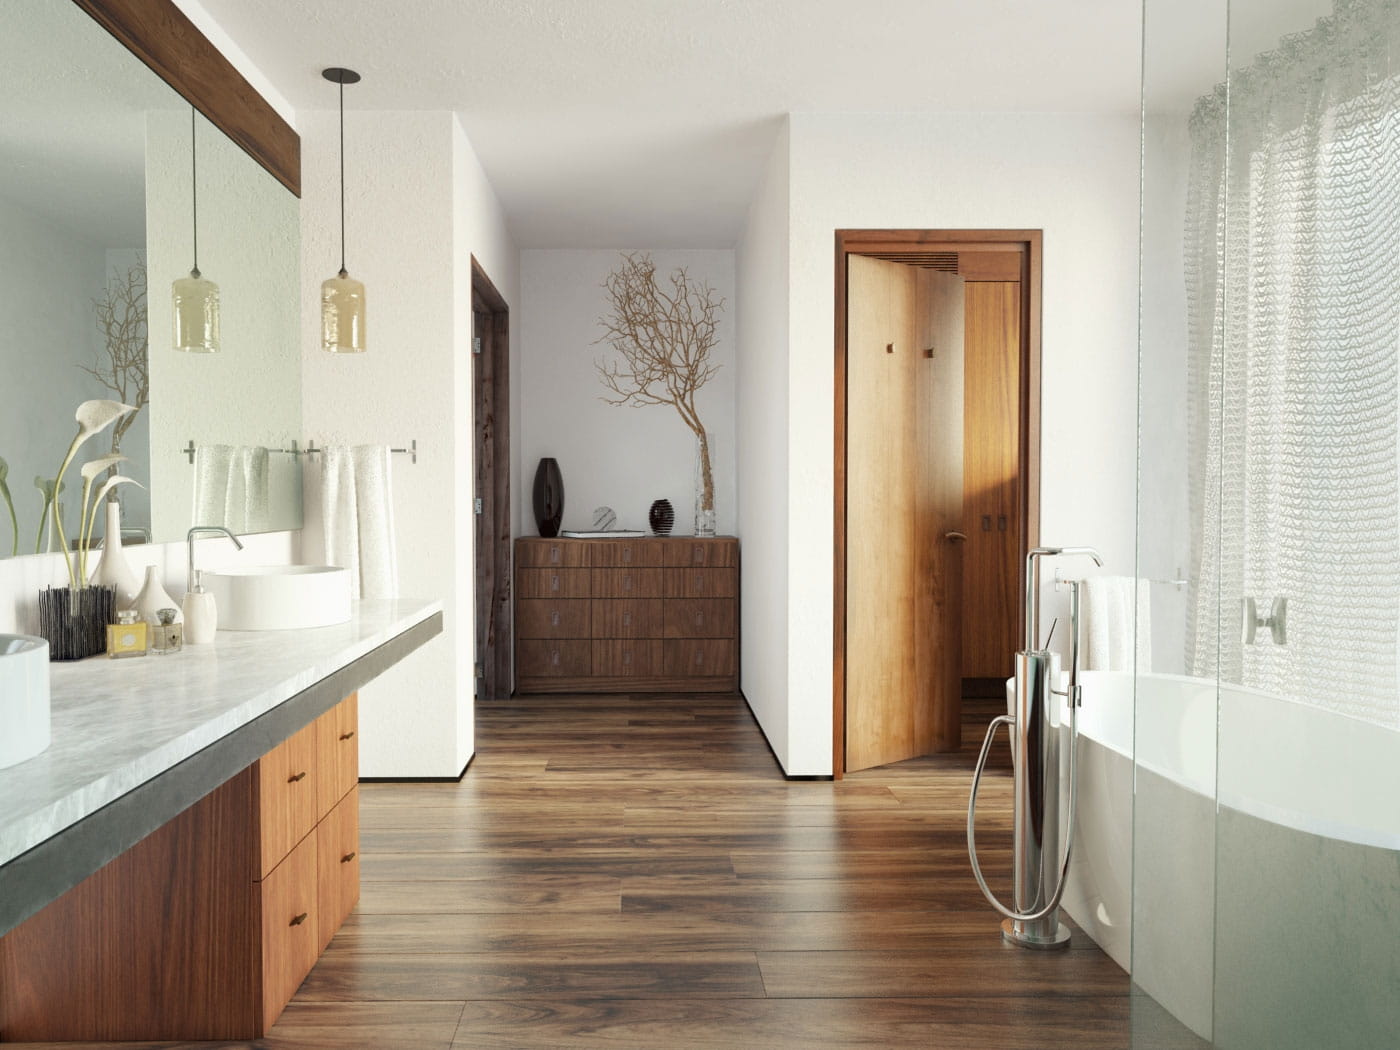
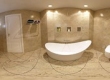
This is an original scene from Archinteriors vol. 39. It was modeled in 3ds Max, rendered with V-Ray. Nice GI, good balance, it's a clean architectural visualization, ready to ship to client. Of course, to get this render quality we need to spend some time (more than hour) on the rendering and each separate shot or change requires re-rendering. That was the reason we are watching more and more arch-viz renders made in realtime engines, especially Unreal Engine. But is Unity capable to deliver decent quality? I exported the scene from 3ds Max to single obj files and imported it to Blender (my 3d software of choice), then I unwrapped it and exported it via Capsule plugin to Unity and Substance Painter, because I wanted to create game engine-friendly PBR materials.

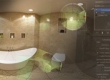
This scene is a screenshot from Unity, a bit greenish result, not bad for the first interior in new engine. It's a simple shot, without external post-production, that could be better tweaked using Unity Post-Processing Stack, Beautify plugin for Unity or Photoshop.
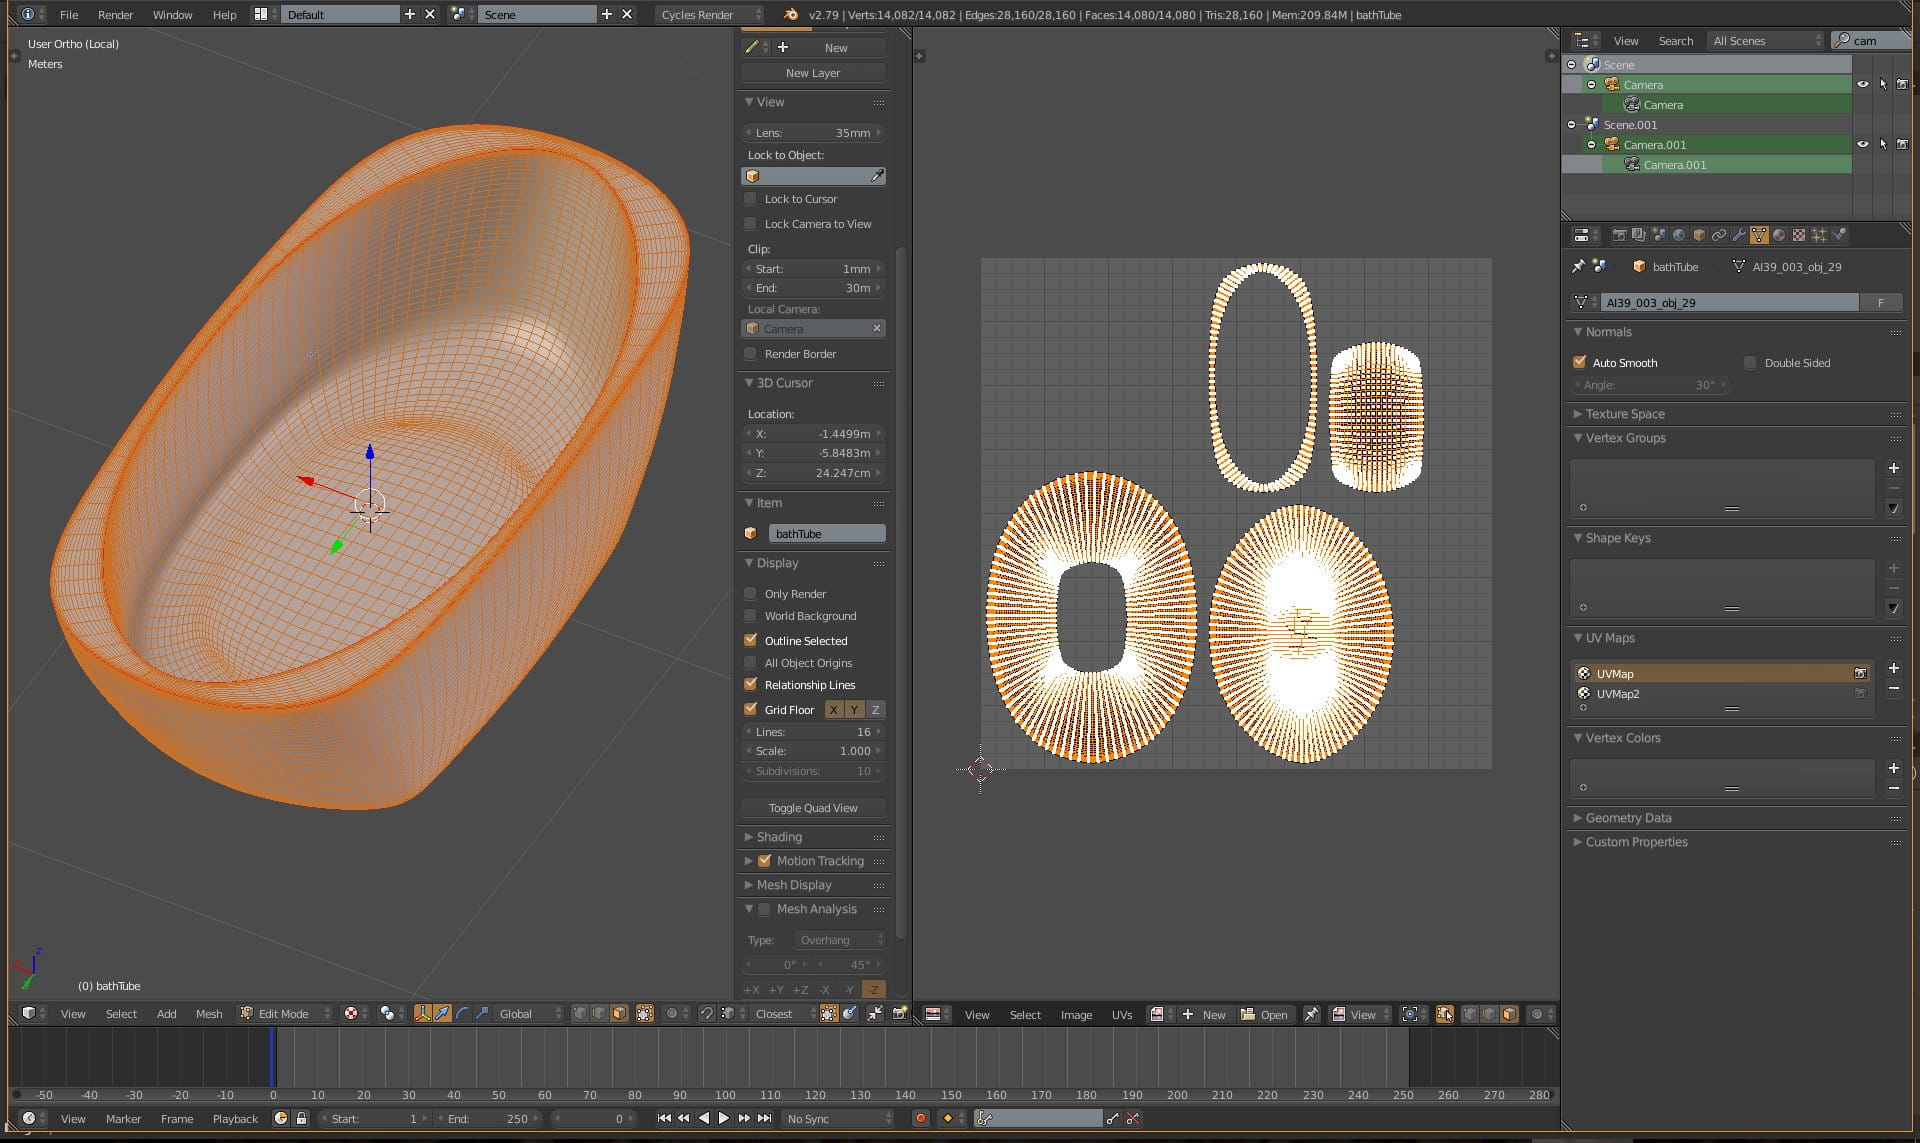
Bathtube in blender and UV mapping on the right

Round sinks and their UVs.

All objs imported to Blender

Interior (ceiling is hidden). I created new floor mesh with Archipack addon for Blender.
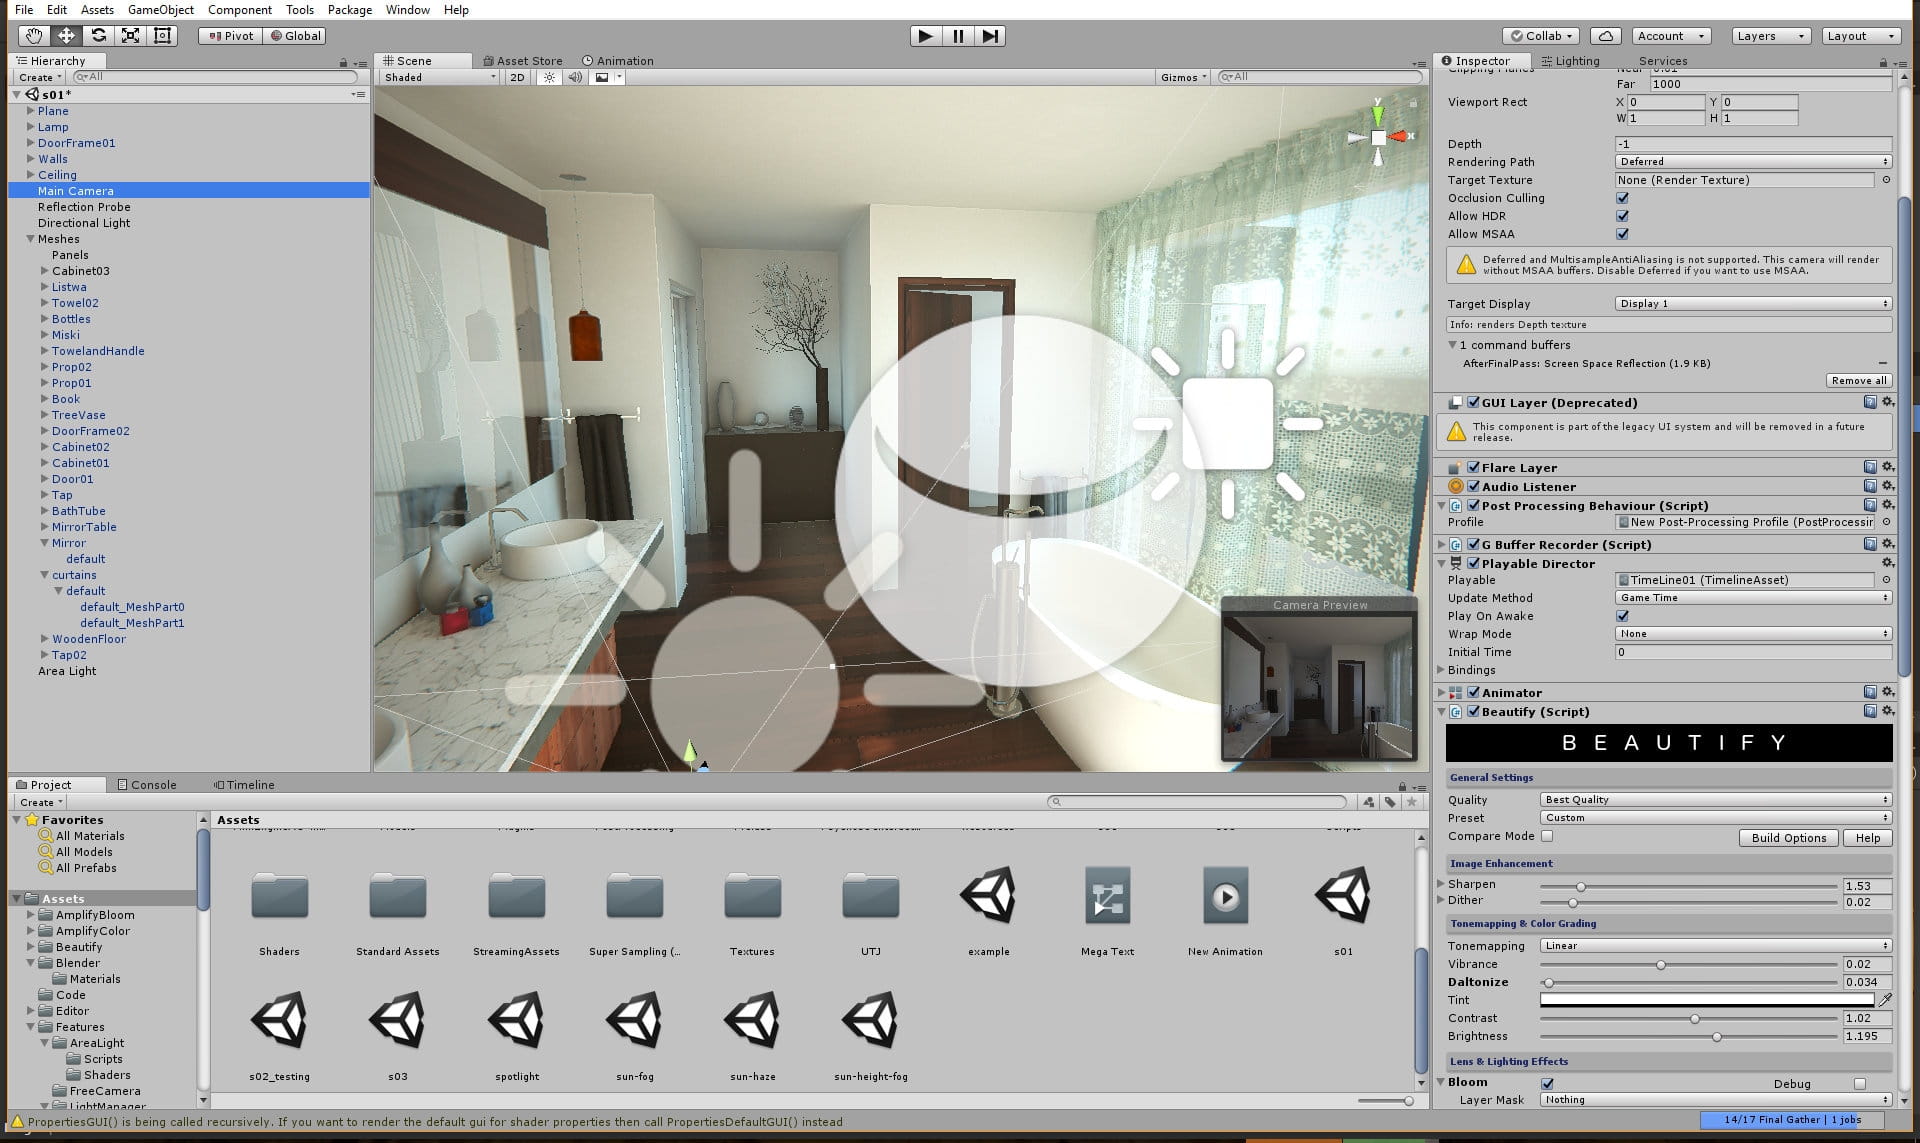
This is scene in Unity editor. On the left we can see the list of all assets used in the scene. On the bottom we have project brower that we use to import all models, textures, materials, plugins, etc. On the right we have properties of currently selected object. In this case we see camera settings.
The good thing in Unity is built-in Asset Store that lets you manage all bought assets. Unlike Unreal Engine, adding new plugins to project does not require restarting it.

To have good anti-aliasing I used MadGoat SSAA - it's supersampling anti-aliasing plugin, smoothing those jagged edges in nice way.
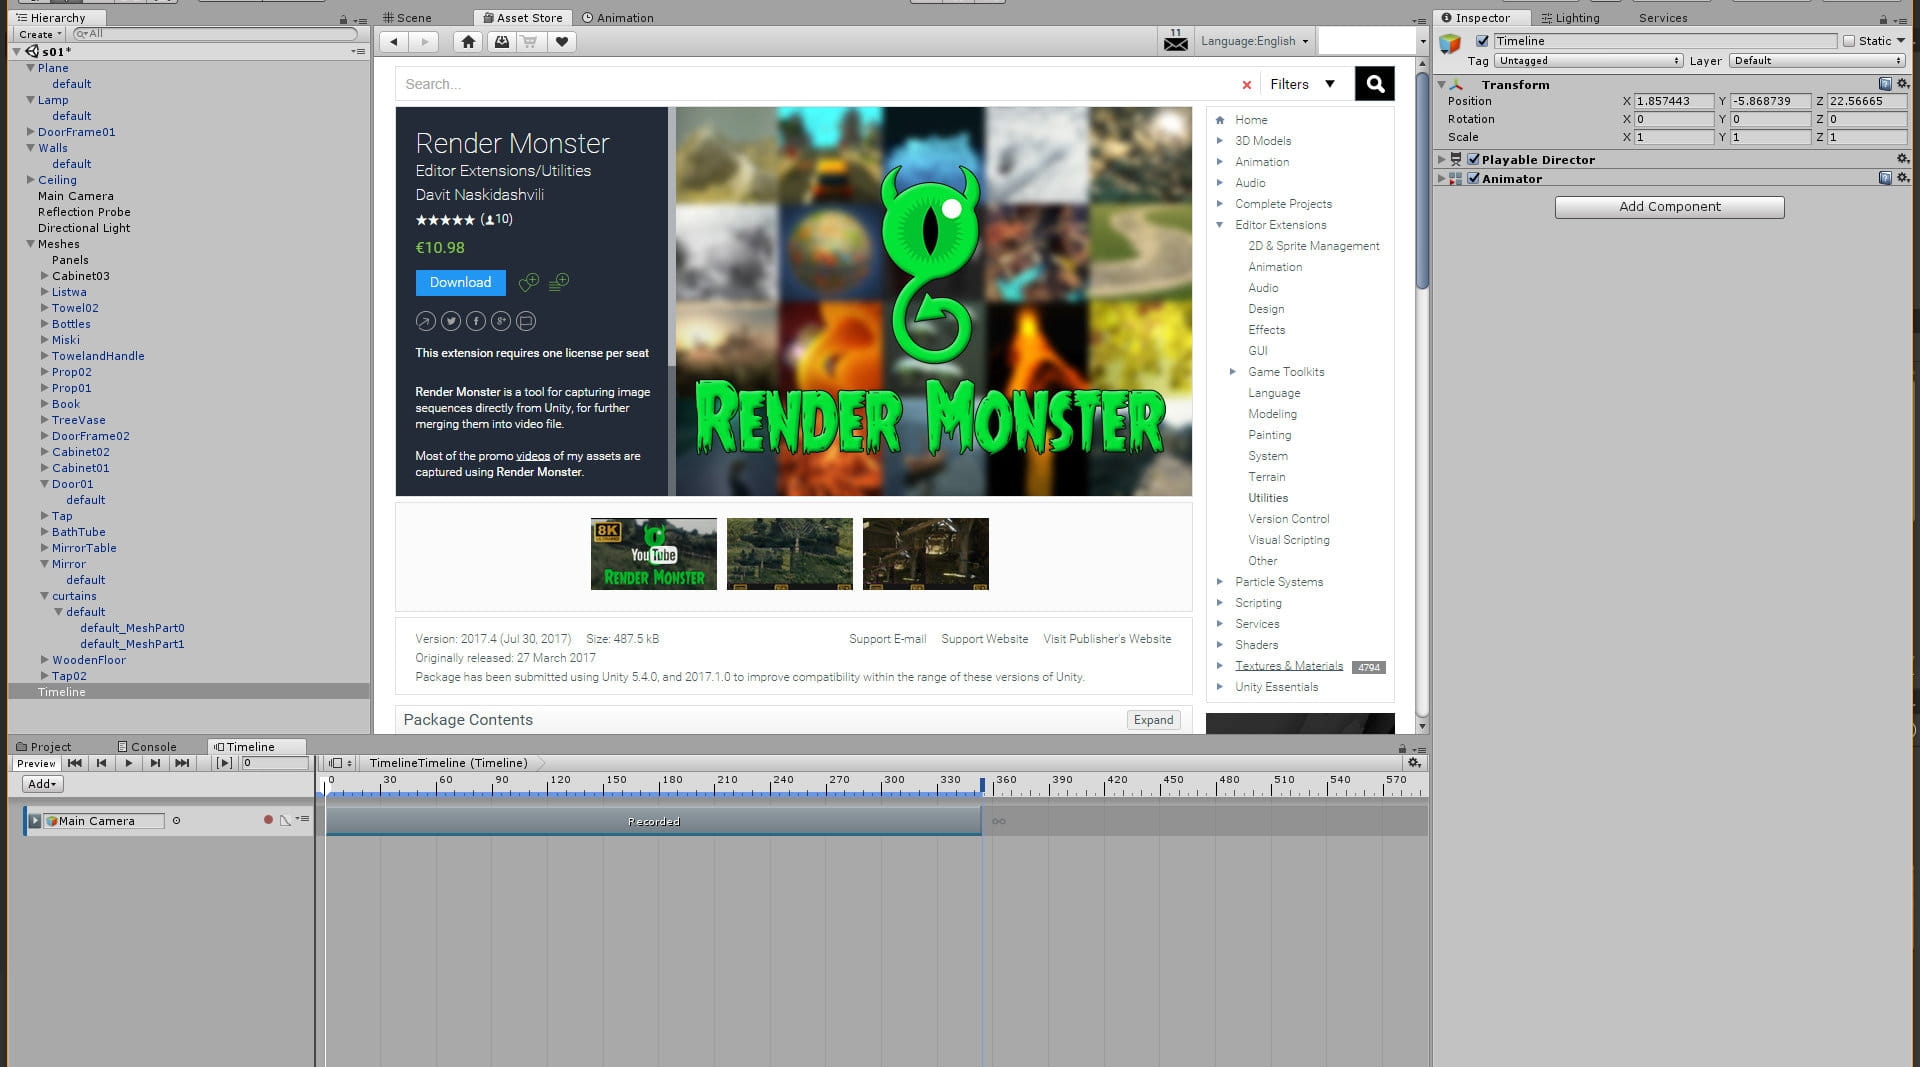
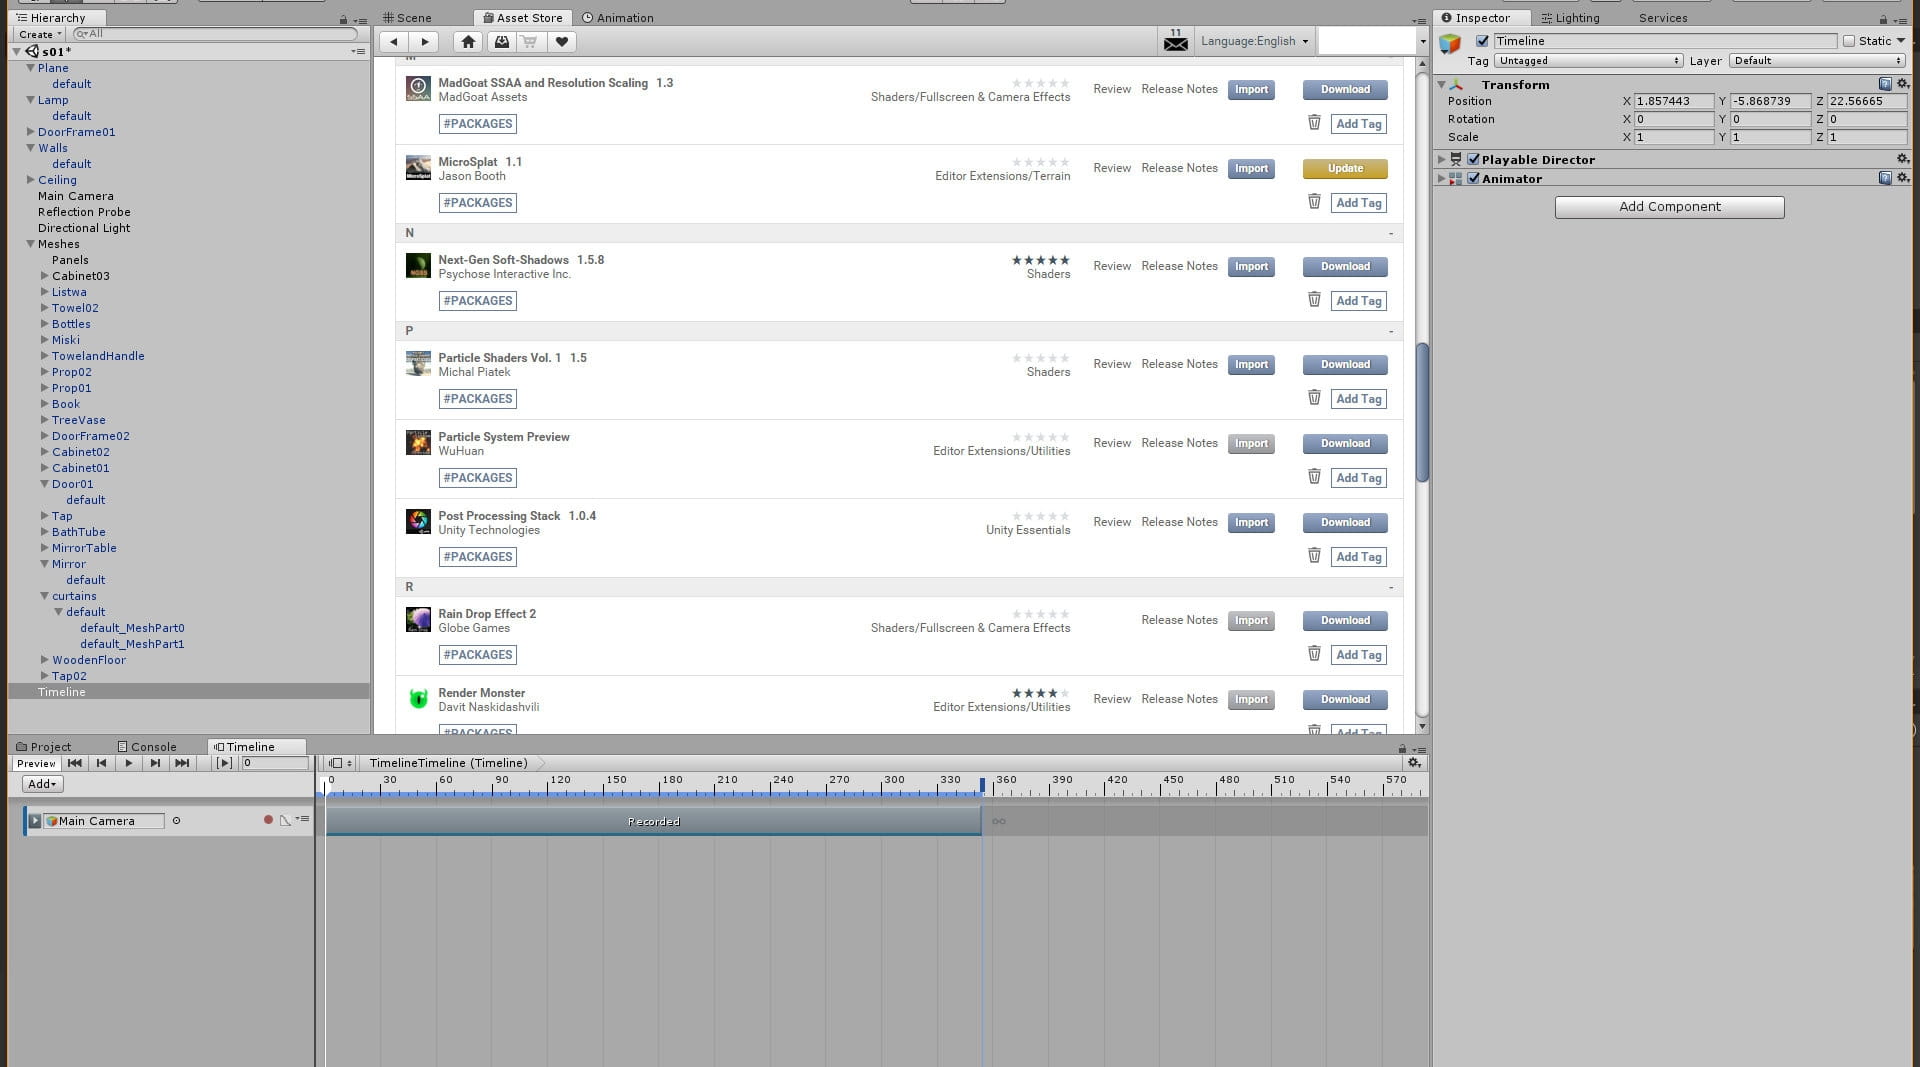
The other plugin that I used was Render Monster which allows to capture screenshots / frames in a fast and high quality way.
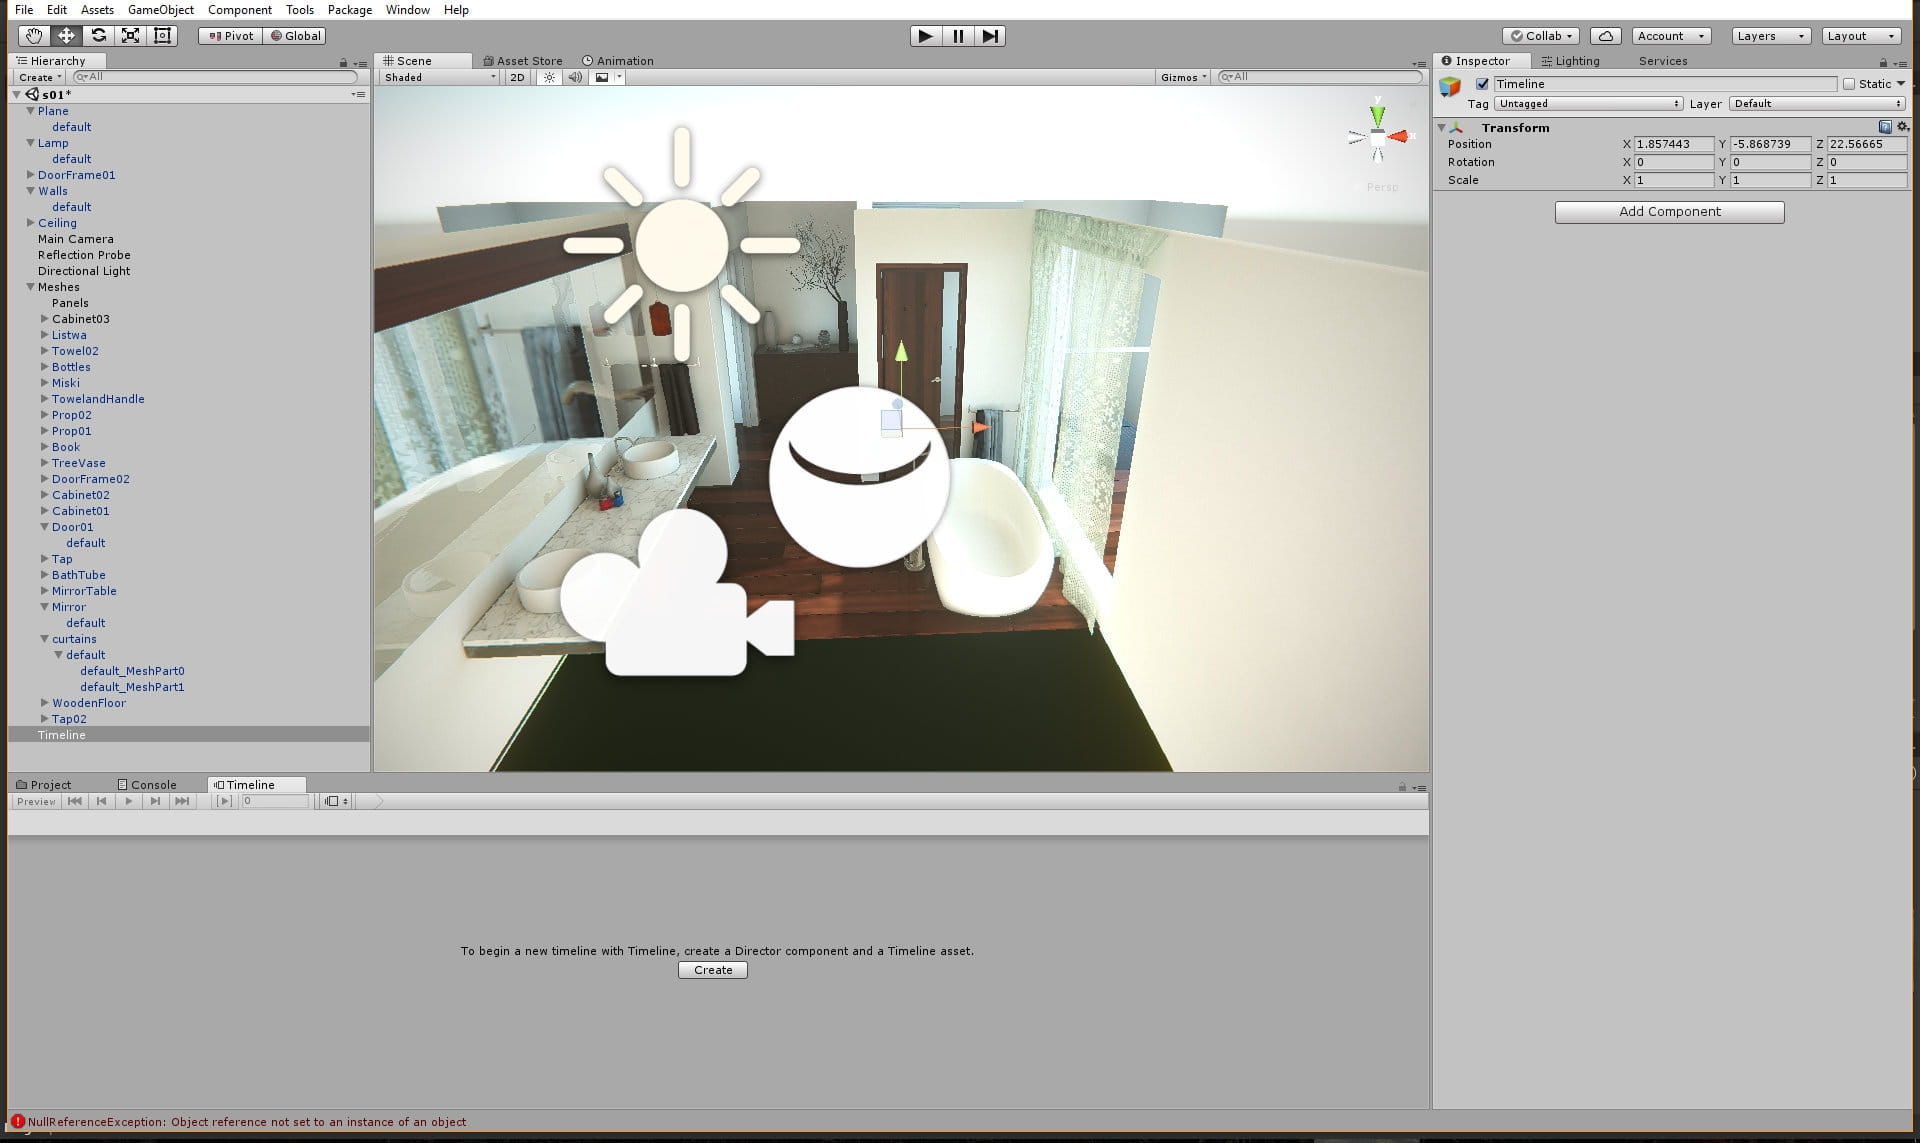
If you want to record camera movement, it's very simple - create new empty object in Hierarchy window, open Timeline panel and and press "Create" button to create new timeline asset.

New, empty timeline. Now you can select your camera and drag and drop it to Animation track.
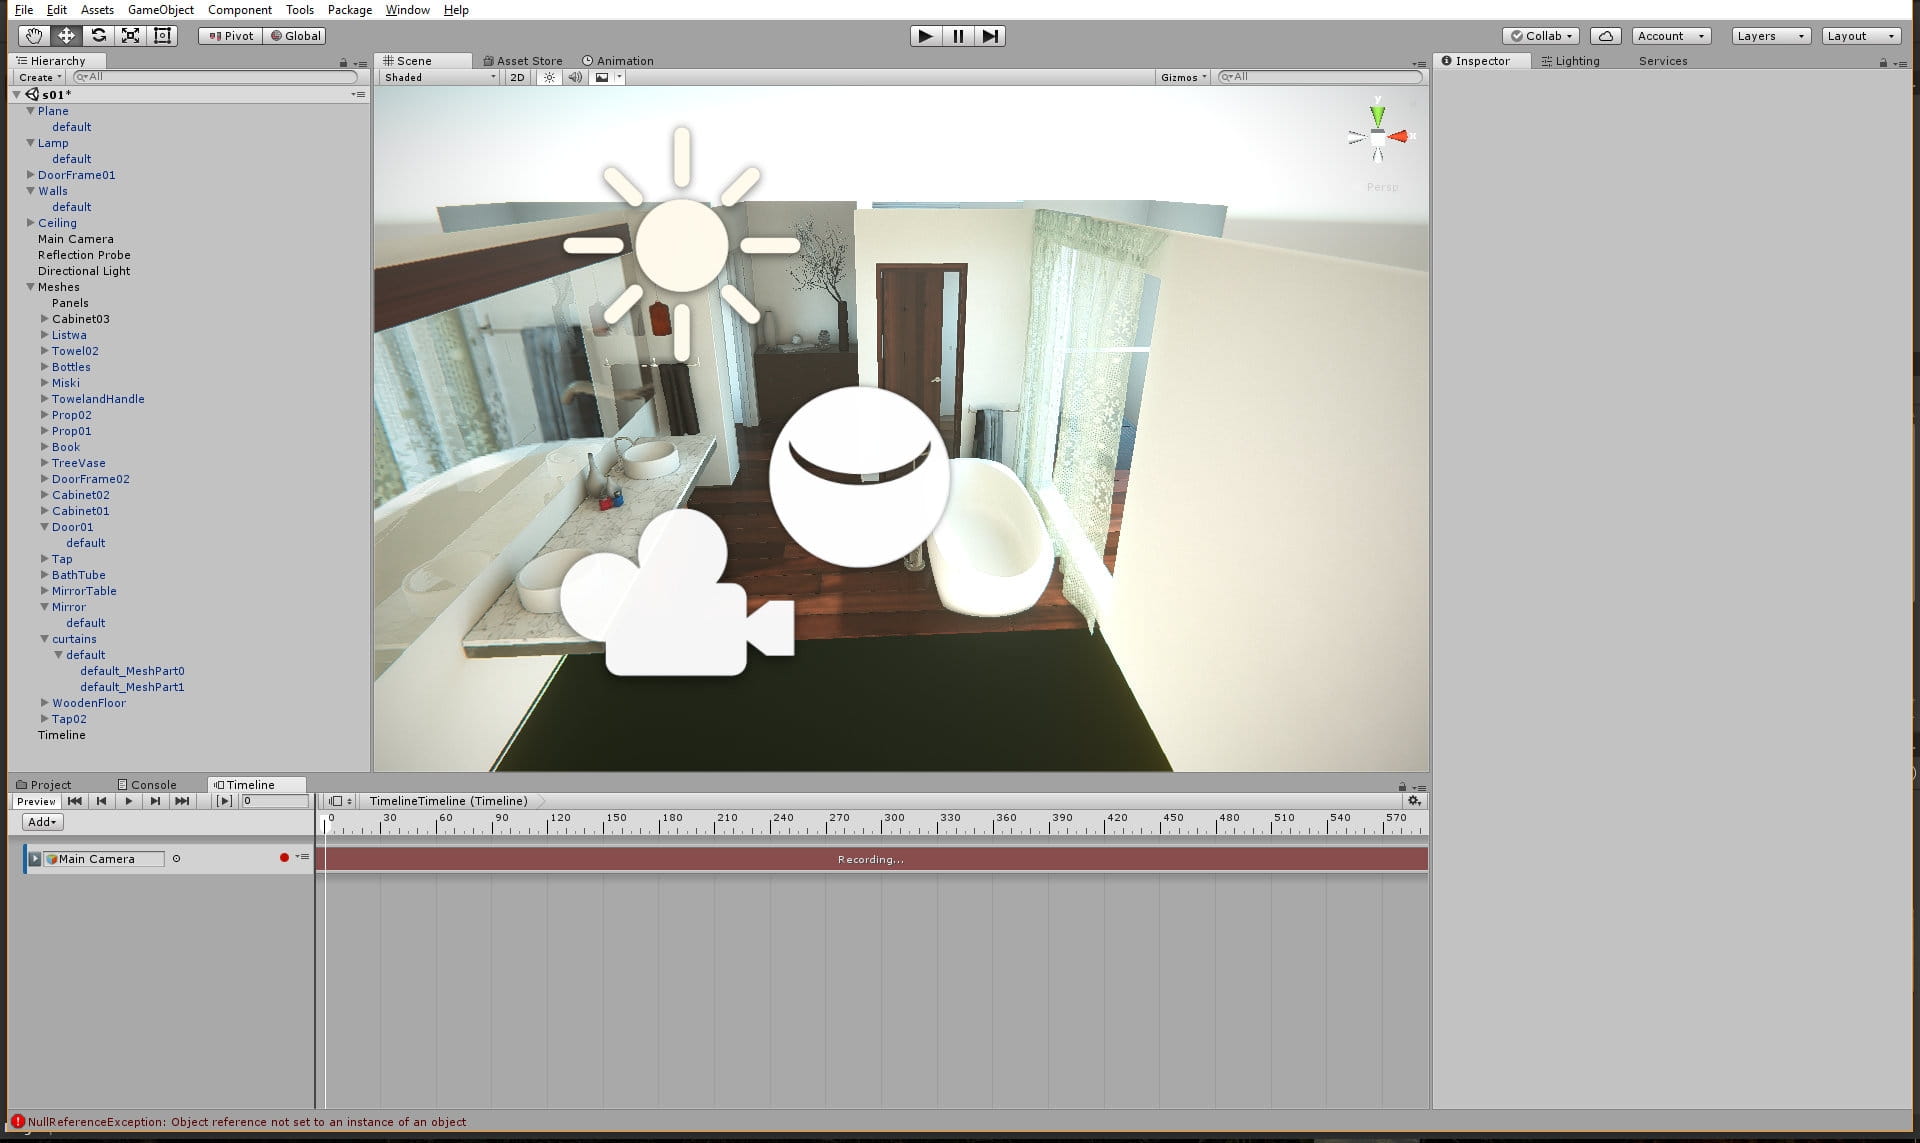
Press" record" button on a track and select your camera again - now each position / rotation of a camera will be recorded to the frame that is currently selected as a keyframe.
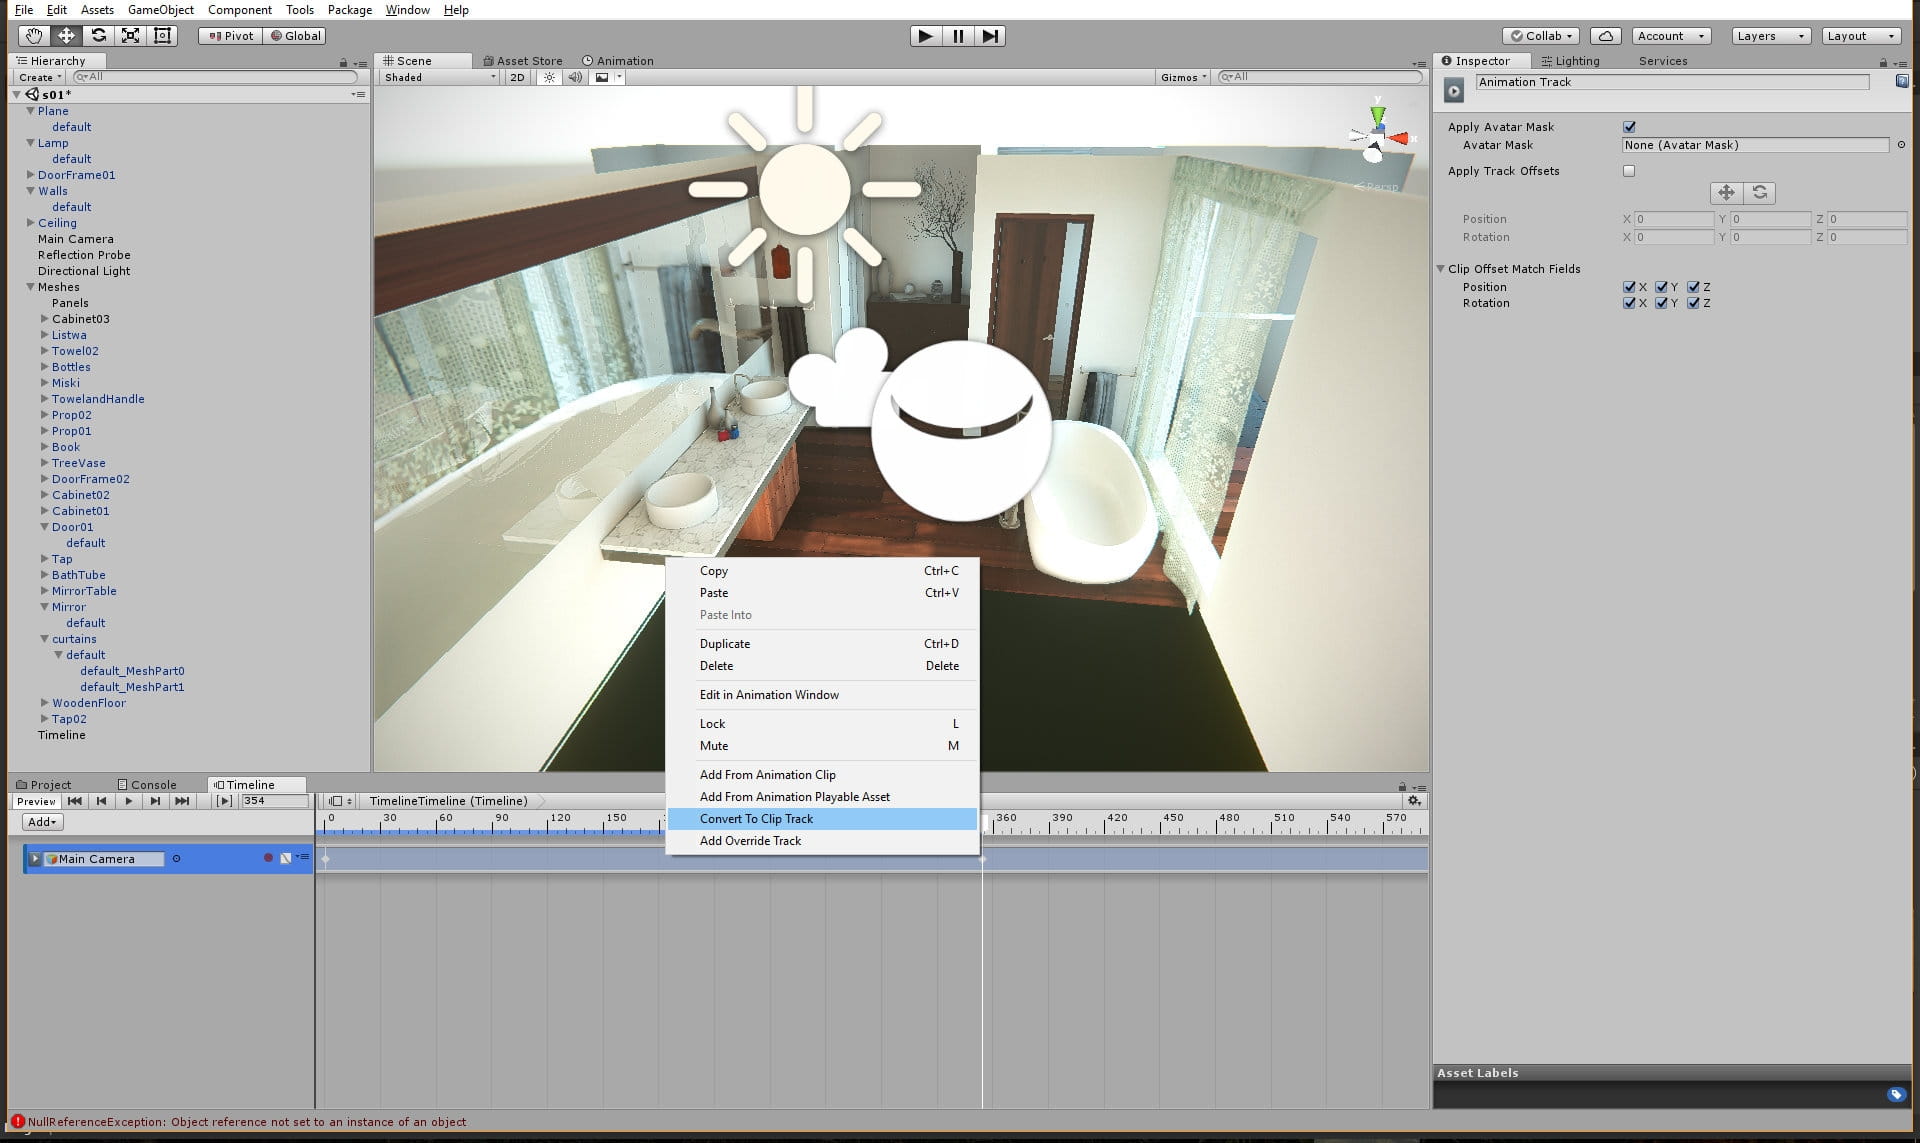
After recording at least two positions of a camera on two different frames you can right-click on newly created animation and select "Convert to clip track".
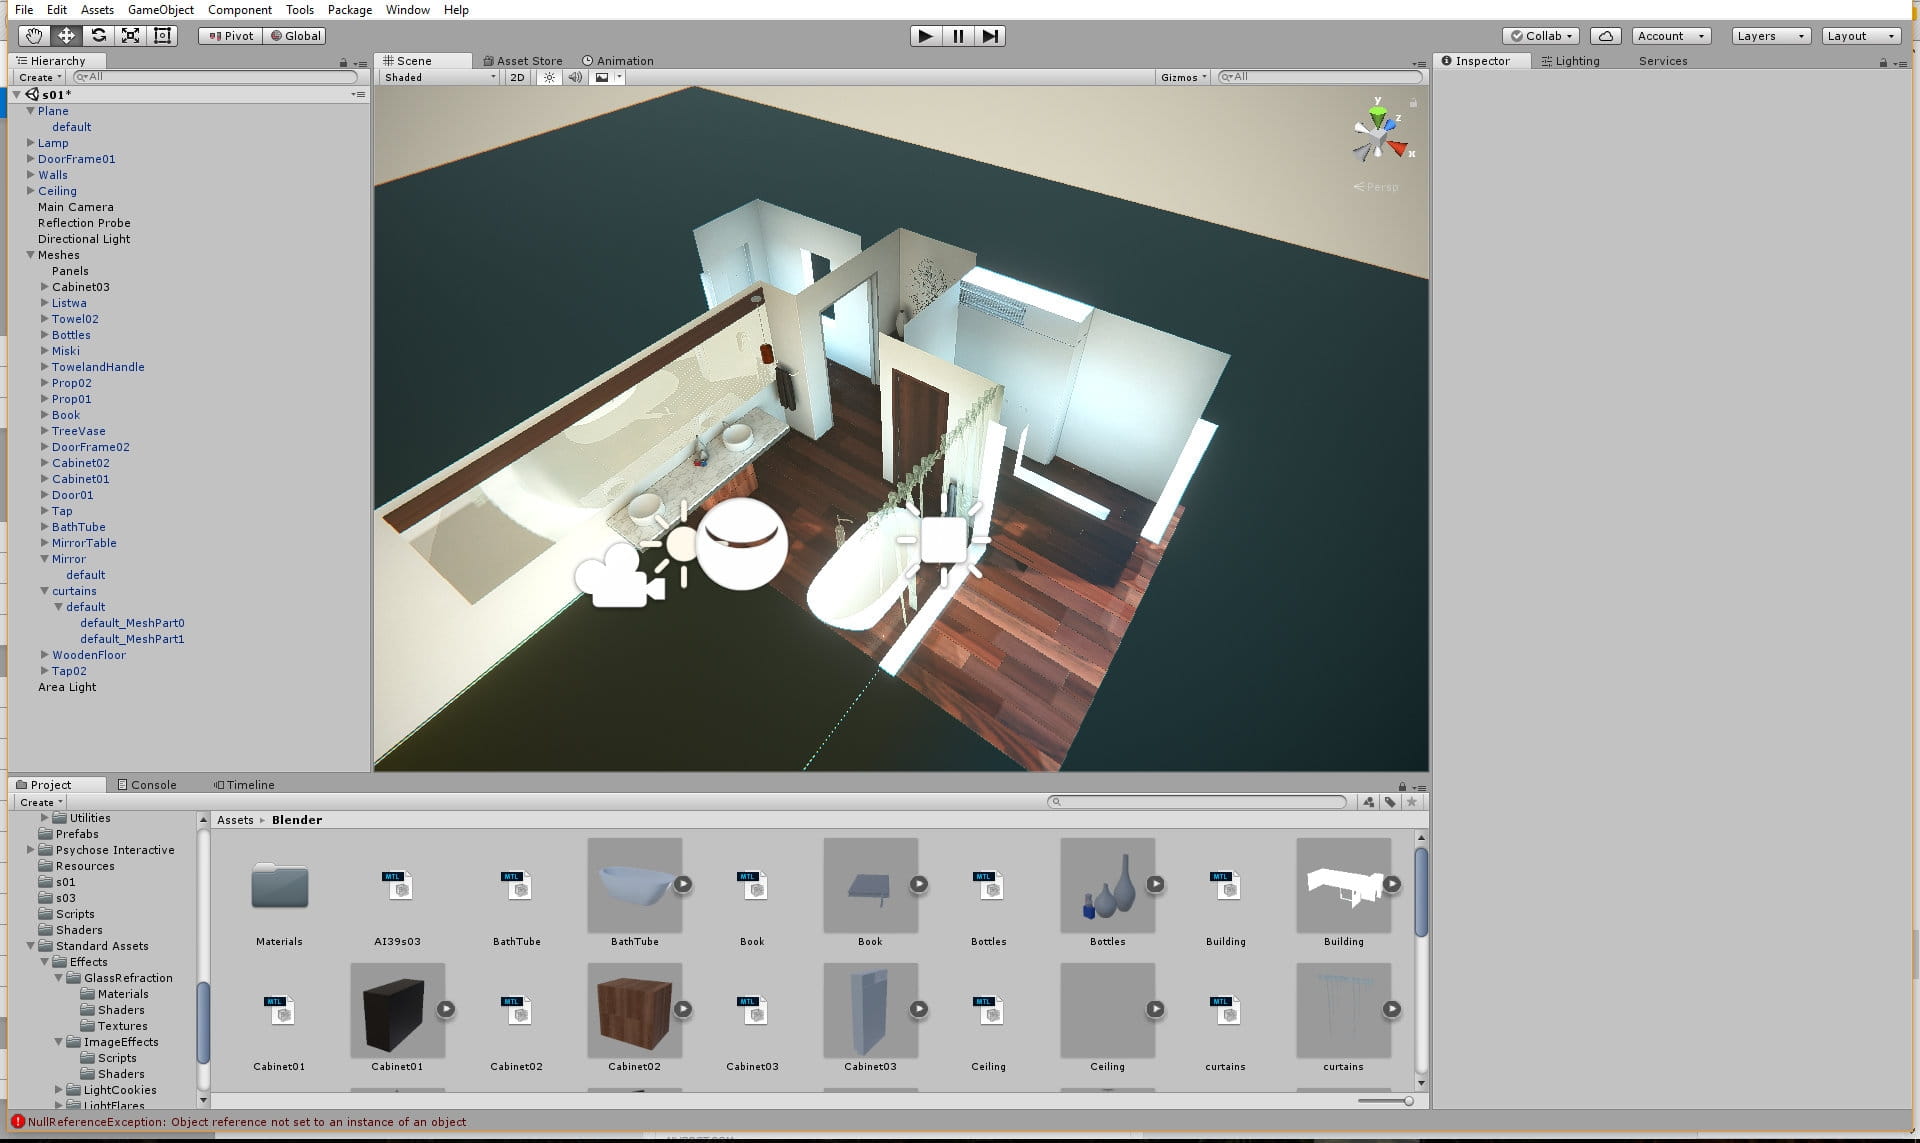
The scene overview in Unity Editor.

Door mesh with two materials for door and handle. I haven't used here Substances directly in engine (which is now possible using Substance Source plugin for Unity and Unreal), I imported textures that were prepared in Substance Painter.

Mirror is a simple reflective material. In this case it is not a perfect solution, bhecause we cans ee artifacts (two hanging lamp reflections in the back). These artifacts come from ScreenSpace reflections post-process. There is a way to create it in better way, though.

Main directional light settings - it's our main light source in the scene. I chosed "baked" option to get nice GI from engine.

Baked lighting settings on the right. I baked lightmaps with Enlighten engine with "Baked Indirect" option. It gives nice results, it's currently faster than Progressive Lightmapper in interiors and gives nicer results. Unity is more sensitive to building mesh than Unreal - you can get light leaks quite often and there is a lot of work with optimizing meshes and UVs until everything is correct.
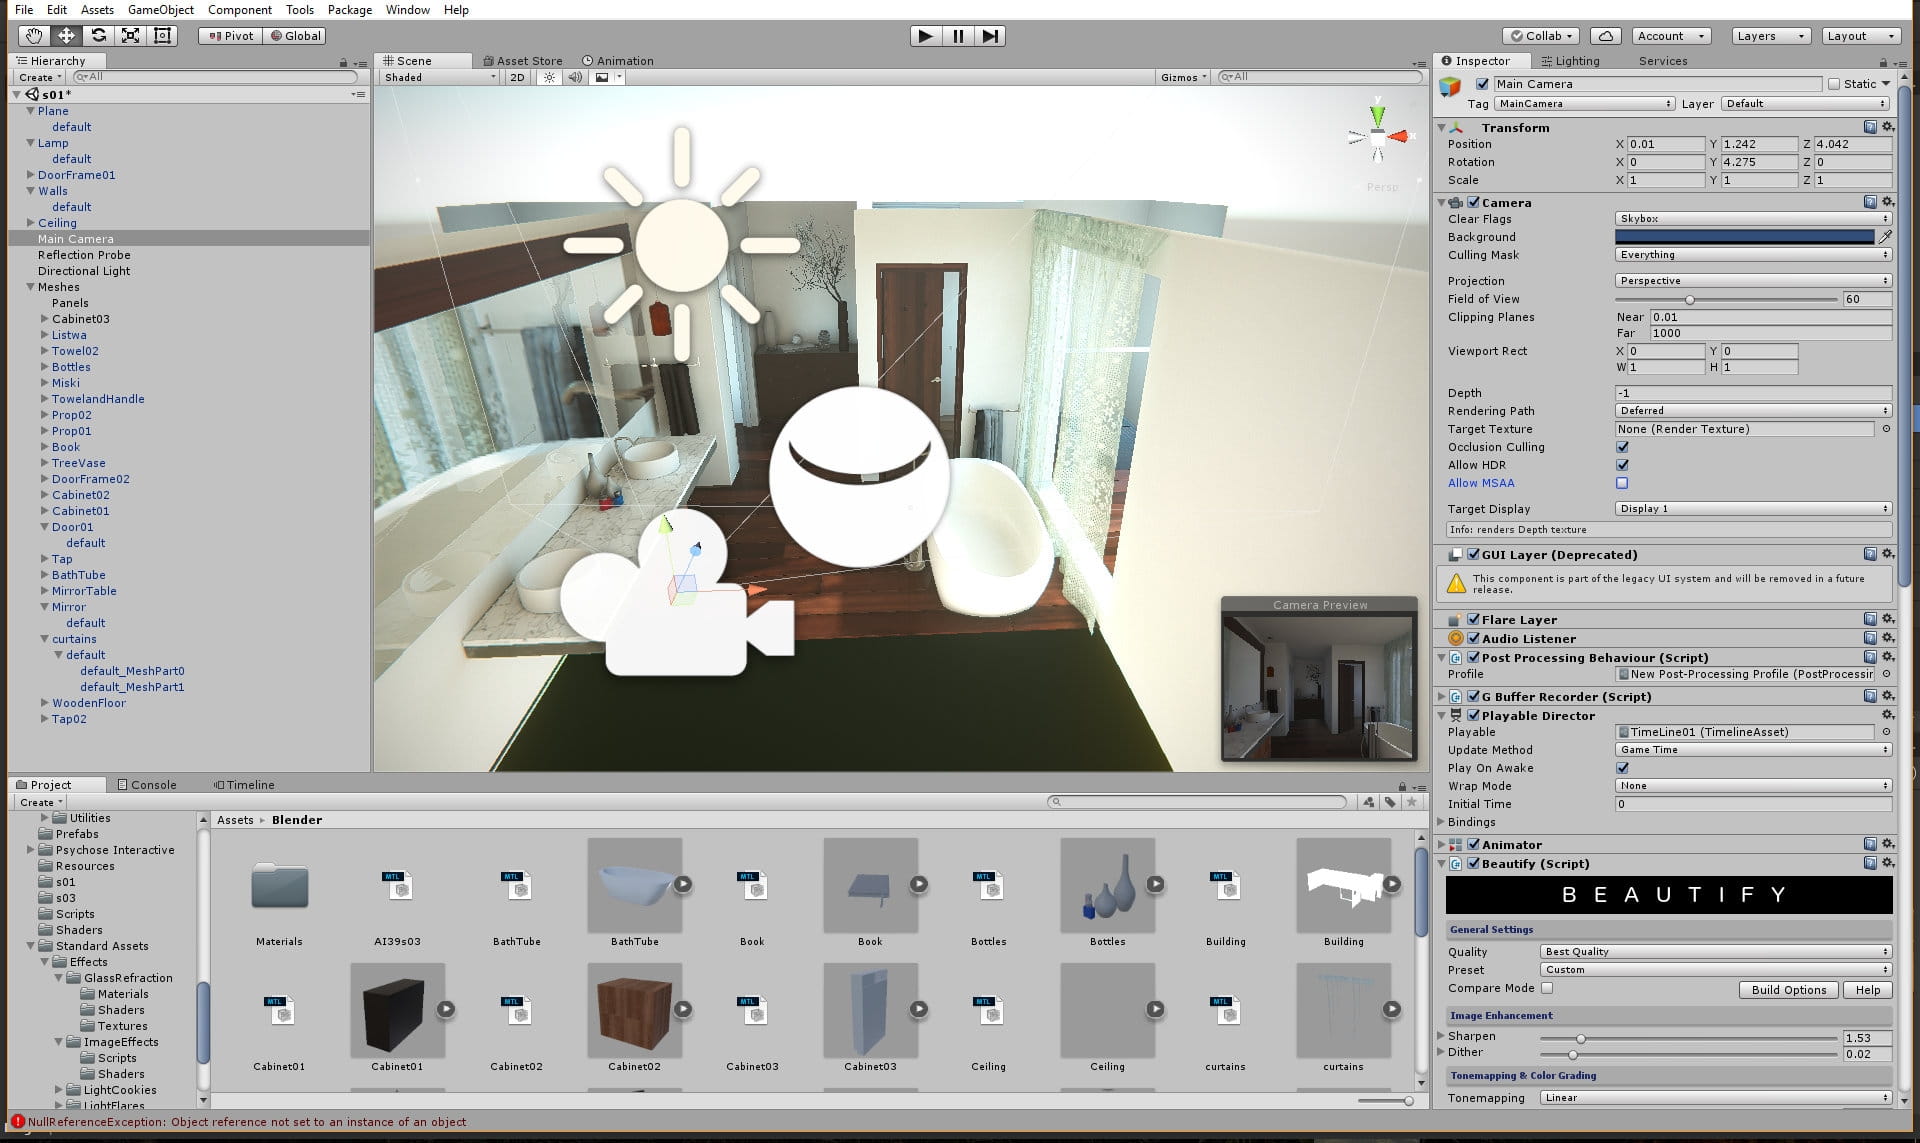
Main camera settings. Camera is using "deffered" rendering. we also place post-processing effects in Camera inspector window. You can see that we are using third-party payware plugin "Beautify" here.

Some post-processing effects are achieved via "Post-processing" stack that was introduced this year. It is great free plugin with many usable post-processing fx. In this scene its main purpose is to enable screenspace reflections.
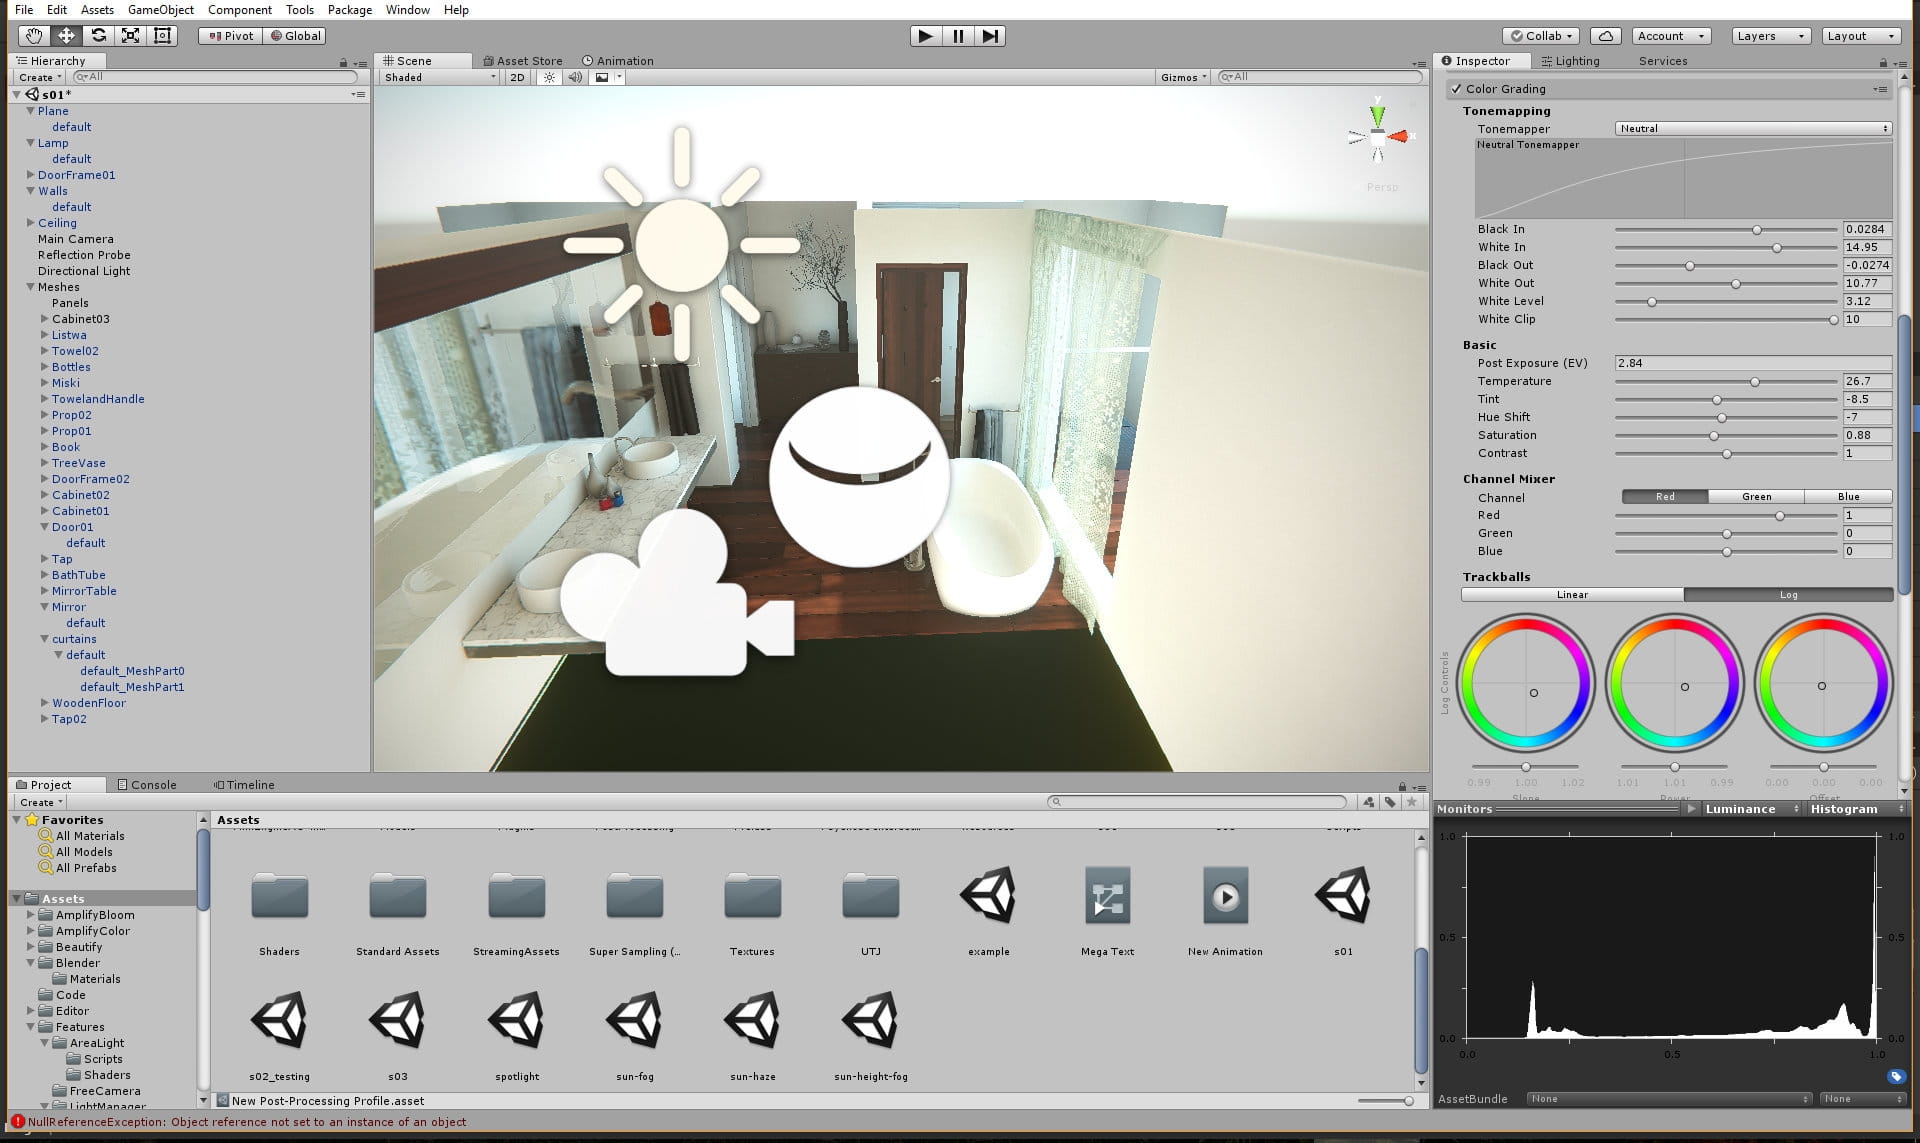
Color grading settings
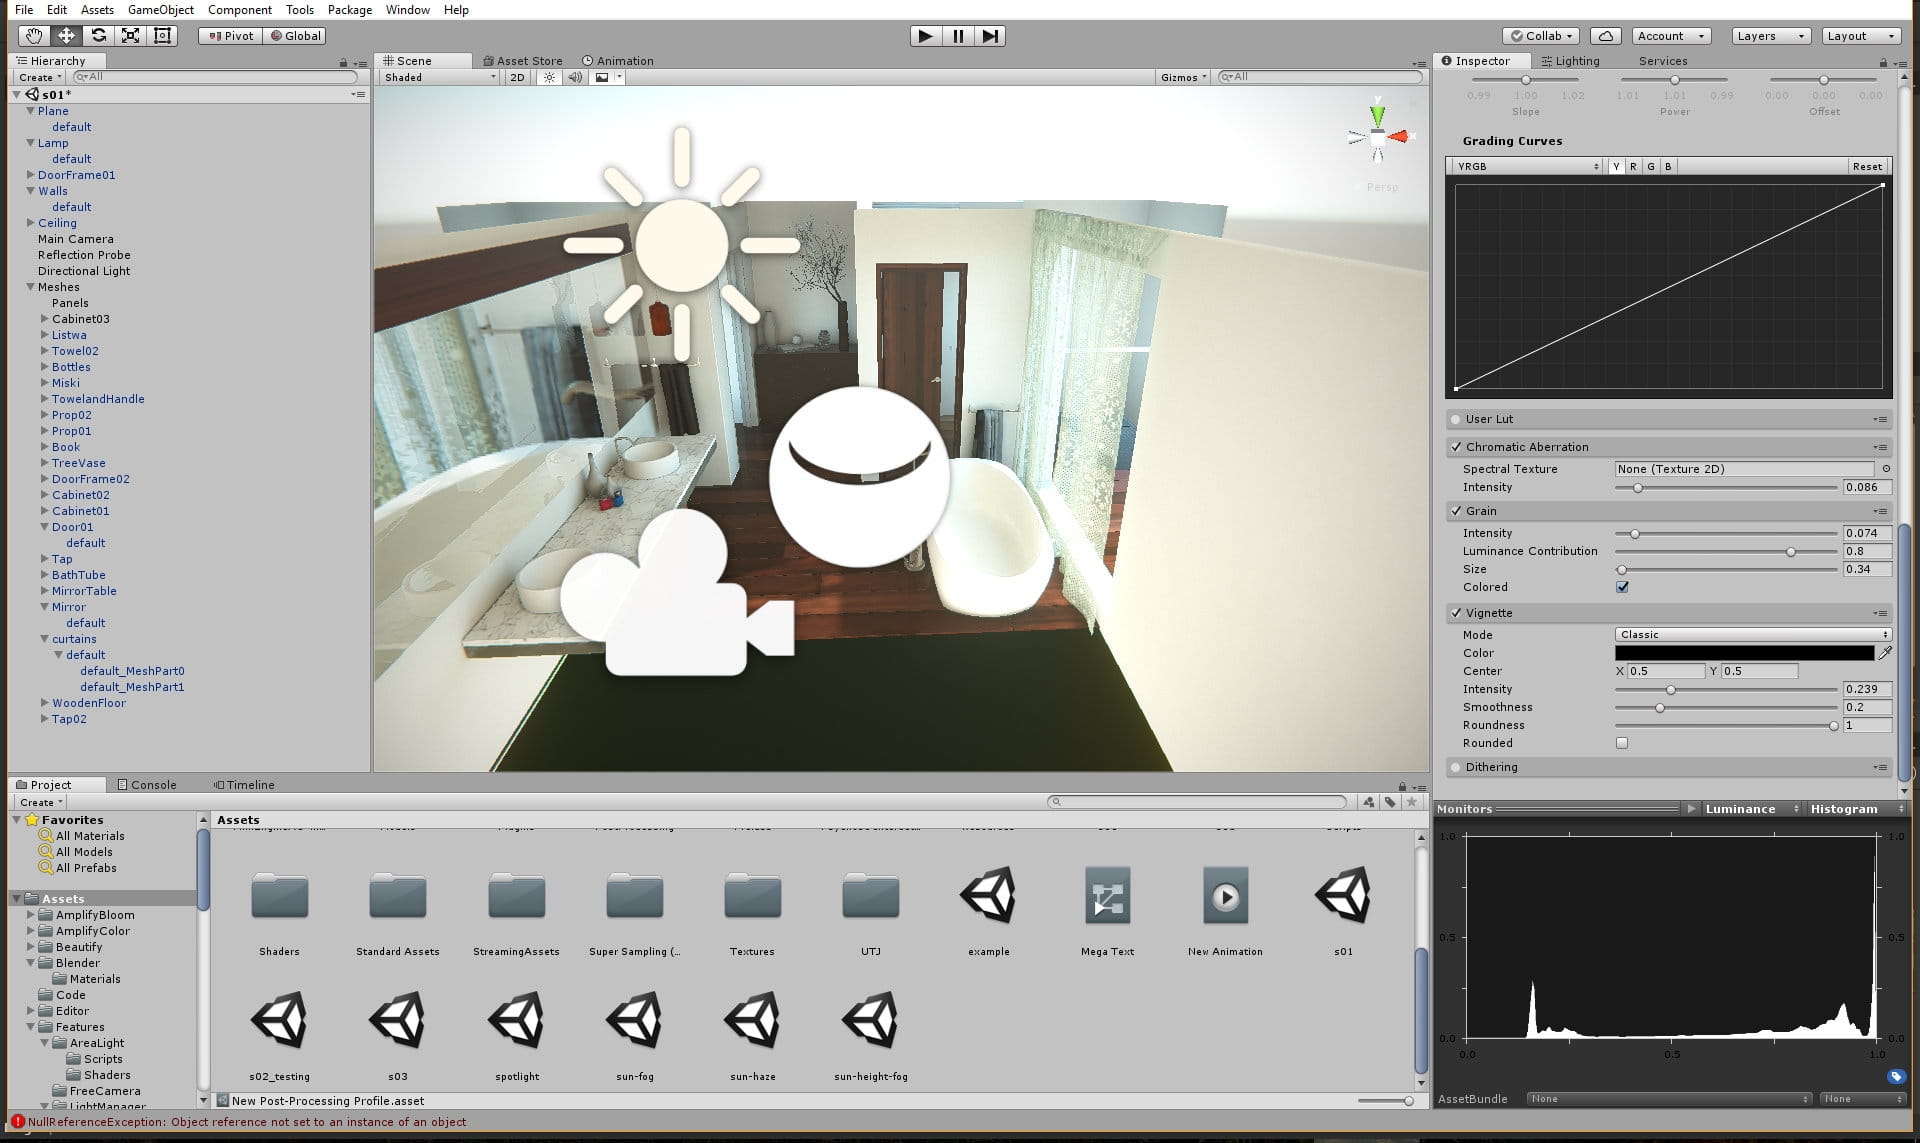
Some final touches: vignette, grain, etc.
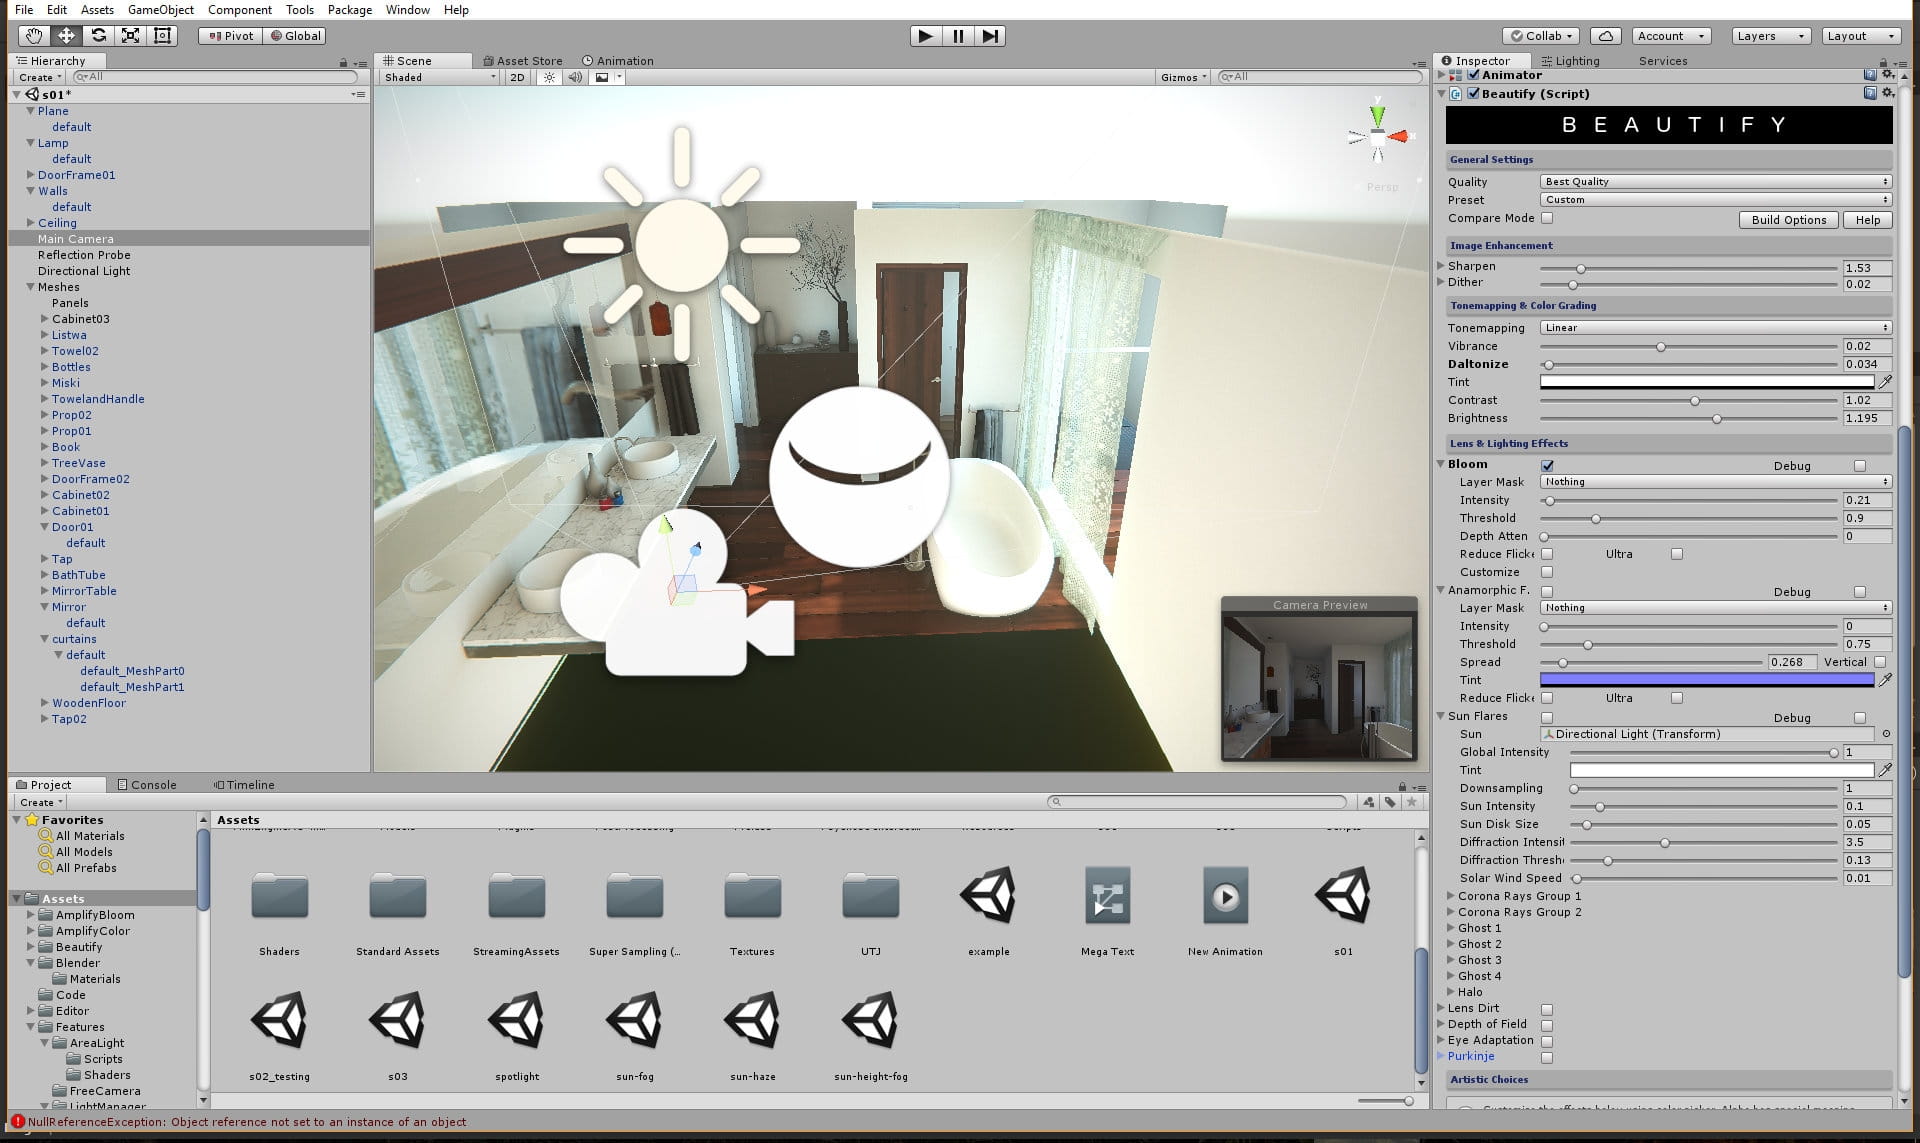
Beautify settings - this plugin is nice when you want to sharpen your scene, add some nice bloom and flares and grade it.
Thanks for reading! :)


LEAVE A COMMENT


|

|

|

|

|
 Customer zone
 Your special offers
 Your orders
 Edit account
 Add project
 Liked projects
 View your artist profile
COMMENTS