How To Make Your CGI Walls More Realistic
Realistic walls with noise modifier.
Total: € 0
Continue Shopping
In accordance with the art. 13 section 1 and 2 of the European Parliament and Council Regulation 2016/679 of the 27th April, 2016 on the protection of natural persons, with regard to the processing of personal data and on the free movement of such data, and repealing Directive 95/46/EC (General Data Protection Regulation), hereafter RODO, I hereby inform that:
1. EVERMOTION S.C., 8 Przędzalniana Str., 15-688 Białystok, Poland is the Administrator of your Personal Data (APD)
2. Data Protection Inspector can be reached through e-mail: iod@evermotion.org
3. Your personal data are to be processed on the basis of art. 6 section 1 letter a, b and f of RODO in order to:
a) prepare, conclude and execute the agreement and for other purposes approved by you,
b) to execute the legitimate interest like marketing of products and the agreement, claim assertion or defence against claims resulting from the law regulations.
4. Entities entitled to the reception of your personal data may be the authorised public bodies; mail providers; providers of the services covered by the agreement; responsible for debt recovery, keeping the archives, document utilization, legal consulting, technical services, IT services and accountancy.
5. Your personal data shall not be transferred to the third country, nor to the international bodies.
6. Your personal data shall be processed within the period of the agreement and upon your additional consent until you withdraw it. APD shall keep the data for the period of any civil law claim execution connected with the agreement.
7. You have the right to demand an access to your personal data, to correct or to delete the data if there is no other basis for the processing or any other purpose of such processing or to limit the processing of the data, to transfer the data to another administrator and to raise objections to the further data processing if there is no legal basis for further processing and to withdraw any previous consent.
8. You provide the personal data voluntarily, however they are necessary to conclude the agreement. The refusal of providing such data may result in the refusal of the agreement conclusion.
9. You have the right to lodge a complaint to the Personal Data Protection Office when in your opinion the data processing violates the regulations of General Data Protection Regulation of the 27 April, 2016 (RODO).
10. Your data will be automatically processed, including the form of profiling.
11. You are obligated to forward above mentioned information to your representative, especially if you appointed this person in the agreement as the contact person or as the representative for the agreement execution.


Unity is a great visualization program, but in its vanilla version and default settings it is not perfectly suited for arch-viz work. Let's make it better with these simple steps!
There are plenty of reasons why you could use Unity for your arch-viz projects – speed, stability, nice lighting, seamless integration with Substances, FBX, MAX, blend, Alembic and OBJ files. It has flexible interface that allows you to work fast, to name the few. It is also modular – you can easily expand almost every aspect of Unity with addons, many of them are free to get from Asset Store or Github repositiories. But, before you start browsing Asset Store, you need to change some defaults.
Color and performance
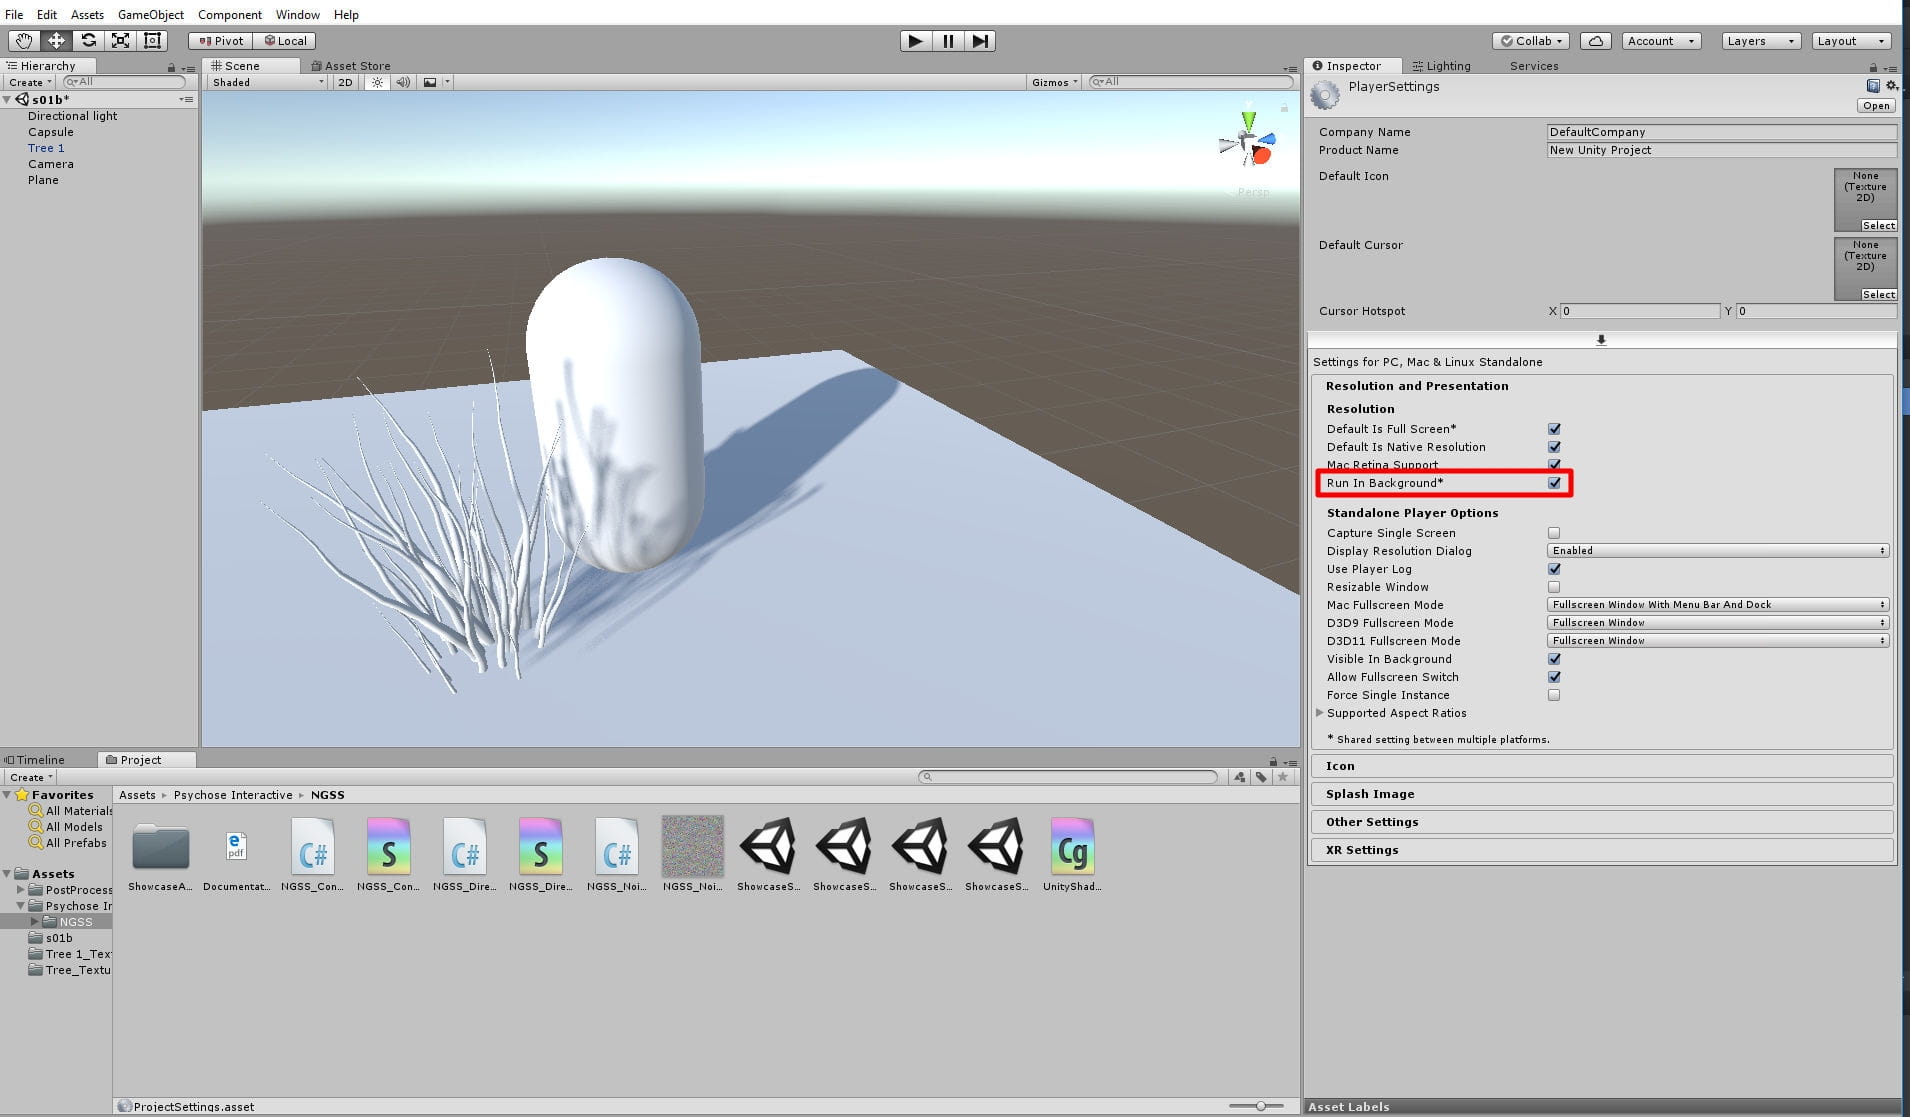
Go to Edit > Project Settings and choose „Player”. There are couple of settings we can change here. First, check „Run in background”. This way Unity will not interrupt baking light or exporting animation frames when you switch to other application. You can also disable antialiasing here, you will use this feature from your post-processing stack instead of this.
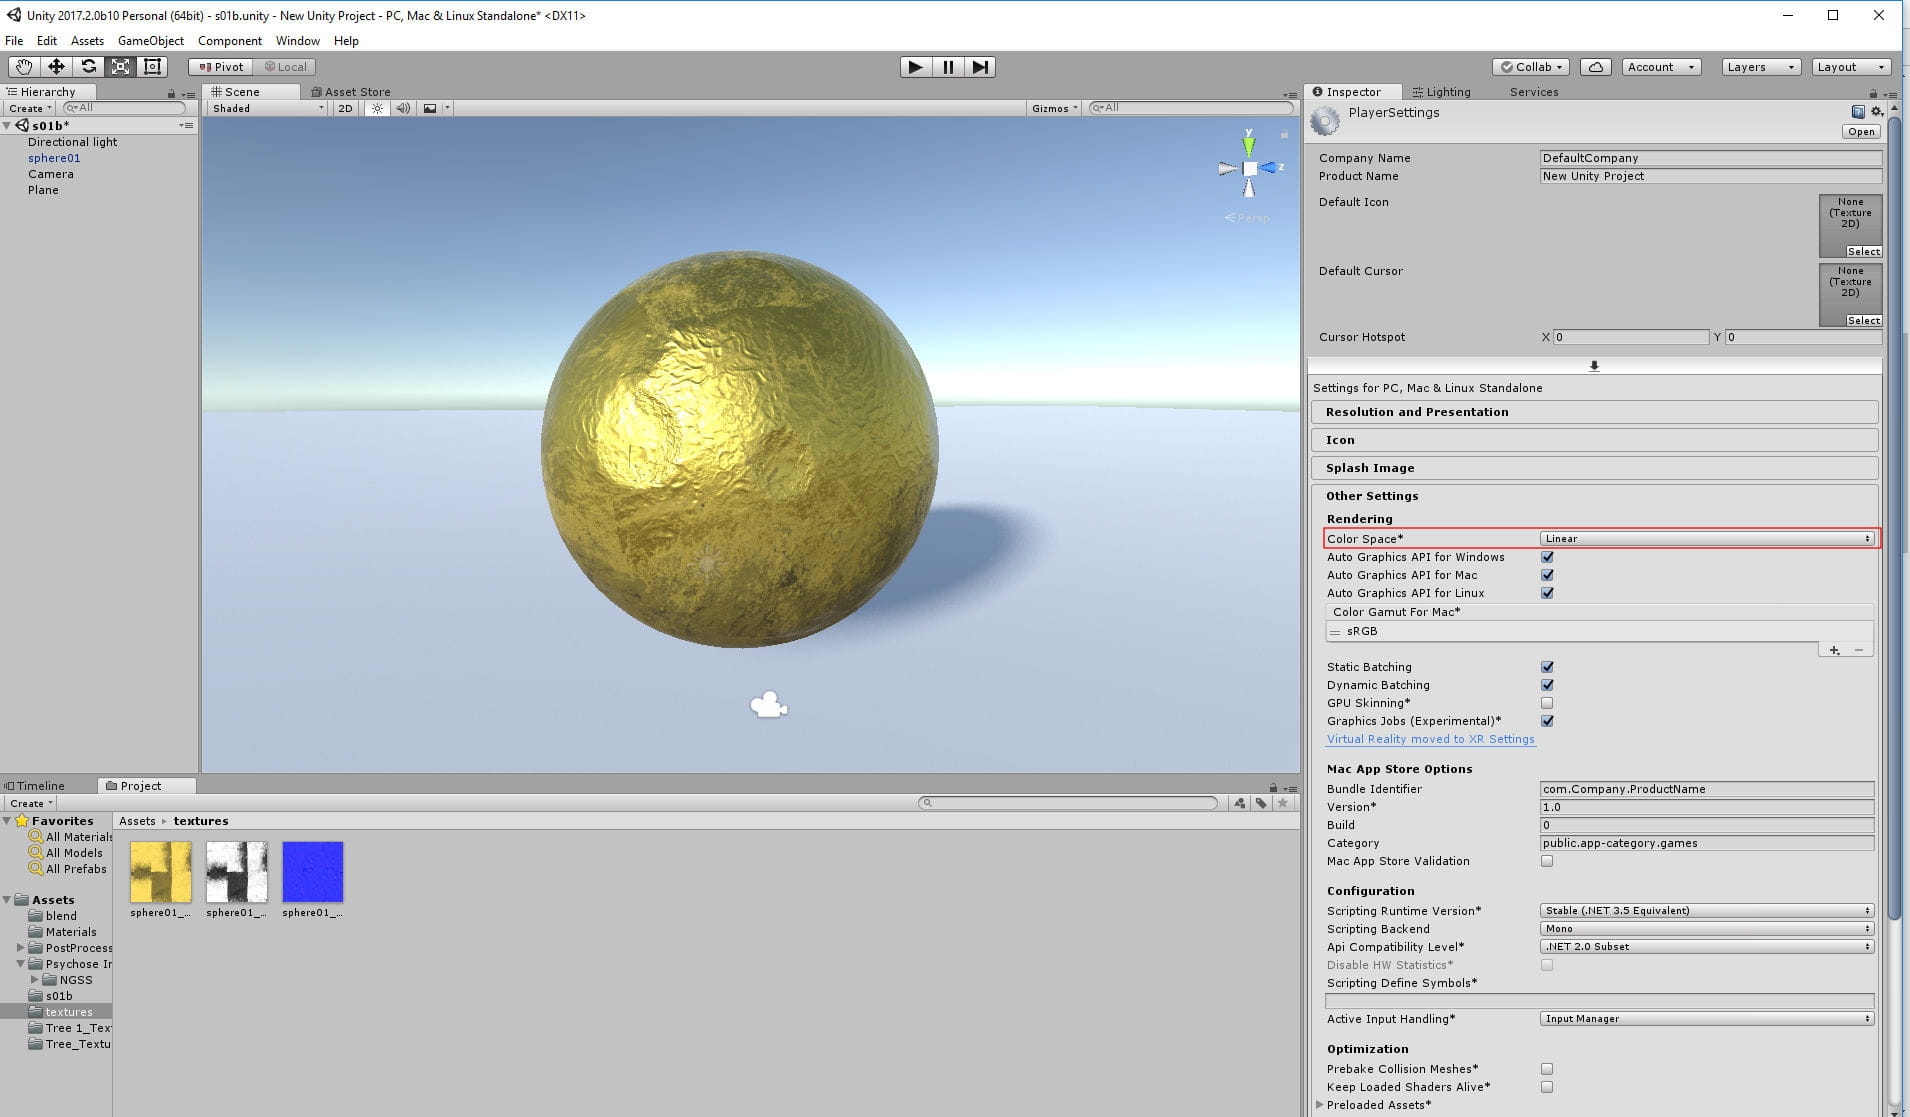
Then, in Player > other” settings choose Linear color space so you can have better real-life light representation in your project and better capabilities while color grading.
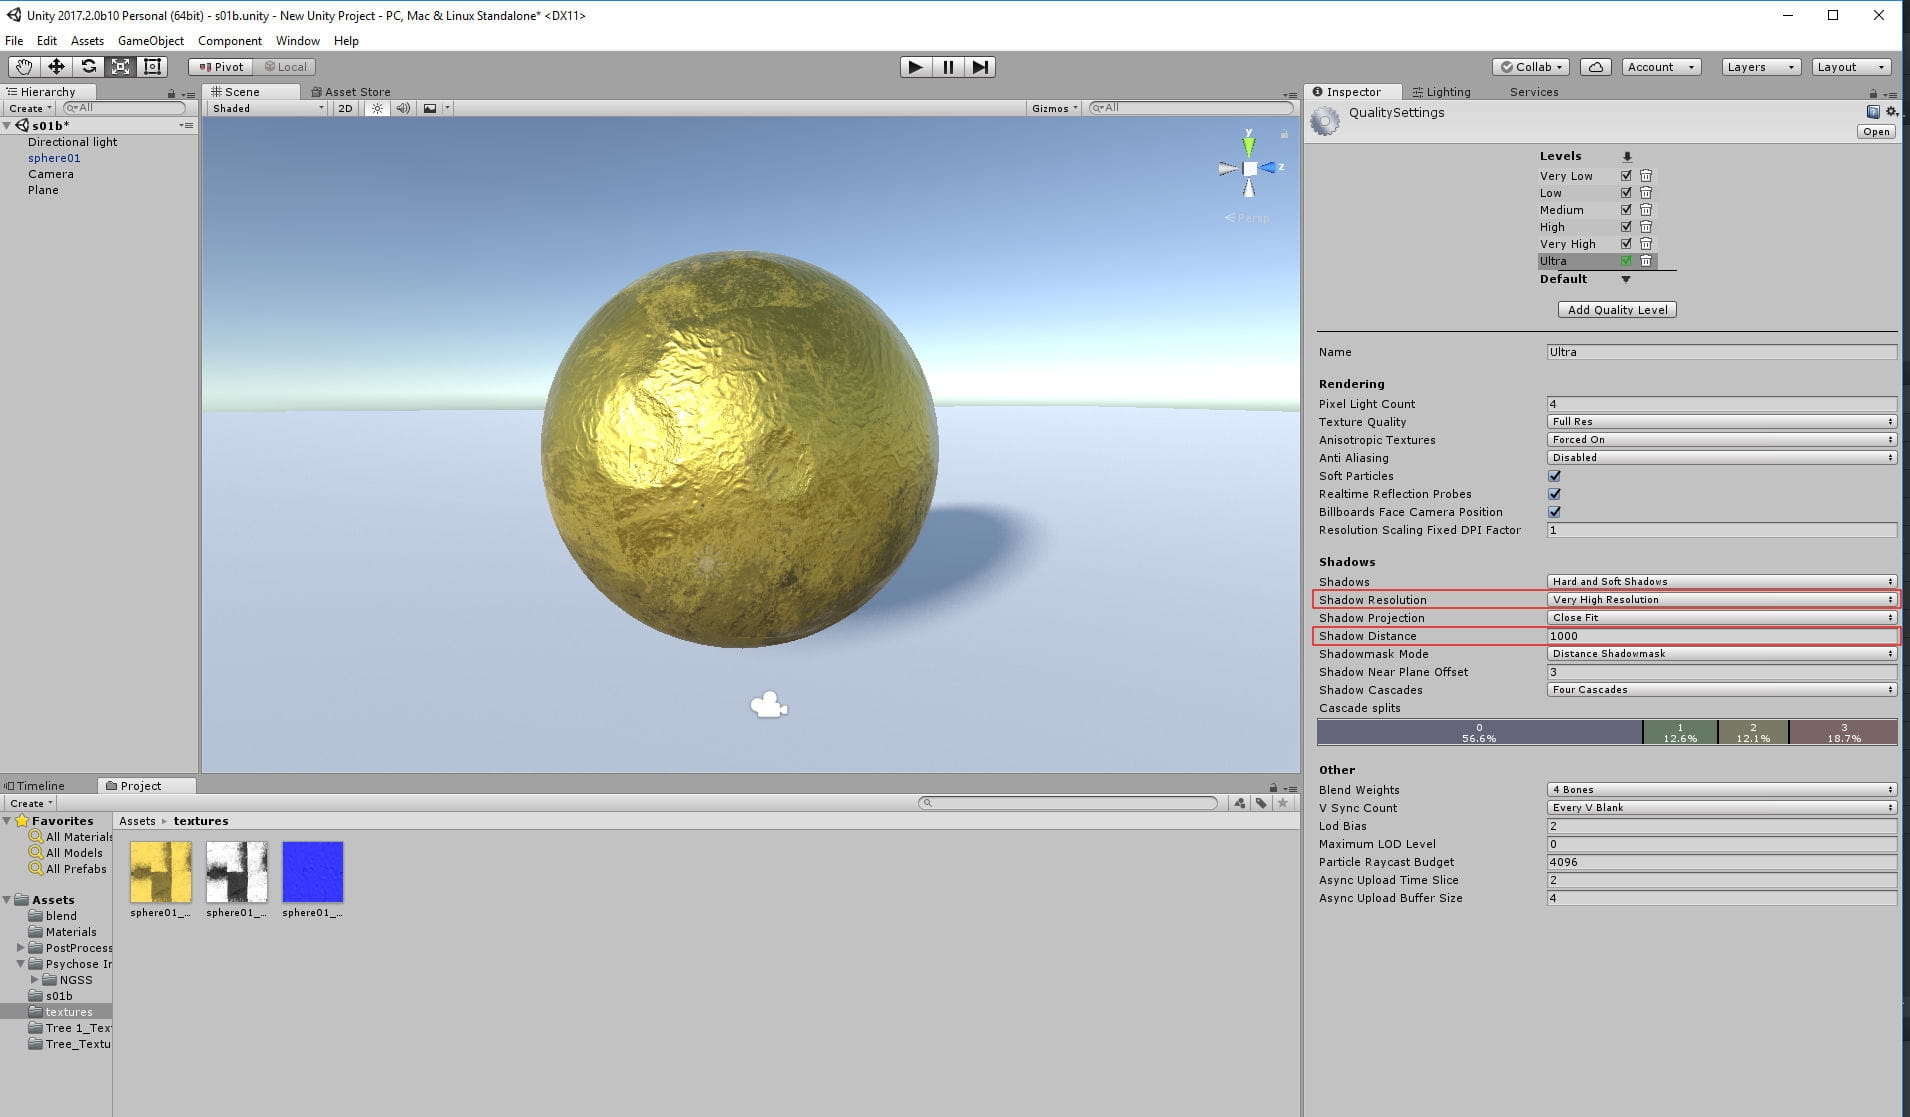
Change your rendering settings to „deffered” in "Graphics" settings, it gives better result than Forward rendering. You can also increase shadows distance and resolution in "quality" settings:
Camera navigation
Install Ortho Camera plugin. Just download it, unrar it and put unpacekd .cs file in your „Assets” folder, it will work after a few seconds (press Shift + number to change views, SHIFT + 7 for perspective view).
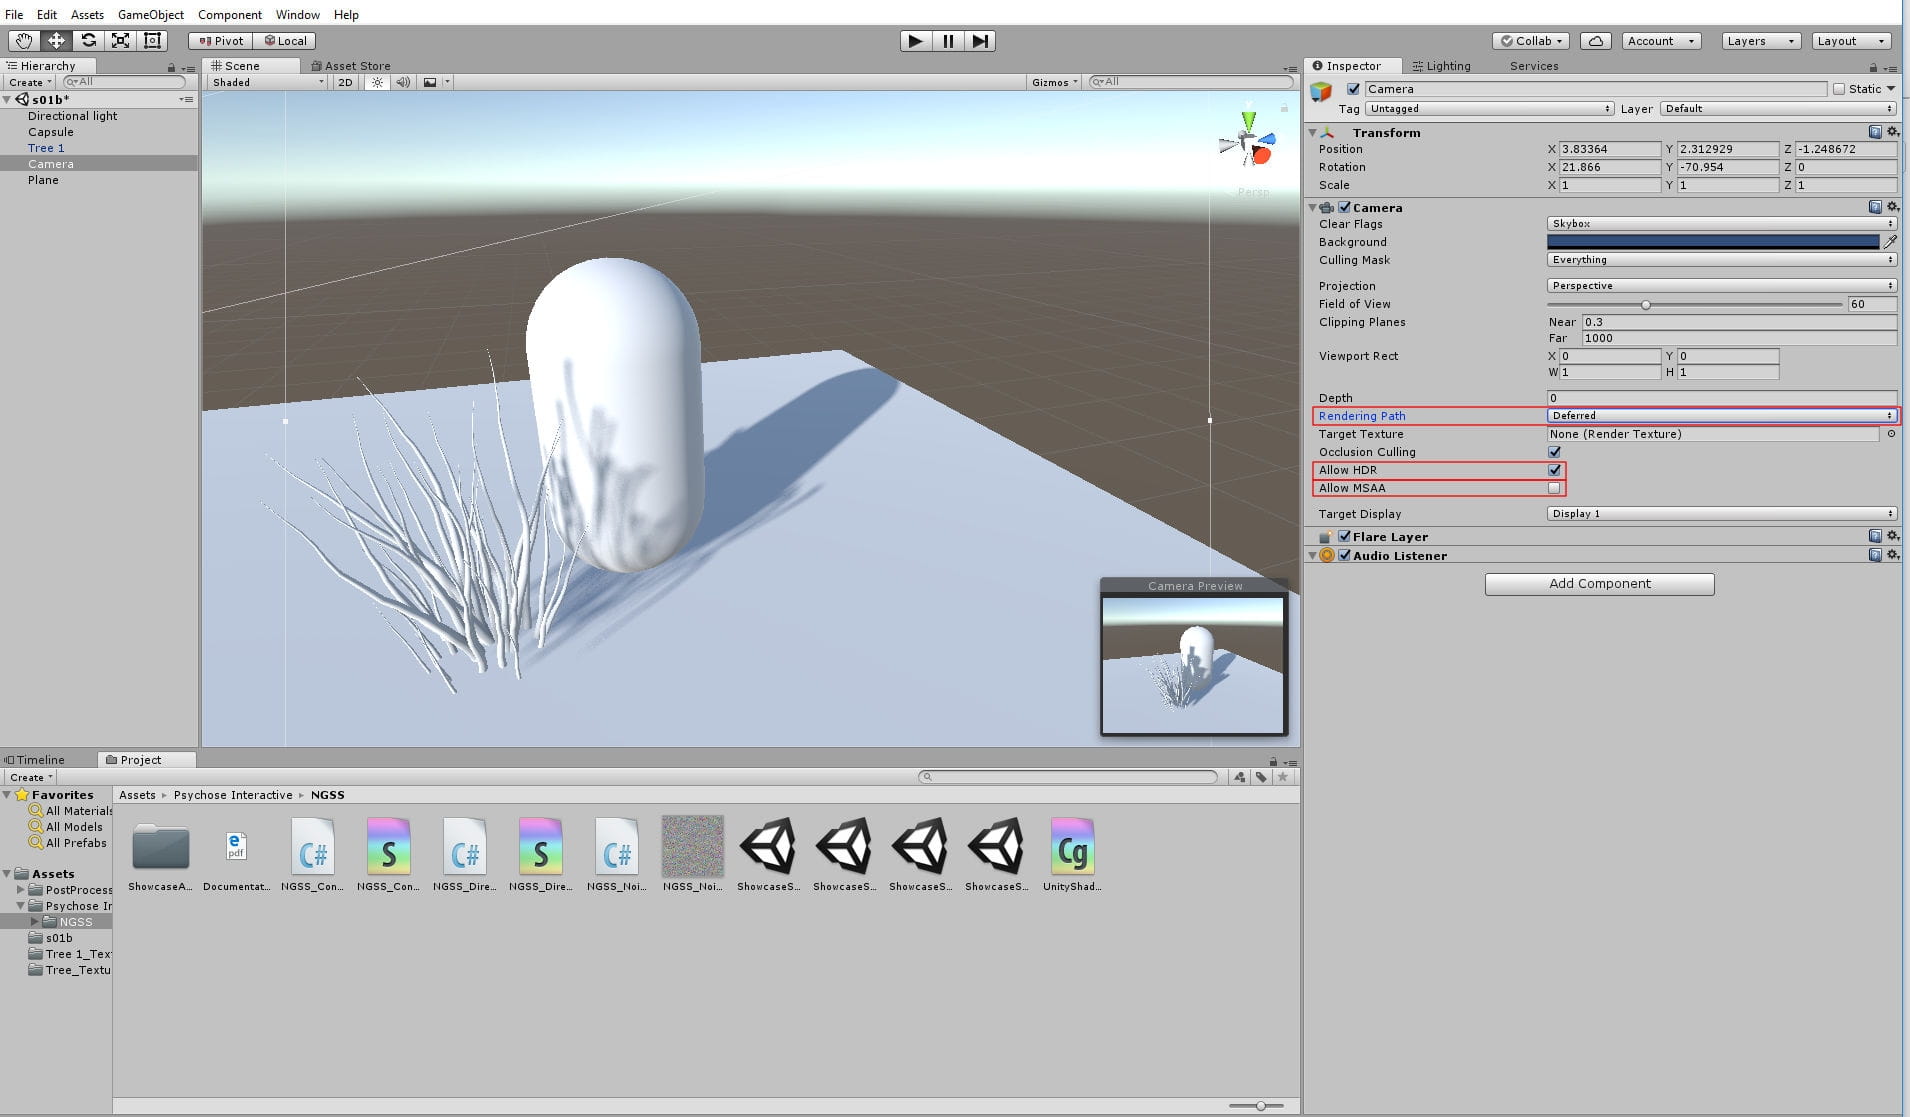
Select your camera and turn HDR on, so yu will have greater color space for tweaking and turn MSAA off. You can also turn on „Deffered rendering” here.
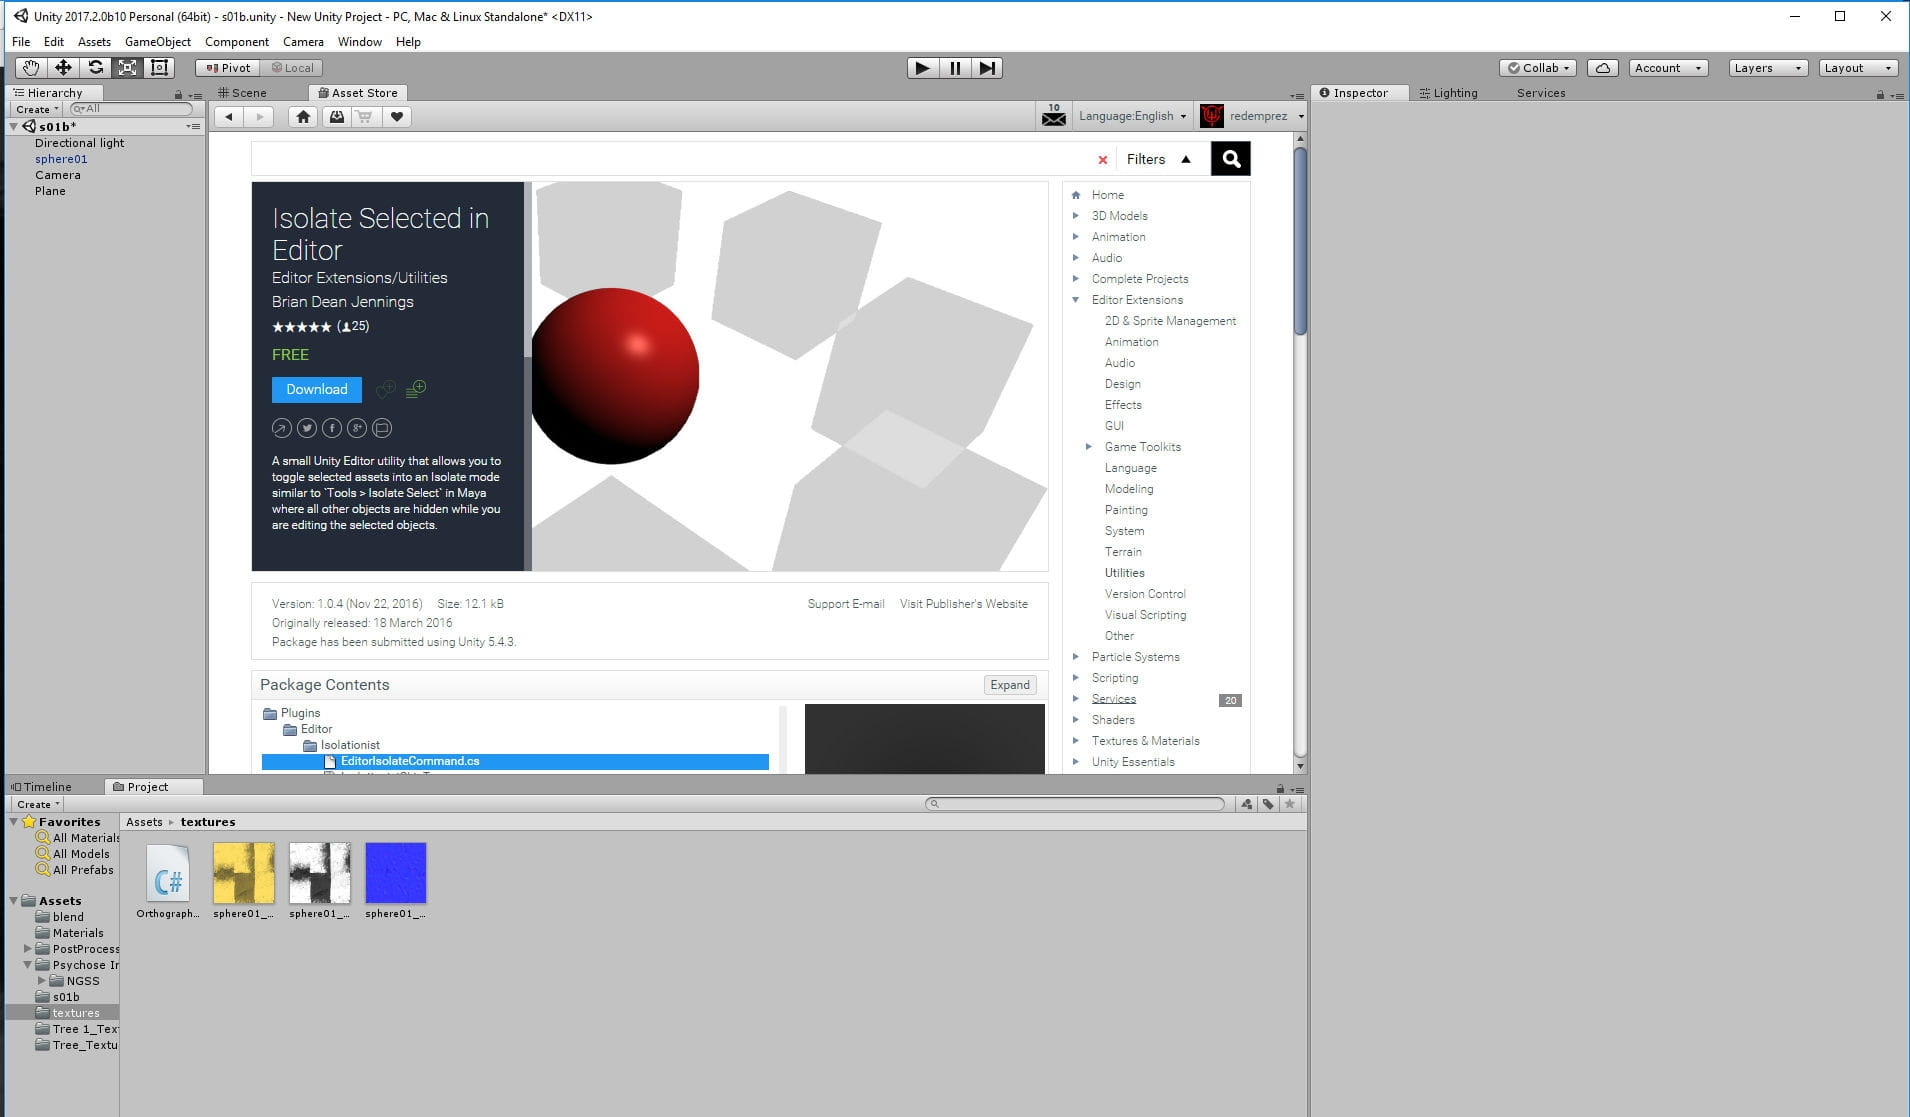
You may want to import „Isolate Selected in Editor” which works like „Isolate selection” in 3ds Max or „Local view” in Blender (default shortcut: I).
What's great in Unity is its integration with Asset Store. You can open Asset Store window from Window menu (or by pressing CTRL + 9) and download directly to your project. No need to restart, it will work just right away. Once you downloaded your asset, it remains in your "Download Manager" section on your all machines (an icon right from "Home" icon), so you don't need to search it in the store again, just press "Download" and "Import" to add an asset to another project. Great time saver!
Formats exchange
When choosing import format for your scene, we advise to use FBX file format. OBJ works also, but FBX respects mesh names that you applied in your 3d package. Unity automatically imports data from FBX, you can change import options at any time, just by choosing your imported file in Project View. Unity imports your FBX meshes into single group asset, which is great when it comes to tiding space of Project window or placing them in the scene.
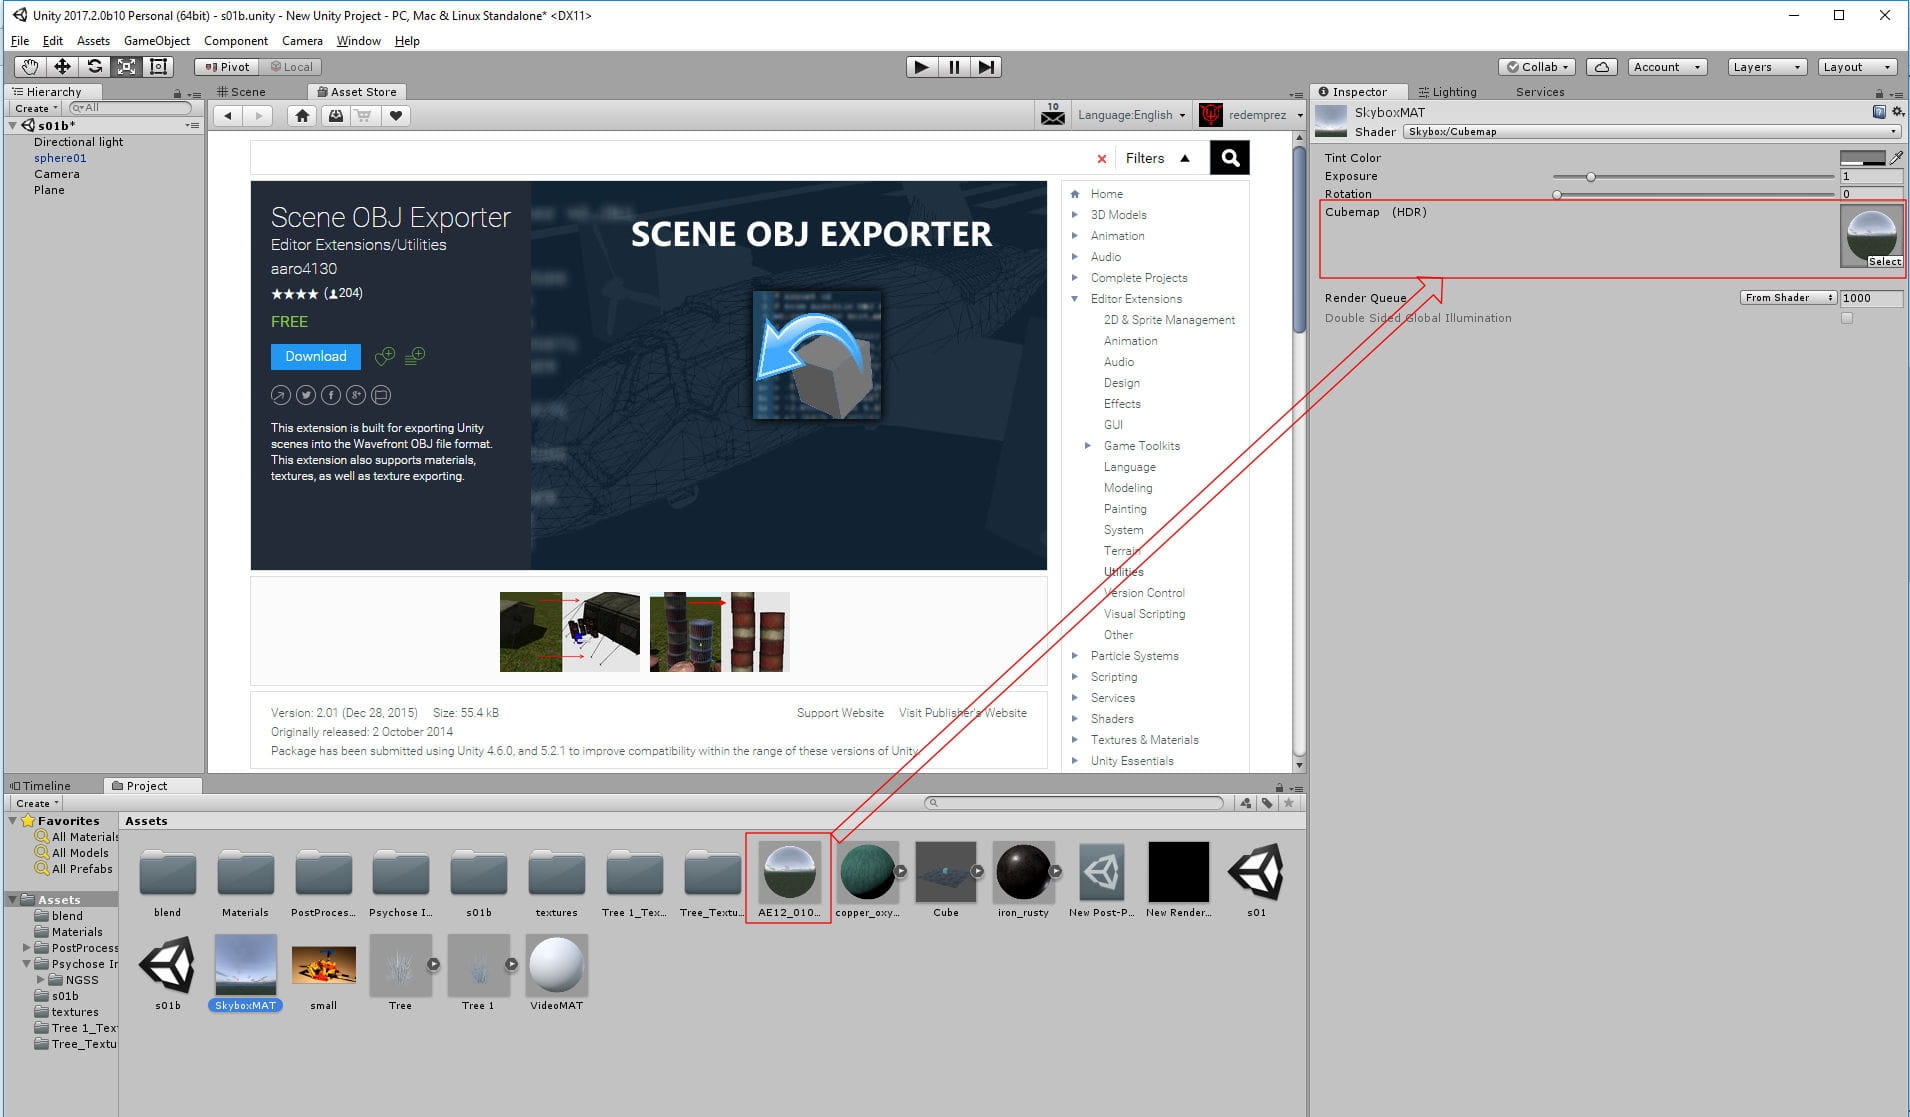
Import „Scene OBJ Exporter” addon that will allow you to export assets made in Unity (like, for example terrain) to your 3d software. It’s free and you can download it from Asset Store.
Import and convert HDRis
You can rely on Unitys default skybox, but probably you will want to use custom HDR maps for lighting the scene. Importing them to Unity is easy:

We also recommend to import Unity’s HDRI pack - it contains textures, materials and skyboxes.
Post-processing
Post Processing in Unity is camera-dependend, not like Unreal's Post Processing Volume which is area dependent
After installing Post Processing stack, select your camera and press „Add component” button. Choose „Post-processing behaviour” from the list (you can also type „post” if you cannot see it). Then you can right click in Project window and Create New Post Processing Profile. Select your camera again and drag your profile to Post-processing behaviour” window. Now you can click on Profile name in Project view and tweak the options, and there are many to play with!


LEAVE A COMMENT


|

|

|

|

|
 Customer zone
 Your special offers
 Your orders
 Edit account
 Add project
 Liked projects
 View your artist profile
COMMENTS