Evermotion: More Than an Asset Library
How Evermotion became a full-scale production partner for archviz, automotive and synthetic data.


Total: € 0

This tutorial was brought to you by vraymaterials.co.uk - the finest VRay material library consisting of a collection of high quality free materials for 3Ds Max and Maya.
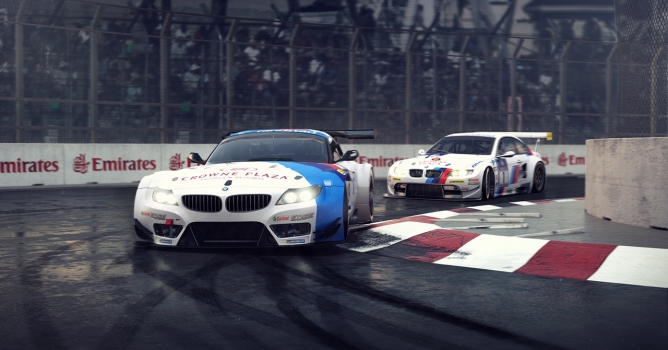
This scene showcases two of our favourite cars in their full GT3 race spec, The BMW Z4 & BMW E92. Below we will run through our process of lighting, and texturing the full scene and we’ll also throw in Free Vray materials for you to download and use in your own scenes.
Click on image to enlarge 
Click on image to enlarge 
Below we will run through our process of lighting, and texturing the full scene and we’ll also throw in Free Vray materials for you to download and use in your own scenes.
Click on image to enlarge 
Click on image to enlarge 
Click on image to enlarge 
Scene Materials Used
Click on image to enlarge 
Click on image to enlarge 
Click on image to enlarge 
Click on image to enlarge 
Click on image to enlarge 
Click on image to enlarge 
Click on image to enlarge 
Click on image to enlarge 
Click on image to enlarge 
Click on image to enlarge 
Click on image to enlarge 
Click on image to enlarge 
Click on image to enlarge 
Click on image to enlarge 
Scene Lighting
Our main source of light for the scene comes from a HDRI map attached to a dome Vray material.
Click on image to enlarge 
Click on image to enlarge 
Camera Settings:
Click on image to enlarge 
Post Production
Click on image to enlarge 
Click on image to enlarge 
Click on image to enlarge
We hope you found this project breakdown and run through helpful, and be sure to download the materials used in this project below.
Download materials (click on images below):


This tutorial was brought to you by vraymaterials.co.uk - the finest VRay material library consisting of a collection of high quality free materials for 3Ds Max and Maya.


LEAVE A COMMENT


|

|

|

|

|
 Customer zone
 Your orders
 Edit account
 Add project
 Liked projects
 View your artist profile
COMMENTS