This interior scene was made in 3ds Max and V-Ray by Marcin Białecki from Evermotion. It is scene 9 from Archinteriors vol. 36. You can purchase this single scene or entire Archinteriors vol. 36 collection in Evermotion Shop.
Click on image to enlarge 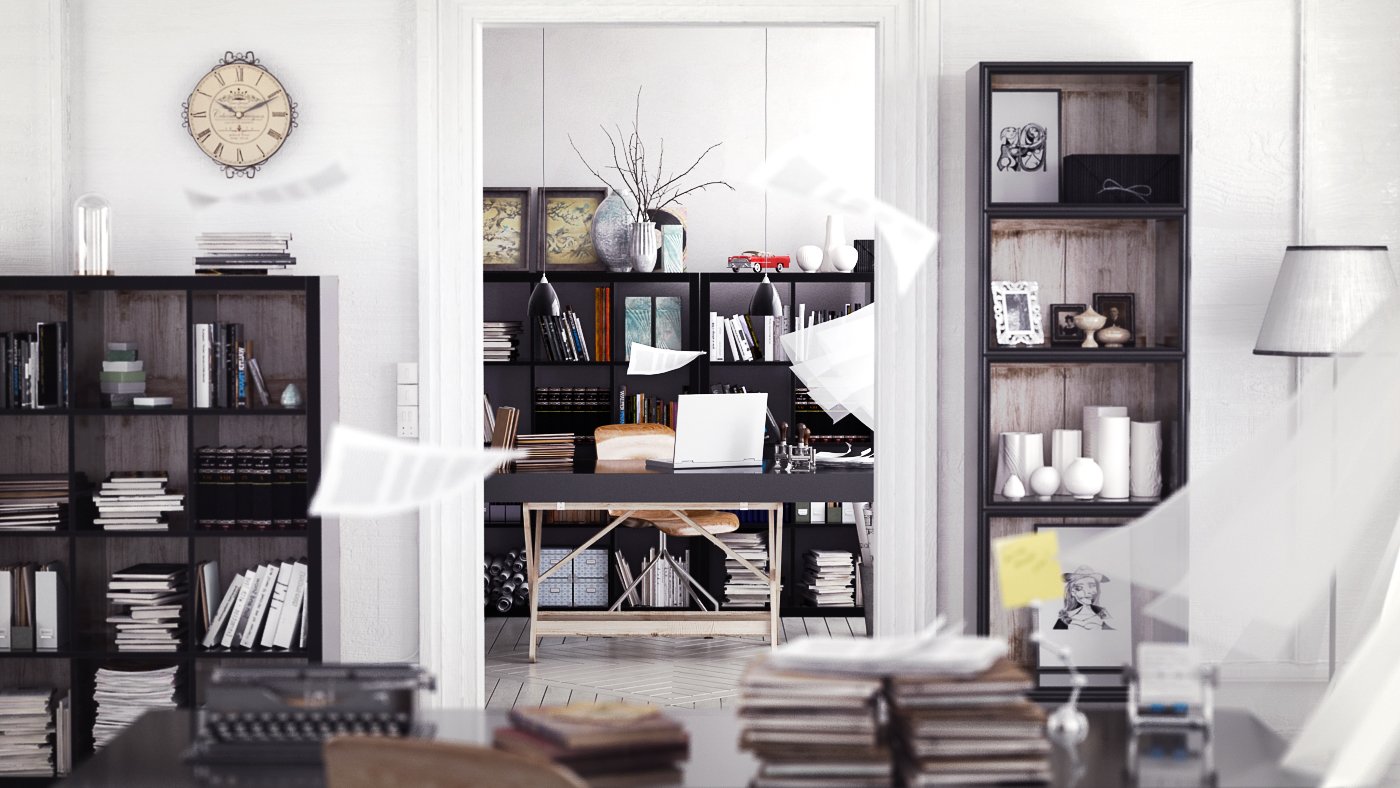
Final image after post-production. There are three planes of the scene, including blurred desk close to the camera. We wanted to achieve movement in this scene, we made it with flying paper sheets and curtains moved by the "wind".
Click on image to enlarge 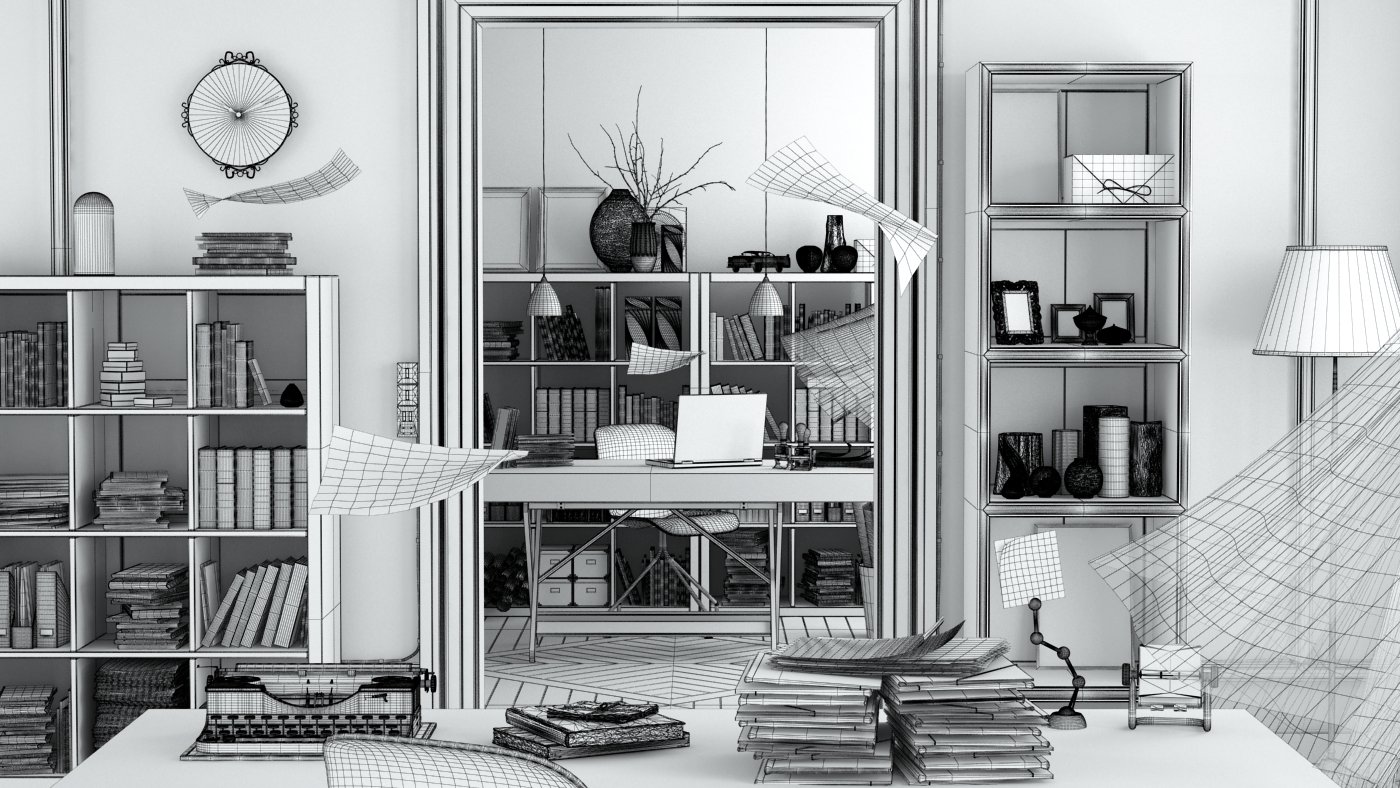
Click on image to enlarge 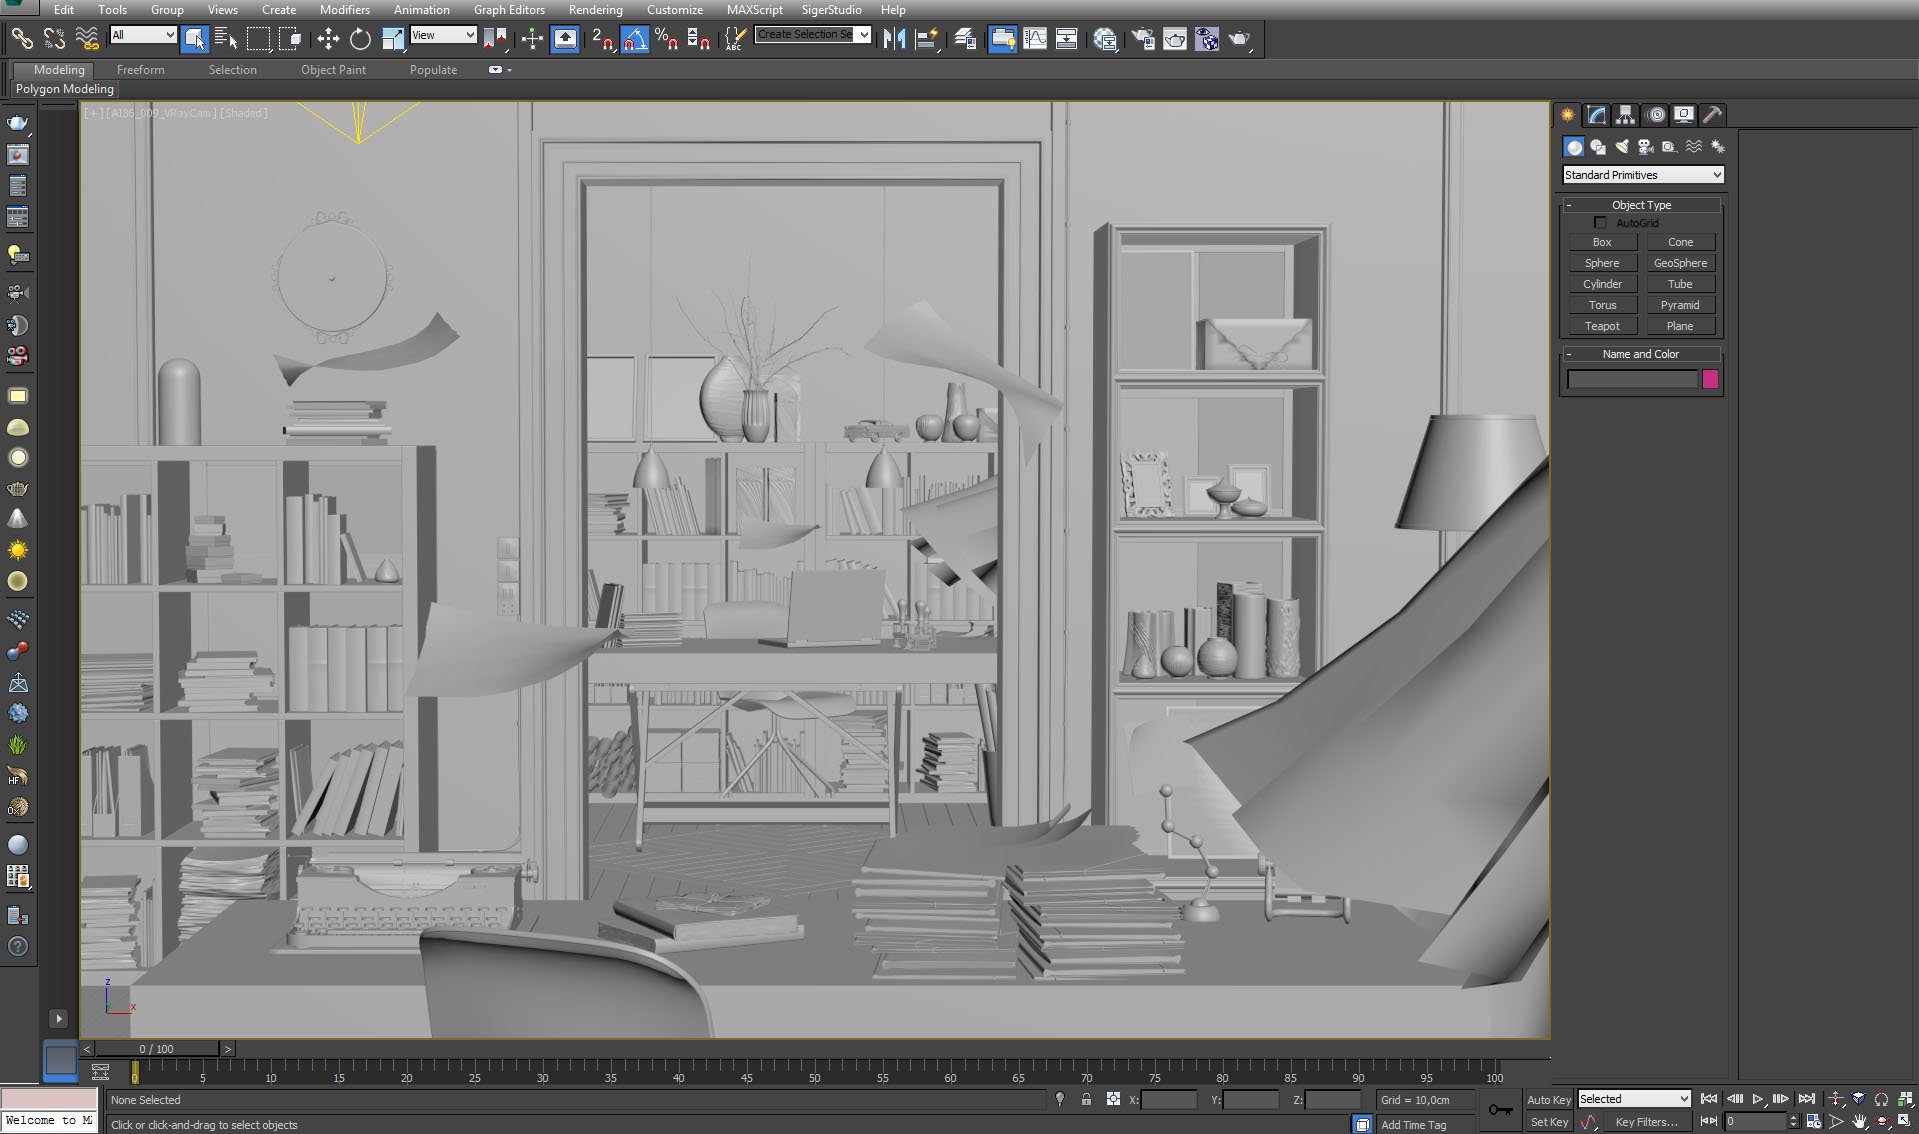
3ds Max viewport. View from camera.
Click on image to enlarge 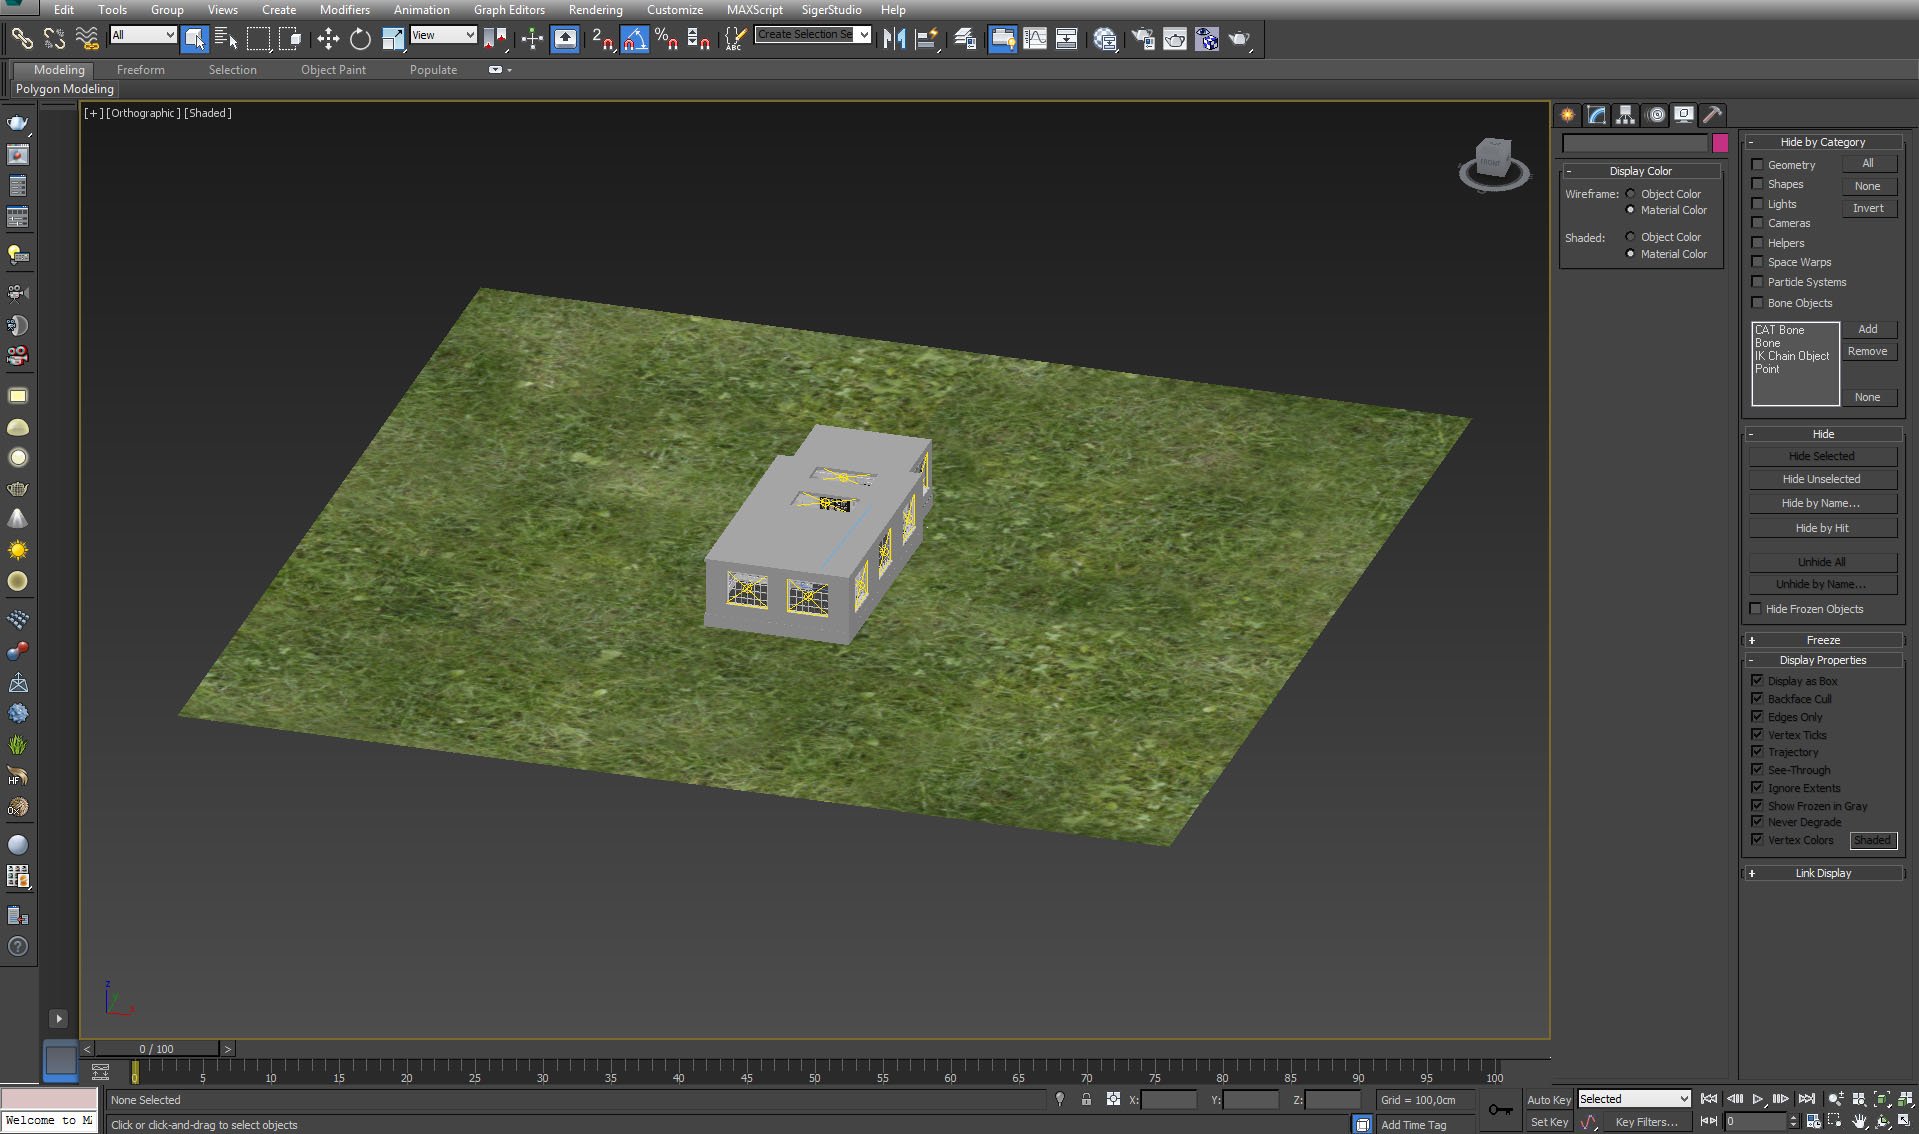
Outside view. Marcin didn't use any Vray Sun or Target Direct light. He lit interior by placing Vray plane lights in all windows.
Click on image to enlarge 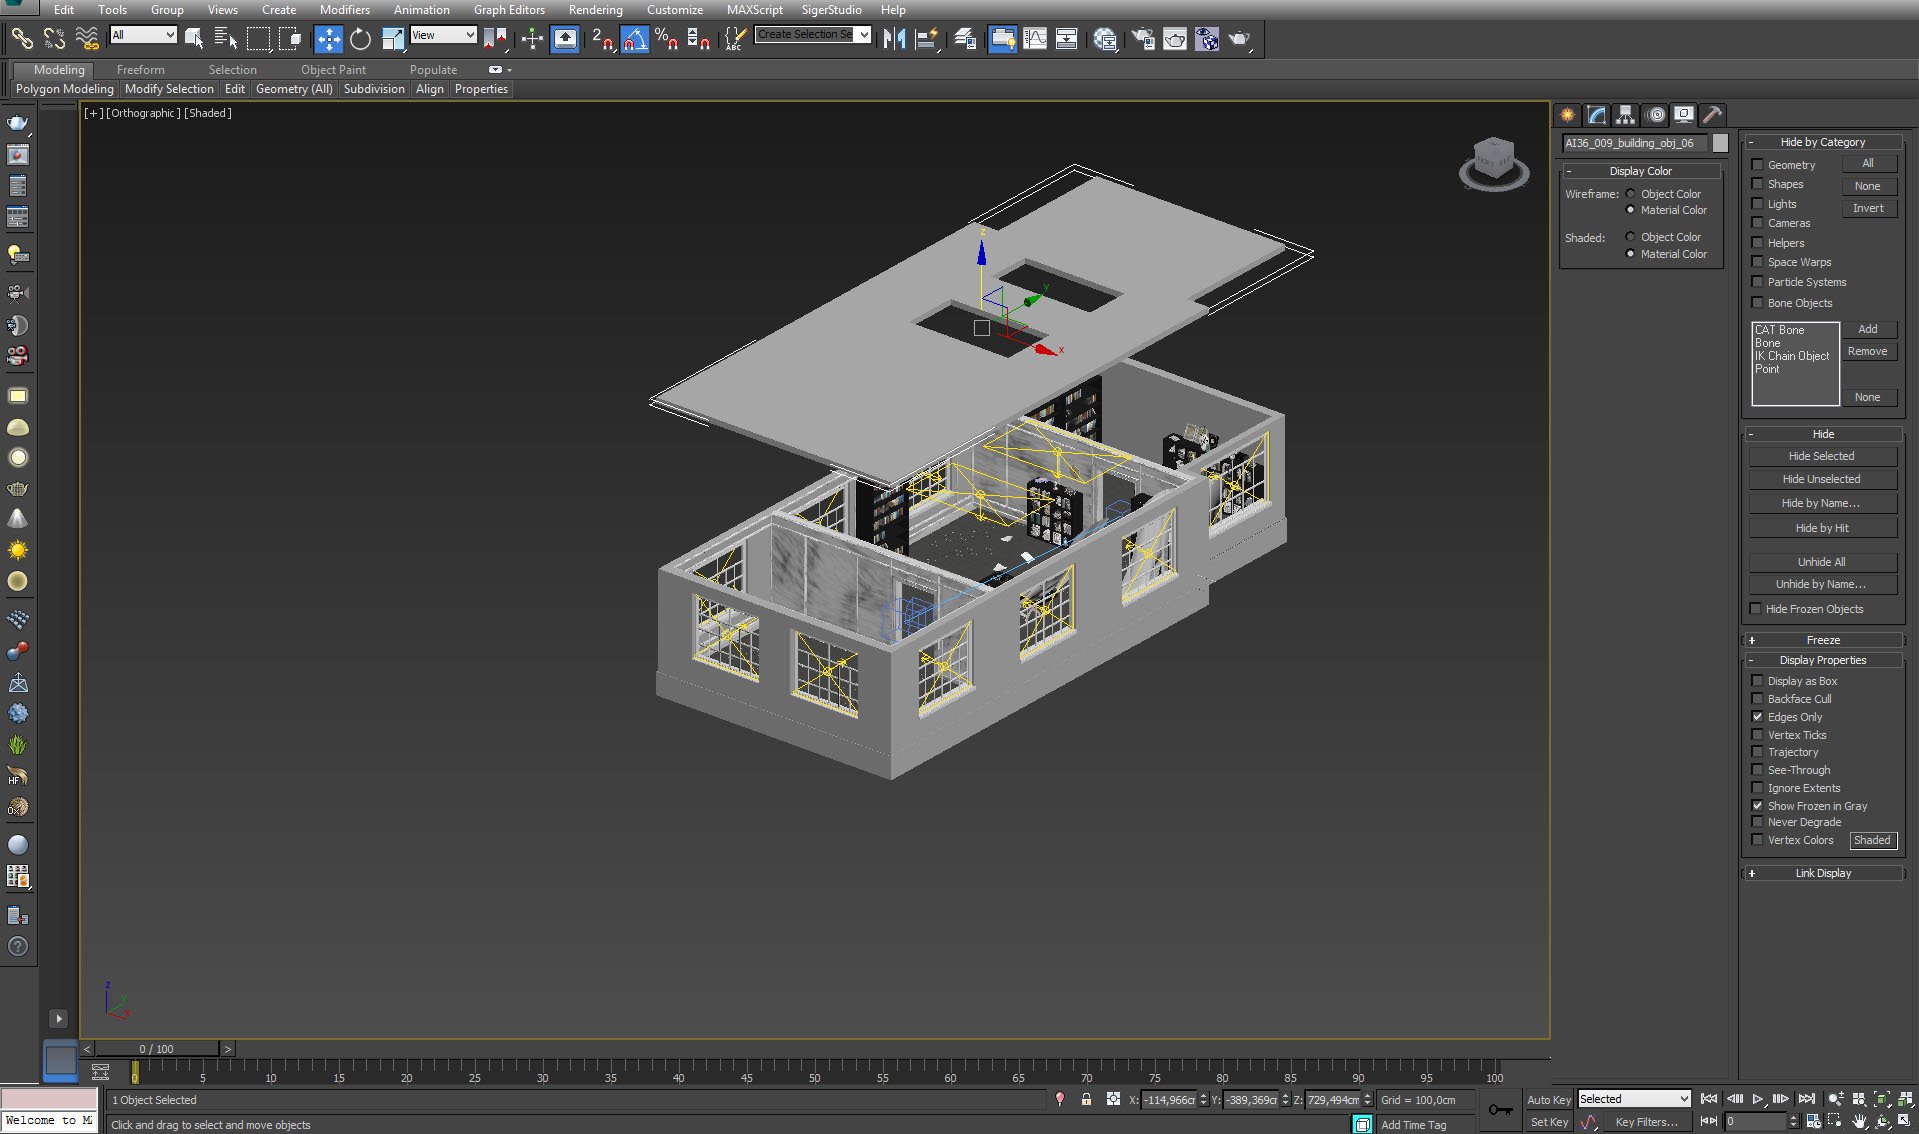
Building interior with 3 rooms.
Click on image to enlarge 
Top view of a building, you can see also all (11) lights in the scene.
Click on image to enlarge 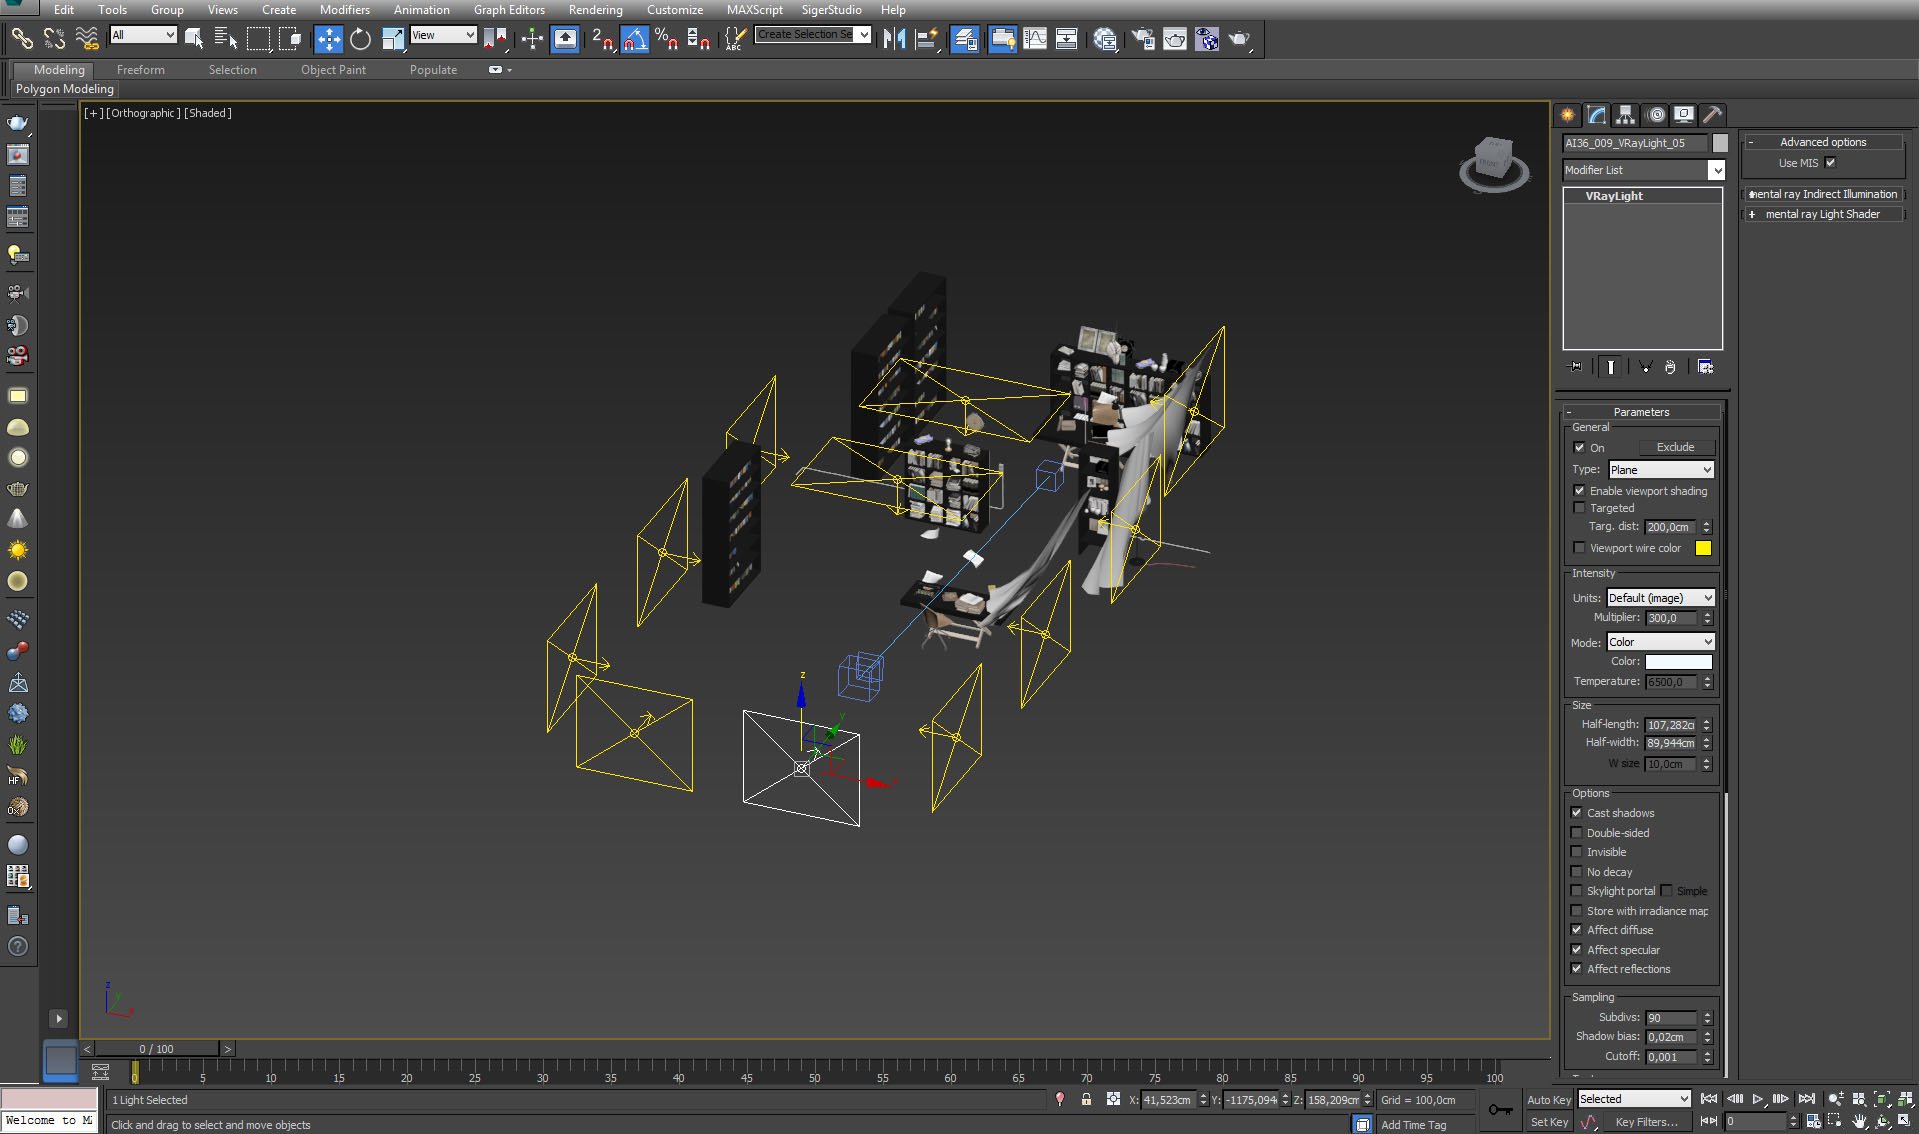
Vray Lights placed in windows have similar settings.
Click on image to enlarge 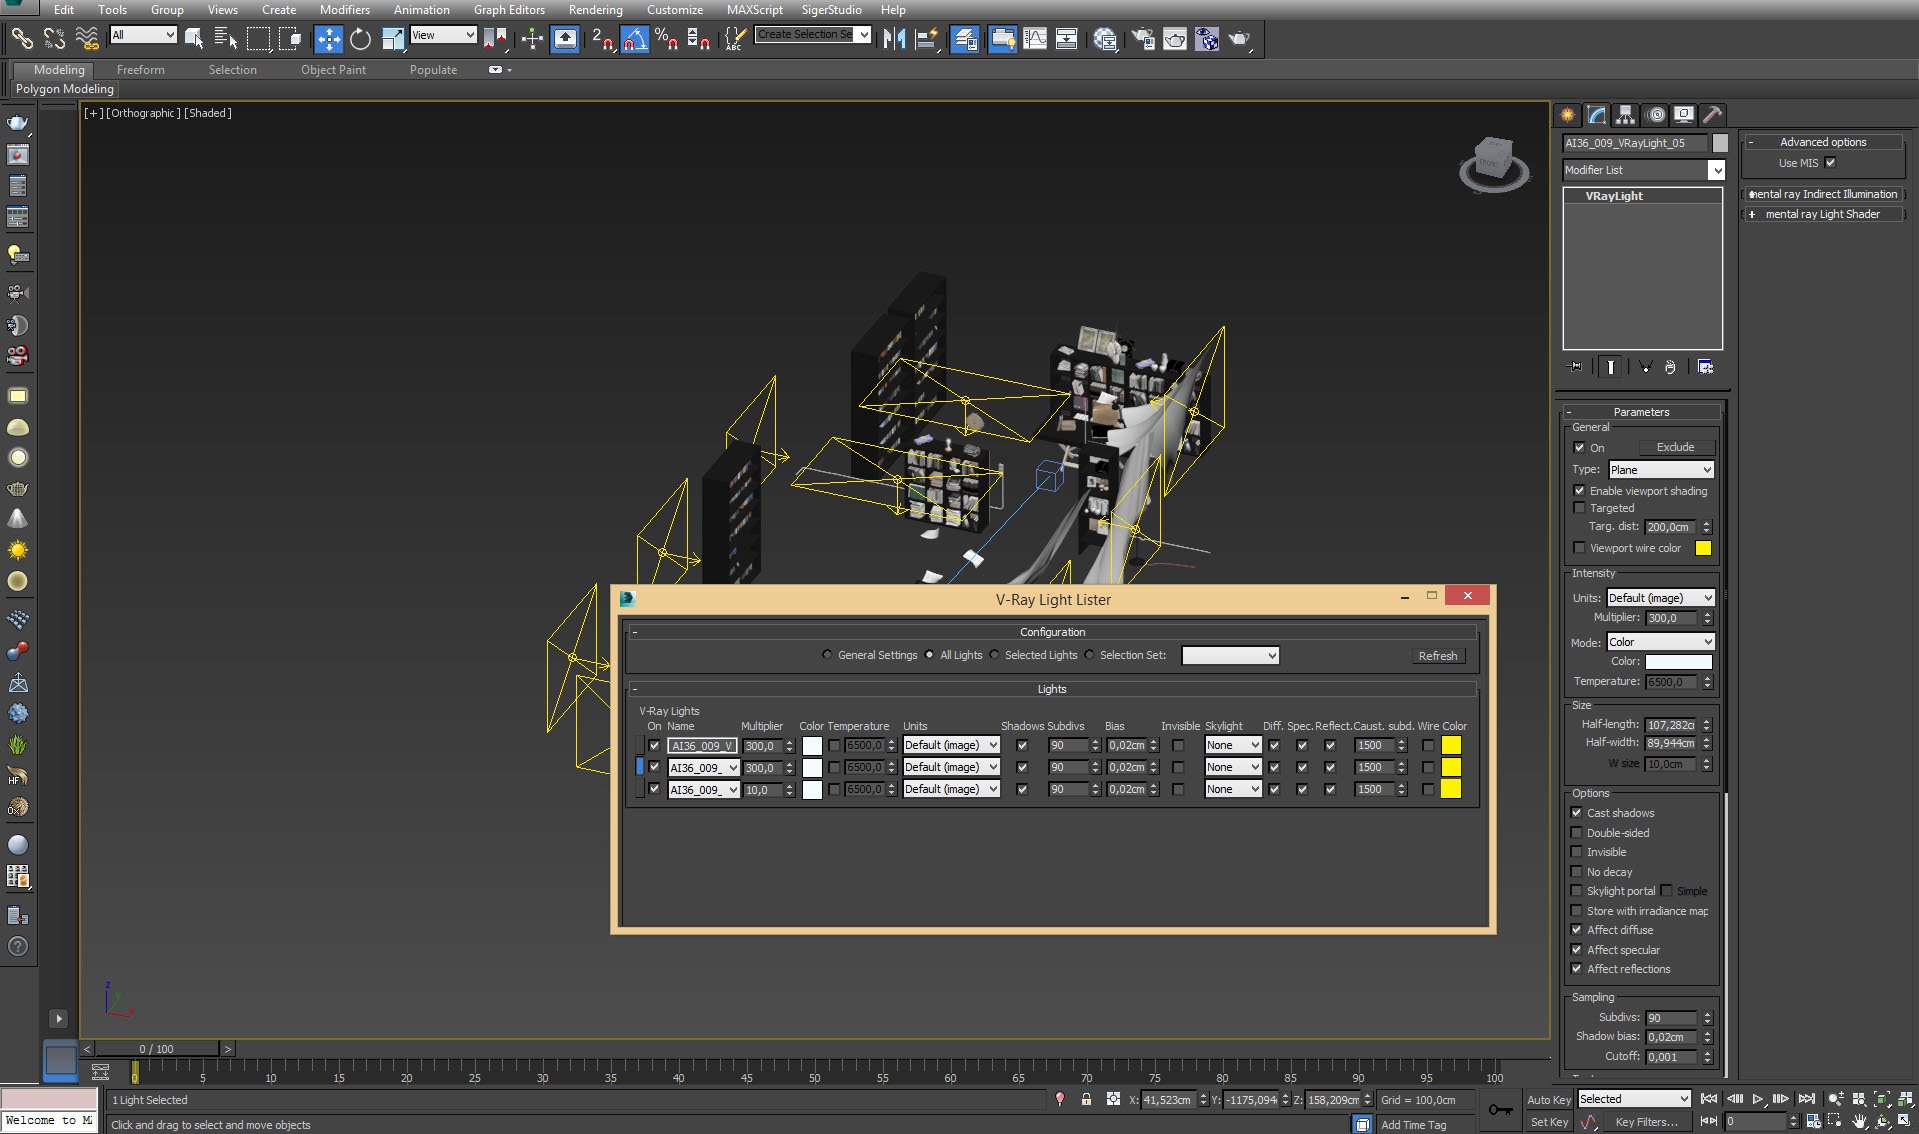
Click on image to enlarge 
Camera settings. Marcin used very low f-number (1,6) to increase depth of field. To compensate big amount of light reaching camera lens, he set shutter speed to 6000.
Click on image to enlarge 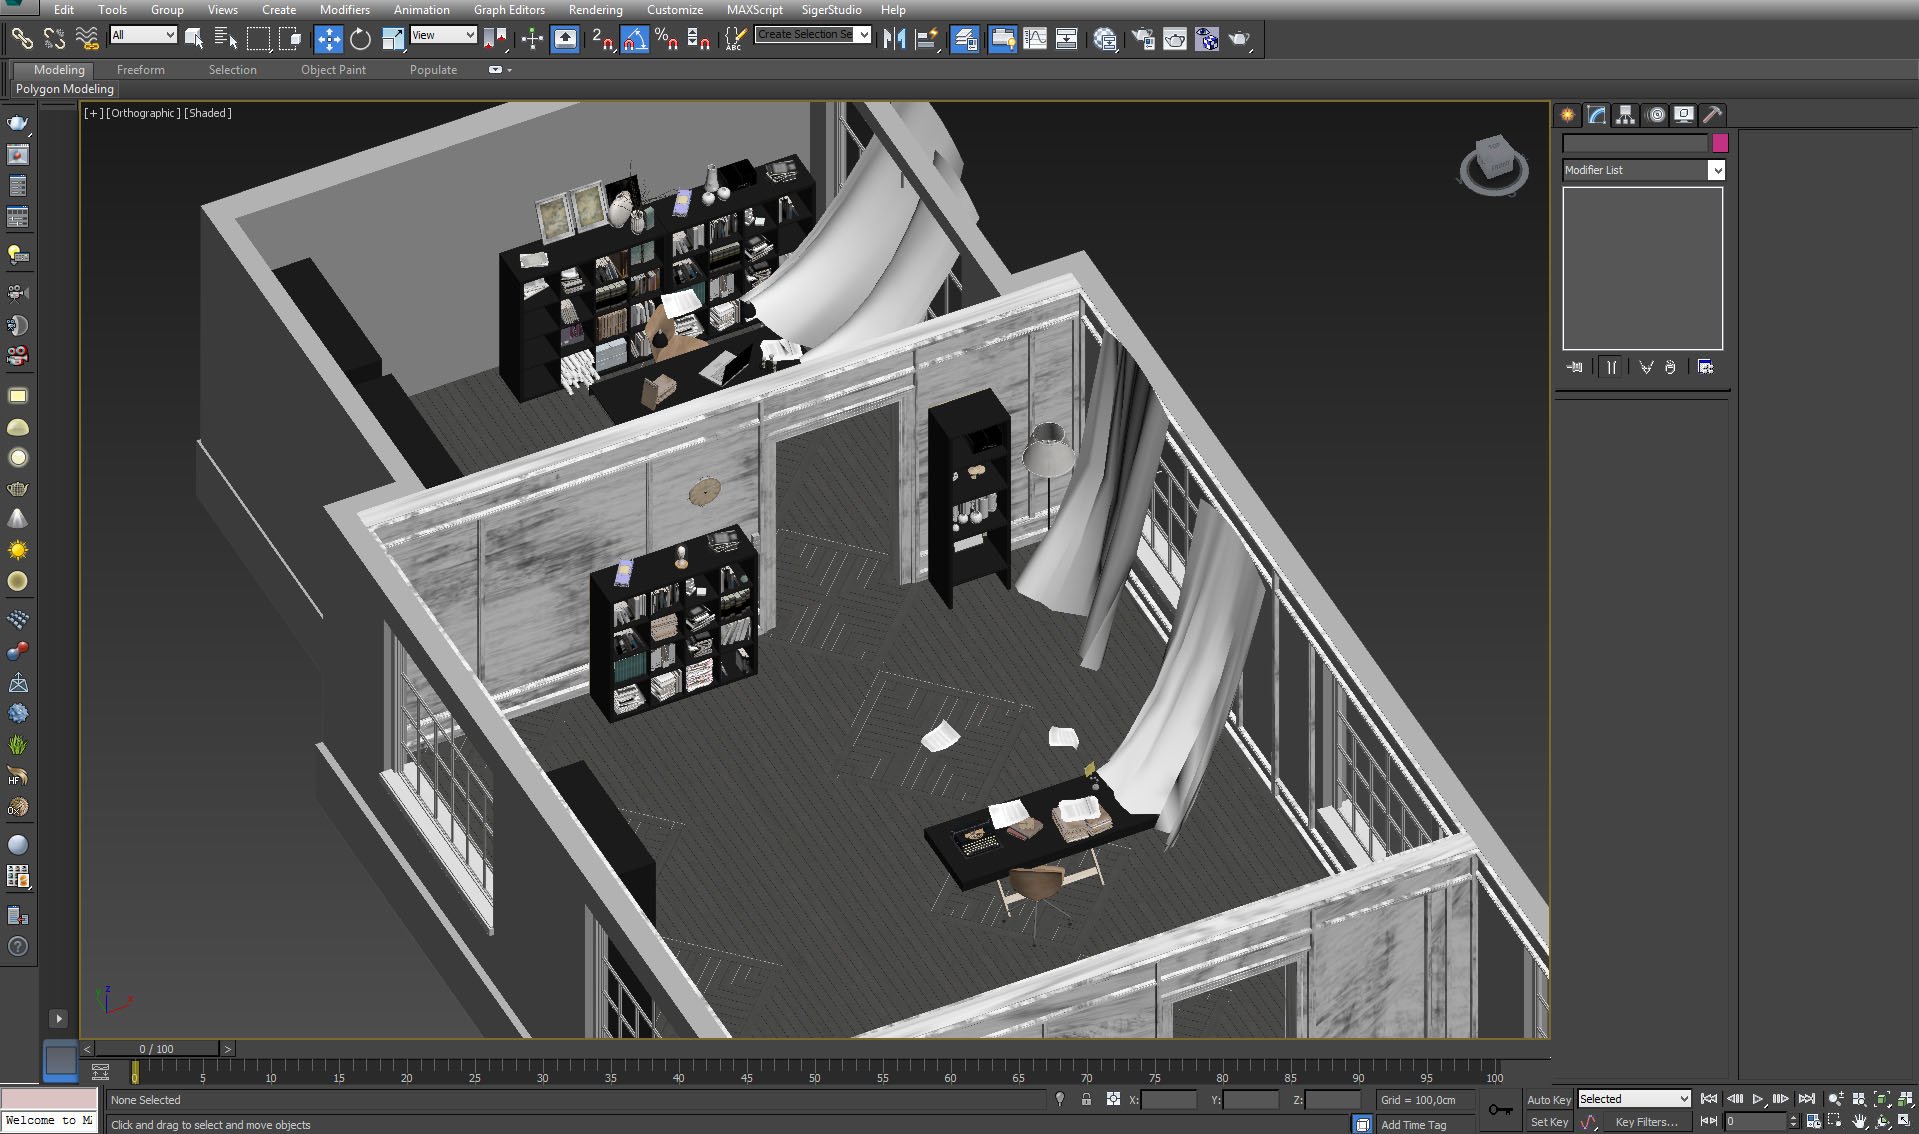
Building interior - isometric view.
Click on image to enlarge 
Floor pattern. Modeled by hand.
Click on image to enlarge 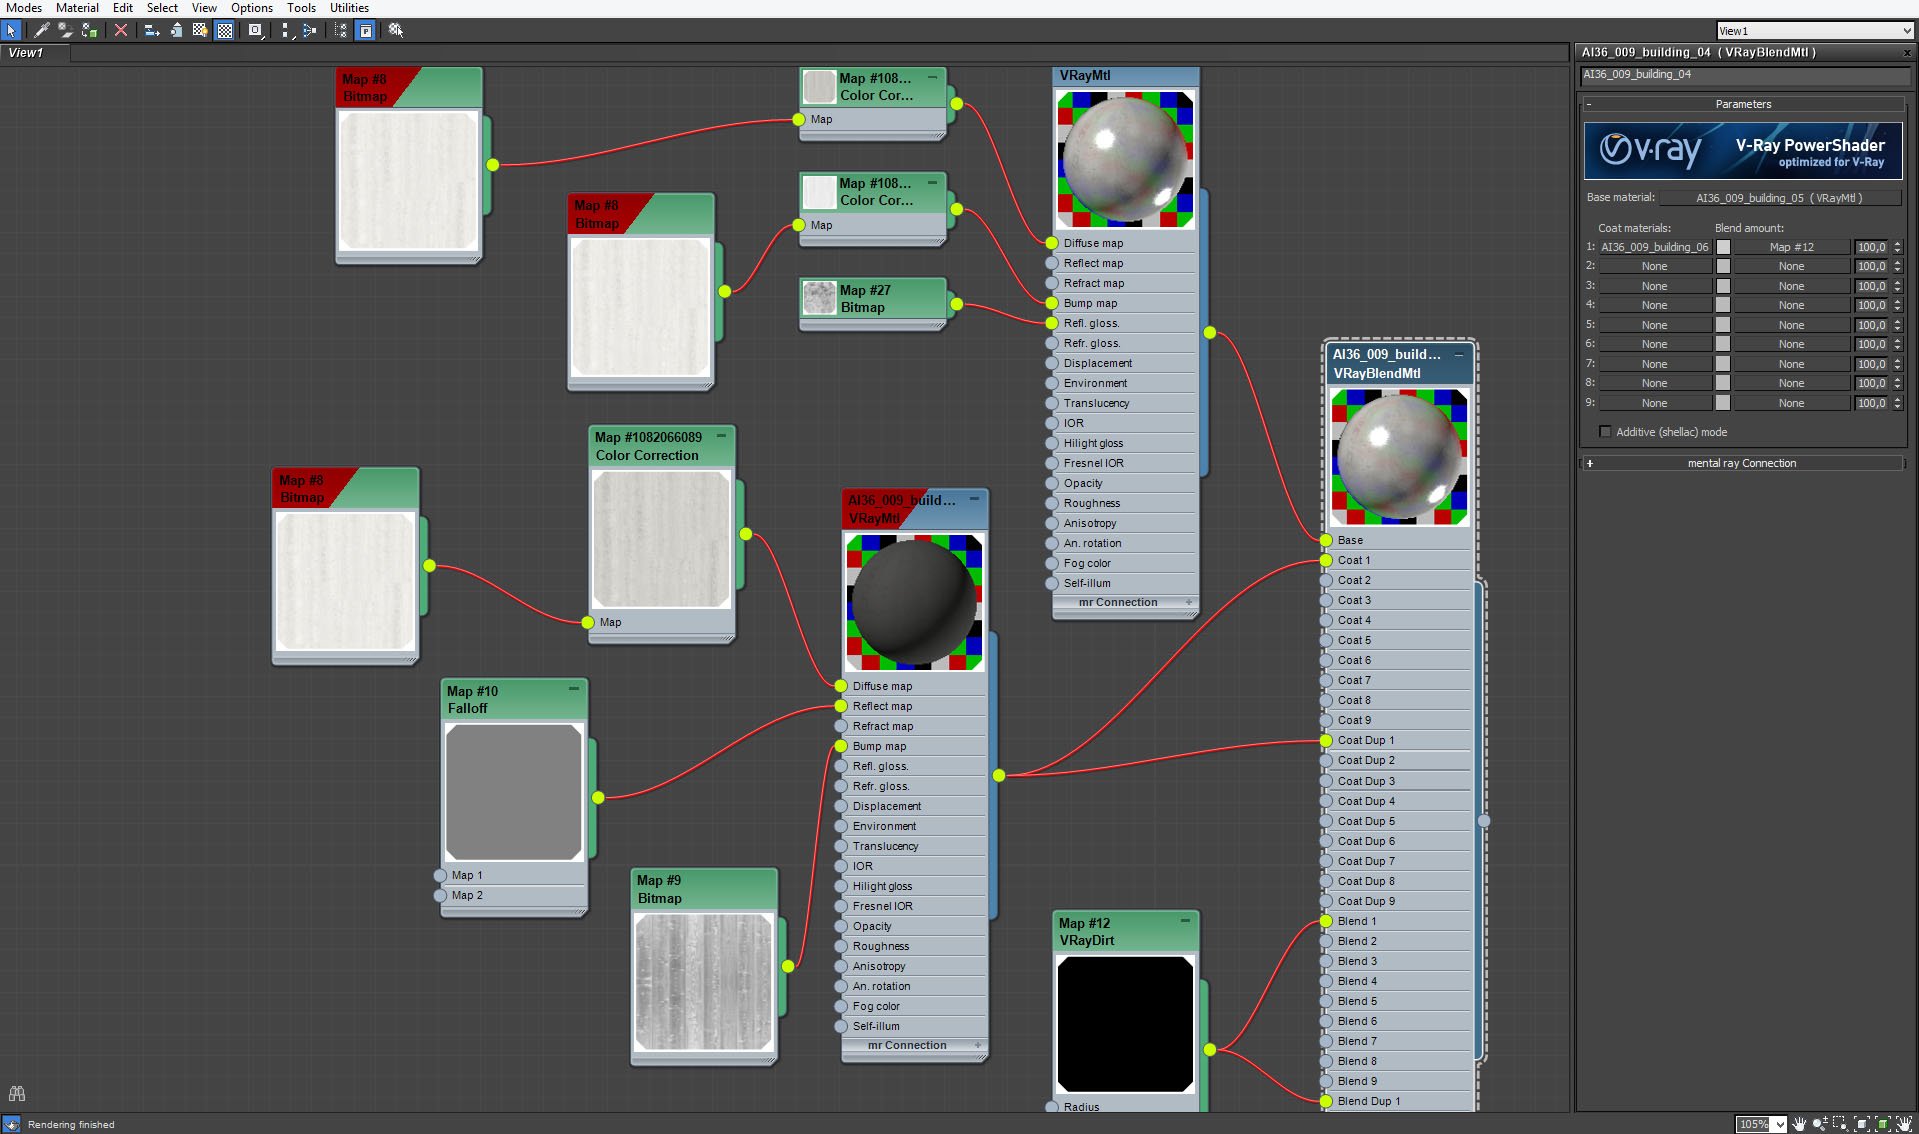
The floor is made of wooden boards painted white. Marcin used Vray Blend material. Base material is glossy white wood with fractal noise in reflection glossiness slot that imitates uneven paint thickness. Coat material is old, dark wood without paint. Both materials are blended with Vray Dirt map. result - boards are painted white but also worn off - there is less paint on the edges.
Click on image to enlarge 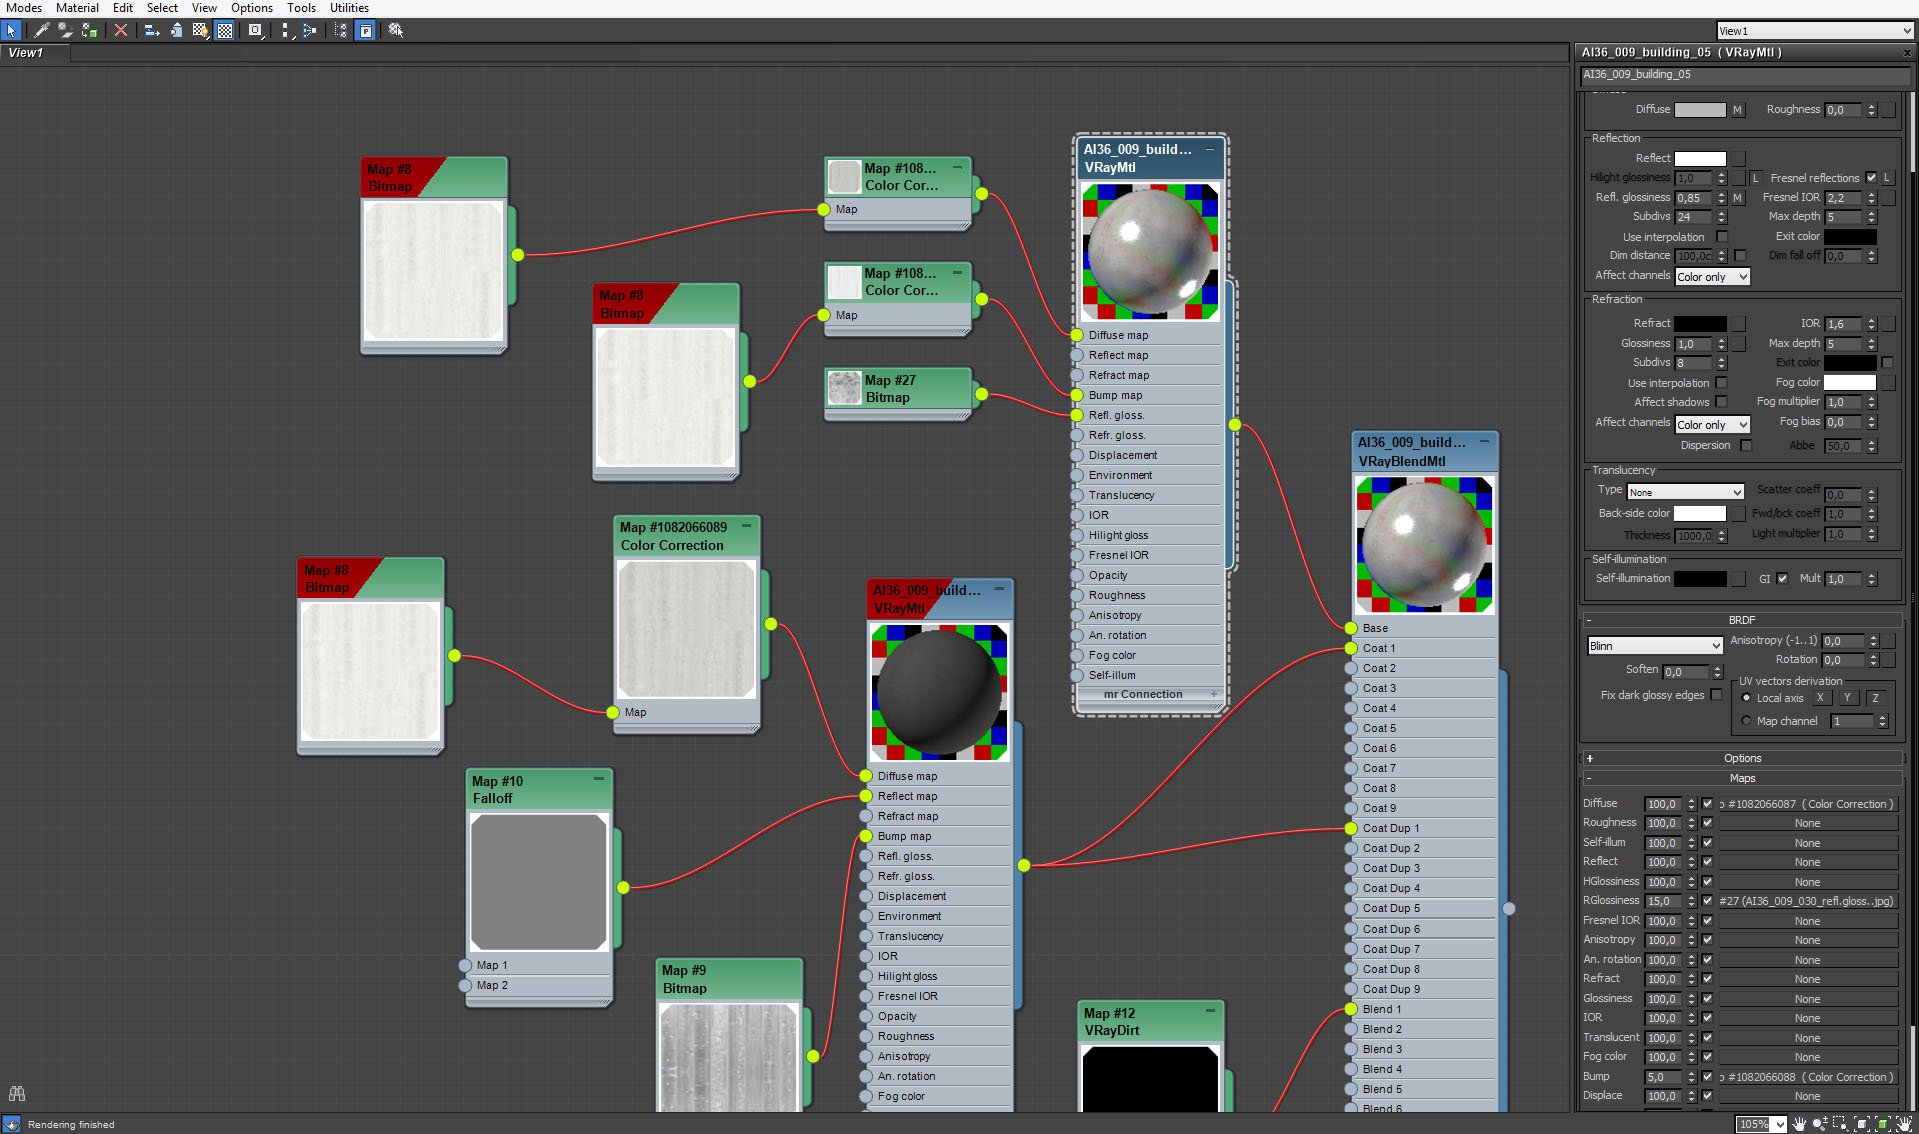
Floor material - base material settings.
Click on image to enlarge 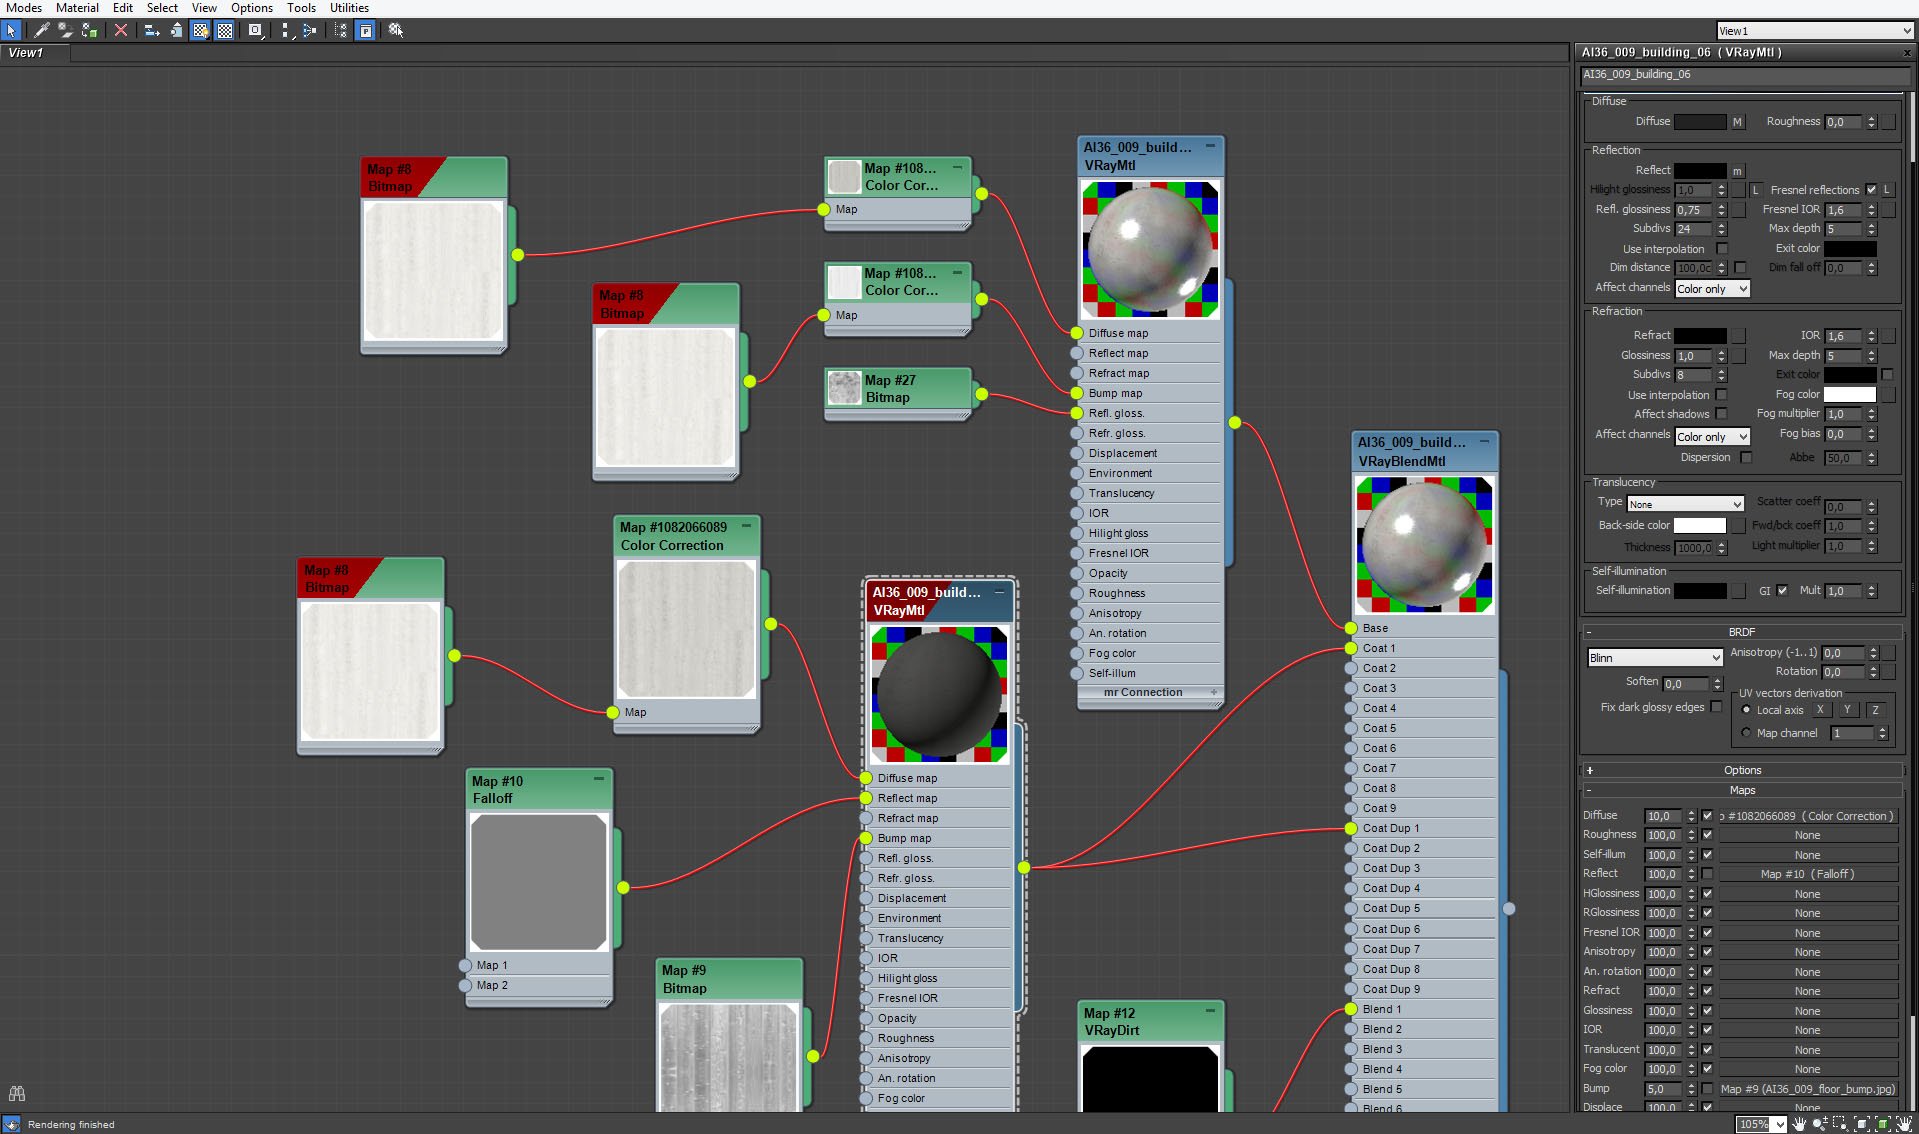
Floor material - coat material settings.
Click on image to enlarge 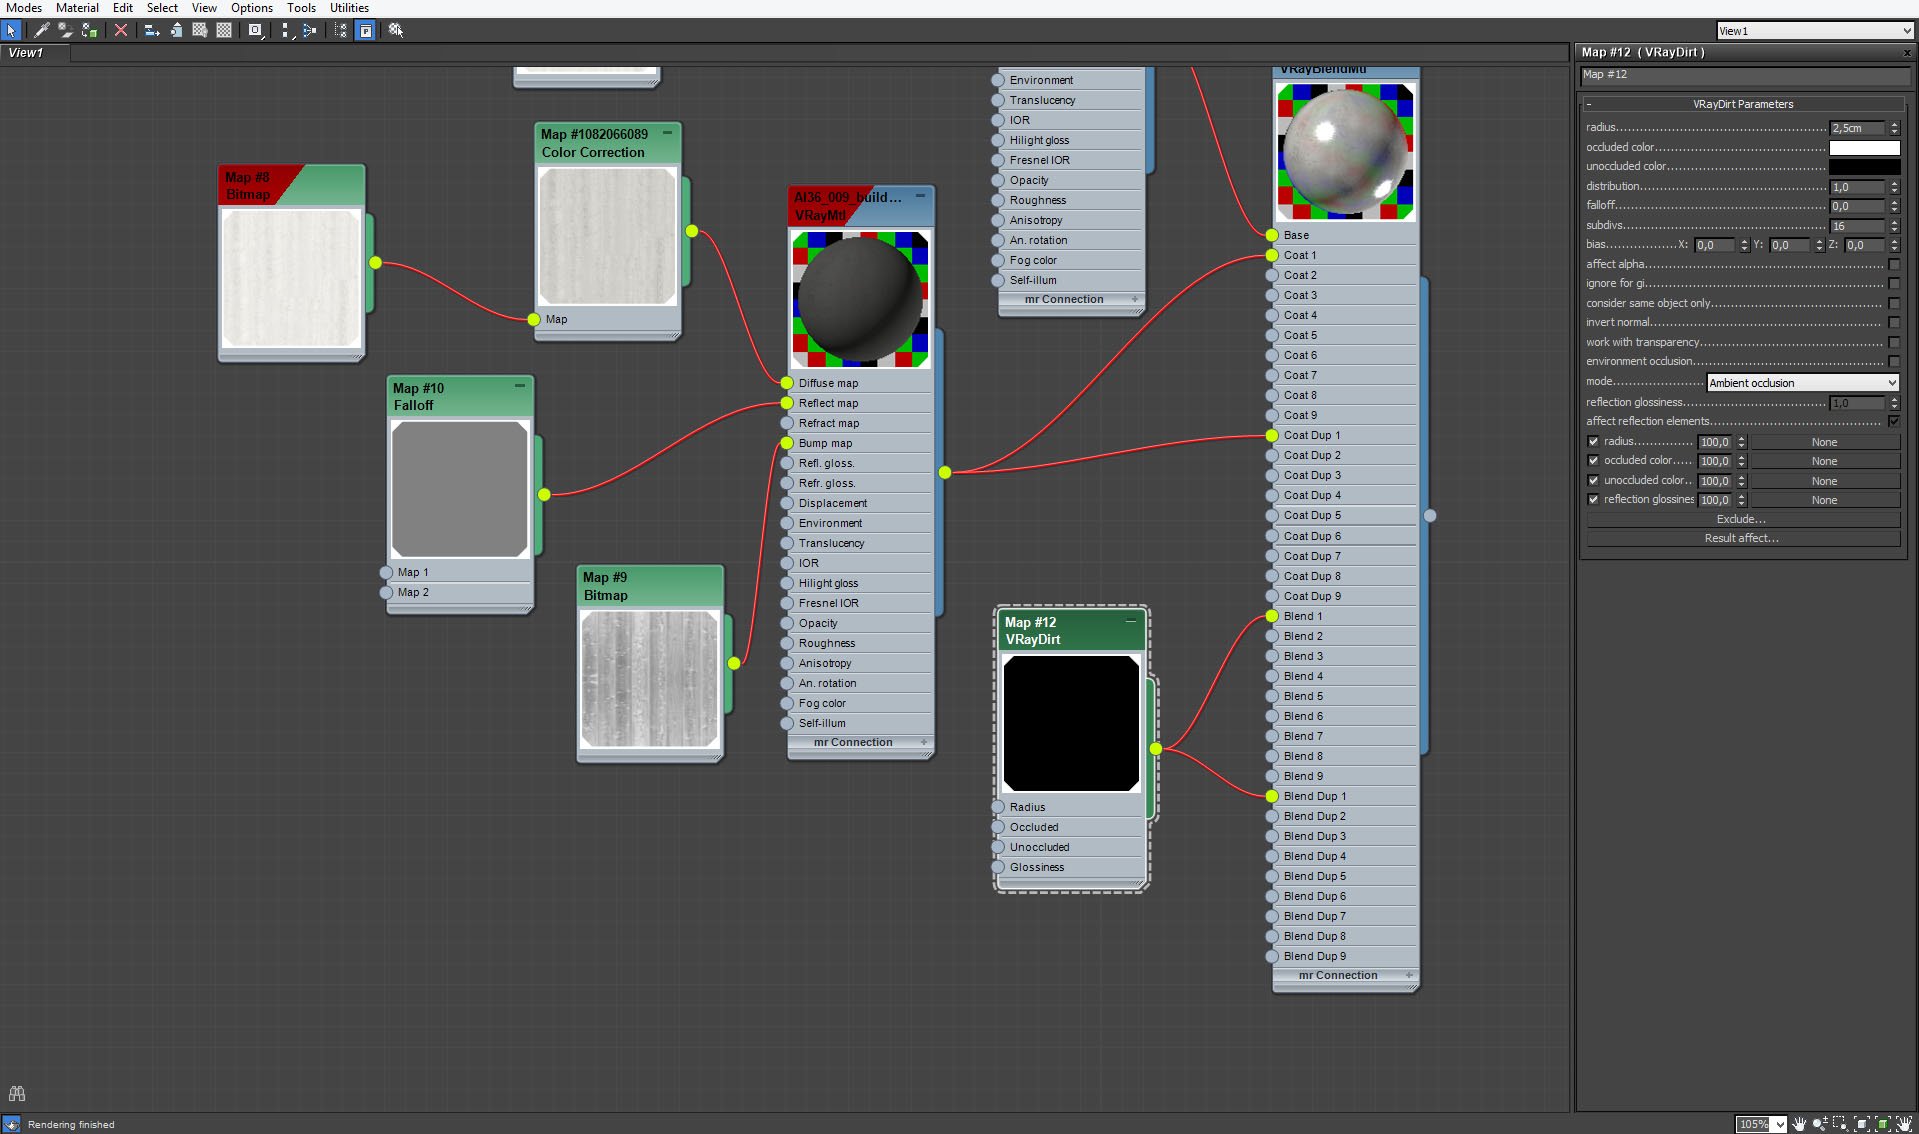
Floor material, Vray Dirt settings.
Click on image to enlarge 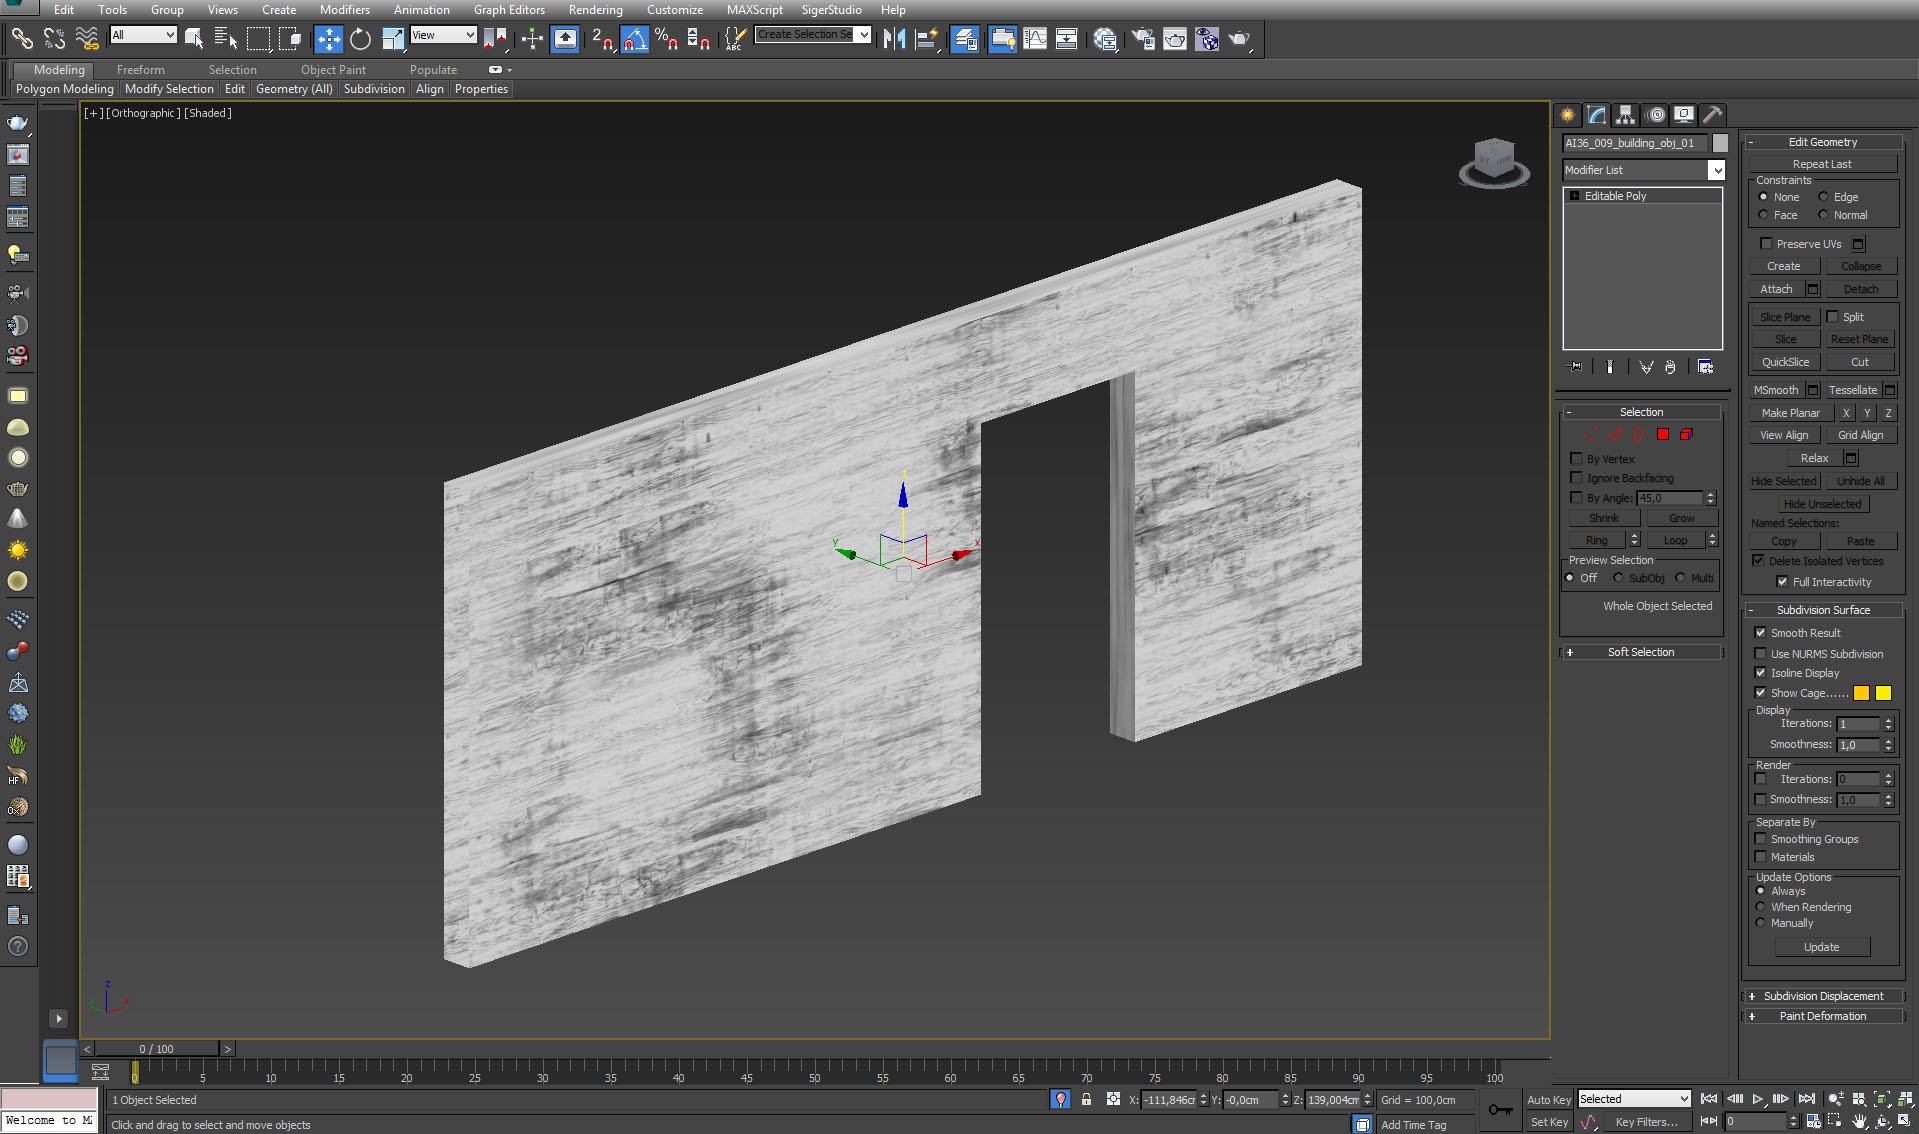
The wall that stands in front of the camera.
Click on image to enlarge 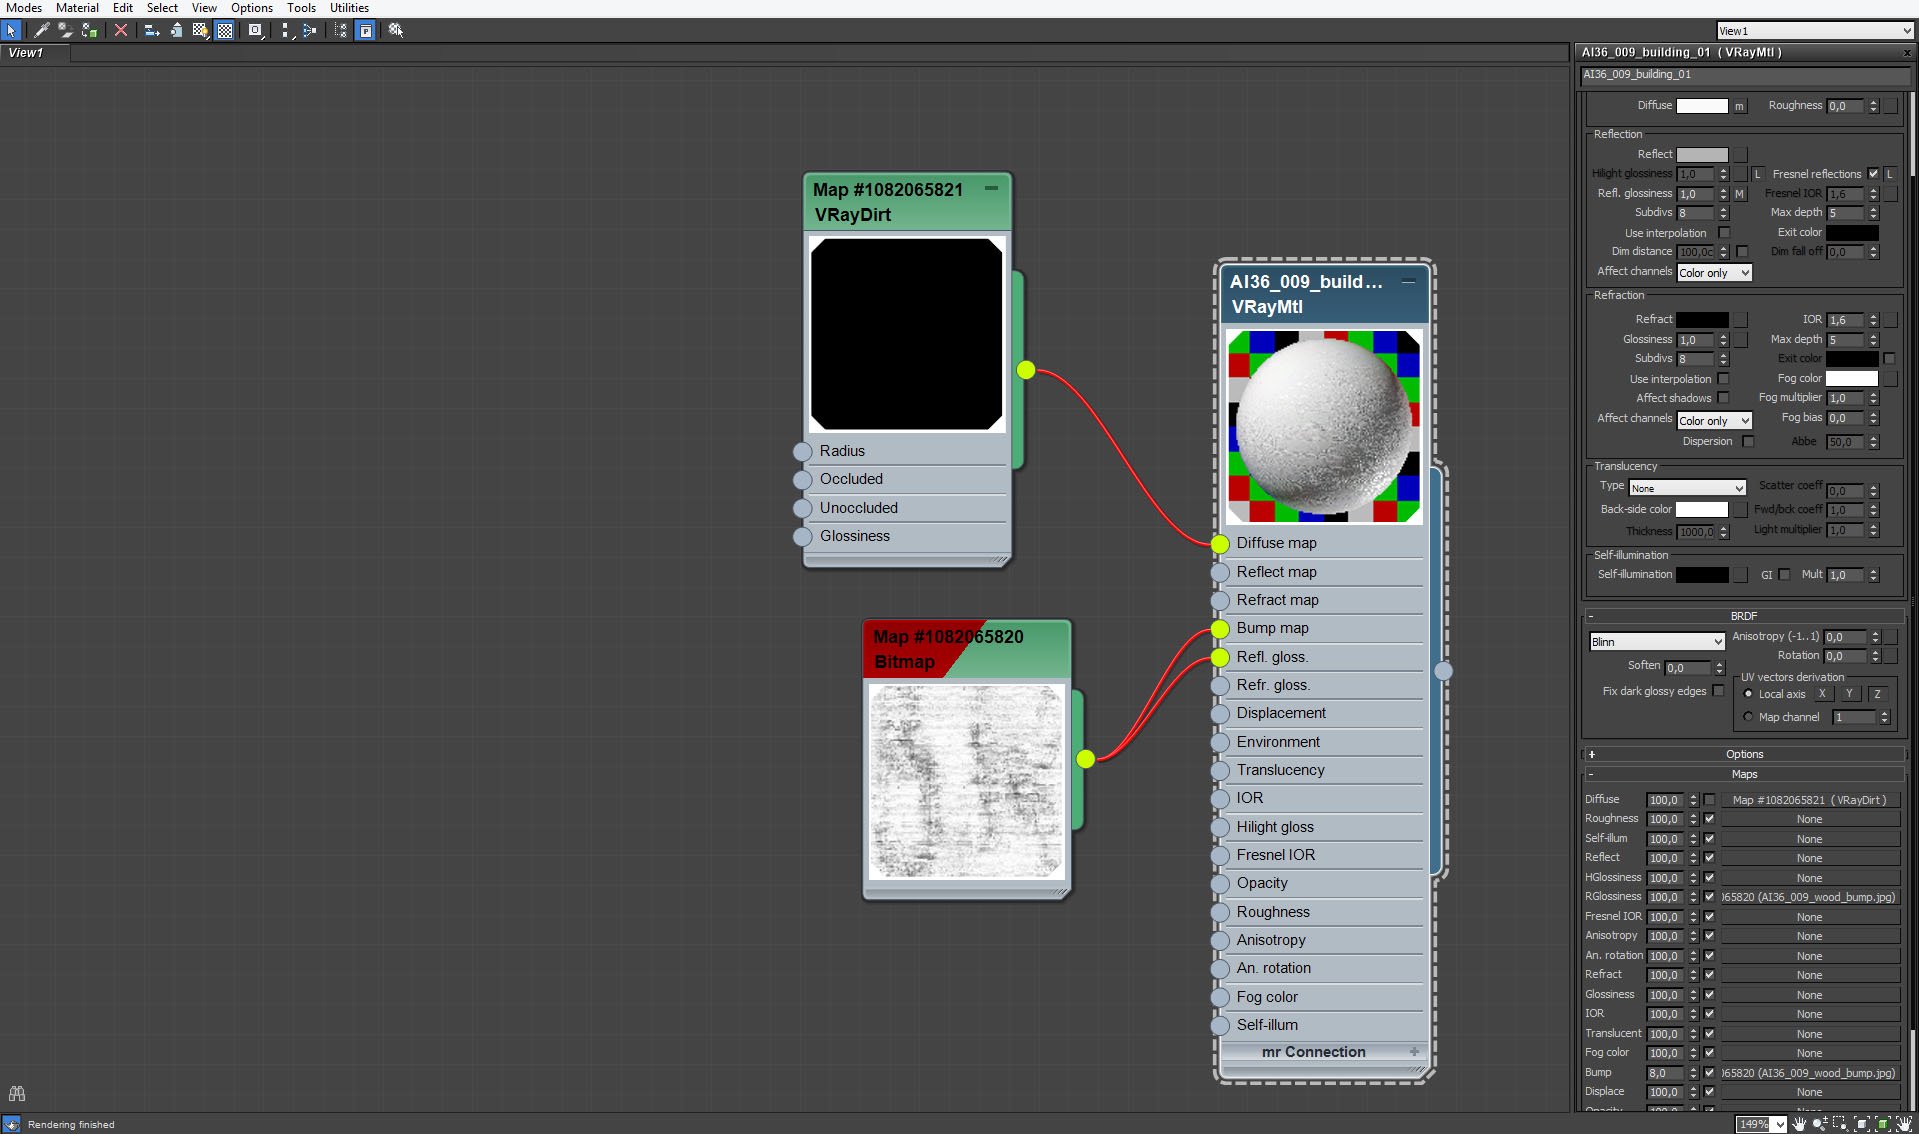
White wall with uneven surface is achieved with a map in bump and reflection glossiness slots.
Click on image to enlarge 
Wall material - map settings.
Click on image to enlarge 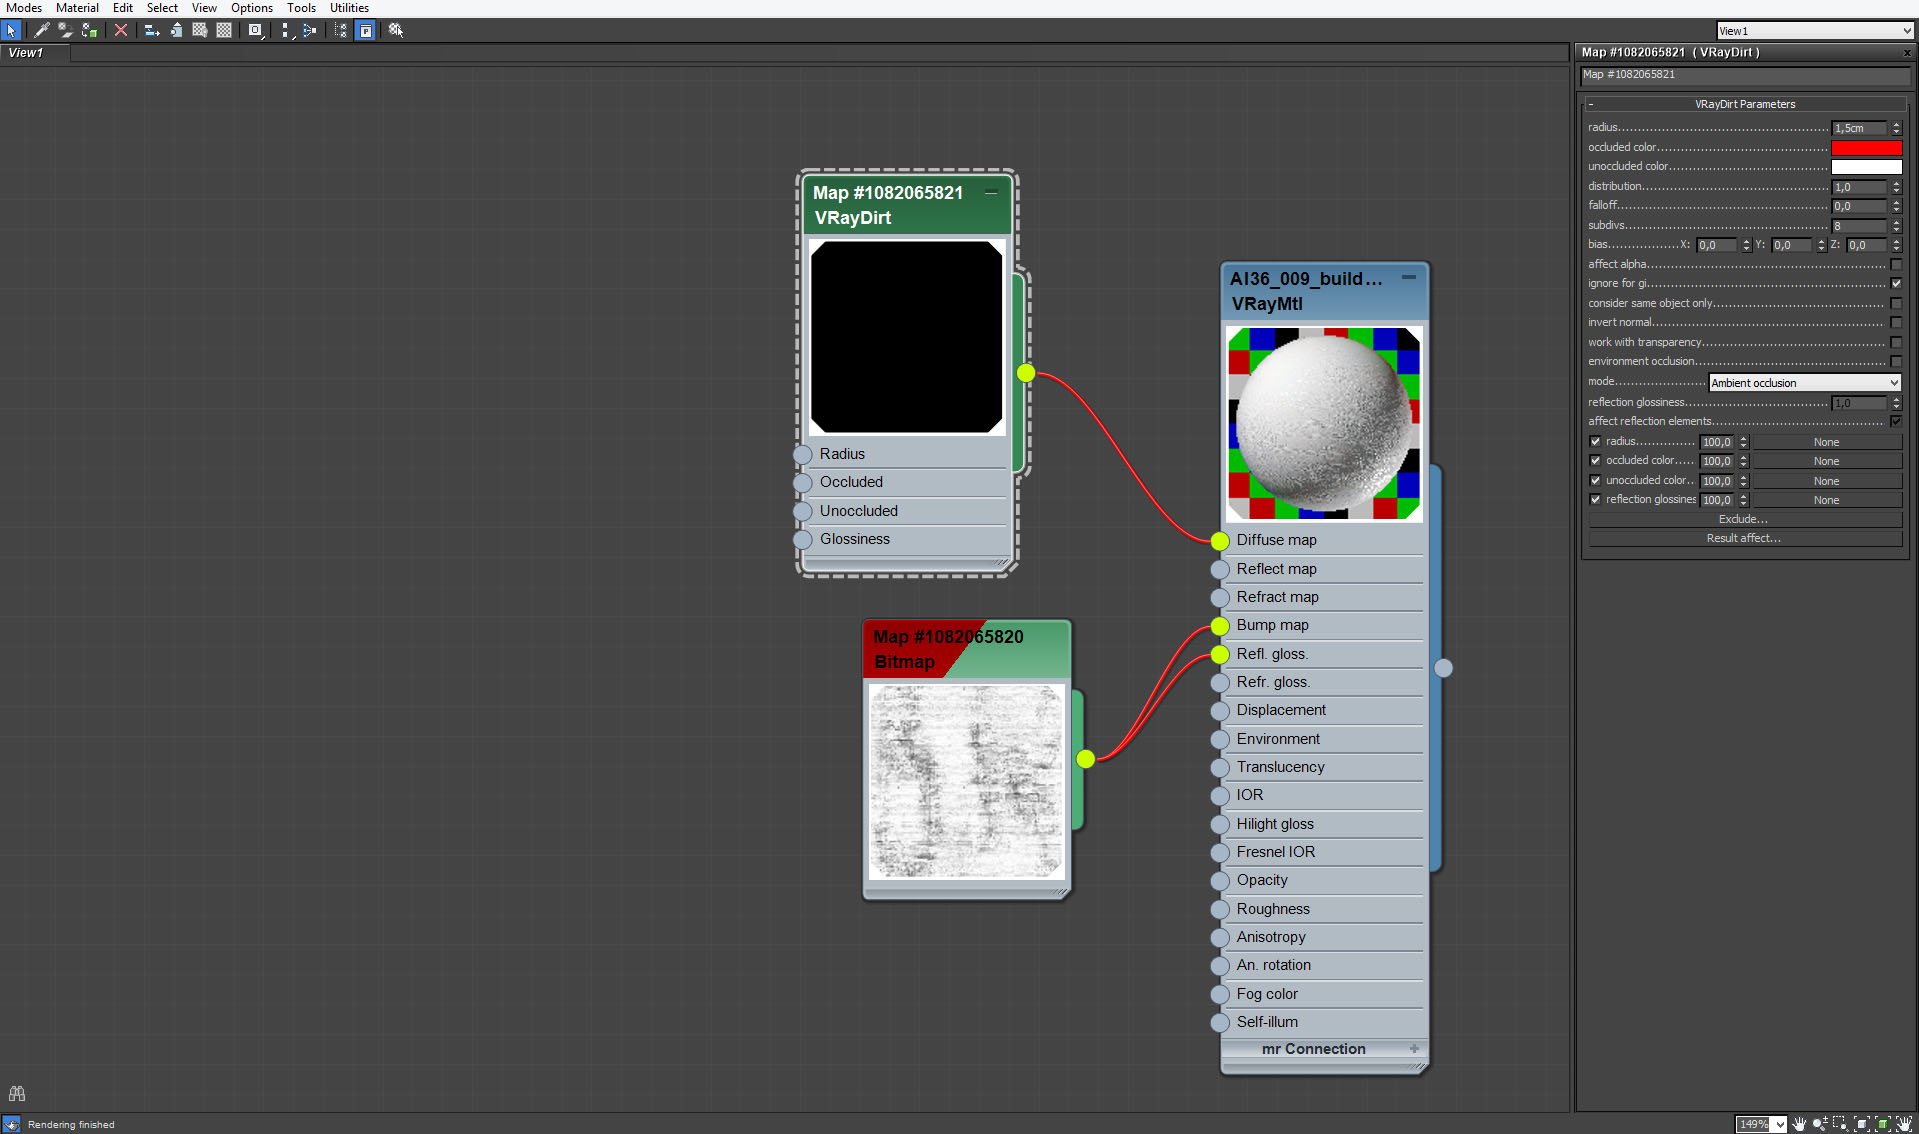
Wall material - VrayDirt settings.
Click on image to enlarge 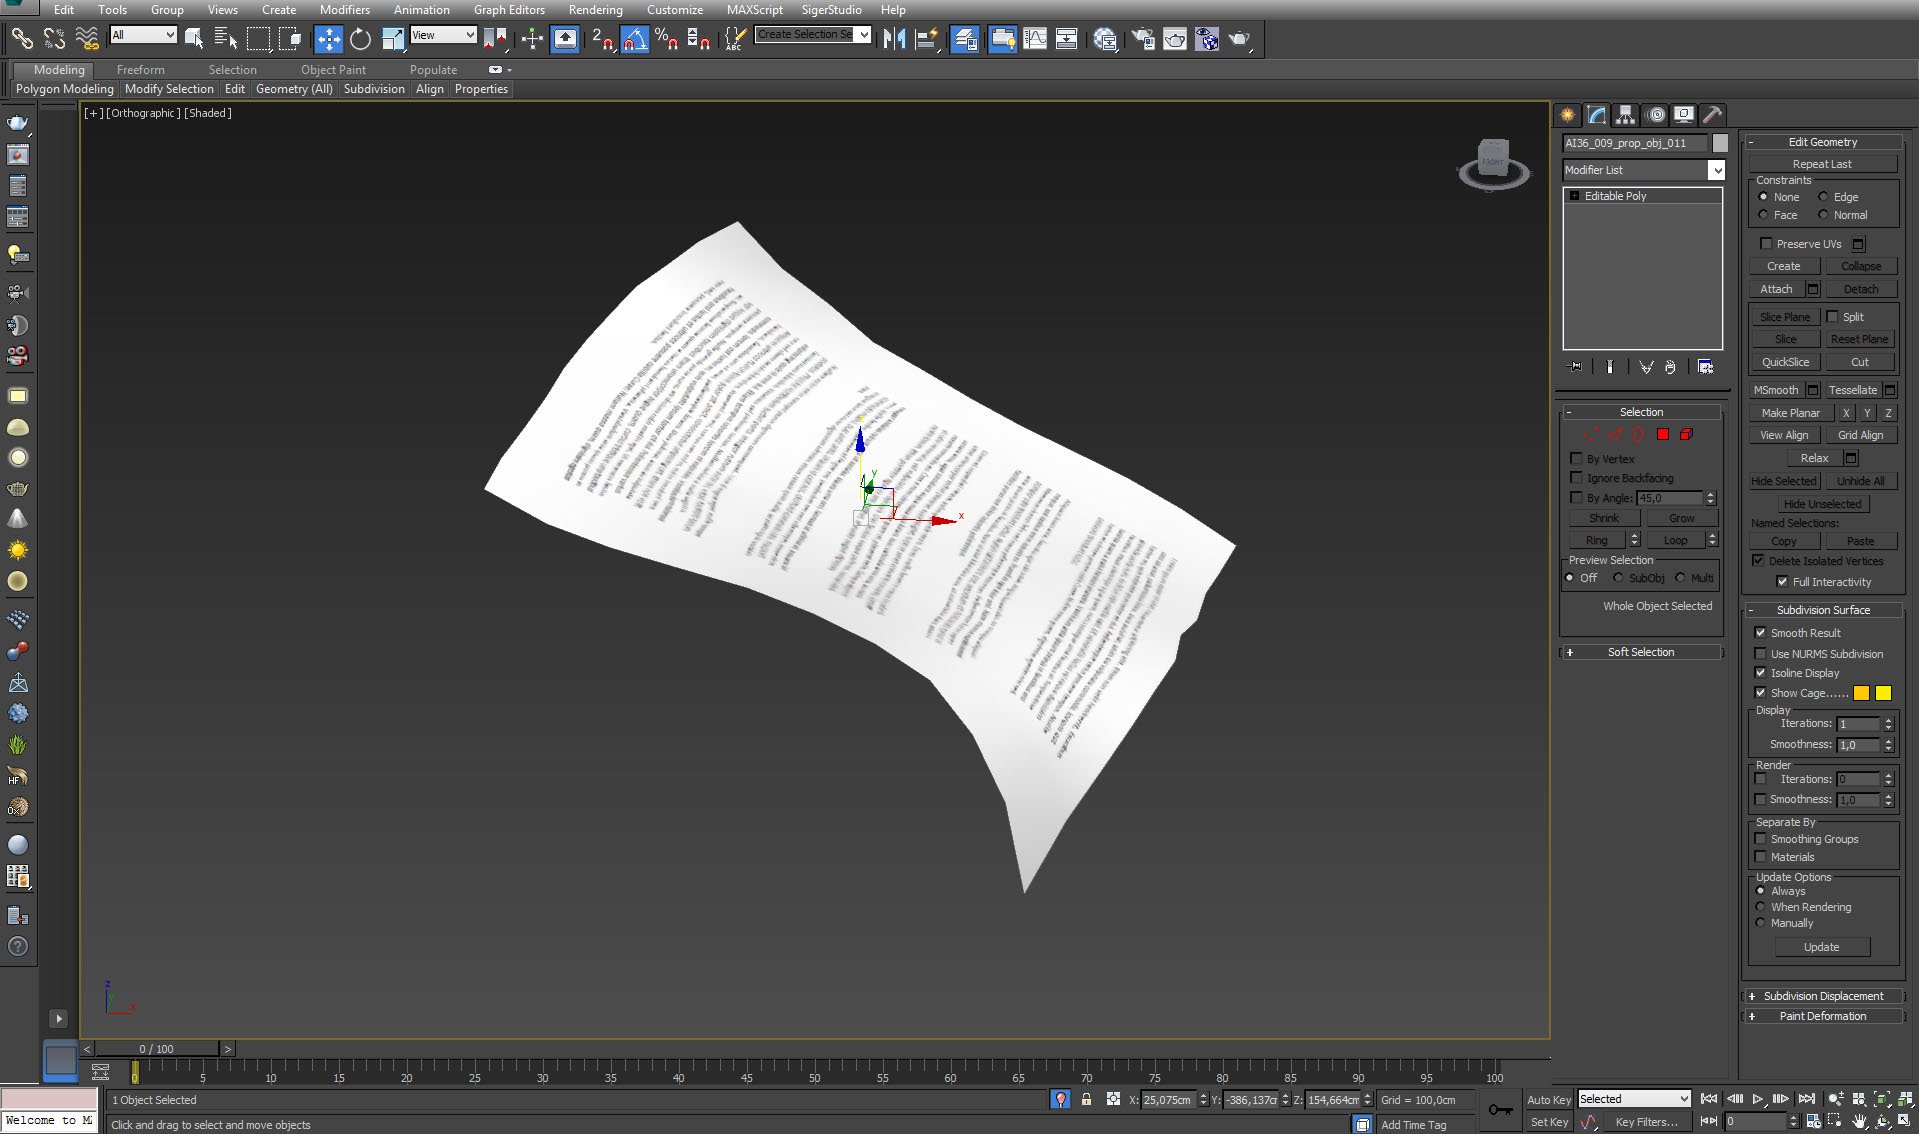
One of many flying sheets of paper - simple bended plane.
Click on image to enlarge 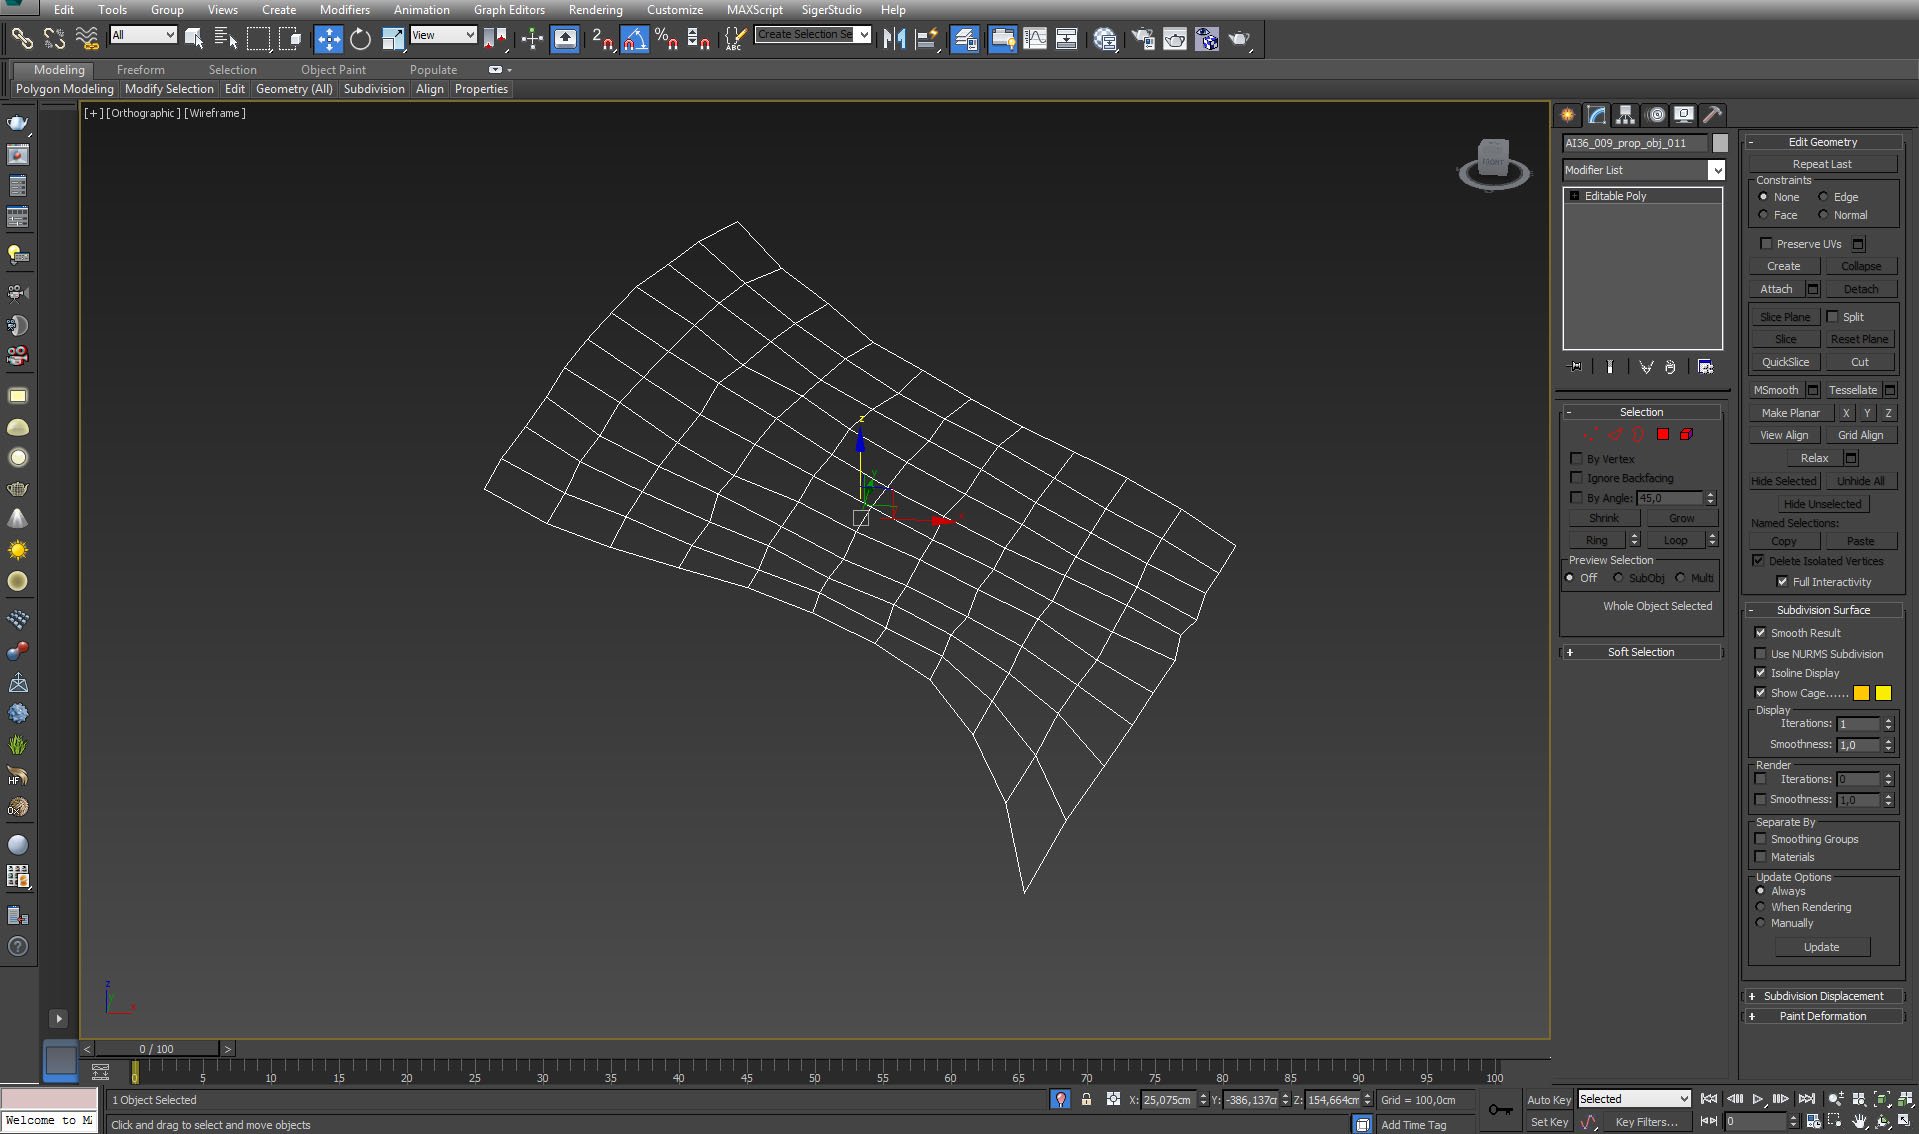
Flying sheet of paper - mesh.
Click on image to enlarge 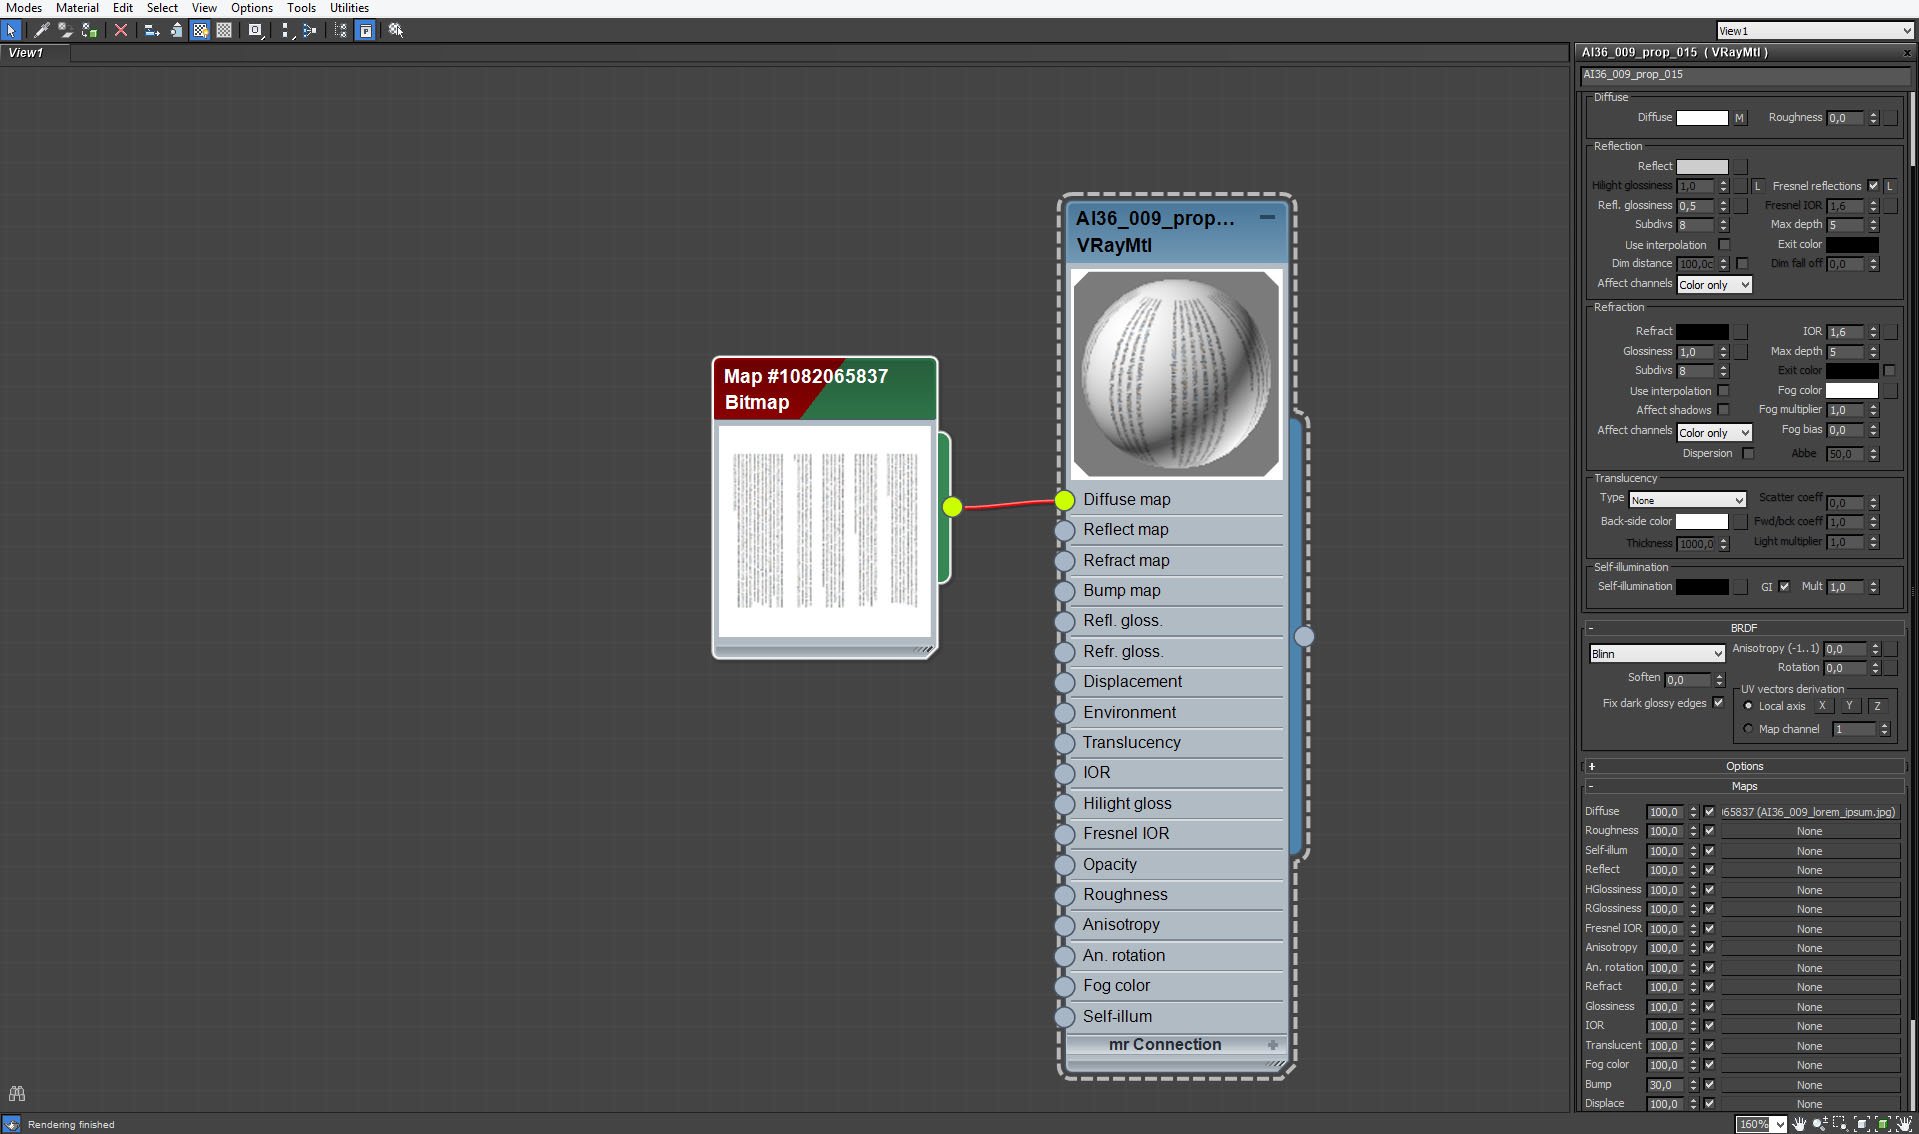
Flying sheet of paper material. Most of sheets are blurred by Depth of field, so there was not necesarry to use translucency - it would not add much to the scene.
Click on image to enlarge 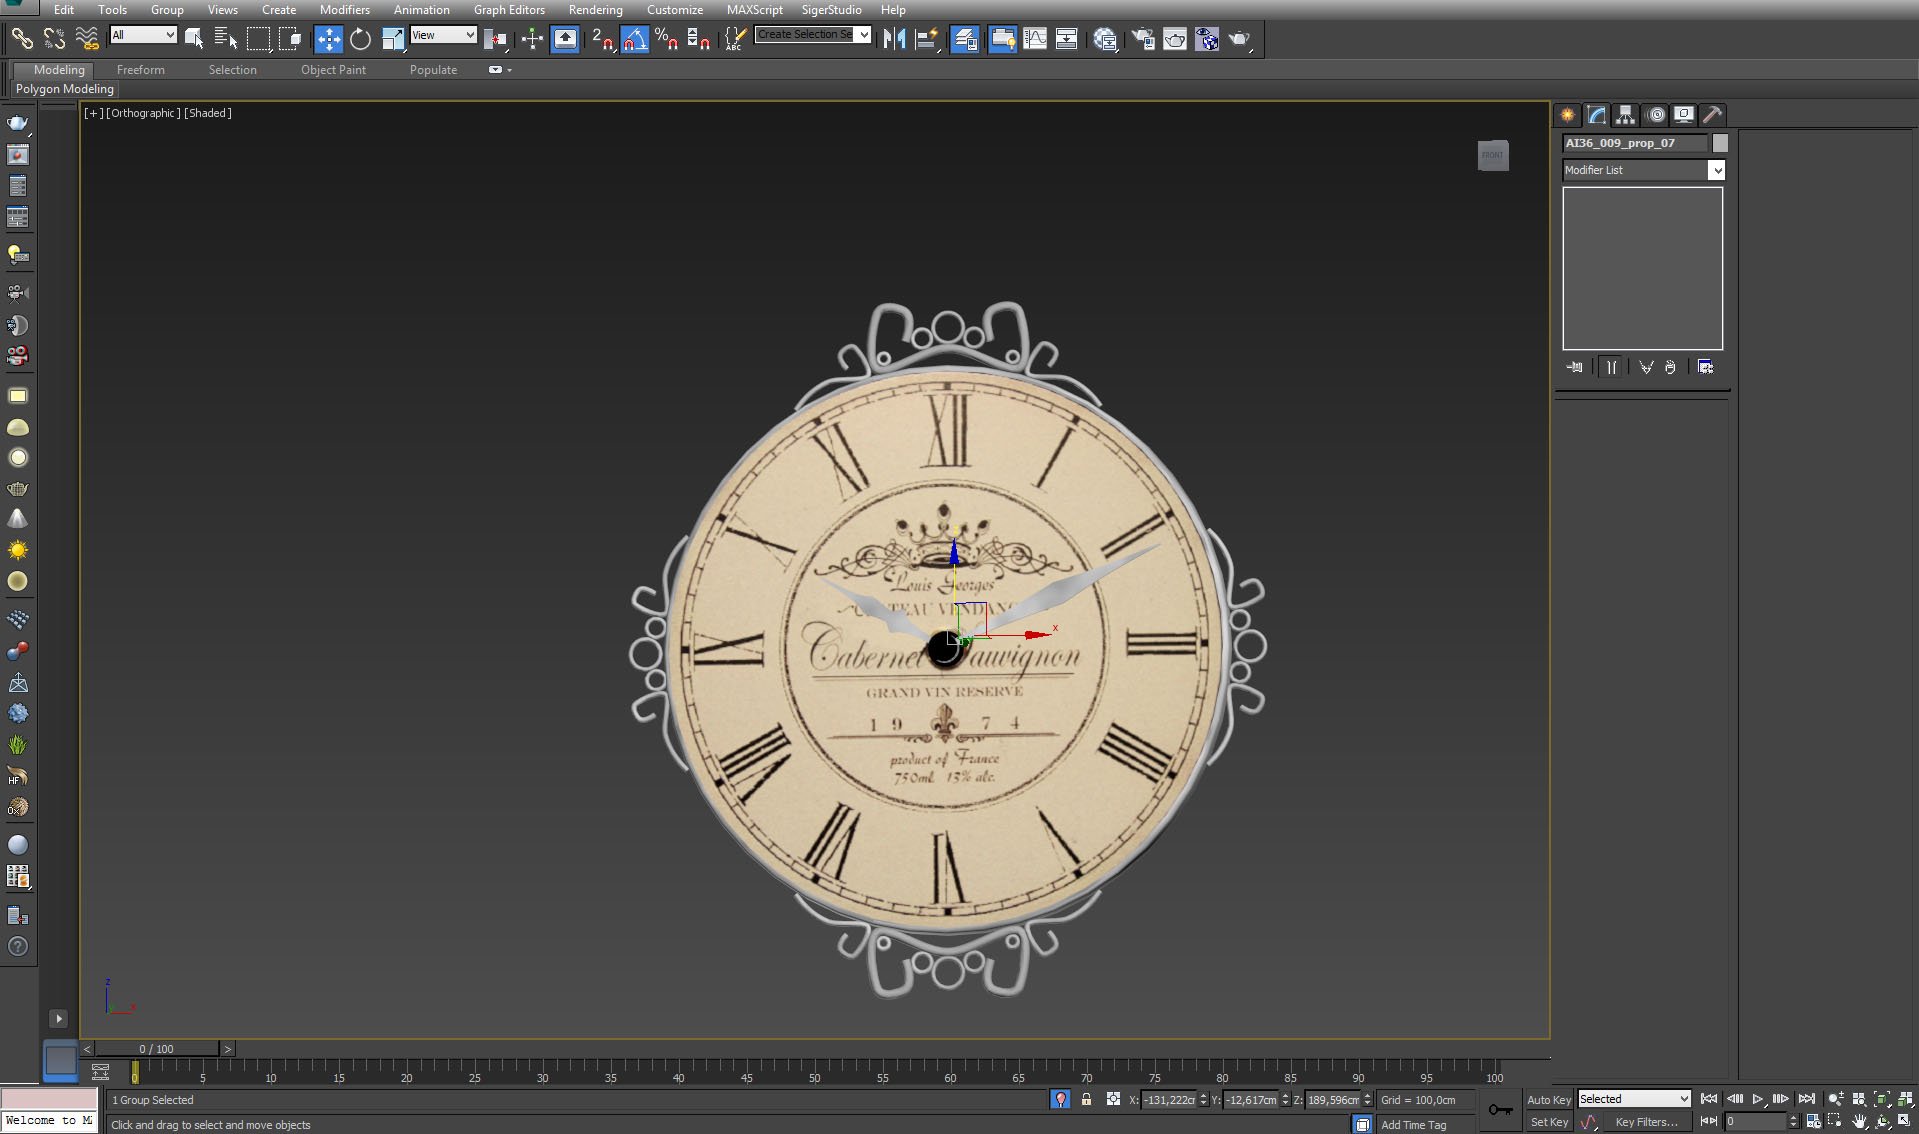
Click on image to enlarge 
Click on image to enlarge 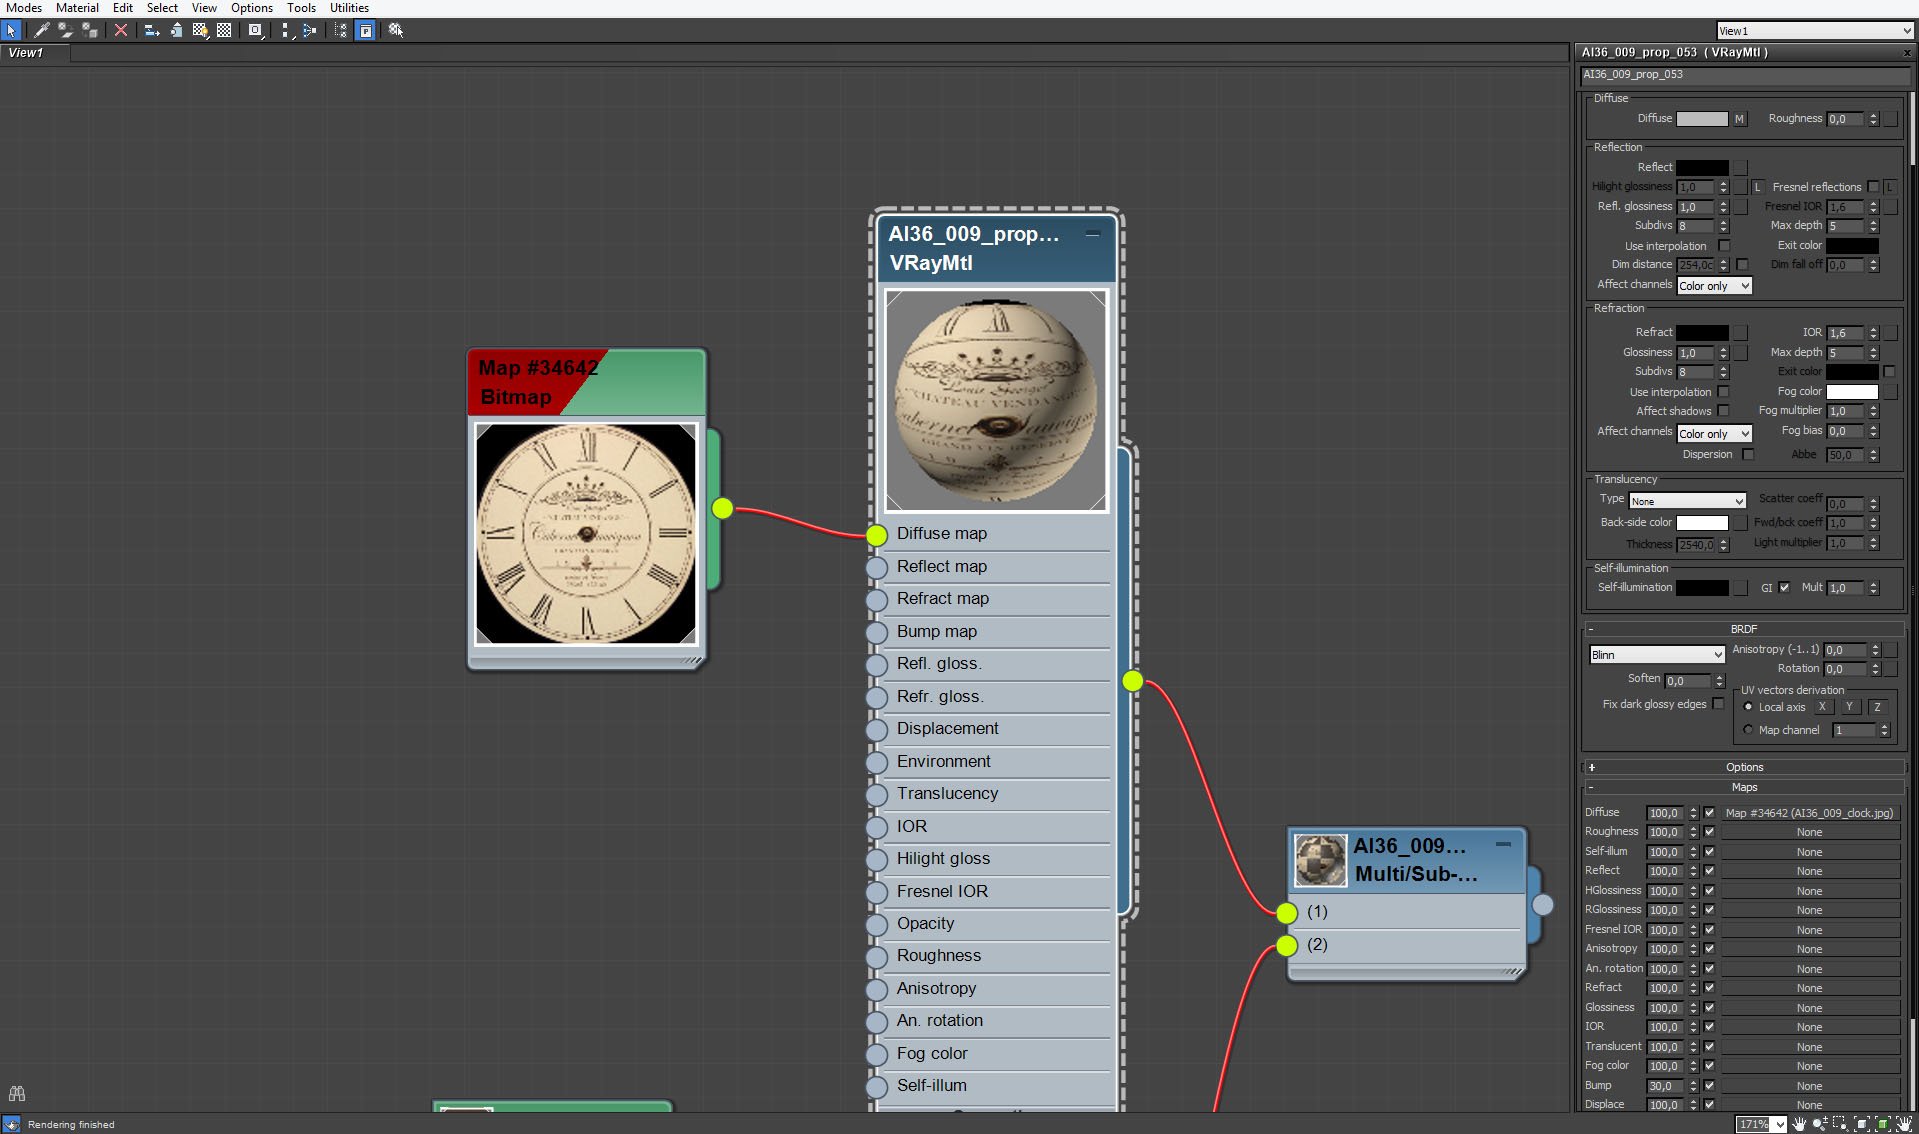
Click on image to enlarge 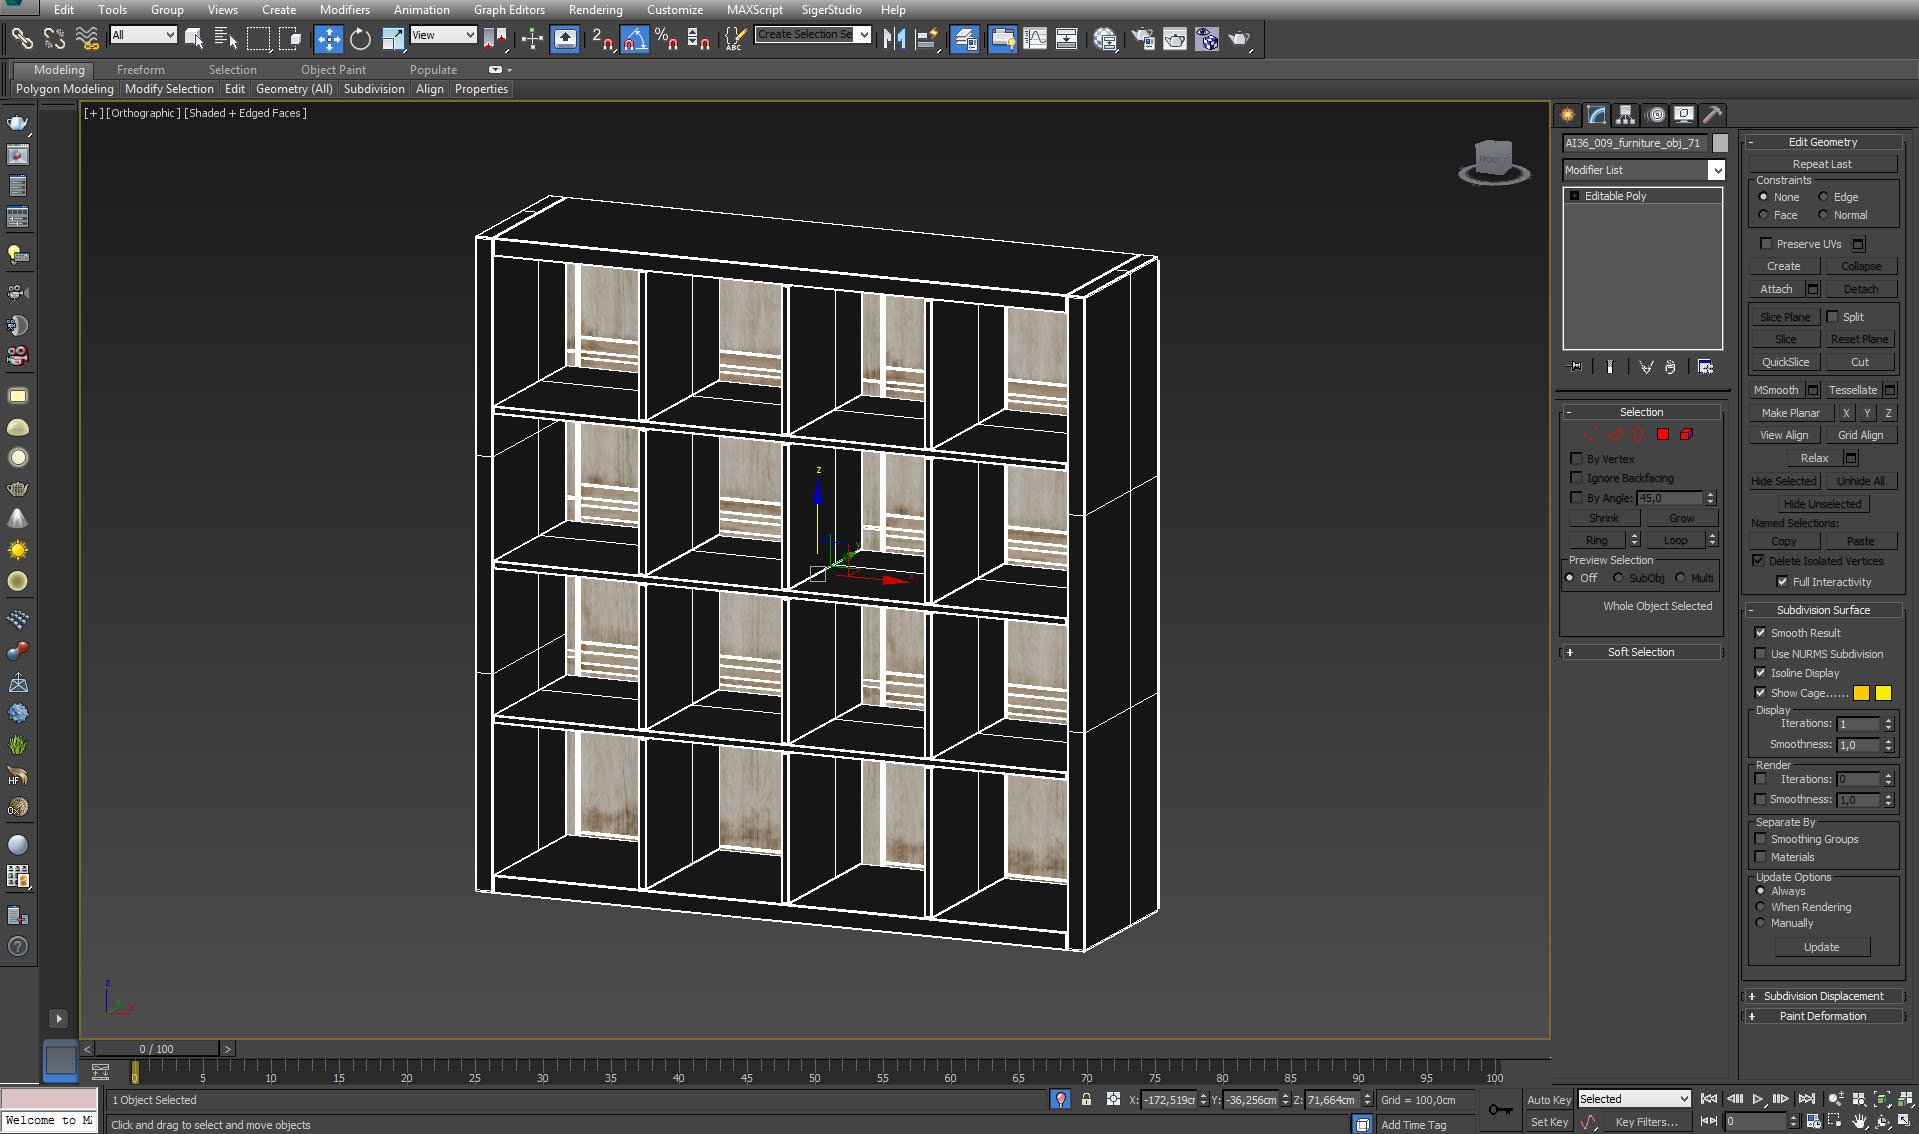
One of the cases standing by the wall.
Click on image to enlarge 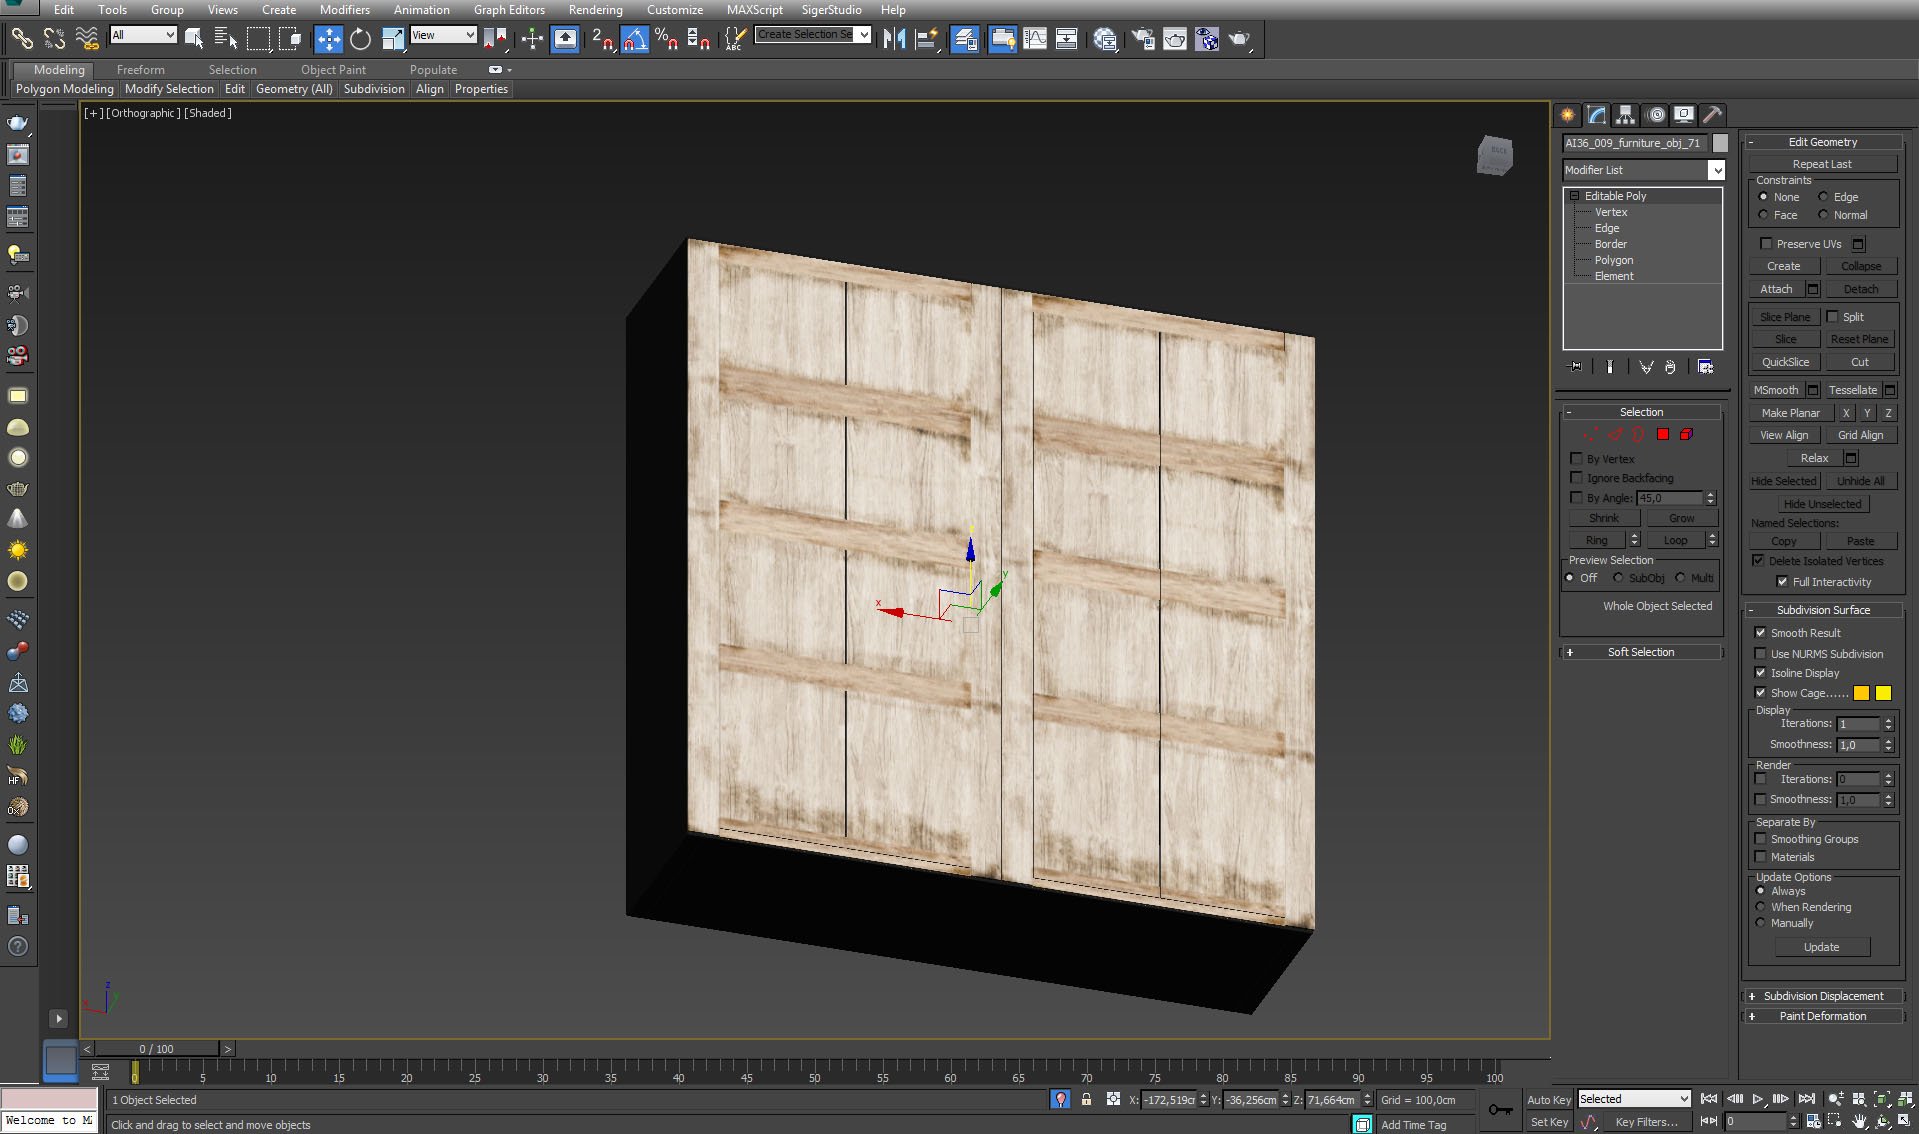
Click on image to enlarge 
Case material. There are two materials total - one (black, glossy) for sides, top and bottom of a case and one (old rough wood) for back facet of a case.
Click on image to enlarge 
Case sides material - made of two Vray materials that have different glossiness. Overal glossiness is controlled by falloff map.
Click on image to enlarge 
Black sides case material, continued.
Click on image to enlarge 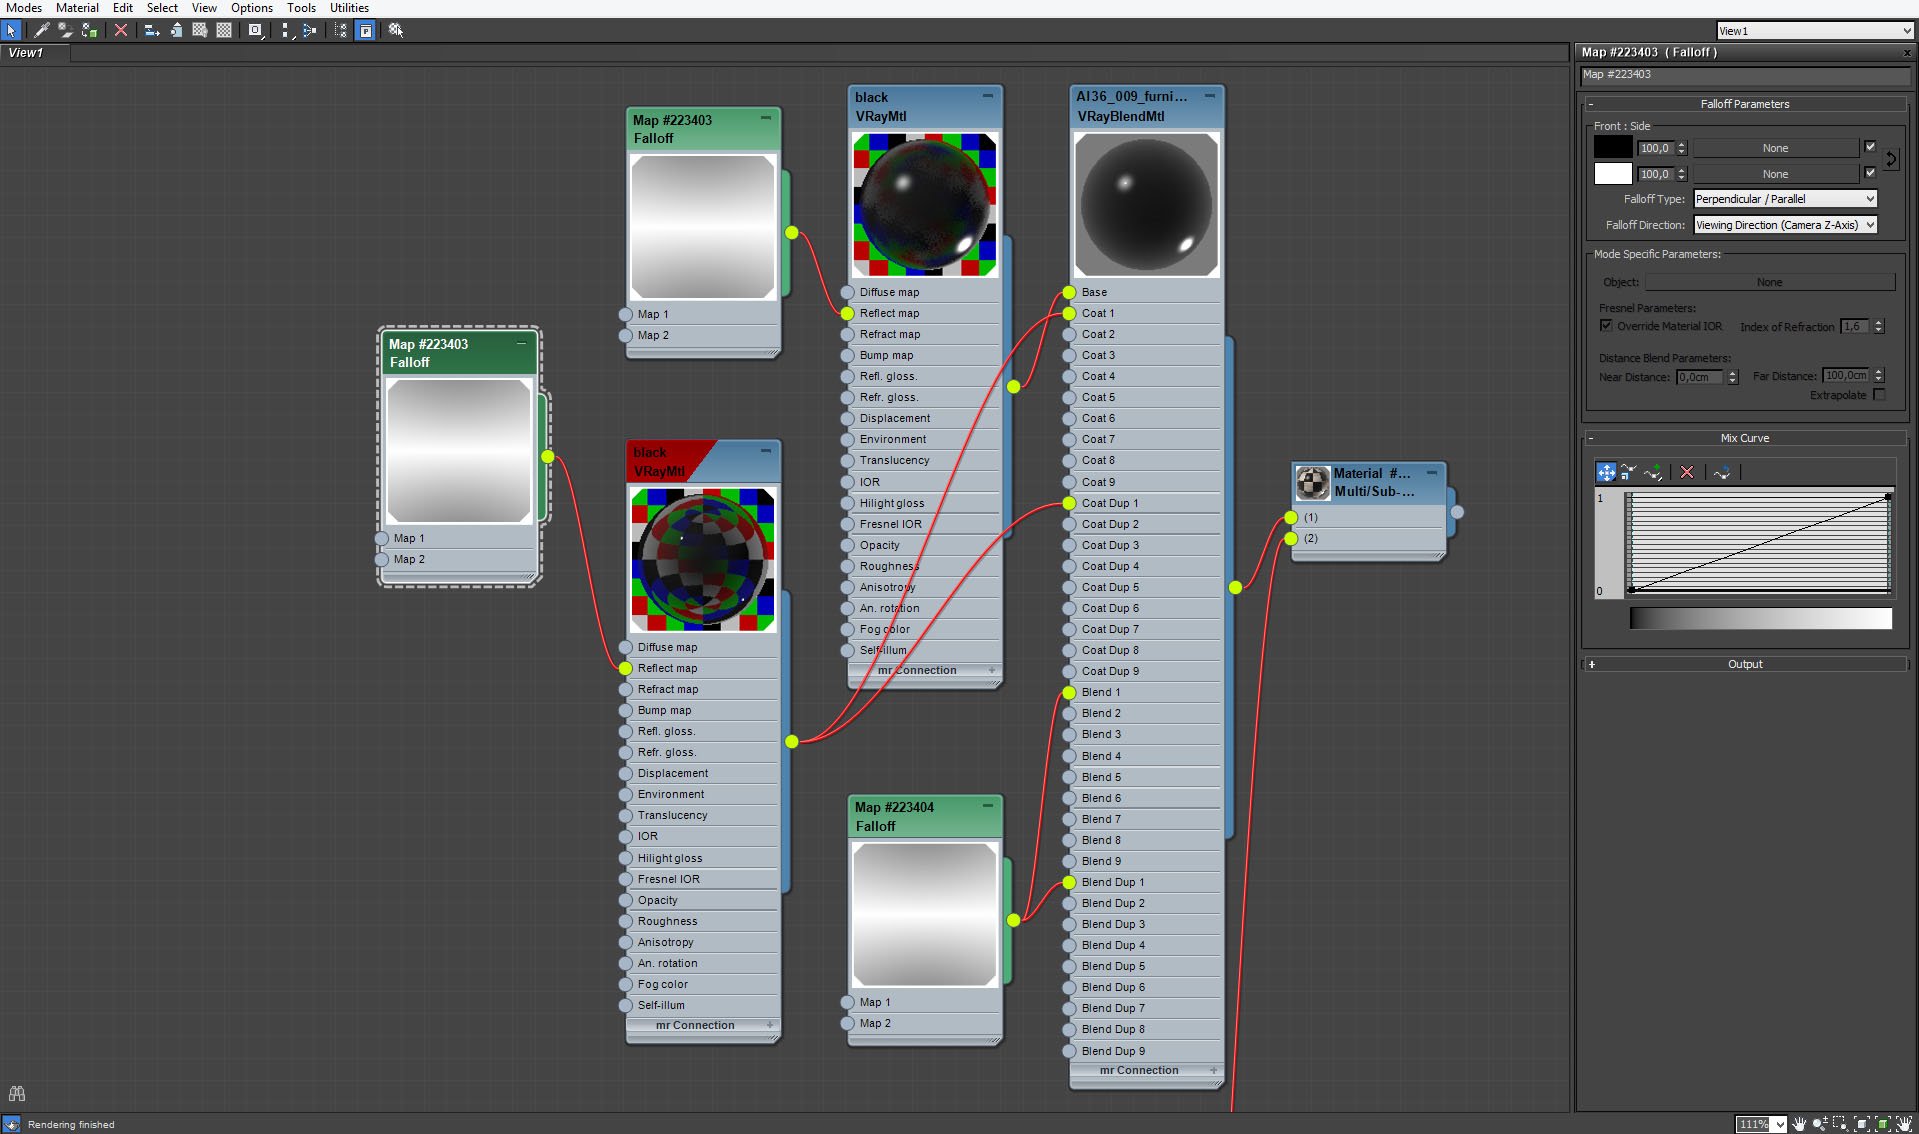
Black sides case material, continued.
Click on image to enlarge 
Black sides case material, continued.
Click on image to enlarge 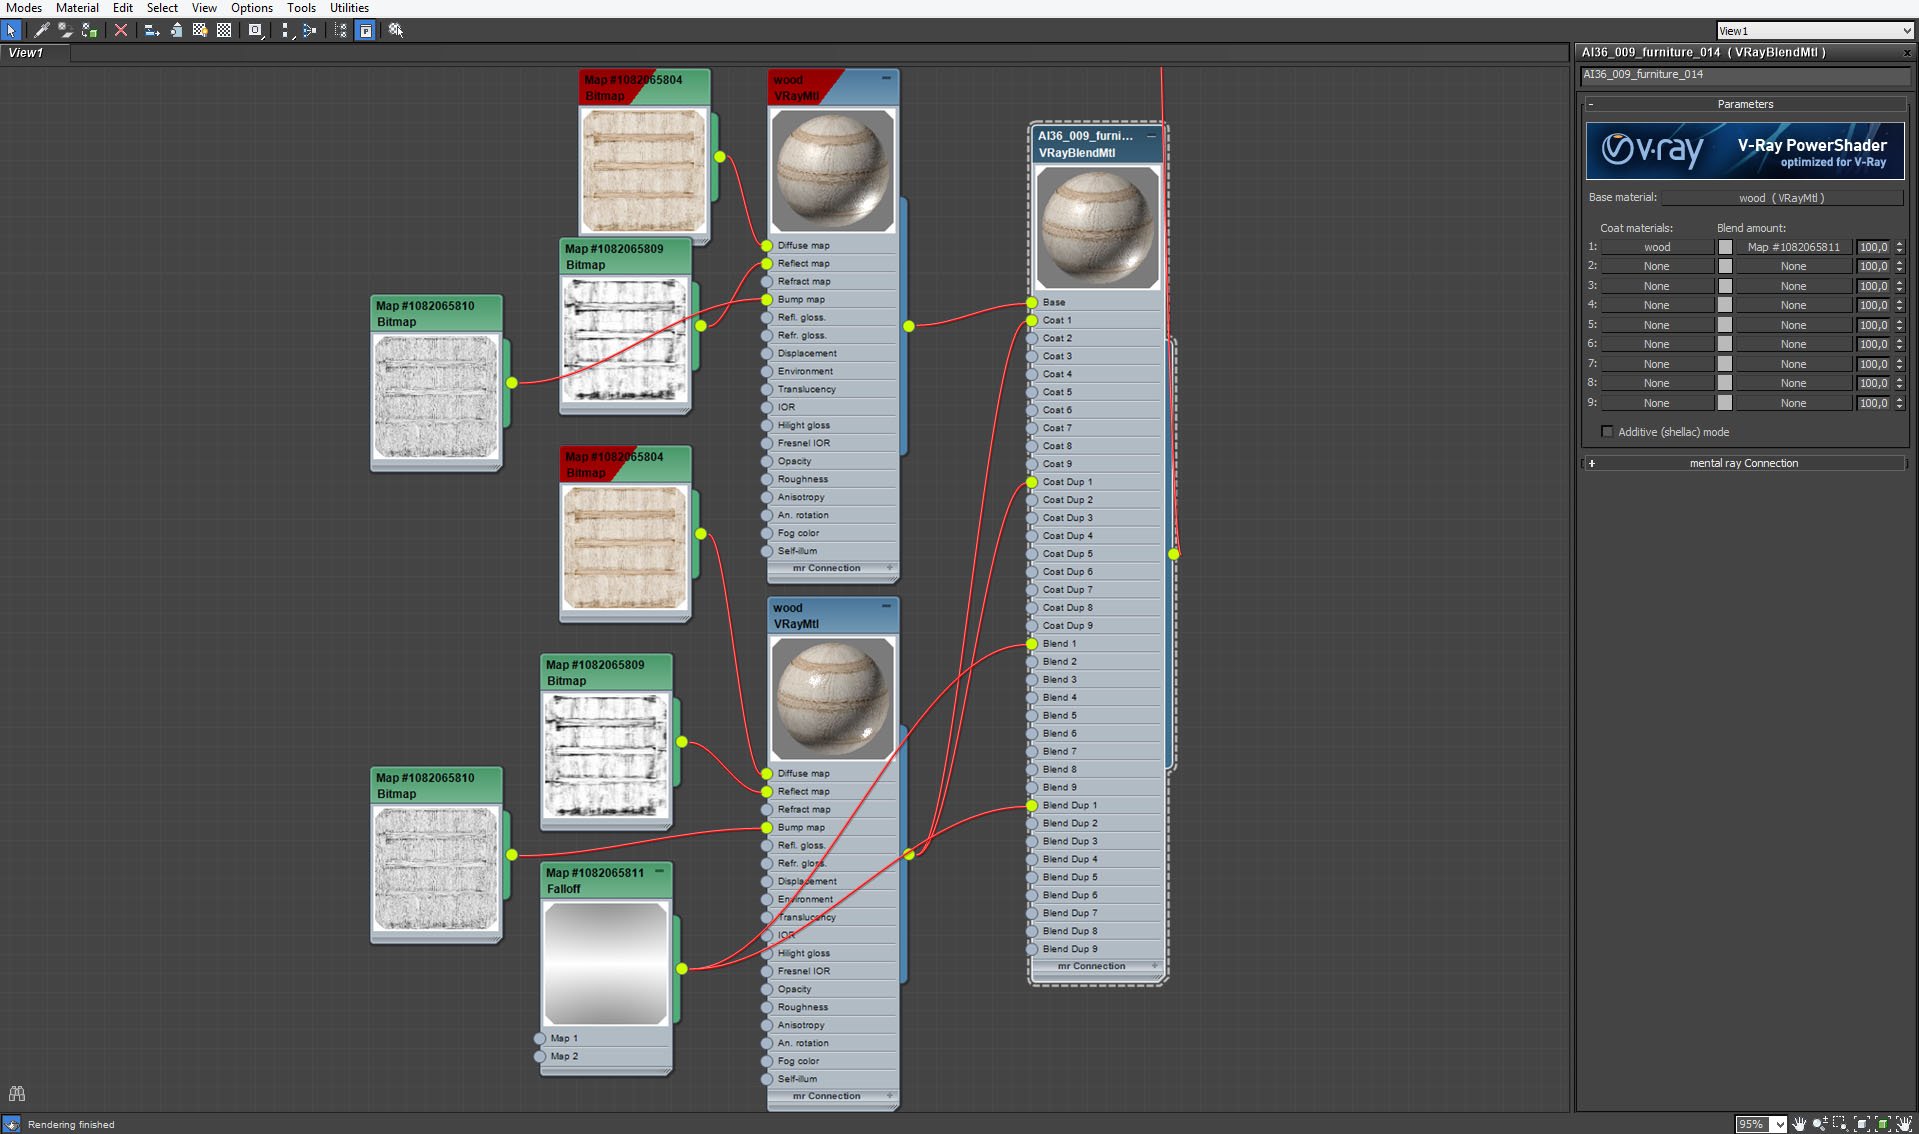
Case material - back facet.
Click on image to enlarge 
Case material - back facet.
Click on image to enlarge 
Case material - back facet.
Click on image to enlarge 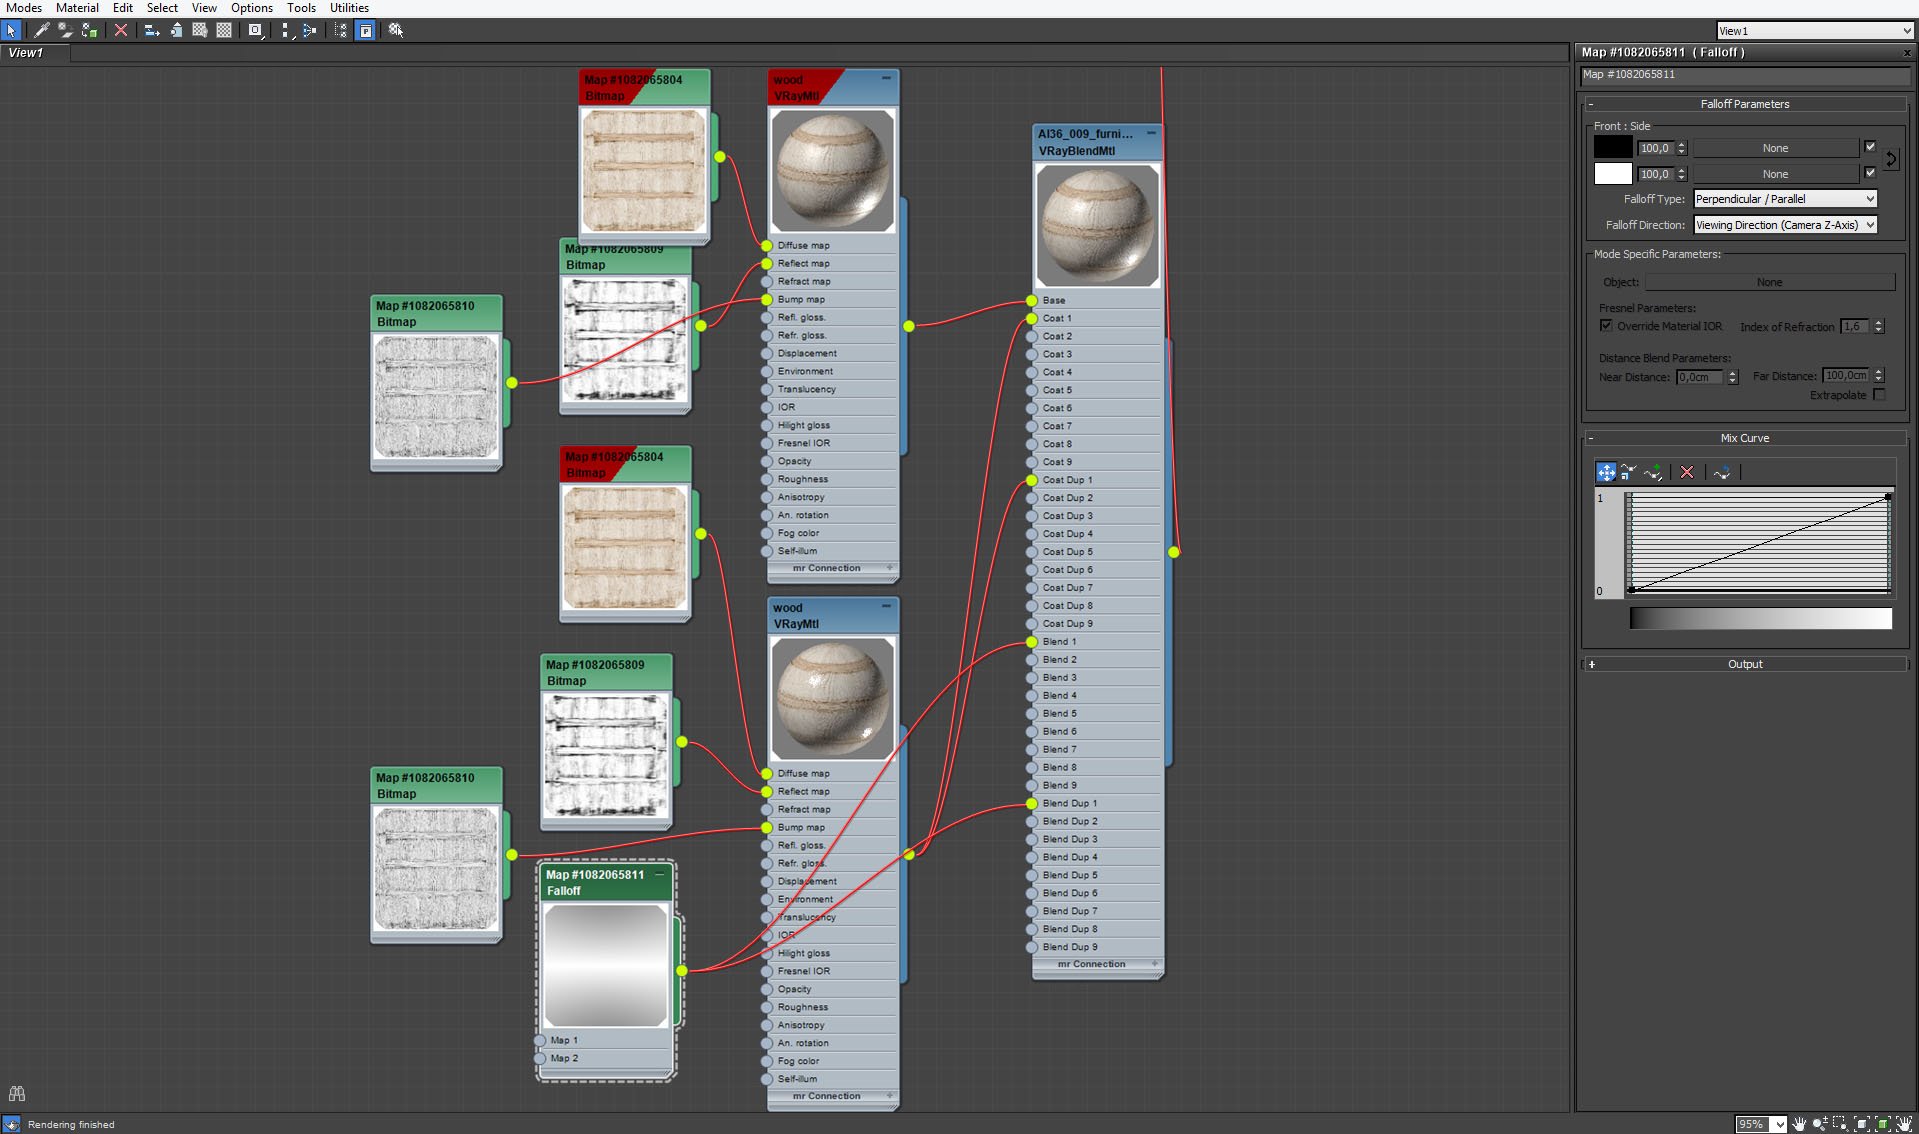
Case material - back facet.
Click on image to enlarge 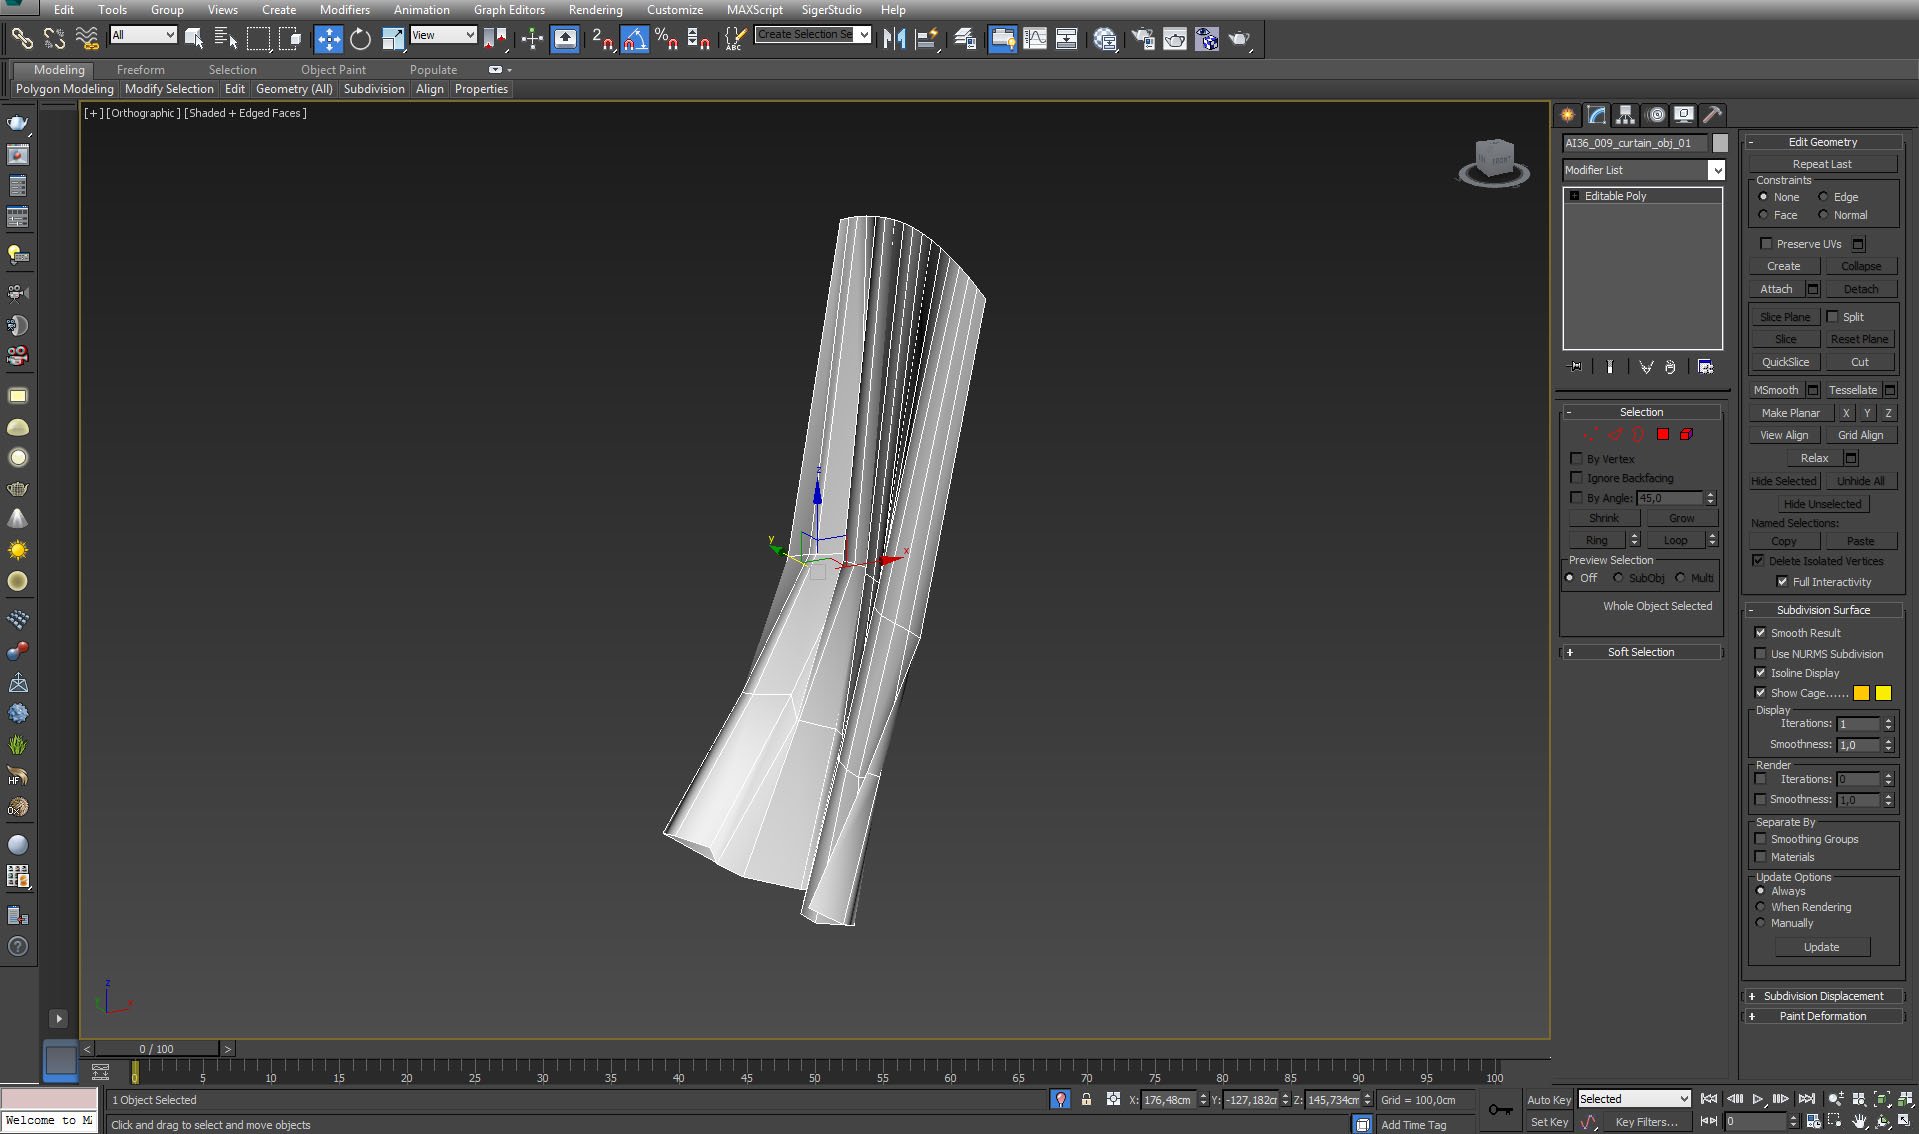
Click on image to enlarge 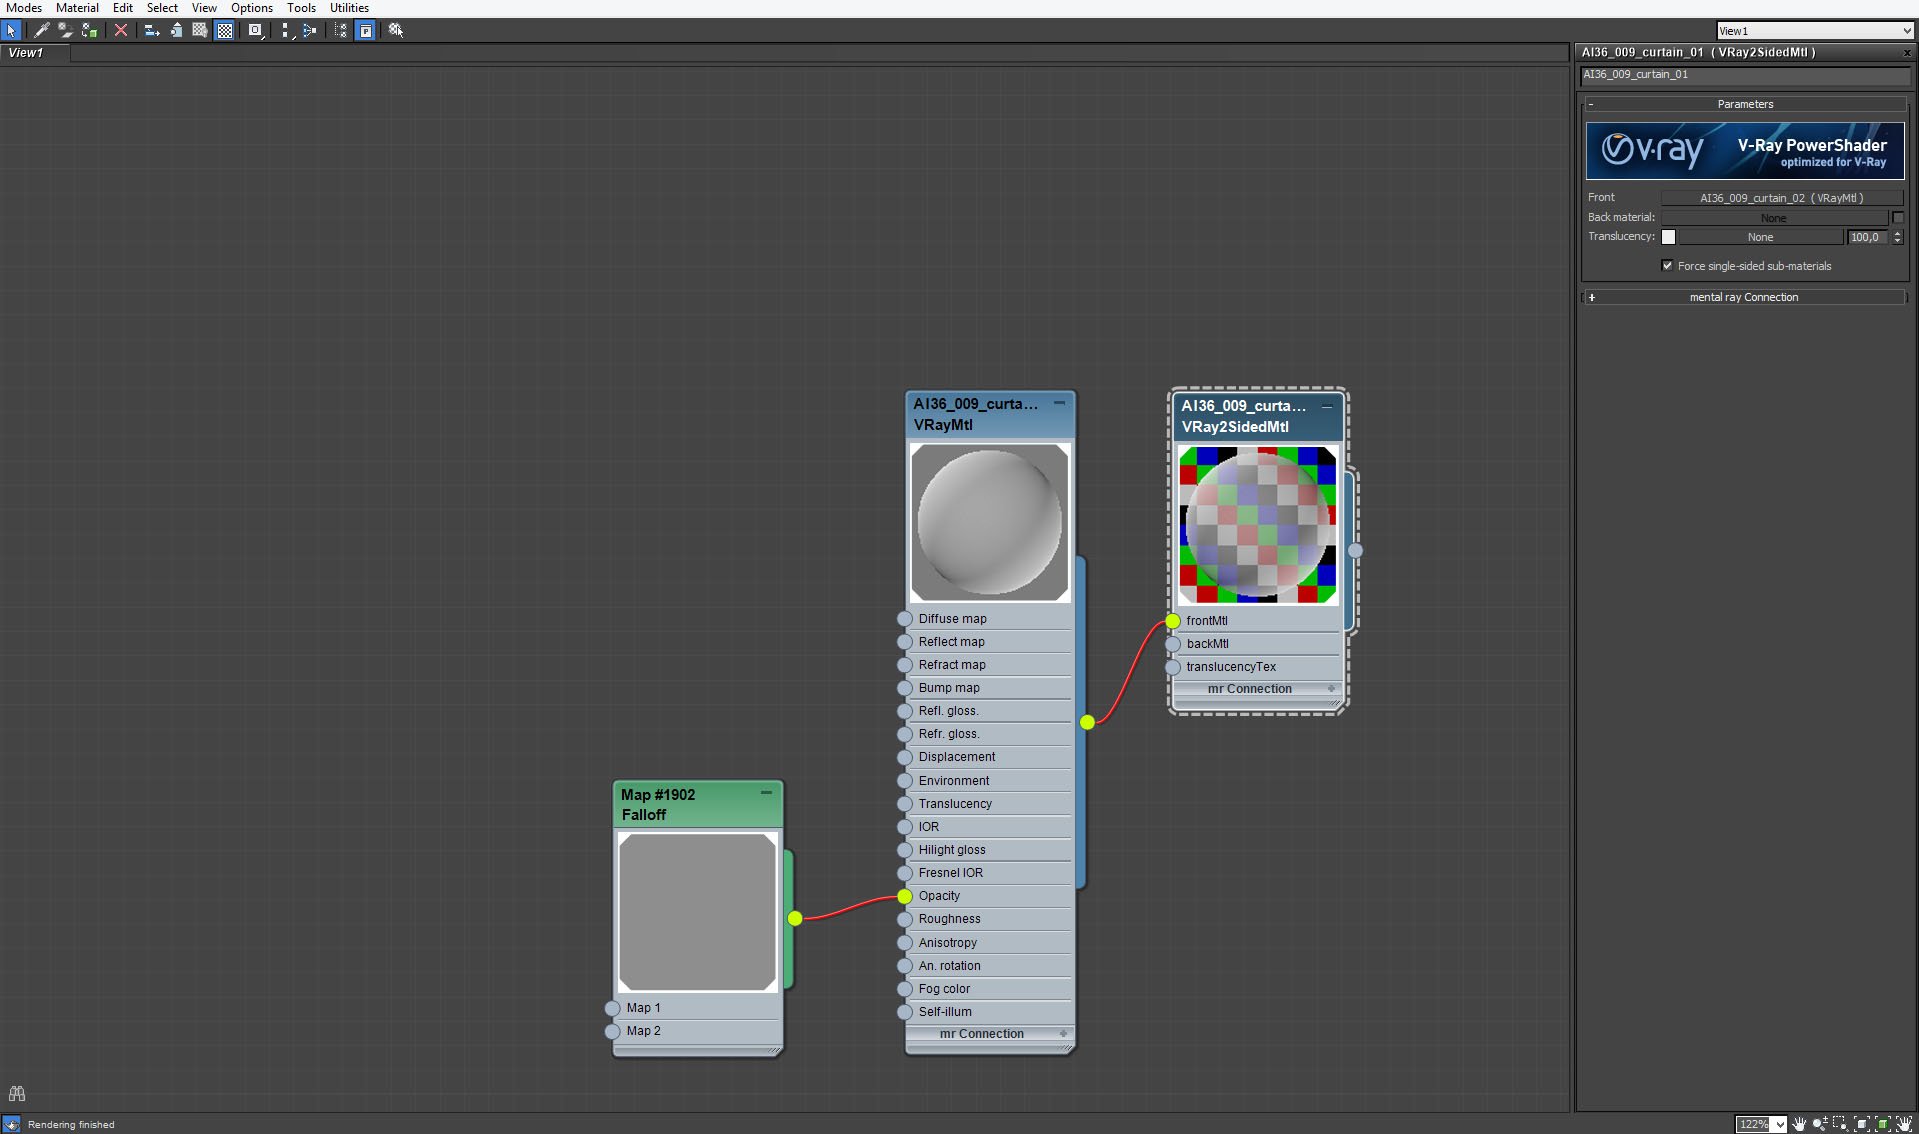
Click on image to enlarge 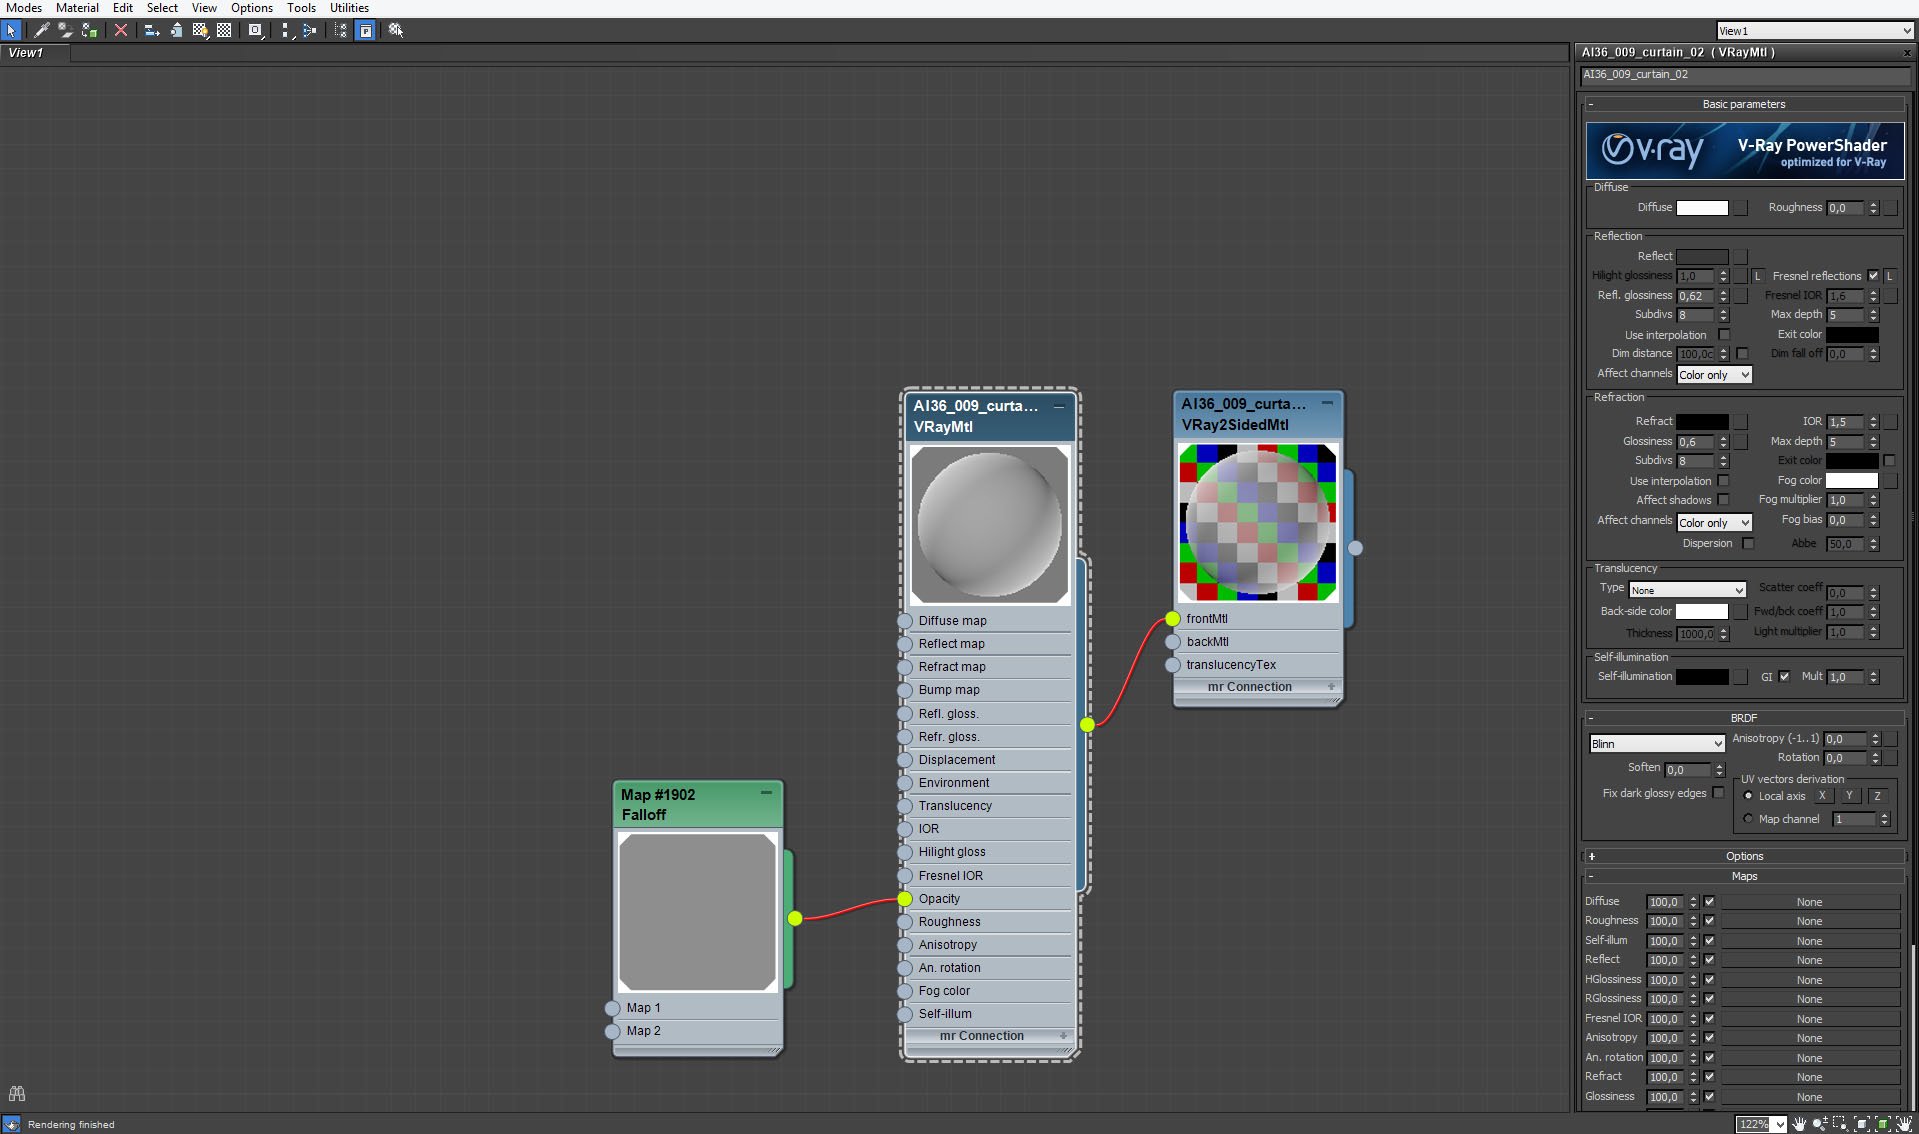
Click on image to enlarge 
Curtain material - fallof map settings.
Click on image to enlarge 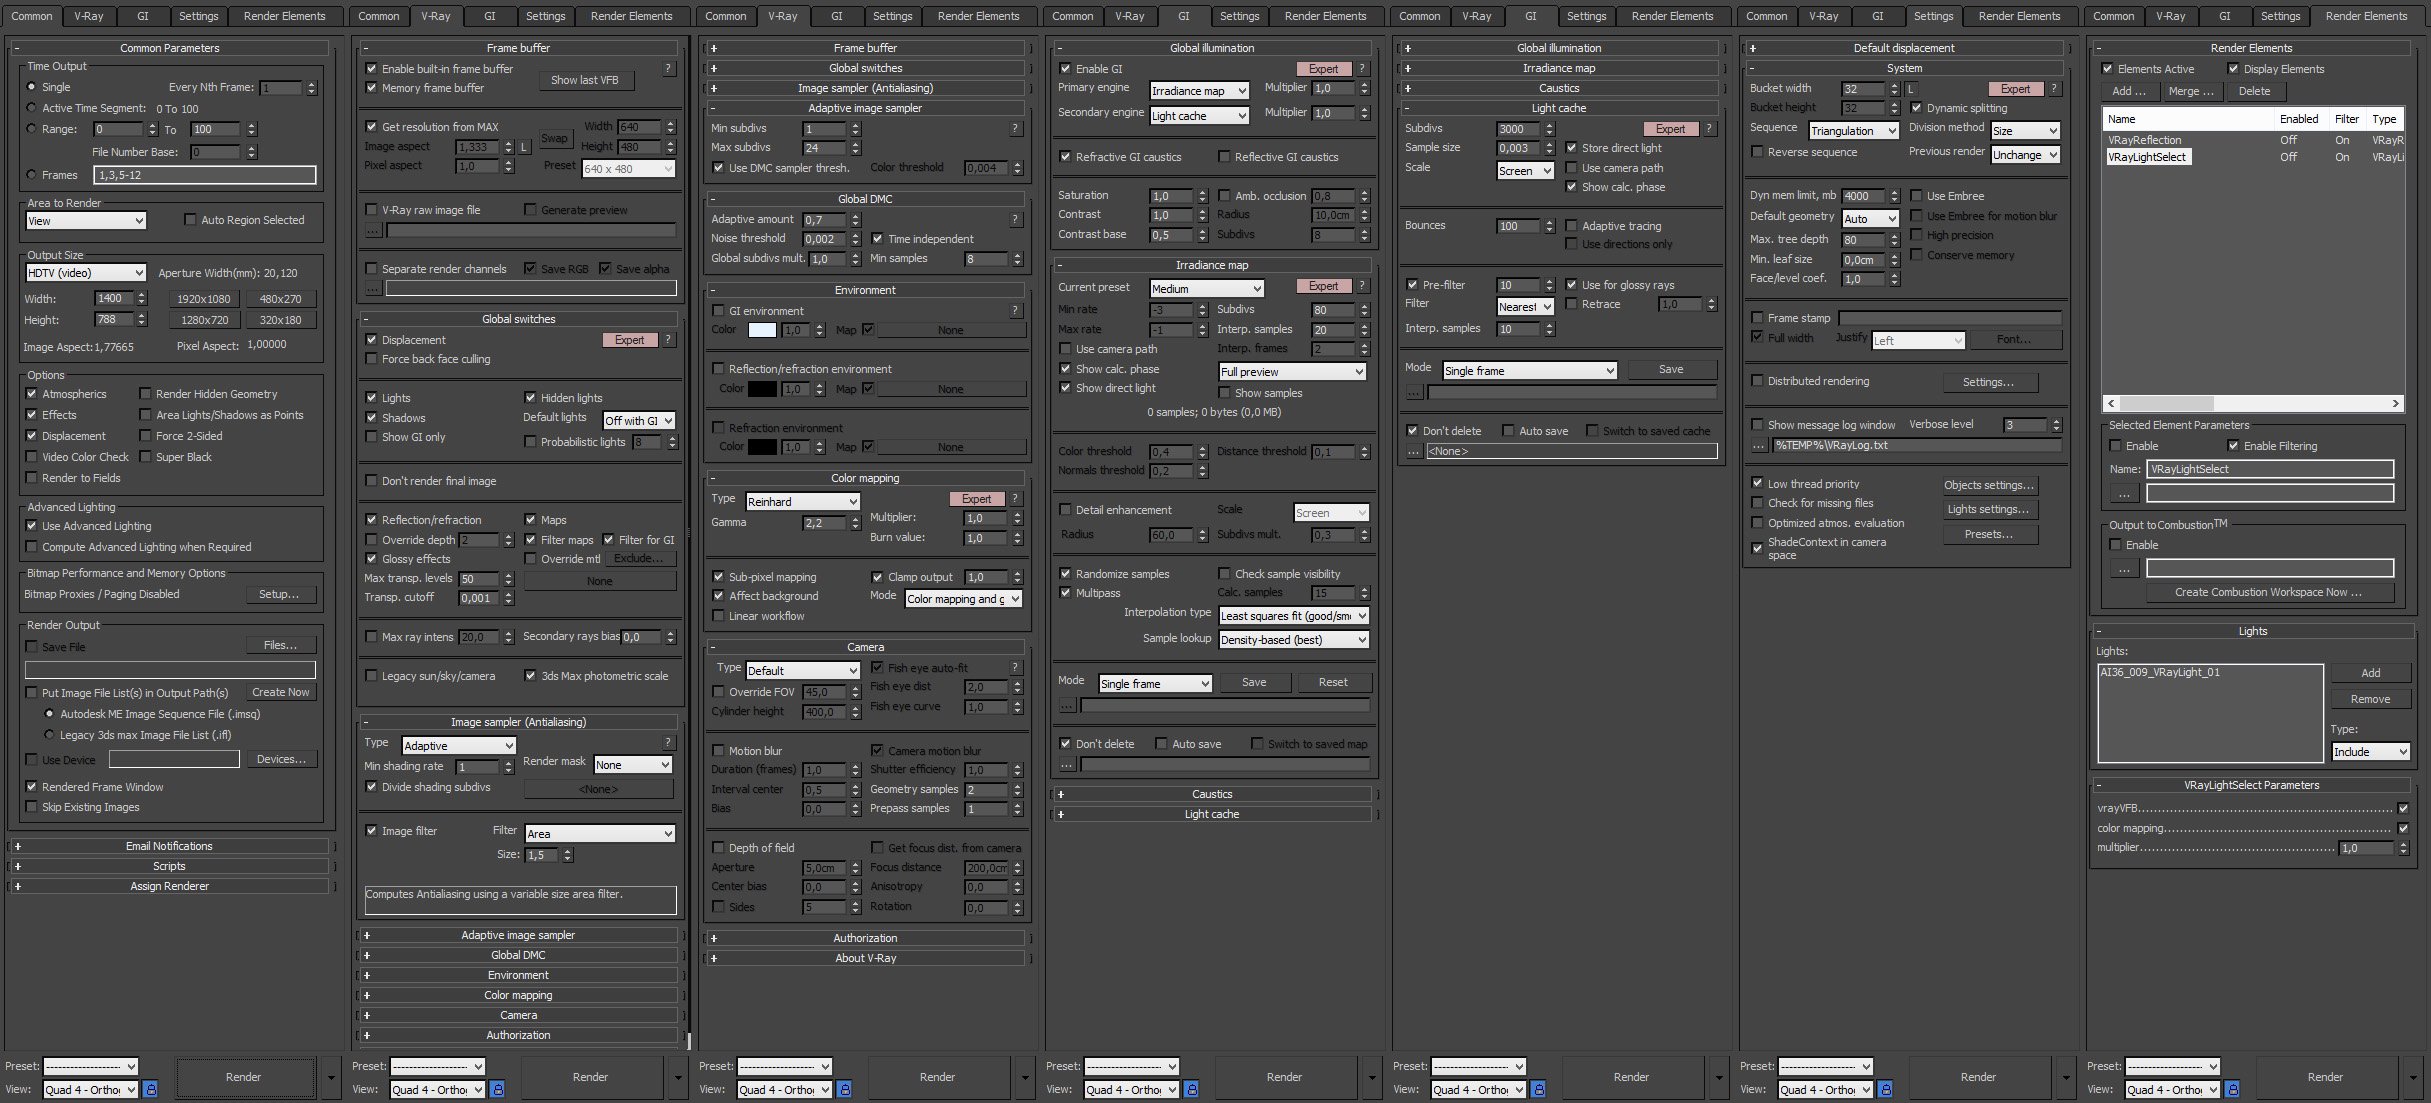
Click on image to enlarge 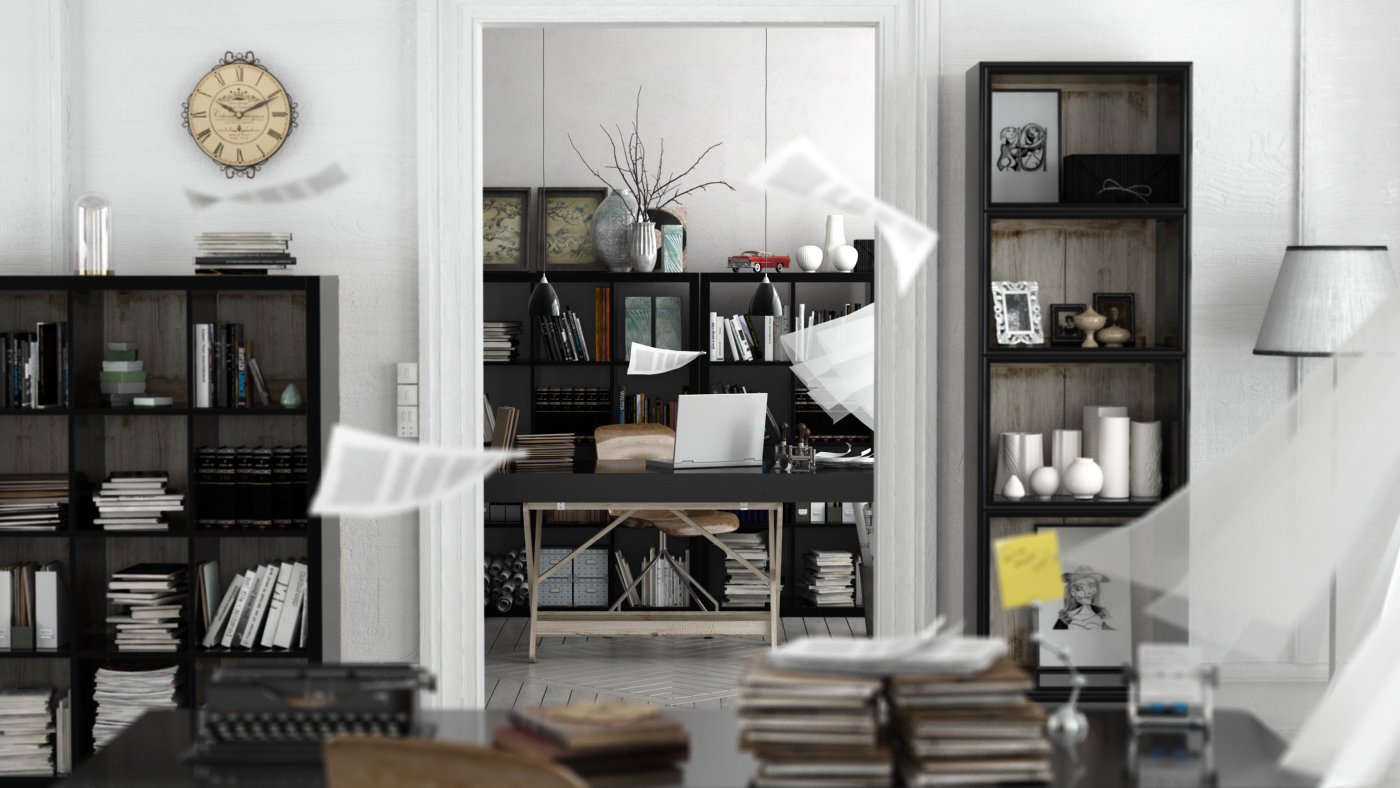
Raw render without post-production.
Click on image to enlarge 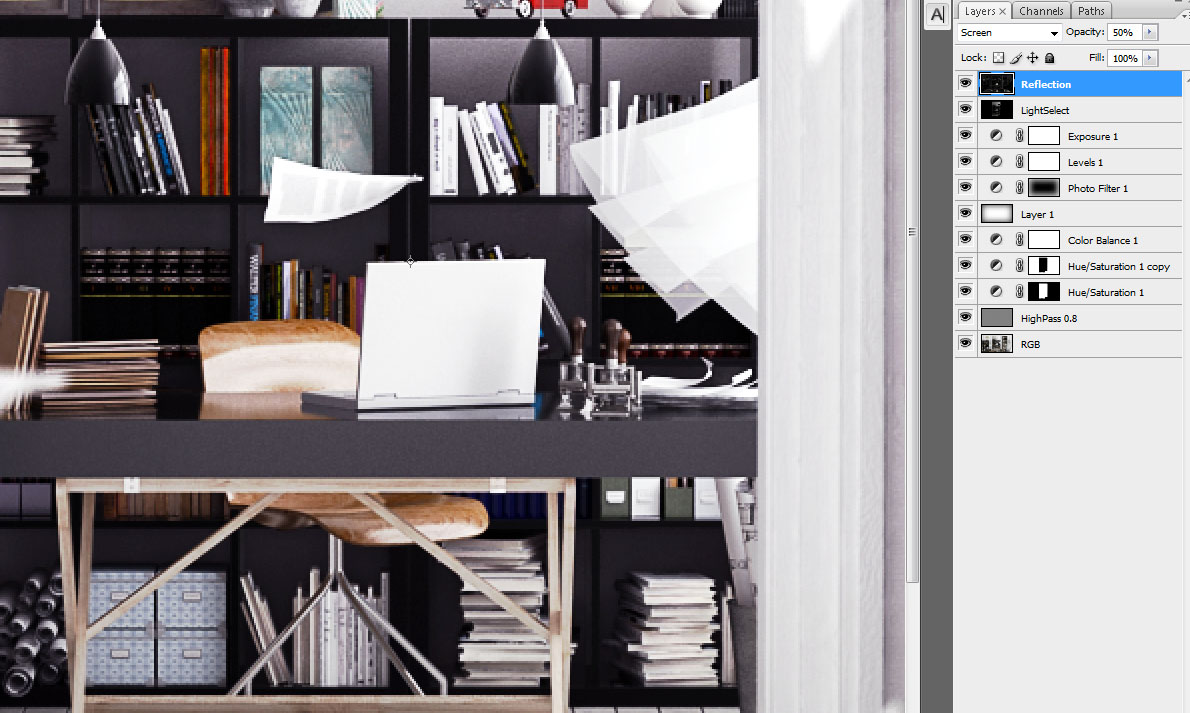
Photoshop stack. On the second layer Marcin used highpass filter to sharpen the image. Then he added +25 saturation for the room in the back. the next layer is decreased saturation for everything else and increased lightness. Color balance layer make image less green. Layer above it is overlay (opacity 50%) layer that increases lightness of the scene. The next three layers add more contrast to image and small (10%) amount of yellow tint.
Click on image to enlarge 
Final image after post-production. Thanks for reading! :)
Customer zone
Your special offers
Your orders
Edit account
Add project
Liked projects
View your artist profile





COMMENTS