How To Make Your CGI Walls More Realistic
Realistic walls with noise modifier.
Total: € 0
Continue Shopping
In accordance with the art. 13 section 1 and 2 of the European Parliament and Council Regulation 2016/679 of the 27th April, 2016 on the protection of natural persons, with regard to the processing of personal data and on the free movement of such data, and repealing Directive 95/46/EC (General Data Protection Regulation), hereafter RODO, I hereby inform that:
1. EVERMOTION S.C., 8 Przędzalniana Str., 15-688 Białystok, Poland is the Administrator of your Personal Data (APD)
2. Data Protection Inspector can be reached through e-mail: iod@evermotion.org
3. Your personal data are to be processed on the basis of art. 6 section 1 letter a, b and f of RODO in order to:
a) prepare, conclude and execute the agreement and for other purposes approved by you,
b) to execute the legitimate interest like marketing of products and the agreement, claim assertion or defence against claims resulting from the law regulations.
4. Entities entitled to the reception of your personal data may be the authorised public bodies; mail providers; providers of the services covered by the agreement; responsible for debt recovery, keeping the archives, document utilization, legal consulting, technical services, IT services and accountancy.
5. Your personal data shall not be transferred to the third country, nor to the international bodies.
6. Your personal data shall be processed within the period of the agreement and upon your additional consent until you withdraw it. APD shall keep the data for the period of any civil law claim execution connected with the agreement.
7. You have the right to demand an access to your personal data, to correct or to delete the data if there is no other basis for the processing or any other purpose of such processing or to limit the processing of the data, to transfer the data to another administrator and to raise objections to the further data processing if there is no legal basis for further processing and to withdraw any previous consent.
8. You provide the personal data voluntarily, however they are necessary to conclude the agreement. The refusal of providing such data may result in the refusal of the agreement conclusion.
9. You have the right to lodge a complaint to the Personal Data Protection Office when in your opinion the data processing violates the regulations of General Data Protection Regulation of the 27 April, 2016 (RODO).
10. Your data will be automatically processed, including the form of profiling.
11. You are obligated to forward above mentioned information to your representative, especially if you appointed this person in the agreement as the contact person or as the representative for the agreement execution.

Software used: 3ds Max, V-Ray, Forest Pack, Photoshop.
Web: www.leandrosilva.pt
Email: leandrosilva.arq@gmail.com
Introduction
Hi everyone!
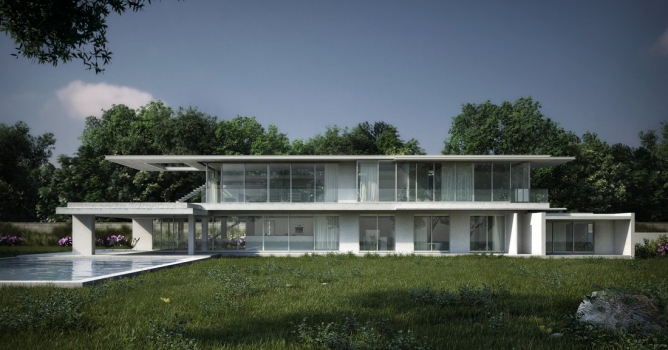
I will provide some insights about one of my last projects for CGRecord Rendering Competition. For this contest, the participants were invited to recreate the entire environment of the Crescent House designed by Saota & Antoni Associates, with the only restriction of keeping the basic house geometry as it was.
Click on image to enlarge
Concept & References
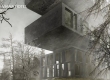
Before starting, it is essential to schedule the work and focus in the main concept behind the project. The inspiration for this work emerged when I tried to imagine what could this house and its surroundings look like by creating a nature atmosphere, simple, quiet and, most importantly, that expresses a natural extension of the house into the landscape. As a first step, I always collecte several references about the building, landscape, materials, mood and lighting that could express the concept I was after. Here are some of the reference images.
Click on image to enlarge
Basic Setup
Once I gathered the references for the project, I started by configuring the units setup and the gamma. I always work with gamma 2.2 and linear workflow.
Click on image to enlarge
Modeling
The main 3d model of the house was provided to the participants of the competition by CG Record, with which I began to work by making some adjustments/improvements, mostly chamfer the edges and fix some modeling issues, so then I could focus in the atmosphere and the environment of the building straight away.
Then I added the interior furnishing such as chairs, tables, lights and curtains to fill up the kitchen, the bedrooms and the living areas.
Click on image to enlarge
Environment & Vegetation
The terrain model is created with a simple plane which I converted to an editable poly, added a noise modifier and deformed with a few push/pull tools to enhance the effect of terrain imperfections. To scatter the vegetation, I used the Forest Pack Pro plugin to achieve a more random result with different types of models mostly from R&D iCube and Evermotion. First I began with spreading the grass with different types and sizes, and then added some flowers and leaves, the bushes and finally the trees. Here’s the overview of the scattered vegetation inside the 3dsmax viewport.
Click on image to enlarge
Click on image to enlarge
Camera Setup
For the camera placement, I adjust it throughout the process, exploring the various options for positioning the cameras. I think the most important is always try to capture the best lighting and composition of the scene, showing the building, the environment or a simple detail in the best and most appealing way, as close as possible to the real world. You can see the V-Ray Physical Camera settings from both shoots in the image below.

Lighting
In my opinion, lighting is one of the most significant element in 3d visualization, emphasizing the mood and the atmosphere of an image. For this project, I used a HDRI Map inside a V-Ray Dome Light (default), using Peter Guthrie’s HDRI 1224 Clear Sky and 2028 Dusk, combined with a V-Ray Sun to get strong shadows and a little warm highlights. In the night shoot, I also placed some additional Vray Lights that throw warm light from the interior.
Click on image to enlarge
You can see how it all looks in the clay renders below.
Click on image to enlarge
Click on image to enlarge
Materials & Texturing
In this step of the process, it’s important to collect real material references to have a good base and understanding for texturing the materials in the scene. Most of the textures are self made, based on those available at Arroway and CGTextures, with specific adjustments in Photoshop (contrast, color, dirt) to get a better result and make all the tests needed until the materials achieve the desired look.
Click on image to enlarge
Click on image to enlarge
Click on image to enlarge
Click on image to enlarge
Click on image to enlarge
Render Setup
I rendered this scene with V-Ray and aimed keeping render times acceptable with an Irradiance Map and Light Cache solution. Also, I enabled some render elements to use later in post production stage. Here are the final render settings that I usually use.
Click on image to enlarge
Below are the final raw renders.
Click on image to enlarge
Click on image to enlarge
Post Production
For the post production phase, I generaly focus in making little tweaks and adding some artistic retouching with the main objective of enhancing the atmosphere and “beauty” of the raw images. Below, I show the highlights of this process done in Photoshop for the day view.
Click on image to enlarge
Click on image to enlarge
Click on image to enlarge
Click on image to enlarge
Click on image to enlarge
Click on image to enlarge
Click on image to enlarge
Click on image to enlarge
Click on image to enlarge
Click on image to enlarge
Click on image to enlarge
Click on image to enlarge
Click on image to enlarge
If you want to see more of our work please visit our website and don’t forget to follow our Facebook page.
Best regards, Leandro Silva.

LEAVE A COMMENT


|

|

|

|

|
 Customer zone
 Your special offers
 Your orders
 Edit account
 Add project
 Liked projects
 View your artist profile
COMMENTS