A week after my post "Student Residence" on Evermotion forum, I received a kind proposal from Evermotion for the making of the scene to share knowledge with our community and I have to say that I'm glad & honoured to do that. I would like to give great thanks to Evermotion offering me a chance for doing this making of and all of CG community's nice comments for my work so far.
First, I'd like you to take a look at some final images below. Click on images to see full resolution.
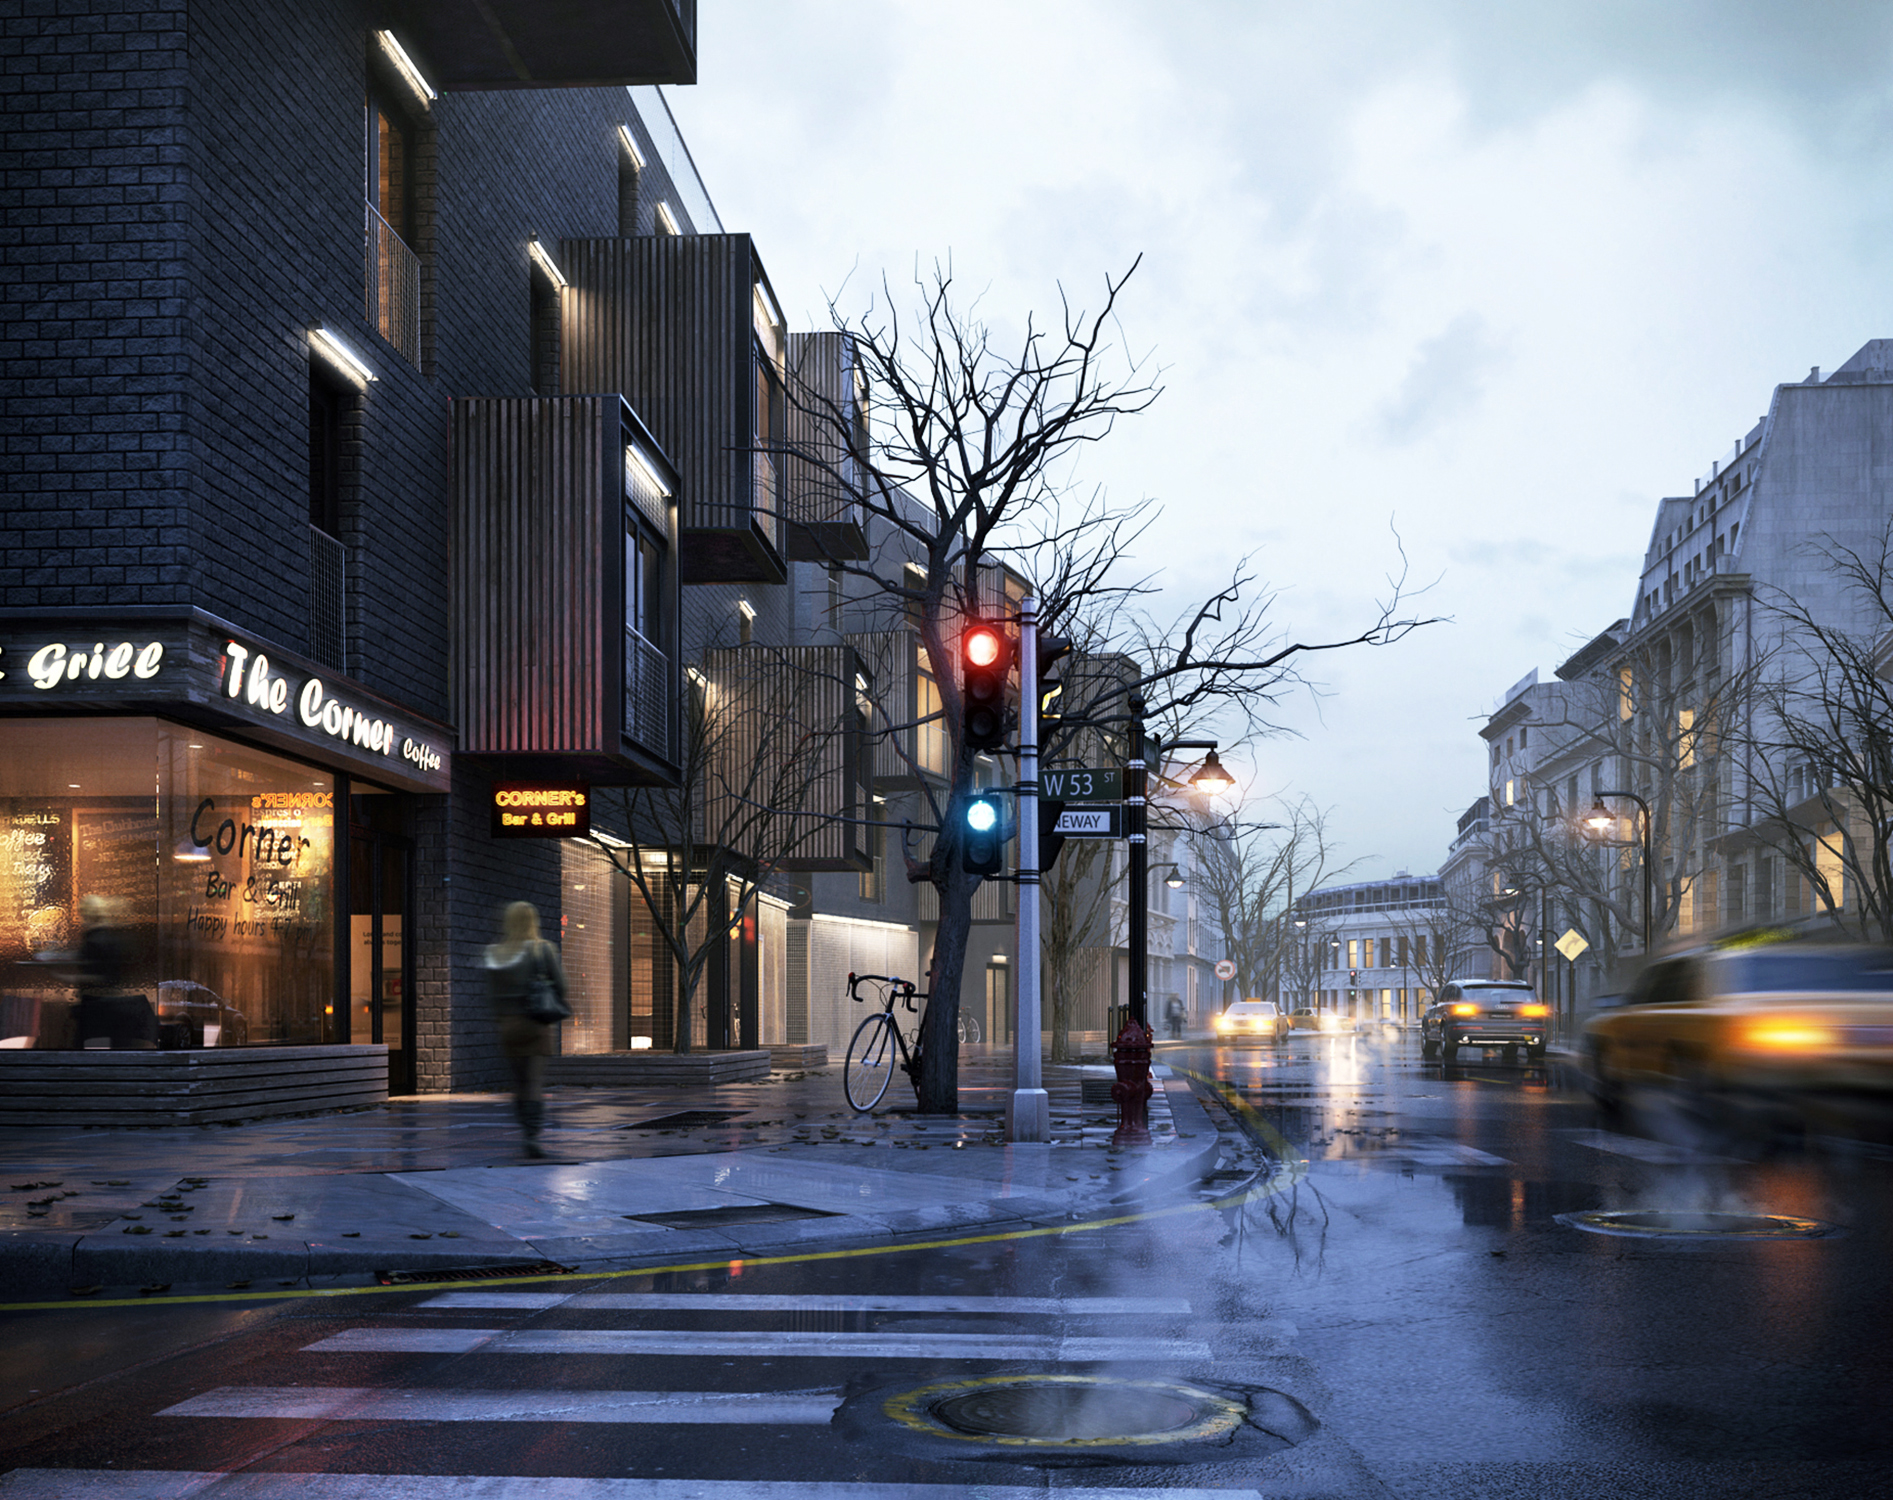
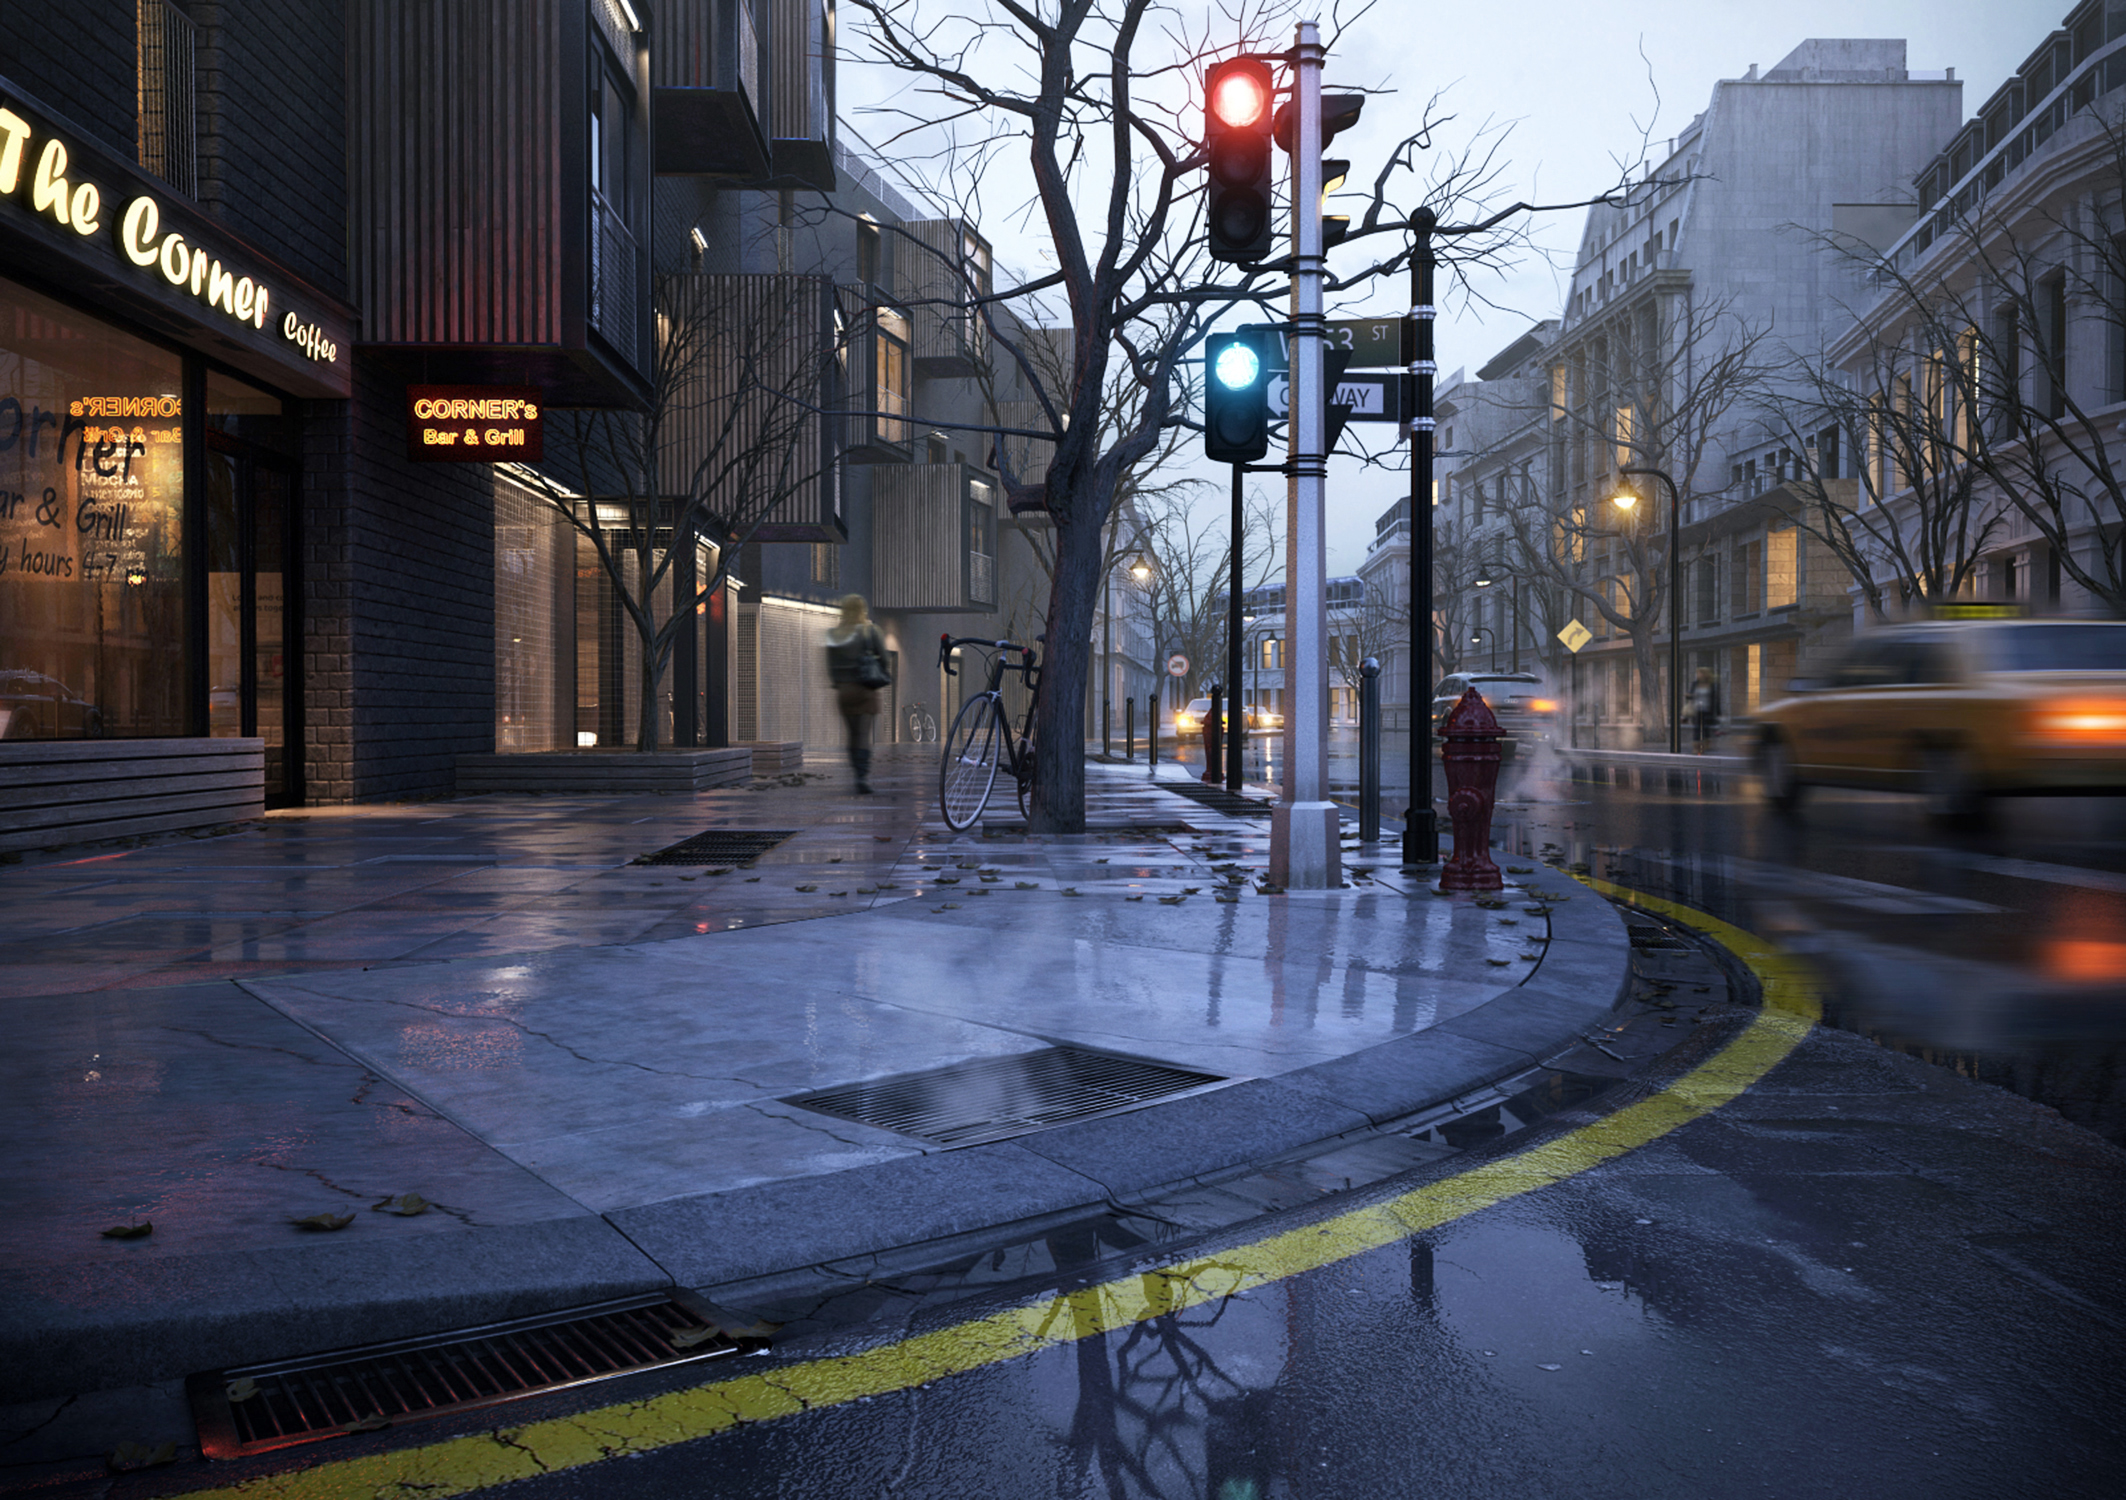
You can also find full set in the post from Evermotion or Ronenbekerman forum.
Modeling
First, for the building, I imported the facades from cad file to arrange in 3dsmax viewport and used some poly commands to model the building, as this is a simple building so I'm not focusing much on modeling of the building.
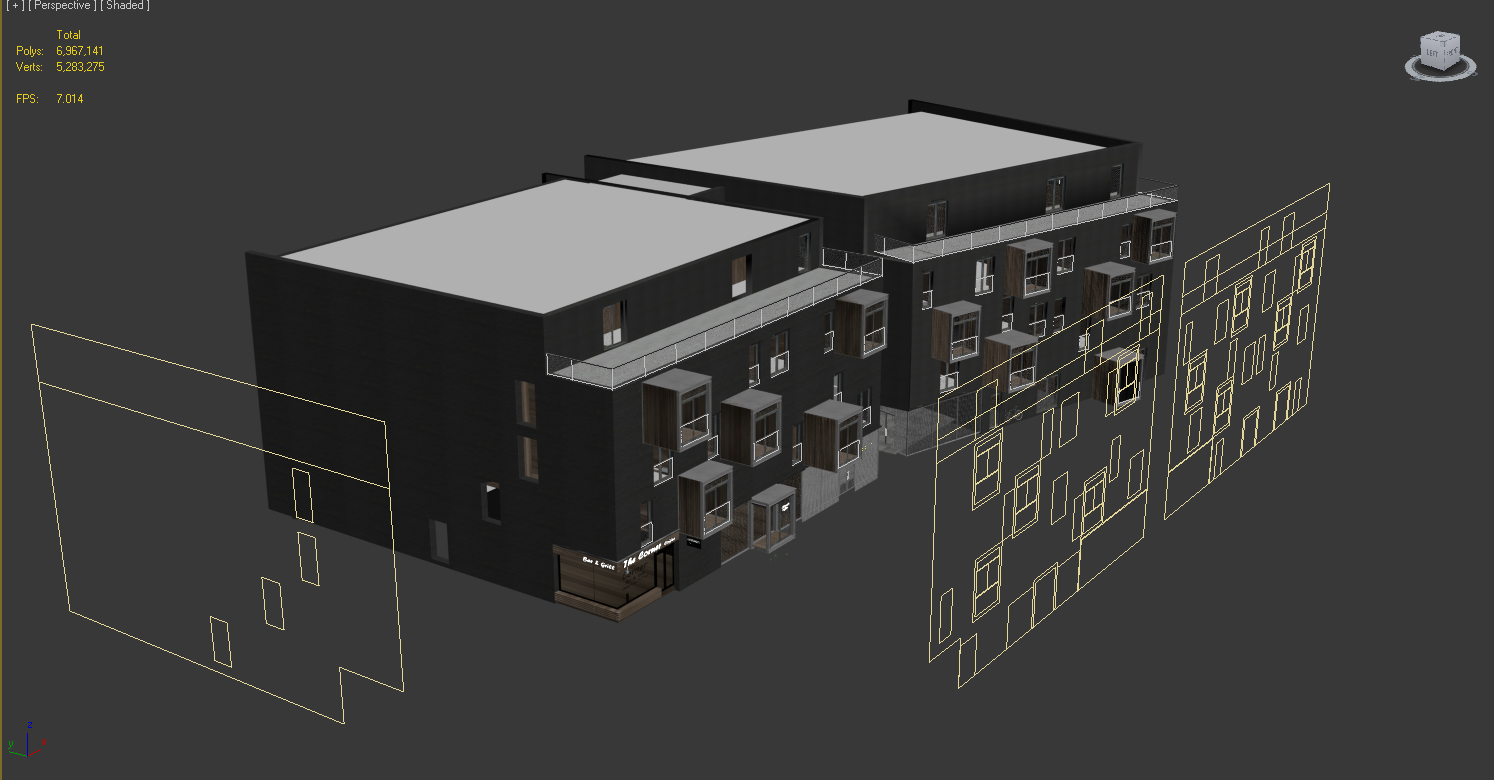
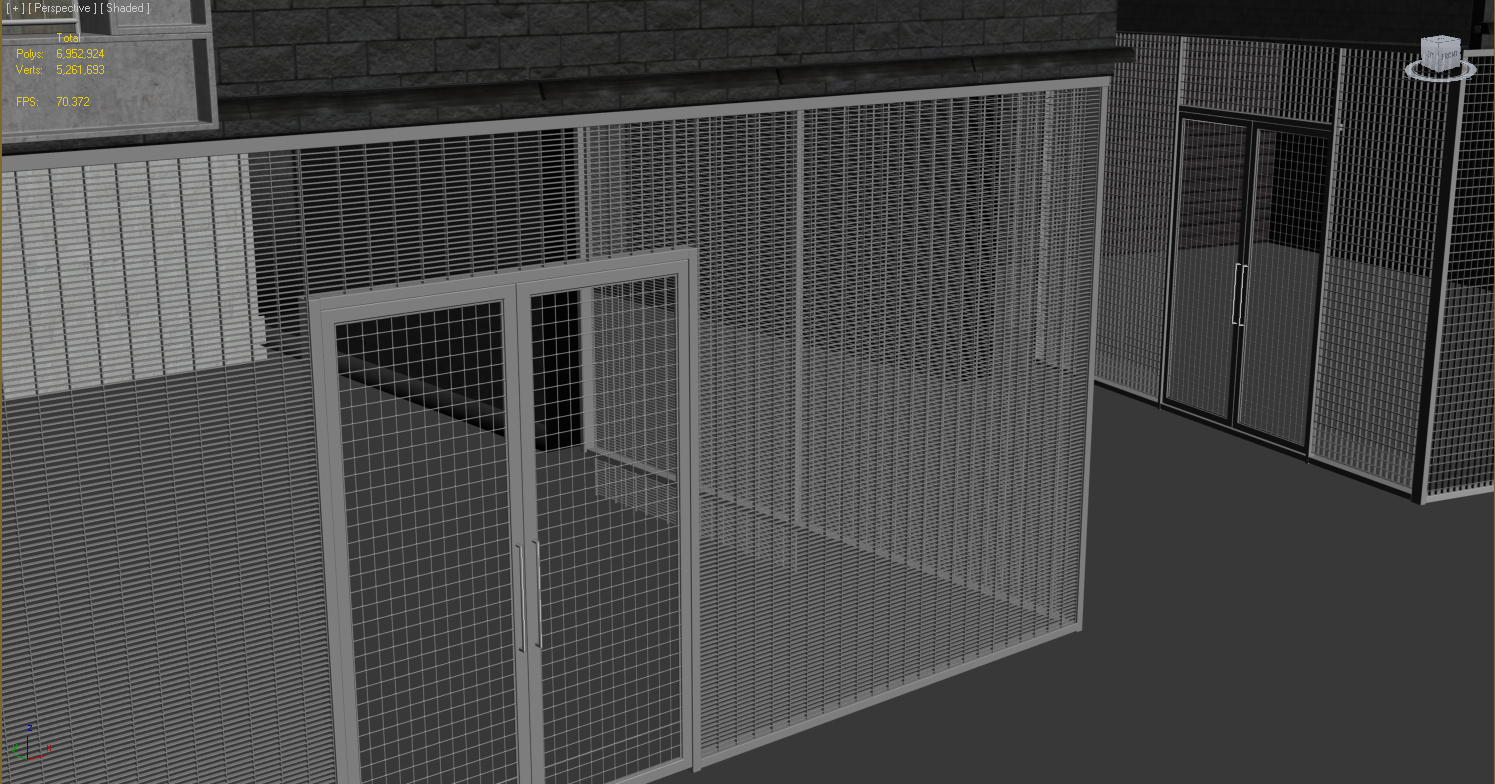
For detailing of steel balcony fence & steel wall fence, I used plans divided in to appropriate measured segments and used some poly commands like insert, extrude, lattice and then apply noise on the fence to make it look more natural as you can see in images below.

The sidewalk was created with floor generator script and a little height tilted to make random altitude for a more natural look. It was also randomly scattered with some simple detailed manholes.
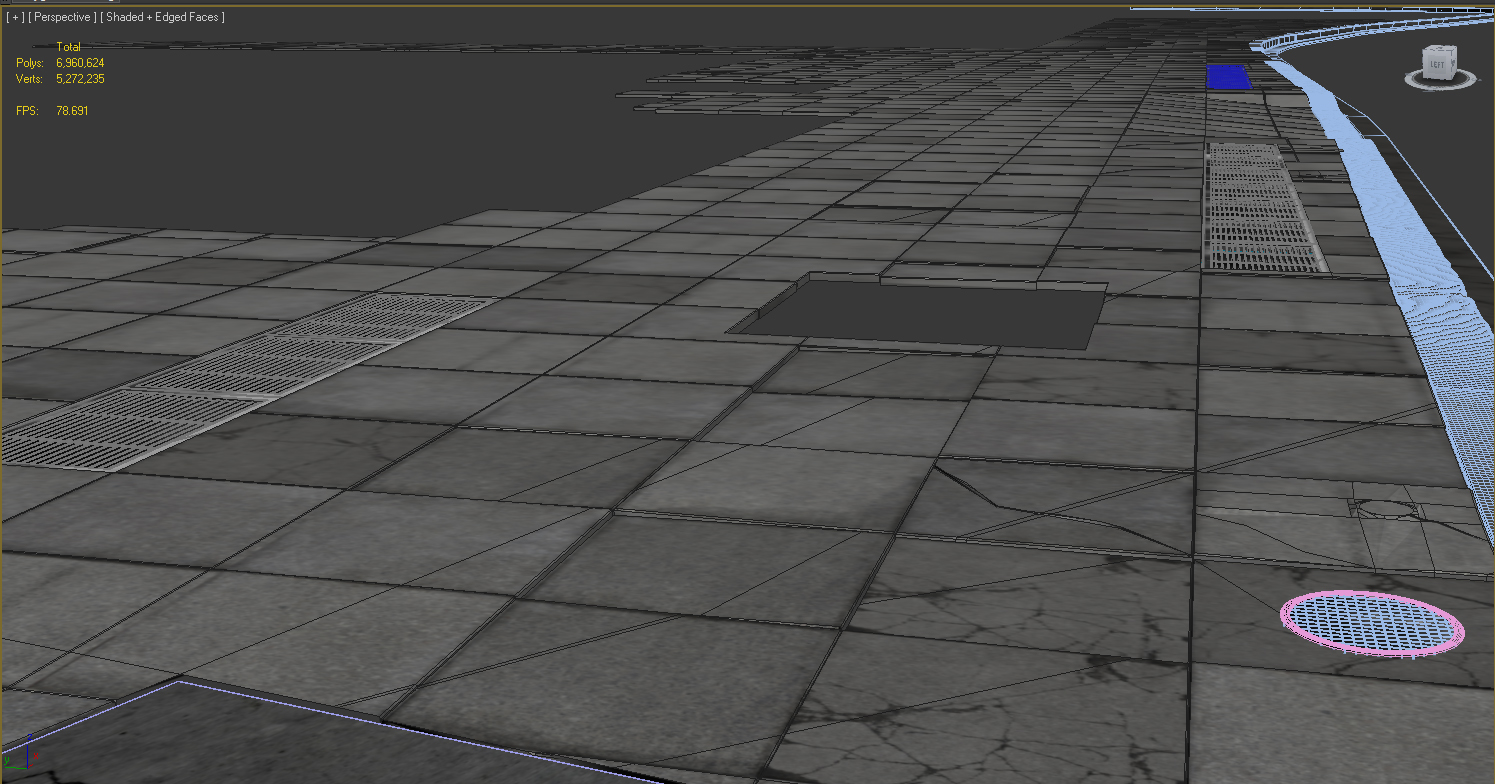
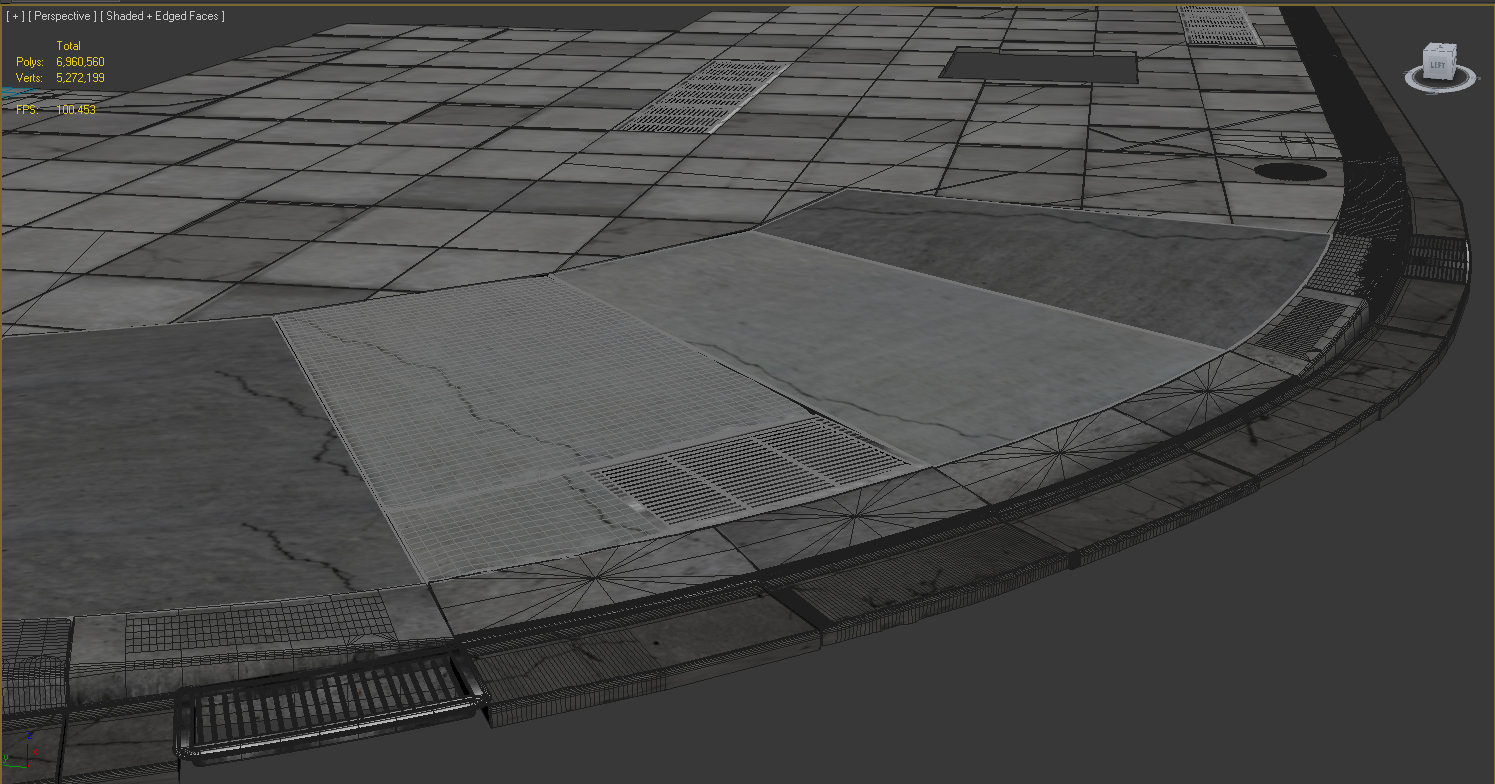
The curved sidewalk part & kerb were created mainly with high segment boxes converted into editable poly and some push/pull, noise, meshsmooth commands.
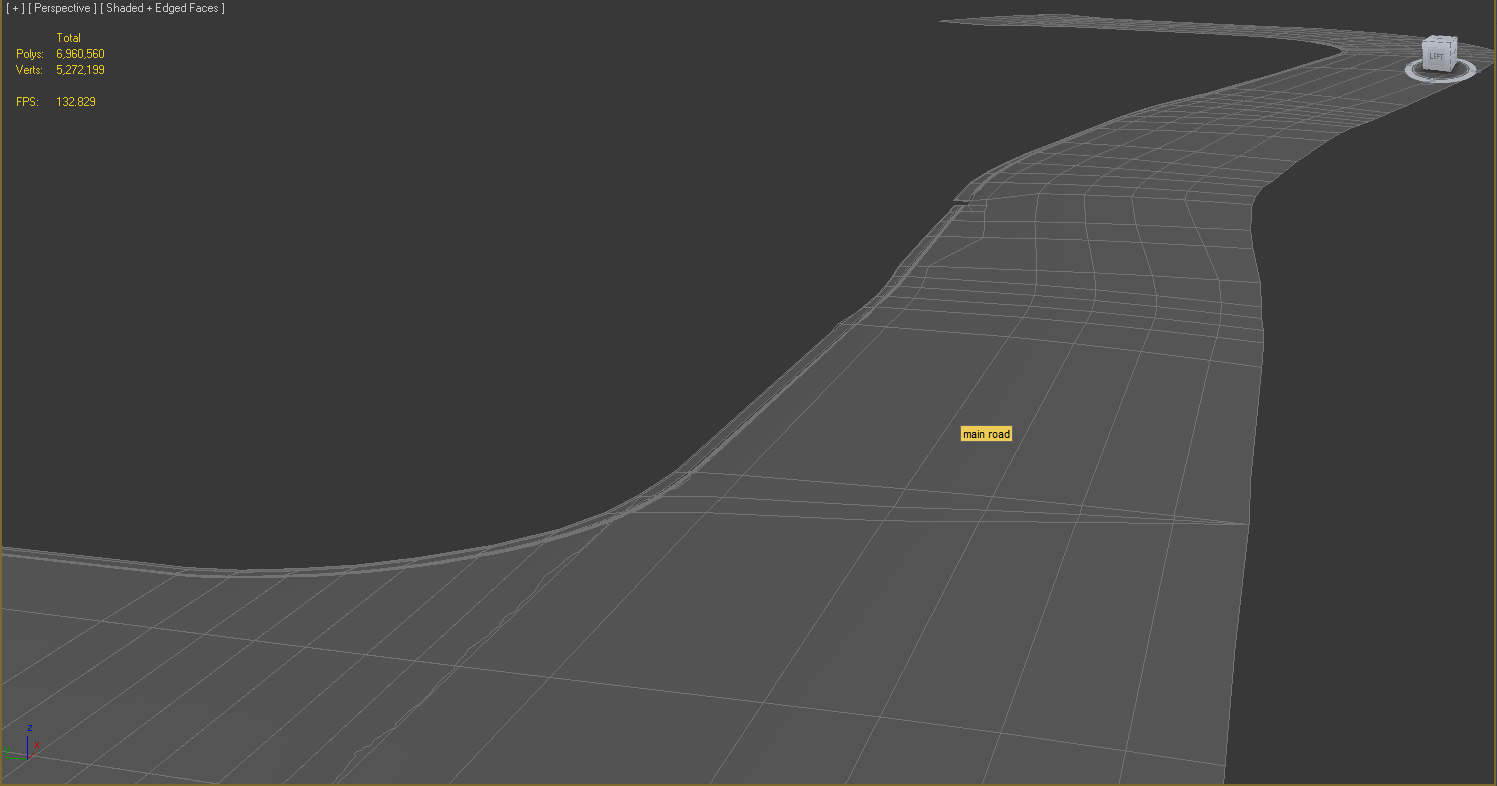
The most interesting part which also took a lot of my time is the road and its material, the road modeling was simply done with some steps.
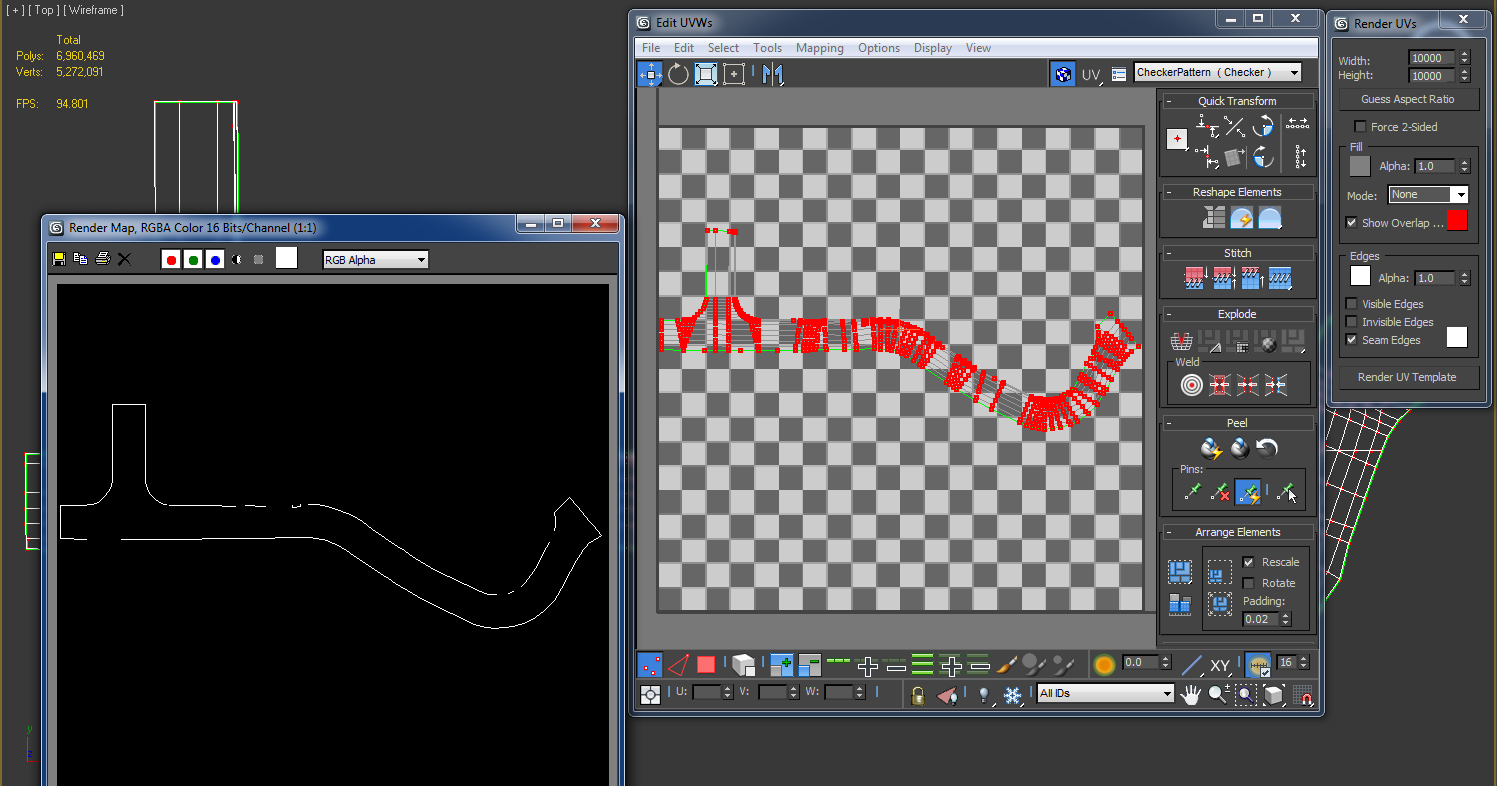
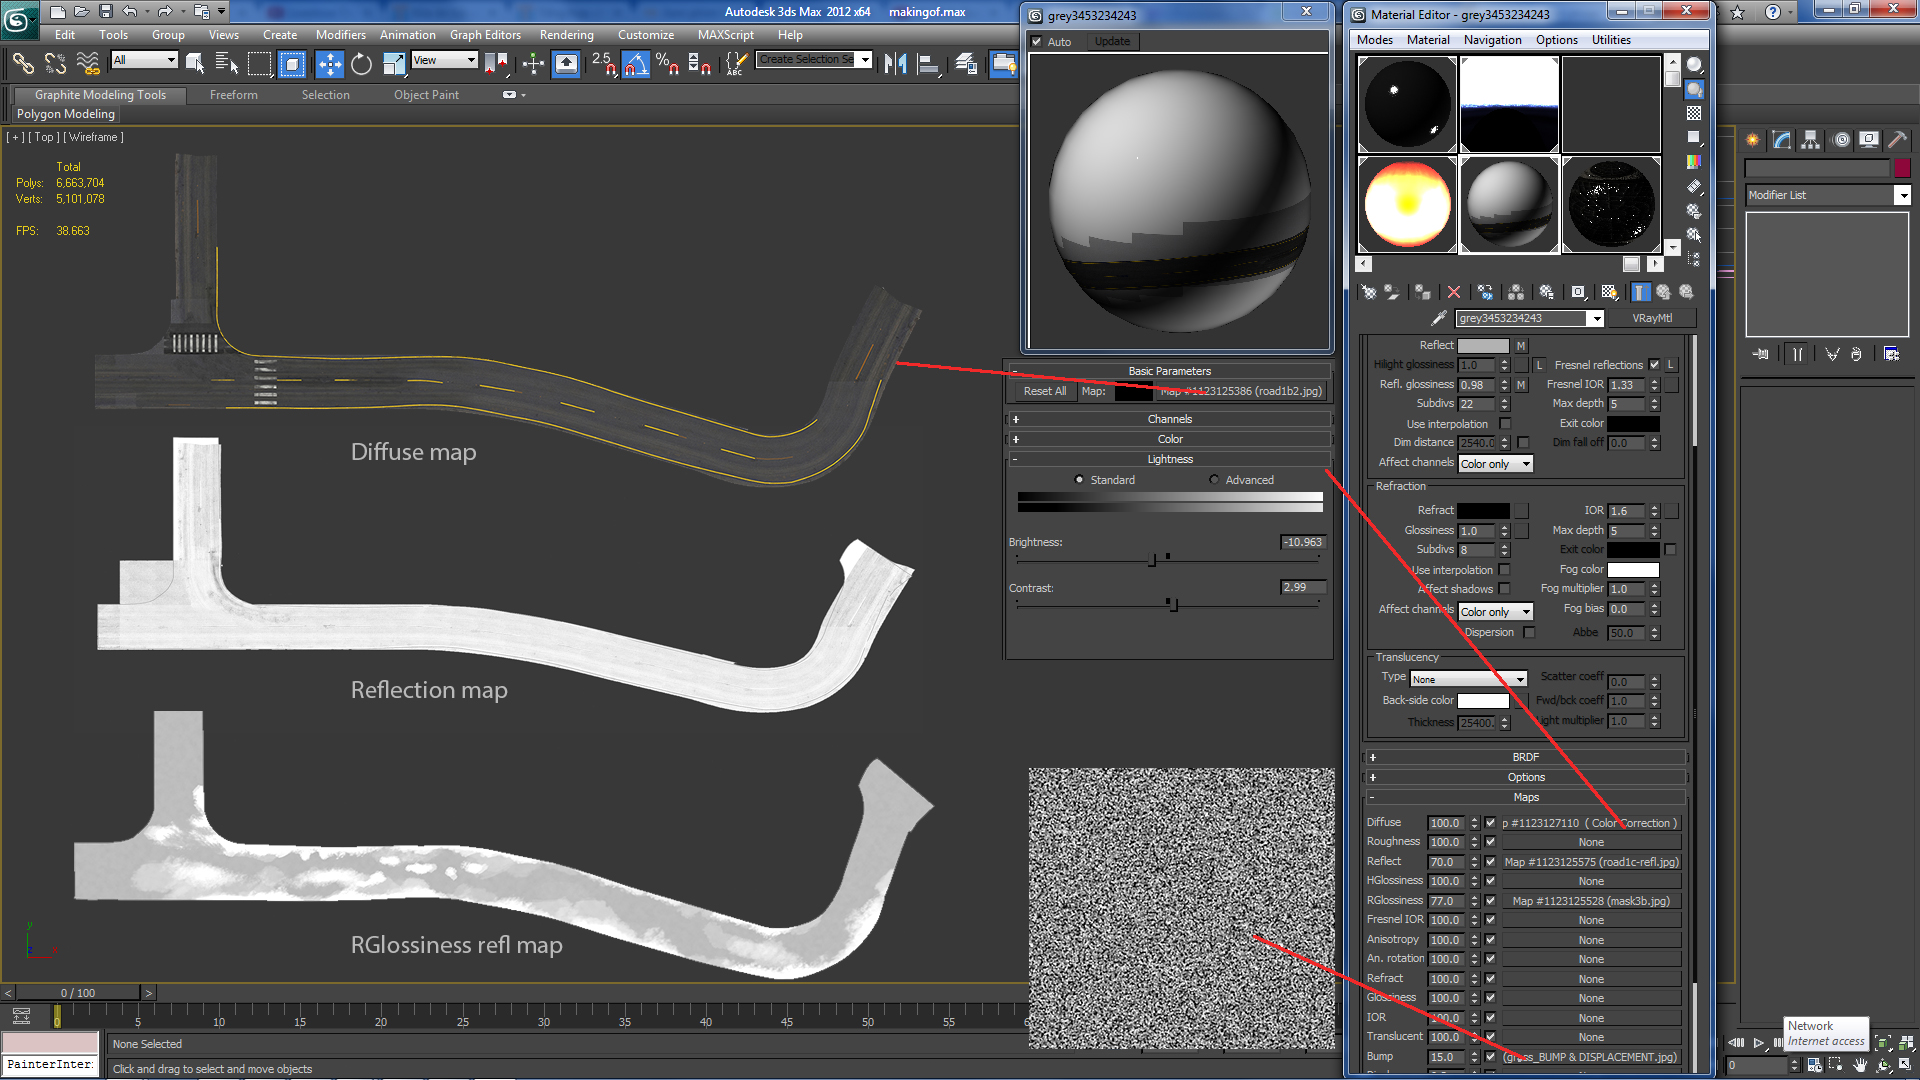
Then, for the road texture, I used unwrap UVW, render the road shape UVW template and used the road shape render for editing its texture in Photoshop.
Some maps I used for editing the road texture in PS were mainly taken from cgtextures as you can see below.

To give high detail for the road map when taking close shots, I set the road resolution in PS to about 24000 pixel, that was a bit much heavy when processing in Ps but the result in 3d was pretty good, and the outcome road map as you can see.
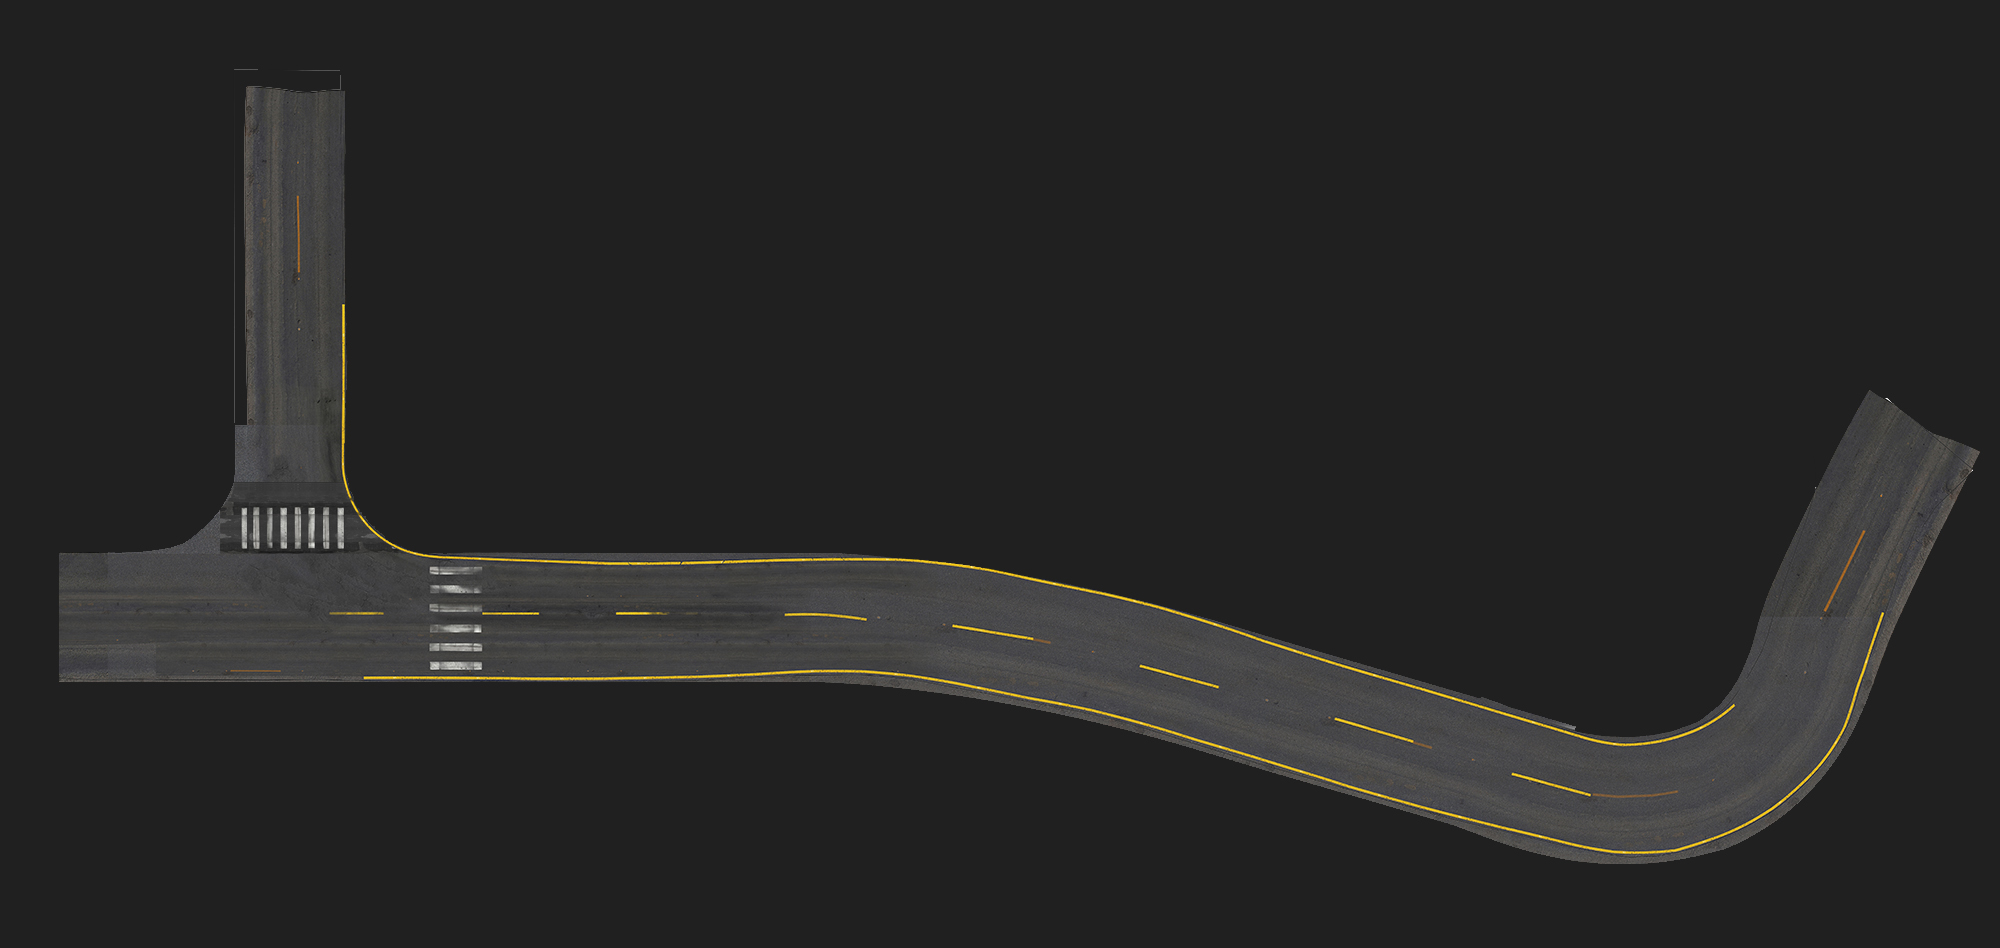
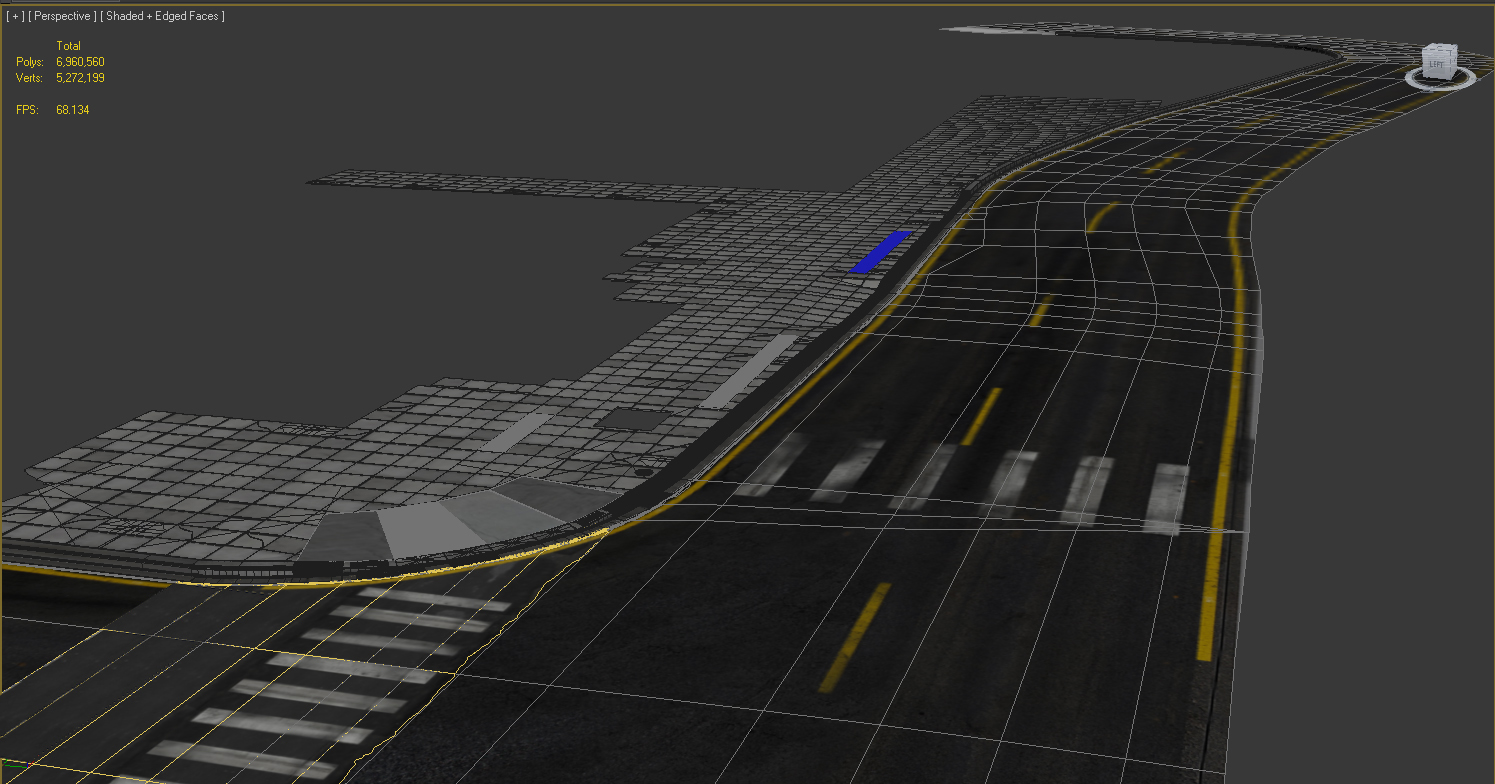
The next step is very simple, just apply the map to the road.
Then, when the modeling of building, sidewalk & kerb was done, i proceeded to surrounding stuff like trees, bicycle, car, traffic light... and put them into the scene, model of those can easily be found on some 3d webpages, some stuff i modeled myself.
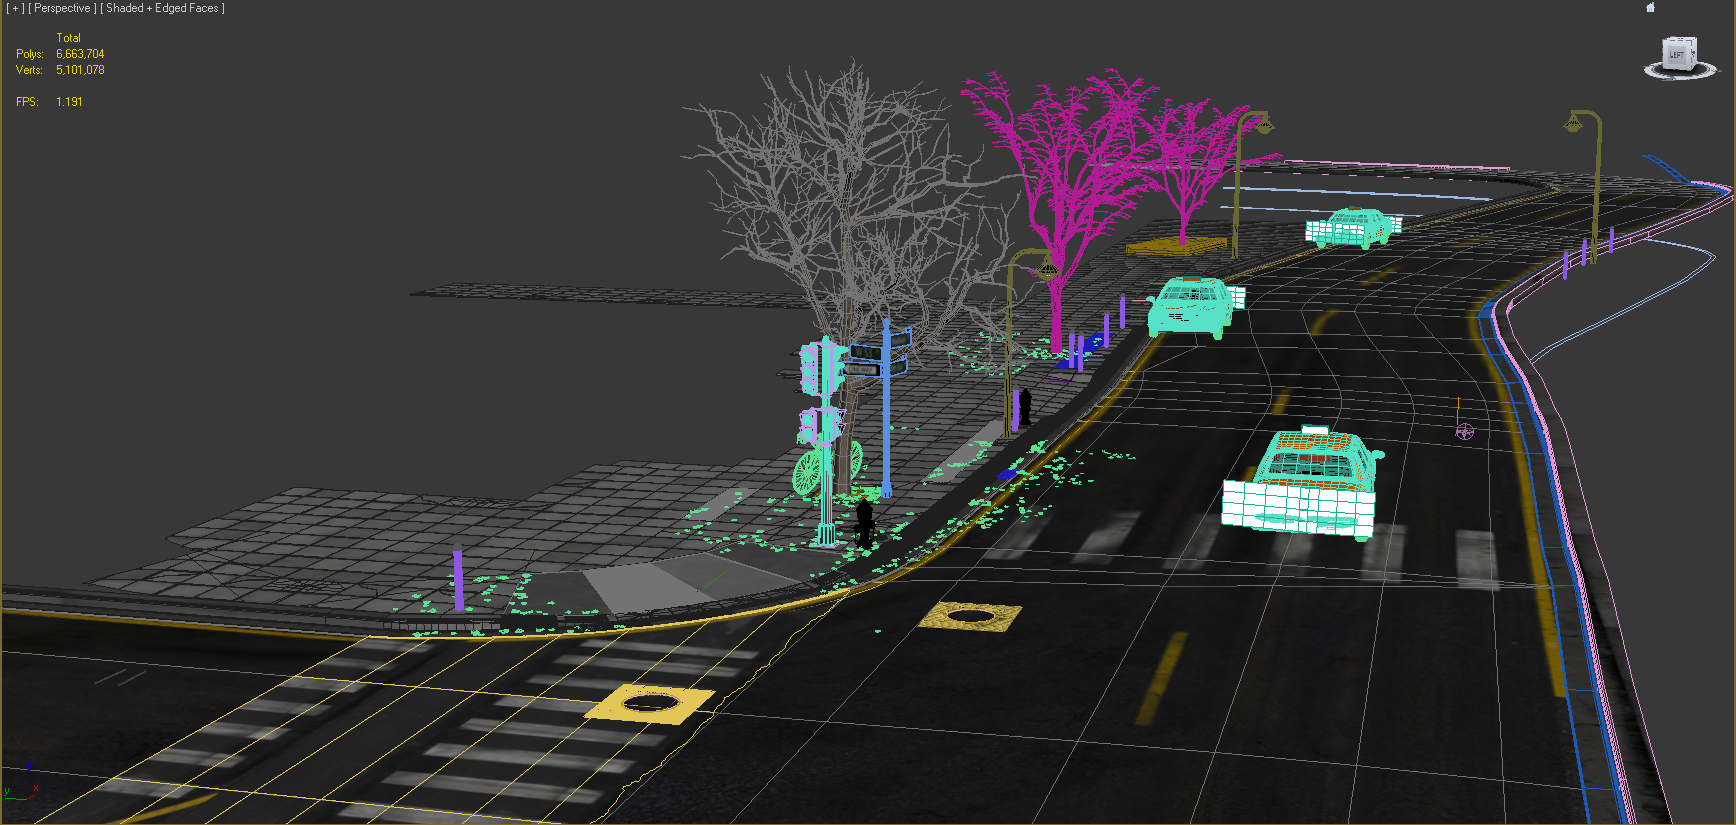
The smoke from manholes was done with particle spray attached to some wind helpers.

Materials:
Materials for this wet scene was a real challenge as everything in the scene was supposed to have a wet looking and it took much time for testing to get desired effects.
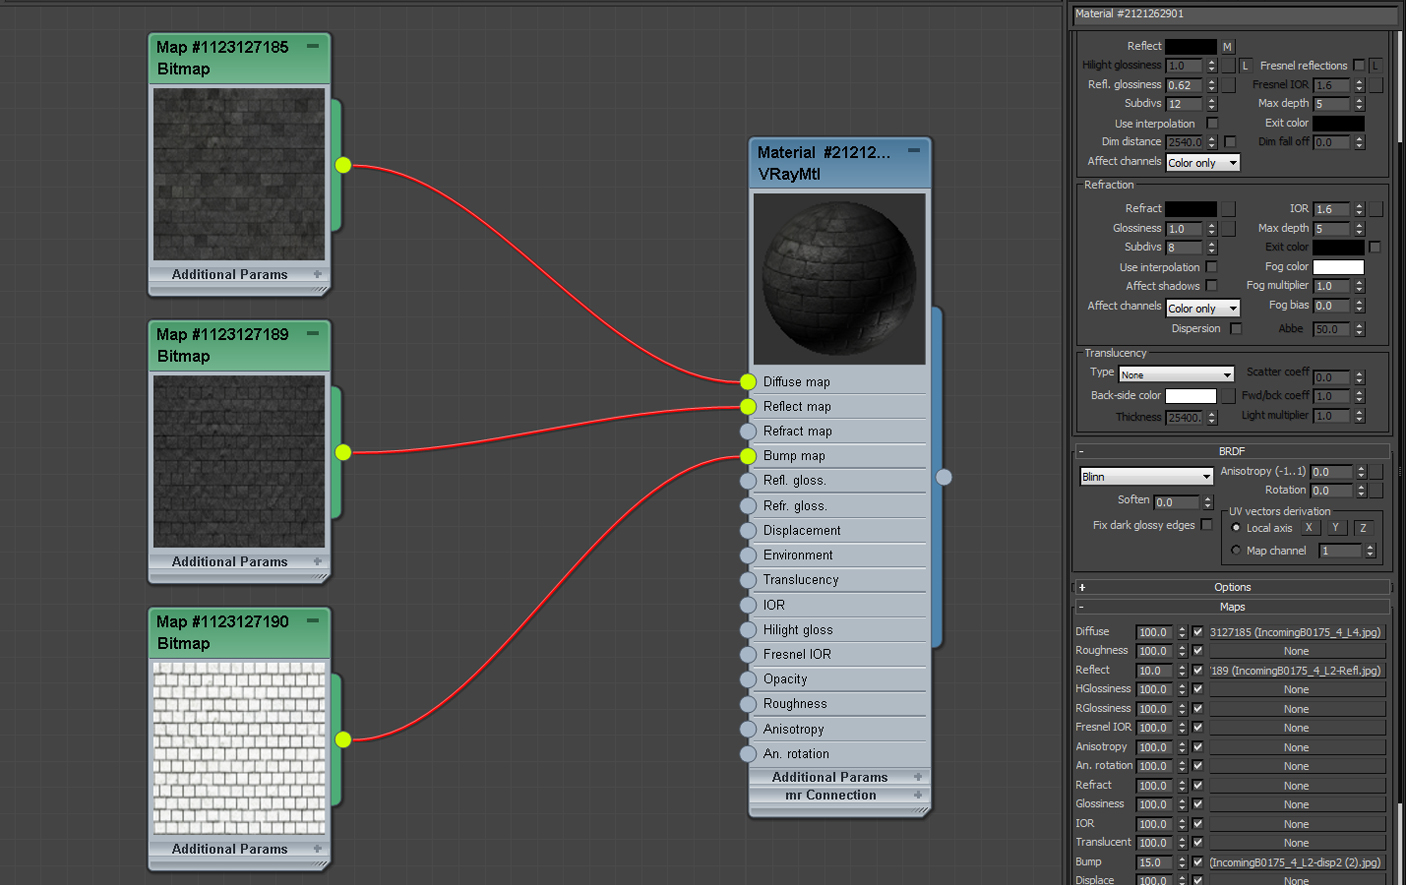
The building brick wall material:
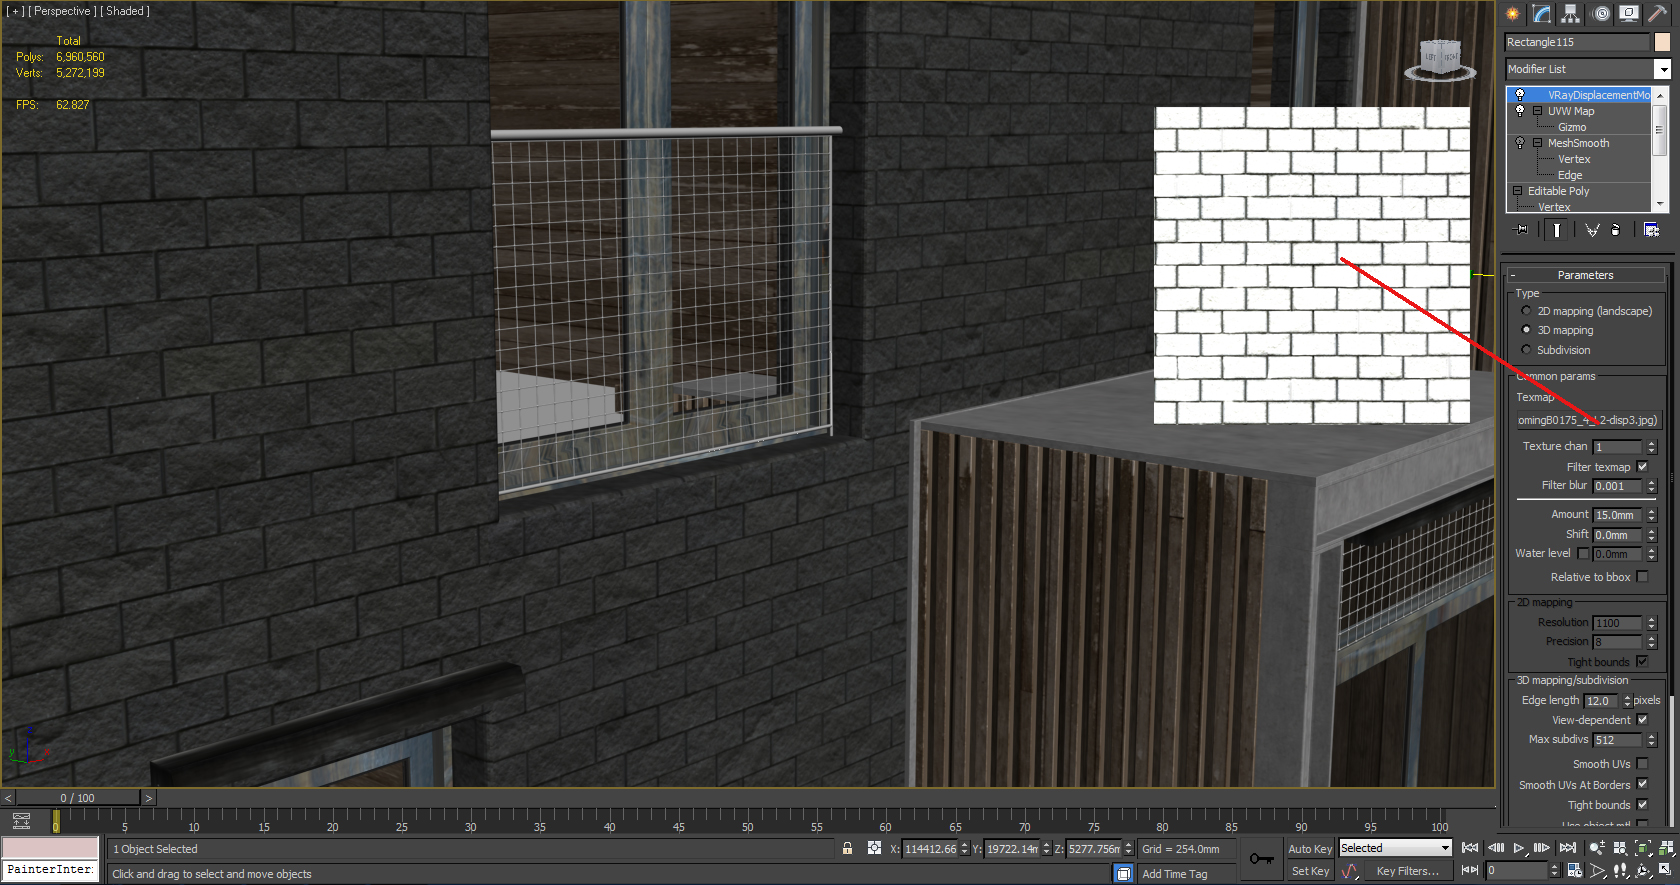
From a map I found on cgtexture, I edited diffuse map to an older & little dirty looking and created the displace & bump map in PS to get desired effect for the wall.
For displacement of the wall, I used Vray 3d displacement mod for better brick effect at wall corners and to avoid edge tearing.
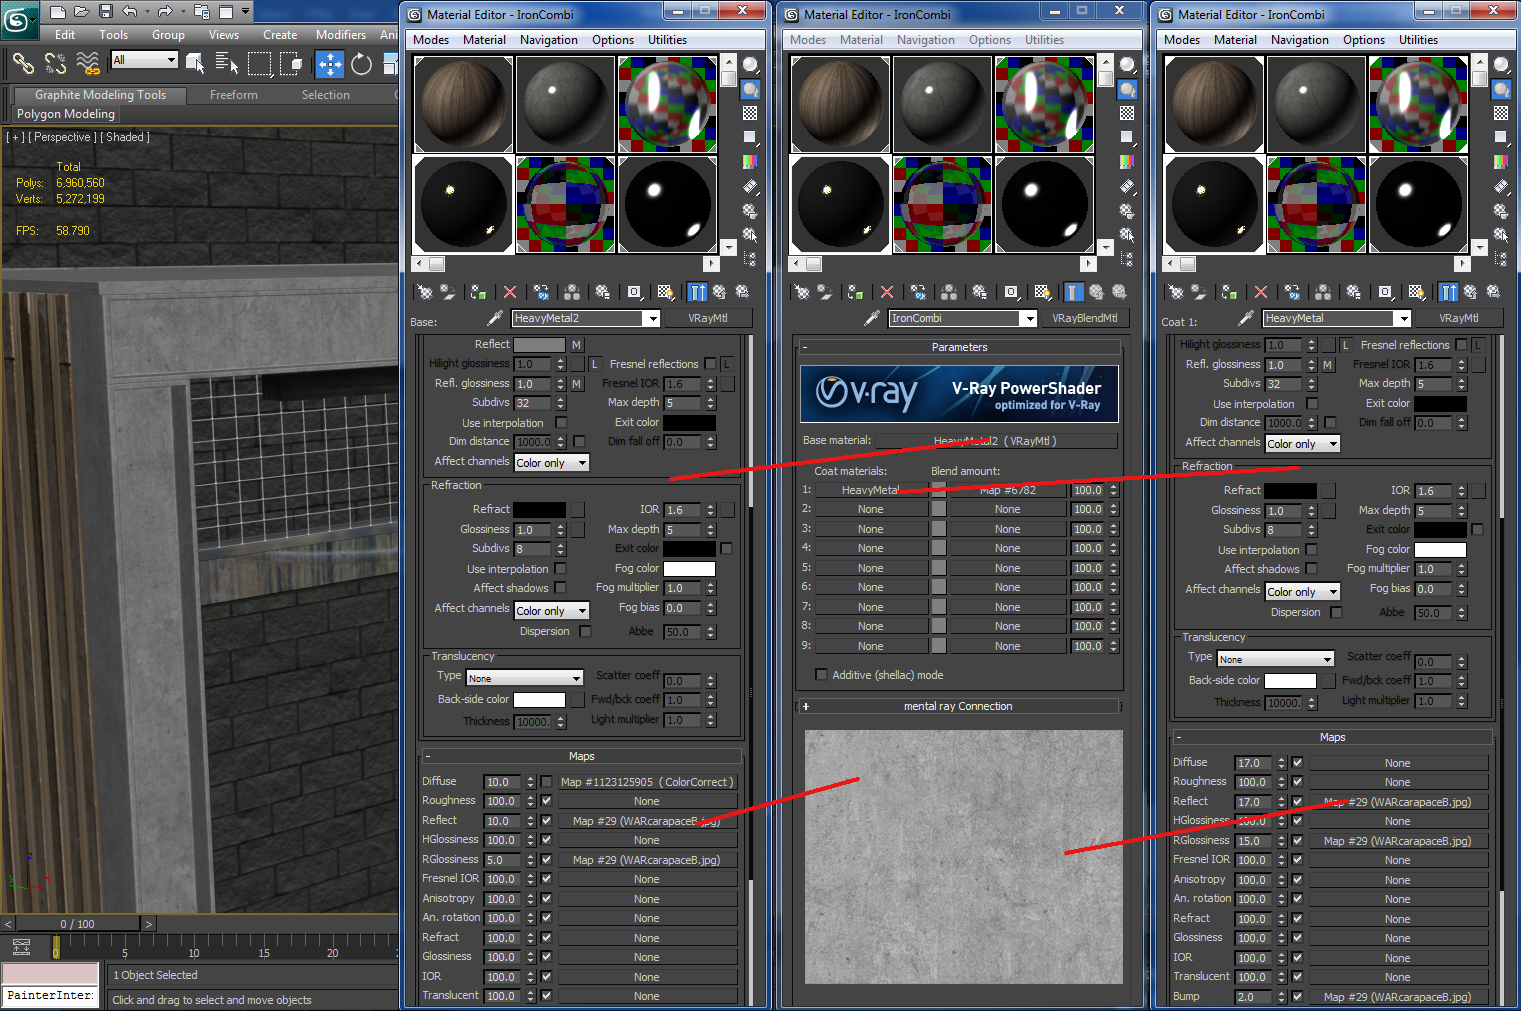
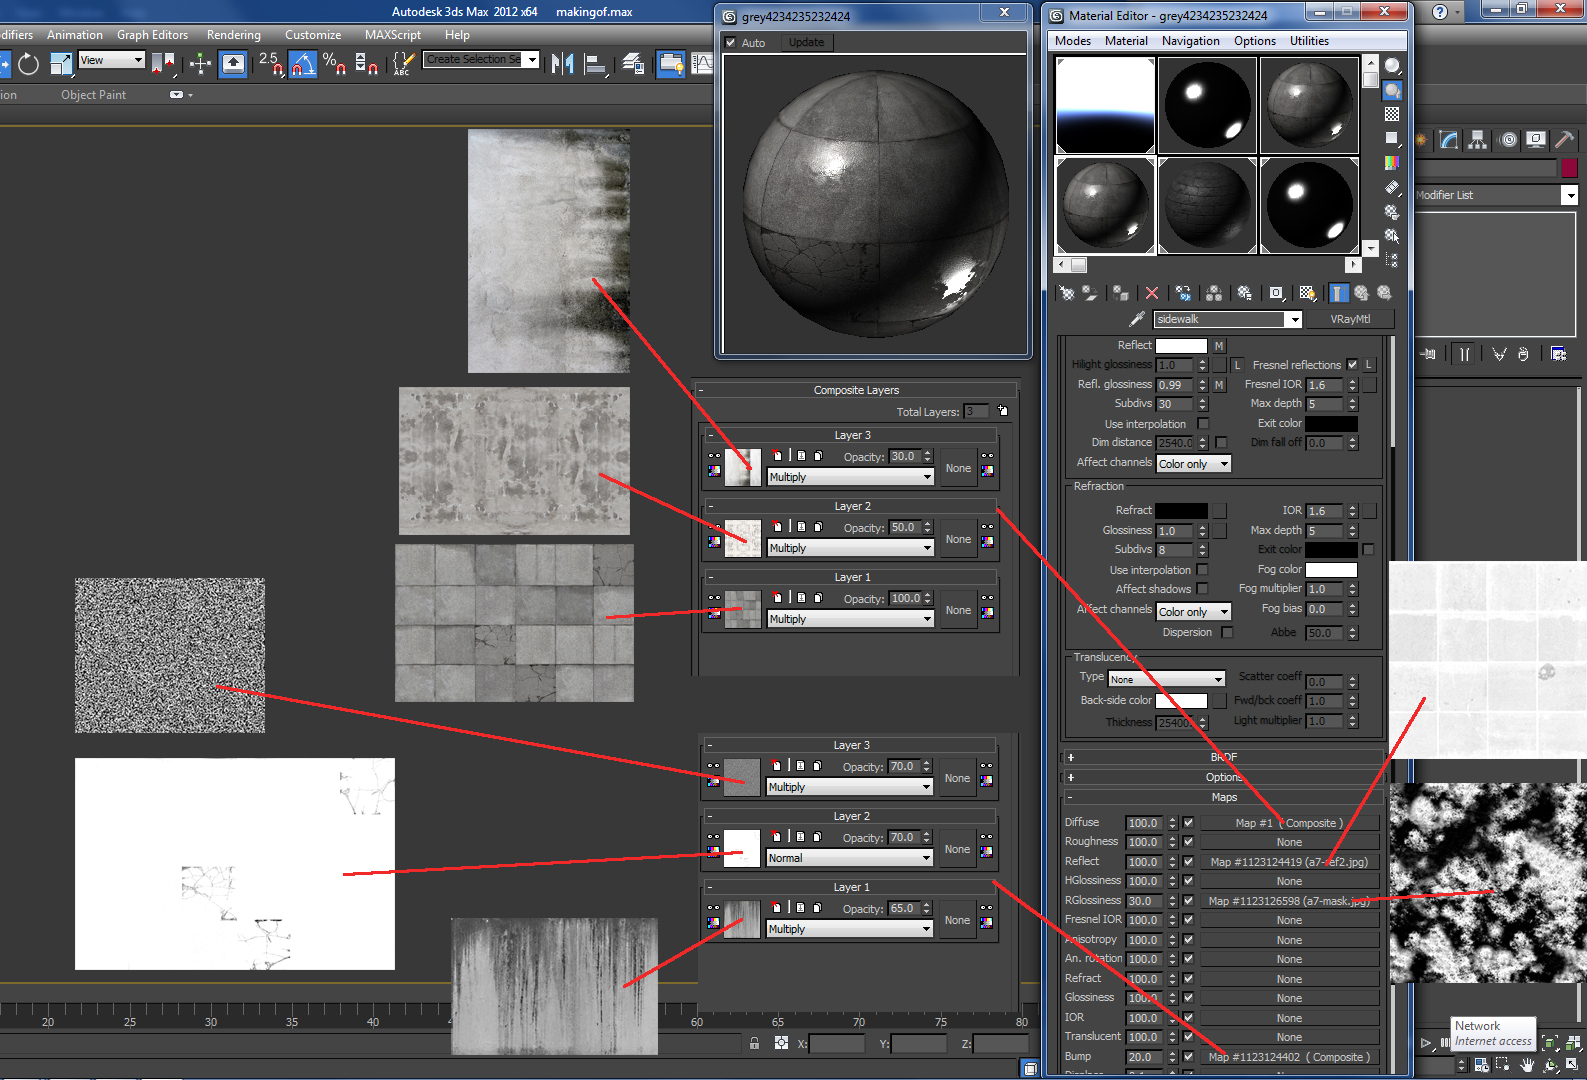
Sidewalk material: the wet effect material was simulated with setting as below:
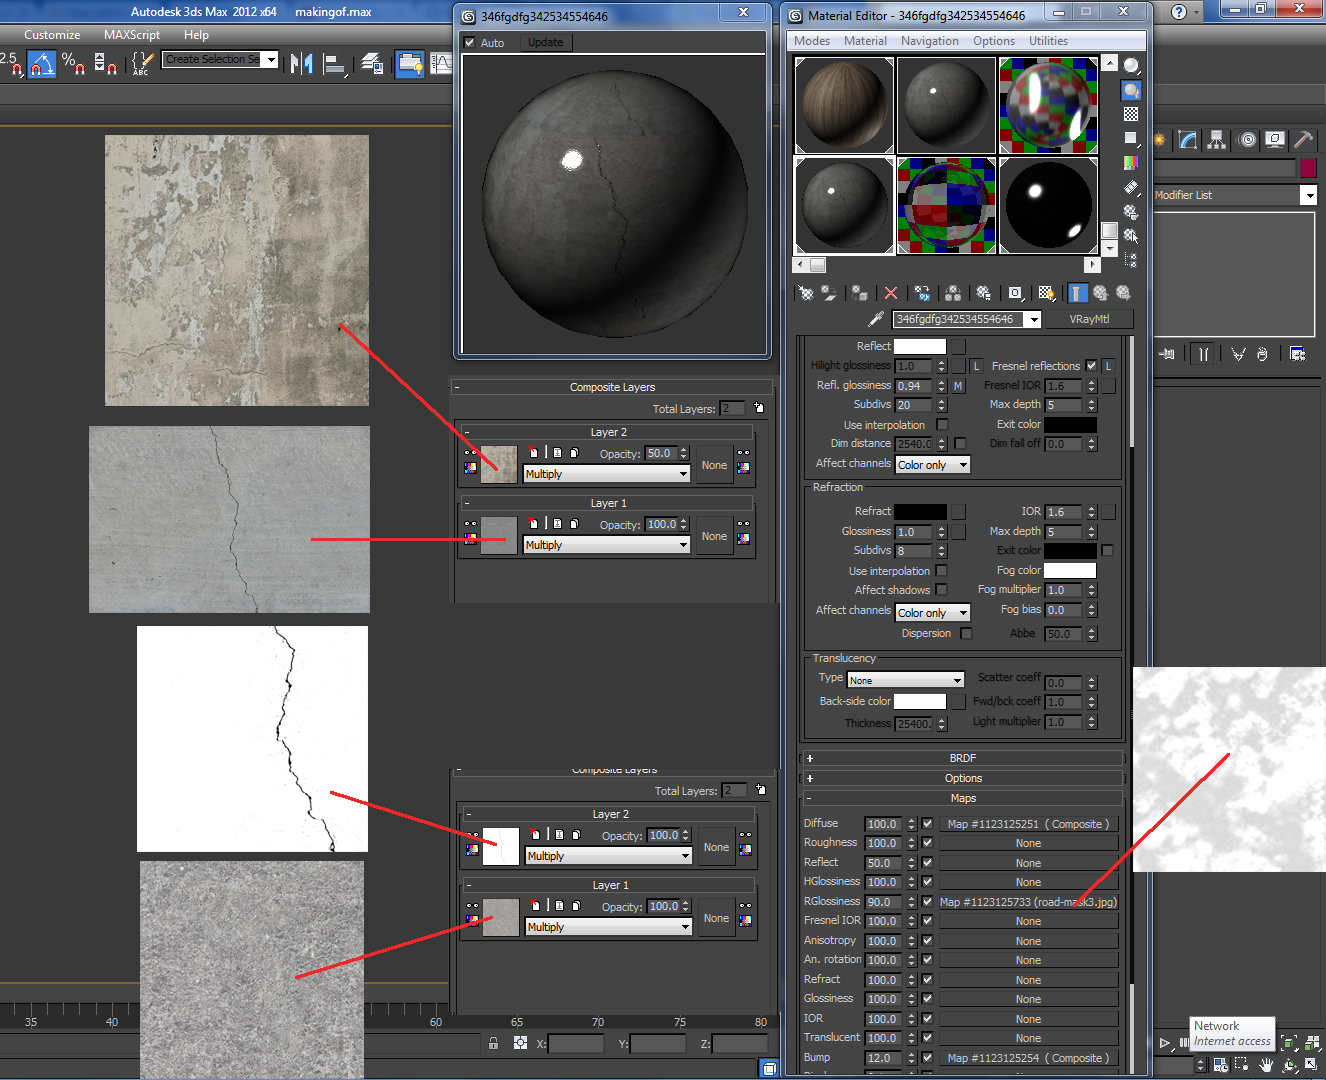
Curved corner sidewalk material:

The Road material: I created diffuse, reflection & Rglossiness Refl map in PS to achieve the wet road effect I desired as in image below:

Scene setup
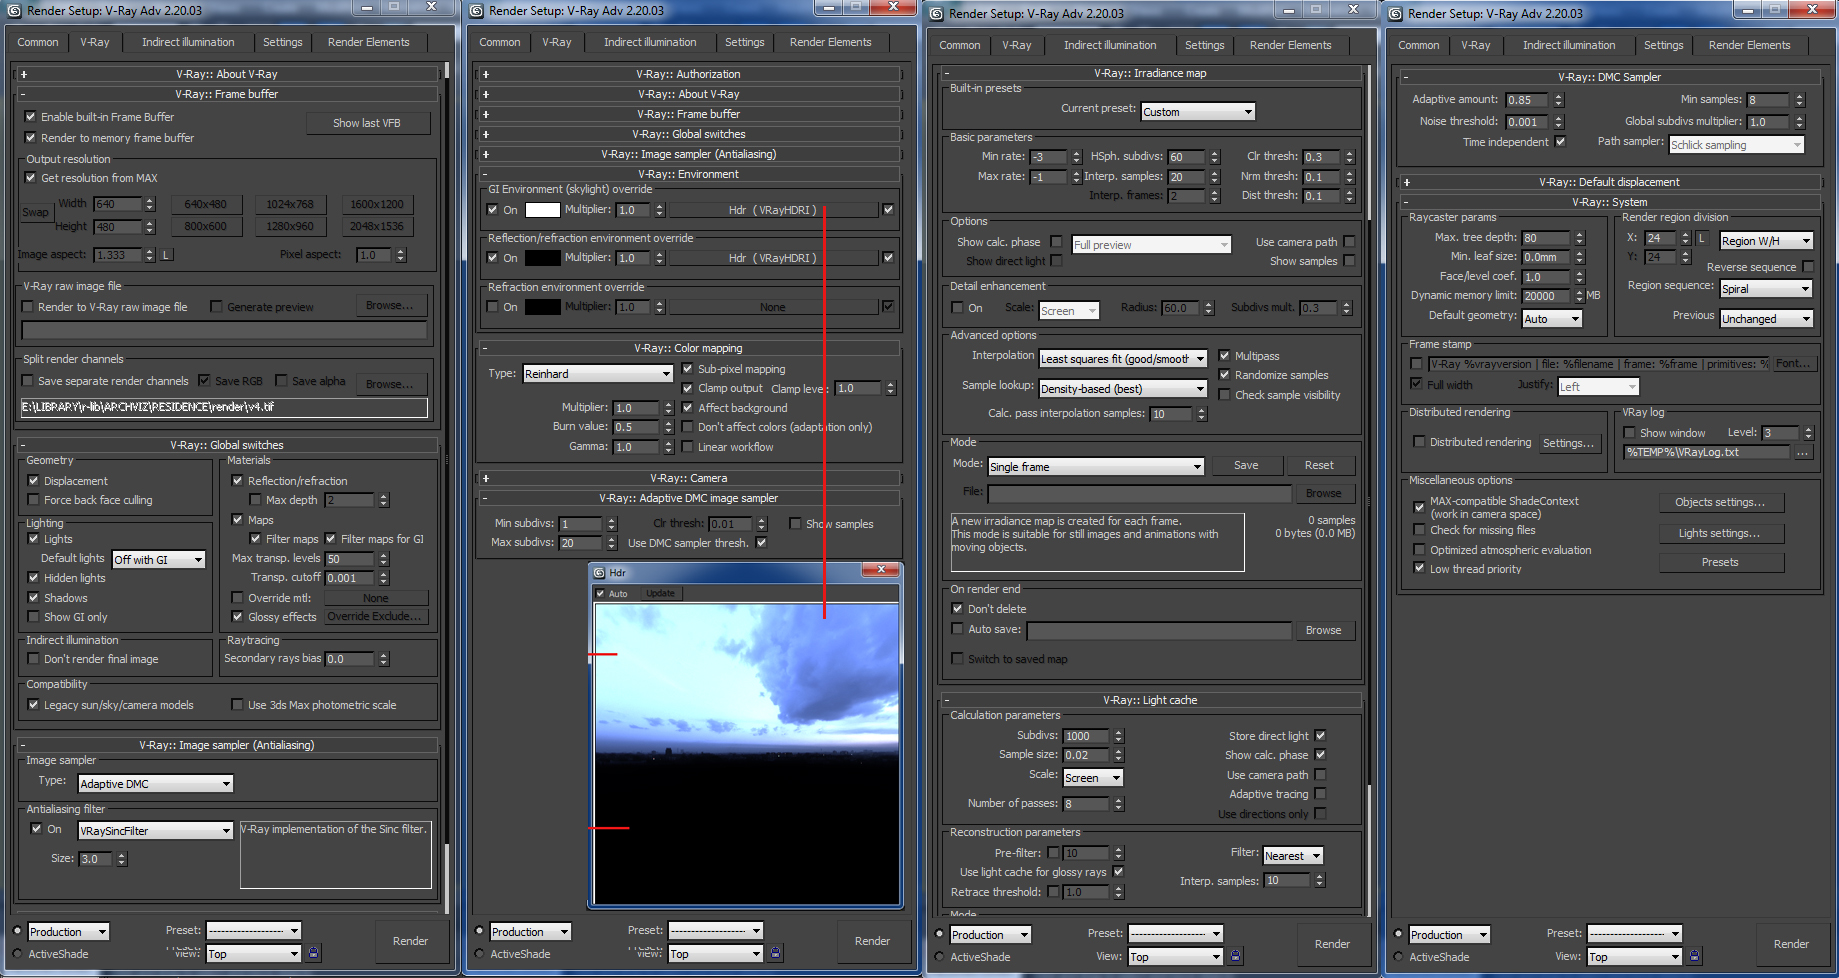
The scene lighting setup is pretty simple, I used a Hdr map in the set of Peter Guthrie (2003 Dusk Blue) plugged in to a vraydome light for environment light. I desaturated the Hdr map a little in PS to reduce the blue intensity since original map was quite blueish.
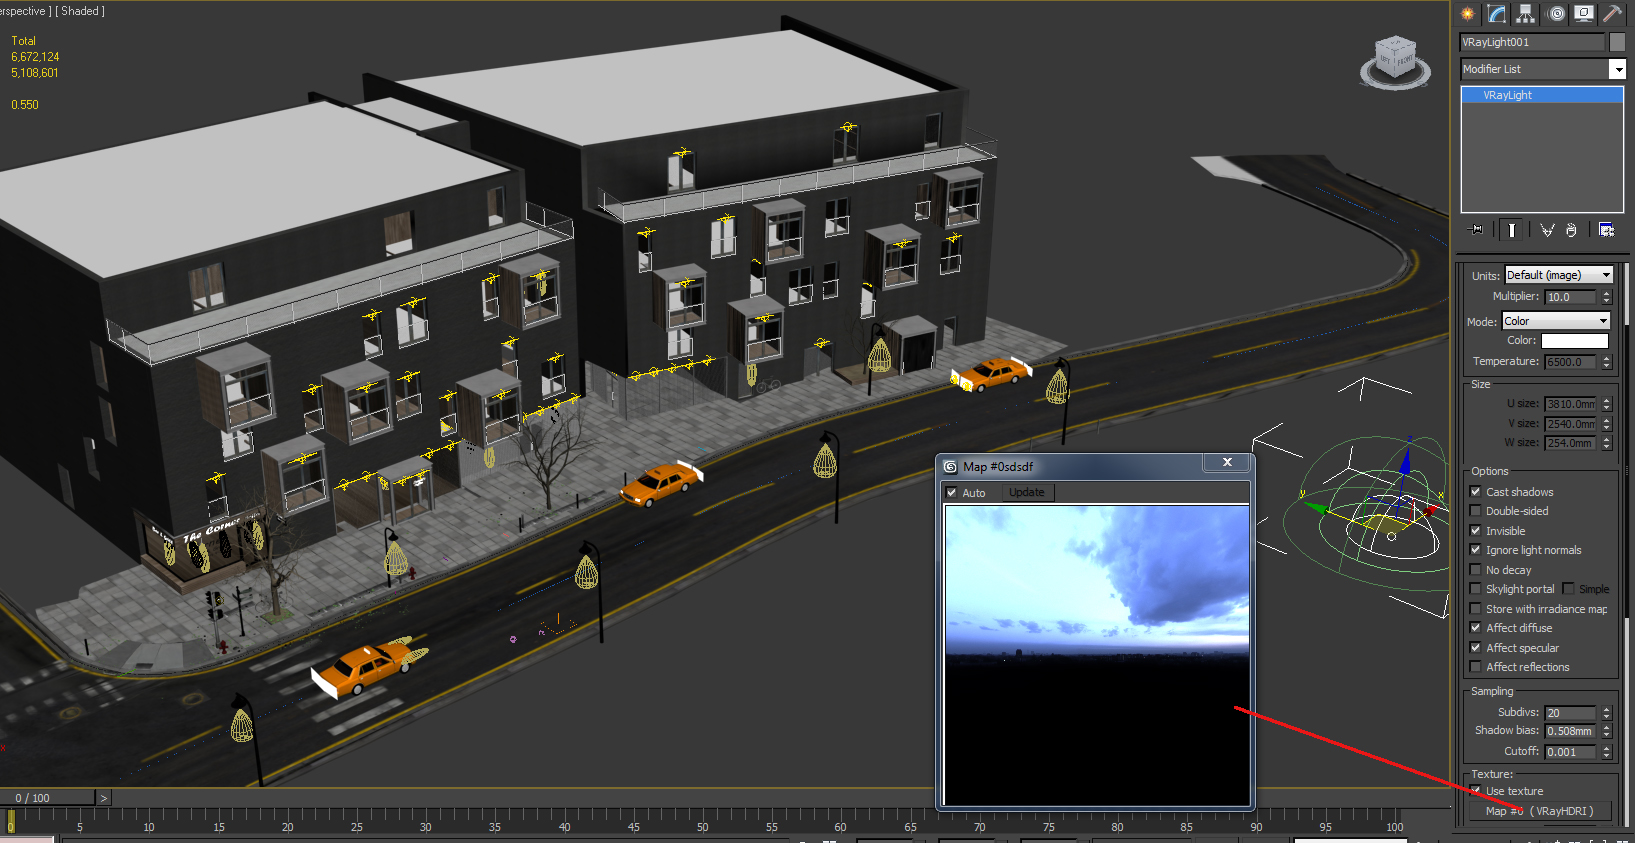
The rest of the lights are VrayLight for neon lights on the wall and photometric for indoor lights and street lights.
Render Settings
Post production
Raw render
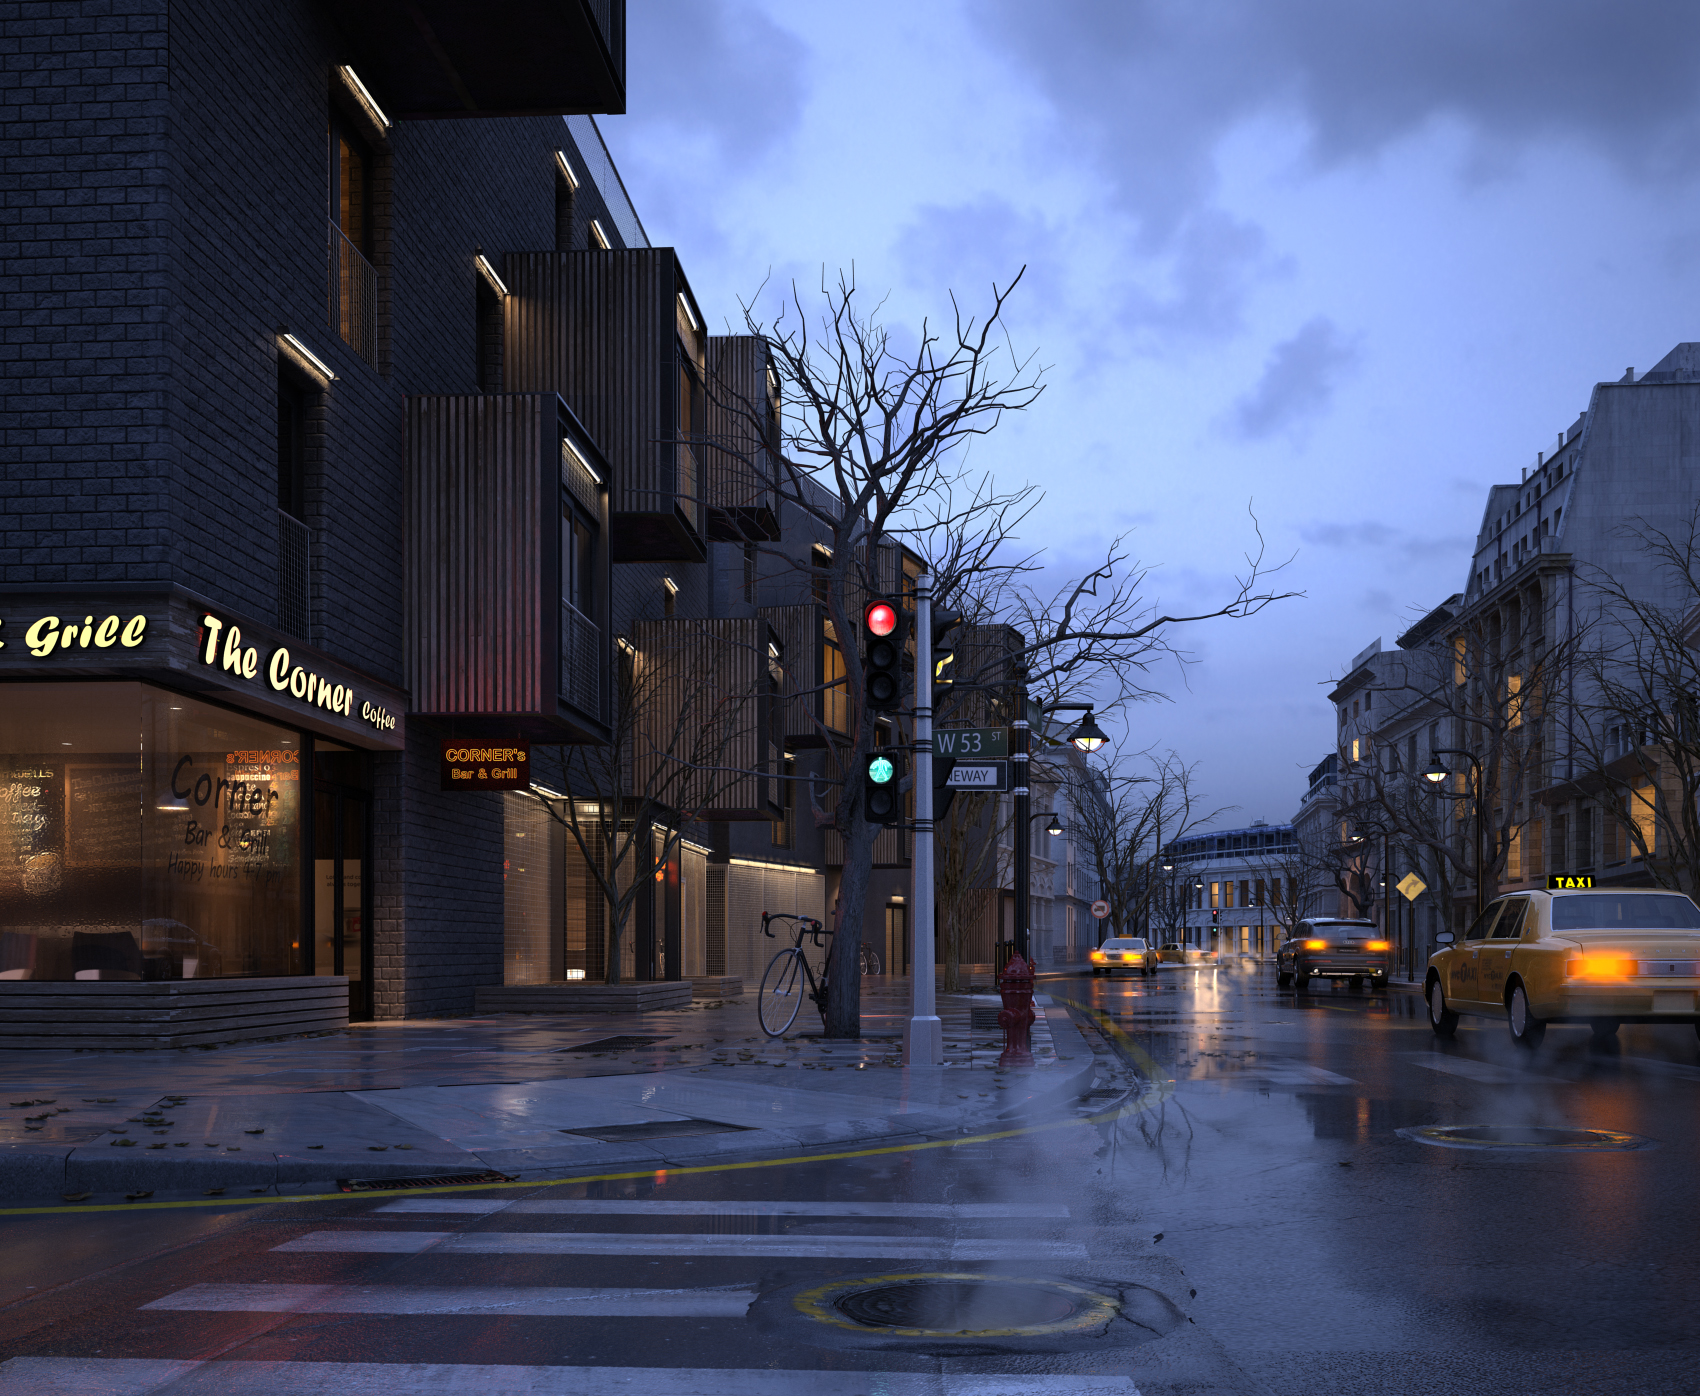
In Photoshop, I mainly used render passes to get desired effect:
- VrayReflection pass with a mask to add more reflection on desired objects & areas,
- VrayLighting pass with a mask to add more light intensity to some lighting areas,
- Vrayselfillumination pass to add more intensity to neon lights,
- Factory knoll light plugin was used to add flares to light spots.
Outcome image after processed with render passes.
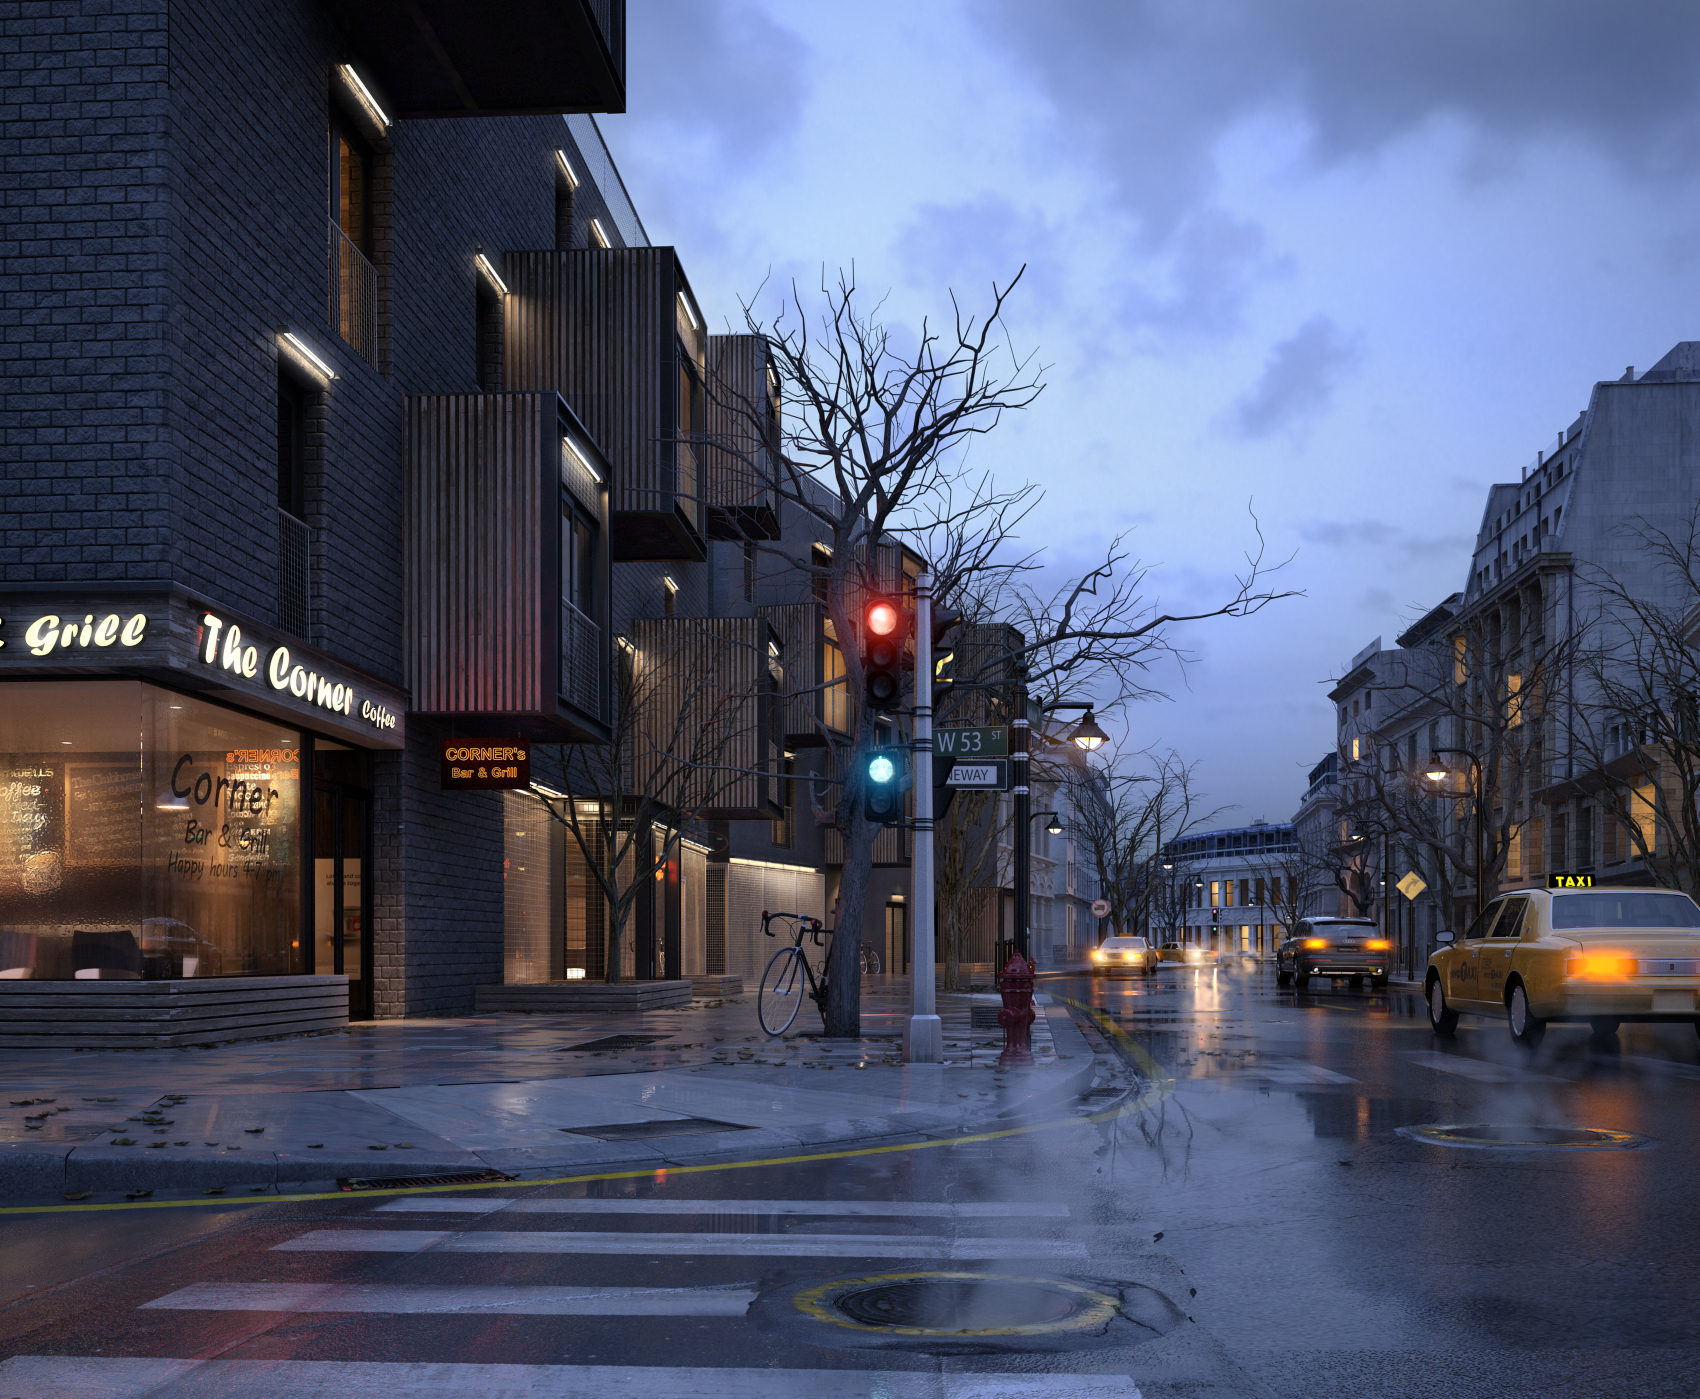
To add fog effect to image, I used inverted Vrayzdepth pass with linear dodge blending to above image, and the outcome image.
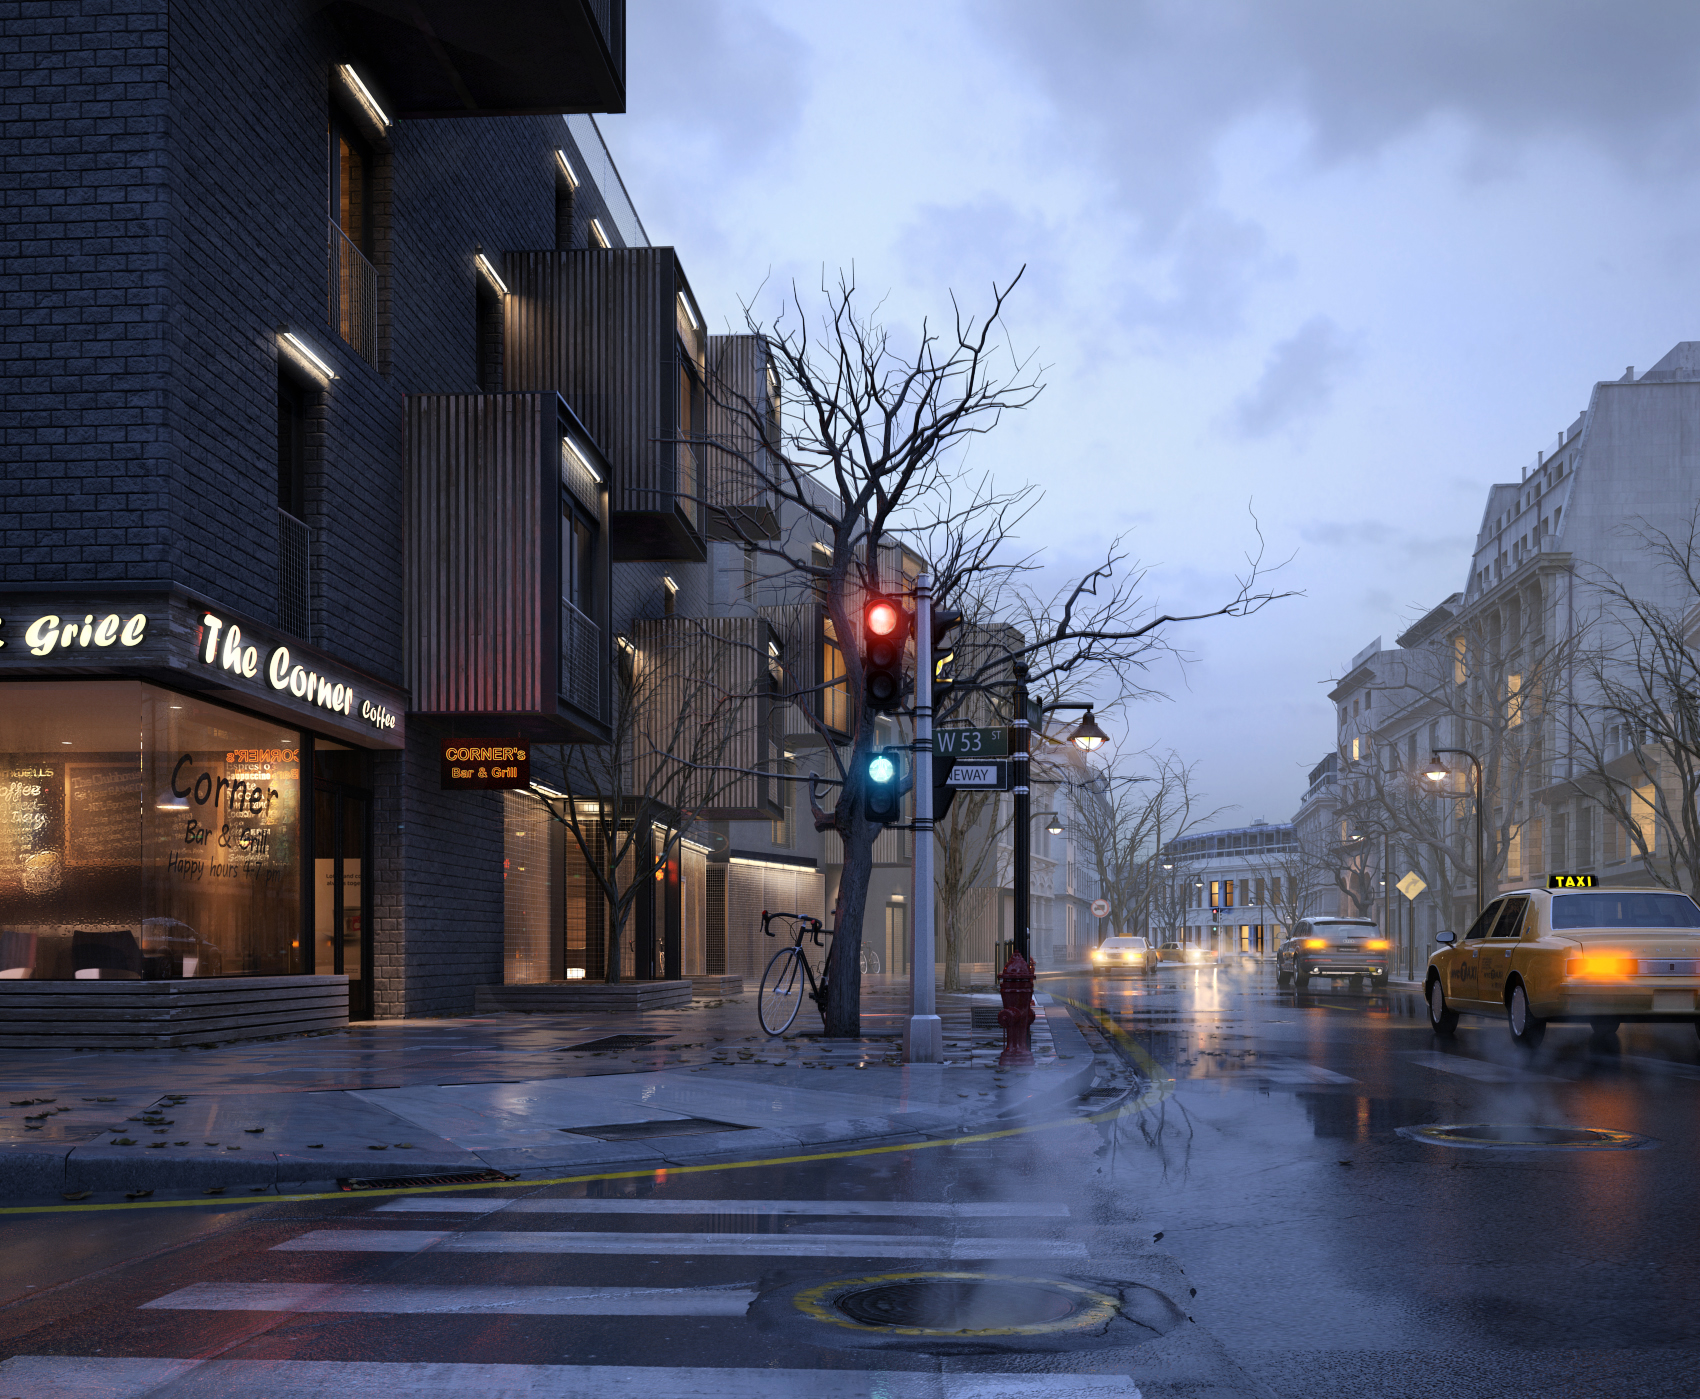
Finally, I used "Magic bullet Look" plugin to give better contrast, color boost, vignetty and a little bleach bypass to the image, and the final shot:

That's it!
I hope you find this making of enjoying and helpful in some ways, also you can find more of my works at my studio: www.atdesignviz.wix.com/atdesign
Thanks for reading!
My webpage - AT.design&viz Architectural design & 3D Visualization
Customer zone
Your special offers
Your orders
Edit account
Add project
Liked projects
View your artist profile










COMMENTS