How To Make Your CGI Walls More Realistic
Realistic walls with noise modifier.
Total: € 0
Continue Shopping
In accordance with the art. 13 section 1 and 2 of the European Parliament and Council Regulation 2016/679 of the 27th April, 2016 on the protection of natural persons, with regard to the processing of personal data and on the free movement of such data, and repealing Directive 95/46/EC (General Data Protection Regulation), hereafter RODO, I hereby inform that:
1. EVERMOTION S.C., 8 Przędzalniana Str., 15-688 Białystok, Poland is the Administrator of your Personal Data (APD)
2. Data Protection Inspector can be reached through e-mail: iod@evermotion.org
3. Your personal data are to be processed on the basis of art. 6 section 1 letter a, b and f of RODO in order to:
a) prepare, conclude and execute the agreement and for other purposes approved by you,
b) to execute the legitimate interest like marketing of products and the agreement, claim assertion or defence against claims resulting from the law regulations.
4. Entities entitled to the reception of your personal data may be the authorised public bodies; mail providers; providers of the services covered by the agreement; responsible for debt recovery, keeping the archives, document utilization, legal consulting, technical services, IT services and accountancy.
5. Your personal data shall not be transferred to the third country, nor to the international bodies.
6. Your personal data shall be processed within the period of the agreement and upon your additional consent until you withdraw it. APD shall keep the data for the period of any civil law claim execution connected with the agreement.
7. You have the right to demand an access to your personal data, to correct or to delete the data if there is no other basis for the processing or any other purpose of such processing or to limit the processing of the data, to transfer the data to another administrator and to raise objections to the further data processing if there is no legal basis for further processing and to withdraw any previous consent.
8. You provide the personal data voluntarily, however they are necessary to conclude the agreement. The refusal of providing such data may result in the refusal of the agreement conclusion.
9. You have the right to lodge a complaint to the Personal Data Protection Office when in your opinion the data processing violates the regulations of General Data Protection Regulation of the 27 April, 2016 (RODO).
10. Your data will be automatically processed, including the form of profiling.
11. You are obligated to forward above mentioned information to your representative, especially if you appointed this person in the agreement as the contact person or as the representative for the agreement execution.


At first we have to find reference image. In this case I needed to model object I have had physically in my hands, so using scanner was an obvious choice. After few minutes image was ready. It was too bright to use it, so I had to darken it a little bit in photoshop to get better contrast. Here is a final result: download B-9.jpg image. So after this introduction it is time to open max.
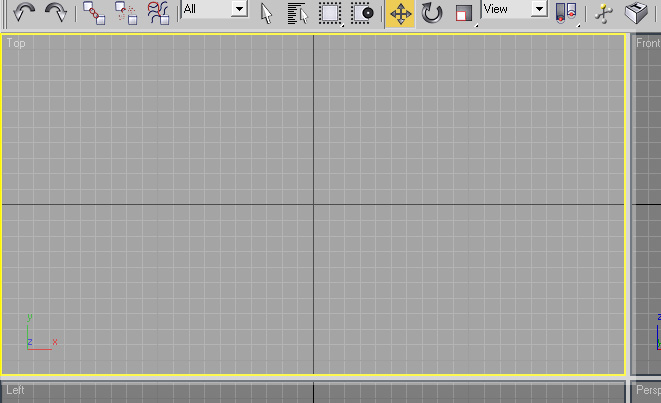
I will be using Generic units, so I prefer you use it as well to avoid mistakes. Just roll out Customize from toolbar, click on Units Setup and check Generic Units. We get to the Top view, as we have view from the top of element (you can use either of viewports but it will be harder to operate camera in perspective then)
Pressing Alt + B opens window called Viewport Background . If you think we will choose file now, you are right. Press Files... and choose B-9.jpg in this case. Then tick Match Bitmap, Display Background, Lock Zoom/Pan - it will allow us to use image as a blueprint.
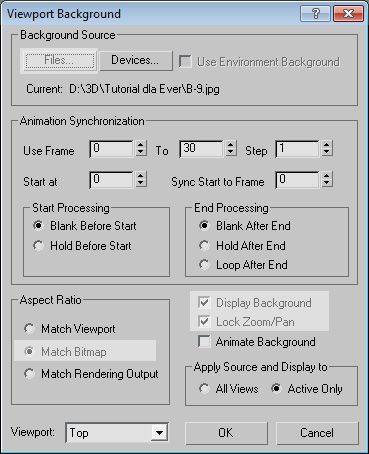
Press OK. It should look like this:
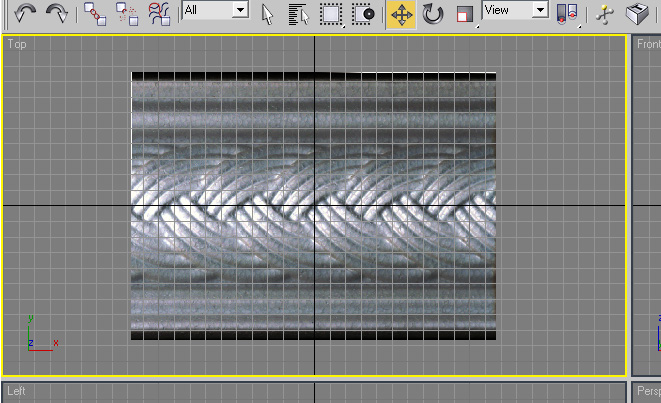
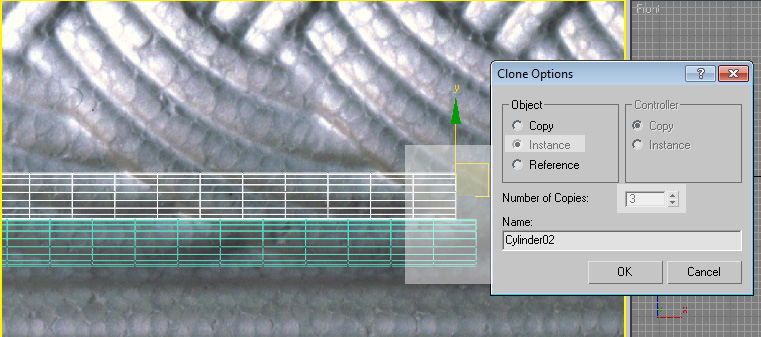
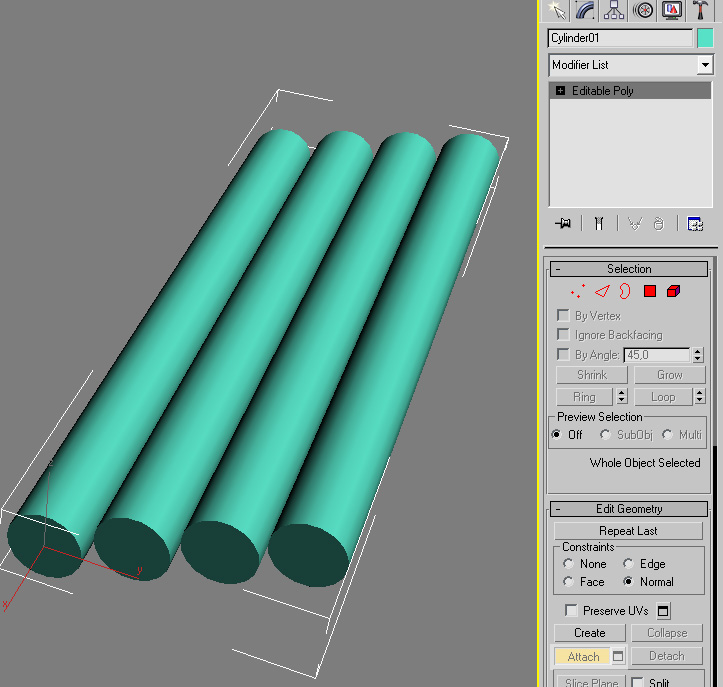
As you can see in the viewport in this situation grid is rather annoying, so I prefer turning it off (just press G as the Top view selected). Now we get into modeling. First step is to create Cylinder with parameters - radius 7.5 and height 164 with eg. 12 height segments. Place it like shown on the image below. Clone it 3 times. Just hold Shift and move it like shown in picture. It is important to have Gizmo correctly in this place (just create Cylinder from Left view).
Now bending it. Convert one Cylinder to Editable Poly and then use Attach button to attach all these objects in one.
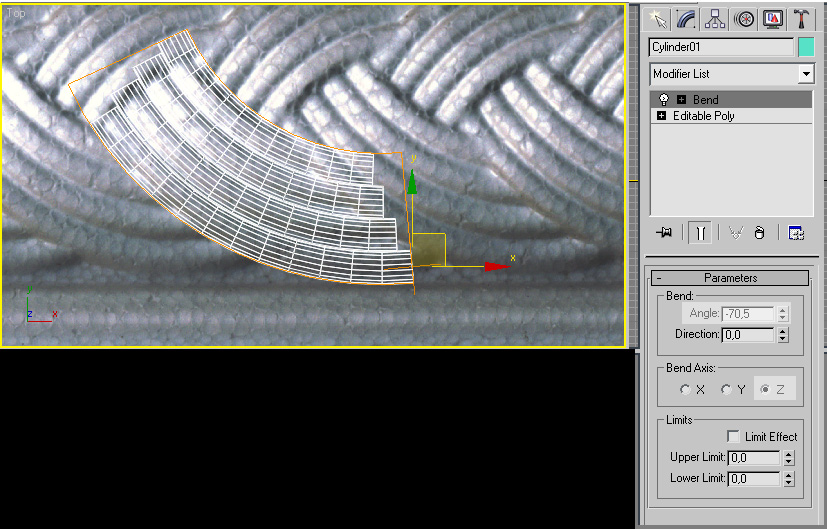
We have them attached. It is time to add Bend modifier from Modifier List. Angle parameter allows us to control value of bending it. As you can see -70.5 does its job. It will disturb somehow our placement, so move it again into correct position (even turn it a little bit to match the reference).
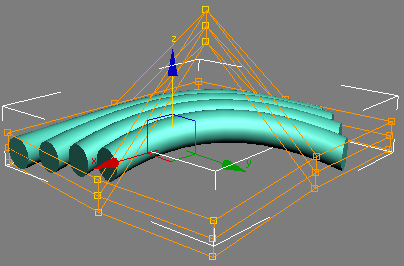
Now, also from Modifier List, choose FDD 3x3x3. Roll it out and click on Control Points. Select middle points and put it higher than others. After doing it, select the others two on the one edge, and put it lower, like on the screenshot. It is necessary to avoid bad collisions in future.
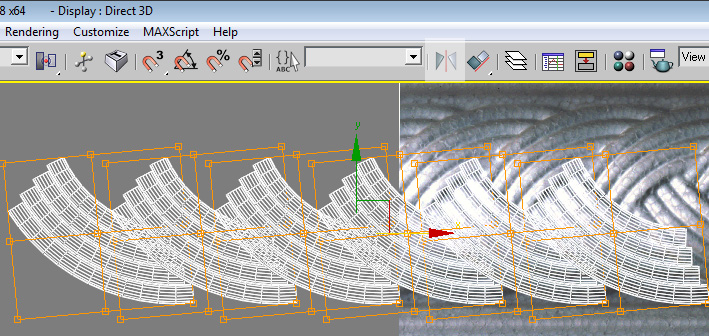
We are ready to clone our model. Like before, hold shift and move it like on the picture. Now we just clone it 5 times just for training (if you want you can clone it 1Â000Â000 times - amount does not matters). Remember to be even though a little bit precise to match the reference. Check Instance - if you would like to change shape or bending value, changing it just in one random element will cause changes in every object.
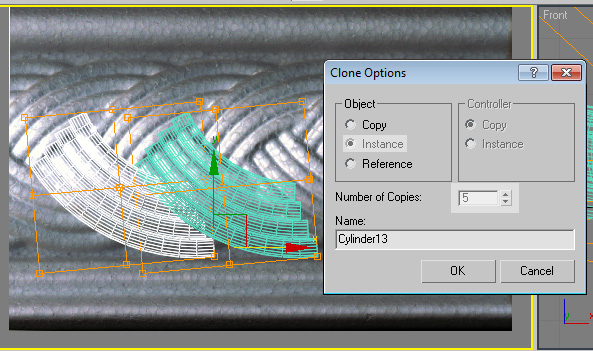
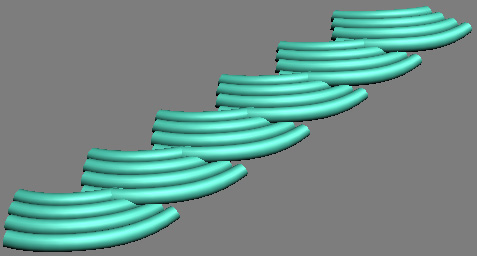
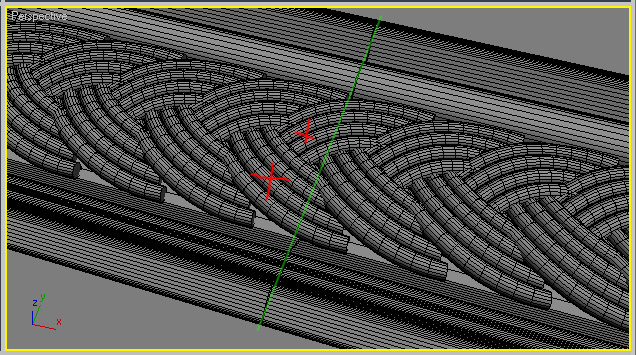
And as a result of our work, we should get something similar to this:
We have done just one side. It is time to do the second one - very easy and fast method. Select all of the elements and click on the Mirror icon on the command panel.
New windows appeard - just make everything look like on the screenshot below.
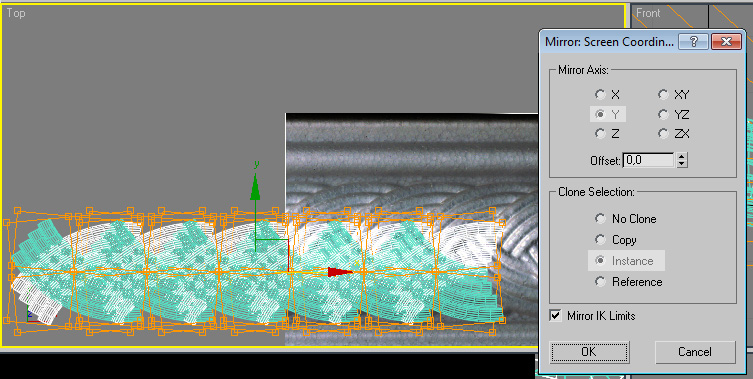
We get a little bit confused element, so it is time to put it in some order. Just move it to match the reference. This is what we should get after it:
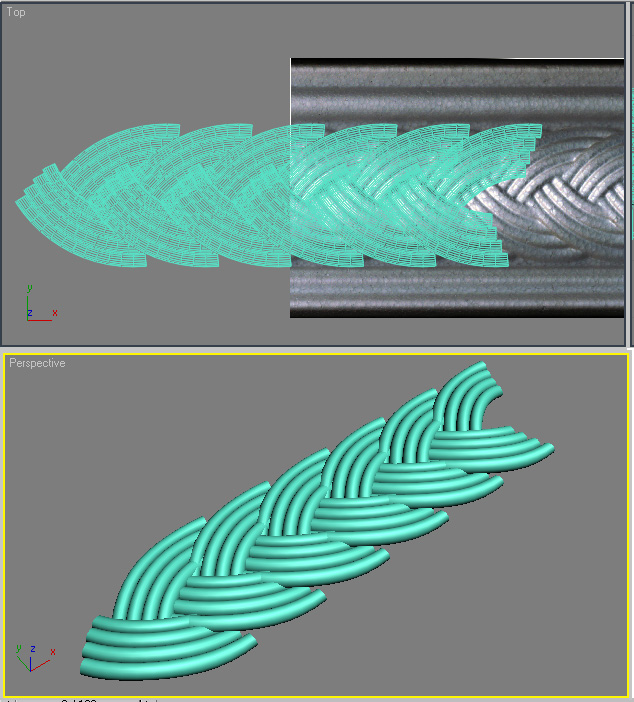
Main thing is finished. Now we will model something to put in on. I have chosen rather simple shape. Just use Line from Splines section. And try to achive for example this shape:
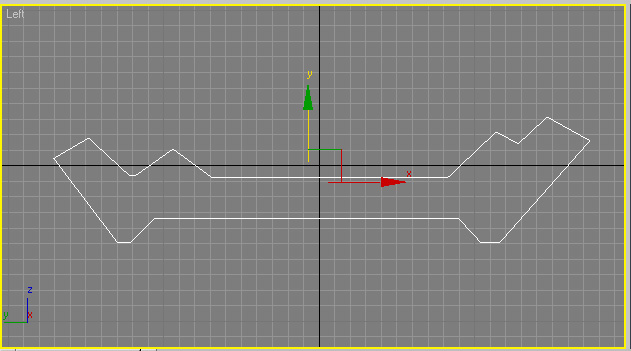
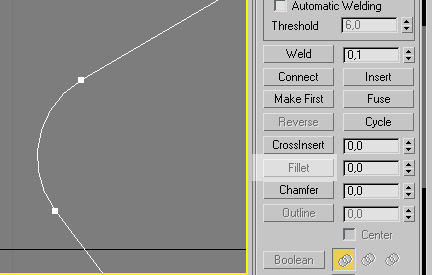
I use mostly Fillet to get little bends. Just select vertex where you would like to have smooth corner, click on Fillet and insert some value (the higher the smoother corner is) or just simply move arrow pointer on vertex and slide it with left mouse button pressed.
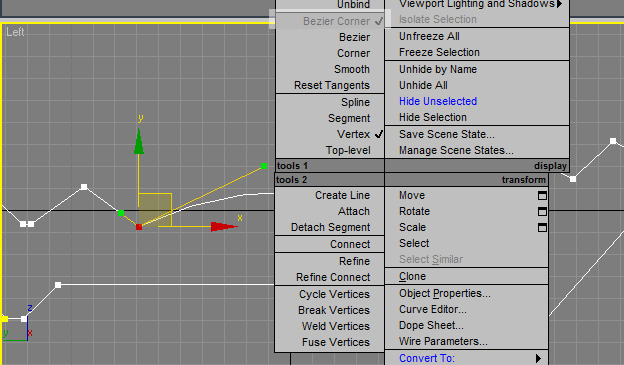
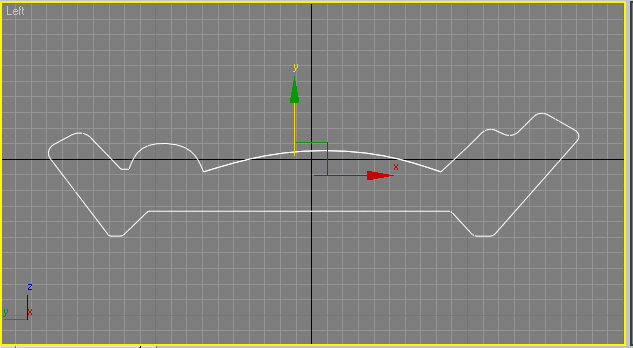
Bigger bends are easier to control with bezier and bezier corner.
After some tweakings with line, we should end up with something similar to this:
Now we have just a spline so it is time to make it real object. It is very simple - just add Extrude modifier from list and enter value as big as you like. It just controls length of element. So we are done with it. It is time to make it fully tillable.
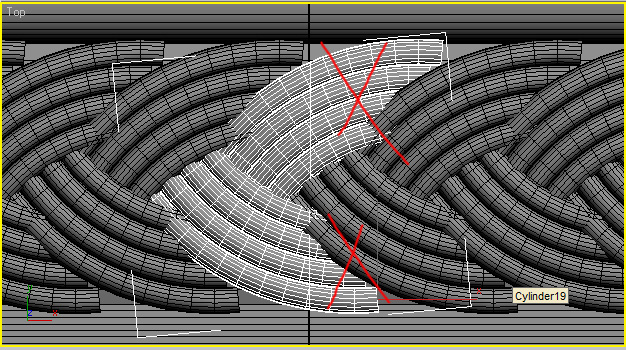
Select all elements in the scene, clone and move it on the right to match excatly the ends of last element. Convert last 2 elements (with red crosses on the screenshot) to editable poly and attach them to themselves. We will use Quick slice (Edit geometry) to cut it fast and without pain. Maximaze the Top view and cut it somewhere where the line on the picture appears (it is end of last element we have created with line). Try to be precise to cut it perpendicular as it is possible.
It will add new vertixes along the cut line.
Now delete everything what is on the right side of the cut (crossed with red lines). Delete also elements from the right - they were there just to help us with matching correct position.
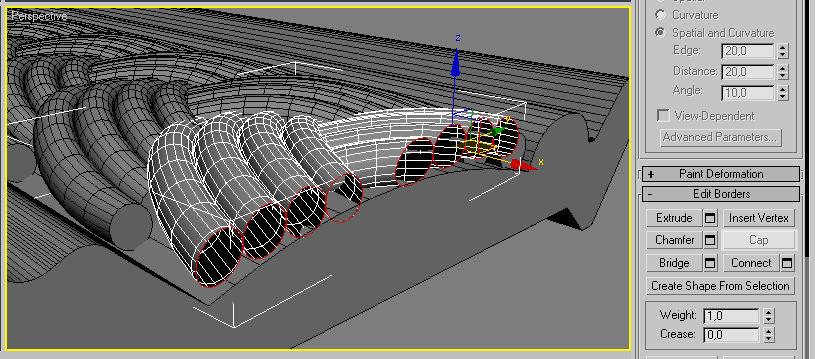
We ended up with open cylinders, so we have to close them. Use Border to select edges and then click on Cap. It will fill the ends.
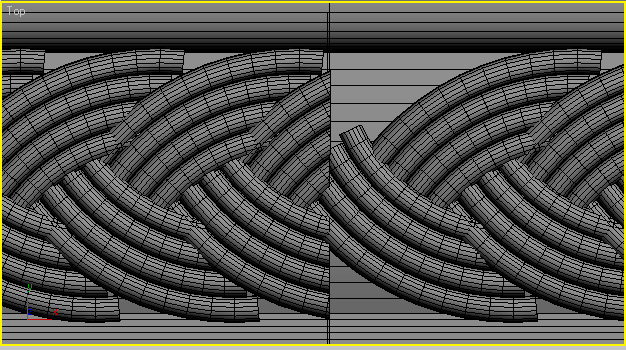
Done on the one side and for the other side is 99% the same. Copy, cut and cap. This is what we should get:
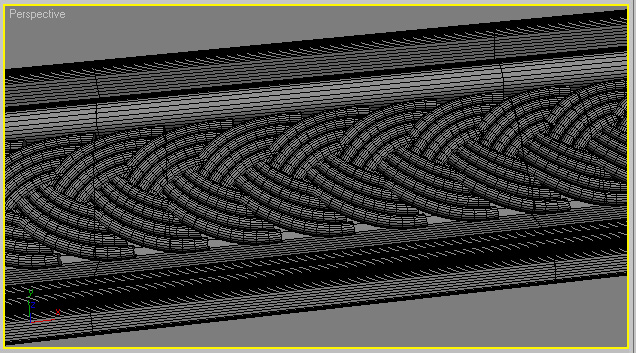
We have nice, fully tillable decorative element for our interior. It has many polys but you can easy change it just by lowering down segments or sides, thanks to instance copying. Final result after rendering is right here:

Modeling_tutorial from evermotion on Vimeo.


LEAVE A COMMENT


|

|

|

|

|
 Customer zone
 Your special offers
 Your orders
 Edit account
 Add project
 Liked projects
 View your artist profile
COMMENTS