Removing LUTs from Textures for better results
Remove the LUT from a specific texture in order to get perfect looking textures in your render.


Total: € 0
Continue Shopping
In accordance with the art. 13 section 1 and 2 of the European Parliament and Council Regulation 2016/679 of the 27th April, 2016 on the protection of natural persons, with regard to the processing of personal data and on the free movement of such data, and repealing Directive 95/46/EC (General Data Protection Regulation), hereafter RODO, I hereby inform that:
1. EVERMOTION S.C., 8 Przędzalniana Str., 15-688 Białystok, Poland is the Administrator of your Personal Data (APD)
2. Data Protection Inspector can be reached through e-mail: iod@evermotion.org
3. Your personal data are to be processed on the basis of art. 6 section 1 letter a, b and f of RODO in order to:
a) prepare, conclude and execute the agreement and for other purposes approved by you,
b) to execute the legitimate interest like marketing of products and the agreement, claim assertion or defence against claims resulting from the law regulations.
4. Entities entitled to the reception of your personal data may be the authorised public bodies; mail providers; providers of the services covered by the agreement; responsible for debt recovery, keeping the archives, document utilization, legal consulting, technical services, IT services and accountancy.
5. Your personal data shall not be transferred to the third country, nor to the international bodies.
6. Your personal data shall be processed within the period of the agreement and upon your additional consent until you withdraw it. APD shall keep the data for the period of any civil law claim execution connected with the agreement.
7. You have the right to demand an access to your personal data, to correct or to delete the data if there is no other basis for the processing or any other purpose of such processing or to limit the processing of the data, to transfer the data to another administrator and to raise objections to the further data processing if there is no legal basis for further processing and to withdraw any previous consent.
8. You provide the personal data voluntarily, however they are necessary to conclude the agreement. The refusal of providing such data may result in the refusal of the agreement conclusion.
9. You have the right to lodge a complaint to the Personal Data Protection Office when in your opinion the data processing violates the regulations of General Data Protection Regulation of the 27 April, 2016 (RODO).
10. Your data will be automatically processed, including the form of profiling.
11. You are obligated to forward above mentioned information to your representative, especially if you appointed this person in the agreement as the contact person or as the representative for the agreement execution.

If you want to have realistic lighting in Unreal Engine you have two options (without plugins like external rendering engines - V-Ray, Octane, etc.). One is to bake all your static lighting into lightmaps. The second is to use real-time GI and reflextions using raytracing. The second method is fresh and new but requires using top-tier GPU cards and even with them it has its own limitations. We are not there yet, when it comes to raytracing GPU power in re-creating great global illumination. But it is still great choice for reflections, ambient occlussion, etc. And in the incoming years it will be more and more important method for achieving photorealism in games and real-time architectural visualizations. But today, let's focus on the other, older method - baking lightmaps.
Lightmaps are special textures that are used for simulating global illumination. They can work with static objects only - thius is a big limitation for games, but it is not a very big problem for architecture, which is mostly focused on visualizing non-moving objects. Baking lightmaps can give wonderful results and let you make camera animations in photo-realistic envronments in a fraction of time that wopuld be needed when we would use classic path tracing rendering engine. It is also great for VR.
But baking lightmaps using CPU is very time-consuming. Achieving highest possible quality takes sometimes days. It's much too much for working professional. That's where GPU lightmap baking kicks in. A more than a year ago an invidual called Luoshang introduced his own plugin for Unreal Engine, which used GPU for baking lightmaps. It was an instant hit. This solution was about 20 times faster than regular CPU baking, we wrote about it in a separate article on Evermotion and still recommend to check it out.
Epic wasn't blind and sooner than later started cooperation with Luoshang and the work on native GPU lightmap baking has begun. Several months have passed and... with the hot, latest Unreal Engine 4.26 Preview version we finally can check it out! Let's see how to use this method in its current state.
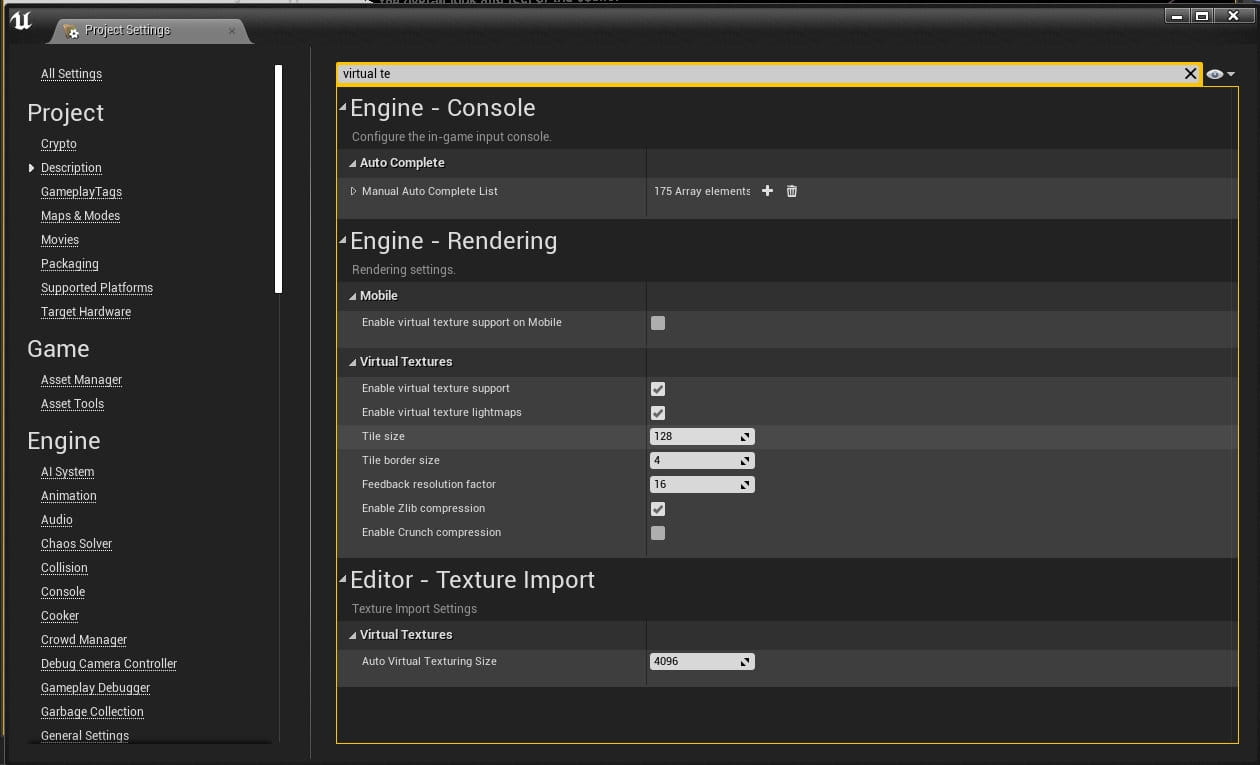
There are several prerequisites to enable GPU lightmap baking in Unreal Engine 4.26. You need to use tha latest Windows 10 version. Update if necessary. Then, install the latest version of Unreal from your Epic launcher. Then, create a new architectural project and go to Project settings. Enable "Virtual Texture support" and "Virtual Texture Lightmaps".
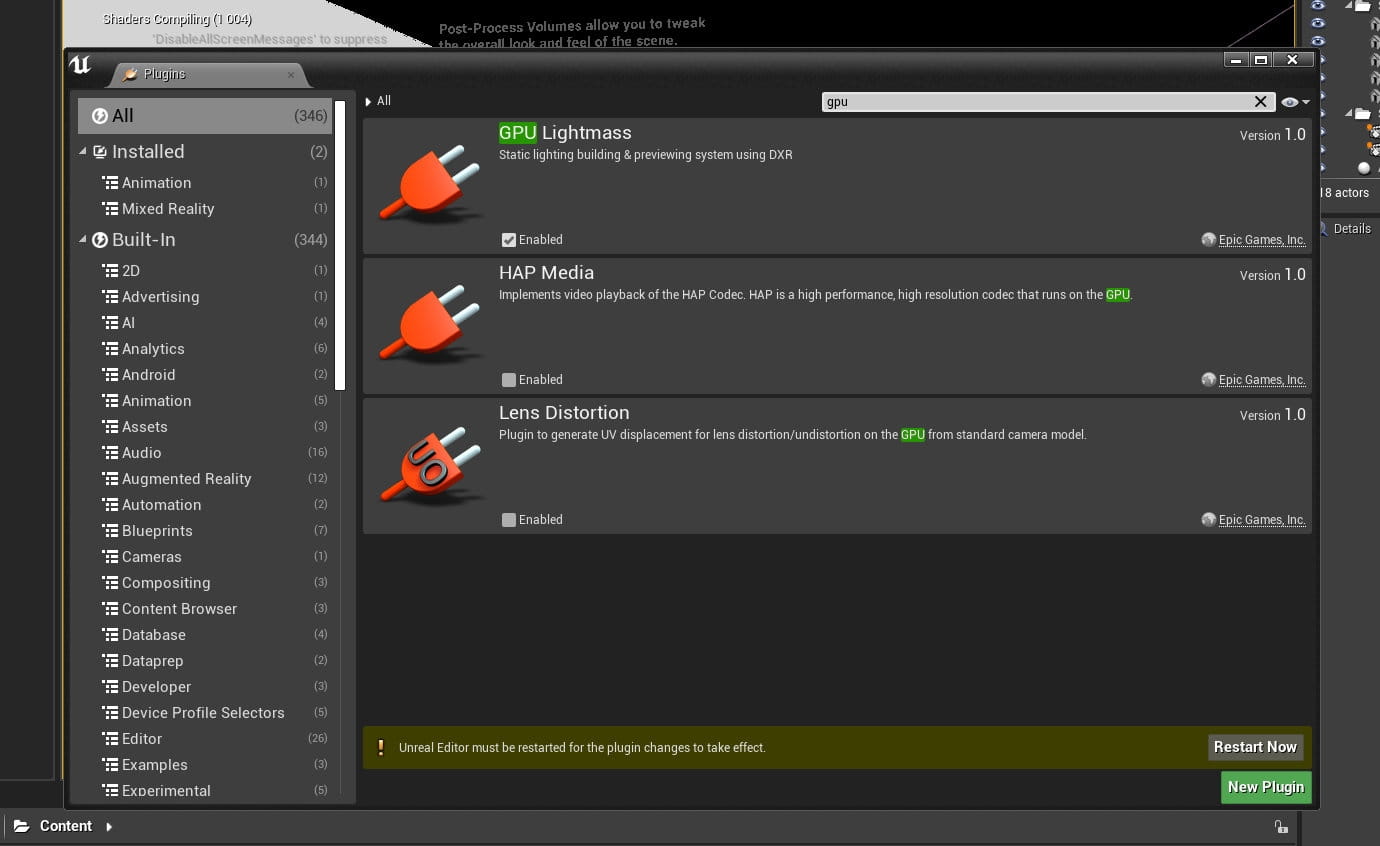
Also enable GPU Lightmass plugin in Editor > Plugins menu.
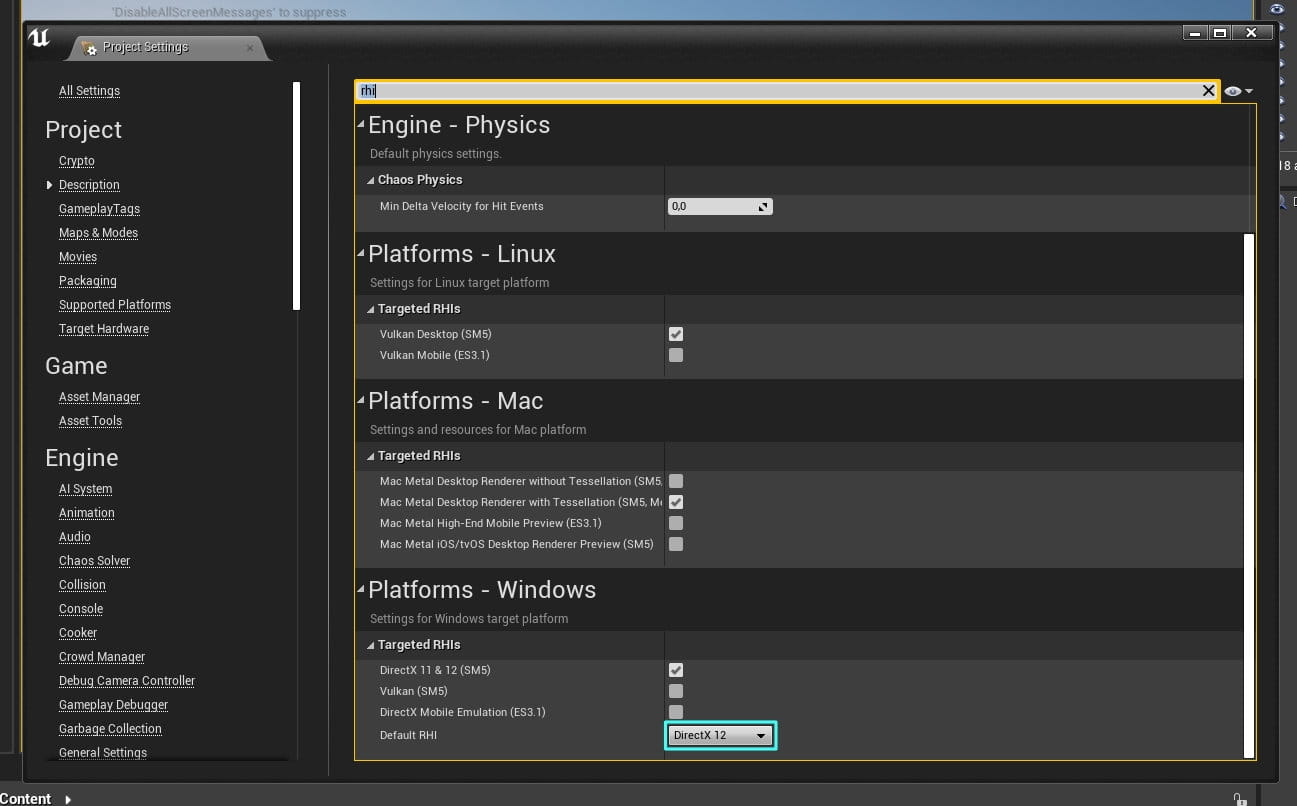
Change default RHI to "Directx 12".
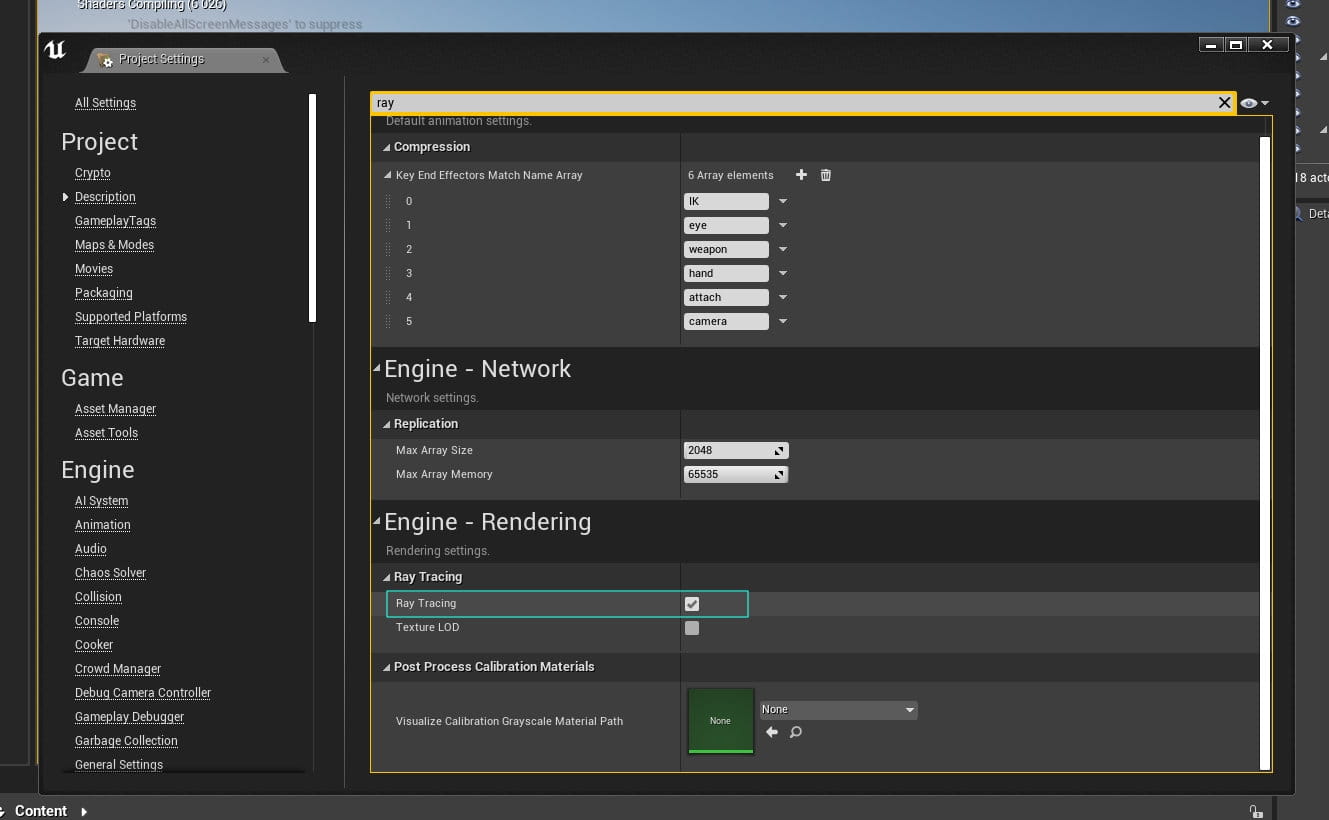
Enable ray-tracing. Restart the editor, wait for shaders to recompile. It can take some time.
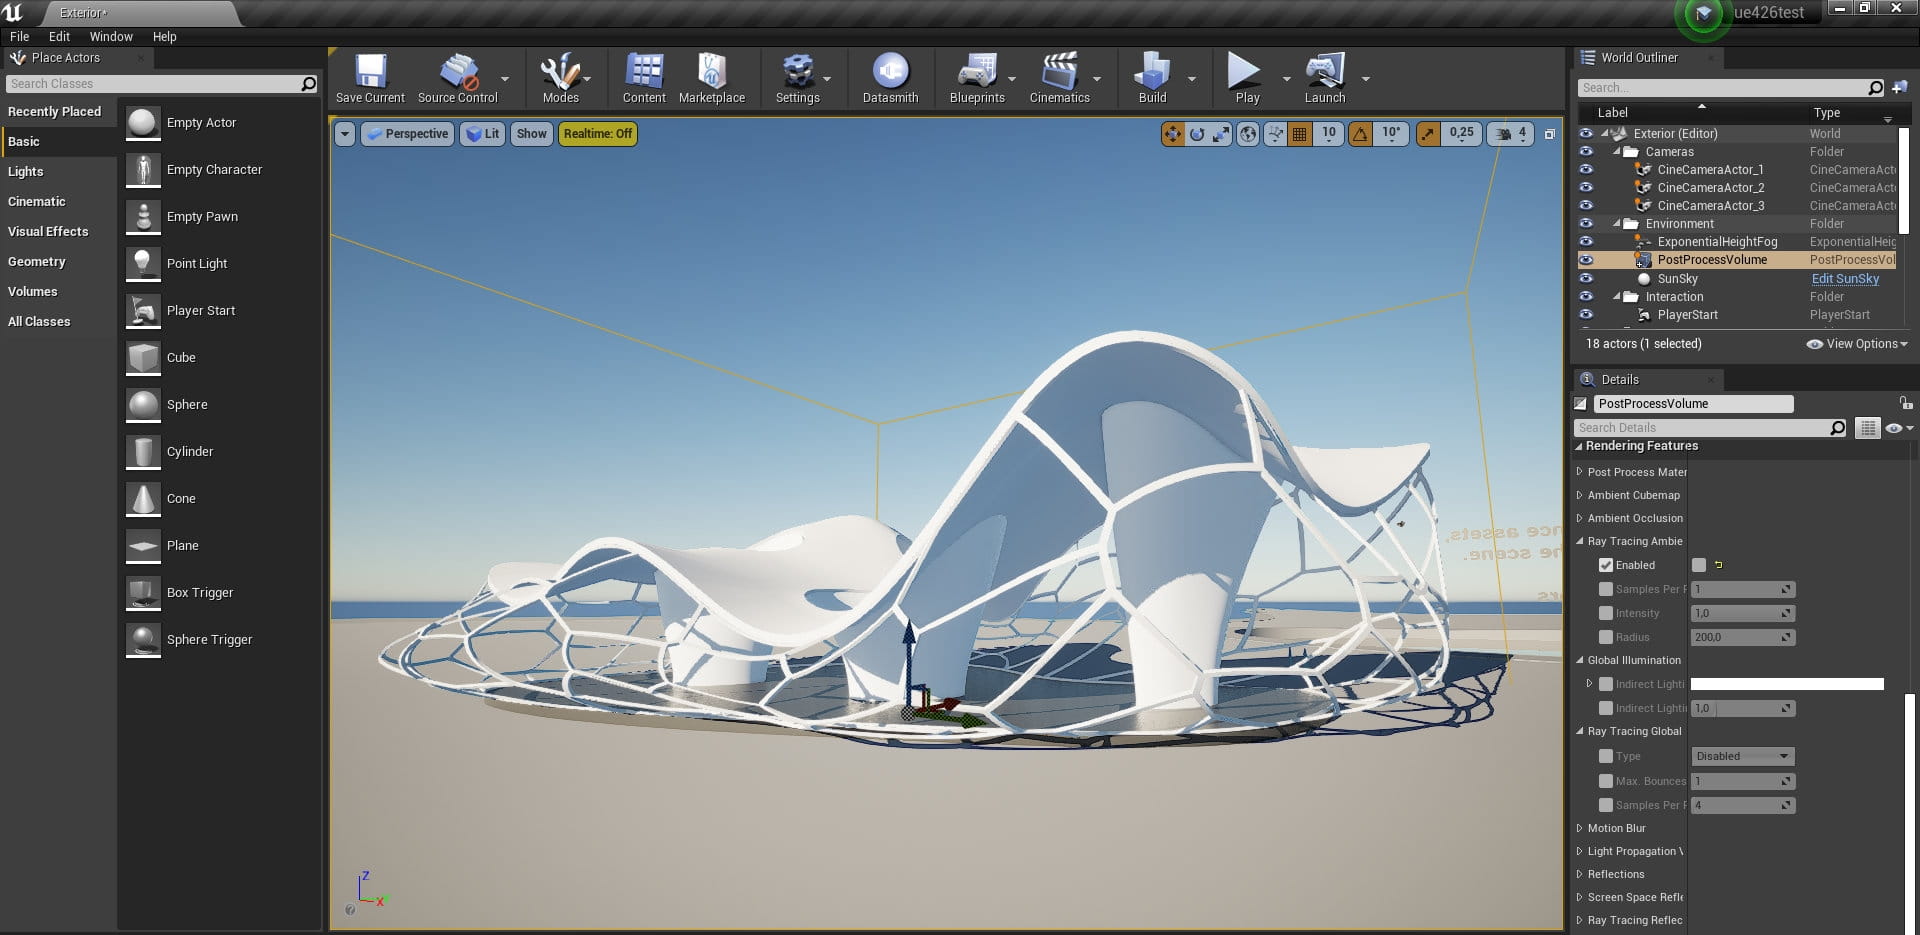
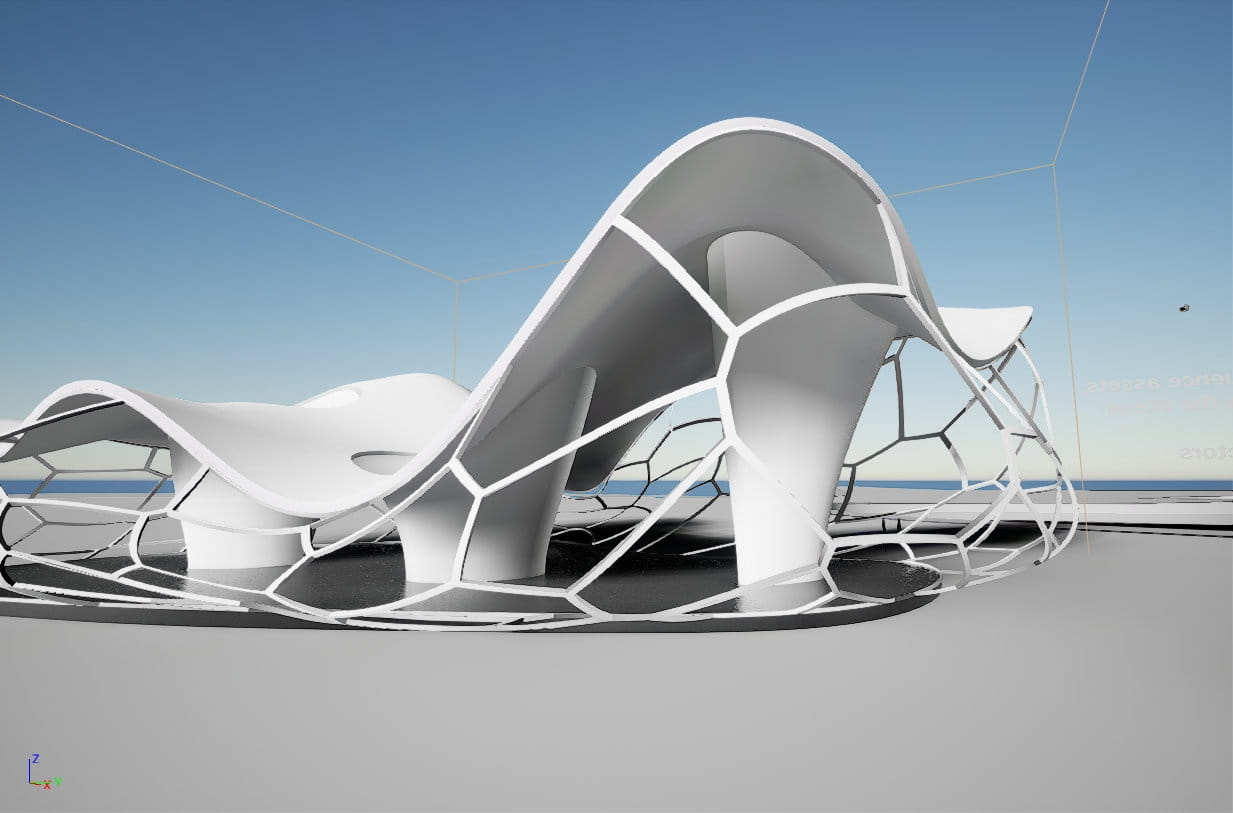
Default Unreal Engine architectural exterior scene looks like this. At the beginning it is lit by movable lights - no real global illumination, no lightmaps, no ray-tracing. We need to change it.
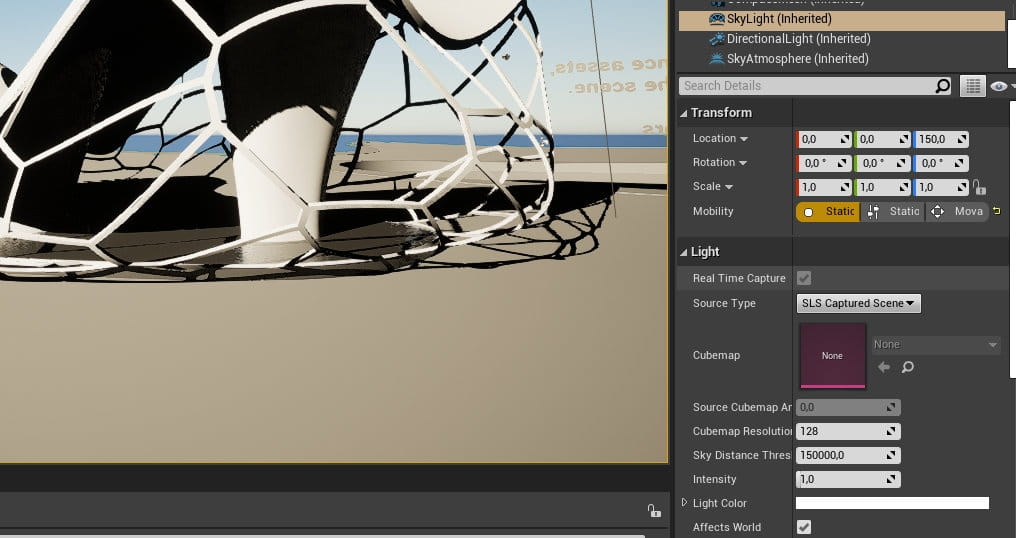
Go to SkyLight in the Outliner and change it to static. You can also increase Cubemap resolution to 256.
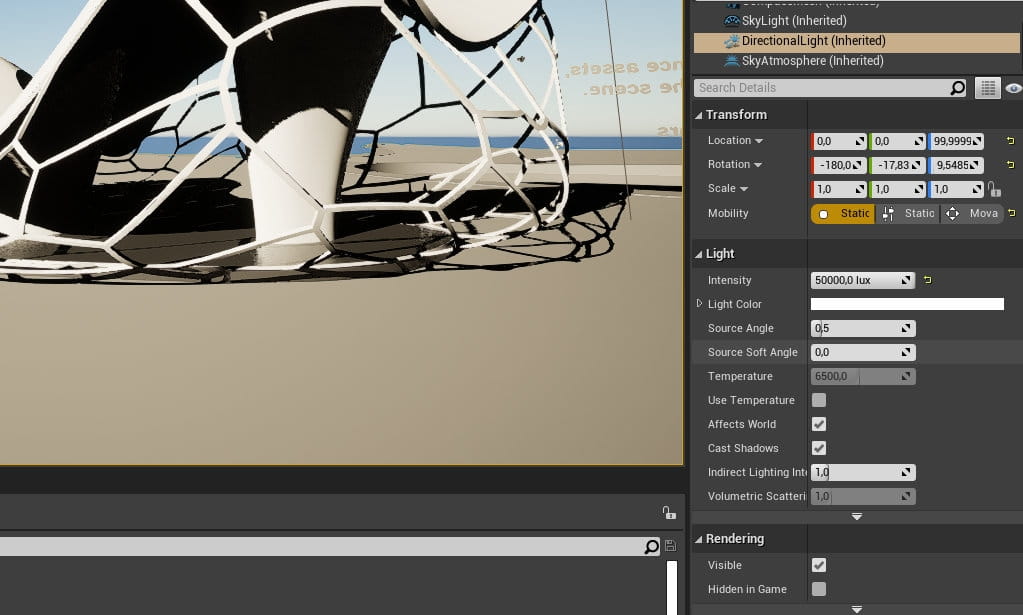
Select Directional Light and make it static too.
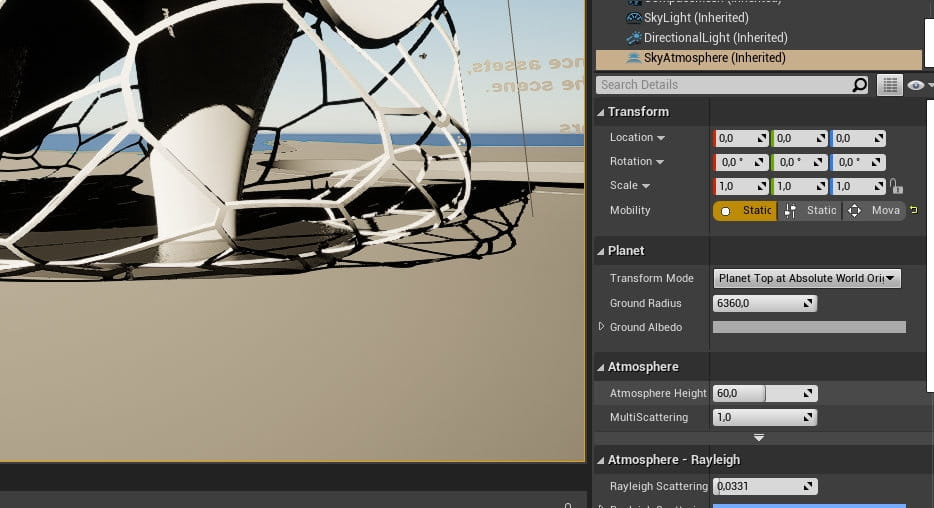
Change SkyAtmosphere to static.
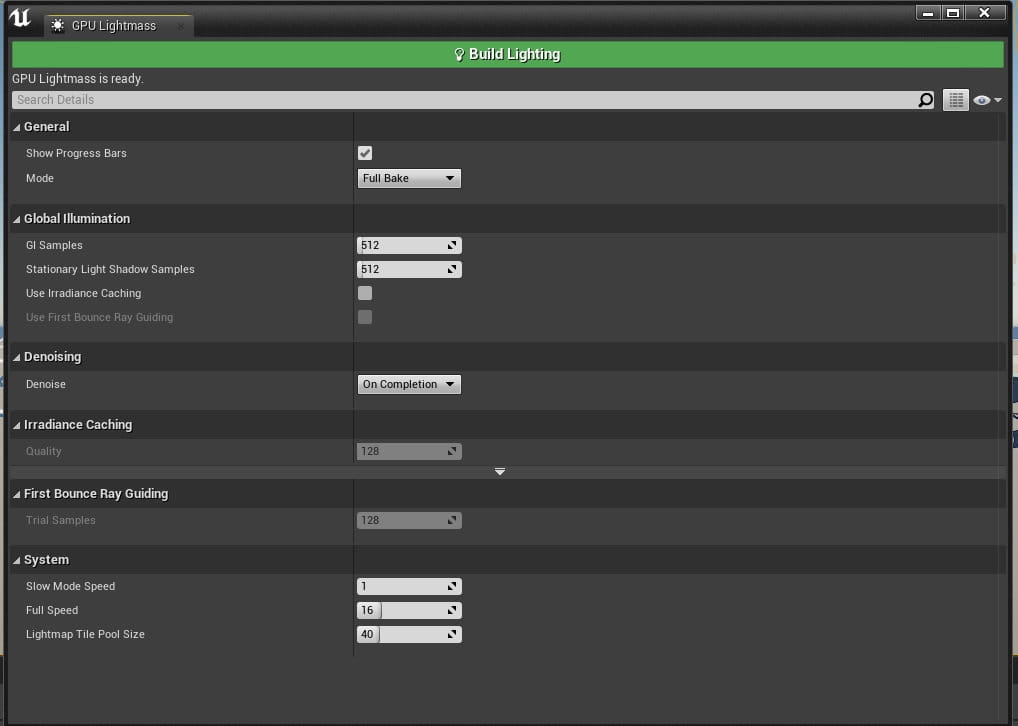
Go to Build menu and press a little arrow near the icon. Select GPU Lightmass from the menu. You can get a warning that GPU Lightmass works in slow mode if the viewport is refreshed in real-time and at the full speed when real-time is off. To turn off real-time viewport refreshing press "CTRL-R". You will see "Realtime off" icon appear in the top left corner of the viewport. Now we can render. Default settings are good for the start.
The first baking result comes in seconds, but the quality is horrible. The main reason is default lightmap size of our models. We need to ijncrease it.
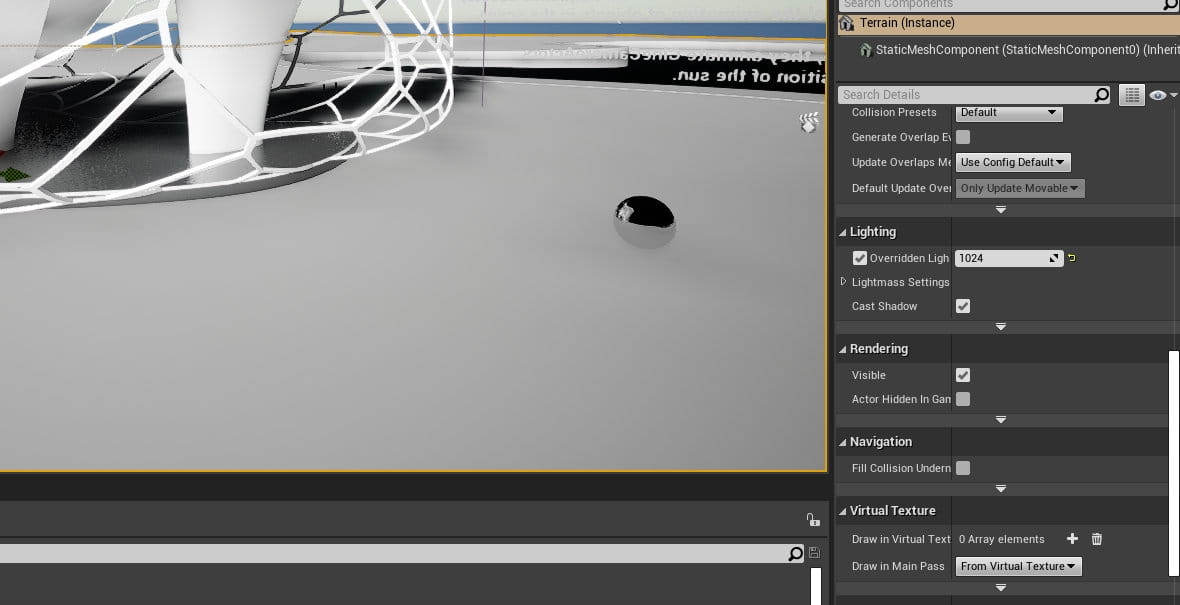
You can increase lightmap size for all models at once, just select them and find "Lighting" paragraph in object details panel. Change it to 256 or 512 for small and medium sized objects and to 1024 or 2048 for bigger ones.
Second shot is better- we increased our lightmaps a bit, shadows are more accurate, let's increase it further.

This time baking took 3 minutes. Still it's pretty fast, quality is higher than before. No you can clear the level from default assets, import your scene from your 3d software through Datasmith or Send to Unreal Blender plugin and test it further. Enjoy!


LEAVE A COMMENT


|

|

|

|

|
 Customer zone
 Your special offers
 Your orders
 Edit account
 Add project
 Liked projects
 View your artist profile
COMMENTS