Evermotion: More Than an Asset Library
How Evermotion became a full-scale production partner for archviz, automotive and synthetic data.


Total: € 0

Blender's development is very fast lately. It is just a couple of weeks since we celebrated the release of Blender 2.80 and now there is already Blender 2.81 alpha available for download. and it is packed with new features. Some are improving the workflow (like Outliner improvements), some are improving modeling (VDB remesher works like magic) , but the one is really interesting, when it comes to rendering performance. Blender now is equipped with "Denoise" node that is based on Intel Open Image Denoise.
Remove the noise
Intel Open Image Denoise is an open source library of high-performance, high-quality denoising filters for images rendered with ray tracing. At the heart of the Open Image Denoise library is an efficient deep learning based denoising filter, which was trained to handle a wide range of samples per pixel (spp), from 1 spp to almost fully converged. Thus it is suitable for both preview and final-frame rendering.
It is not the first denoiser in Blender. Blender has already built-in denoiser from a longer time. It gets the job done, but it uses CPU for denoising, which can be a bit slow.
If it would not be enough, this year Remingoton Pro released an add-on for Blender called D-NOISE. It is a next-gen AI denoising platform that rapidly accelerates the process of rendering noise-free images in Blender. Powered by NVIDIA's new OptiX AI-Accelerated Denoiser.
So, now we have three denoisers for Blender, two built-in and one as an add-on. Today I will focus on the most recent one - Intel Open Image Denoiser.
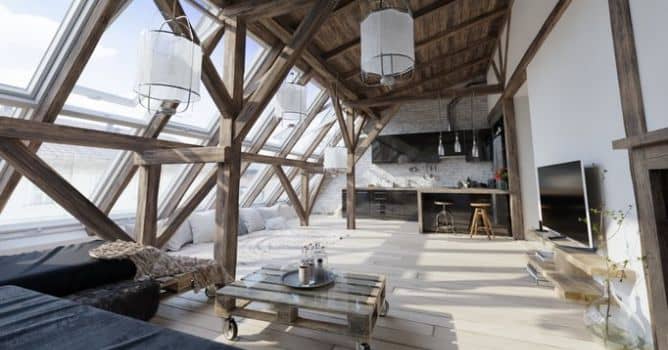
Scene for testing
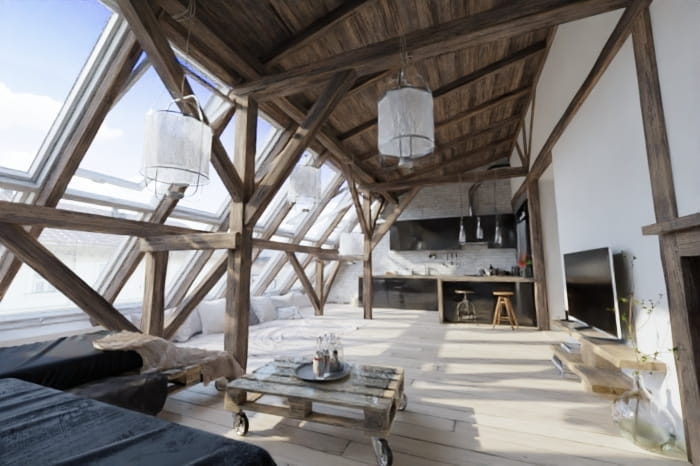
It's a Evermotion Archinteriors vol. 48 for Blender scene 1 rendered with CPU. We used 64 squared samples and built-in denoiser. What it means that samples were squared?
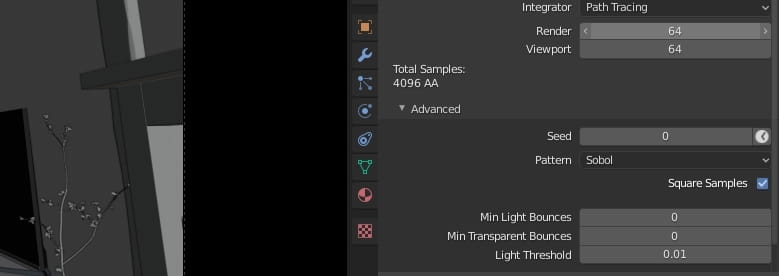
Blender allows us to tick a checkbox "square samples" for designating final sample count. When we use "64" as a base, we get 64 x 64 = 4096 samples total. From now on I will refer to this number, instead of squared samples. This render made with CPU rendering takes literally hours on mid-range CPU. We need to render faster. Maybe we will use GPU?
GPU and memory
Modern GPUs give a big boost to rendering speeds when it comes to path tracing. At first I thought that my RTX 2080 Ti will not have enough memory for rendering such a scene, but luckily, cycles can render out-of-core memory - it can sum up system and VRAM and use it for rendering. My 2080 Ti is equipped with 11 GB of VRAM, my system has 16 GB of RAM. The scene requires 13,9 GB of RAM to render. So I am covered by a big extend.

Test number one. I rendered this scene with only 64 samples, denoising is off. I used GPU for rendering. Although the output is bad even for a preview, we gain the speed: my PC used about 2 min 20 sec for loading all assets and textures to memory and 22 seconds to render it. 2:42 total. Mind that I reduced final resolution to 50% and the output image is 700 x 465 px.

Then I turned on built-in denoiser. Unfortunately, the result image is still noisy as hell - built in denoiser was not able to get rid of hundreds of fireflies and speckles, especially on the right wall. Let's check Intel Open Image Denoiser. We add it by uinserting "Denoise" node in Blender's Compositing editor.
Well, the noise is gone, but the result is rather... artistic! Everything is smudged and blurred. Ok, we used only 64 samples and rendering took literally seconds but maybe we can get it better? In fact, we can!
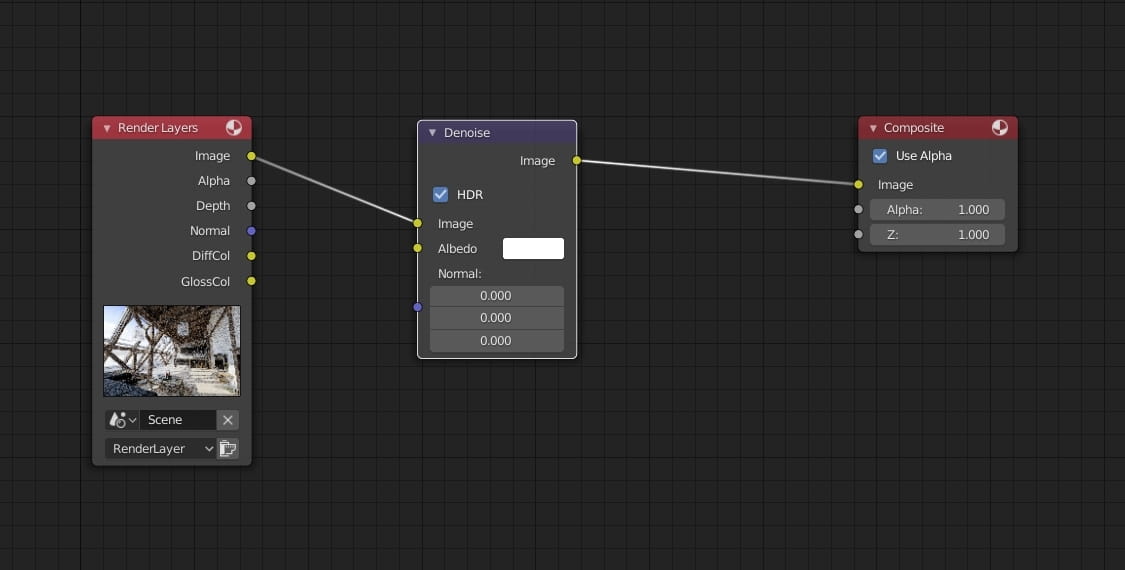
Intel Open Image Denoiser can use rendered image as a source for AI denoising. we just need to add "Denoise" node in Blender Compositing editor and connect it with image and output. But Intel's denoiser can use more data - we have also "Albedo" and "Normal" inputs. So, what happens if we provide more data for denoiser?

First, we need to connect dots...
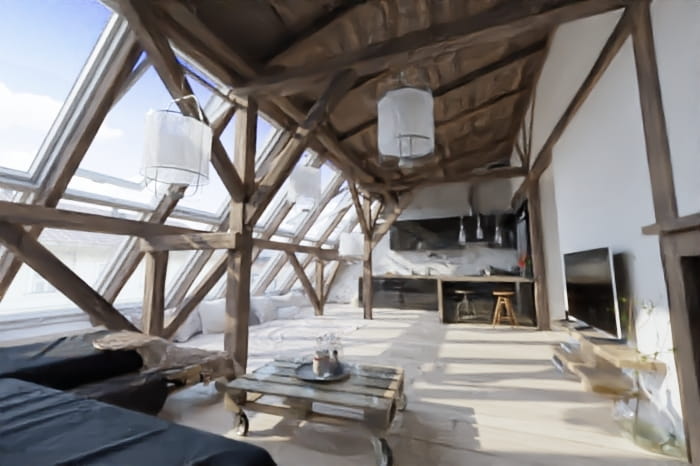
And the result is... amazing! We still get this "dreamy-denoised" look but this image is quite usable now! And we only used 64 samples! Let's increase the resolution.
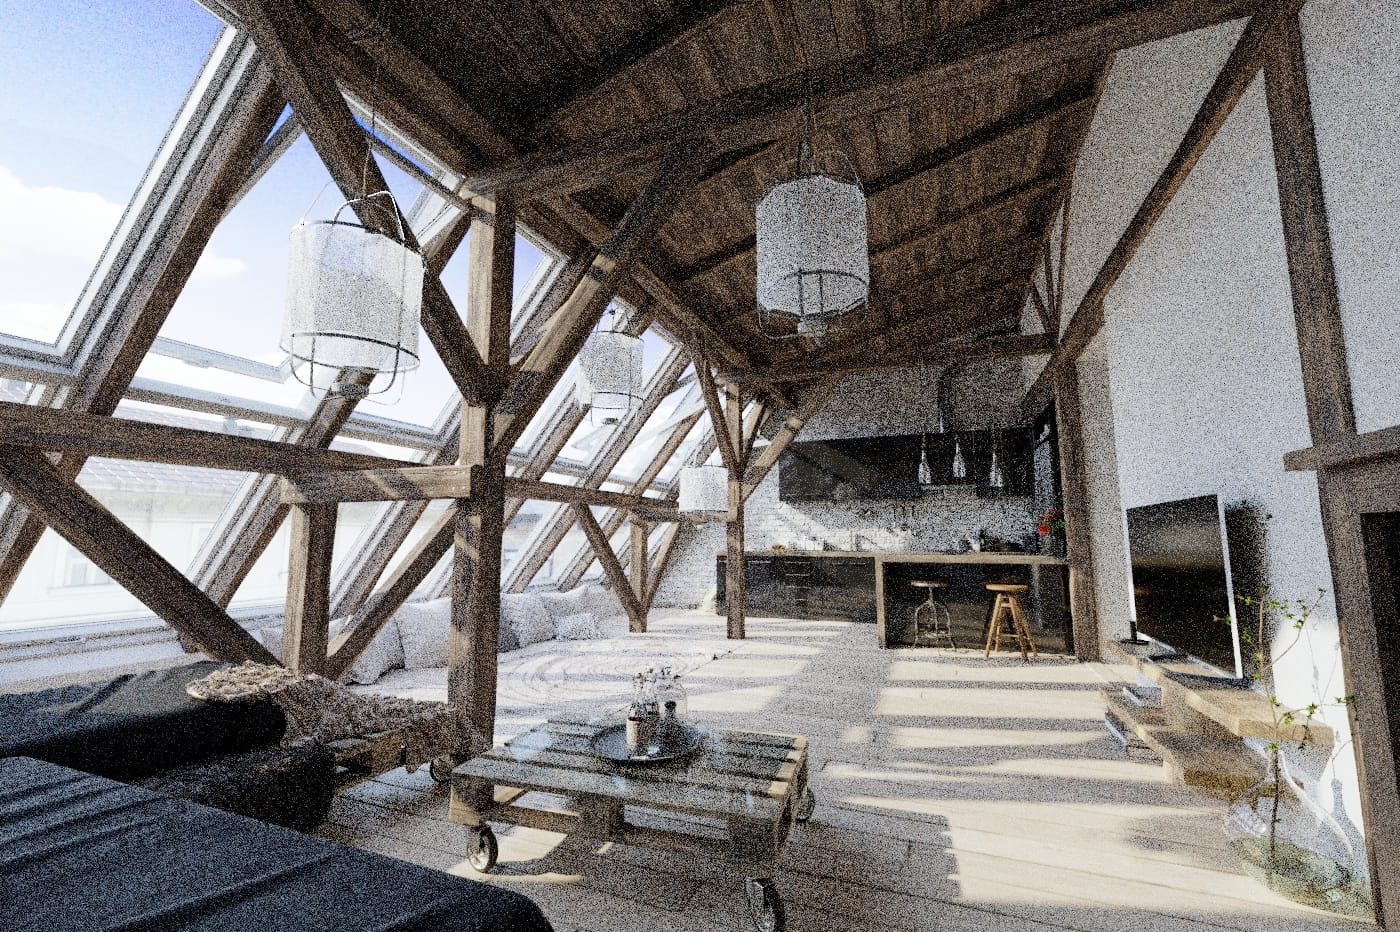
No denoising, full resolution (1400 x 933)

Simple Intel denoising (using only "Image" input)

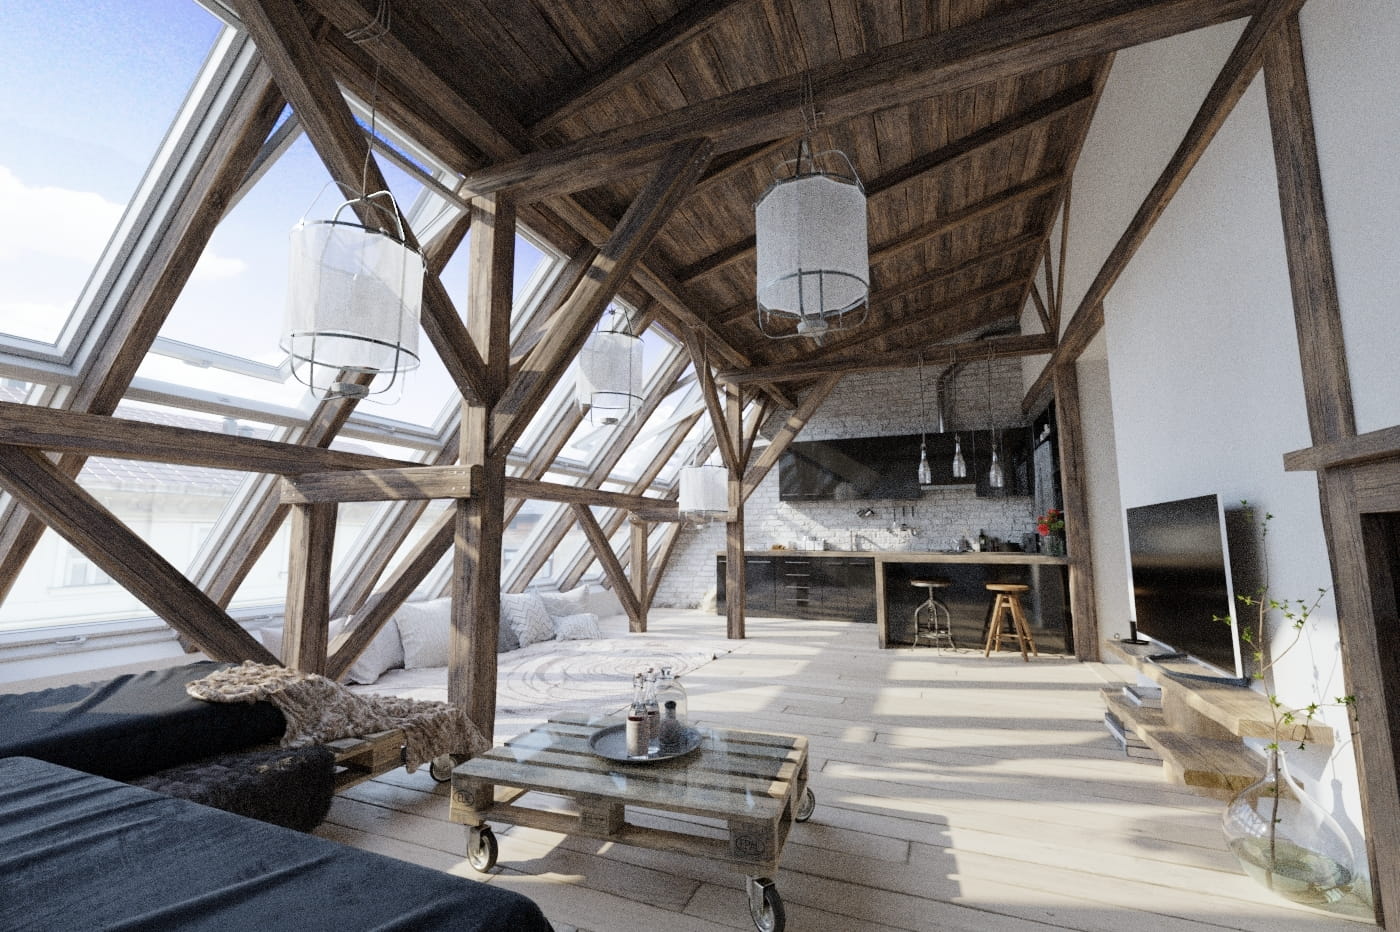
Full Intel denoising - using "Image", "albedo" and "Normal" inputs. Render time is still very short: 3:30 (caching: 2:23) Now, let's raise the number of samples!
800 samples rendered with GPU, no denoising, 11 min and 57 sec
Simple Intel denoising - it looks ok, but still we get some smudging.
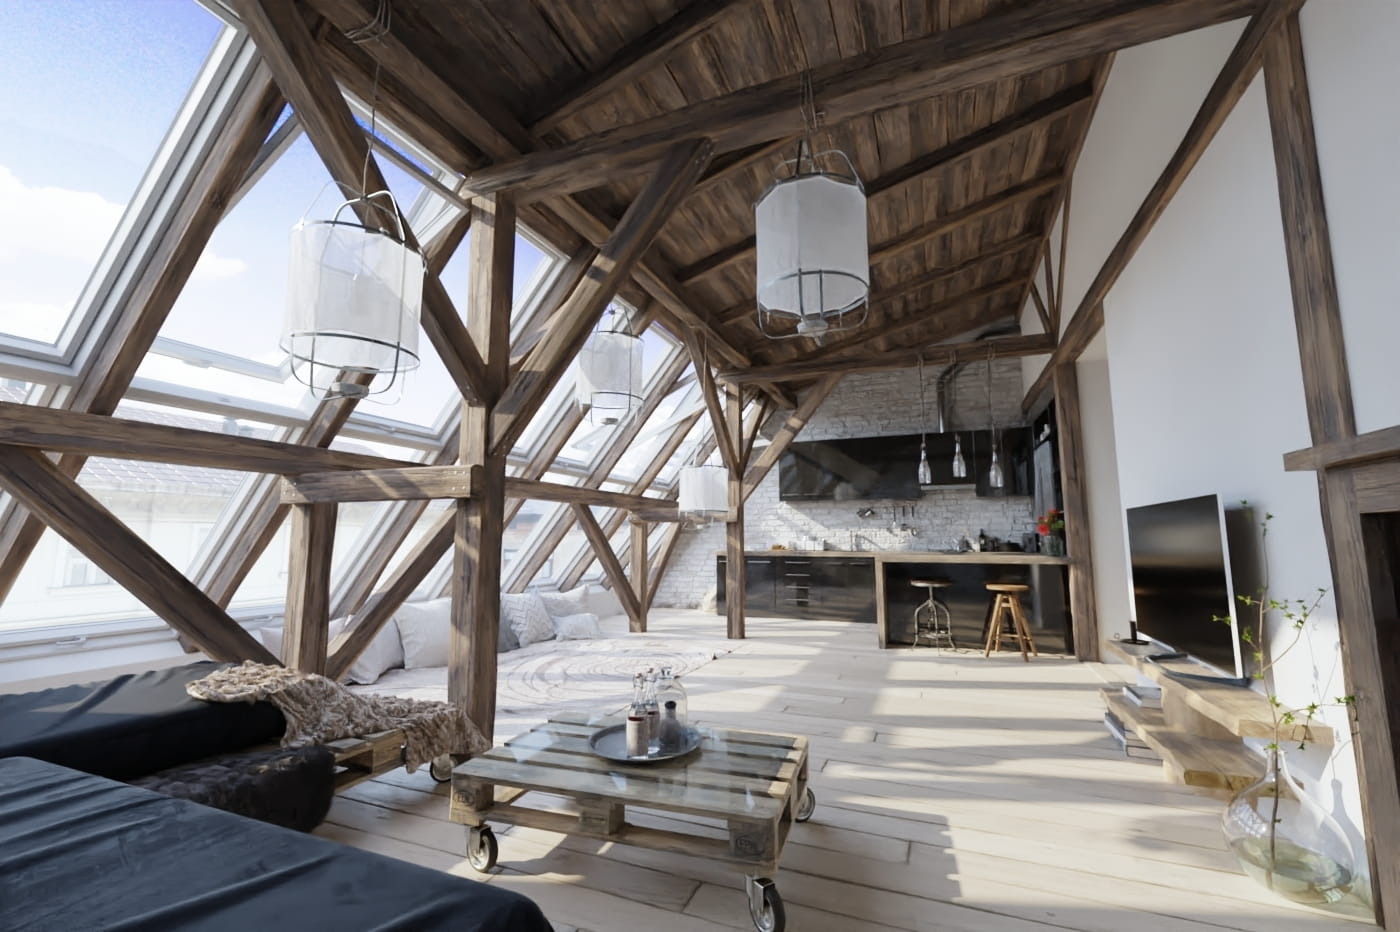
Full Intel denoising. I would say that this image is close to production quality. And we just saved about an hour of render time!

CPU rendering (4096 samples). >3 hours on 4770k, about an hour with GPU RTX 2080 Ti.
Summary
Intel Open Image Denoiser is just pure awesomness. It gives stunning results even with extreme low sample counts. It has cleaned this particular scene quickly and efficiently. We need more testing in different scenarios, but for a start I would say that it is extreme useful addition for Blender. And with upcoming RTX speed improvements and adaptive sampling we can say that Blender Cycles rendering will get rocket fast in not so distant future.
Thanks for reading!


LEAVE A COMMENT


|

|

|

|

|
 Customer zone
 Your orders
 Edit account
 Add project
 Liked projects
 View your artist profile
COMMENTS