Evermotion: More Than an Asset Library
How Evermotion became a full-scale production partner for archviz, automotive and synthetic data.


Total: € 0

BoxCutter is a tool that streamlines the process of creating objects based on Boolean operations. Originally created with the idea of simply cutting holes in objects to speed up hard surface modeling, in the most recent version it offers a wide range of tools for cutting, slicing, insetting, creating arrays, etc.
In the last update for Blender 2.80 (BoxCutter 7.1.2), developer made it possible to perform operations using custom shapes, which greatly increased the capabilities of this tool.
Installing BoxCutter is simple, just install add-on from file using Blender "Preferences" menu.
In order to get to know the Boxcutter thoroughly and work smoothly, we need to learn a few keyboard shortcuts.
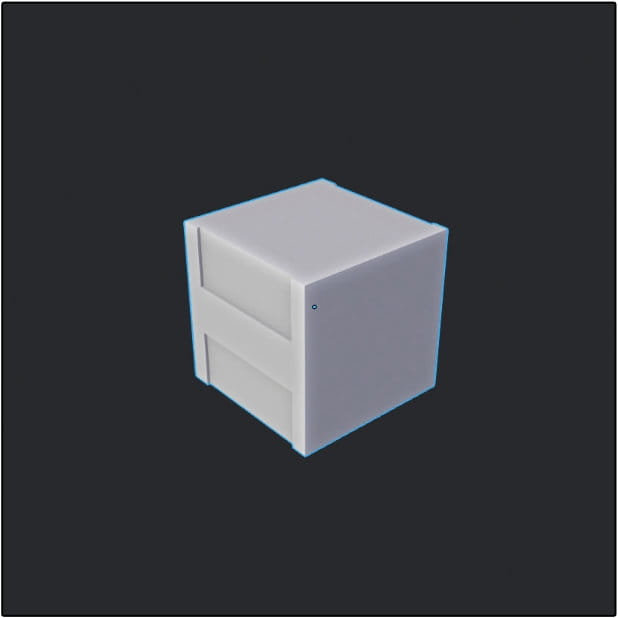
We start BoxCutter using the ALT-W shortcut or by clicking the button on the toolbar.
If we do not select any object and we will do drag with a mouse in the viewport, we will create a new objects aligned to viewport floor: box, cylinder, custom shape, n-gon, etc.
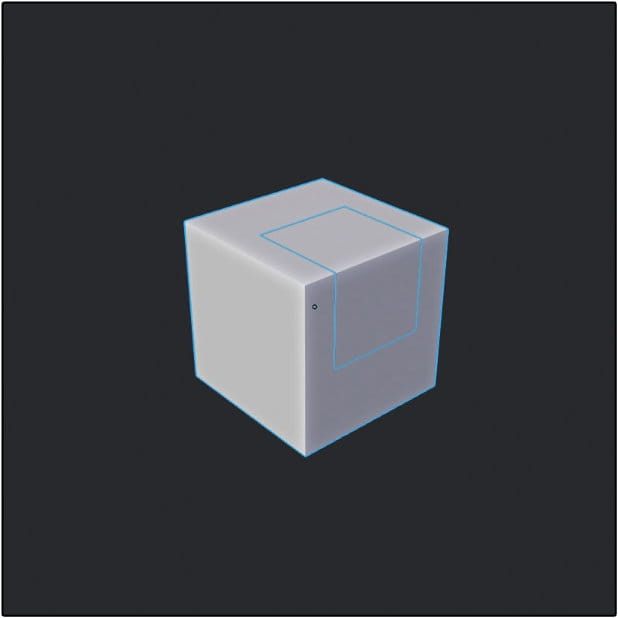
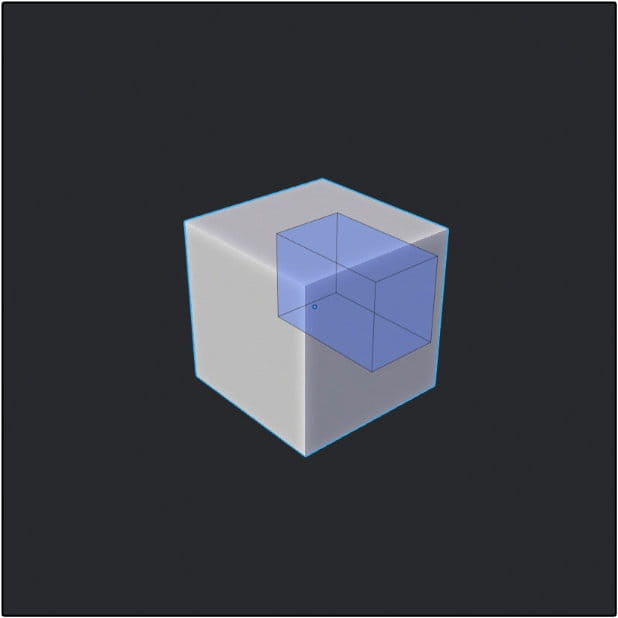
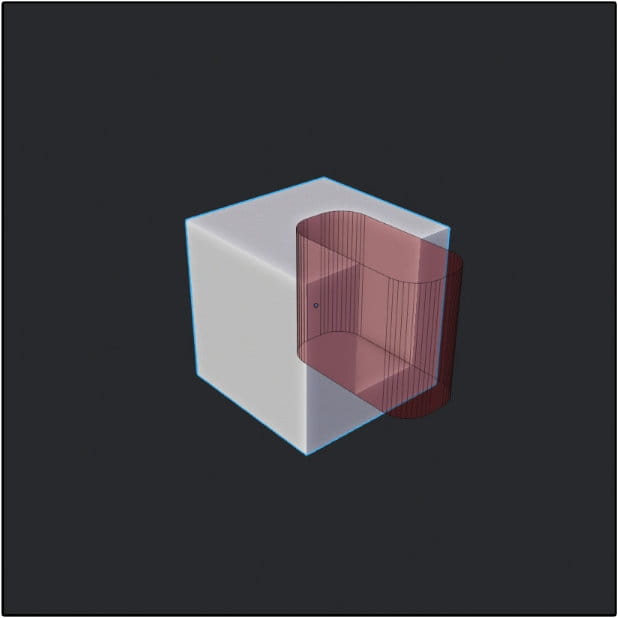
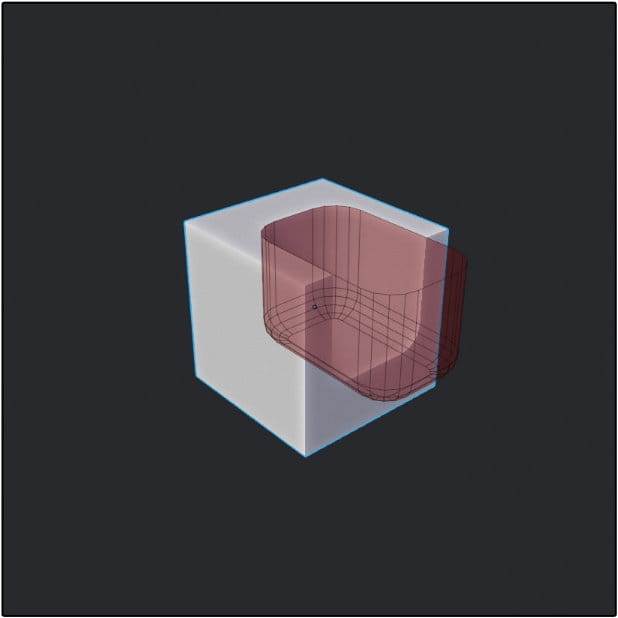
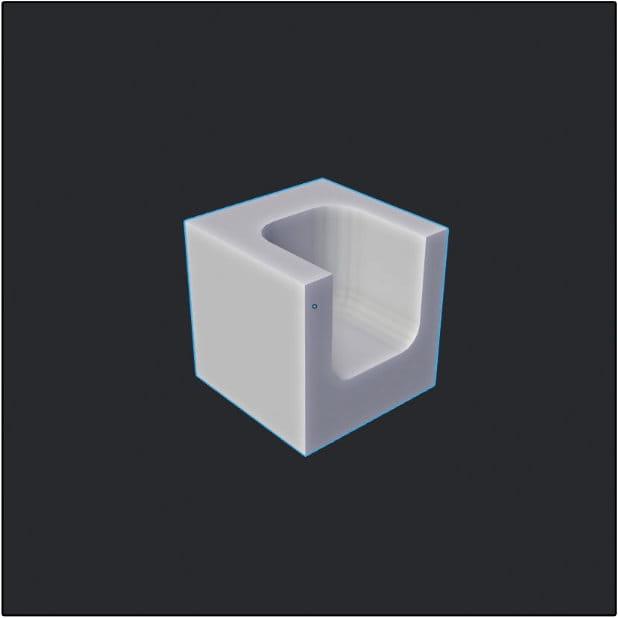
The real fun starts when we want to modify objects. Select an object that you want to modify and drag with a mouse over a face you want to cut. BoxCutter automatically aligns boolean shape to the surface.
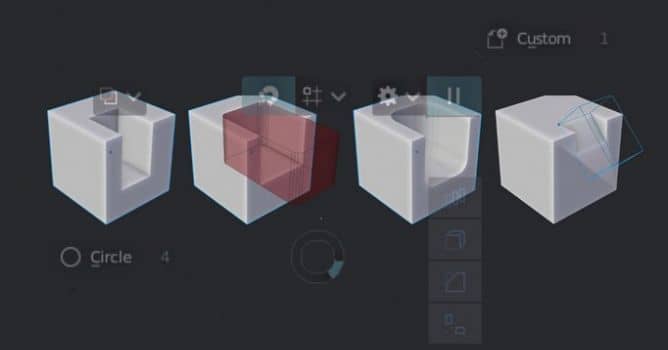
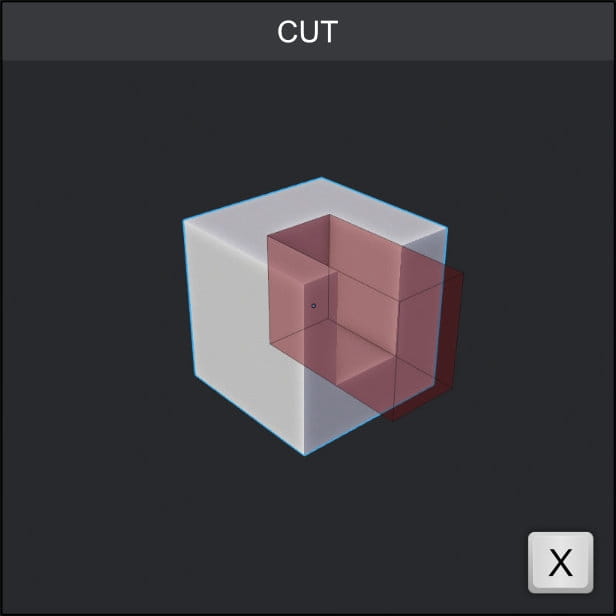
Important note: you can select one of six primary tools prior to dragging, but you can also freely switch between BoxCutter tools while dragging your mouse. Just press a button correponding with a tool. for cutting and slicing it is "X". If you have cut tool selected, you don't need to press anything, just drag:
Just drag your mouse...
...and release.
If you drag your mouse and press "X" BoxCutter switches to "slice" mode.
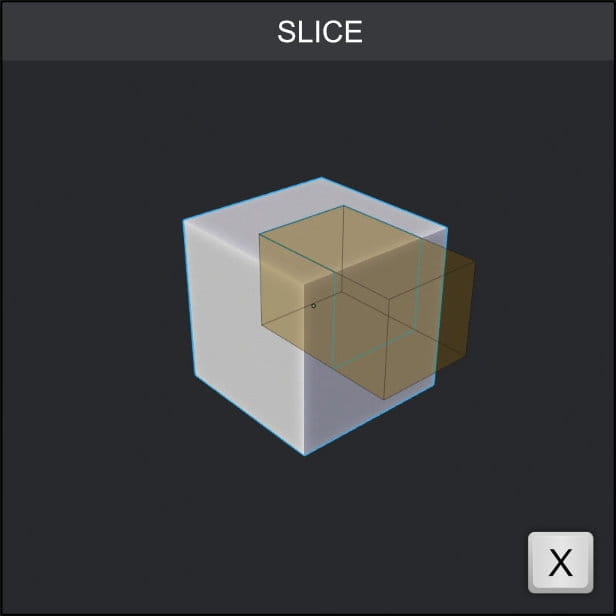
The box color changes to yellow.
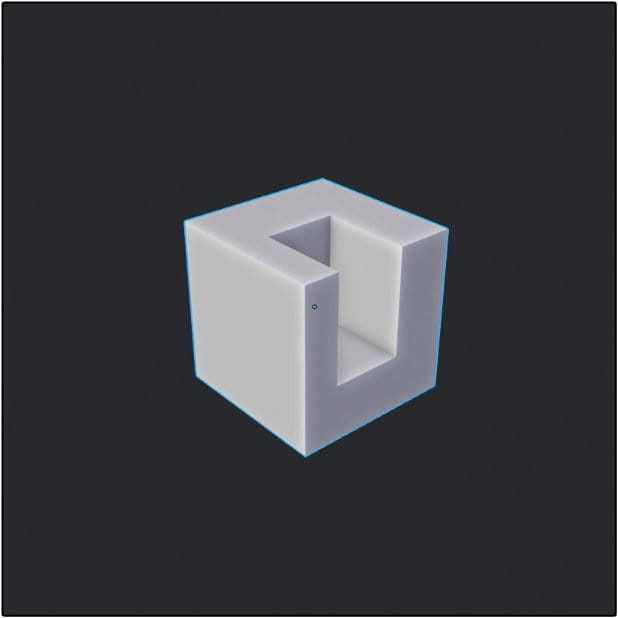
...and the final output is a new object sliced from the first one.
If you press "Z" or select "Inset tool" from menu box will change its color to purple:
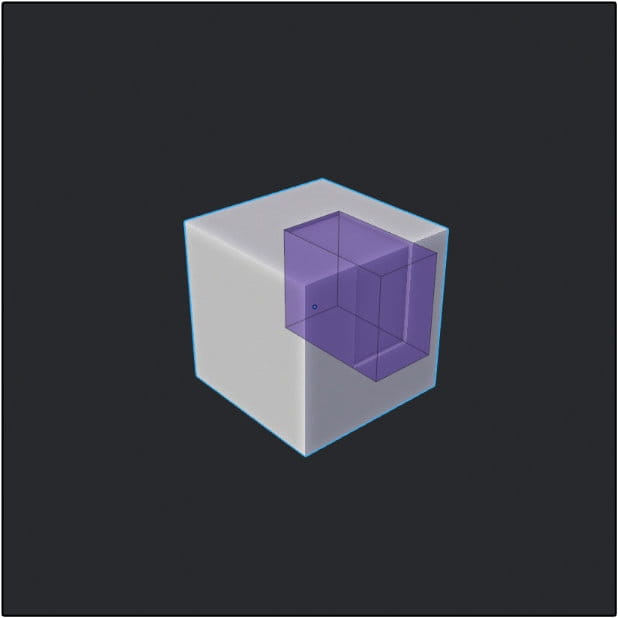
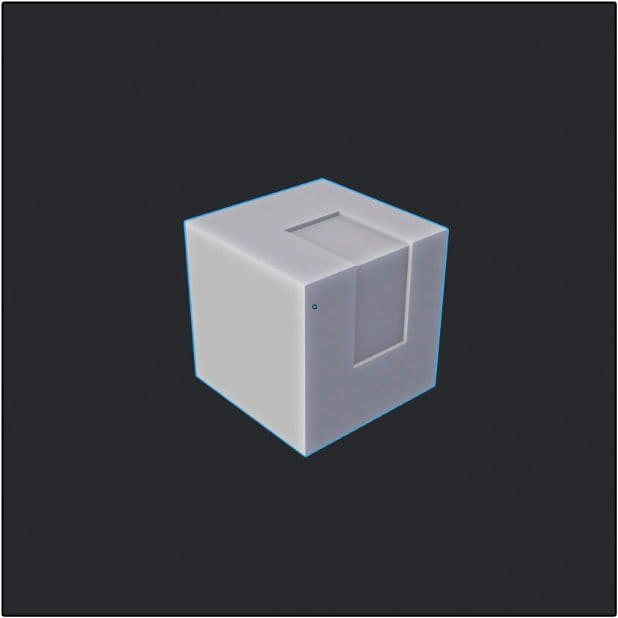
And the final object will be insetted. The depth of an inset can be controlled by pressing "T" and then dragging before you release and left click with your mouse.
If you press "J" you will switch to "join" mode - now the box is green:
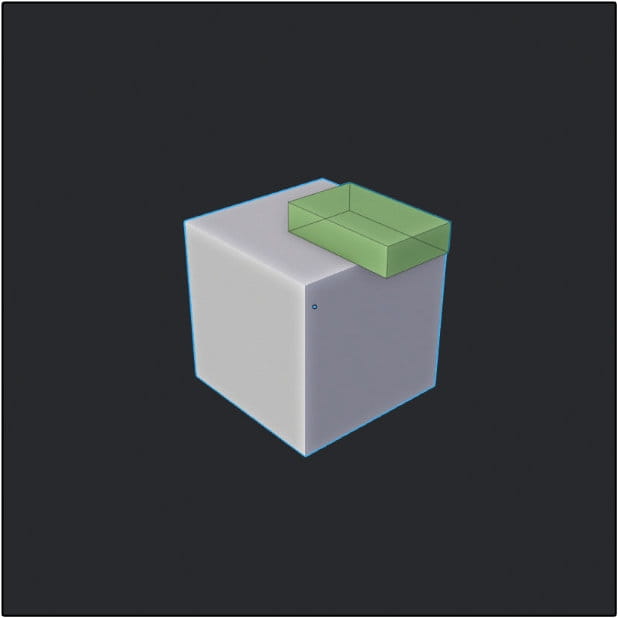

After releasing your mouse you will get additional box. Both elements are single object now.
Another tool is "Knife" which is accessed by pressing "K":
The effect of the knife can be seen after we go into edit mode - it adds new edges based on boolean shape.
By the way: BoxCutter works also in Edit Mode, but it will be destructive, oposing to non-destructive workflow in object mode.
The last main tool is for creating new shapes. Just press "A" and box is turning to grey:

We get new box on top of an old one. Both objects are separate.
These actions are the basic ones, but there is more - until we left-click to confirm our operation, we can apply a wide array of modifiers to our objects to cut more interesting shapes.
One of the most useful tools is Bevel. You can access it by pressing "B" after you defined your shape (but before confirmation click).
The Bevel parameters can be easily changed on-the-fly:
Drag your mouse for changing bevel amount, use mouseroll to change bevel segments count.
You can also press "Q" to enable "Quad Bevel" mode.
Important note: each modifier can be enabled and disabled by the same shortcut. If you decide you don't need bevelling, just press "B" again.
Bevel result.
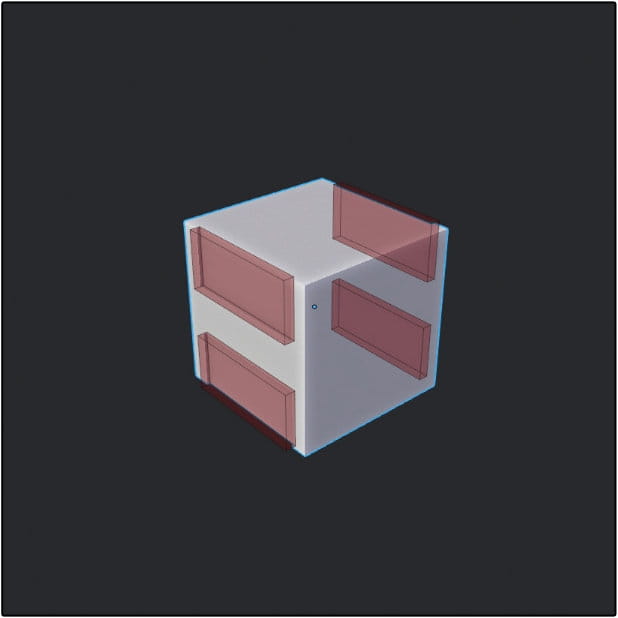
Another great tool is an array. You can enable it by pressing "V". Mousewheel controls amount of shapes added to an array, mouse drag controls spacing between them. You can also rotate it with "R".


Cutting with an array - result.
"Solidify" is another modifier, we can access it by pressing "T".

You can control the thickness of solidified boolean with mouse drag.
One of the last modifiers available in BoxCutter is Mirror. Press 1,2 or 3 to mirror your cutter along X, Y and Z axes.
Mirror - result.
BoxCutter comes with some additional menus that are useful for fast switching without distraction from viewport. If you have your object selected and you haven't start dragging, you can press "D" to choose the shape you want to use for cutting. We shown above cutting with a single box, but you can also use circle, Ngon or custom shape for this job. This greatly expands the possibilities of the tool.

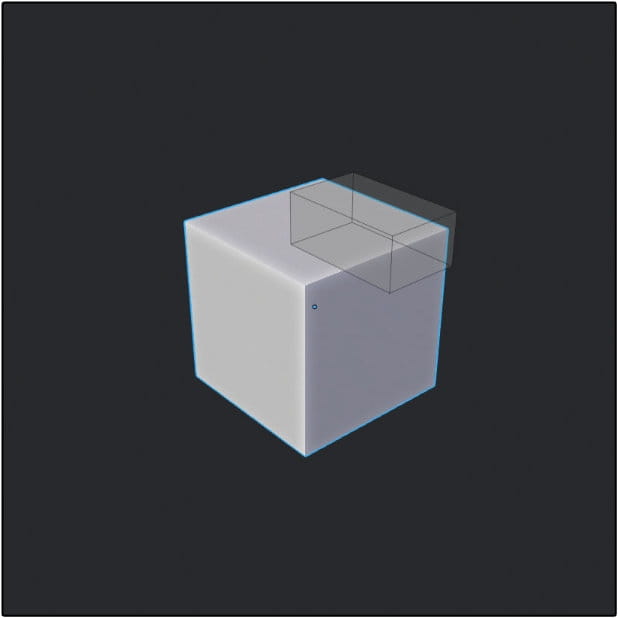
Primary way to finish an operation is a mouse click that confirms it. But there are two other ways. One of them is pressing "TAB".
After pressing TAB instead of left-clicking we "freeze" shape. We can modify it further from here - by pressing "E" we can change extrude amount.
We can also use CTRL-D menu for parameter modification.
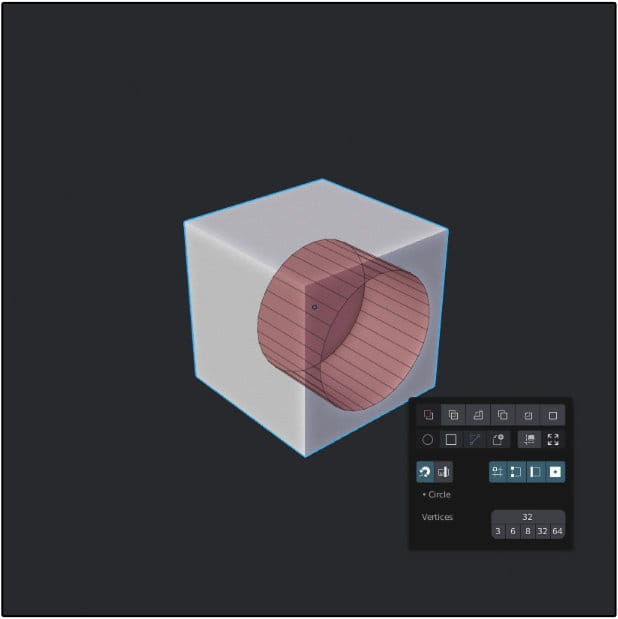
After pressing TAB and then opening menu (CTRL-D) we can change cutter parameters, like for example number of segments of this cylinder. Let's bring it down to 6.
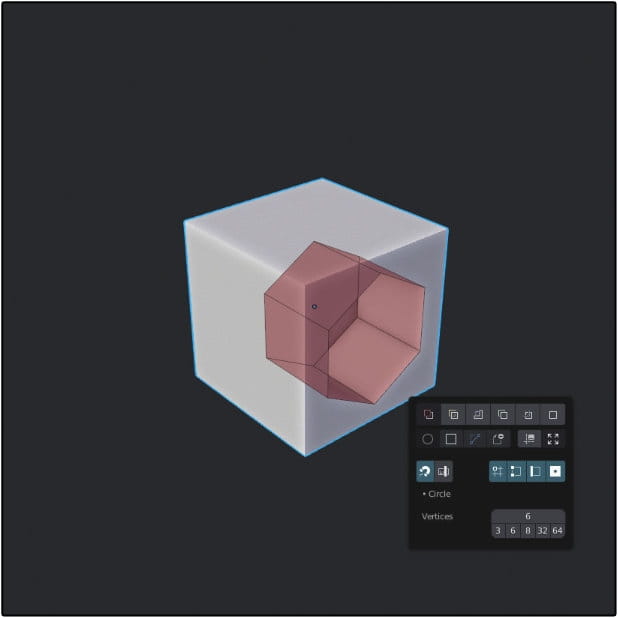
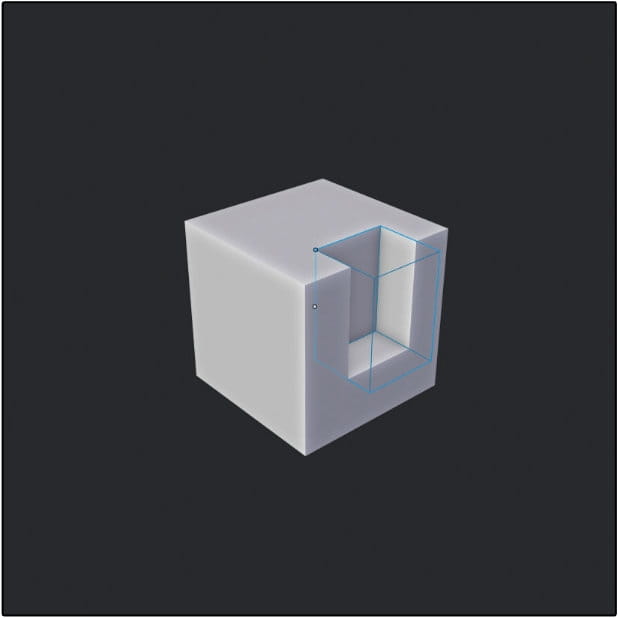
Now we have 6-gon that will cut our box. Exit menu and left click to confirm to finish an operation.
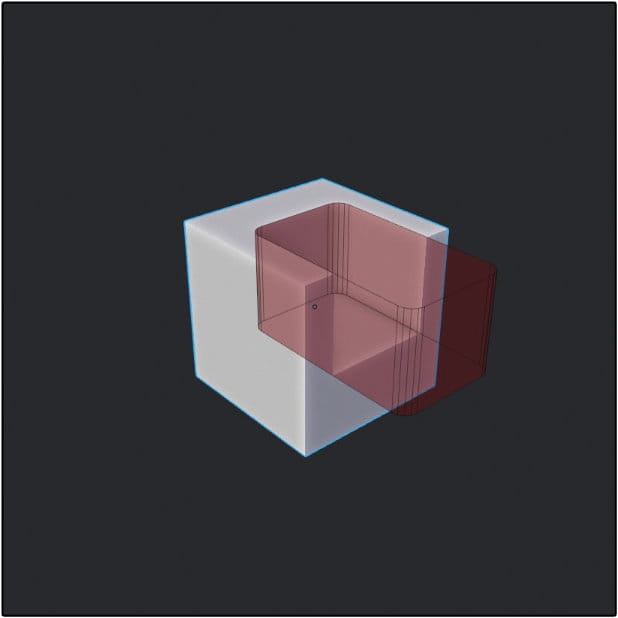
Another way that leaves us a ot of freedom is creating an active cutter. We do that with SHIFT-click. After that we can see that the cut was made, but there is also an outline of an object. We can rotate it, move it, go into edit mode and change it in any way, and the boolean result will adapt to our actions.

We first made a cut, confirmed it with shift-click and then just rotated boolean to get angled cut.
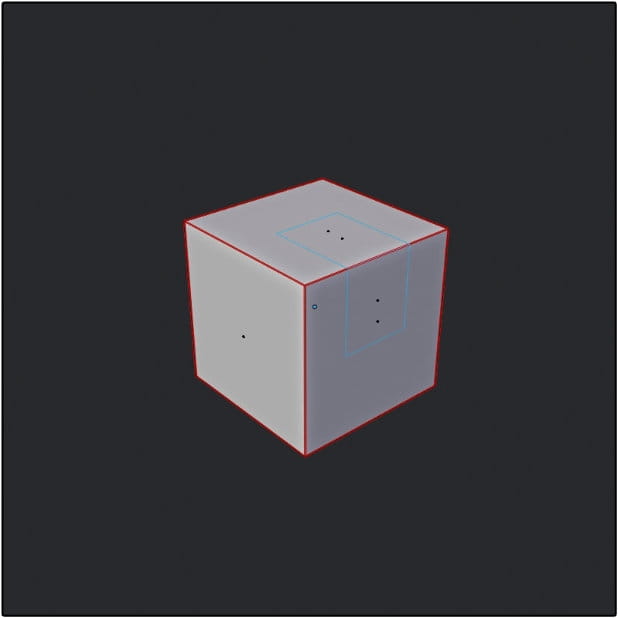
New version of BoxCutter also has snapping options. We can snap to vertex, edge and face center, grid, cursor, increments, which means that we can be very precise when it comes to cutting shapes.

Just press "snap" button, choose which options you want to enable and press "CTRL" before dragging. Small grey dots will appear on selected shape. Dragging close to one of these dots will align boolean shape to it. It is useful if you will drag with "ALT" enabled, this will create the center of cutter in the location of the dot.
This was a brief introduction to this powerful tool and we think you will find it very useful during modeling process. If you want to expand your knowledge about Boxcutter, we recommend to visit masterxeon's Youtube channel.
BoxCutter is paid add-on, available on BlenderMarket nad Gumroad.
This text was not endorsed in any way by developers of this tool.


LEAVE A COMMENT


|

|

|

|

|
 Customer zone
 Your orders
 Edit account
 Add project
 Liked projects
 View your artist profile
COMMENTS