How To Make Your CGI Walls More Realistic
Realistic walls with noise modifier.
Total: € 0
Continue Shopping
In accordance with the art. 13 section 1 and 2 of the European Parliament and Council Regulation 2016/679 of the 27th April, 2016 on the protection of natural persons, with regard to the processing of personal data and on the free movement of such data, and repealing Directive 95/46/EC (General Data Protection Regulation), hereafter RODO, I hereby inform that:
1. EVERMOTION S.C., 8 Przędzalniana Str., 15-688 Białystok, Poland is the Administrator of your Personal Data (APD)
2. Data Protection Inspector can be reached through e-mail: iod@evermotion.org
3. Your personal data are to be processed on the basis of art. 6 section 1 letter a, b and f of RODO in order to:
a) prepare, conclude and execute the agreement and for other purposes approved by you,
b) to execute the legitimate interest like marketing of products and the agreement, claim assertion or defence against claims resulting from the law regulations.
4. Entities entitled to the reception of your personal data may be the authorised public bodies; mail providers; providers of the services covered by the agreement; responsible for debt recovery, keeping the archives, document utilization, legal consulting, technical services, IT services and accountancy.
5. Your personal data shall not be transferred to the third country, nor to the international bodies.
6. Your personal data shall be processed within the period of the agreement and upon your additional consent until you withdraw it. APD shall keep the data for the period of any civil law claim execution connected with the agreement.
7. You have the right to demand an access to your personal data, to correct or to delete the data if there is no other basis for the processing or any other purpose of such processing or to limit the processing of the data, to transfer the data to another administrator and to raise objections to the further data processing if there is no legal basis for further processing and to withdraw any previous consent.
8. You provide the personal data voluntarily, however they are necessary to conclude the agreement. The refusal of providing such data may result in the refusal of the agreement conclusion.
9. You have the right to lodge a complaint to the Personal Data Protection Office when in your opinion the data processing violates the regulations of General Data Protection Regulation of the 27 April, 2016 (RODO).
10. Your data will be automatically processed, including the form of profiling.
11. You are obligated to forward above mentioned information to your representative, especially if you appointed this person in the agreement as the contact person or as the representative for the agreement execution.
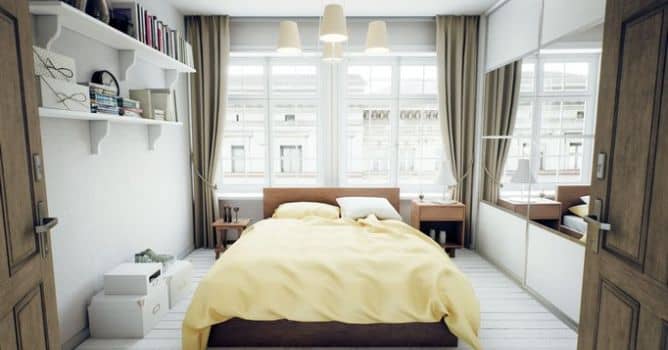

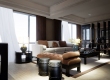
This scene comes from Archinteriors for Unreal engine vol. 5 collection, our latest collection of loft and home interiors for Unreal Engine 4. Collection consists of five scenes and is sold in regular price: 120€. This interior consists of 2 rooms filled with great assets, let's see what we got.

The final scene, screenshot from Unreal Engine 4.

Final scene, continued.
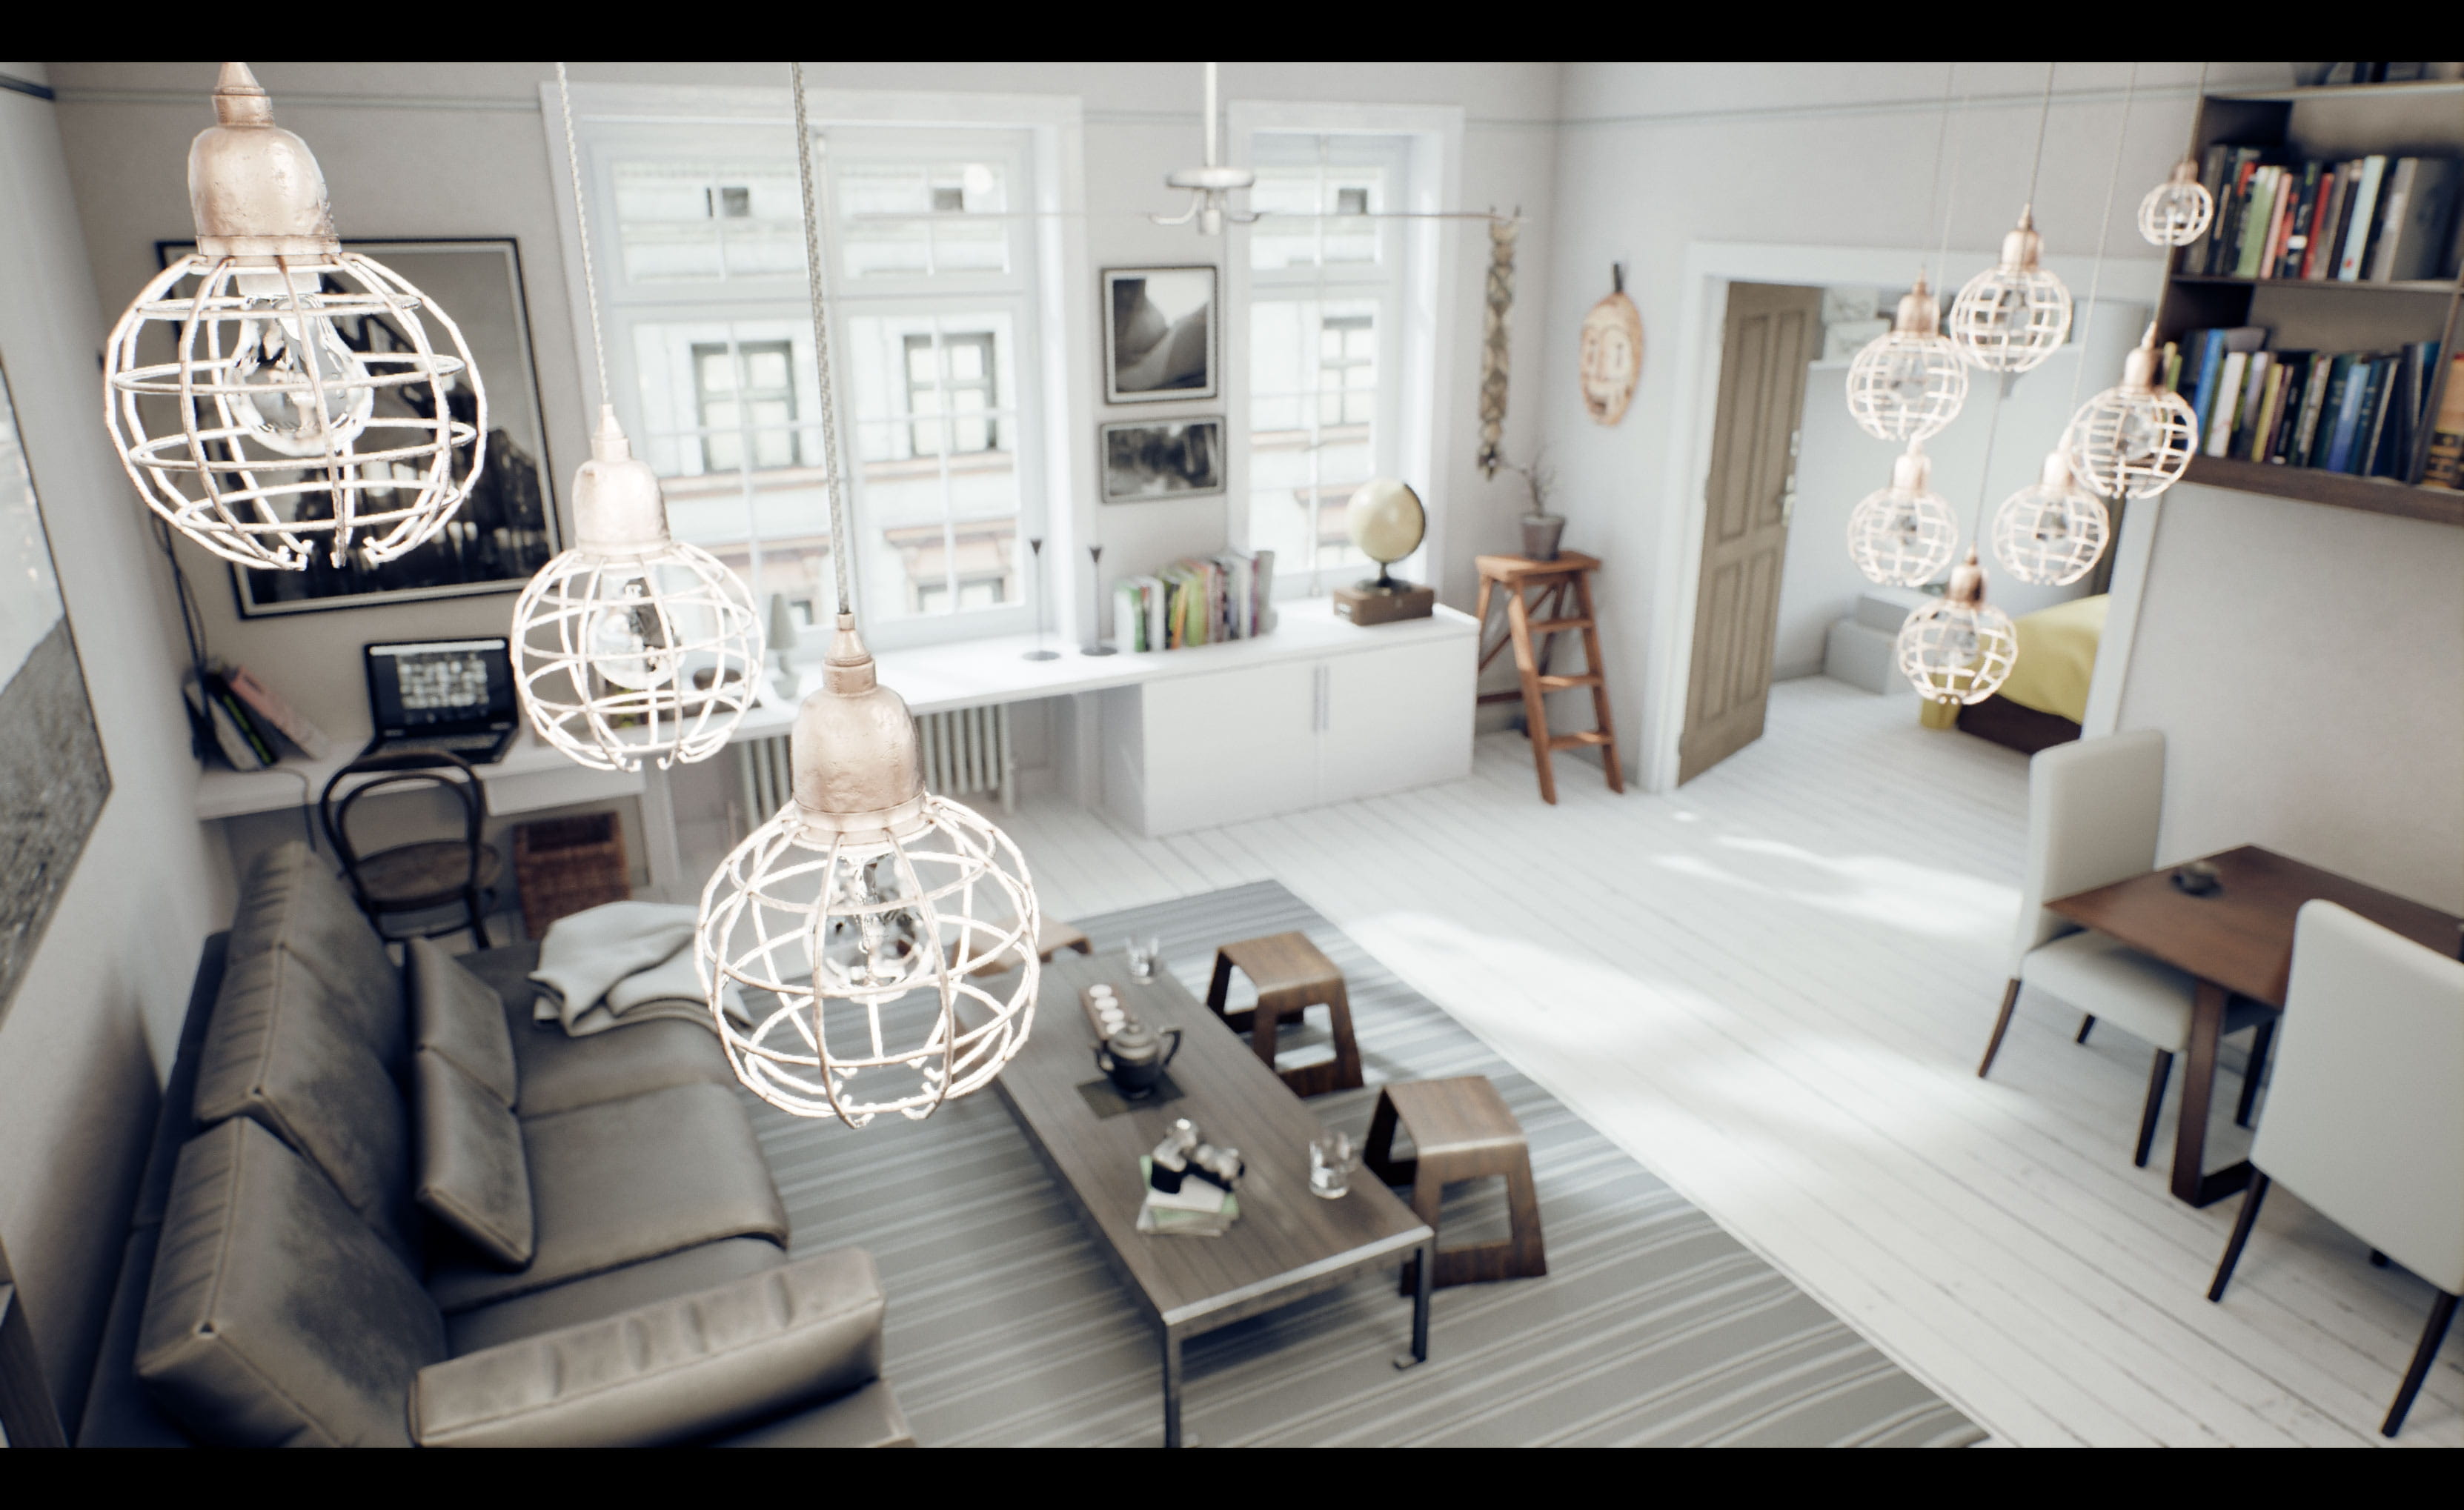
Final scene, continued.

Final scene, continued.

Final scene, continued.
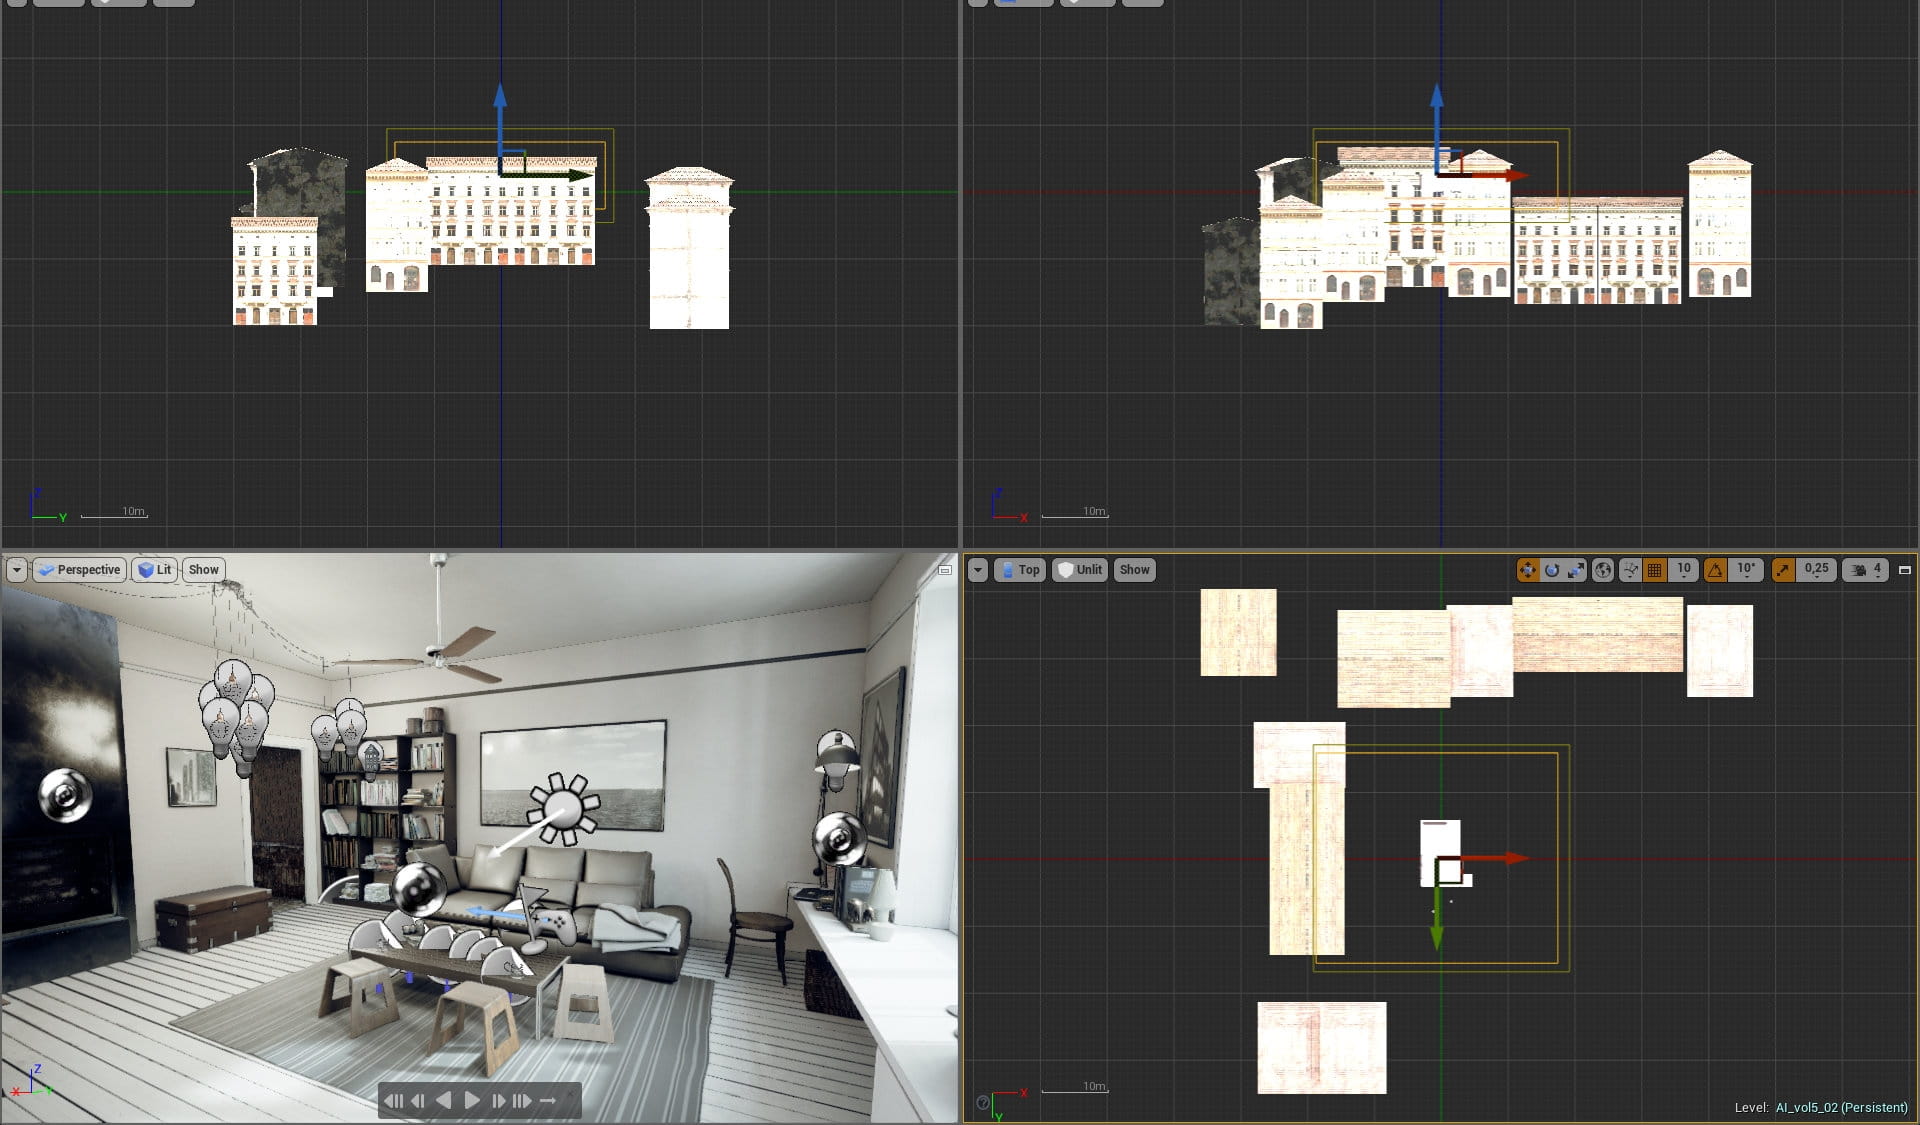
The scene in Unreal Engine viewport, with side, front and top views. As you can see, there is not only our interior, but also some surrounding buildings that are visible through windows.
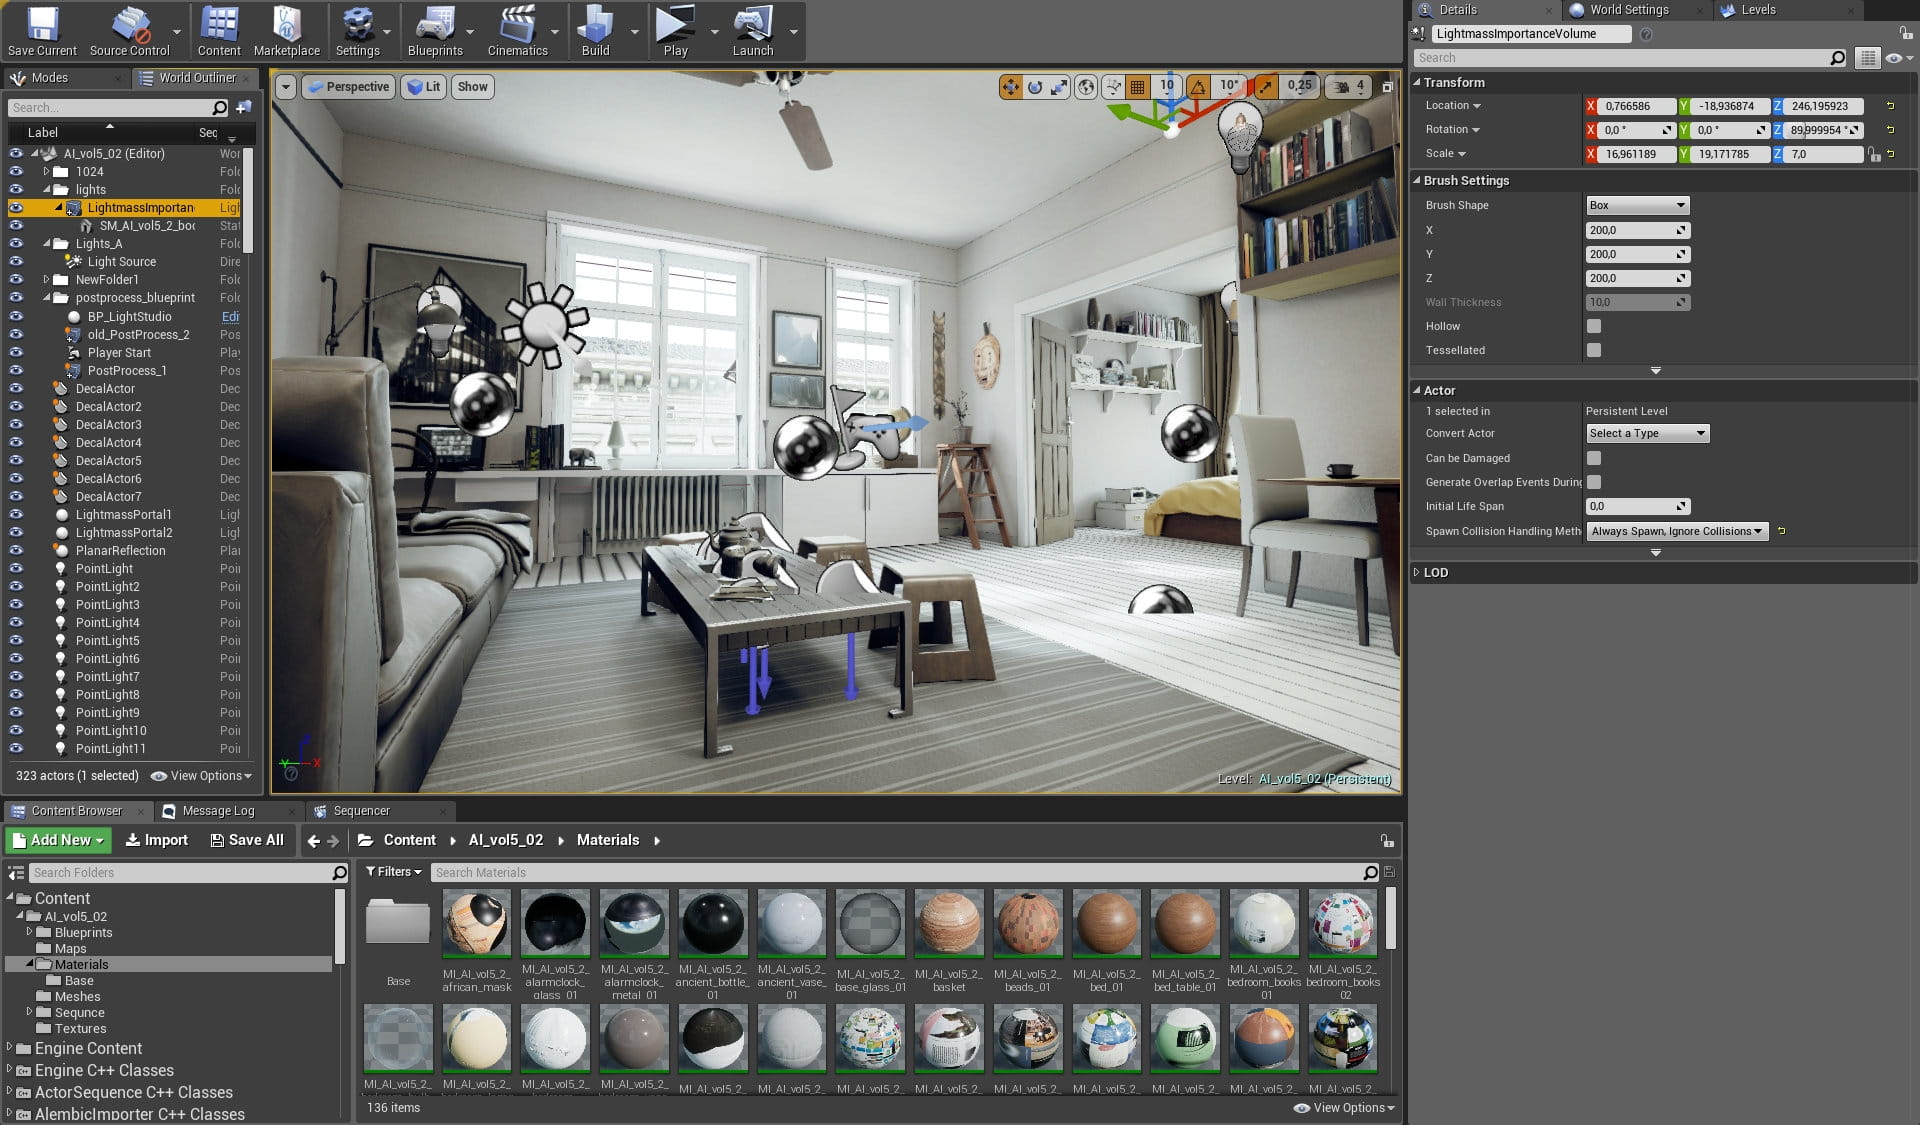
We surrounded our interior with Lighmass Importance Volume (LIV). It allows you to selectively choose where in the level you want to focus the light calculations. If you have some elements in the distance (like our surrounding buildings), you do not need them to place inside LIV, so Global Illumination is calculated only for our interior. Without LIV the engine would trace indirect lighting to the bounds of the level which would increase lightmap sizes and build times.

Main light source settings. We used stationary direct light with quite big intensity (20). Increased Light Source angle and checking "Use Area Shadows for Stationary Light" gives us soft shadowing, like on overcast day.

Environment was made with BP_LightStudio blueprint. It provides all-in-one solution for Skylight, Fog and environment map. We used HDRI for lighting this scene. This blueprint allows to control HDRI brightness and contrast in engine.

Skylight settings. White skylight further adds brightness to the scene.

Post-processing settings. We changed a lot, actually. Decreased global saturation, make image more blueish by altering gamma values, we also increased gain a bit.

Besides changing global tint of the scene and white balance temperature, we also make highlights more warm in tone.

On top of color grading we put subtle chromatic abberation and bloom. We disabled Auto-Exposure by entering "1,0" in Min and Max Brightness fields. We also added vignette and grain.

The last Post-Processing settings: Ambient Occlusion, global illumination intensity and increased quality of screen space reflections.
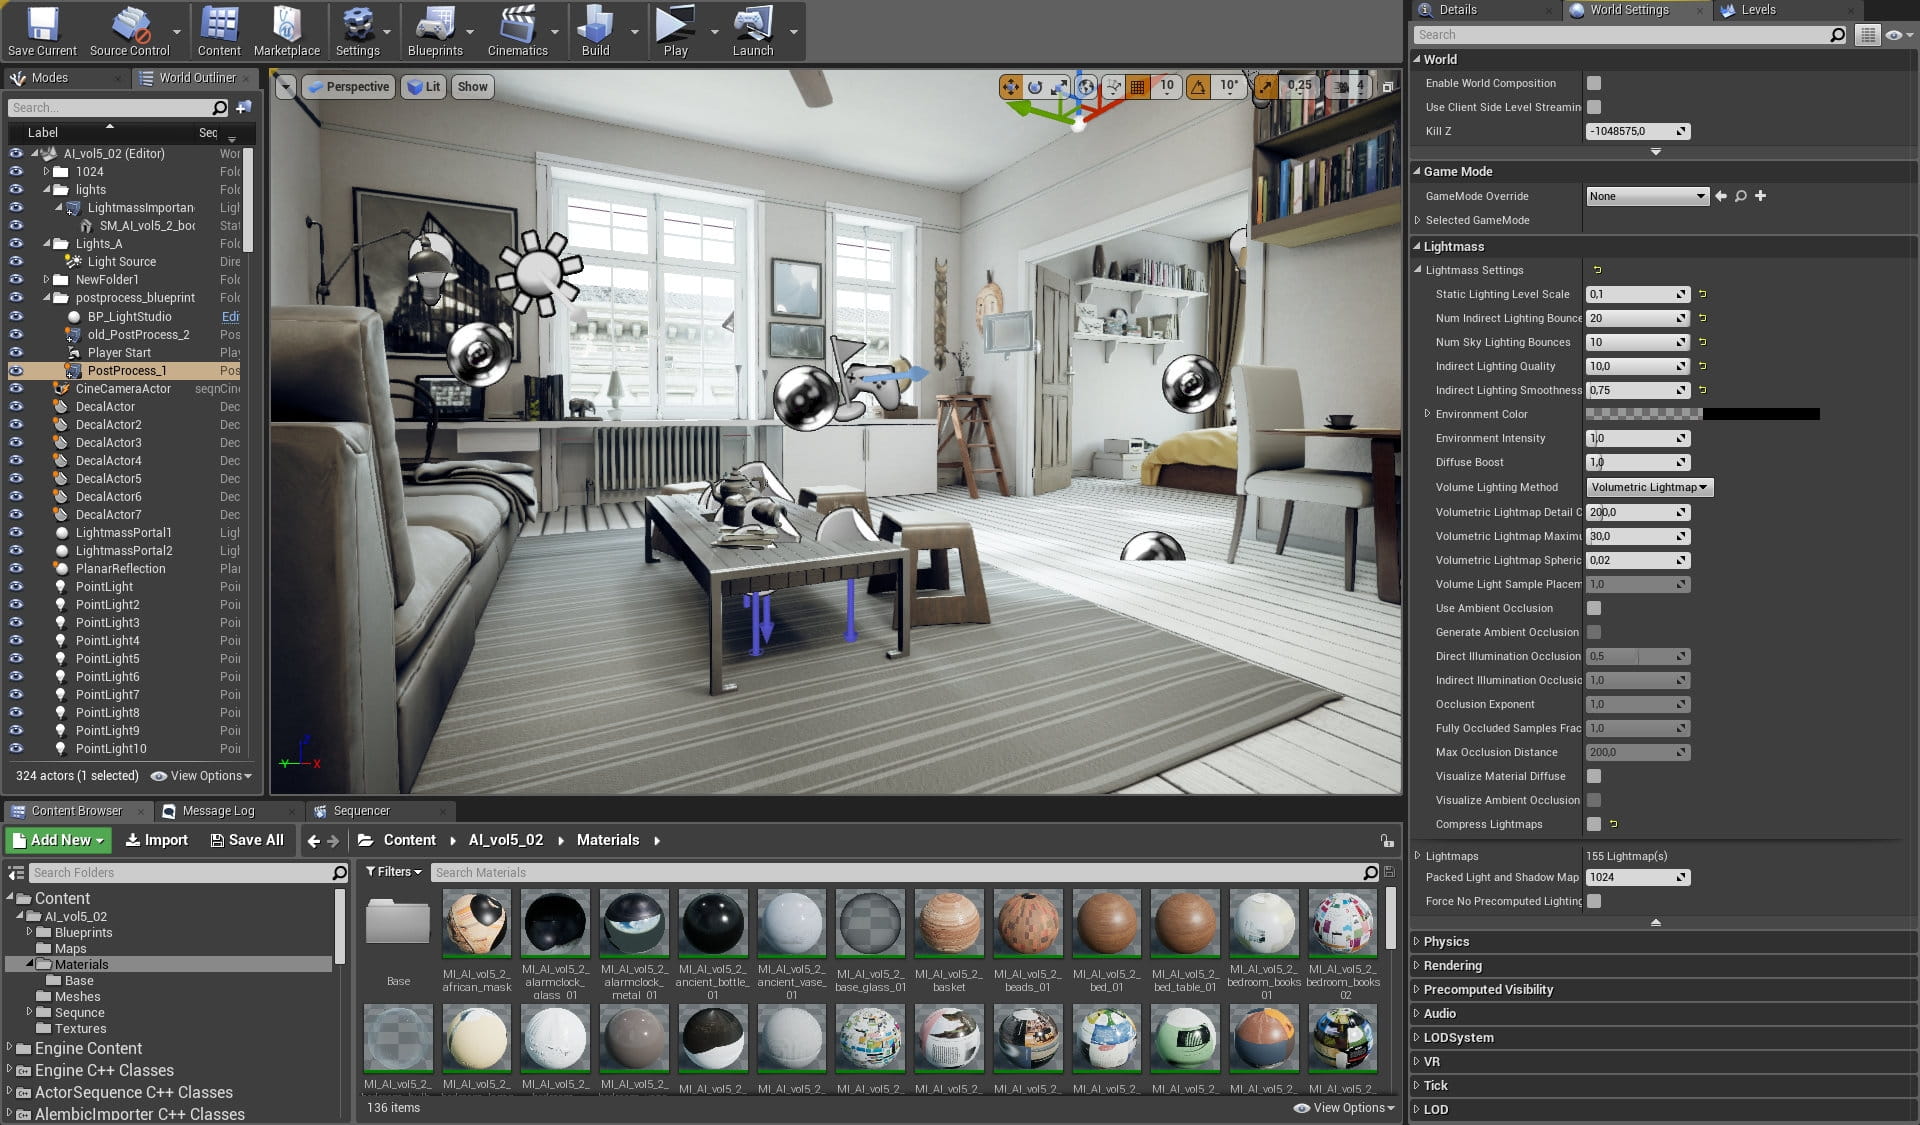
Lightmass settings - these settings give great final quality, but they demand a lot of CPU power and time for baking. You can change them if you want to re-bake the scene. Basically there are two sliders that influence time of bake - Static Lighting Level Scale and Indirect Lighting Quality. By the rule of thumb their multiplication should give "1" as a result (Static Lighting Level Scale x Indirect Lighting Quality = 1).
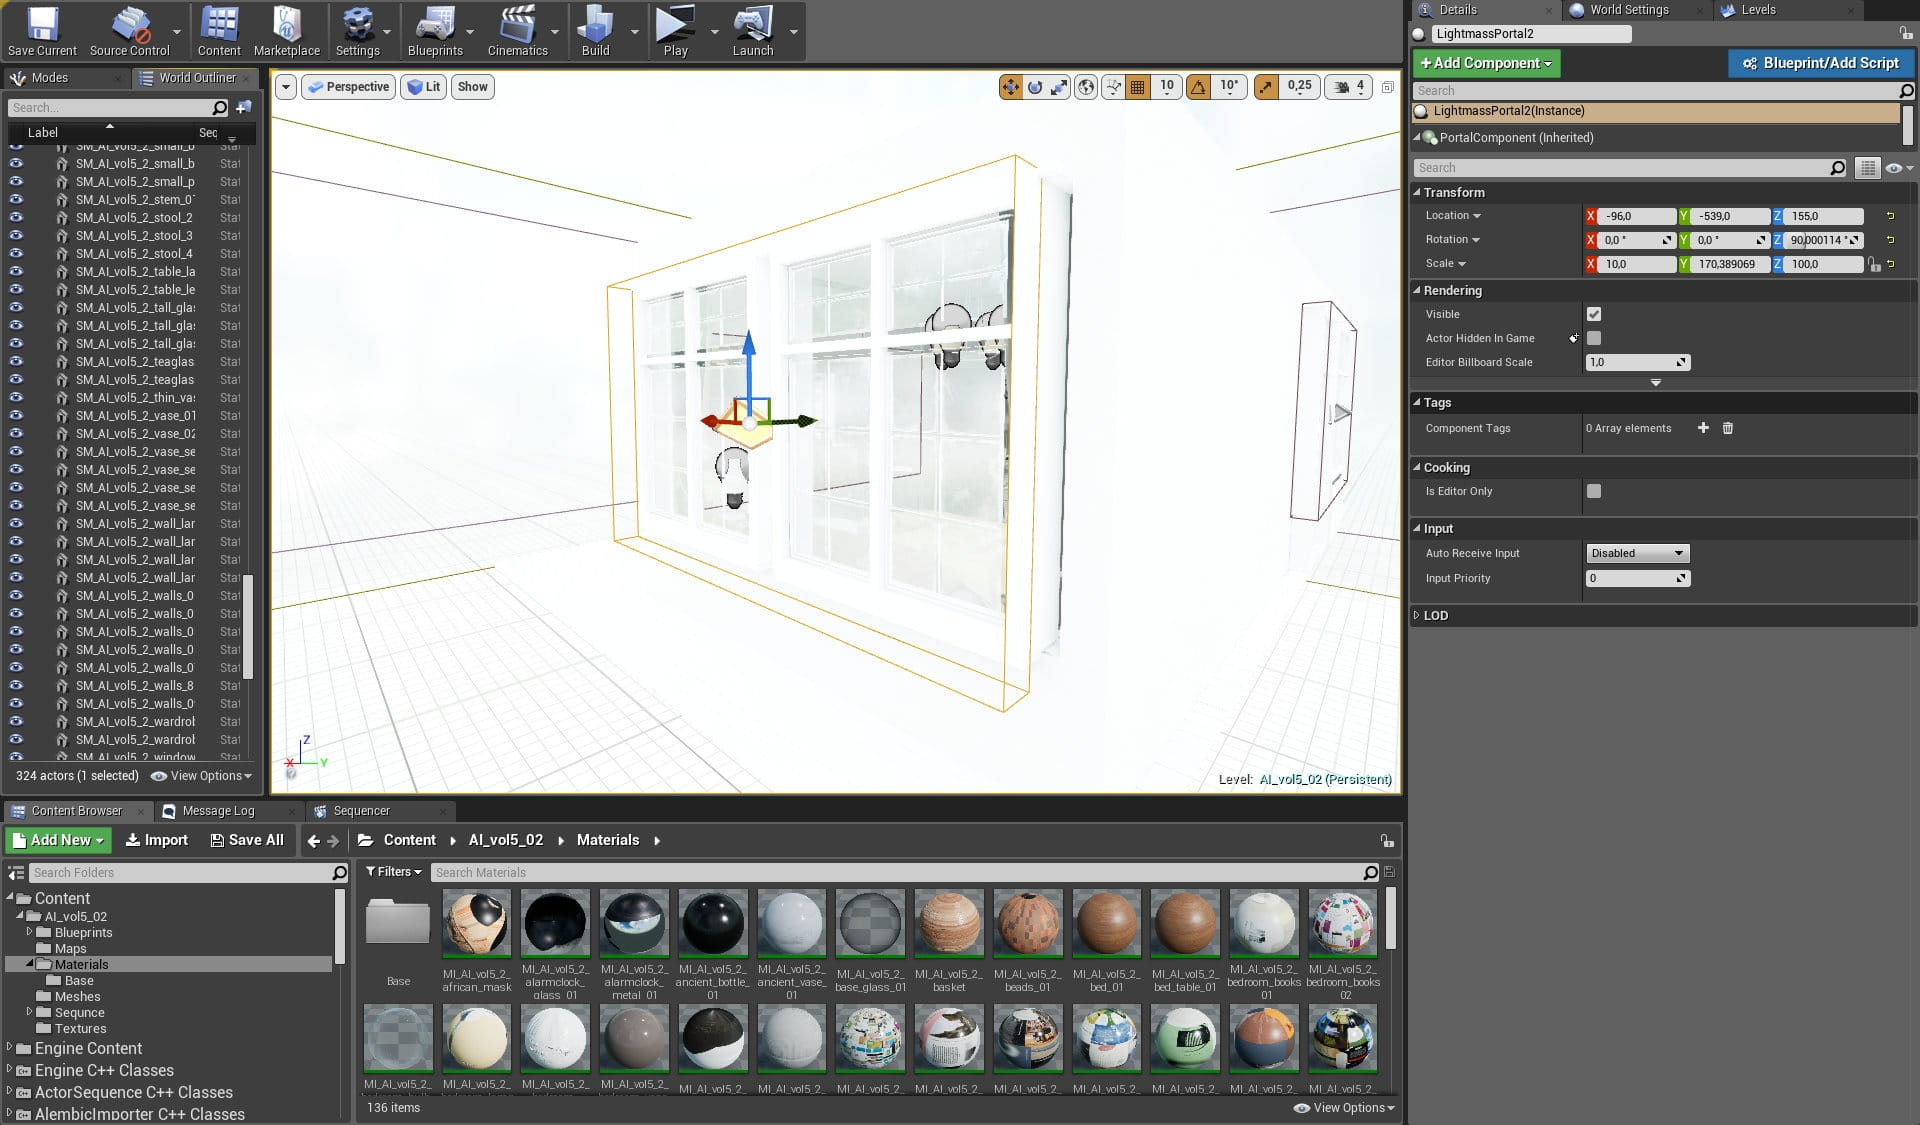
Placing Light Portals in windows increases speed of baking light.
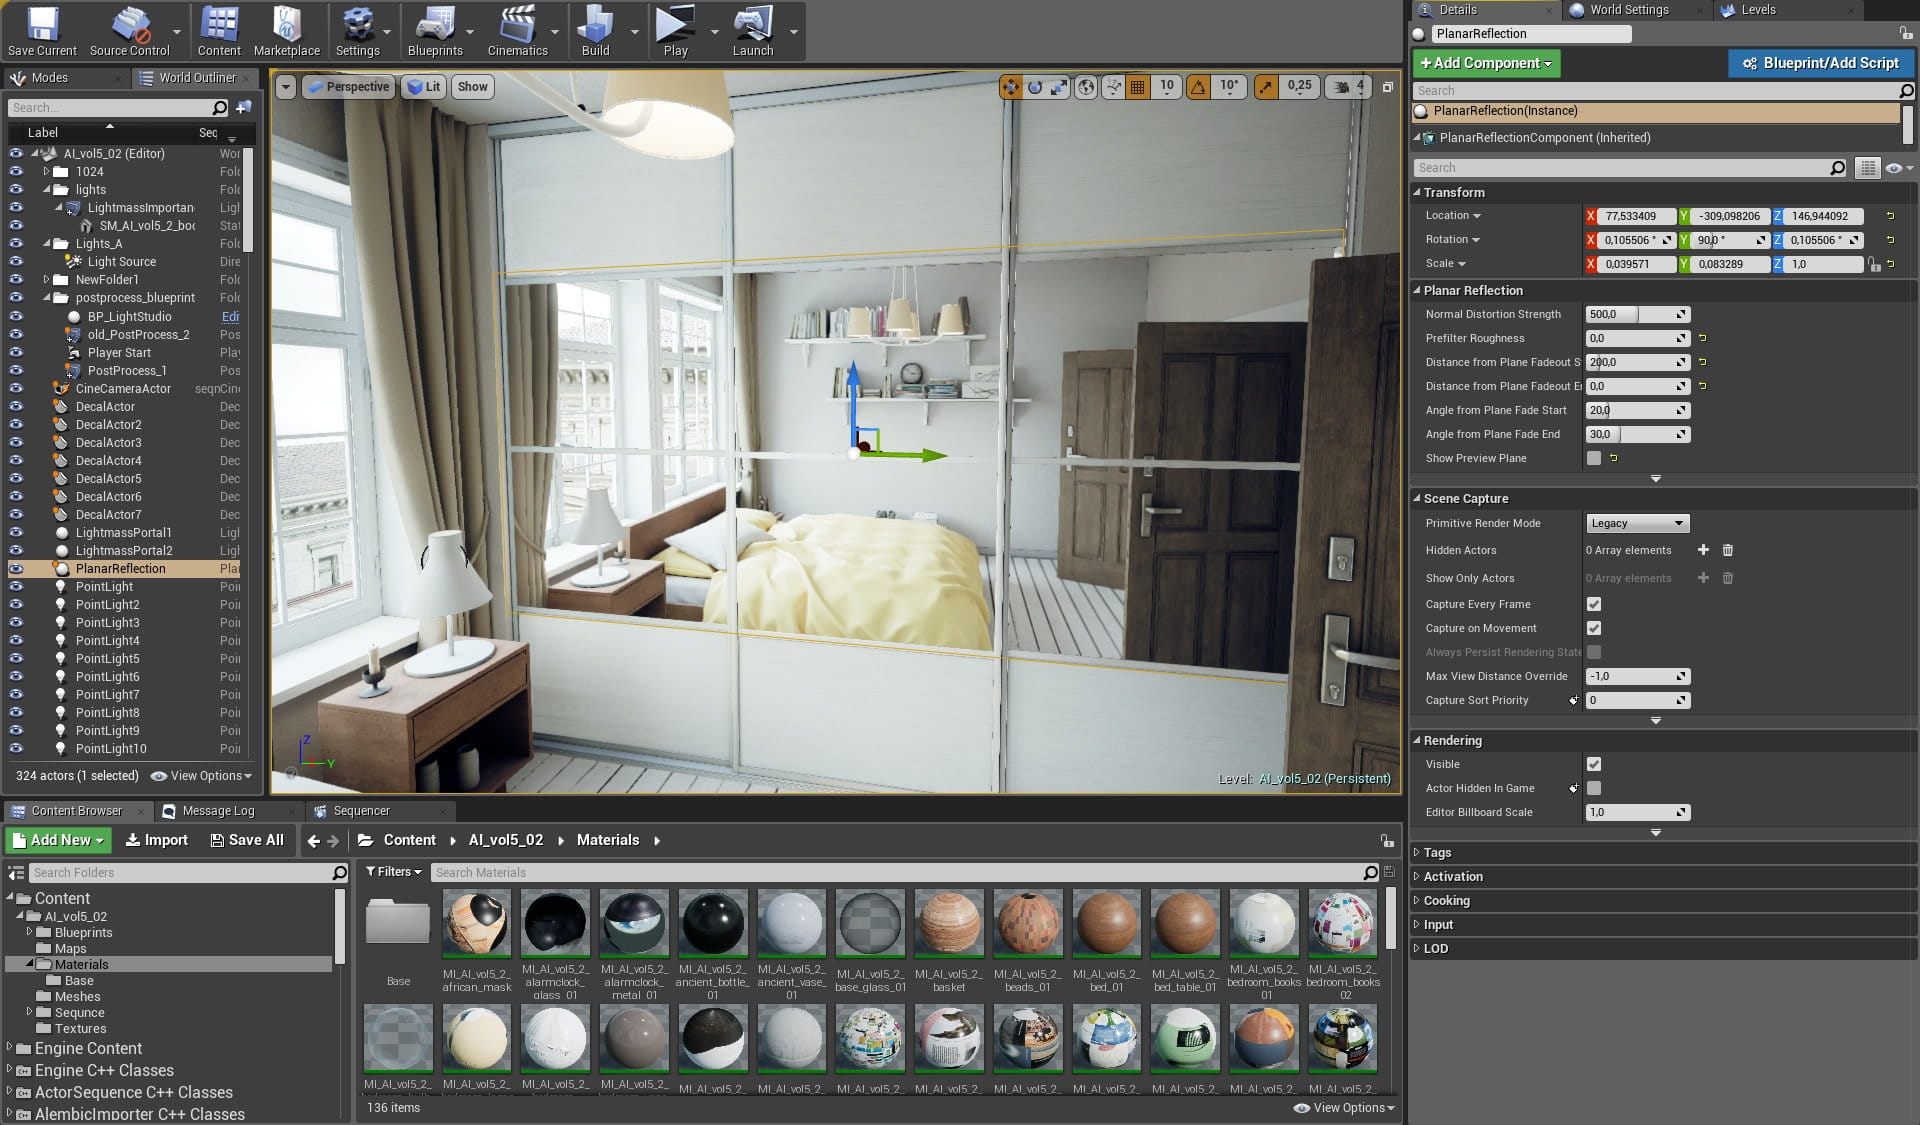
For mirror reflections we used Planar Reflection.
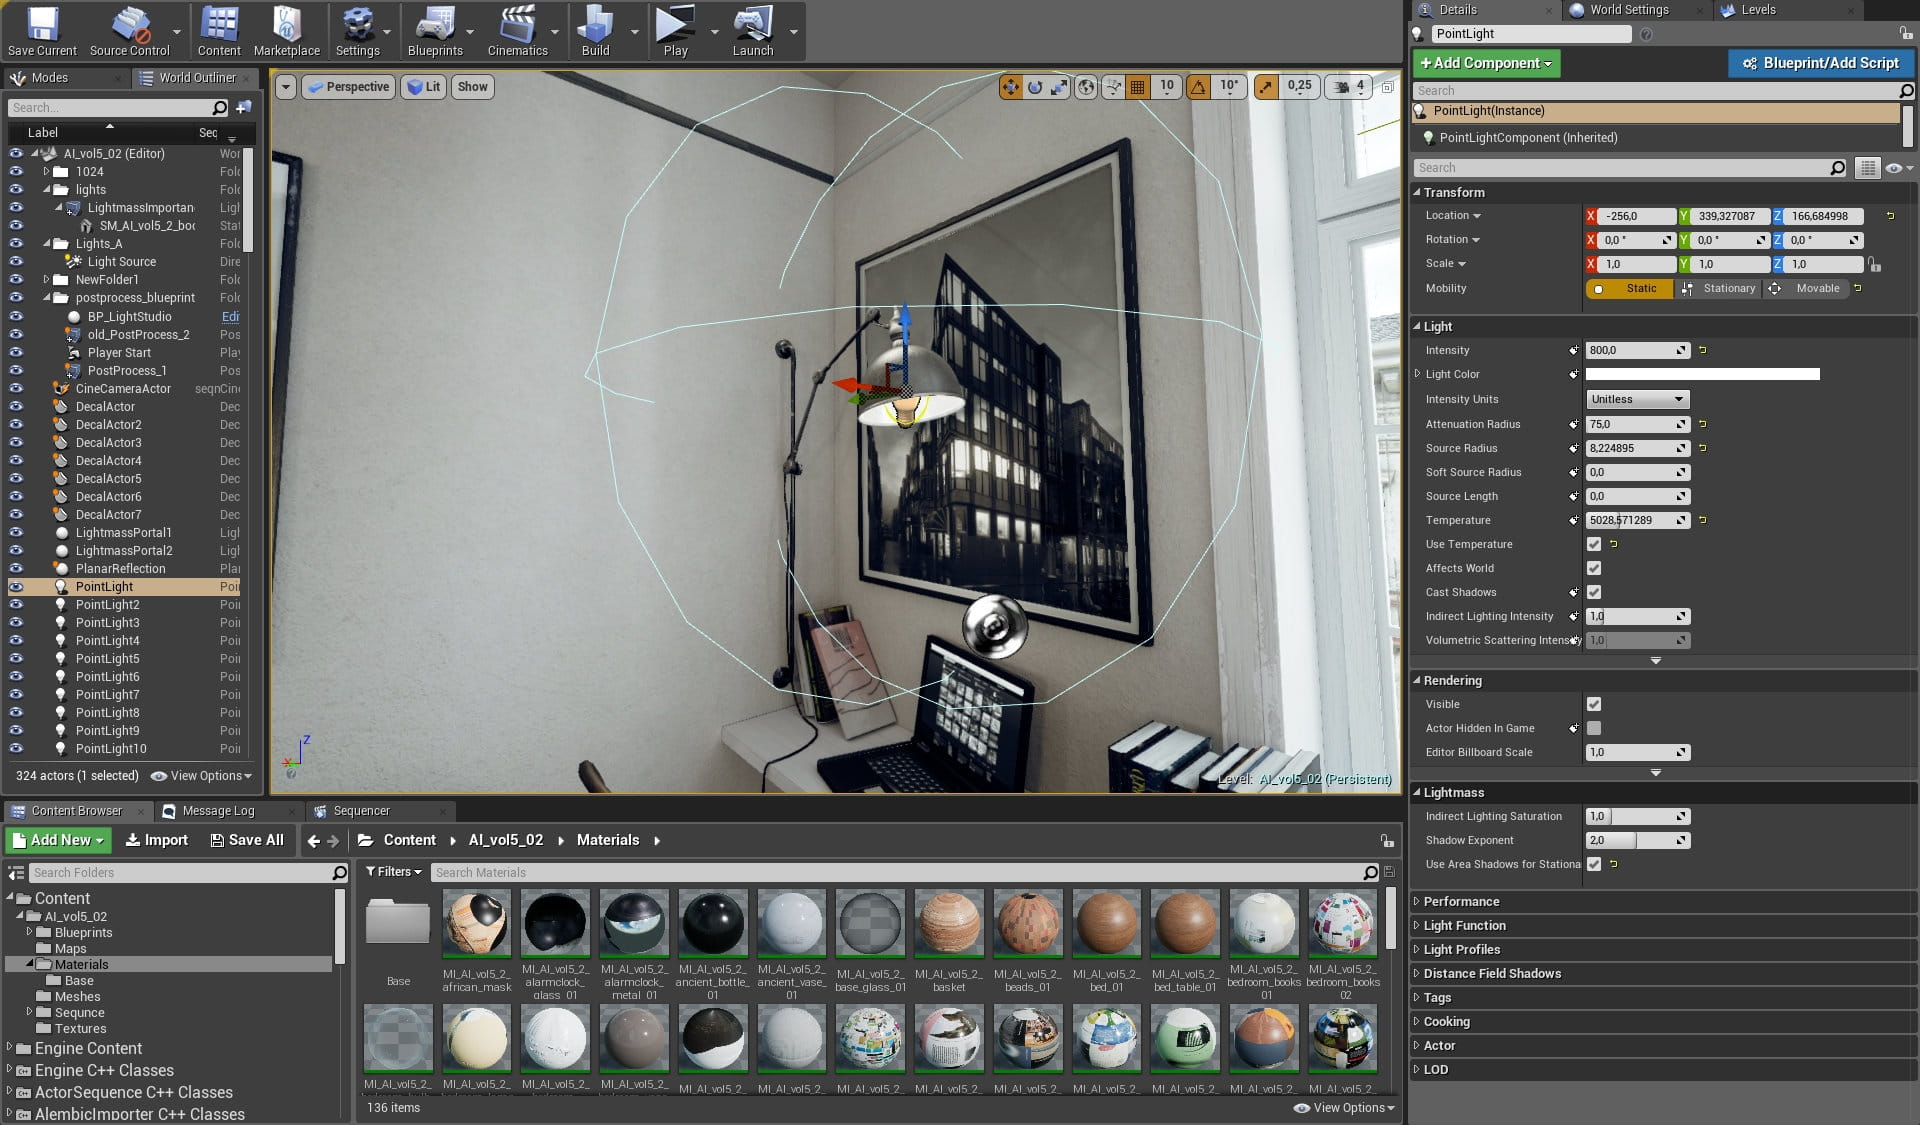
We also placed some lights for lamps.
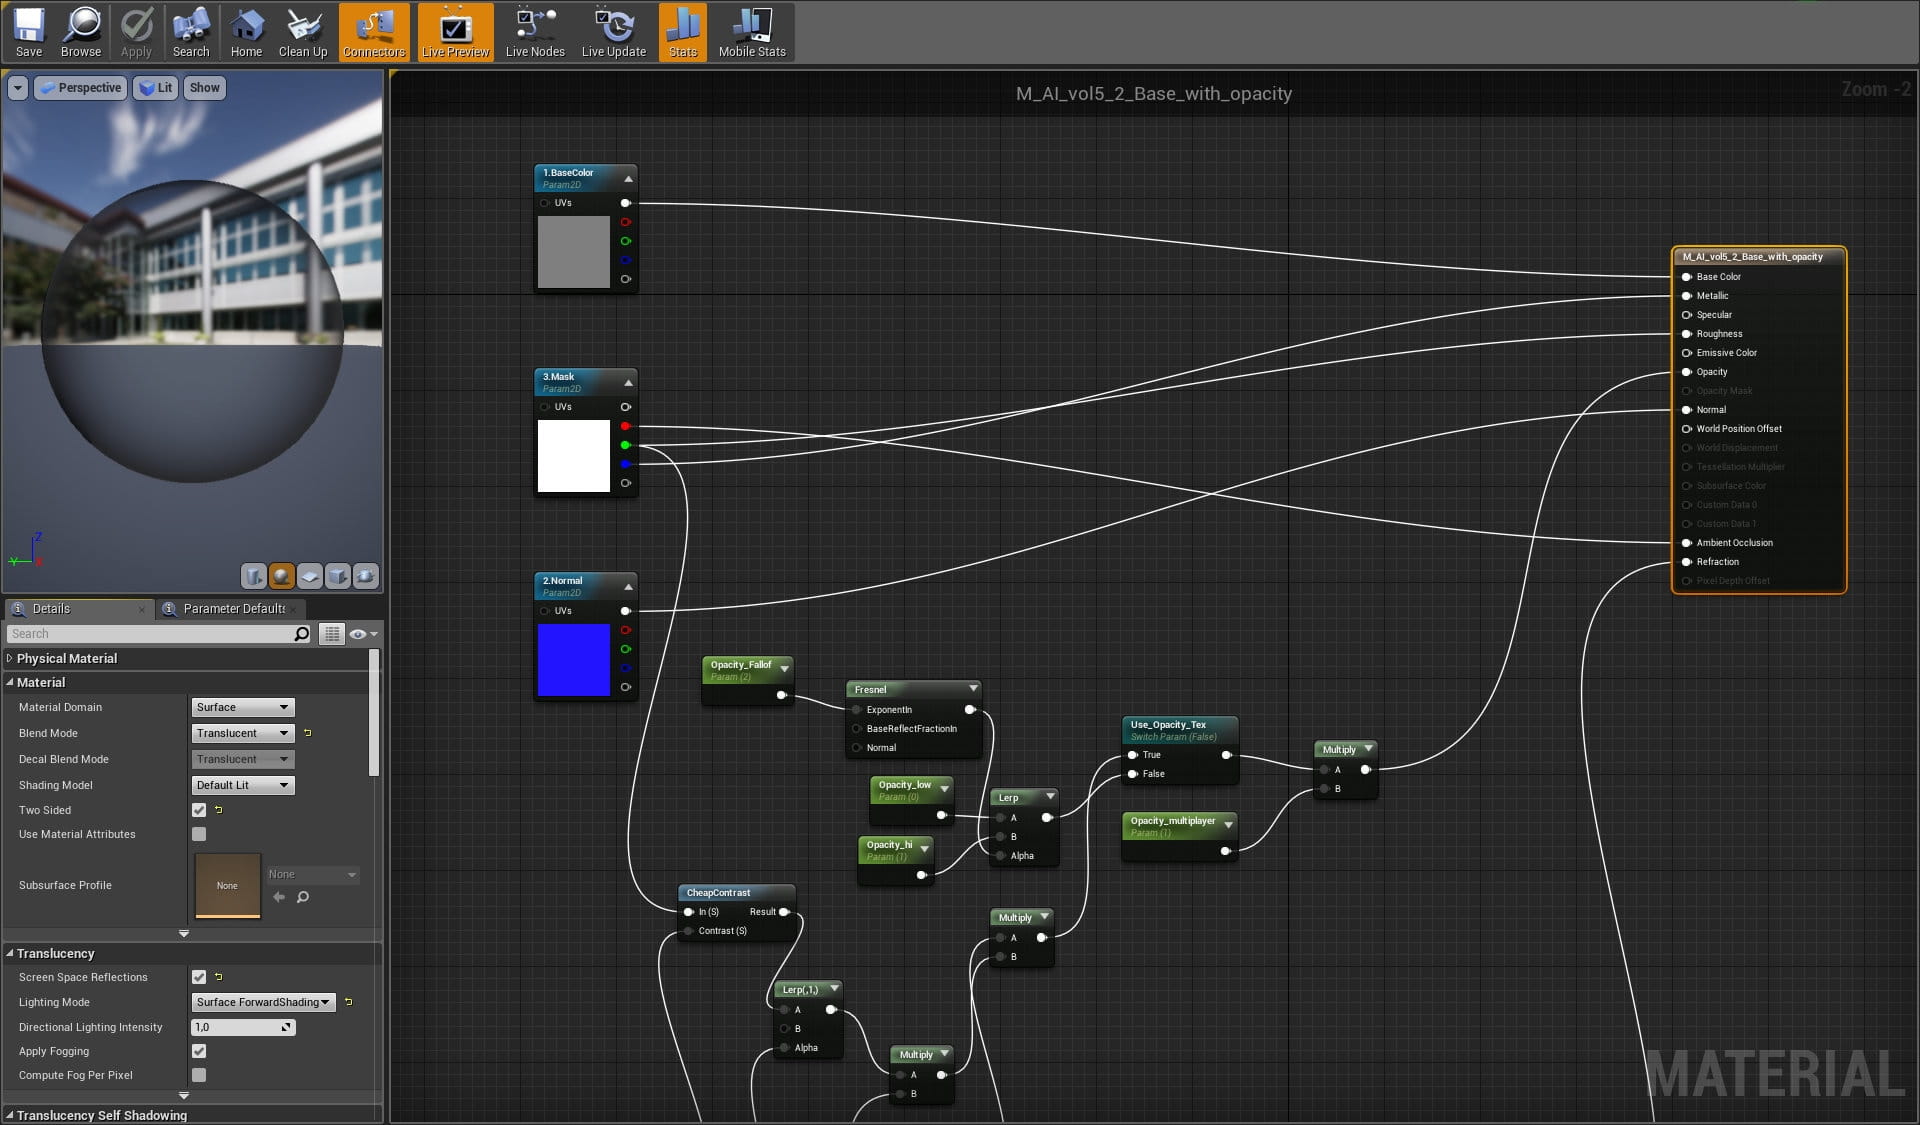
Glass material - one map for basic color, another (mask) is used for two reasons. The same texture controls metallic (0), roughness (0) and AO (0) values, so we connected it with these three slots. It is also input for CheapContrast. Fresnel node is used for simulating different density of transparent material.
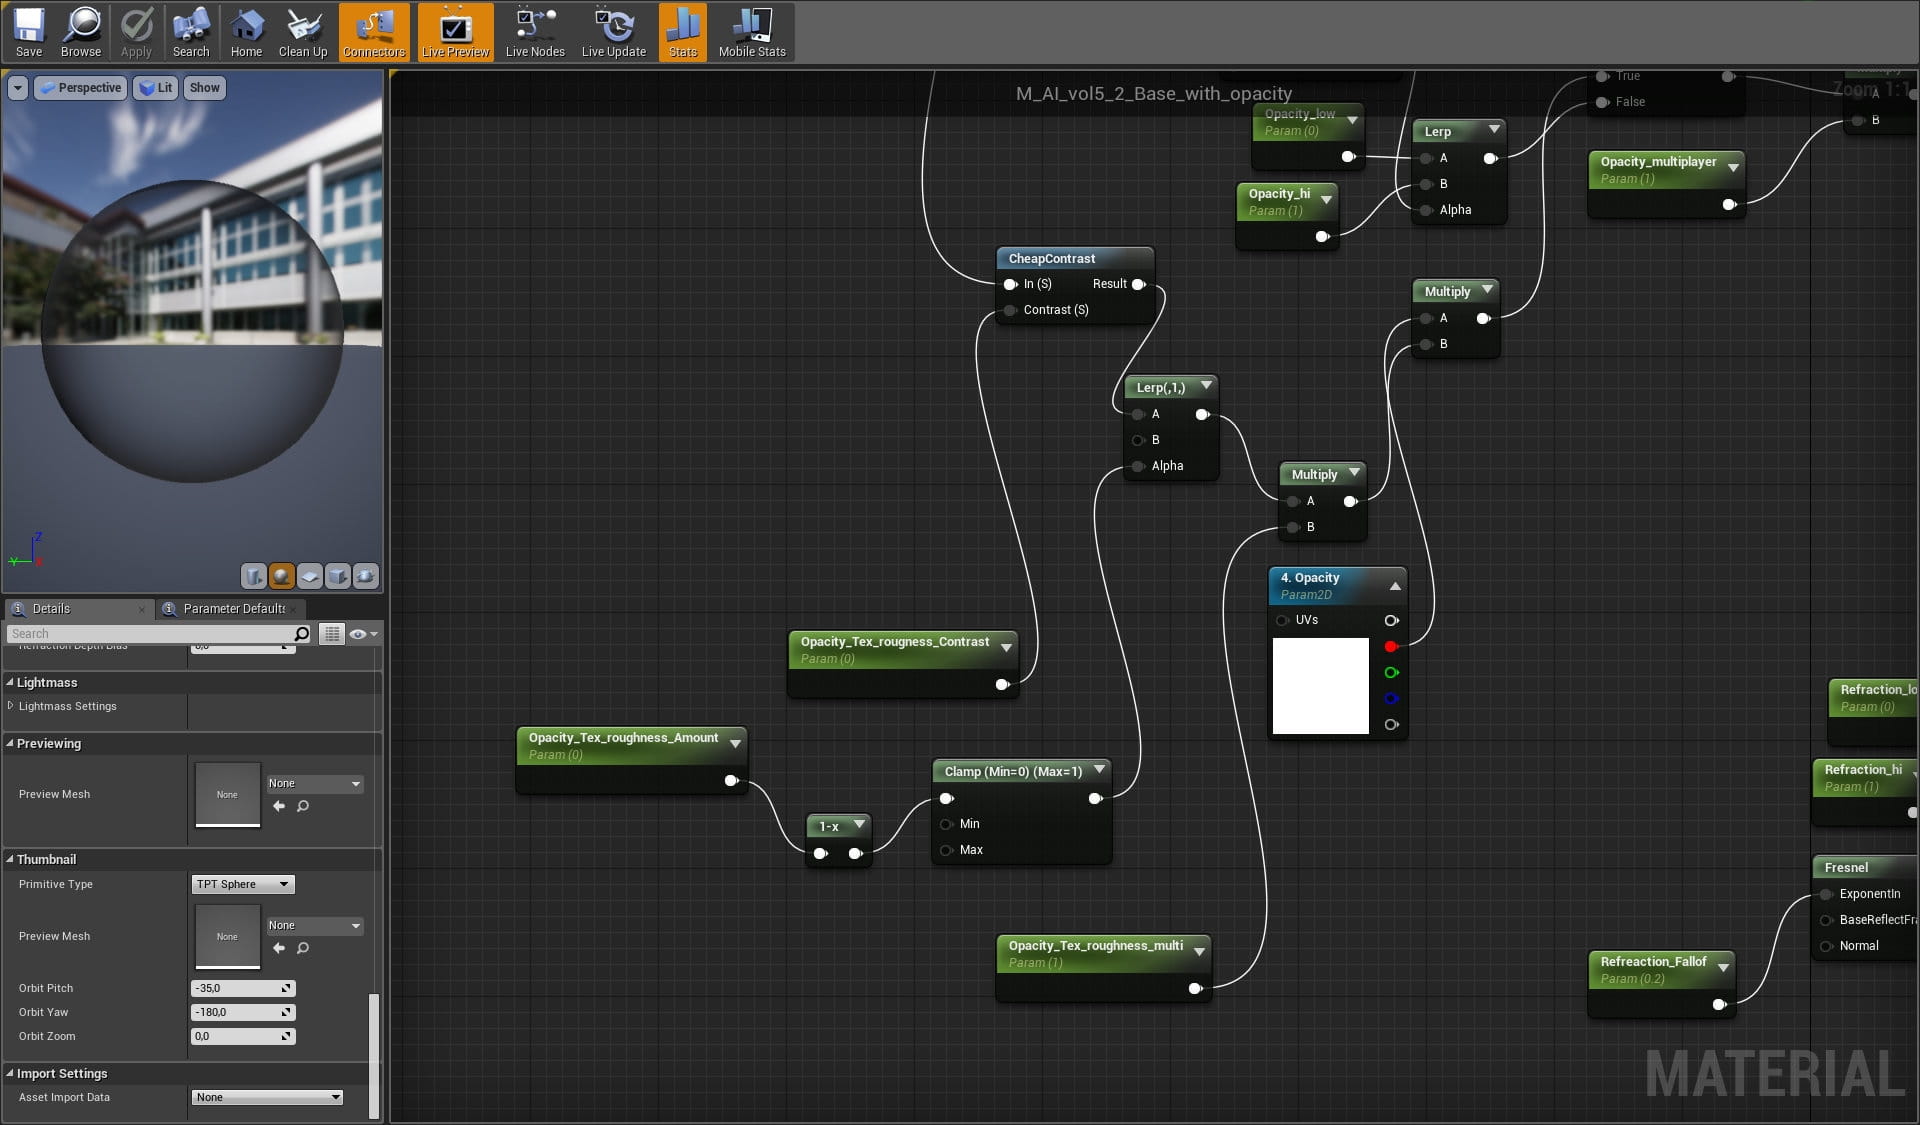
The rest of glass settings. We exposed many parameters in this material: Roughness amount and contrast, refraction falloff, opacity parameters, etc.

Refraction settings.
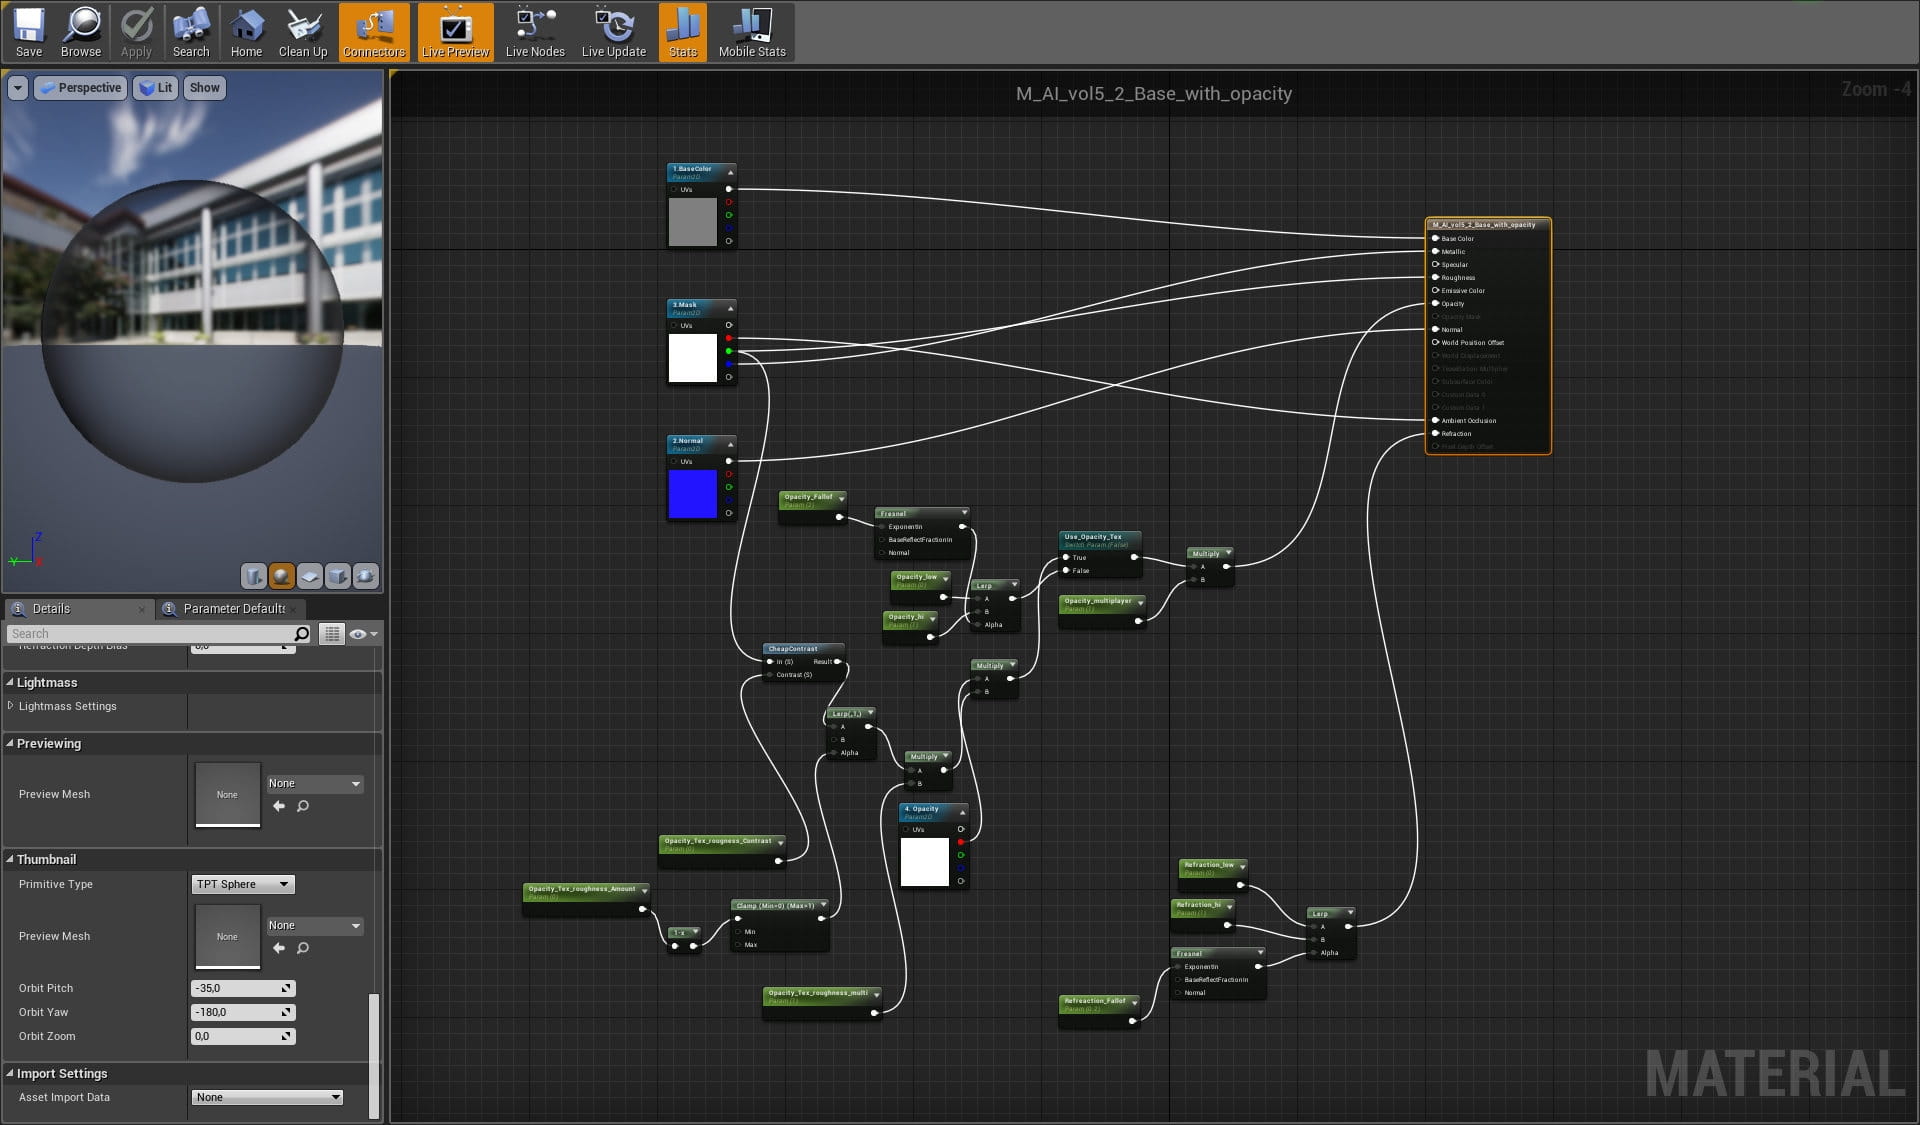
Whole glass material.

Main sofa UV map.
Thanks for reading! If you are interested in getting this scene or entire Archinteriors for Unreal engine vol. 5 collection, please, visit Evermotion Shop.


LEAVE A COMMENT


|

|

|

|

|
 Customer zone
 Your special offers
 Your orders
 Edit account
 Add project
 Liked projects
 View your artist profile
COMMENTS