OCIO Color Management in 3ds Max 2024
Color management is crucial for full control over your renders.


Total: € 0
Continue Shopping
In accordance with the art. 13 section 1 and 2 of the European Parliament and Council Regulation 2016/679 of the 27th April, 2016 on the protection of natural persons, with regard to the processing of personal data and on the free movement of such data, and repealing Directive 95/46/EC (General Data Protection Regulation), hereafter RODO, I hereby inform that:
1. EVERMOTION S.C., 8 Przędzalniana Str., 15-688 Białystok, Poland is the Administrator of your Personal Data (APD)
2. Data Protection Inspector can be reached through e-mail: iod@evermotion.org
3. Your personal data are to be processed on the basis of art. 6 section 1 letter a, b and f of RODO in order to:
a) prepare, conclude and execute the agreement and for other purposes approved by you,
b) to execute the legitimate interest like marketing of products and the agreement, claim assertion or defence against claims resulting from the law regulations.
4. Entities entitled to the reception of your personal data may be the authorised public bodies; mail providers; providers of the services covered by the agreement; responsible for debt recovery, keeping the archives, document utilization, legal consulting, technical services, IT services and accountancy.
5. Your personal data shall not be transferred to the third country, nor to the international bodies.
6. Your personal data shall be processed within the period of the agreement and upon your additional consent until you withdraw it. APD shall keep the data for the period of any civil law claim execution connected with the agreement.
7. You have the right to demand an access to your personal data, to correct or to delete the data if there is no other basis for the processing or any other purpose of such processing or to limit the processing of the data, to transfer the data to another administrator and to raise objections to the further data processing if there is no legal basis for further processing and to withdraw any previous consent.
8. You provide the personal data voluntarily, however they are necessary to conclude the agreement. The refusal of providing such data may result in the refusal of the agreement conclusion.
9. You have the right to lodge a complaint to the Personal Data Protection Office when in your opinion the data processing violates the regulations of General Data Protection Regulation of the 27 April, 2016 (RODO).
10. Your data will be automatically processed, including the form of profiling.
11. You are obligated to forward above mentioned information to your representative, especially if you appointed this person in the agreement as the contact person or as the representative for the agreement execution.

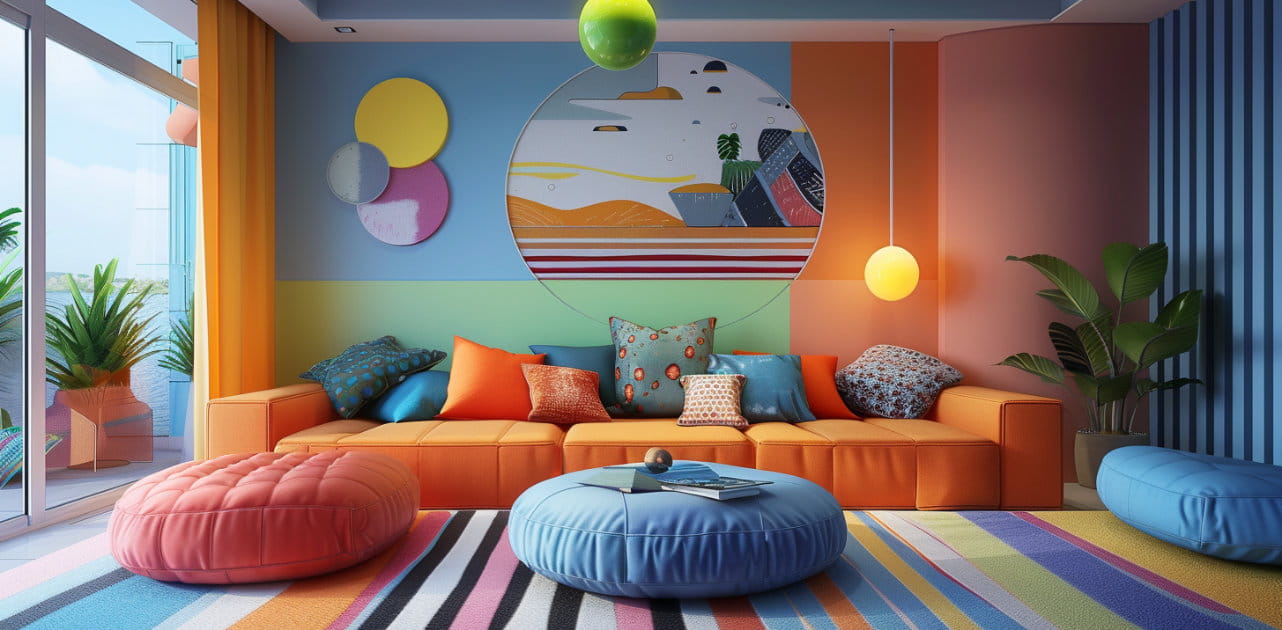
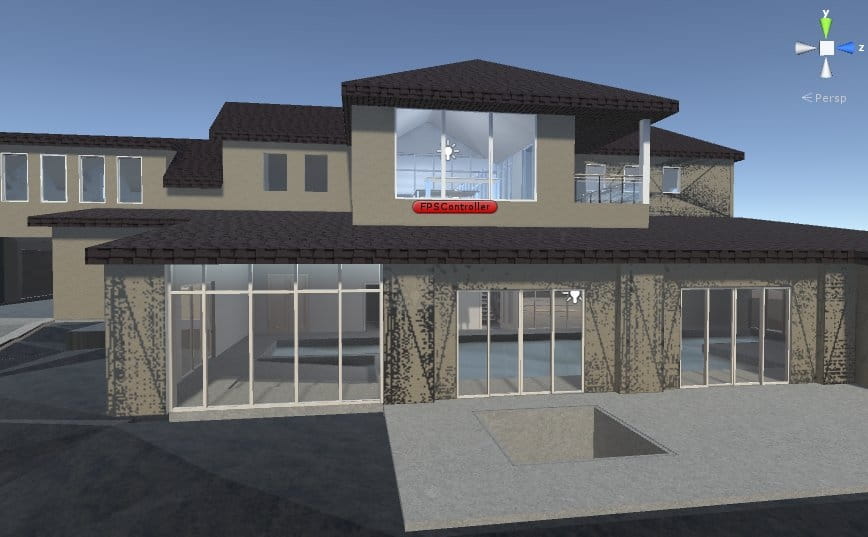
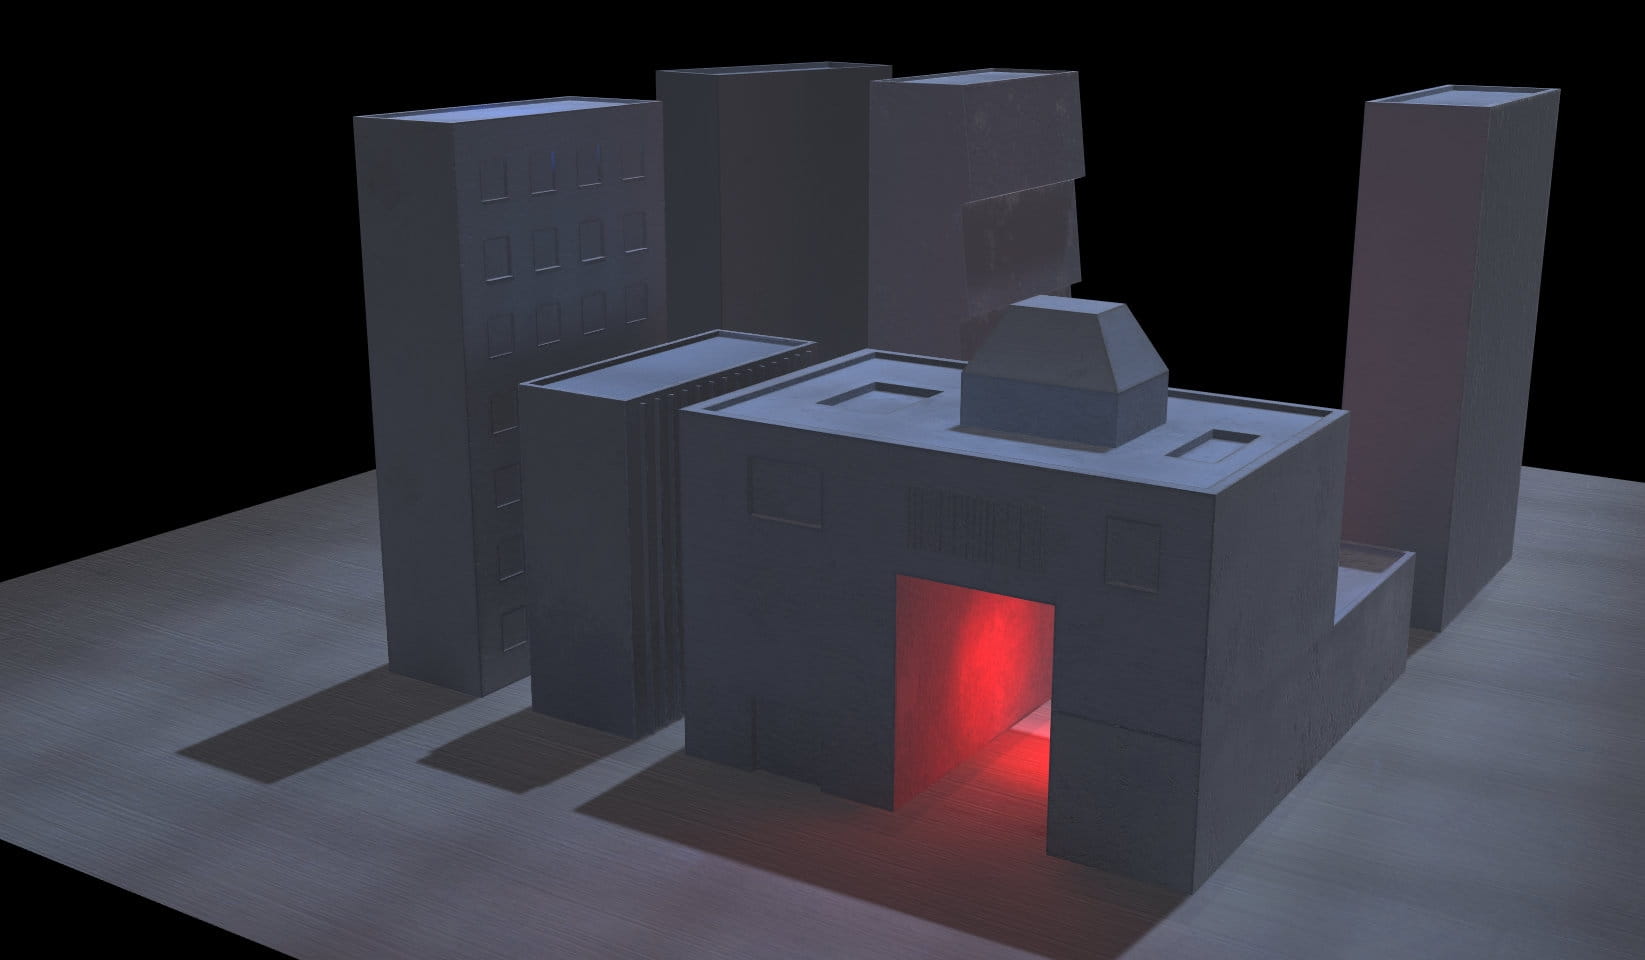
Top image: interior by Artem Netyagin
Unity becomes more suited for arch-viz visualizations with each new version. It's relatively simple to create your own architecture animation or create interior scene. But, unlike some other engines, Unity is more modular - you can choose what functionalities you will include in your project. And some of them do not come "out of the box".
1. Importing your assets from 3d application
Unity can make on-the fly import from many 3d applications, icluding, 3ds Max, Maya, Cinema 4d and Blender. All you need to do is to put your file into Assets folder of Unity project. The rest will be done automatically. The only perequisite: your Unity project should be on the same machine that you have your 3d app installed.

Unity imports .blend files gropued into one container, this way everything is clean and tidy. You can exapnd / collapse contents of the container
Advantages of that approach: you can easily move back and forth 3ds Max and Unity without constantly browsing folders and manually reimporting. But there are disadvantages too, especially when working with bigger files (which is true to the most of arch-viz scenes). If your project will grow, each re-import will take longer time. We recommend exporting your assets from 3d scene as single OBJ files to Unity’s Assets folder. Unity still will re-import them if they will be overwritten by new versions, but it will be fast and the risk of crashing will be close to none.
2. Unwrapping your assets and exporting textures
Make sure that you have two UV channels for each asset – one for texturing and the second for lightmapping in Unity. Export textures to separate folder in Unity/Assets location. Drag and drop your assets to scene, click „Reset position” button and drag and drop textures to material's slots. The standard material in Unity is really good, it accepts PBR textures so you will probably need PBR authoring software to re-create your materials, like, for example, Substance Painter. Save your textures in "Assets/Textures" folder of your Unity project - Unity will re-import them automatically if you make any change to your files.

No overlapping UVs!

Two UV channels
3. Fixing shadows
If you use low-poly meshes with flat shading, sometimes the realtime soft shadows can be screwed – you will see leaks of light on the floor. The fast option for fixing it is to reset Normal Bias of shadows to zero. Alternatively you can use meshes with beveled edges which are more unlikely to cast bad shadows.

Bad shadows due to low-poly geometry and bad normal bias
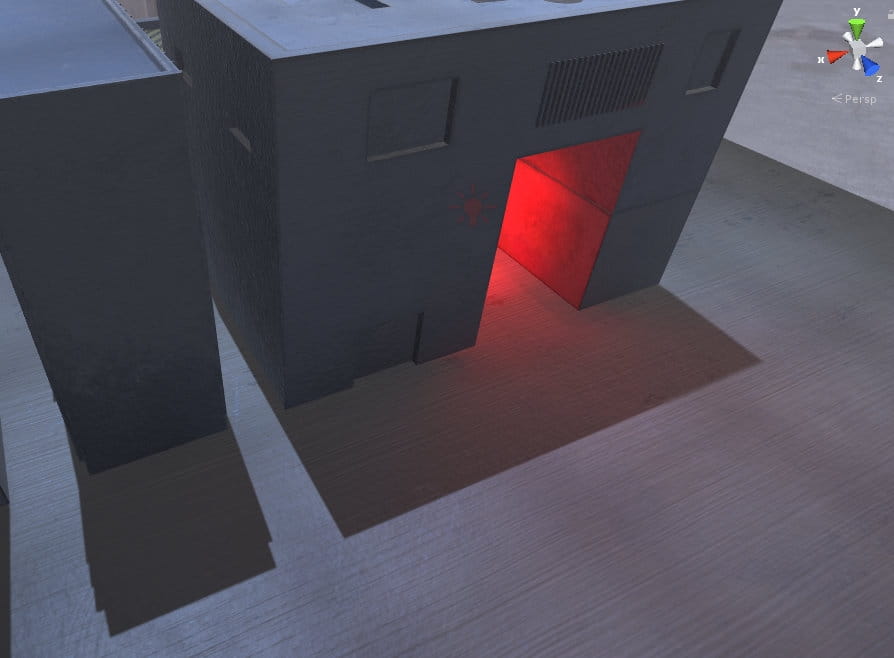
Fixing normal bias in Direct Light Inspector Realtime shadows section and we got rid of the artifacts
4. Fixing sploches of baked light.
If you want to have nice looking global illumination (GI) in your scene, rule number one is: "no overlapping UVs". Unity also prefers to read files that have one texture per object. And if you have to use many textures per object, make sure they don’t overlap, at least – not on the second channel which will be used by Unity for baking. The good practice is to make this second channel in your 3d app before importing to realtime engine. Unity can generate the second UV channel for you, but sometimes it does not give good quality UVs.
Screenshot byEzraLee2015
5. Switch to ortho views like in your 3d app.
Vanilla Unity does not have keystrokes for changing view from "to" to "front", etc. You can only use navigation arrows in 3d view for that. If you prefer using your keyboard, you can make it in a few simple steps.
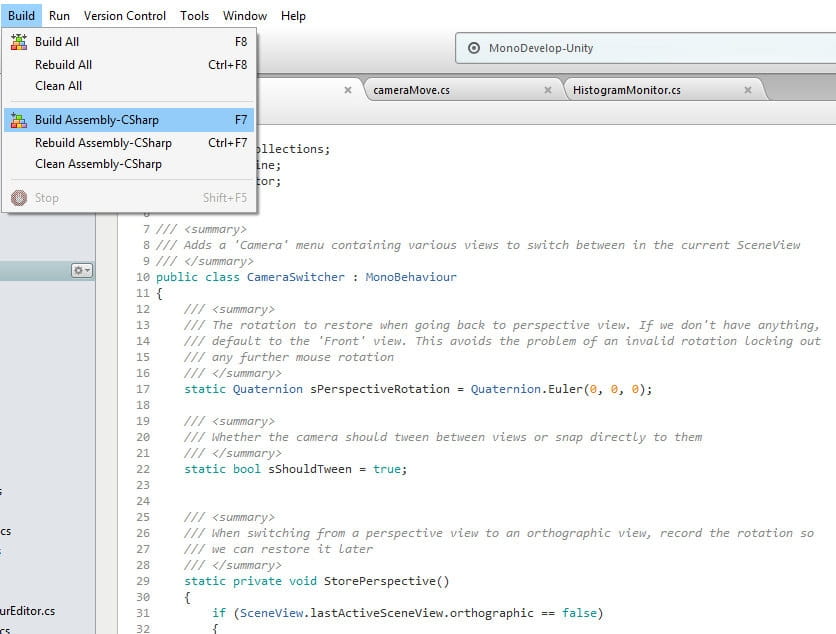
Building the script is as simple as pressing F7 button
Choosing compiler in Edit > Preferences window
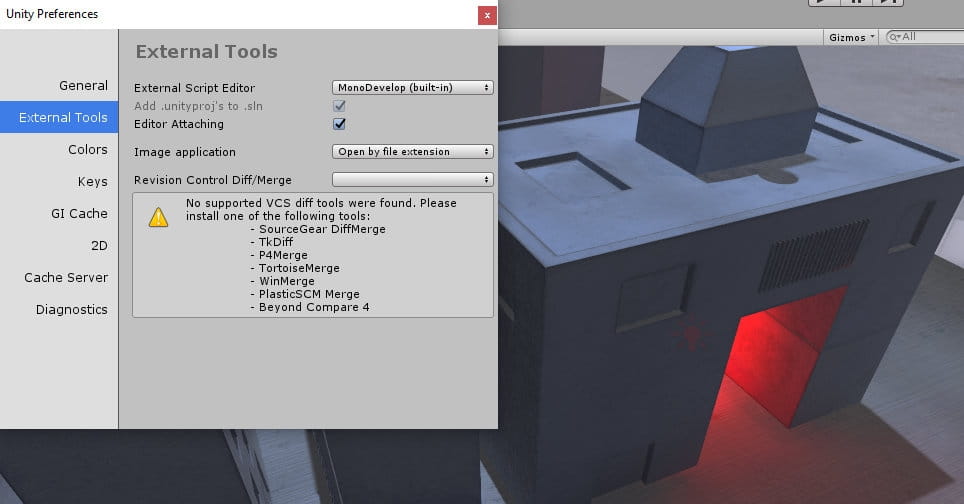
6. Change the background in your viewport and renders
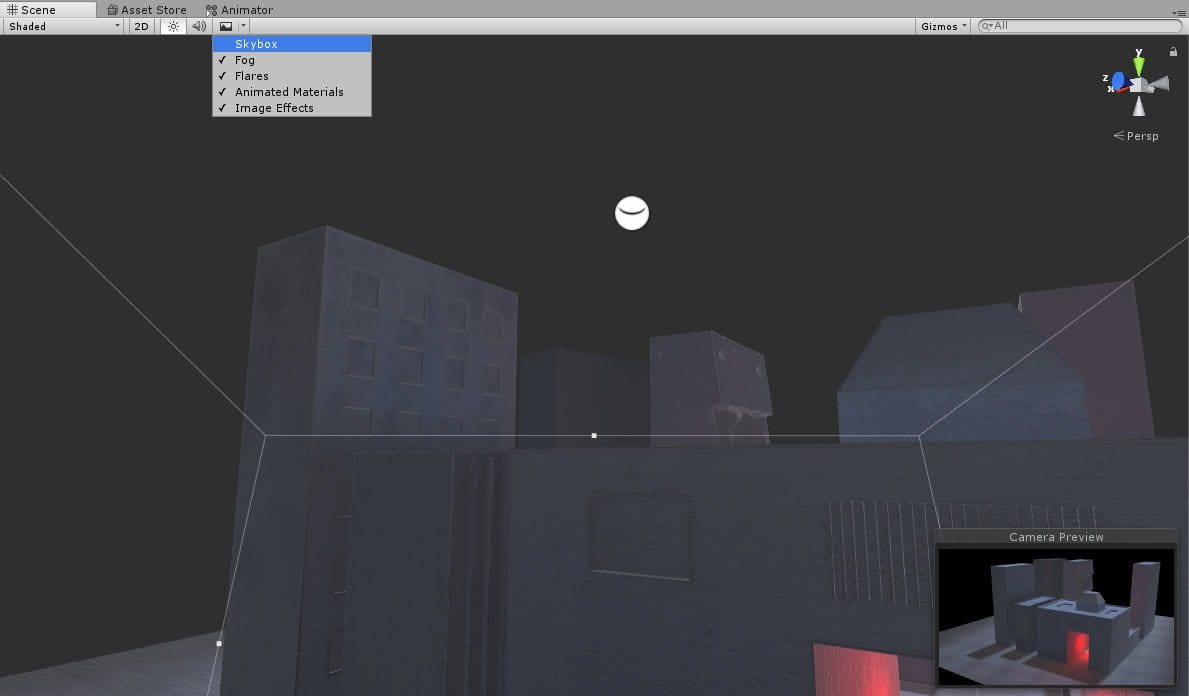
Changing the background for renderings: choose your camera and clear the „Skybox” flag in the Inspector panel. Choose a solid color. Skybox will still affect lighting and reflections. You can change it in "window > Lighting > Settings" panel. If you would like to disable Skybox in your scene view, just untick the option under small image icon. You will get solid color background. If you want to change it too, go to Edit menu and choose Preferences > BG color.
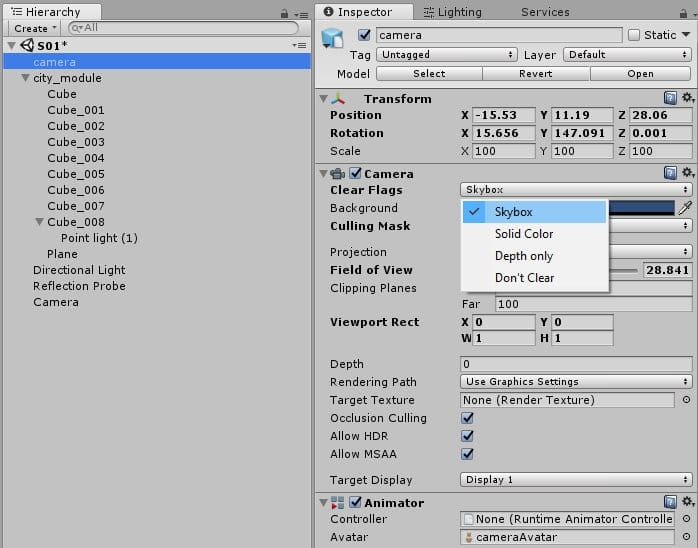
"Clear flags" to change what is visible to the camera

Skybox is enabled in "Clear flags" list
Skybox is disabled in "Clear flags" list
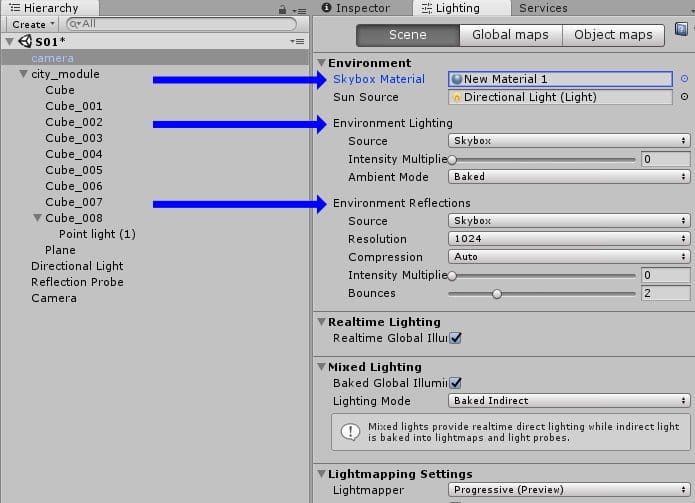
Skybox still affects other image rendering passes - it gives environmental lighting, reflections and it appears in the viewport (Environment Skybox Material)
We can disable Skybox in the viewport by clearing the checkmark on the list

Finally, we can change background color of the viewport in Unity Preferences
7. Enable volumetric Lights.
Unity does not have native volumetric lights, but there is free extension that works like a charm. Go here and download zipped archive of Volumetric Lights project. Uzip it, paste „Assets” folder into your Unity project folder. Now you can add „Volumetric Lights Renderer” as your camera component and „Volumetric Lights” component to your lights. Volumetric lights effect will show only after you press „Play” icon on the top. So enter "Play mode" and tweak Volumetric Light settings to your taste. In Unity each change you make during play mode is temporary, so if you want to save your settings, make sure you copy the component before exiting play mode, stop the game and paste them to your component. Volumetric lights can be easily animated too, just use "noise" slider!
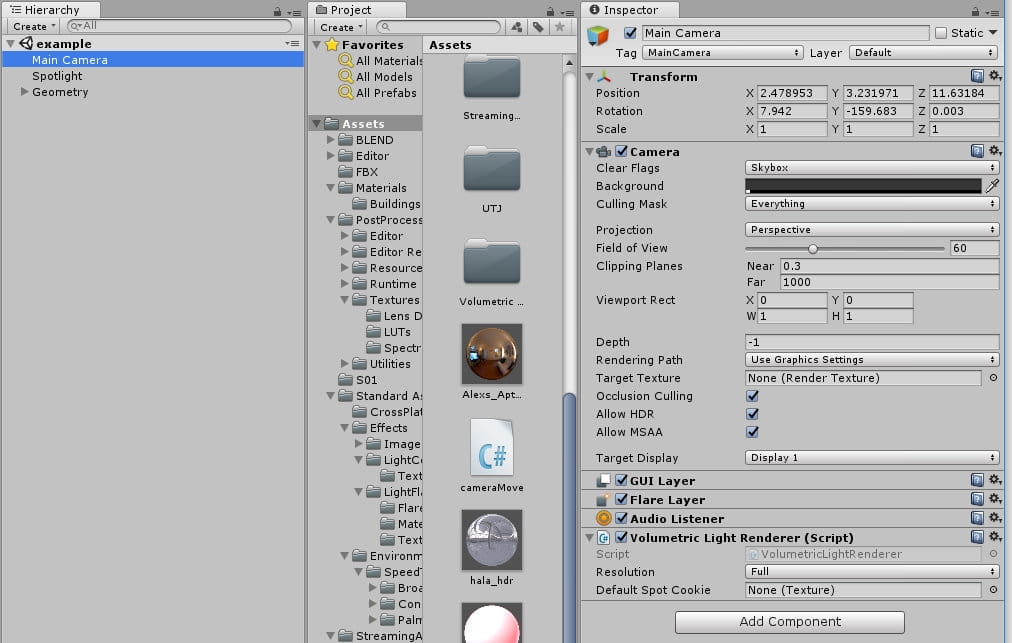
We added Volumetric Light Renderer Component to the camera

We added Volumtric Light component to our light. We can tweak all the settings here

Volumetric Lights Scene by Brackeys.
You liked this article? We are also planning to release some tips for getting global illumination right for interior renderings. Stay tuned!


LEAVE A COMMENT


|

|

|

|

|
 Customer zone
 Your special offers
 Your orders
 Edit account
 Add project
 Liked projects
 View your artist profile
COMMENTS