Search
Cart
Sign in
  • offerCustomer zone
  • offerYour orders
  • offerEdit account

  • offerAdd project
  • offerLiked projects
  • offerView your artist profile

  • Dark mode

We care about your privacy

We use cookies to provide you with the best possible experience. They also allow us to analyze user behavior in order to constantly improve the website for you. The consent is voluntary. You can withdraw it at any time or renew it in Cookie settings on the home page. Withdrawal of your consent does not affect the lawfulness of processing performed before the withdrawal. Privacy Protection Policy
Accept all
Accept selection
Reject all

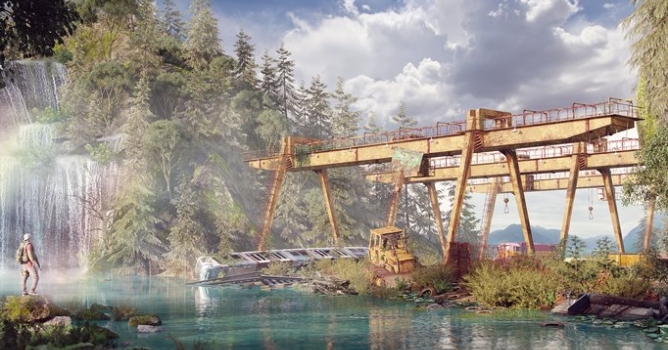
Making of "Valley of my Mind"

Hamed Hosseinpour 2016-03-30 09:31 tutorial  > 3ds MAX  > modeling

Tutorial by Hamed Hosseinpour.

First of all,many thanks to Evermotion for sharing my work and this "making of" here and also thats great honor. The base story of my work started in 2015 with "Castle of my mind" (story of the person that looks into his mind). After that and some consideration from websites & mags, I'm back to that story again. I found some inspiration in nature and started working.

Click on image to enlarge01_evermotion.jpg

Inspiration and references.
 

Click on image to enlarge02_evermotion.jpg

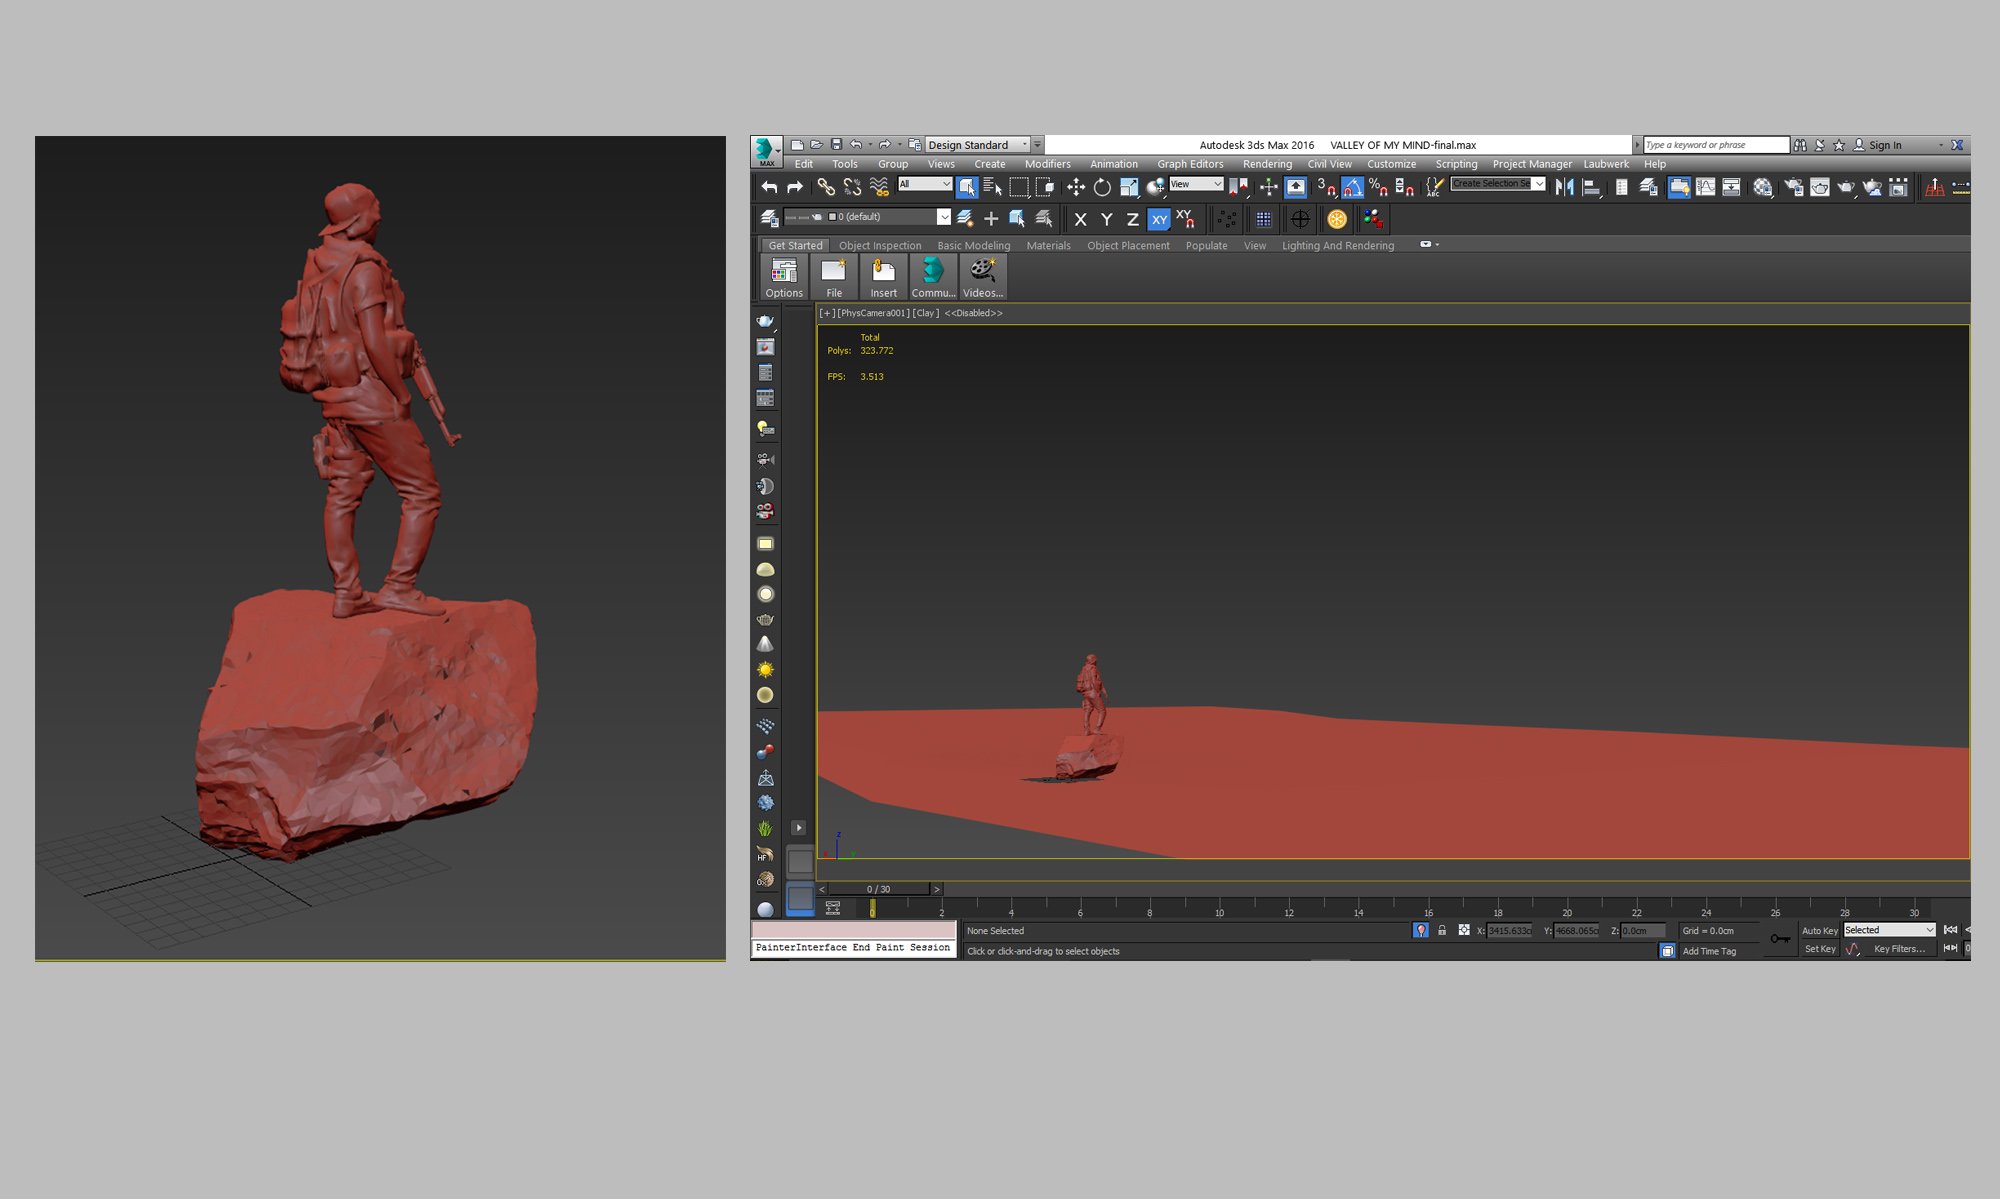
In this scene I put the character in the viewport and place the camera. Before I start in 3dsmax I make some sketches.
 

Click on image to enlarge03_evermotion.jpg

I used "rock generator" to create every stone and rock in the scene (just use some FFD for randomize) and used vray proxy for many rocks in the scene.
 

Click on image to enlarge04_evermotion.jpg

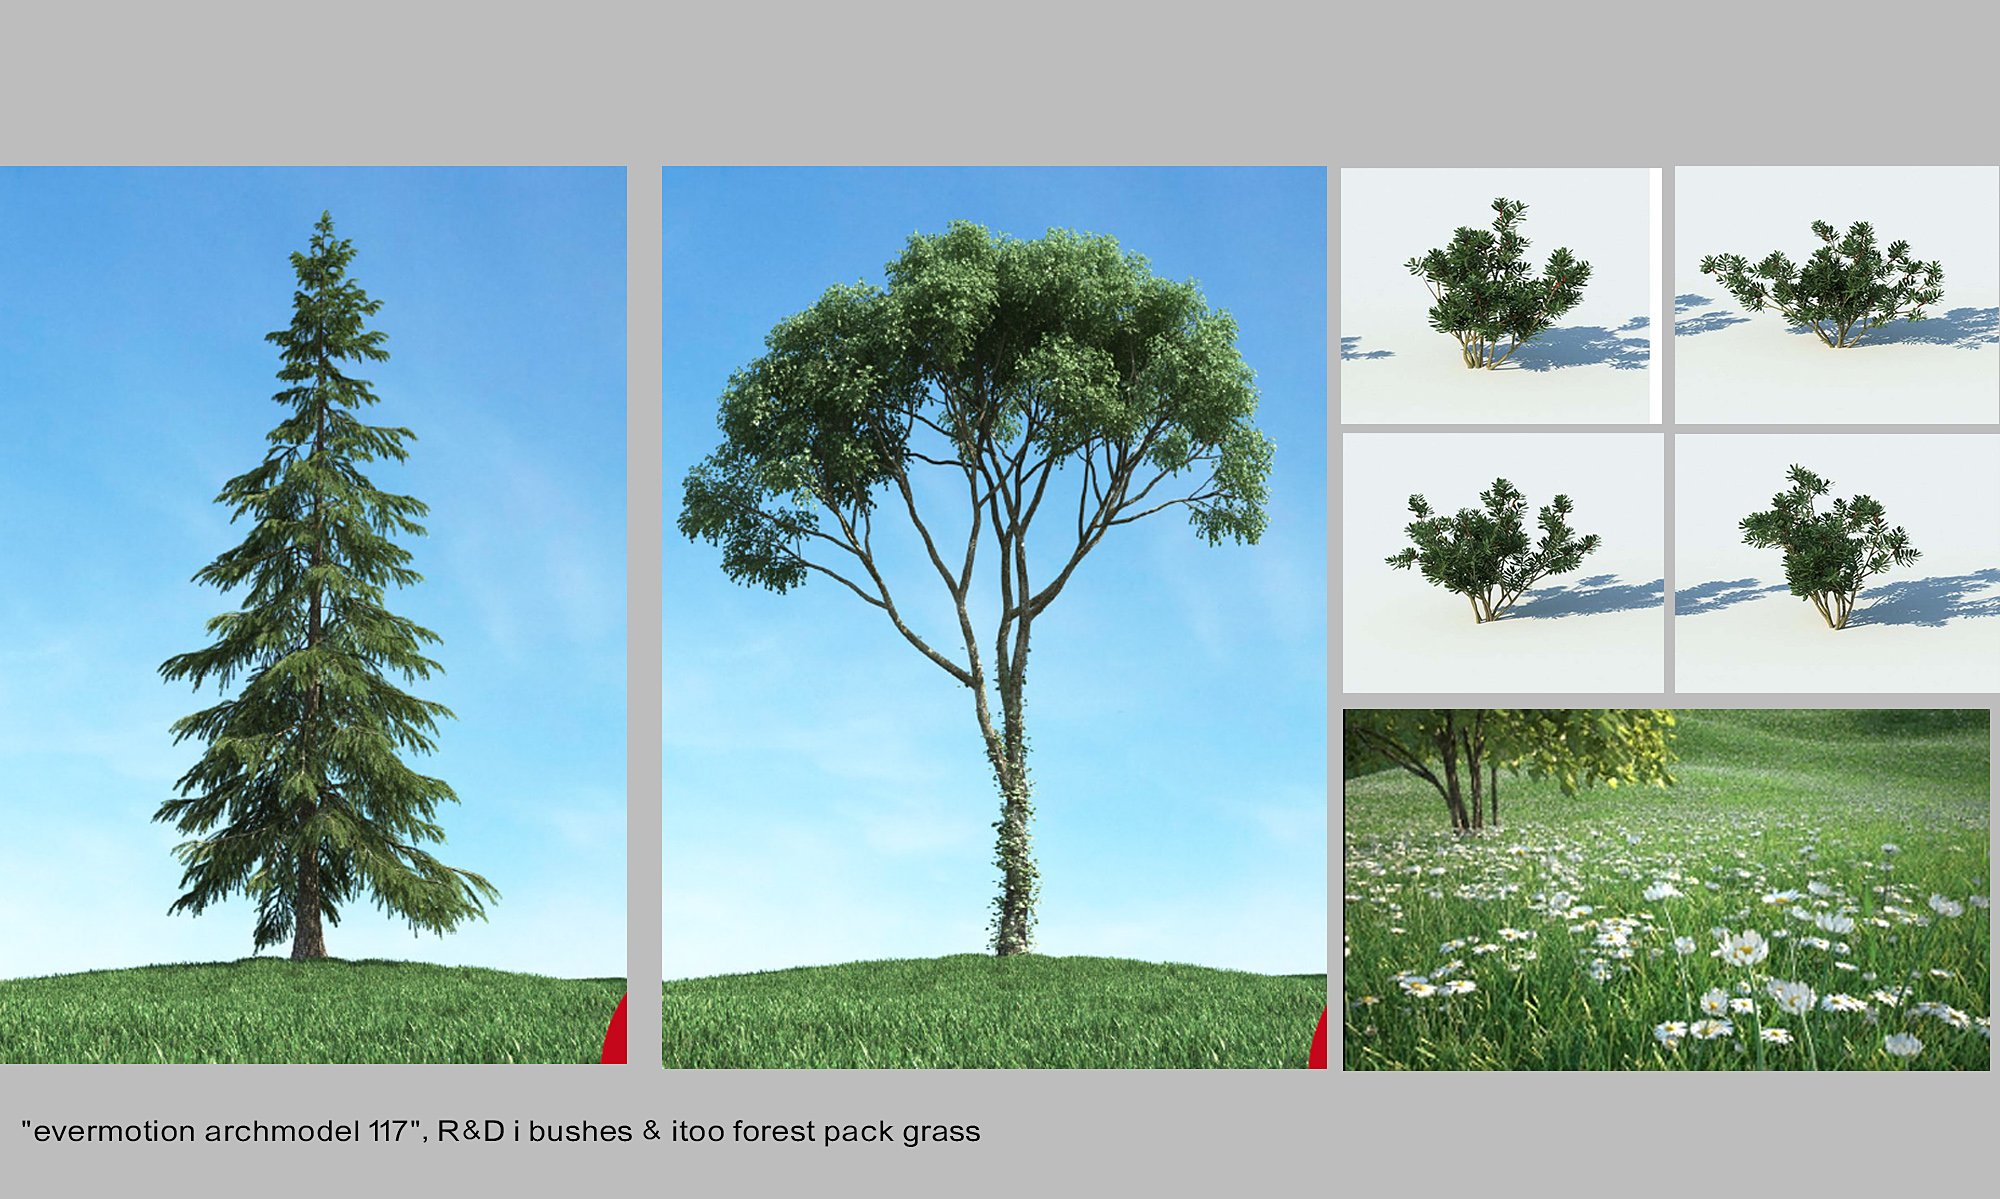
My goal was to show greenery and some natural elements. I used some high quality 3d models from Evermotion Archmodels vol. 117, R&D iBushes & itoo Forest Pack grass (every shader is upgraded or recreated for better quality).
 

Click on image to enlarge05_evermotion.jpg

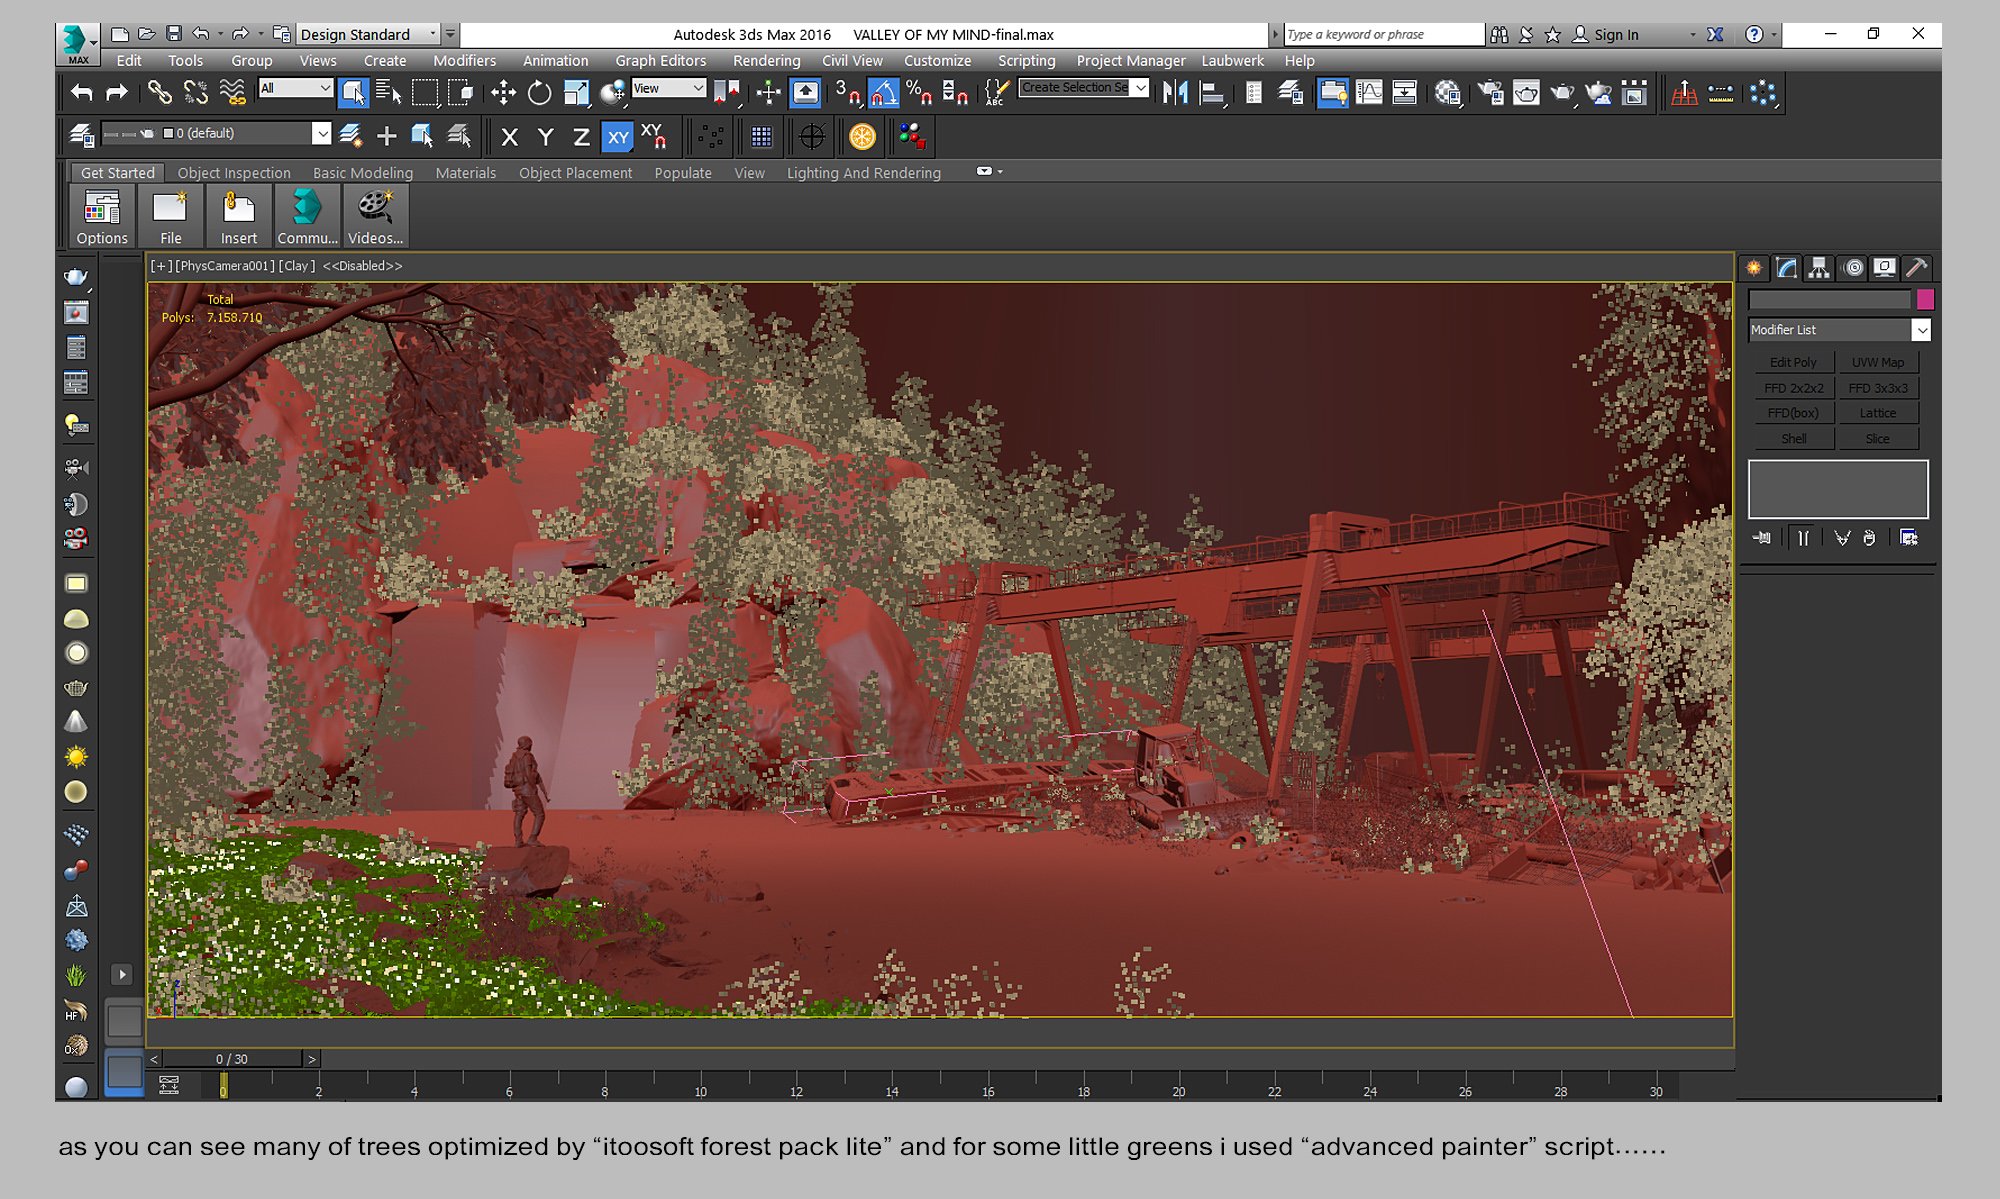
For scattering the trees and plants I used Forest Pack Lite and Advanced Painter (in this free version you cannot scatter over slopes and many objects but I do it manually, by scaling and rotating groups.
 

Click on image to enlarge06_evermotion.jpg

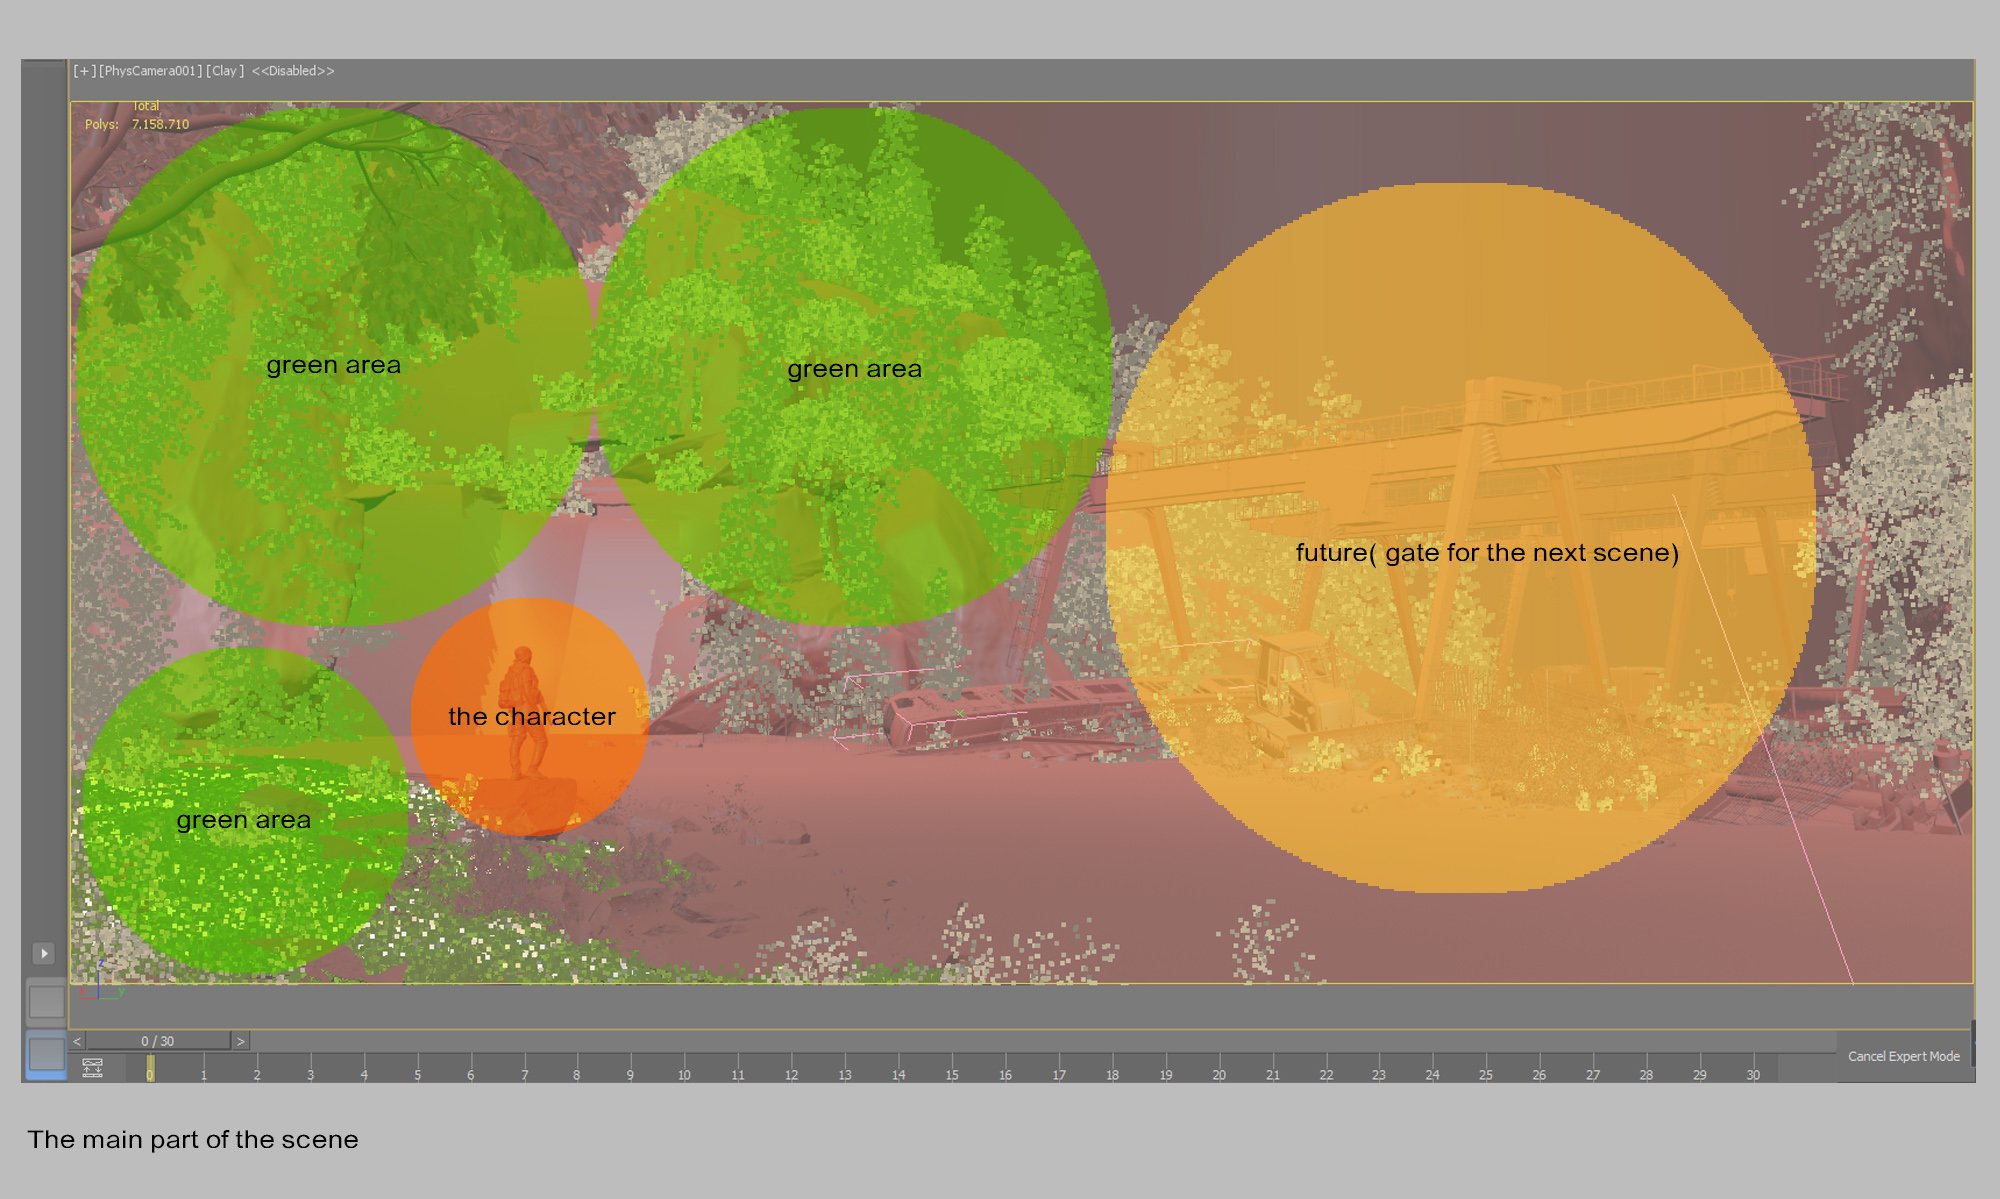
The main part of the scene.
 

Click on image to enlarge07_evermotion.jpg

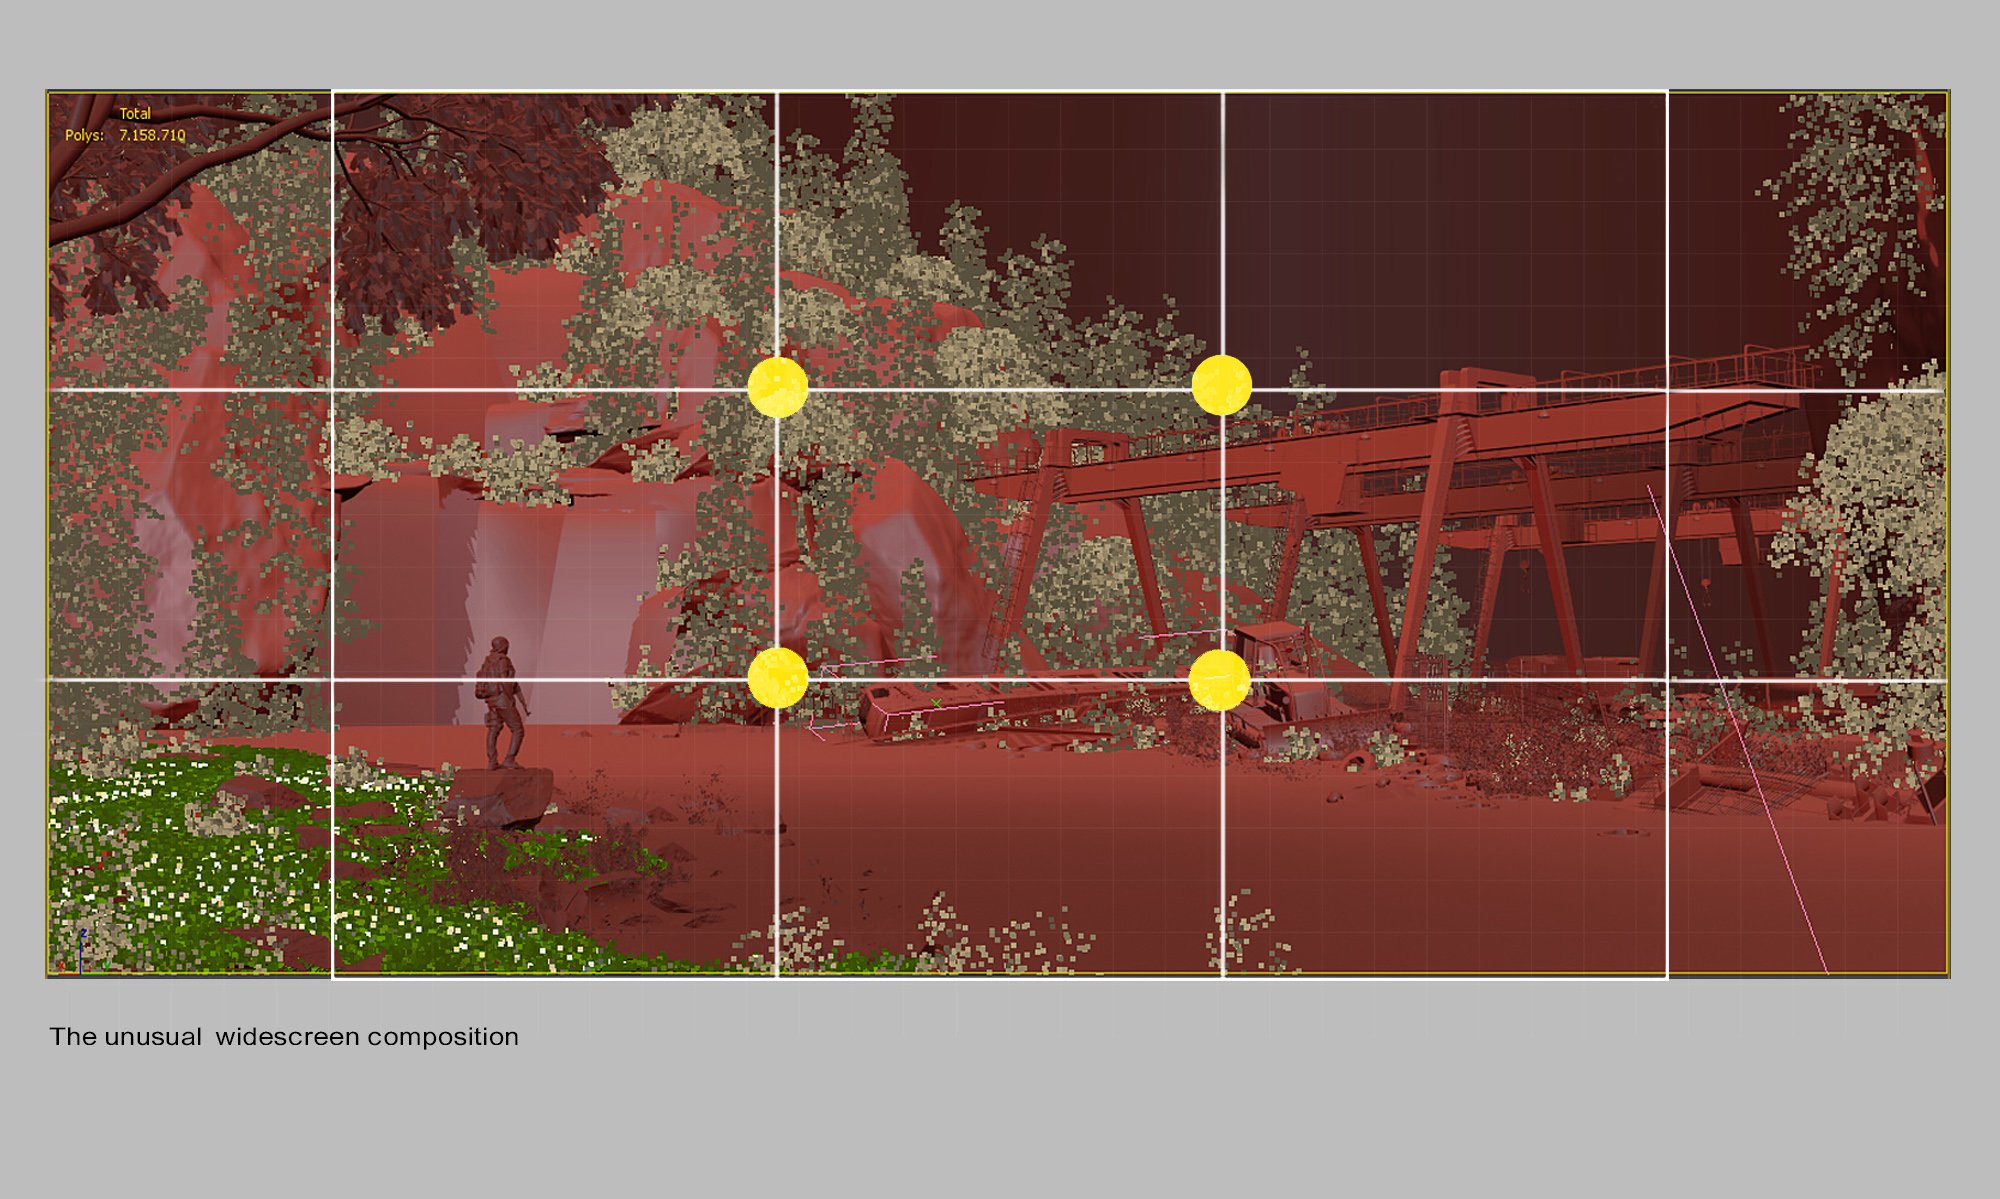
Wide screen composition.
 

Click on image to enlarge08_evermotion.jpg

Before creating materials, we need to know the color style. You can find many design inspirations in internet. A book that really helped me was "Learning to see creatively: design, color & composition in photography" by Bryan Peterson.
 

Click on image to enlarge09_evermotion.jpg

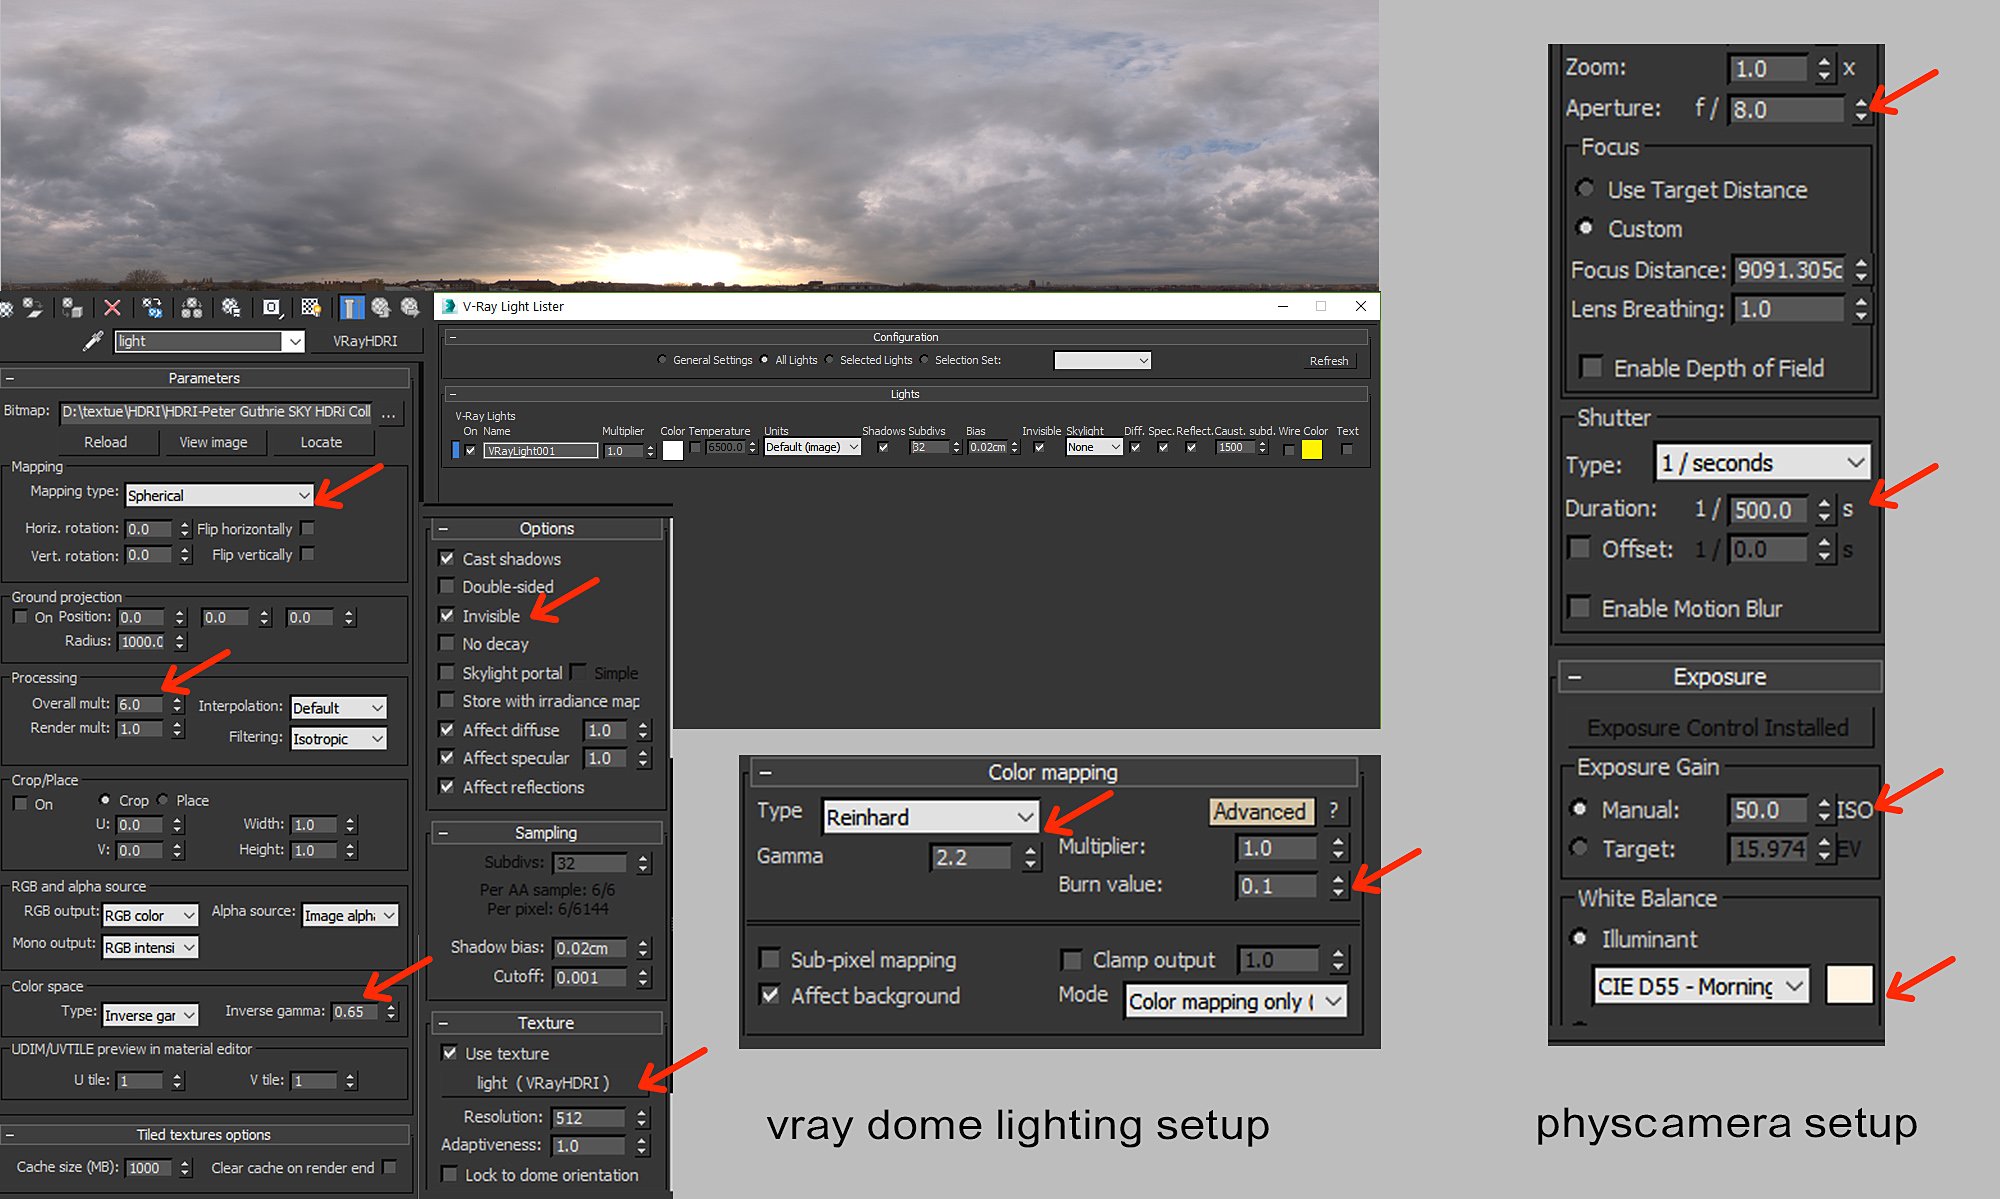
One of important parts of my work is the lighting setup. I used just one HDRI from Peter Guthrie colection. "0743" for more effective and sharper light, I low "inverse gamma" in HDRI map and the result is great.
 

Click on image to enlarge10_evermotion.jpg

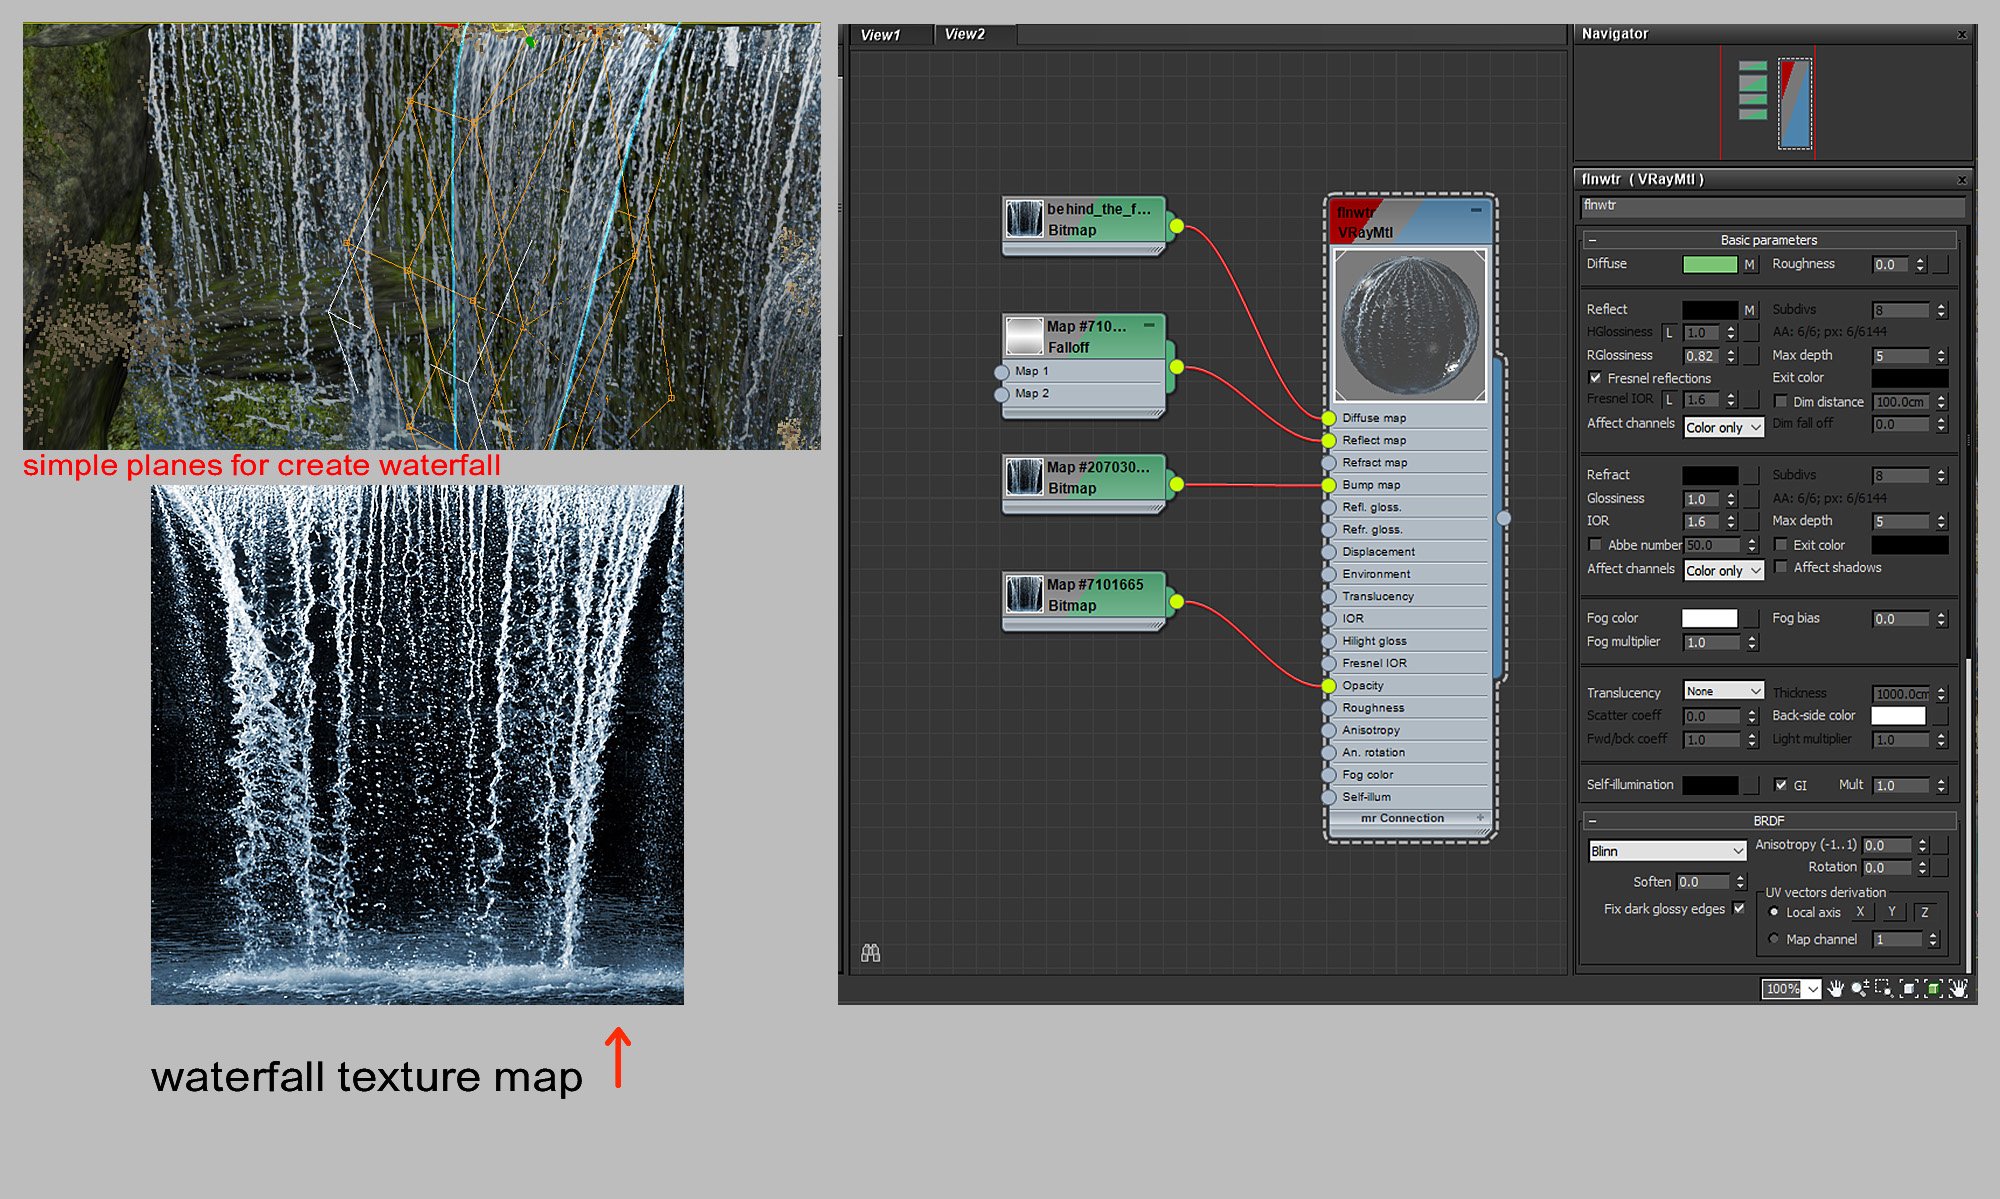
To create the waterfall I just used some planes and textures for faster result. (you can use realflow and some simulating plugin to create real water)
 

Click on image to enlarge11_evermotion.jpg

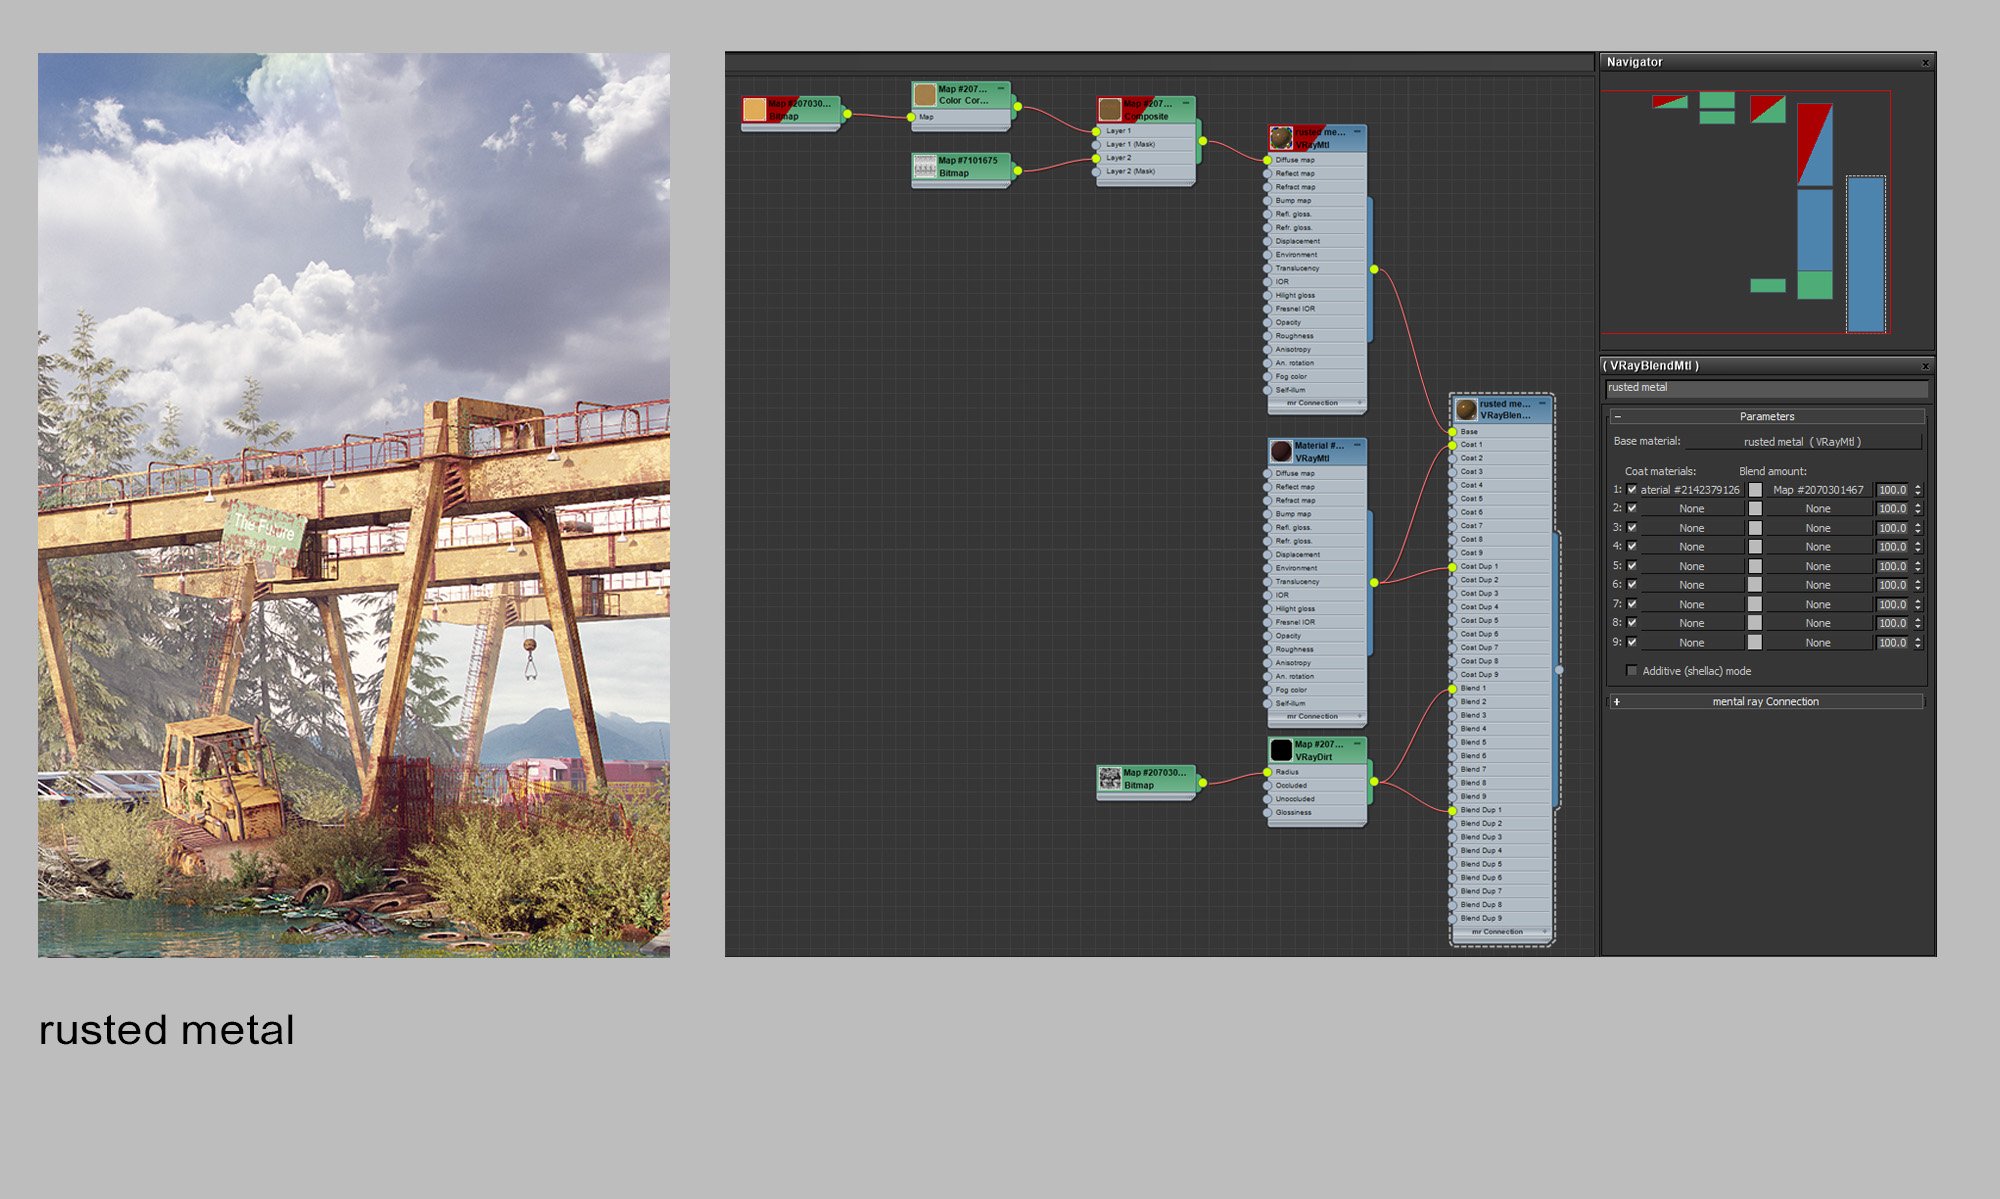
Rusted metal.
 

Click on image to enlarge12_evermotion.jpg

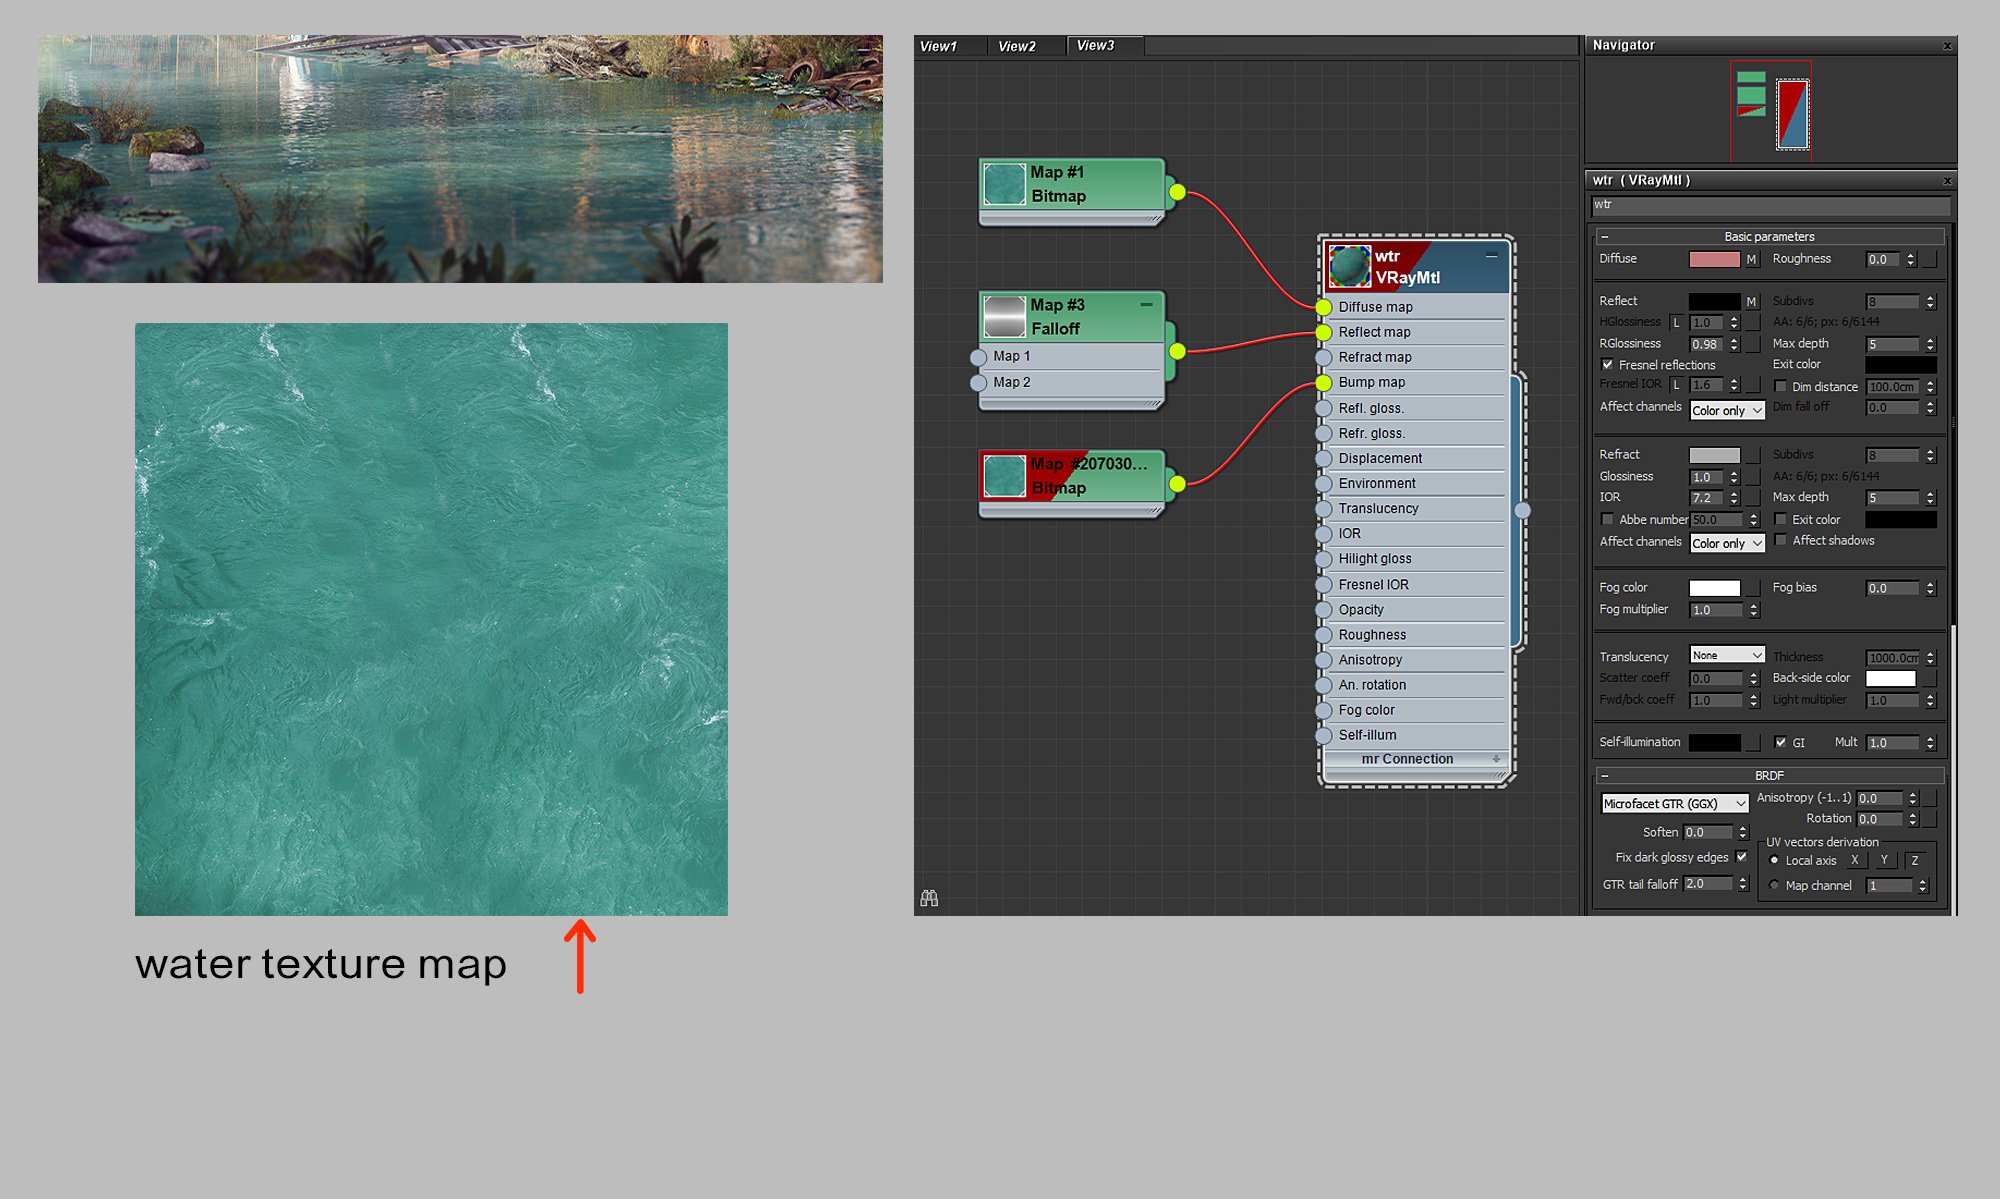
I made the water texture from a high resolution image and used with this settings.
 

Click on image to enlarge13_evermotion.jpg

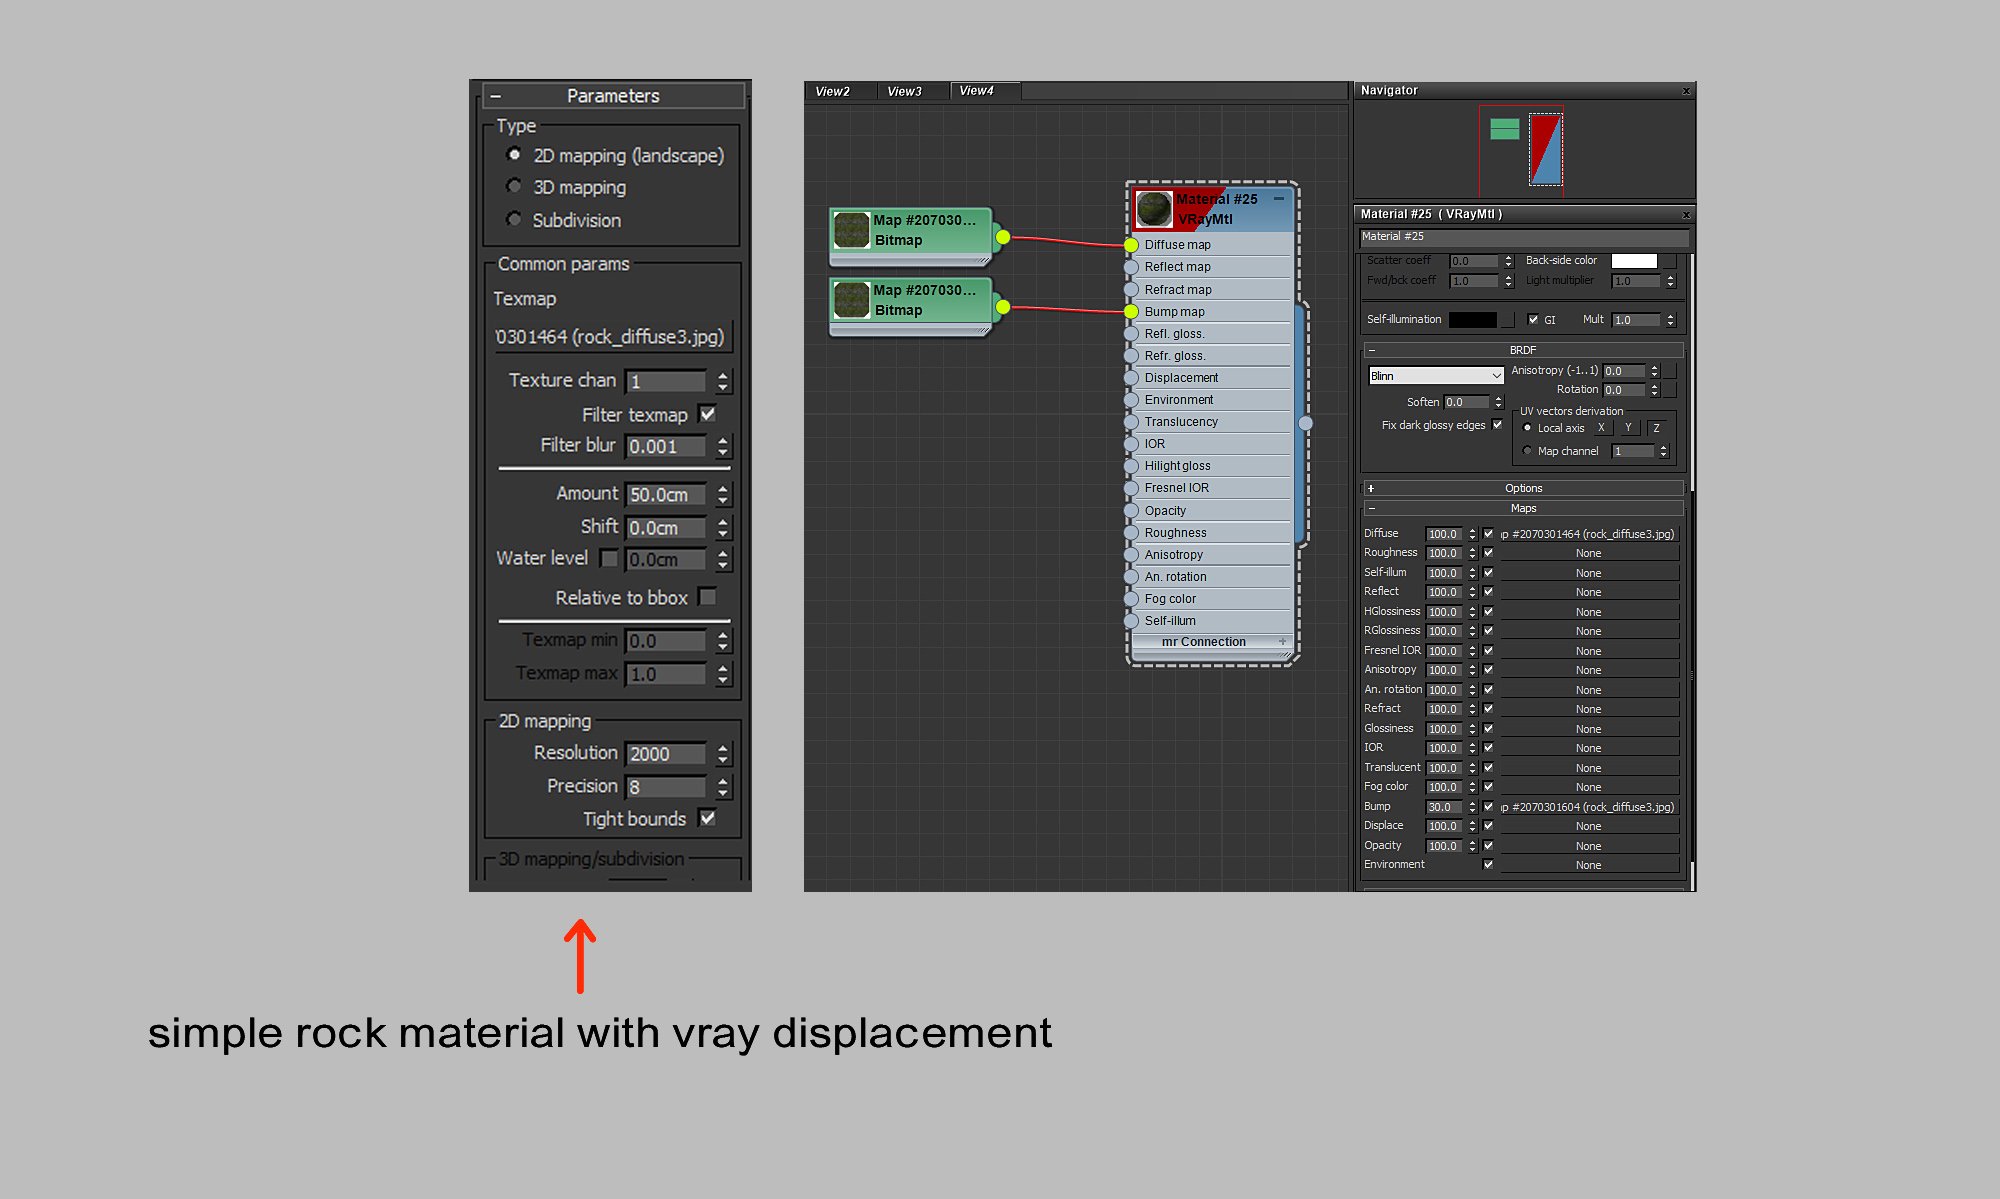
Simple rock material with vray displacement.
 

Click on image to enlarge14_evermotion.jpg

All plants and trees materials are Vray2sidedMtl and all of them have color correction (other shaders are made with simple vray material).
 

Click on image to enlarge15_evermotion.jpg

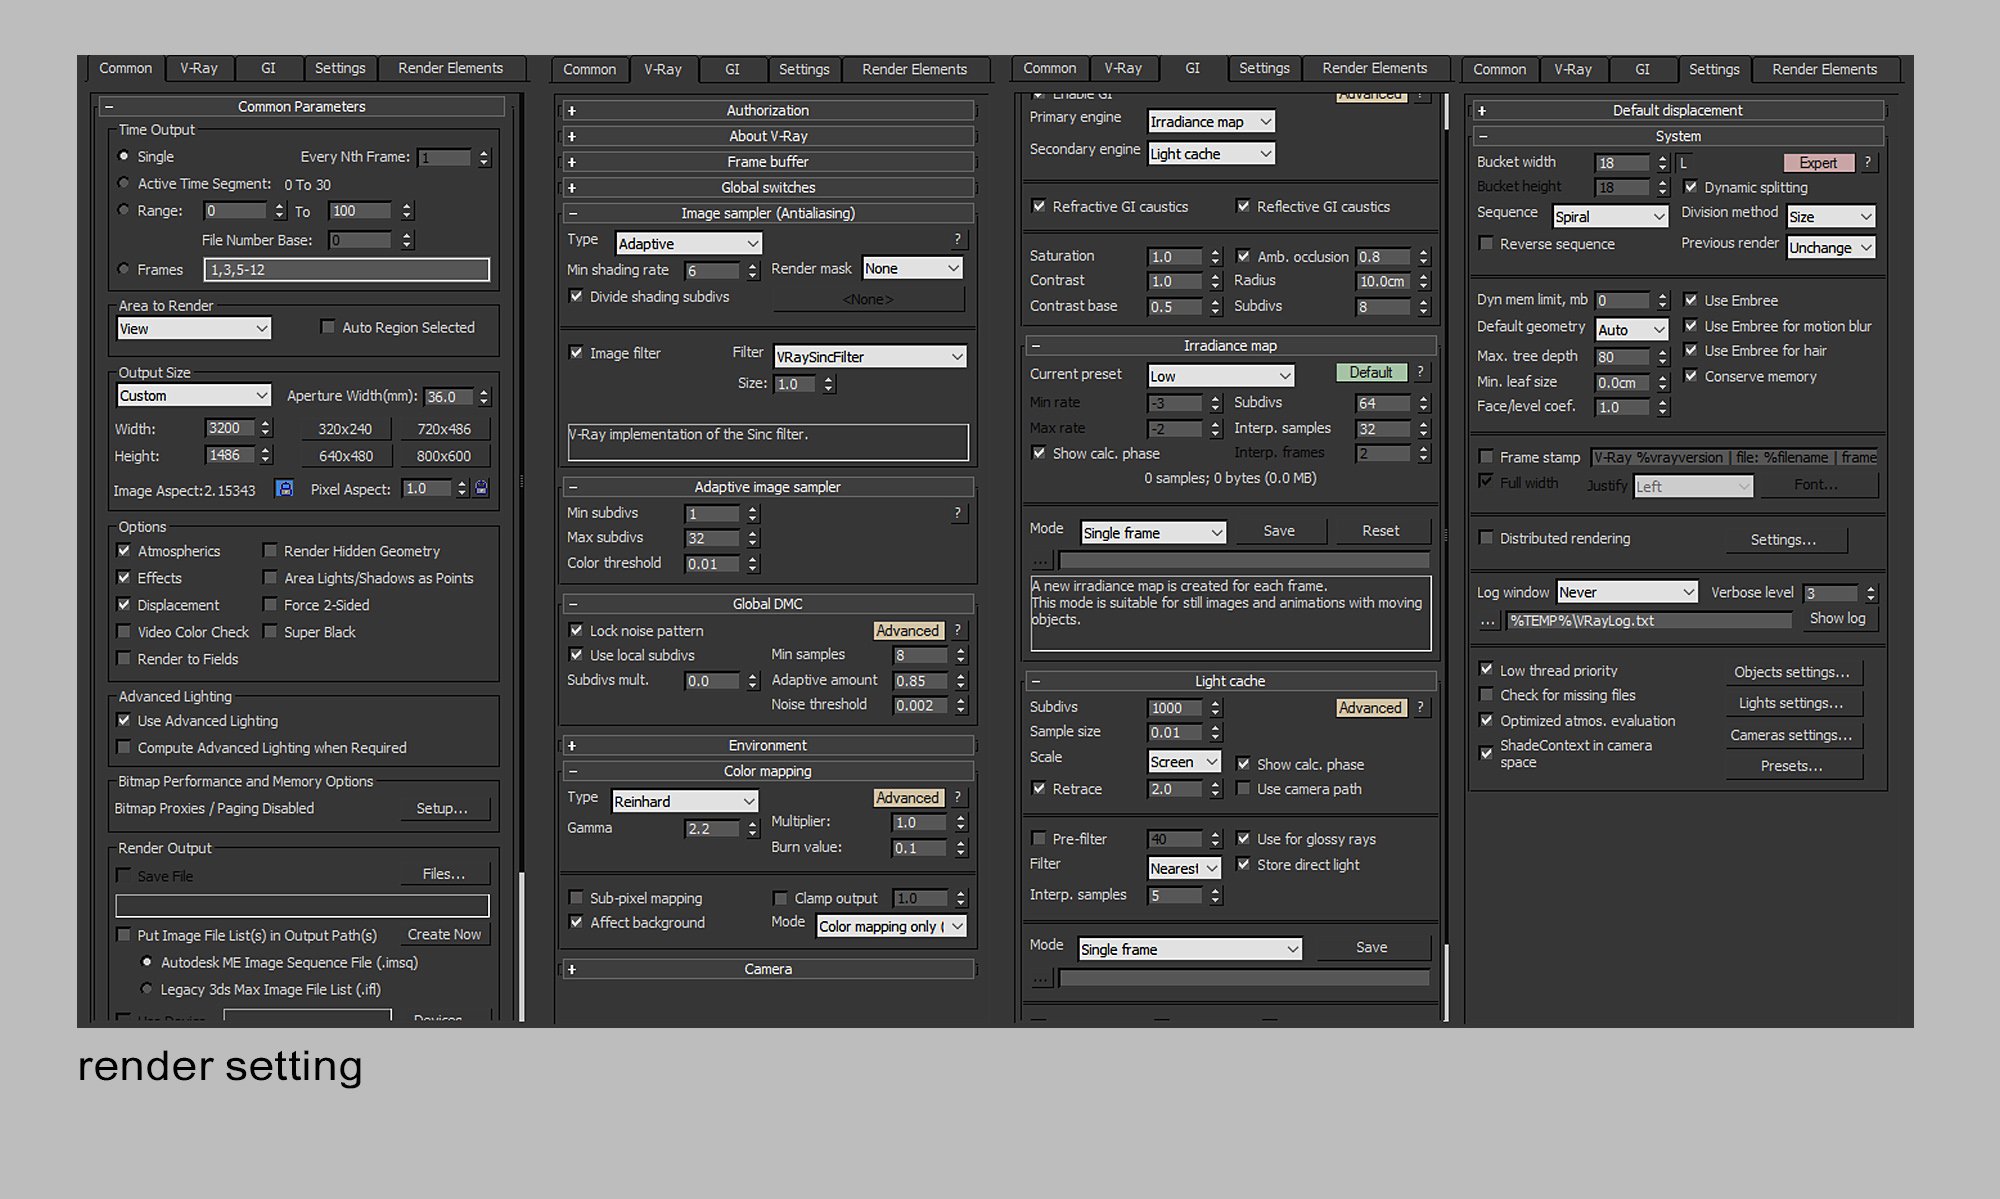
Render settings.
 

Click on image to enlarge16_evermotion.jpg

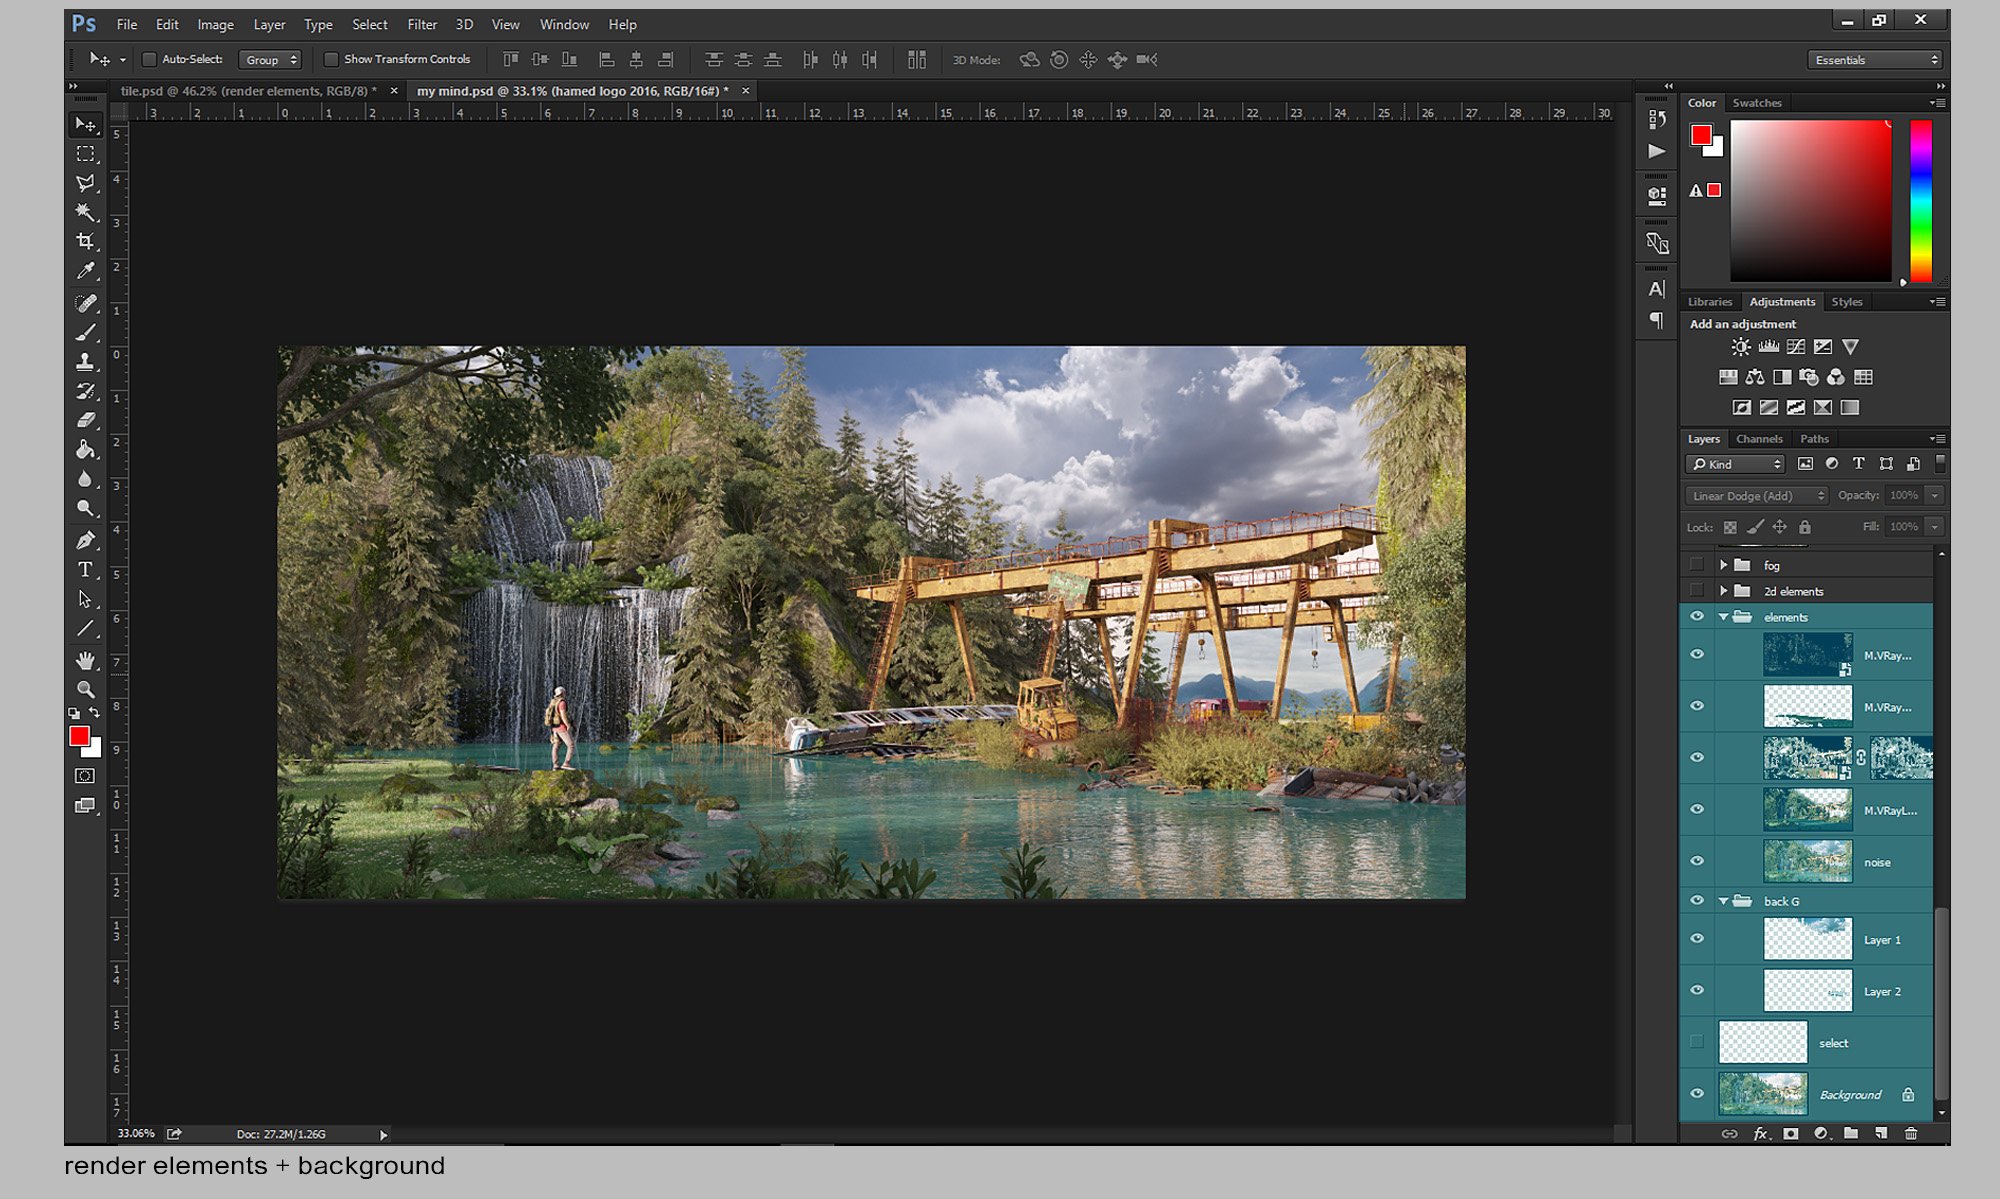
Render elements.
 

Click on image to enlarge17_evermotion.jpg

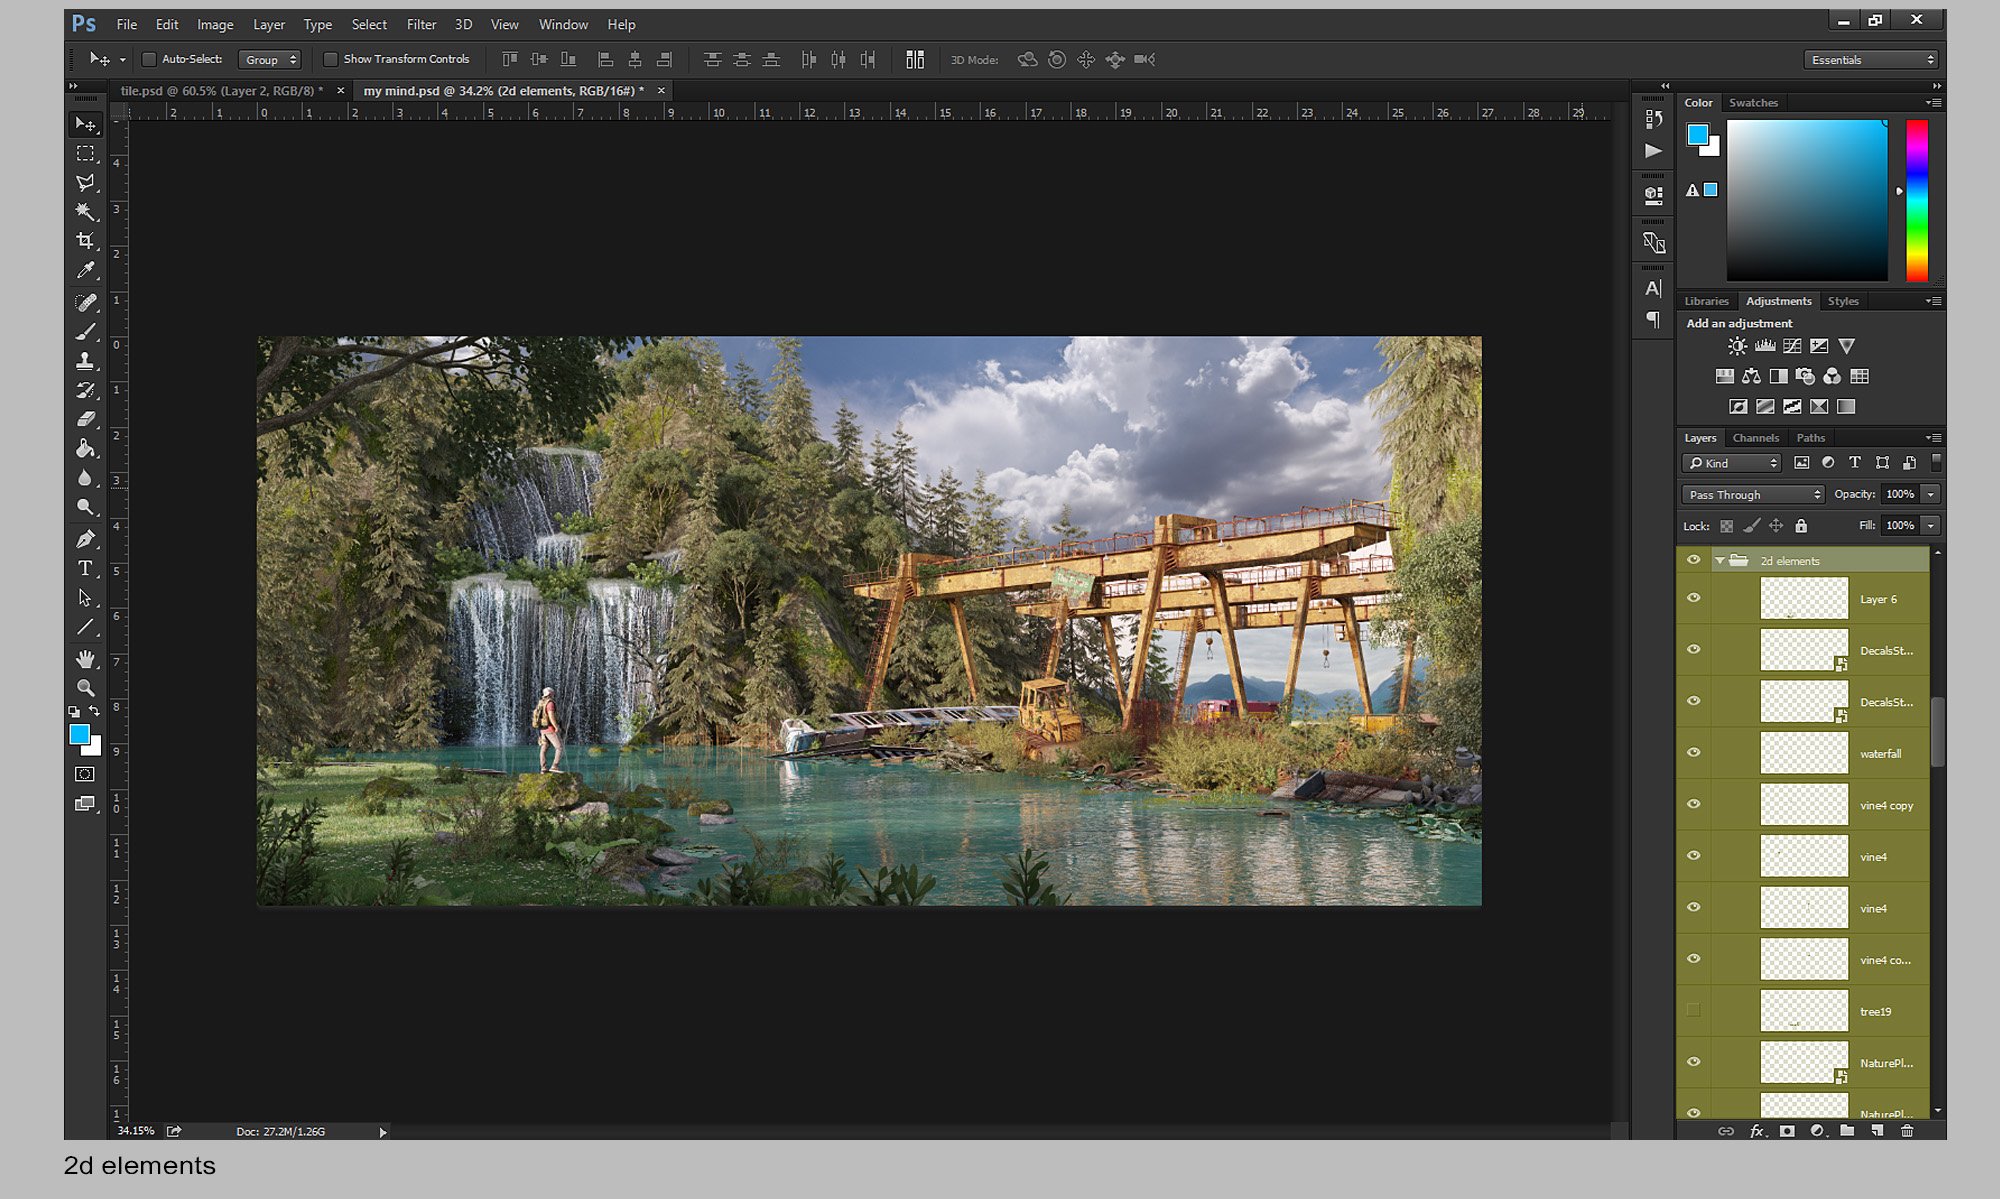
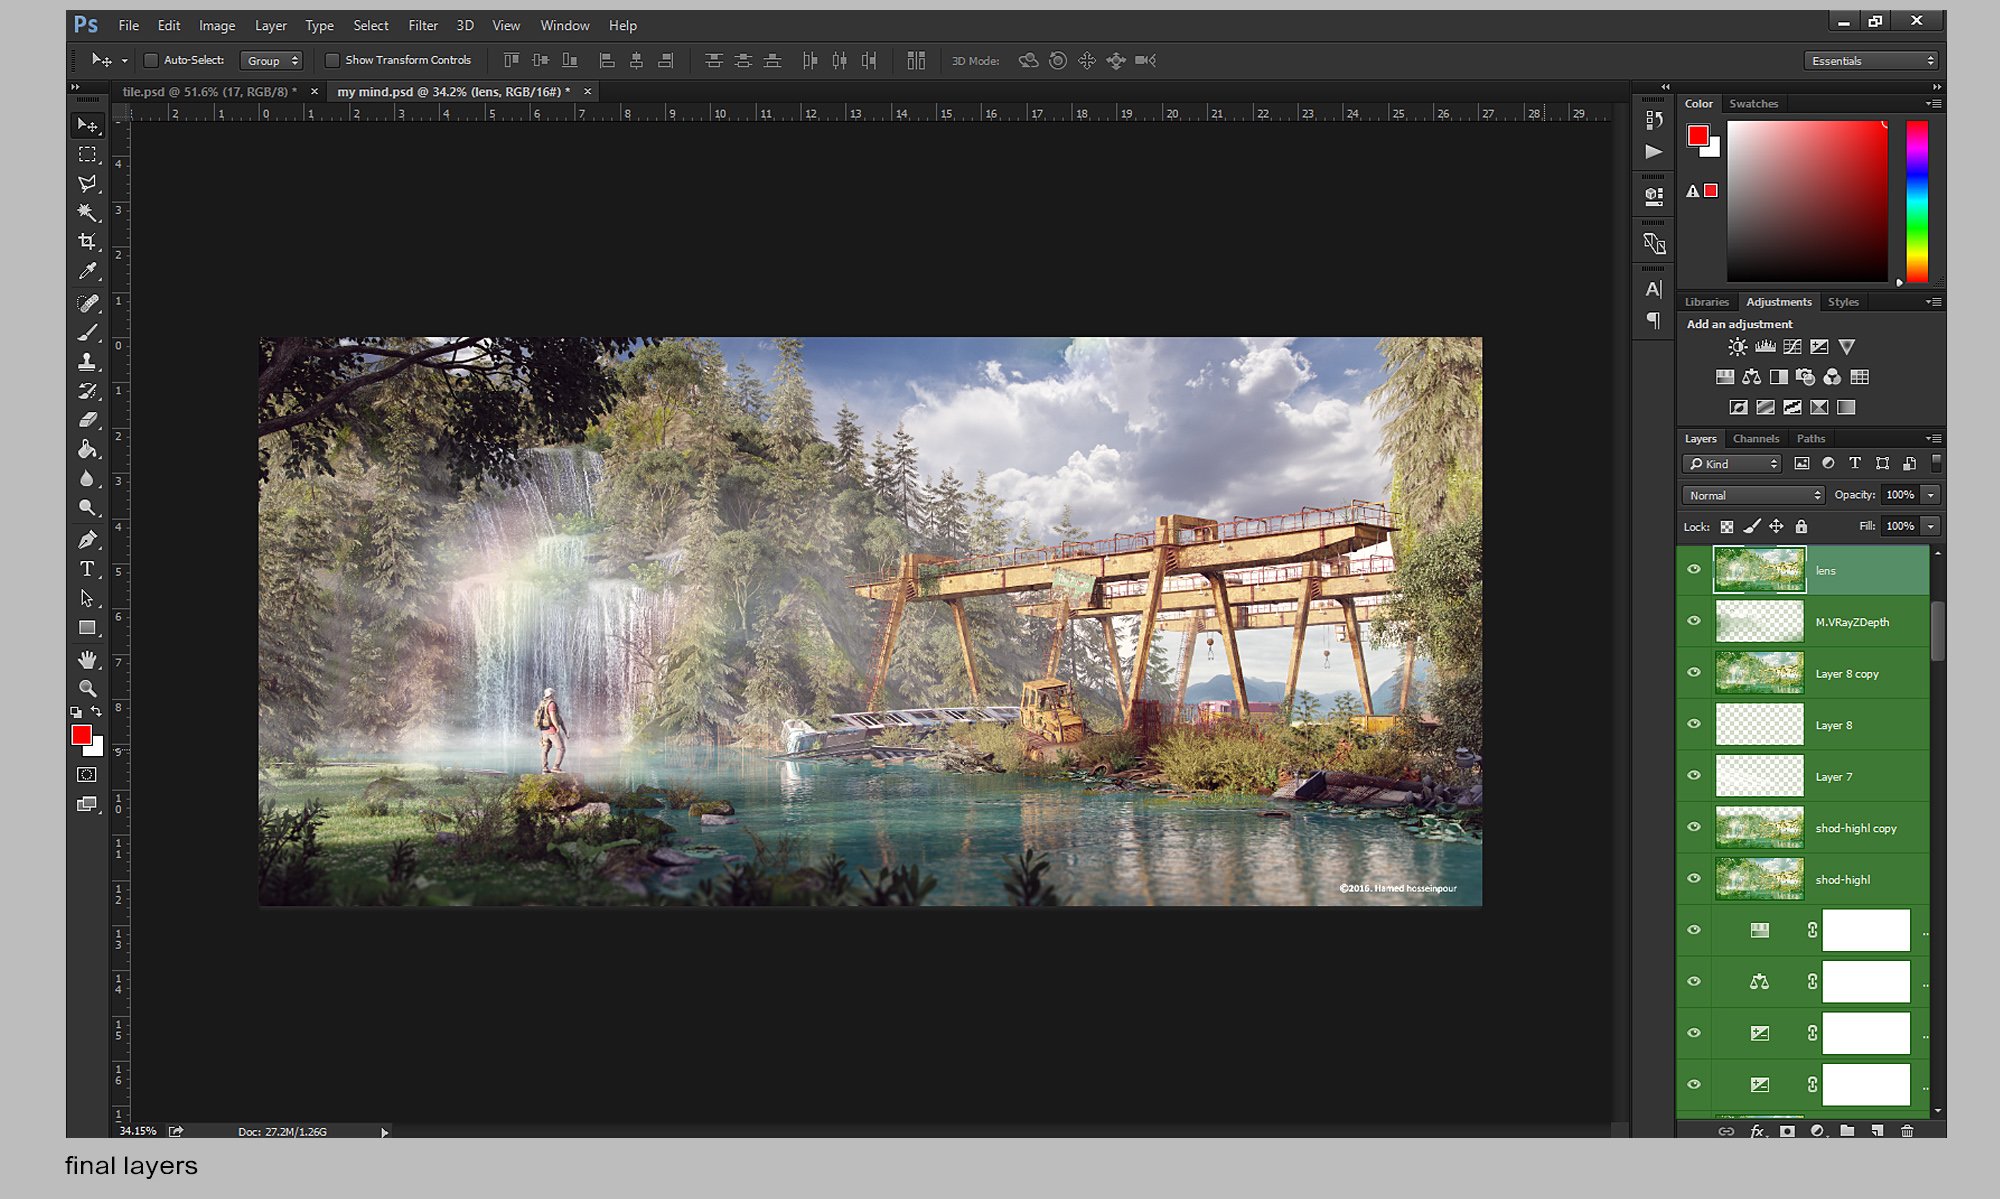
My post-production was made with four parts: render elements + 2d elements + fog and light rays + color and contrast correction. I used vray lighting, reflection, diffuse filter and specular passes and edited background in diffuse filter.
 

Click on image to enlarge18_evermotion.jpg

2d elements.
 

Click on image to enlarge19_evermotion.jpg

Fog and light rays.
 

Click on image to enlarge20_evermotion.jpg

And the final part is adjusting exposure, color correction, contrast, lens blur and unsharp mask.
 

Click on image to enlarge1_VALLEY_OF_MY_MIND_evermotion.jpg

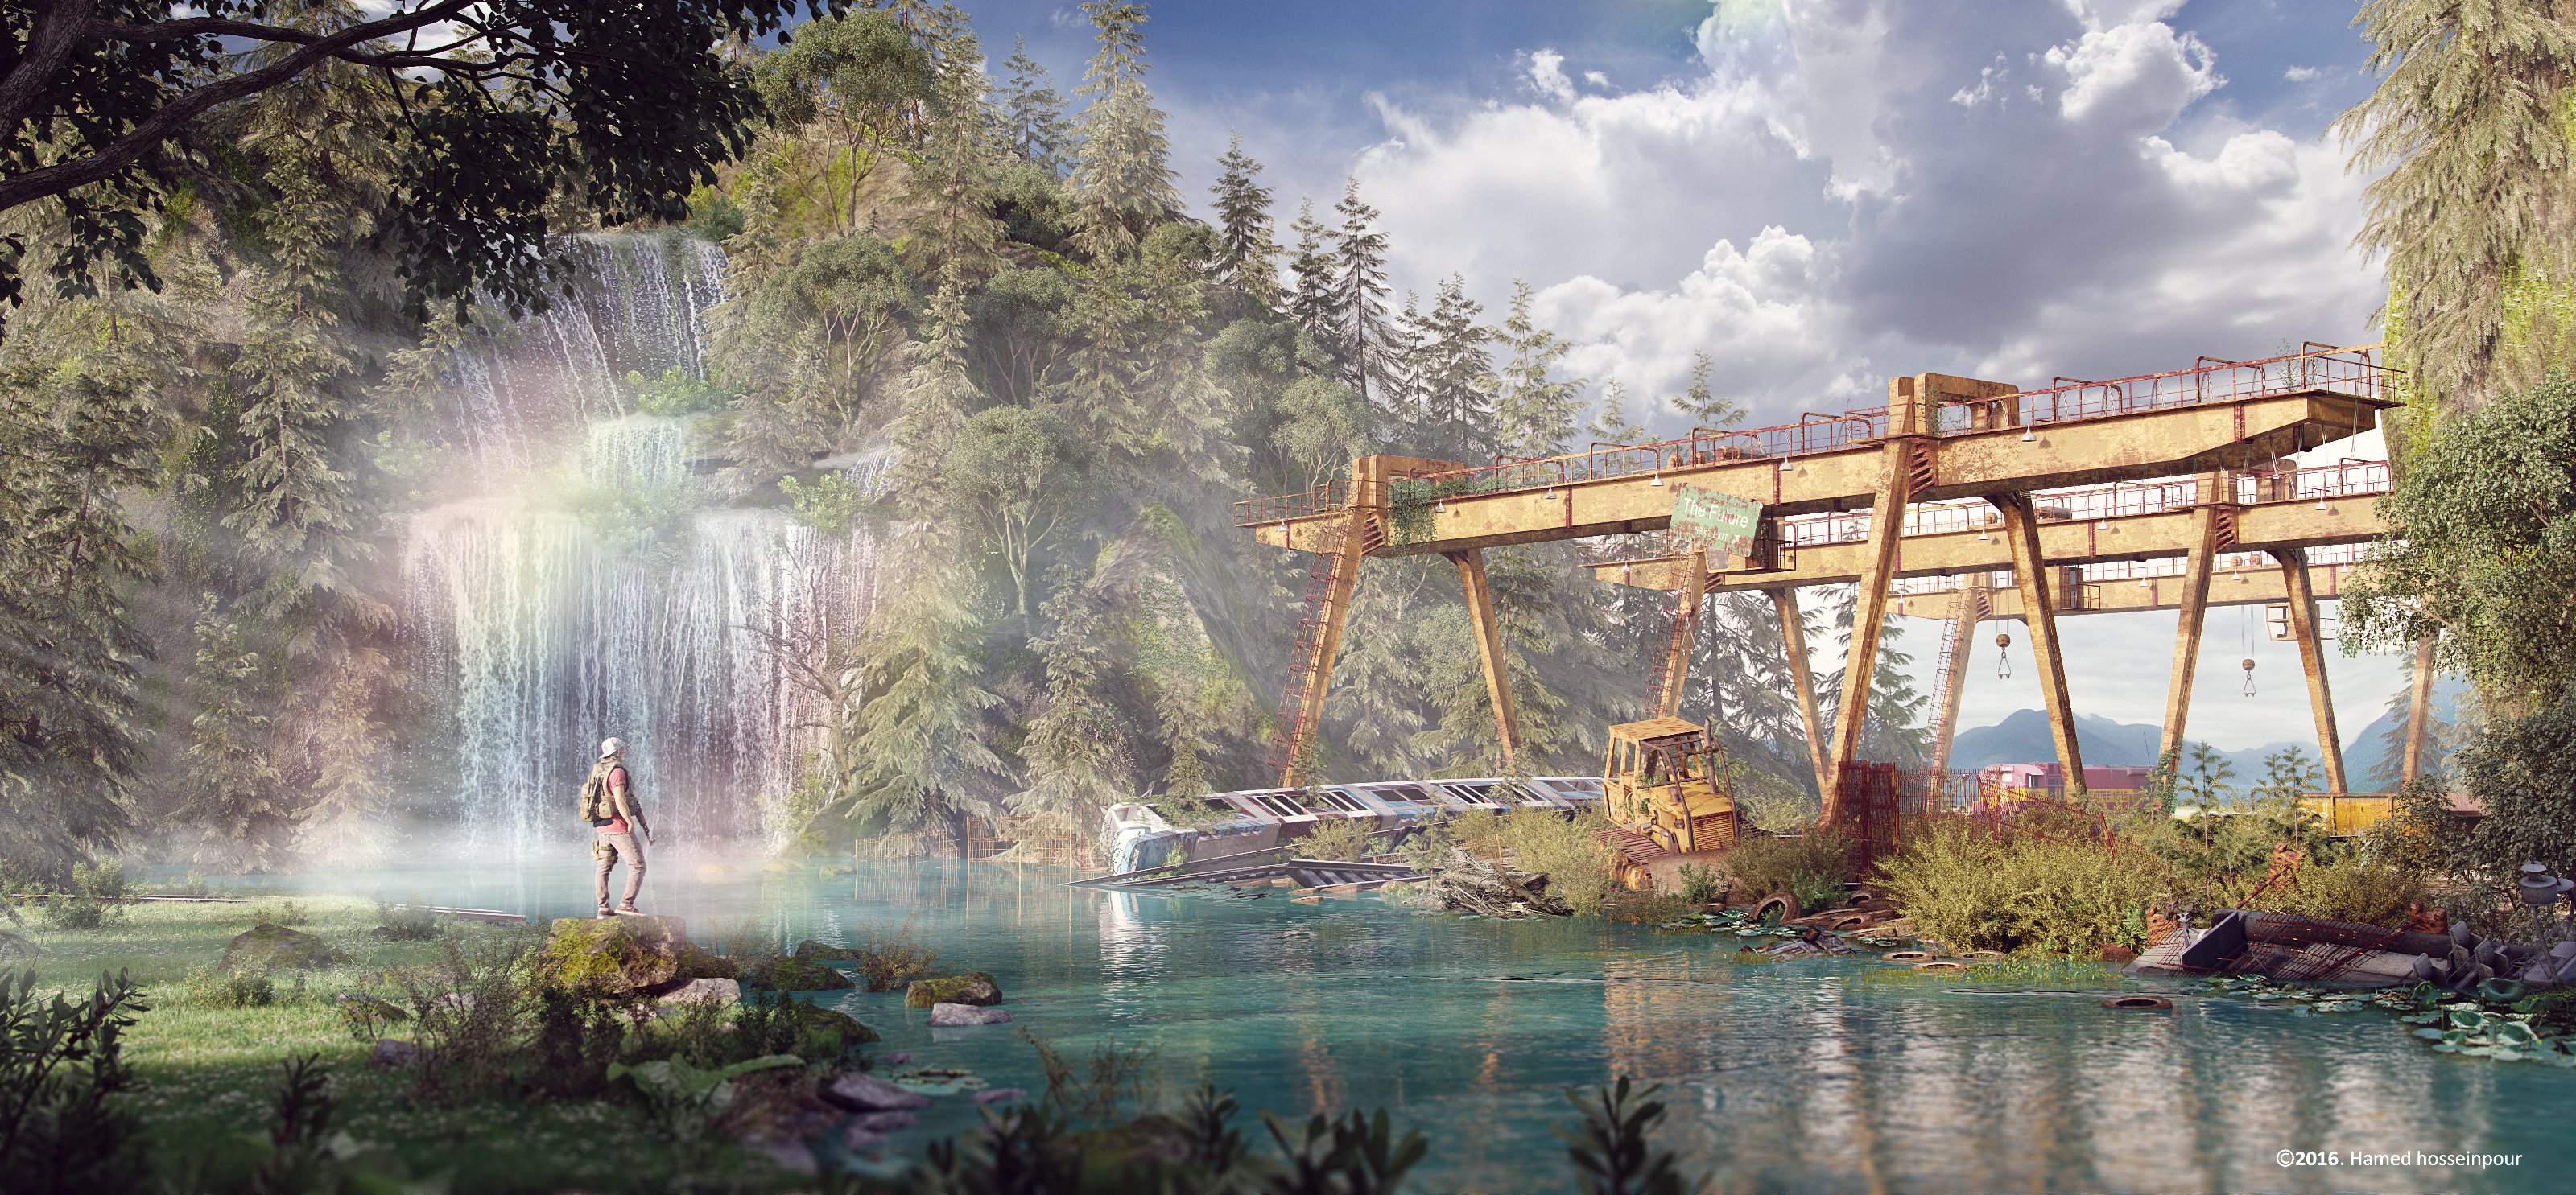
Final render
 

Click on image to enlarge2_VALLEY_OF_MY_MIND_SHADED_evermotion.jpg

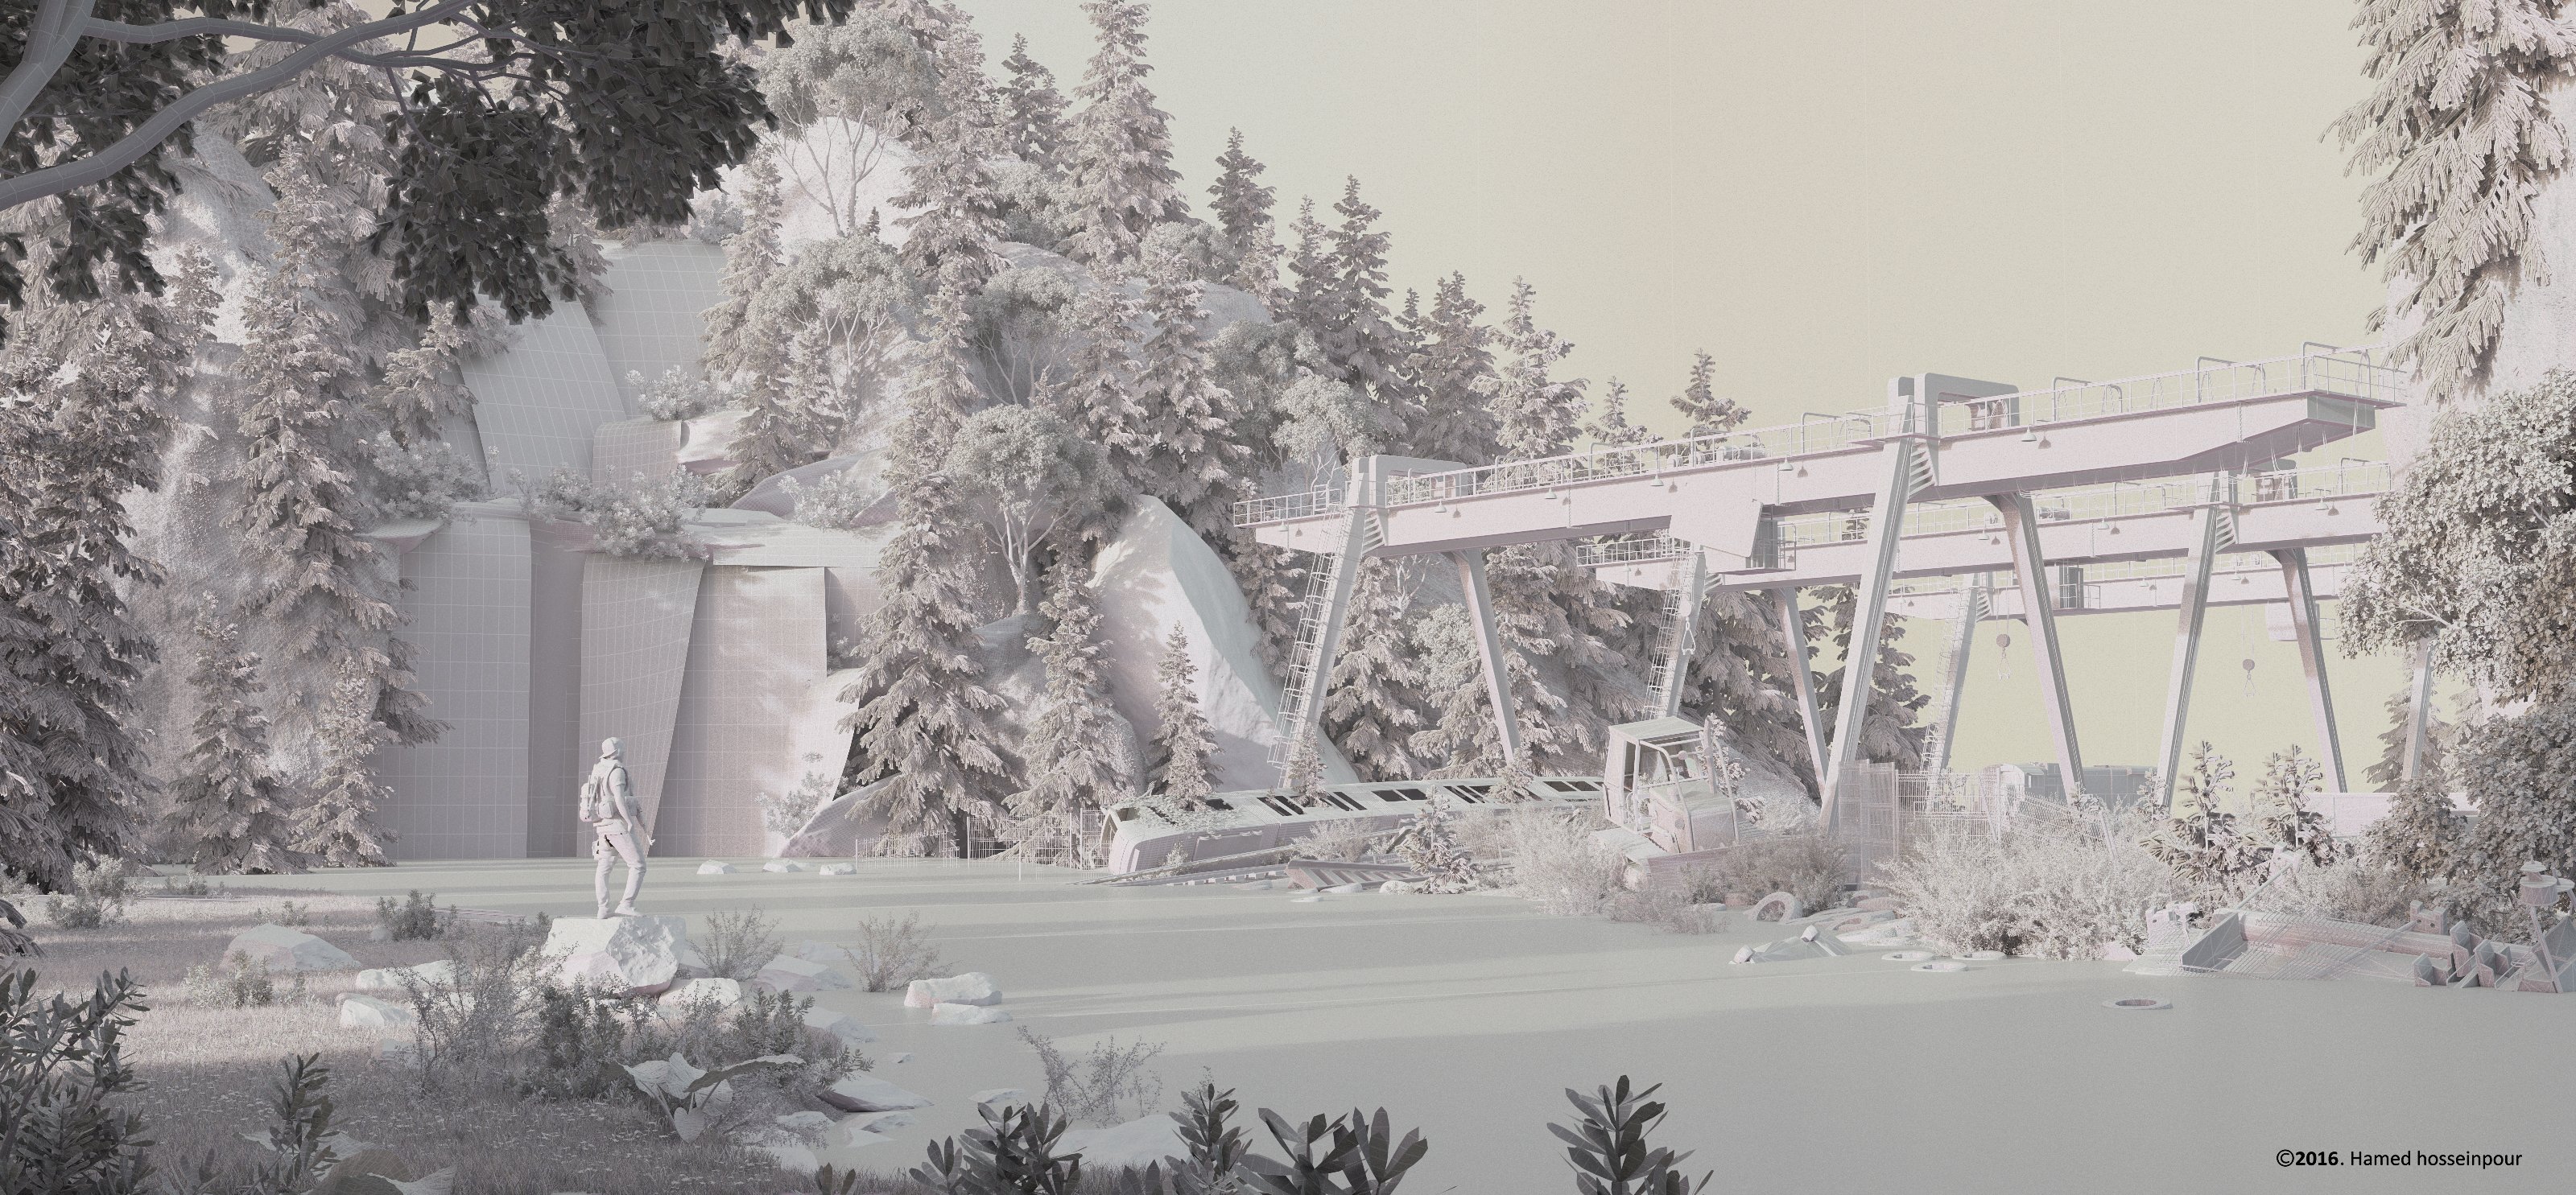
Wireframe.
 

Click on image to enlarge3_CROPS_evermotion.jpg

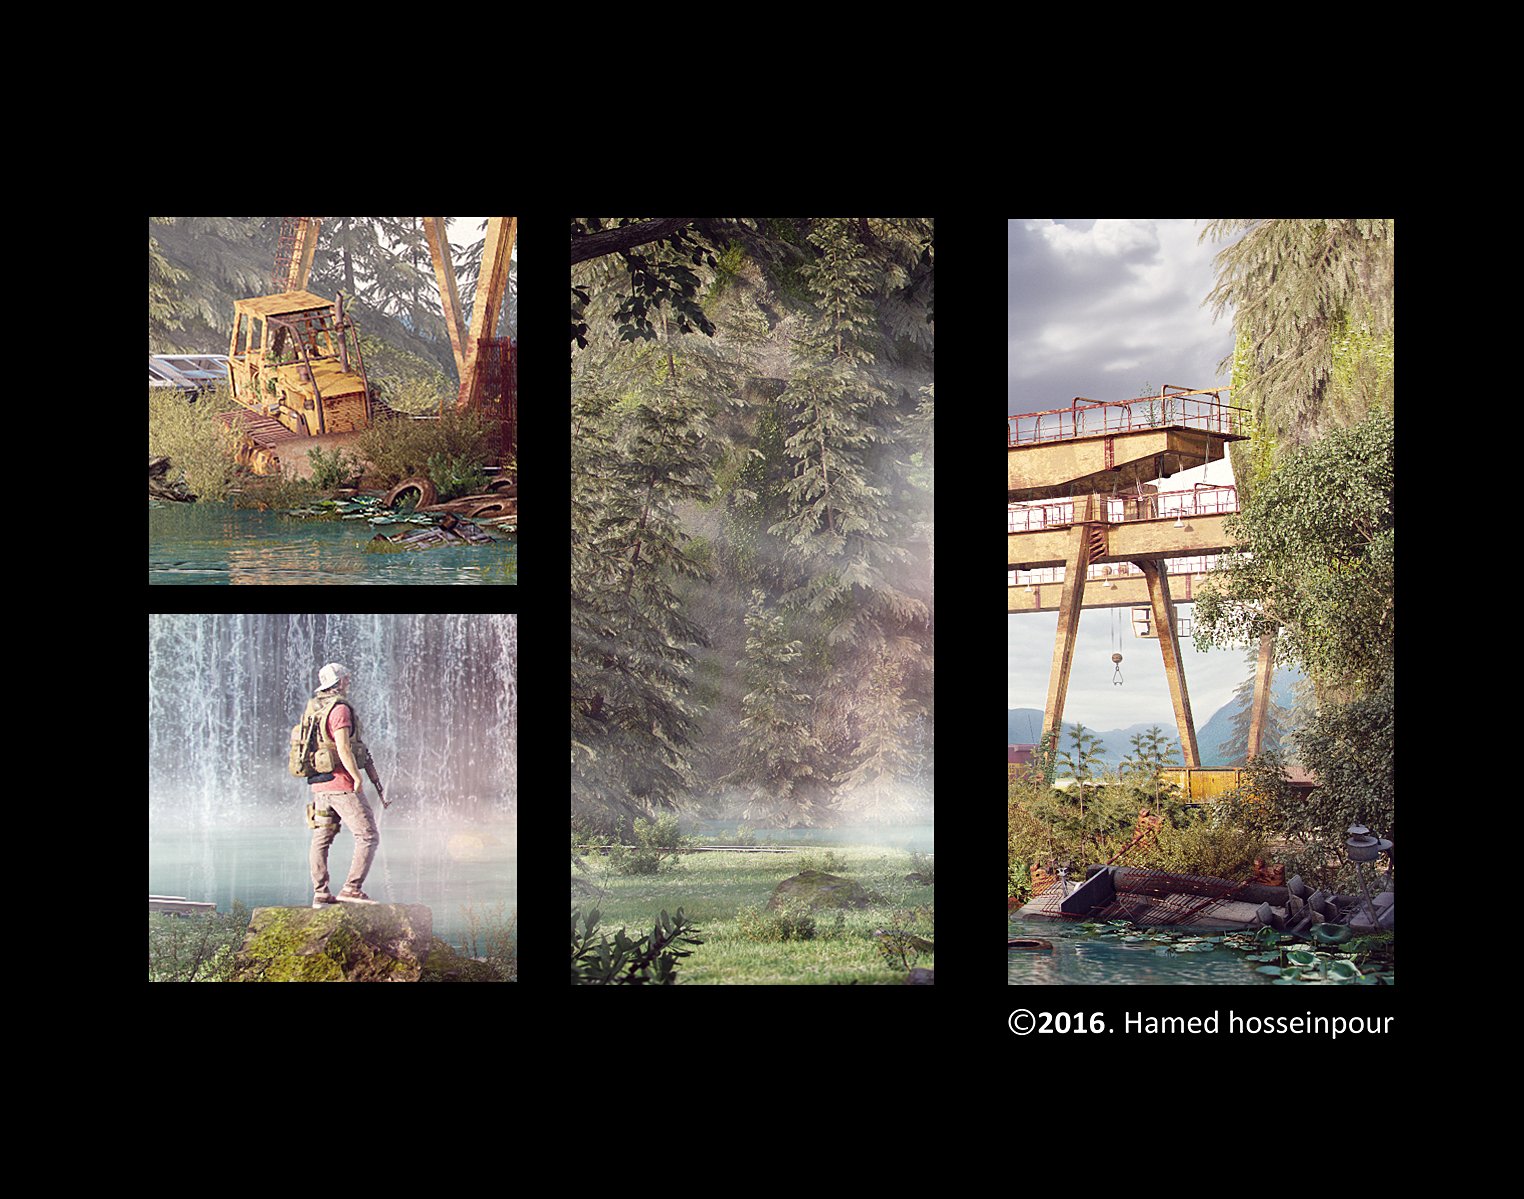
Cropped elements.
 

Click on image to enlarge4_COLOR_SEED_evermotion.jpg

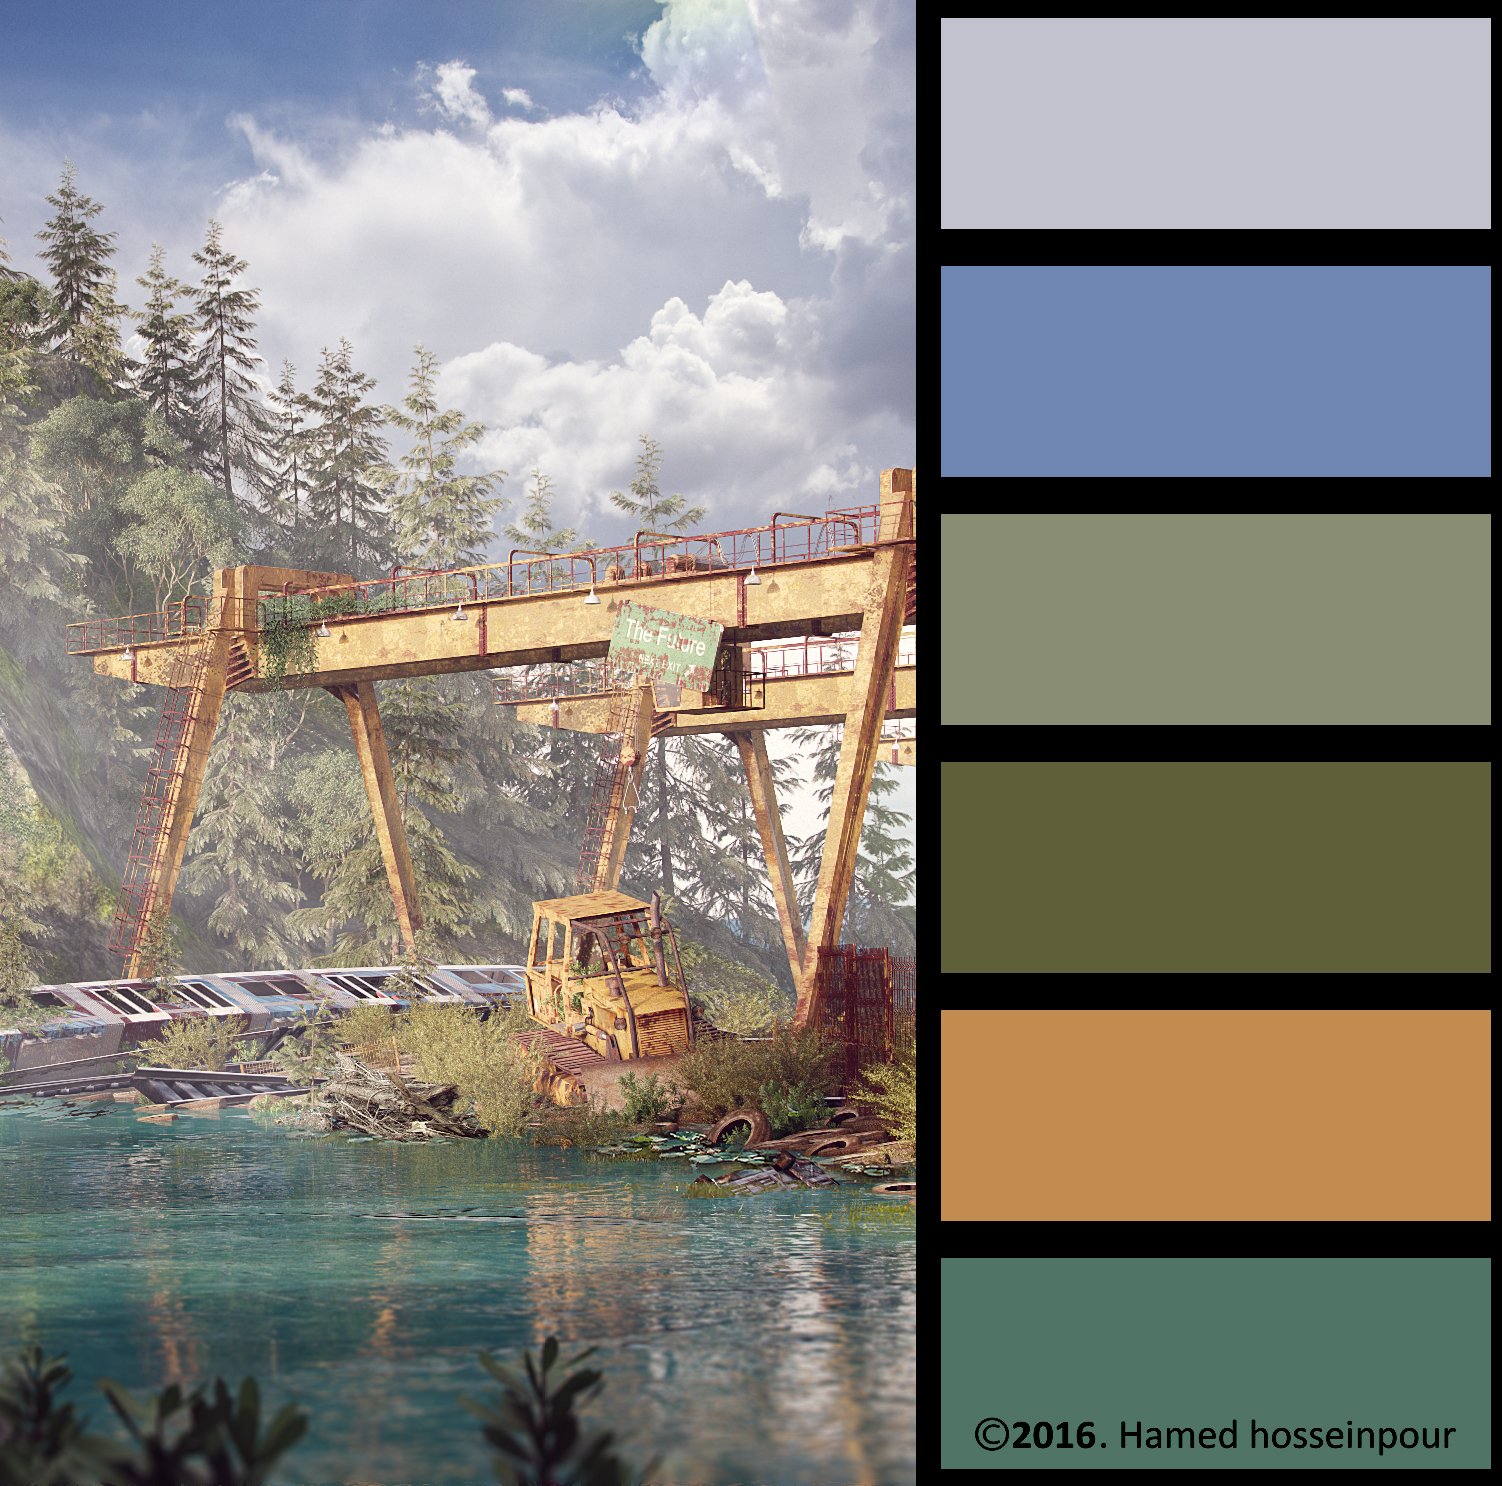
Color seed.
 
About me:

I'm Hamed Hosseinpour from Iran. I started learning architecture in 2007. My first trials in archviz begun in 2009 and I focused on architectural visualization. I'm making interior and exterior designs and visualizations for past four years and everyday seek for better results.
Author: Hamed Hosseinpour Editor: Michał Franczak
Tags: max vray 3dsmax hamed hosseinpour valley mind
You may also like...
Flickering free flythrough animation in Vray

Flickering free flythrough animation in Vray

TipOfTheWeek: particleflow pt. 2: Make cool effects using 3ds max curve editor
×

LEAVE A COMMENT

You need to be logged in to leave a comment. Don't have account? Register now.

hseenfx 14:53:06  |  31-03-2016
great scene much respect thank you for sharing
Art77 14:57:04  |  12-04-2016
great tutorial. thanks hamed and evermotion :)
ali989 14:58:43  |  12-04-2016
awesome color mood- thanks hamed
thekapow 03:30:08  |  20-04-2016
post production ruined the image, but the 3d process was top notch, final picture is not.
hamid elec 15:20:42  |  25-04-2016
great tuts . thanks hamed