3ds Max offers Skin modifier that provides user with some fine tools for the job. Unfortunately the way weights are assigned by bones usually cannot be trusted. Long story short: automatic skinning almost always fails and we end up with tweaking envelopes ranges and strength manually.
Bones Pro, a commercial script developed by 3d-plugin is supposed to be a solution for all our troubles. As its developer claims "it allows you to create high quality skin meshes rapidly with easy-to-understand bone influences and vertex assignments, impressive real-time skin-deformations and special-effects". Surfing on Bones Pros website was like reading a brochure about a paradise.
After I saw this I knew I had to try it myself.

A promising header from https://www.bonespro.com/
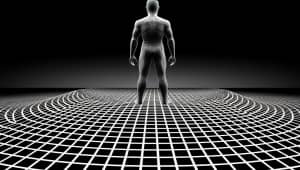
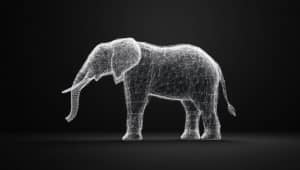
Bones Pro functions like any other modifier, therefore it does not require new windows, toolshelves or panels. User only has to add it to a chosen object from the scene, assign bones and then let the script create weights for each and every one of them. At this point you should not expect miracles. Although the way weights are distributed slighlty differs from the algorithms used in standard Skin modifier, it still creates dozens of bugs that need to be fixed manually.

Automatic weight distribution fails in both Skin and Bones Pro modifier
However this time all the cleaning process takes less time due to simple and yet powerful tools provided by Bones Pro. With a Strength and Falloff sliders you can easily control range of envelopes and then - if necessary - set the same information for picked vertices. Options are mostly intuitive as using them changes the look of our model in realtime. One should not forget about extremely handy Mirror section that allows us to copy and paste the entire weight settings of active bones. Although it does not take into consideration infuences of other unselected neighbour bones (therefore copied settings may not be correct) it still speeds up our workflow when used wisely.
There are two methods of displaying weights and bones of our object. The first one makes model transparent therefore allows us to select all the envelopes that are hidden inside. The other sets it opaque again but reveals weights as blending colors from red (maximum influence) to blue (minimum influence) or white (vertex excluded from selected bones).
Unfortunatelly we are not offered the third display method that would be a mixture of the two existing ones. In other words we cannot see inner bones and weights at the same time which forces us to rapidly change Visualise method during work. Moreover selecting several bones disables display of weights as blending colors; instead all the faces, that are in range, become red, while other parts of our model are marked with - apparently - random tints. It may be a little bit confusing, especially when mirror tools are involved.

Available visualize methods of bones and weights
Another important aspect of skinning involves selecting chosen bones and vertex. I must admit that developer of Bones Pro provided us with bunch of interesting options that are based on bones hierarchy, selection sets or vertex rings and loops. Although all these tools work properly, the time they need to complete the task is suprisingly high (highlighting edge loop takes around 30 seconds while working on 50k polygons model).
Another irritating fact is that Bones Pro ignores rotating view around selection. It always uses object starting location as virtual pivot point center. That means that if we move our character in space, we cannot rotate view around active vertex (the problem does not occur while working with bones only). In other words, tweaking weights of chosen vertex during animation suddenly becomes a real nightmare in which we are constantly forced to zoom in and out the view in order to find precise parts of our mesh in a scene.
One of the most interesting features of Bones Pro is exporting our setup as a Skin modifier. It works well enough in most cases and therefore allows user to fit Bones Pro into personal pipeline. Another way to do that is to download a free plug-in Bones Pro Proxy that allows anyone to open scenes based on Bones Pro. No licence is needed as any changes of weight setup are not available.
What's really worth mentioning is that Bones Pro is not just about bones and weights. It comes with a few other options that may improve the quality of skinned model even more. First of all it gives us another modifier called ParaBone that lets any geometry to push in or out surface of other model. It helps to create an illusion of interaction between different objects (boxer's fist squeezing opponents cheek, all kinds of cartoonish deformations) in similar way MetaBones work.
And speaking about MetaBones - they function as objects (listed as "3d-io Plugins" type) that always look like spheres. When linked to desired bones they can simulate muscles or may just help to avoid unnecessary bending around such parts of our character as hips or stomach (4).
Bones Pro also offers BoneJiggler modifier that introduces soft-body-like effects, that is: realtime jiggle, wobble and oscilations. Perhaps it's a matter of experience but I have never managed to create anything more spectacular with it than dancing hamburger and gooish icycle presented at Bones Pro homepage. When it comes to such kind of simulations I prefer Flex and SkinWrap modifiers that lead to much predictable results.
Pushing out elbow with a help of metaBones
Last but not least, I would like to mention solid training material everyone can find at
https://www.bonespro.com/. Along with well described features it's a great place to start getting to know the script better. Needless to say there's also a forum dedicated for all 3d-plugin clients with over one hundred topics related to Bones Pro. Online support is solid and reliable, developers are also interested in new suggestions about their product.
I won't suggest buying nor ignoring Bones Pro as it all depends on user expectations. It's not a magic wand that will free you from setting weights manually. Furthermore I believe that experienced animators may achieve very similar results with a Skin modifier along with a few other tricks. However Bones Pro lets you finish skinning faster, it's simple, it's very intuitive and in my case it never caused any crash. Nevertheless there are some drawbacks that at some point become quite annoying. Sometimes editing does not work as expected, calculations needed for selecting vertex loops and rings are quite time-consuming, Painting Weights does not differ from a horrible 3ds Max default one. On the other hand, despite a large room for improvement, it's still one of the best plug-ins that are now available on the market. And if there's any way to ease the pain involve skinning it's definitely worth a try.
Bones Pro modifier and its options
Summary
+ simple and fast control of envelopes
+ metaBones and other hypodermic solid deformers
+ very stable
+ realtime updates of deformations
+ Bones Pro Proxy feature and Skin export
- price (299 euros for a single seat licence)
- selecting vertex loops and rings requires long calculations
- not that practical Bone Jiggler
- default 3ds Max Paint Weight options
- lack of fully-featured Visualize method


 Customer zone
 Your special offers
 Your orders
 Edit account
 Add project
 Liked projects
 View your artist profile
COMMENTS