Lately I've been in a need of creating a book with folding pages. I tried to google the answer of how was I supposed to do it but it left me shiftless. All the examples were poor and usually time consuming so I decided to explore the subject myself. I tried many approaches, shape keys, armatures, even simple simulations.
Click on image to enlarge
Eventually I found a trick that I would call the best solution there is. In case you might have the same problem as I did, here's what I learnt.
Click on image to enlarge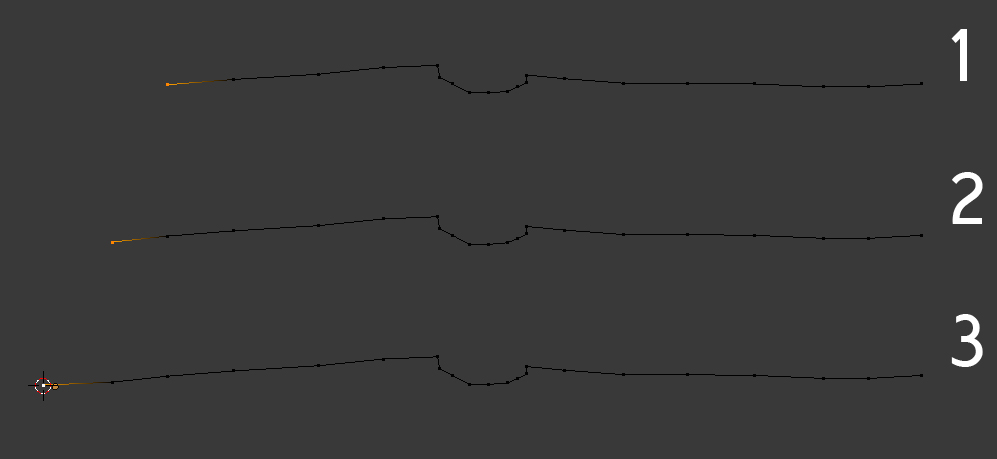
Let's start our work from modeling book cover. Start with a vertex and slowly extrude it in order to achieve the correct siluette. In this case working from the side view and using Ctrl+LMB shortcut for drawing new edges is probably the most intuitive and effective. I didn't really mind the rough shape of my model as I knew I would use Subdivision Surface modifier anyway.
Click on image to enlarge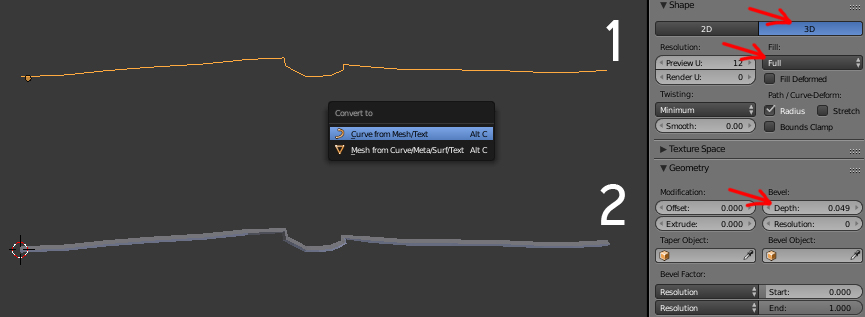
When my shape was ready I converted it to Curve using Alt+C shortcut. This way I could add it thickness using Bevel Depth parameter. Be aware that you need to work on a 3D Curve mode and fill its shape with a Full method.
Click on image to enlarge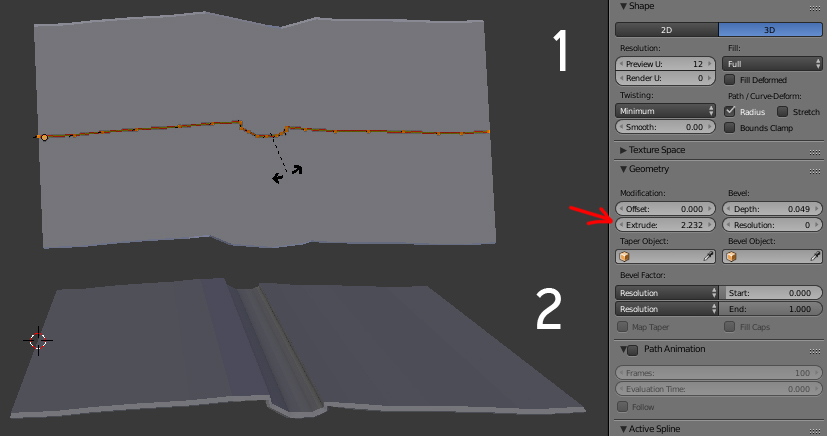
In order to achieve the shape of my cover I needed to extrude the curve. Oddly enough the extrusion went on a wrong axis and I had to fix it. I entered Edit Mode, hit Alt+T and typed 90 so that I tilted the axis of used option by the right angle.
Click on image to enlarge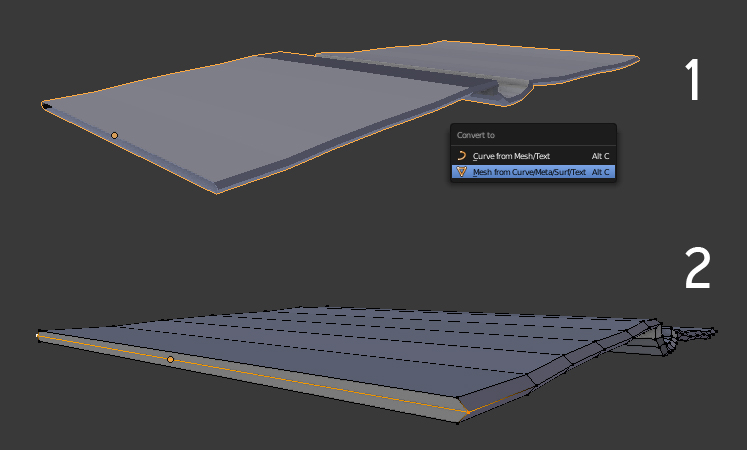
Further improvements of the cover's look required converting curve to mesh. I started by filling gaps on both ends of my model with polygons using some basic Blender commands (F for capping wholes, J for connecting vertex with edges)
Click on image to enlarge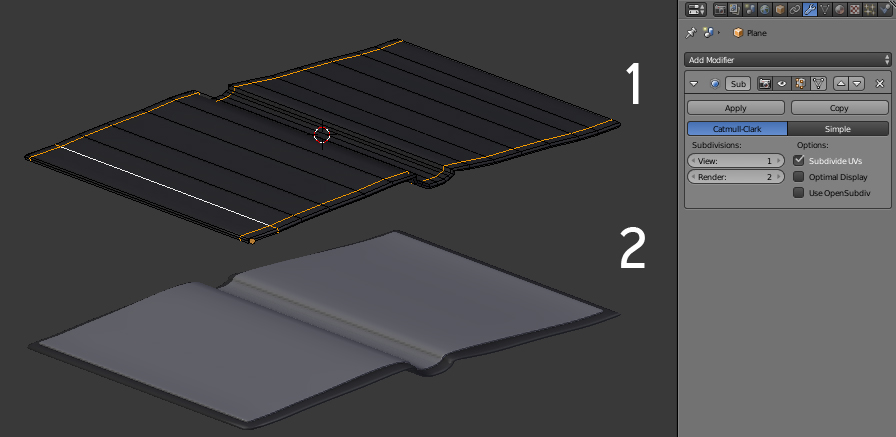
It was time to smooth the look of my cover a bit. I used Subdivision Surface modifier and added few loops that sharpened newly created topology. Because I always pay attention to details, I made another part of the cover that stuck to the original one. Basically I used the same techniques as before but you can duplicate the cover and start your work from there as well.
Click on image to enlarge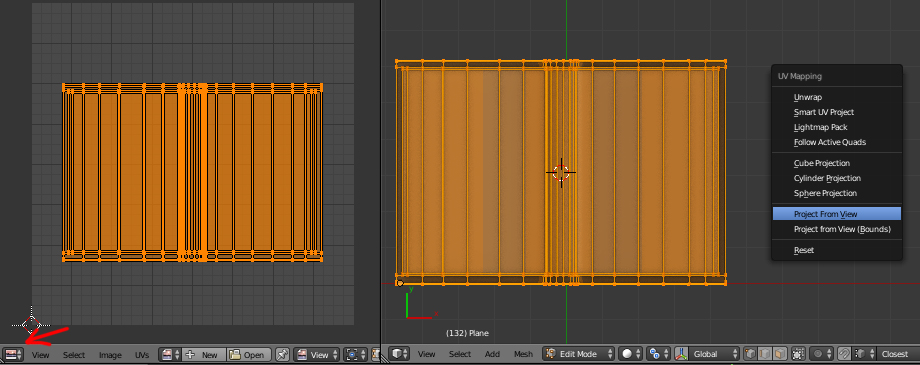
The cover looked fine but not good enough, so I came across an idea that it would be nice to bend it a bit and yet perserve control over such deformations. Therefore I switched to top view and unwrapped my models using Project From View. I knew I was going to need that as I was getting ready to release the power of Displace modifier.
Click on image to enlarge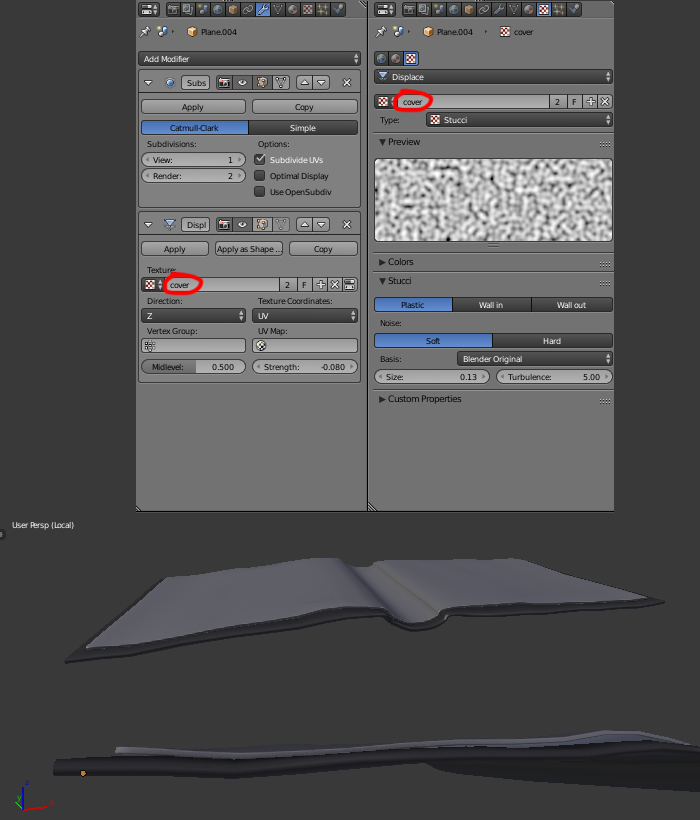
I added another modifier and created Stucci texture to work along with it. I limit Direction of created deformations to Z axis and played with Strength parameter until I reached fine results.
Click on image to enlarge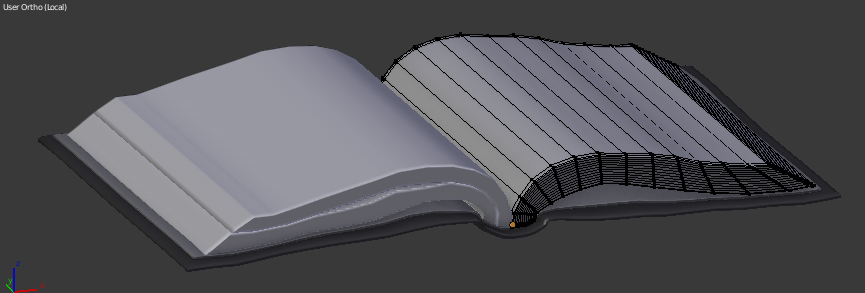
Creating pages that would not be animated was not a big problem. I used the same tools as before but added many additional loops on their sides. I knew how much they would help me to add some geometry variations that would suggest folded and bent pages within.
Click on image to enlarge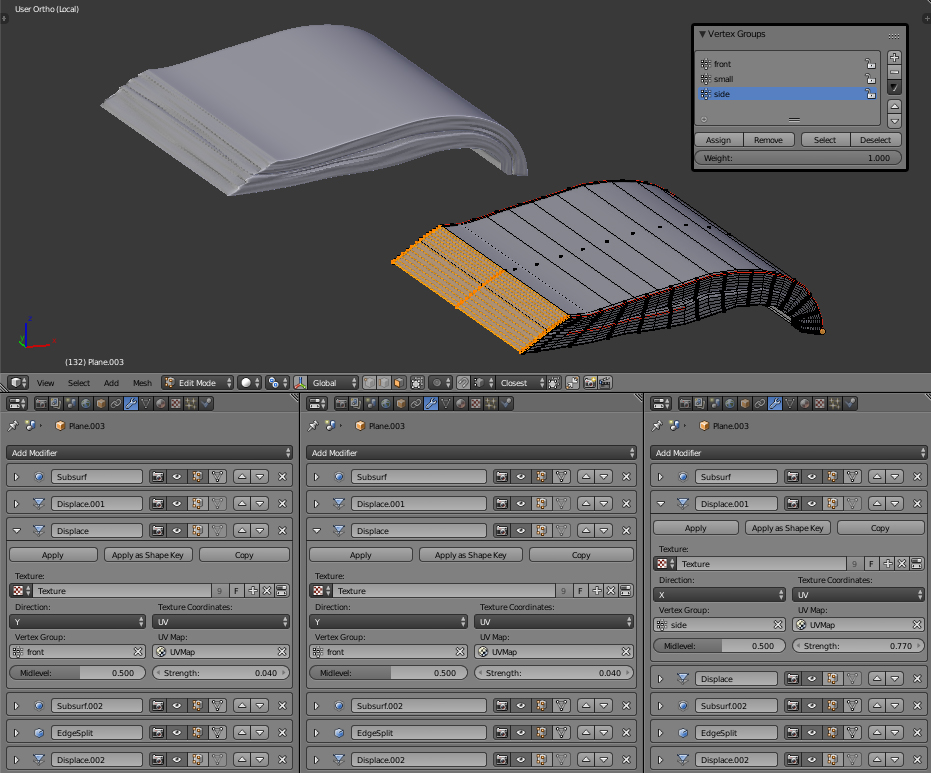
Again Displace modifier came in handy. This time I set other procedural textures and different axis as I worked with different Vertex Groups (for every side of the model except its top). Be aware I uwnraped my stack of pages in order to get the full control over my modifers.
Click on image to enlarge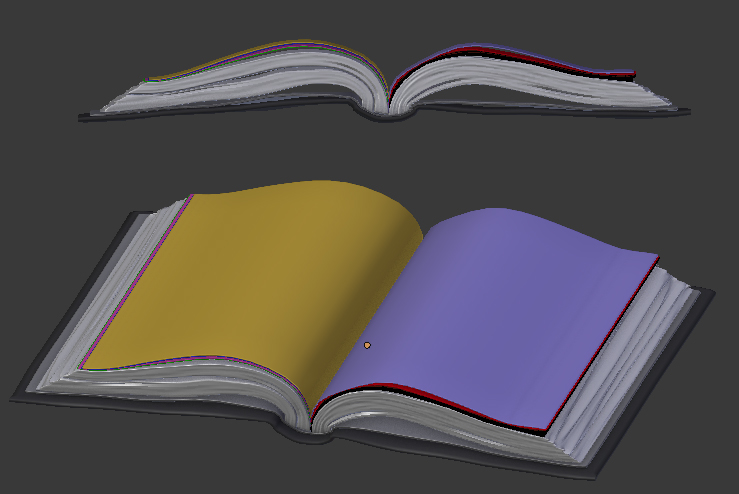
In my next step I created several pages that would fold from one side of the book to the other. I had to be very careful not to let them cross each other. They were flat until I used Soldify modifier and decided to keep their thickness this way. When it comes to attaching your geometry to armature, the less vertex, the better.
Click on image to enlarge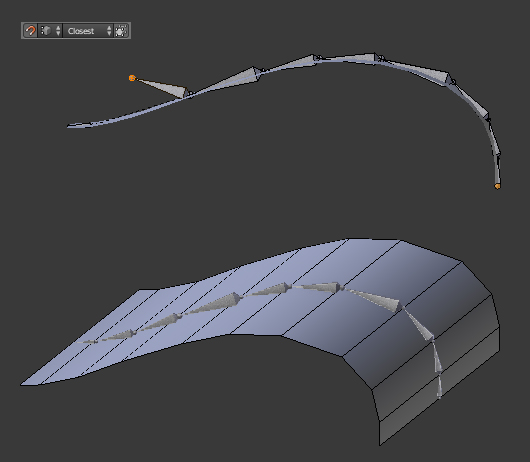
I went back to the side view and added Armature to the scene. I extruded it with Snap option set to Vertex on so that every newly created bone would stick to my page edge loops. This way I made sure that every bone would control every angle of my page. I repeated the whole process for every page I made.
Click on image to enlarge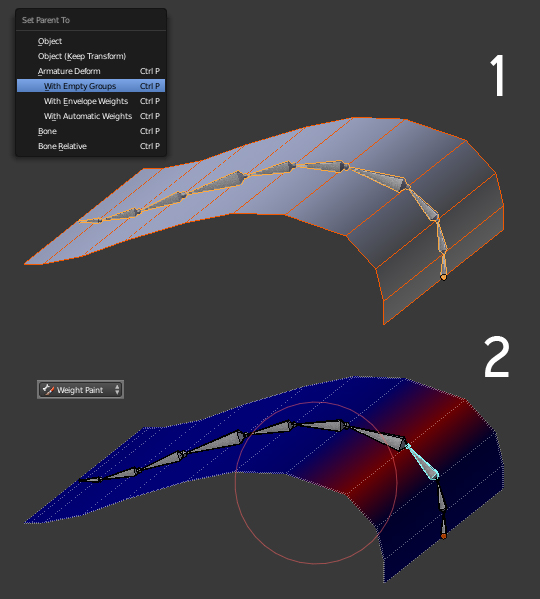
Joining armature to page is crutial. I used Ctrl+P shortcut and With Empty Group option. Then I entered Weight Paint and assigned every edge loop to one bone nerby. Do not let Blender assing Weights automatically as they would need to be fixed anyway.
Click on image to enlarge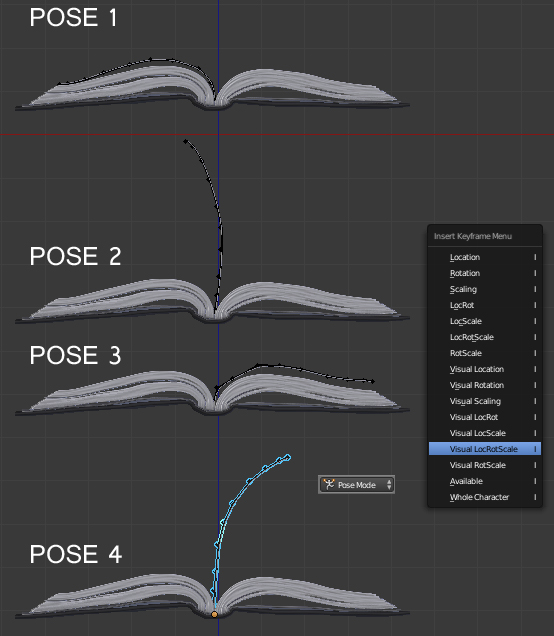
There's just one more thing to do - animating every page. In my case I needed them to go from one side to another and back to their original location. I made four poses and inserted keyframes for every one of them, all in different frames. I saved their location, rotation and scale as they sometimes required changes on these three parameters.
Click on image to enlarge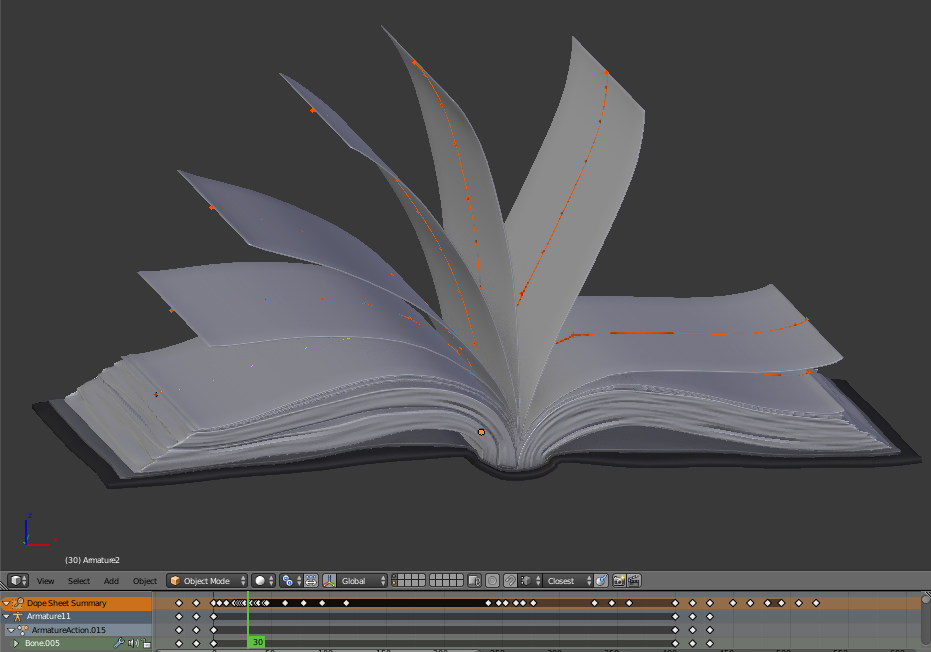
When all pages gained their poses I had to give their animation an offset so that they would not fold together in one brief moment. Remember that you can scale keyframes in Dope Sheet and copy them using the same shortcuts as while editing geometry.
Click on image to enlarge
Final result.
Customer zone
Your special offers
Your orders
Edit account
Add project
Liked projects
View your artist profile


COMMENTS