How To Make Your CGI Walls More Realistic
Realistic walls with noise modifier.
Total: € 0
Continue Shopping
In accordance with the art. 13 section 1 and 2 of the European Parliament and Council Regulation 2016/679 of the 27th April, 2016 on the protection of natural persons, with regard to the processing of personal data and on the free movement of such data, and repealing Directive 95/46/EC (General Data Protection Regulation), hereafter RODO, I hereby inform that:
1. EVERMOTION S.C., 8 Przędzalniana Str., 15-688 Białystok, Poland is the Administrator of your Personal Data (APD)
2. Data Protection Inspector can be reached through e-mail: iod@evermotion.org
3. Your personal data are to be processed on the basis of art. 6 section 1 letter a, b and f of RODO in order to:
a) prepare, conclude and execute the agreement and for other purposes approved by you,
b) to execute the legitimate interest like marketing of products and the agreement, claim assertion or defence against claims resulting from the law regulations.
4. Entities entitled to the reception of your personal data may be the authorised public bodies; mail providers; providers of the services covered by the agreement; responsible for debt recovery, keeping the archives, document utilization, legal consulting, technical services, IT services and accountancy.
5. Your personal data shall not be transferred to the third country, nor to the international bodies.
6. Your personal data shall be processed within the period of the agreement and upon your additional consent until you withdraw it. APD shall keep the data for the period of any civil law claim execution connected with the agreement.
7. You have the right to demand an access to your personal data, to correct or to delete the data if there is no other basis for the processing or any other purpose of such processing or to limit the processing of the data, to transfer the data to another administrator and to raise objections to the further data processing if there is no legal basis for further processing and to withdraw any previous consent.
8. You provide the personal data voluntarily, however they are necessary to conclude the agreement. The refusal of providing such data may result in the refusal of the agreement conclusion.
9. You have the right to lodge a complaint to the Personal Data Protection Office when in your opinion the data processing violates the regulations of General Data Protection Regulation of the 27 April, 2016 (RODO).
10. Your data will be automatically processed, including the form of profiling.
11. You are obligated to forward above mentioned information to your representative, especially if you appointed this person in the agreement as the contact person or as the representative for the agreement execution.


One of our latest products is Evermotion Vegetation Asset Pack for Botaniq vol. 1 - it is a collection of high quality hero trees that can be easily scattered in Blender, using Botaniq - a handy tool for scattering trees, grass, weeds and other assets. Botaniq makes creating green environments very simple and artistic friendly.
A short animation of the final scene
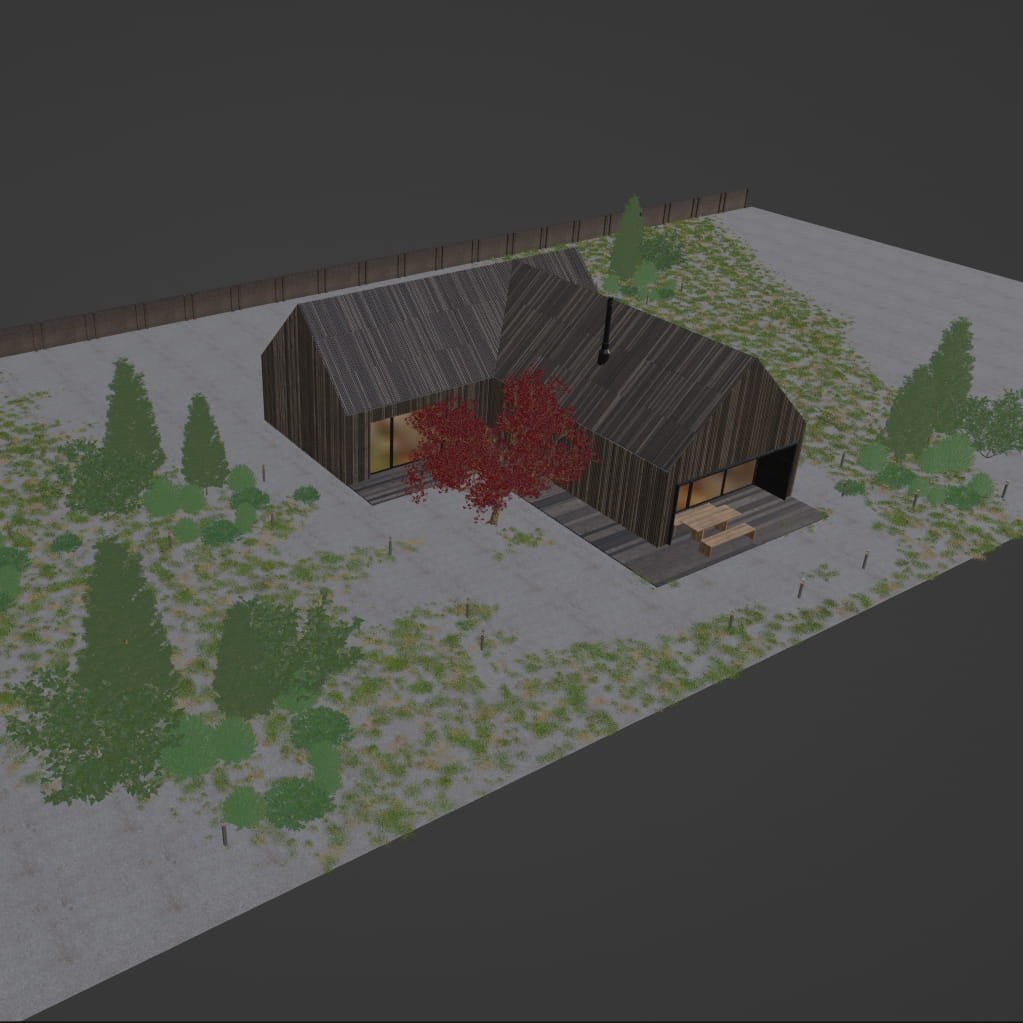
Scene
The scene consists of three planes on which we will use to scatter our greenery models.
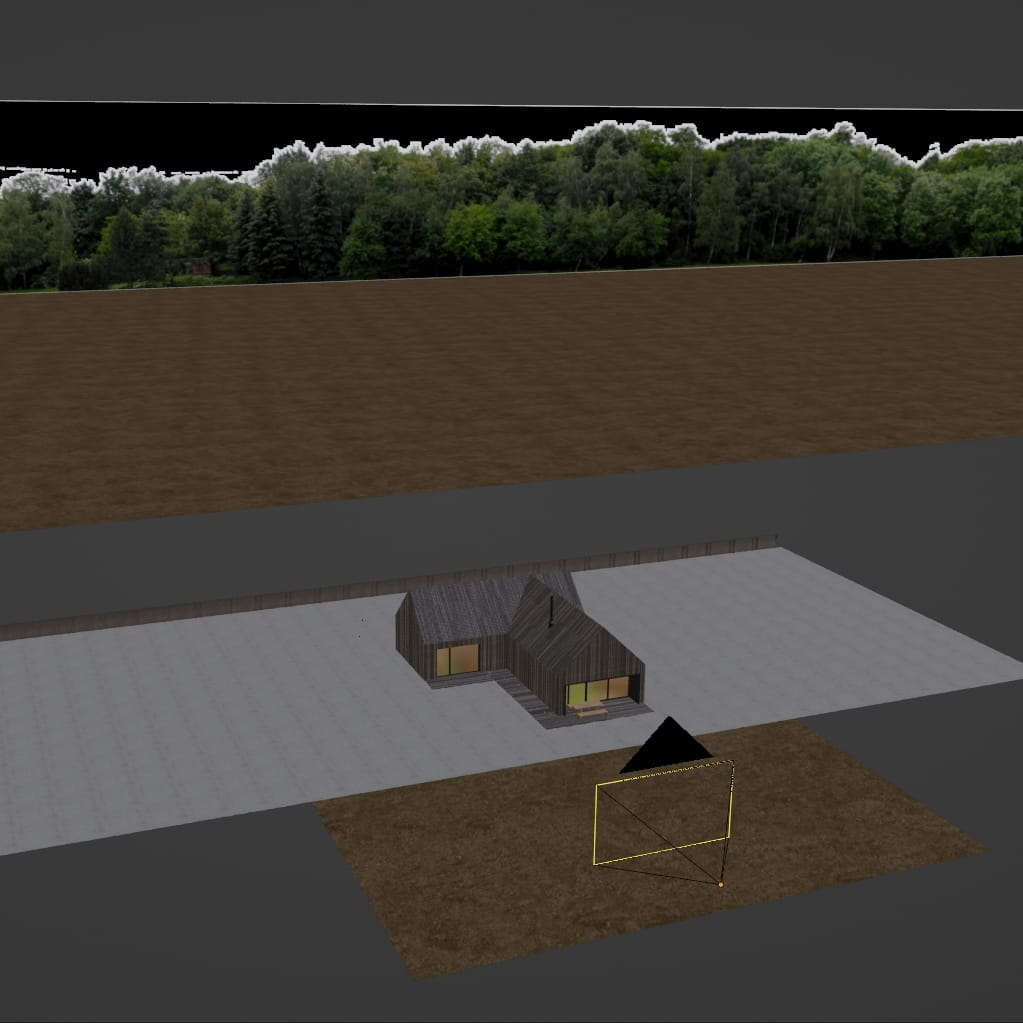
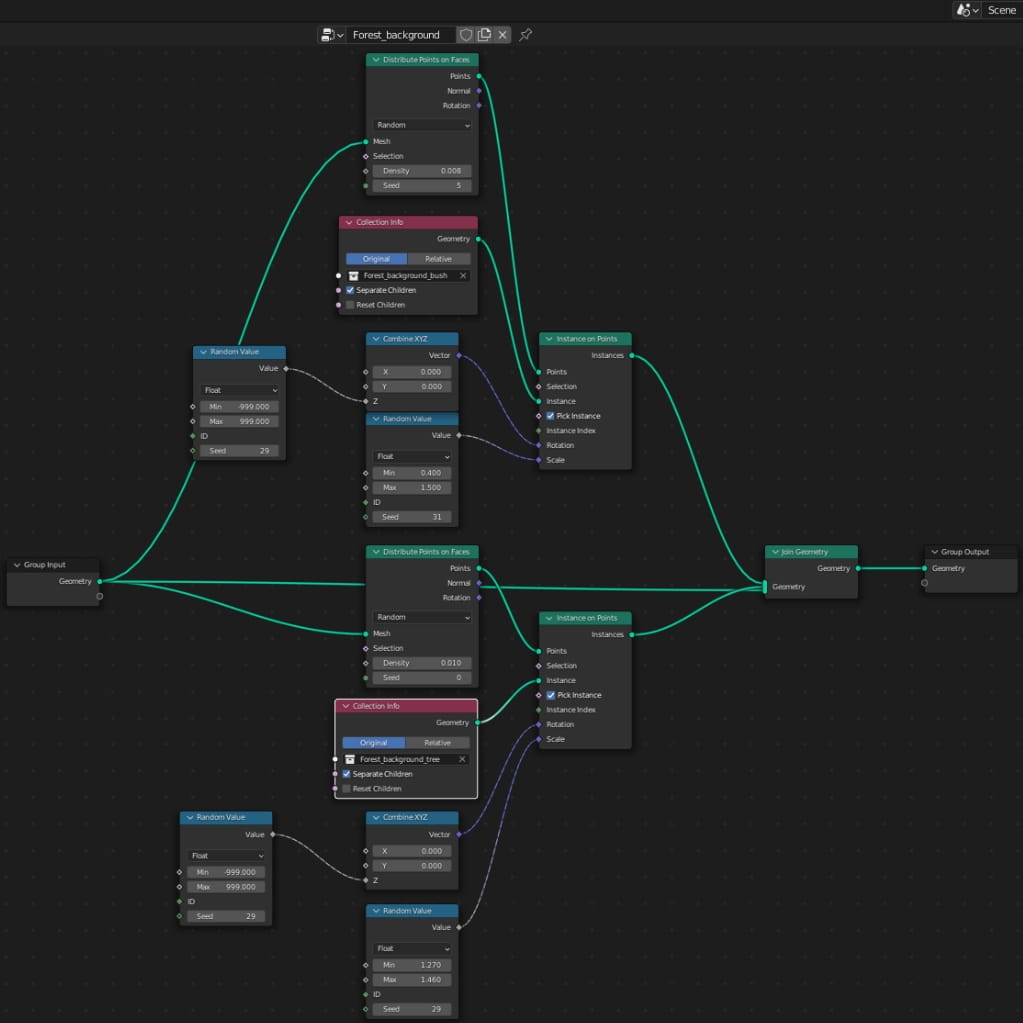
I spread trees and bushes in the background to fill the horizon, additionally I used a photo of the tree line, to cover any holes. For scattering I used Geometry Nodes.

Gemoetry Nodes settings. Remember to turn off the preview in Viewport, it will significantly speed up the work.
The lawn is nothing easier than a preset from Botaniq, I only adjusted the number of instances.
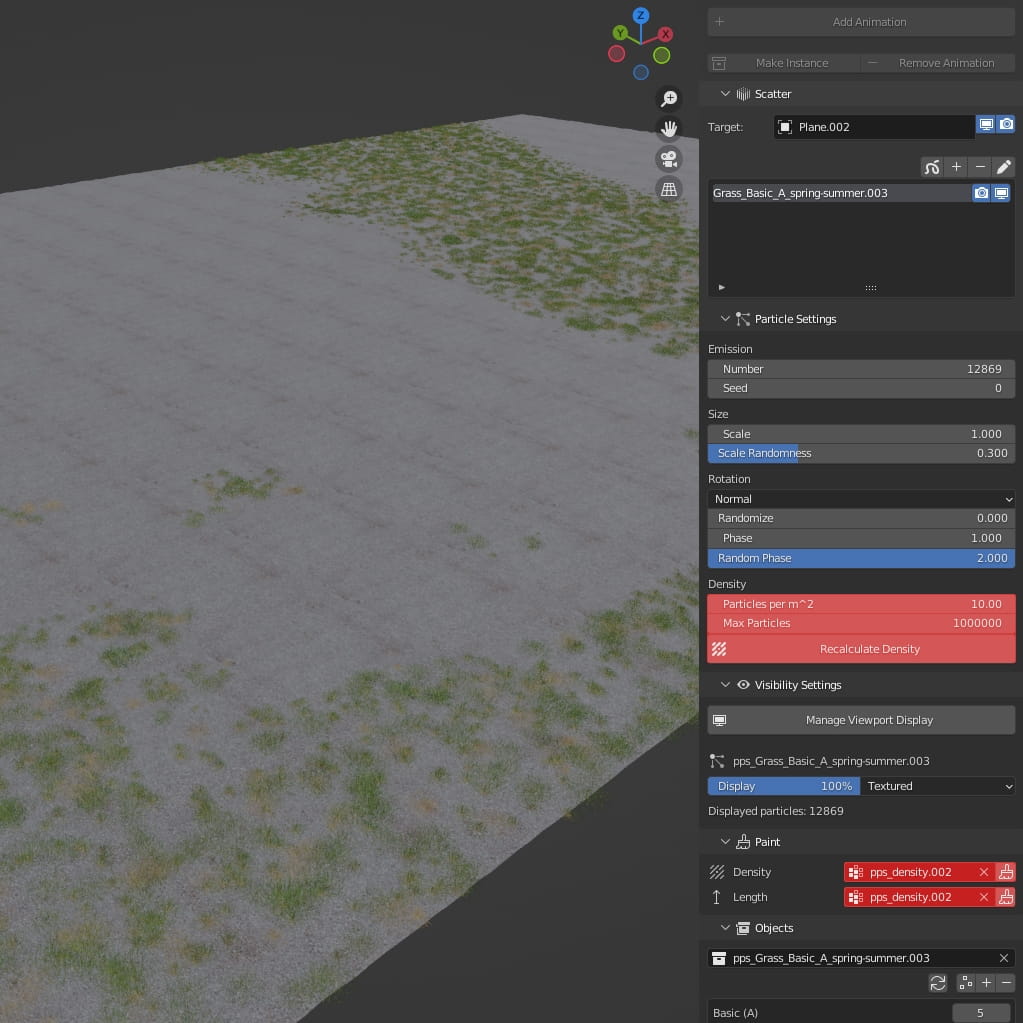
I added Weight Paint which defines where the grass should grow.

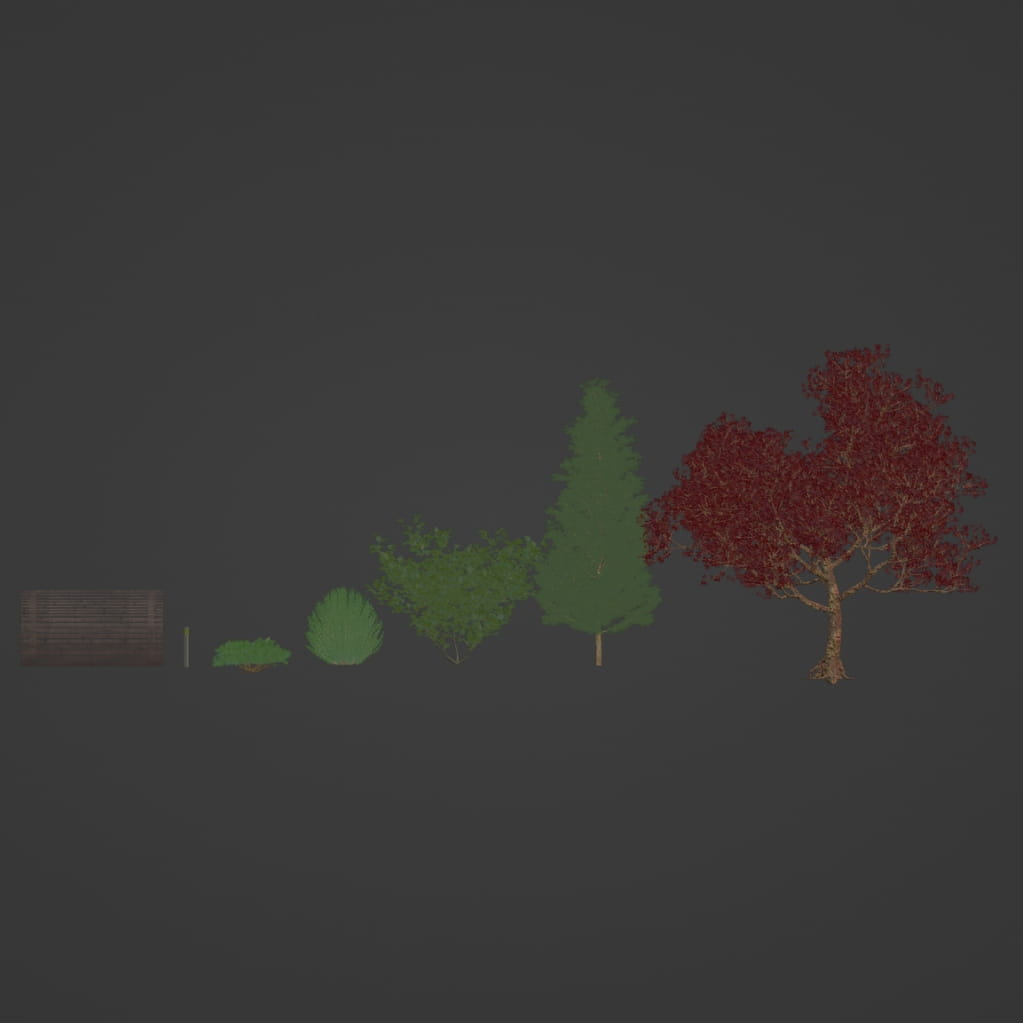
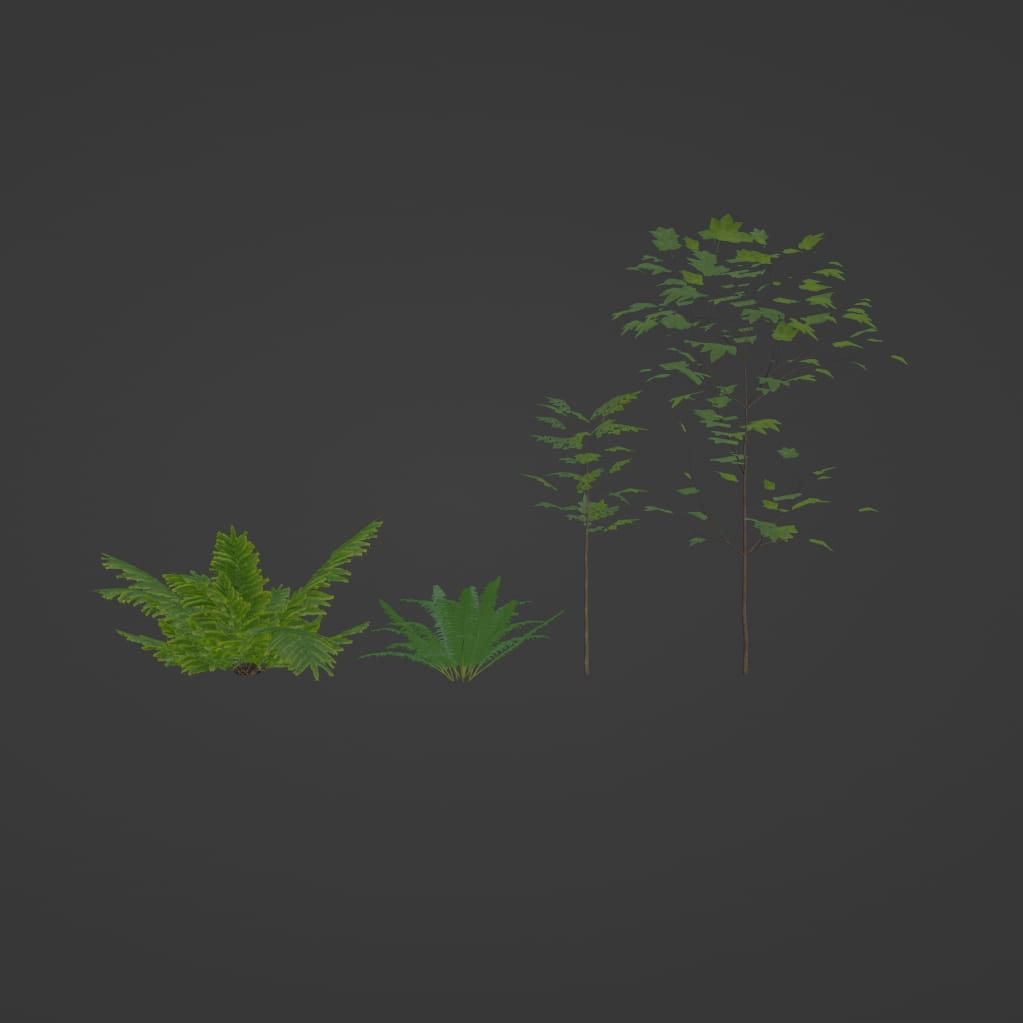
Here are the models that will be needed to fill the space around the house.
I placed these models by hand. Note that we are setting them "for the camera" - there will be no trees in areas that are behind the field of view. Remember, you only need to do what is shown in the picture.
The models used for the foreground.
This time I used the Botaniq scatter, adjusting the scale, rotation and the quantity of elements.

Animated trees are ready to render right away! First select the model you are interested in, click Convert to Editable, then Add Animation. In this scene, I used the following values: Preset - breeze and Strength - .1

I used Geometry Nodes again. Note that I have limited the trees count to minimum.
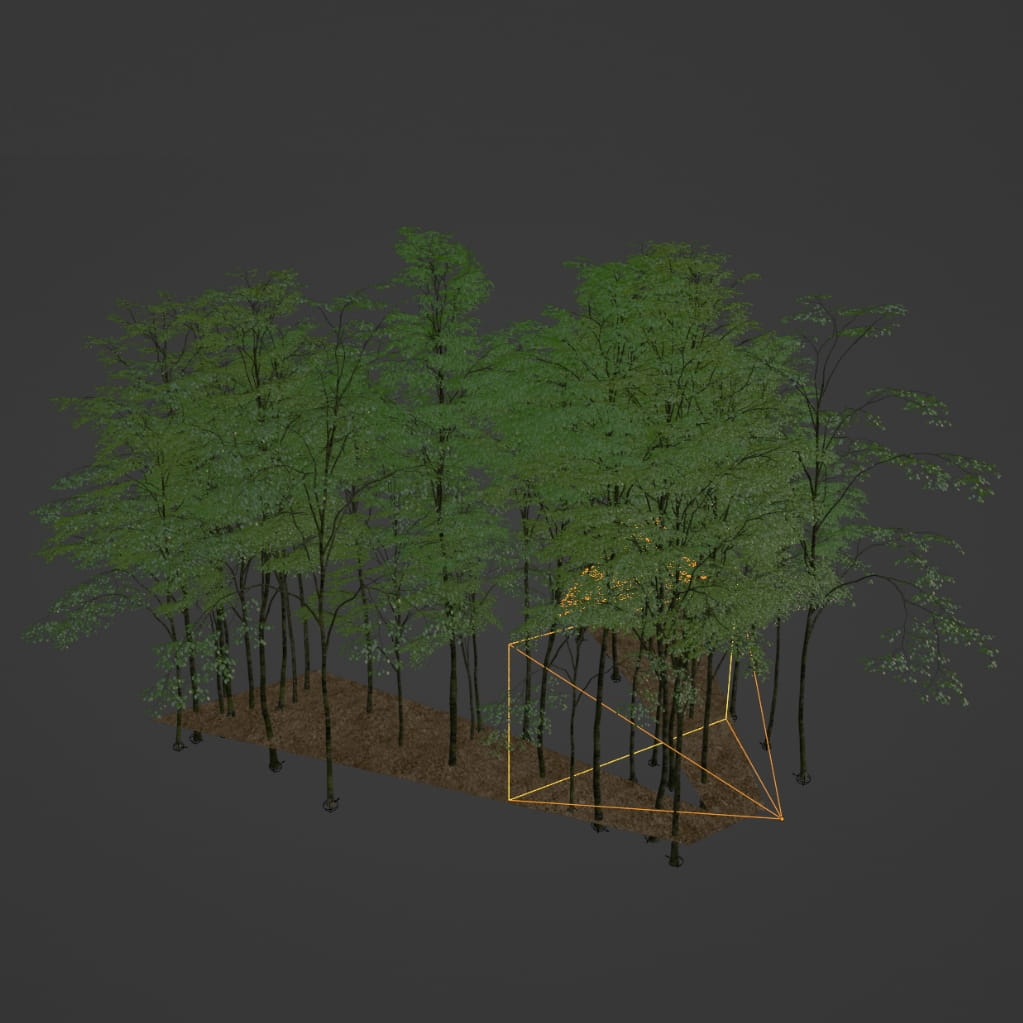
This is what the Geometry Nodes settings look like.

And this is what the foreground looks like
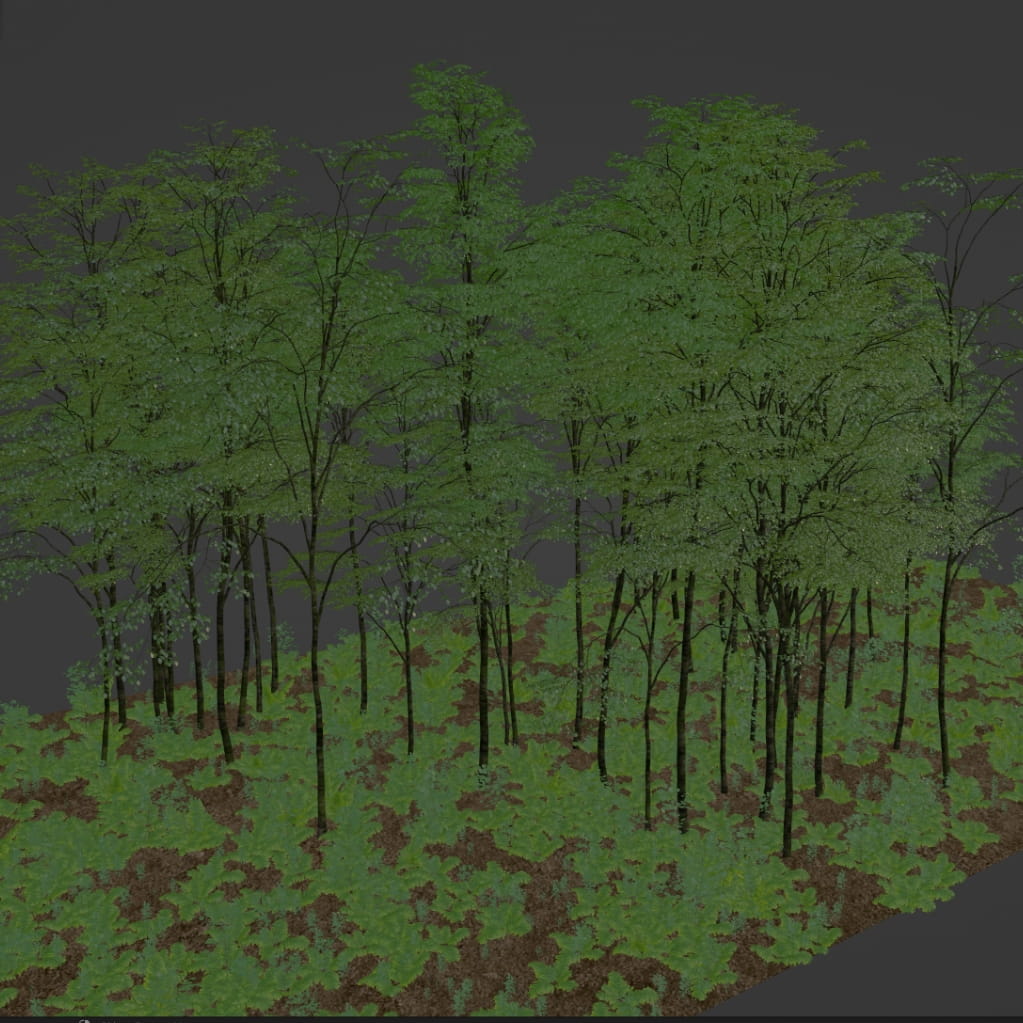
Using Geometry Nodes and scattering is convenient, but do not forget that you often need to manually place the models in the spots, where they compose the best with the rest of the scene.

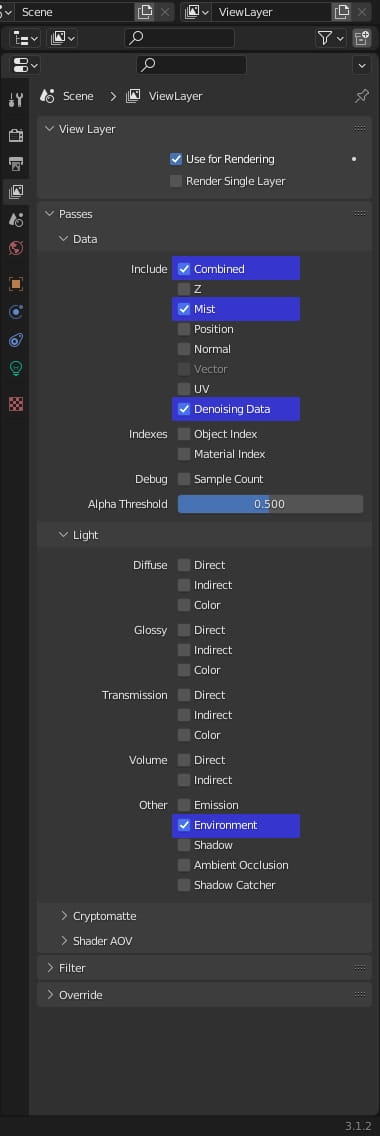
I used following render passes for compositing.
Lighting settings. One HDRI for lighting, the other one for sky.

Birds
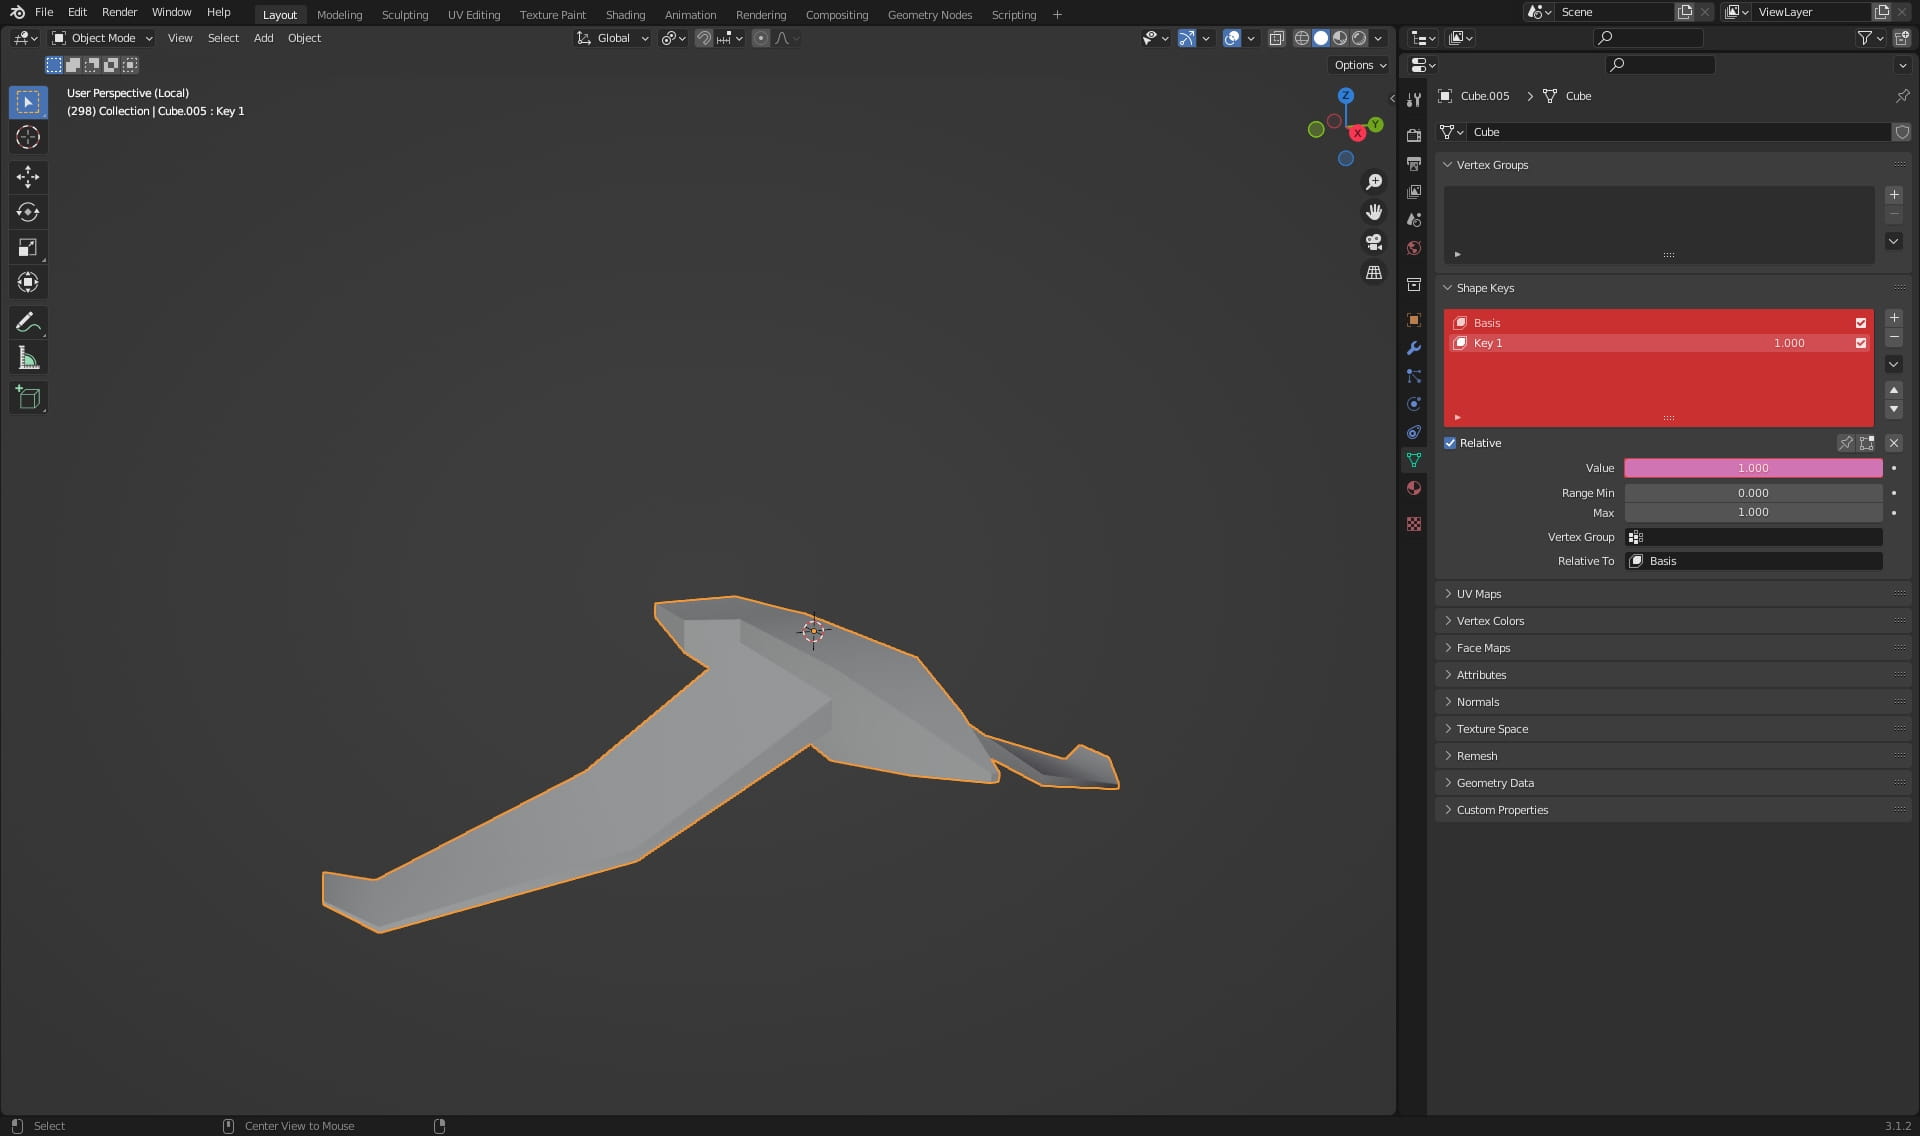
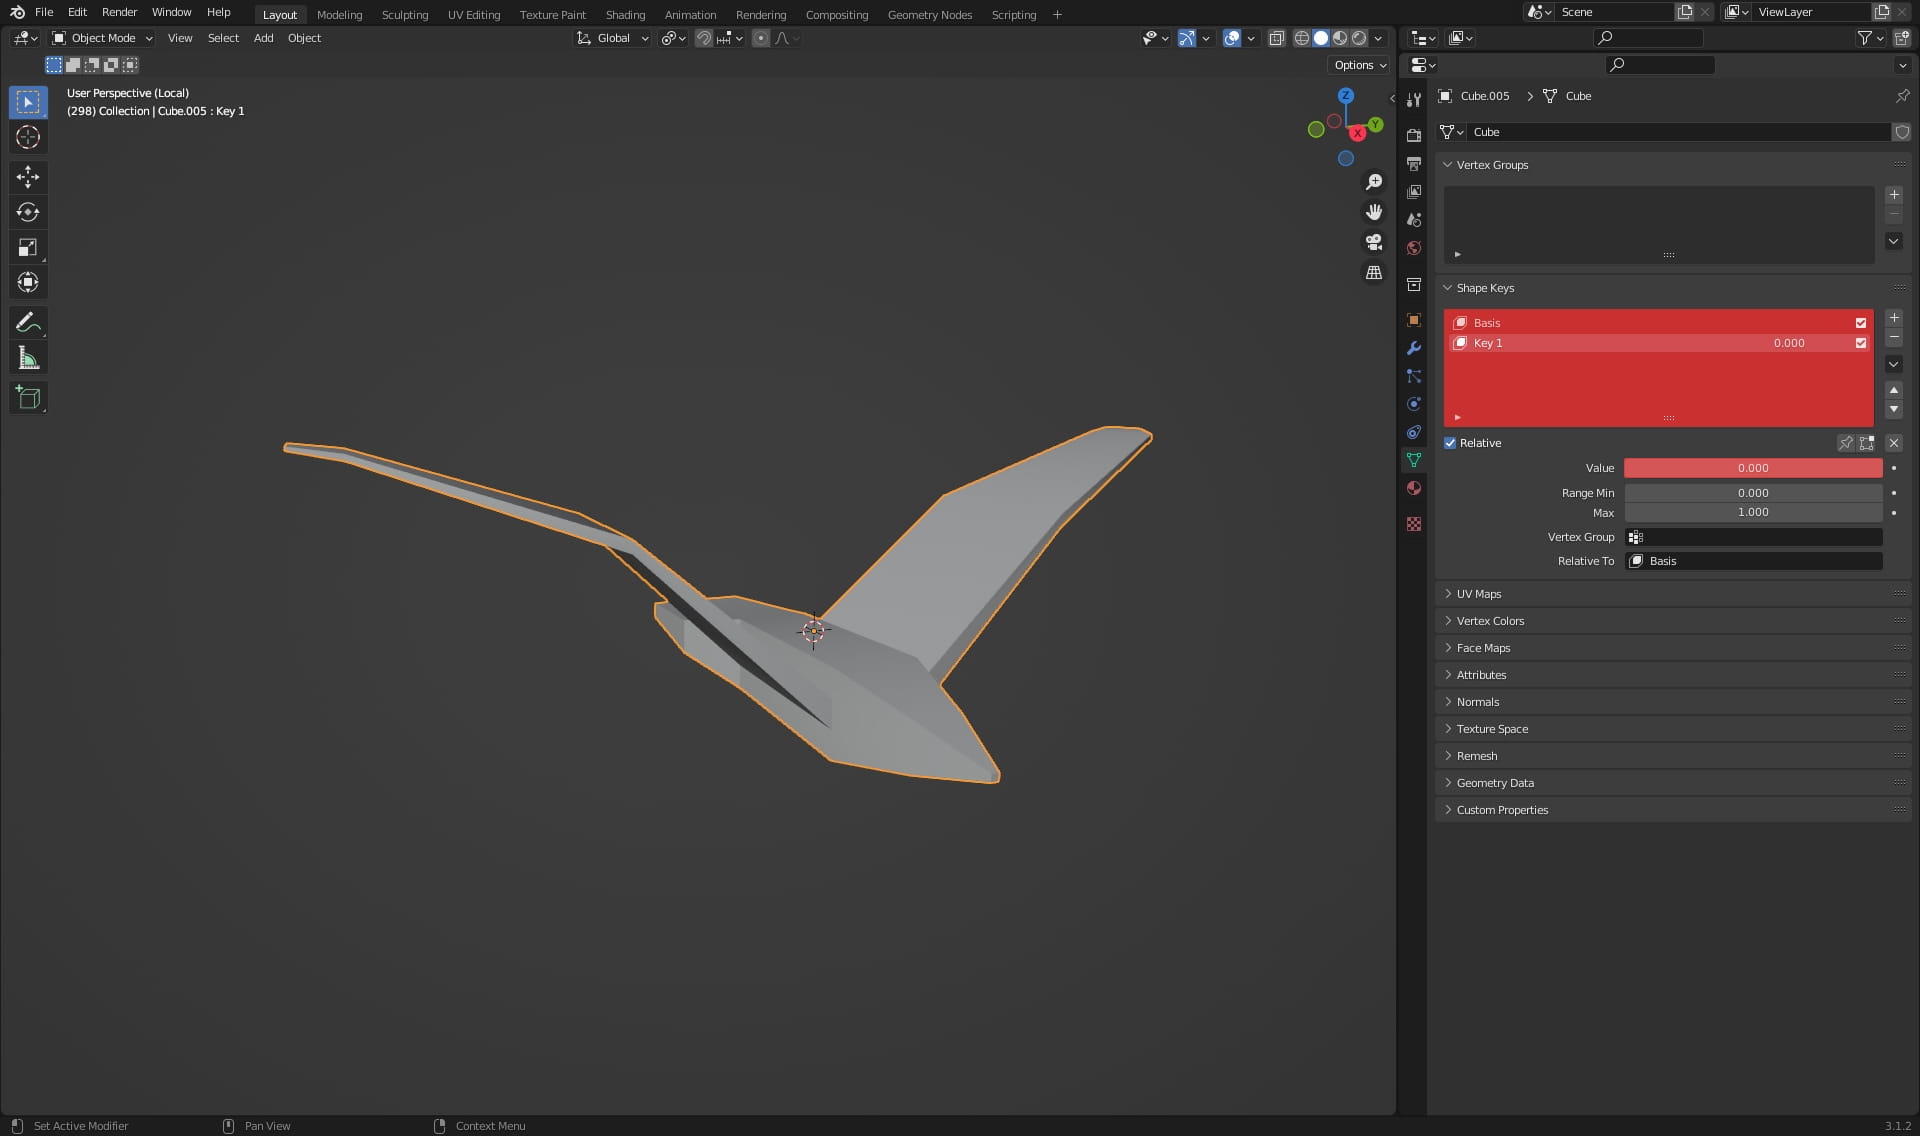
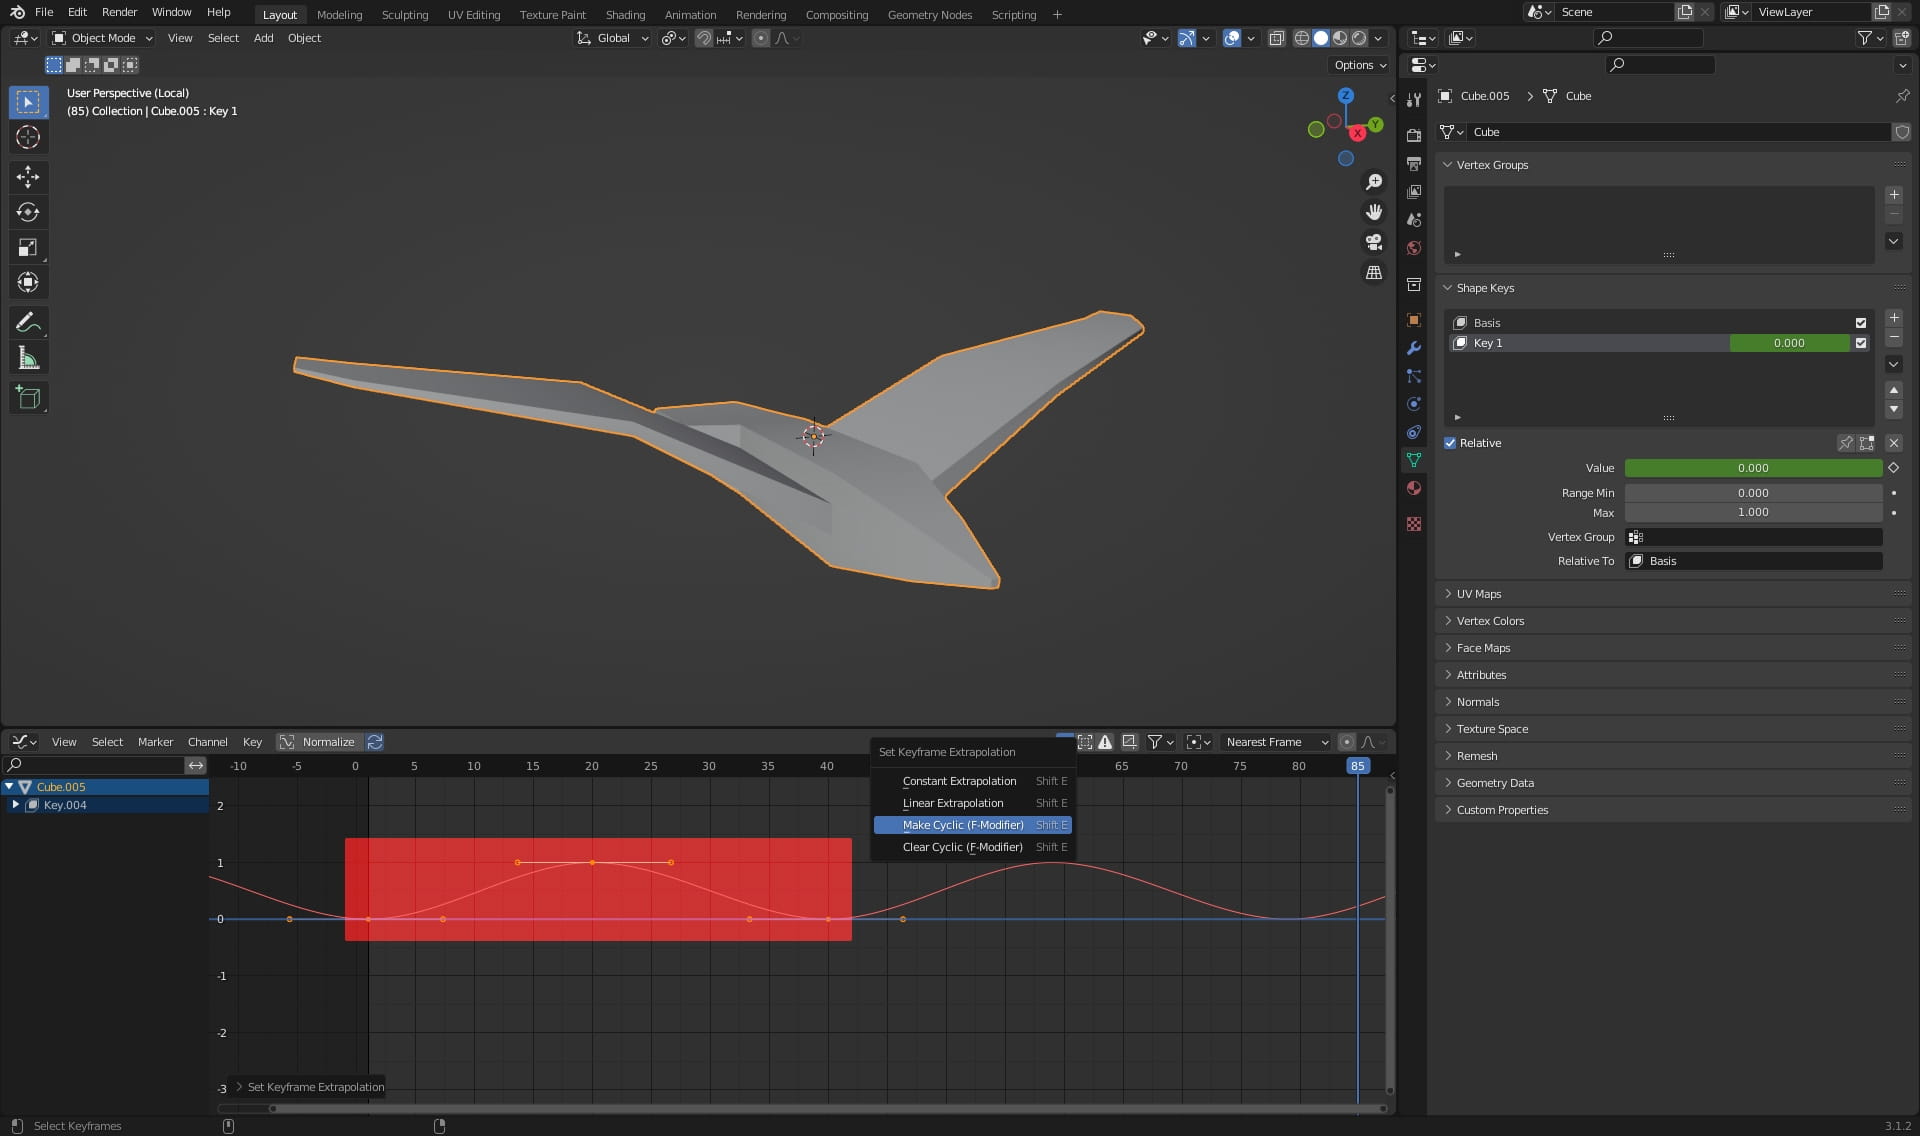
Let's create a simple bird model, it does not need to be detailed, birds will be distant from the camera and blurred by Motion Blur. Let's add two Shape Keys, the first with wings down...
the other, wings up.
Now we have to animate our bird using the Value slider. Just press the "I" key while holding the mouse over the number in the Value box, then move forward a few frames and press the "I" key again. Create animations of one full stroke of the bird's wings.
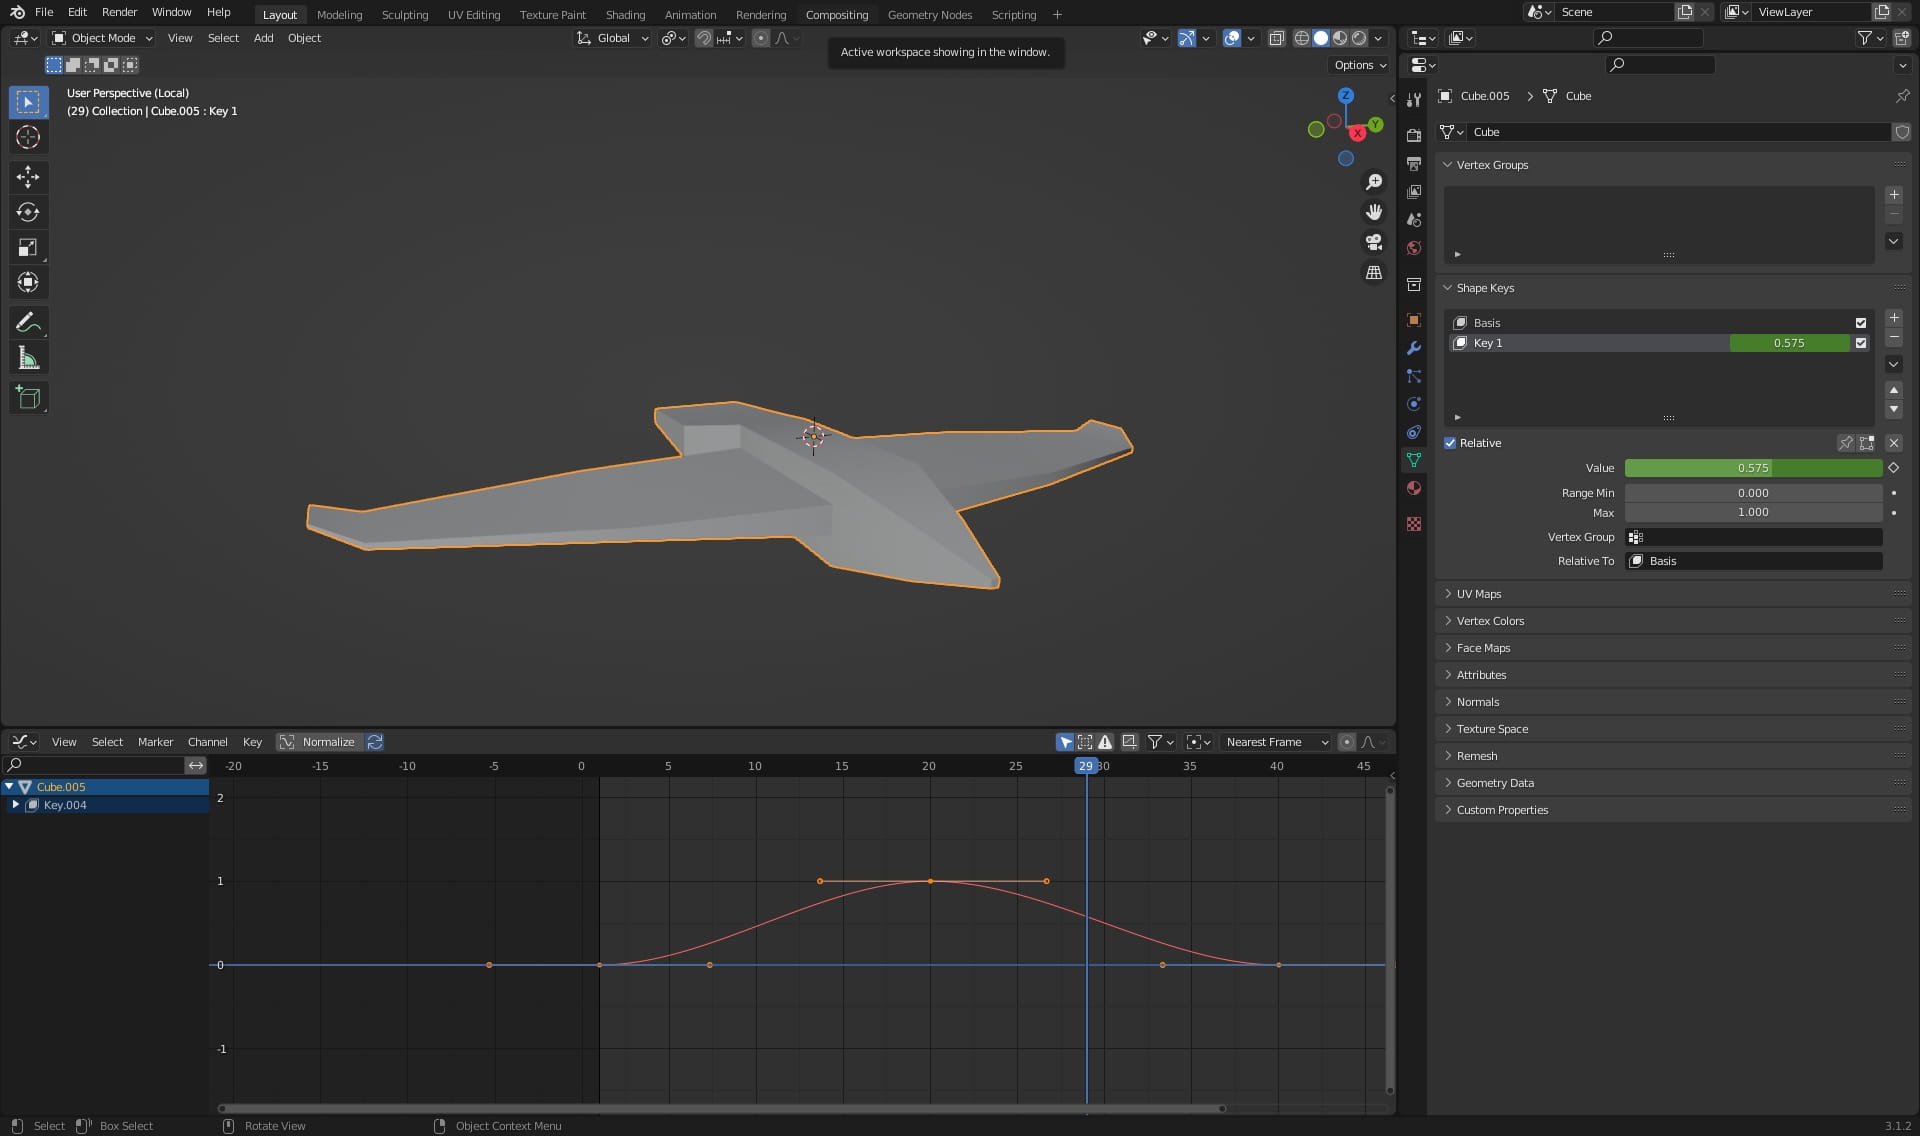
Then select the created Keyframes and press the shortcut "Shift + E" select the Make Cyclic option, this way the animation will be looped endlessly.
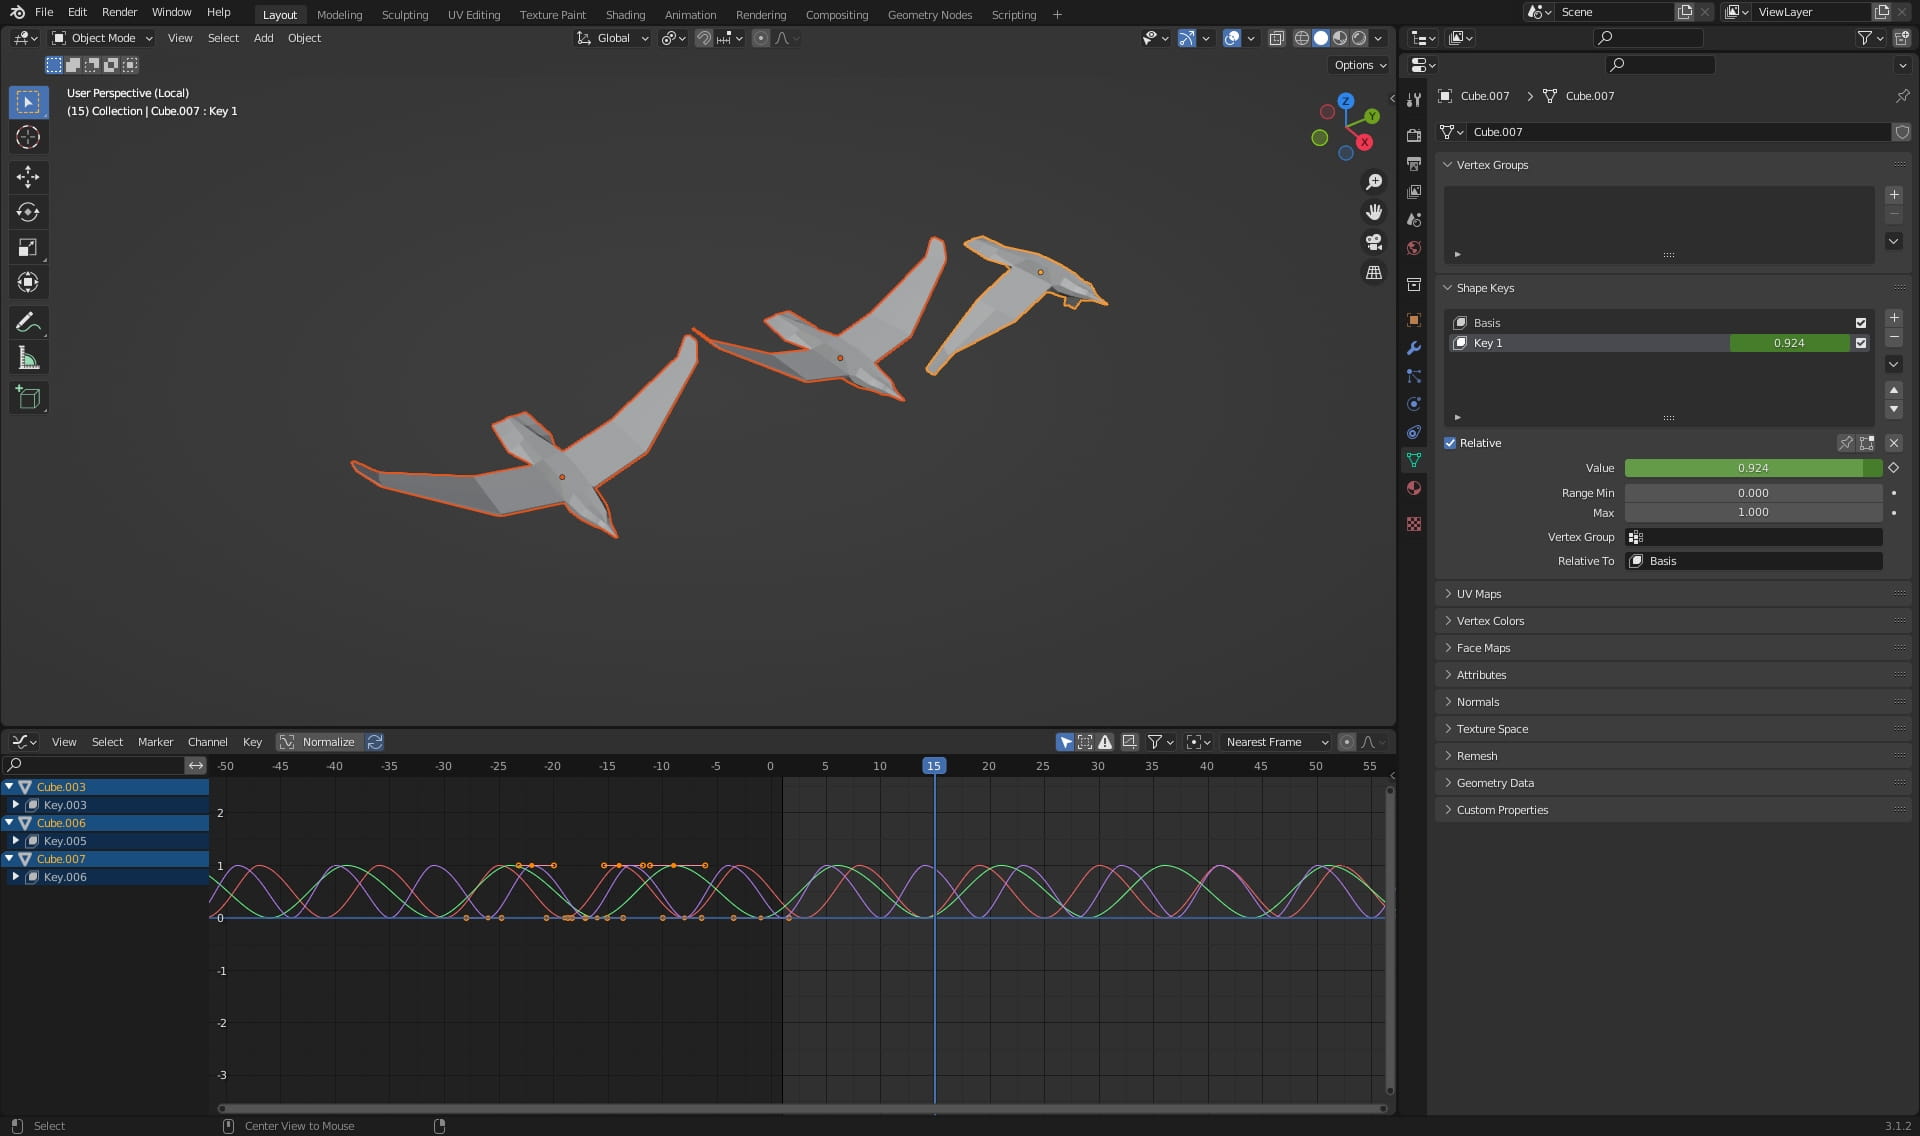
Copy the bird a couple of times and do whatever with Keyframes, we need to break the repetition to make it look natural.
Create a sphere or other shape that defines where the birds will spawn. Then create a new ParitcleSystem by changing "Renders As" to Collection, then select the bird collection and select it in the Instance Collection.
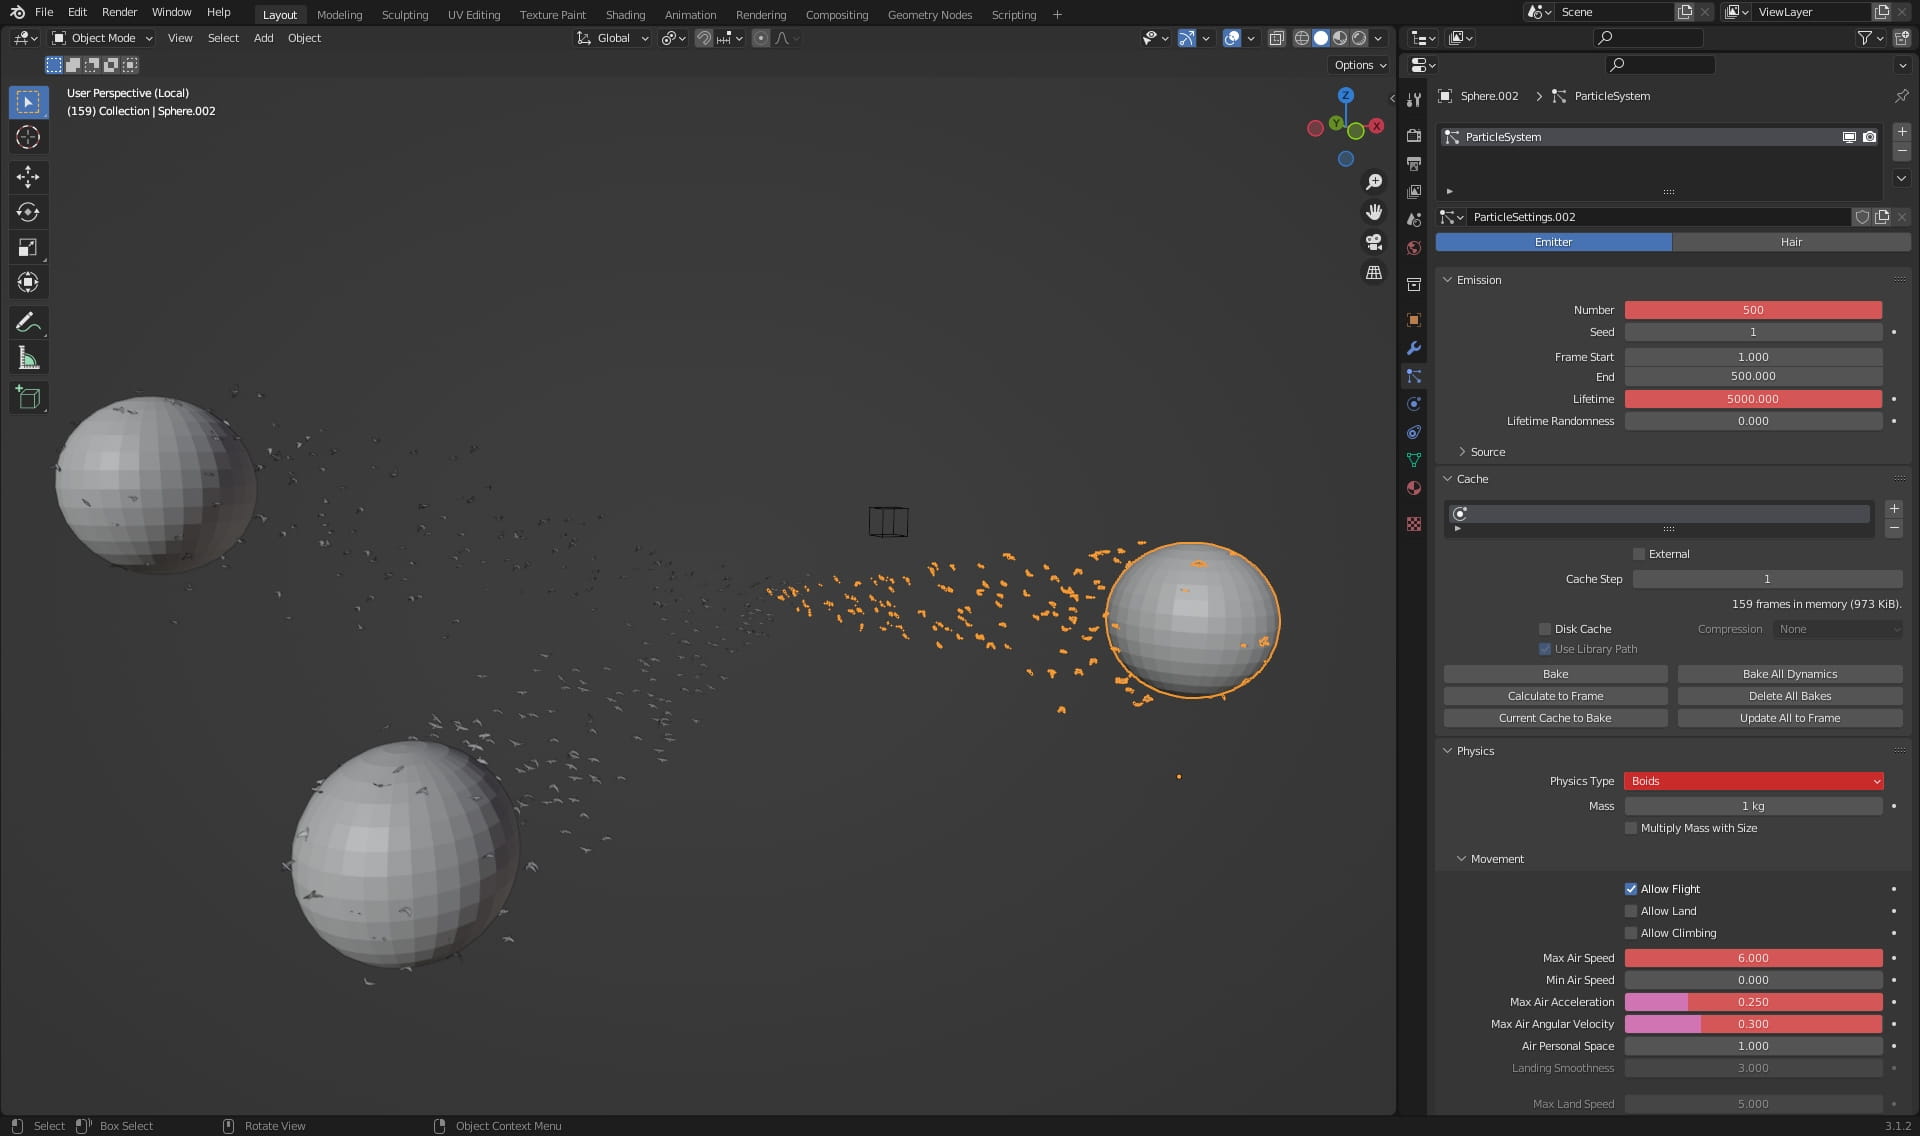
I increased the Lifetime and the number of birds in the Number tab. For Physics Type I chosen Boids and the values below define the speed of the bird's flight, play with these values and choose the one that suits your needs.
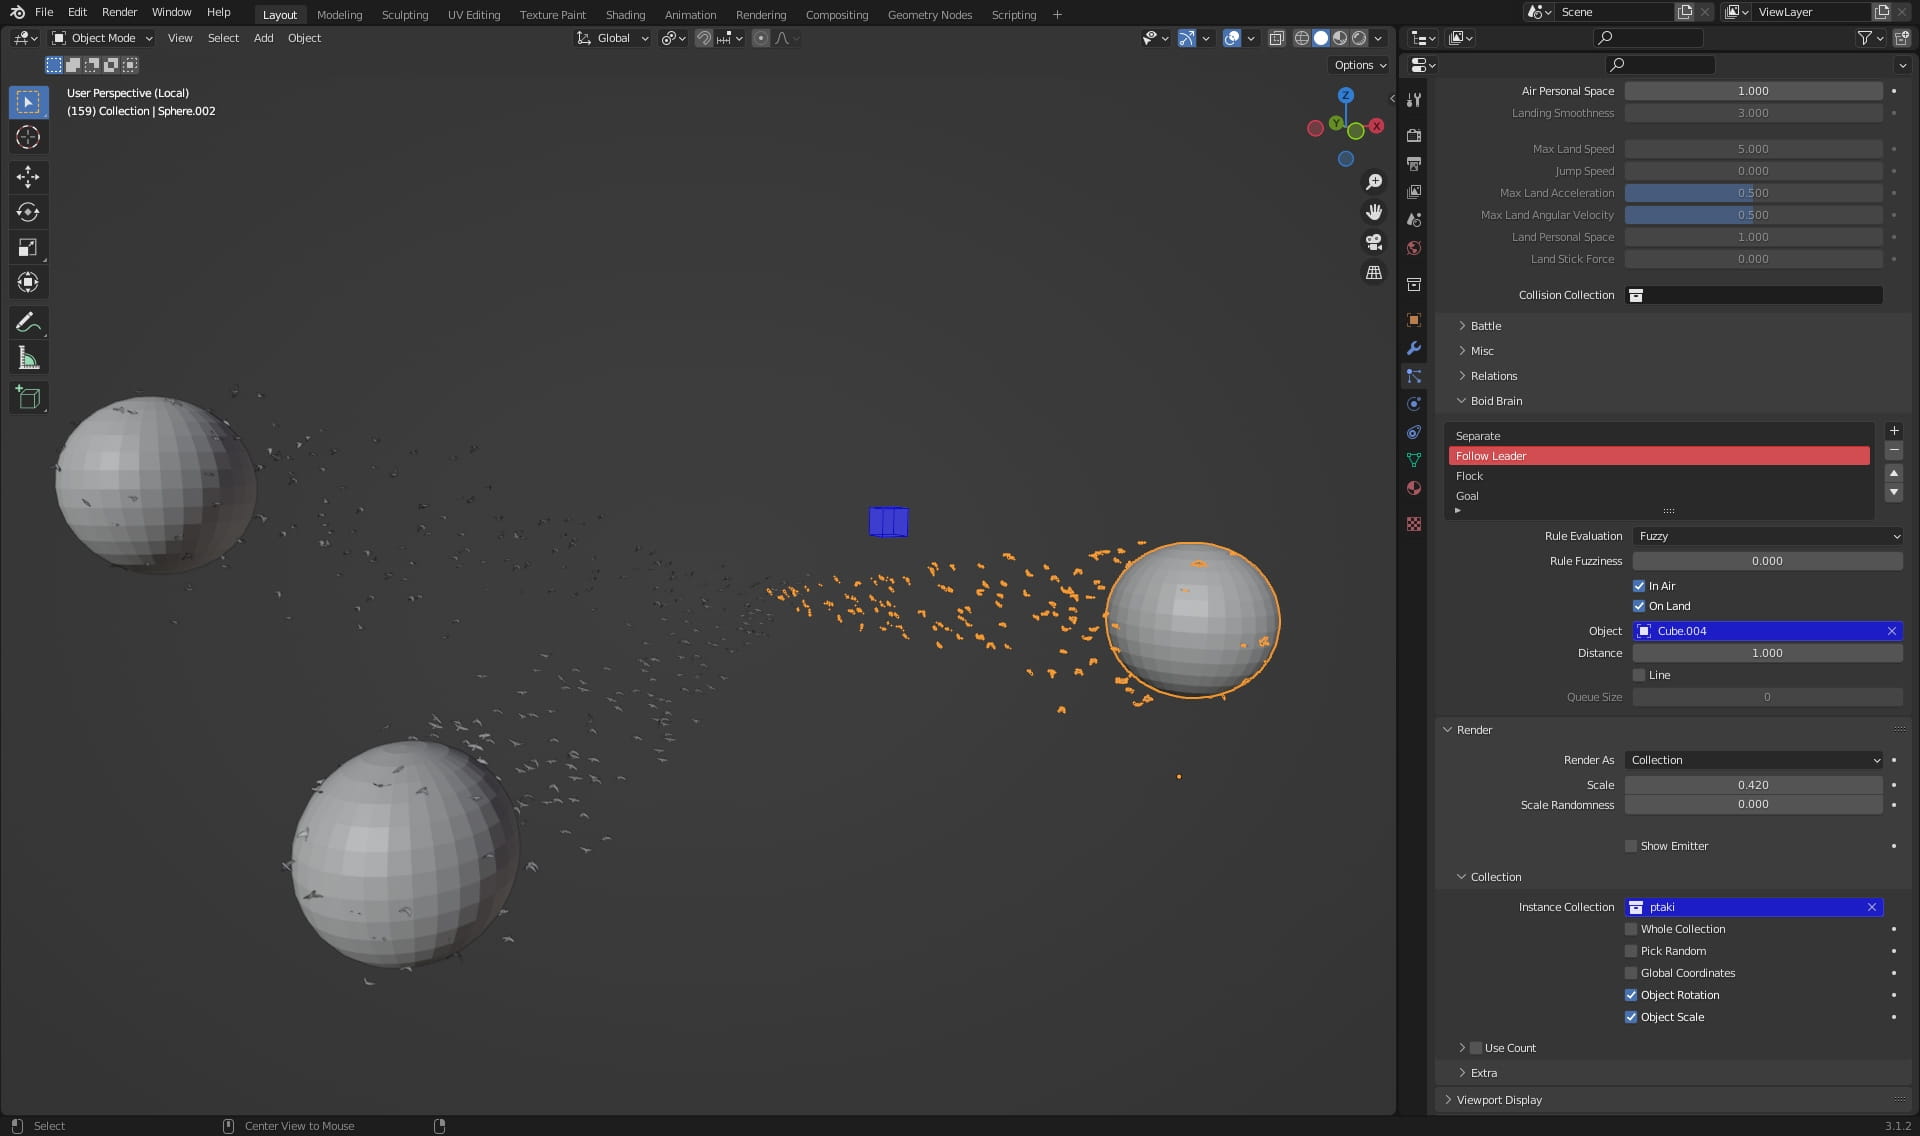
Important: enable "Follow Leader", thanks to this setting our birds will follow the object indicated by us - the leader. I animated the cube, thanks to which the birds will fly exactly in the direction I need.

Leaves
Let's add the falling leaves. The effect is subtle in the image, but in the animation you can see it much more clearly. We create a Plane to which we add a Particle System and change Render As to Object and select our leaf in the Instance Object tab.
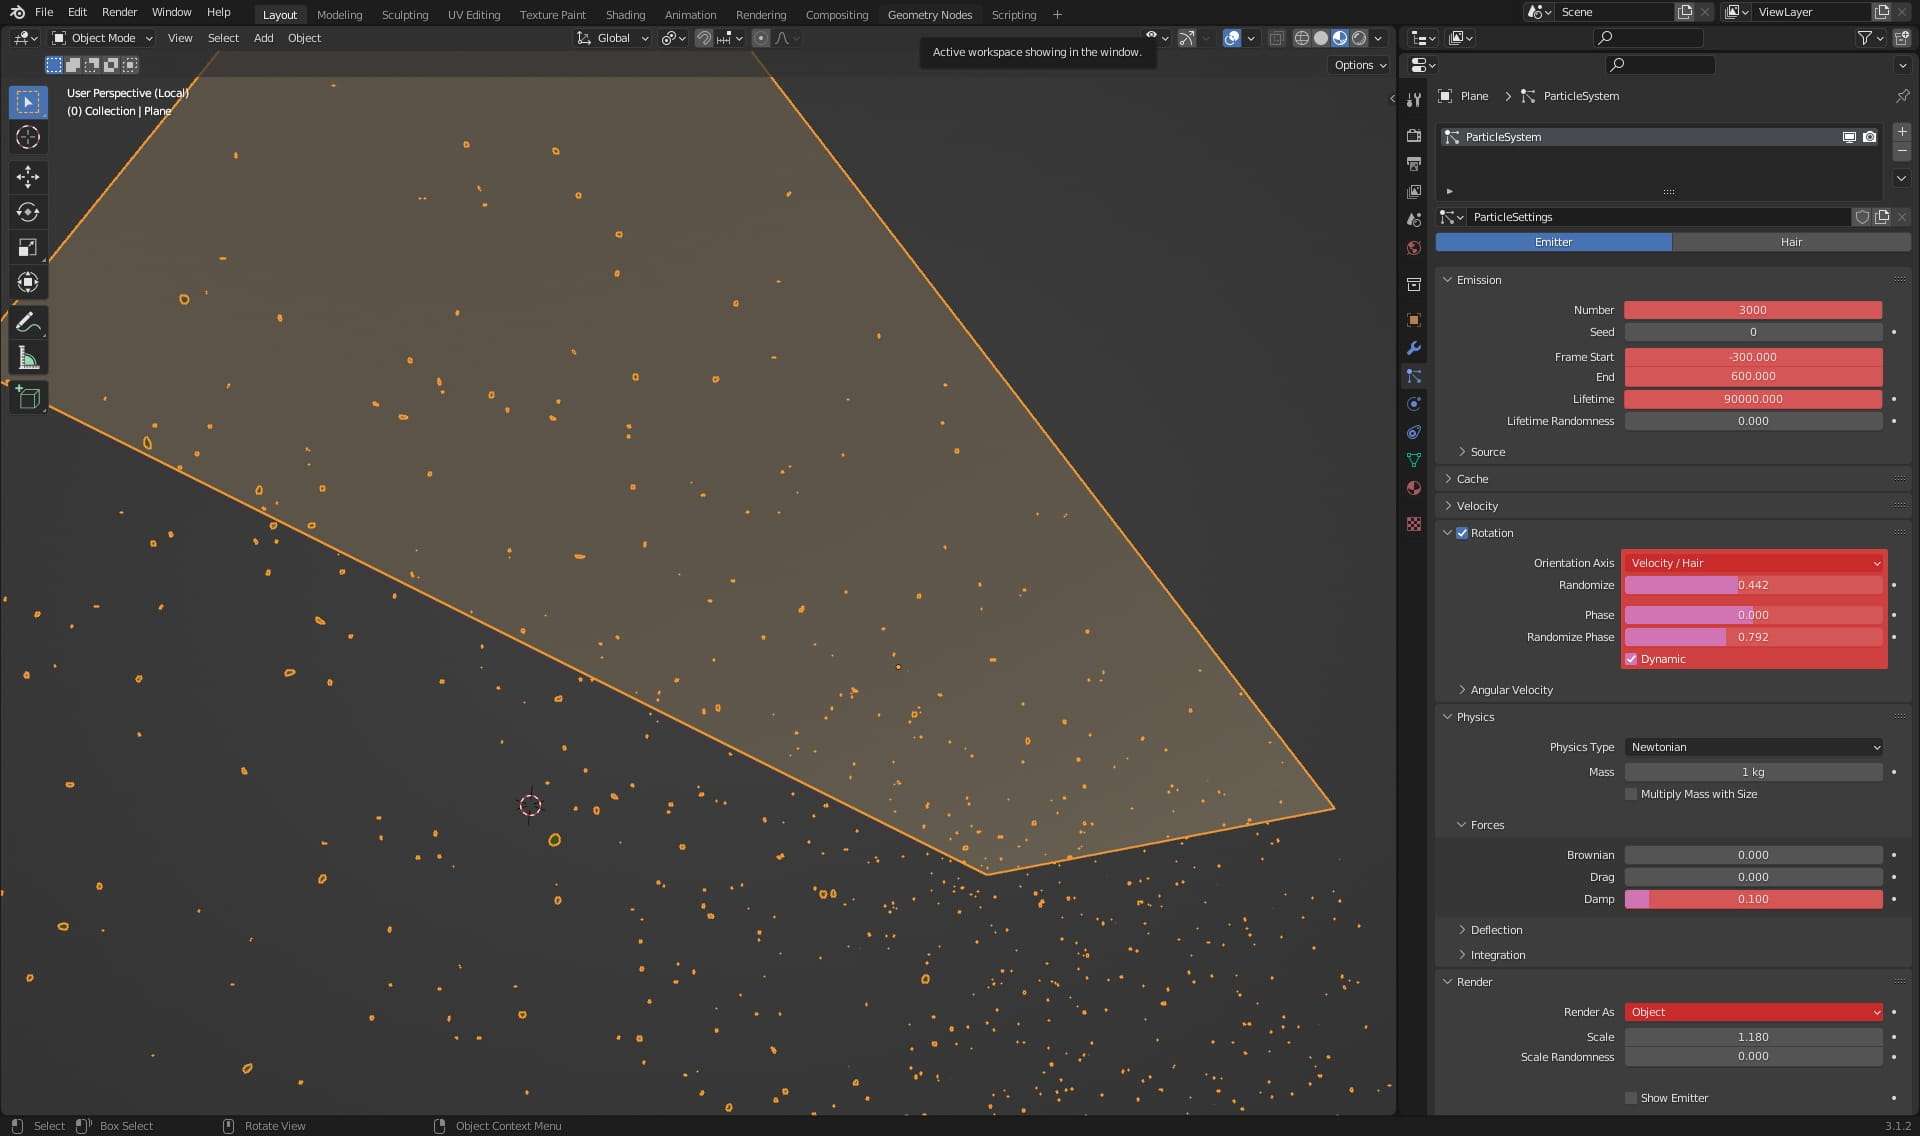
We will change Frame Start and End, so that at the beginning of our animation, the leaves will be in space immediately. Let's increase Lifetime right away so that our leaves don't fade away. We add a random rotation. The Damp value is responsible for how quickly the leaf comes off.

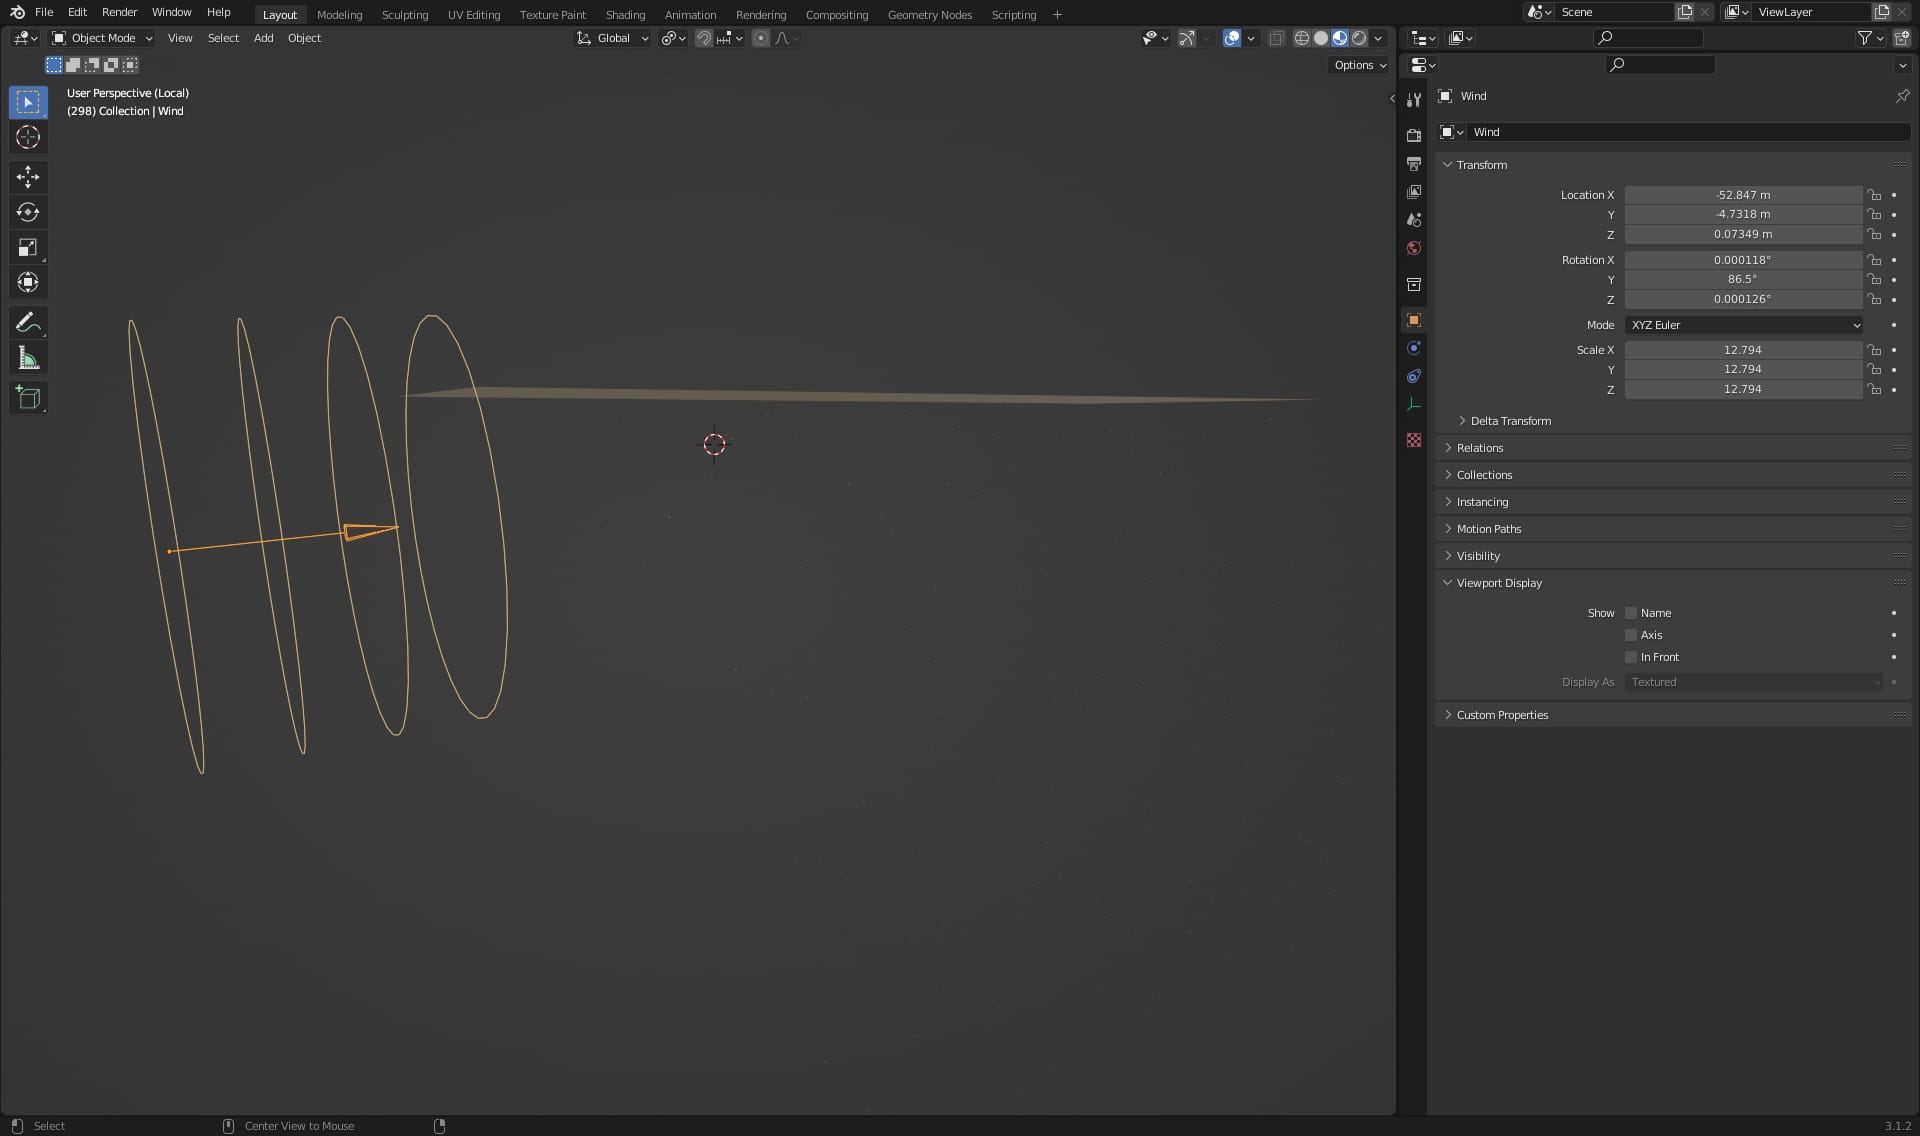
At the end, we create Wind and set it to taste, it works very intuitively.
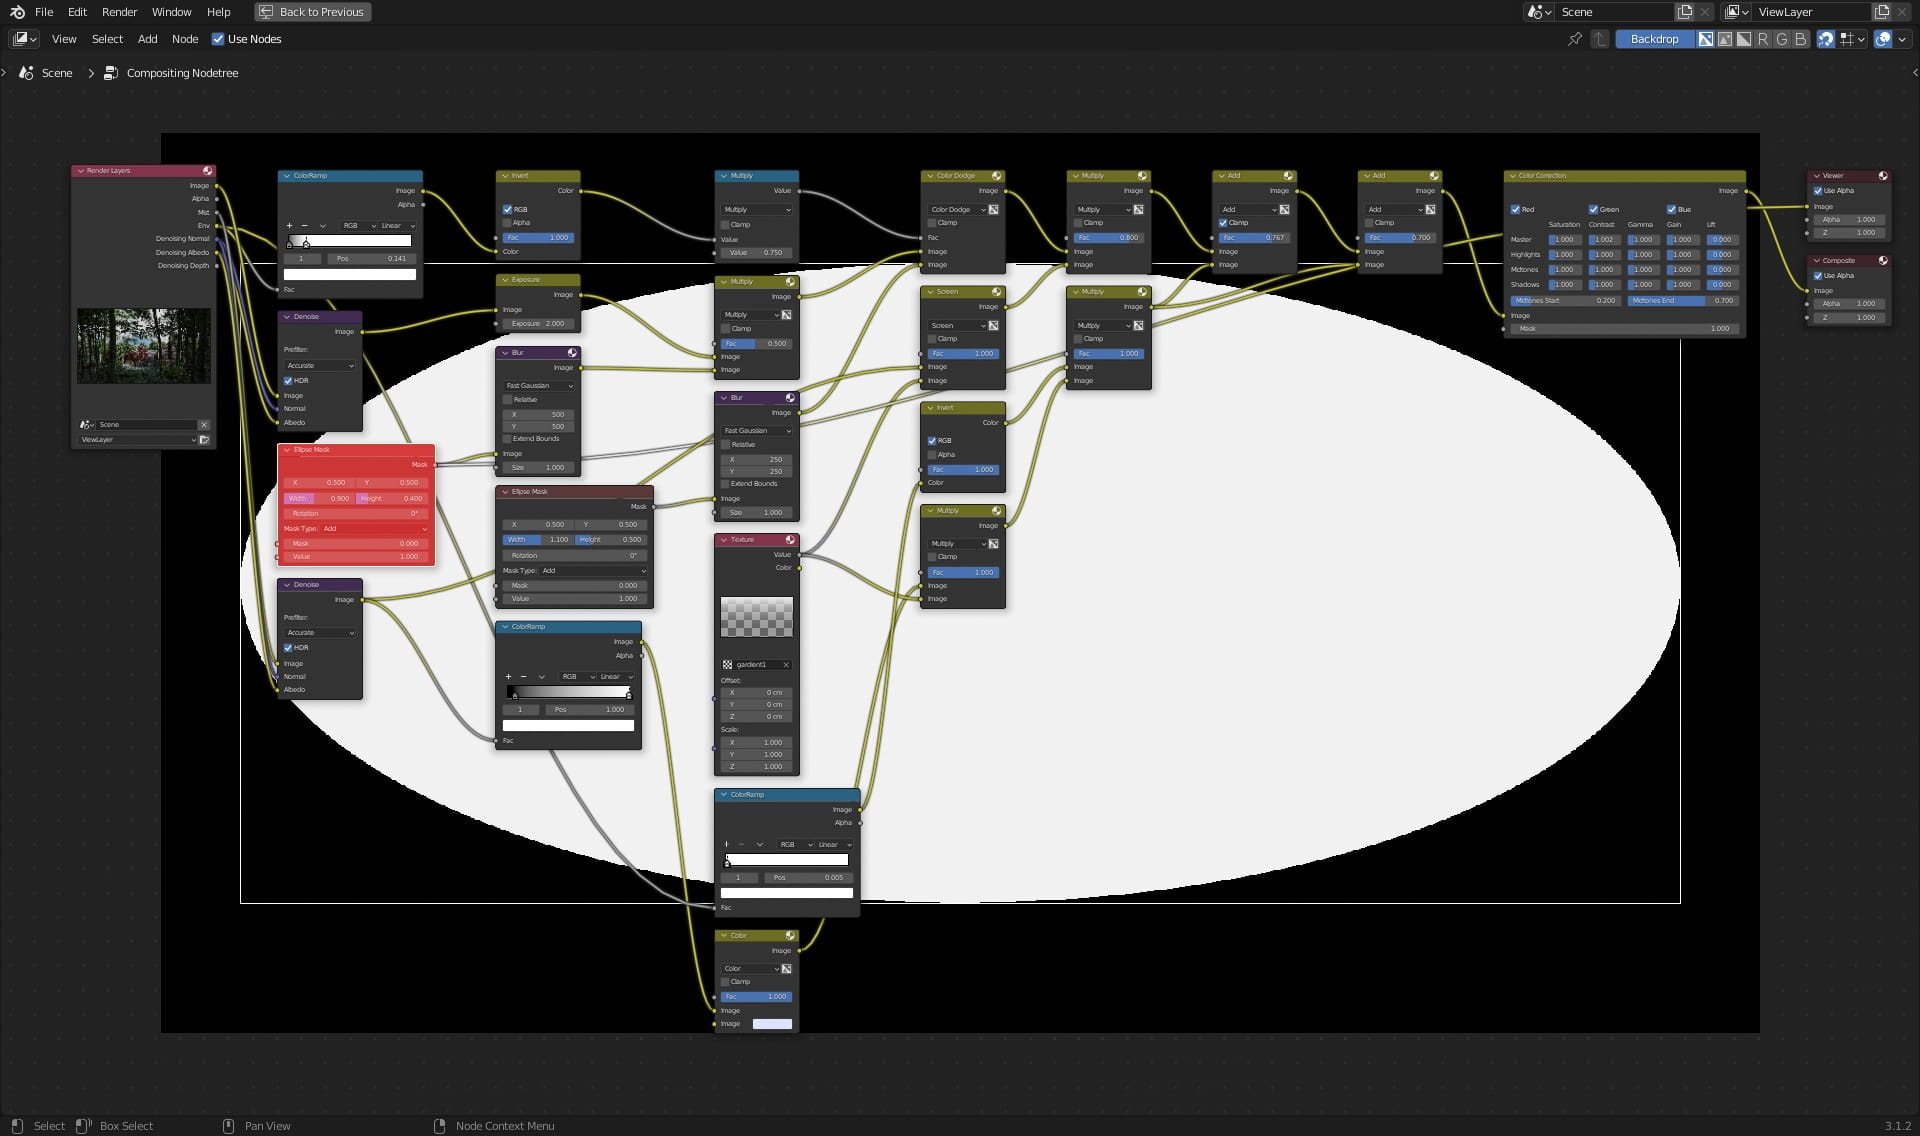
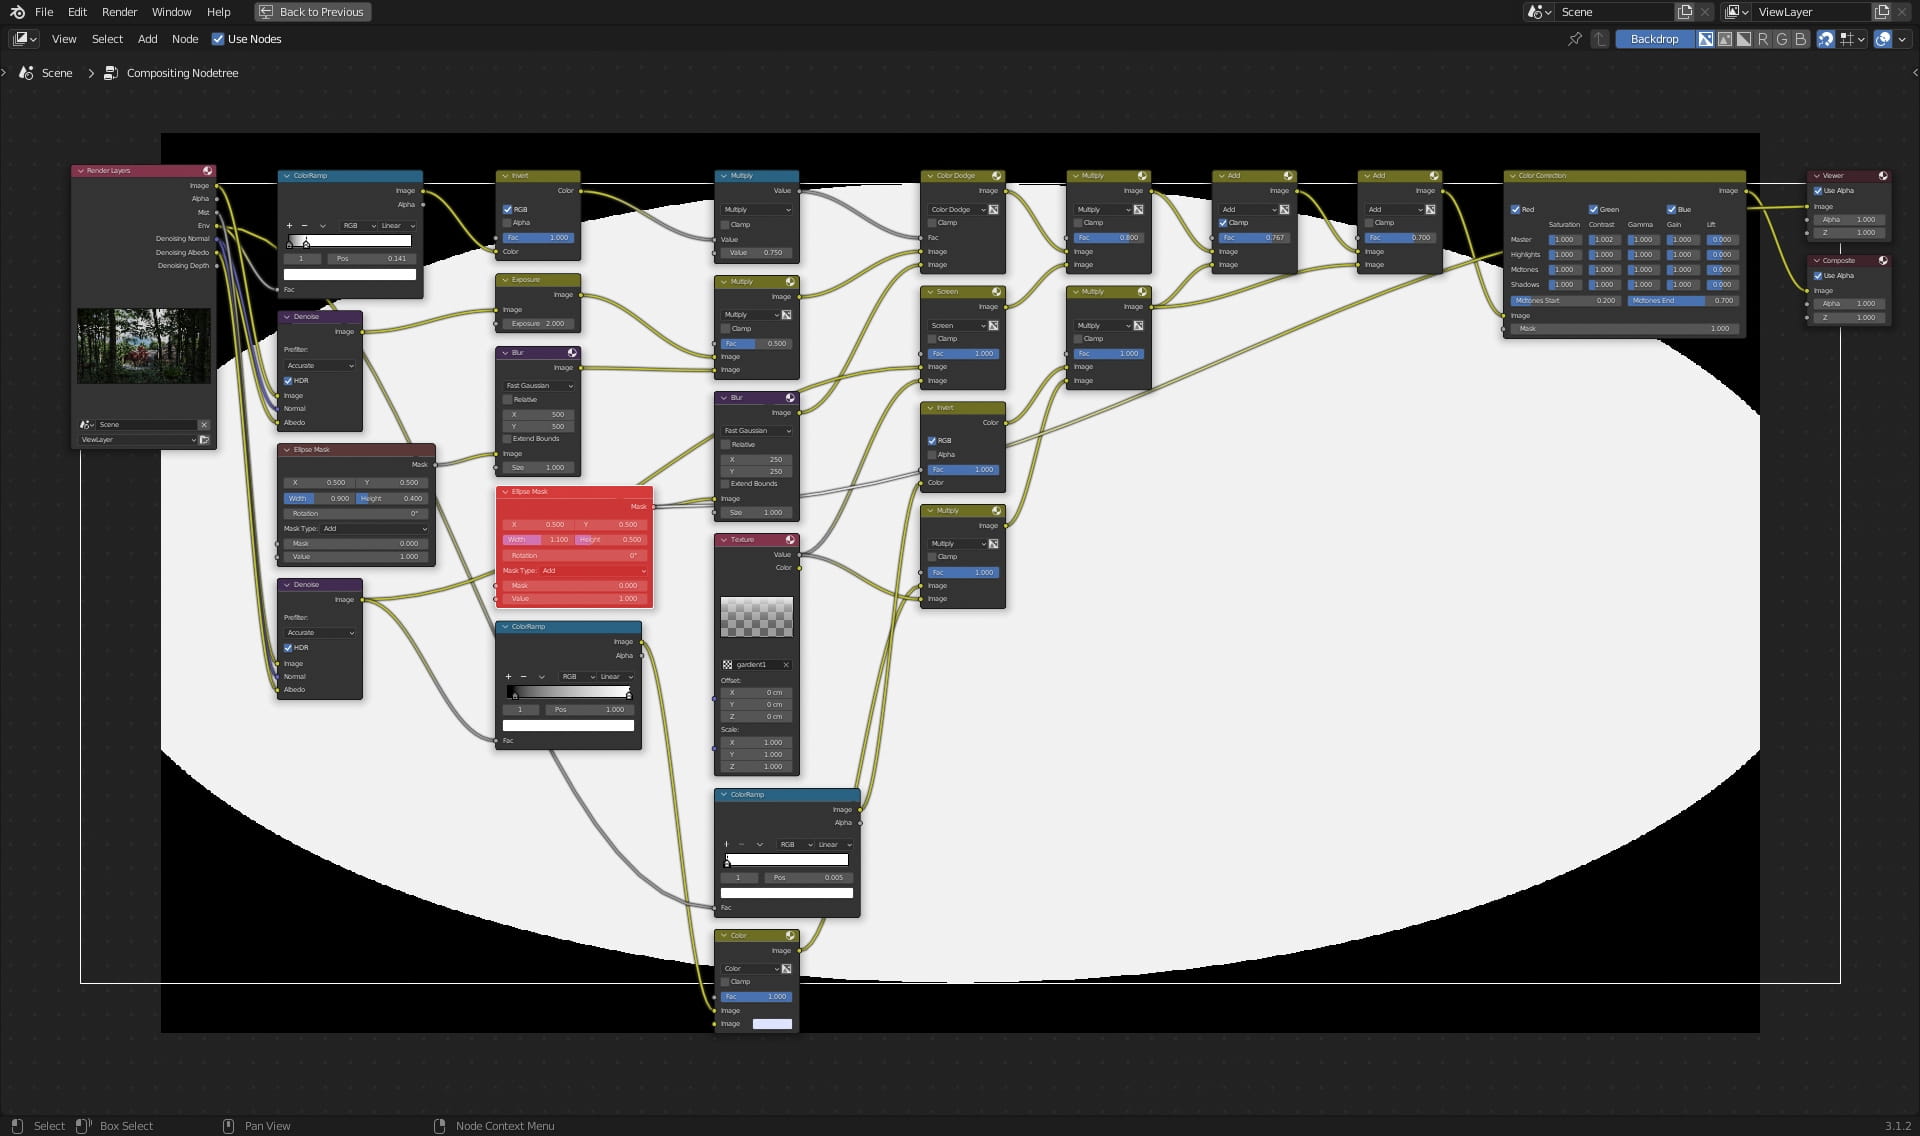
Compositing
Let's move on to the most important, in my opinion, stage of building the scene - compositing. The main goal was to create depth and clearly define the foreground, second and third plan.
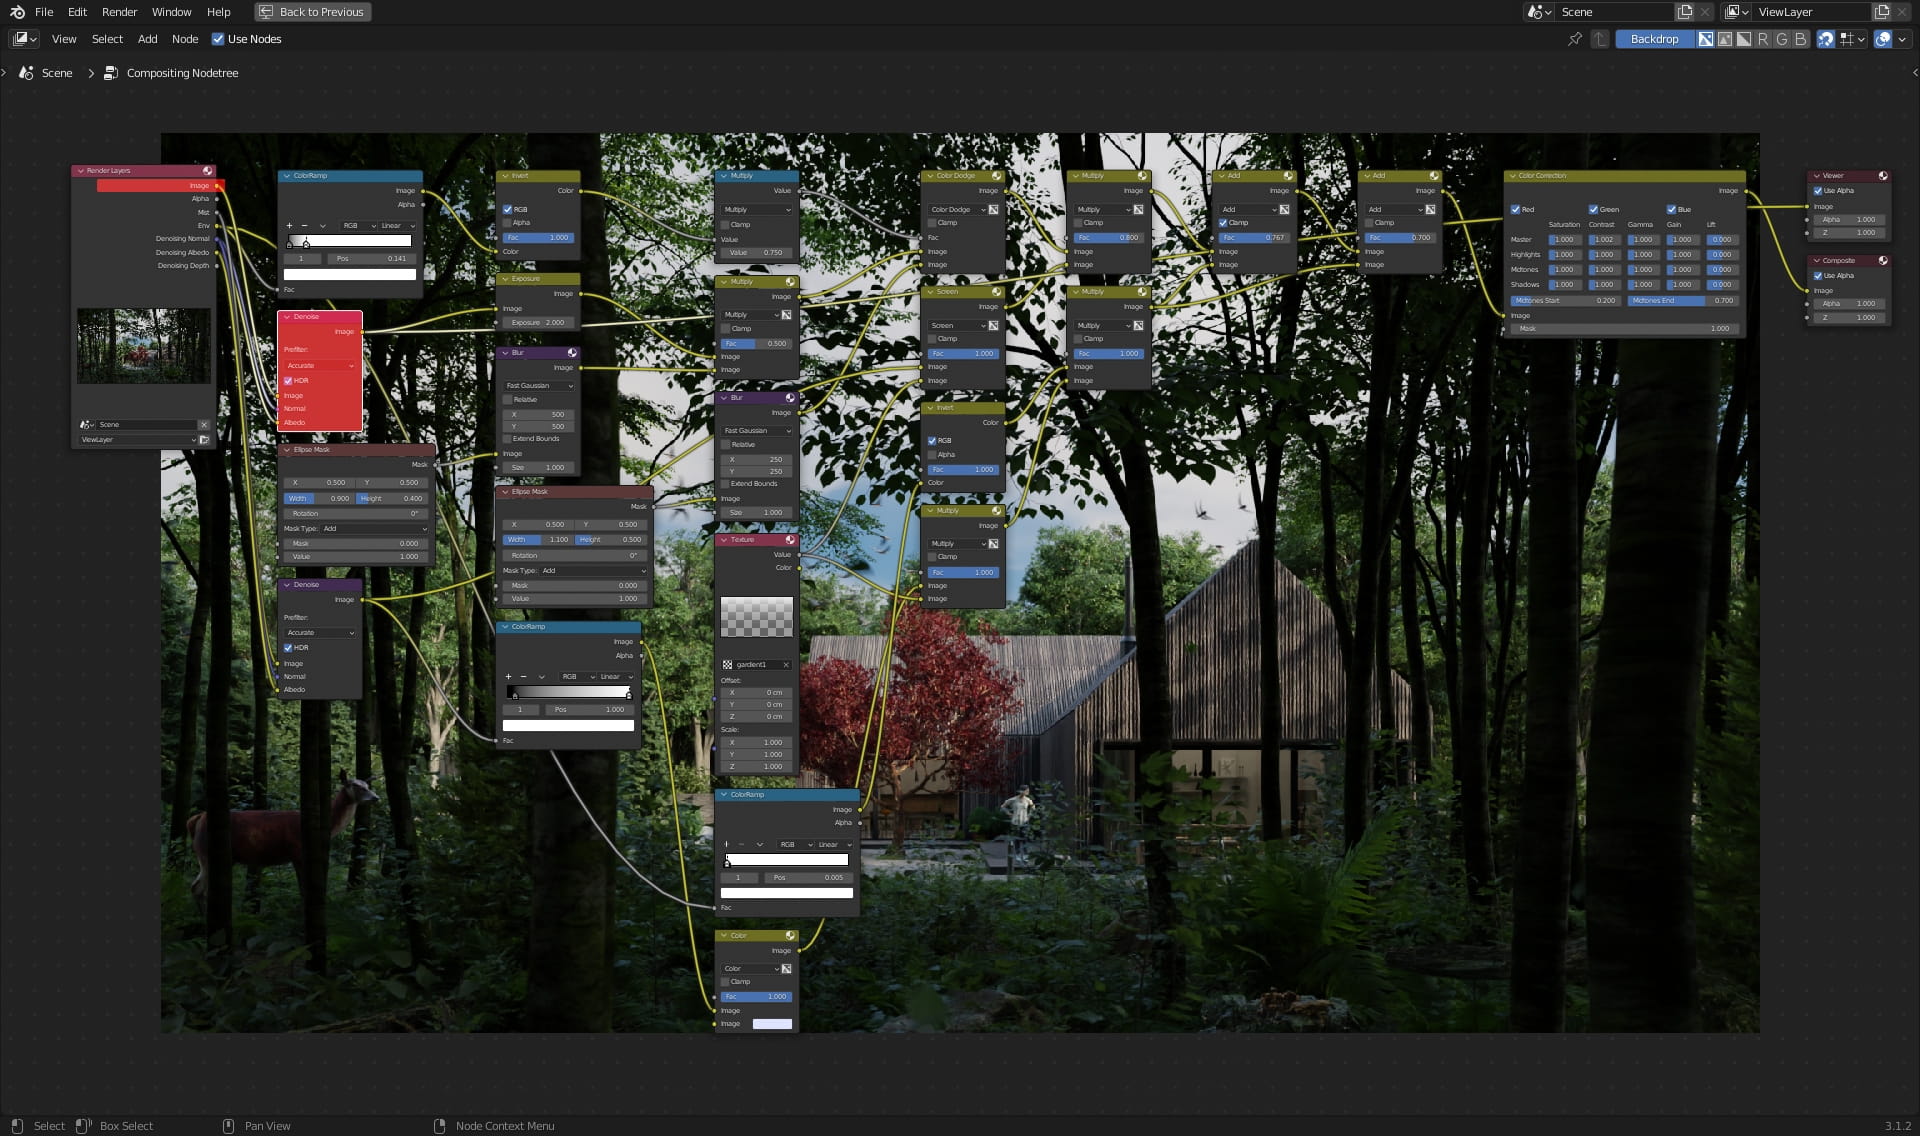
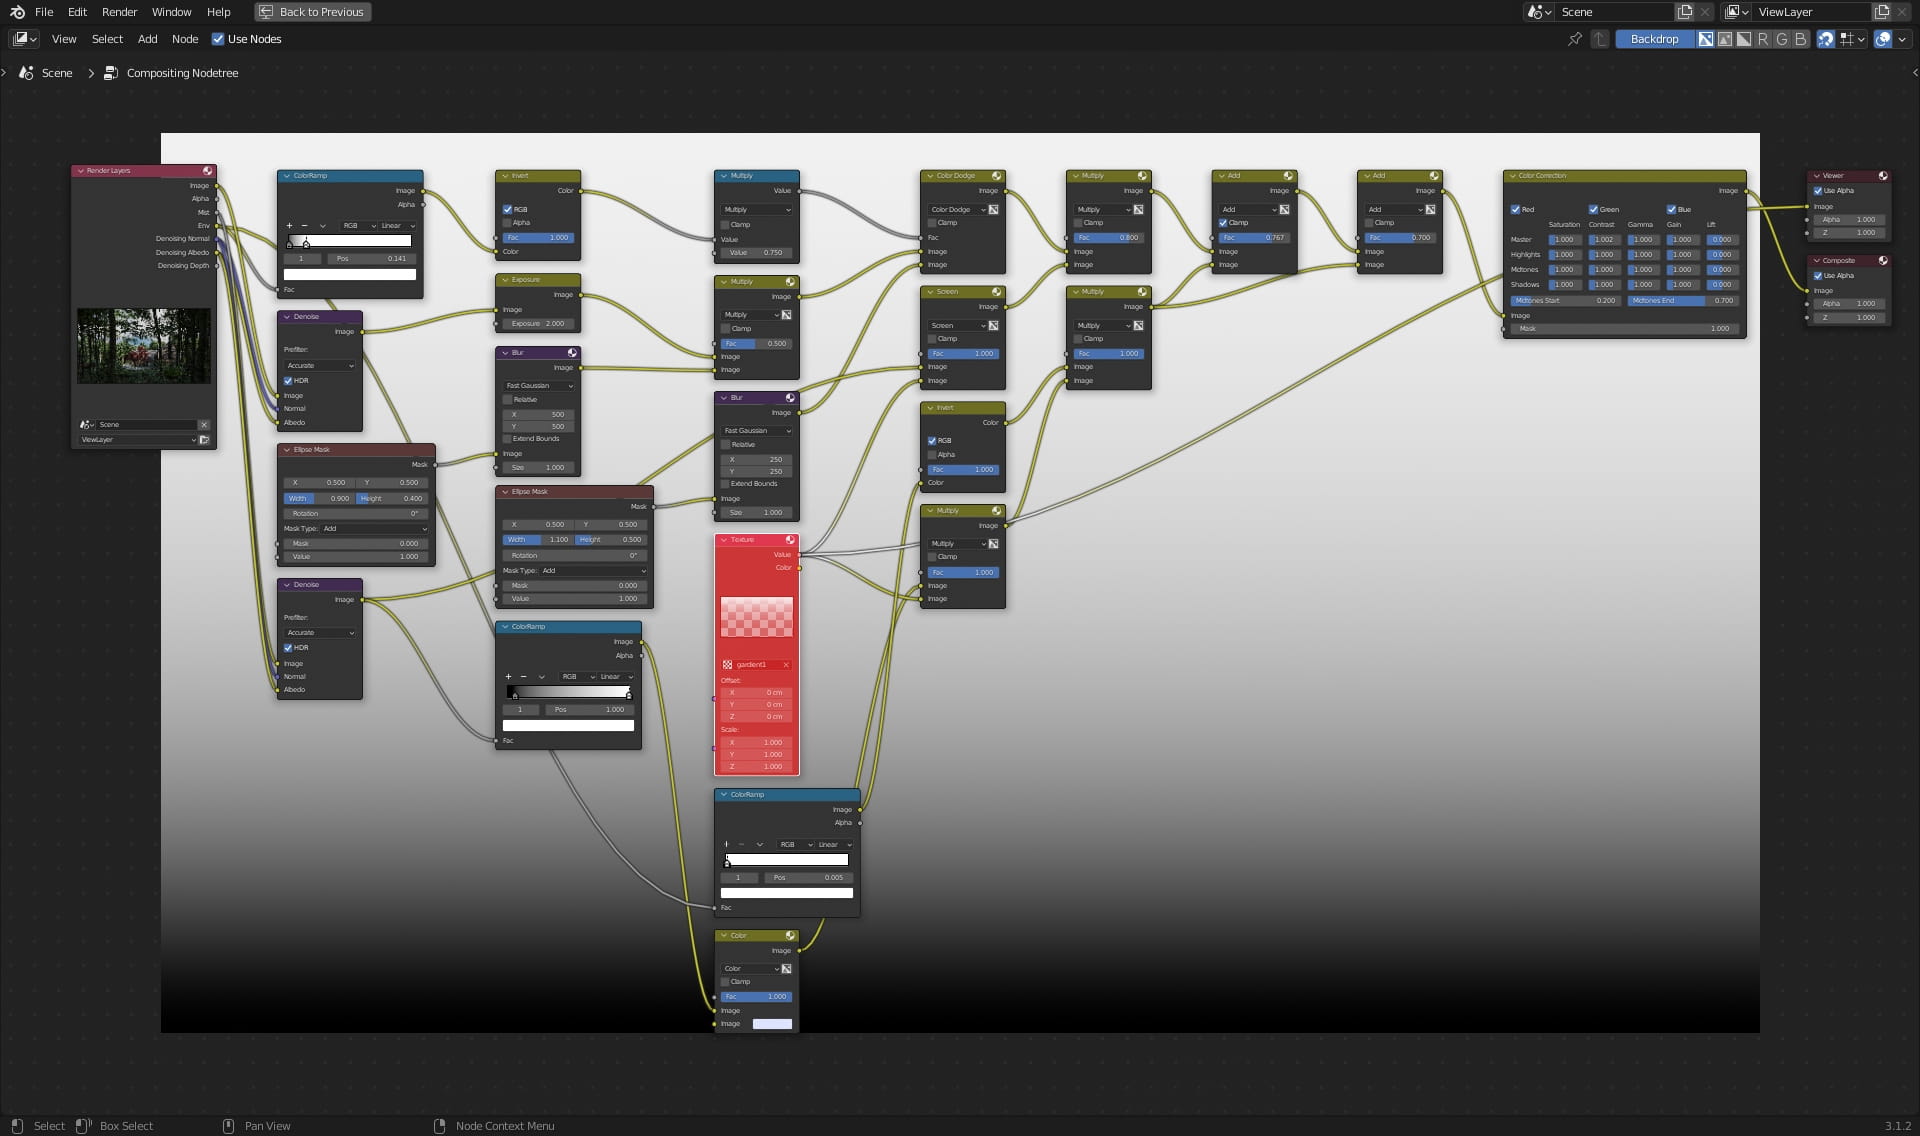
This is the scene without any post-production, only after using Denoise, not too interesting, let's fix it!
Let's increase the exposure a bit.
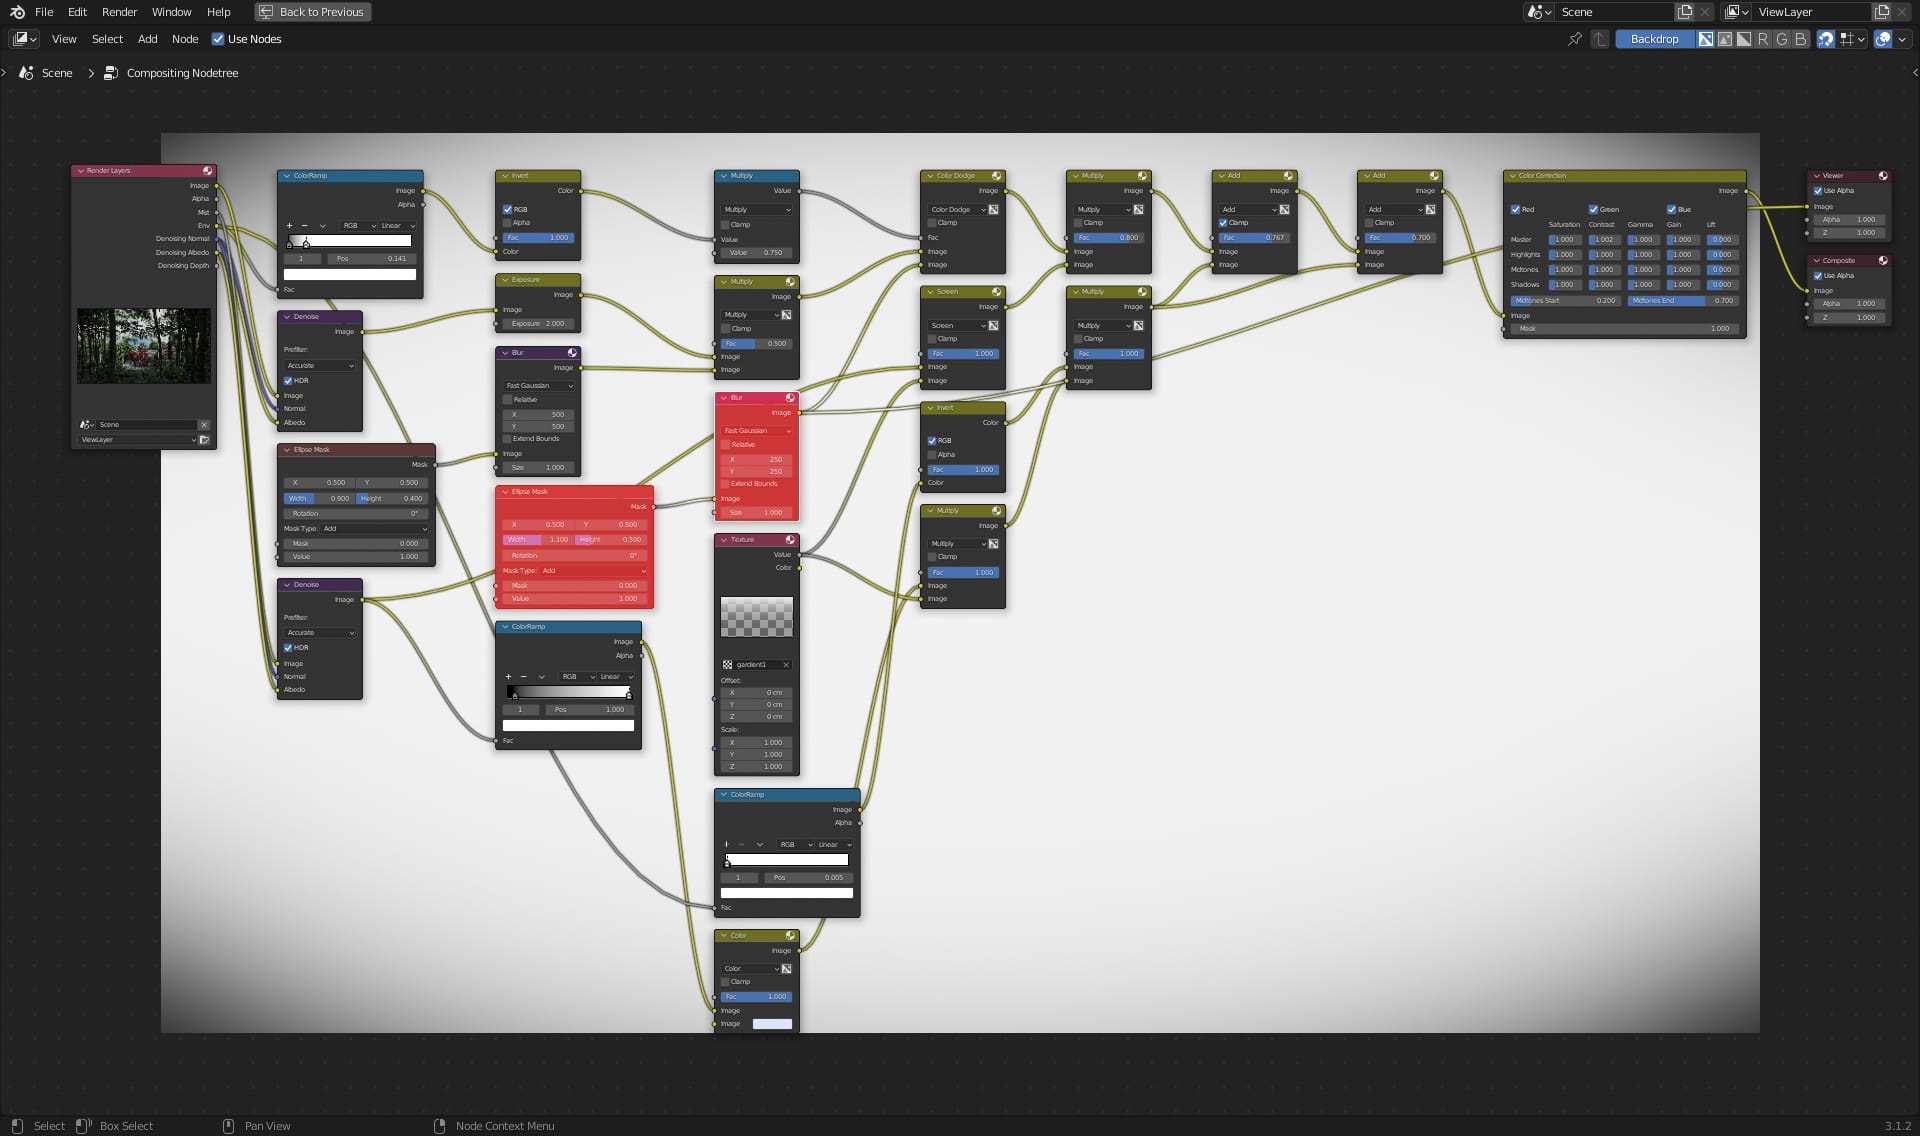
Let's add a vignette right away, using the Elipse Mask ...
and let's use node Blur ...
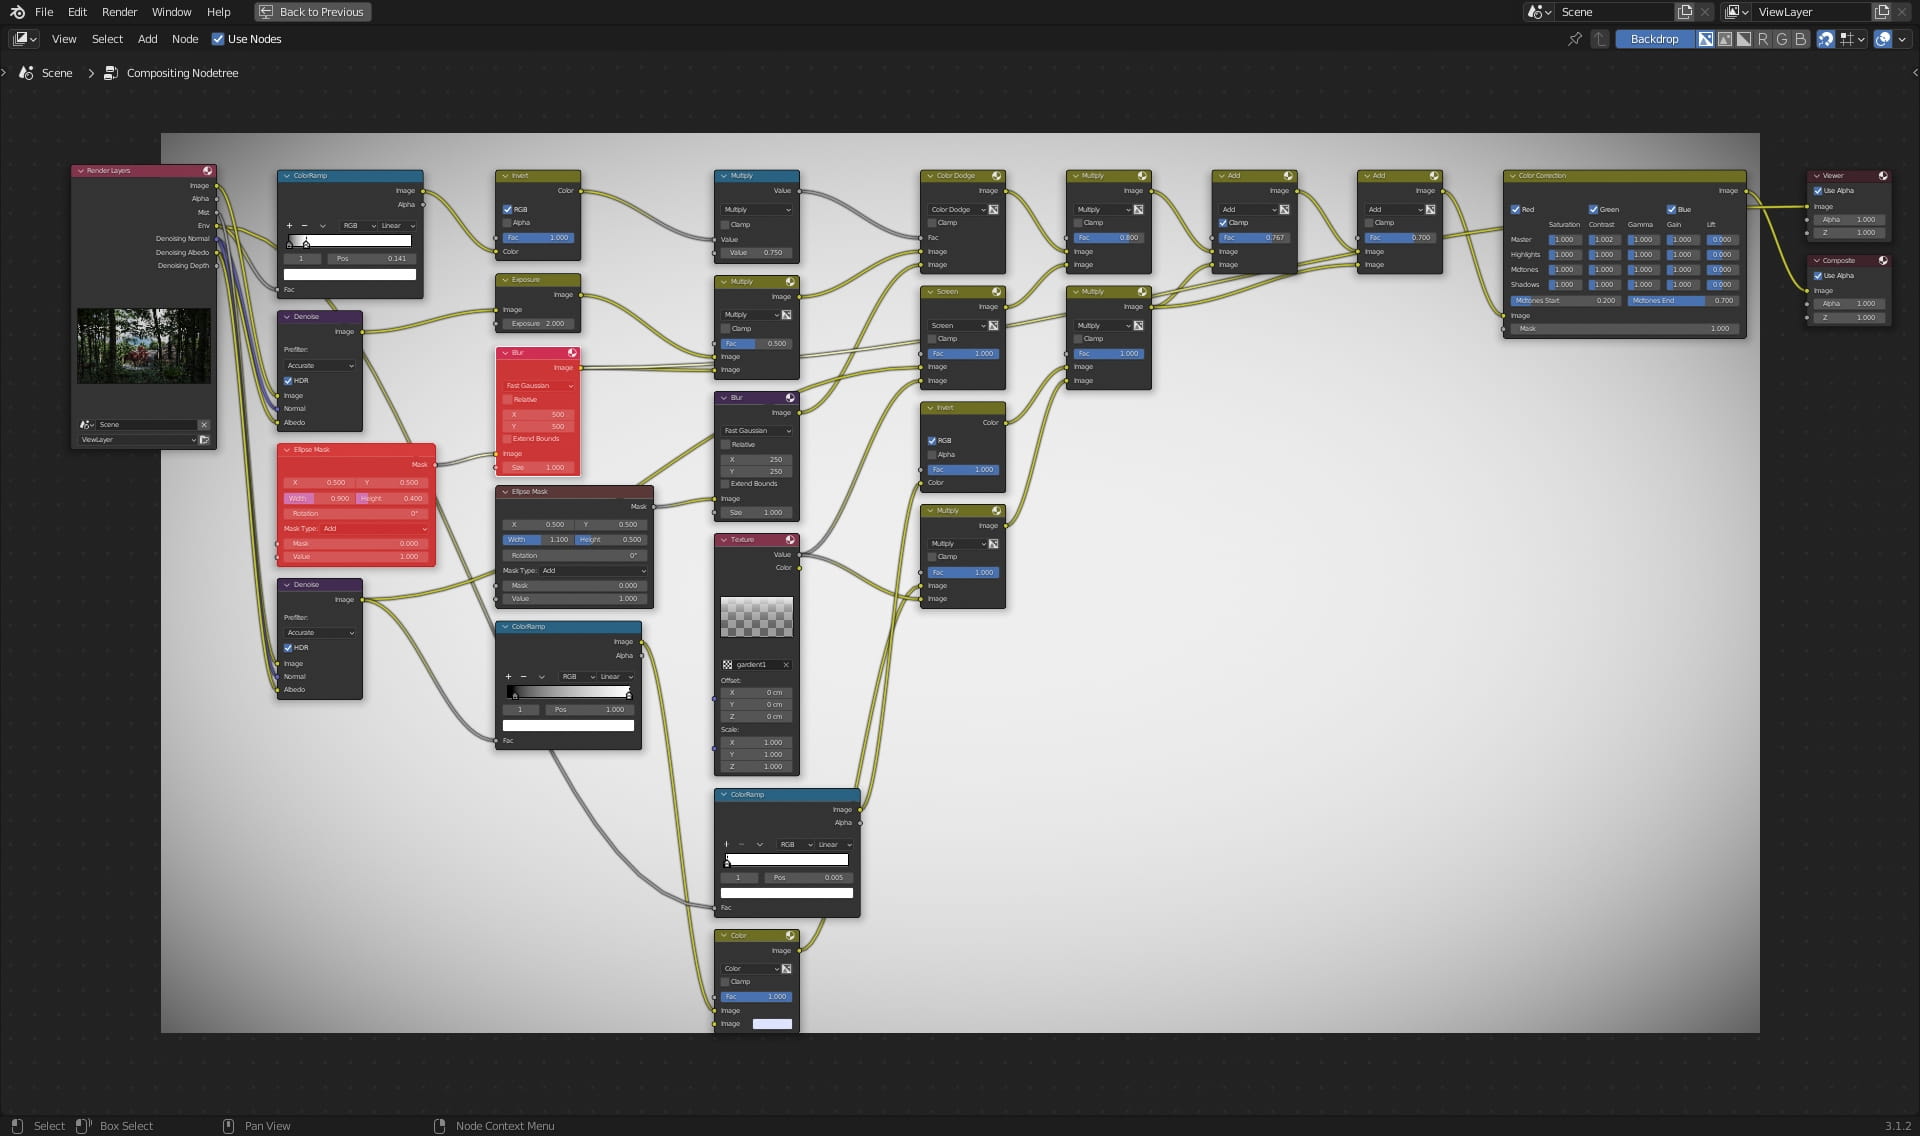
Let's connect everything with Mix node, changing the mode to Multiply, you can control the intensity of the vignette with the Factor value.
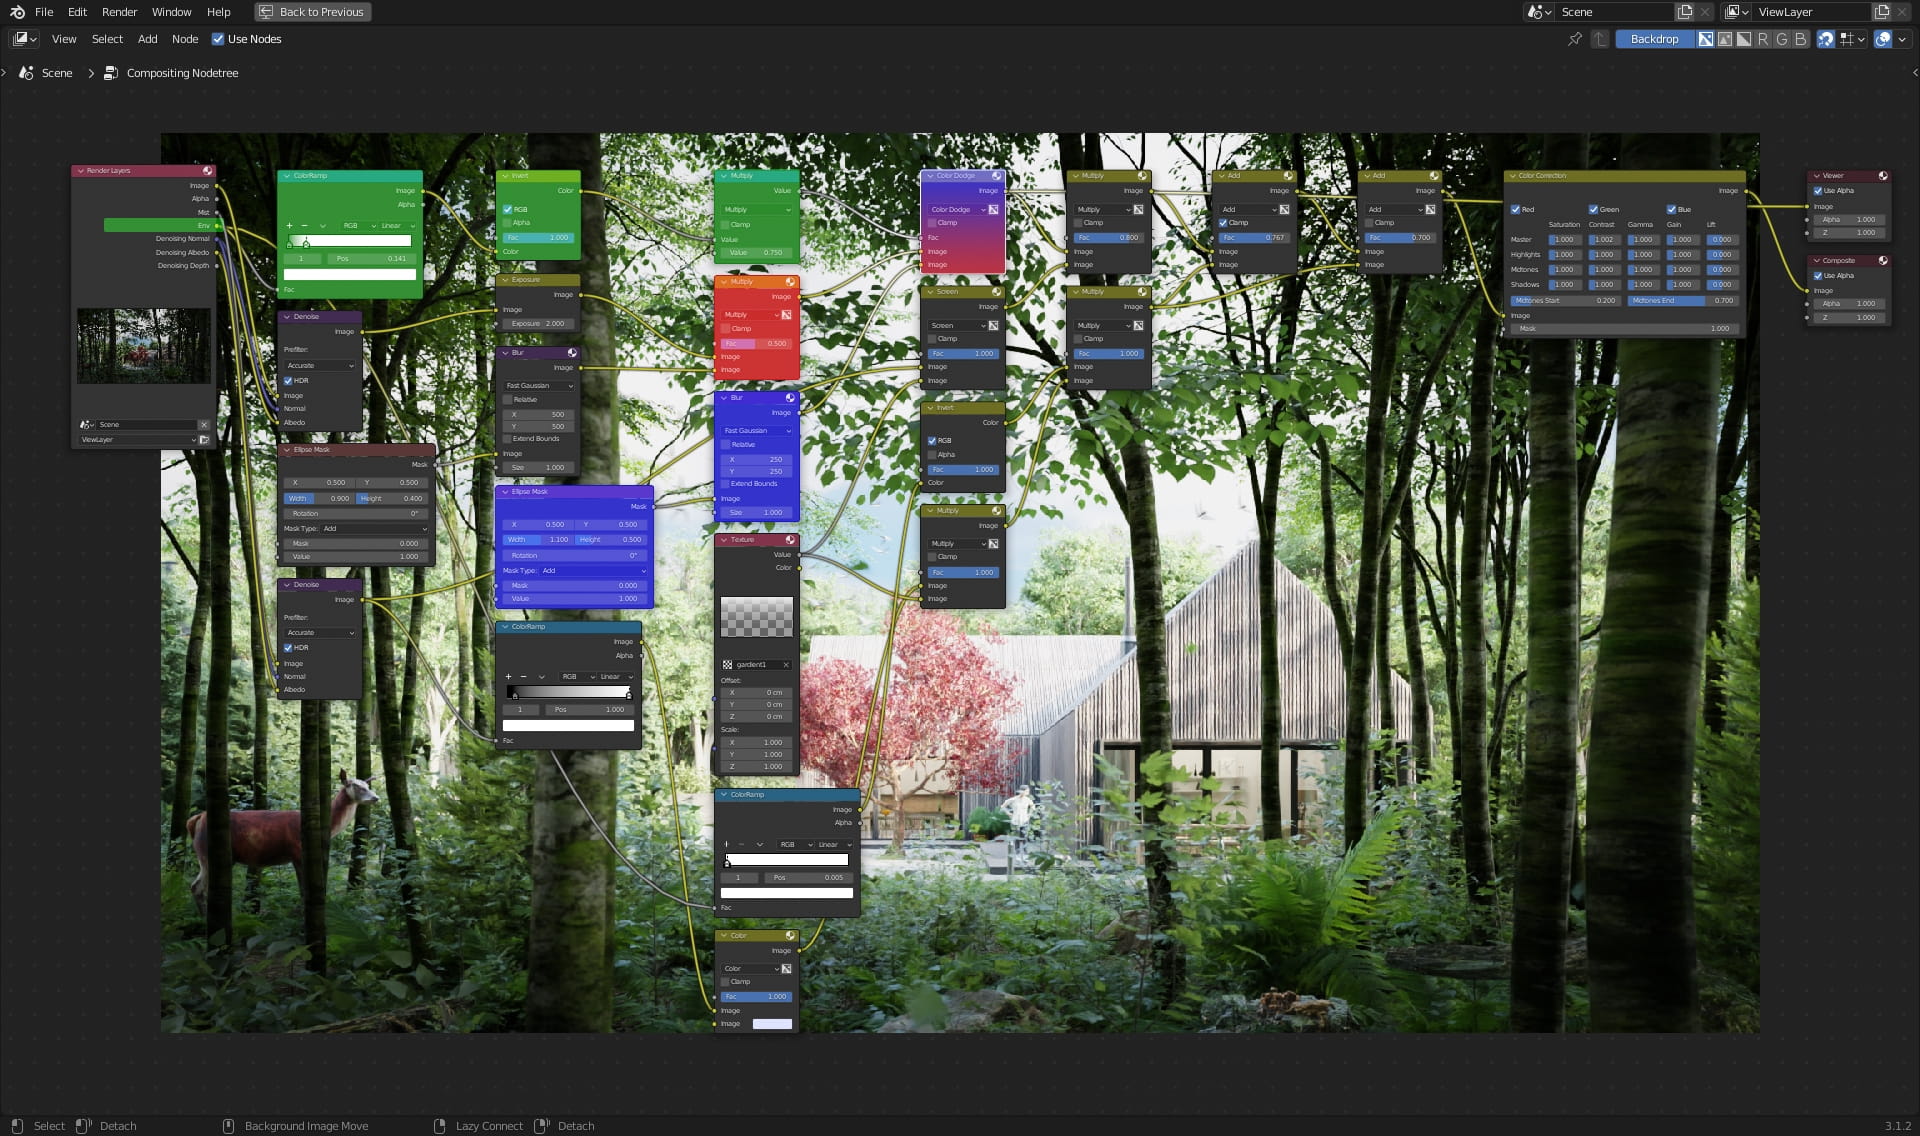
Now we will create a mask that will help us later by using the Environment Pass.
New Elipse Mask ...
again Blur node...
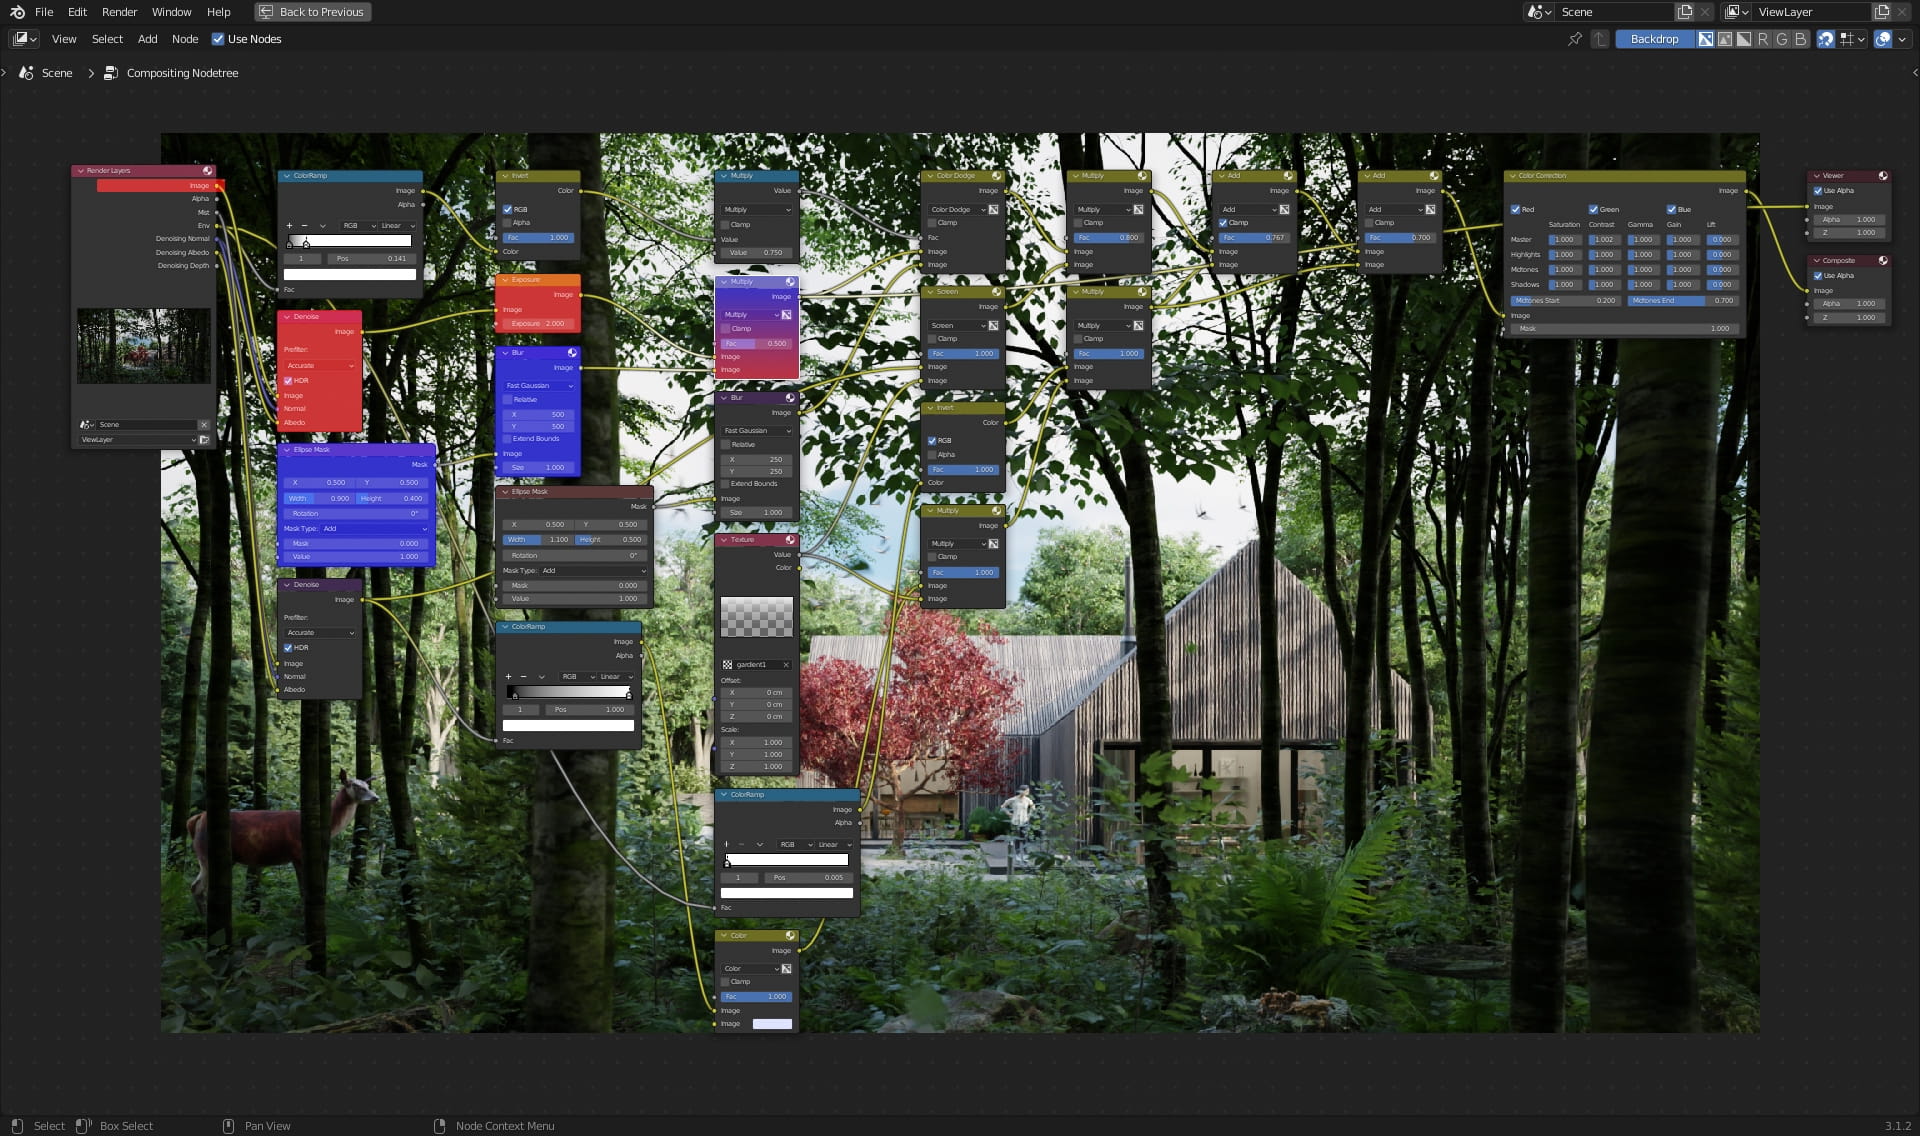
By using the Mix node in the Color Dodge mode and the previously prepared mask, we get an effect where the second plan is definitely in the sun.
Now we will do the opposite, we will darken the foreground by using the Mist Pass ...
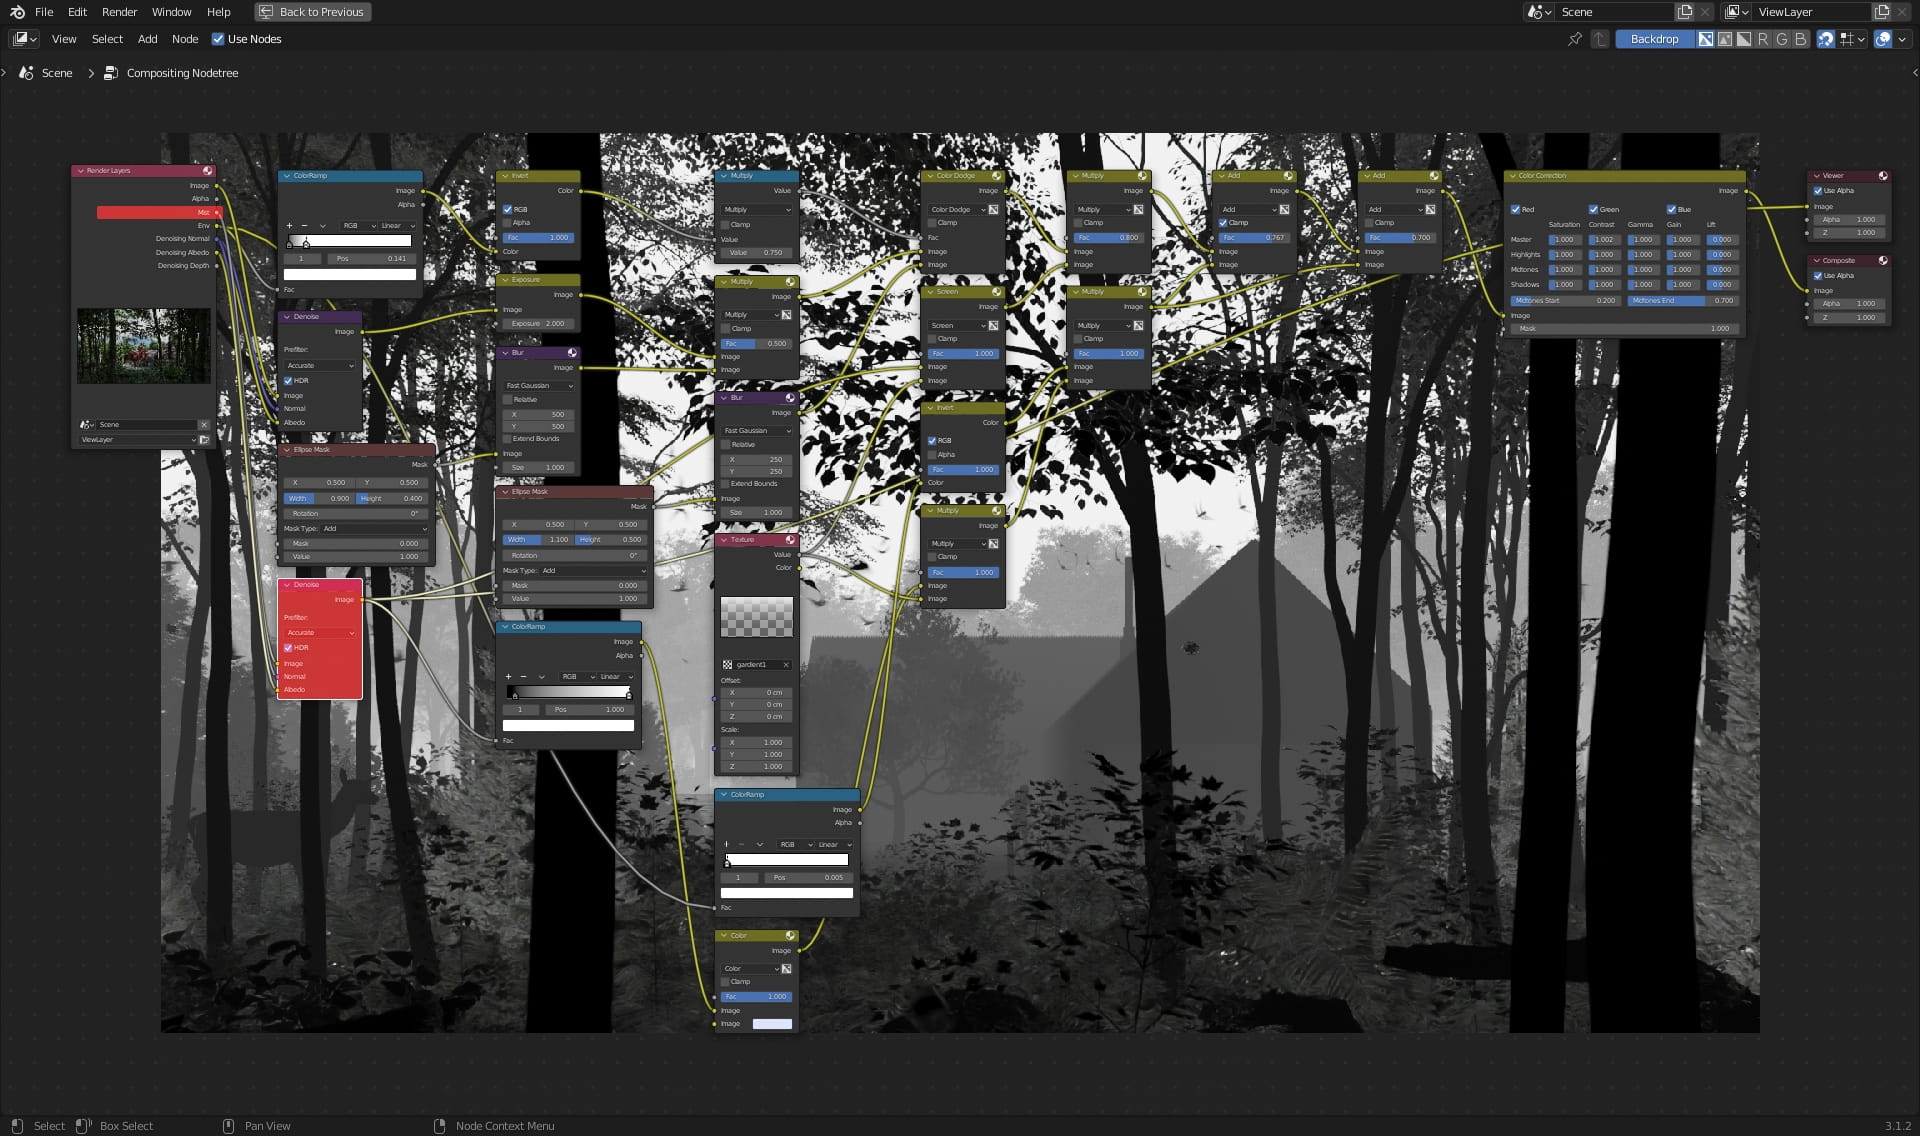
and Texture node with a simple gradient.
We mix the gradient and the Mist Pass with the Mix node in Screen mode, thus limiting the effect only to the elements on the ground that are closest to us.
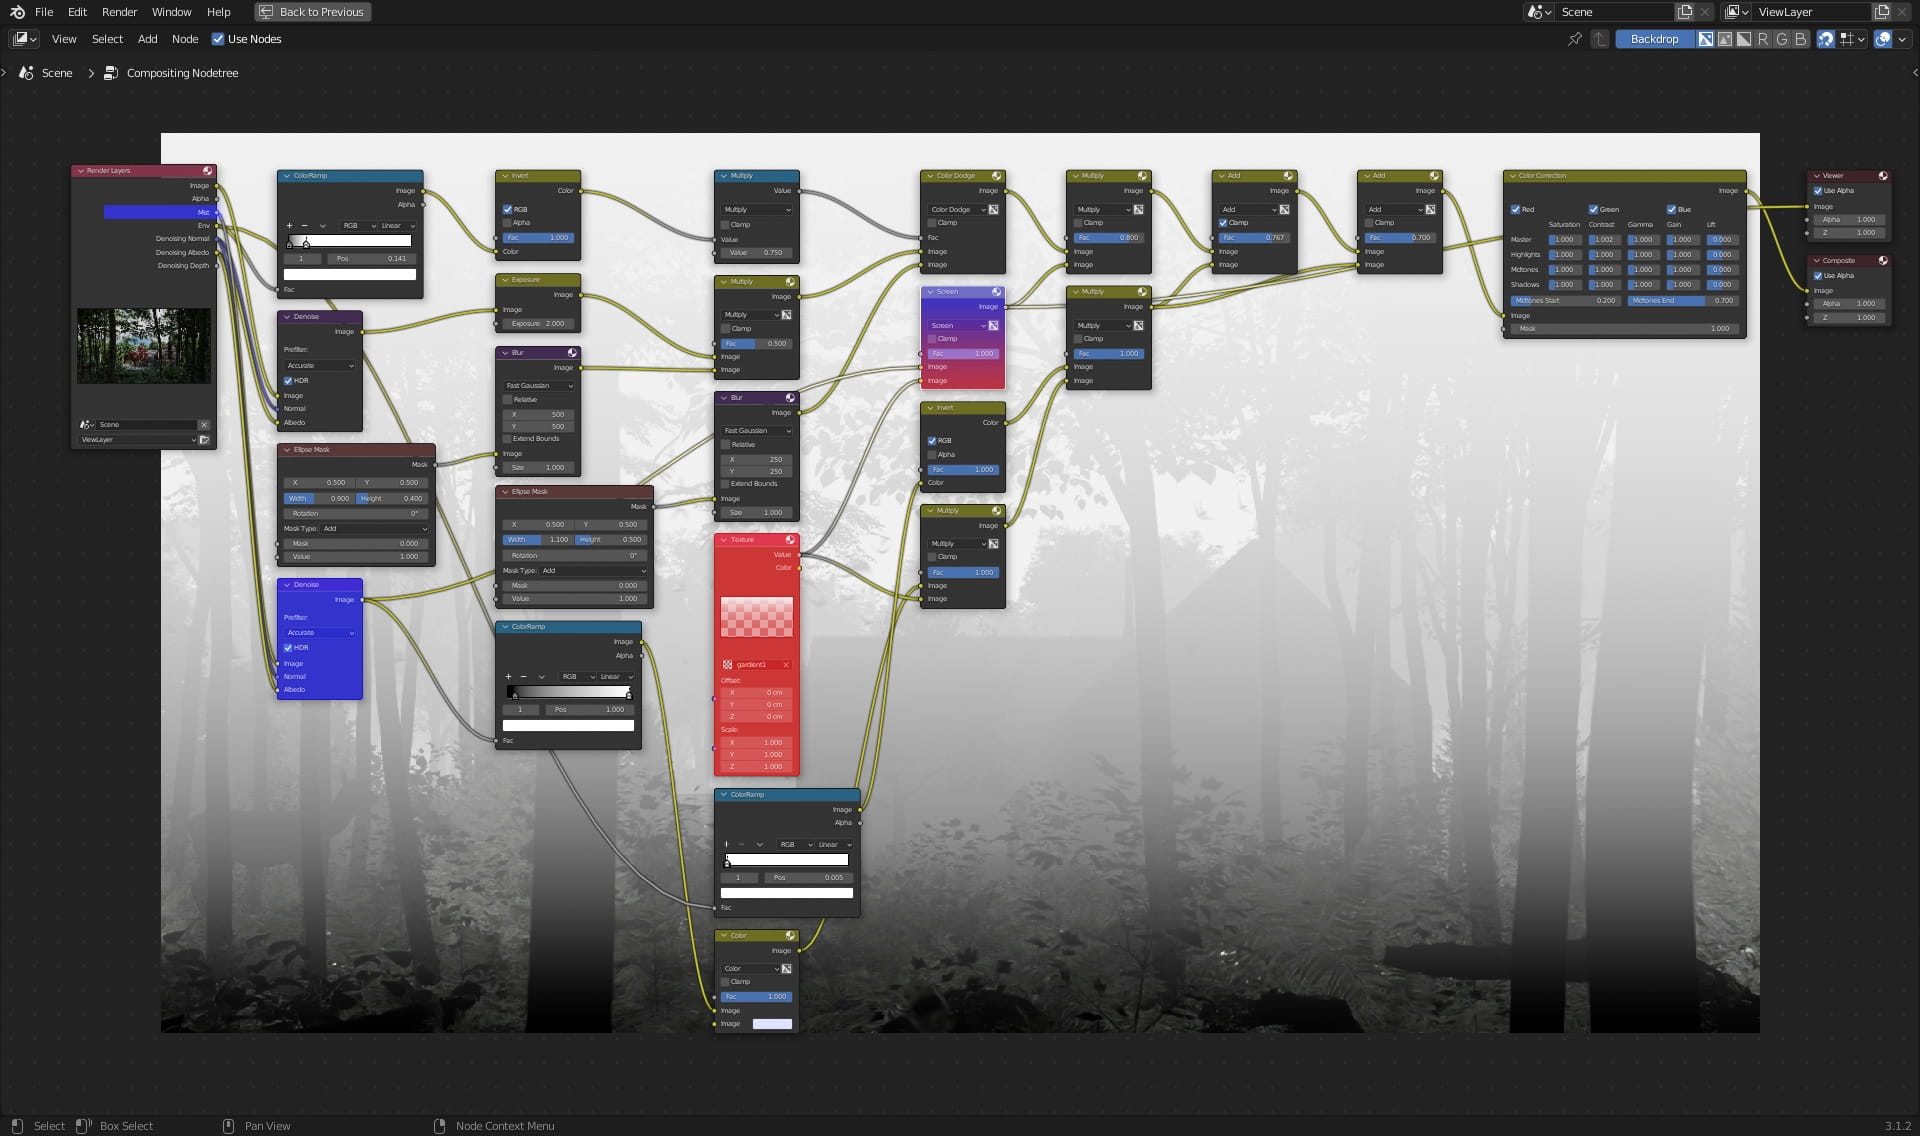
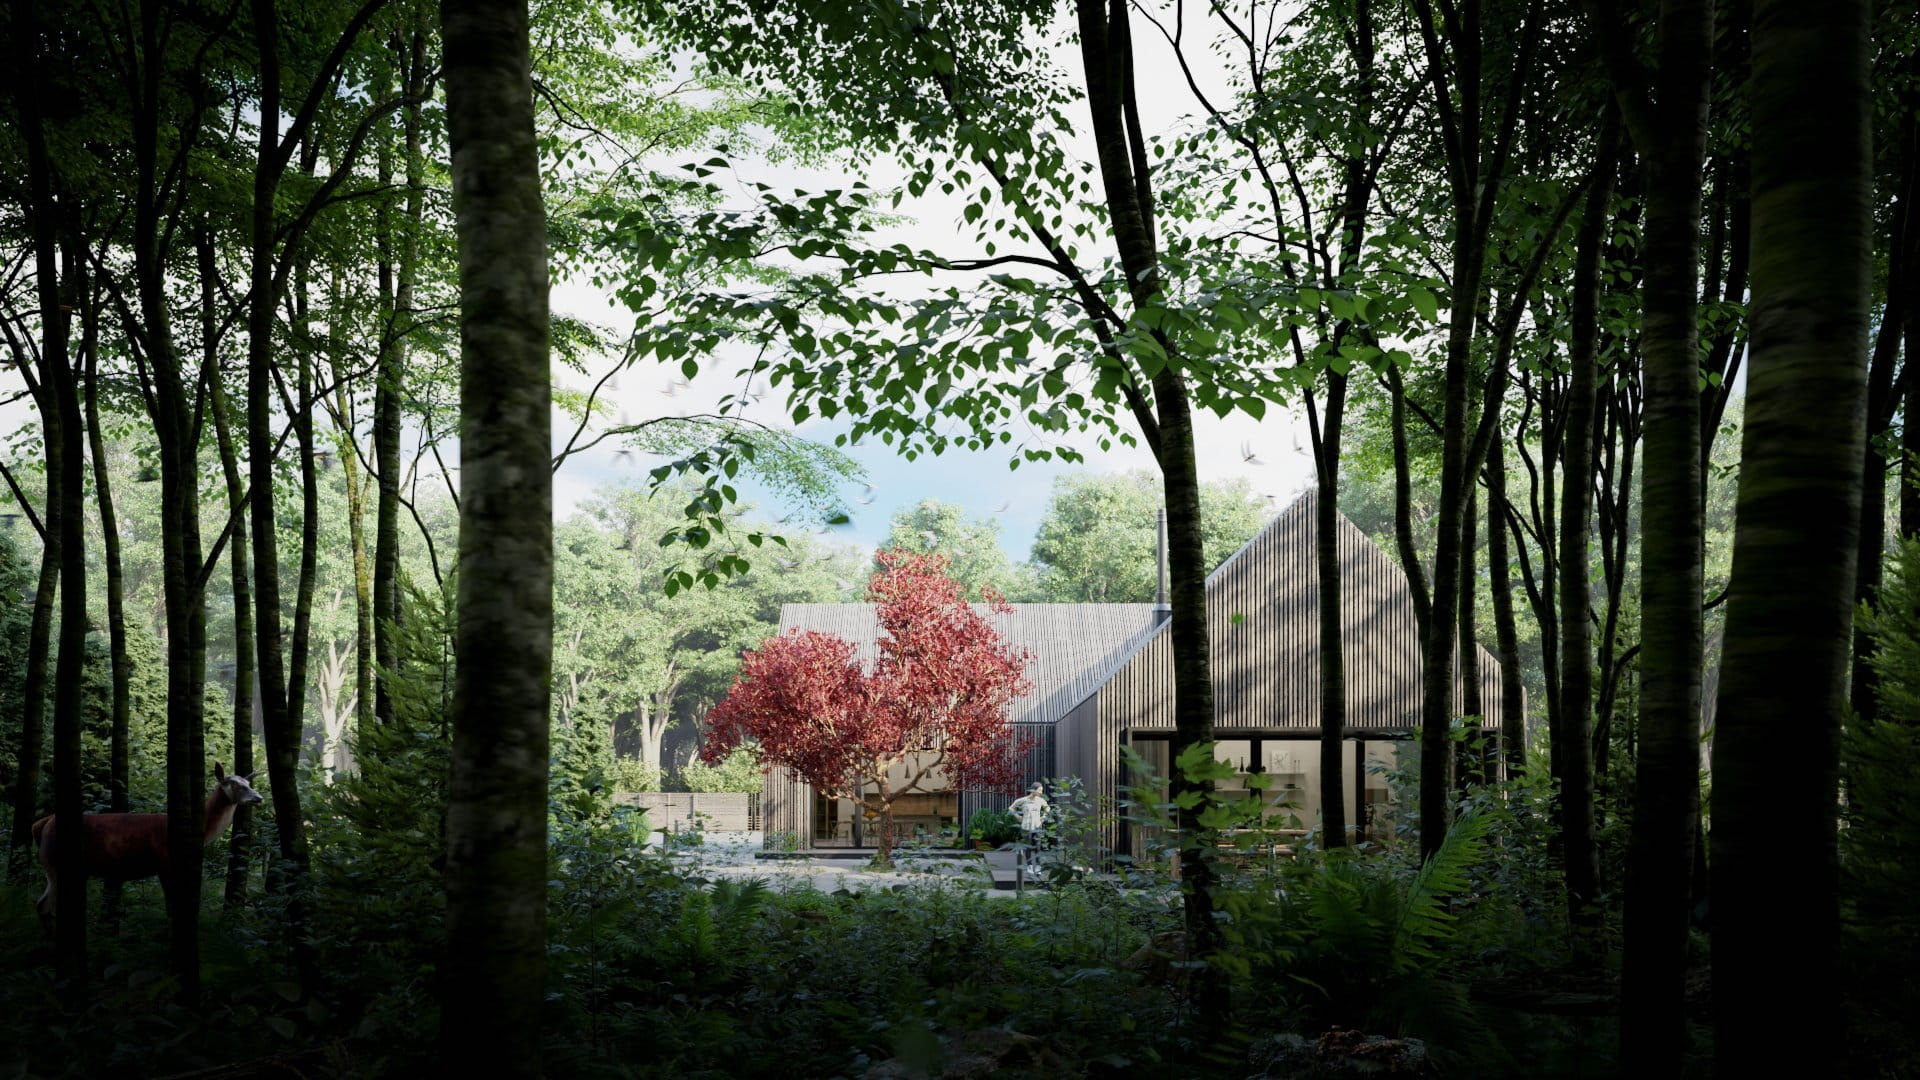
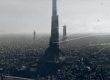
In this way, we have a clearly darker forest in the foreground, which forms the picture frame, and the background with a house is clearly brighter. We miss the third plan.
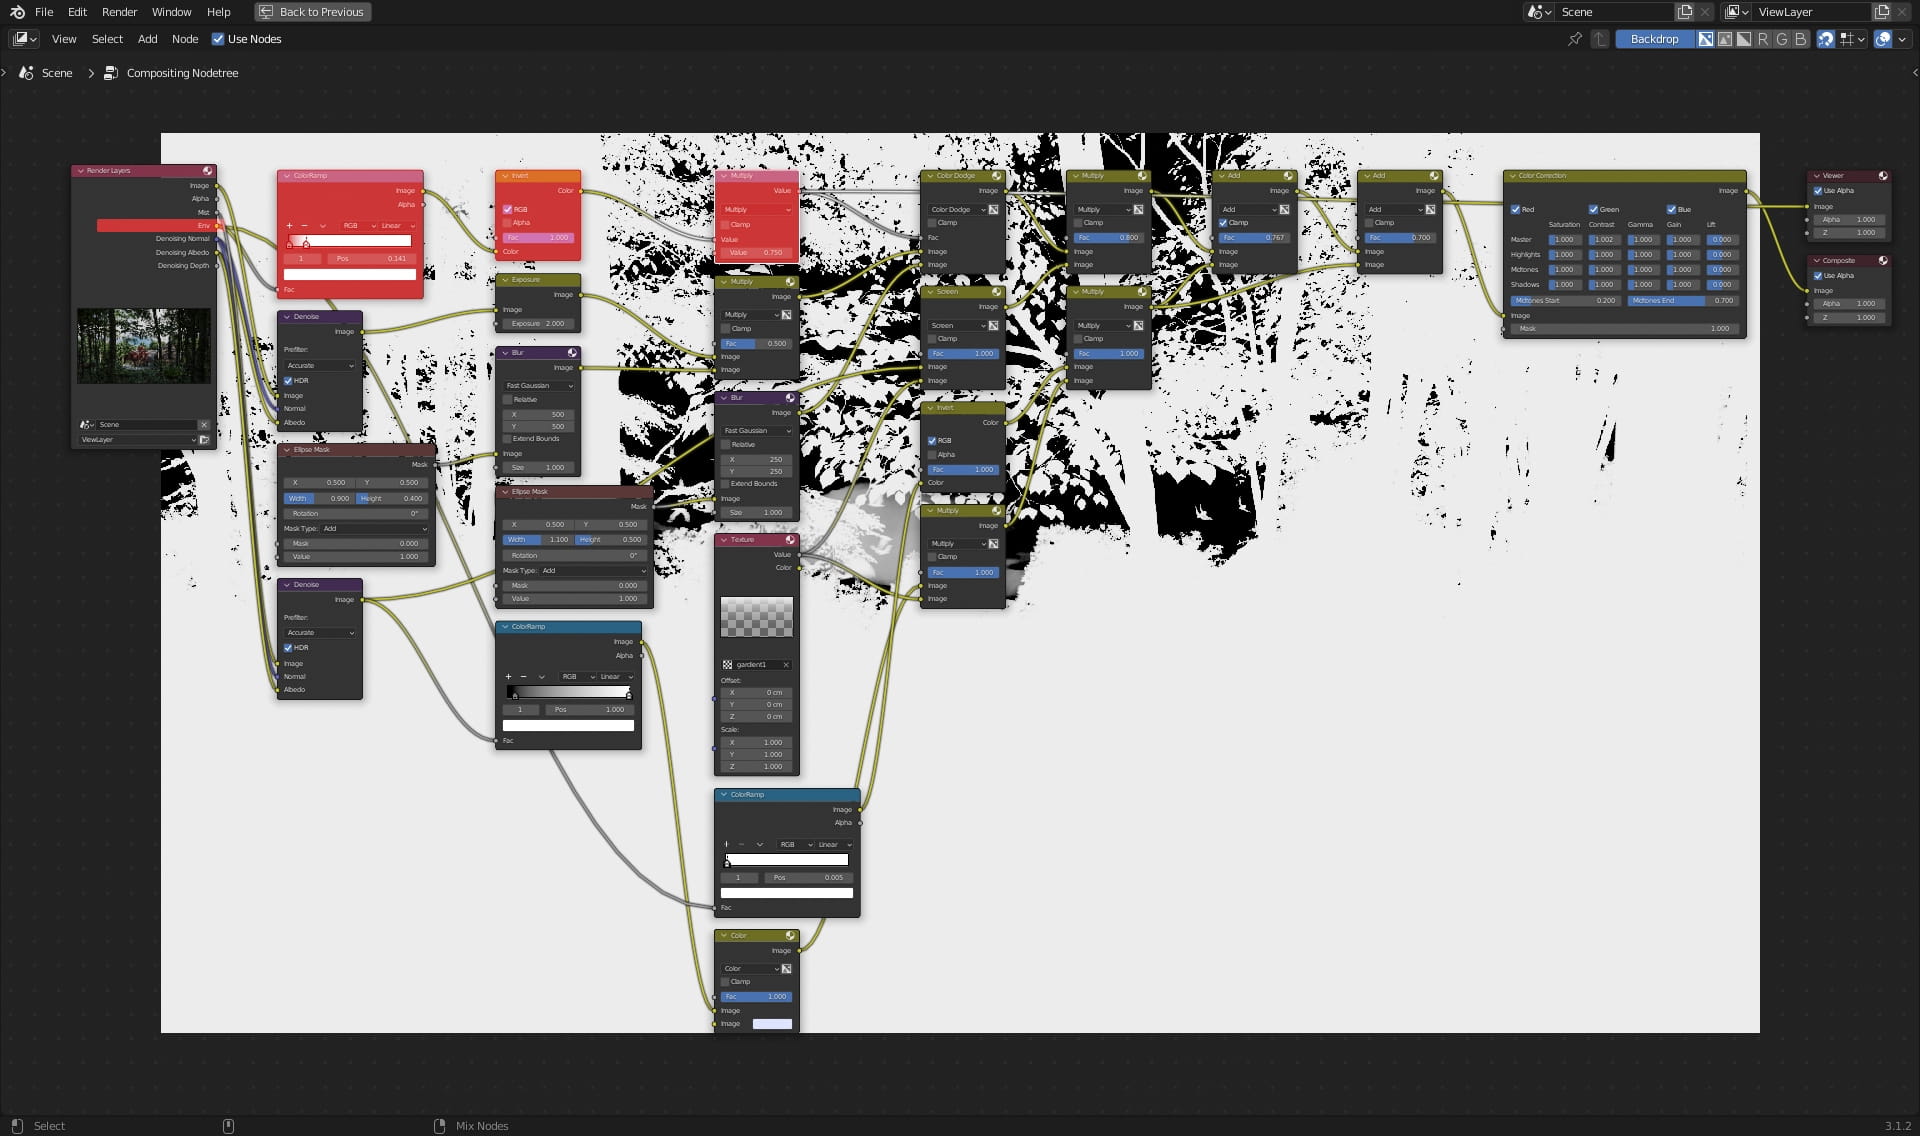
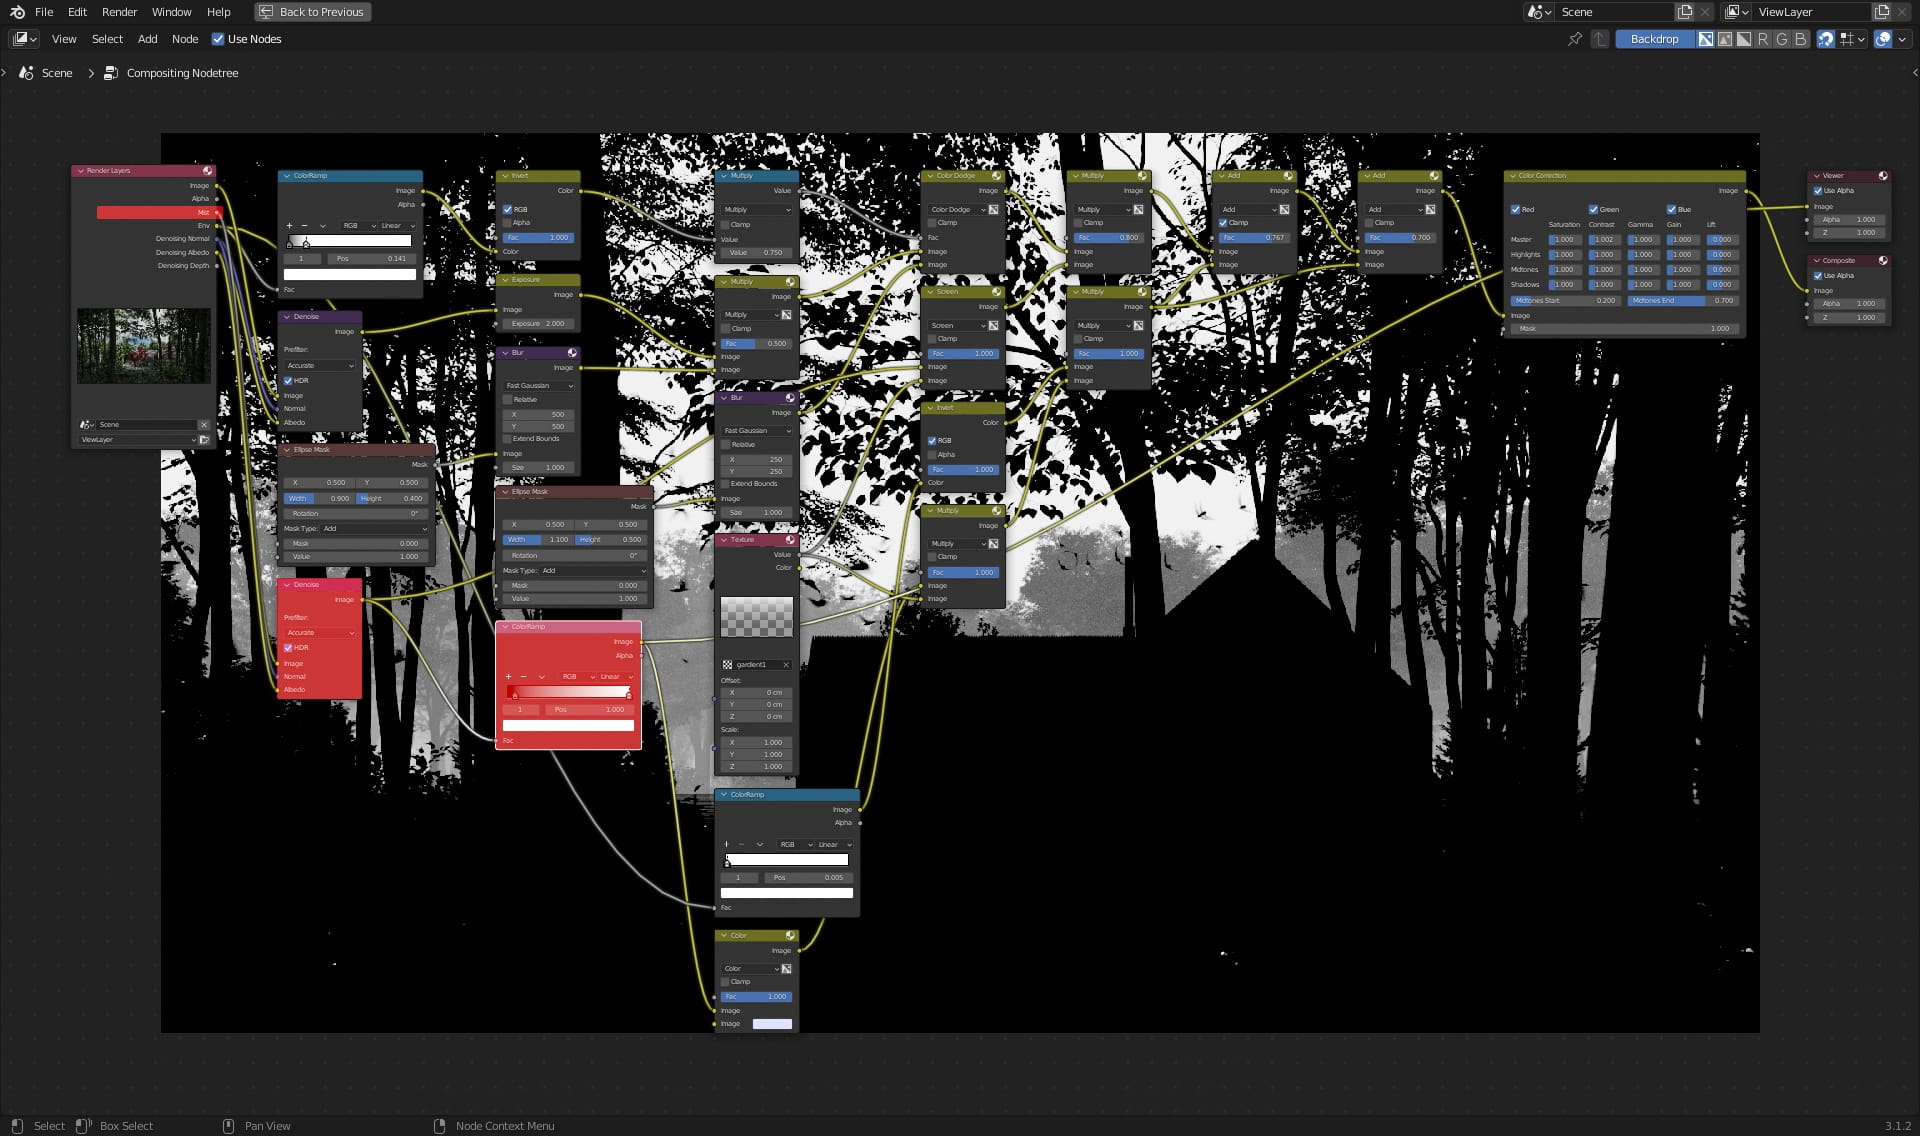
Well, faster now. Mist Pass, which is limited to the third plan only.
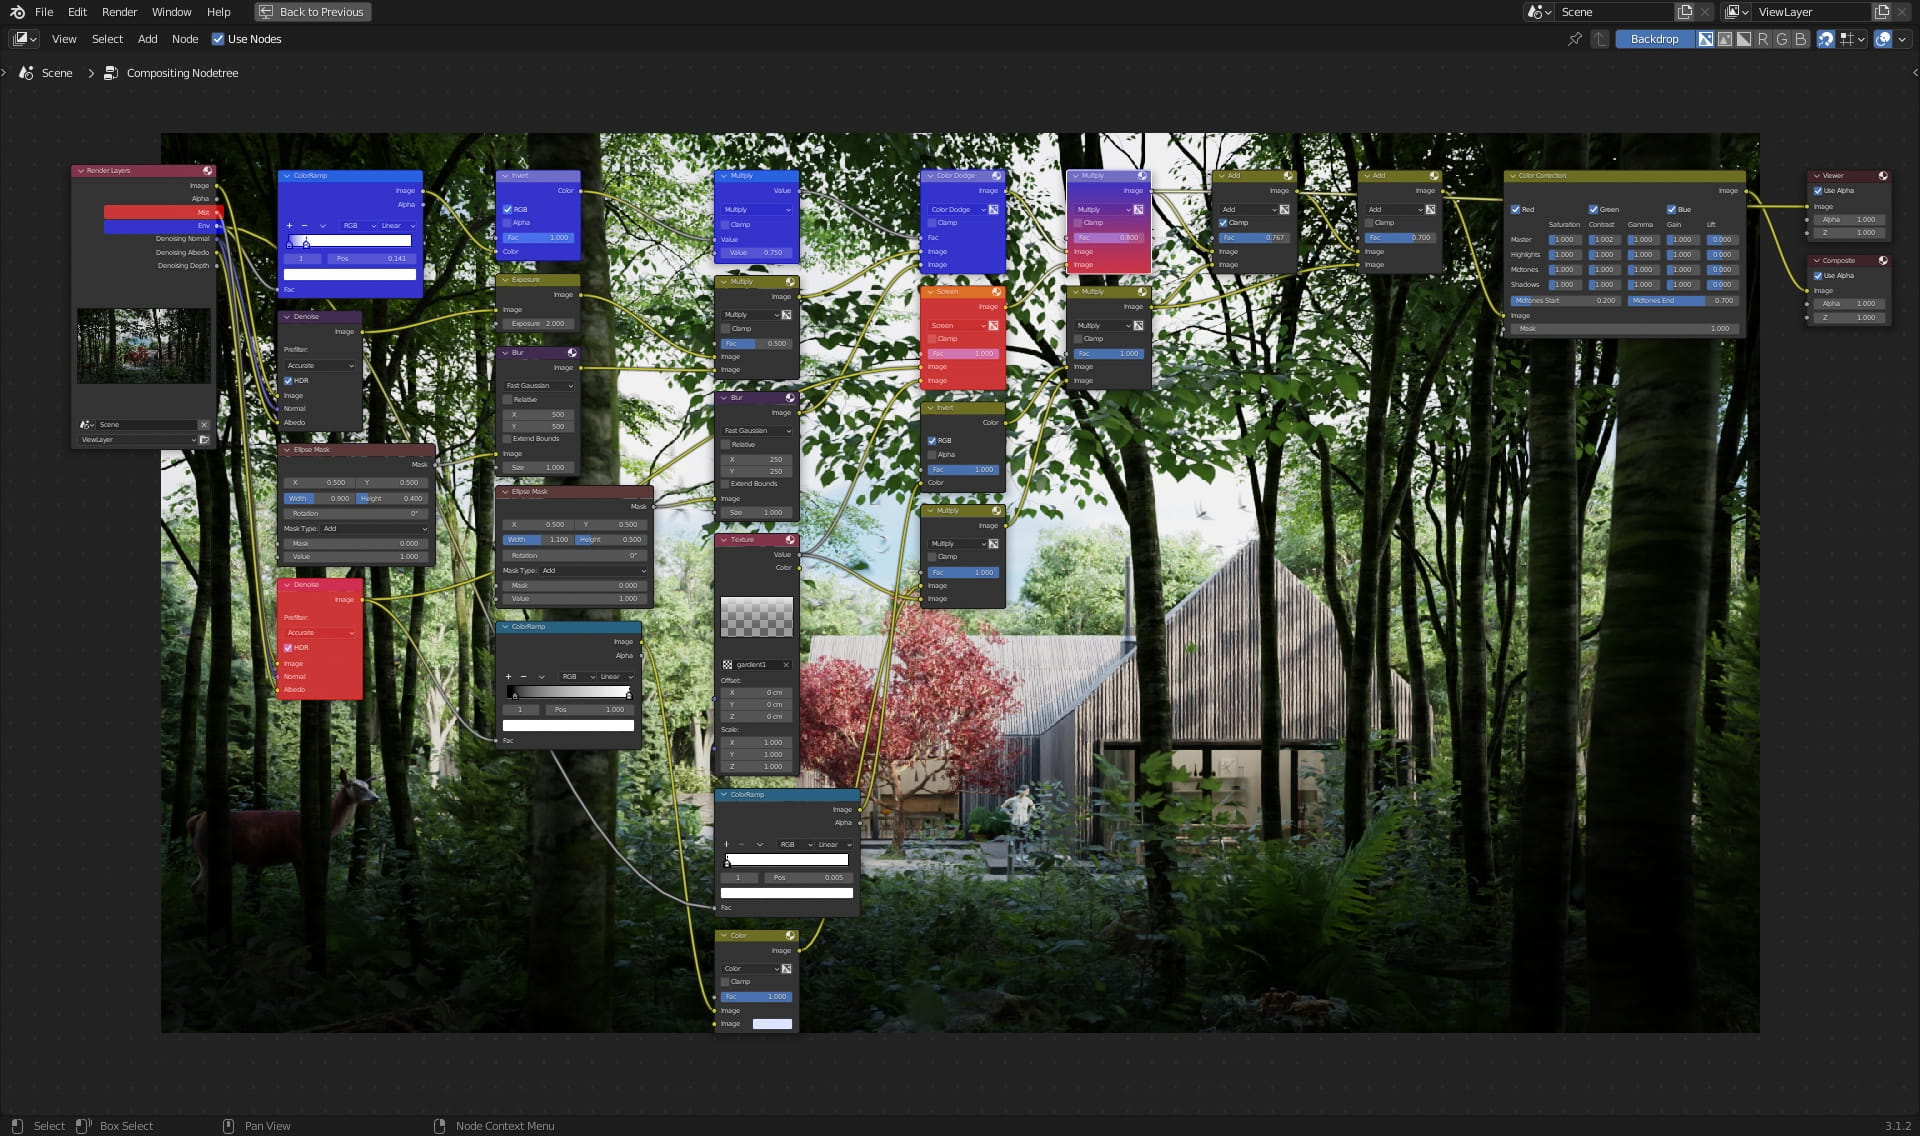
We color it blue, we get fog.

And we connect the picture and the fog together using Mix node in Add mode. Yellow Elements is a simple mask limiting fog to only trees and bushes in the background.
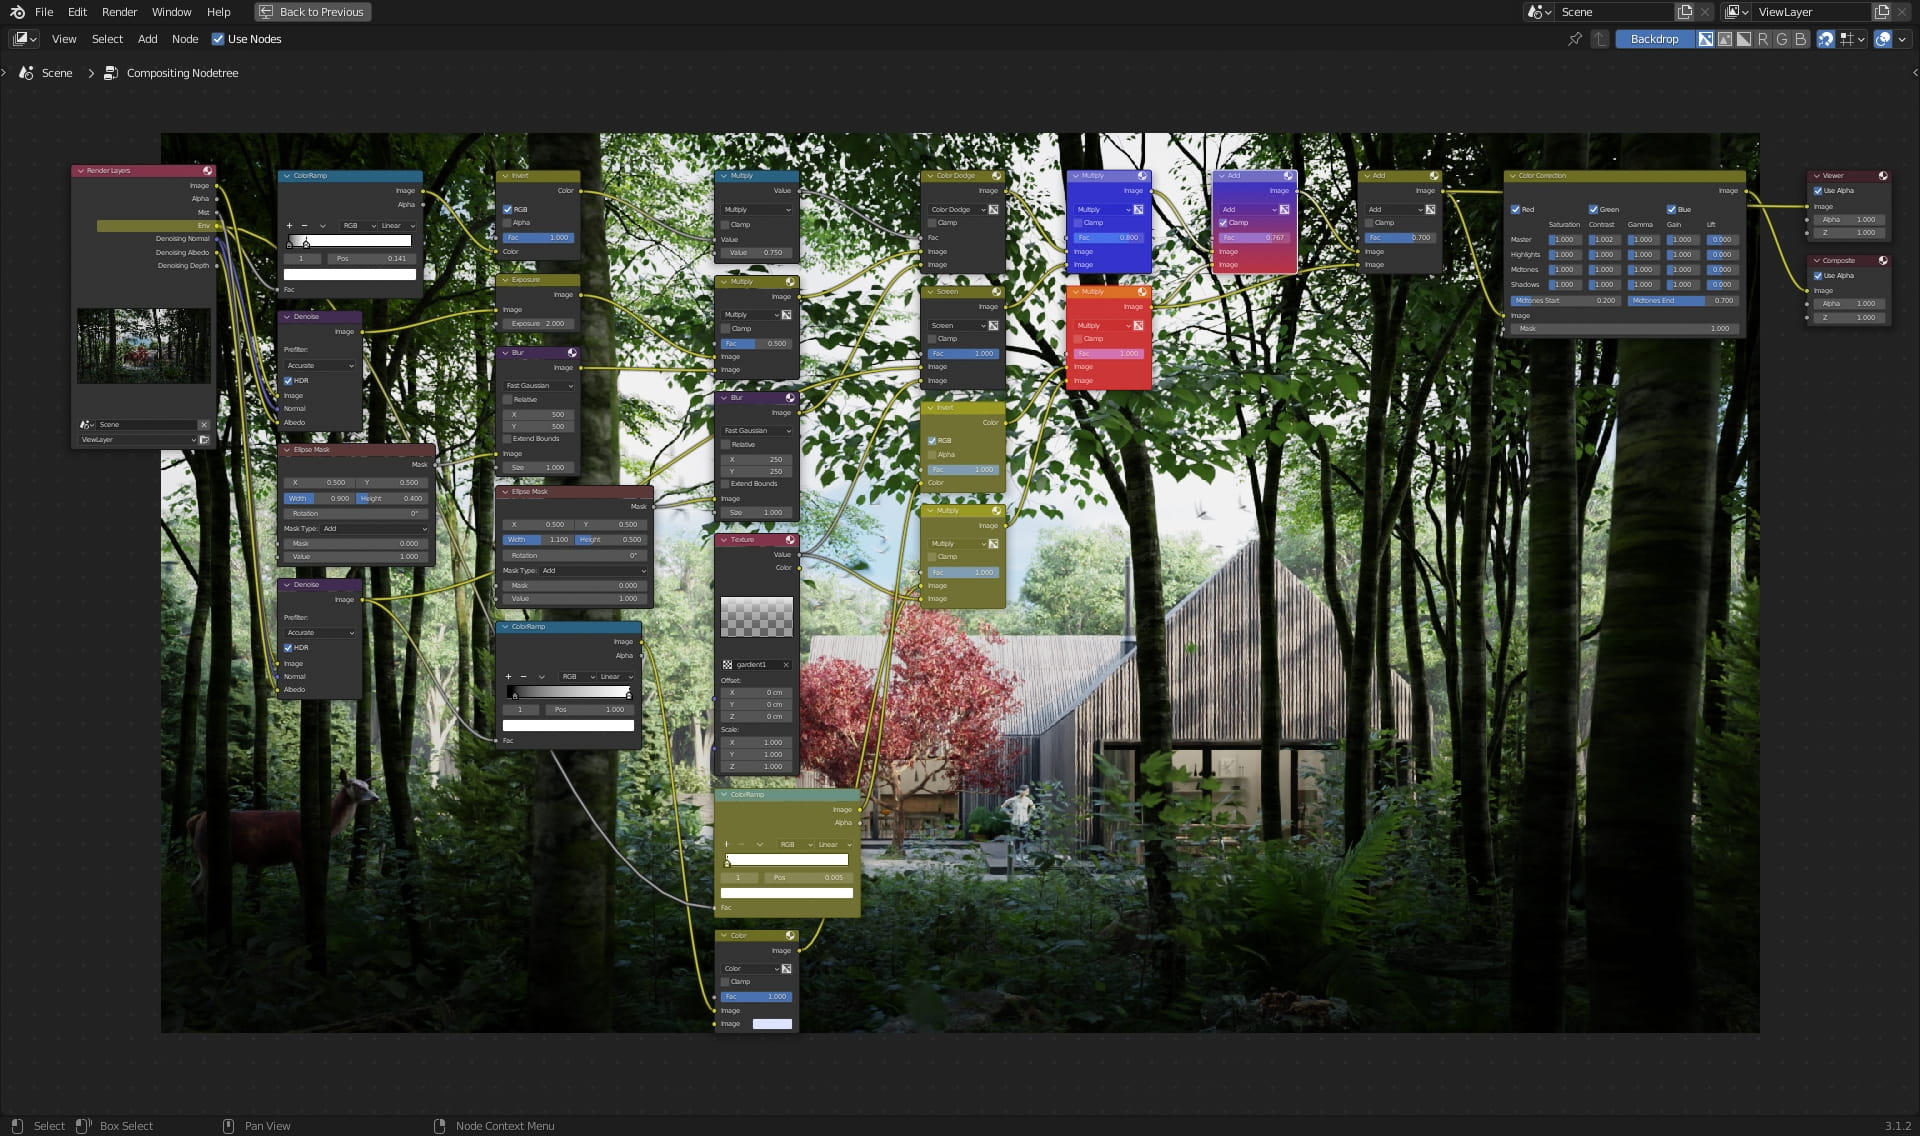
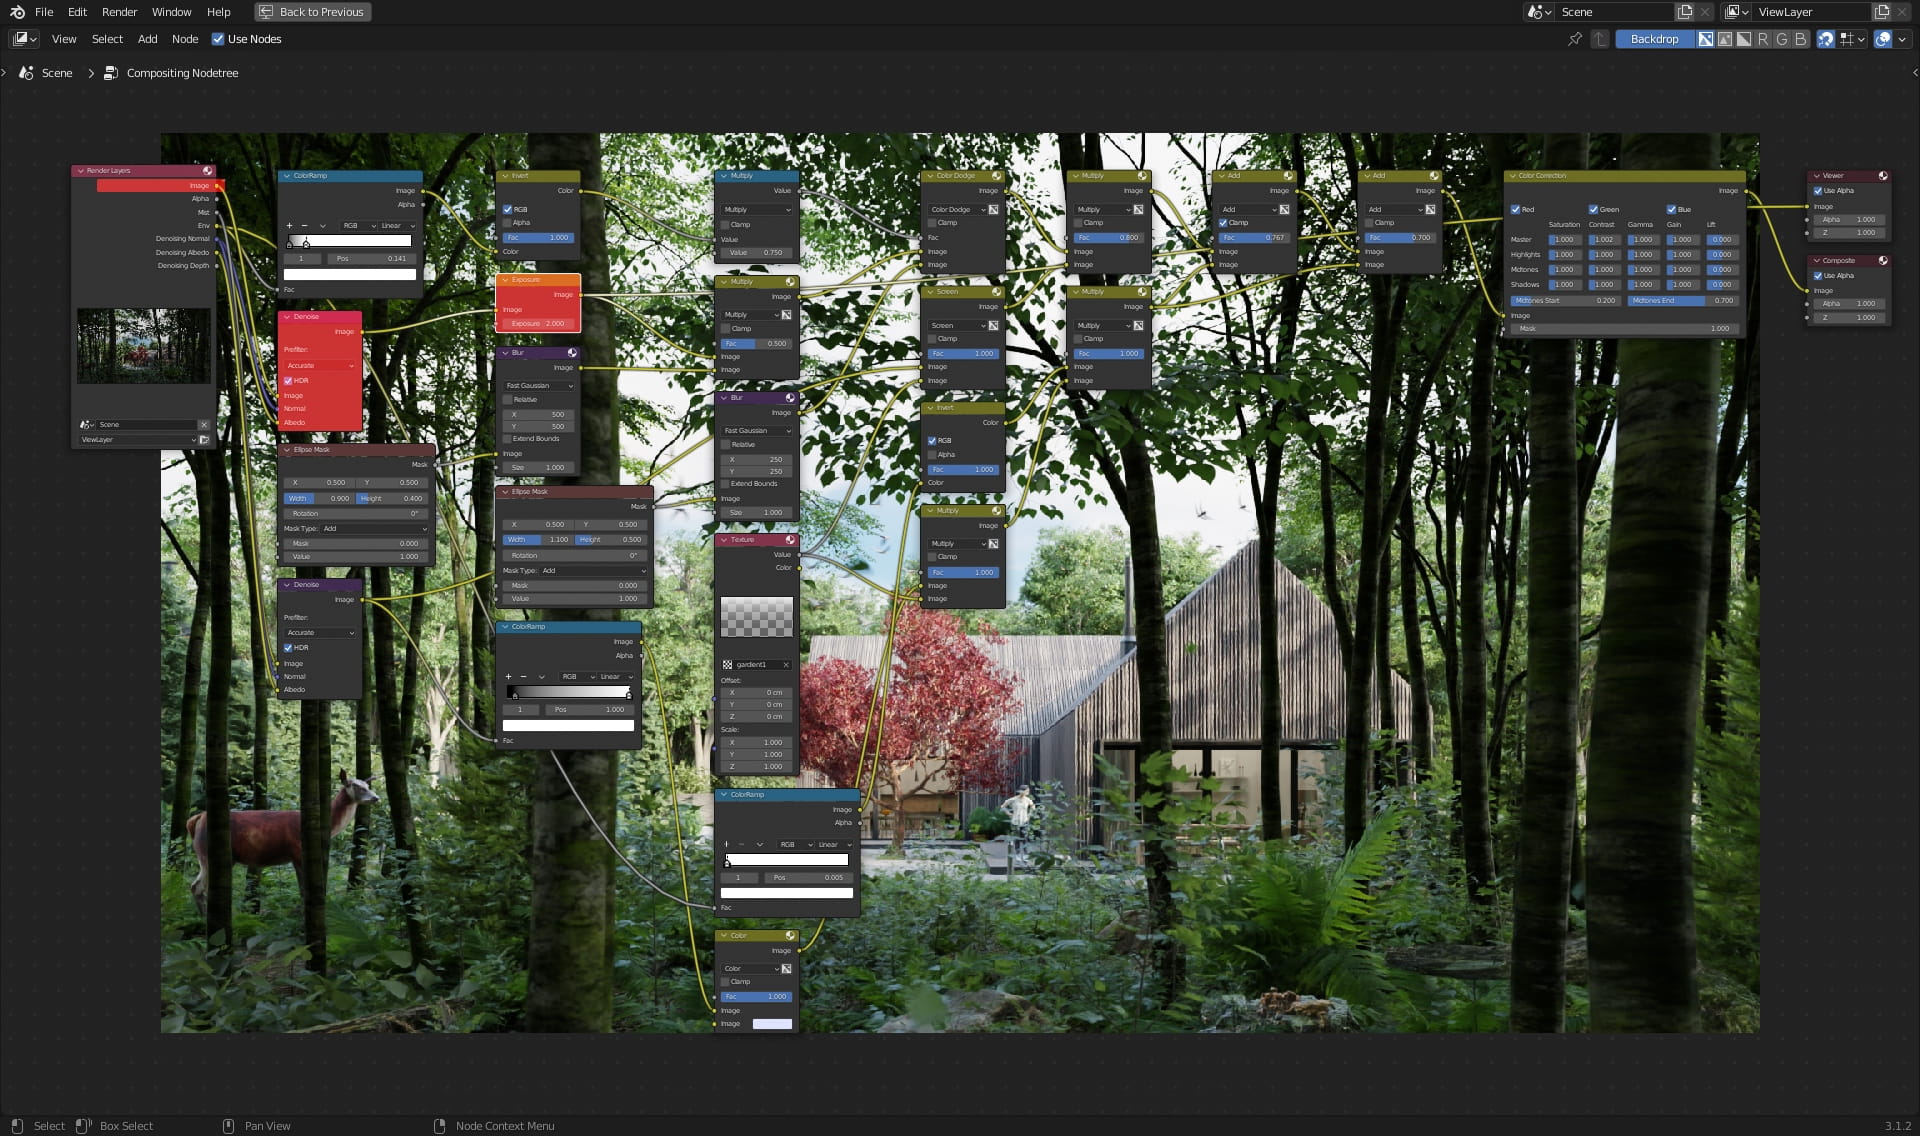
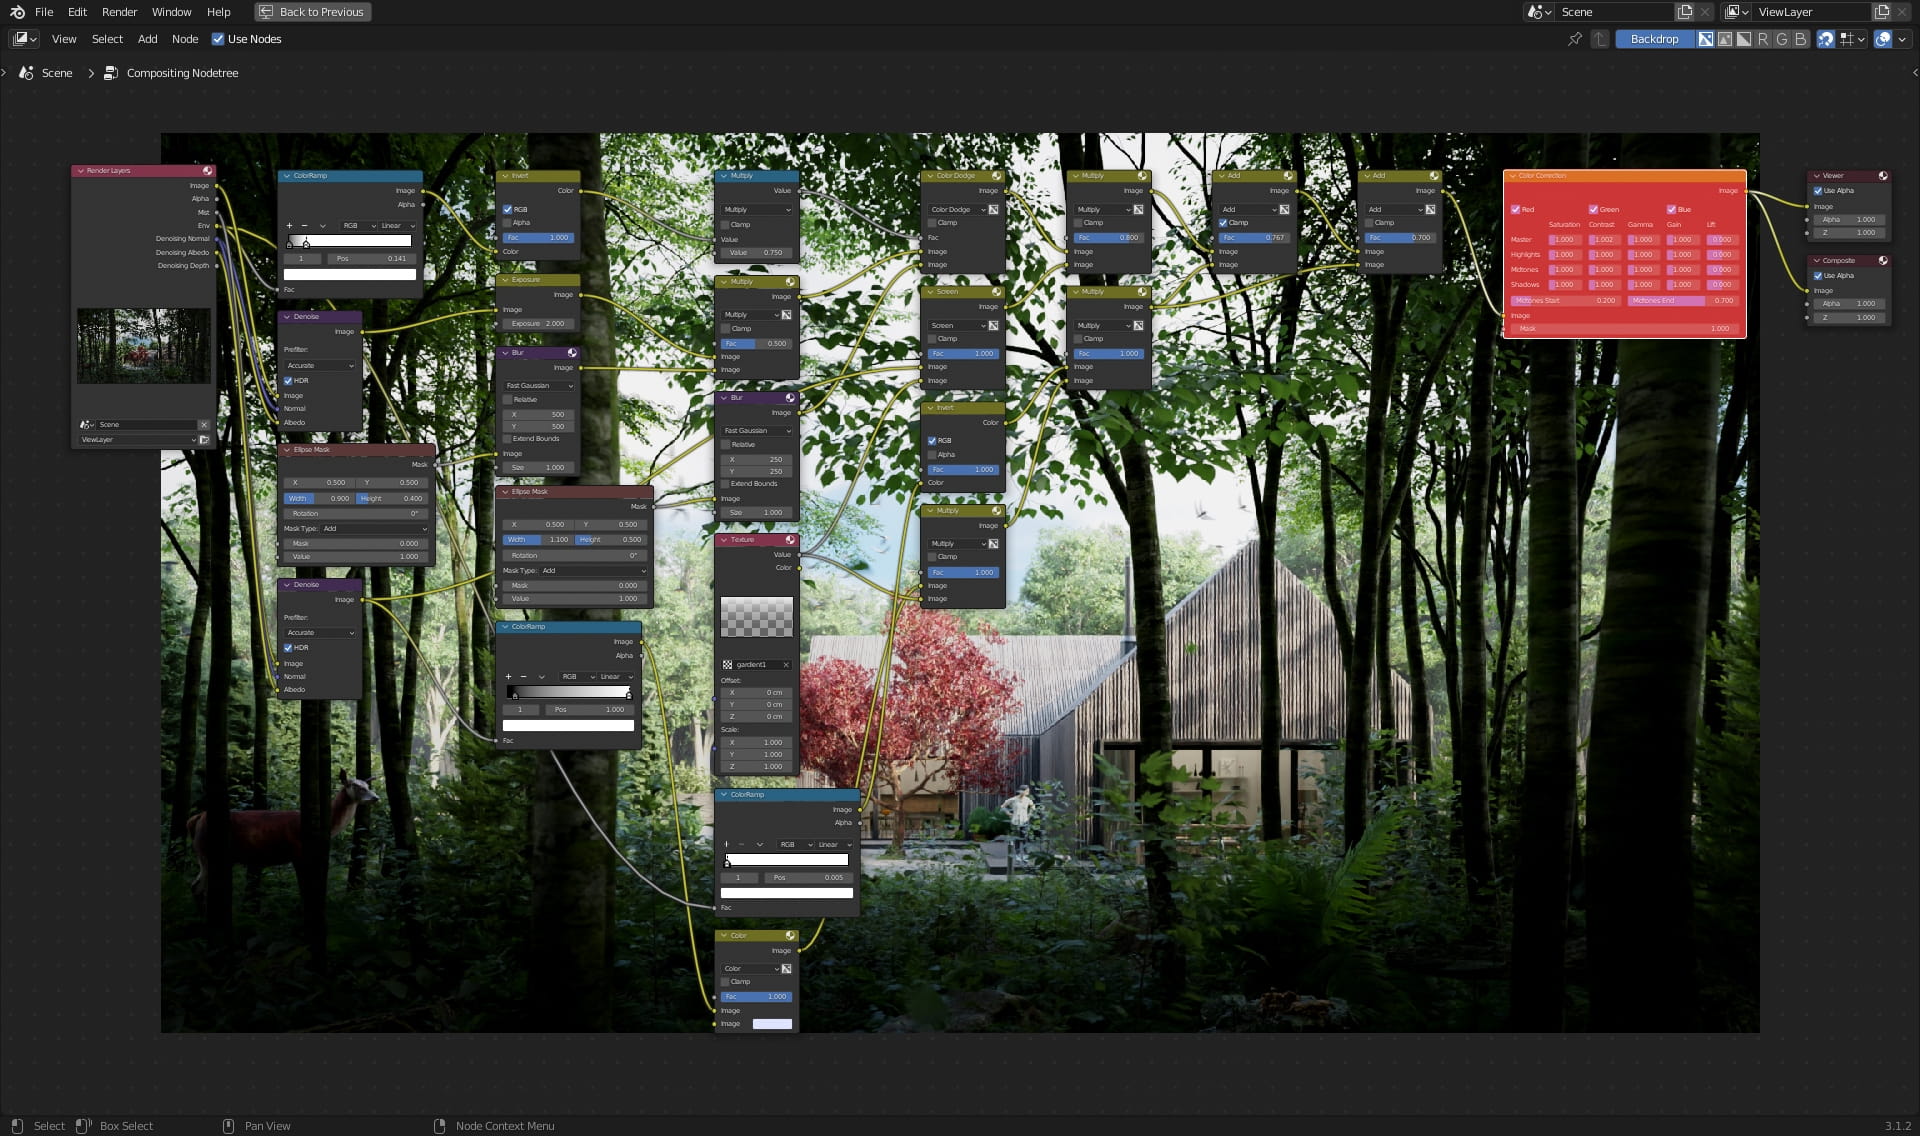
Finally, we gently add contrast and it's ready!


LEAVE A COMMENT


|

|

|

|

|
 Customer zone
 Your special offers
 Your orders
 Edit account
 Add project
 Liked projects
 View your artist profile
COMMENTS